


![Very Cool! Make Your Own Star Wars: Legion Imperial Agent & Officer | Review [7 Days Early Access]](https://images.beastsofwar.com/2025/12/Star-Wars-Imperial-Agent-_-Officer-coverimage-V3-225-127.jpg)


Tale of Three Tigers


Recommendations: 172
About the Project
I am going to build three different Tiger II models using the Bolt Action Tiger II Zug box . I want build an early " Porsche " turret Tiger attached to the Panzer Lehr . I also want to build a production turret ( Henschel ) Tiger with Fallschirmjager tank riders as seen in Battle of the Bulge photos and lastly a knocked out Tiger , your 70 ton road block as it were .
Related Game: Bolt Action
Related Genre: Historical
This Project is Active
Finished !
Wow , it’s been quite a while since I up dated this project . I must admit I got hung up on a paint scheme for my last Tiger , tried a few that didn’t really work so I had to strip off the paint and have a rethink . And as well , the poses of the Warlord plastic Fallschirmjager made it difficult to fit them together on the tank engine deck . So after some waffling about , I decided to swap a couple of legs , giving the figures a smaller foot print , as well one guy had his legs replaced by a seated pair from the plastic Seated German set . Having purchased the odd 2 or 3 ( or 10 ) extra s figure sprues during Warlord’s sales , I had lots of arms in the parts box to pick through to create the right pose .
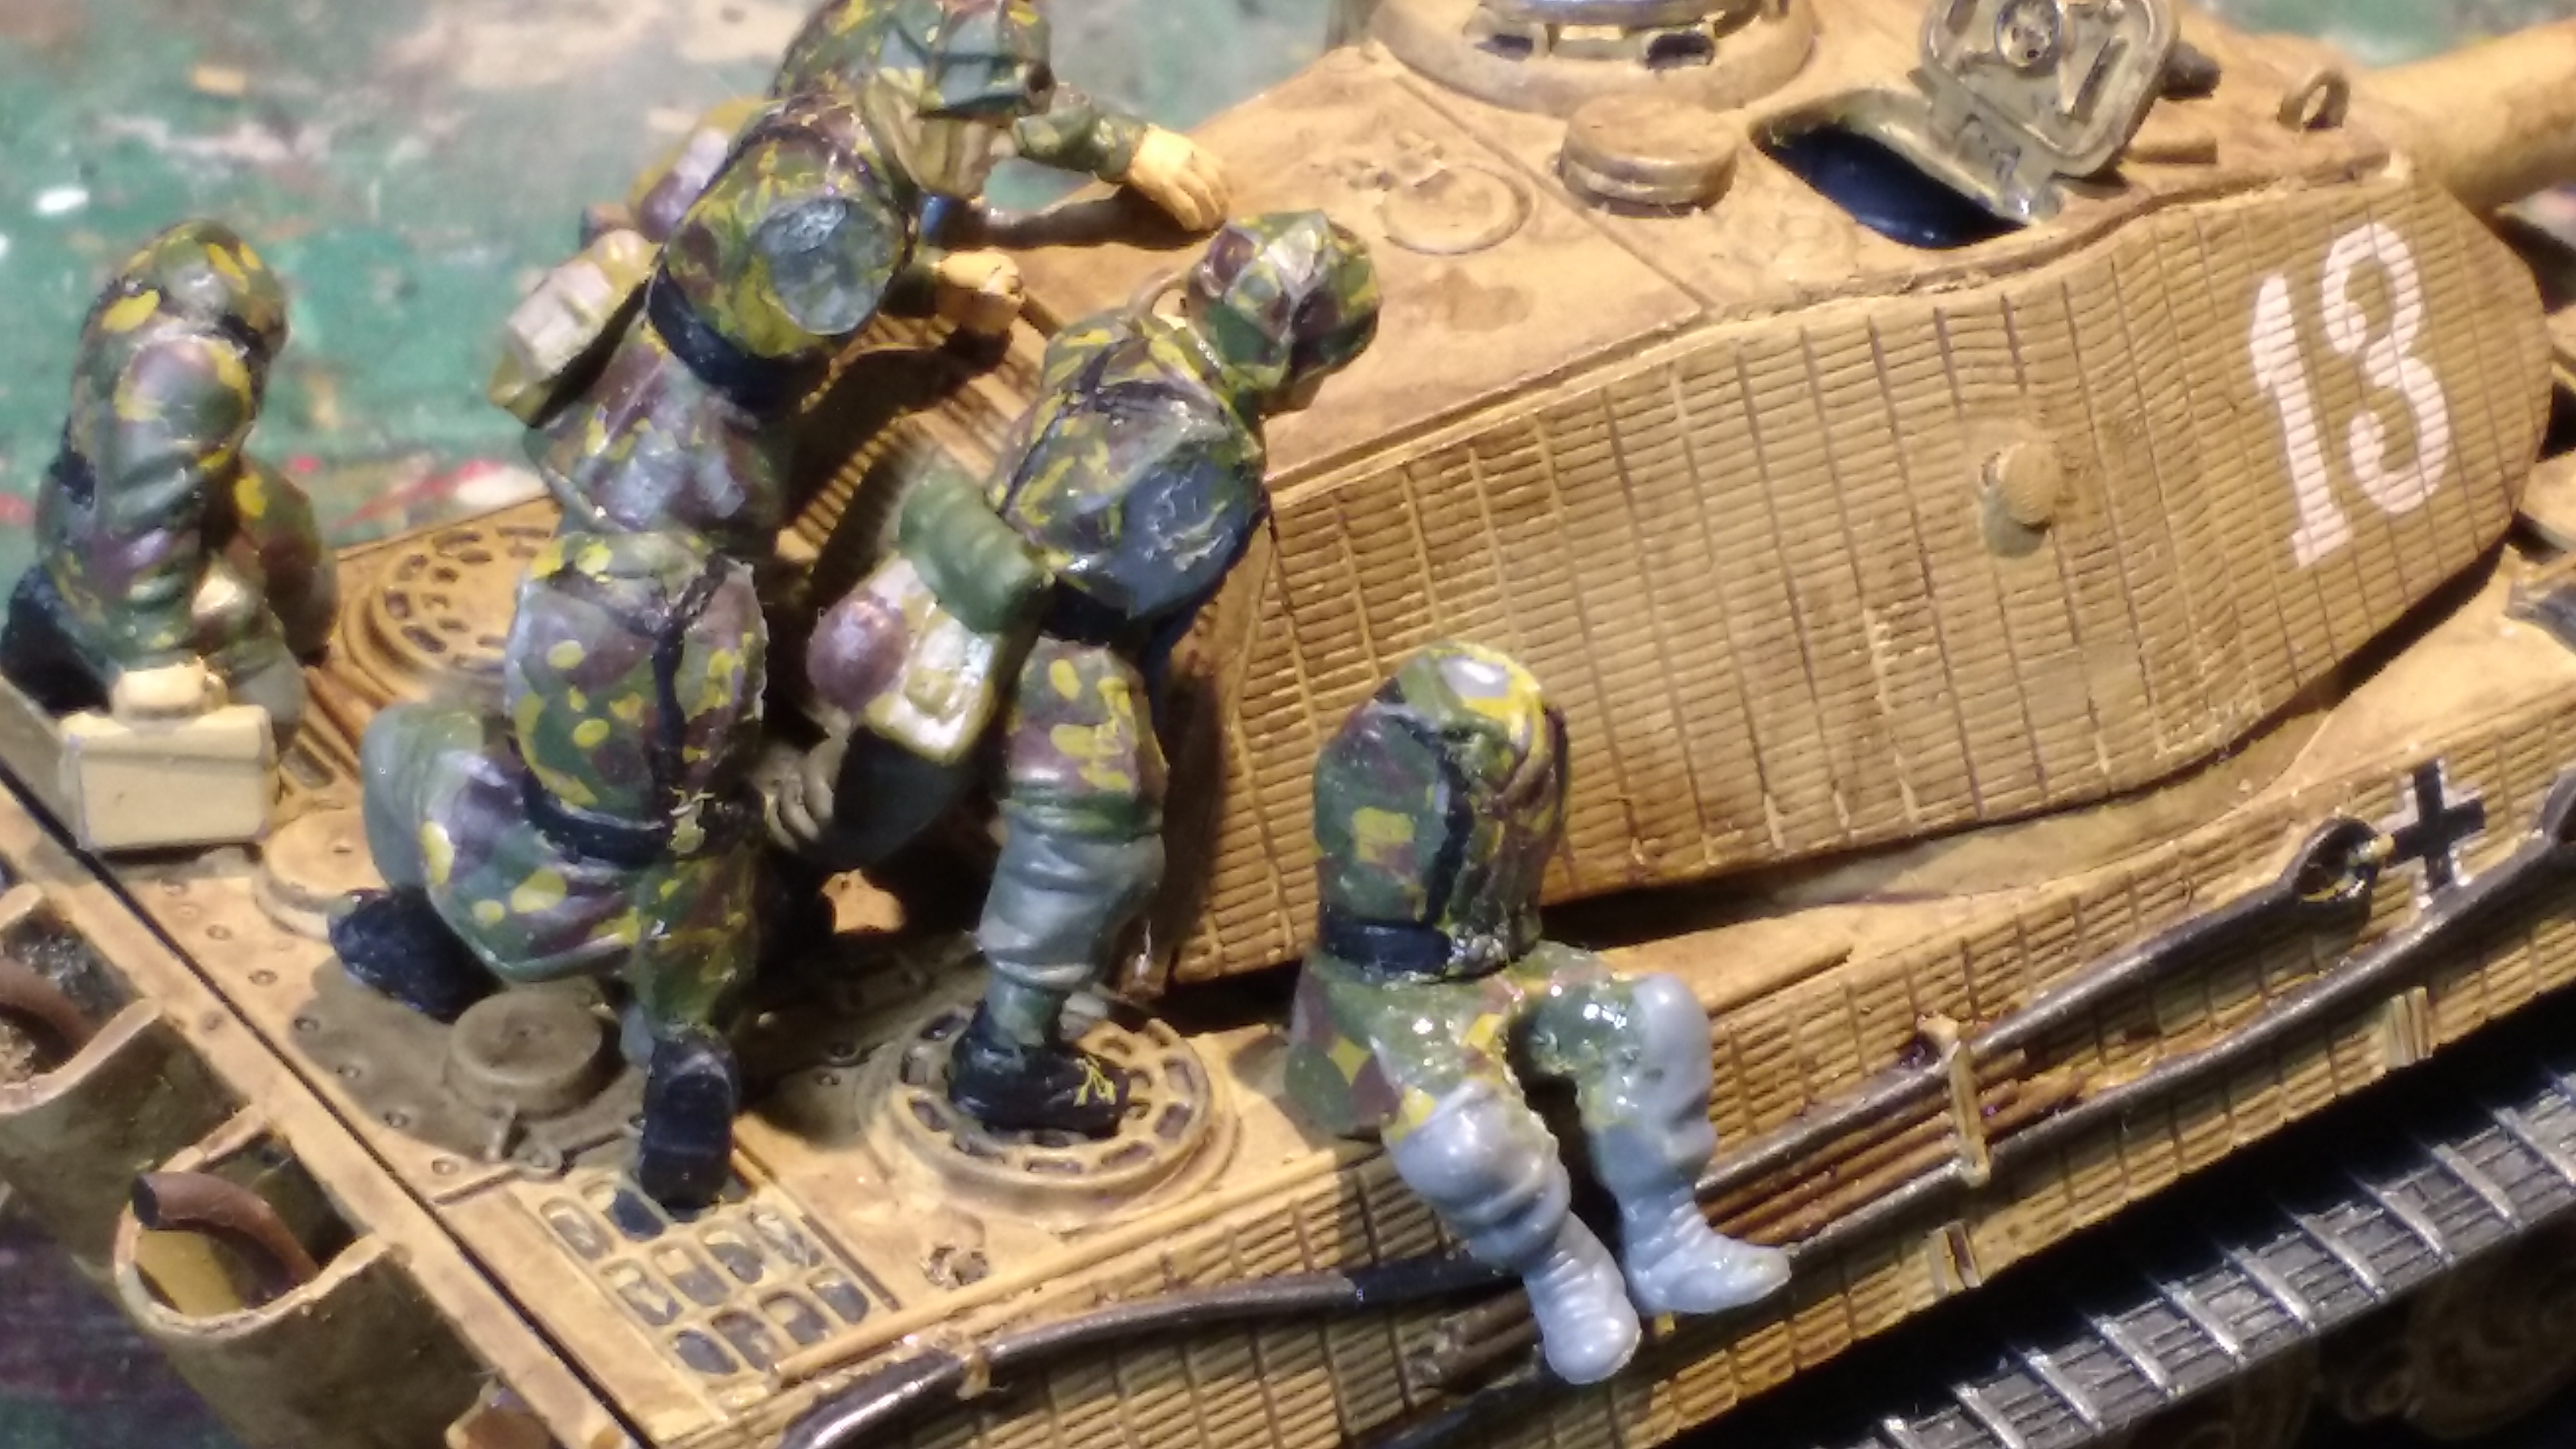
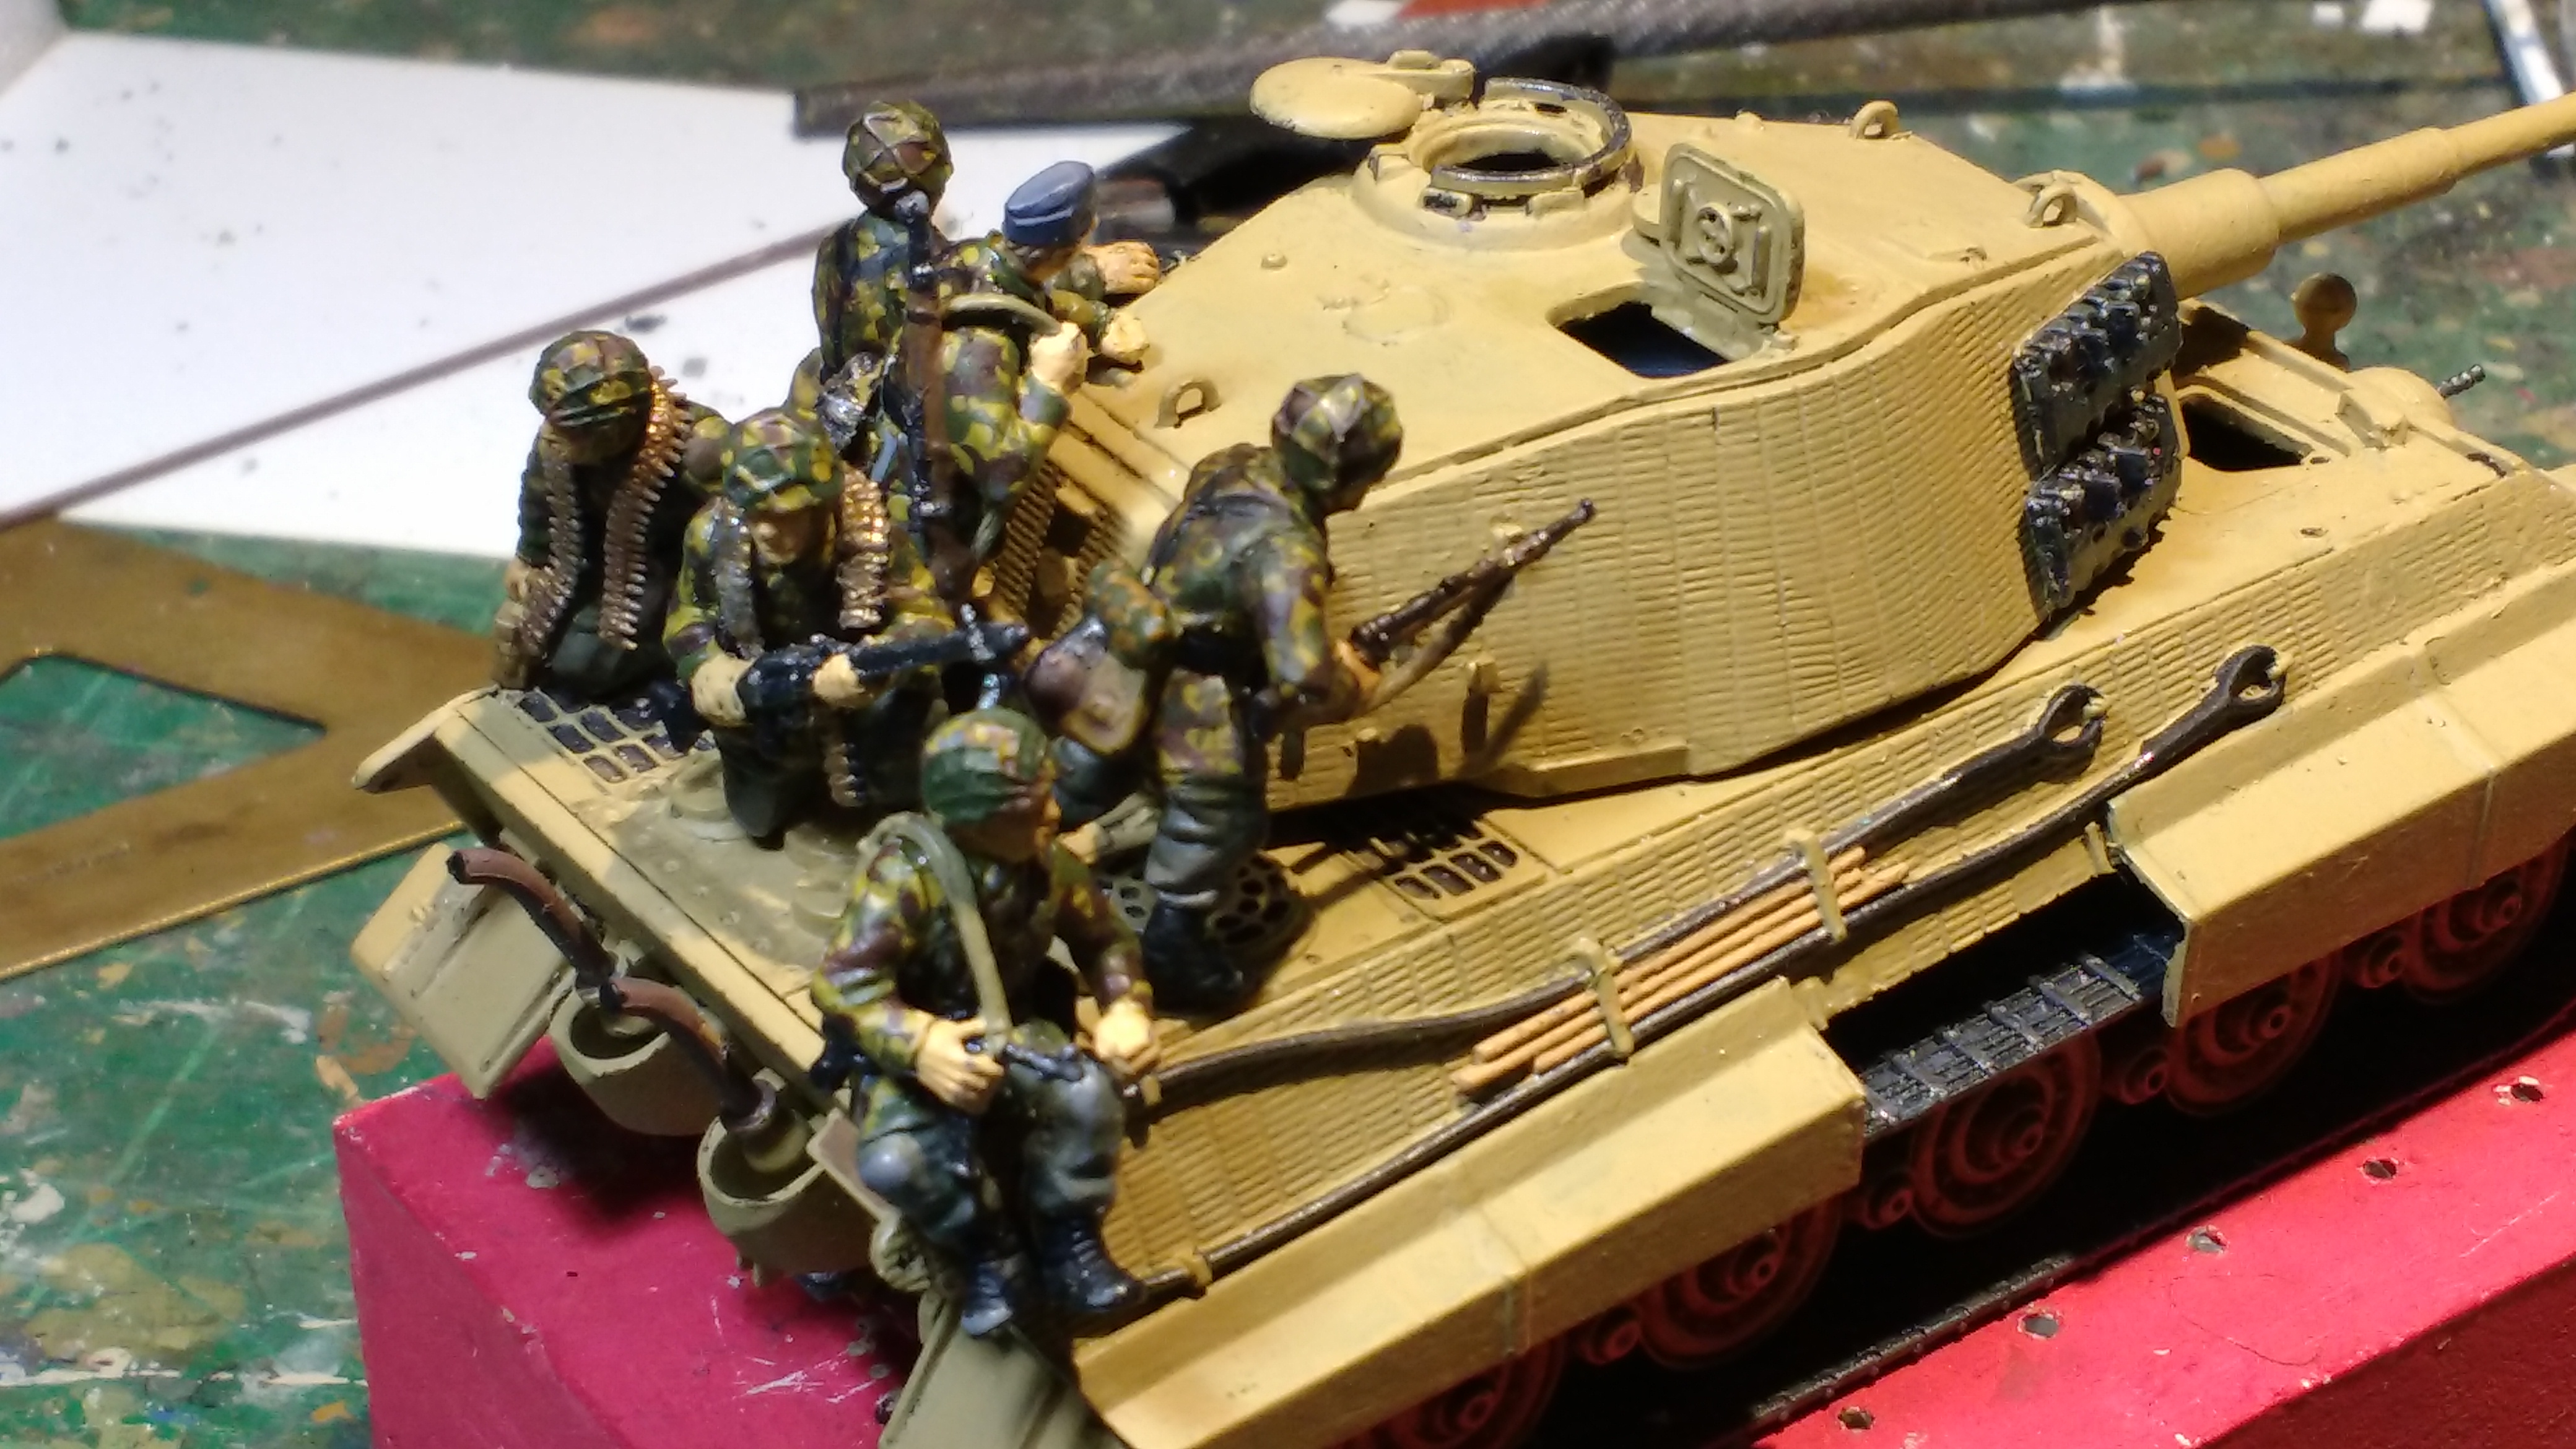
Its a bit like a 3D puzzle getting the figures to fit together in a tight , natural looking group , very much trial and error , thank goodness the liquid glue I use gives you lots of time to tweak the poses before it sets . And even then you might have to adjust a hand to look more natural resting on a surface . But it worked out in the end giving me 6 FJ tank riders . Of course I’ve still got room for a couple more up front by the Driver / Bow gunner’s hatches , so I guess another FJ sprue will be on my next Warlord order . I’m still waiting for Rubicon’s German tank crew figures to be released , so for now crew is minimal

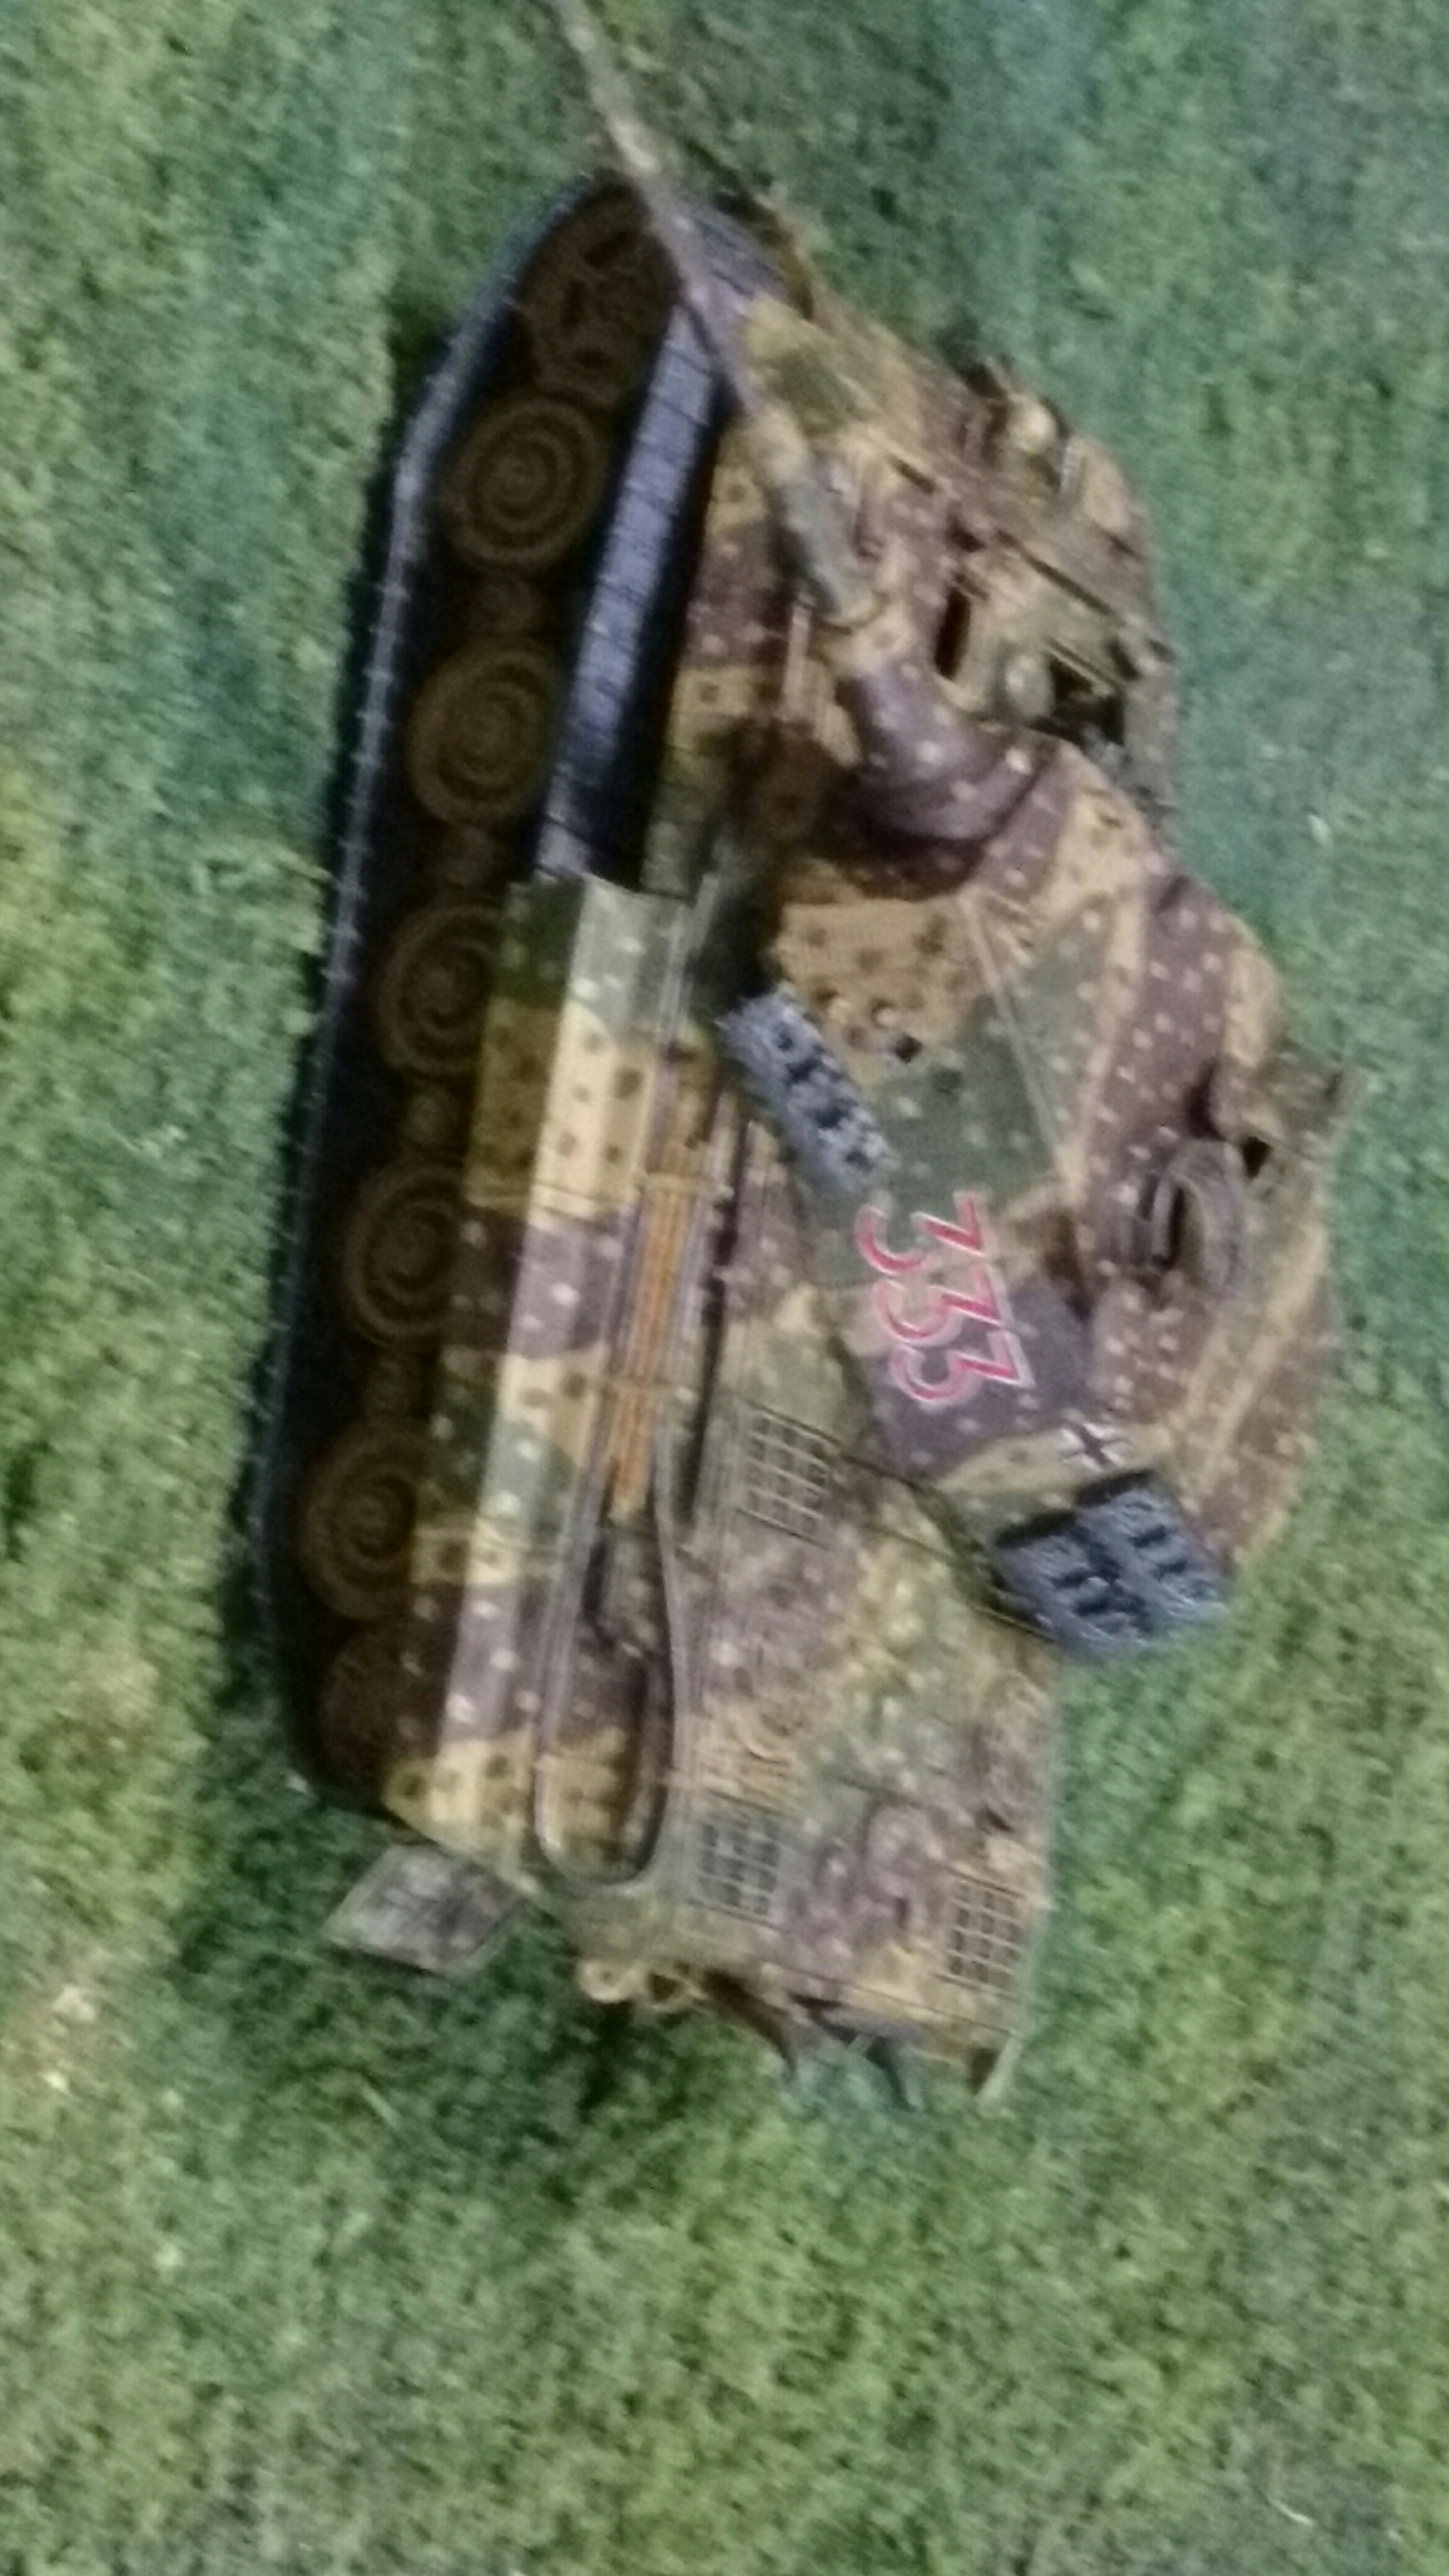
As I mentioned earlier , I was able to build four turrets from this 3 Tiger Zug kit . I decided to build the 4th as a knocked out turret , So I added a couple of shell strikes on the side of the turret , one a little deeper than the other , dislodging the spare track link . I painted this turret the same ambush scheme but gave it a different vehicle number and changed the placement of the German national insignia . I intend to make the crew remove able so I can use this tank as a knocked scenery piece
All in all , the Tiger II was a great kit . It’s nice you get the option of the “Porche ” or production turret . As a modeller I would have liked to have seen separate tow cables , but as a game piece it understandable why they molded them on . Warlord / Italeri still have some work to do to get their supplied crew figures in scale with the vehicles but as there are now other options in resin , metal & plastic this isn’t so much of a problem any more .
Just a heads up guys . Over on www.themodellingnews.com , they have an awesome pictorial walk around and vehicle history of the five Tiger variants at the Bovington Muesum .
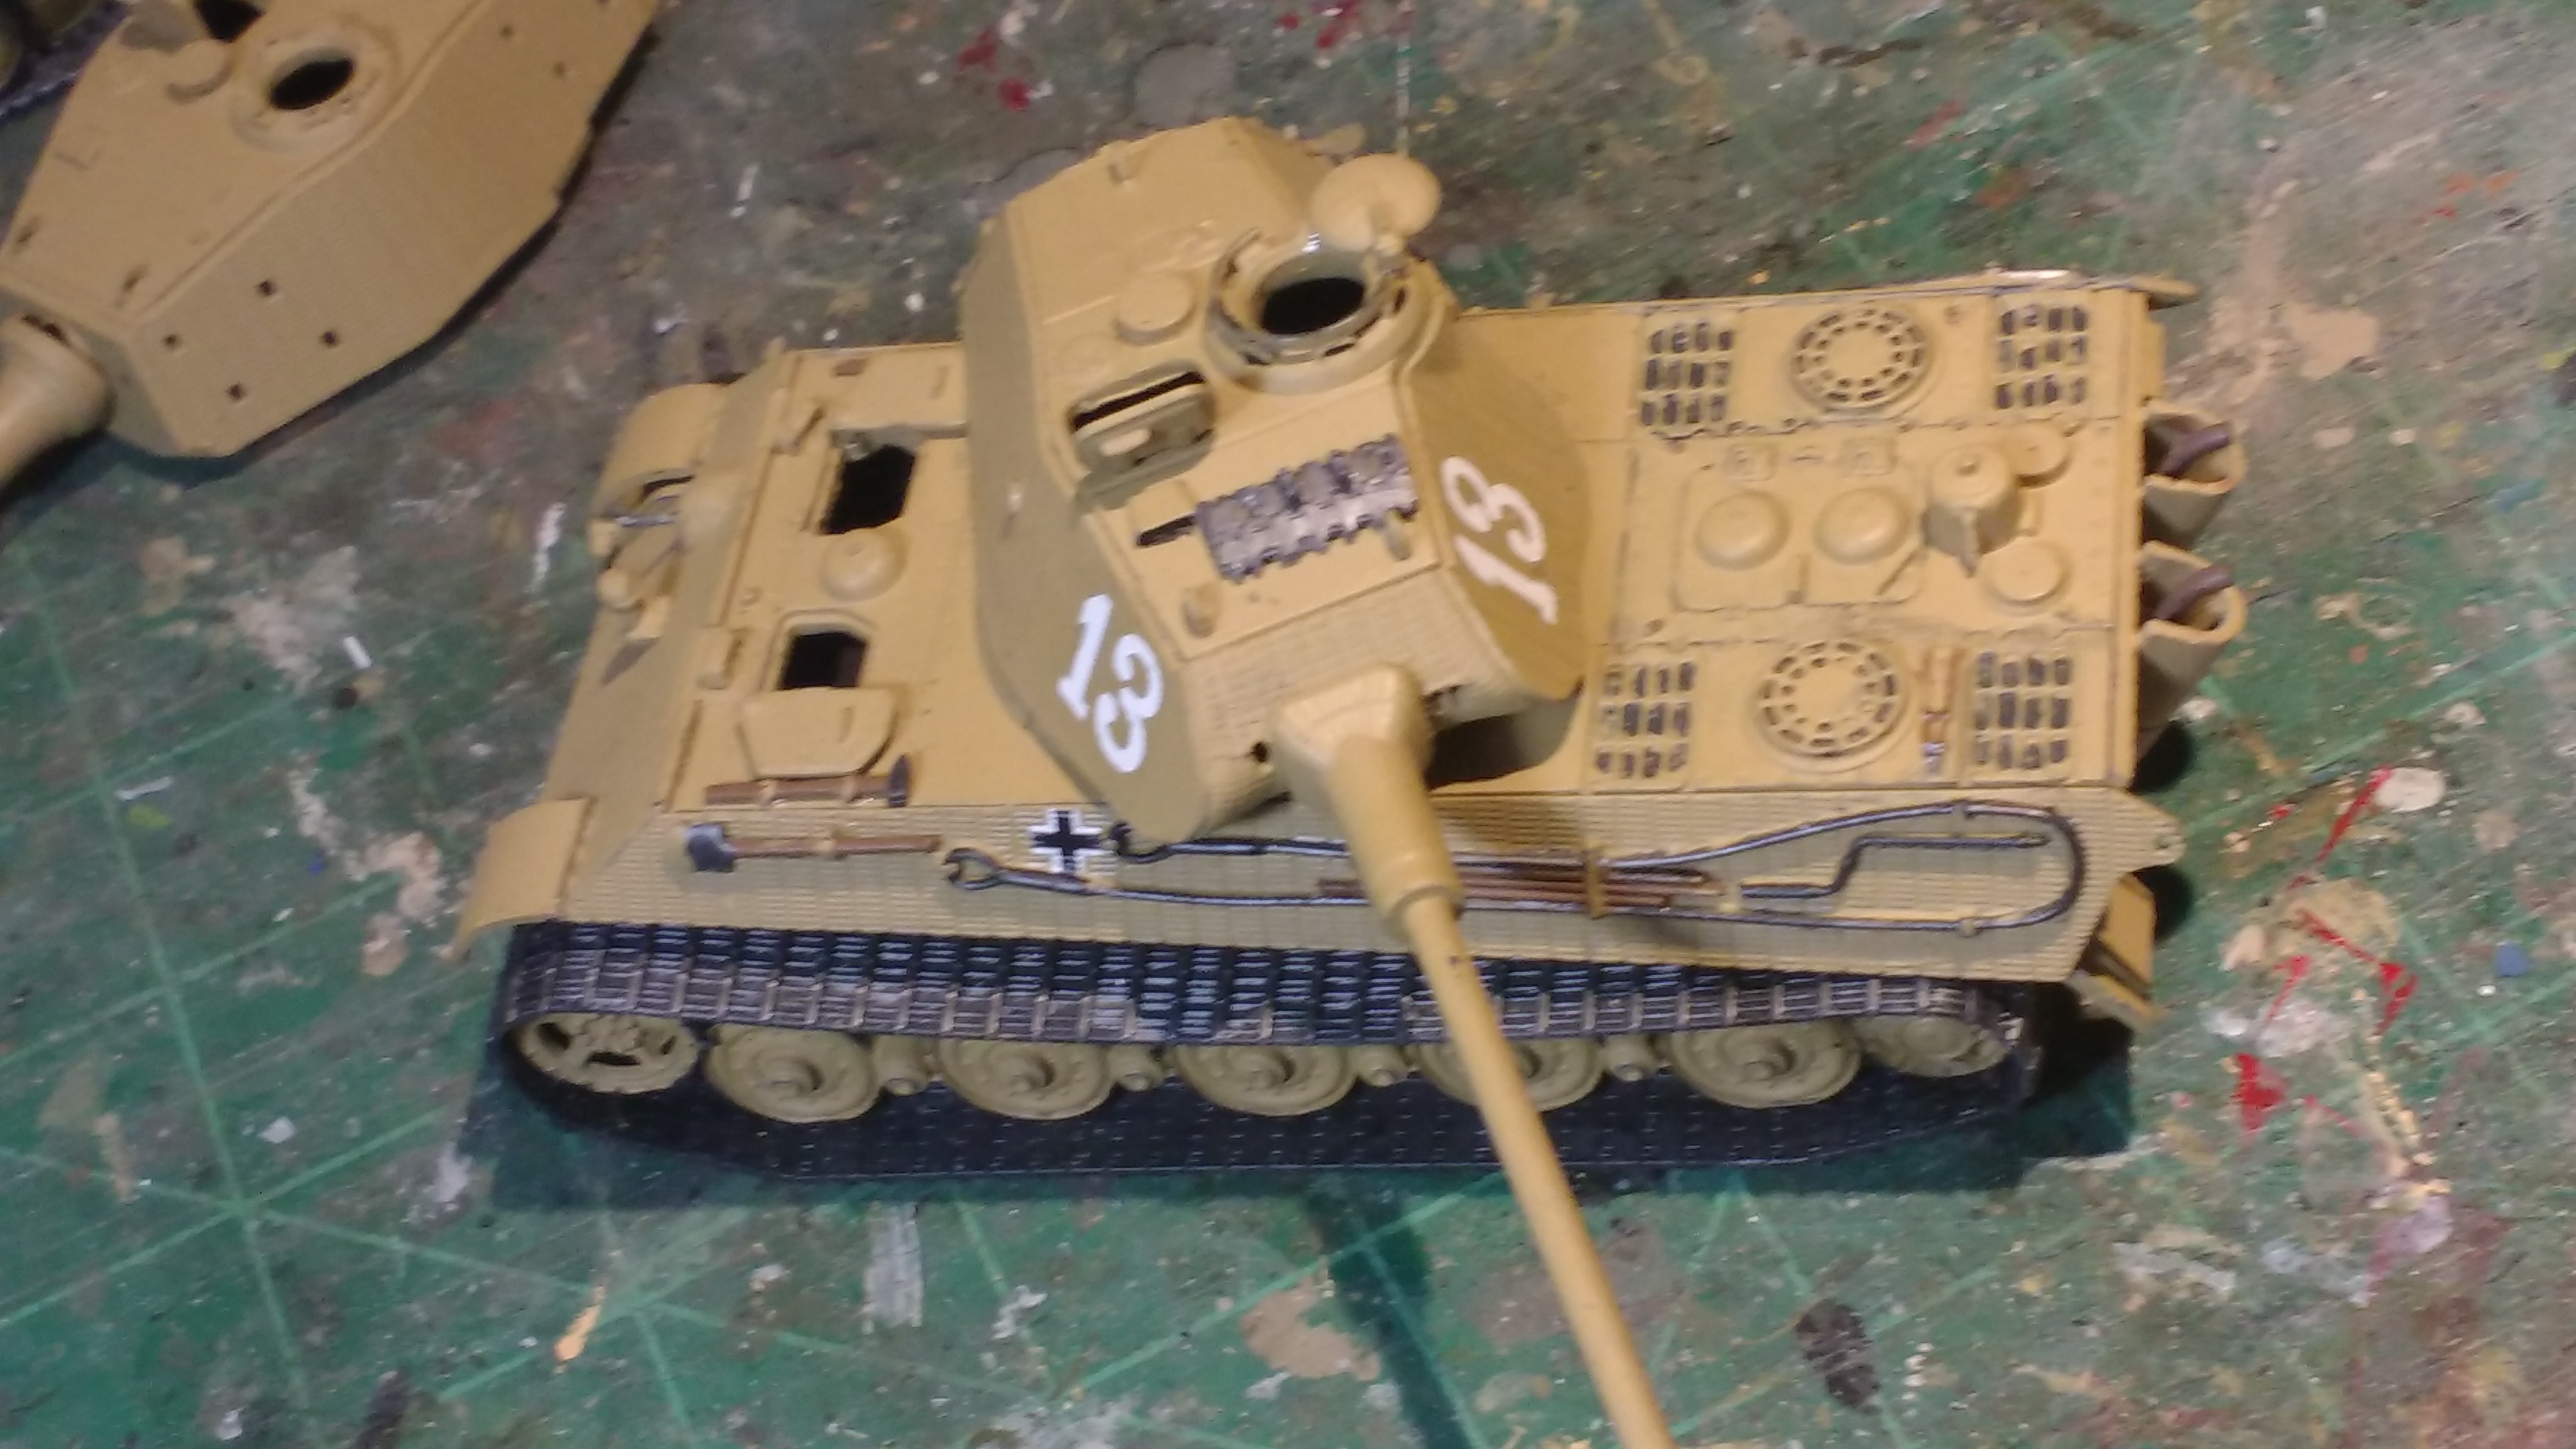
Now to work on the 3 production ( Henschel ) turrets . Back in my June 30 post I showed the almost complete #1 turret . Since then I have added all the little bits and pieces and the spare track on the sides . Warlord gives you 8 sections of spare track , ( part #39) , but they screwed up . There are 2 different style of track pieces , Tiger tracks were handed , meaning a left track and a right track but both left and right are numbered the same . So get out your favorite reference book and check out some Tiger II photos . So with that sorted , I needed to make some track hangers for the turret side as I used a couple of pieces as stowage on #13 . I made the hook from Plastruct C , cutting off on leg of the C . You could also make it from thin metal or brass strip , or even larger size office staples , but I like to work with plastic .

The hooks and lower mounts for the spare track are off set so make sure to check your references carefully
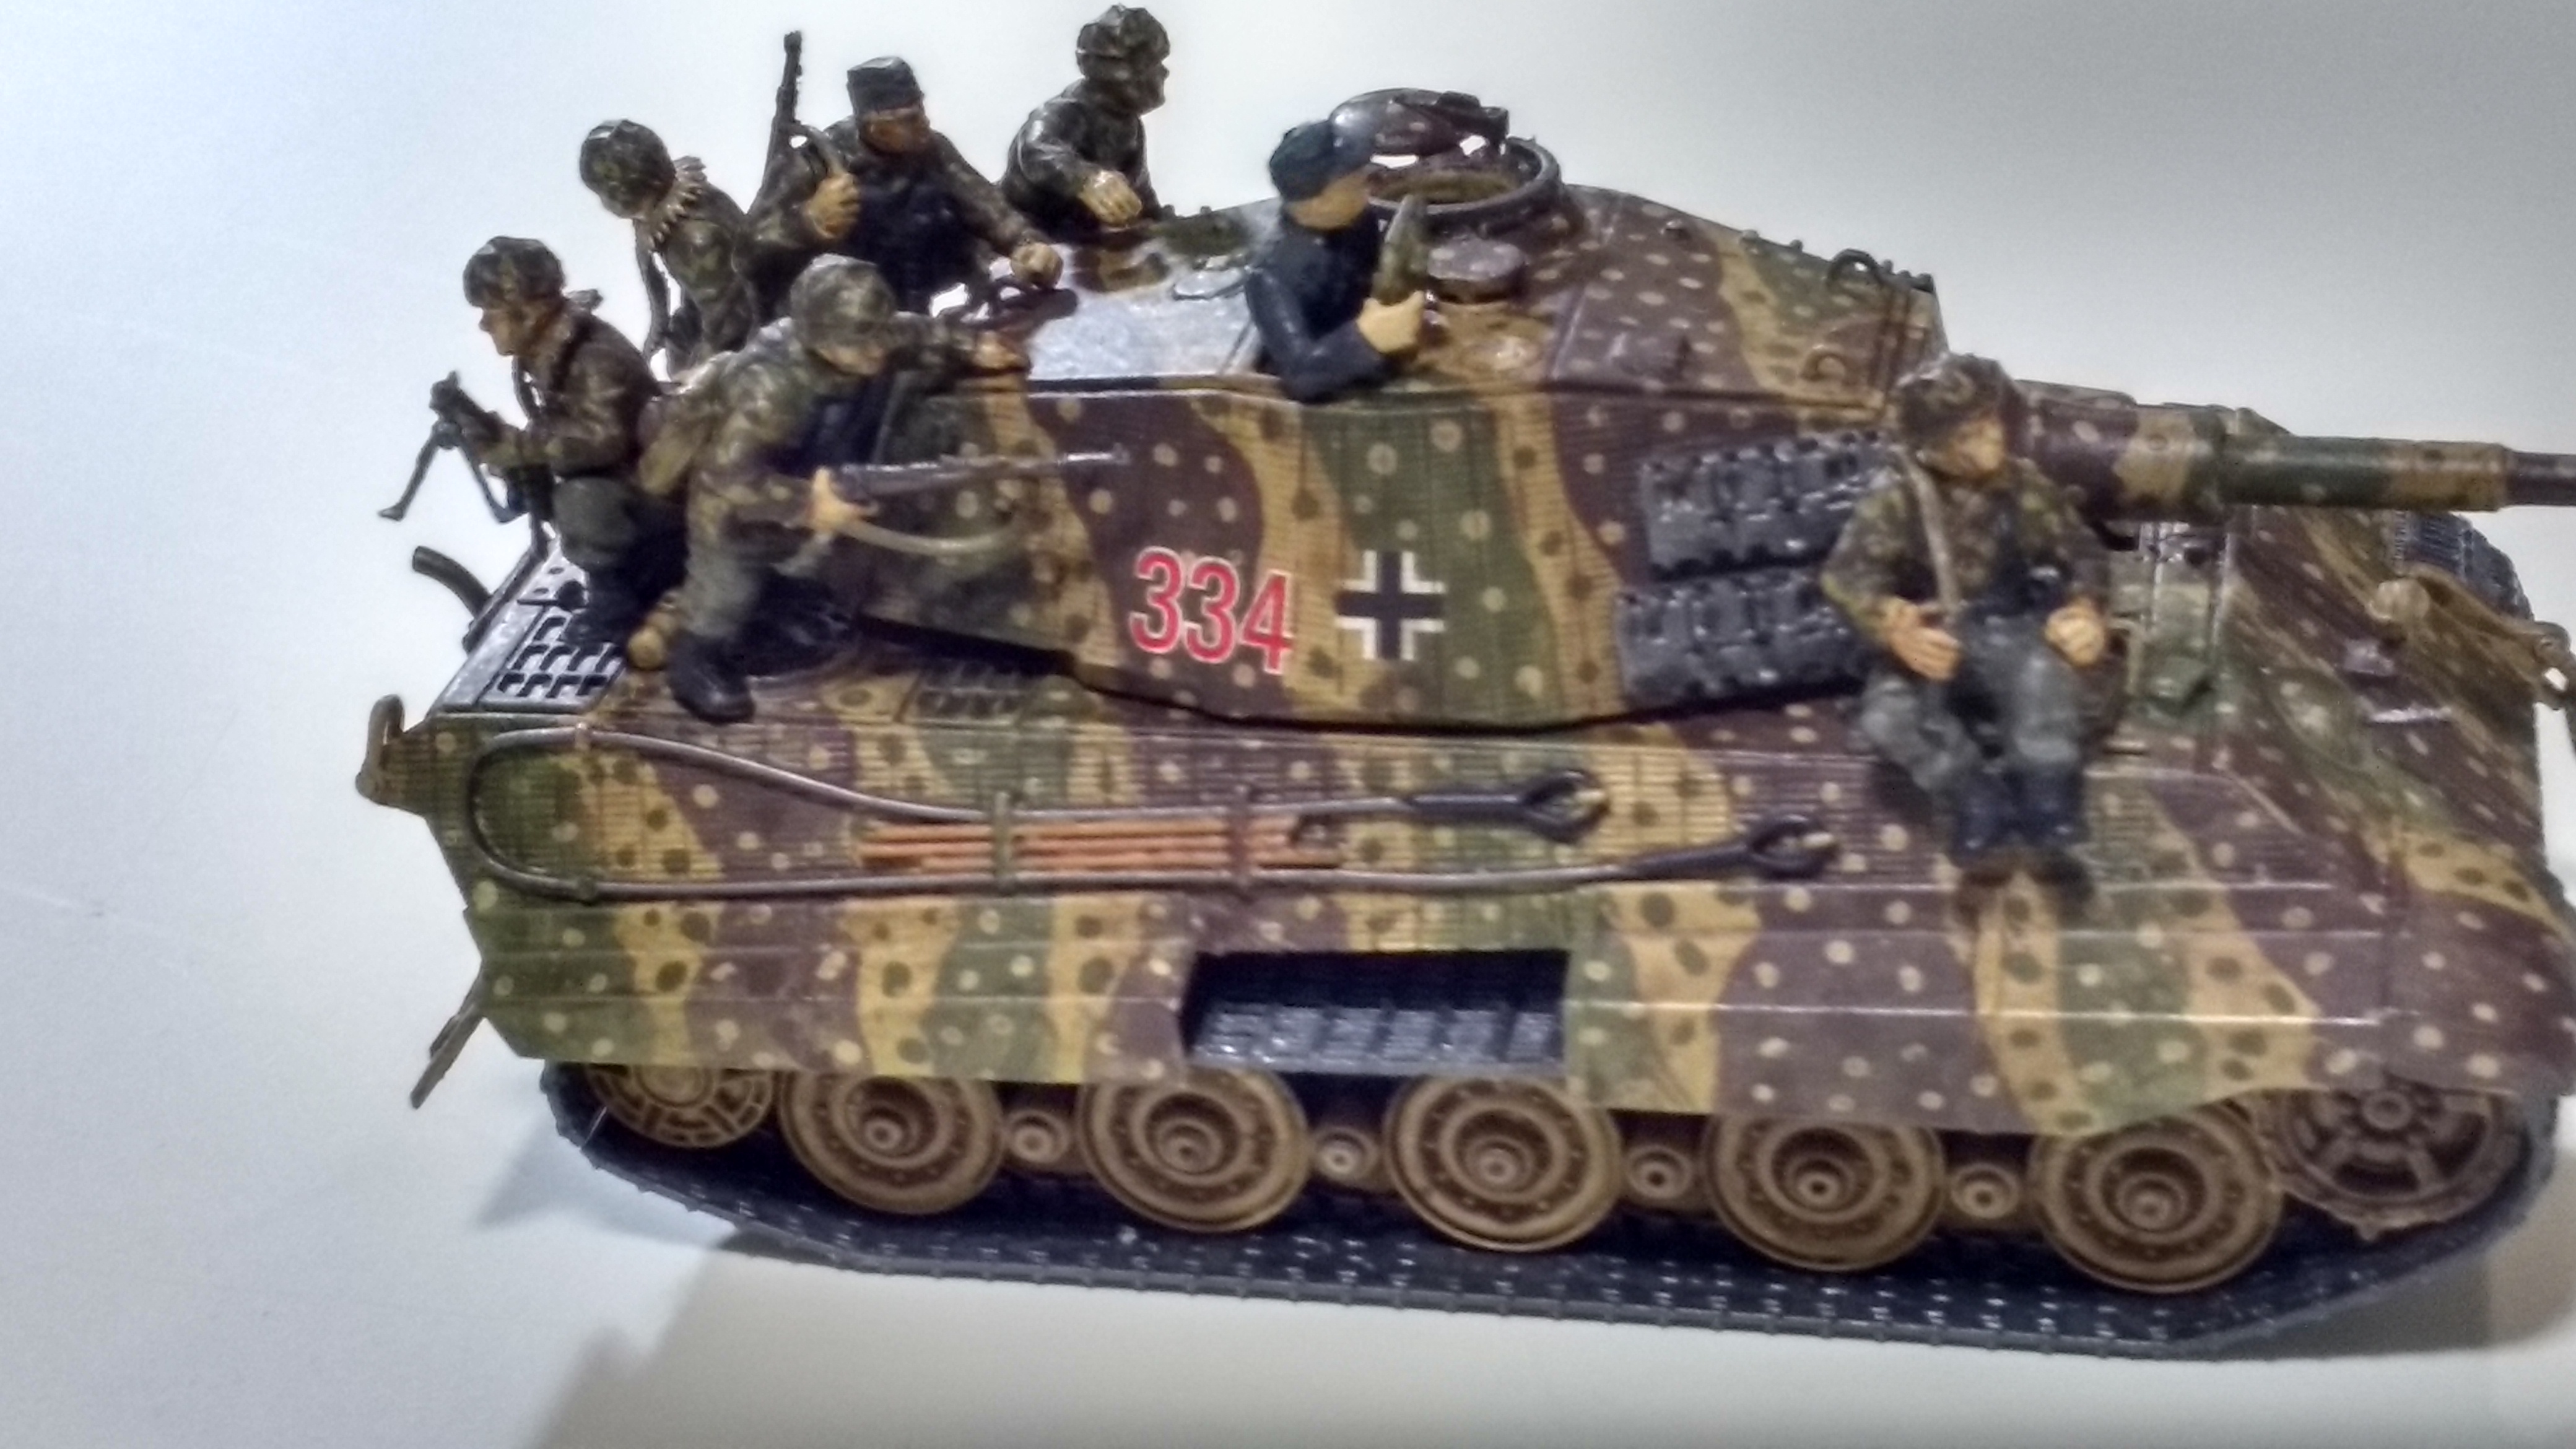
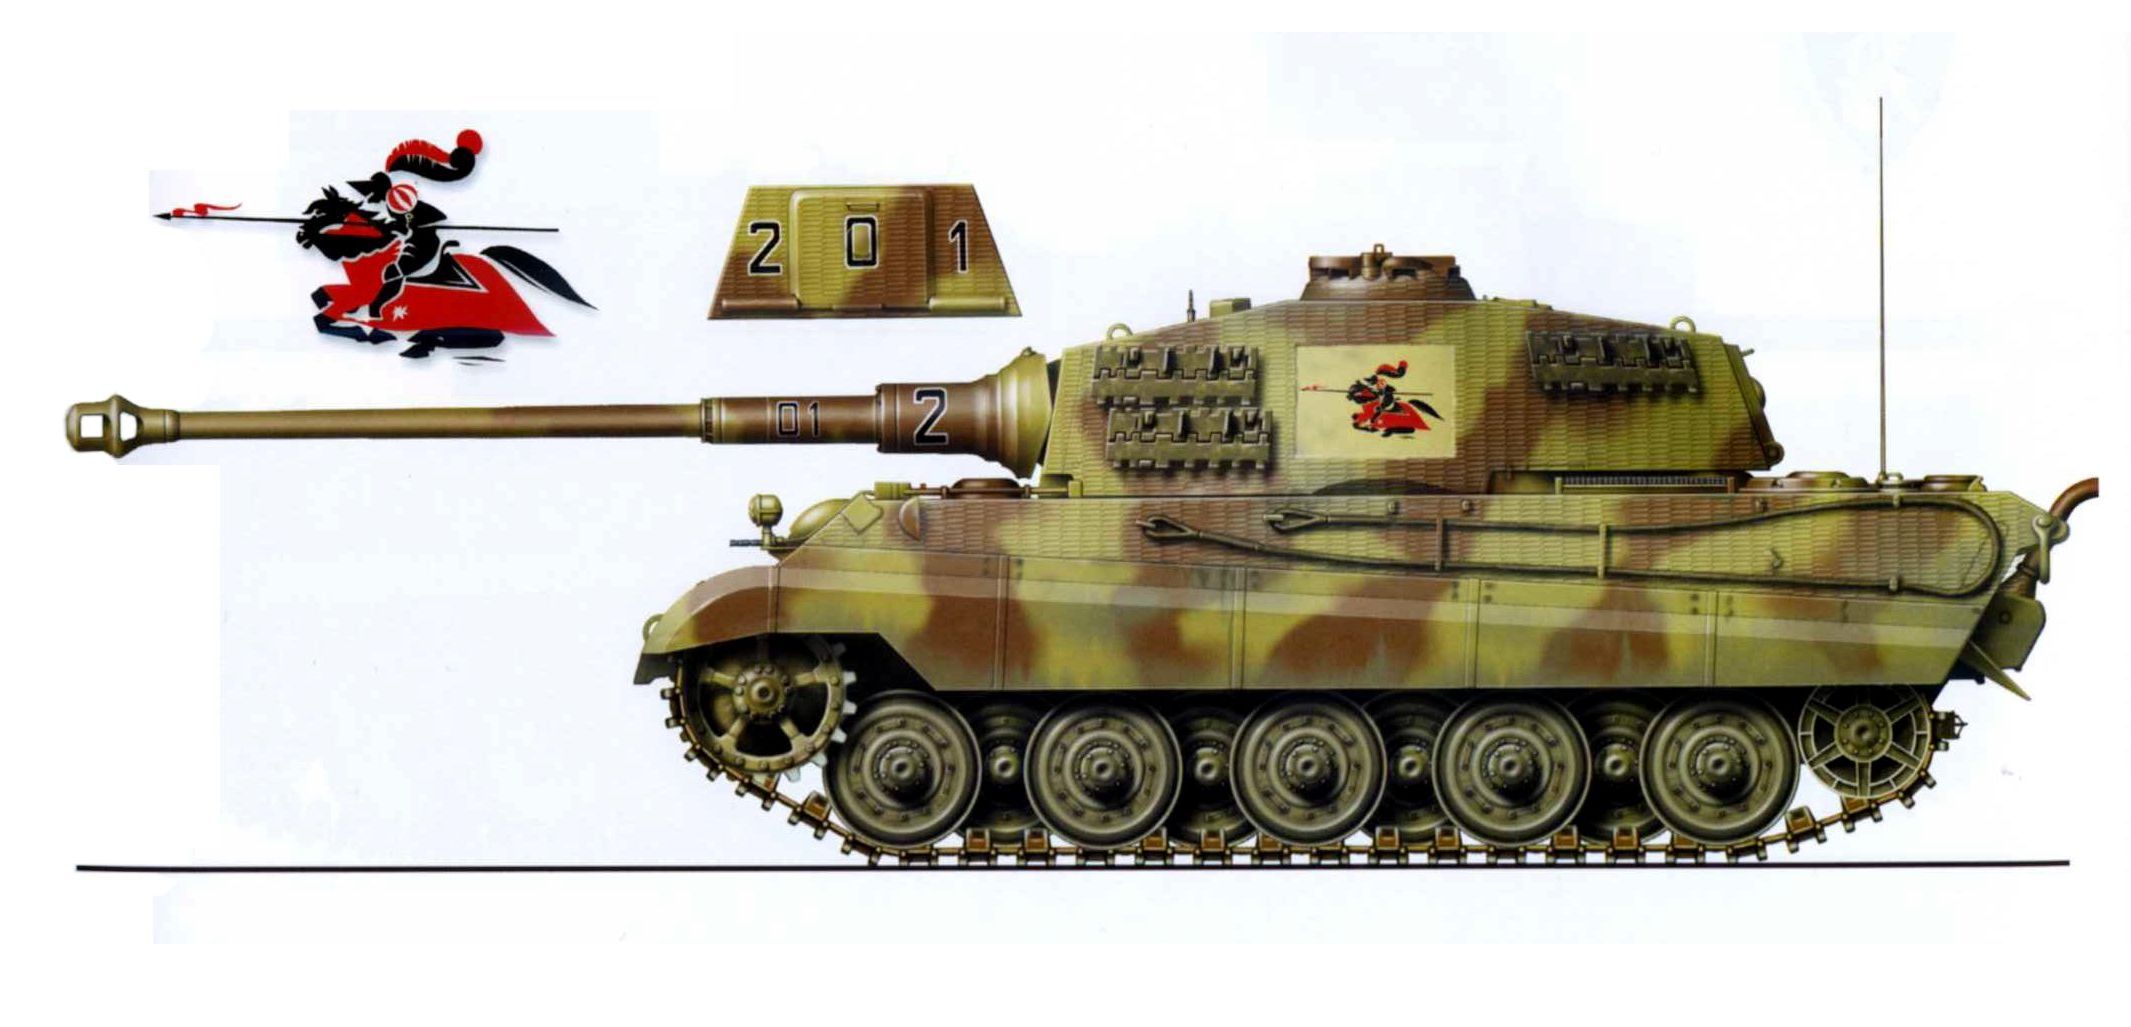
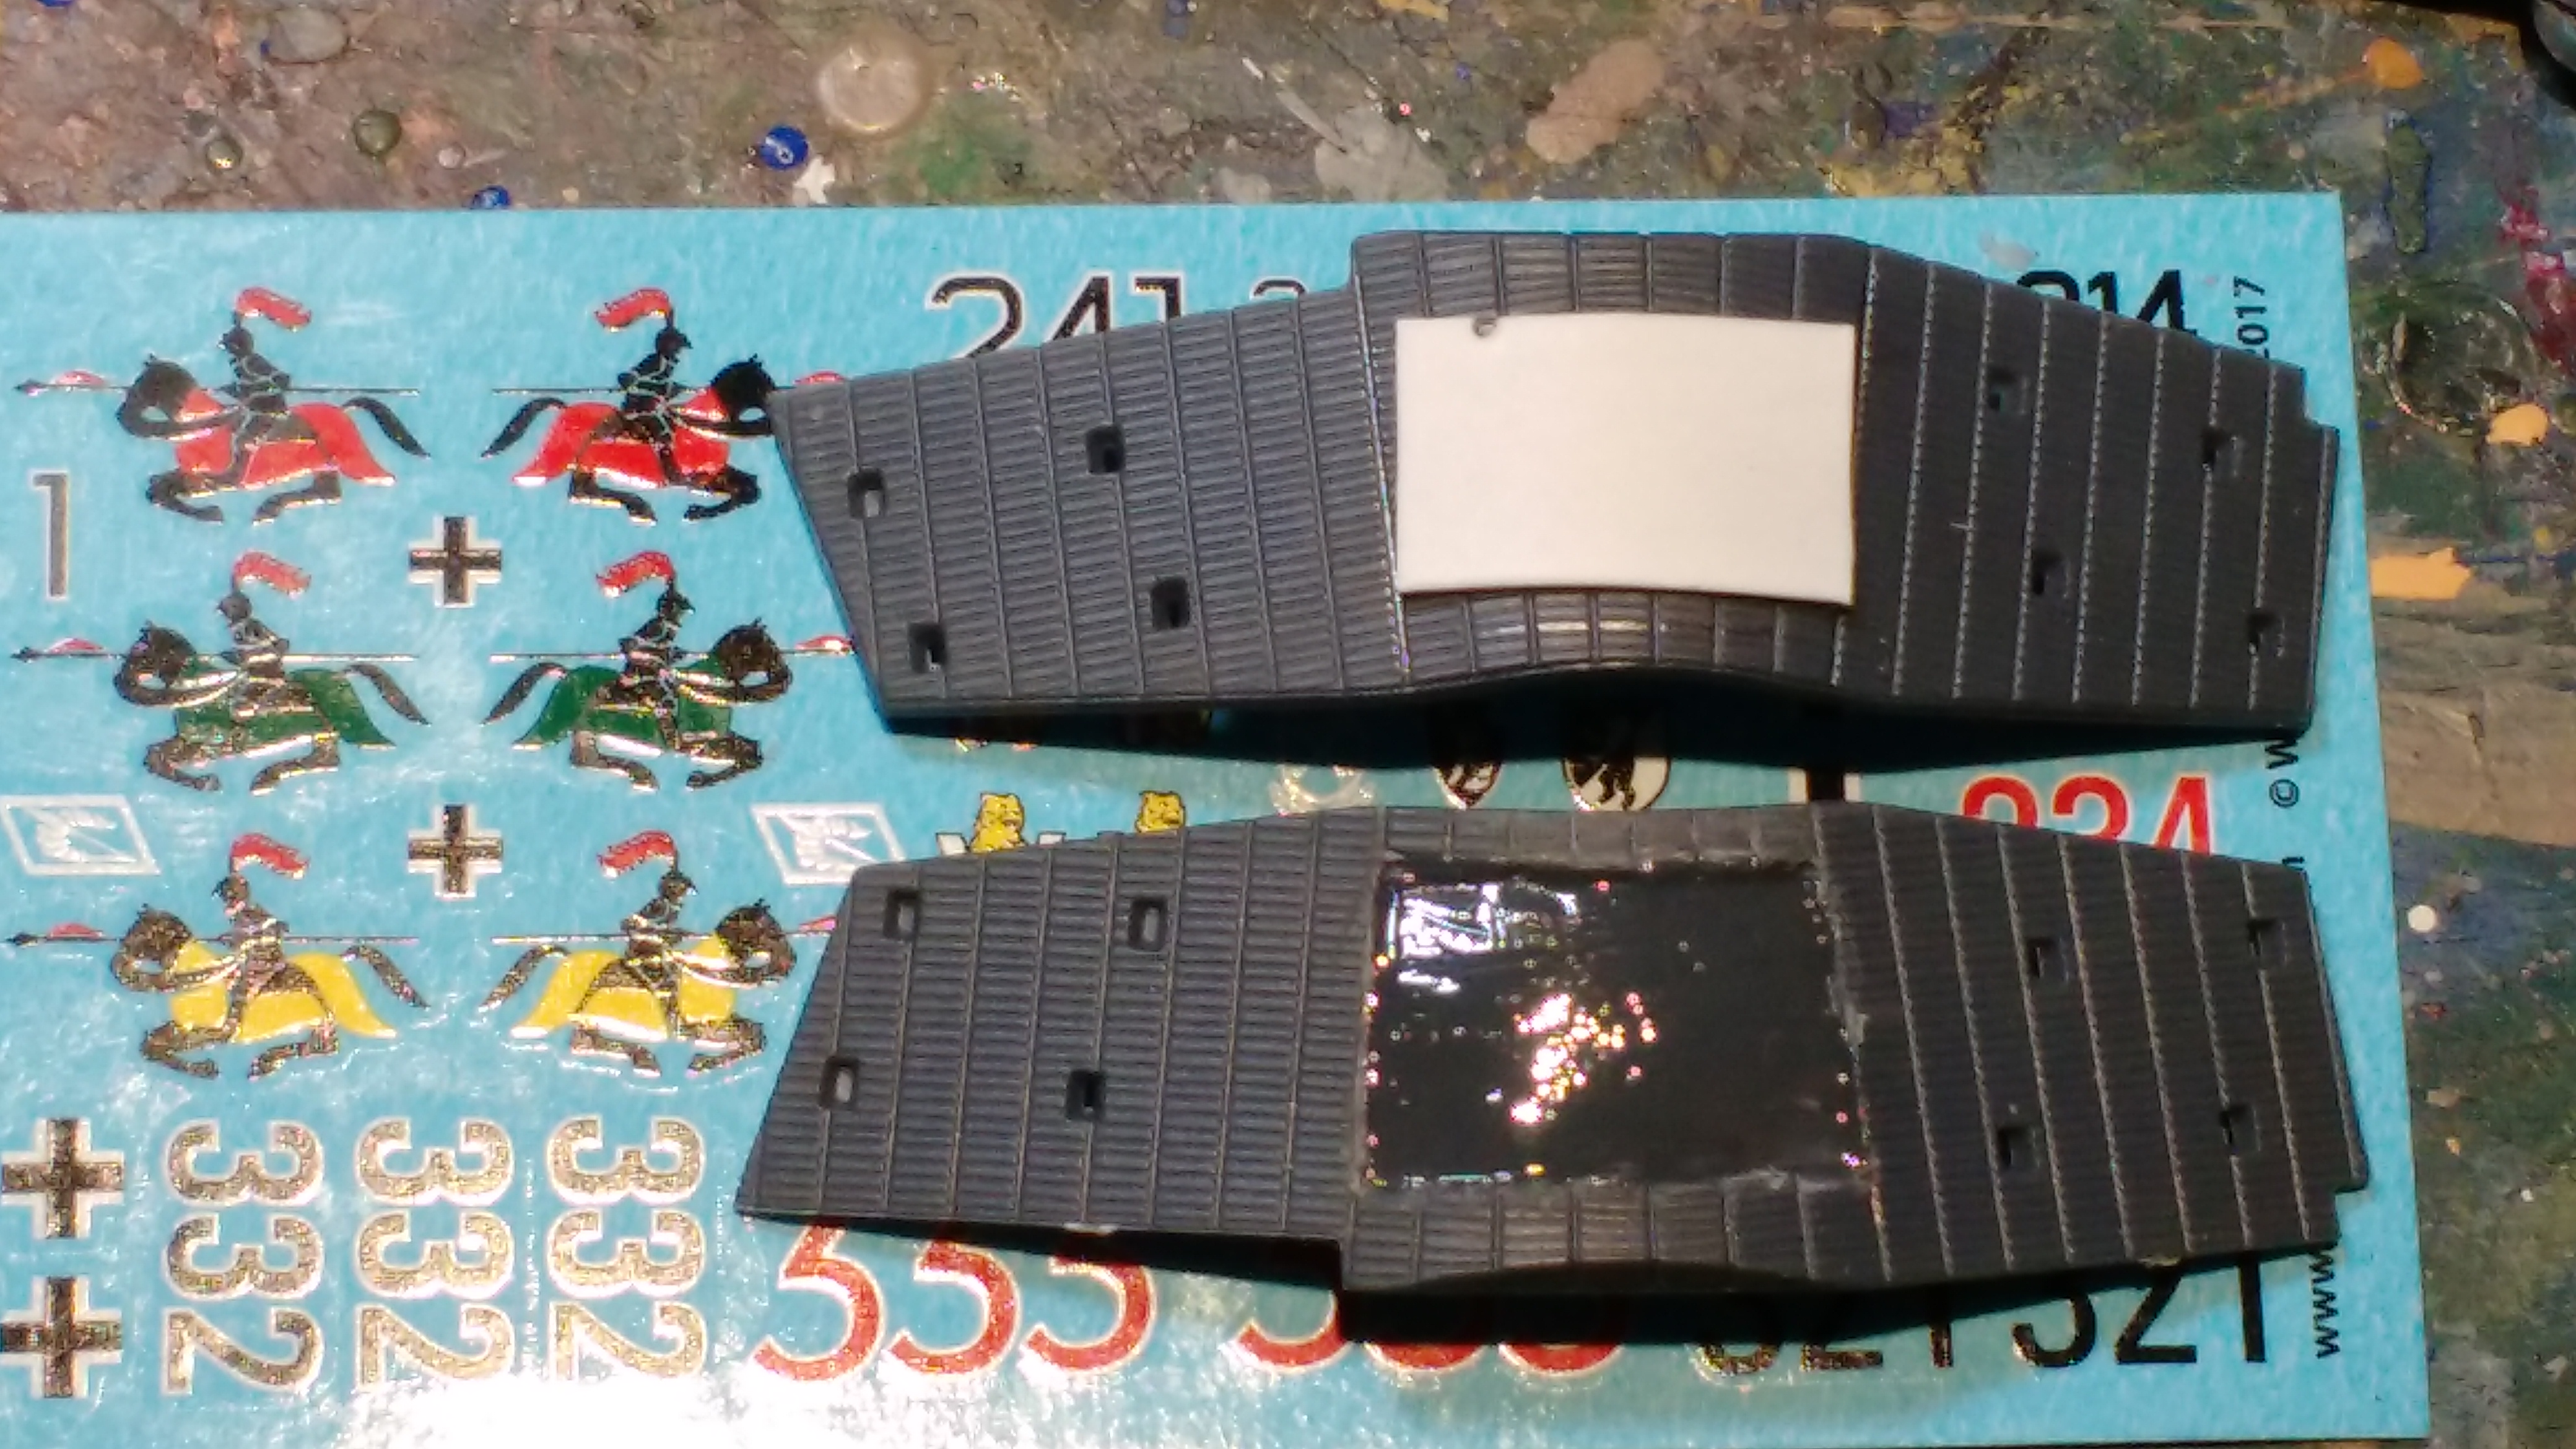
So one production turret down , on to #2 . With this one I wanted to portray a tank from the 505 Heavy Tank company , those Tigers with the neat looking knight on horseback markings on the turret sides . Warlord gives you 3 options of that decal , with the horse blanket in red , yellow , or green . It’s supposed that the color of the blanket stands for the company , red – 1 , yellow 2 , etc . But color photos of the unit show a number the same company tanks with different colors ( interesting discussion on Missing Lynx ) , so again , I picked another unit the experts still have questions about .
While the 505 tanks had zimmerit , they removed a large patch on the turret side on which to paint their knight . So , I got out my collection of X Acto chisel blades and went to work . I cut a template of roughly the size of the decal , traced around it on the turret side and got cutting . I then lightly sanded the area and gave it a coat of Tamiya liquid glue to soften / smooth out some of the chisel marks . When dry I will add a thin layer of putty / liquid green stuff if needed
A couple of last minute details added to #13 . On the left side below the turret is a large pry bar (see picture in July 1st post ) ,which is absent in the kit . I made it from a strip of thin plastic, cutting it apart to add the tool brackets , which were made from a little larger strip . I didn’t even measure for scale , just cut it to a ize that looks good IMO .
On the right rear side , I added the antenna stowage tube , this time using round strip . Pictures also show it mounted forward behind bow gunner’s position , so you have some varation in placement
That’s pretty much it except for crew and a diorama base ( maybe ) for #13 . Im going to build the other two hulls with exactly the same add ons , but I’ll add the side skirting , and maybe damage or remove a section or two if I find a photo that looks interesting . And then on to the 3 production turrets ….
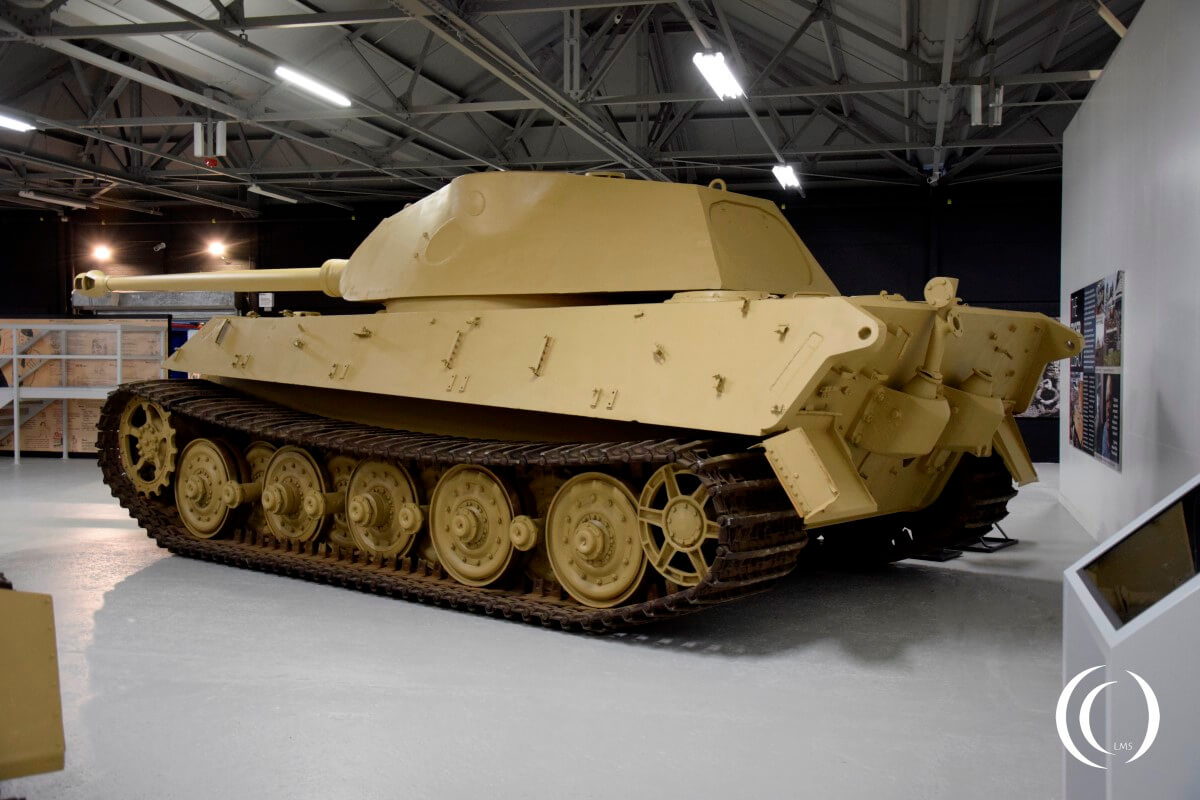
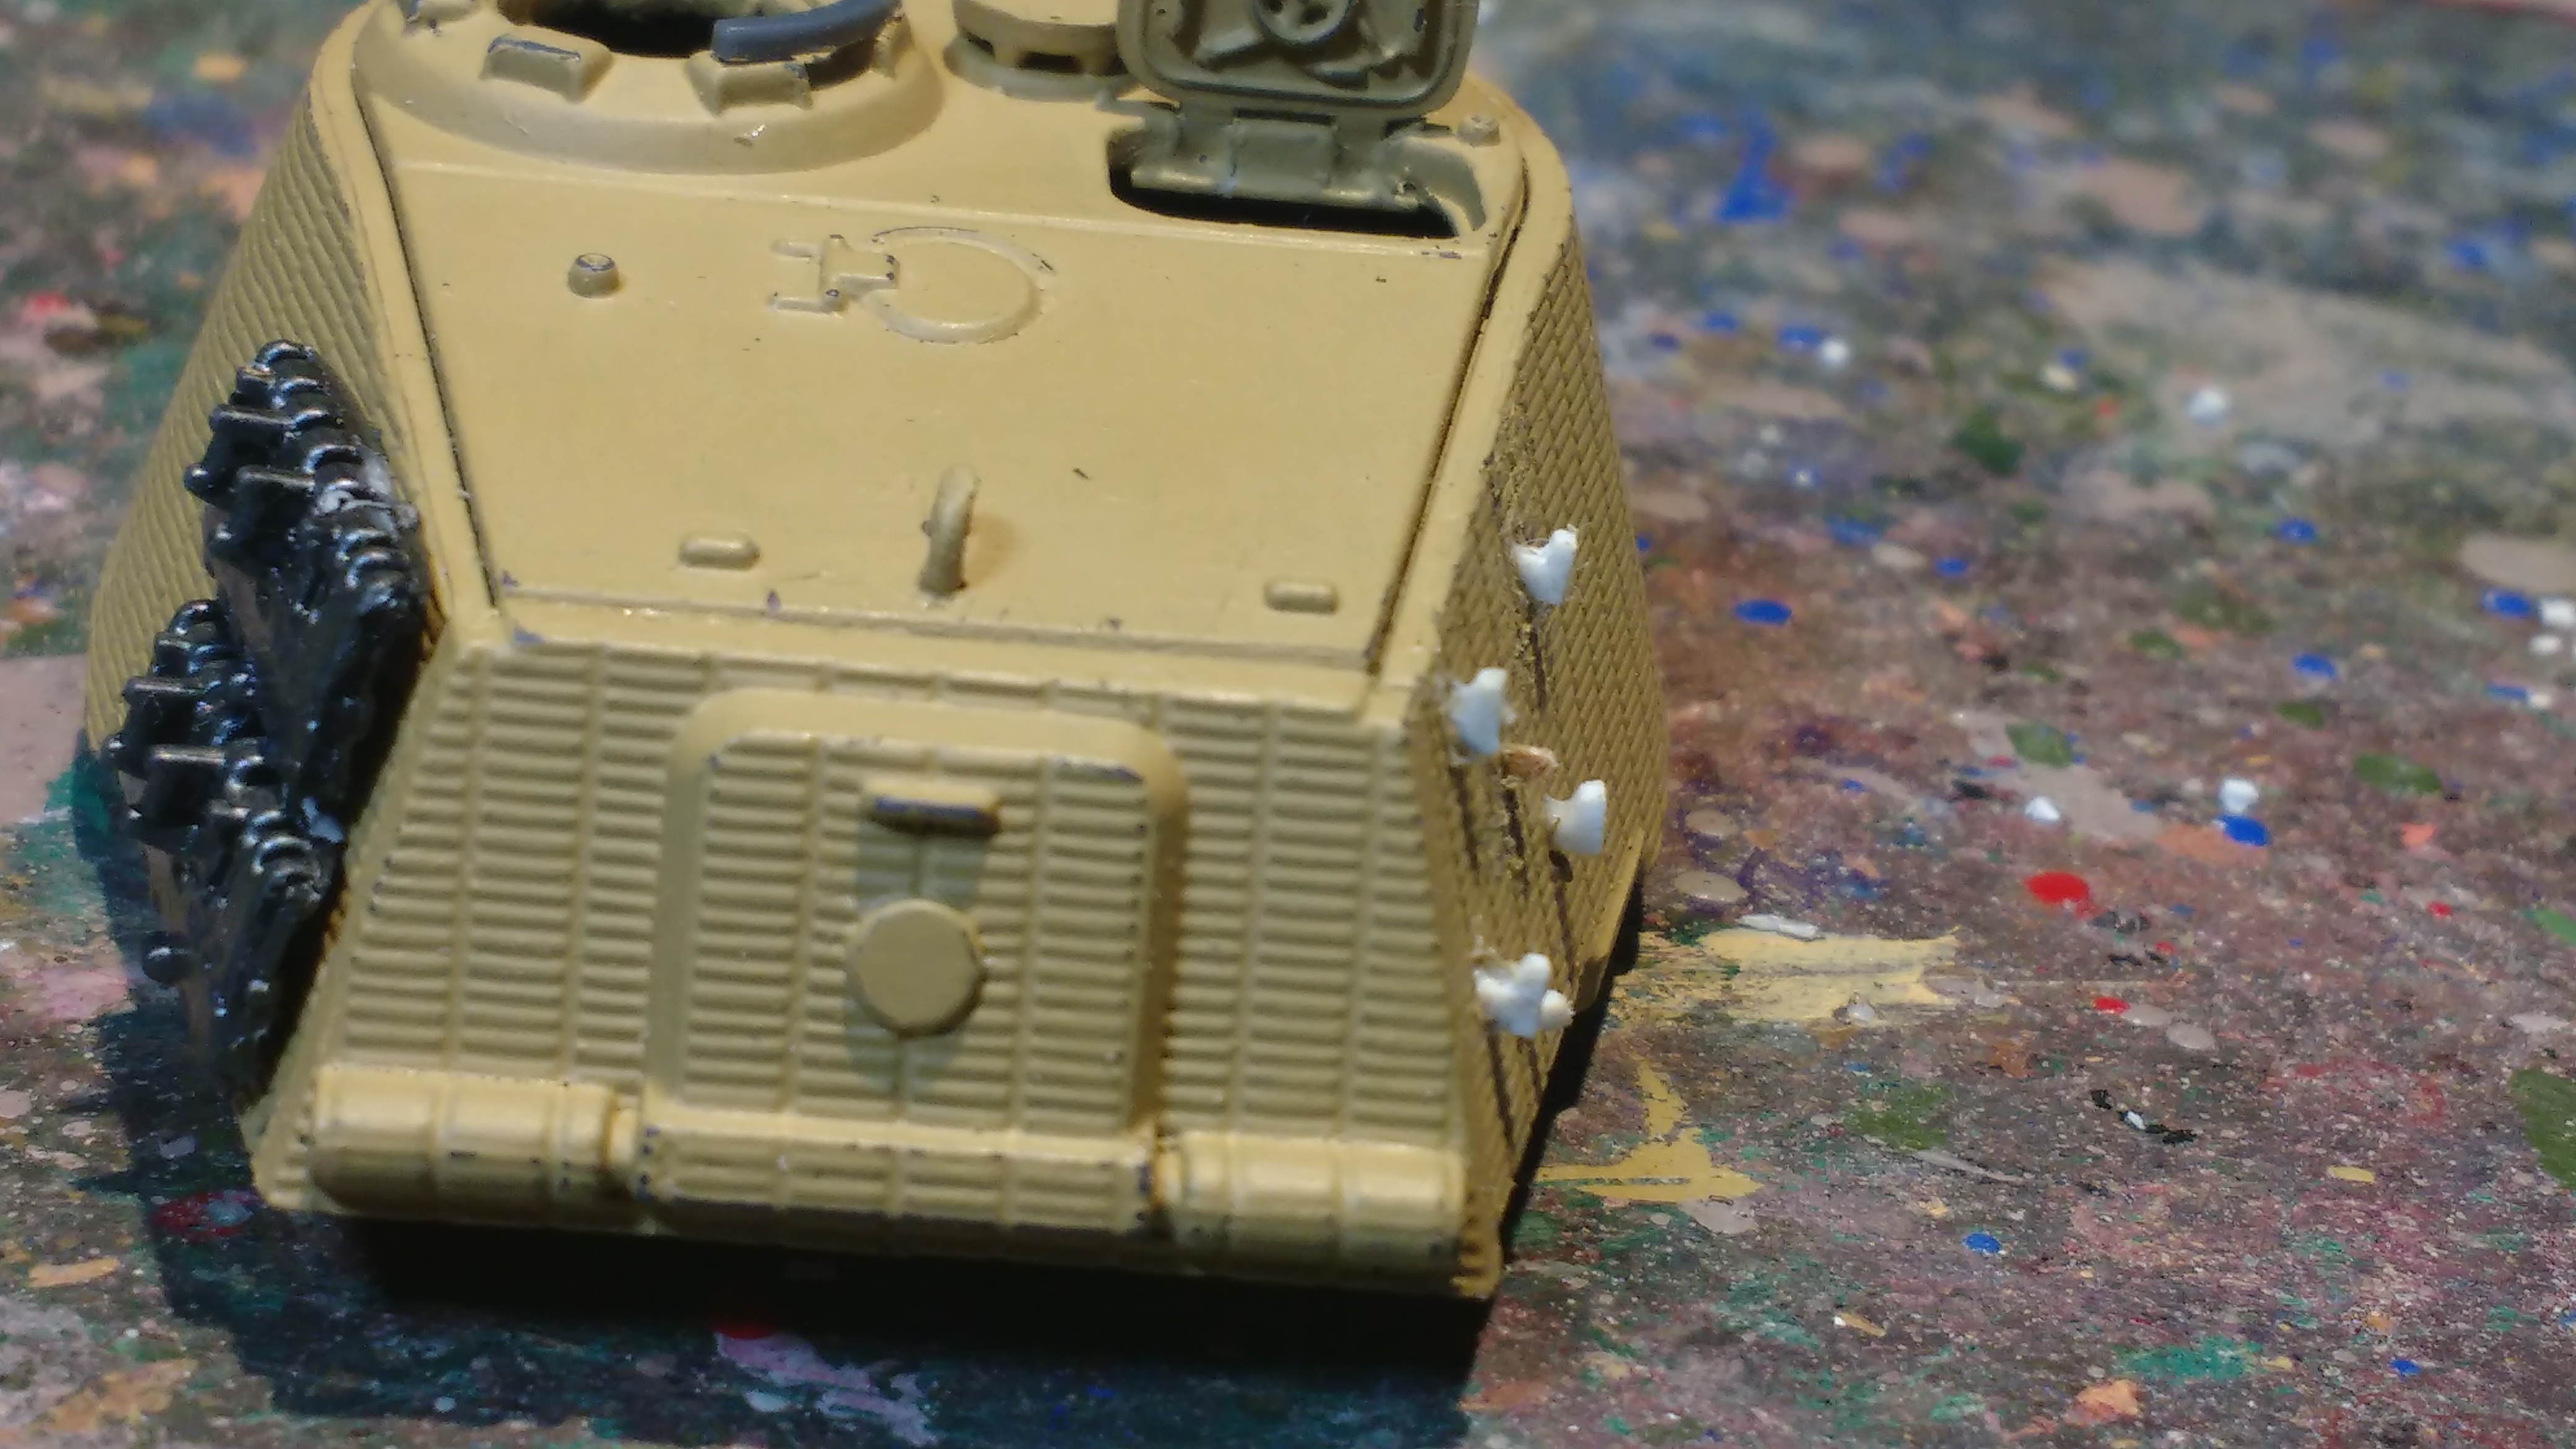
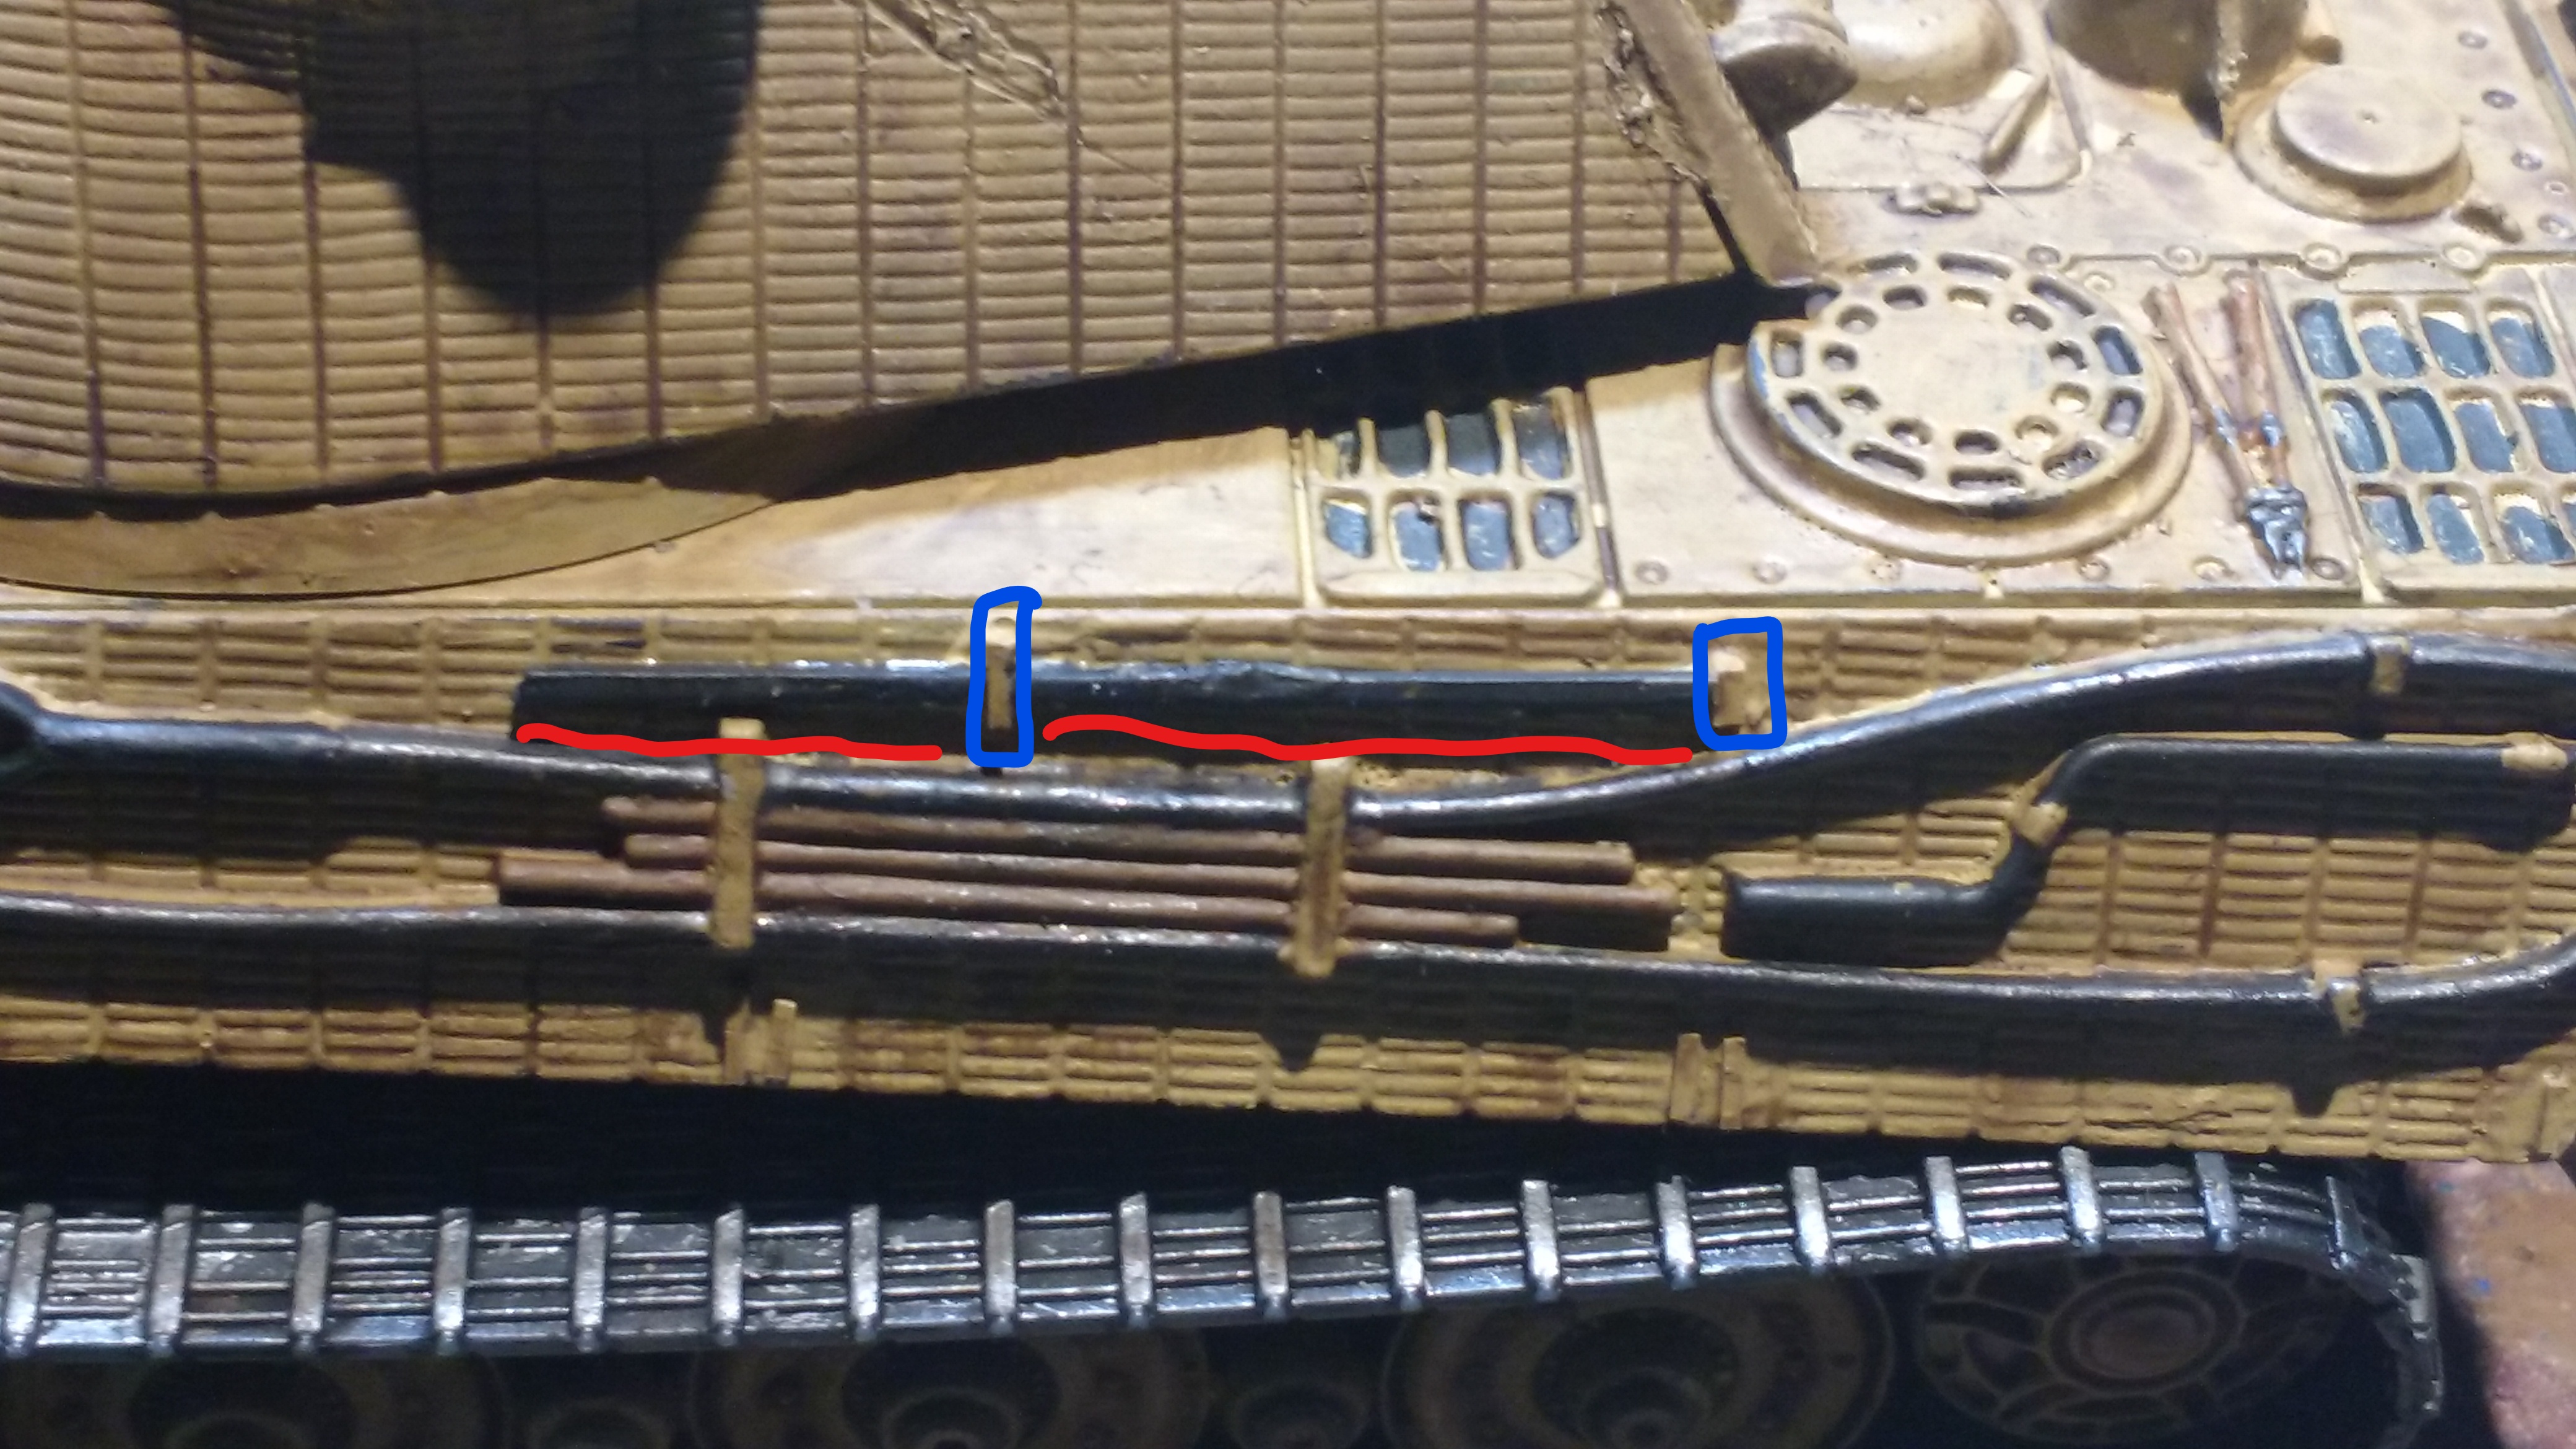
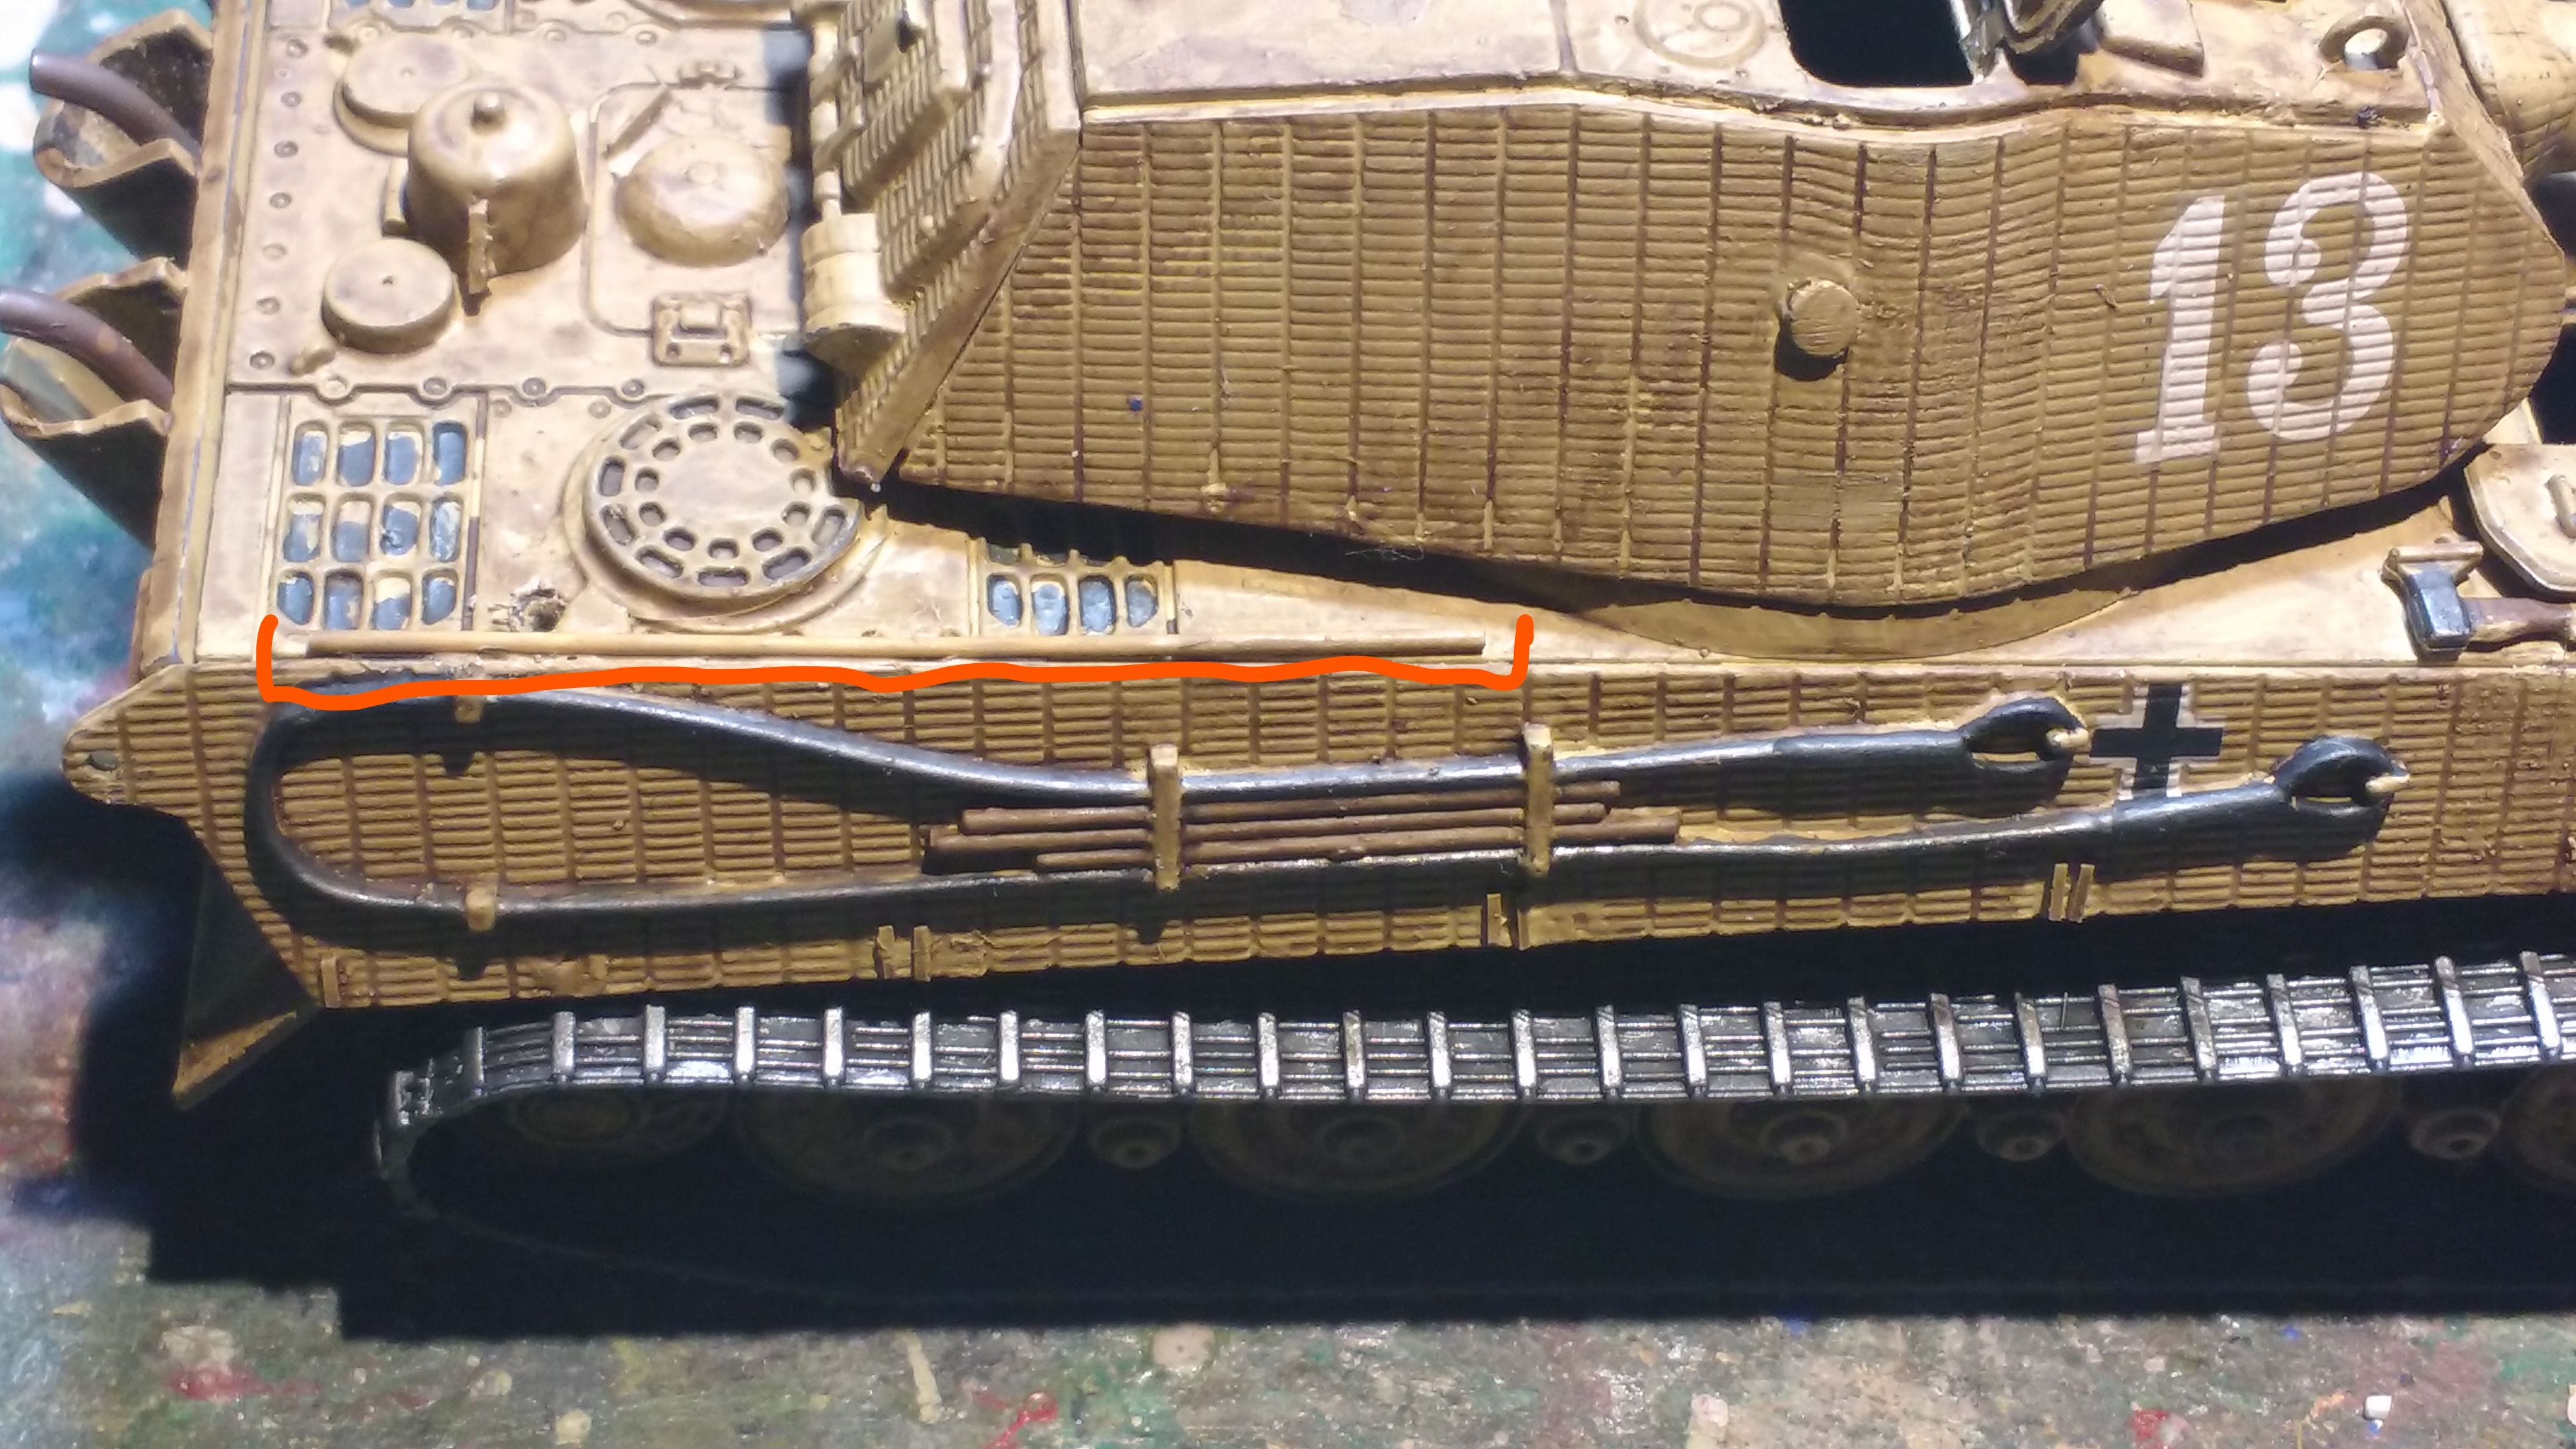
Since I’m not adding the side skirts , I need to add the strips that the skirts attach to , as seen on the lower edge of Bovinton’s Tiger II . I used .05 mm strip and just eye balled the size and placement by holding the skirt piece along the edge of the hull and marking it out with a pencil . I then cut many , many small strips and glued a dozen of roughly the same size on either side of the hull .

I’m not going for scale effect in a 28mm kit , just a representation of the part . If I was building this in say 1/35 I’ld probably go all scale photo etch and tiny resin bolts , but this is just a fun build . Looking through some Tiger II pictures , I noticed quite a few in Normandy have the C hooks mounted on the U shackles for a quick cable hook up to either tow broken down vehicles or to be towed themselves , so I sanded the mounting brackets from one C hook and hung it on a U shackle . I made the empty C hook mount out of plastic strip . Not too happy with it yet , would rather make it out of wire but the mount is flat and wire is round , still working on that one .
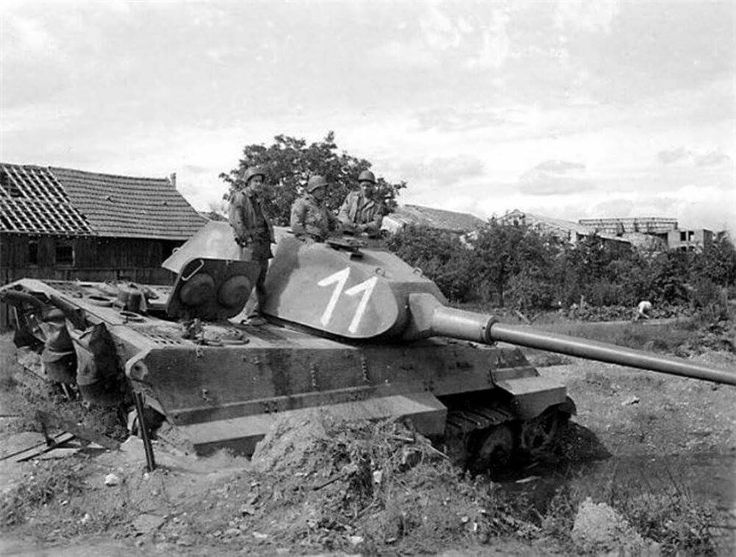
So today I added most of the remaining parts such as hatches and tools . I decided to leave off the side skirts and just add minimal fenders front and rear . I also added the pistol port plugs on the turret sides , although this unit had them welded closed and ground down , I think the ports look cool so I added them . The unit this tank ” belongs ” to { sPzAbt.301 (Fkl)} only had 5 ( some publications say 6 ) Tiger IIs . Photographic evidence is sparse , even after 70 years only about 5 photos each of tanks # 01 , 02 & 12 can be found in publications . There are 20 pictures of #11 , pretty much all from the same angle , 2 picture of # 10 , and one picture of #3 ( so that makes 6 right ? ) . Well the pictures of #10 are very small and are from the rear showing # 10 on the turret rear , or could the negative be reversed and it’s really #01 ? Its too small and grainy to make out any details to be sure . Too many unanswered questions about this unit , all I know for sure is that they were part of a Demolition unit using Radio Controlled Bogward vehicles and those little Goliaths ., attached to Panzer Lehr in Normandy 1944 . So I gave this one a fictitious number – 13 . Next time I’ll pick a unit that has info available .
Still mucking about looking through the parts box for some decent crew figures . So I’m sort them out and came across this revelation
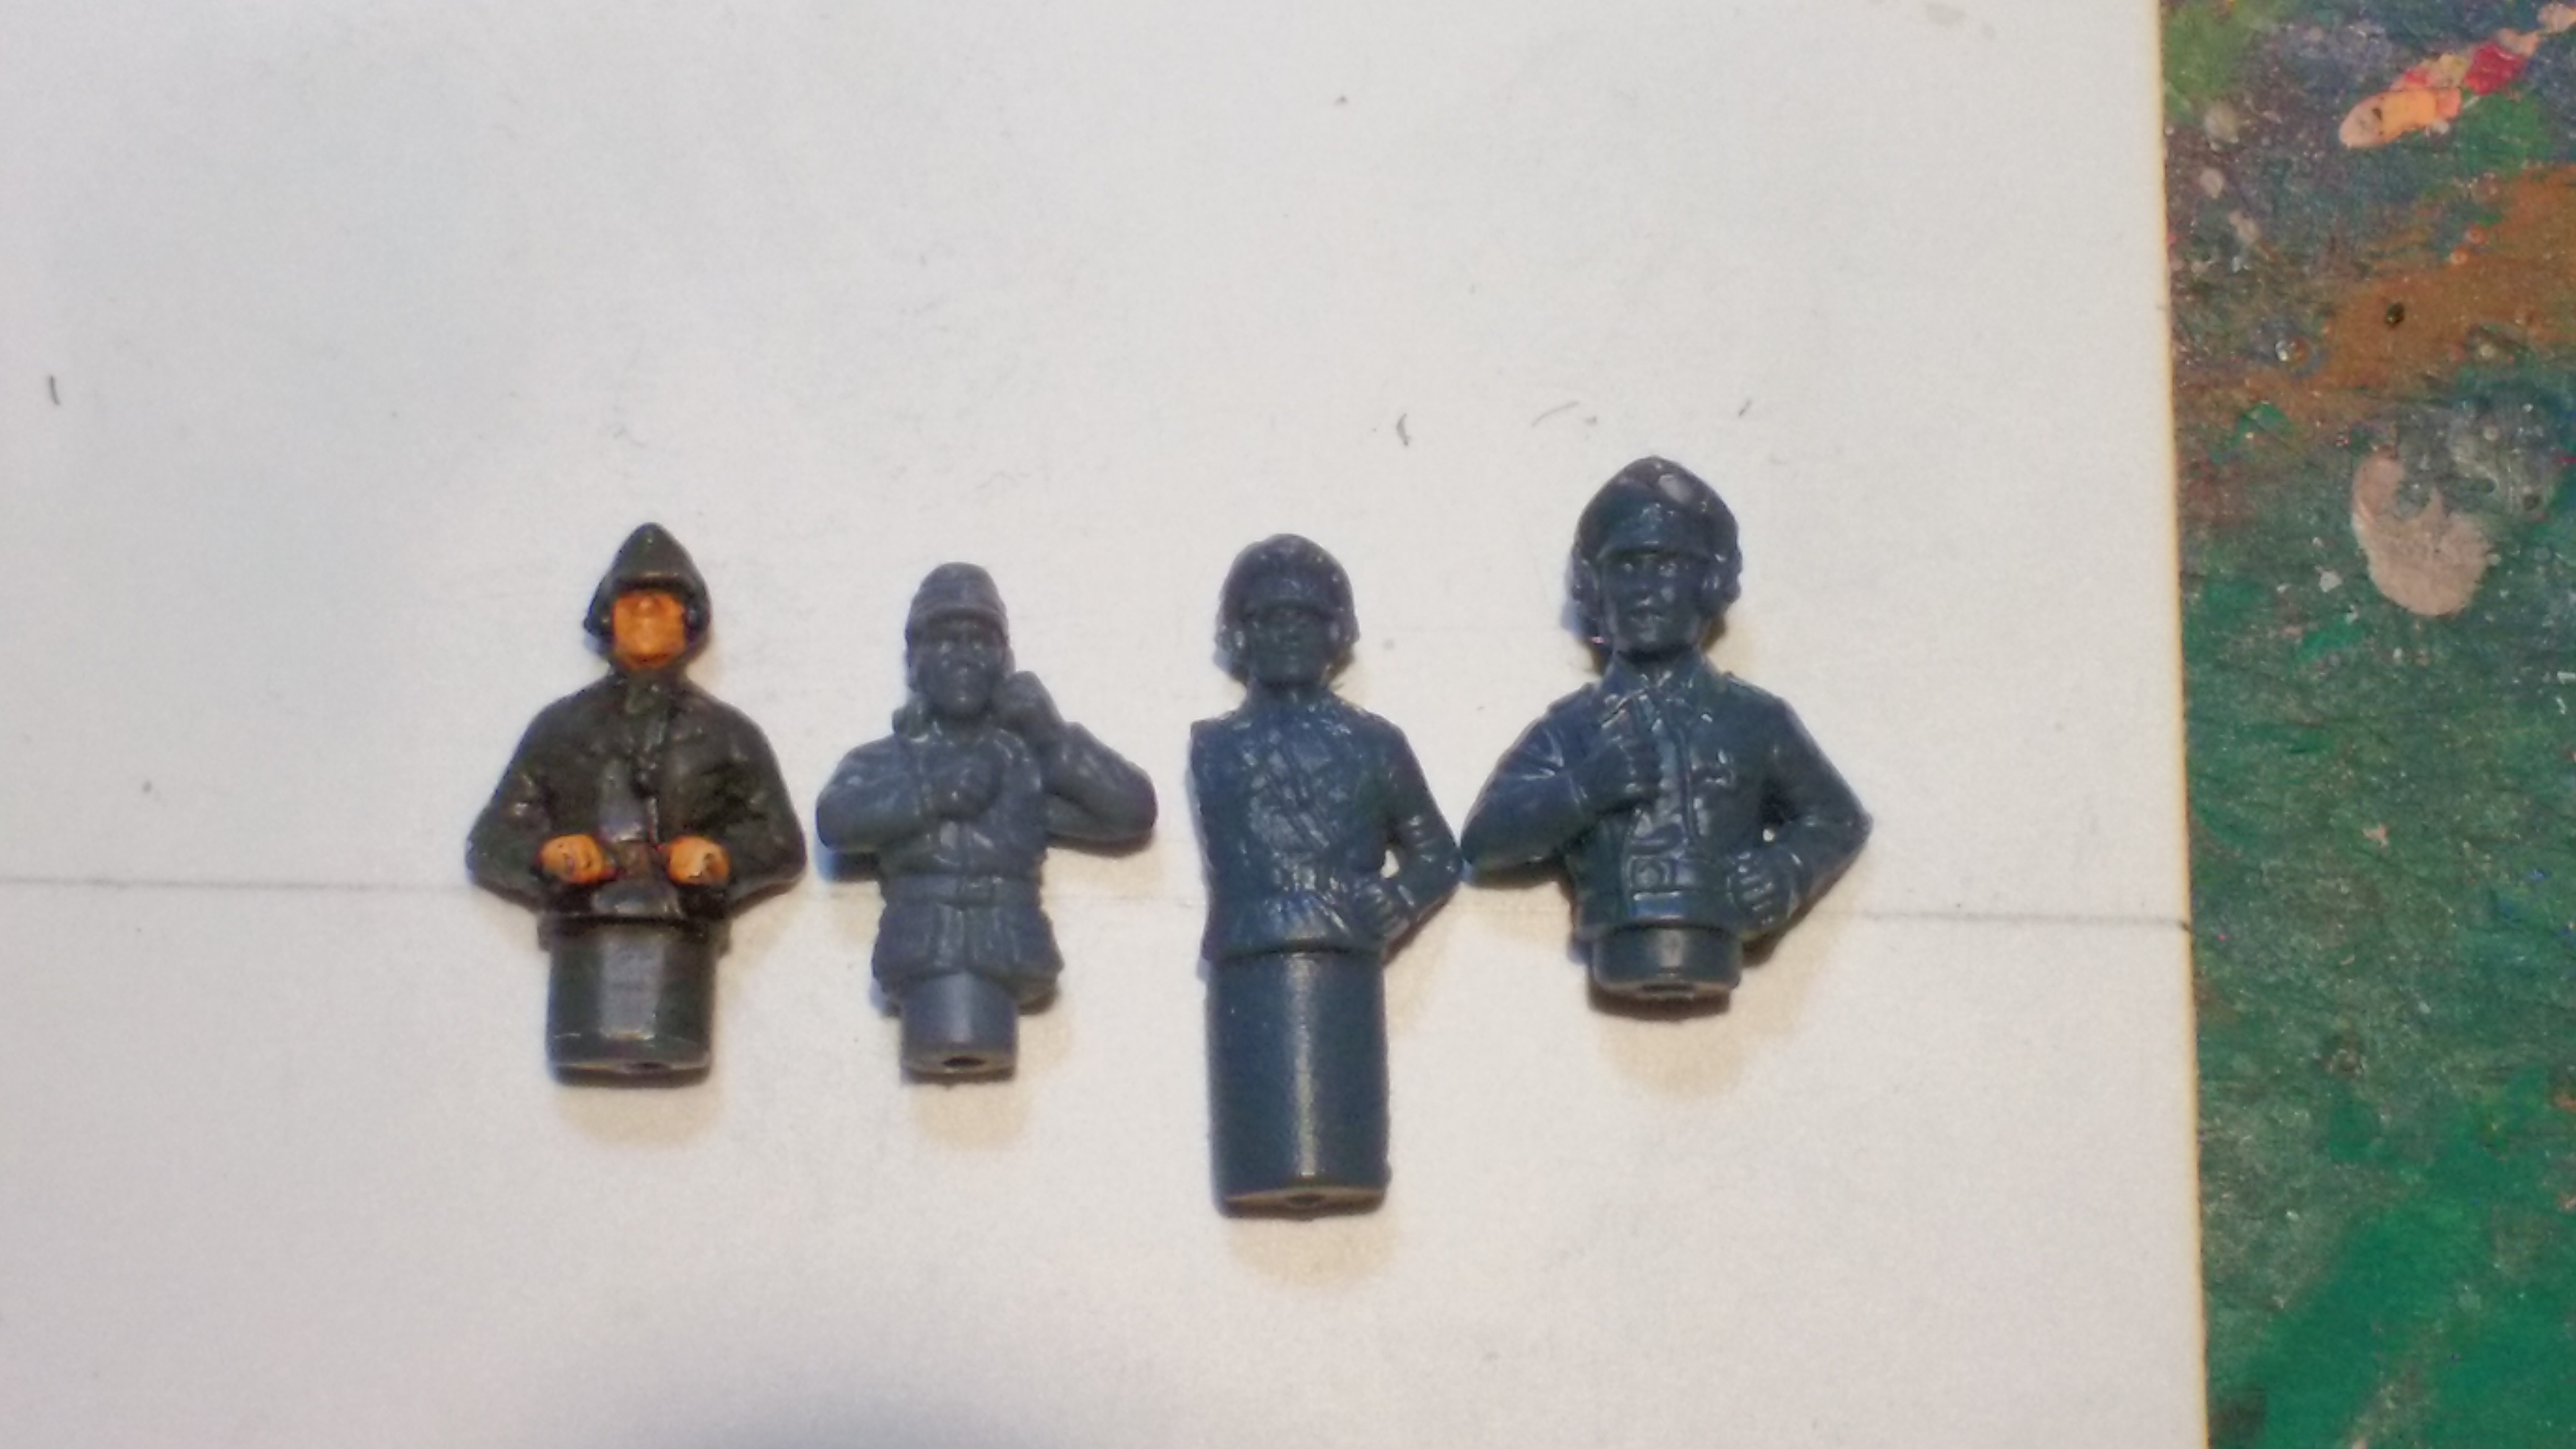
Bolt Action plastic tank crew figures : from left to right . #1 , the painted guy comes with the 234 Puma , the Stug and the Panzer III . #2 comes with the Panzer IV . #3 with a separate arm ( I think I’ve lost it ! ) comes with the Tiger I , and #4 of the group is your Tiger II commander . Bit a a variety in sizes there , I’m thinking that #1 & #3 compare quite well with Rubicon’s new plastic crews , and #2 seems a little on the hefty side , might work as a winter war crew figure in a padded style parka . #4 is the worst of the bunch . he just fits in the hatches with no room to spare , he really looks wrong for 28mm – 1/56 scale tanks . Anybody want one , I got 3 I don’t want . I think other 3 are OK as Commanders with just their heads out of the hatch , not really dynamic enough IMO for a cool looking diorama setting . The hunt continues
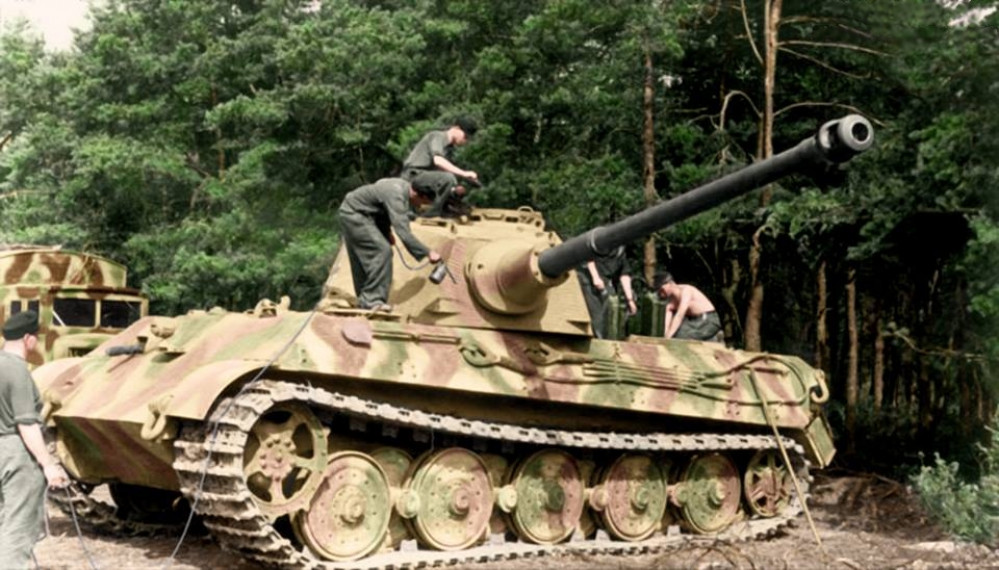
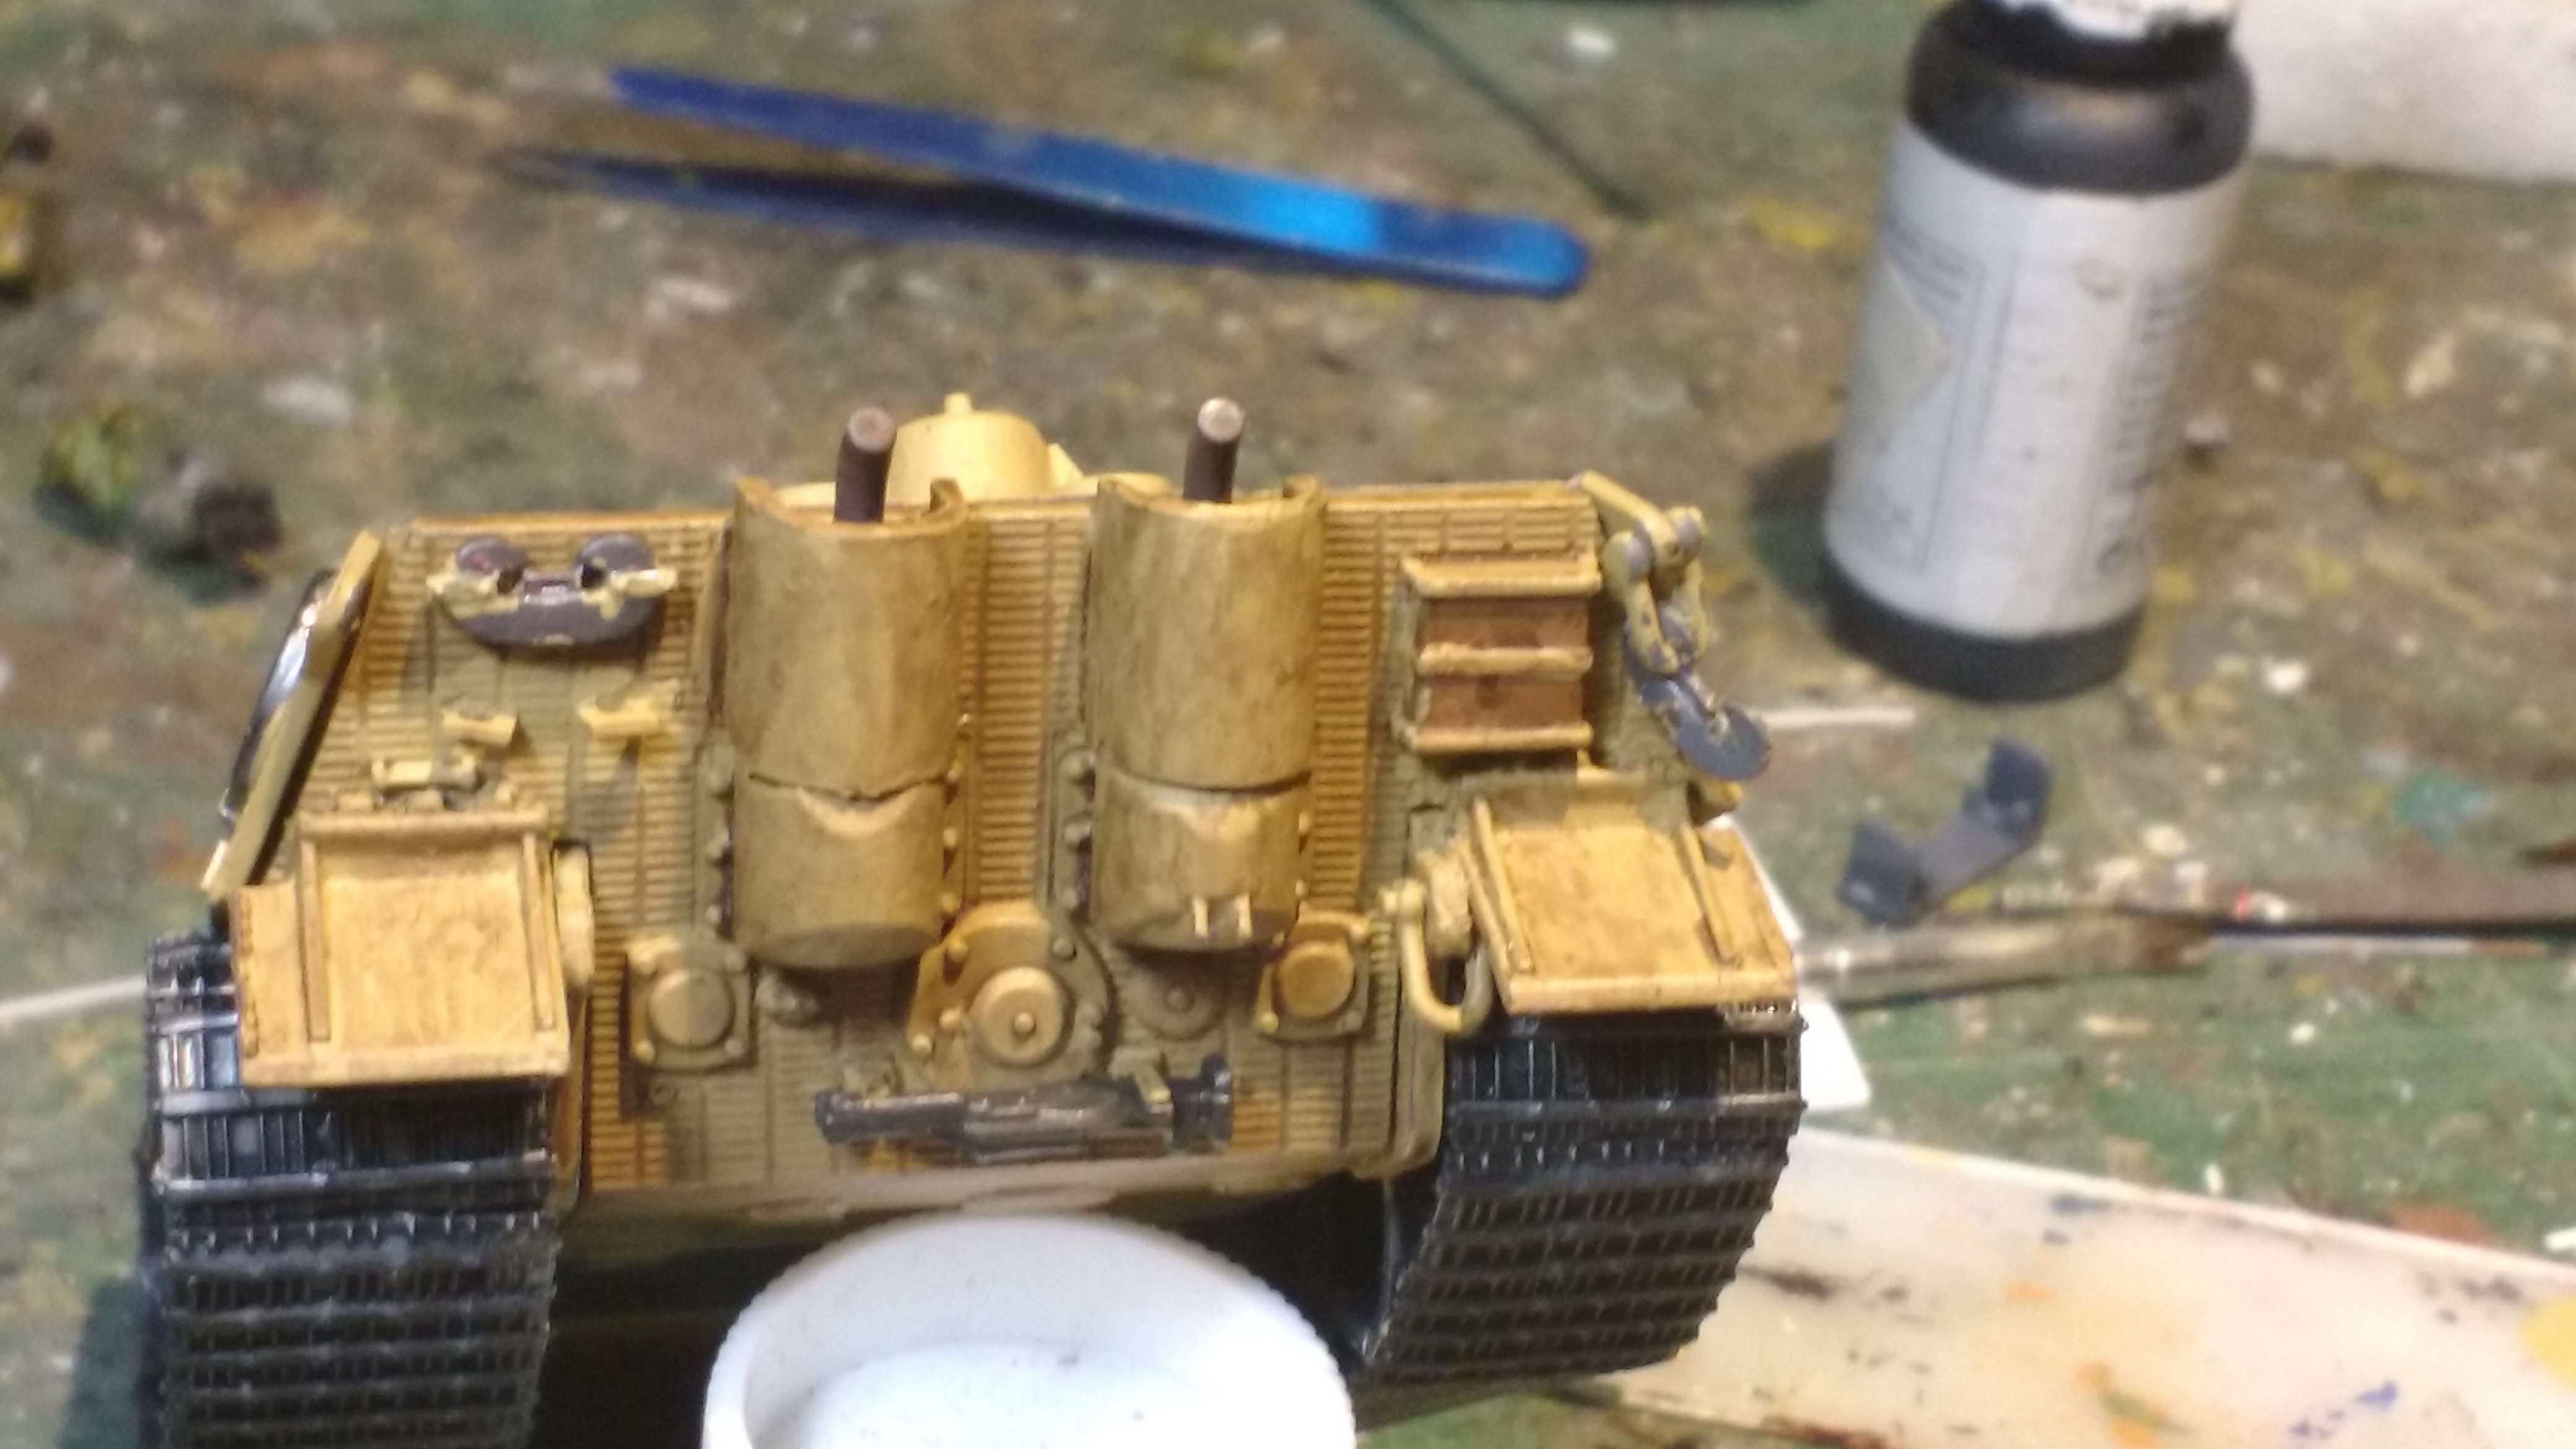
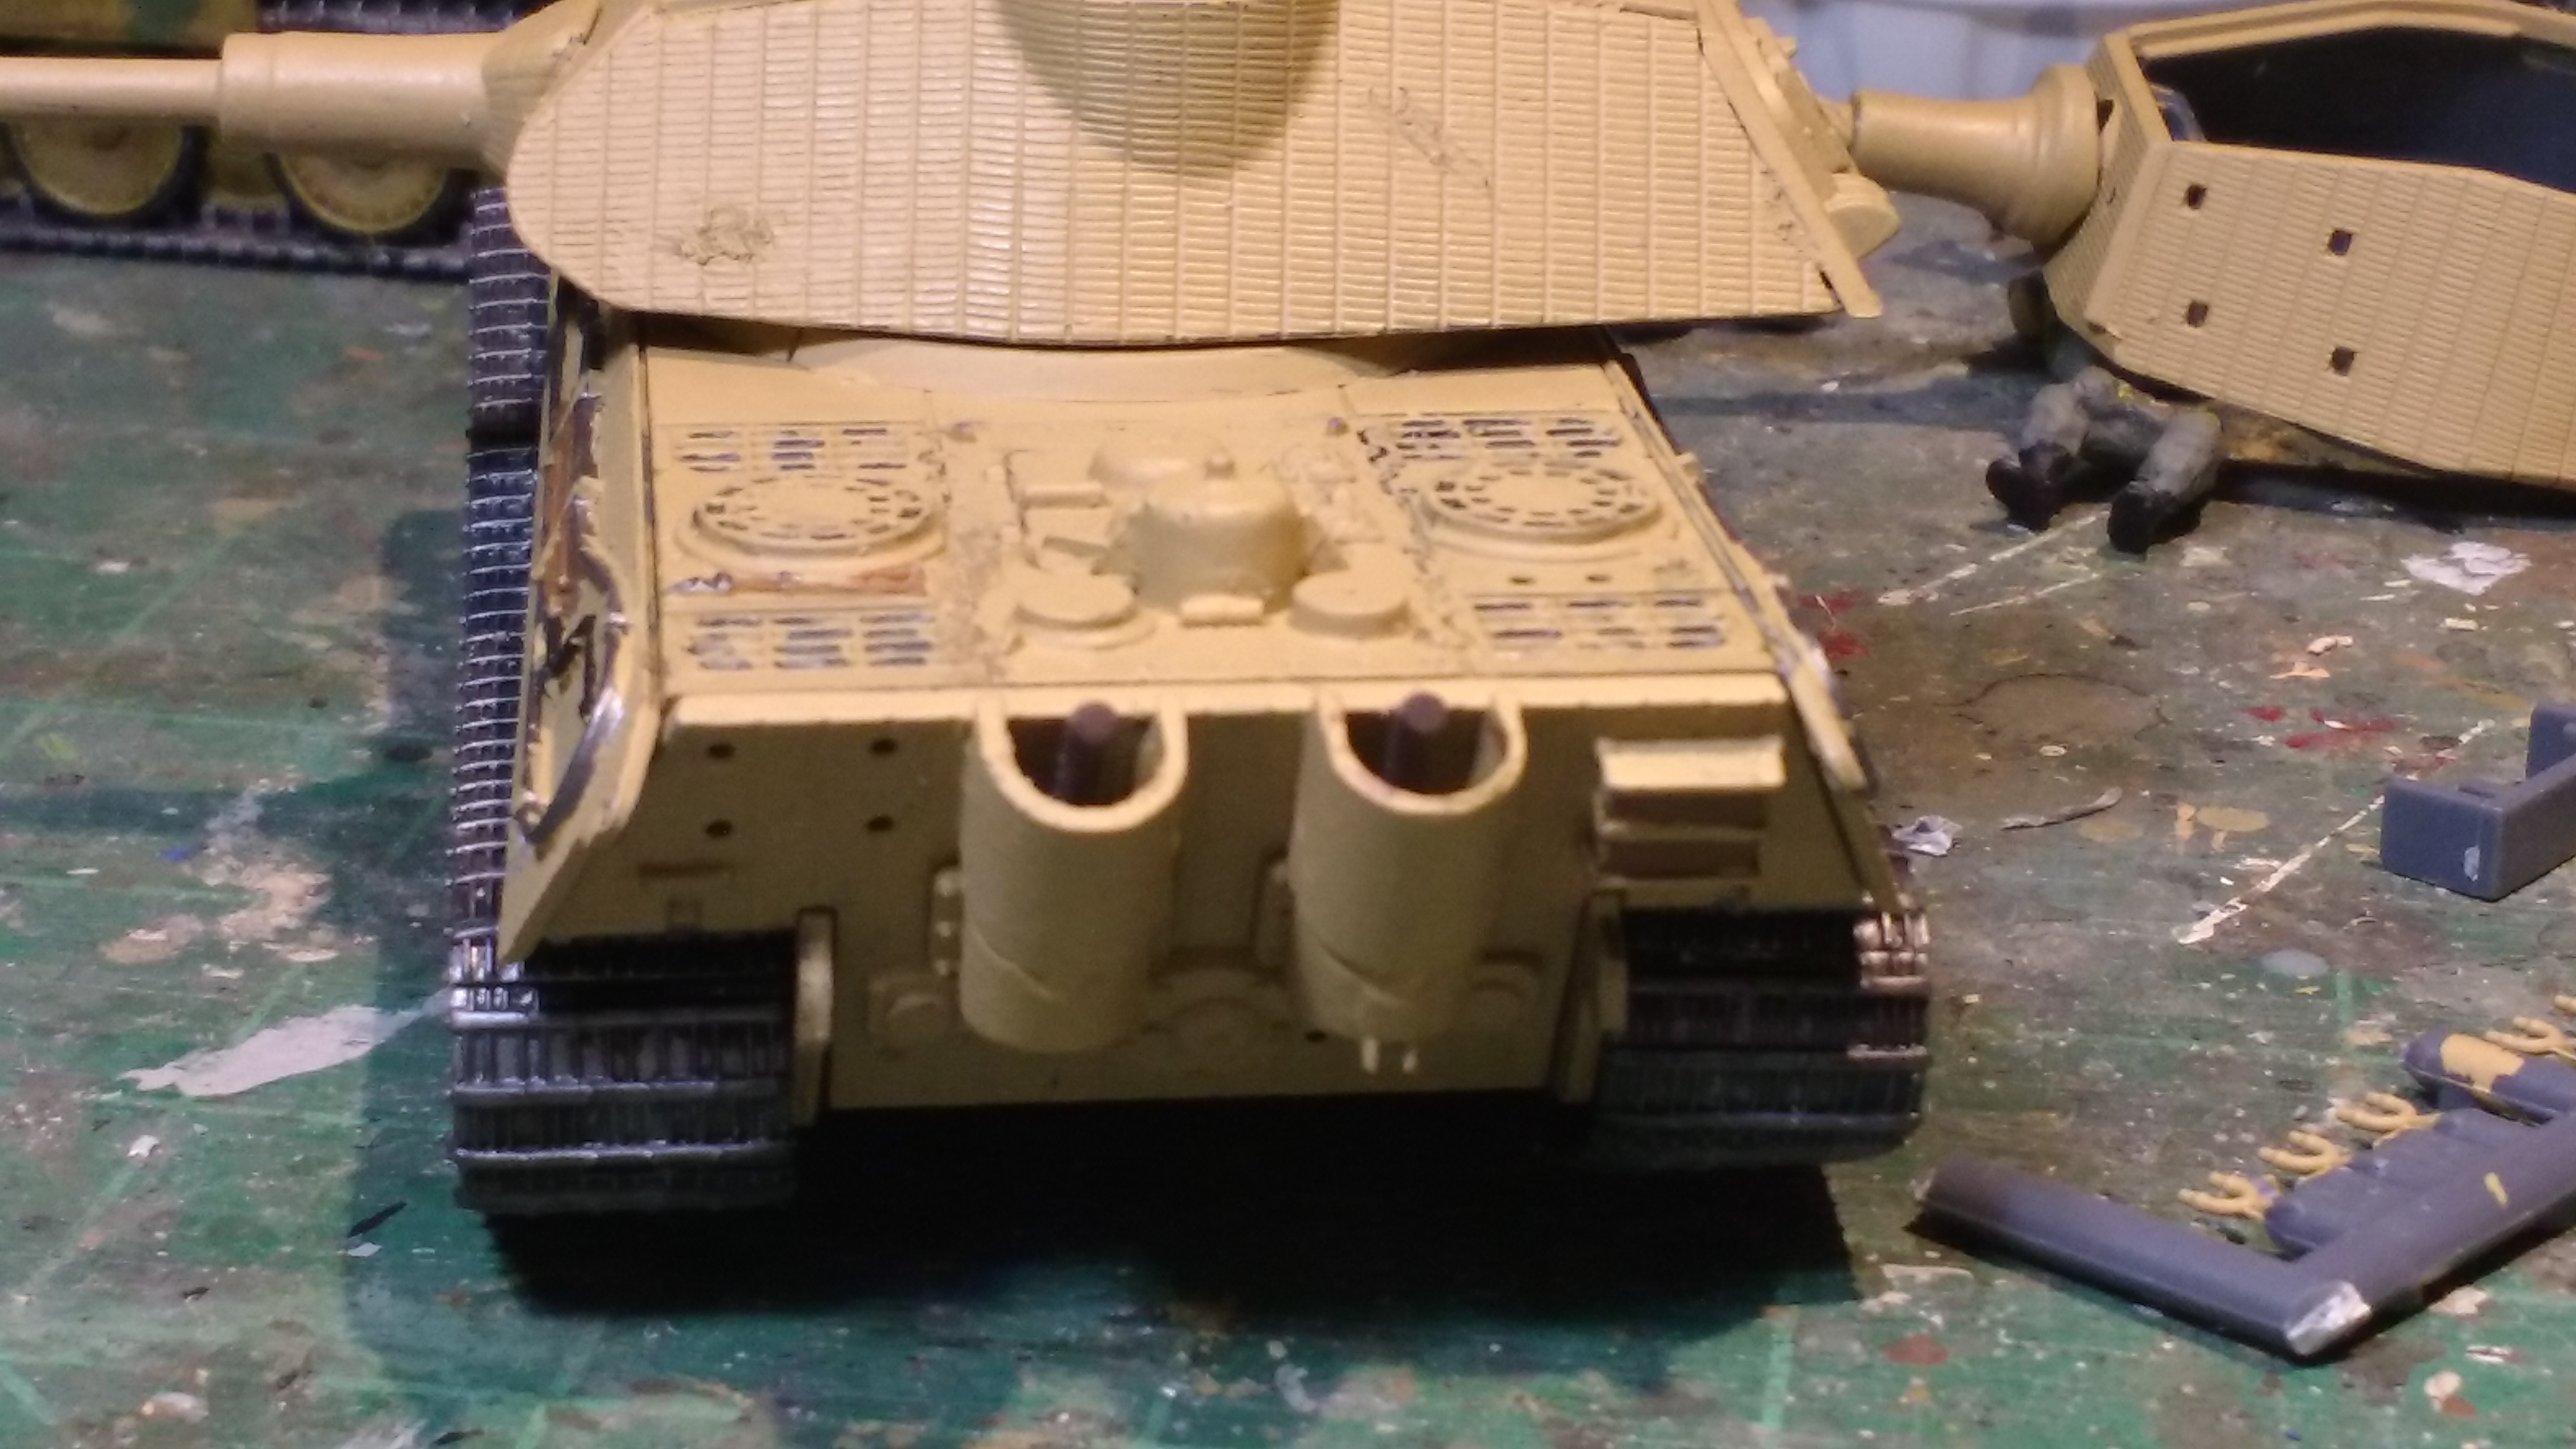
Today I’ve been working on the exhaust and schnorkel cover . Yes just like the Tiger I the Tiger II had a schnorkel for crossing rivers . It was under a bucket shaped cover on the engine deck on some of the first produced Tiger II models . It was deleted early in the production run of the 50 Porsche turret vehicles . The kit part is lacking some details ( a hinge and some hooks / handholds ) I can see the shape of them but have no idea what it is , but its missing from the kit so I’m adding it . Early Tiger II also had the Tiger I style exhausts with the sheet metal covers , then they went to the Tiger II pattern exhaust , again with sheet metal covers . Since I’m lacking T I exhausts in the parts box but have a pair of covers , I’ll go that route . The covers didn’t last long either , getting deleted after 25 – 30 vehicles built .
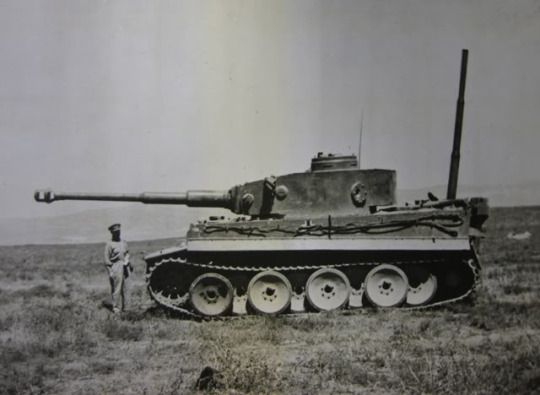
Tiger I with schnorkel
Tiger I type exhaust with covers , Notice bucket shaped schnorkel cover on engine deck
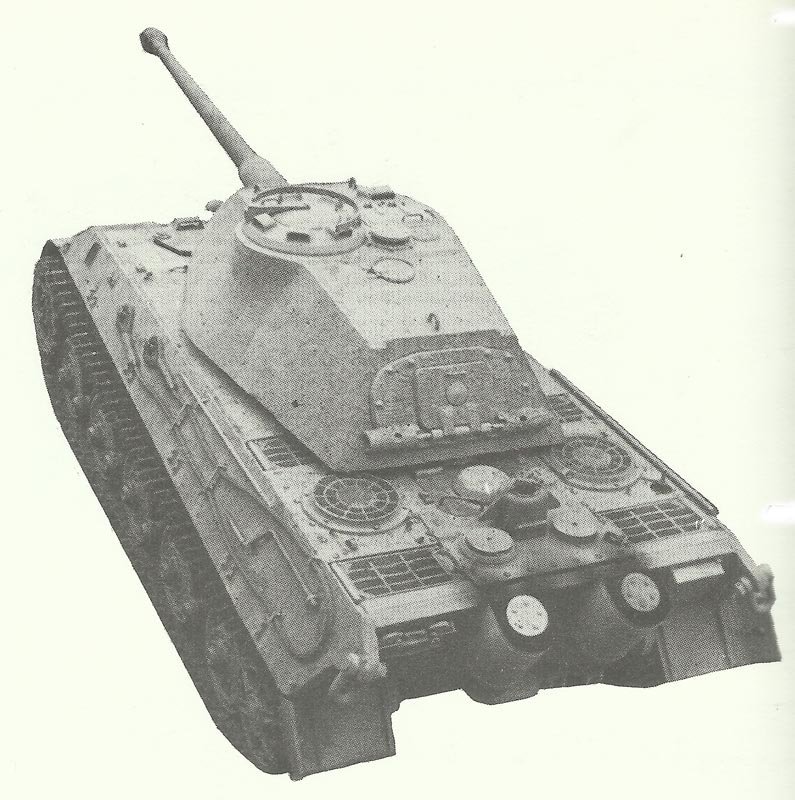
Tiger II type exhausts with covers
It’s coming along slowly . I’m not gluing the hull together till I get myself crew figures that I like . Still undecided on weather or not to add the side skirts and fenders , will have to look through the pictures I’ve got saved . If no side skirts I will still have to add the set of mounting brackets that are spaced along the hull side edges . Plastruct strip will work nicely , I’m not going to worry about adding the bolt heads (.005 mm in size nfw ! ) lol


