


![Very Cool! Make Your Own Star Wars: Legion Imperial Agent & Officer | Review [7 Days Early Access]](https://images.beastsofwar.com/2025/12/Star-Wars-Imperial-Agent-_-Officer-coverimage-V3-225-127.jpg)


Moonstone Christmas Surprise


Recommendations: 733
About the Project
OK first time I’m trying this in a long long time. Surprising my little gaming group this Christmas with Moonstone. I’m doing a not so secret, Secret Santa. I’m picking up three factions for moonstone wrapping them up in three mystery packages. So that during our Christmas game we can randomly pick a faction. That bit’s easy purchase the boxes wrap them up and then on the dat we Ro Sham Bo for the privilege of first choice. Obviously to play we will need a gaming table to play on. That’s where we begin. I’m aiming for a 3x3 dark fantasy ruined/ghost town themed table. But obviously plans can change.
Related Game: Moonstone
Related Company: Goblin King Games
Related Genre: Fantasy
Related Contest: TerrainFest 2024
This Project is Active
Last Post
Only a few days left until the end of Terrainfest, and I’m going away for a few days for work so this is it. Guess I know what I’m working on for this years Spring Clean. Lots of bits near finished, thanks to my short attention span. Plan ahead?
1: Speed paint trees and finish bases with flock.
2: Buildings paint up base coats and finish with Nuln oil / black oil wash and finish with flock and experiment with weathering powders (never used them before so that’ll be fun).
3: Rubble piles bit of dry brushing Nuln oil wash and flock.
4: The board and raised terrain levels. While they have all been painted I think a light dry brushing followed with another wash to tie the colours together.
 I can see light at the end of the tunnel
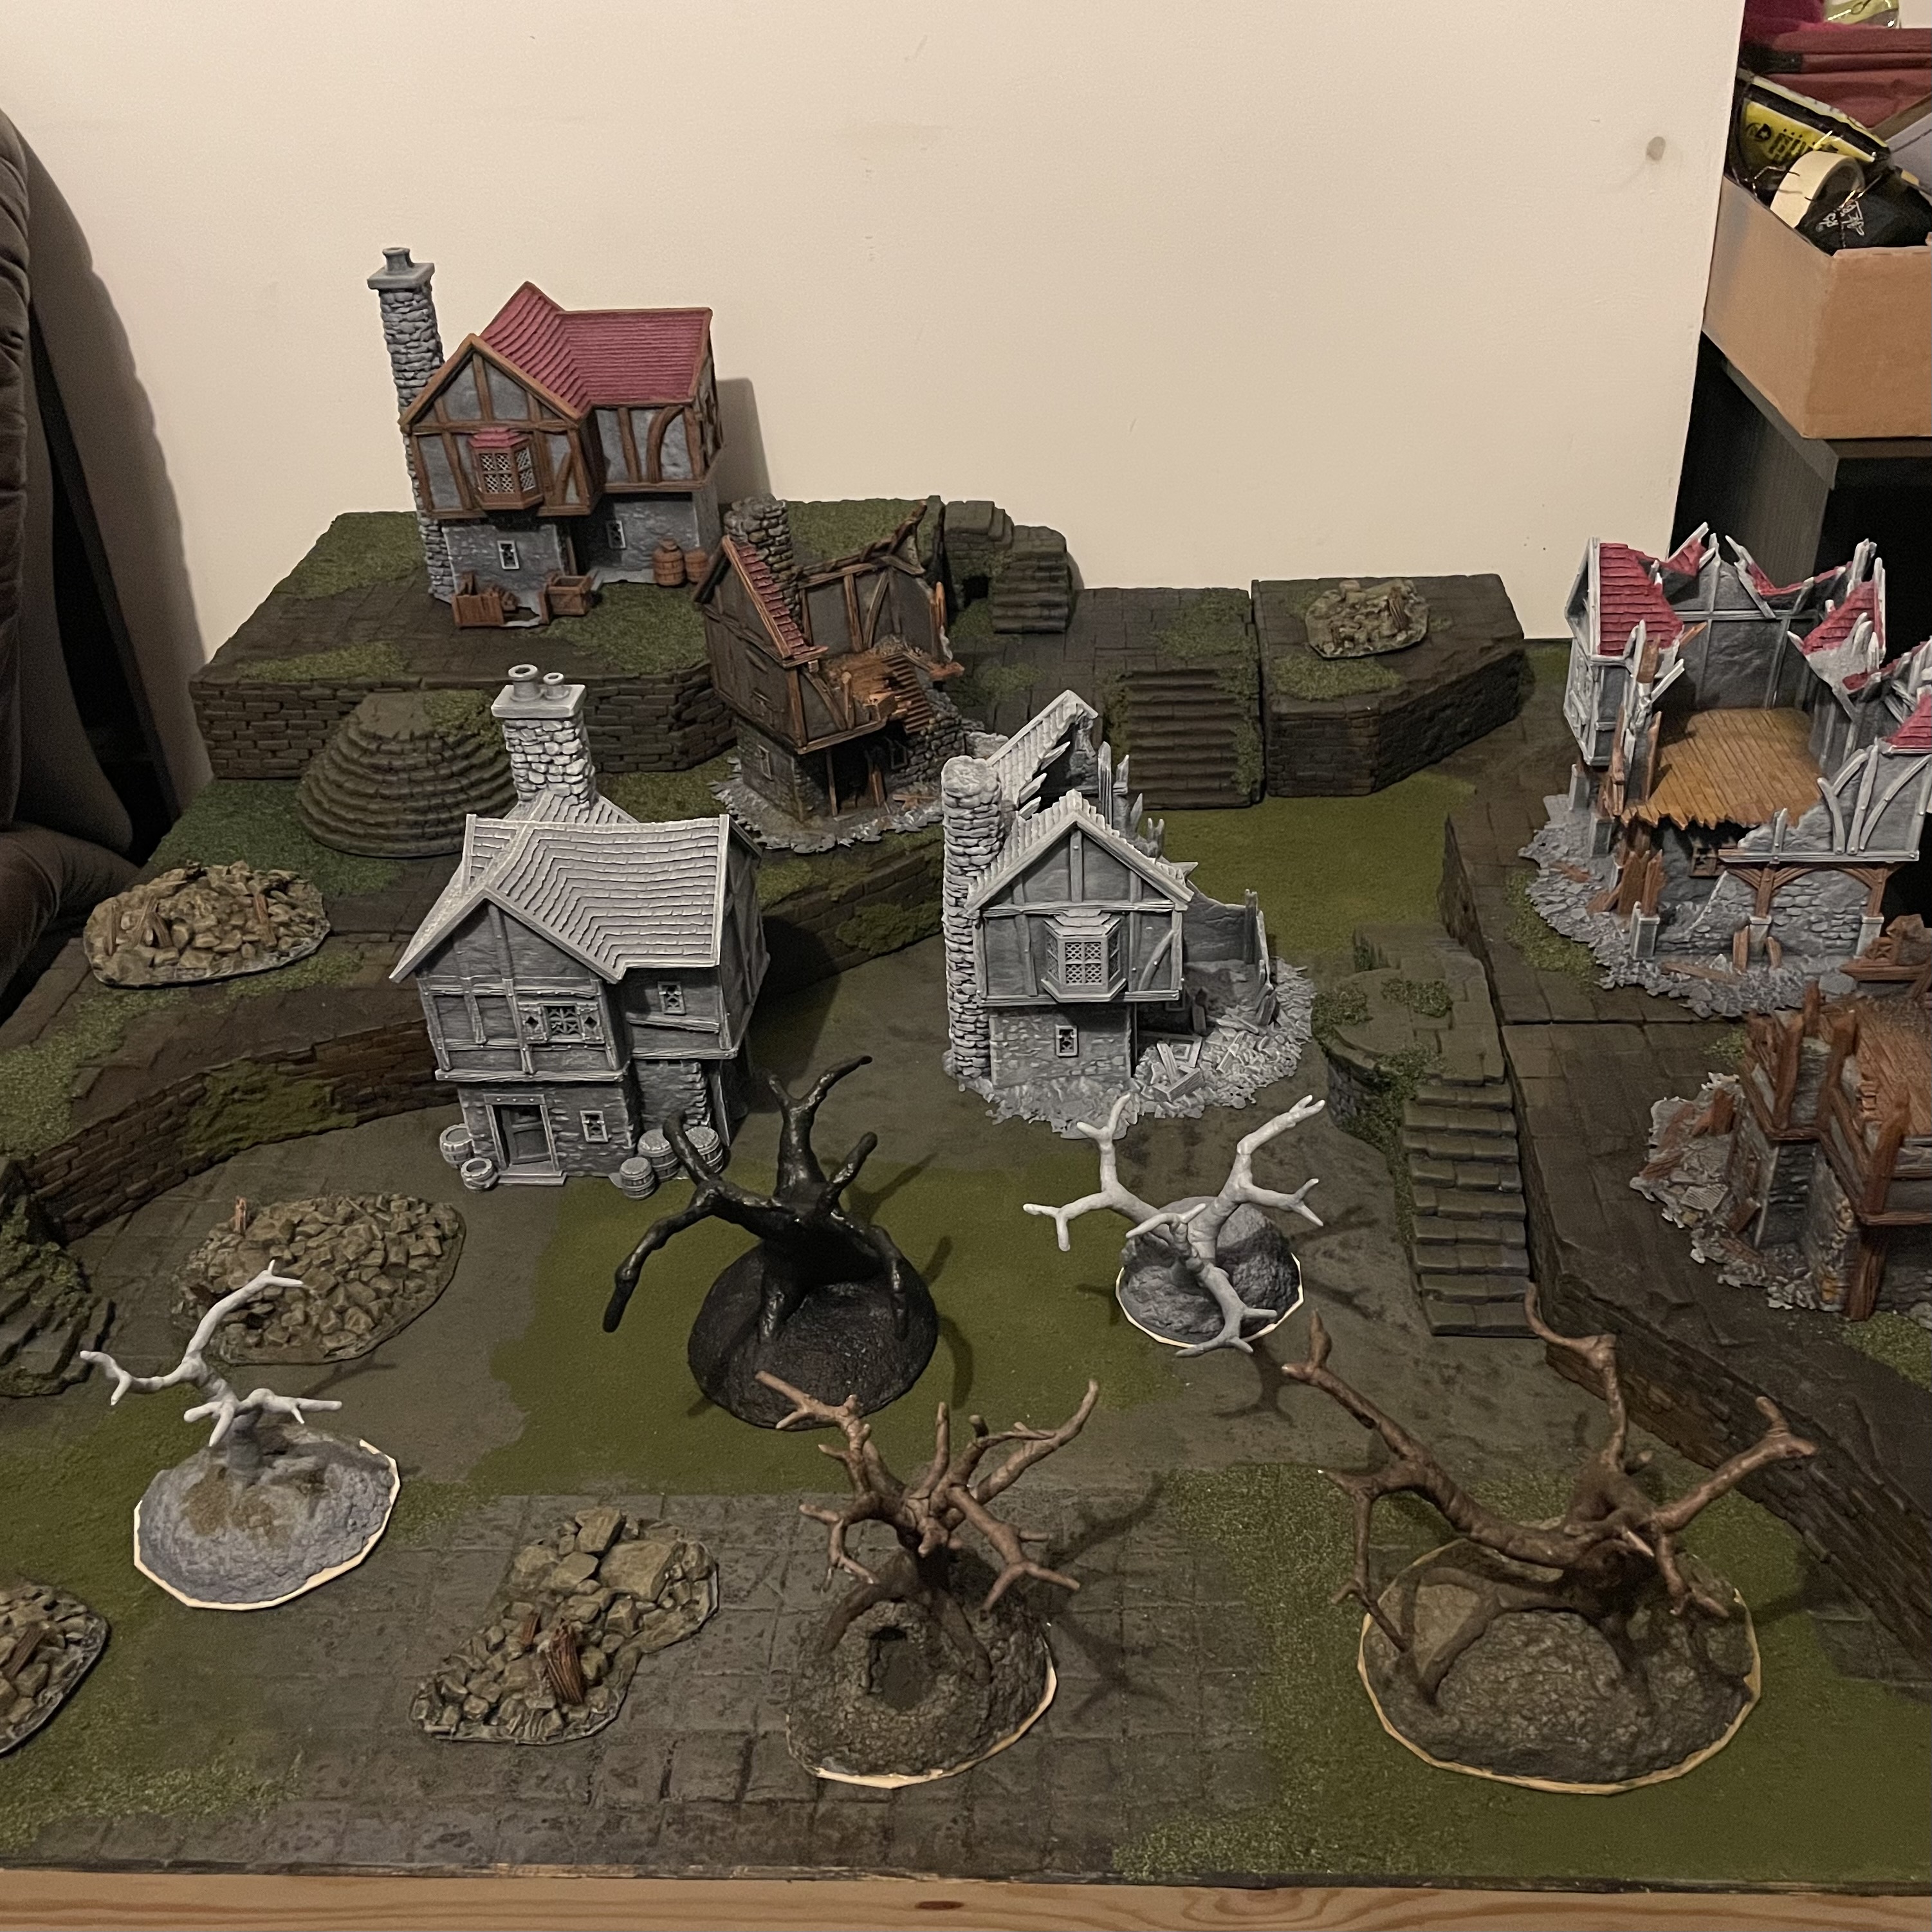

 Stores away nicely into the box for transport. Will need a second box for the 3D printed elements and the trees but ultimately it won’t be a massive pain to take places to play on.
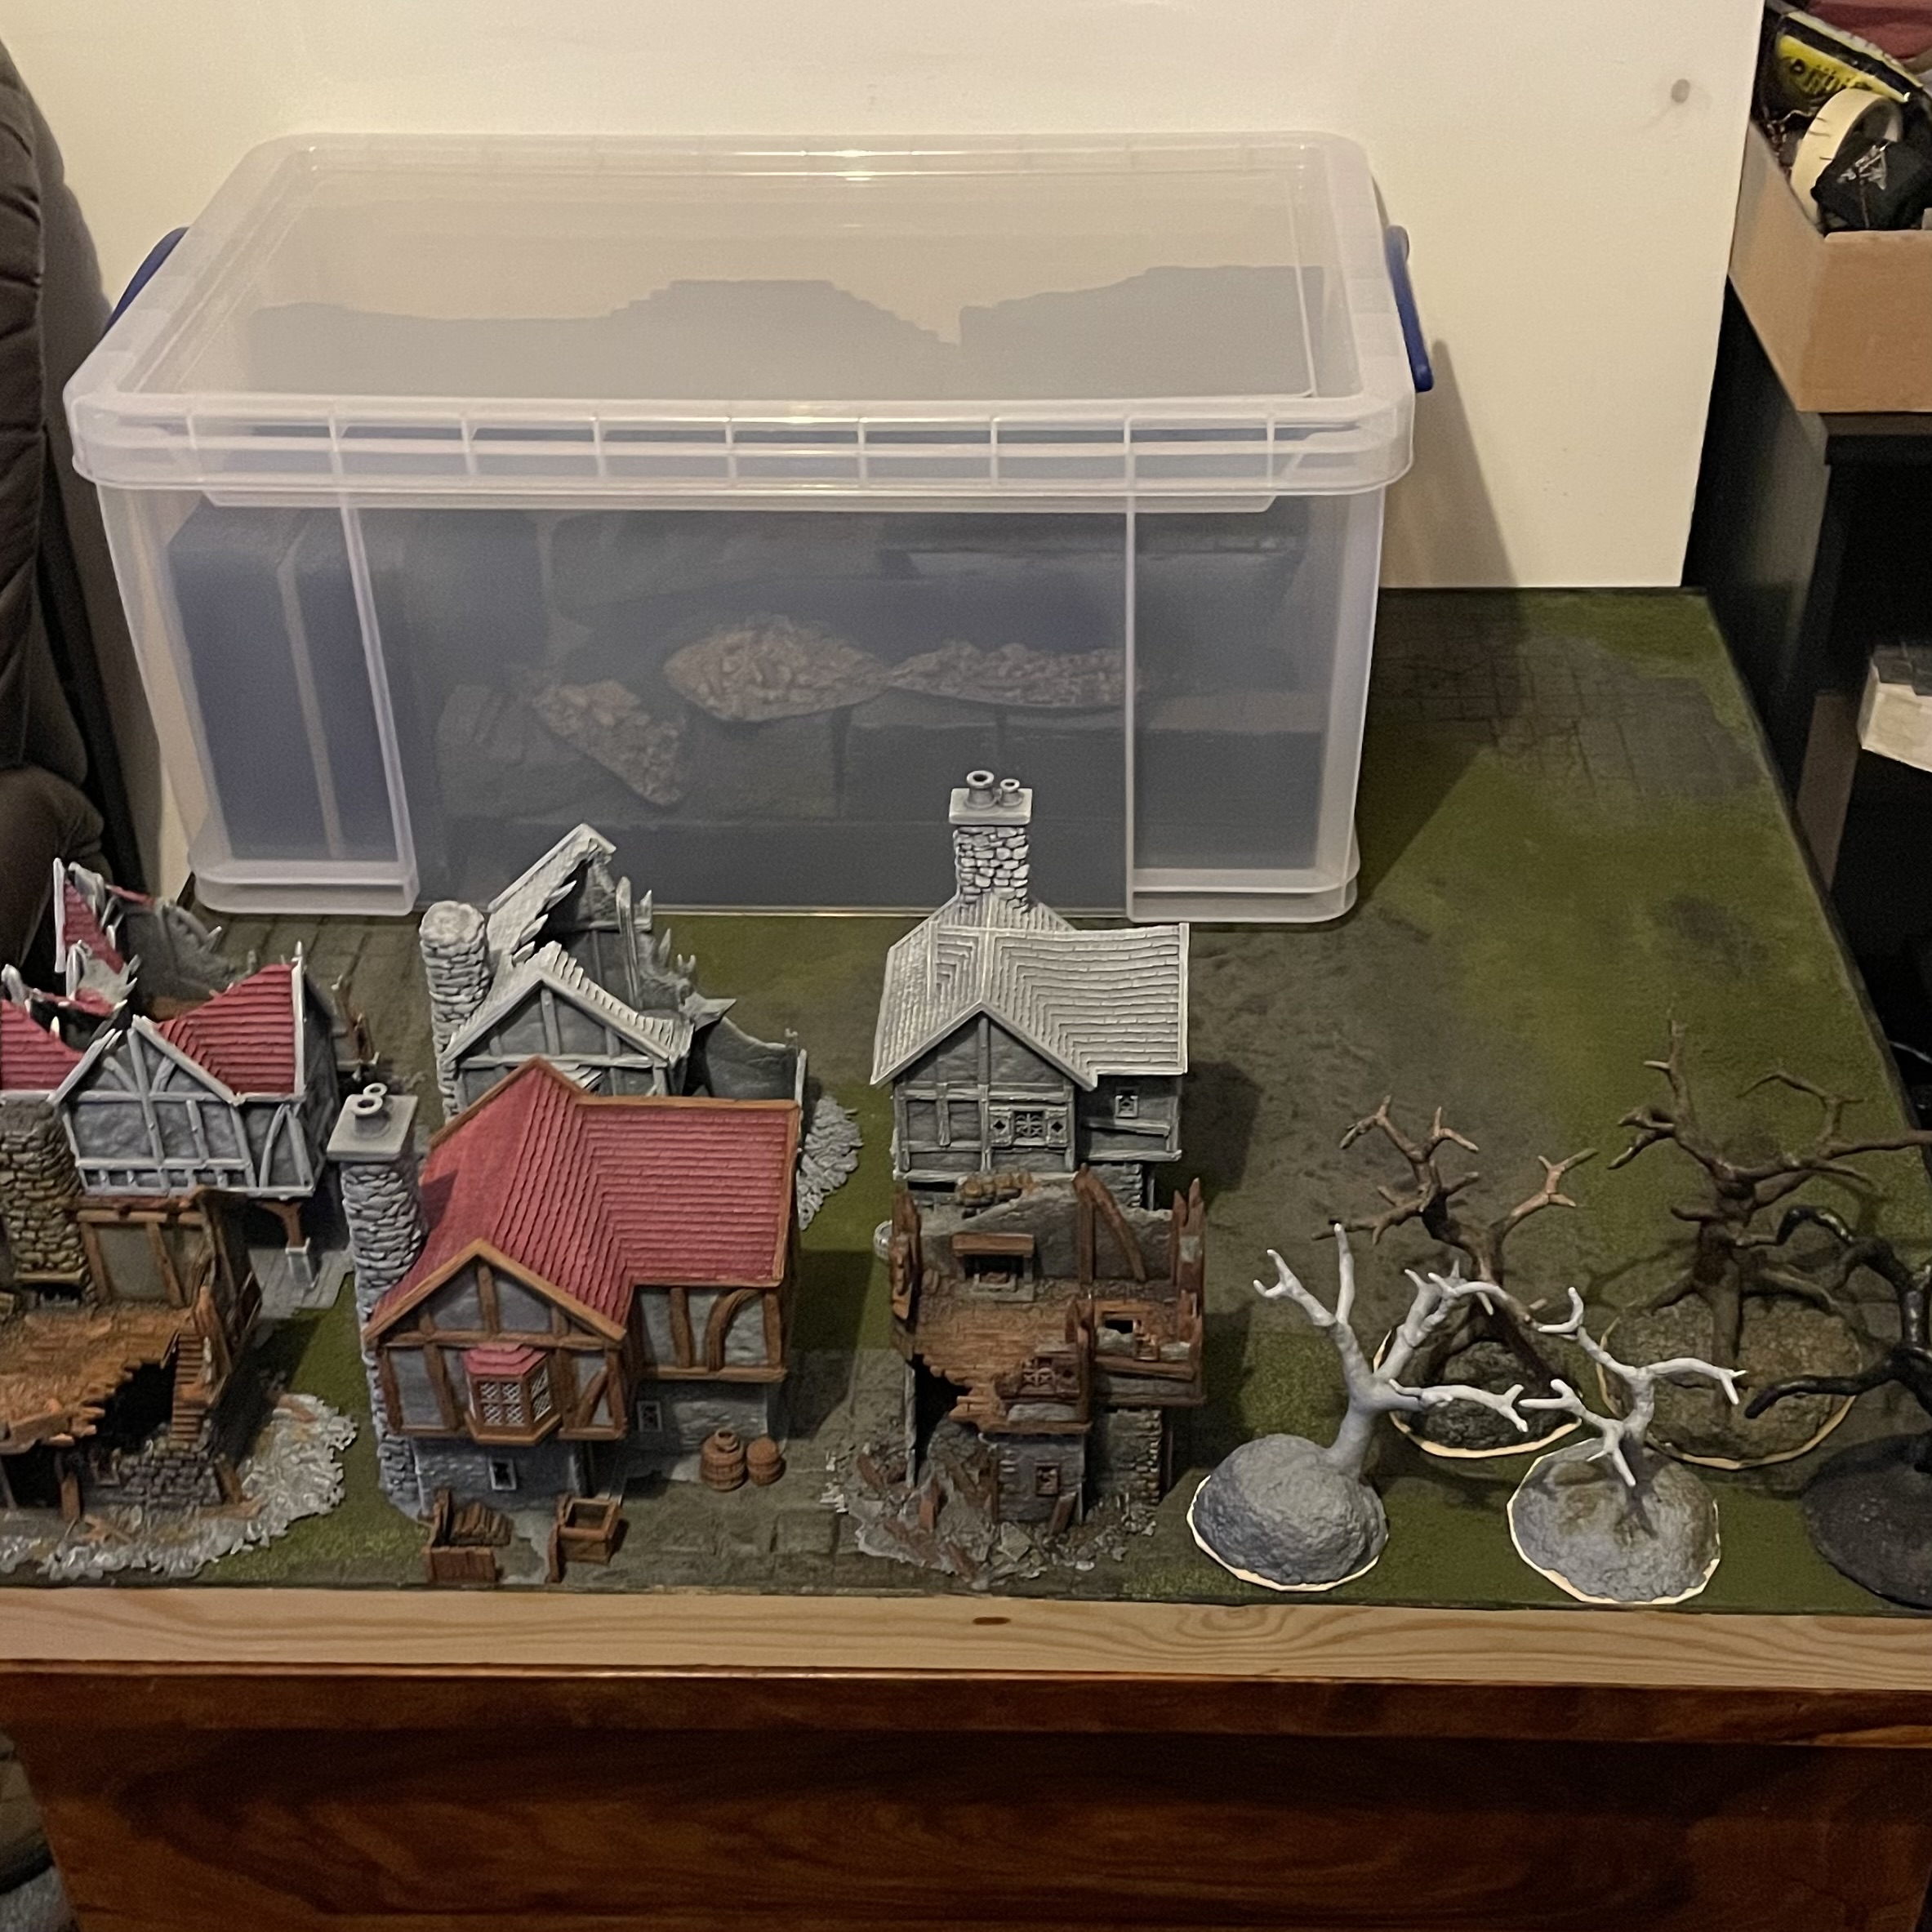
Shouldn’t forget the trees
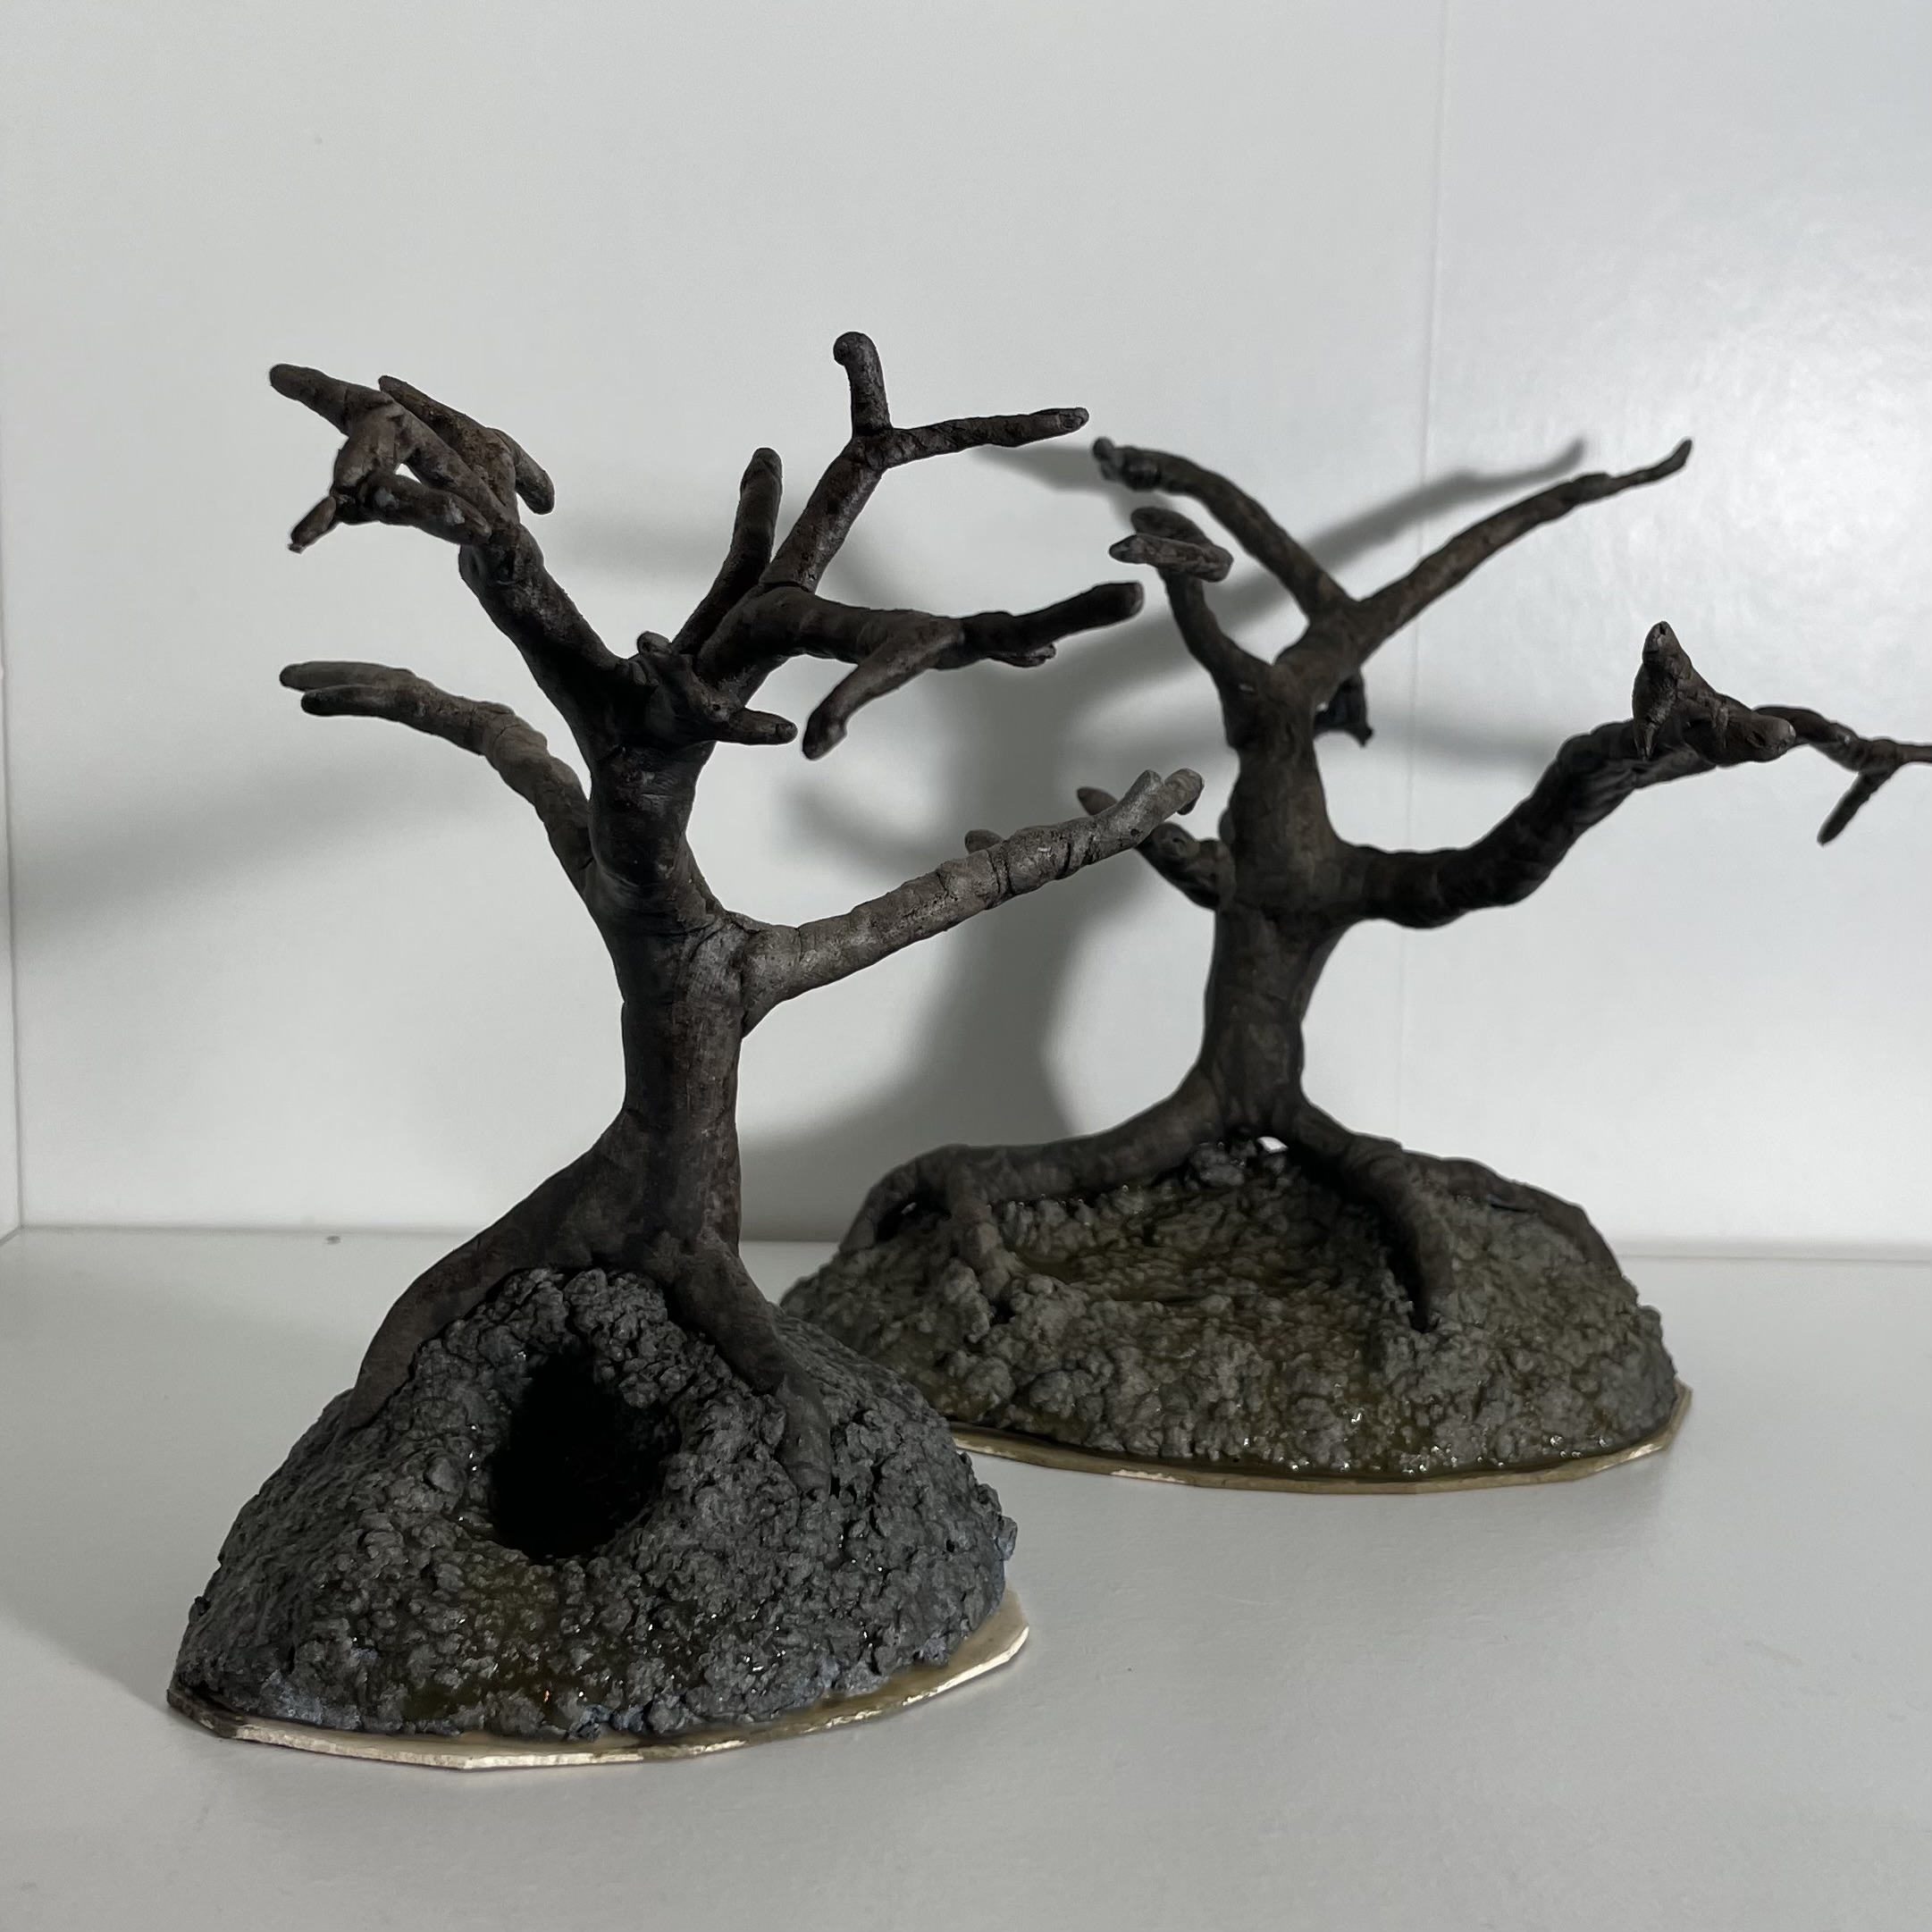 Chipping away but spent some time painting the trees as well. After making the wire frame covering in green stuff and attaching to a base I give it a black undercoat and then a zenithal grey to white coat. Ready for painting.
 Time to throw on the paint.
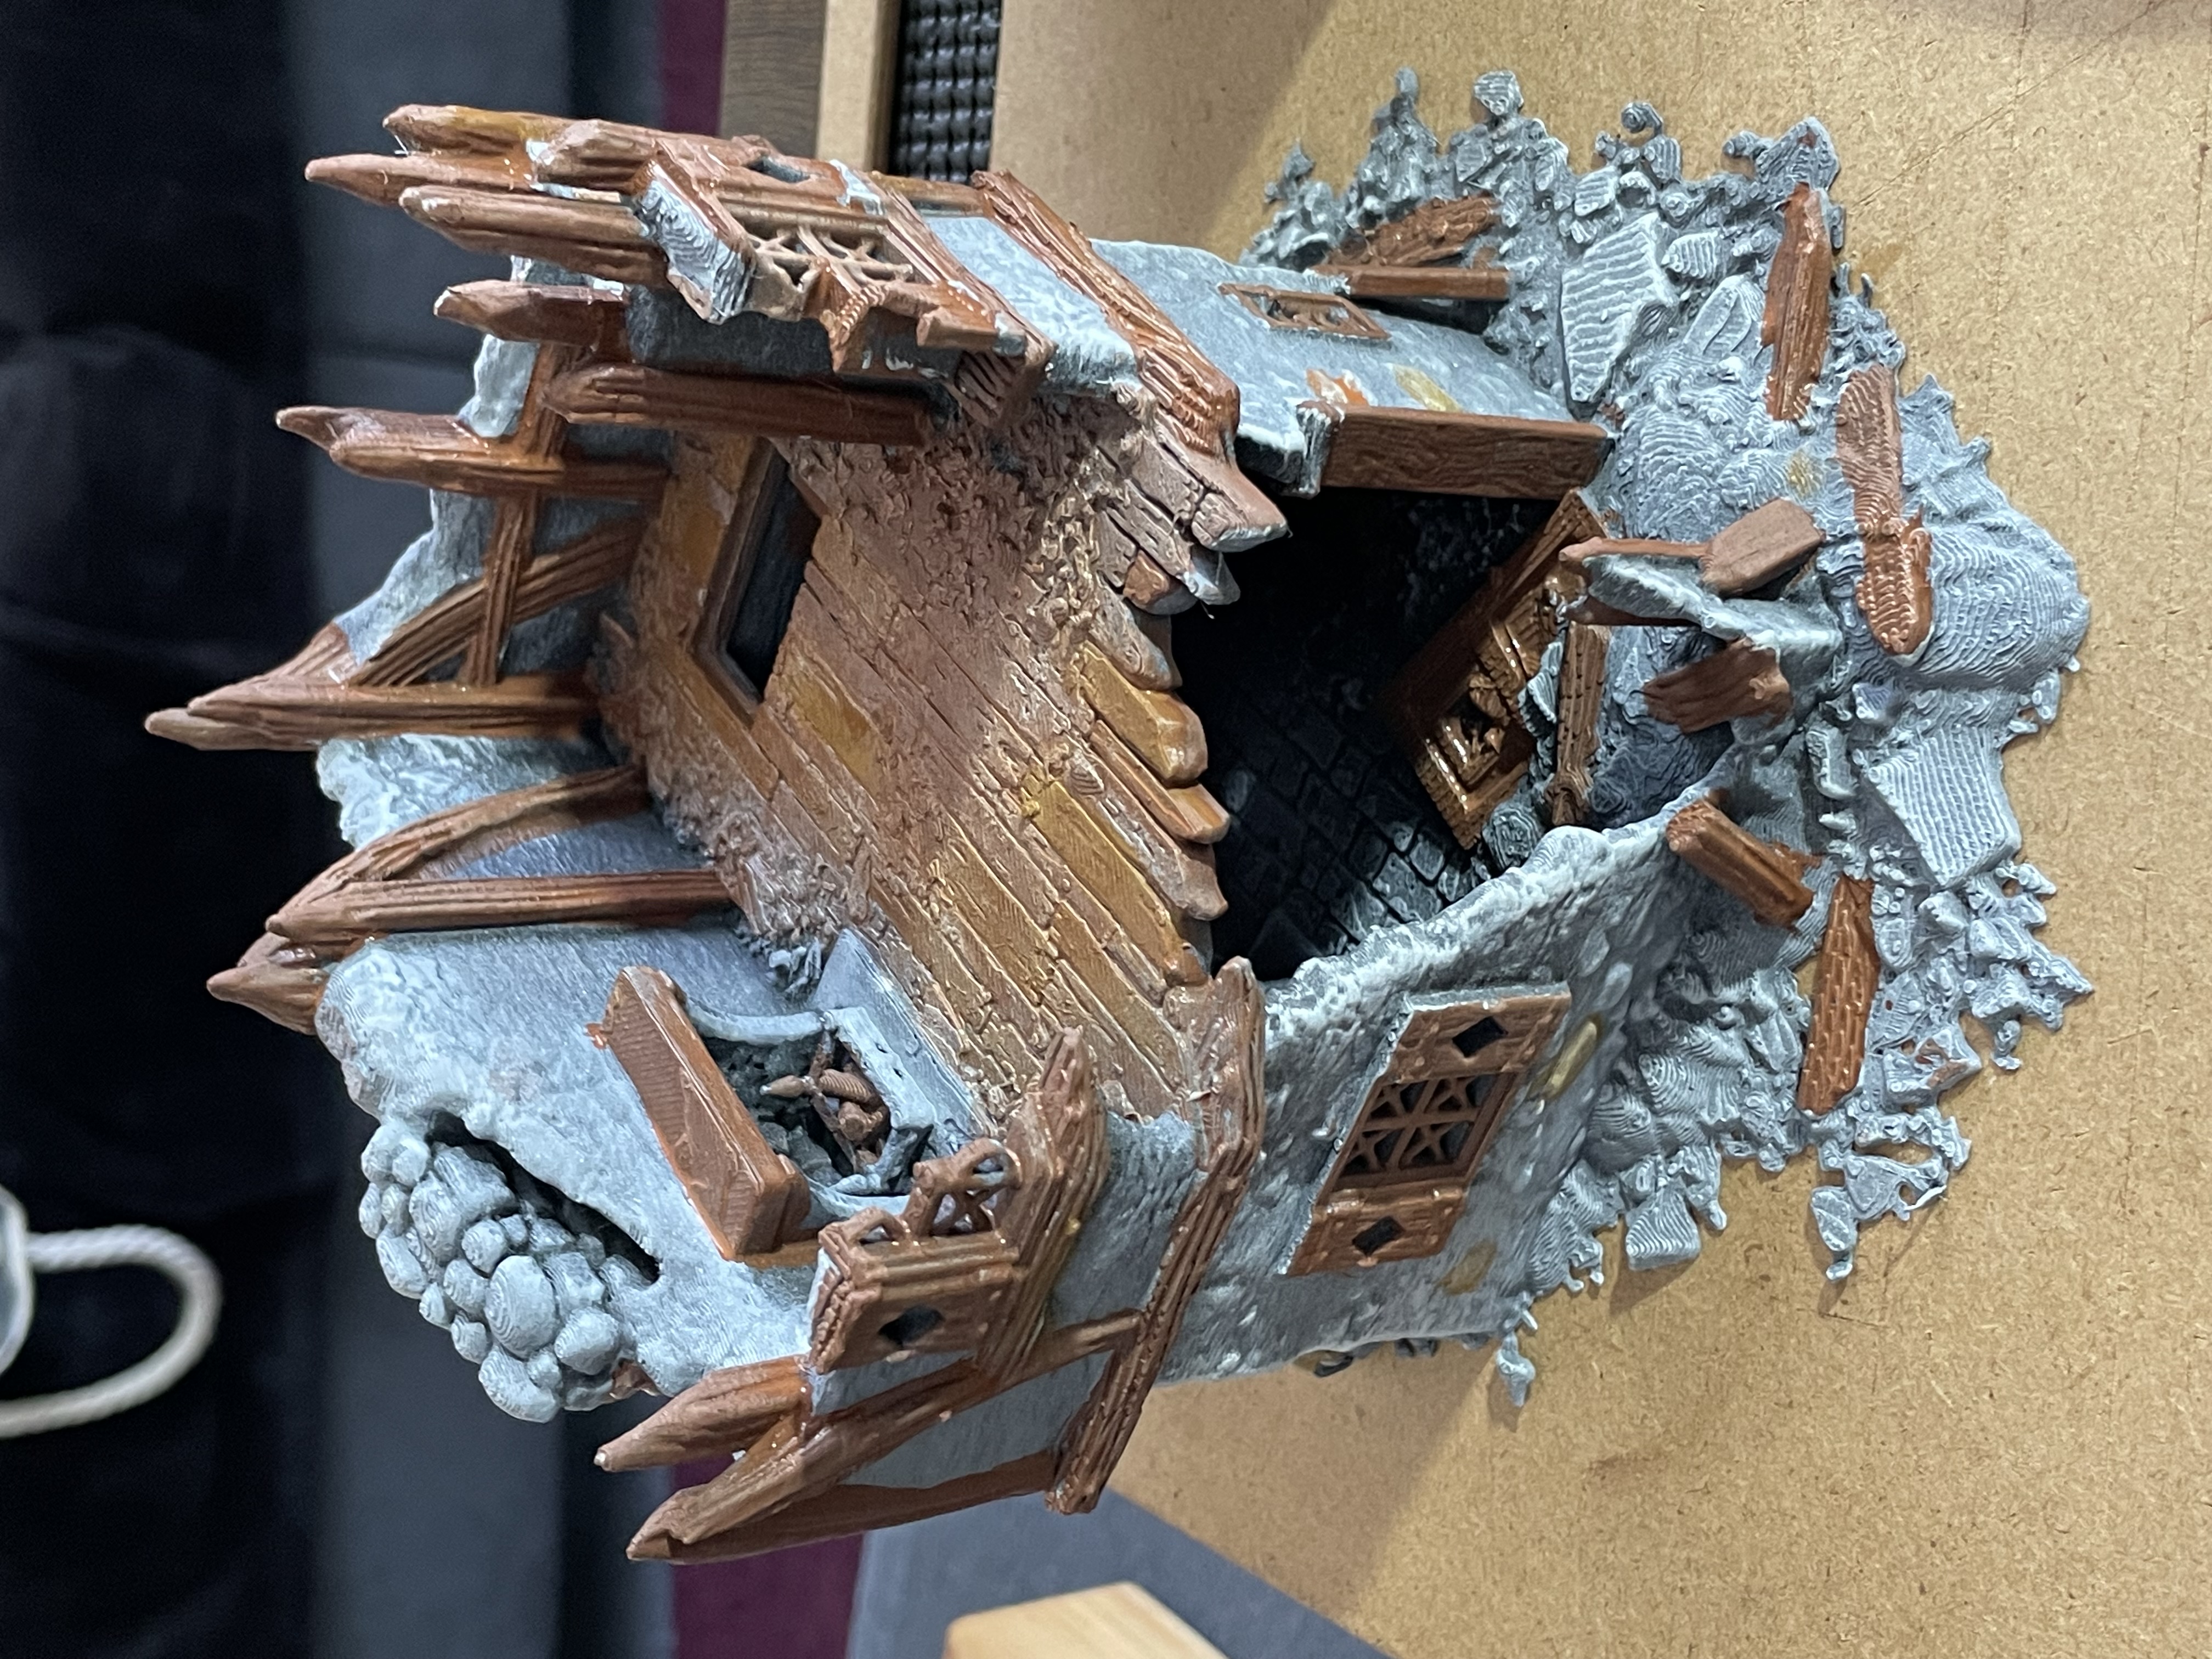
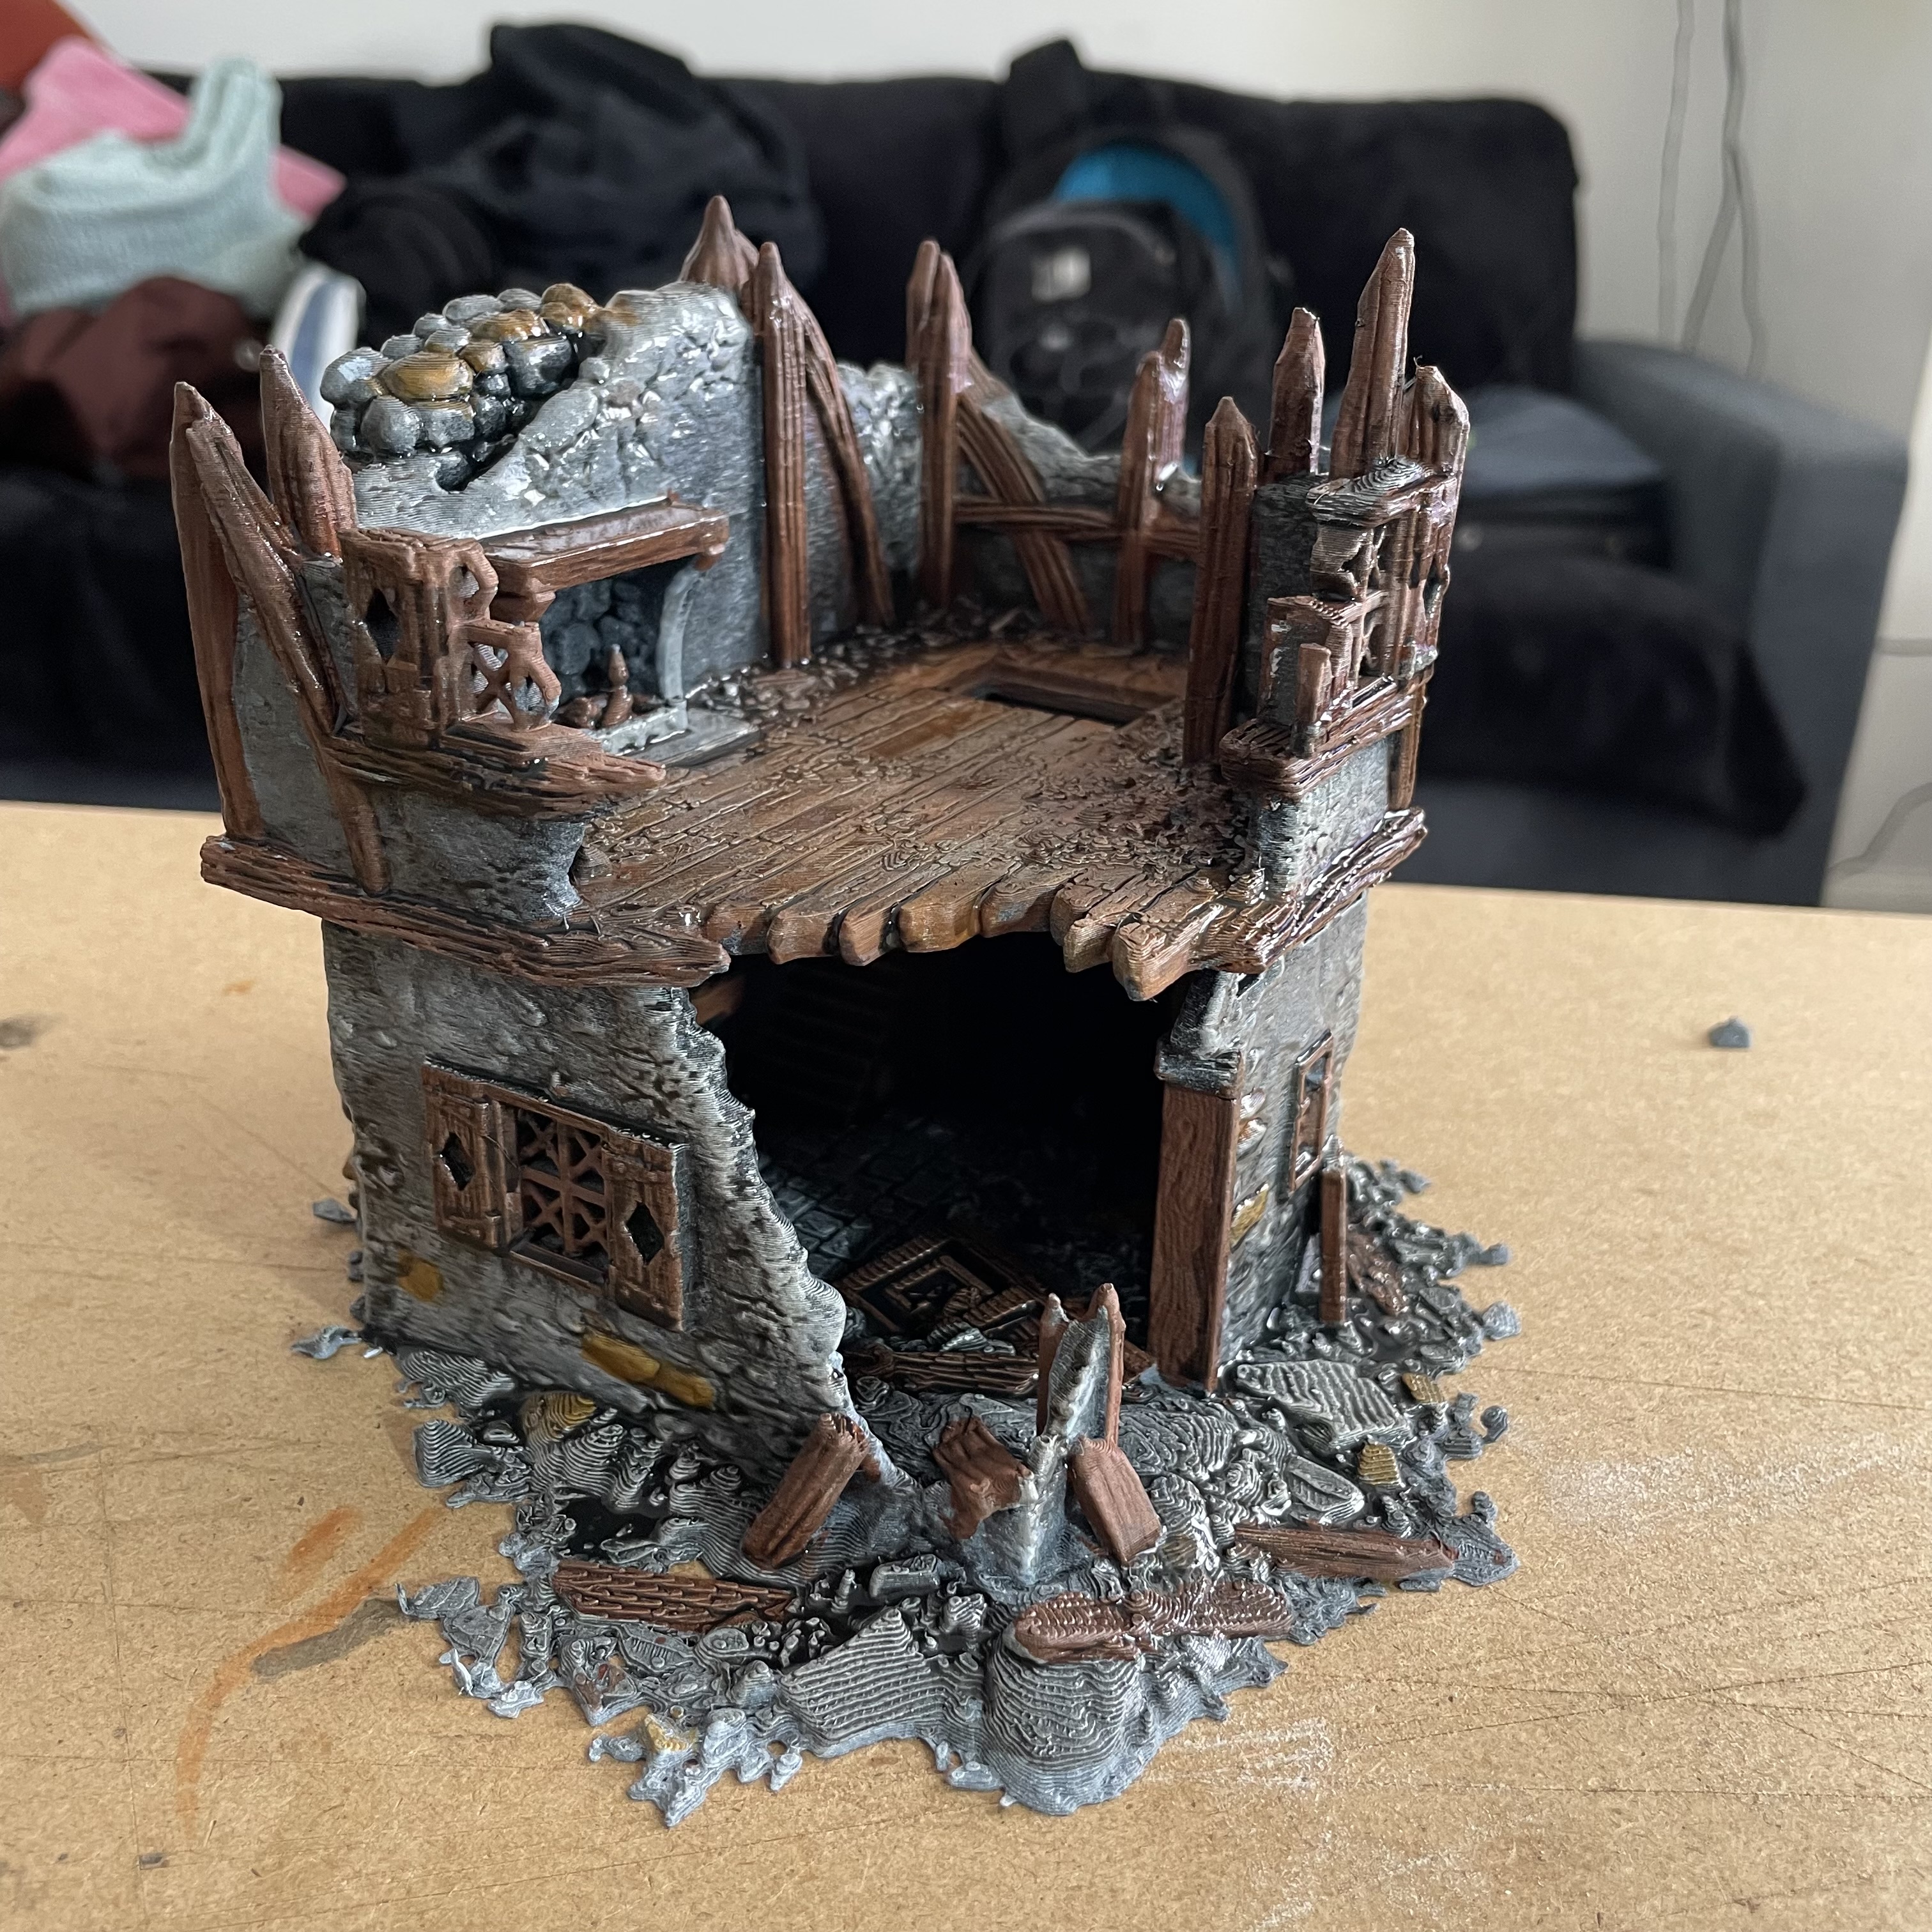
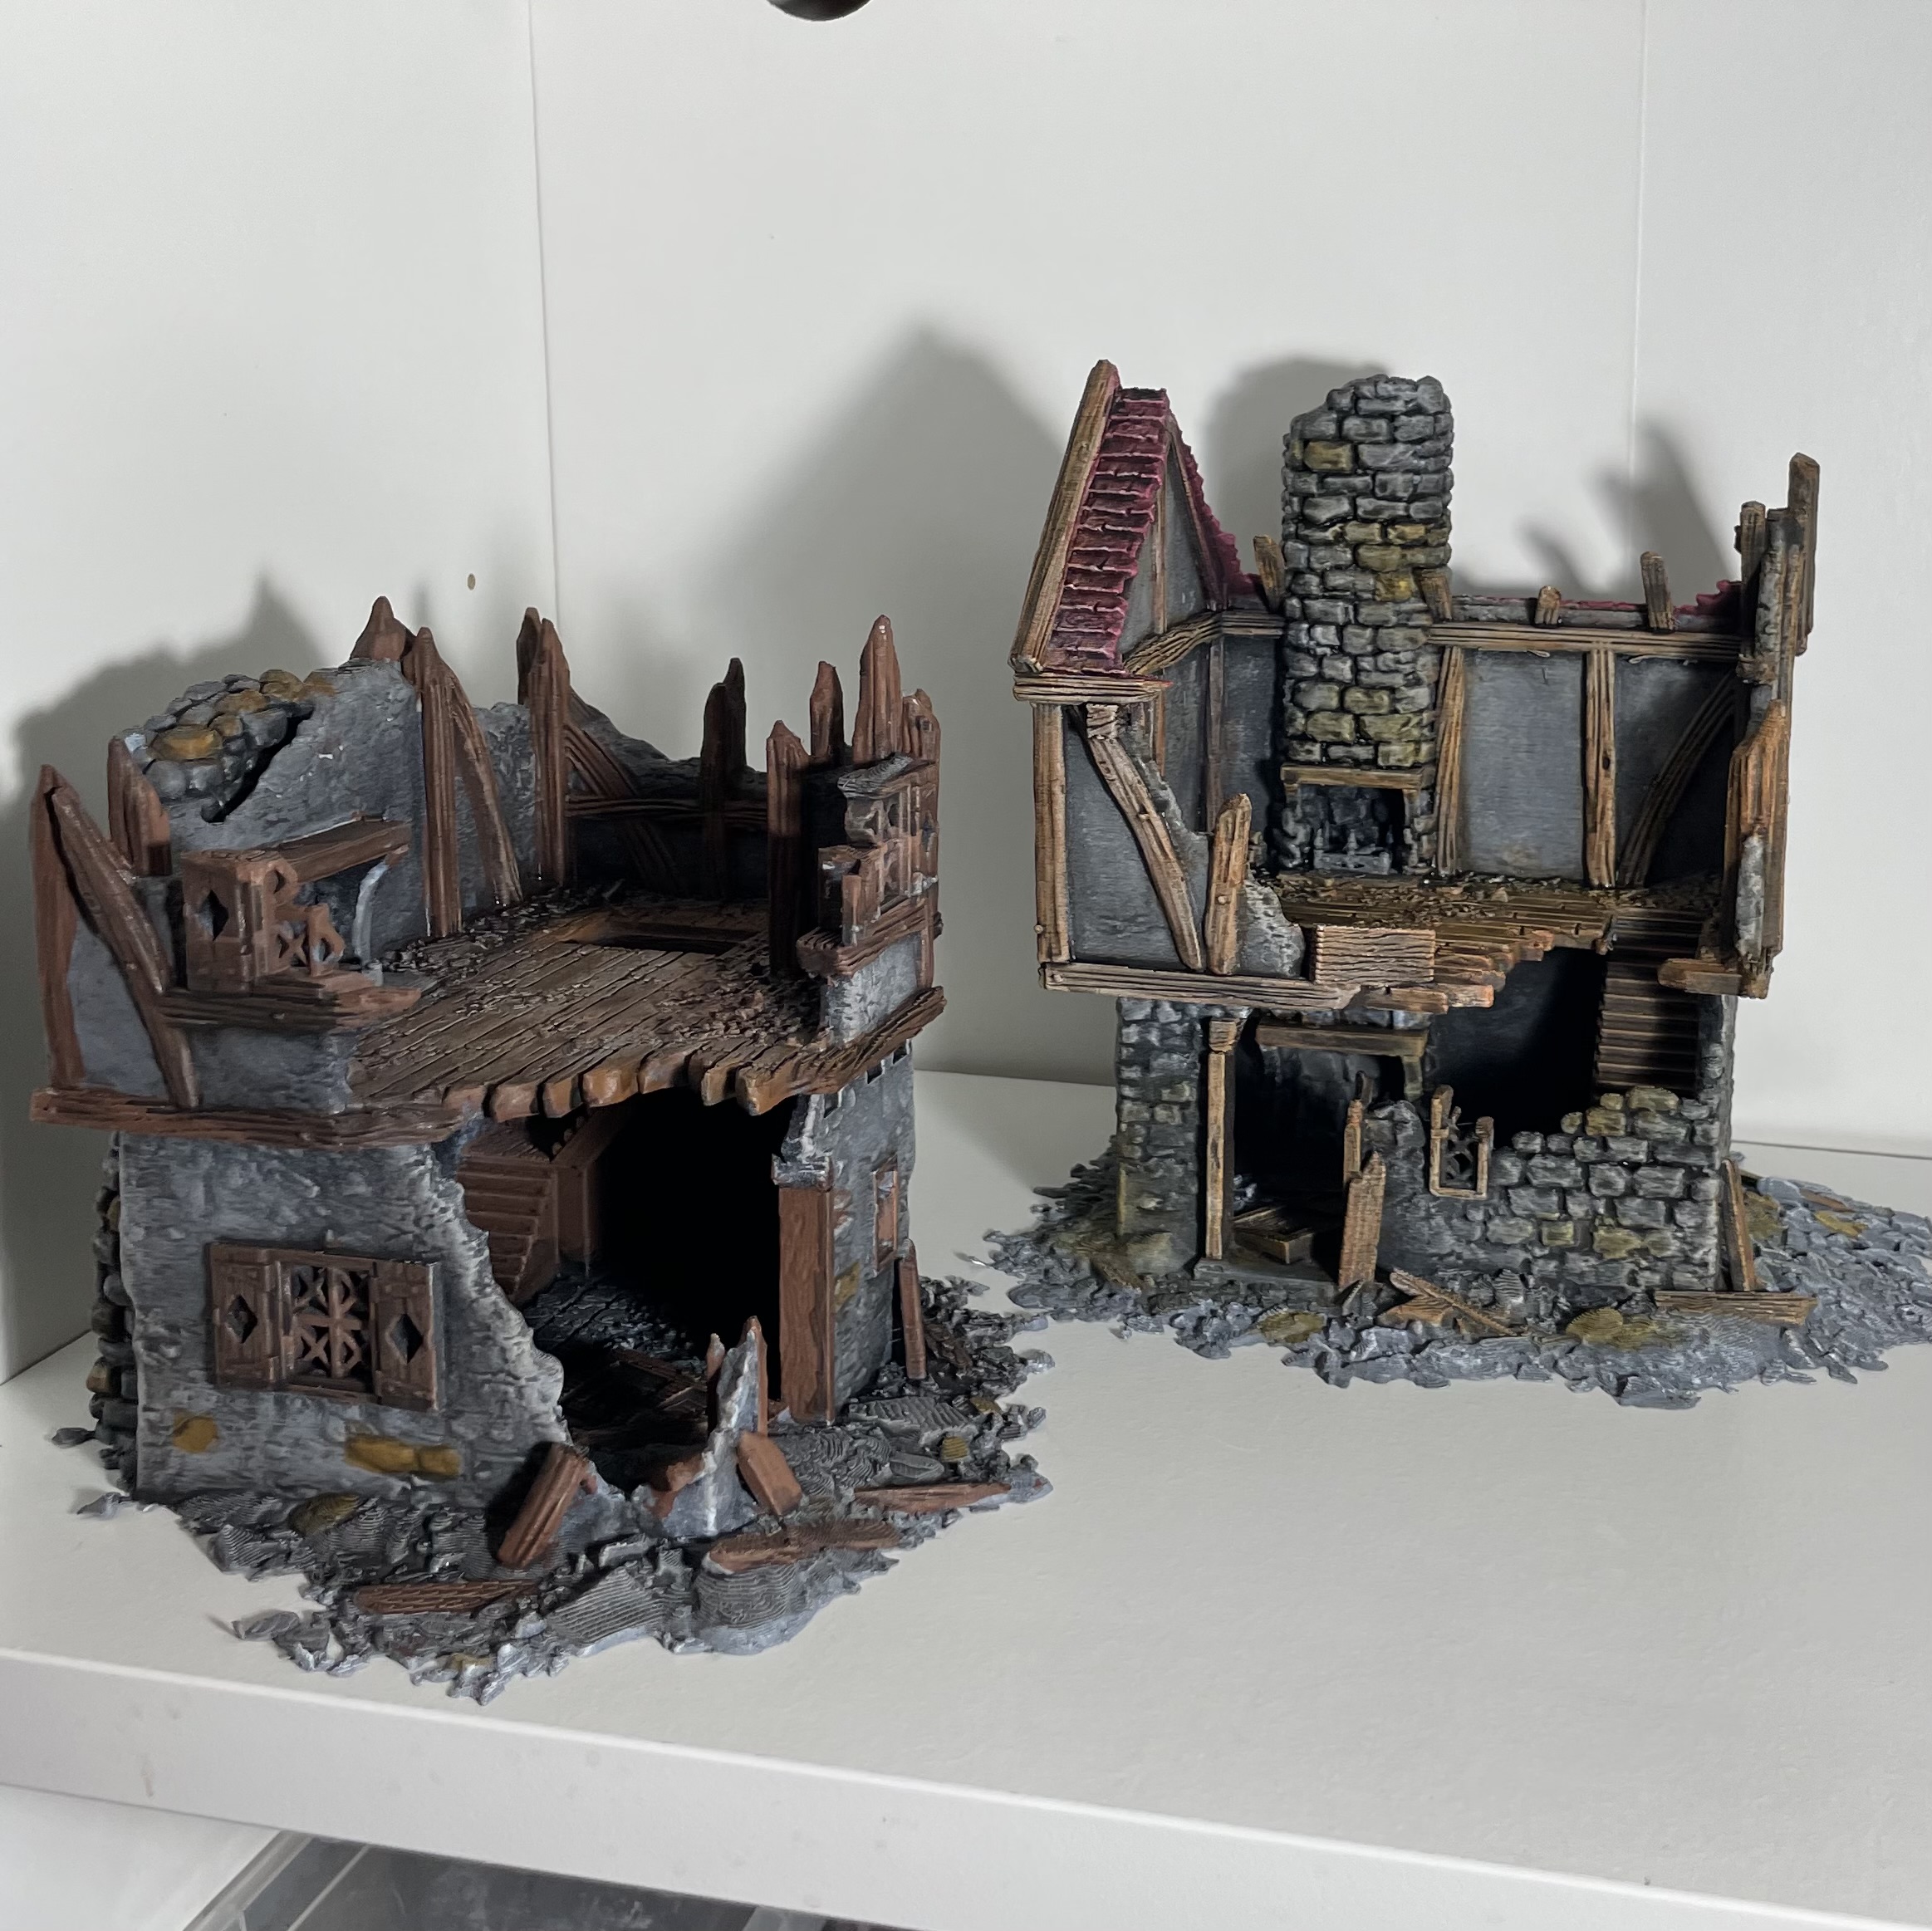 Two of the buildings painted but using different paints to see how they turned out
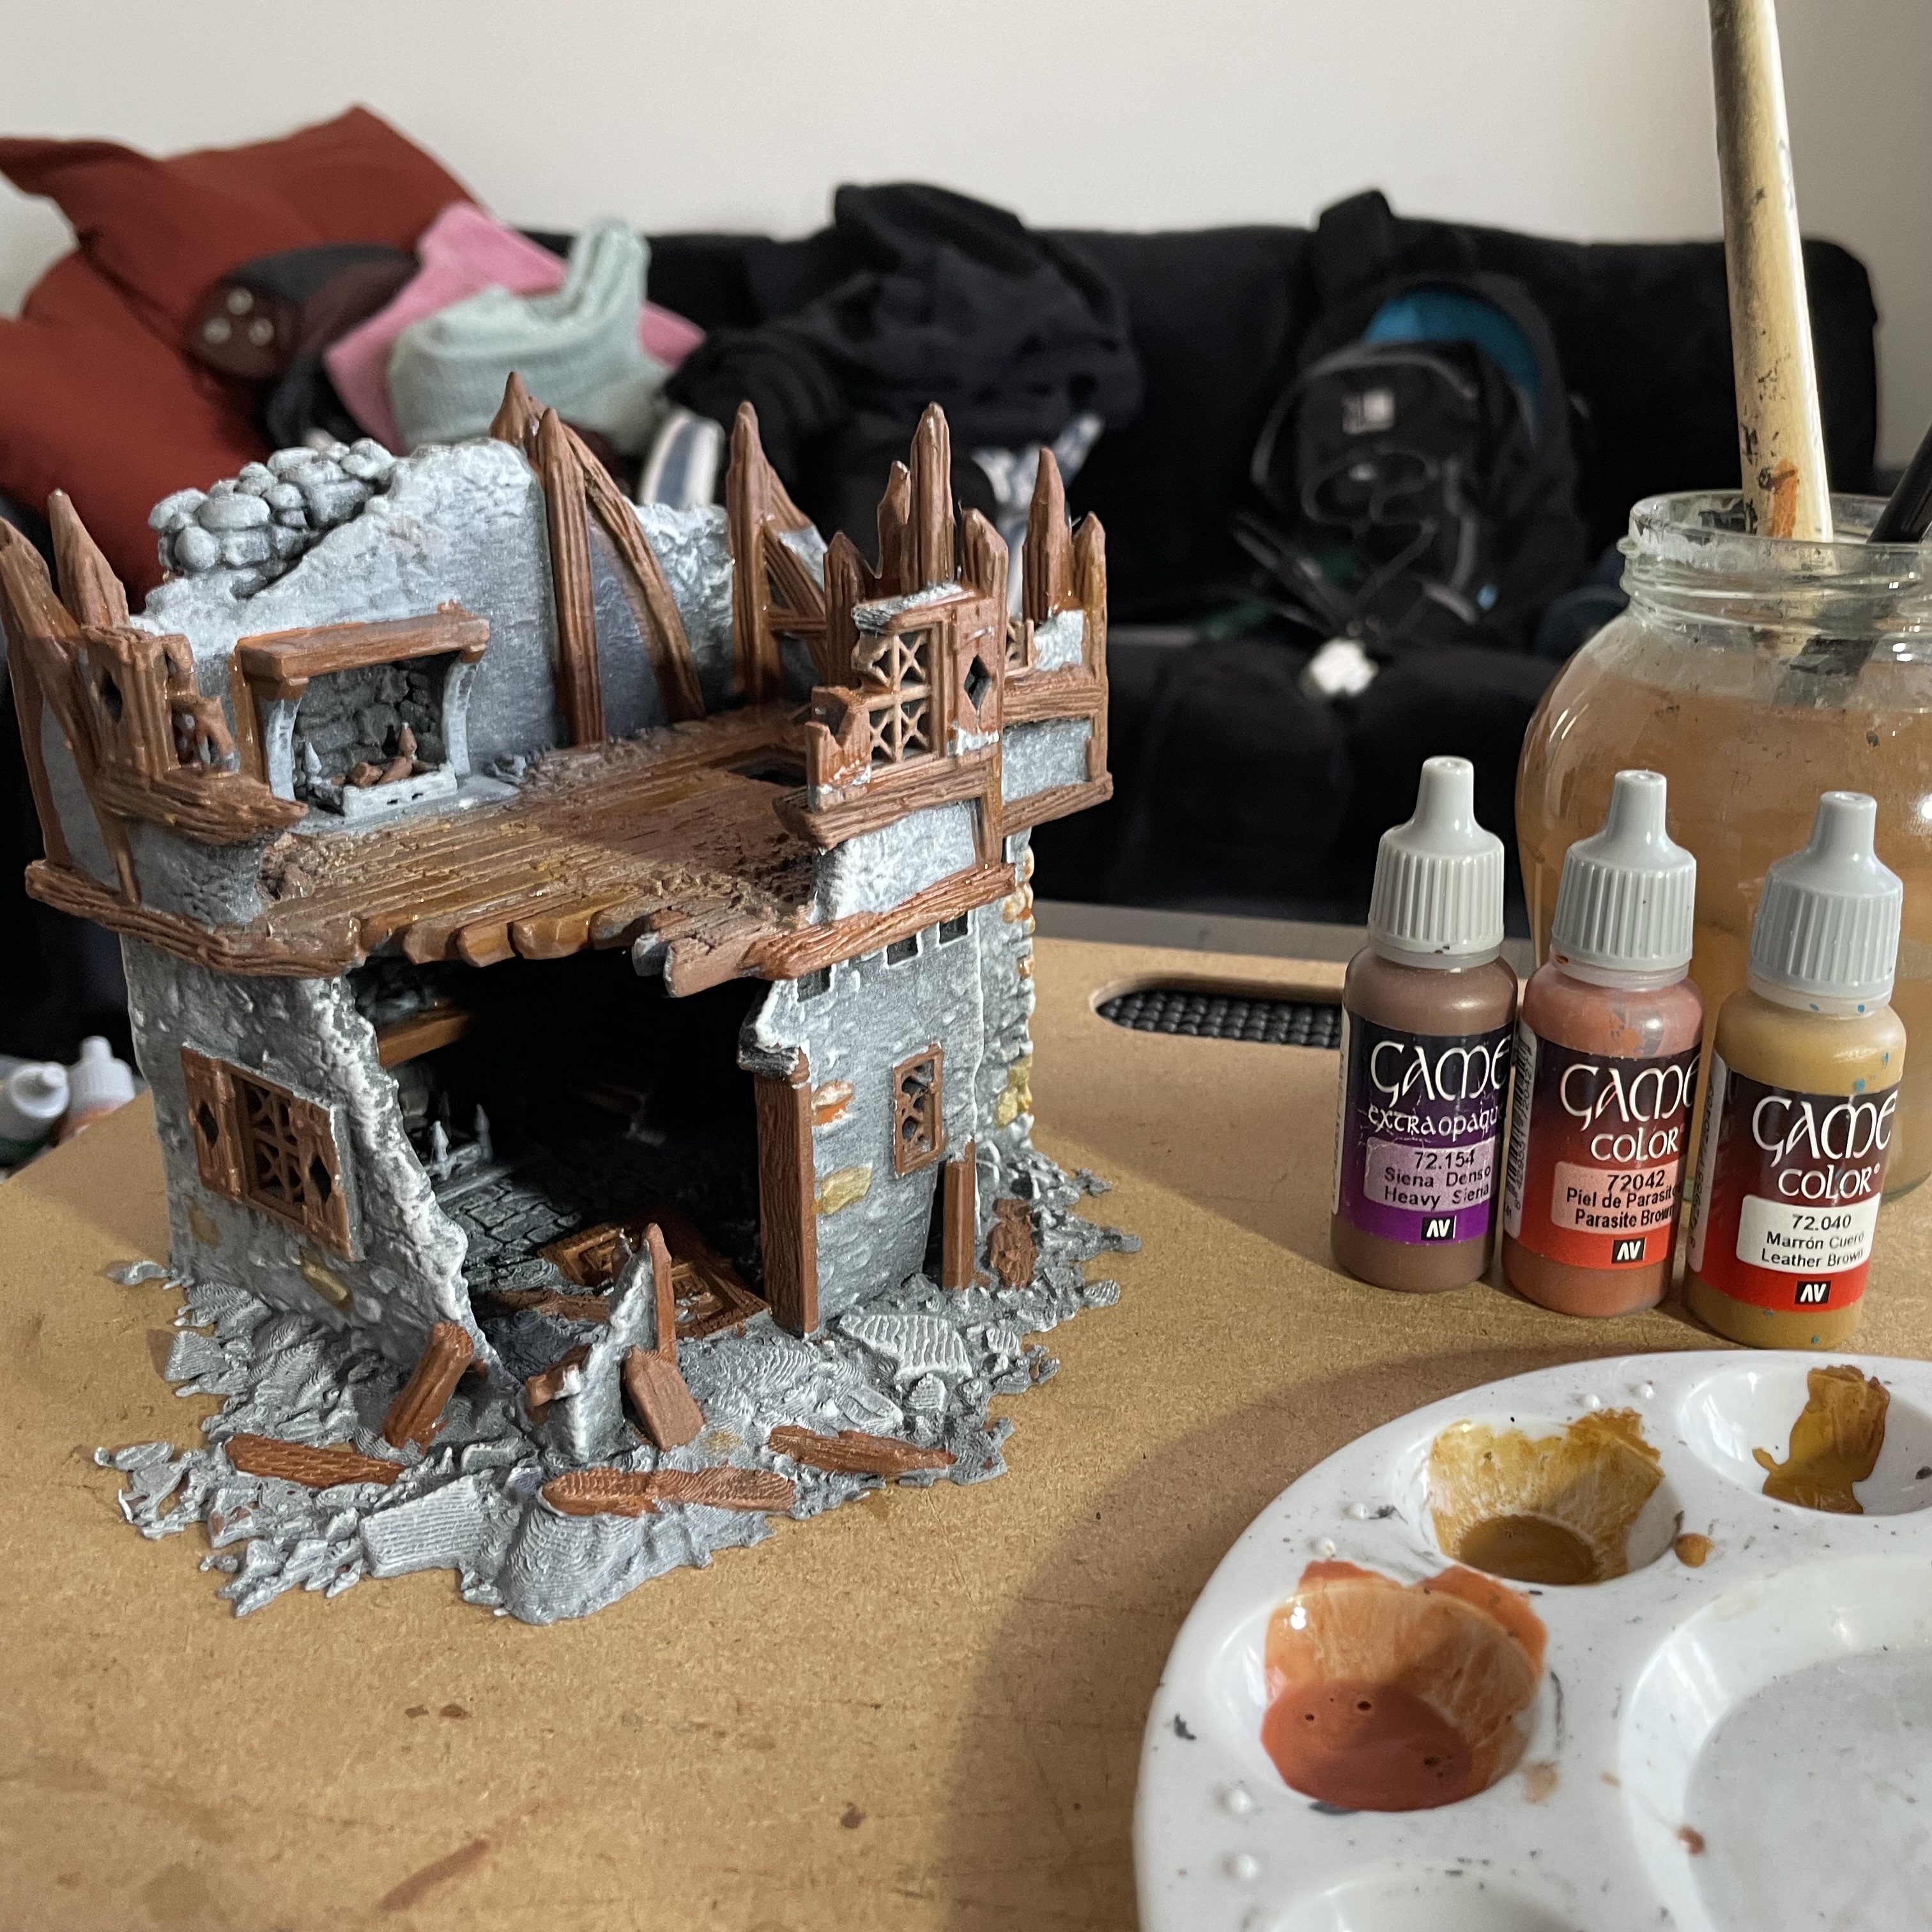
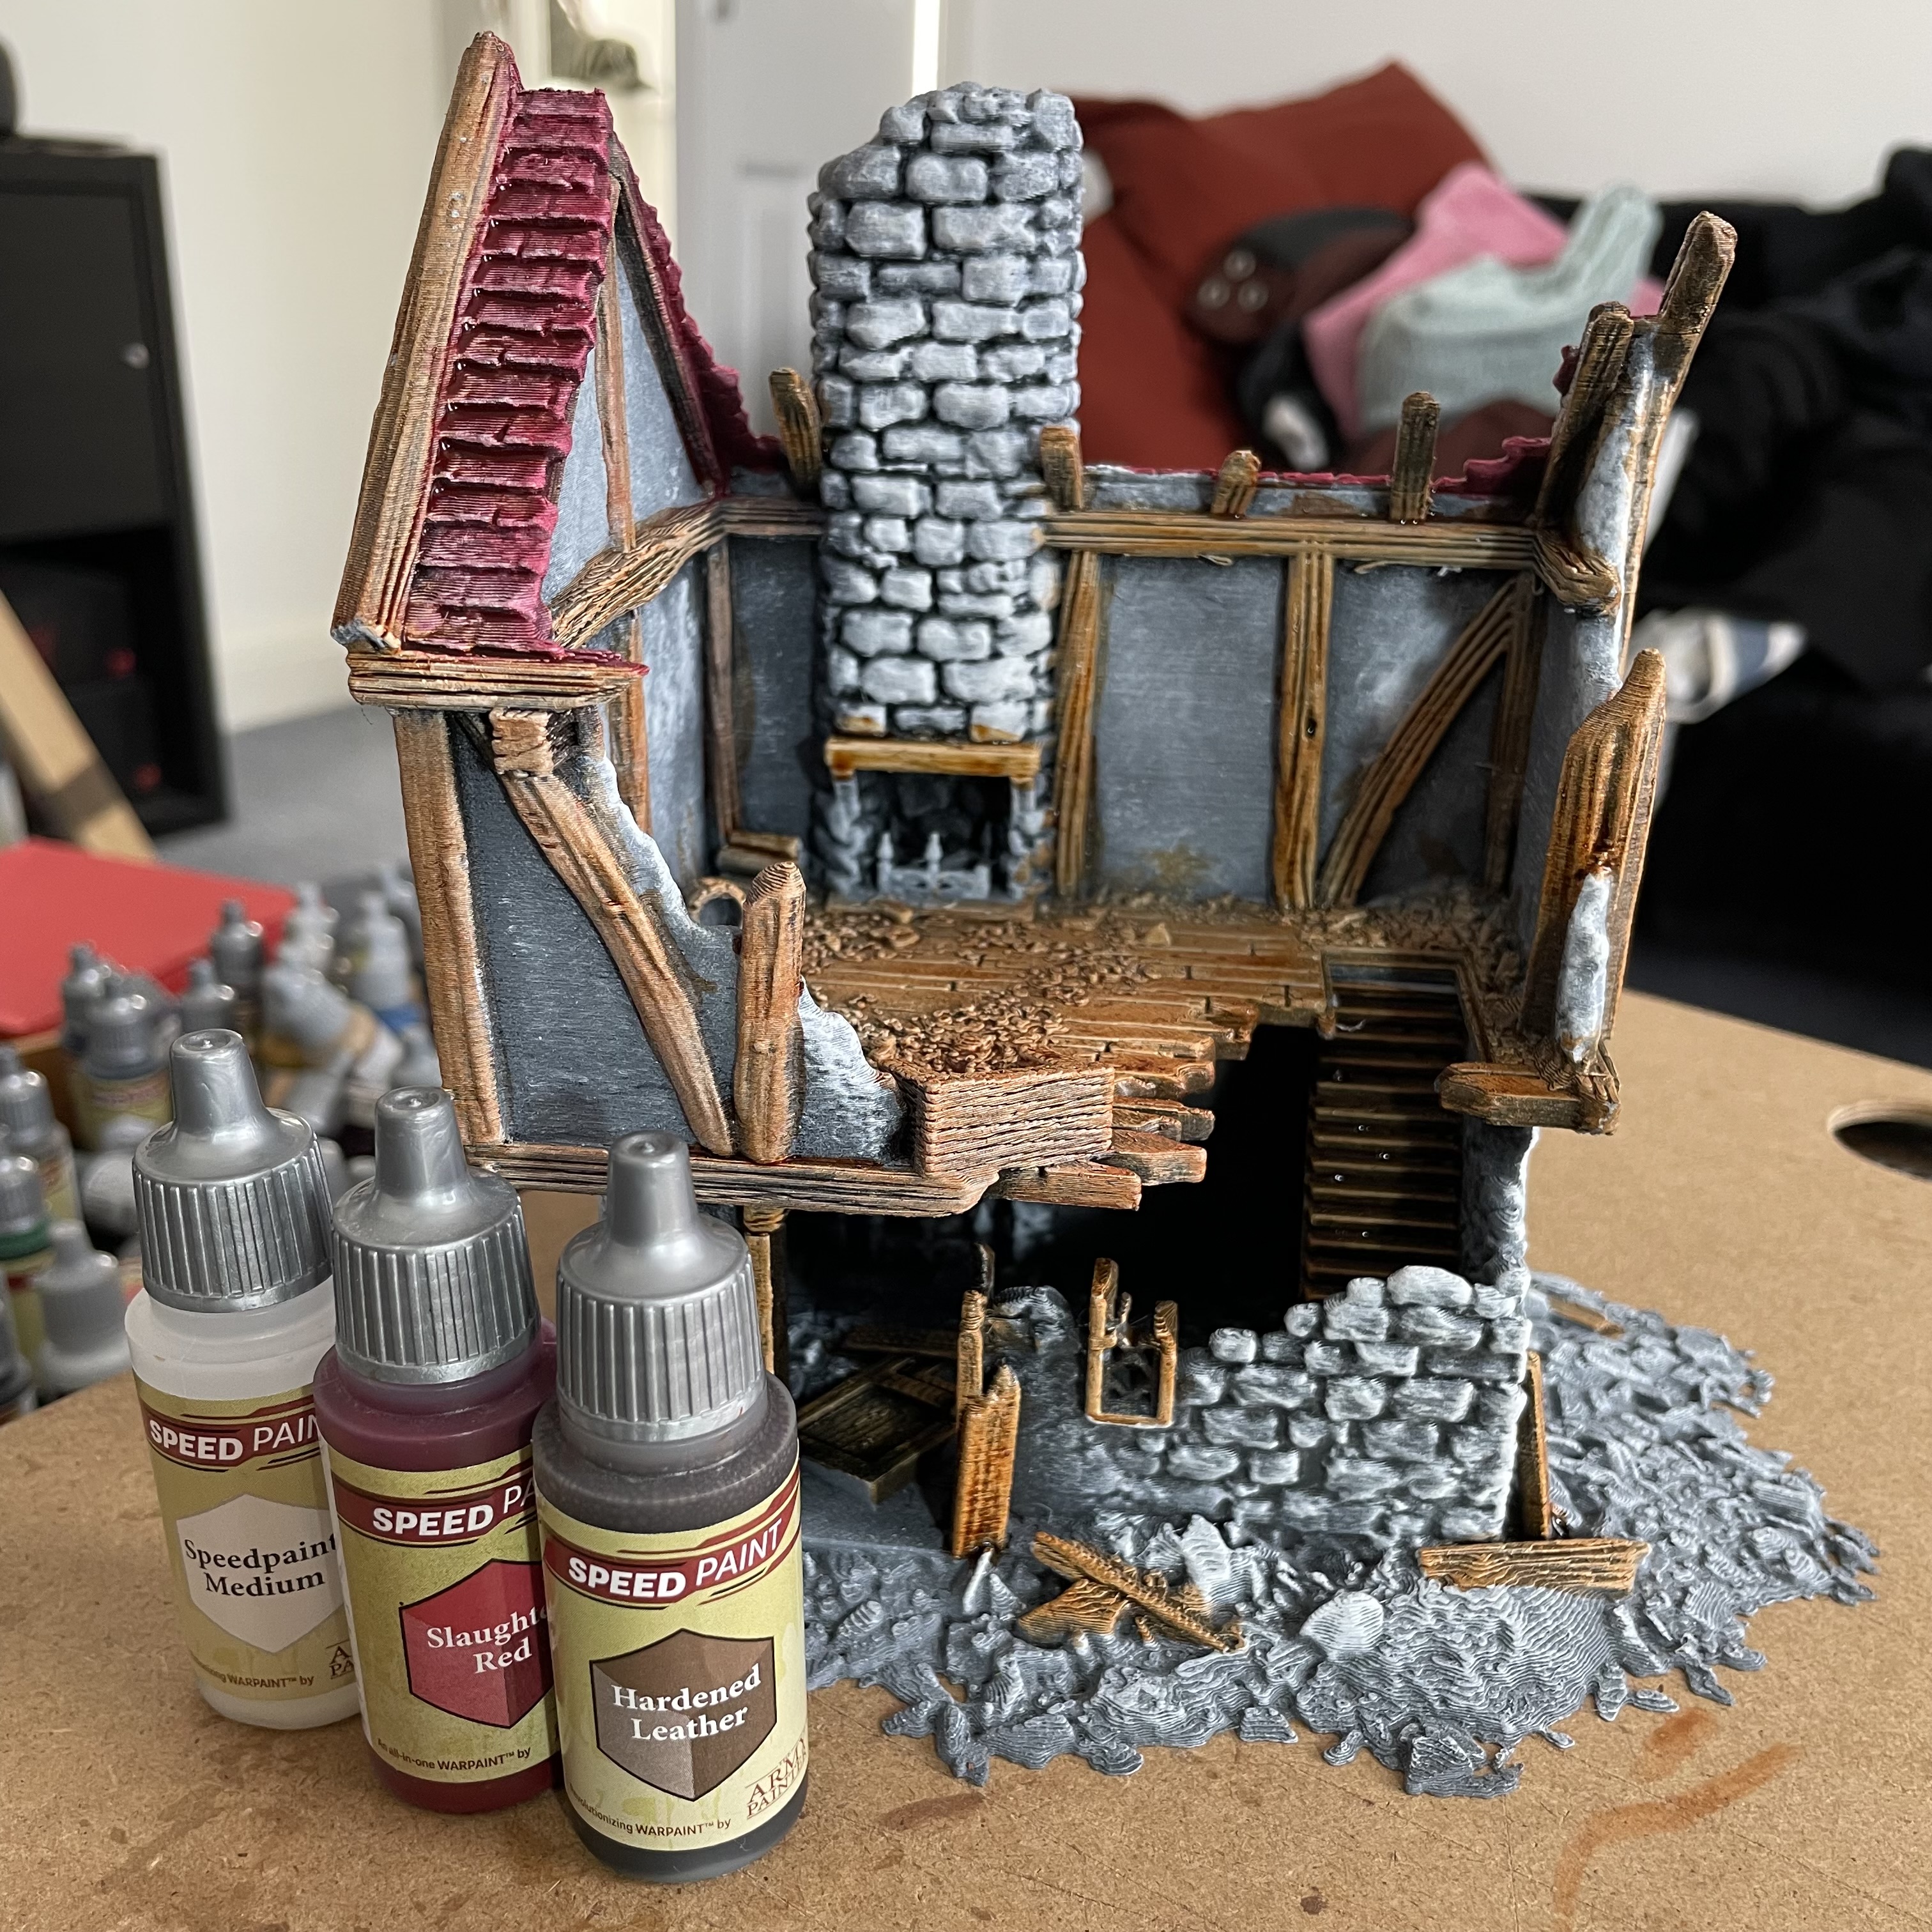
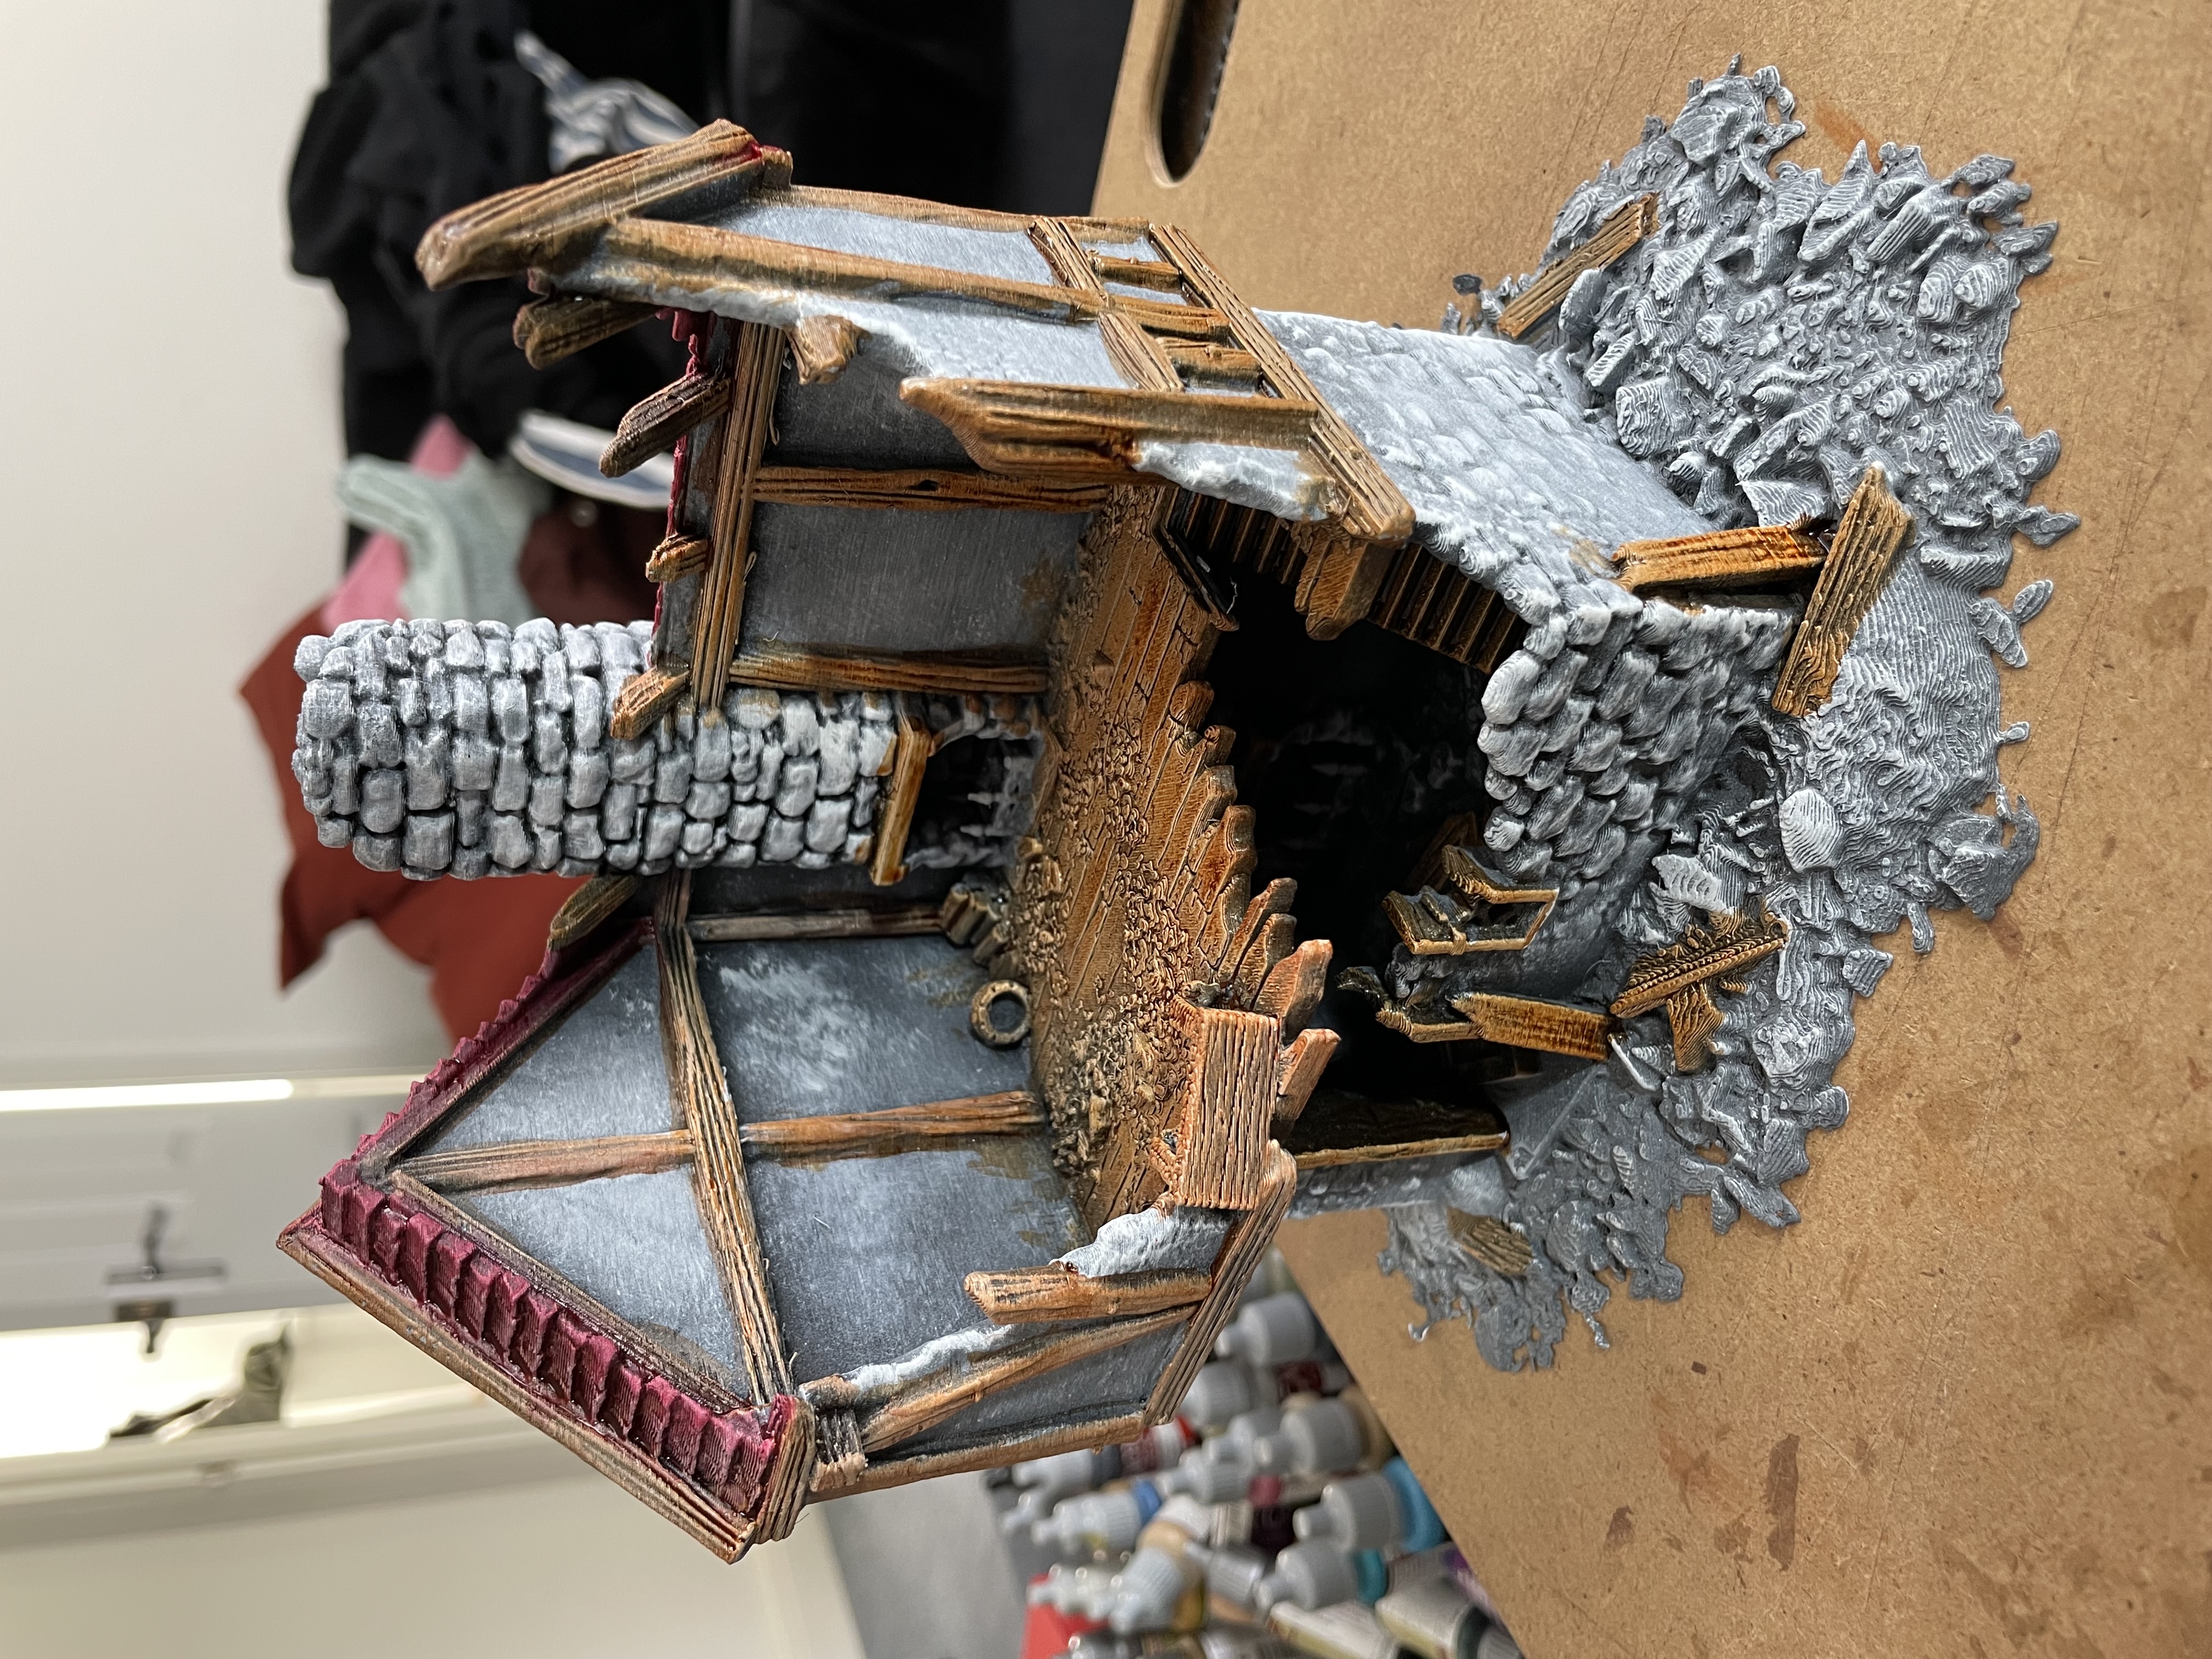
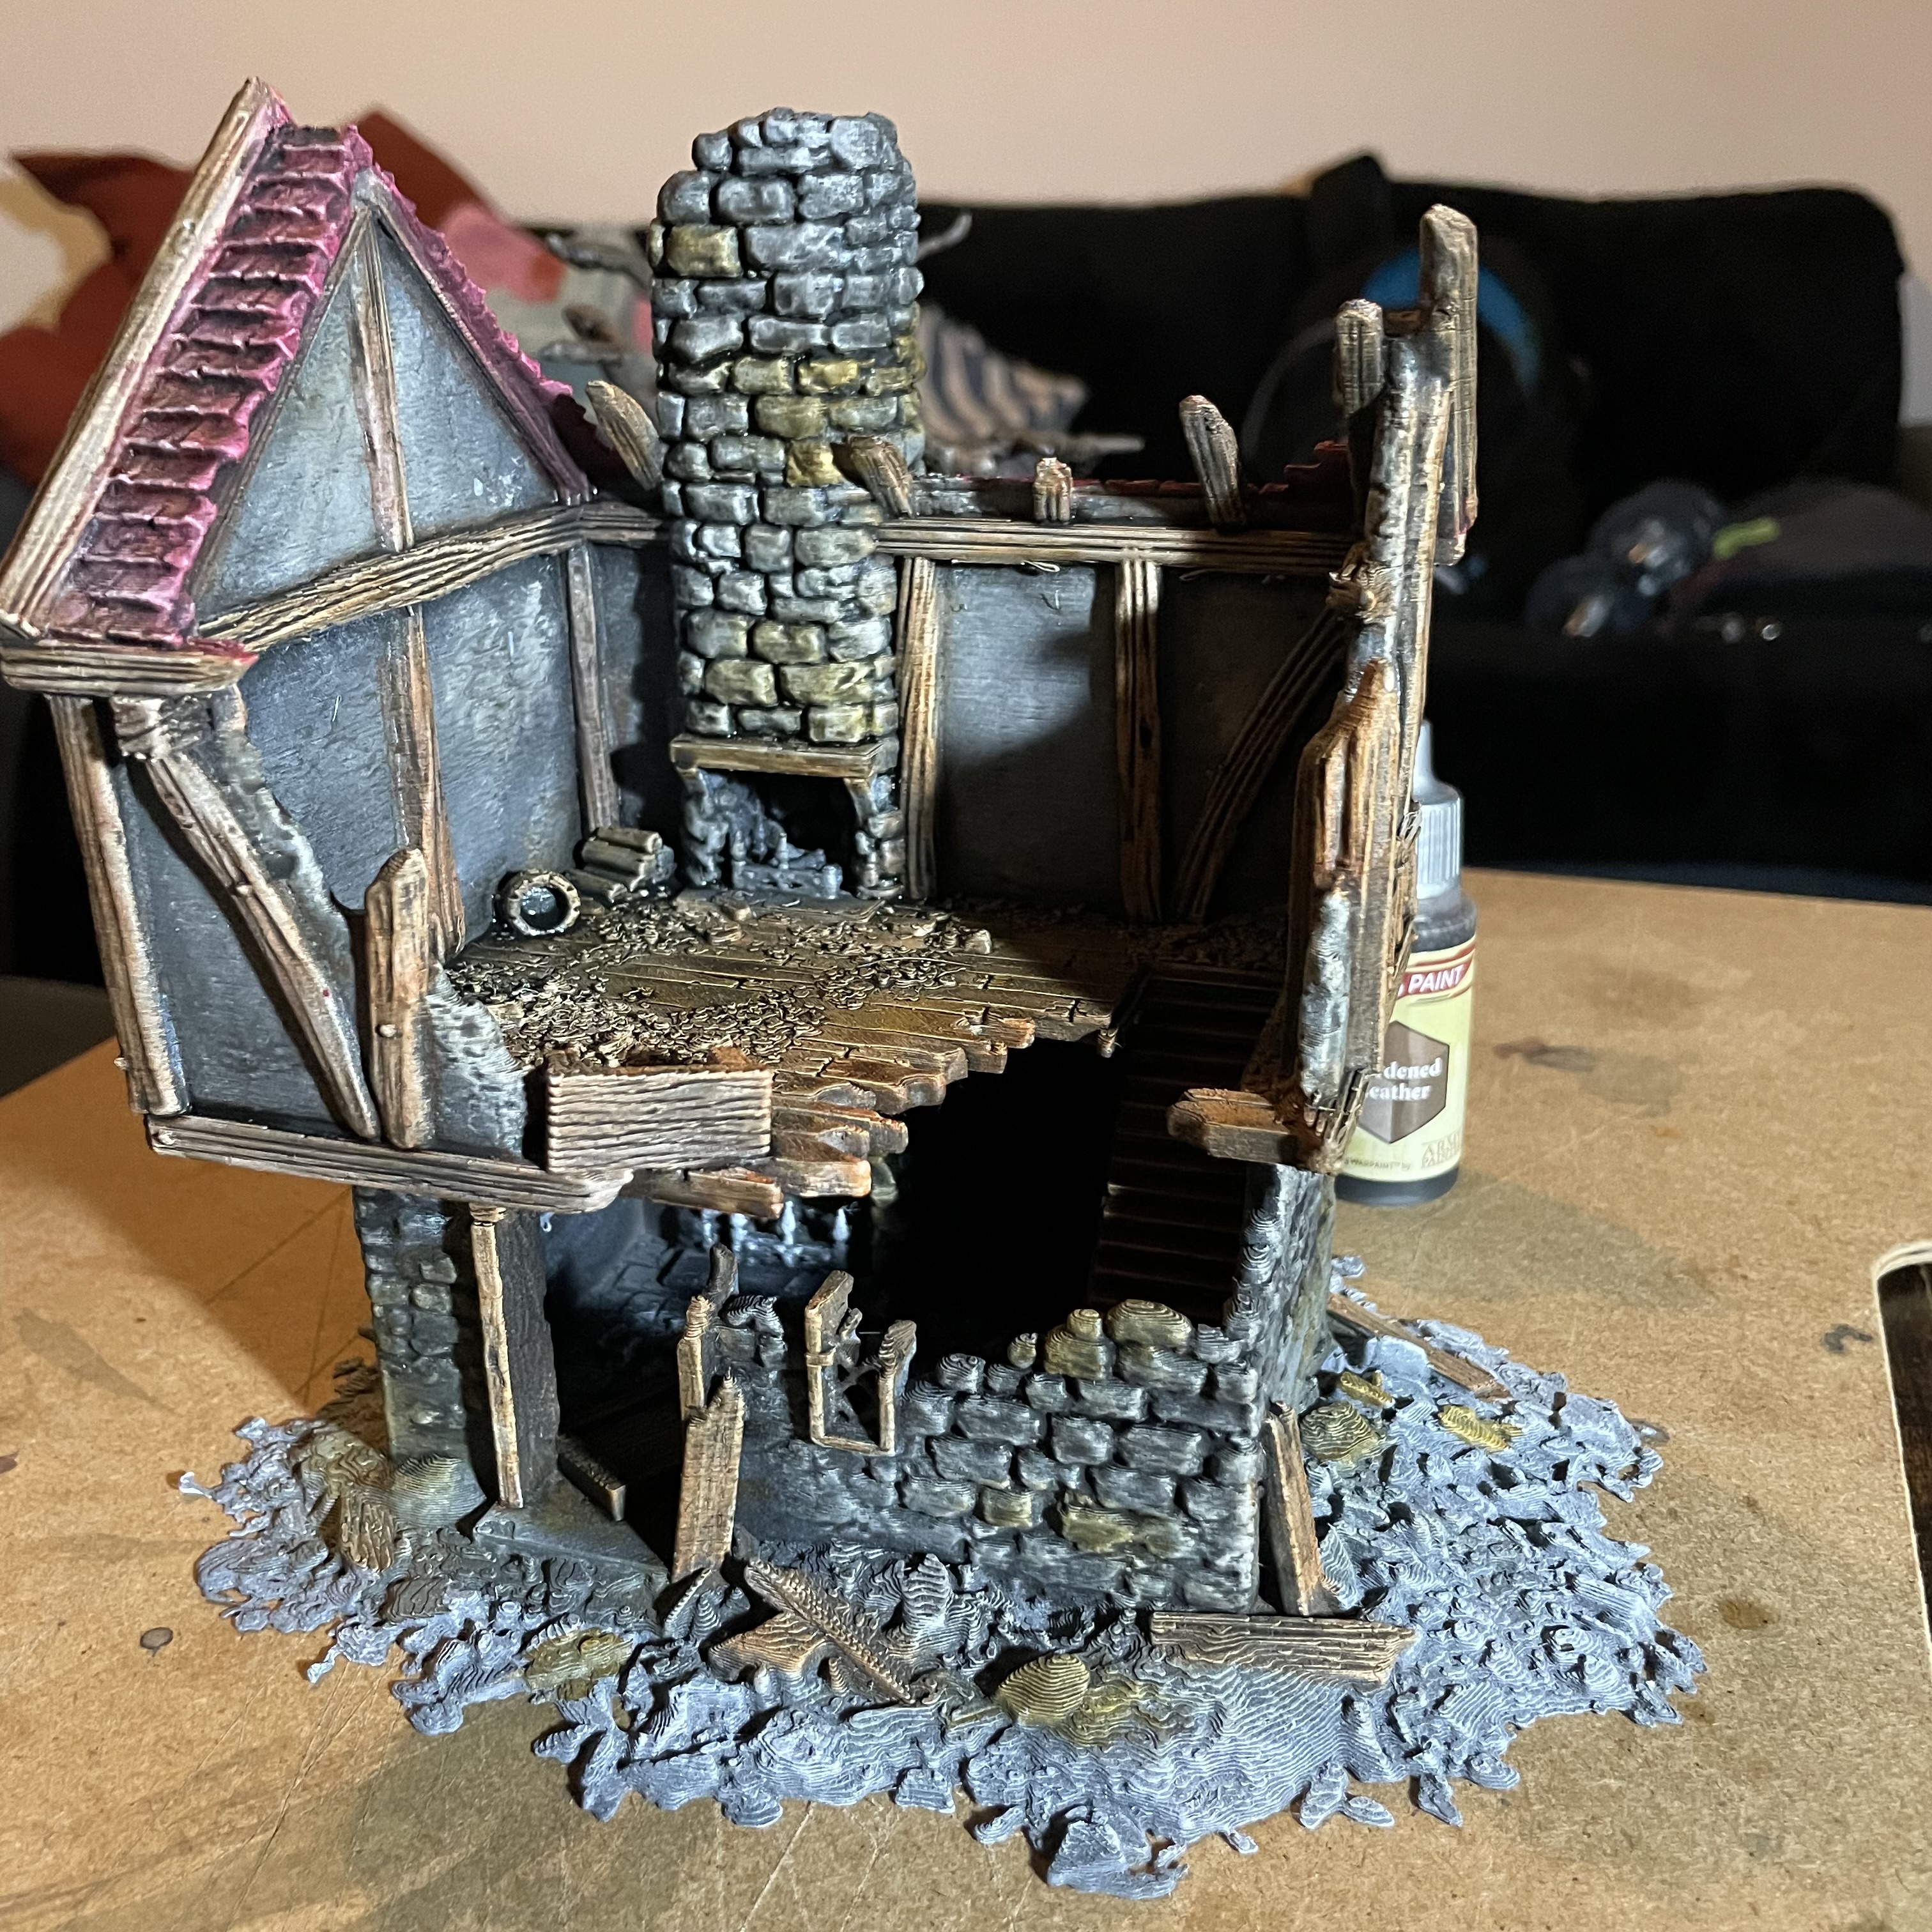
Got some paint to apply
 Undercoated black and drybrushed with some white. A weekend of speed paint and glue and flock should change this. Might make a couple more of the trees at some point as well. Individually the trees look pretty basic but with a group of them together all in the same style they look ok. I’m sure with some colour everything will come together.
 WIP
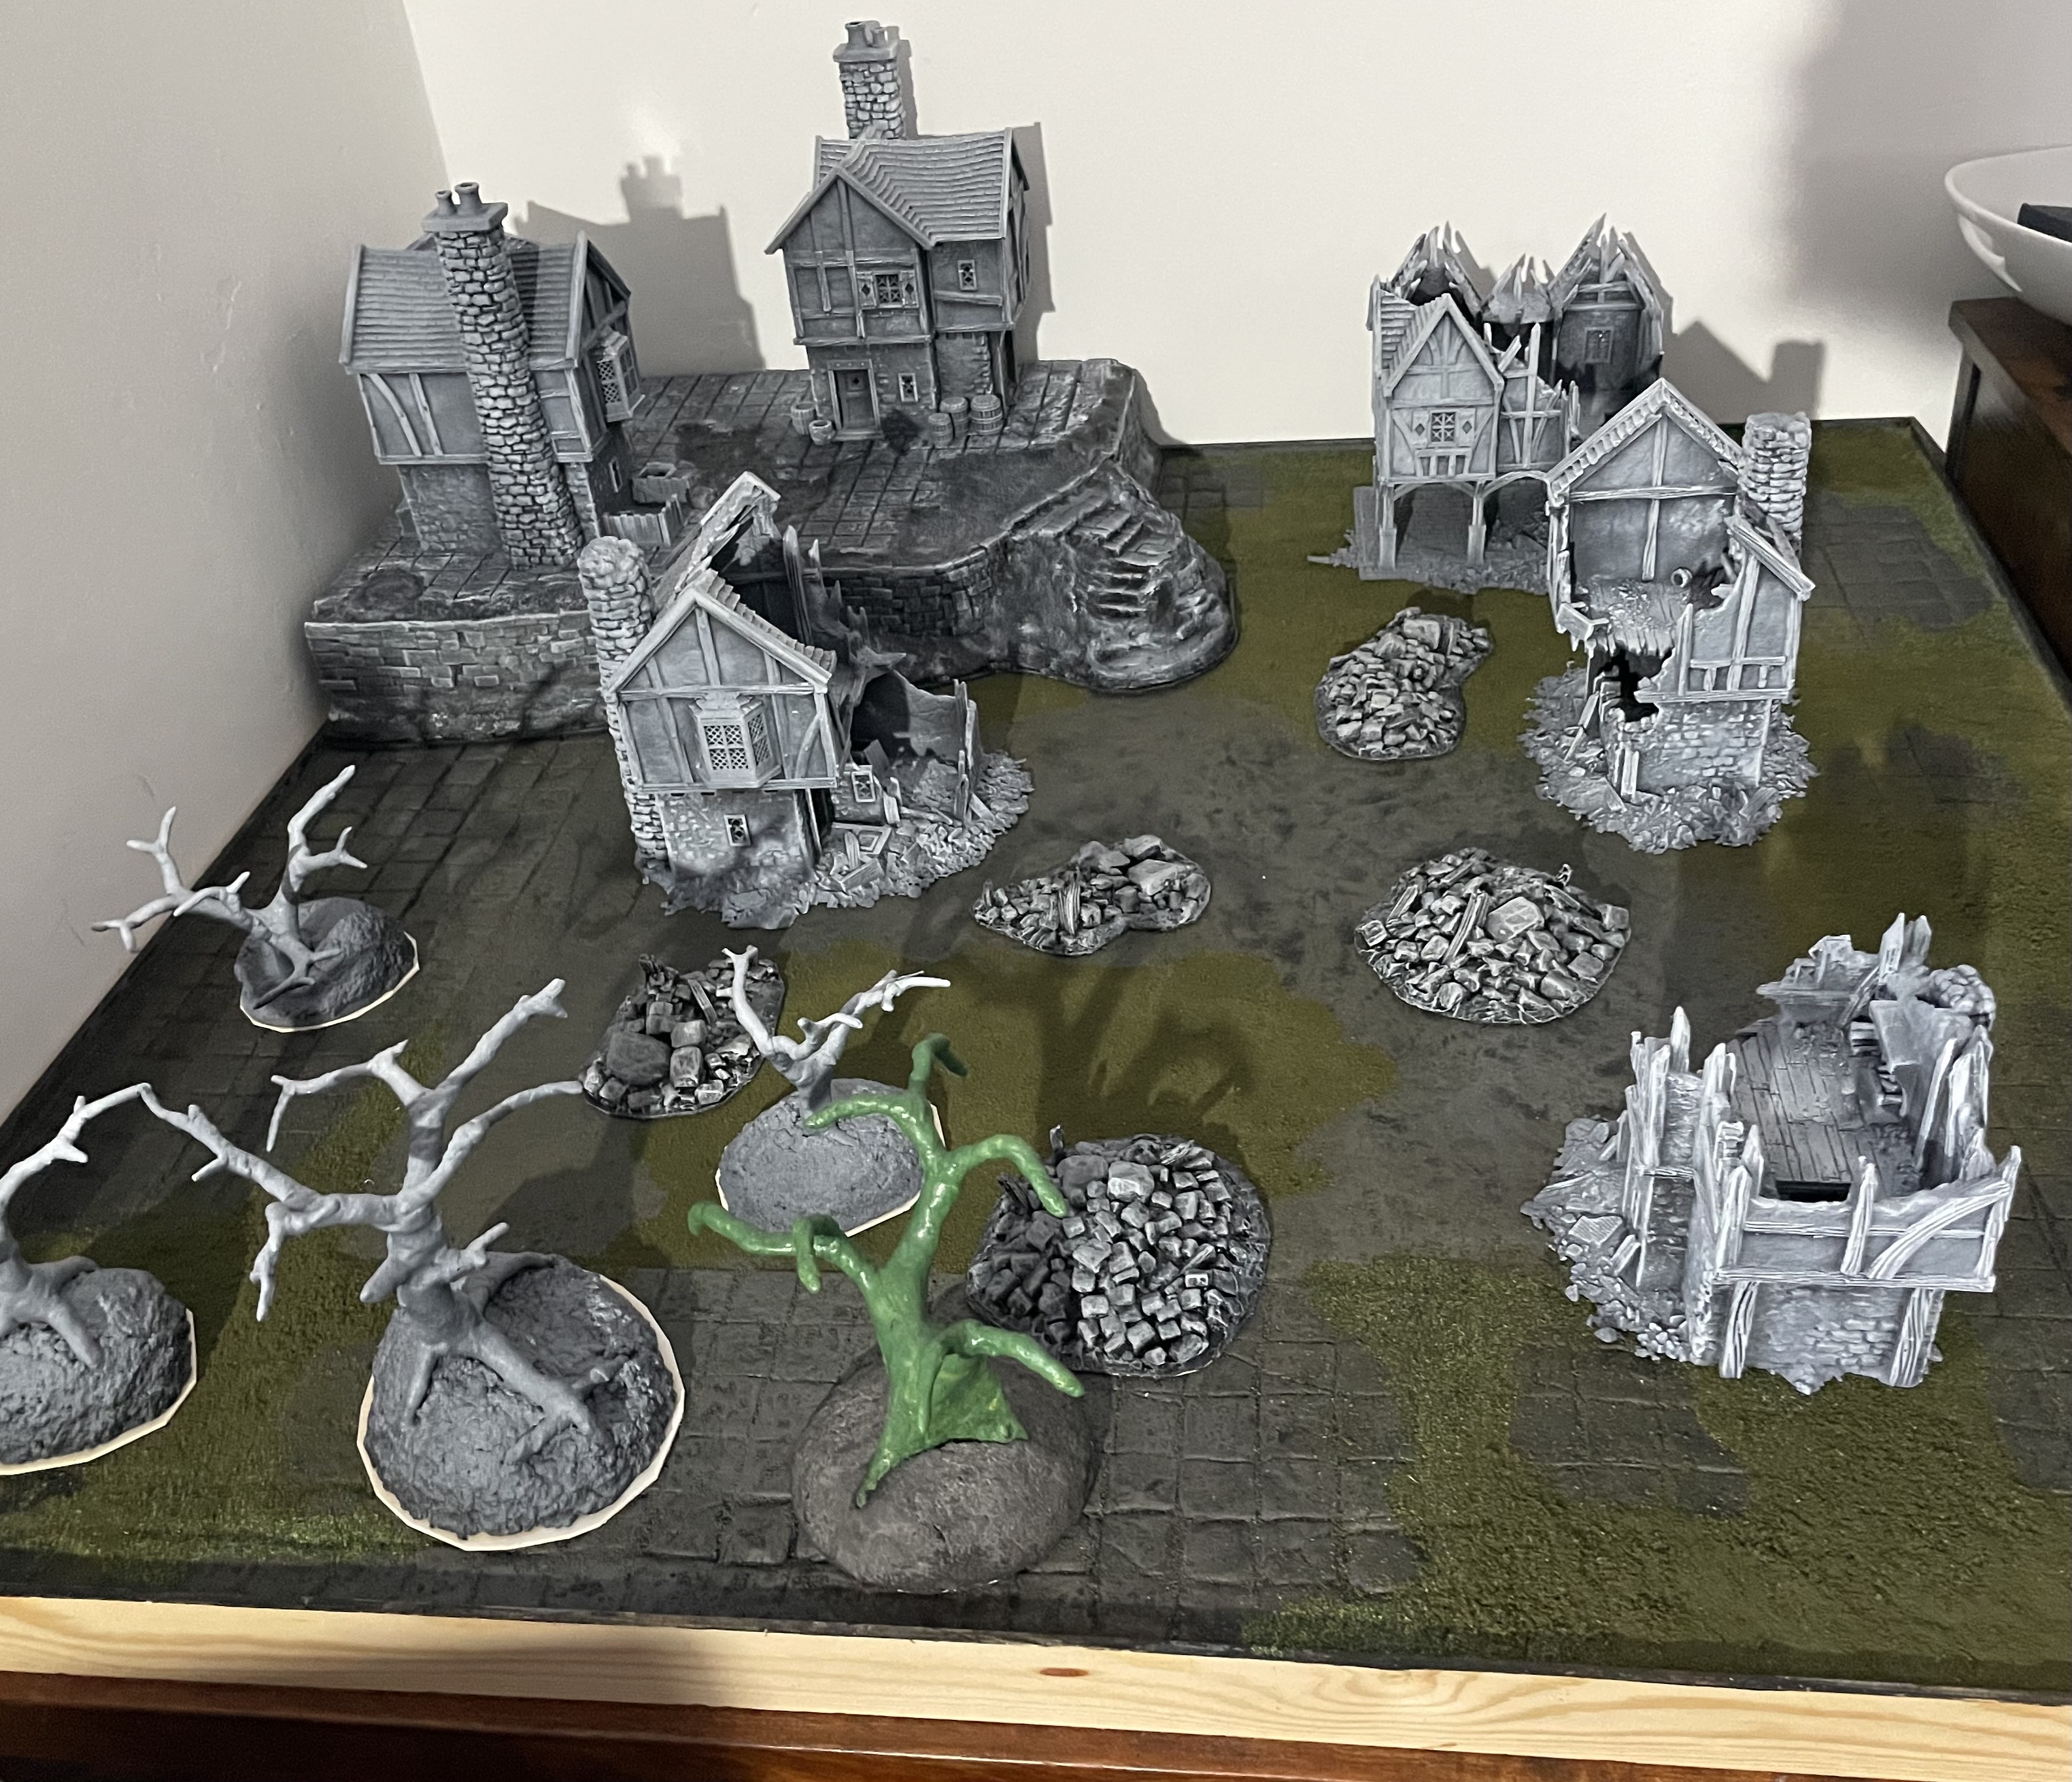
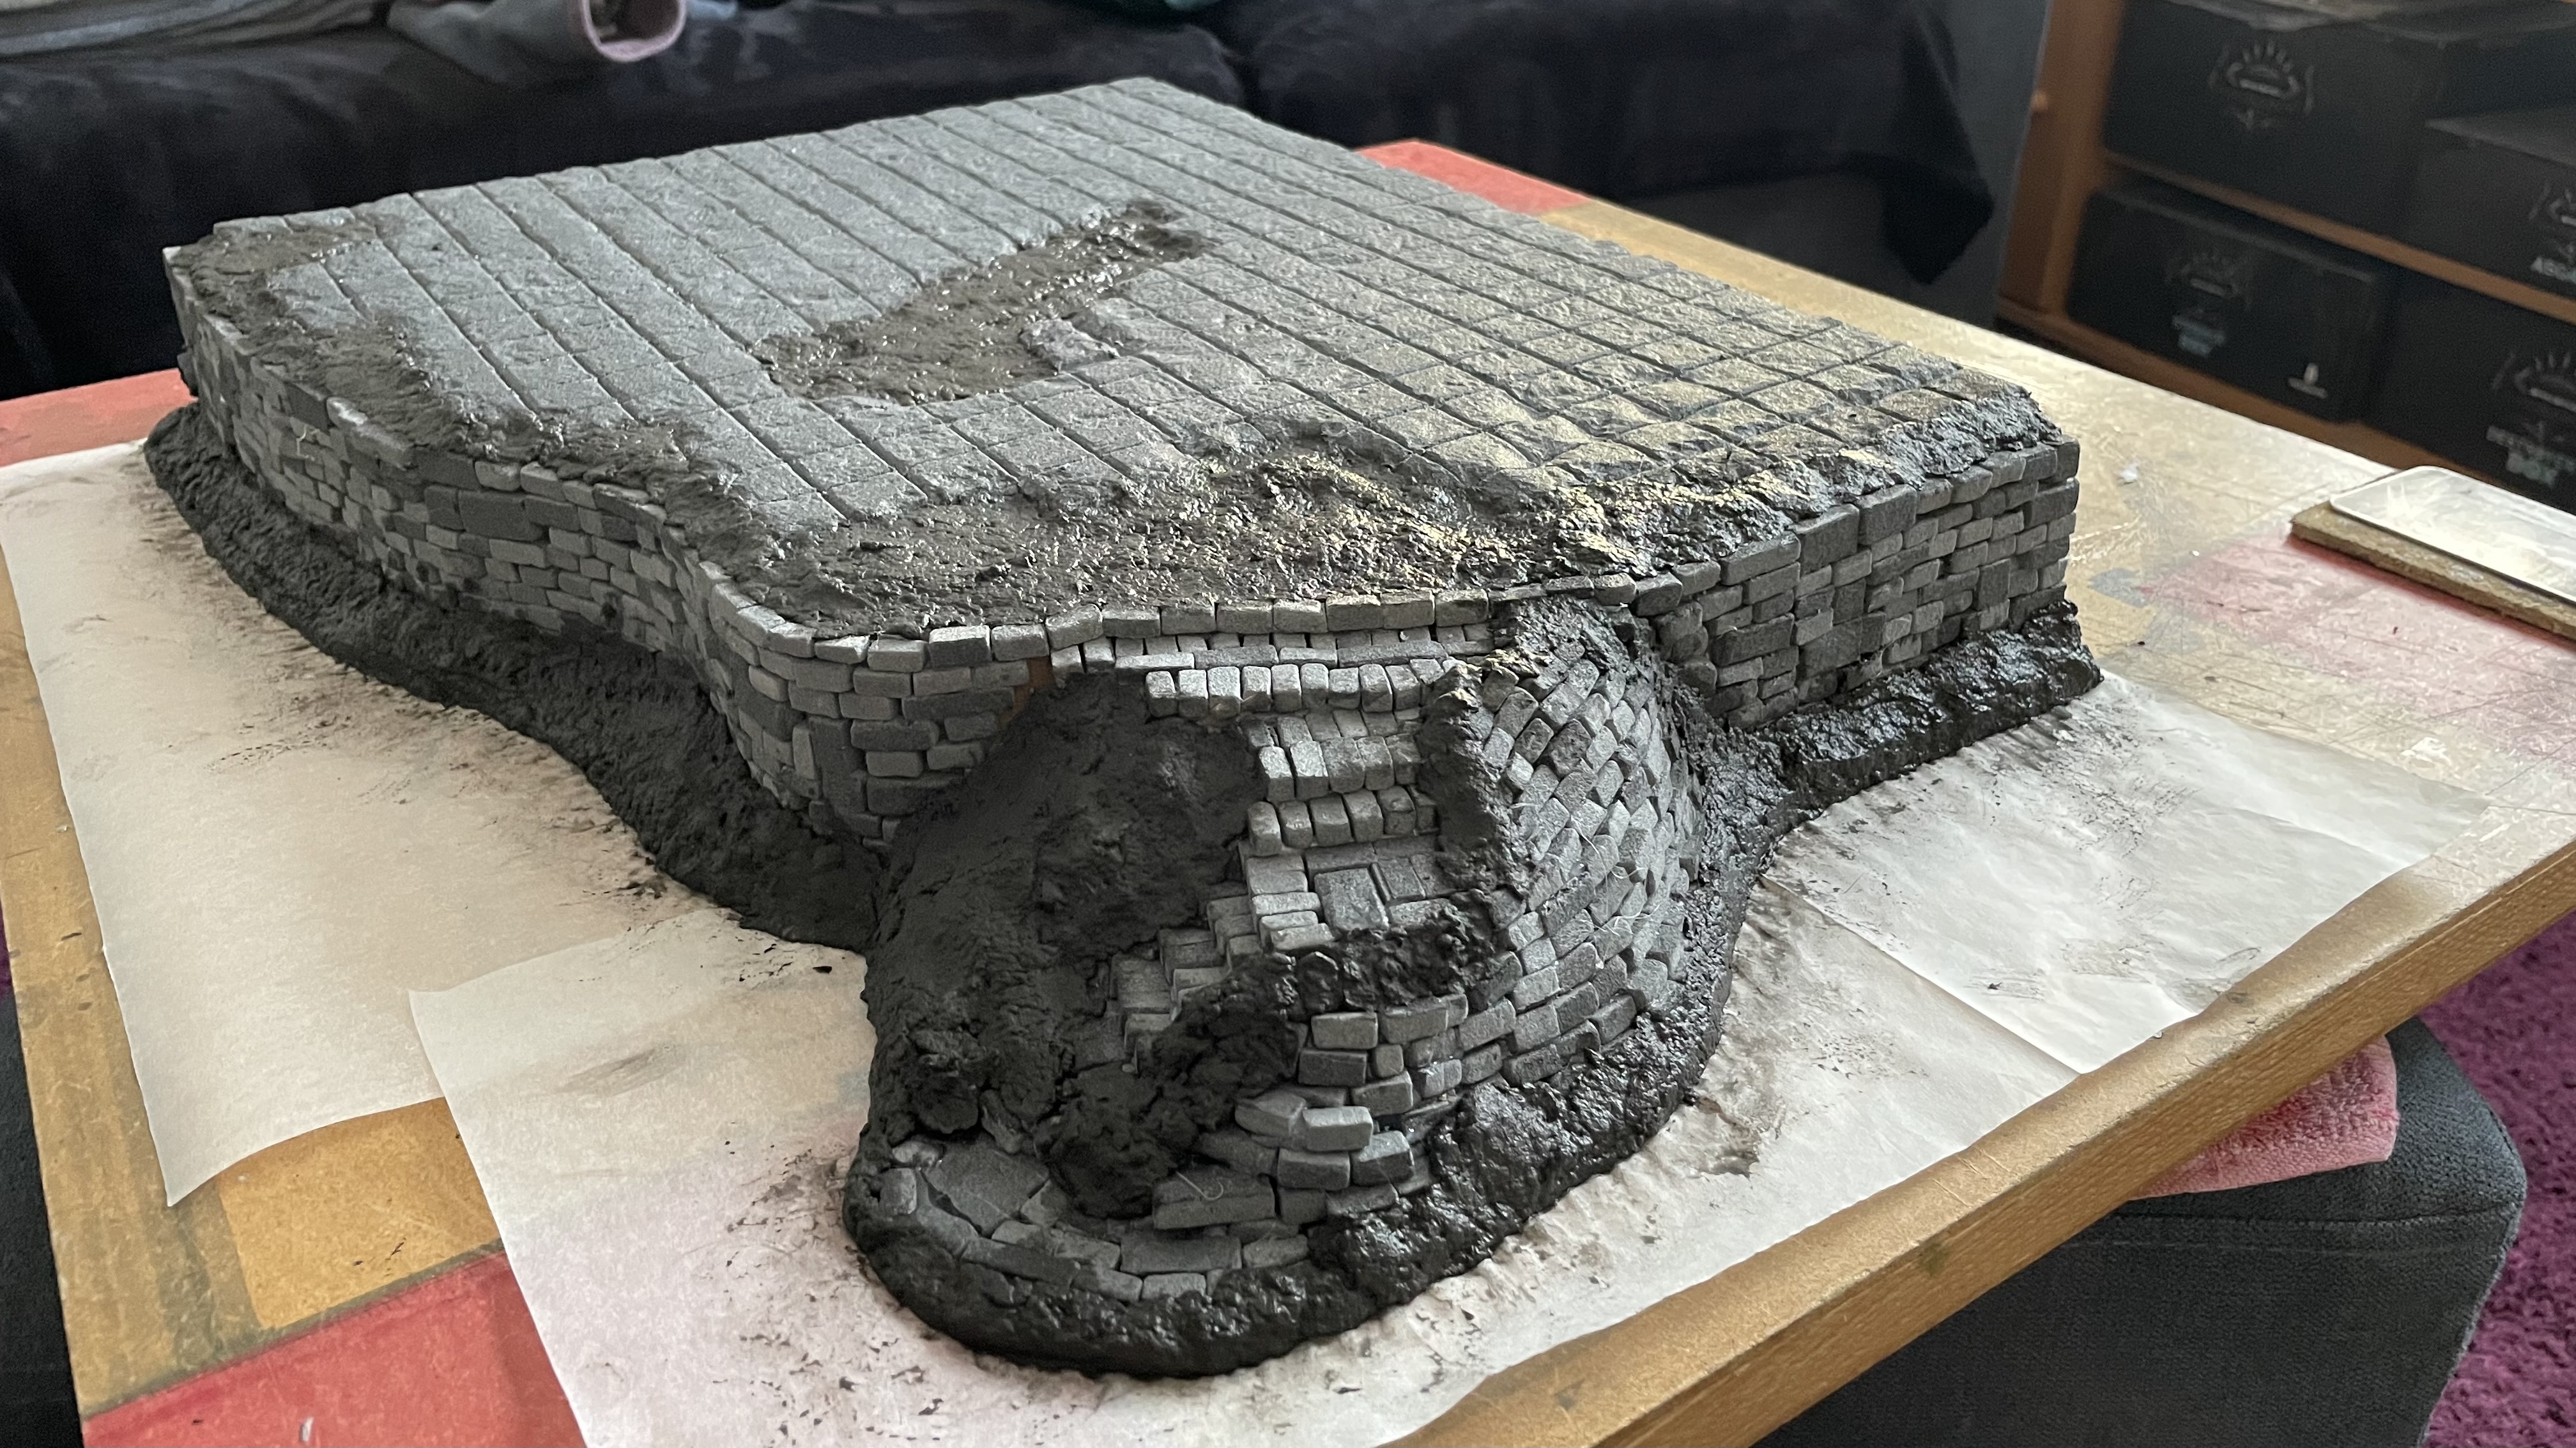
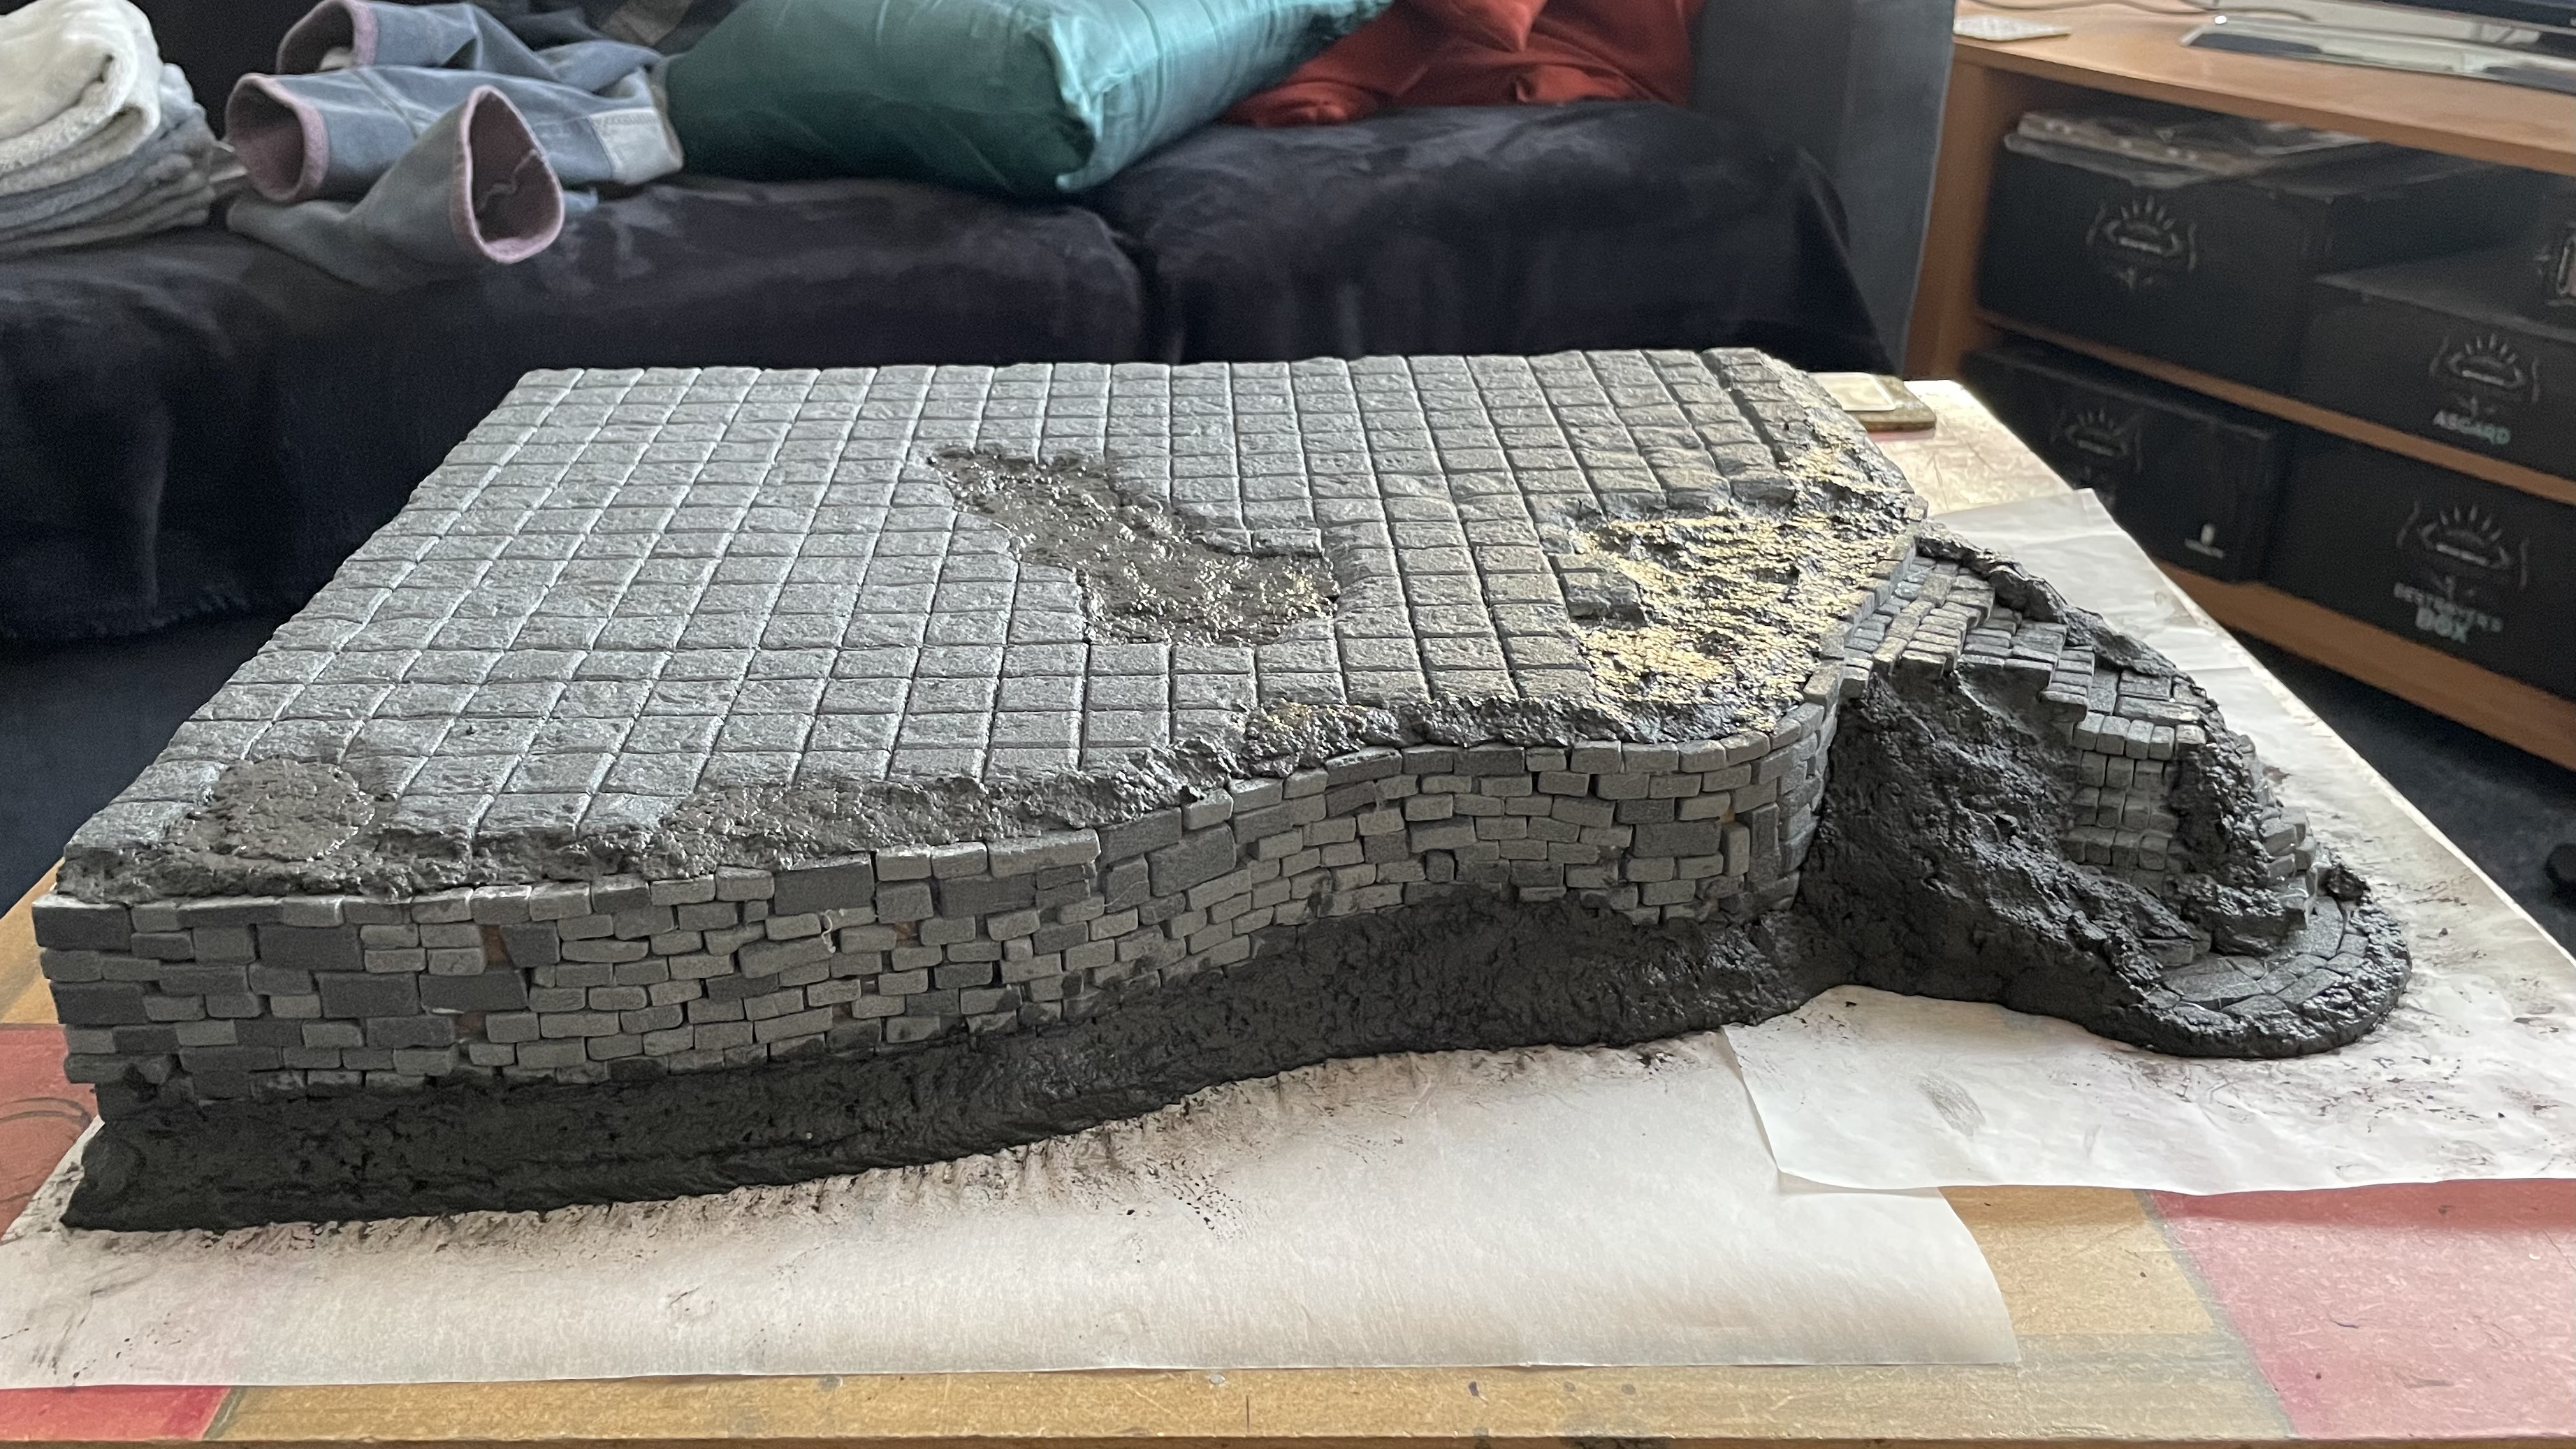
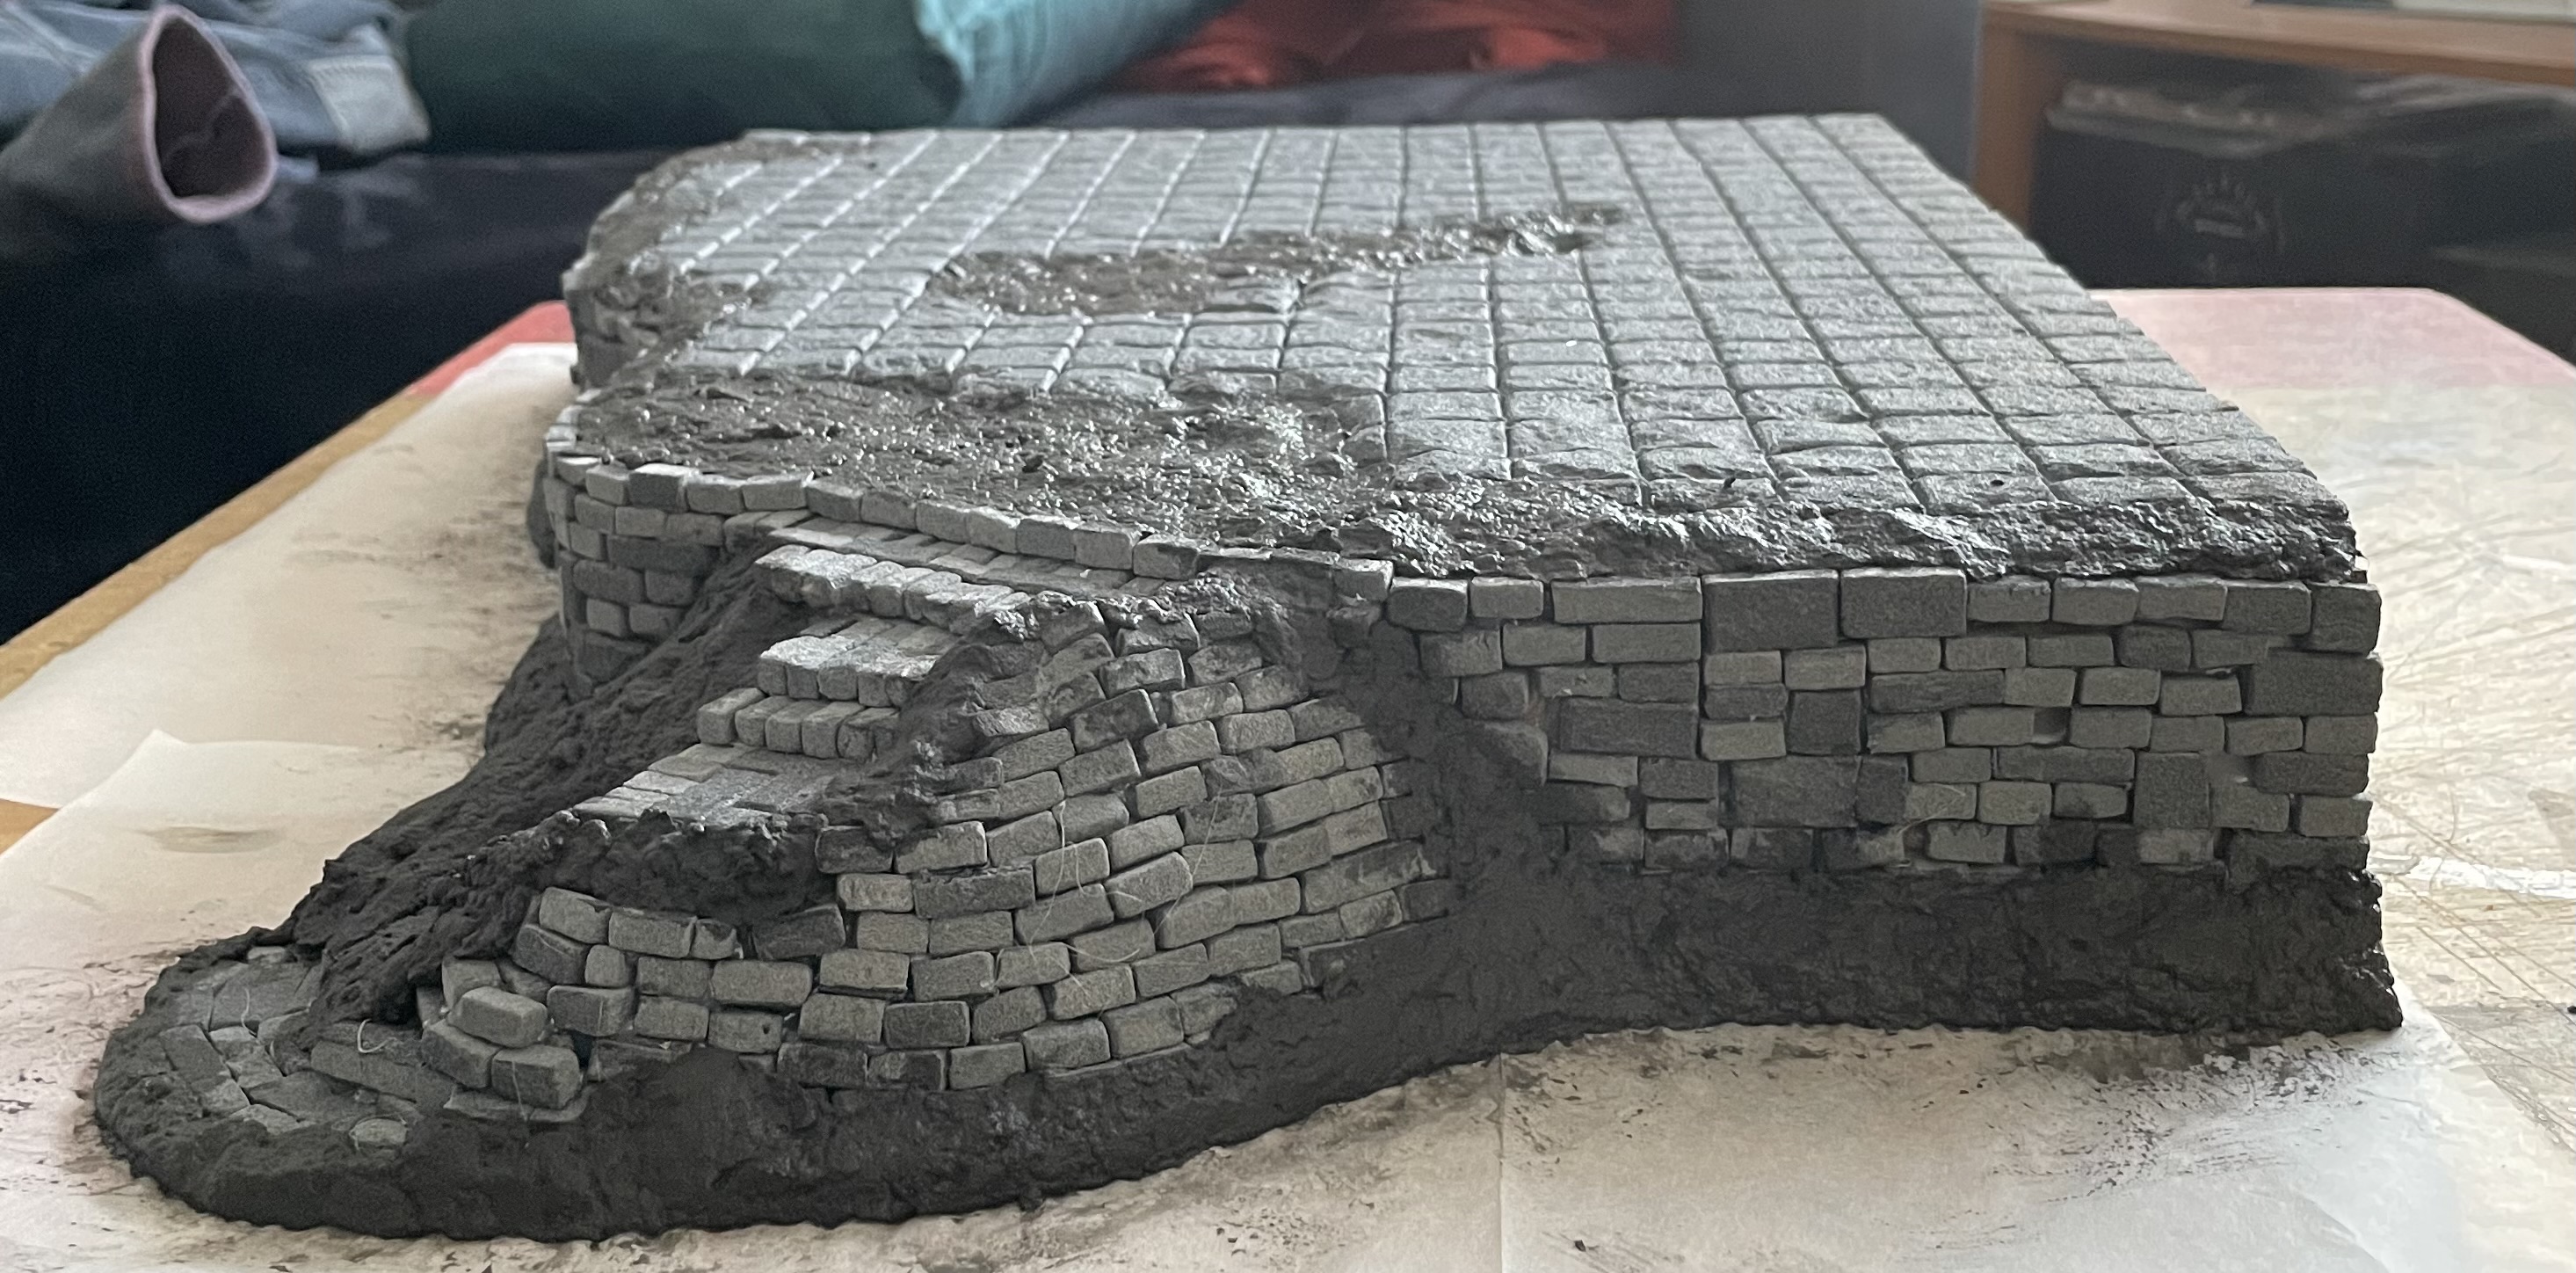
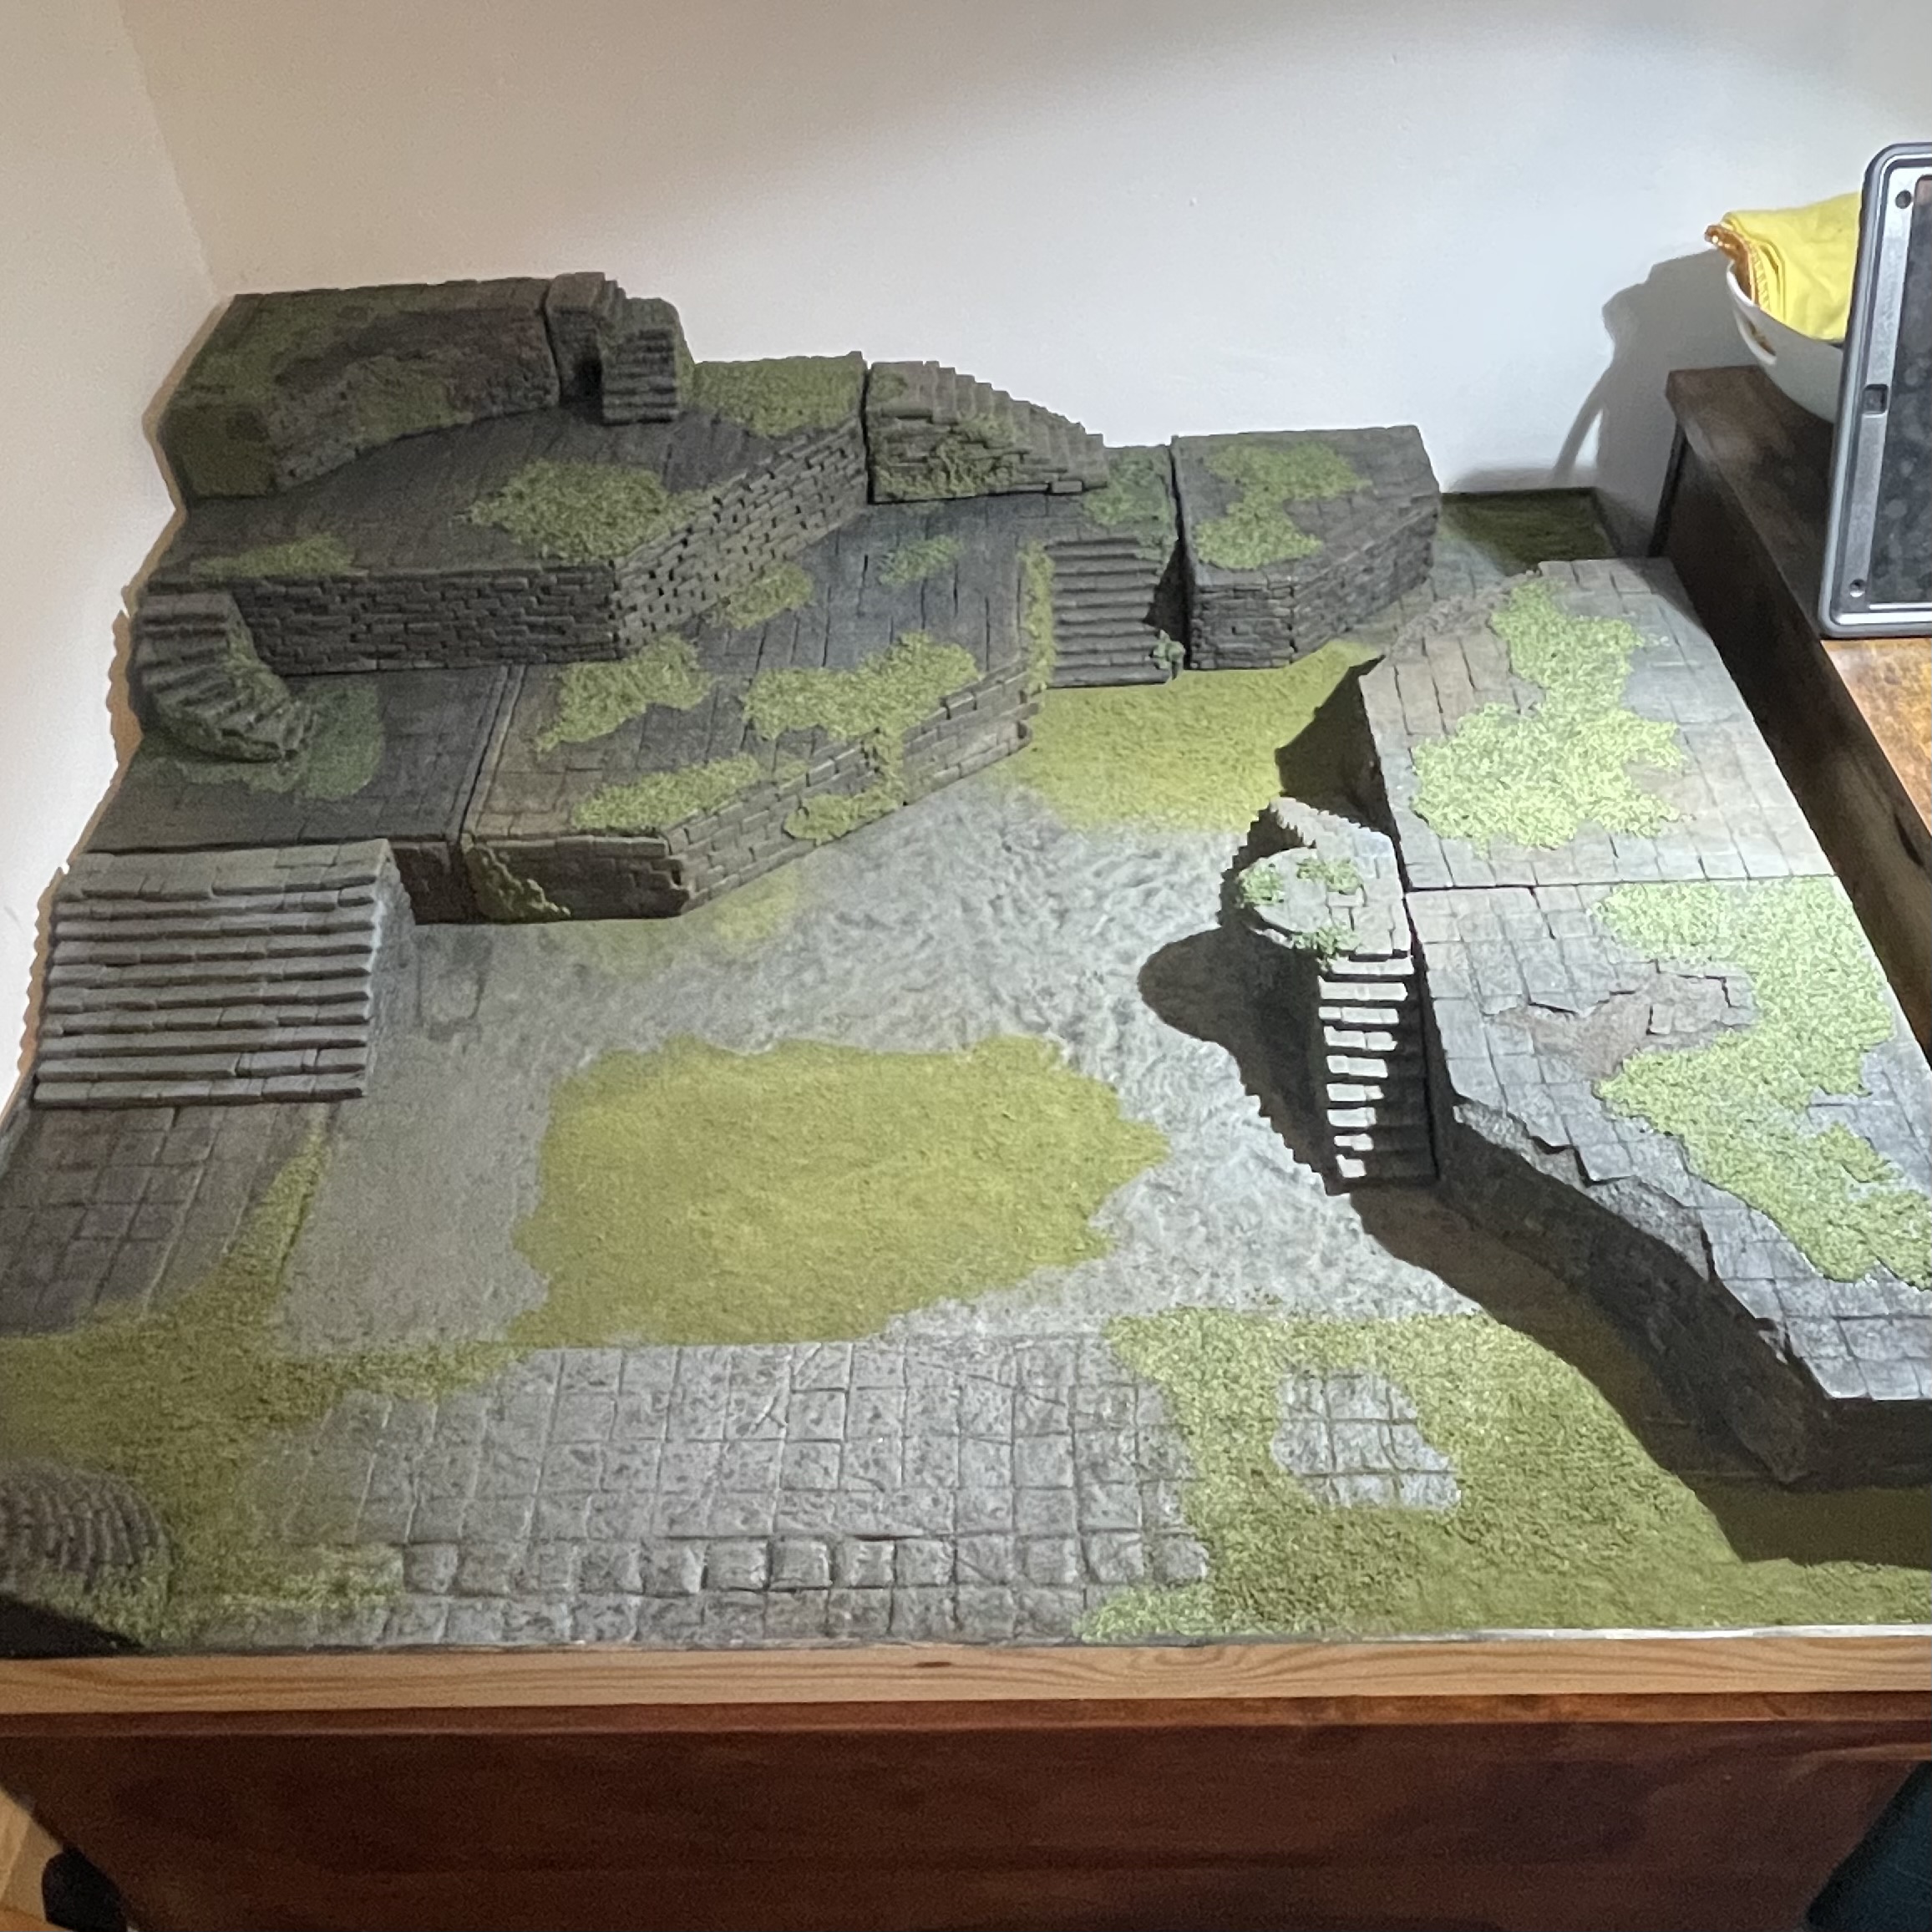 This is the basic board set up. A 3’x3’ board with separate pieces that can be arranged in various layouts.
 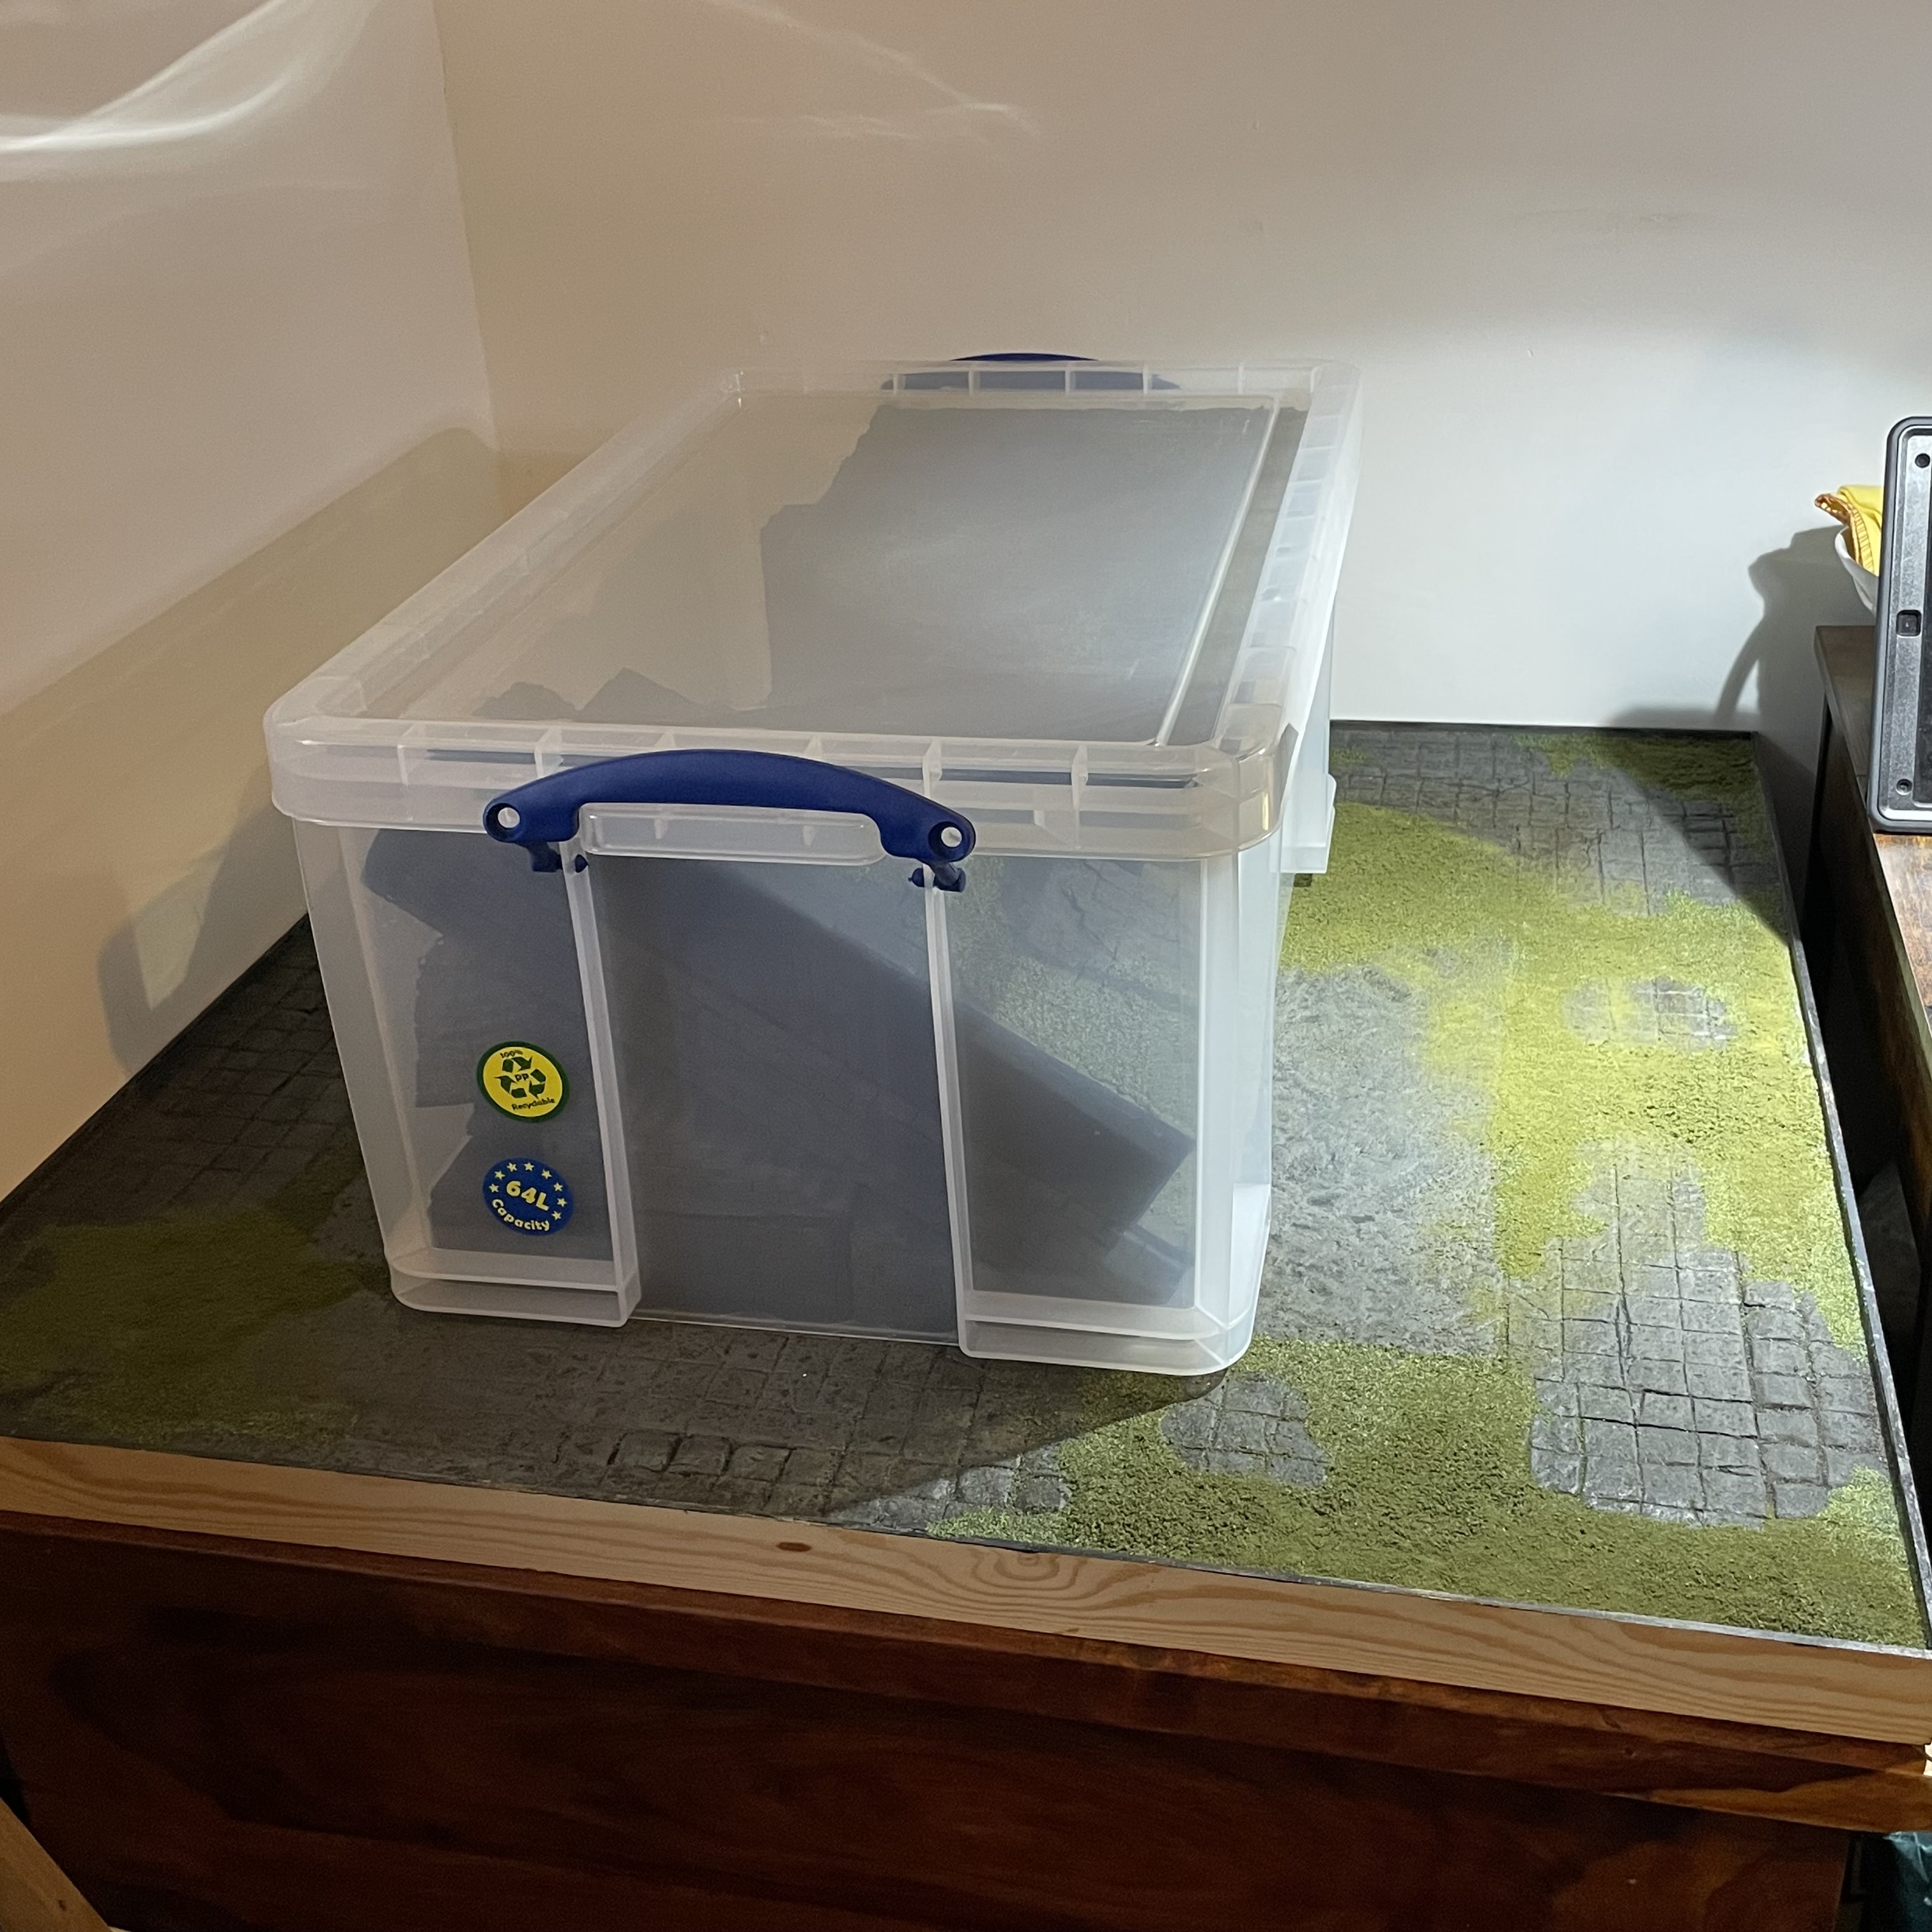 All the pieces fit into the box for transportation
 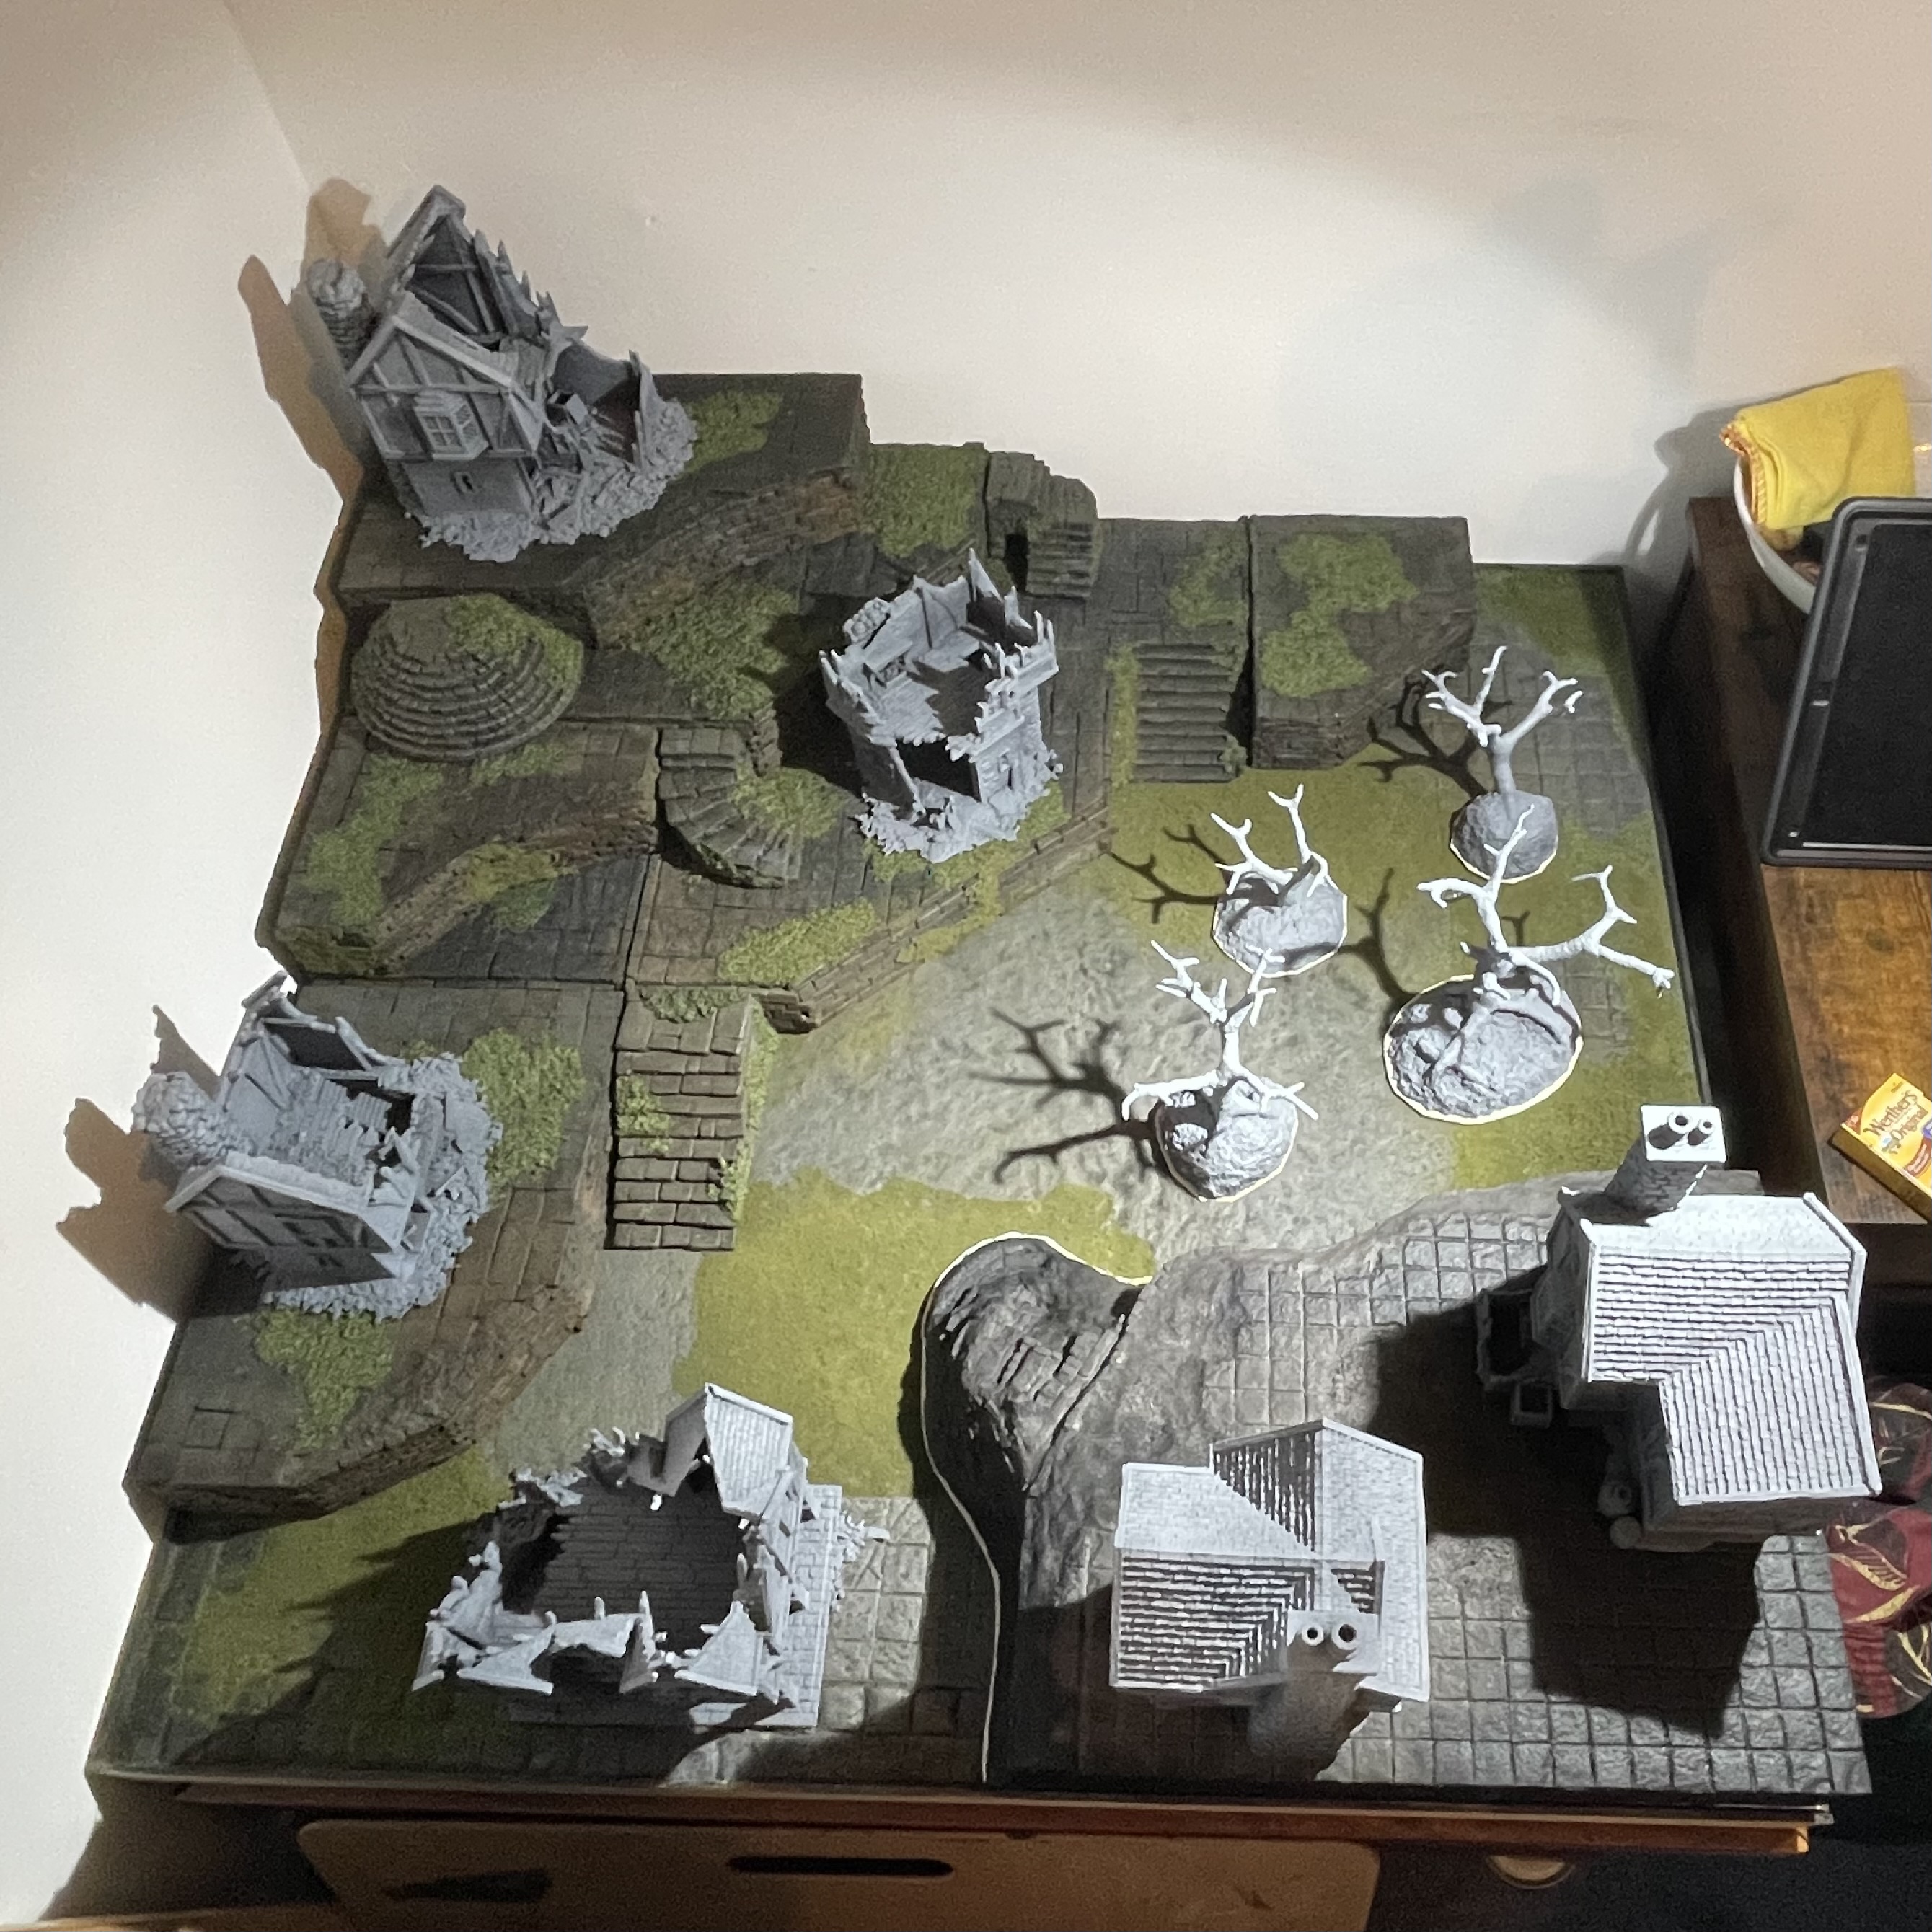 Requiring paint and some texturing are the 3D printed buildings and the trees I’ve made. As well as the new piece of raised terrain. I’m not going to make anything else at the moment for the rest of this month I’ll be adding colour and getting the board ready for it’s first game in February.
 Secret Santa. Who got what!!
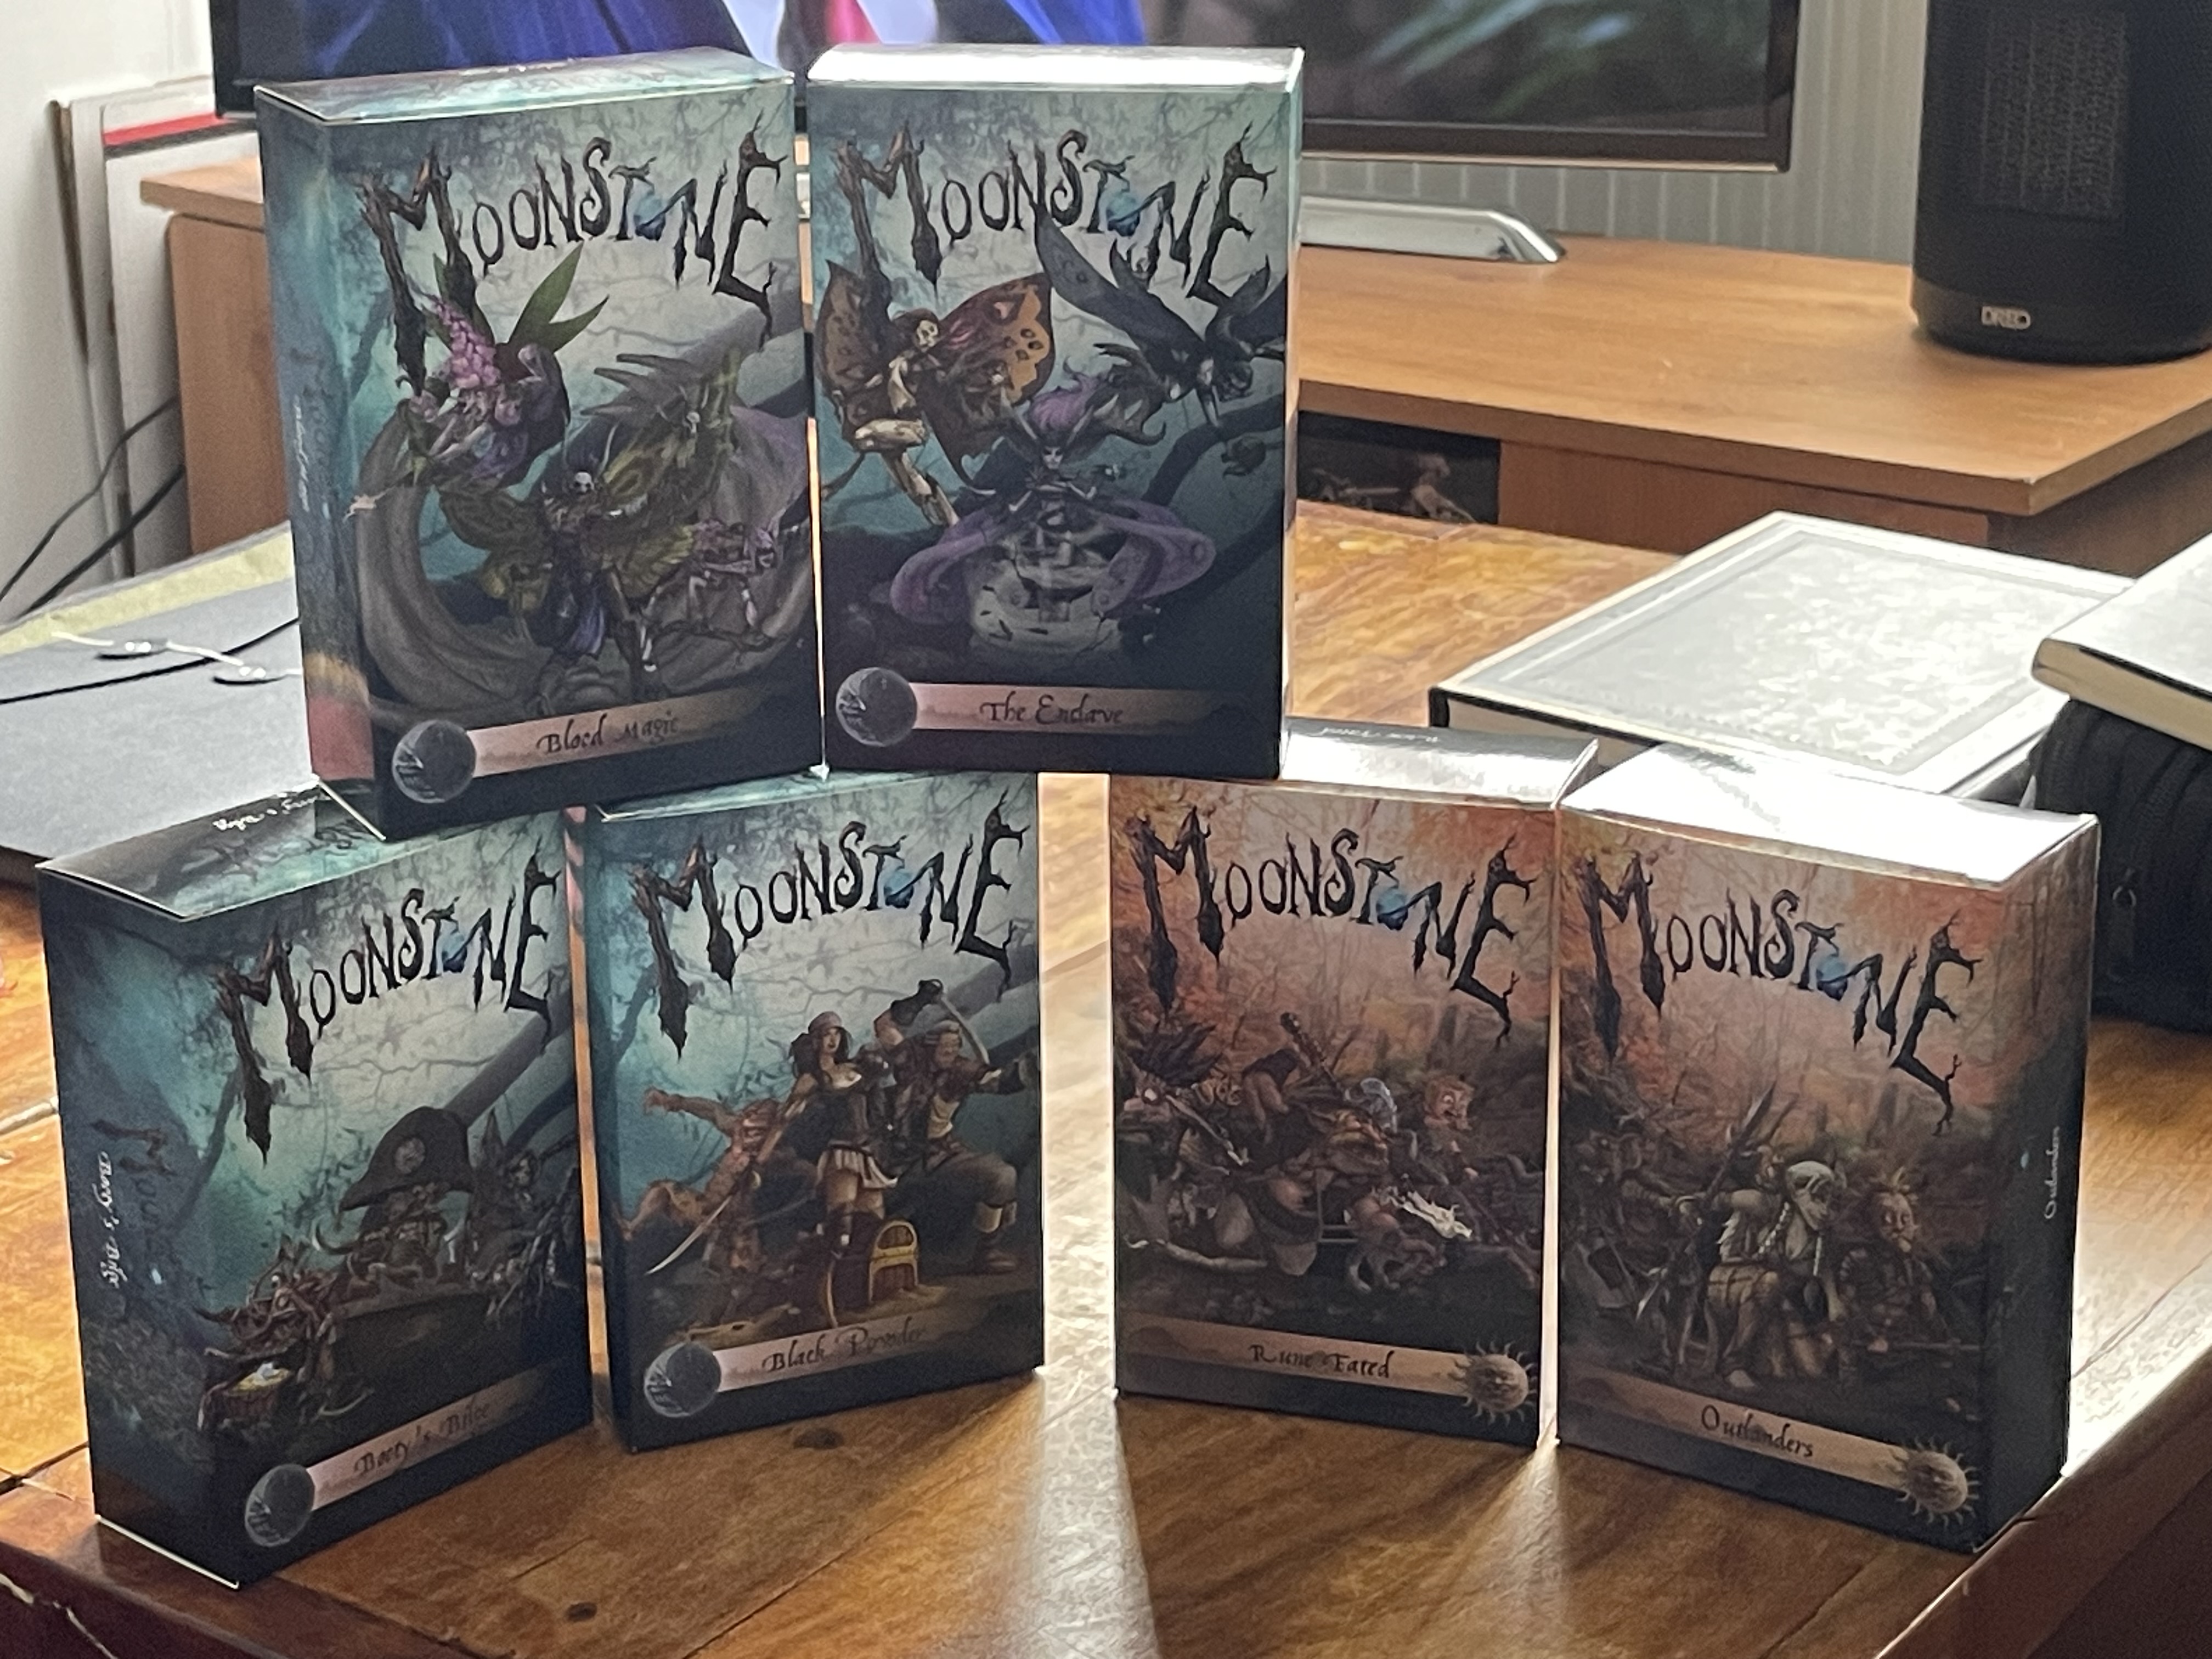 This one’s for Hutch, just answering his questions. So Secret Santa went well. After a festive day of pizza, cake and a game of Mork Borg we then decided in the only honest way possible, we rolled off for it. One dominion faction of Faries another Dominion faction with pirates Gobbos and Humans and a final of Commonwealth Nordic Gnomes. Winner of the roll off picked first. Each faction was wrapped in matching wrapping paper. No I didn’t know what was in what package do we all picked blind. I went first, I picked the Fairies second pick went to Tony and it’s a pirates life for Tony. That leaves the angry Nordic Gnomes for Simon. For the rest of this month I’m finishing the board after that I’ll be painting some toy soldiers or possibly asking someone to paint them for me. Honestly these miniatures are fantastic and I don’t think I can do them justice so I’ll see what I can do with them. From February after the Terrainfest is done and dusted we’re going to work on our own little tale of three gamers forces may develop with the addition of some other interesting characters to add to our factions.
 Thoughts so far. I will add to this as I go.
As I’ve gone through this process I’ve learnt a few things and changed ways I’ve gone through different processes in making the board. Would I do things differently? I think there’s elements of the project that I would do differently there’s techniques and materials I’ve not used before and after this will continue to use.
- hot glue gun, awesome saves so much time and if like me when you’re working on a project you change plans as you go and create in a on the run fashion then waiting for glue to dry can throw off your flow.
- XPS foam, fantastic material you can cut it, texture it, paint it and using other materials imprint surface texture on it. Whether using it to clad other shapes of as a building material in Its own right it’s a good material, I’ll be getting more of it for future projects.
- 5 mm Foamcard love this stuff. Always use it in my builds to form the structures. It’s lightweight and strong.
- Tile grout, I’ve started using it on this build. Used it to texture the XPS and make a poor man’s Sculptamould. A mix of PVA and water (50/50) mixed with toilet paper to make a papier-mâché then add to that the Tile grout. It’s great stuff although I suggest you use latex gloves because it gets mucky.
There may be other insights to come but so far that’s all I got
Time to get a bit messy
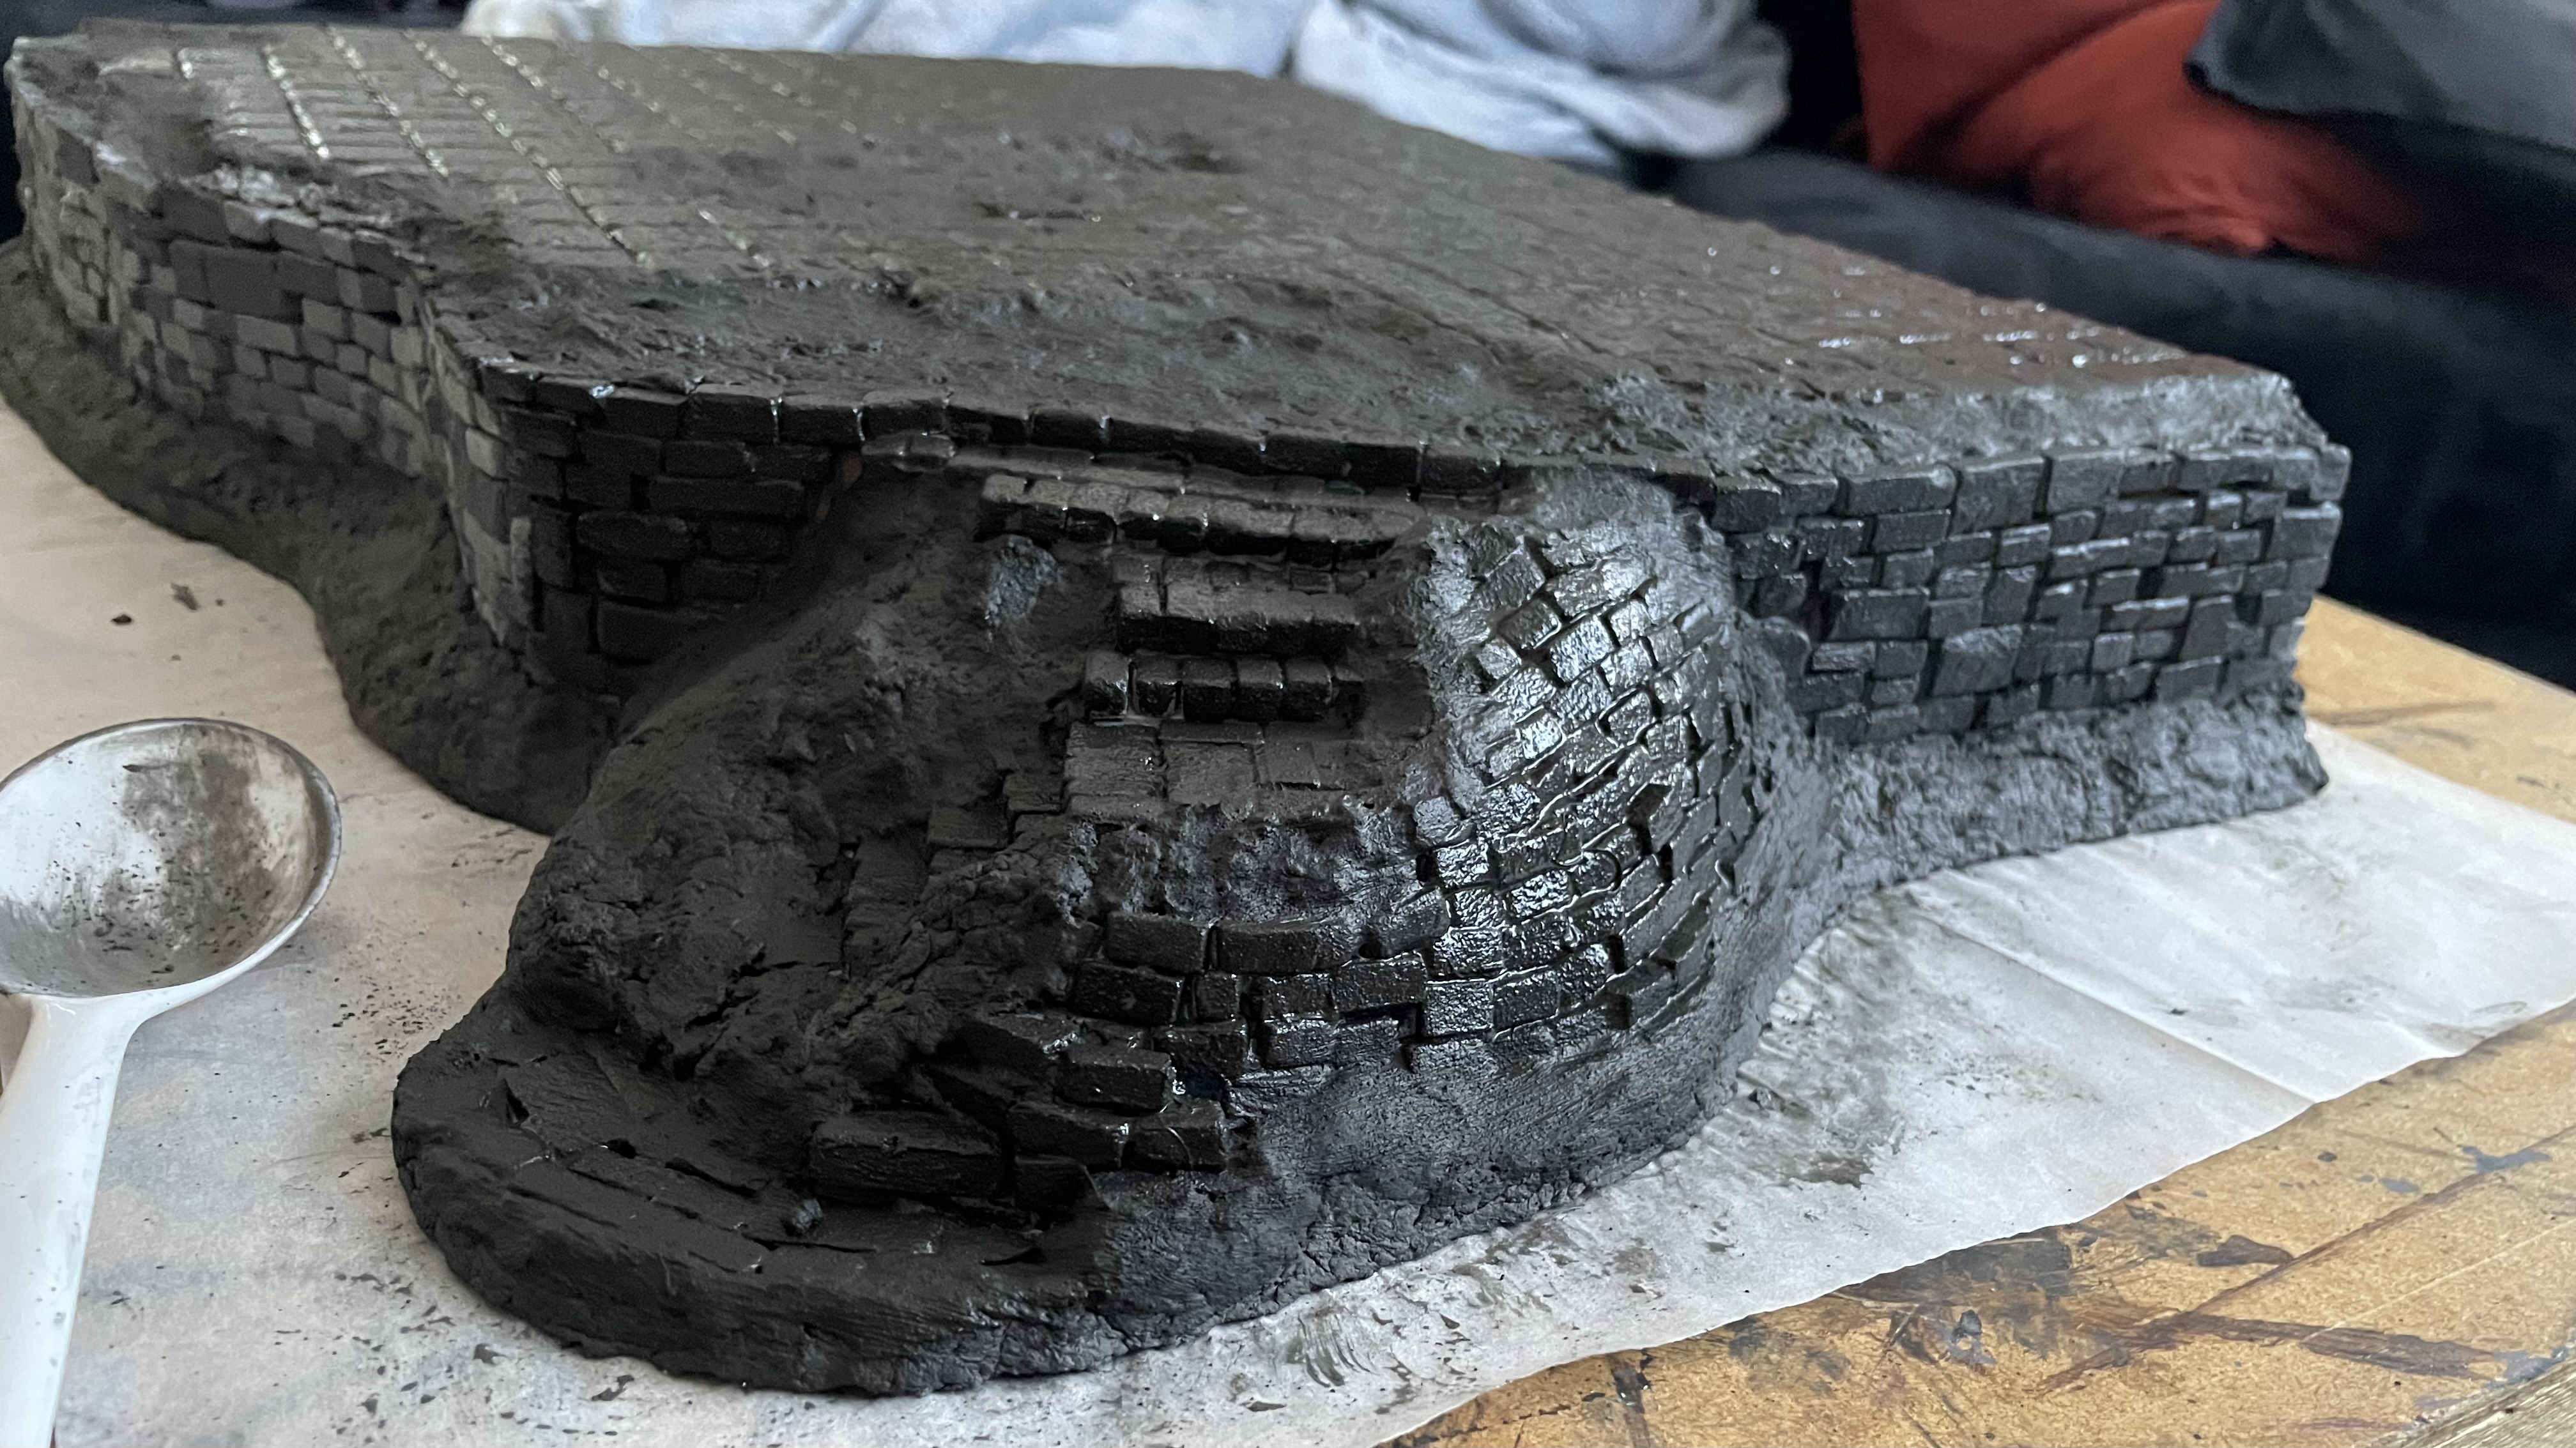
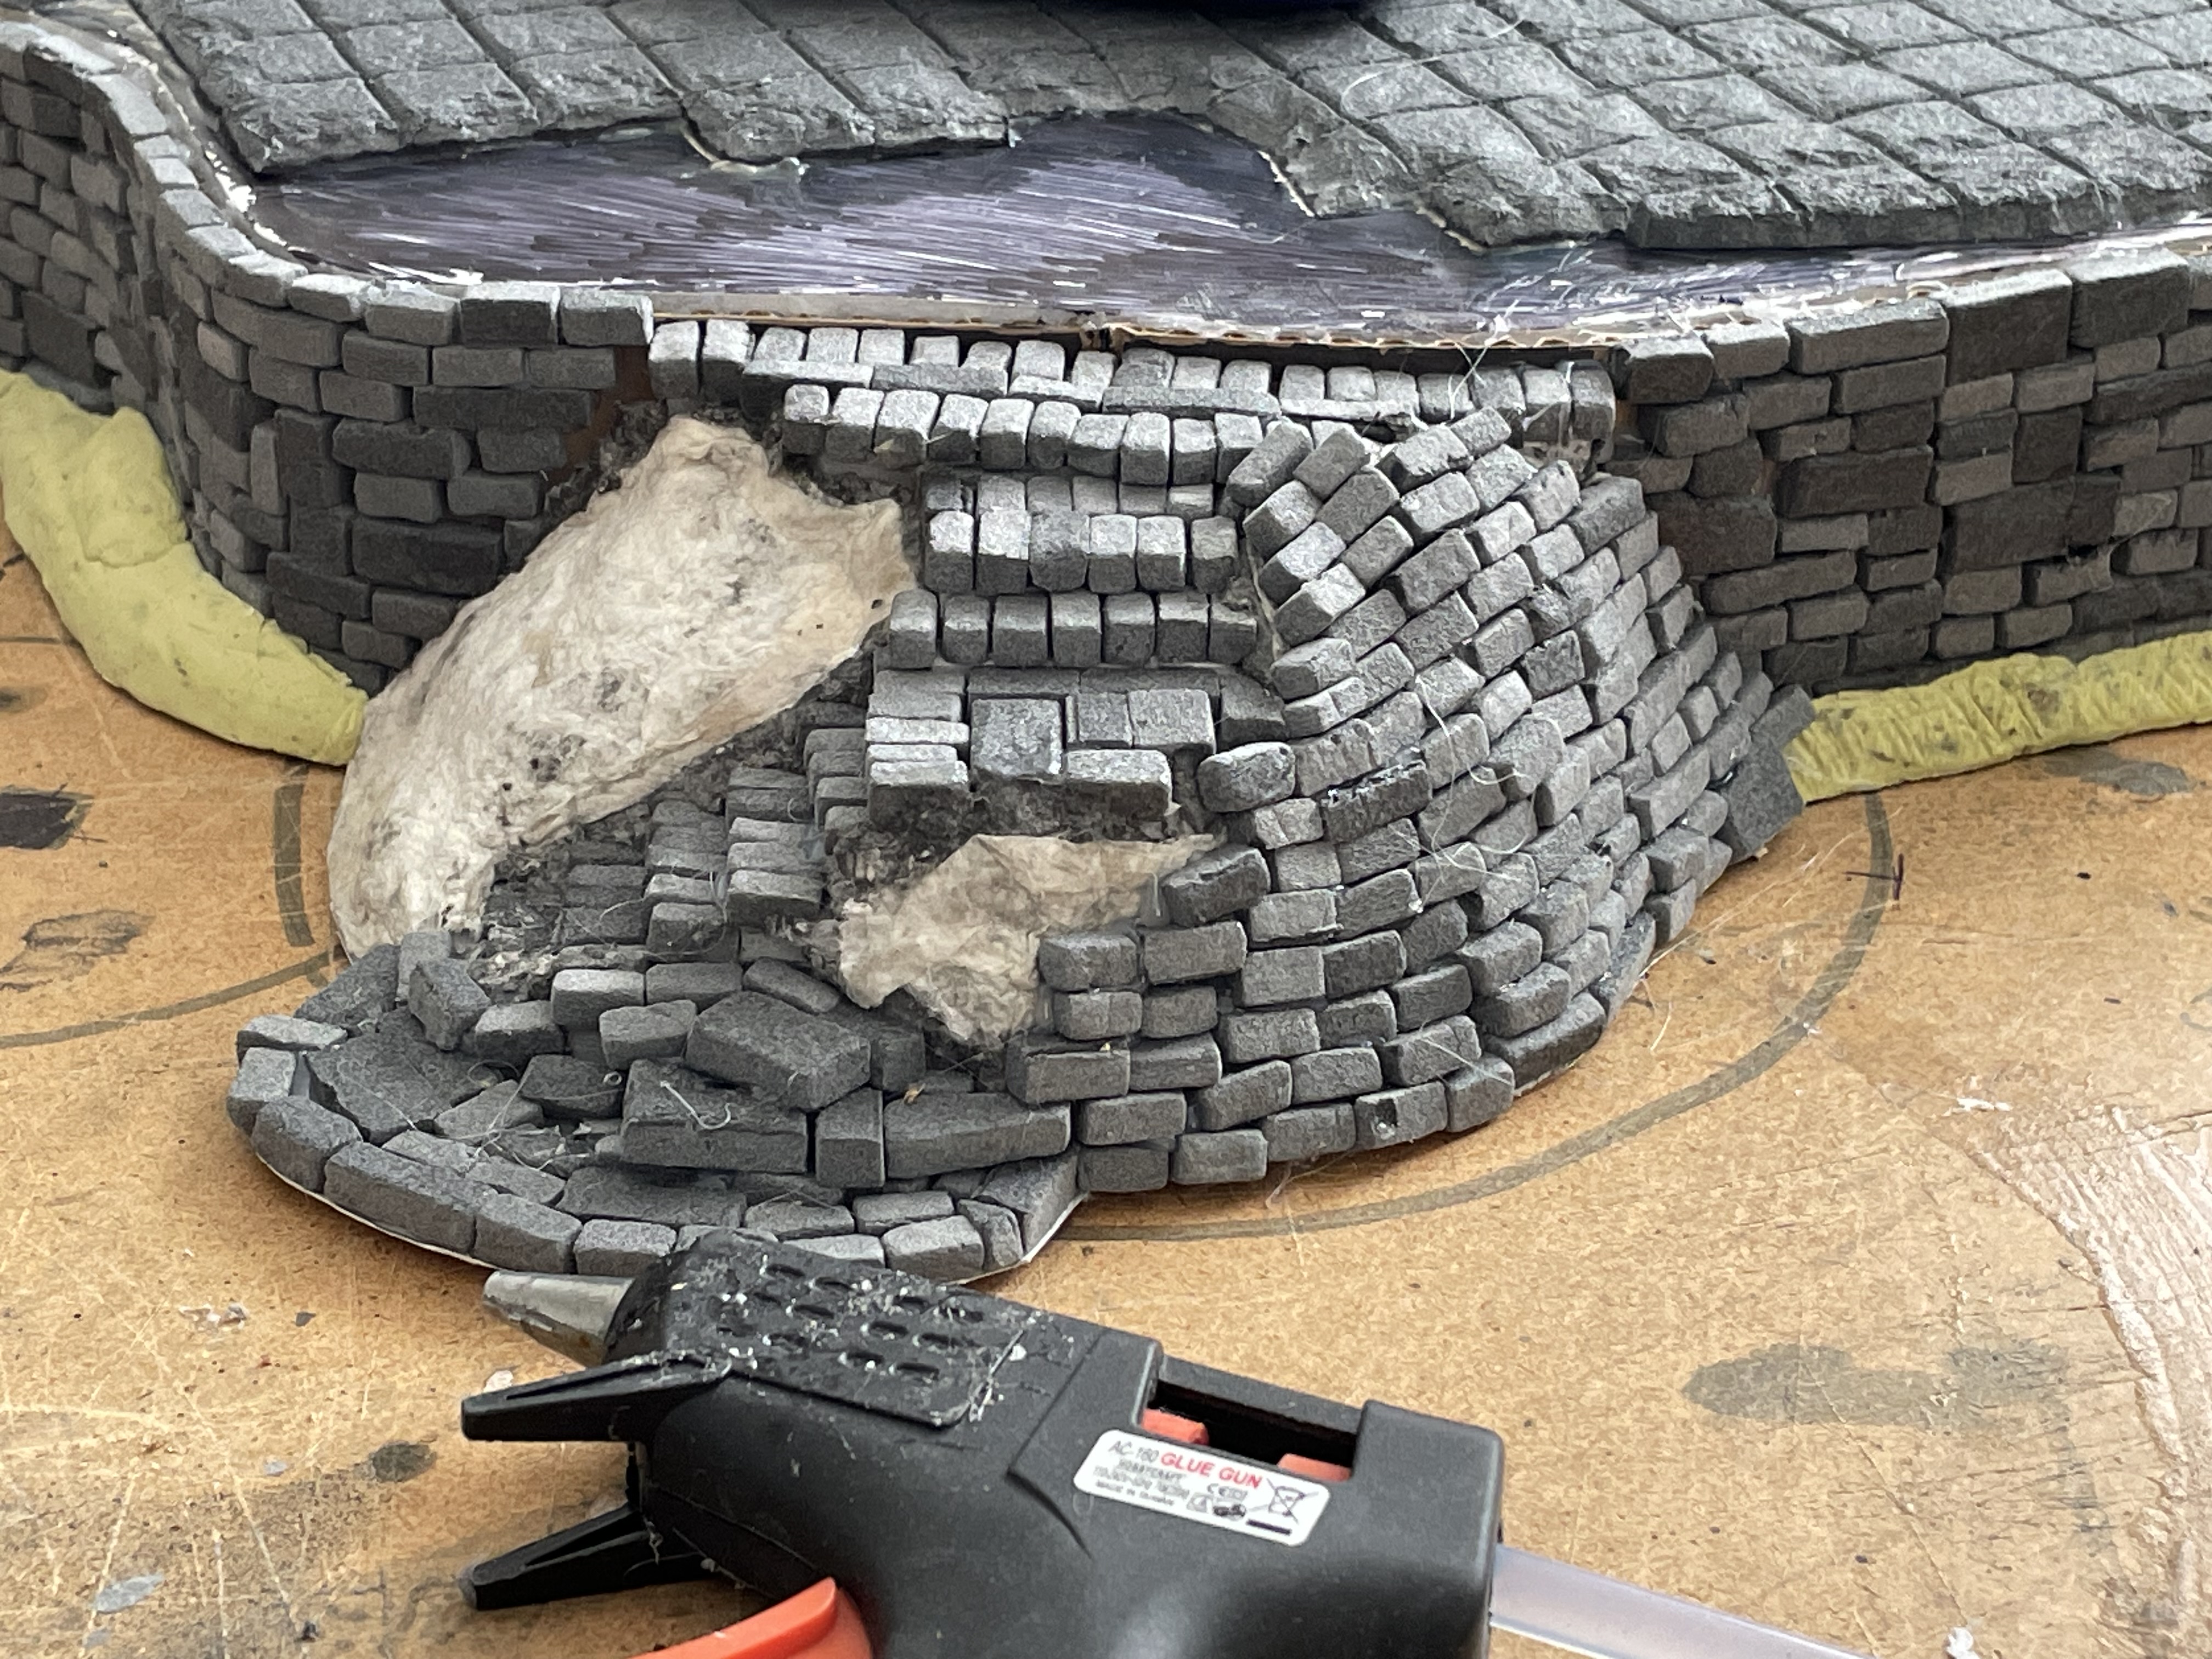 I decided to brick out the edge of mound against the side of the raised platform hot glue gun and teeny tiny bricks for the win.
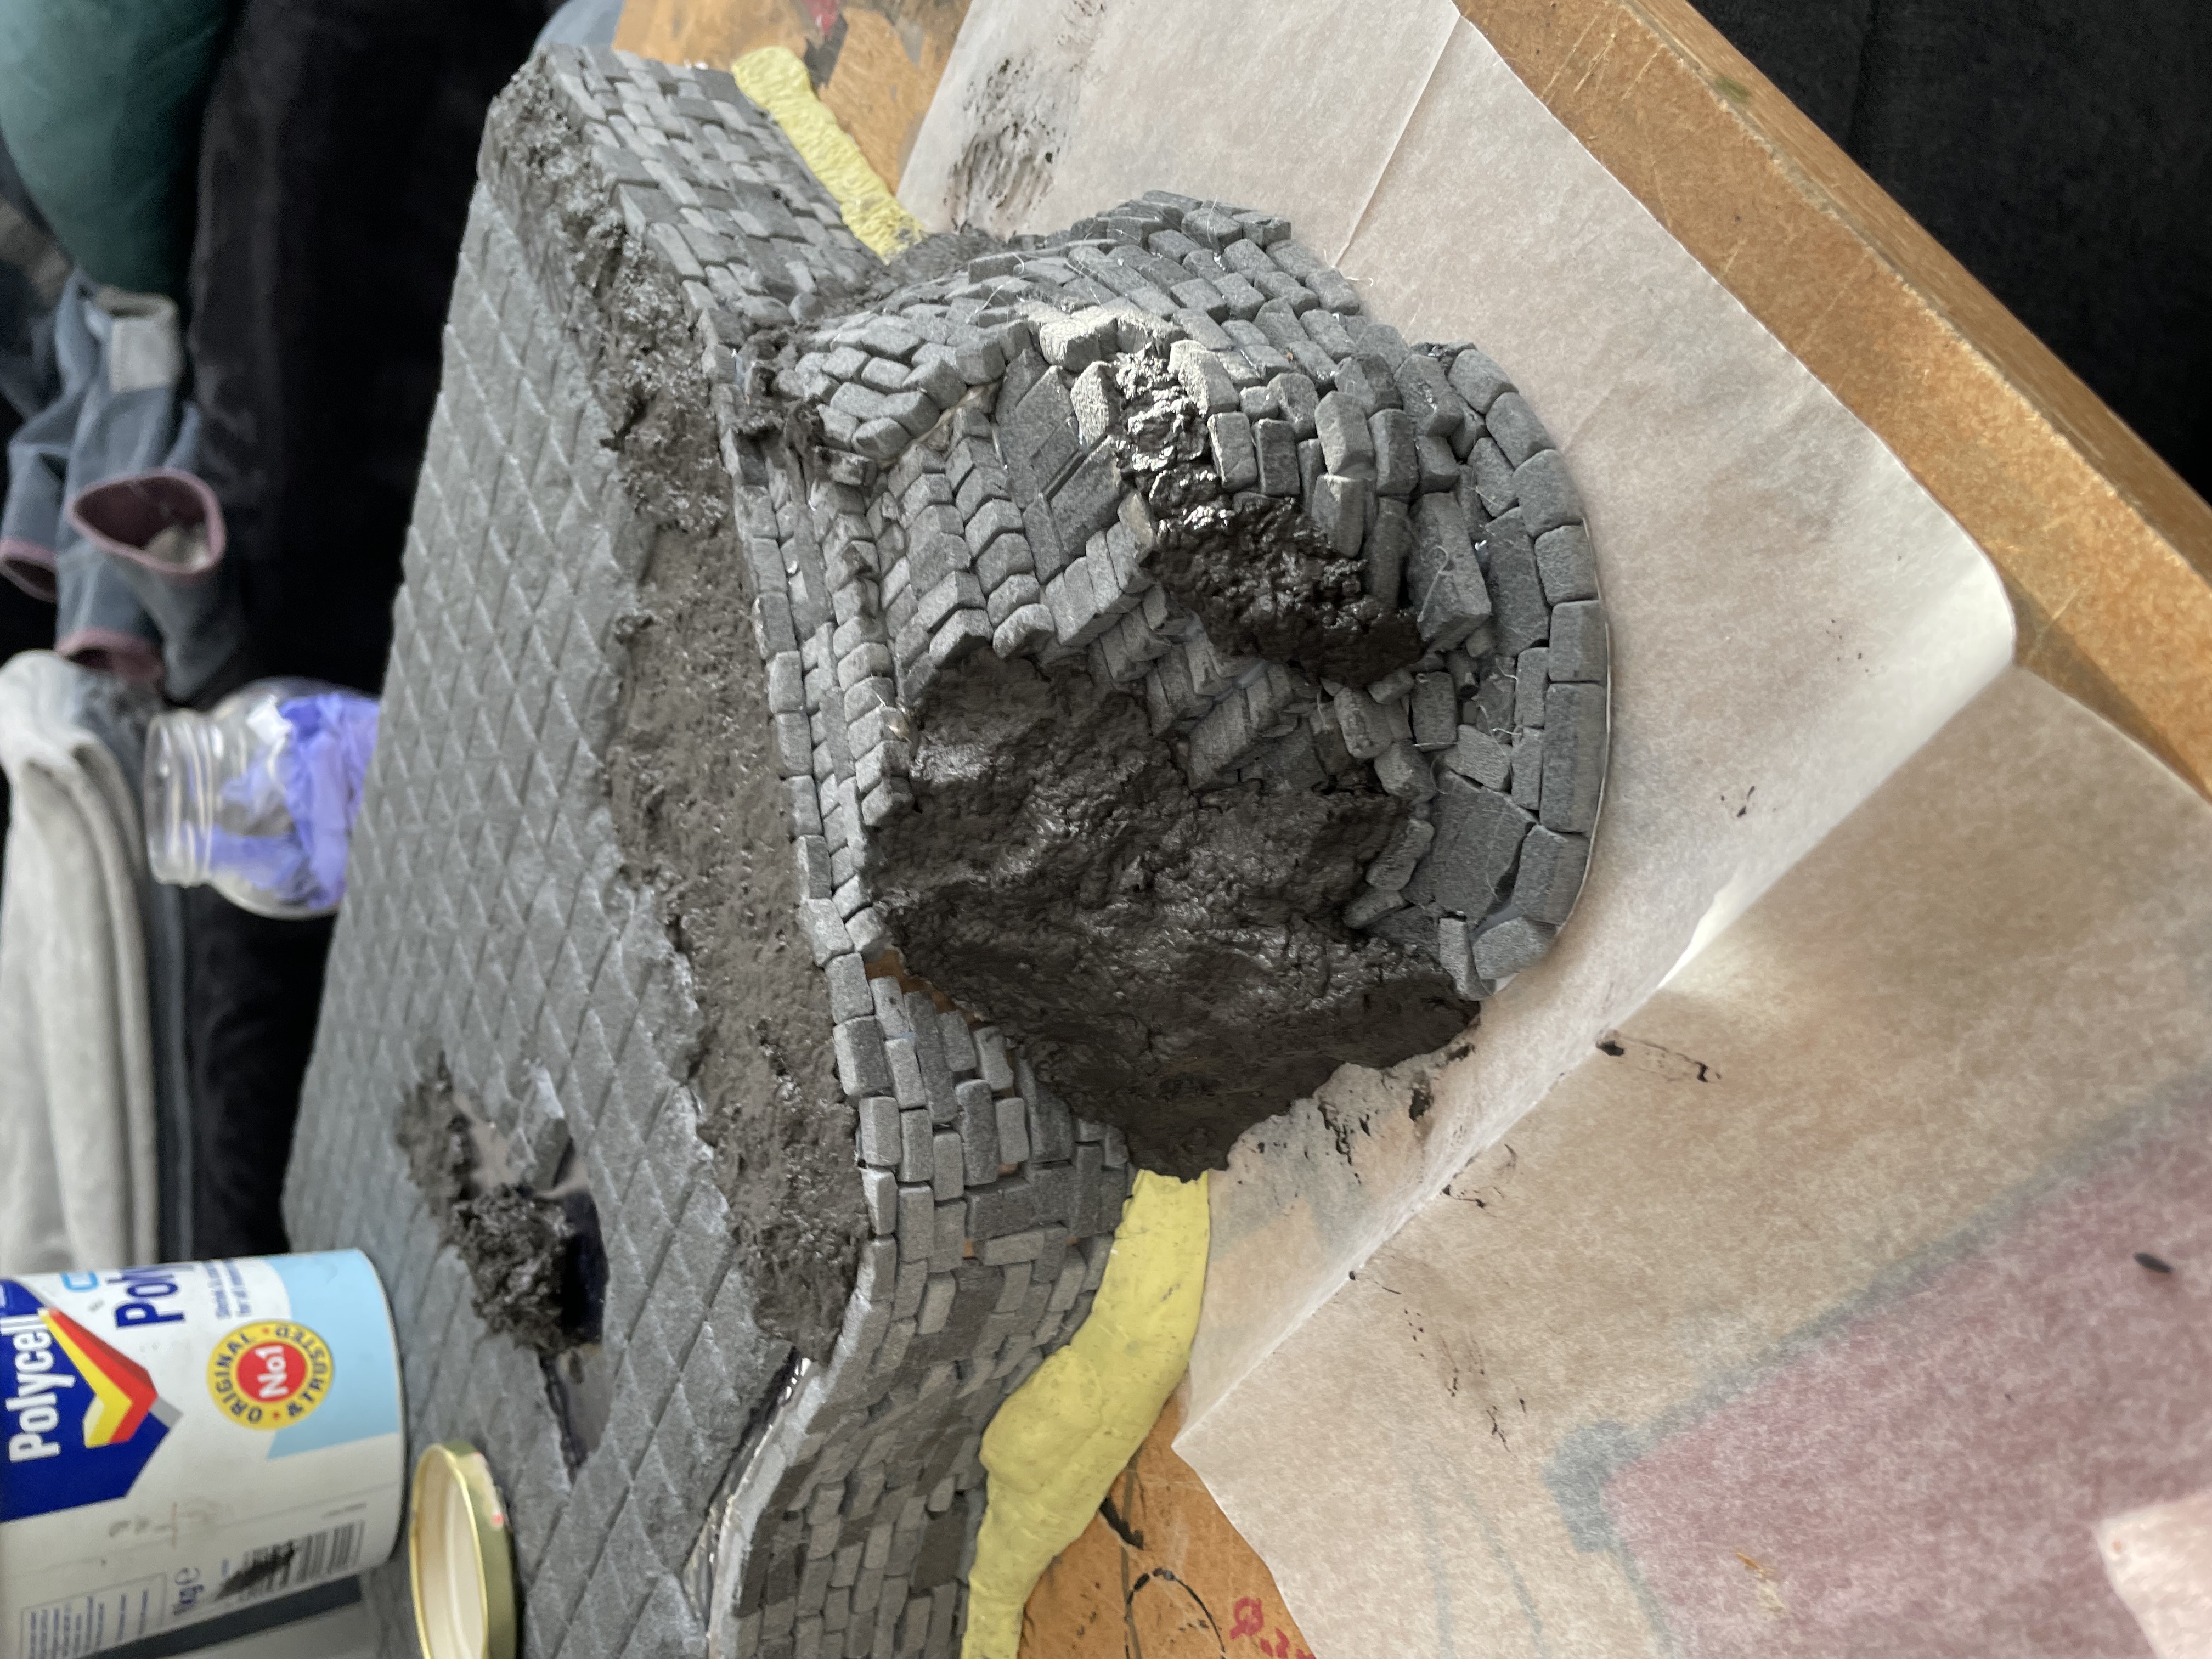
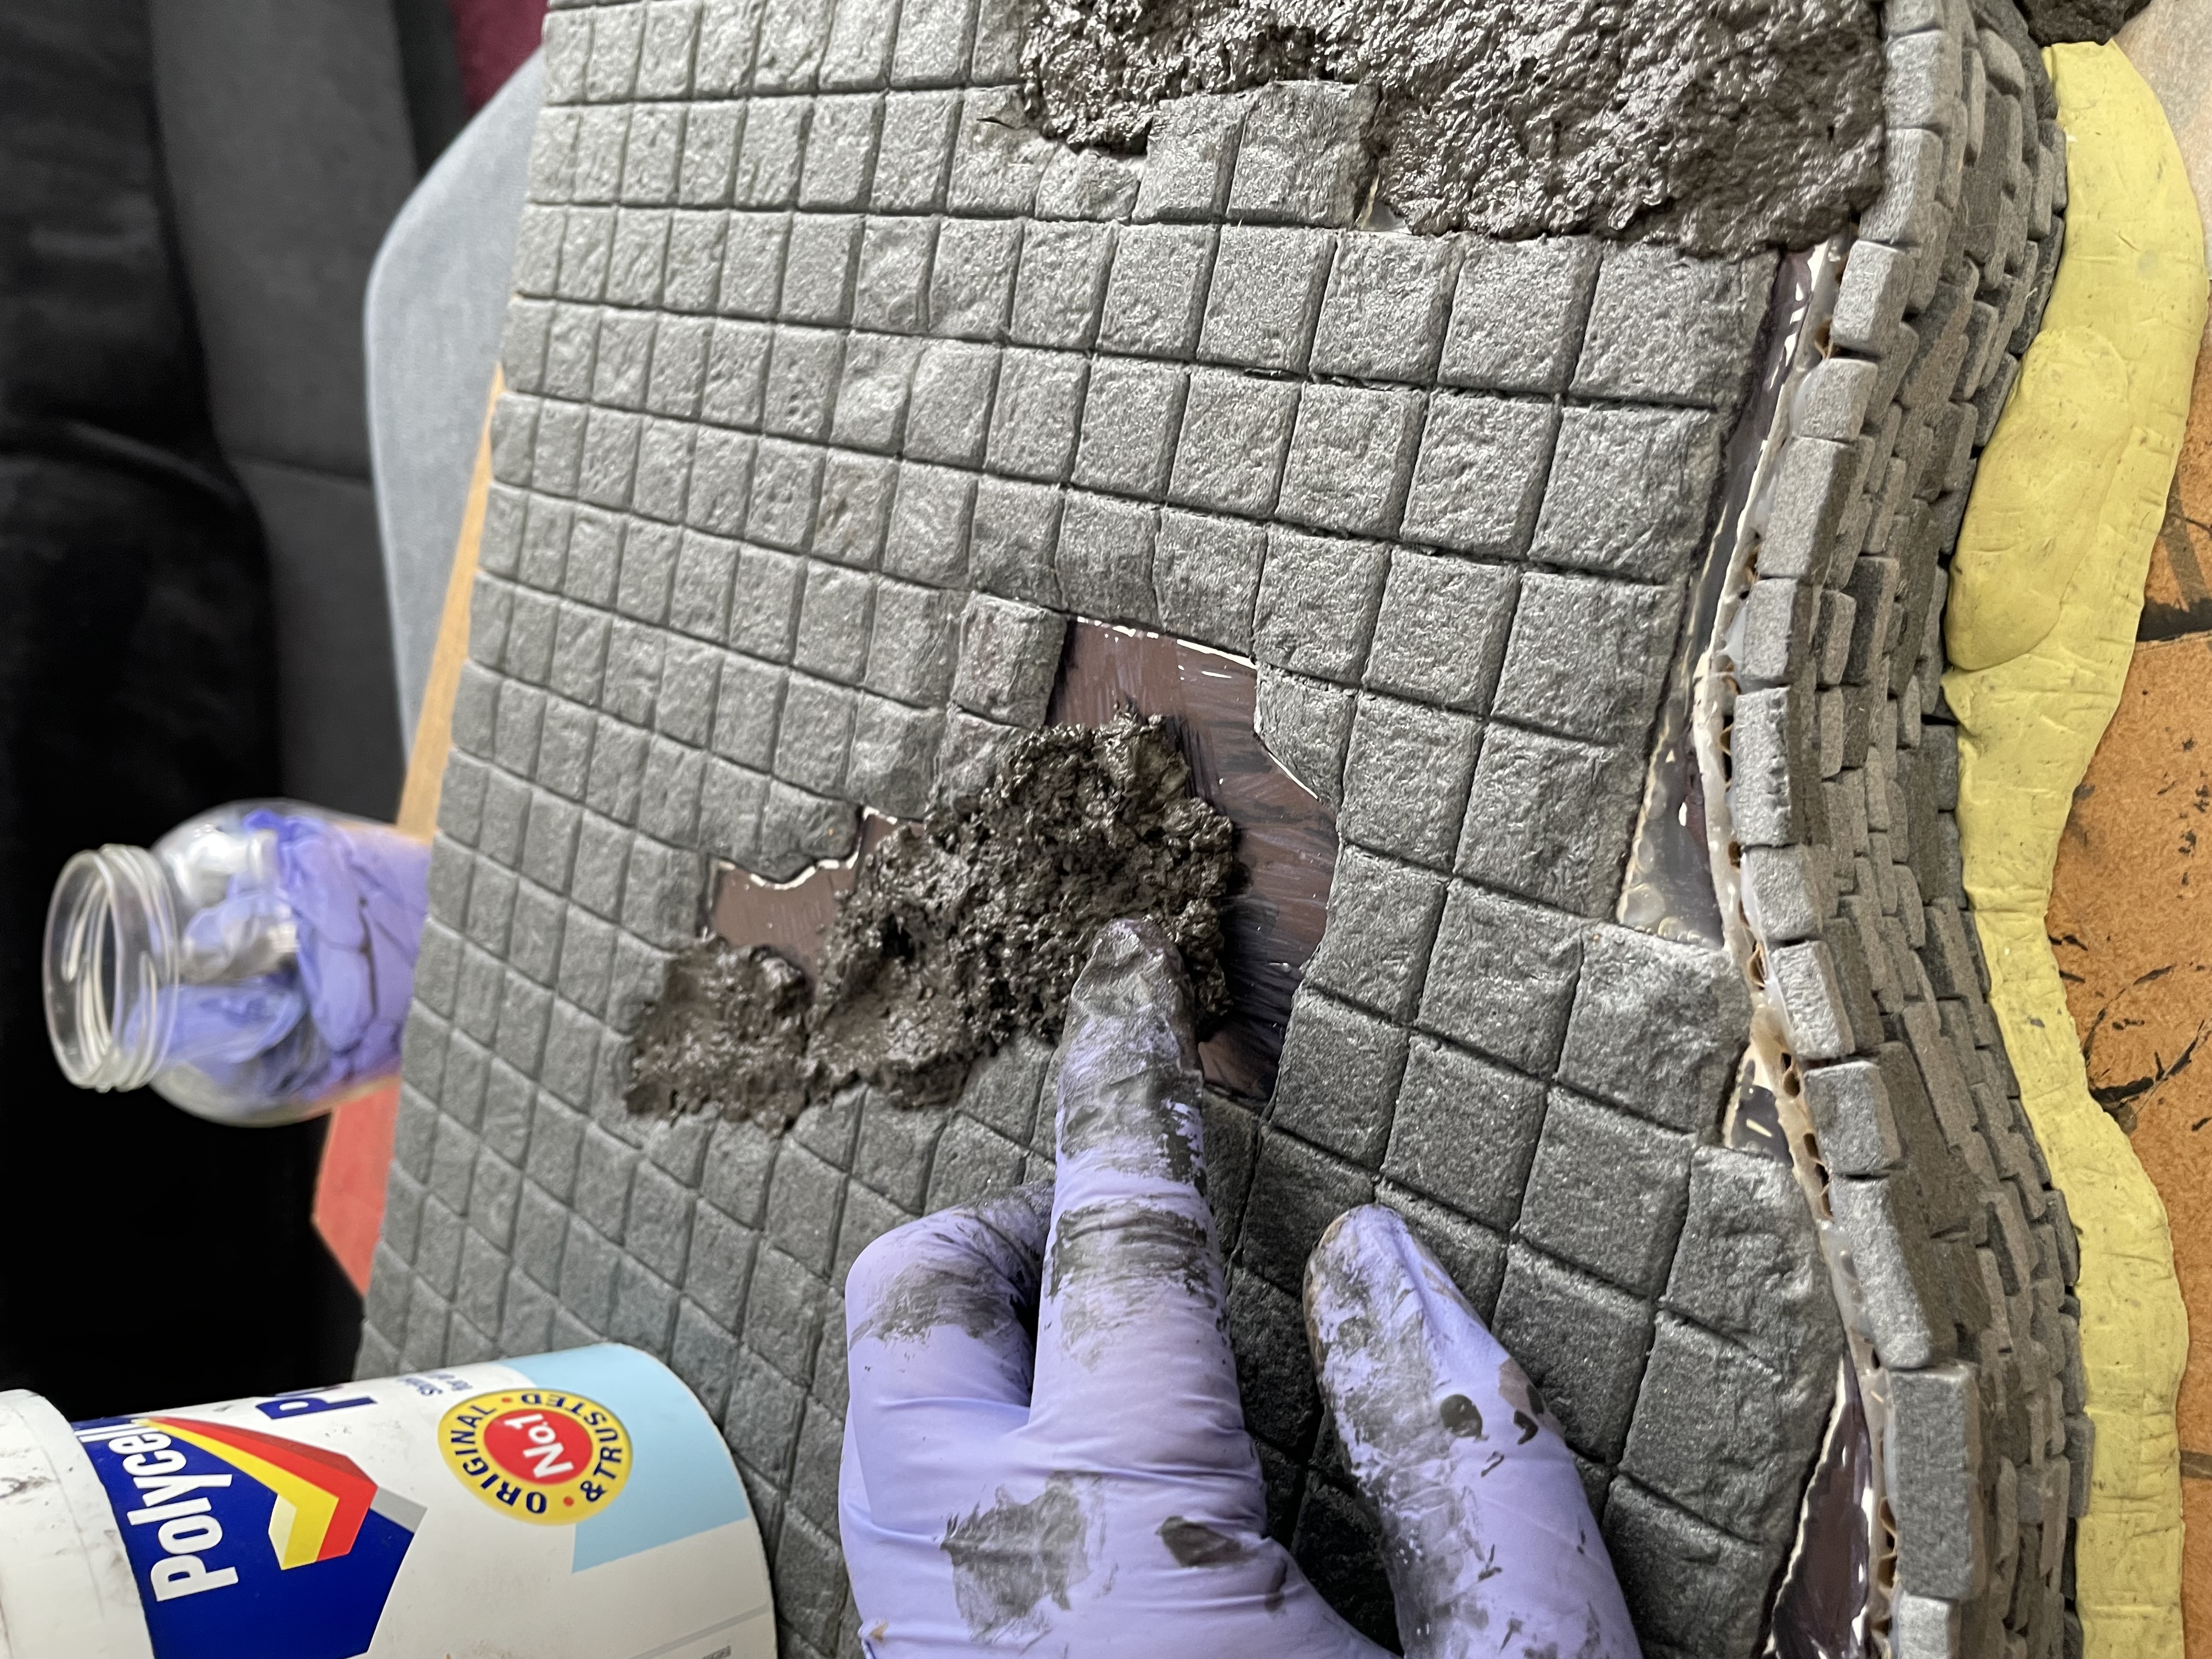
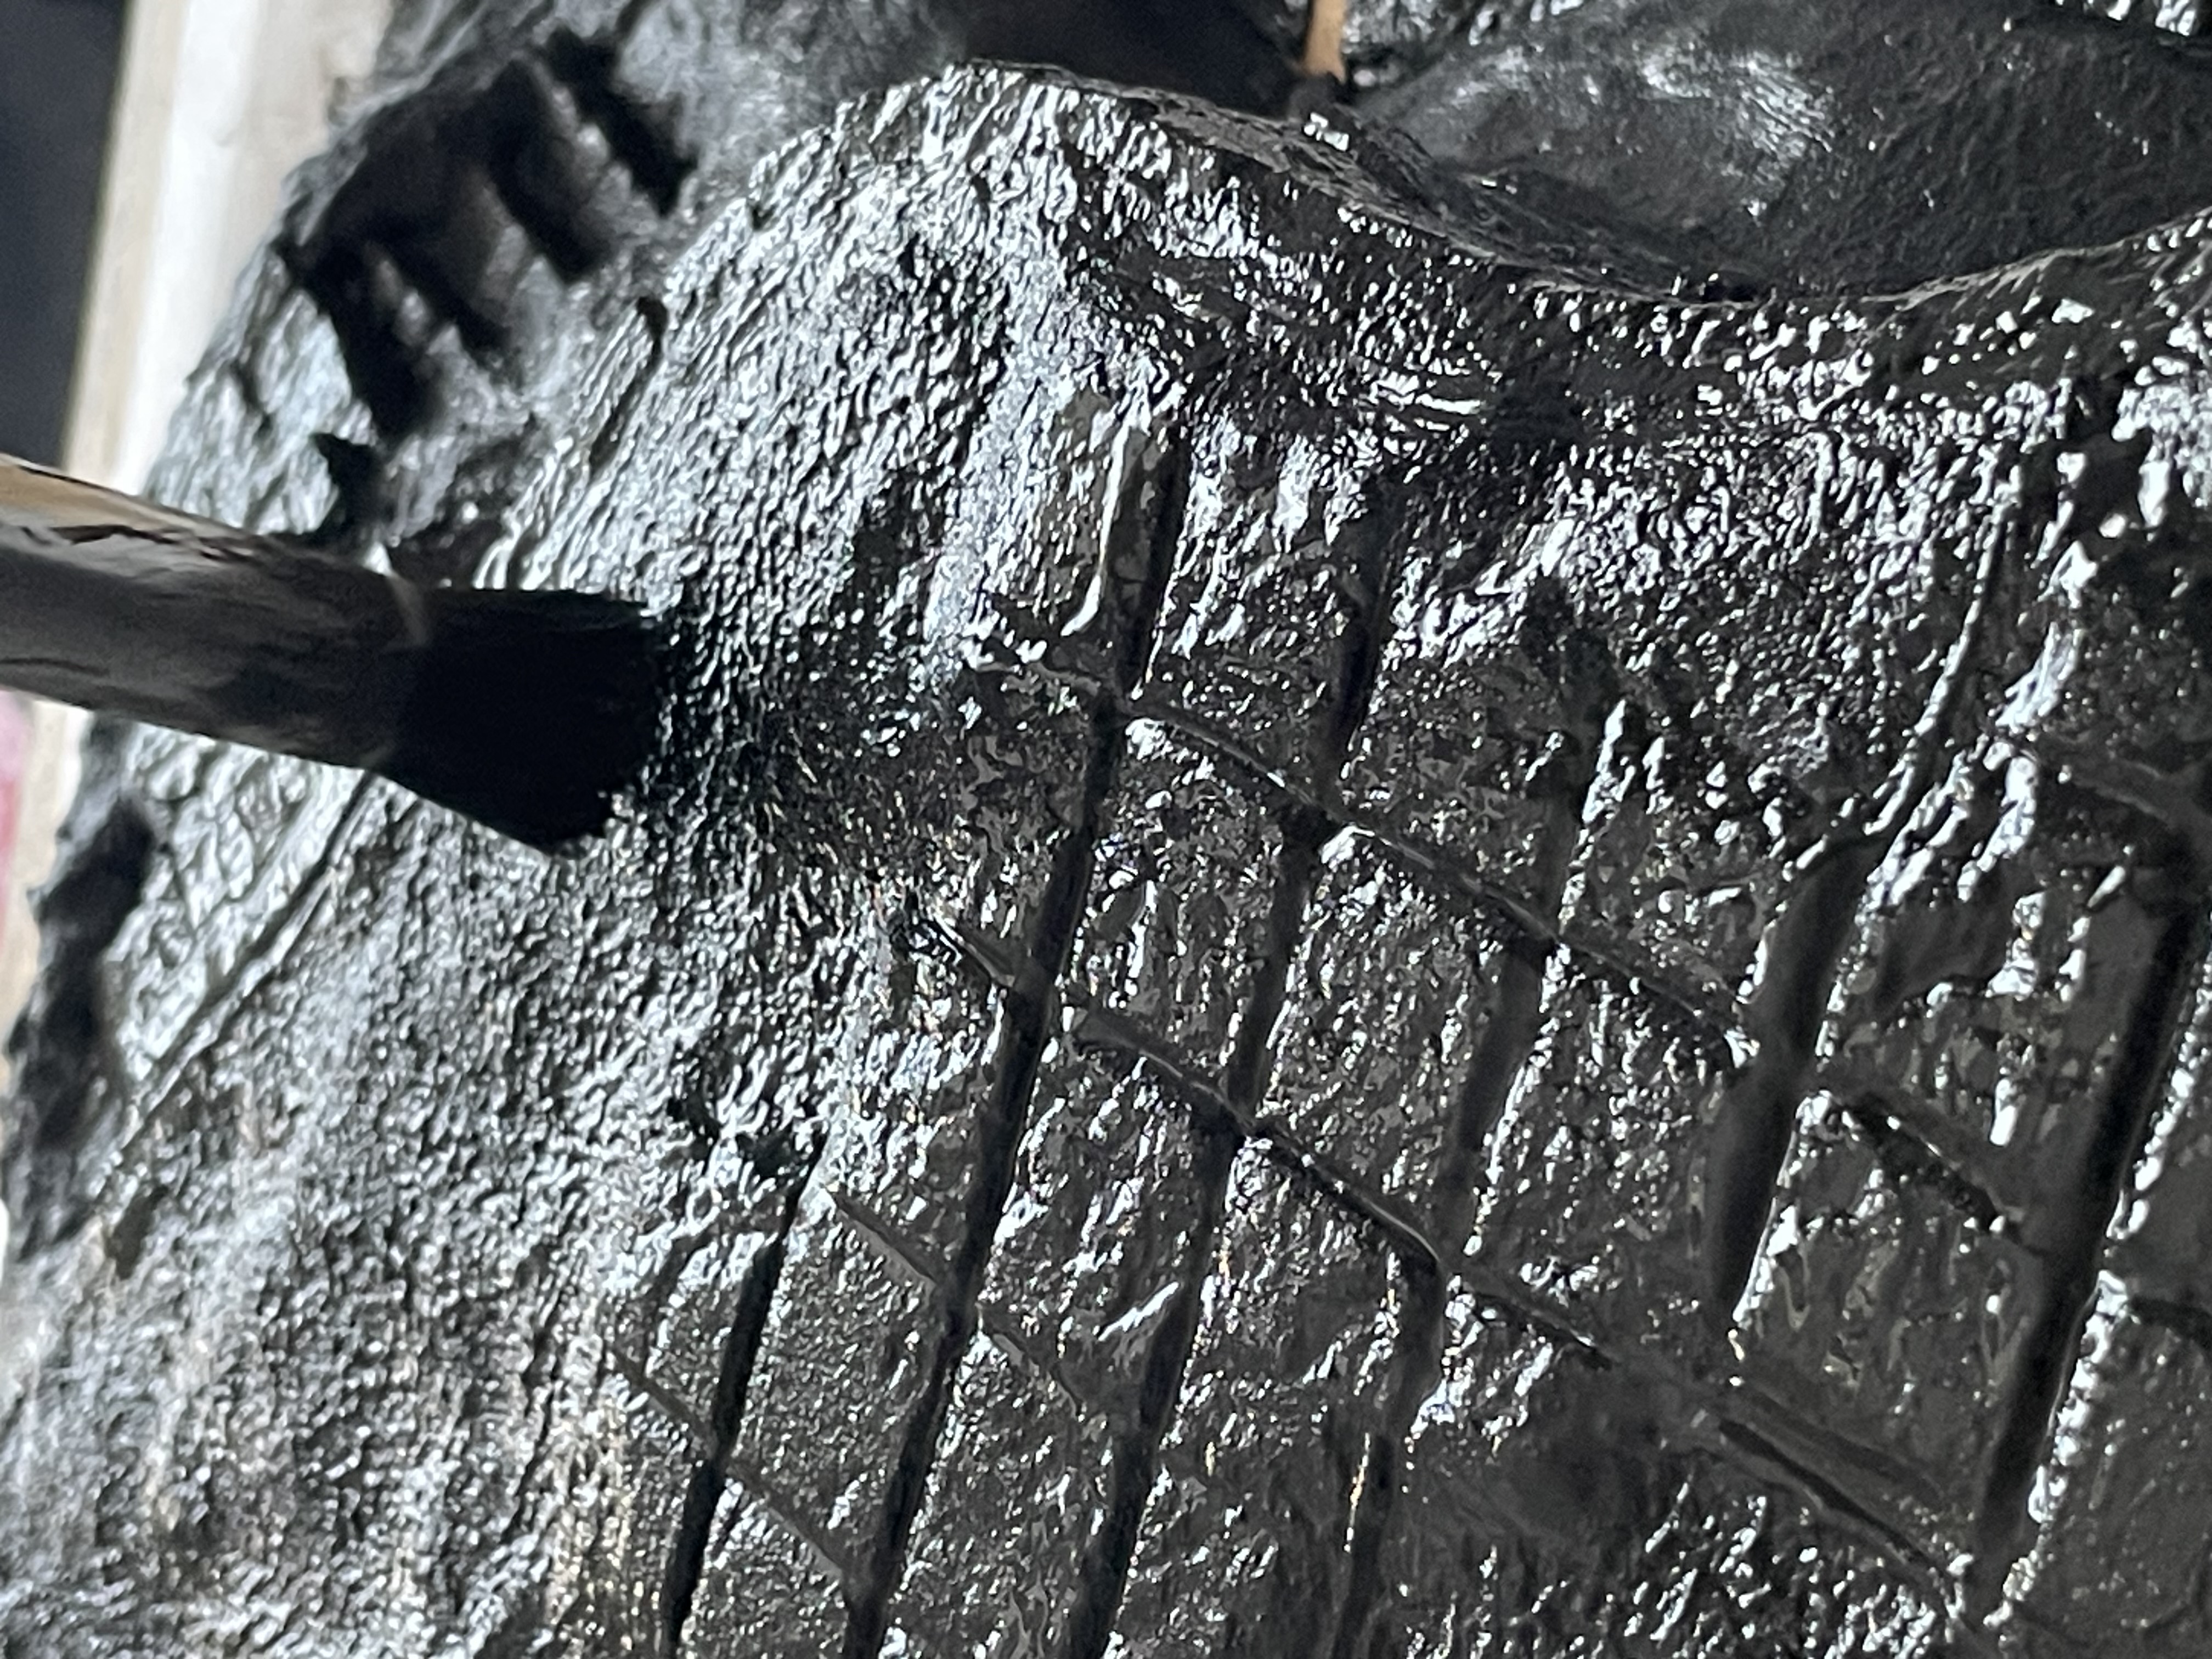
So back to the 50/50 water PVA mix ( remembered the PVA this time) with tile grout thrown in mixed it up to form a paste and I began to cover areas of exposed Foamcard and added texture. When it’s dry and hardened up I can undercoat it and start painting. But that’ll be later on.
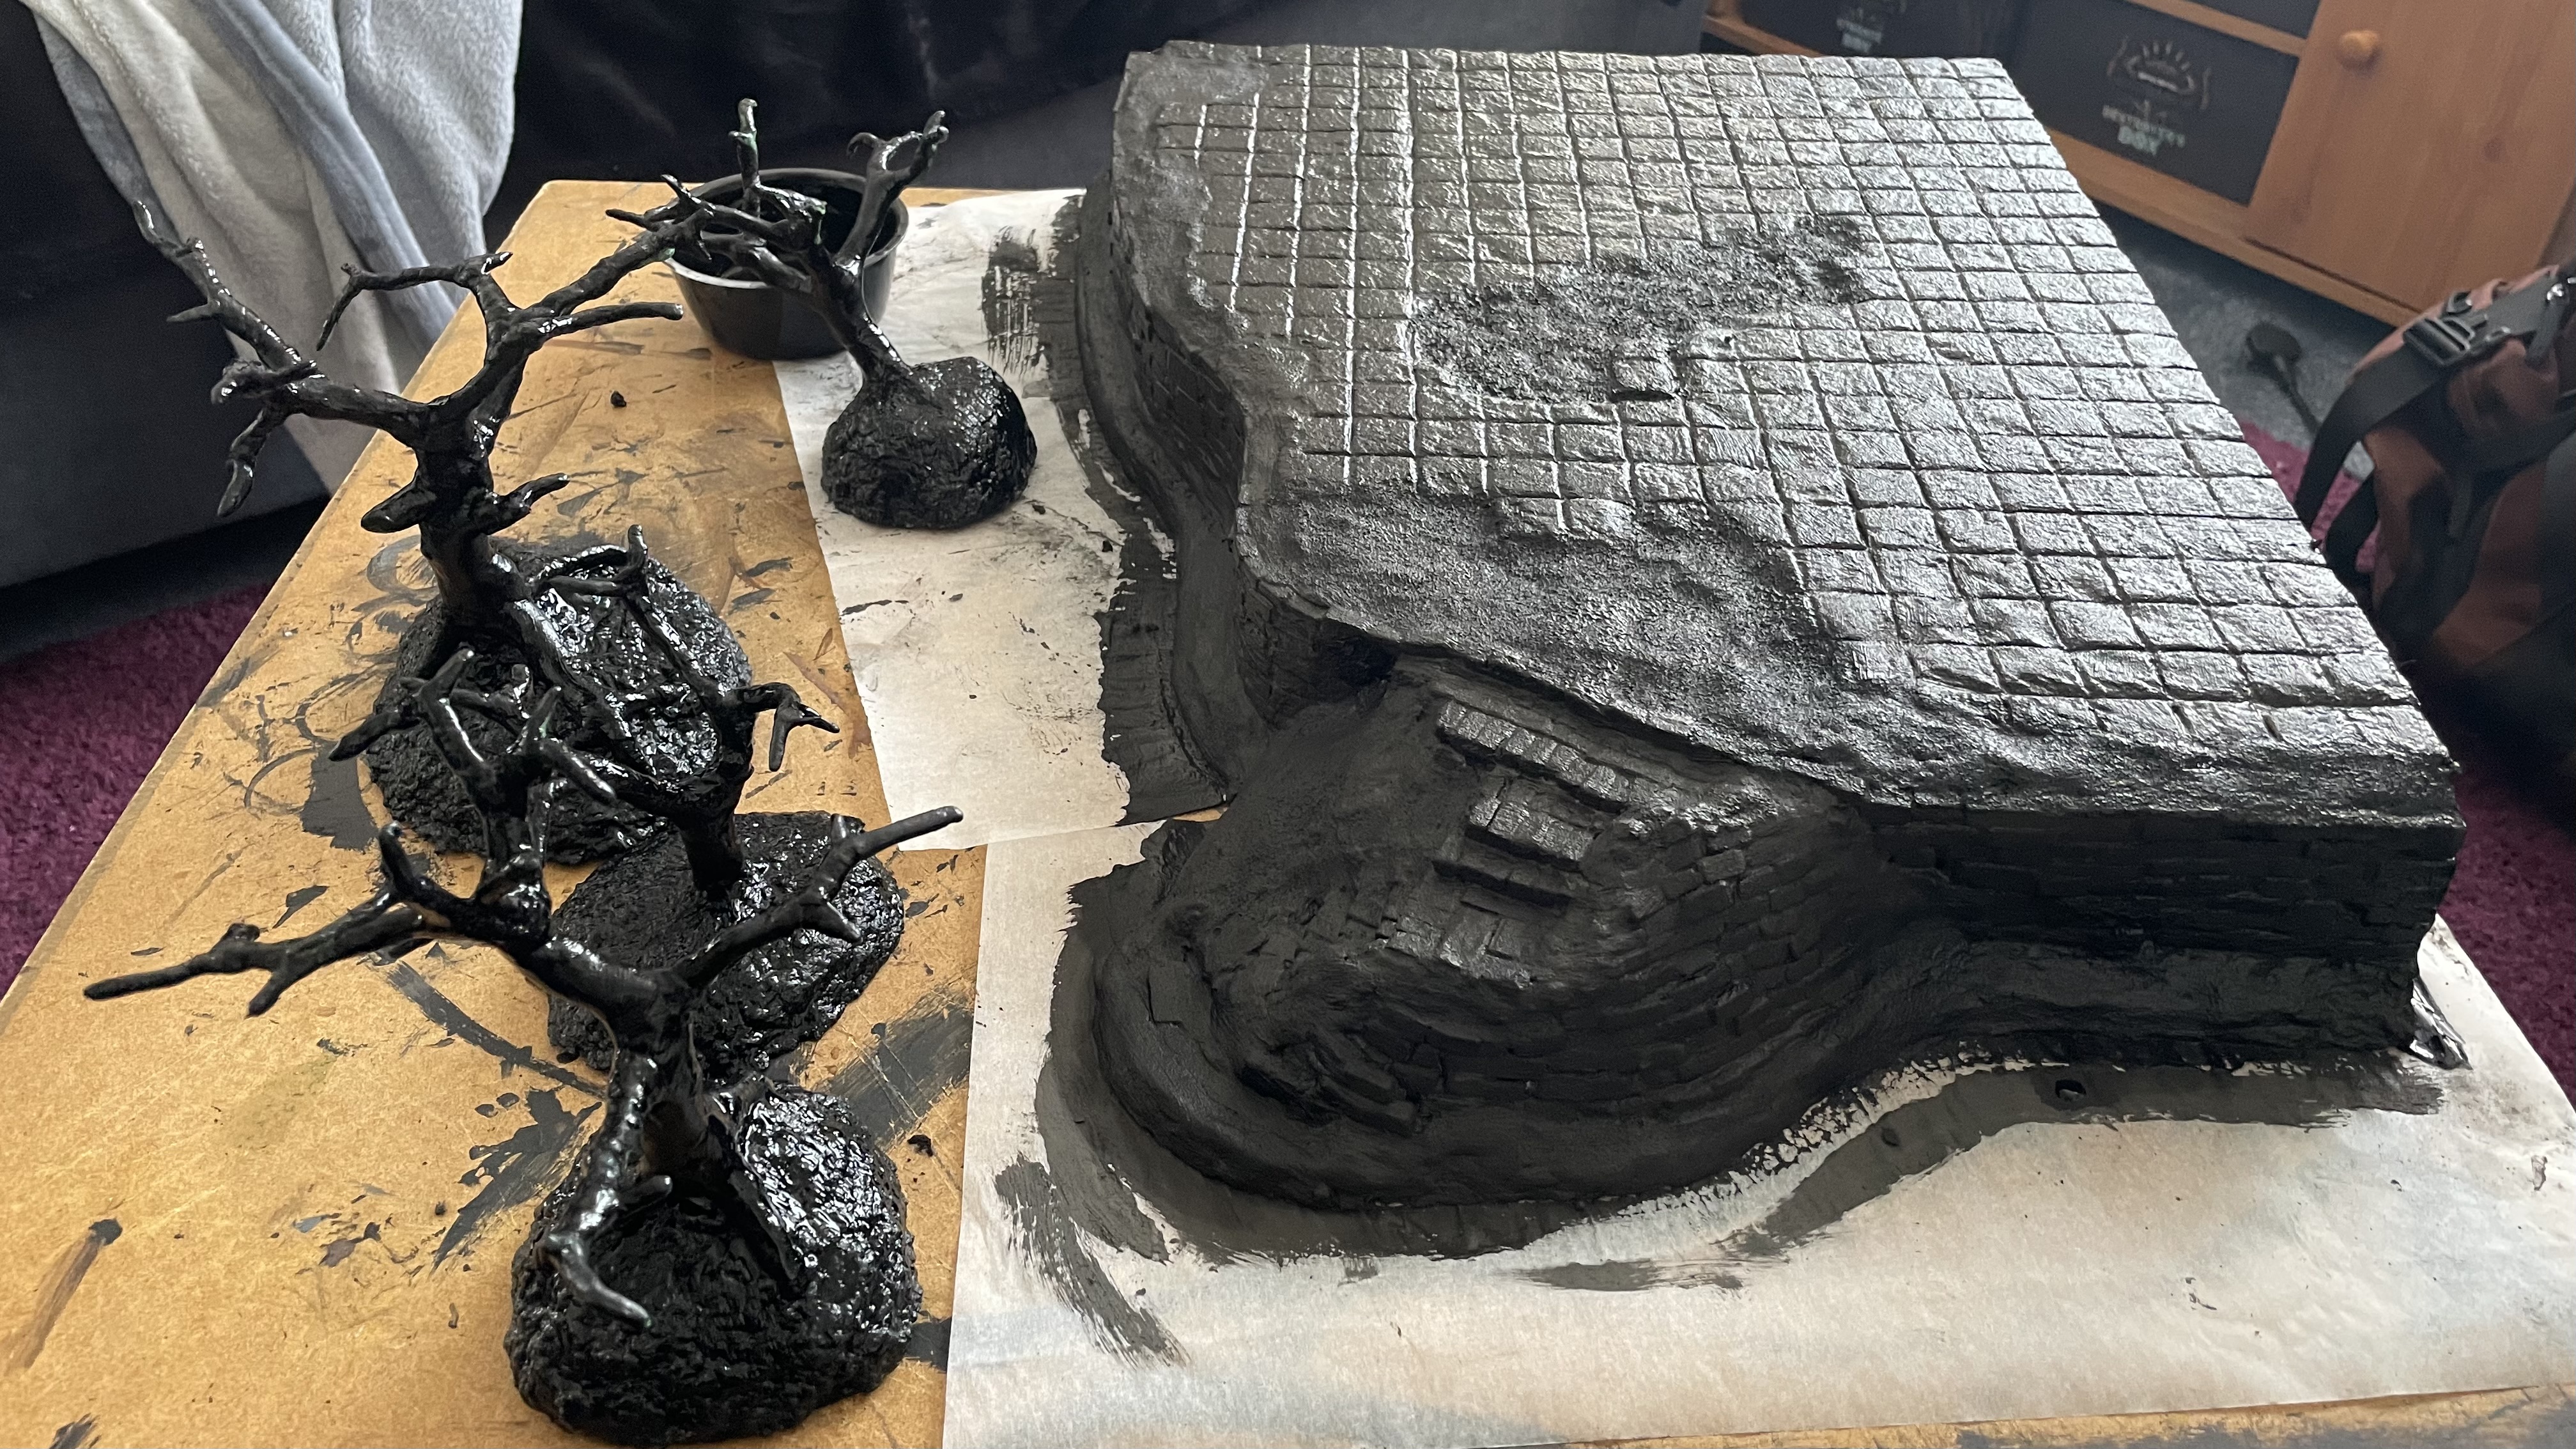
Covered the whole section of terrain with a mix of PVA, Black acrylic paint and coloured tile grout. Stippling the mixture onto areas to add more texture. And because I was already covered in paint and I had some left I painted the tree bases which I had previously worked on.