


![Very Cool! Make Your Own Star Wars: Legion Imperial Agent & Officer | Review [7 Days Early Access]](https://images.beastsofwar.com/2025/12/Star-Wars-Imperial-Agent-_-Officer-coverimage-V3-225-127.jpg)


KoW Elves are coming (finally)


Recommendations: 223
About the Project
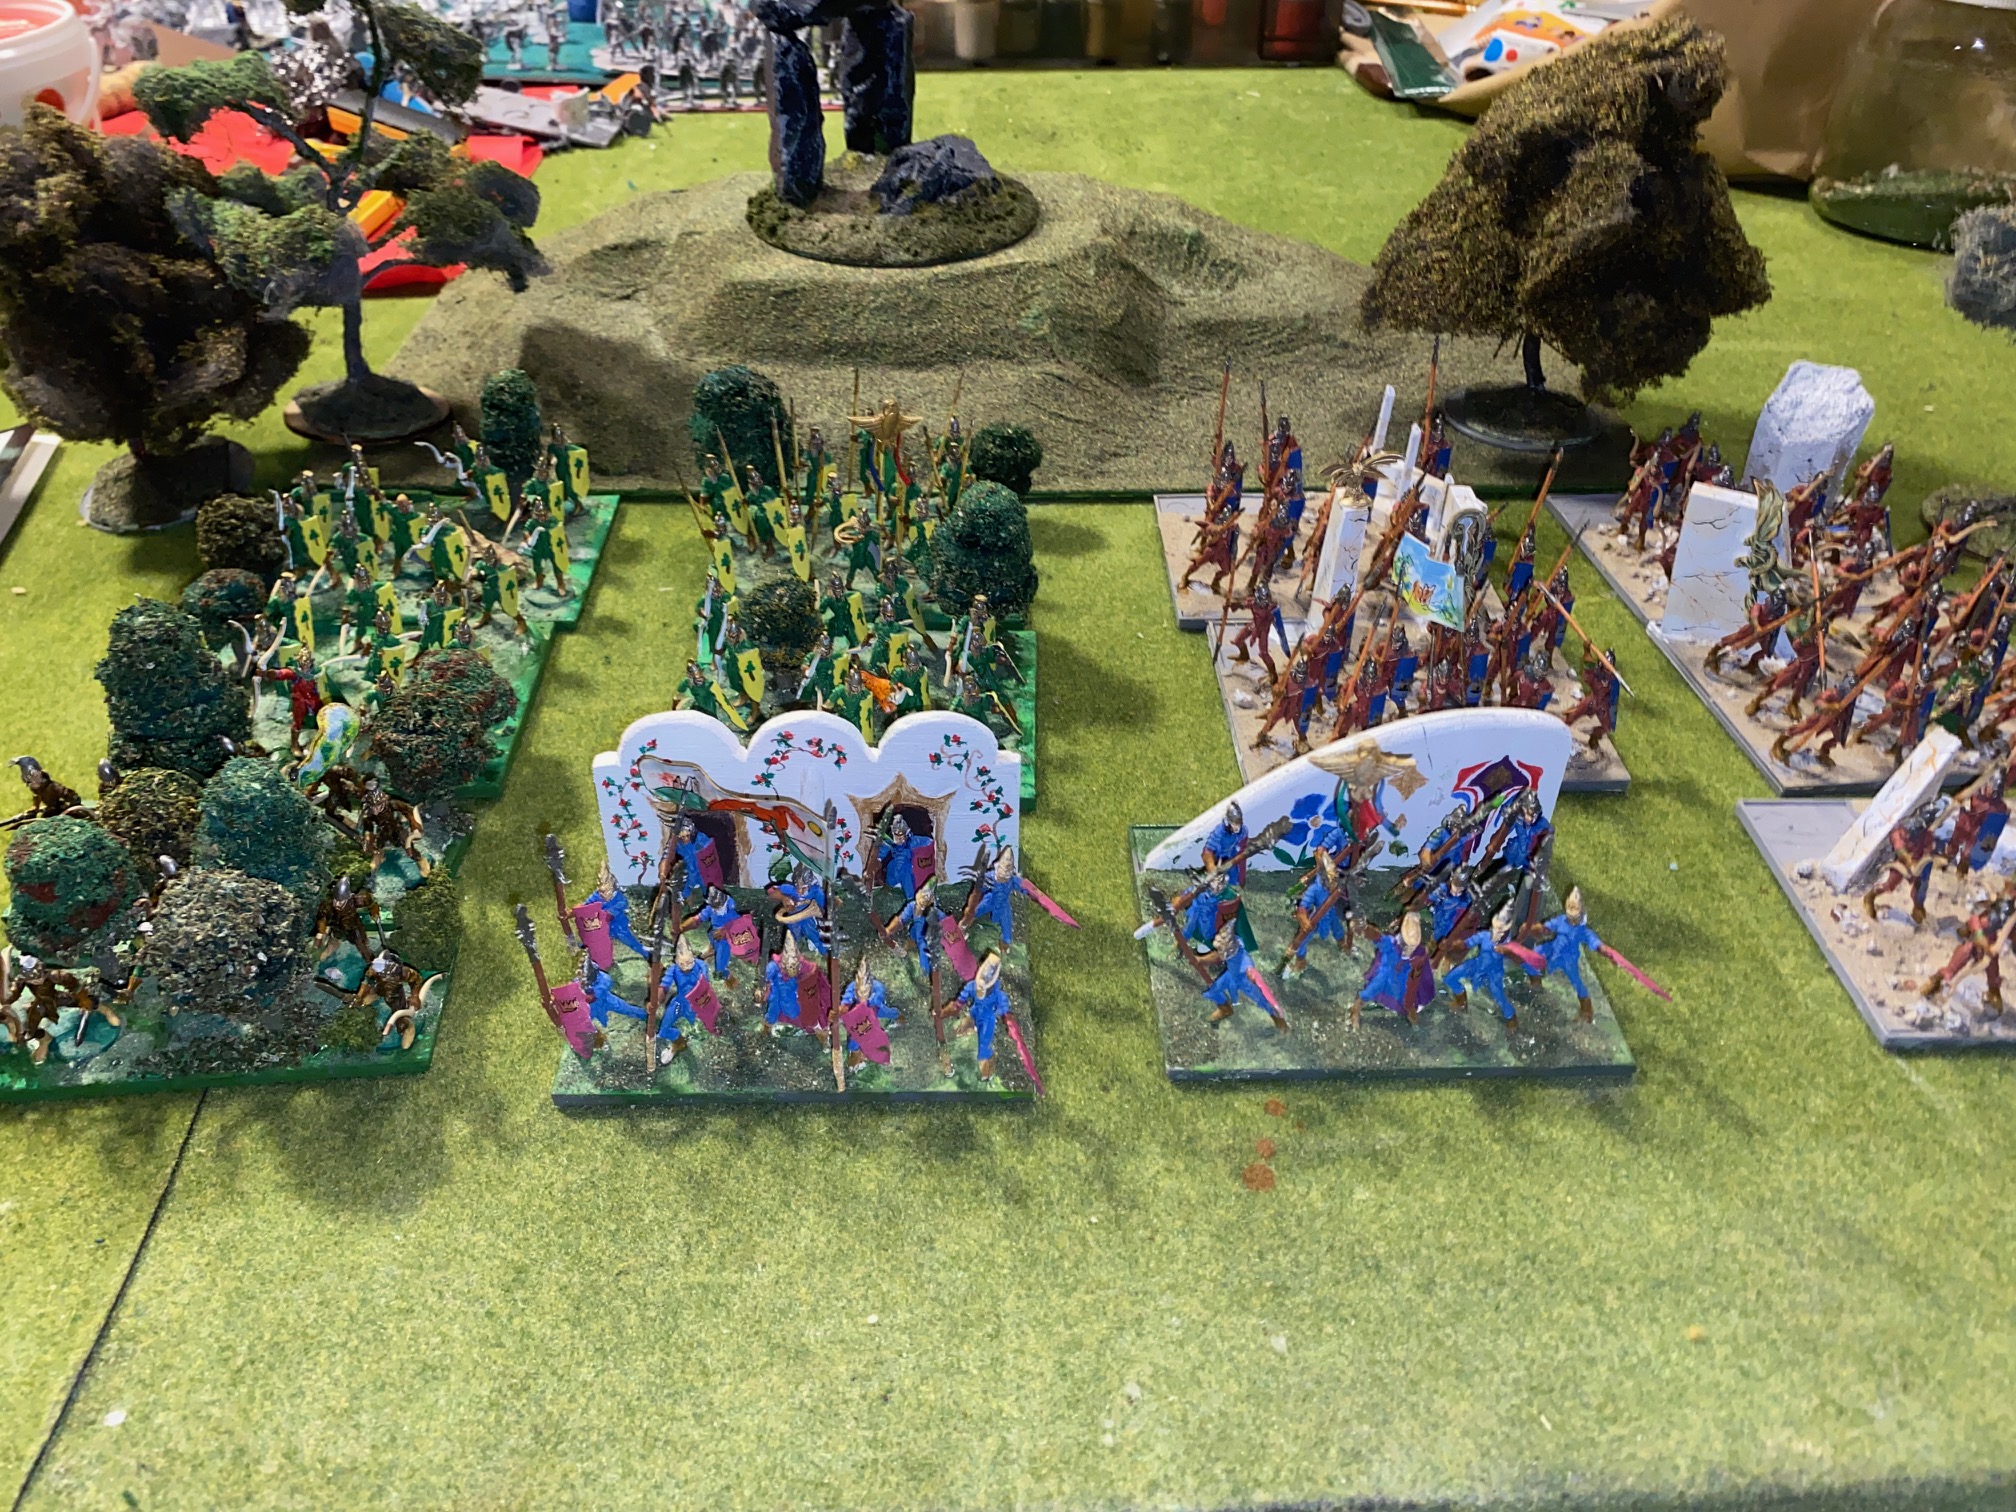
When Mantic launched Kings of War back in the mists of time, I was immediately attracted to their version of the Elves. I thought the concept was etherial and captured for me the mystery of the race; esthetic, other-worldly, different, esoteric. Of course I then ordered far too many boxes and put them on the shelf for that moment which I knew would come (Ha!) when I would build and paint and send them onto the fields of Panathor to claim victory. But of course I didn't do that as other "shinies" caught my eye. But it's time. So here is my final attempt at bringing a KoW Elven army to the table.
Related Game: Kings of War
Related Company: Mantic Games
Related Genre: Fantasy
Related Contest: Spring Clean Hobby Challenge 2024
This Project is Active
Yes, I know these aren't Elves
Before popping off to my health sabbatical, I got bored with painting Elves, so decided they needed some enemies, instead of fighting among themselves.
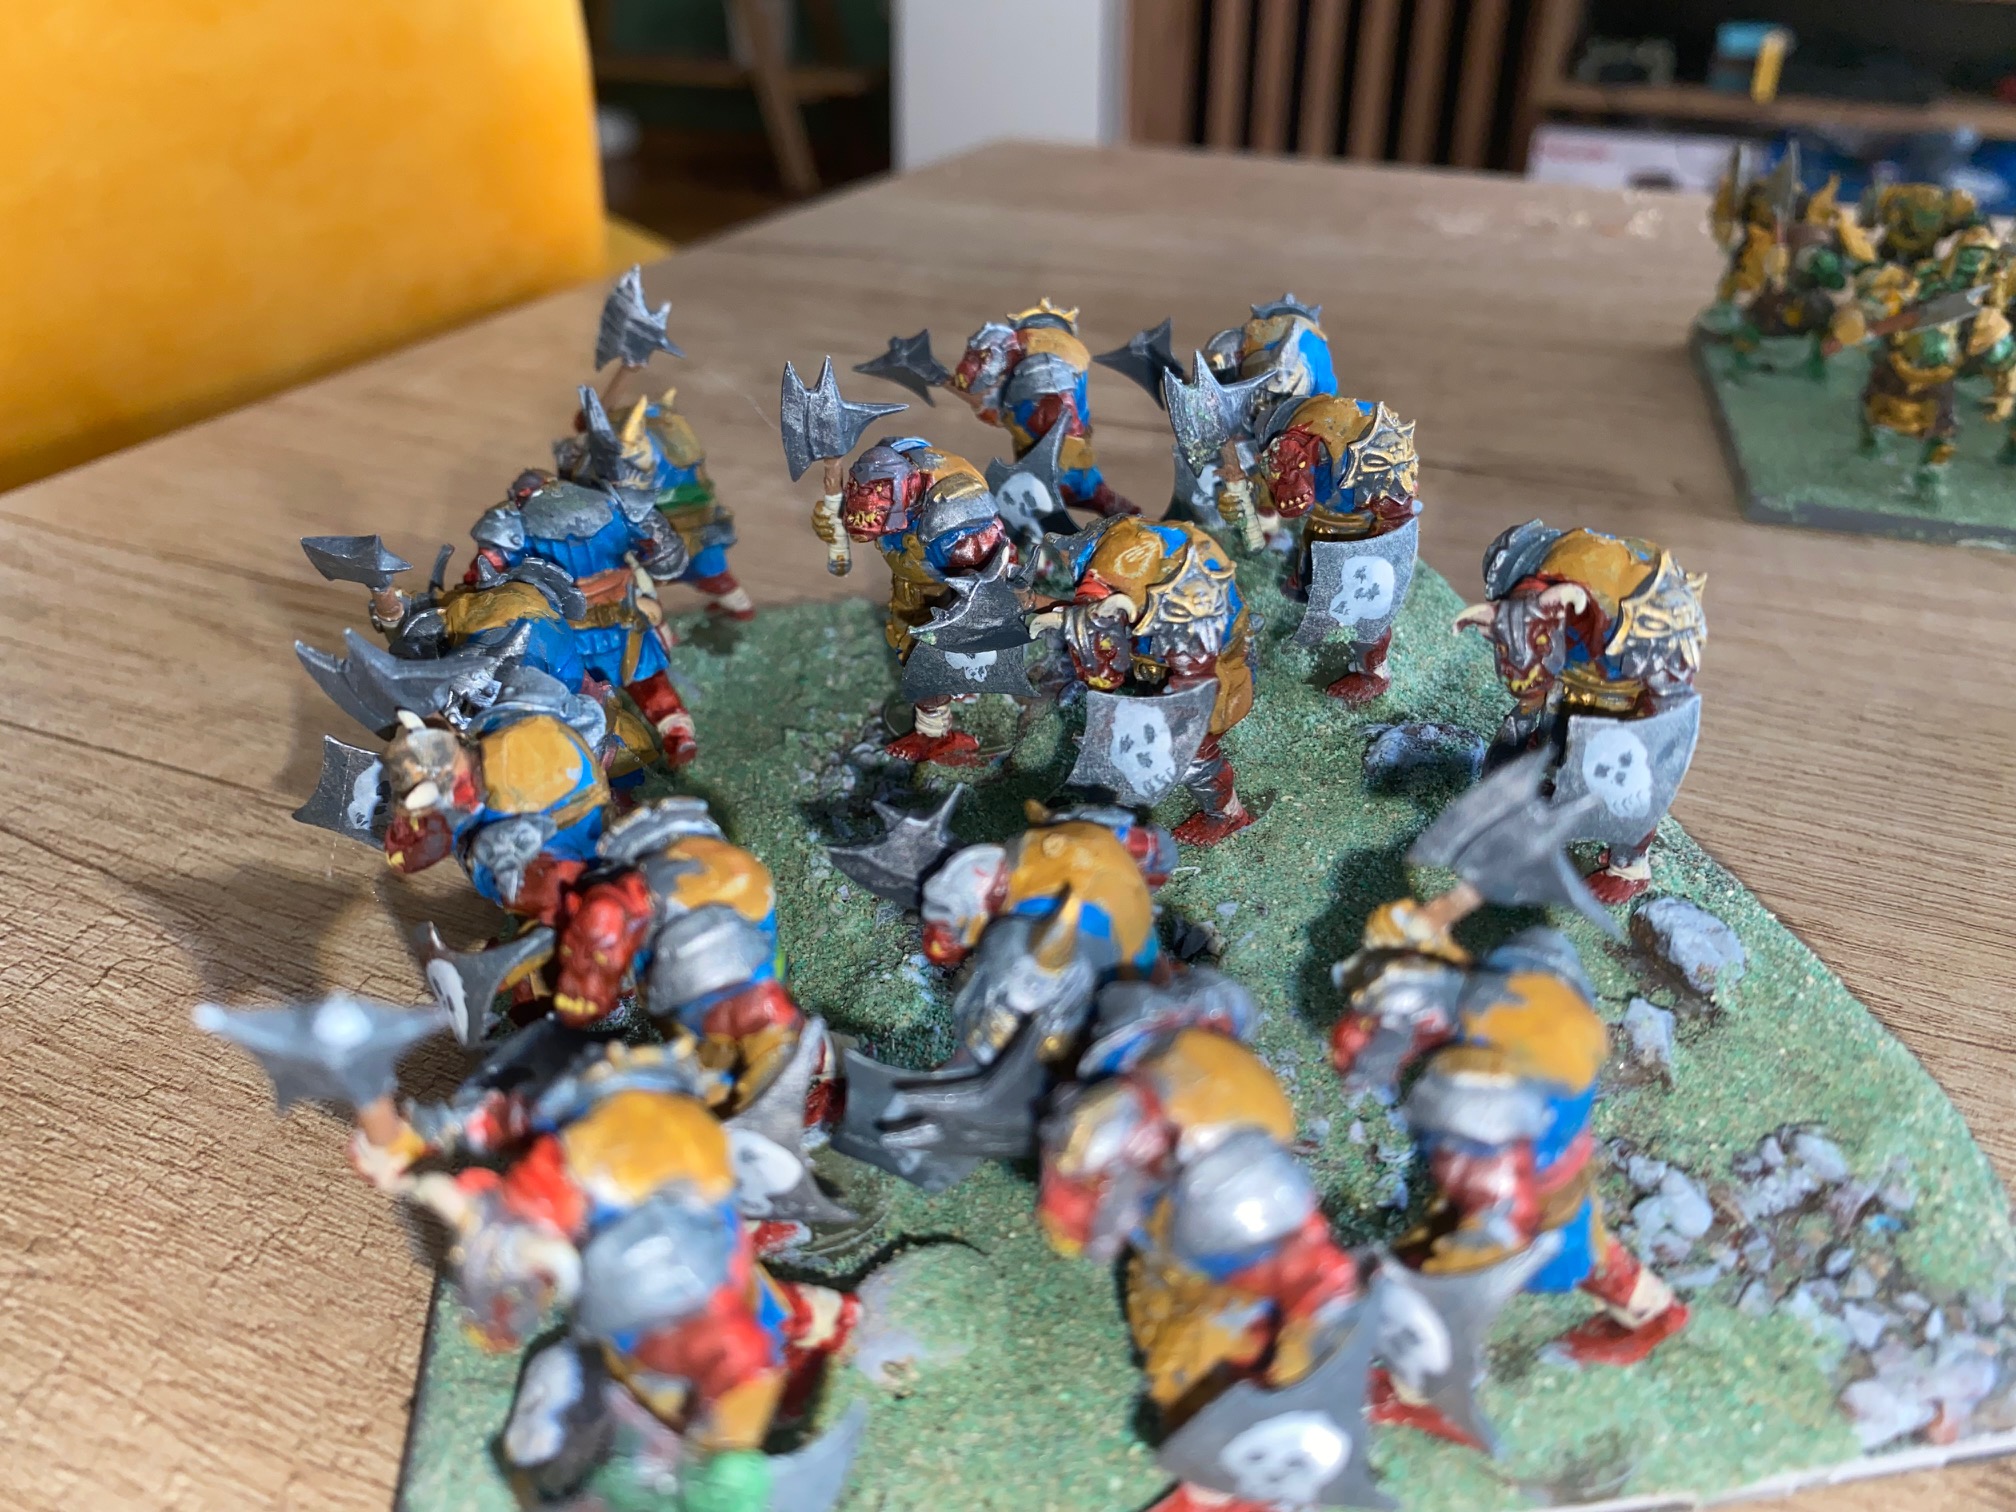
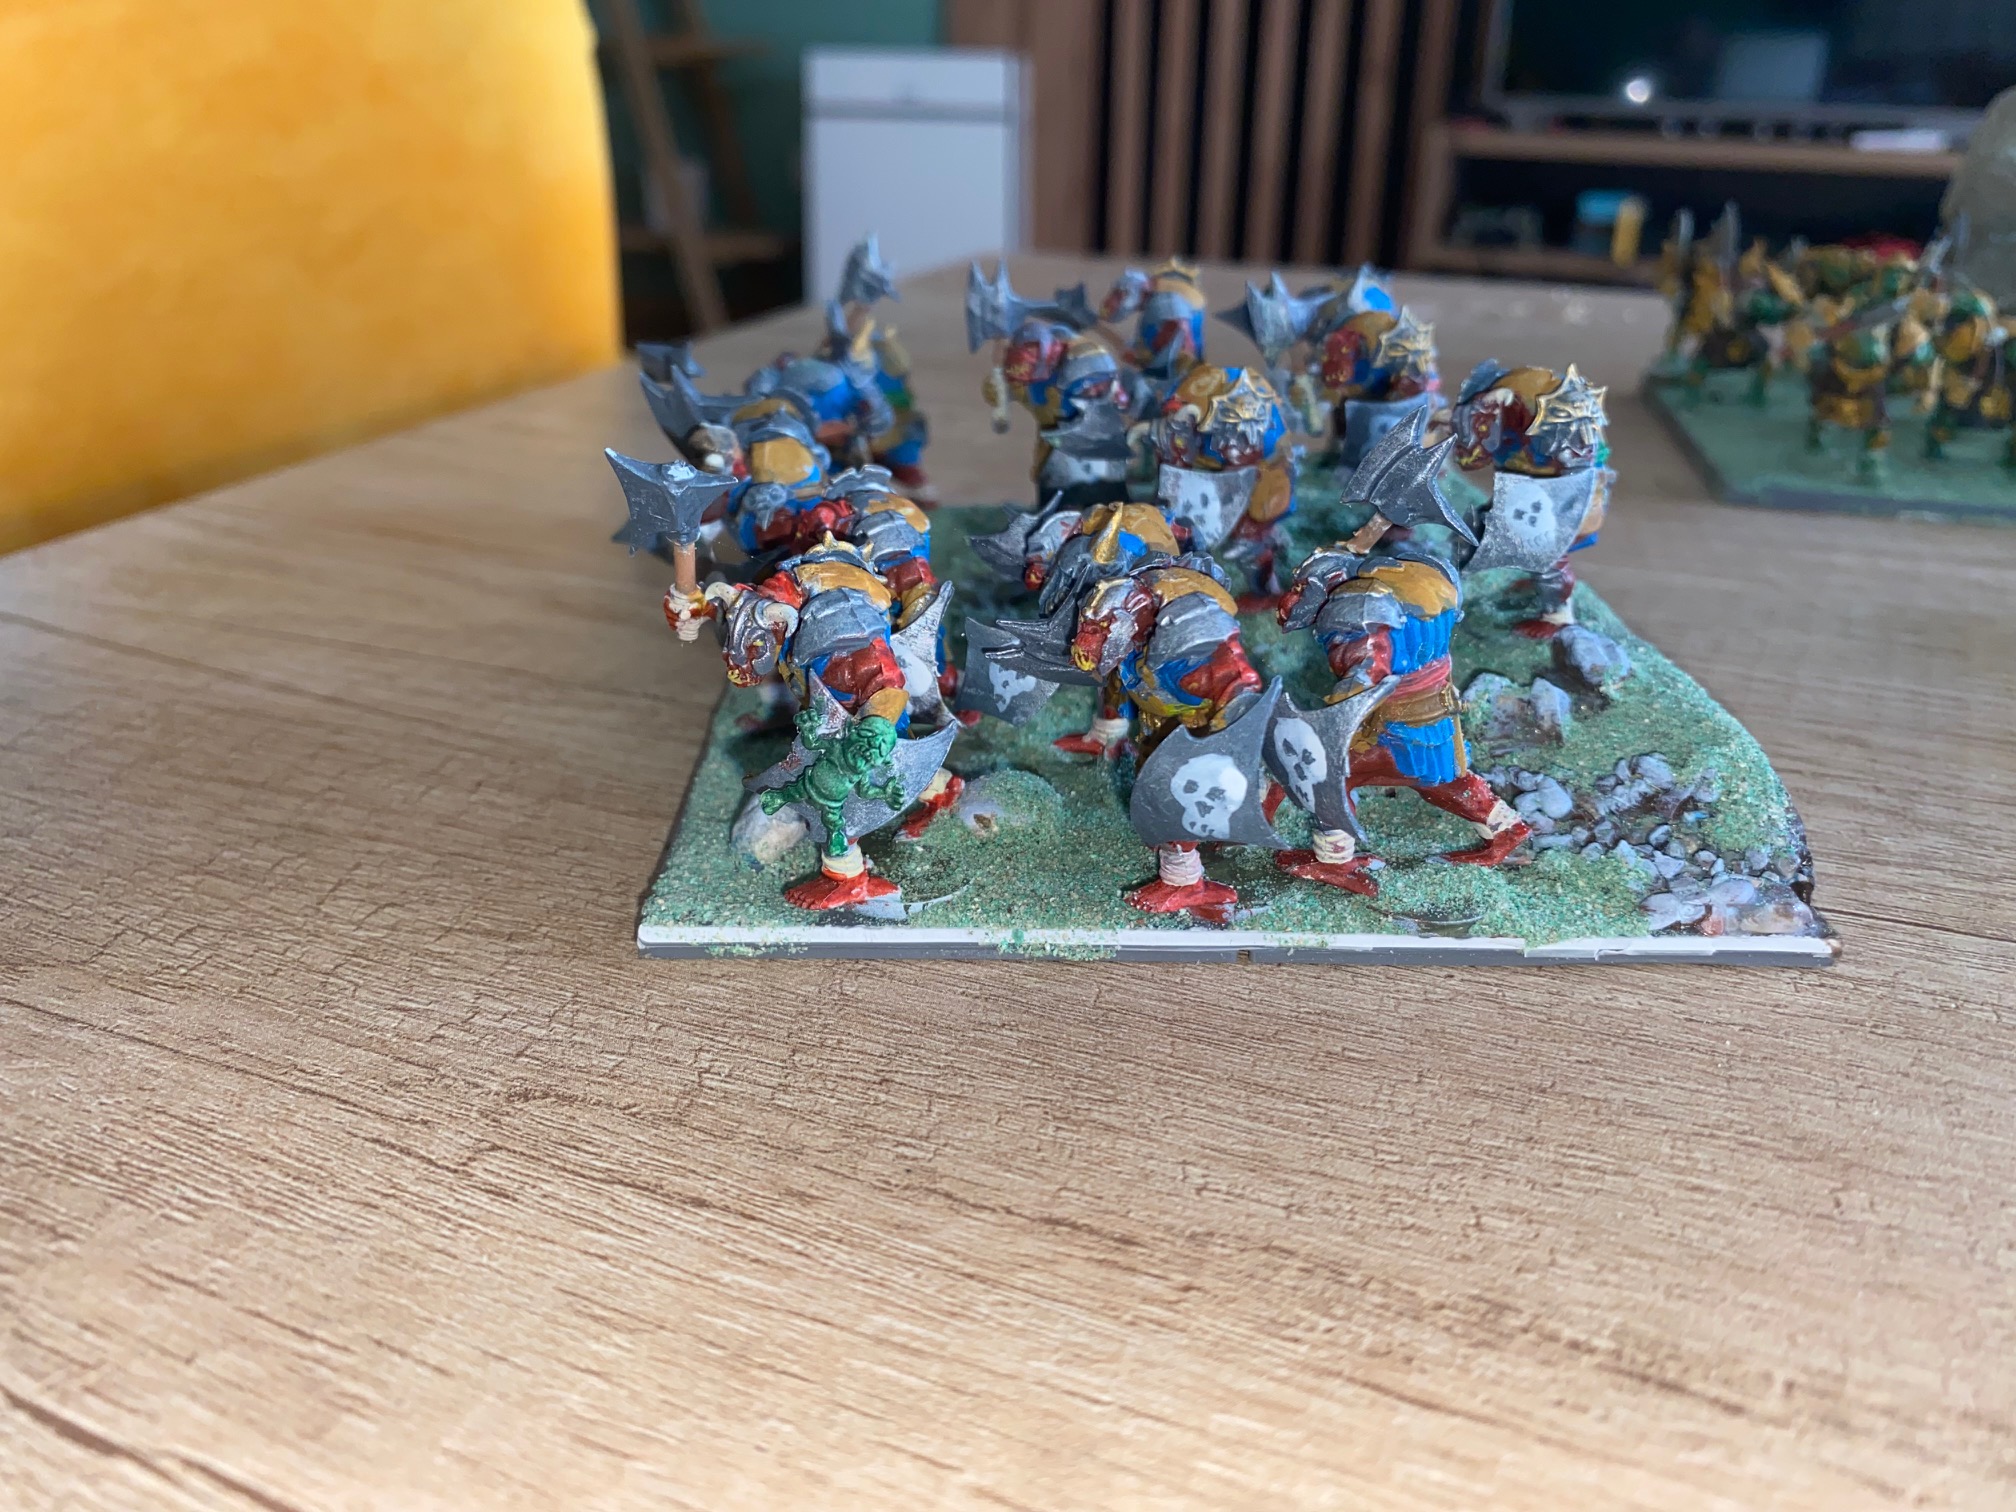
So, three different paining ideas for three regiments of Orcs.
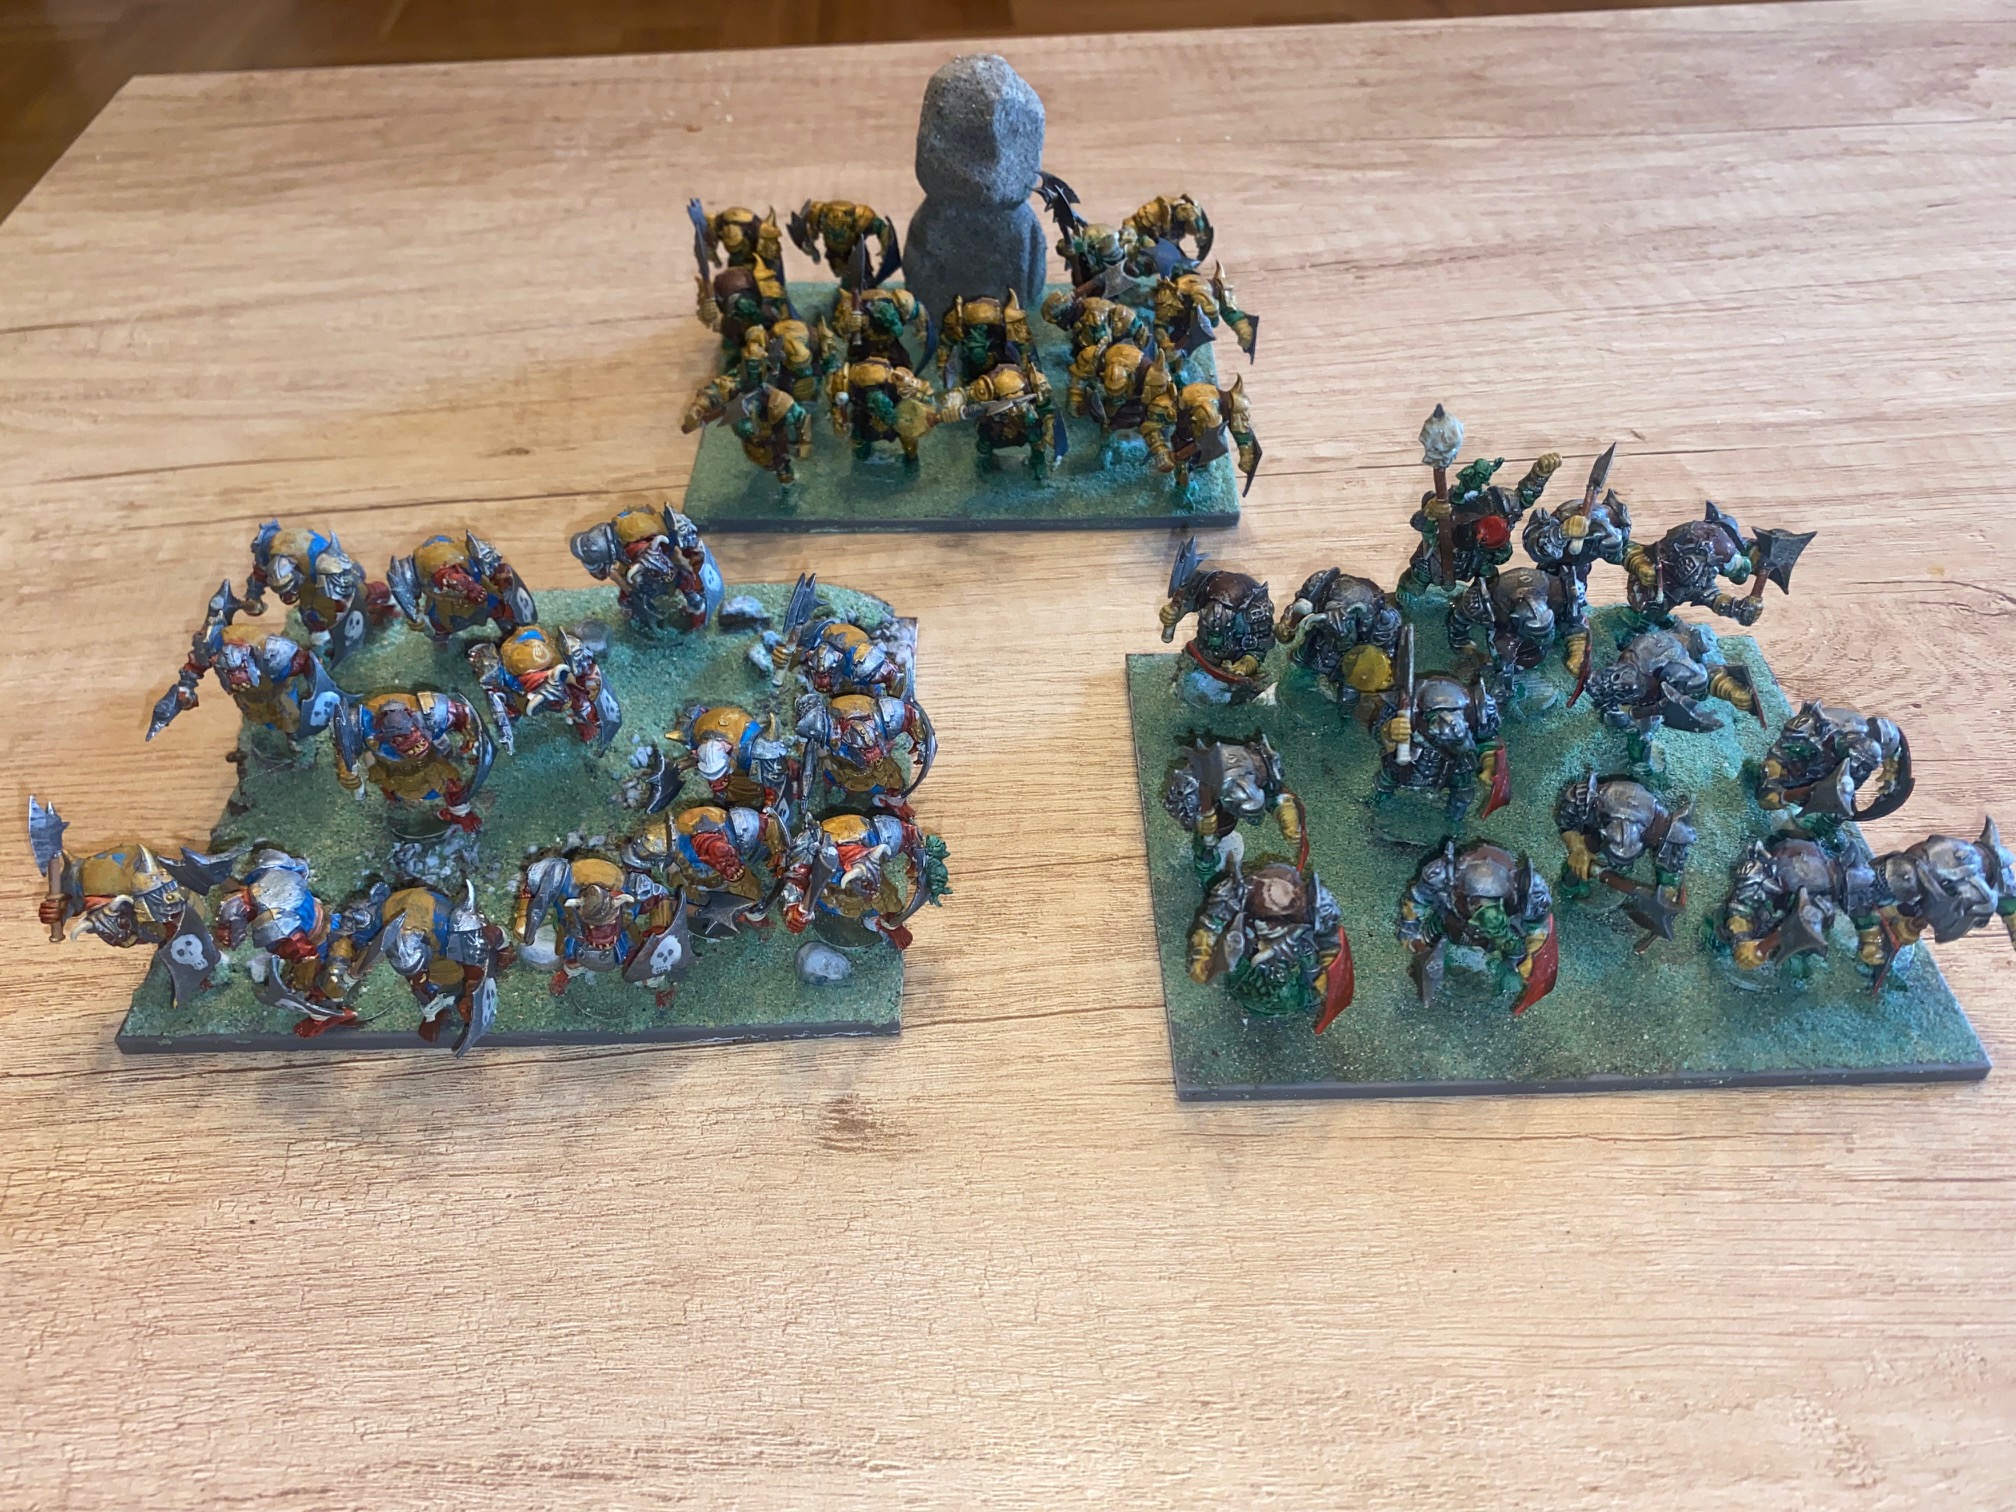 Three "uniform" schemes
I painted these Mantic Orcs mainly with contrast pants, and yes, I forgot to take pictures. But there’s nothing new or exciting here I’m afraid, so nothing really missed!
I didn’t want to paint them all the “usual” green, so mixed in a red skinned unit to add variety. I will continue with this with additional units going forwards.
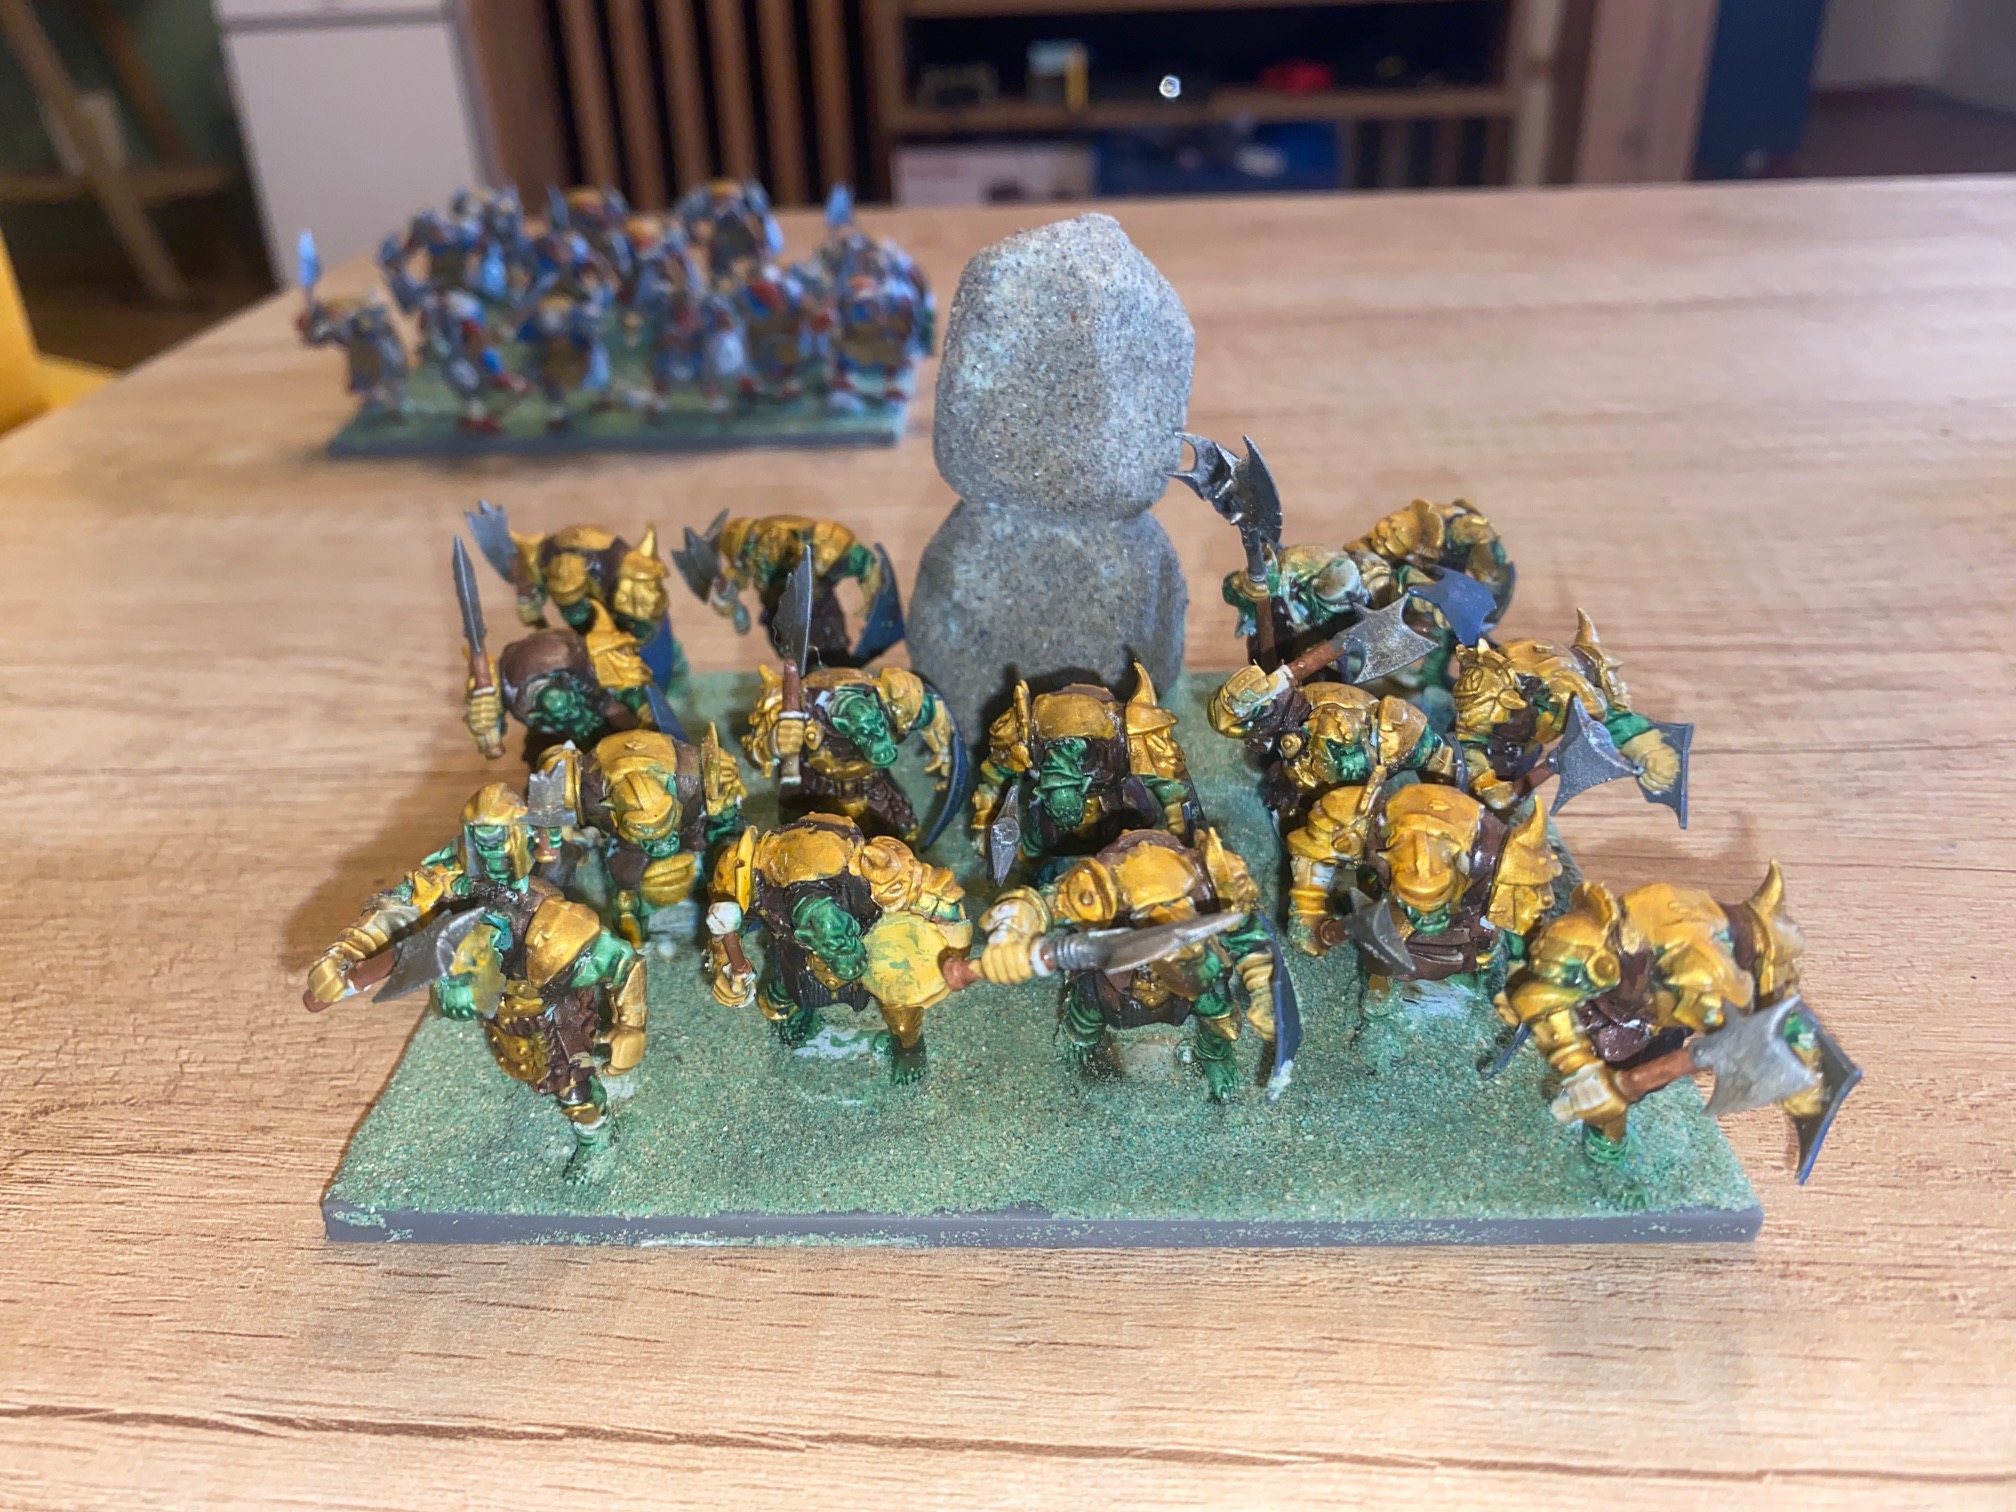
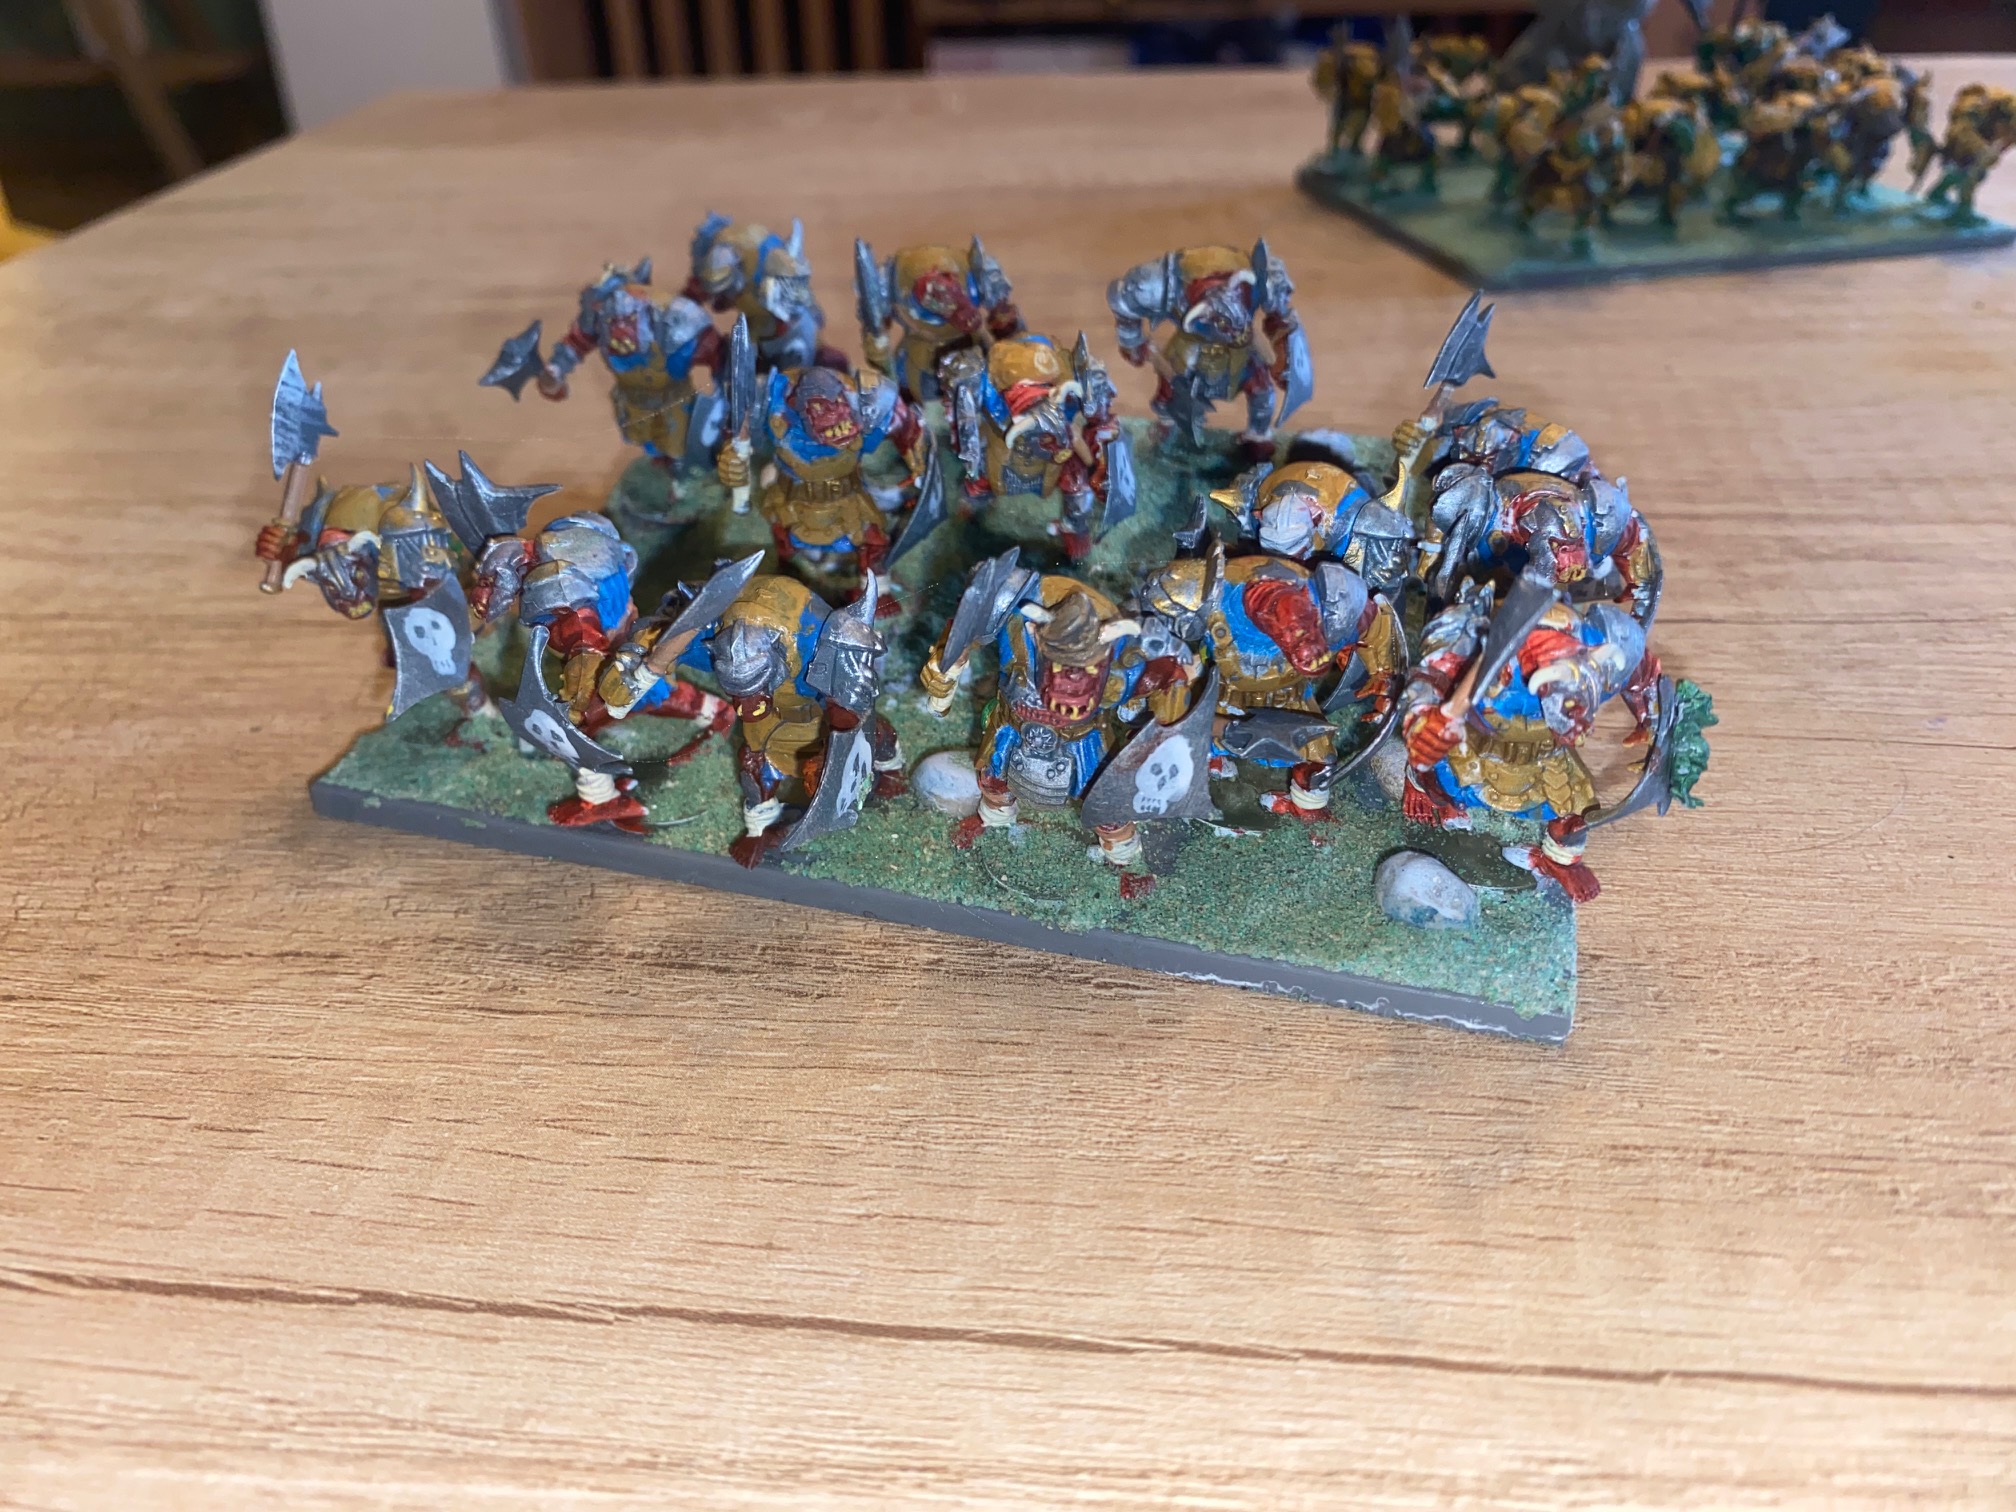
I still have to finalize the basing and make the “Statue” on the “Gold” orc base more dramatic. But it’s supposed to represent a basic idol for their “god”, whatever that is. But I’ll tart it up next.
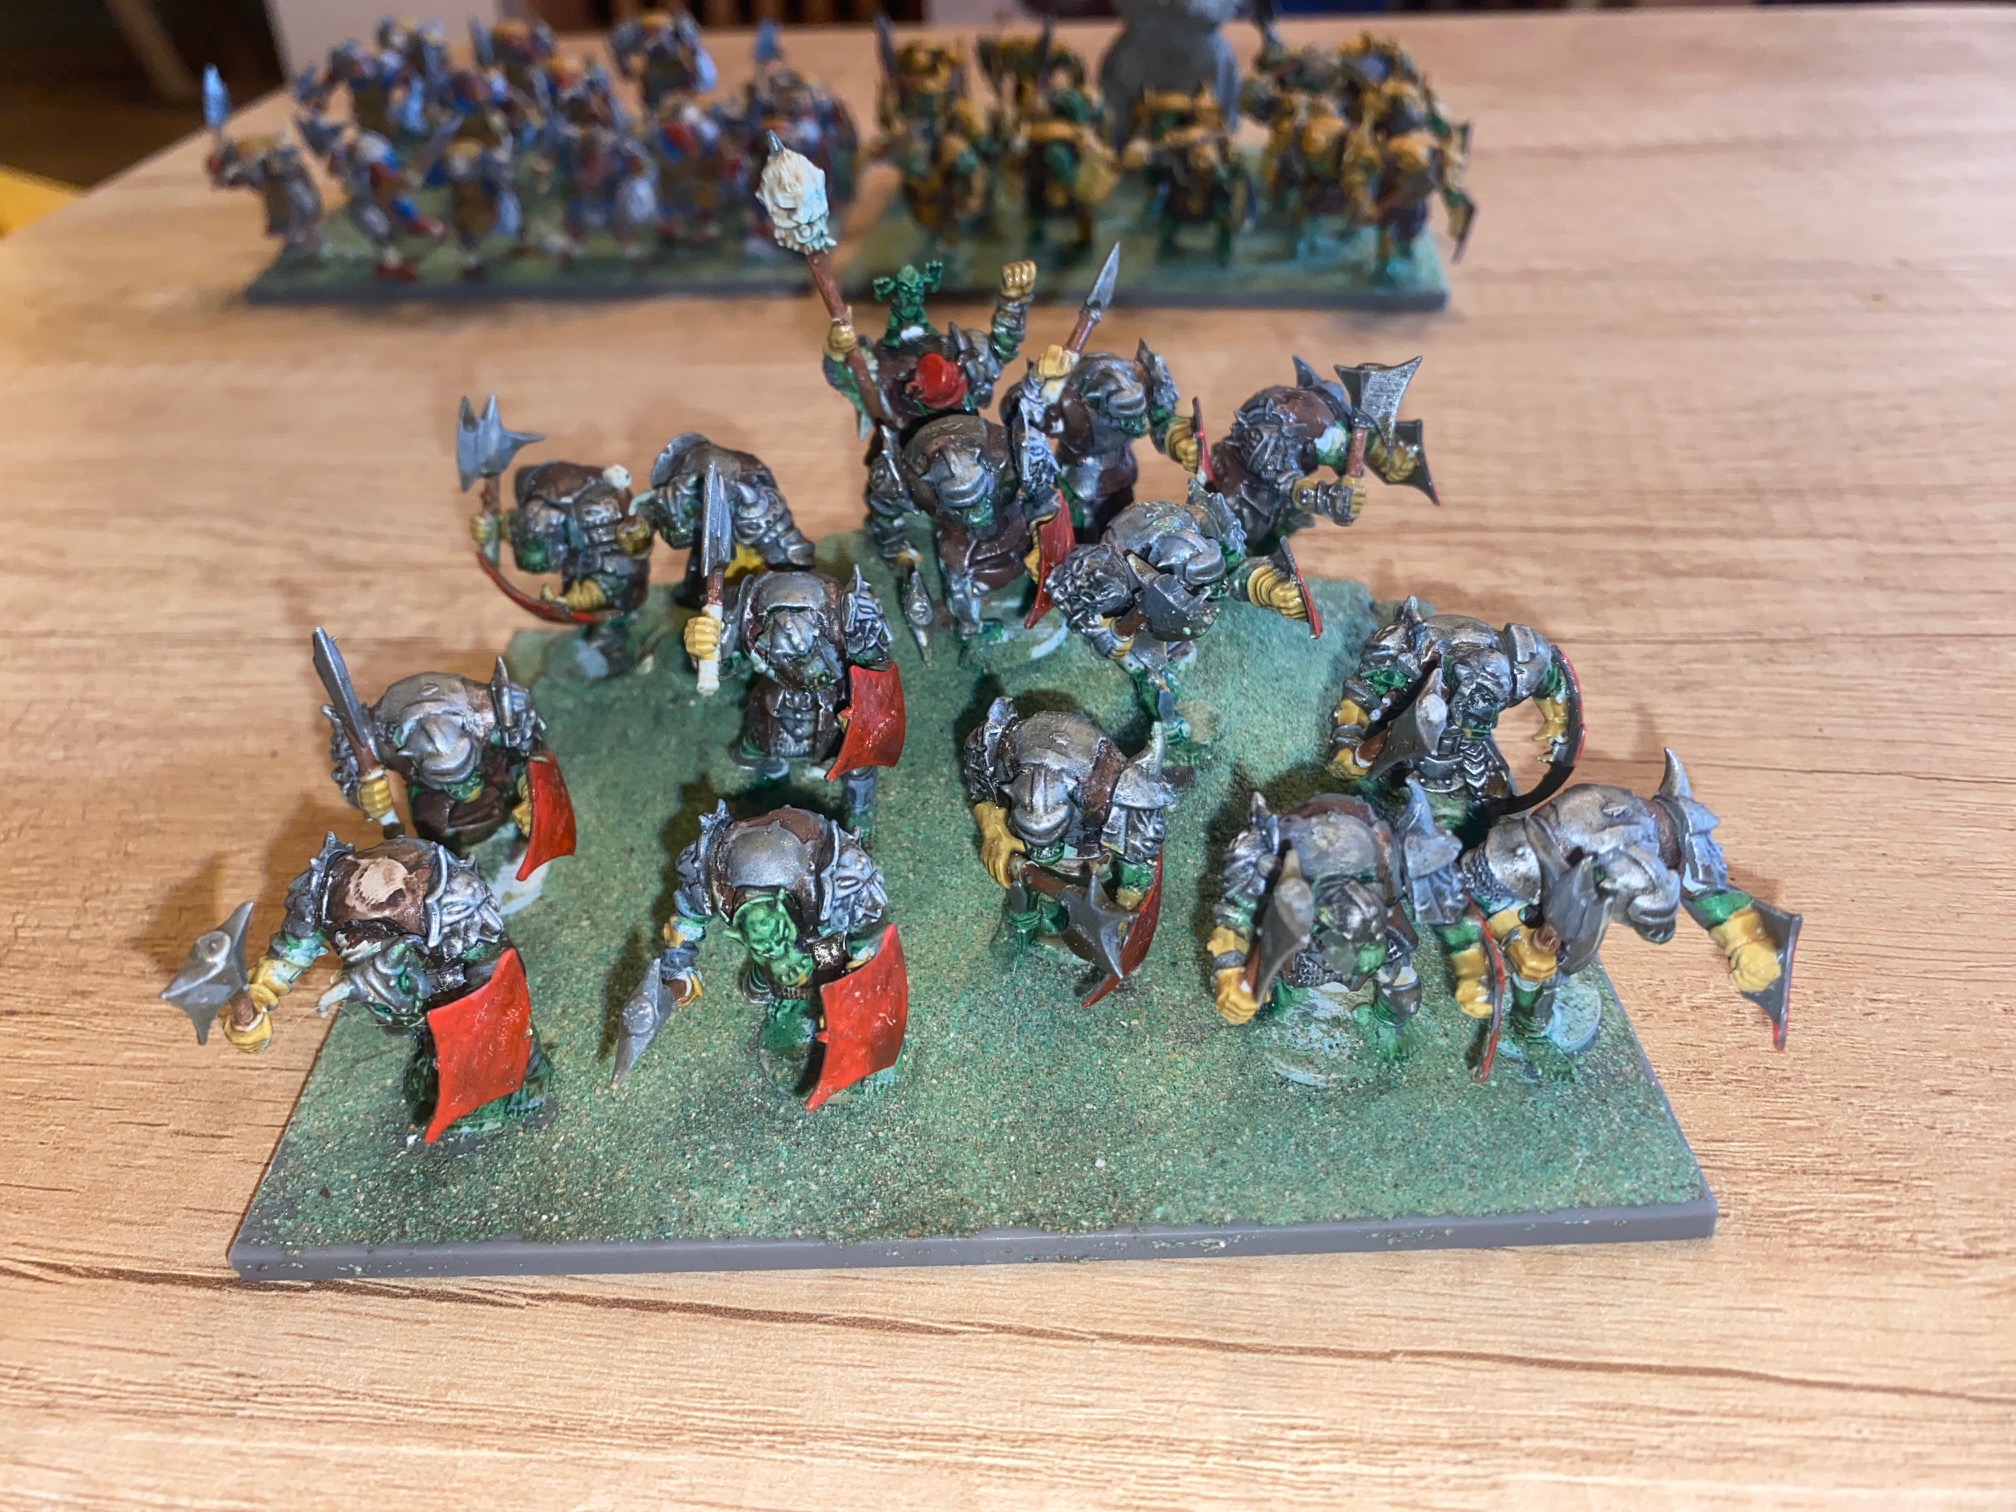
I also need to paint some simple shield patterns on two of the units.
The “Skull” shield was done with watered down white paint and splodged on the shield and moved around with the brush to make the basic skull shape. When dry, I added the features with black paint.
I’ll add something similar on the other units.
Next, I need to finish the Elves, then make a few more Orc units and finally get to Battle!
Happy Gaming!
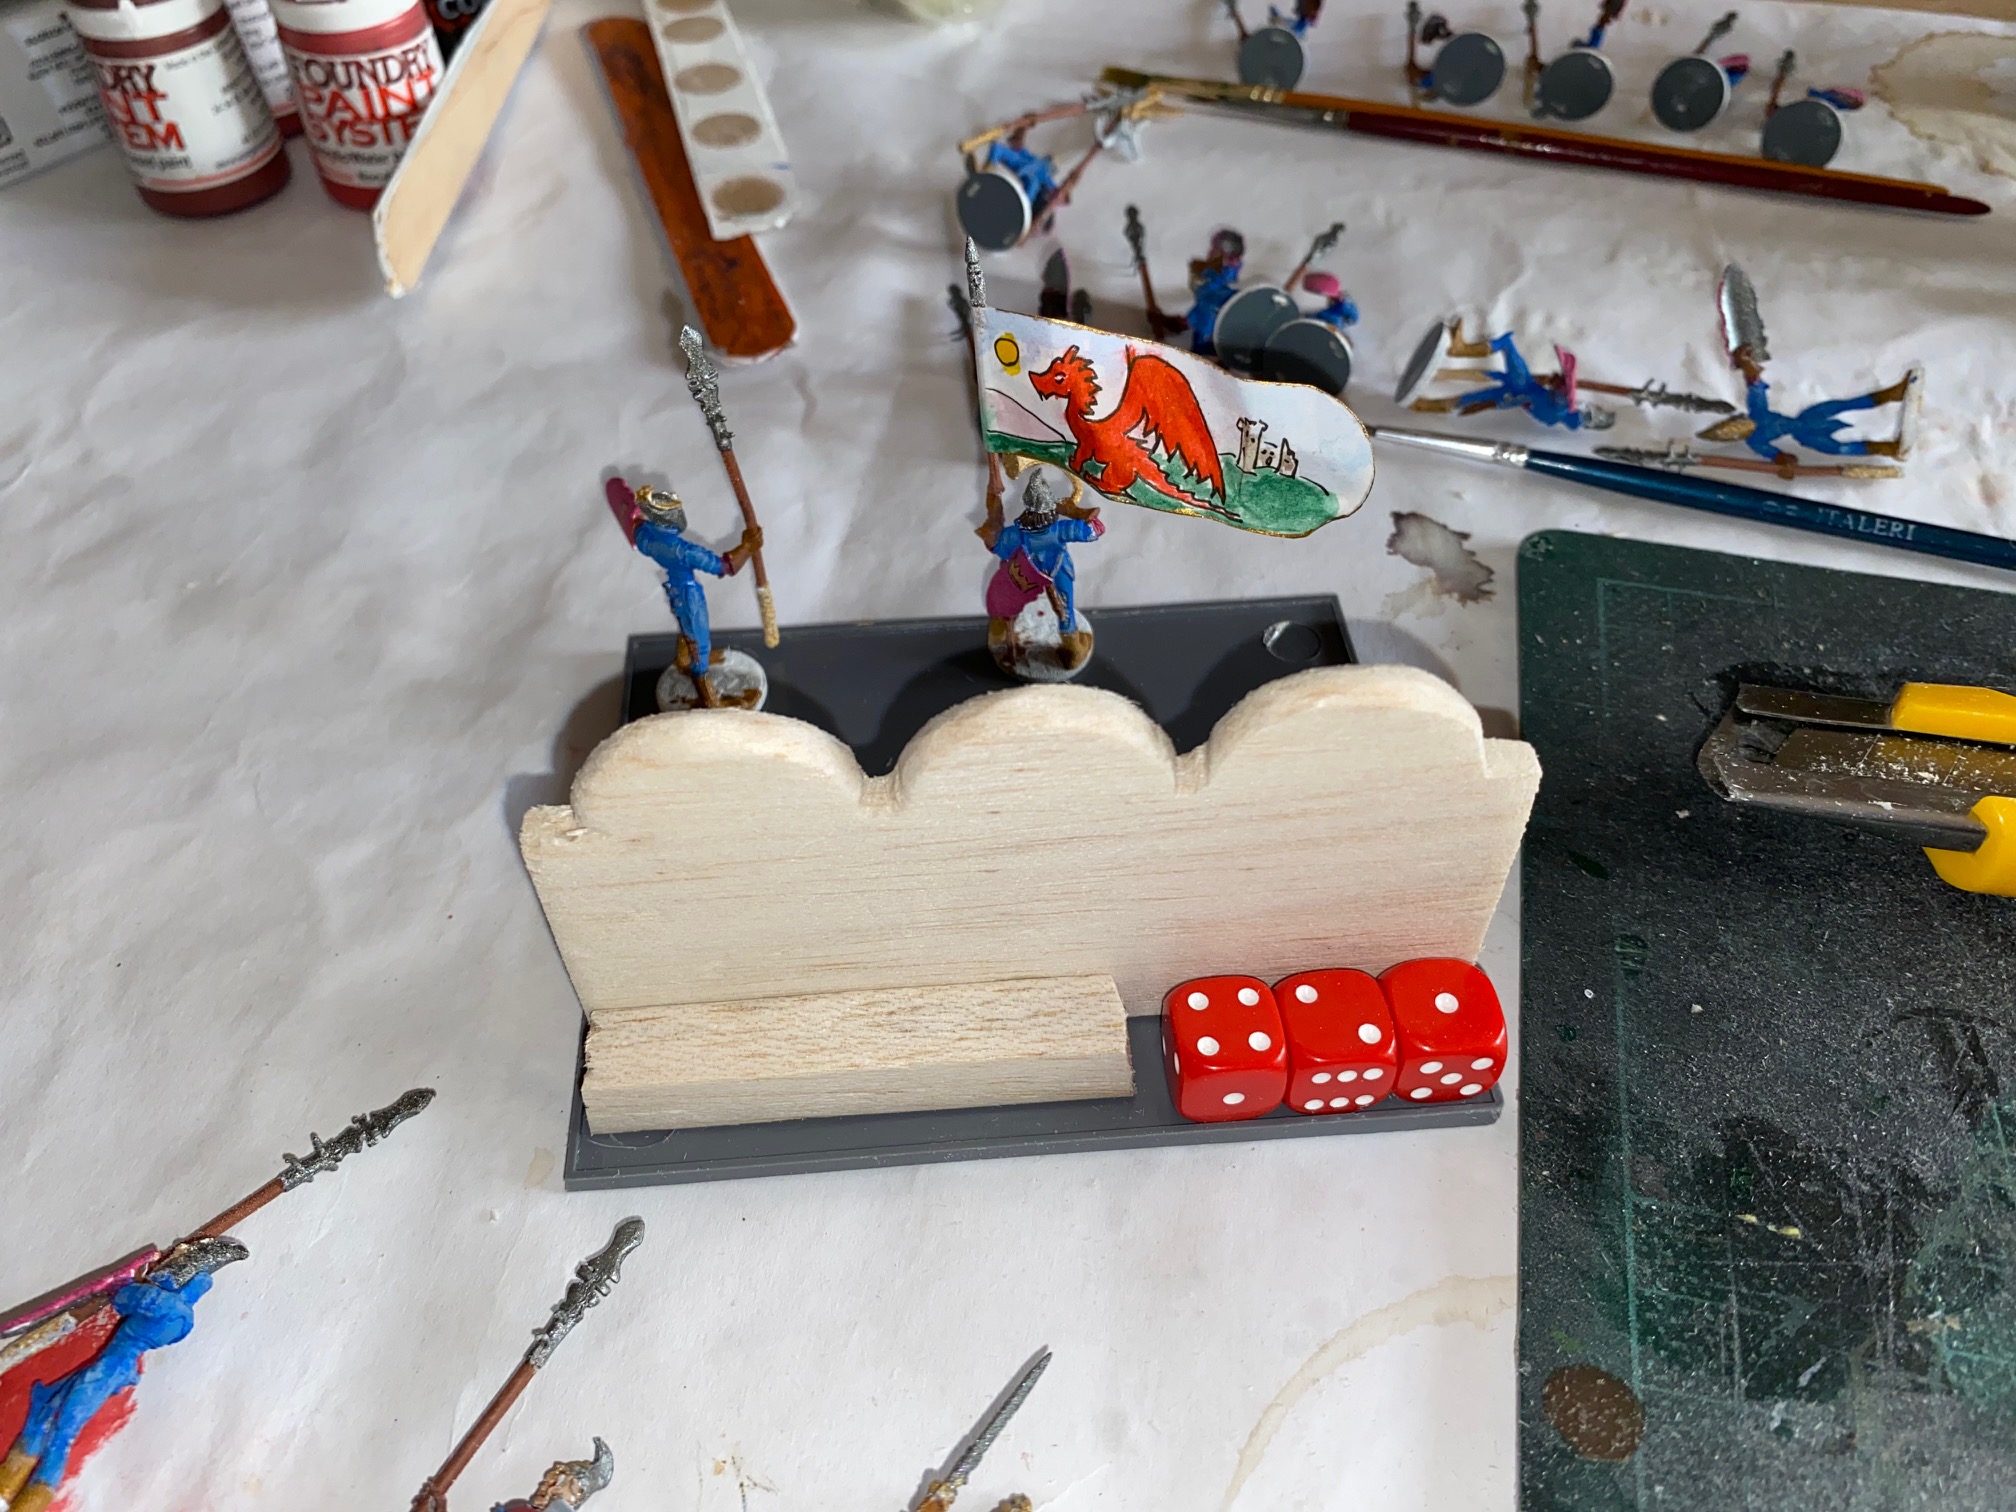
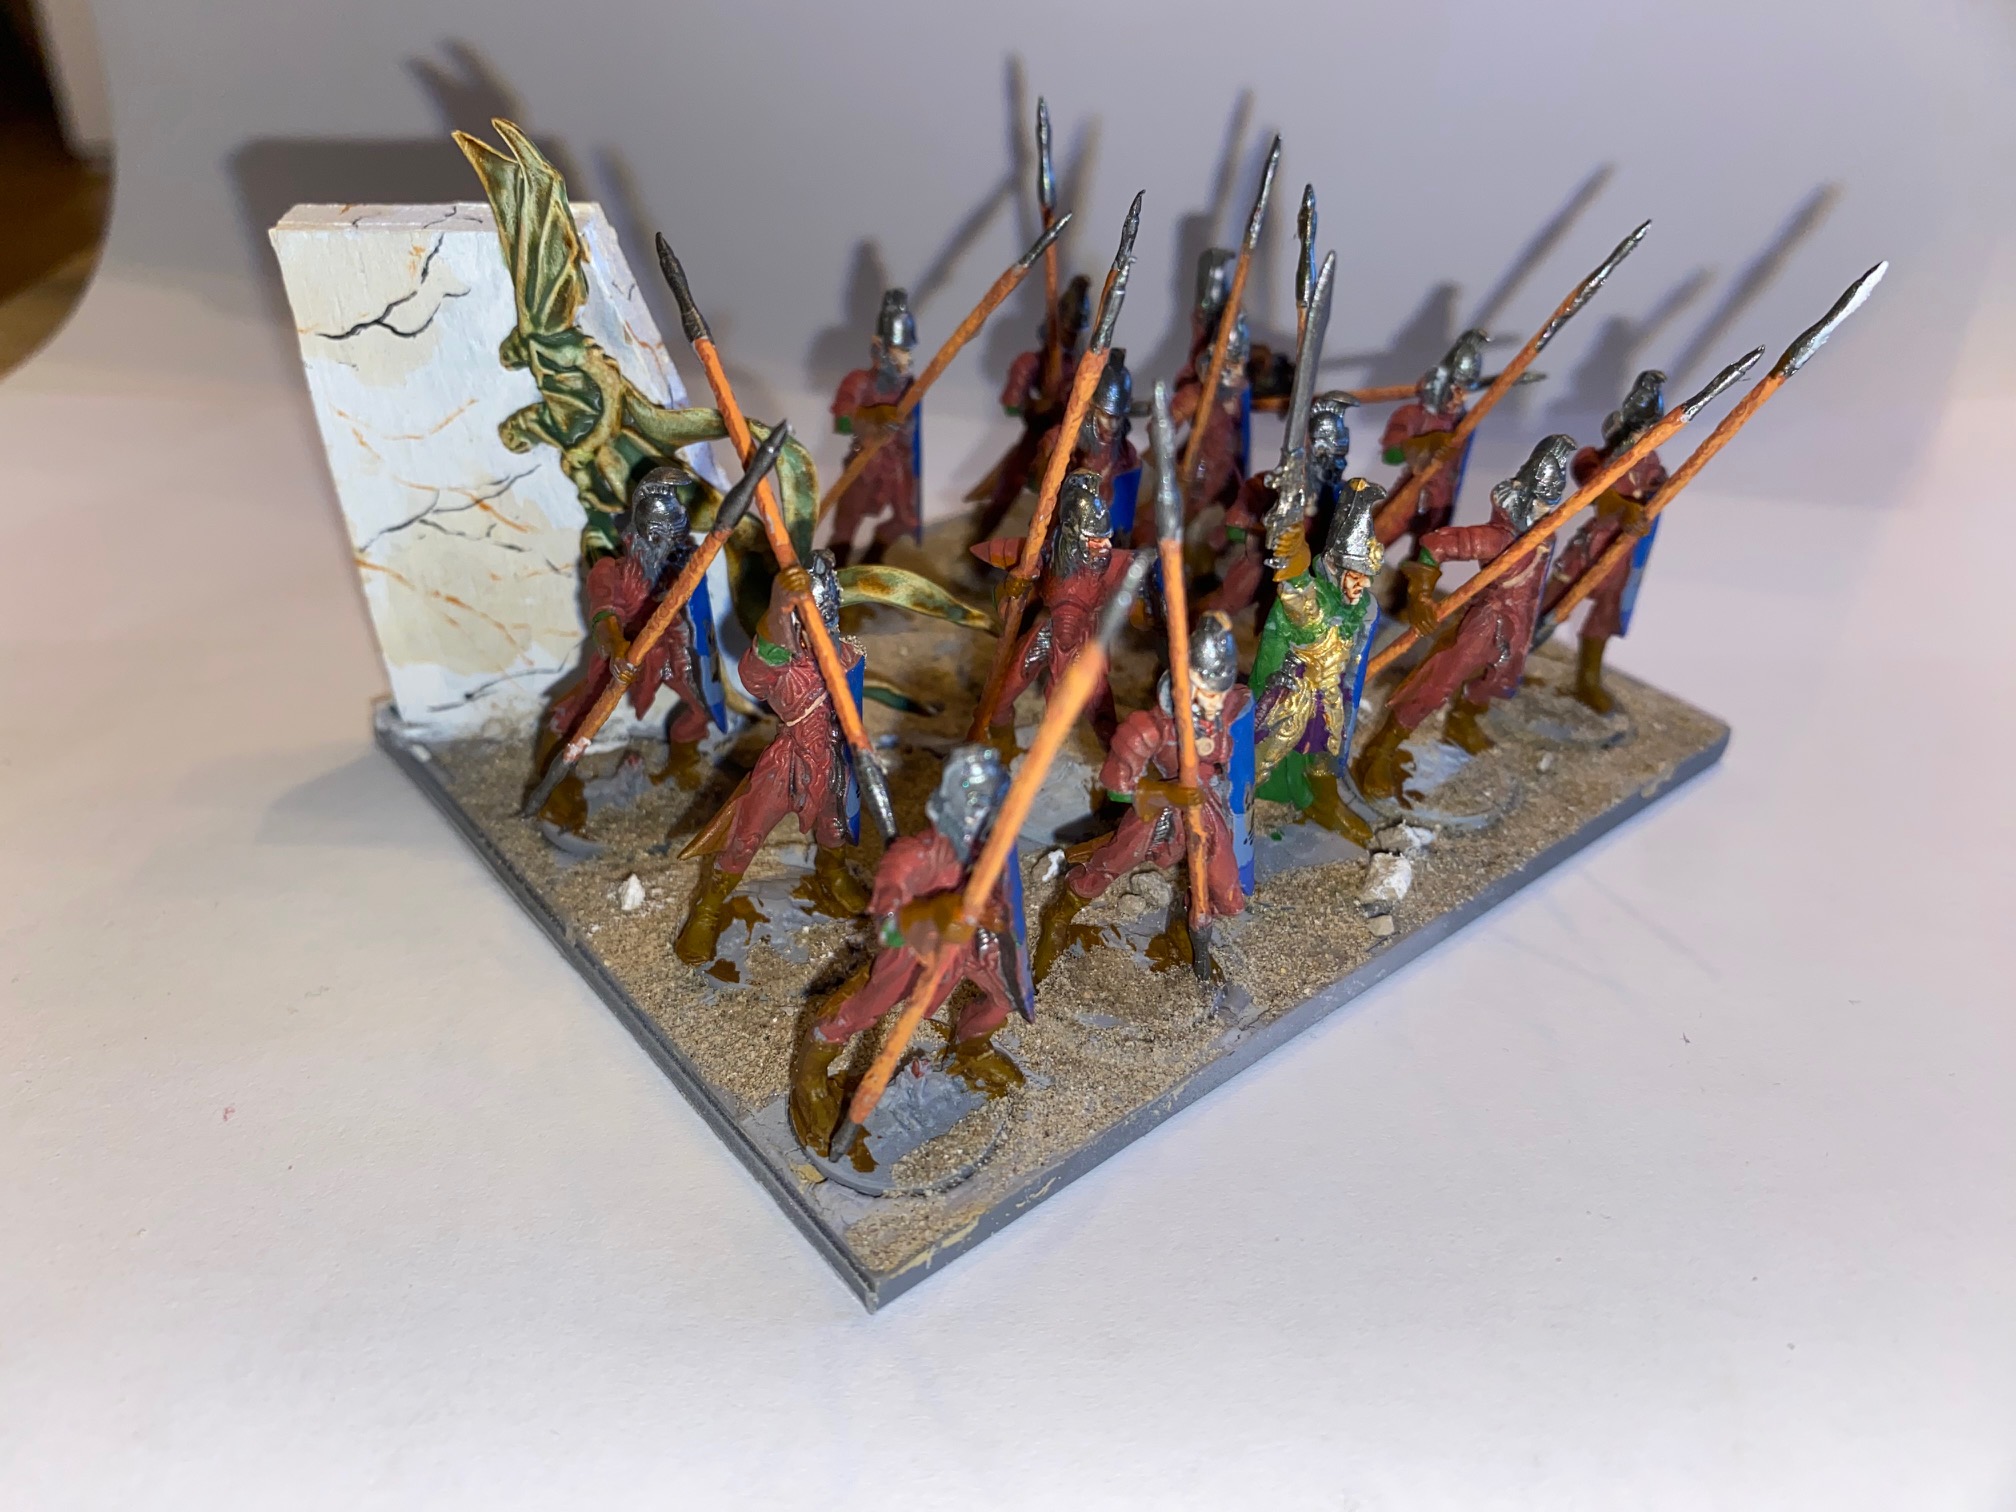
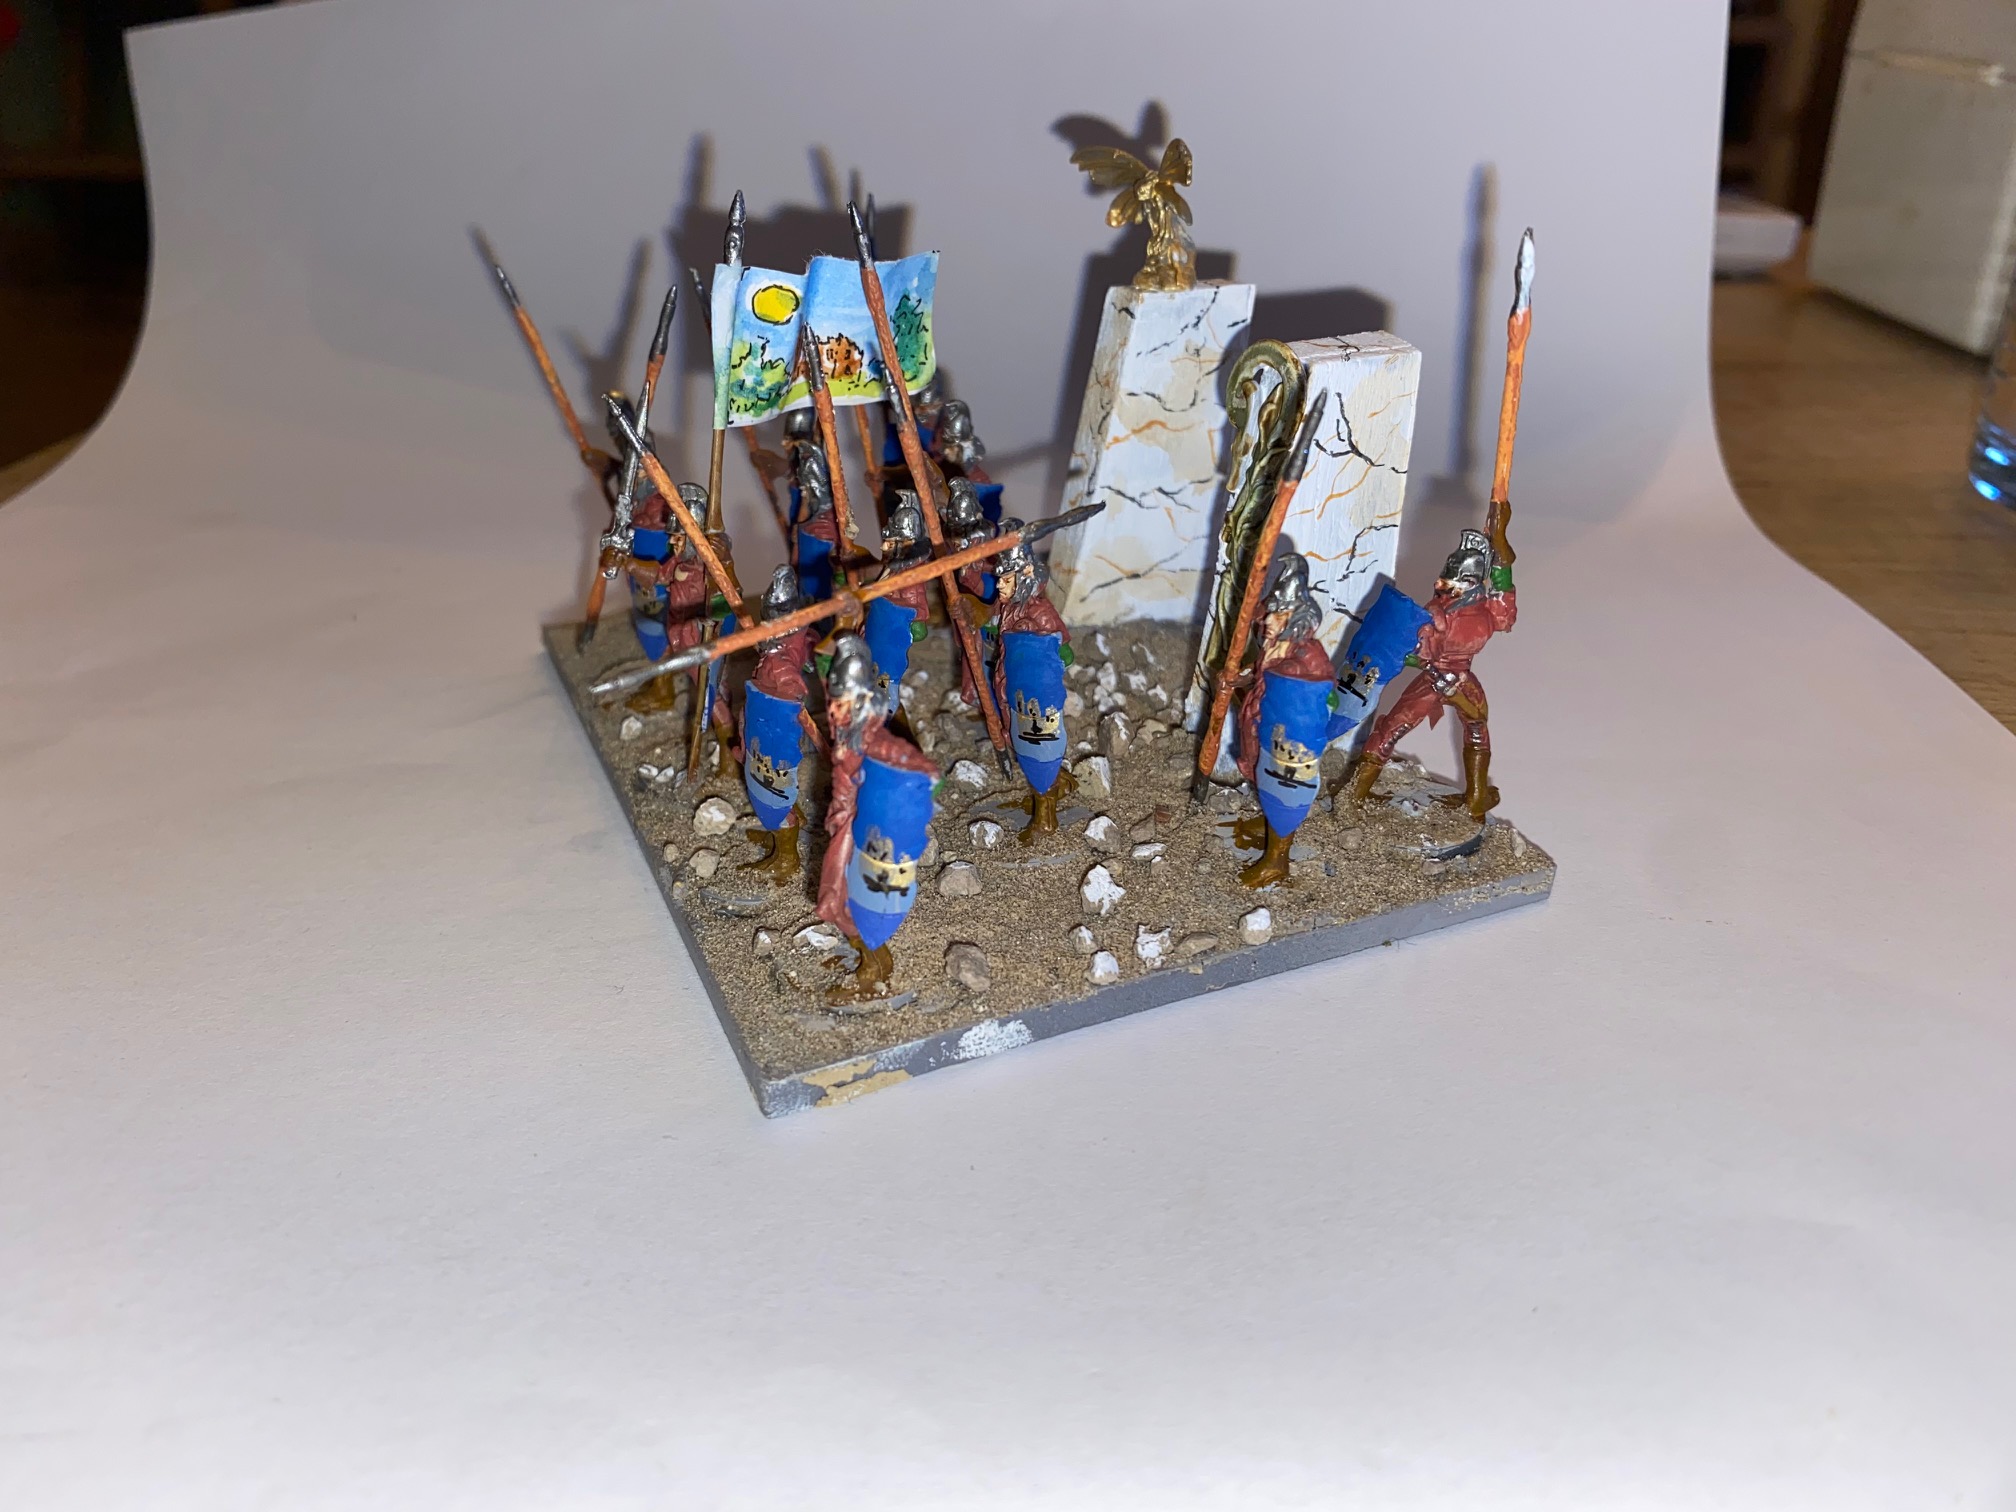
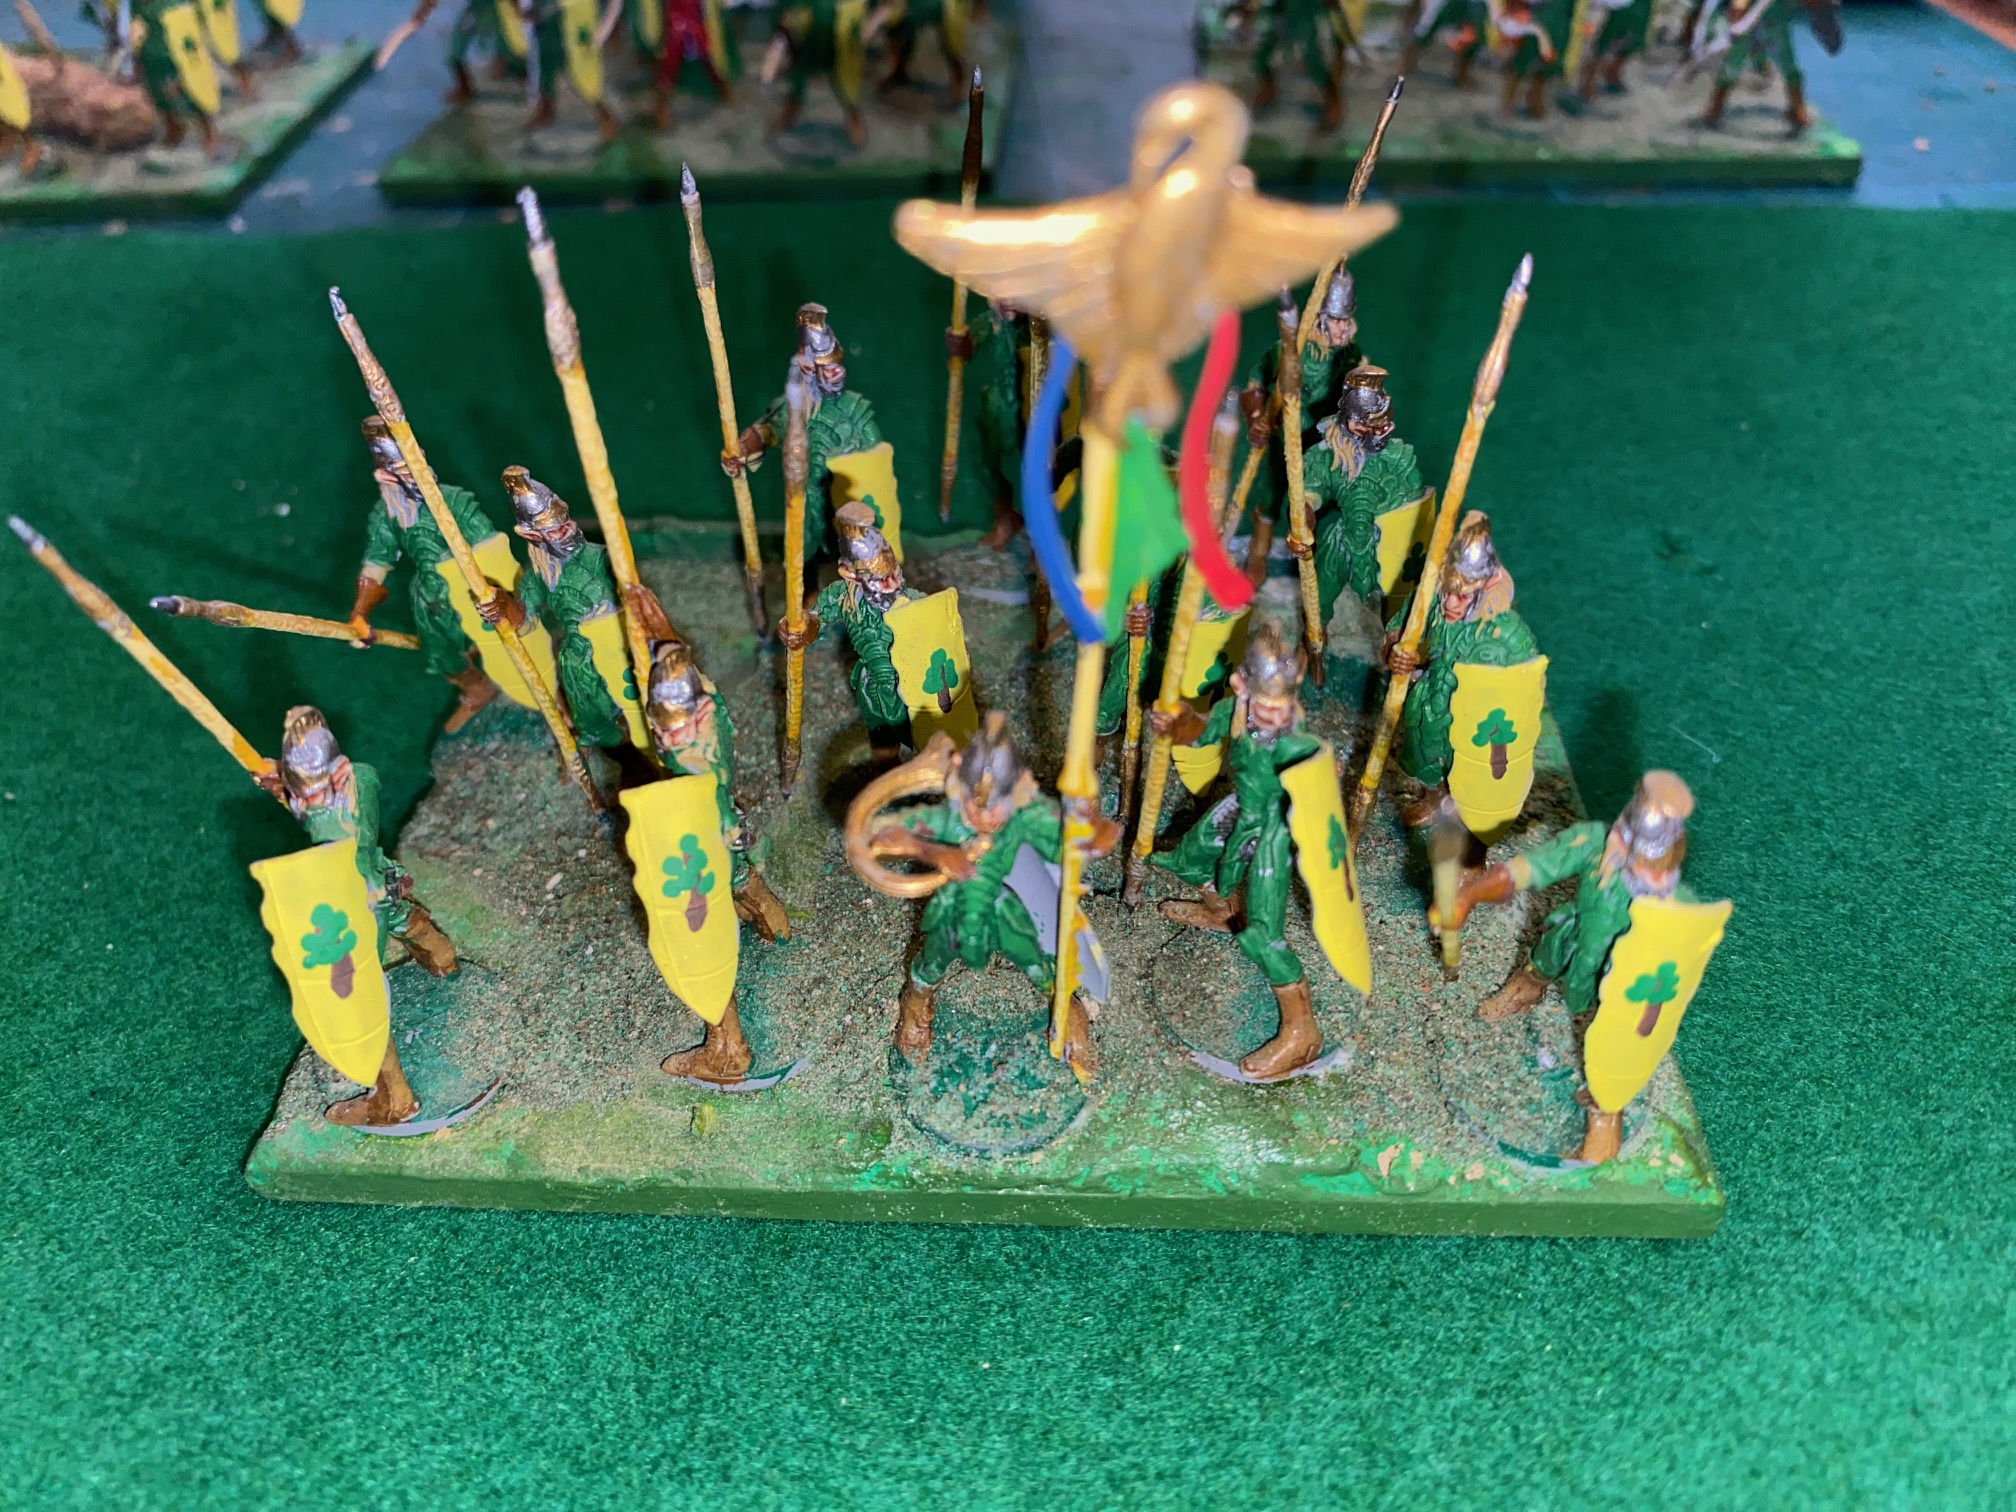
The "Royal" Regiments
This next group of units represent the Royal guard regiments for the Elven King (or Queen). The painting job is just as in the previous units, I chose the main armor color to be a Royal Blue, but the overall approach is quick and simple paint job.
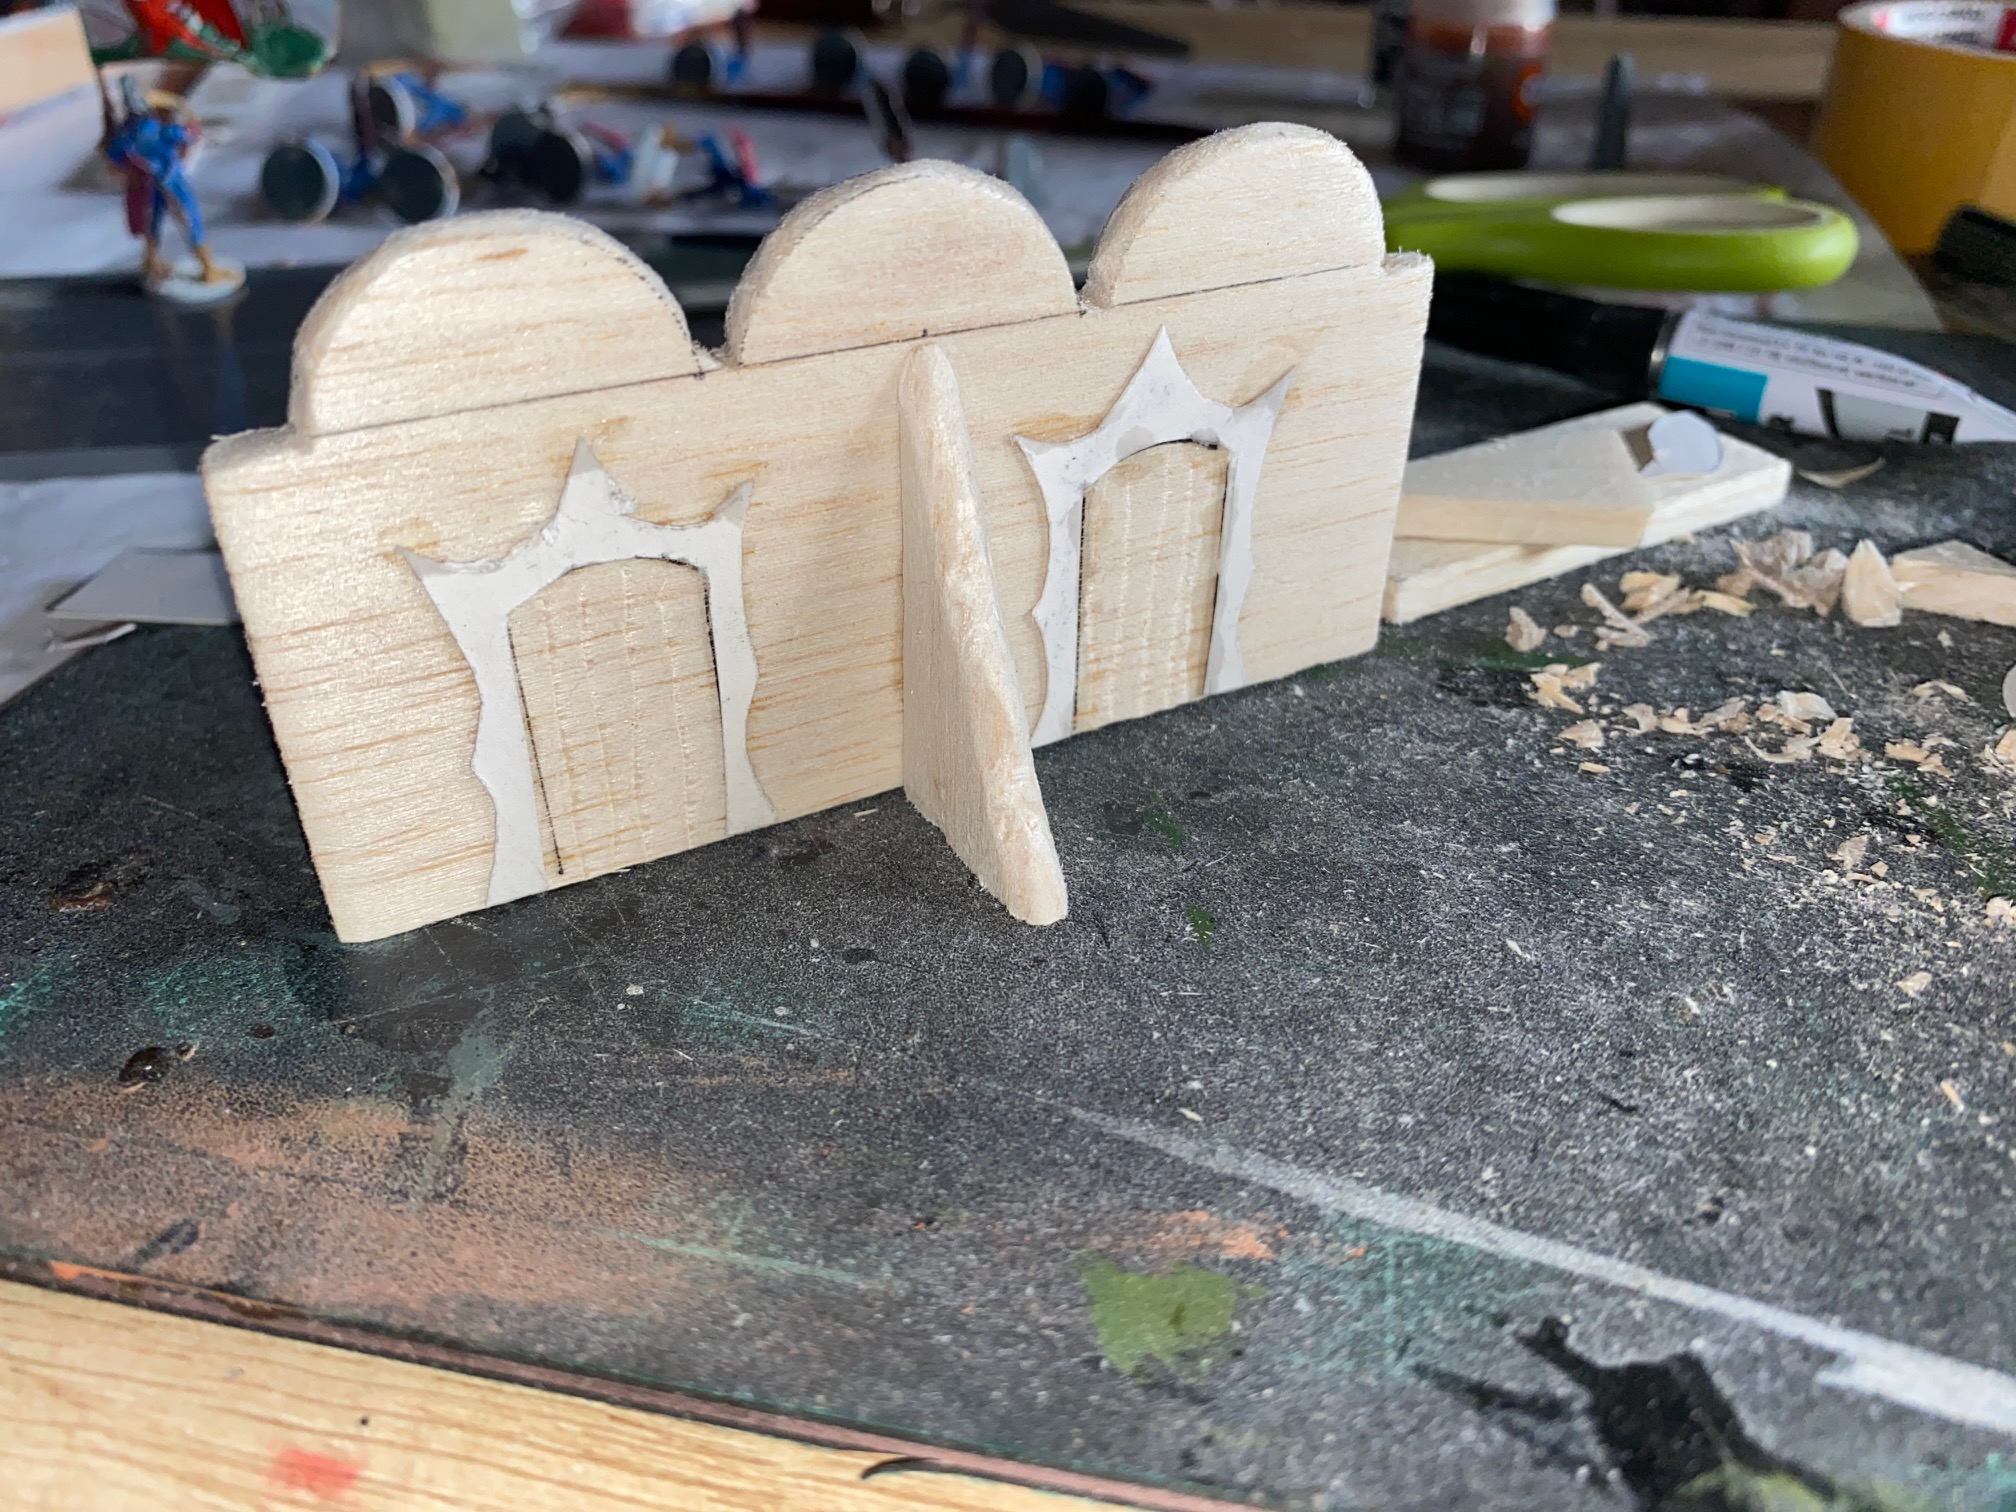
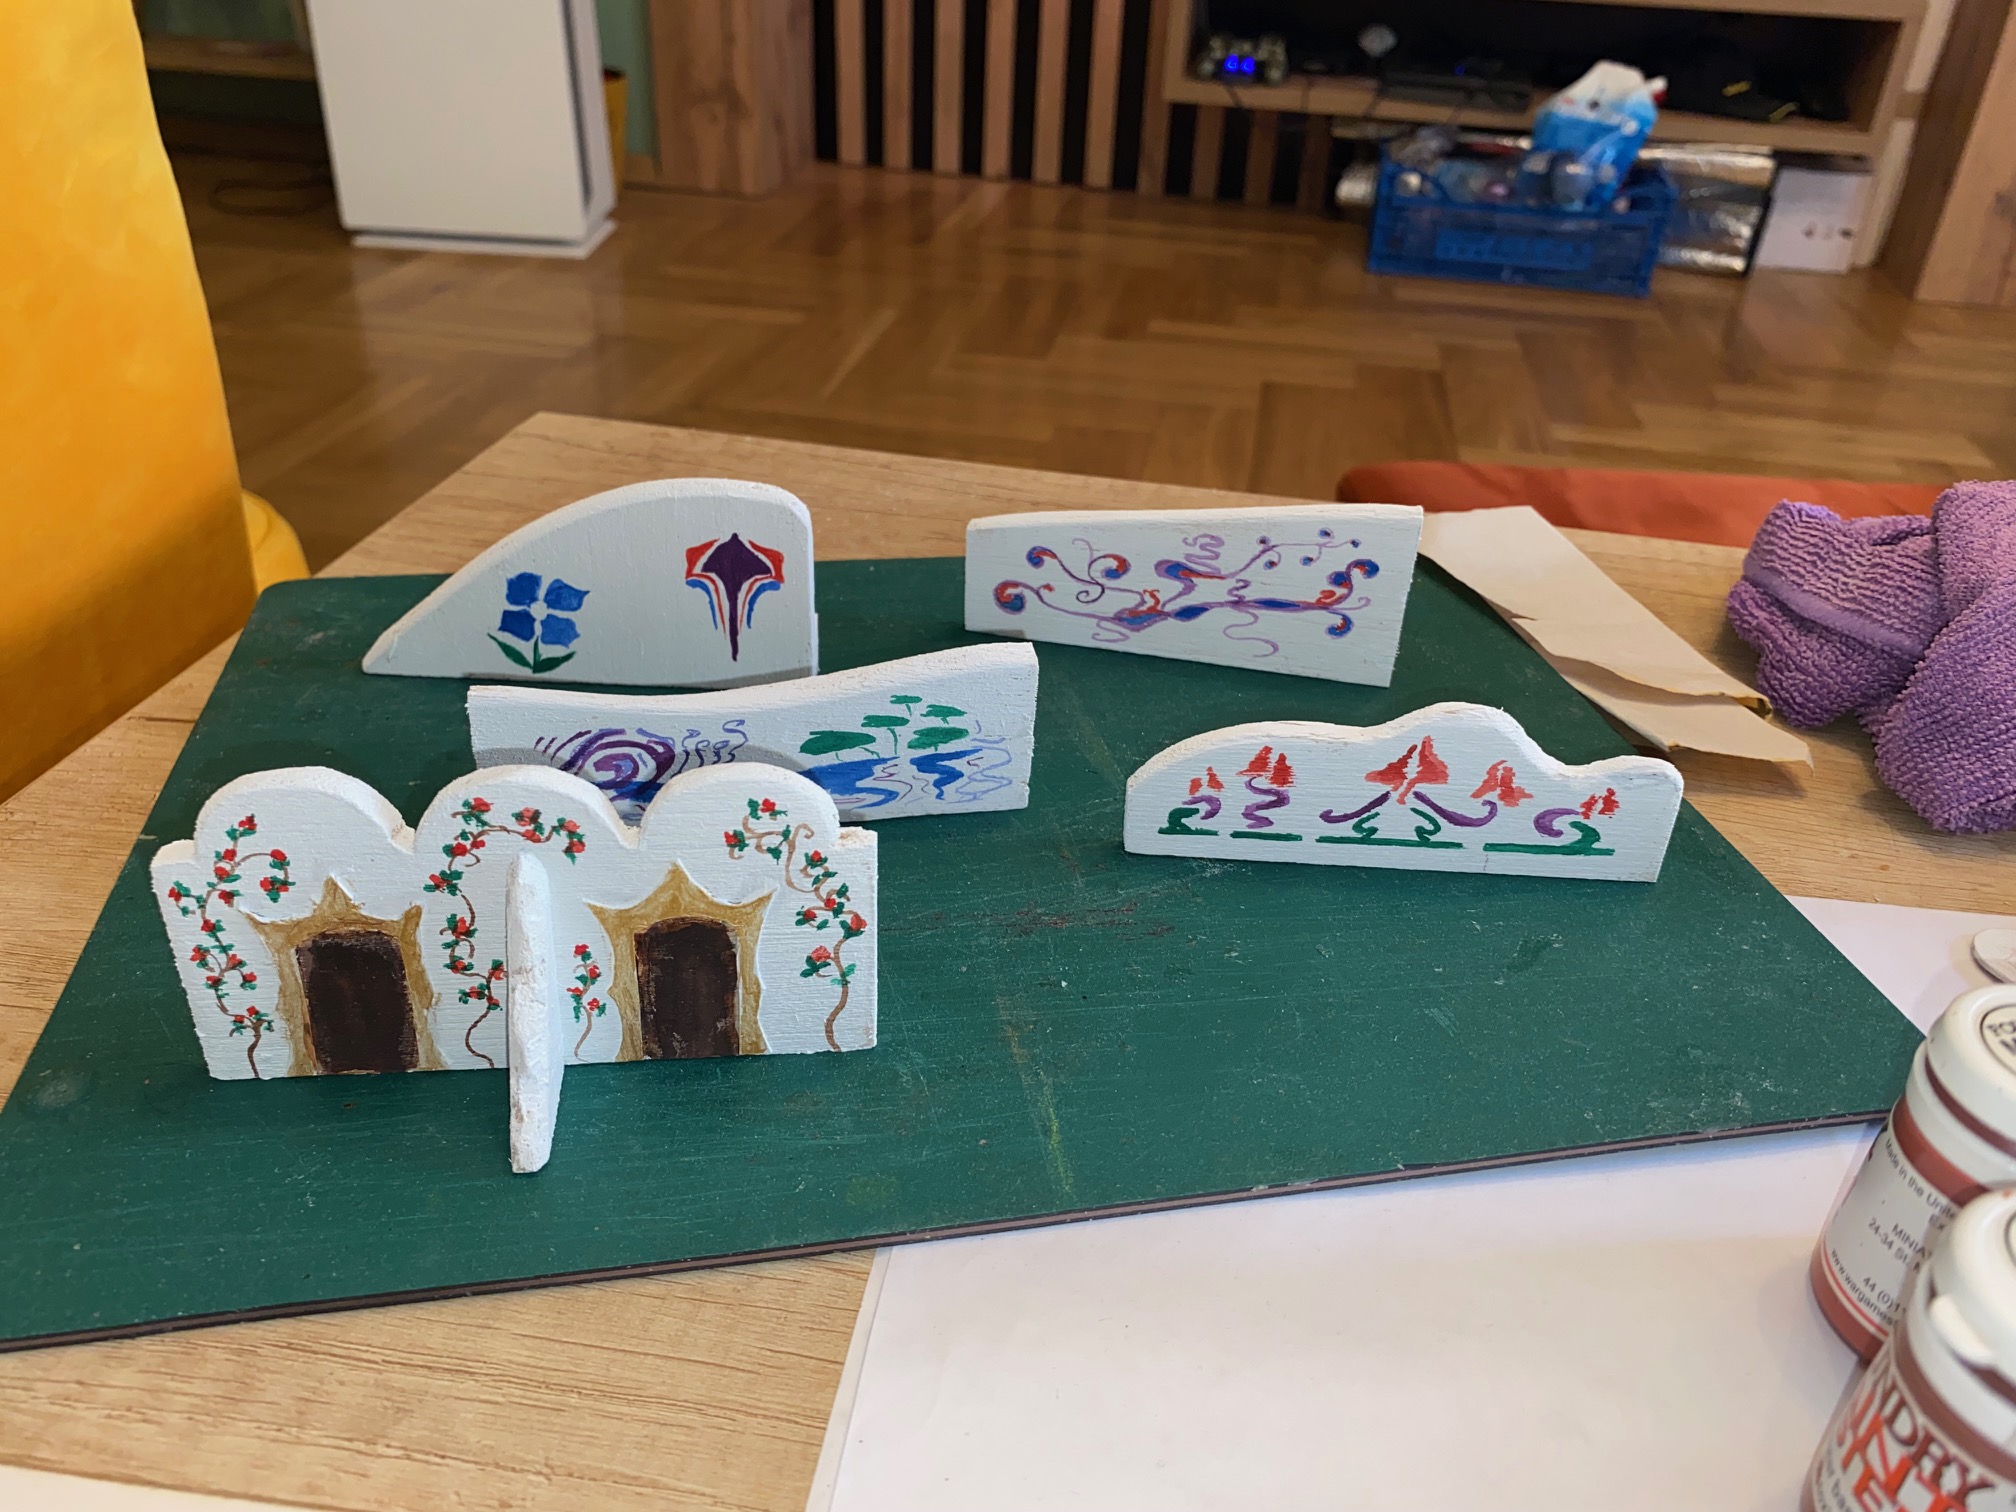
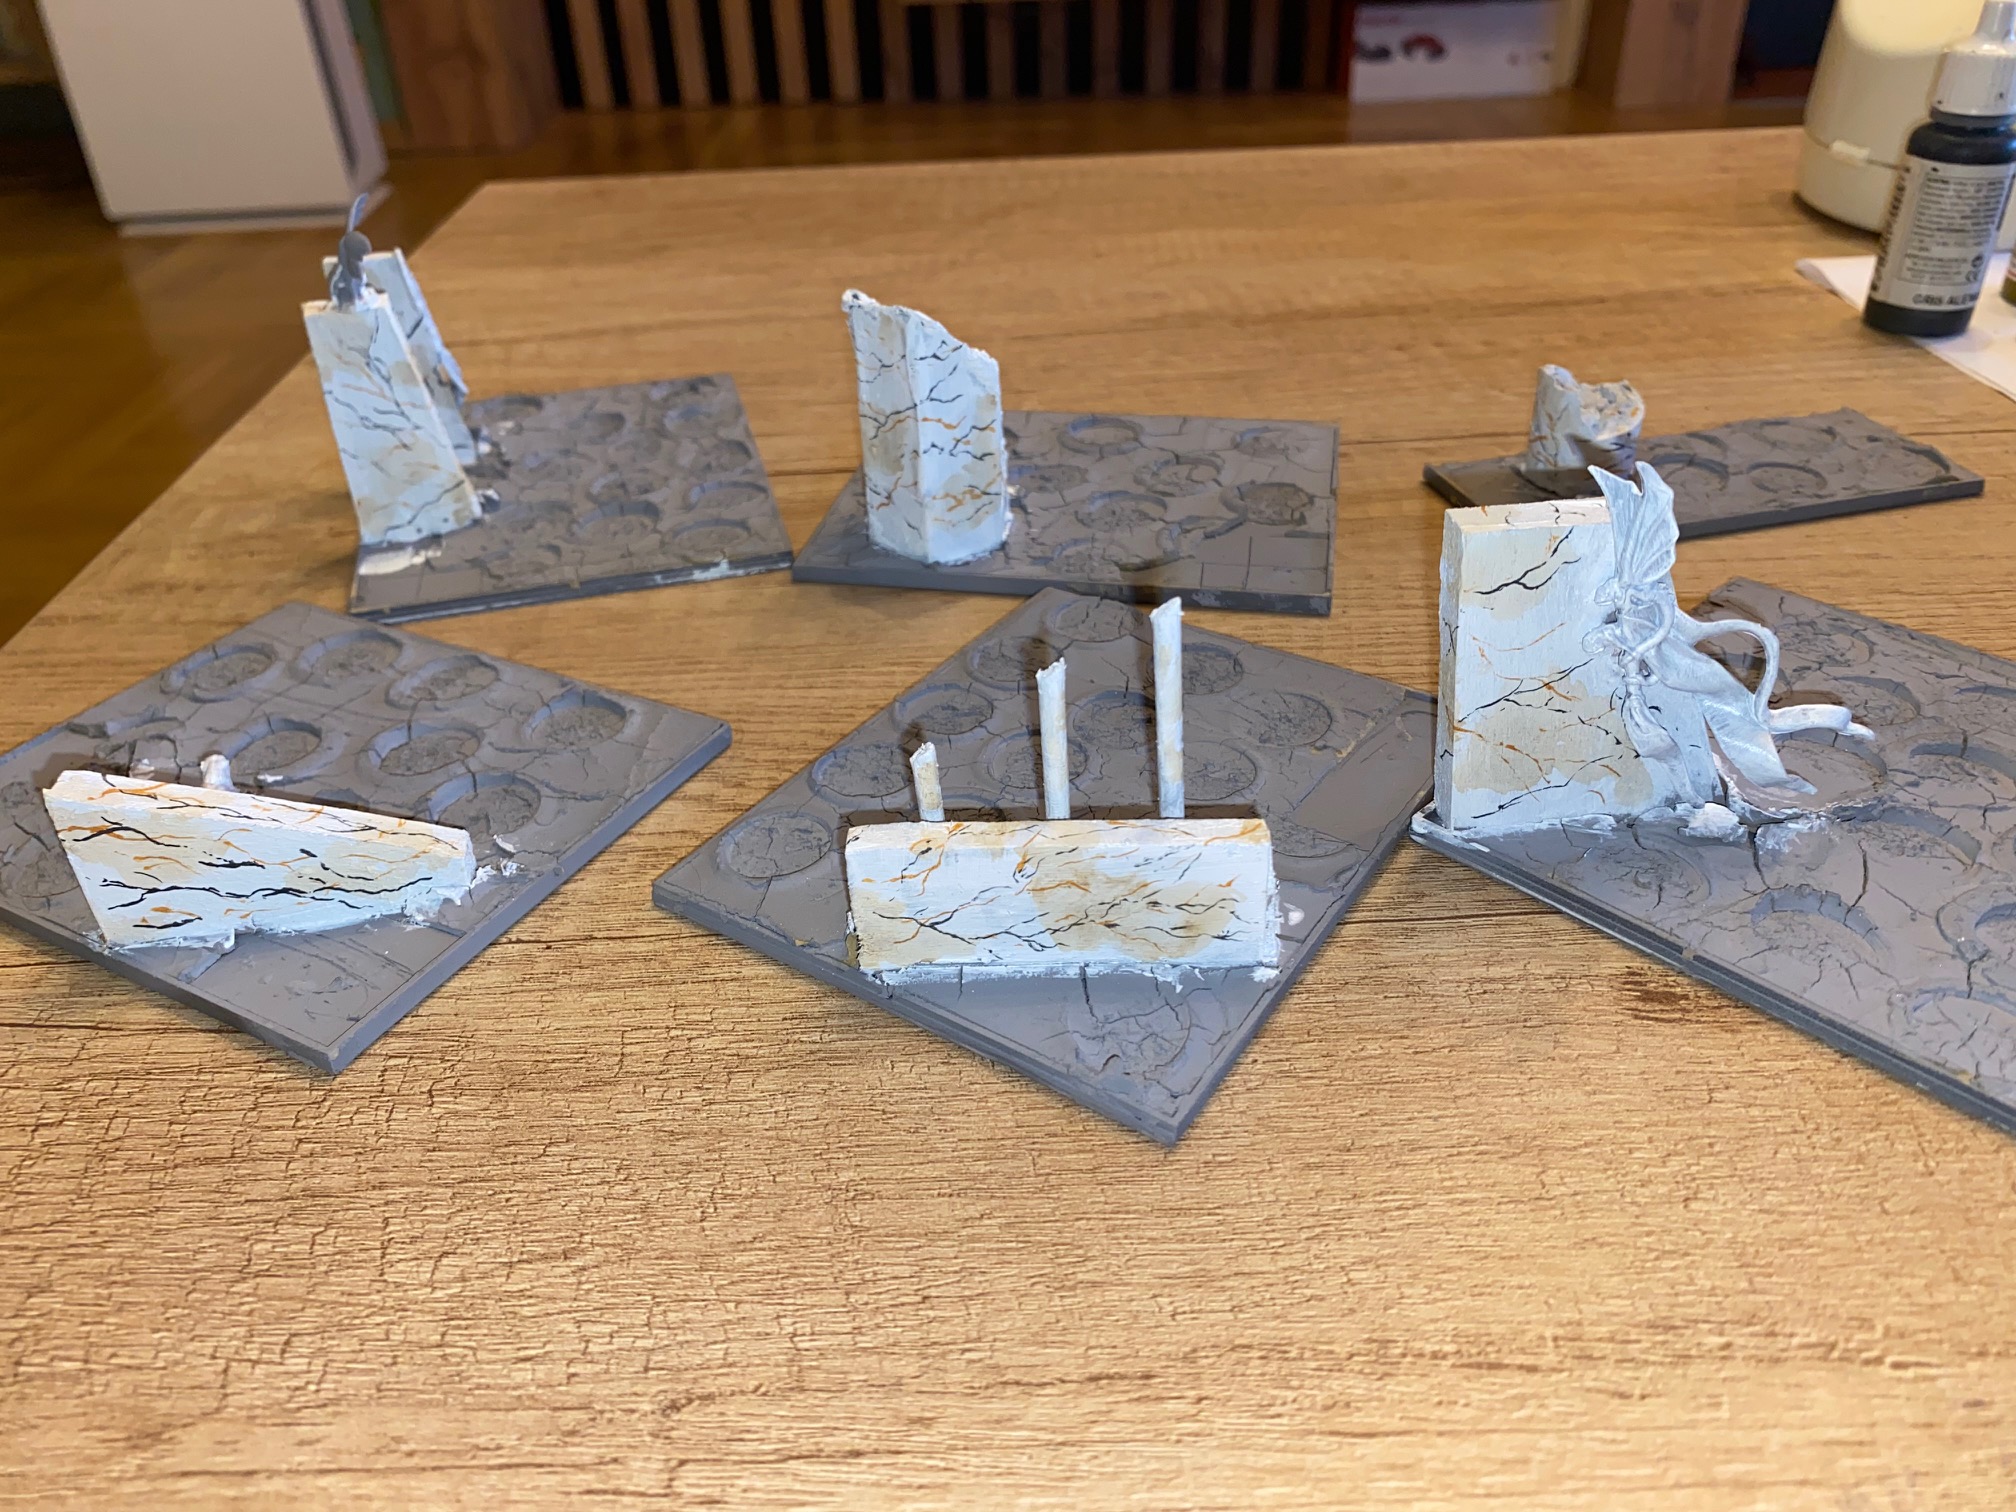
What I wanted to try differently was bases with more elaborate features and for this I wanted to make some form of “wall” to the rear of the base to present the castle or Elven ‘court’ walls.
As inspiration, I decided to go with an “Art Nouveau” style and took as a pattern a book of stencils I have has for decades (some of which adorned one of my houses many years ago).
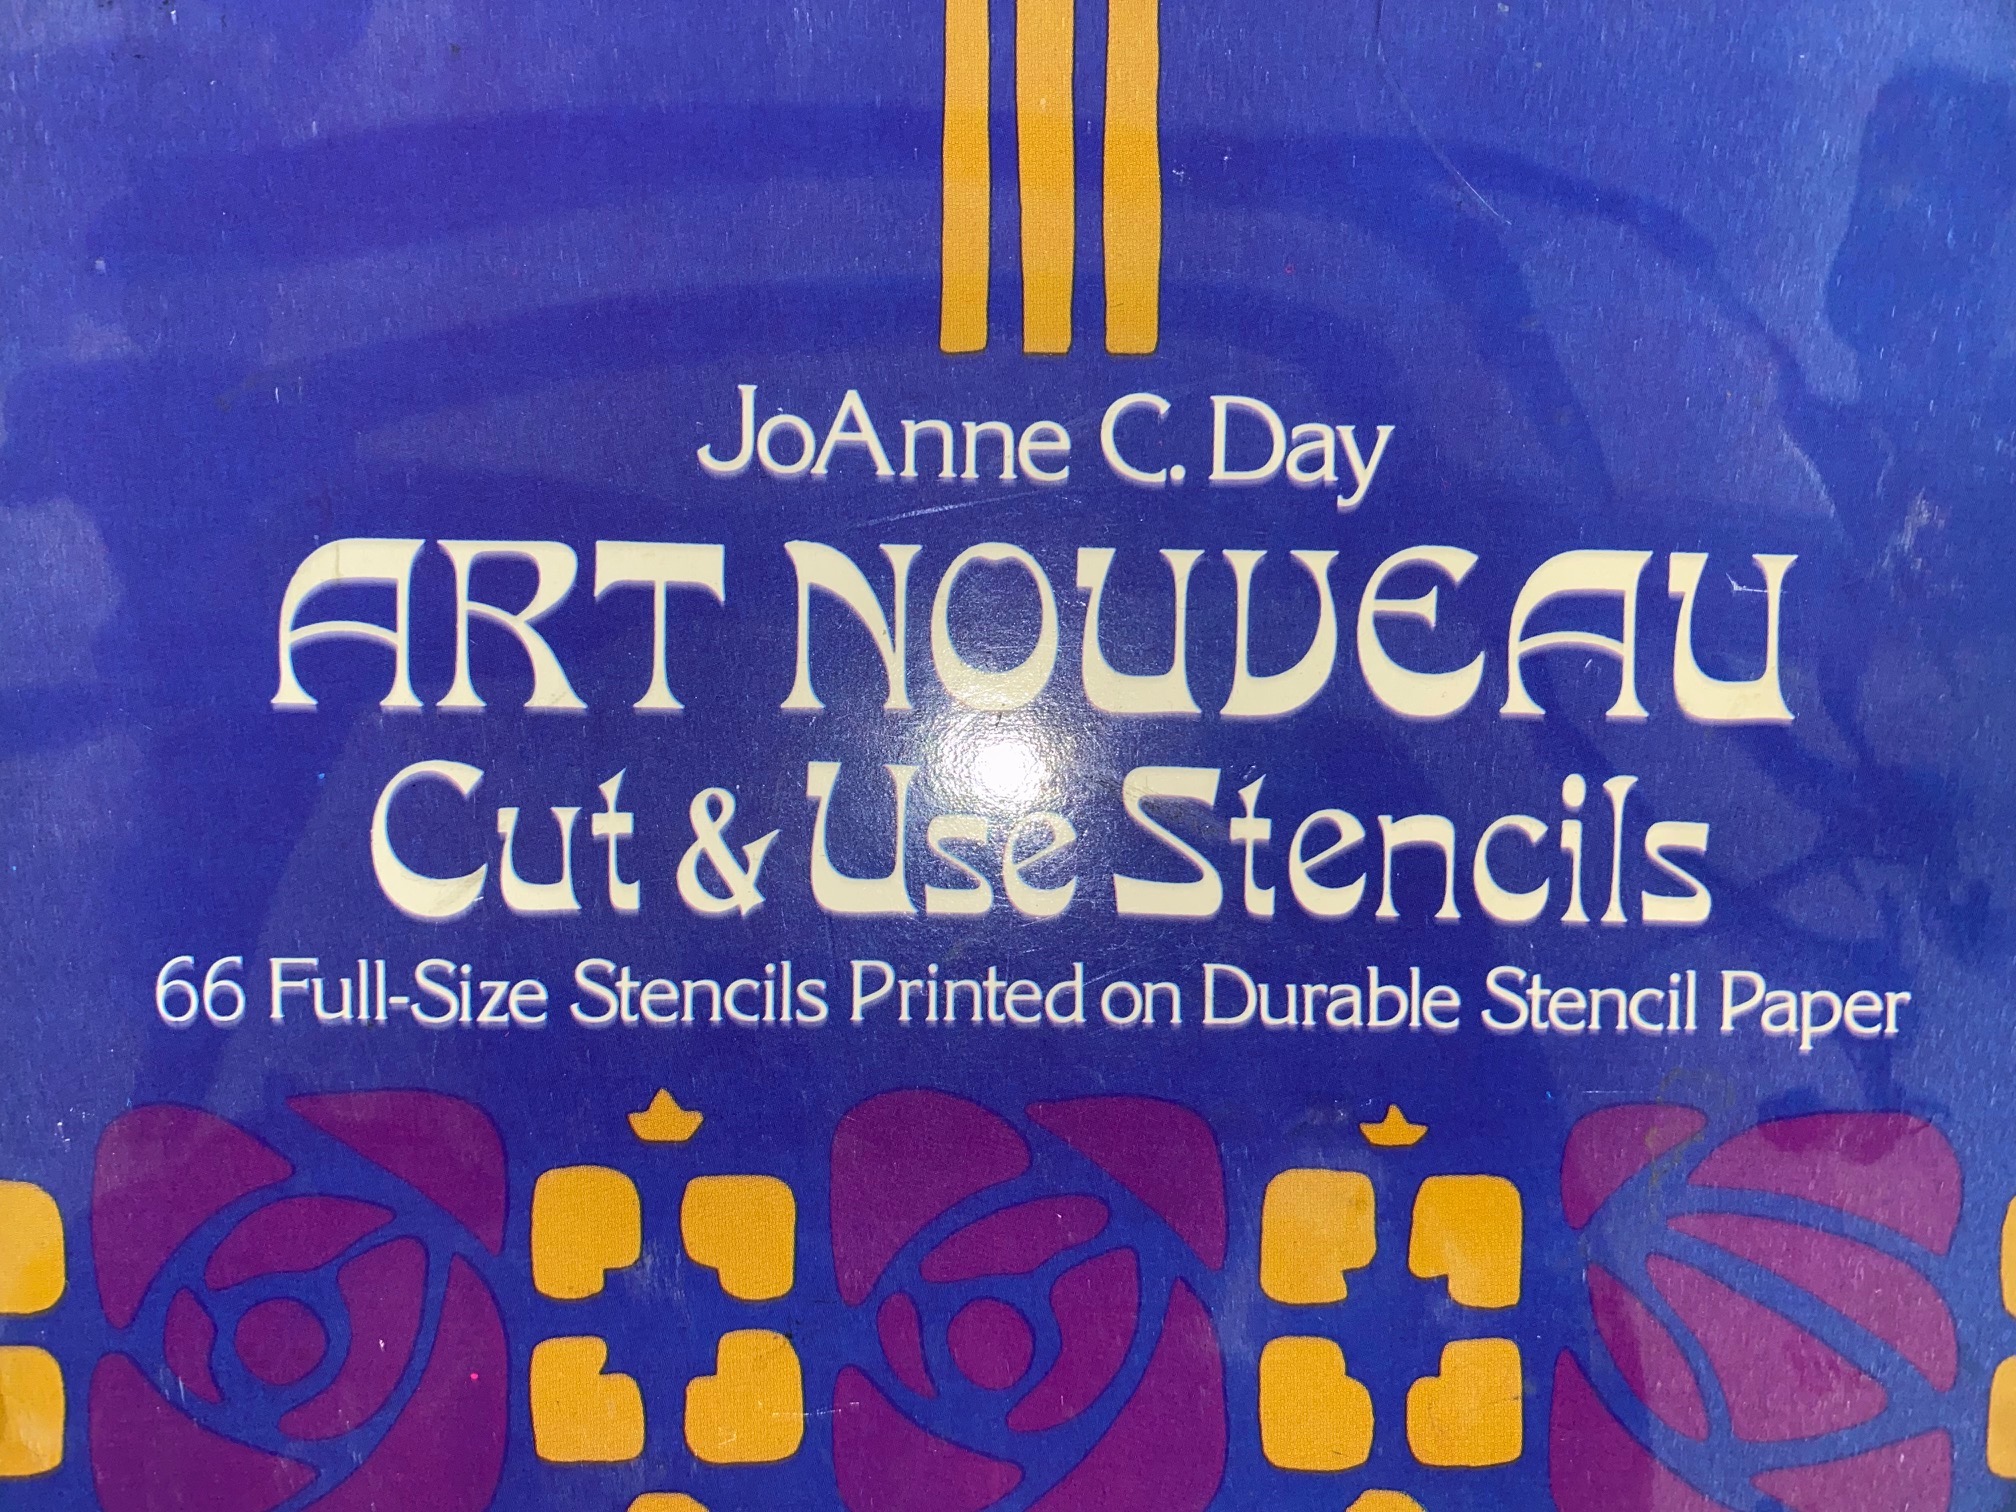 This book was used as an imagination source for the "walls"
As the basis for the walls I used balsa wood once again. I had no fixed ideas in mind as to the shape of these features, and drew simple shapes on the balsa before cutting it our roughly and sanding down the shape with fine grain sandpaper.
Balsa is easy to sand down and perhaps an alternative wood might be more secure in the long run – history will be the judge.
Shapes were made with a coin as a guide for the curved features but otherwise it was all freehand.

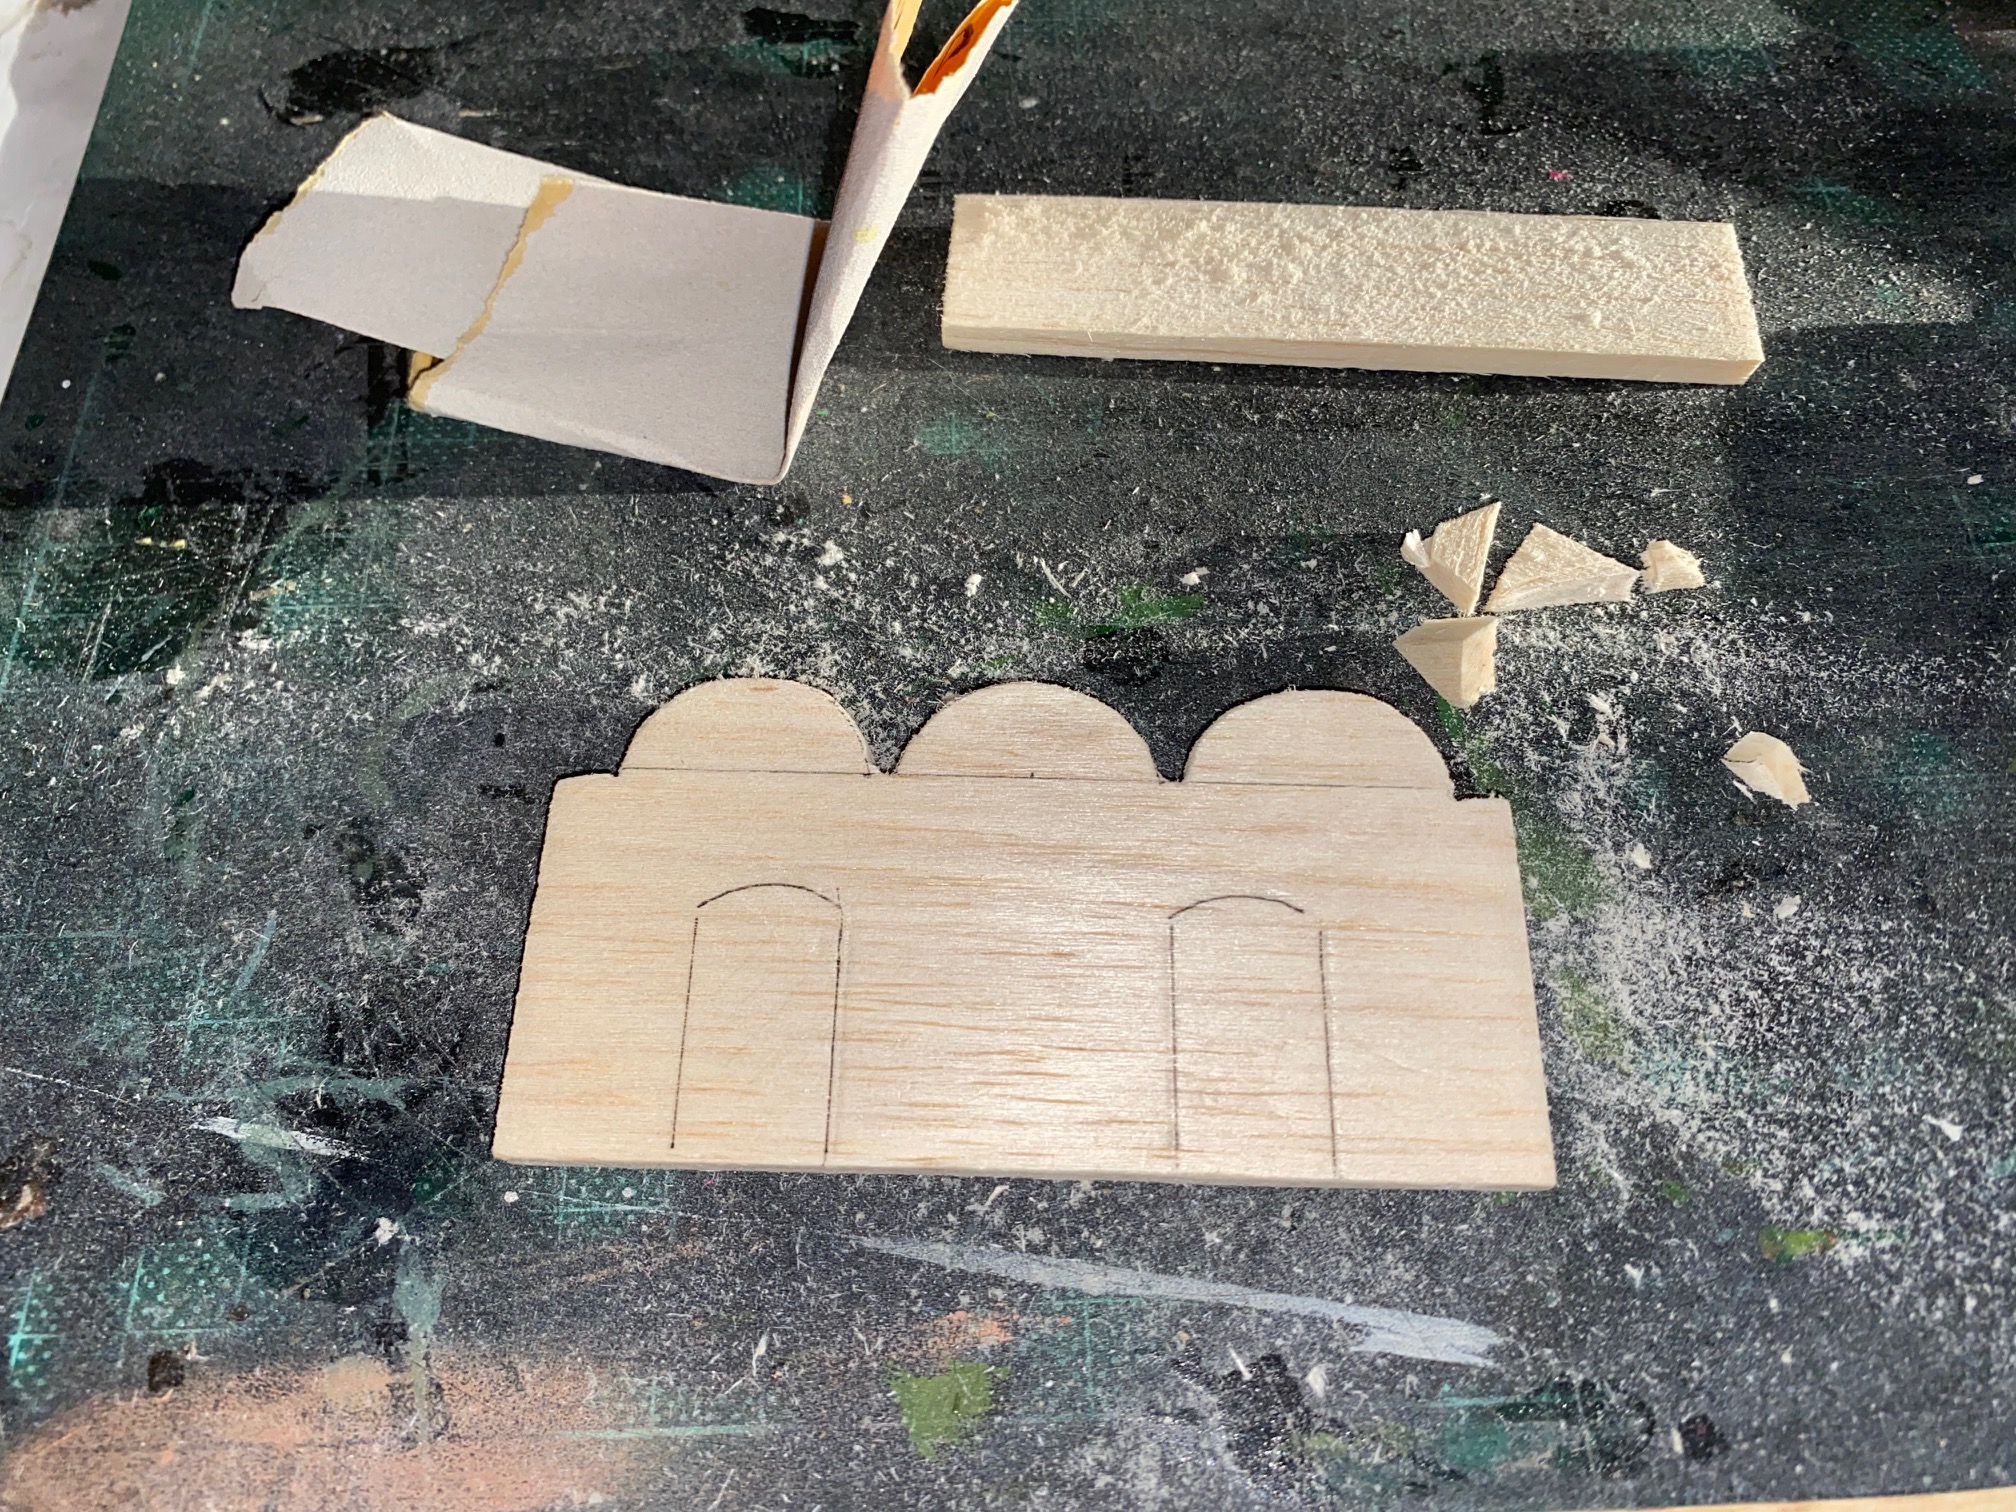

Some doors were marked on and a door frame made out of thick card. I didn’t;t make any other doorframe or windows, although it would be a simple matter to do this in the future.
A variant of shapes were made for the initial five base stands as in the pictures.
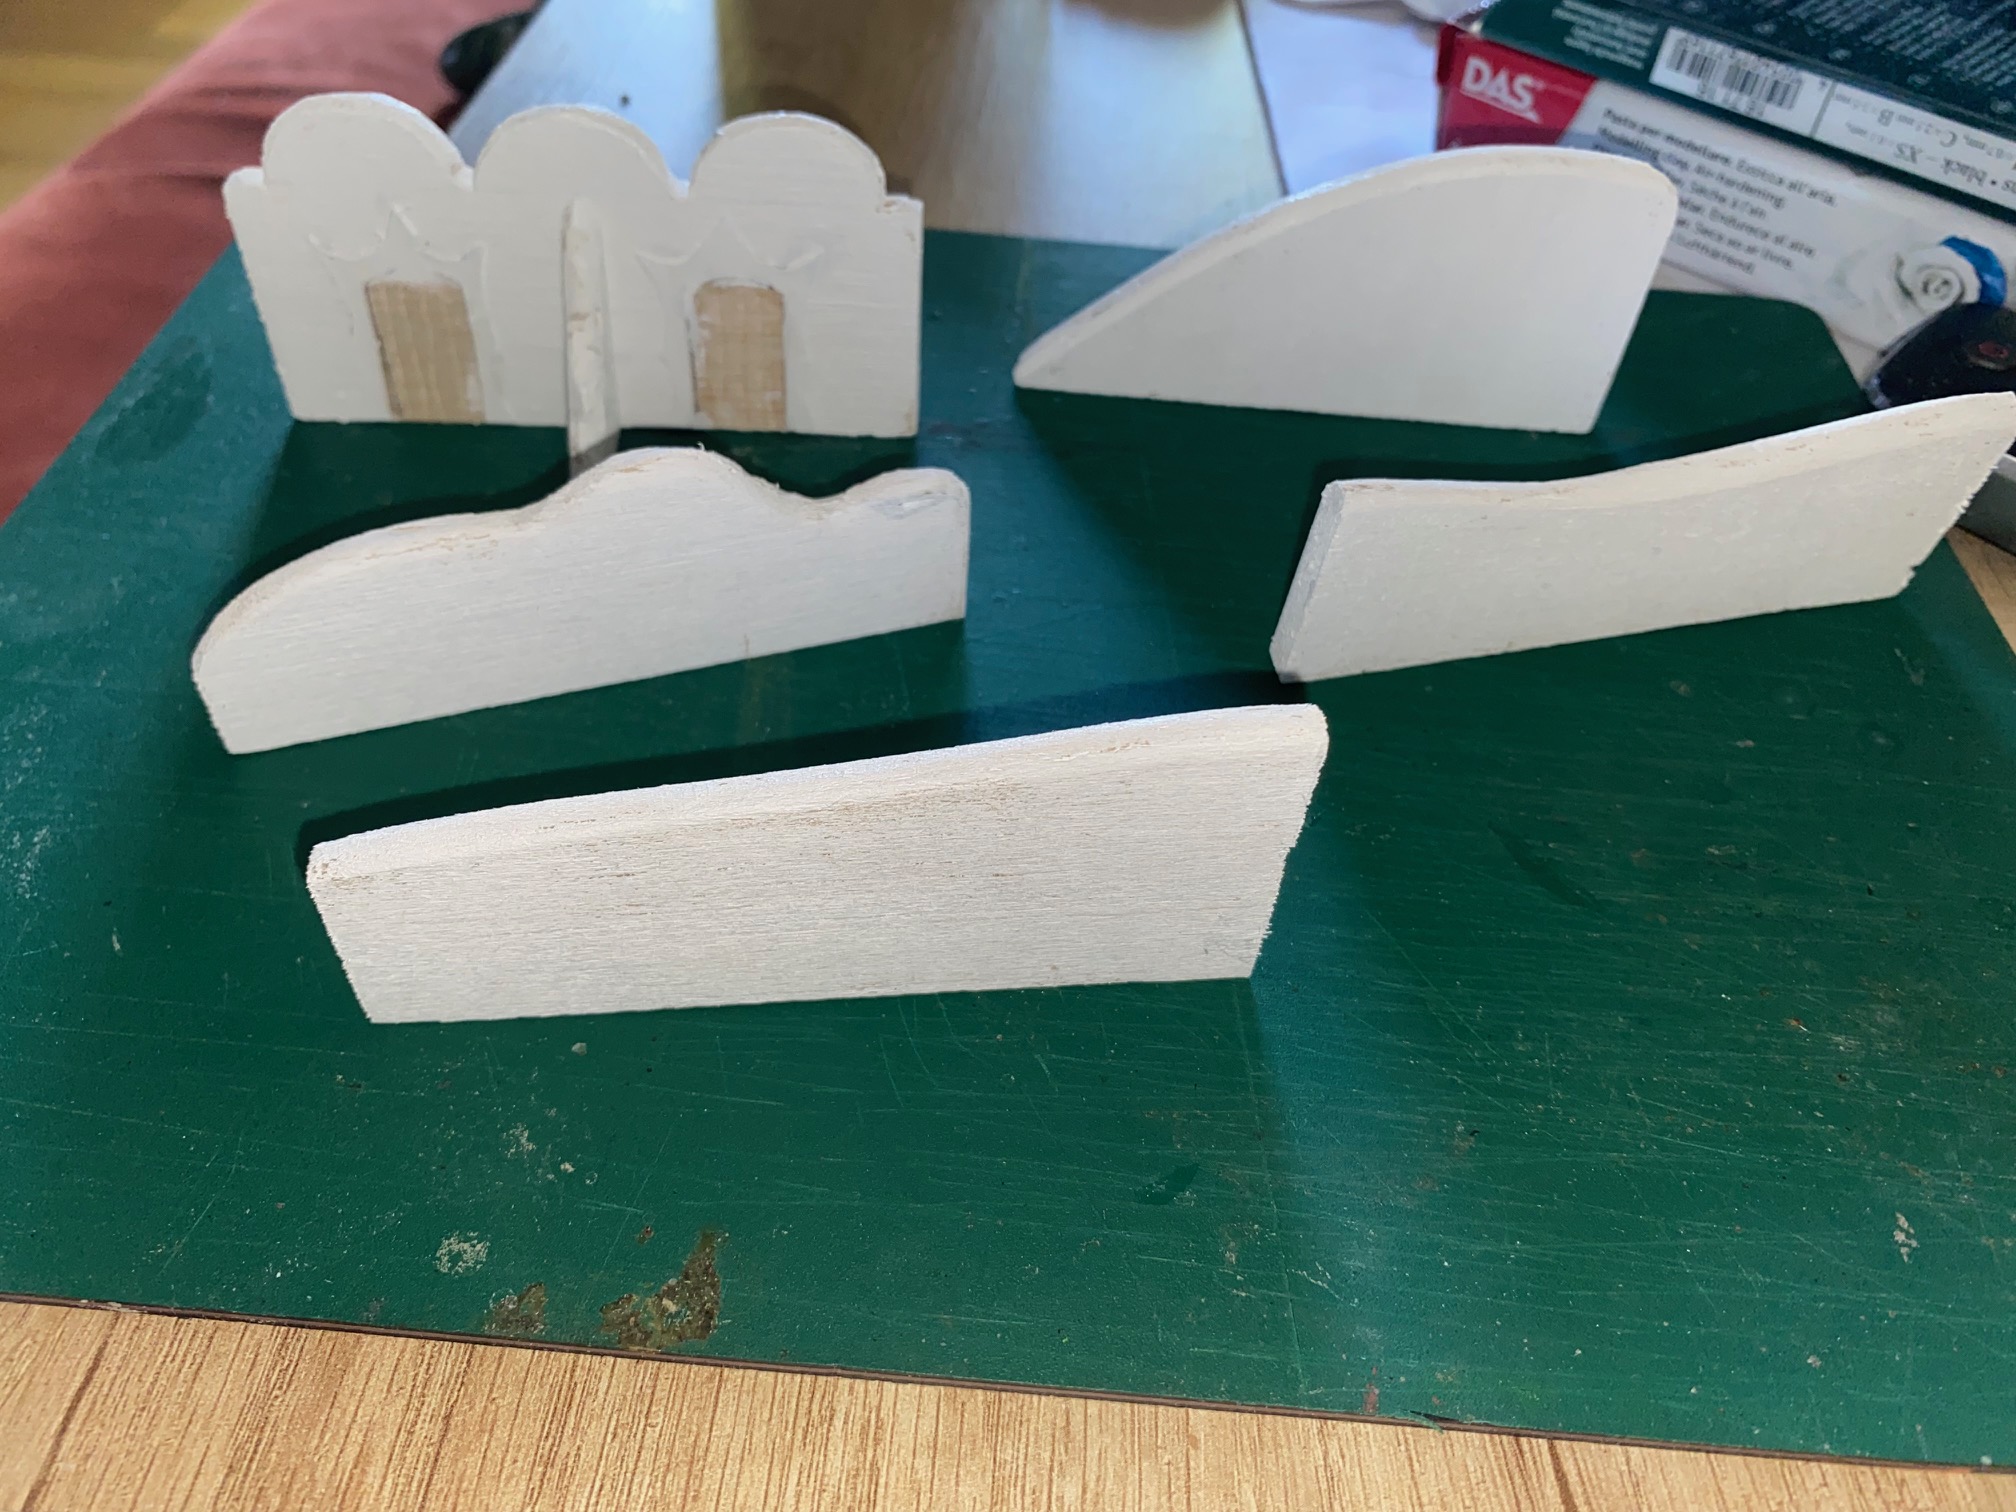
The balsa was panted with a couple of coats of white acrylic paint and then patterns of “flowing lines” were drawn on these “canvases”. On the first wall I instead painted what would become a rose garden.
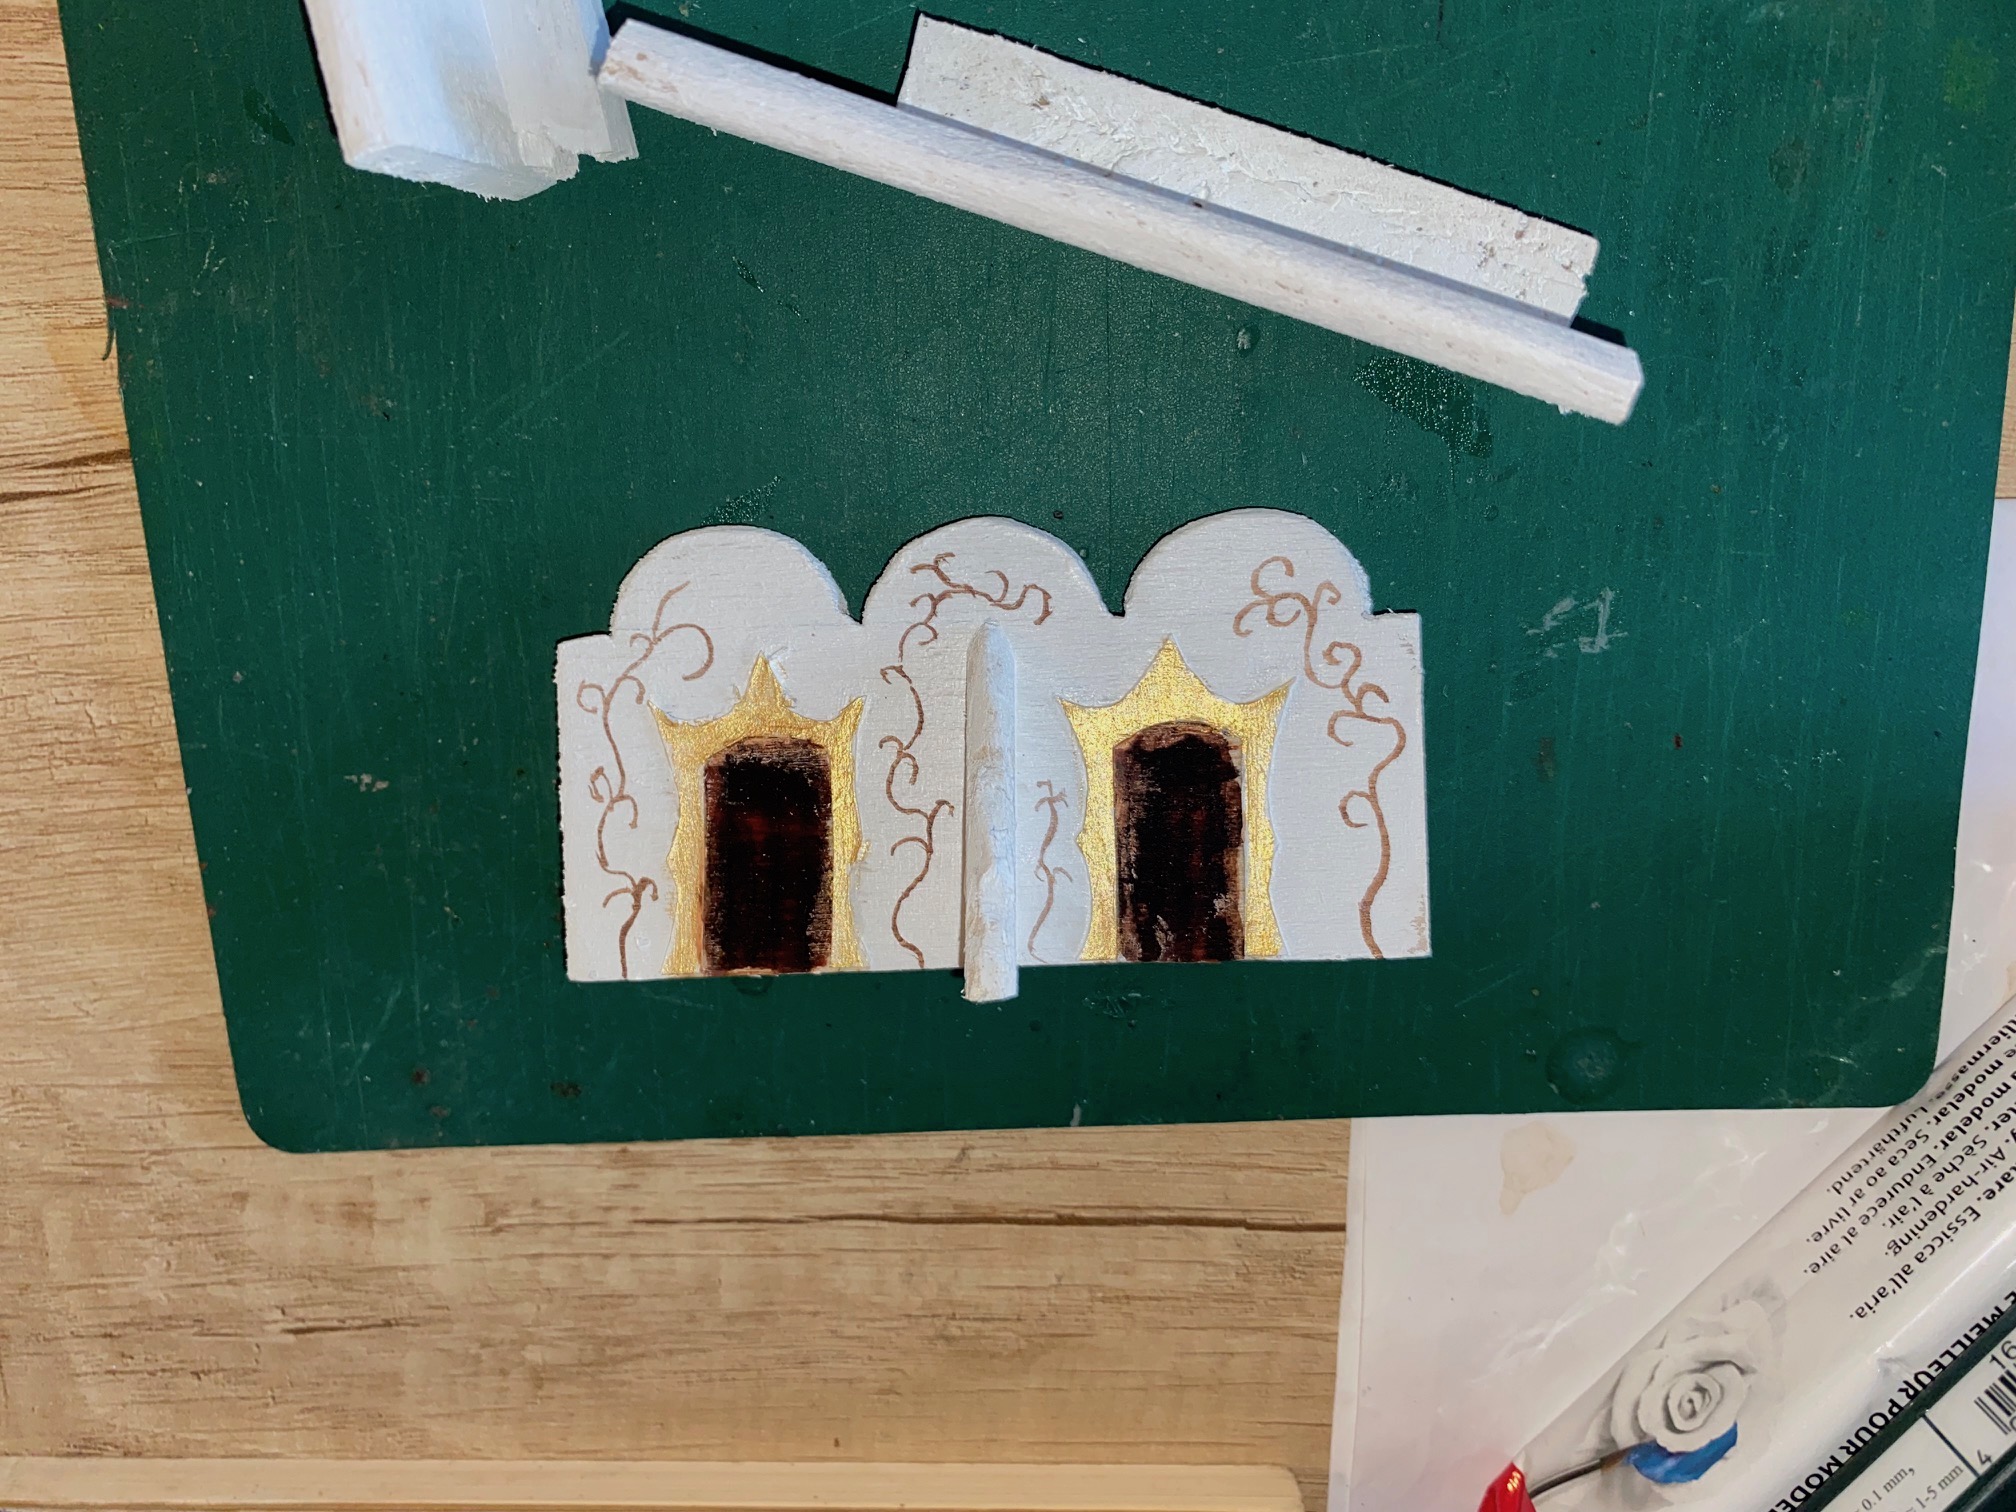
As with the other bases, I used DAS (in this case the white variety) to fill in the base and once dry painted the surface with a variety of green acrylic paints (cheap store paint is fine) and once dry added a little green colored sand to give some variety of the surface.
Other unit bases will be made the same way.
This is probably my final post during the Challenge period as I have to attend a residential rehabilitation programme and can’t take all my toys with me! The final units will be made exactly like the previous posts and I’ll post pictures next month.
In the meantime, a thumbs up to everyone taking part, there are some amazing projects in the Challenge this year and Happy Gaming!
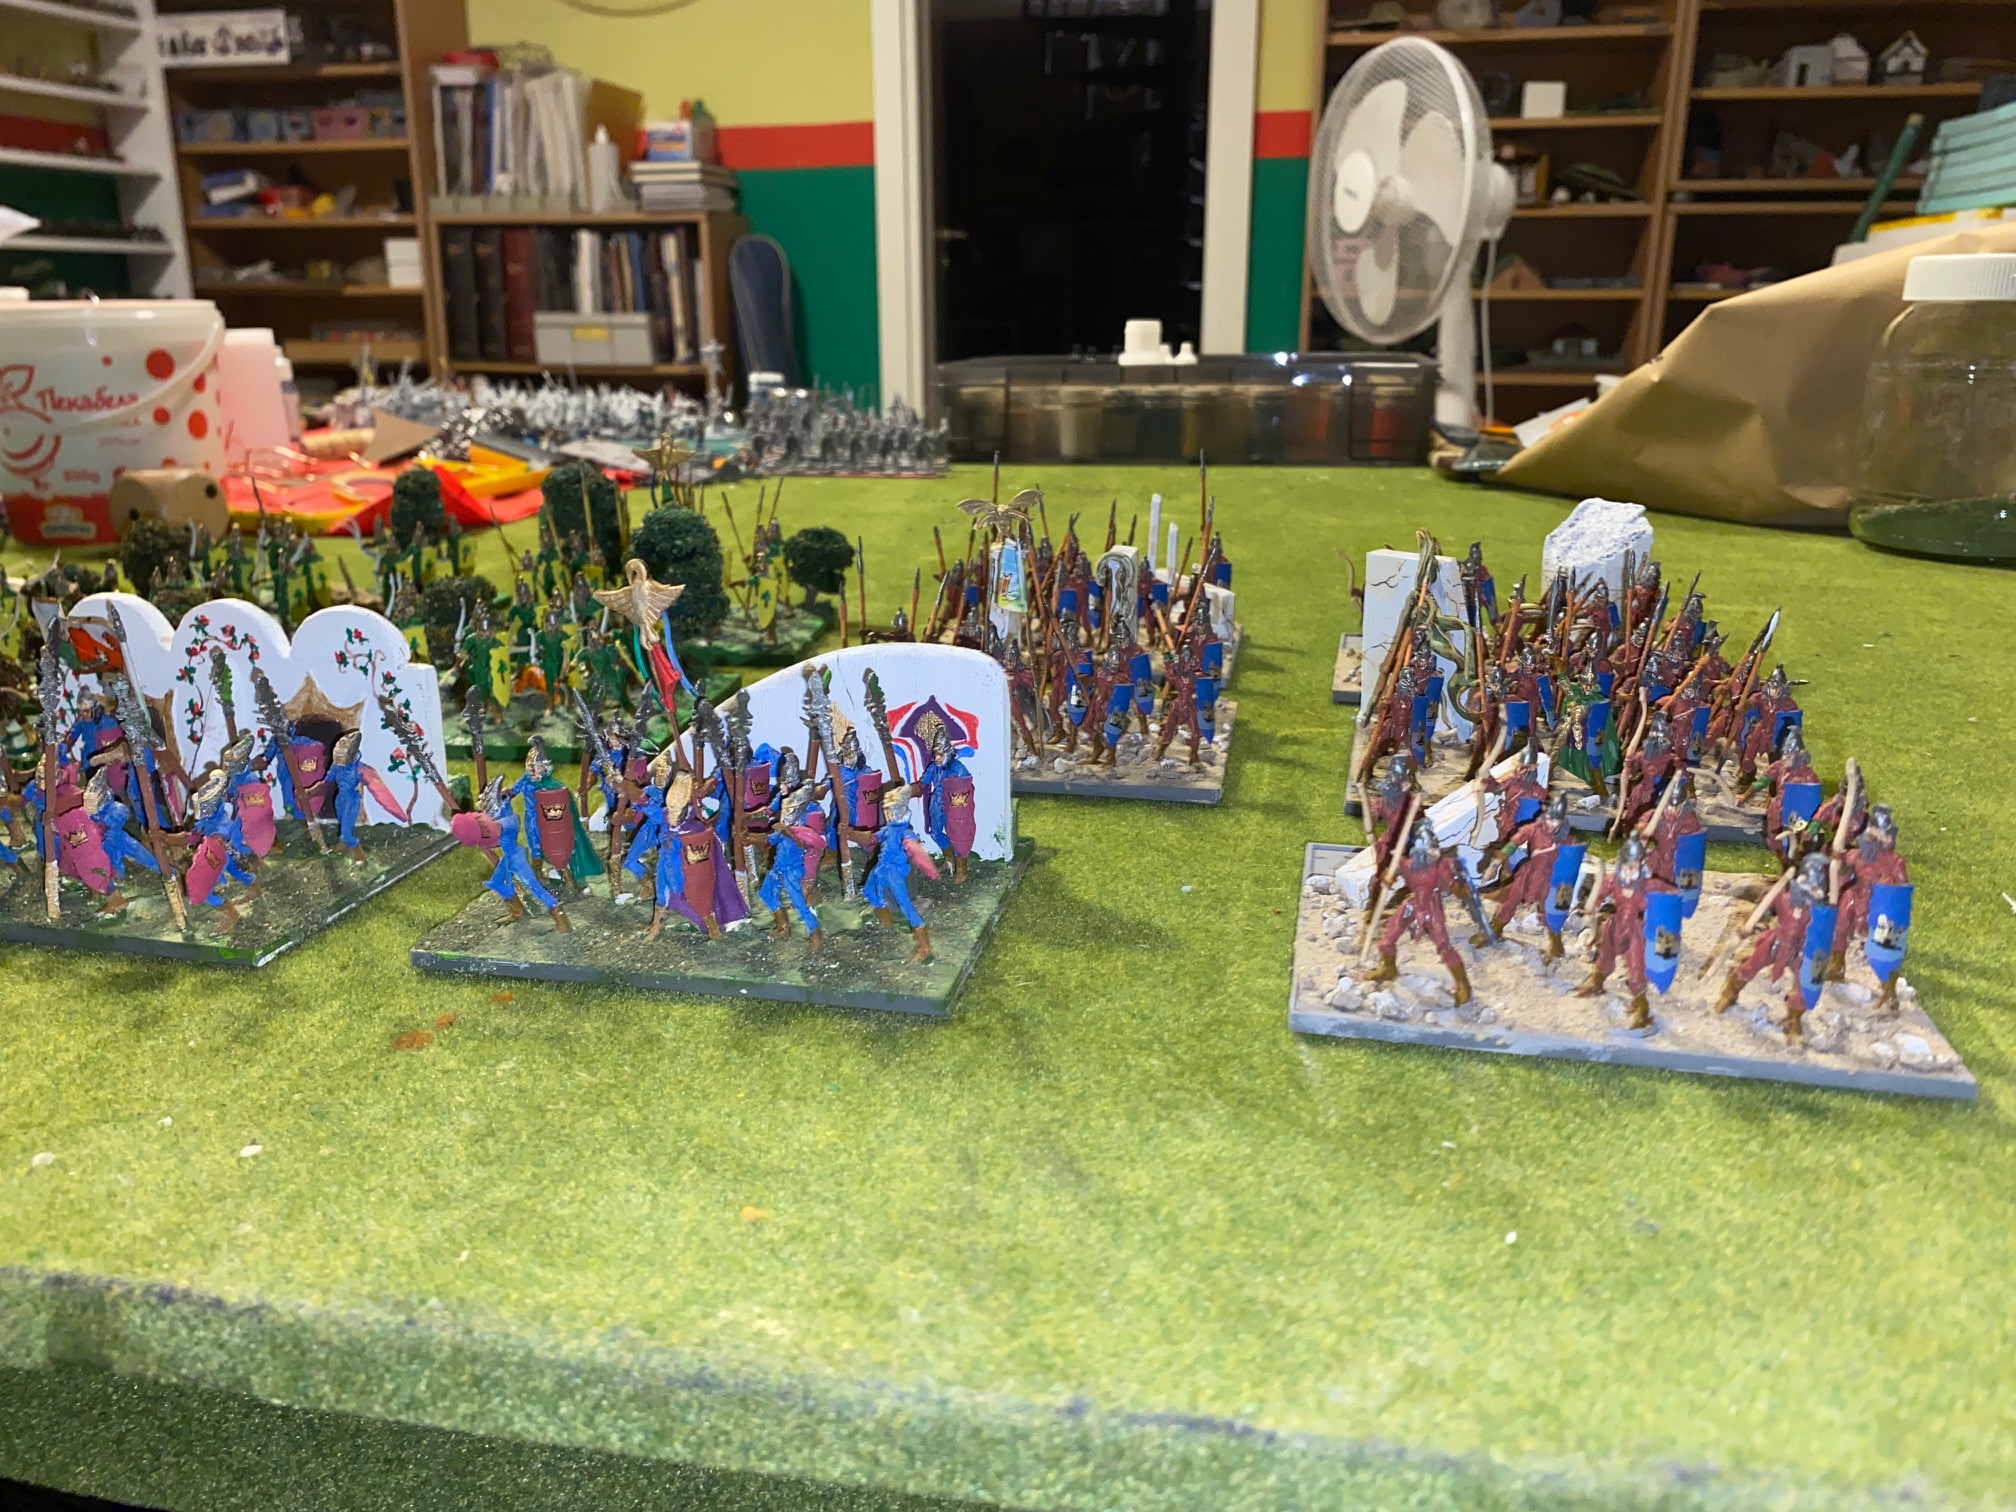

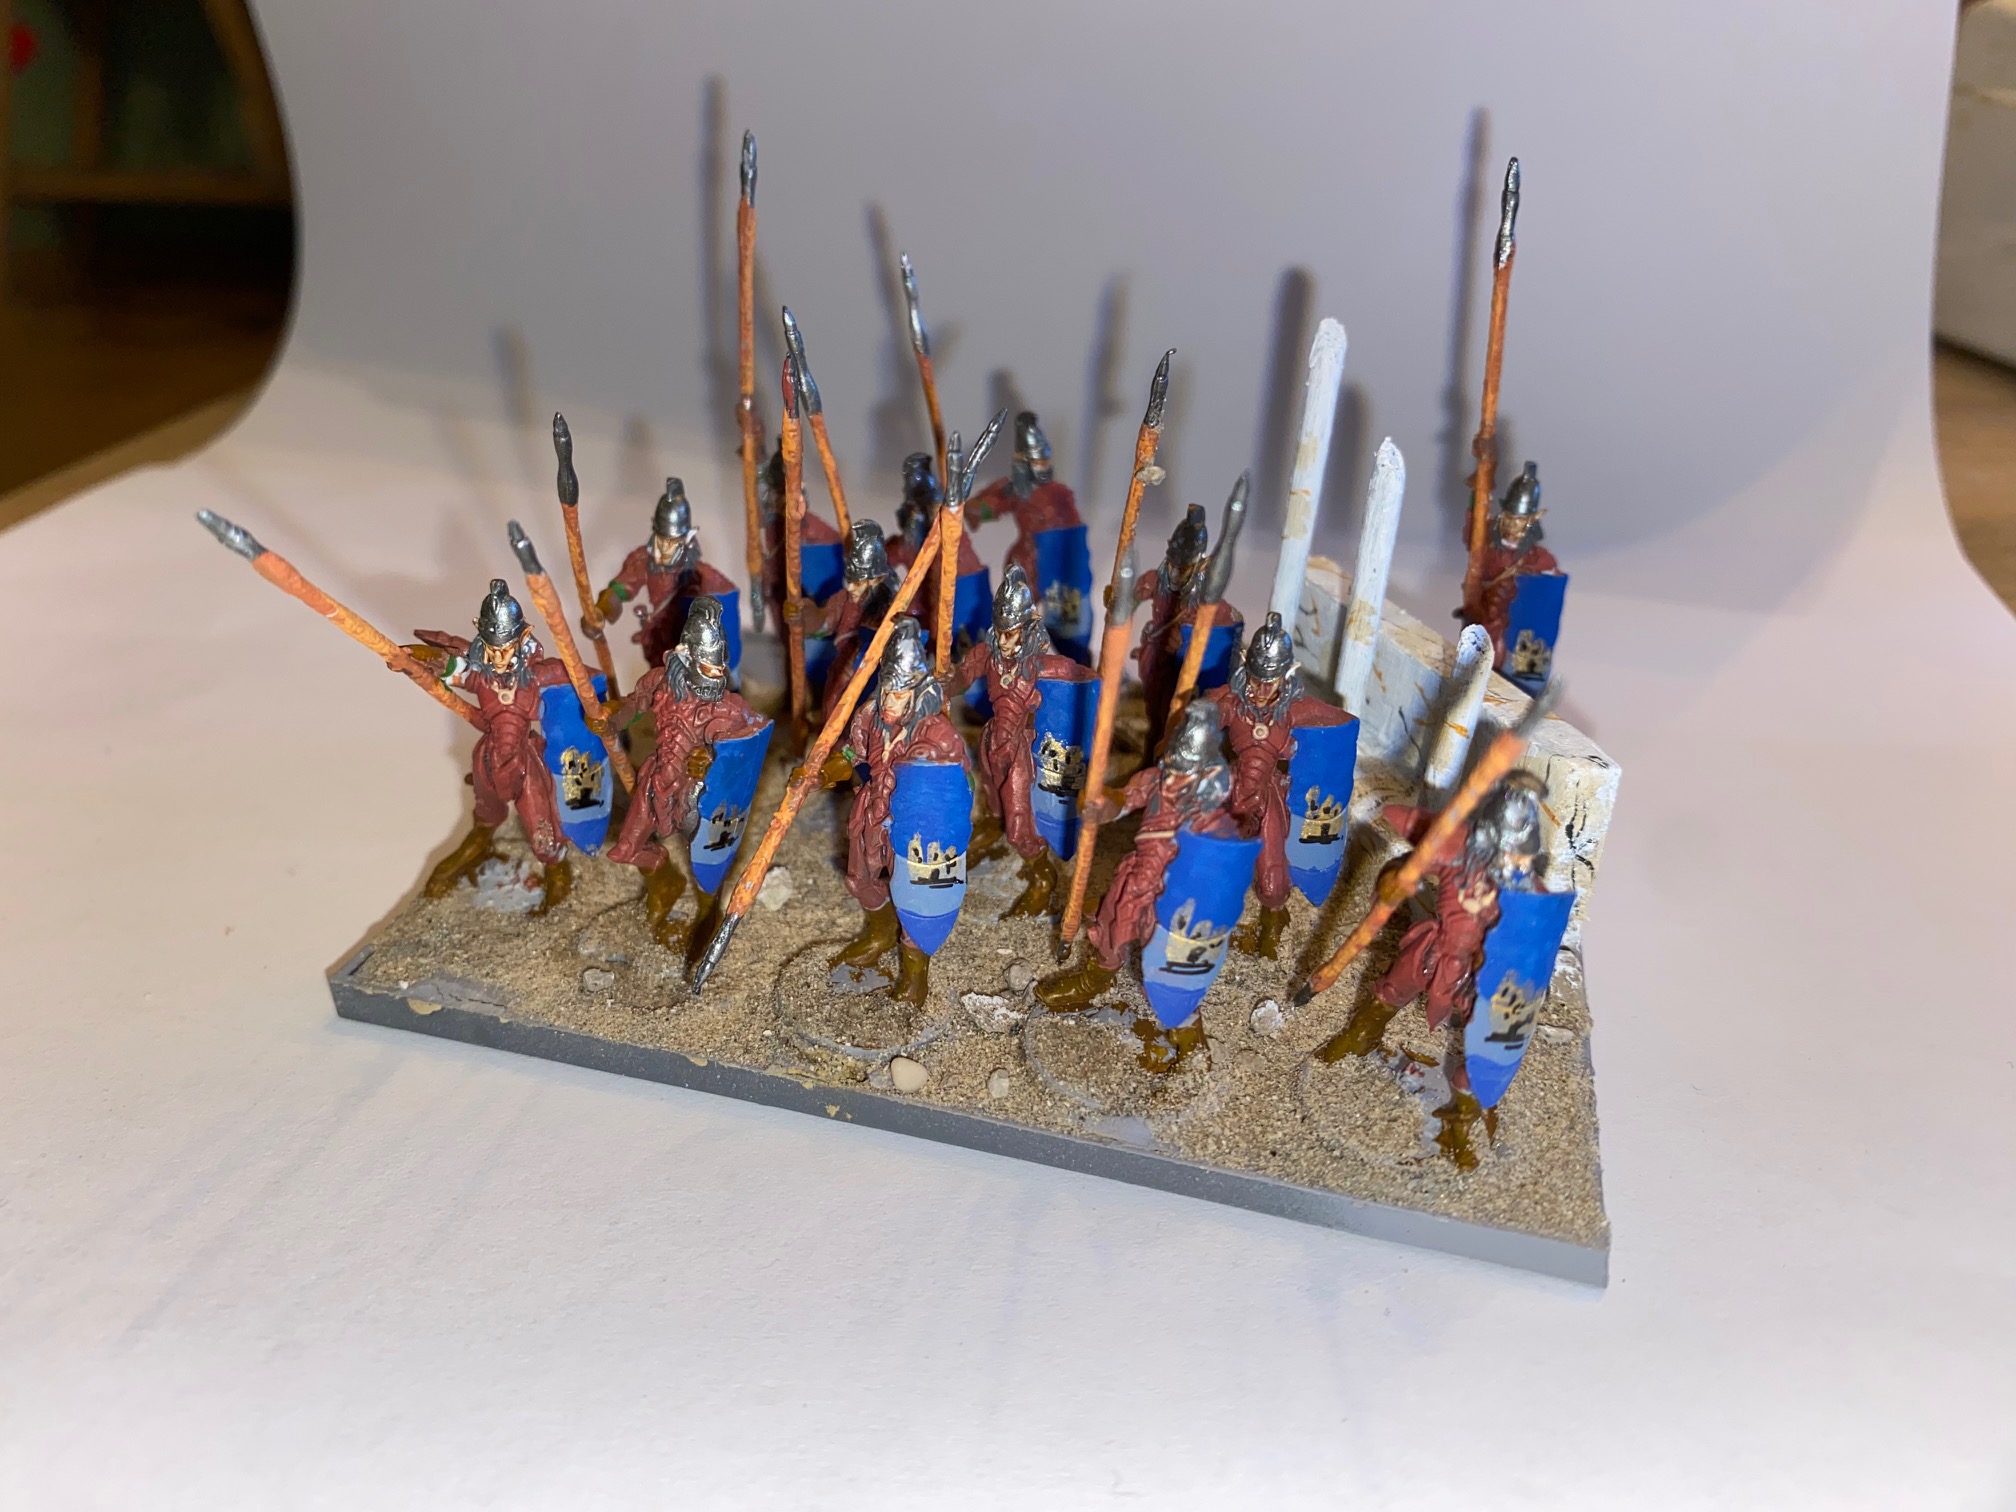
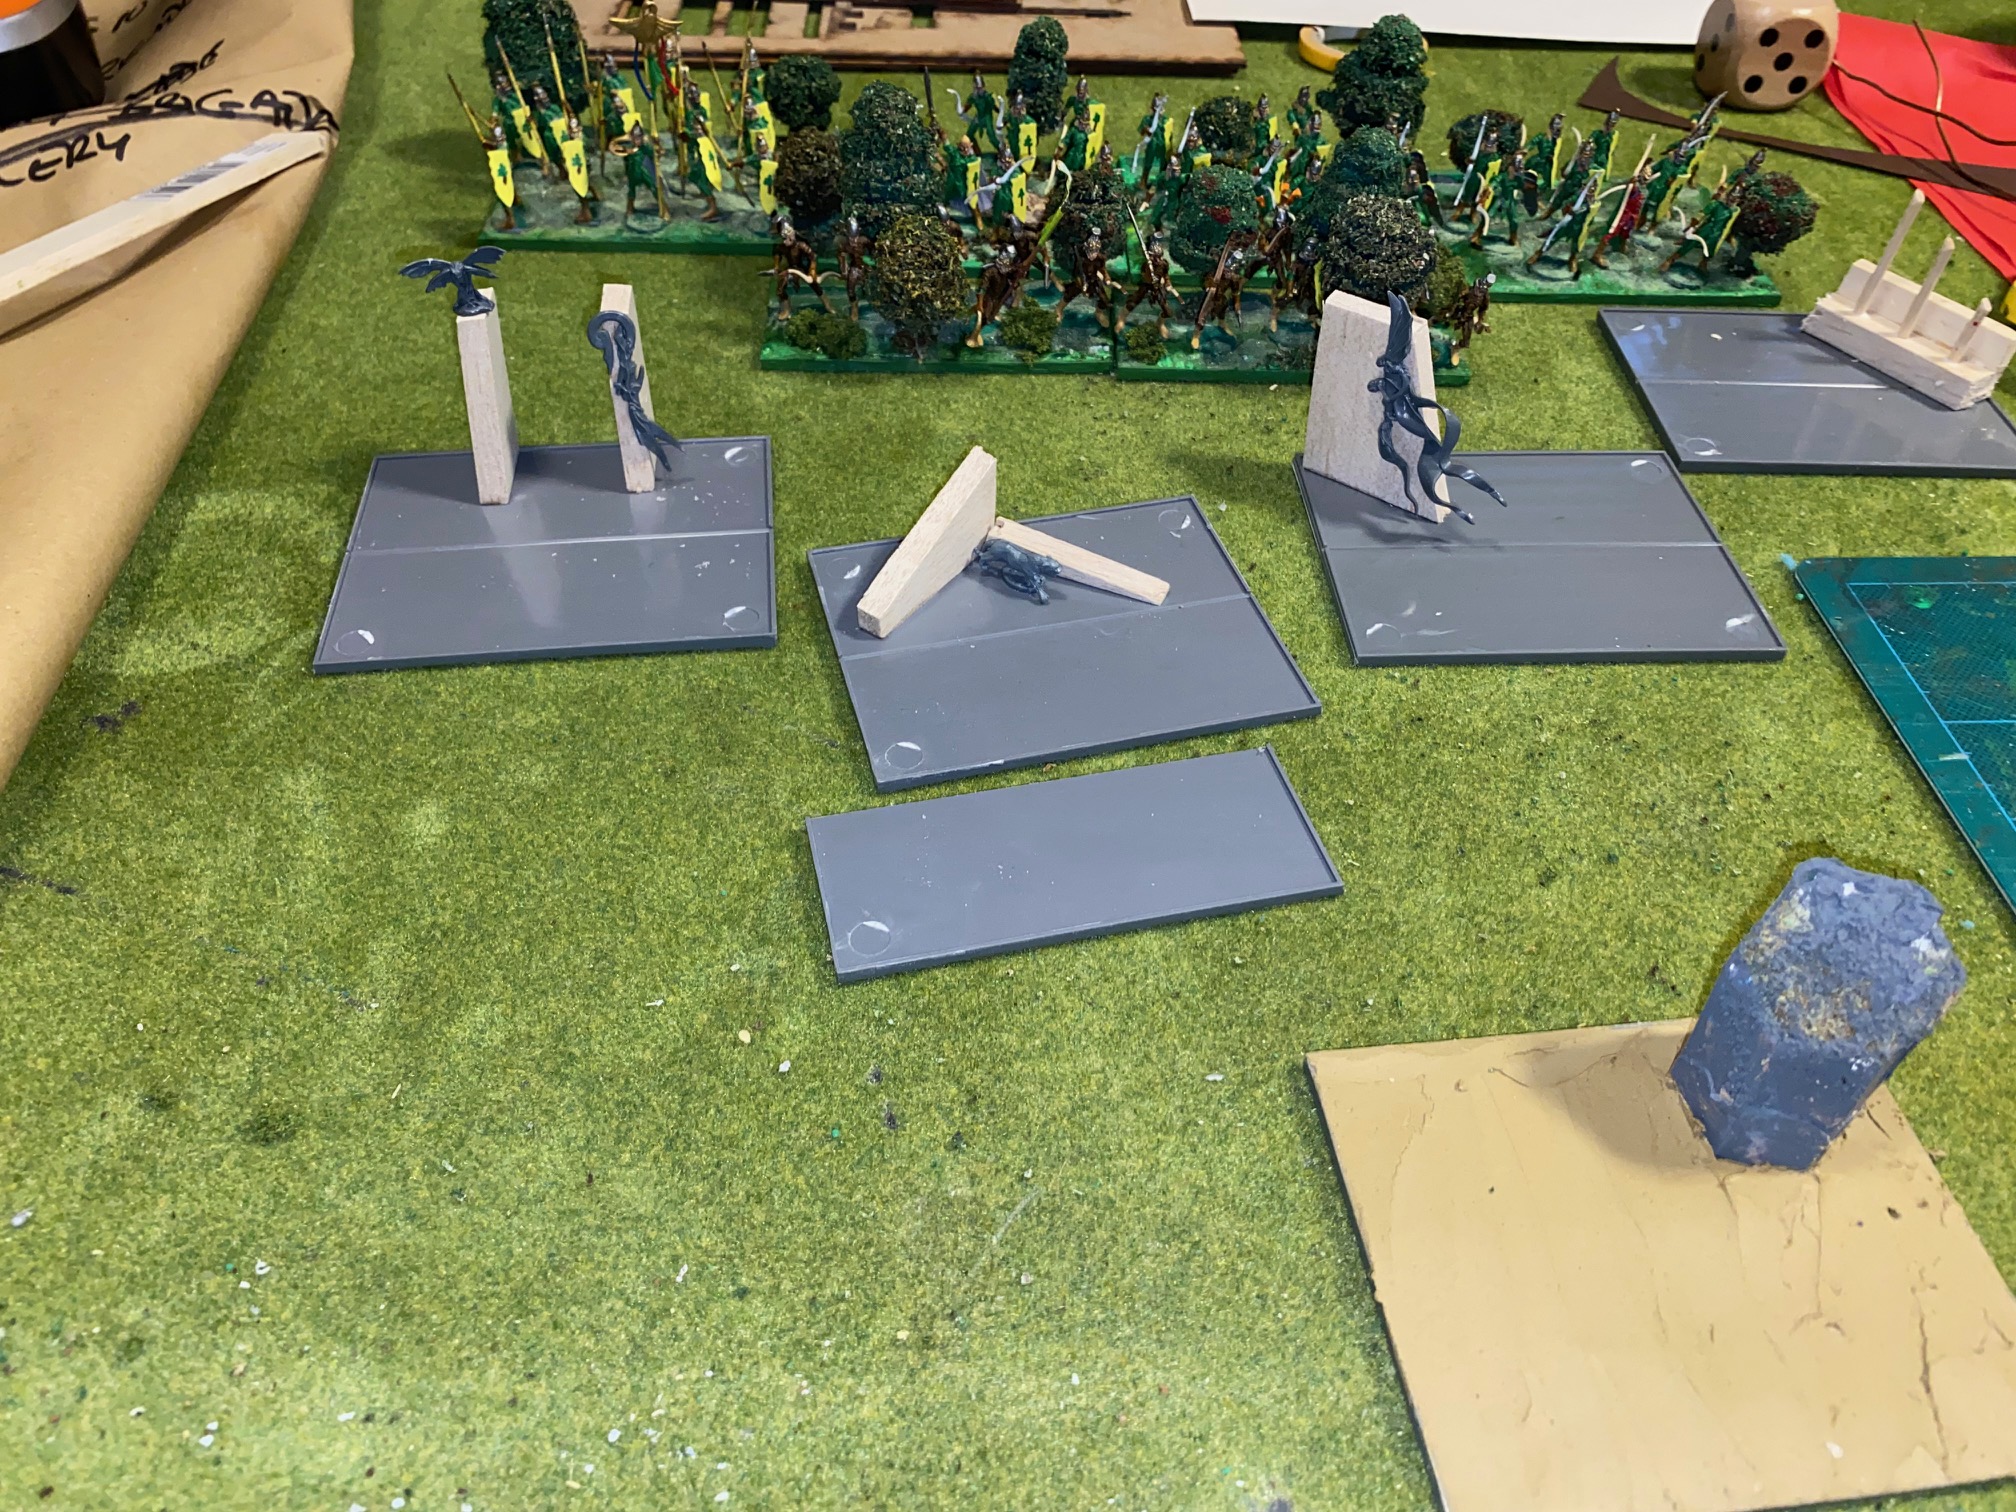
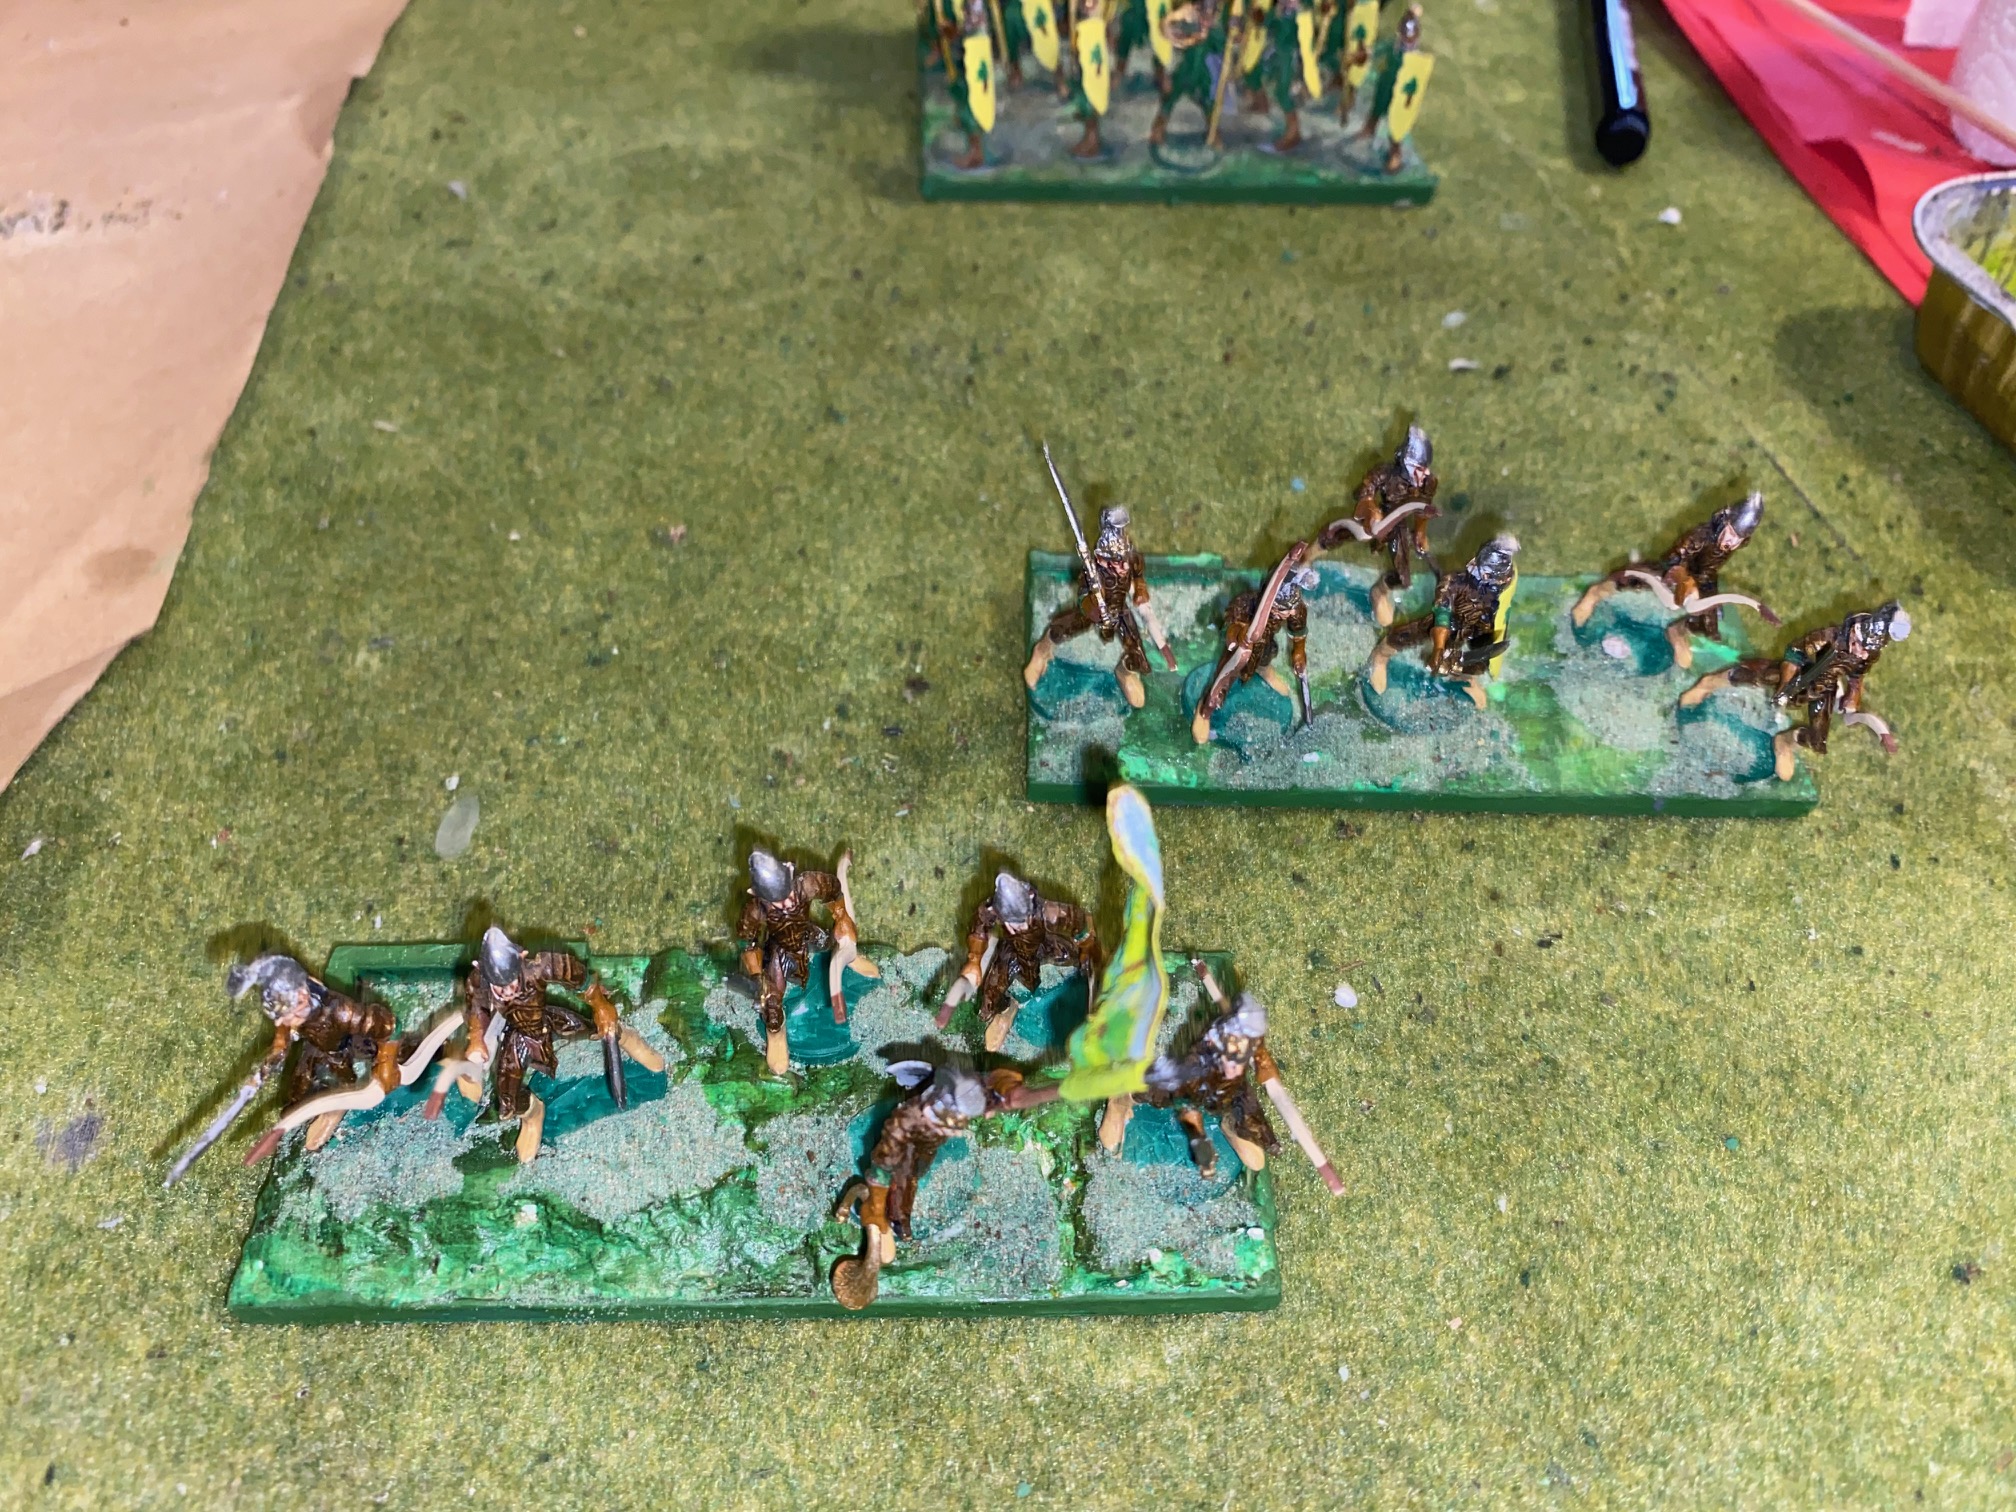
Basing the 2nd Elvish Clan
Following on from last time, I have based the Elves on the “urban” bases.
I used the familiar process of gluing the figures onto the bases in the depressions made previously with PvA and once the glue had dried, I coated he base with a slightly diluted mix of PvA / Water, probably about 80:20 mix.
Onto this glue mixture I poured a mix of small stones and sand and afterwards highlighted some of the stones with white as a nod to the white marble features of the bases.
As a final touch I made a small flag for one of the units.
This was a simple drawing on a pad of watercolor paper and given a quick color with some water color paints. I think the water color paper is a better open than simple printer paper as I think it tends to buckle less obviously.
The flag isn’t meant t be a great work of art but just a small additional feature on the unit. I’ll probably do the same for at least one unit in the other Elvish clan, which will be the “Royal” Guard models.
These are based around the old Mantic “Drow” Elvish metal additions which comprise large spear/halberd type arms and crossbows. This will probably be only a couple of crossbow troops and a Unit or two of Royal Guard.
Anyway, some pictures of the final bases follow.
Happy Gaming!

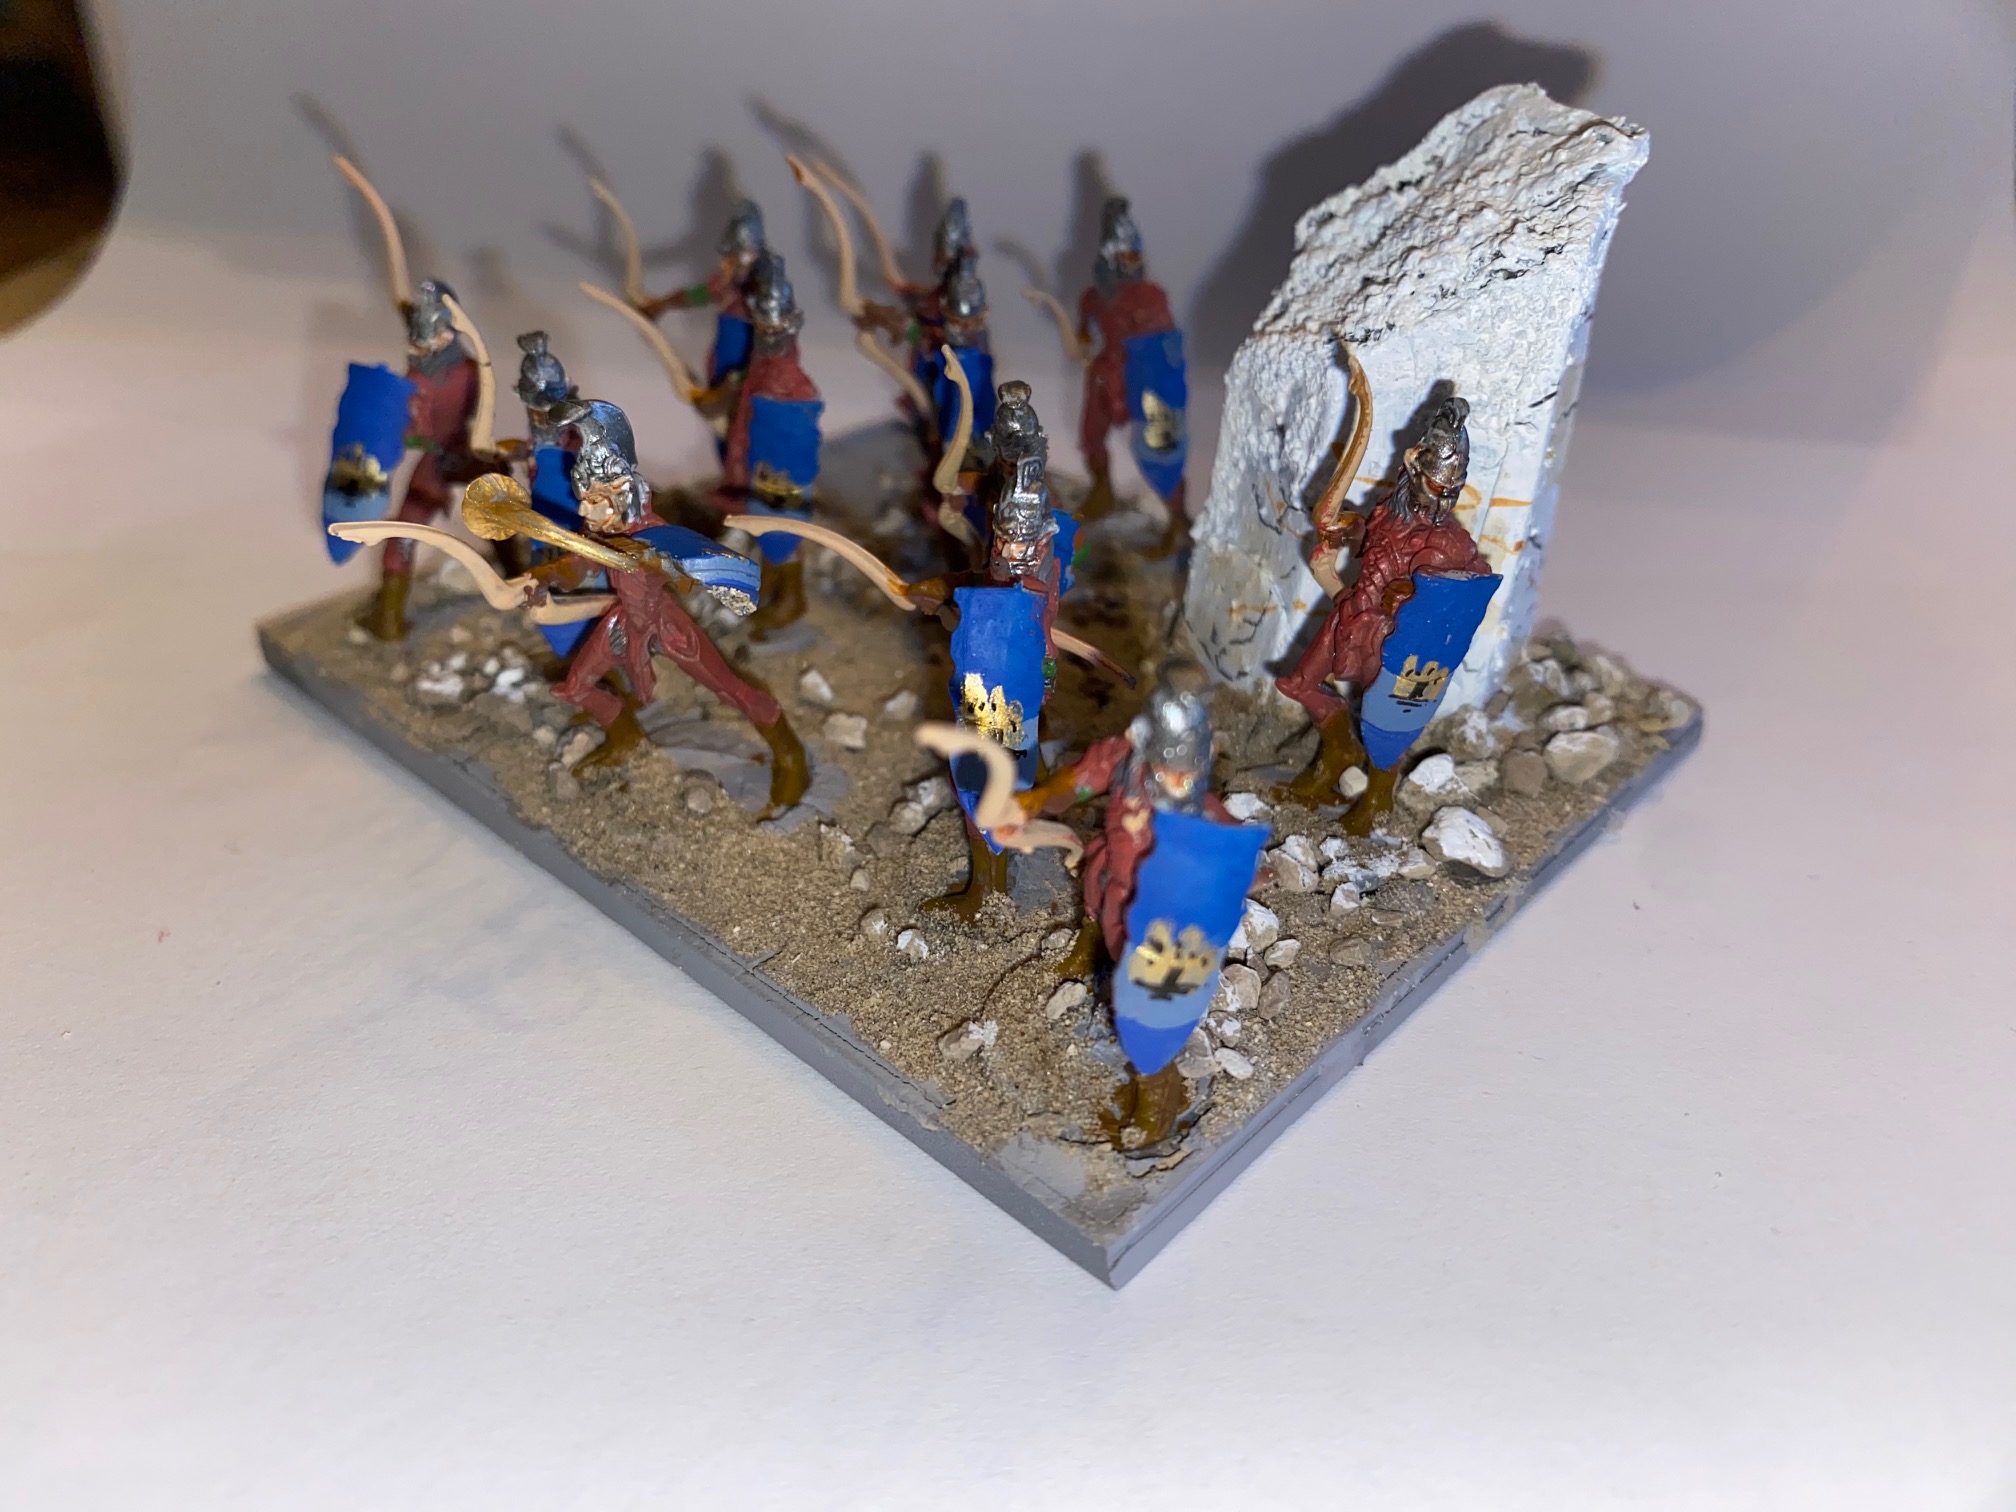
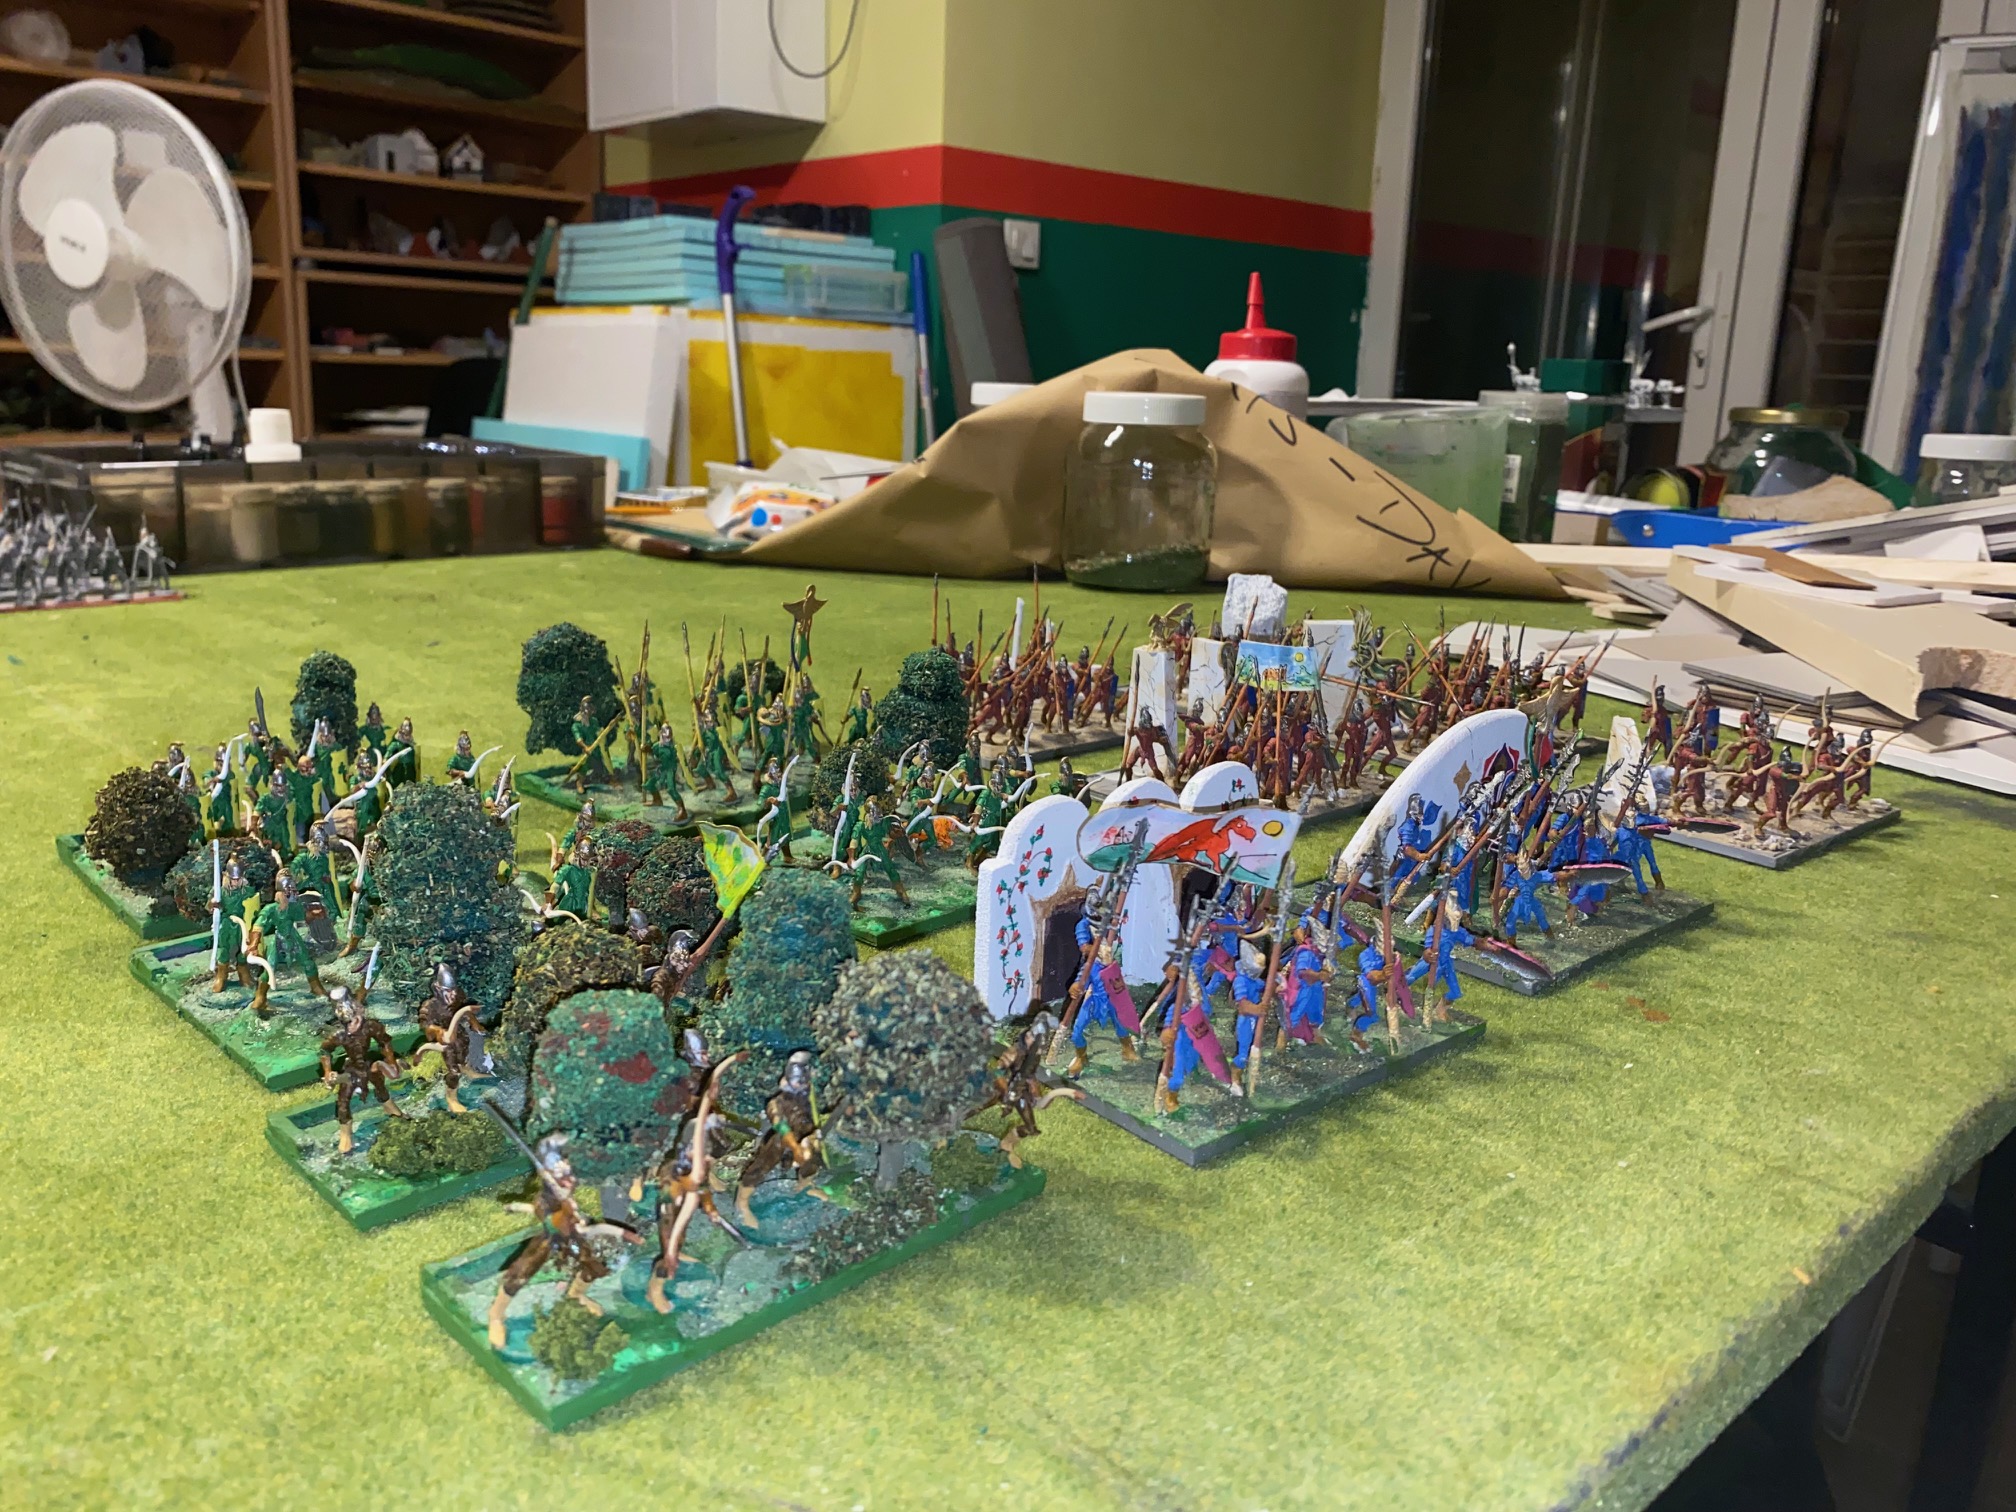
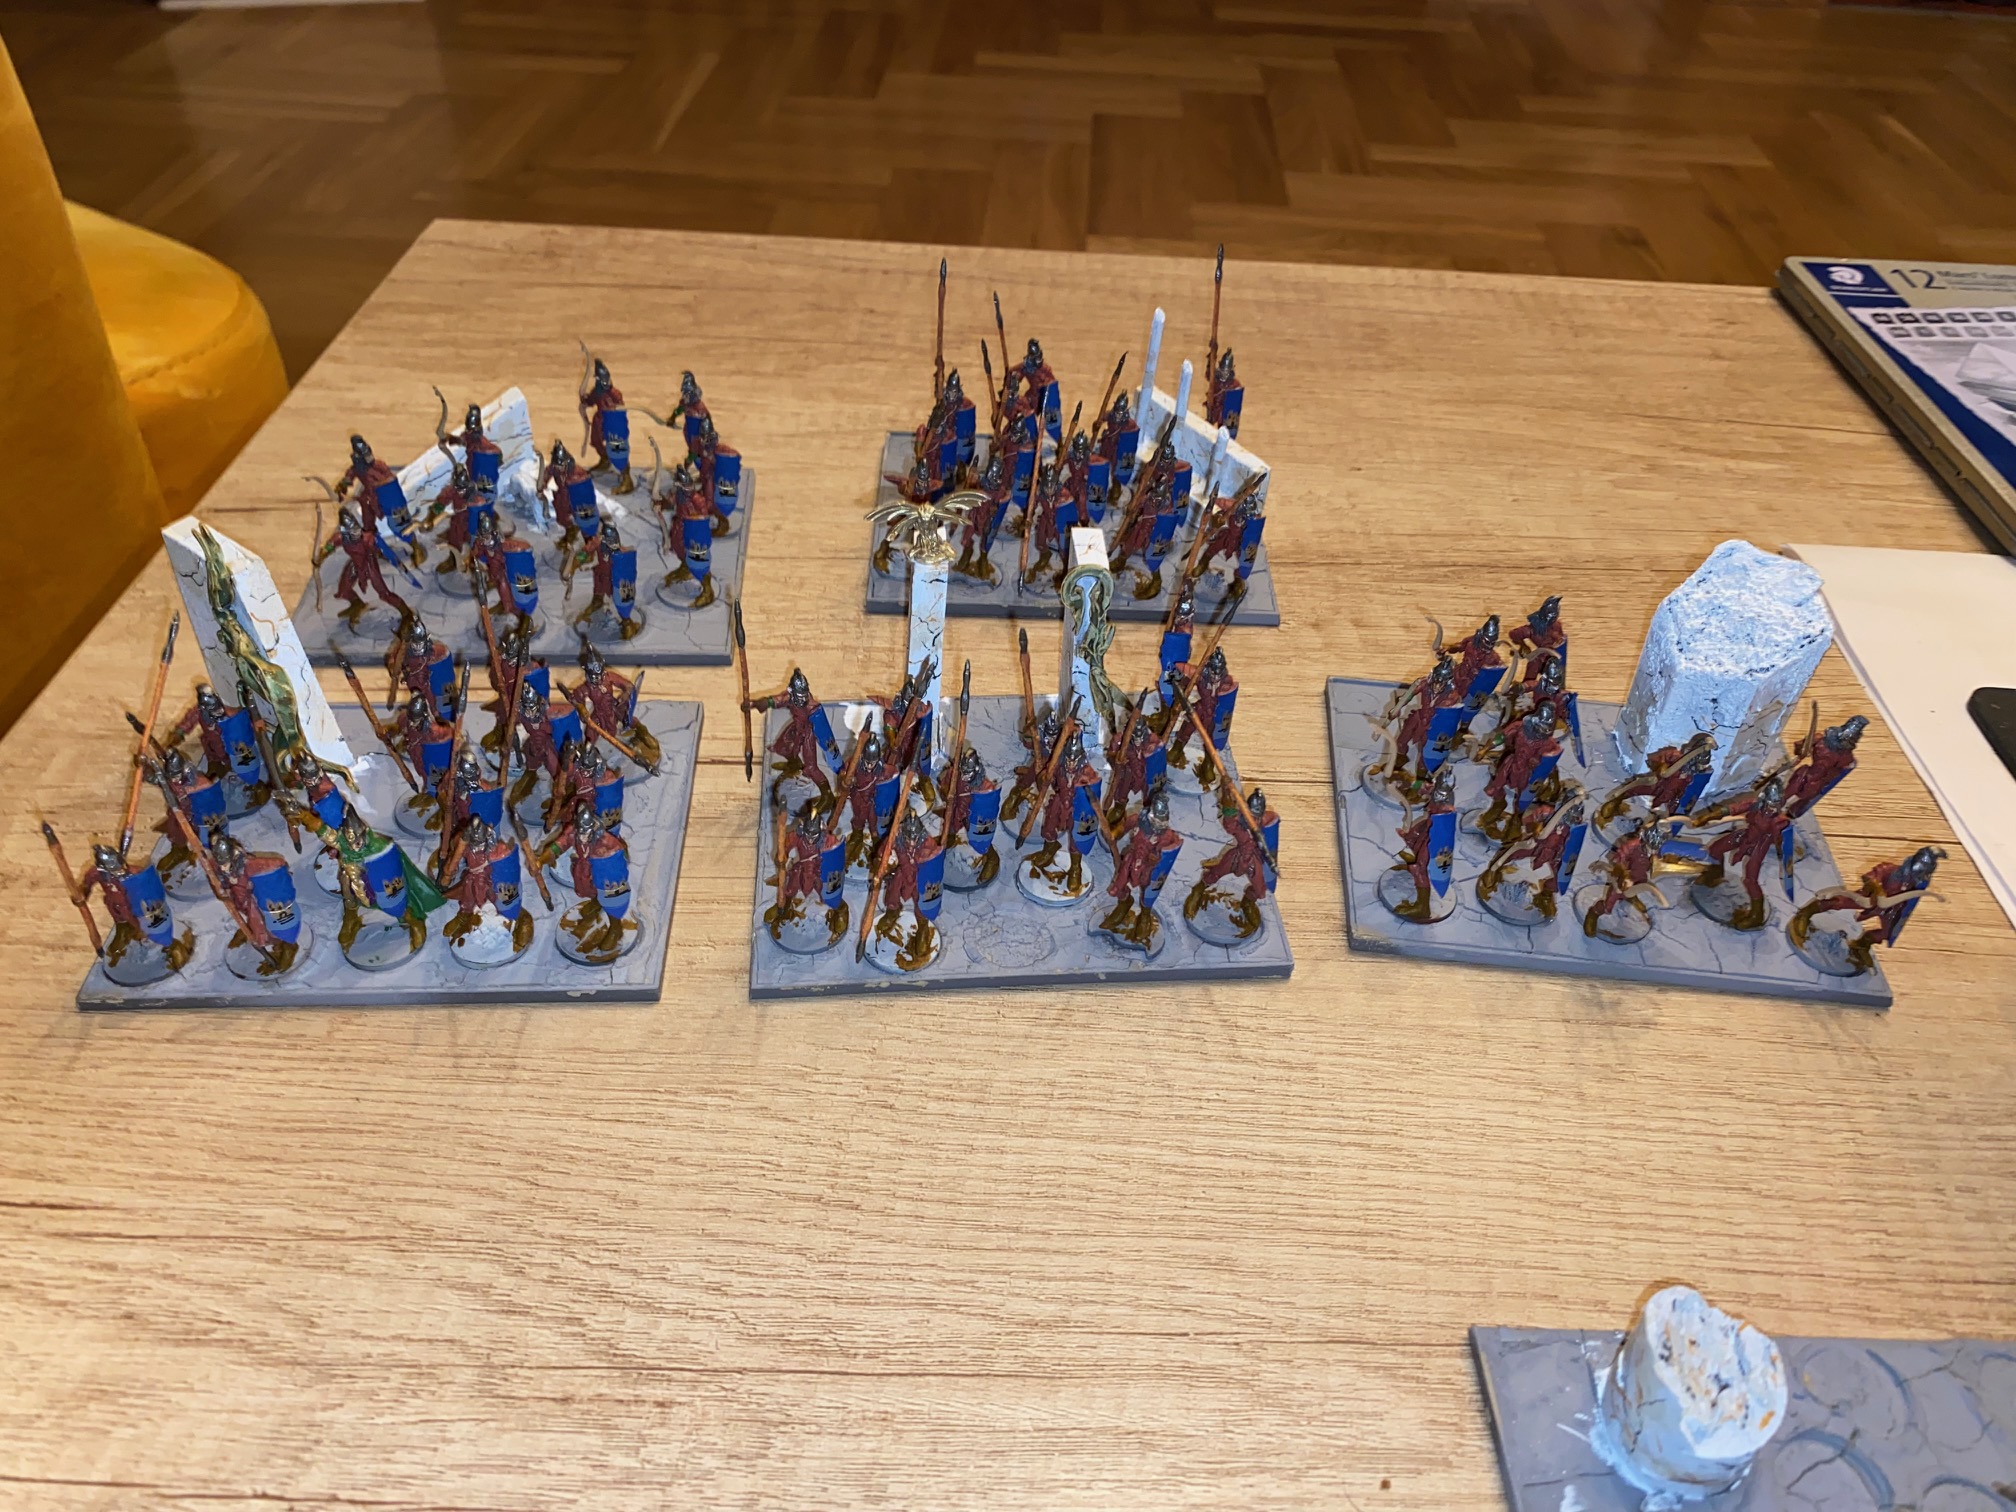
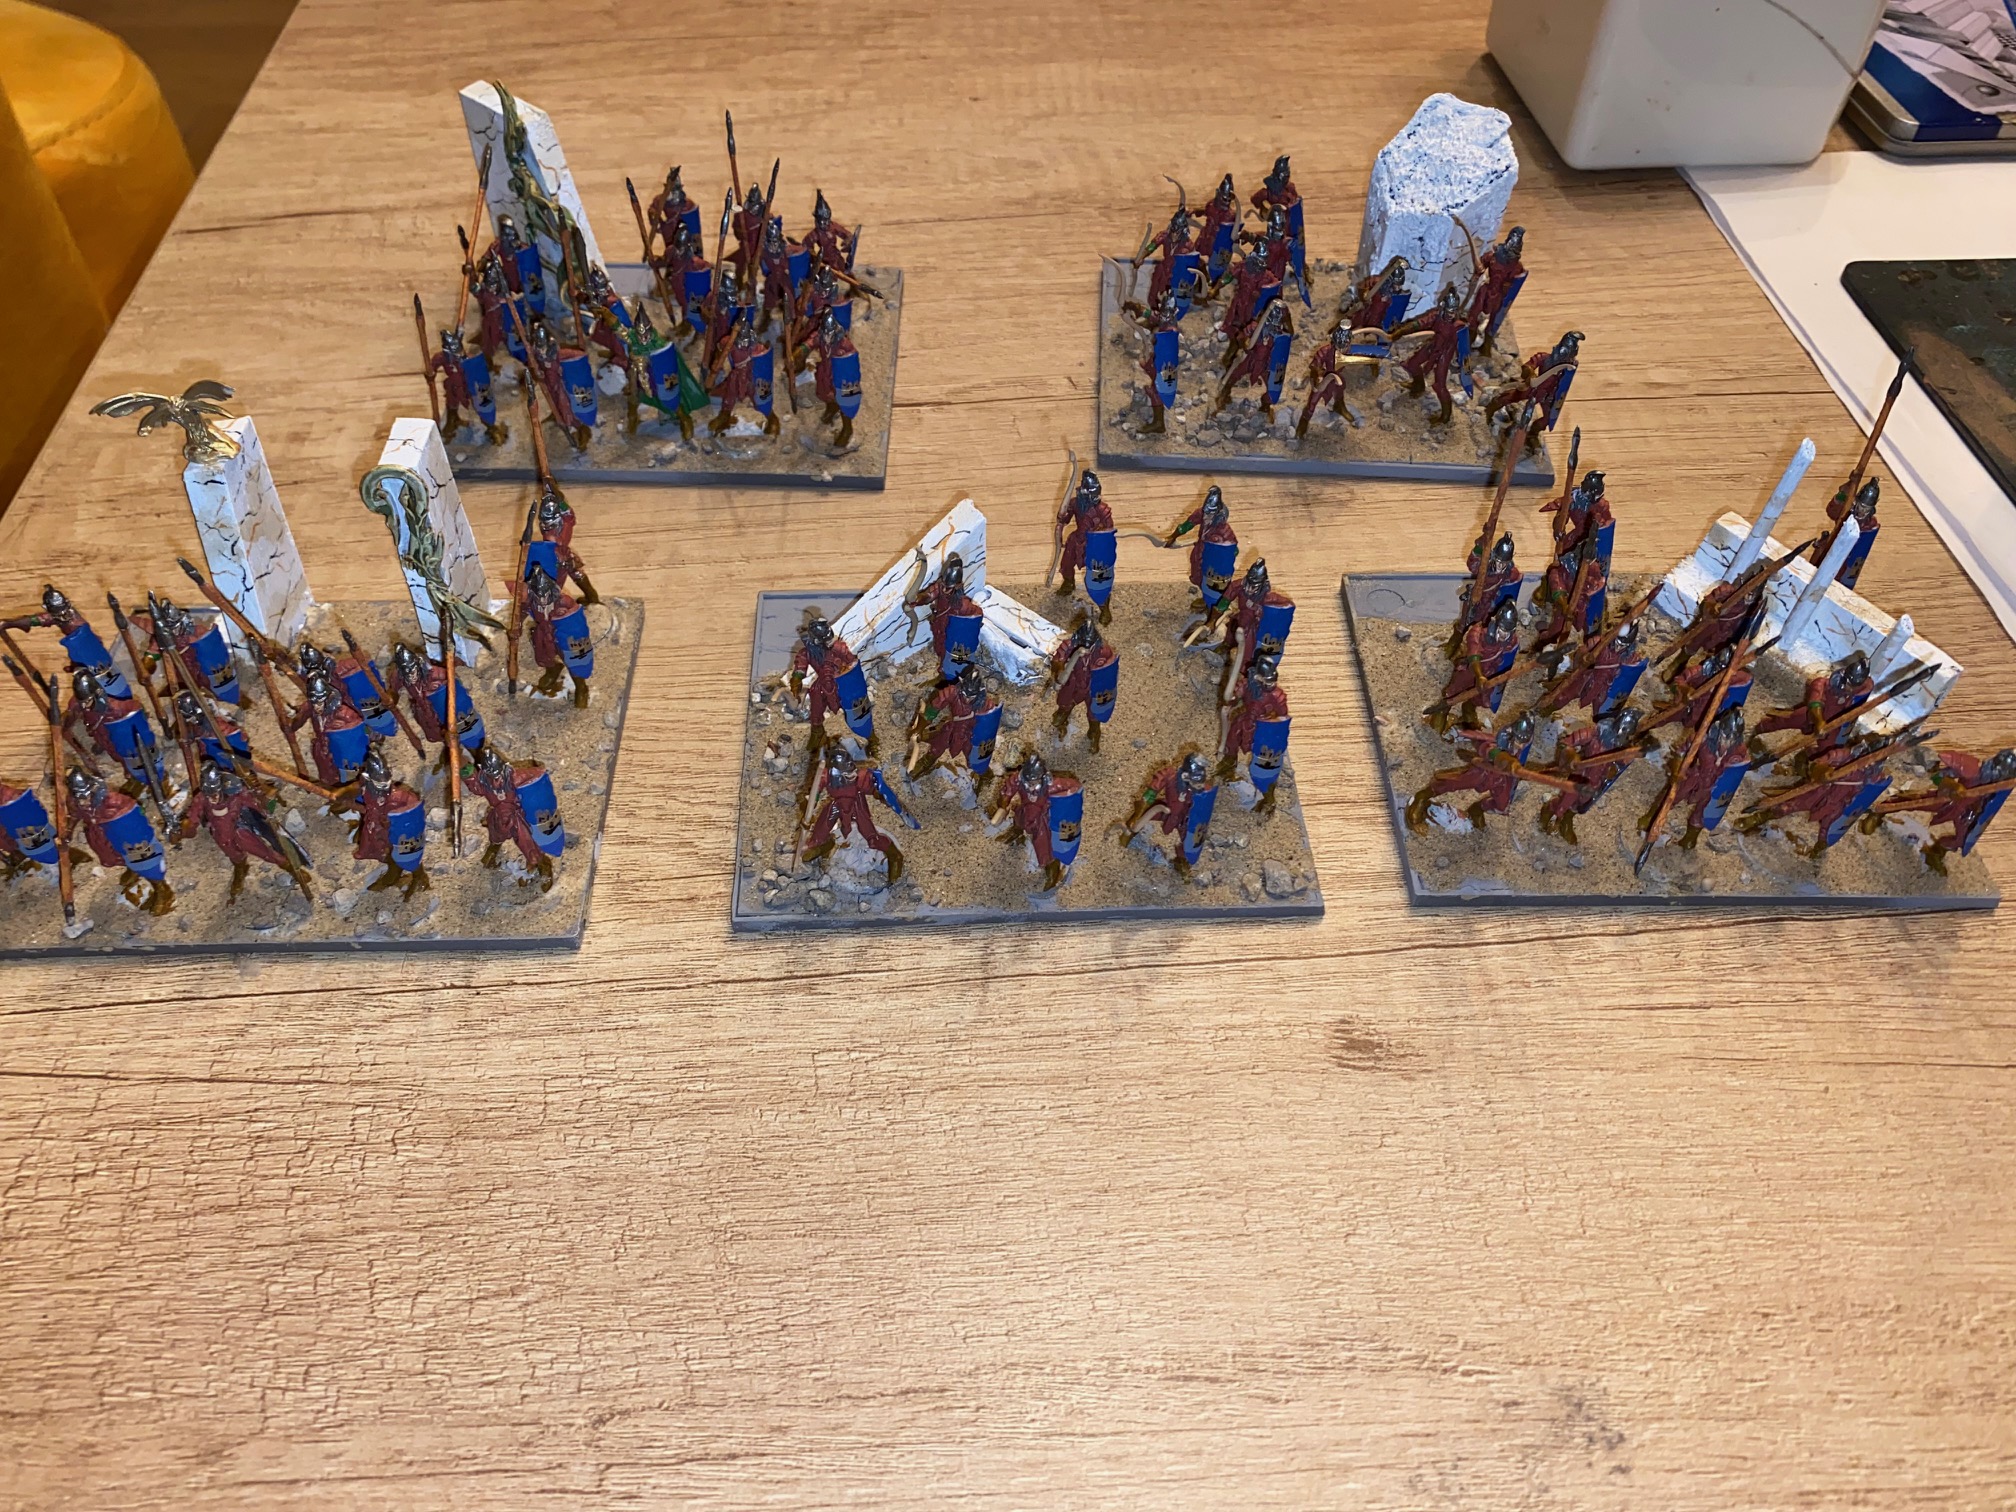
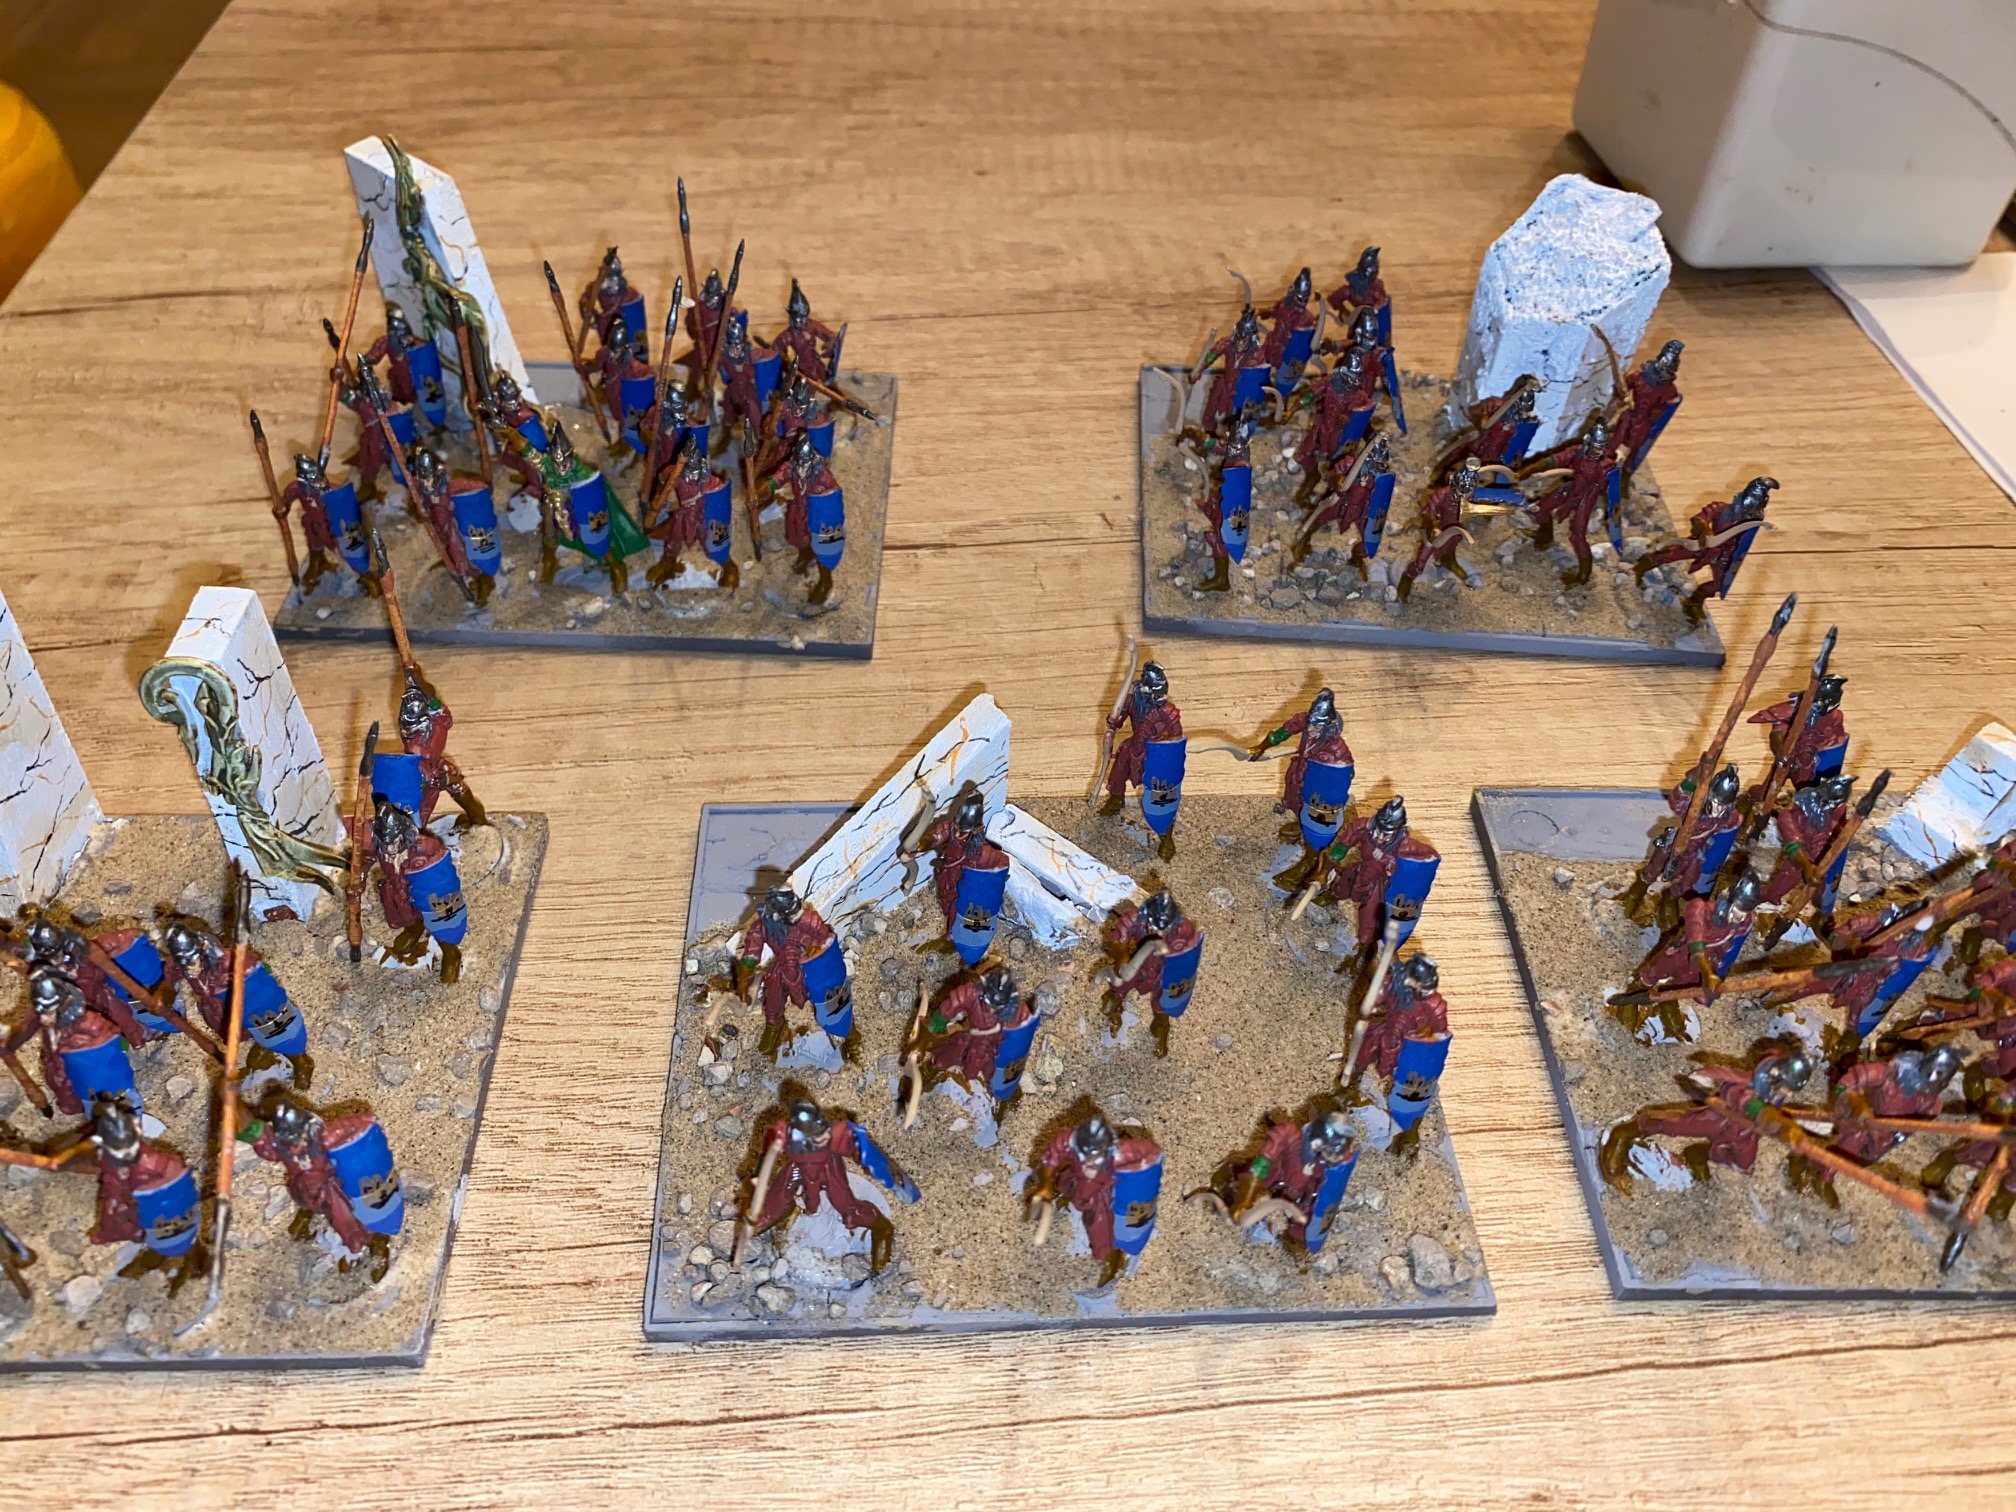
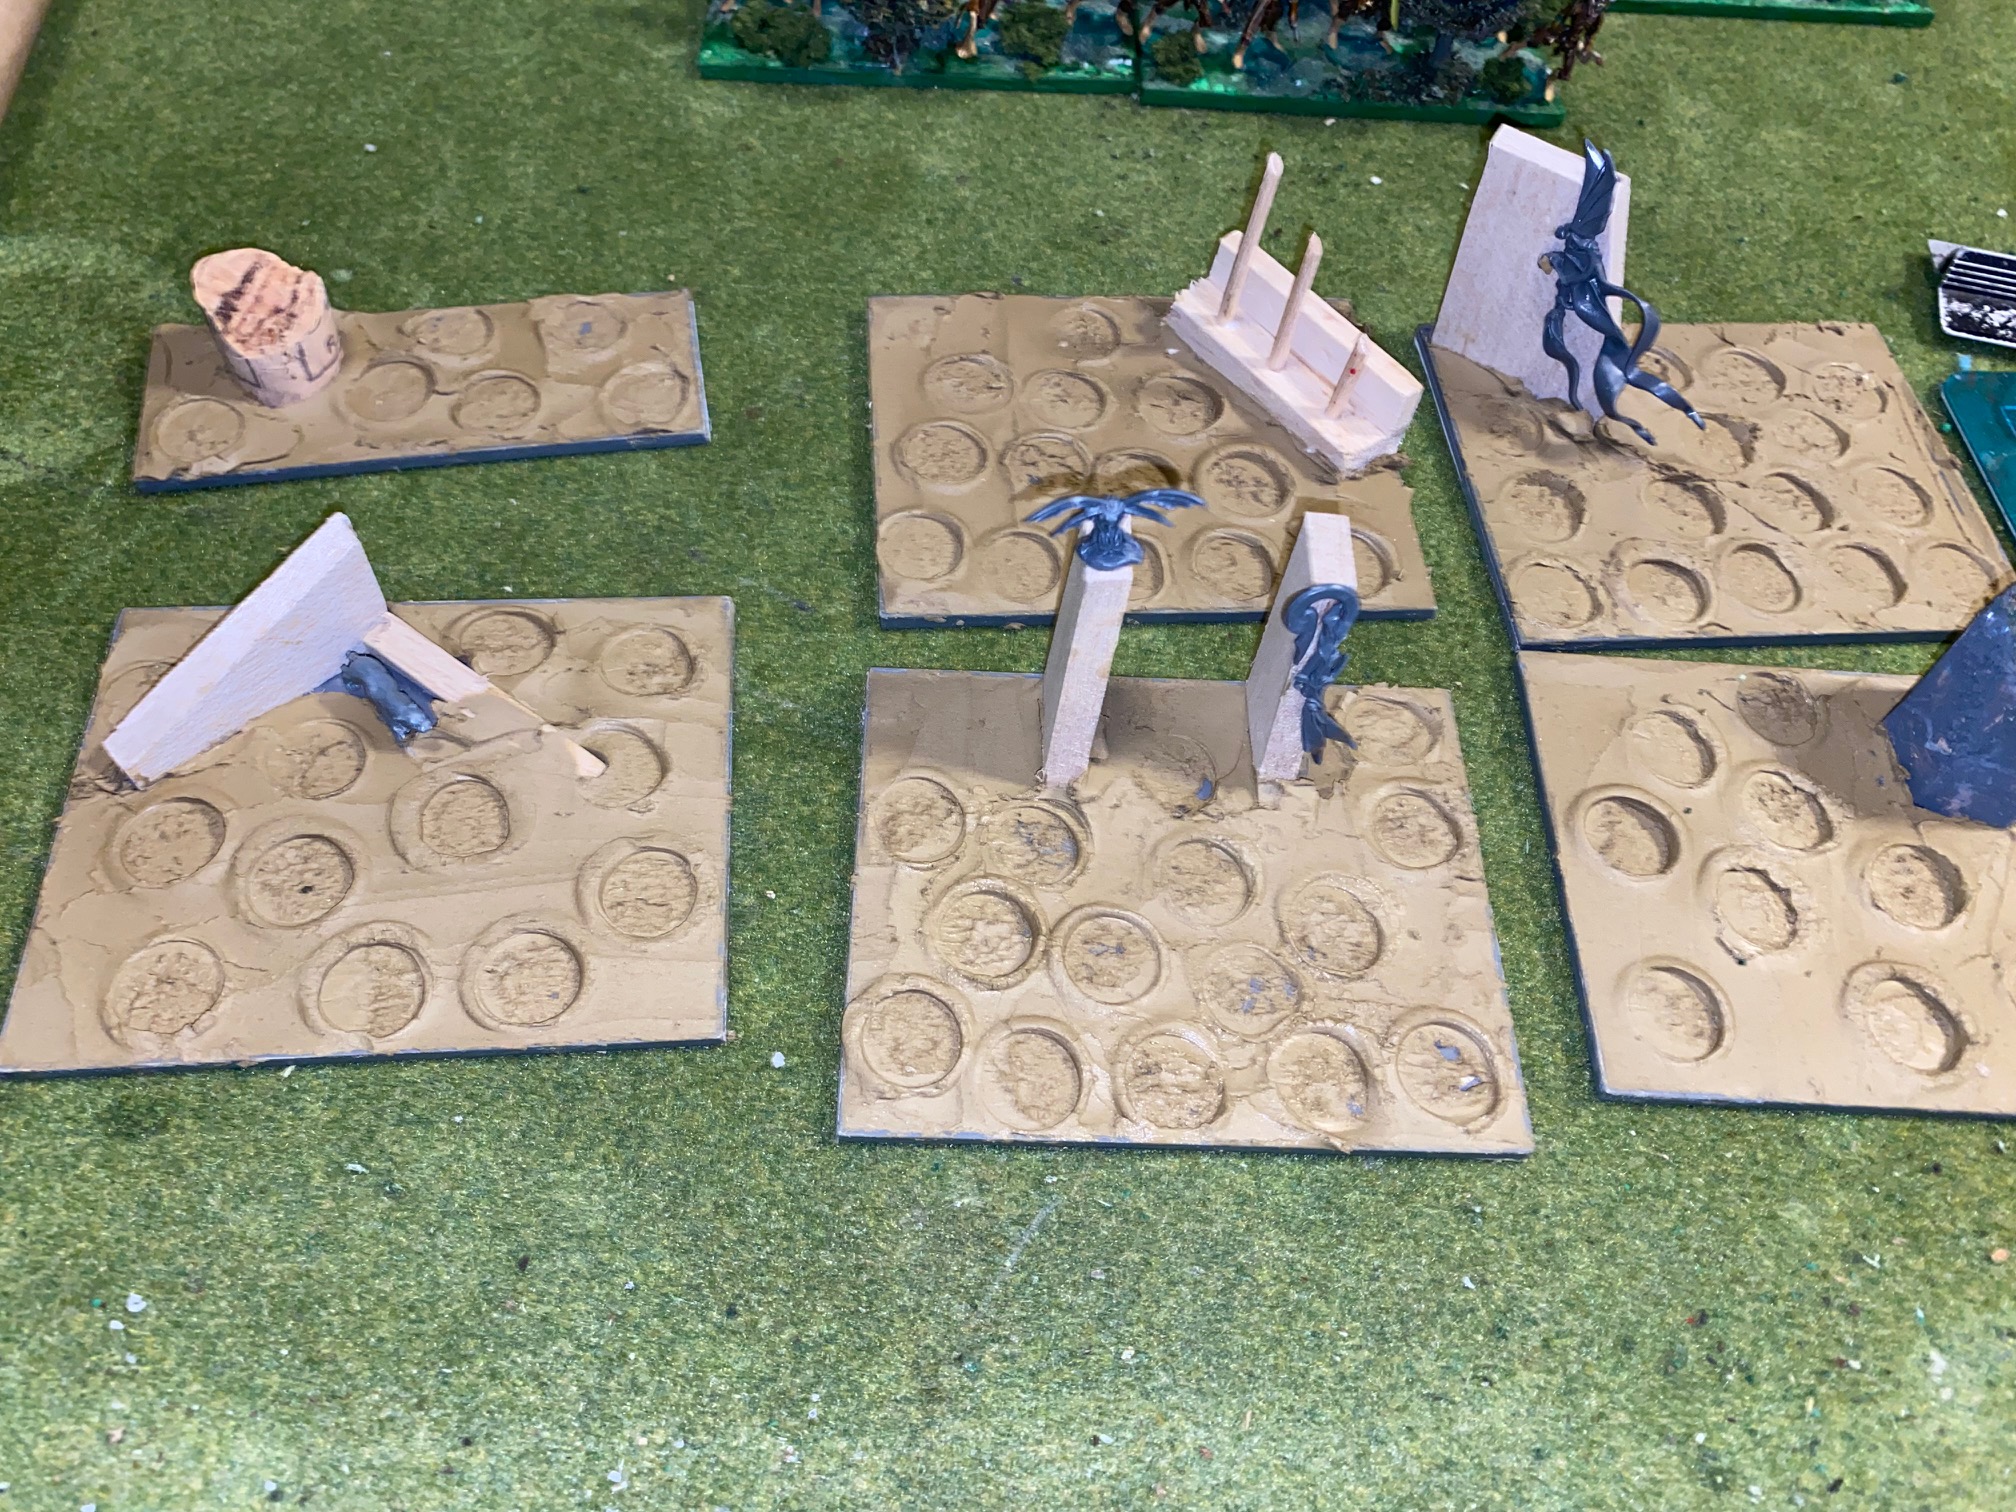
The Quallarion: Elves of the Fallen City
The second Elvish clan I wanted to be based around a city rather than a forest. So with this in mind, I want the bases to reflect an urban environment. So using the Mantic bases, I flipped them over as the underside of these bases is like a large container and glues down random pieces of balsa wood to resemble walls, gates etc.
A broken cork from a wine bottle became a ruined pillar, and a Smarties hexagonal box became a more elaborate column. Some odds and ends from the “bits box” were glued to these pieces to add some additional “flavour”
The air-drying clay was smoothed out onto the bases and as with the previous bases, once it had begun to dry out a little, depressions for the models was pressed into the clay to make the eventual sticking down of the figures easier later.
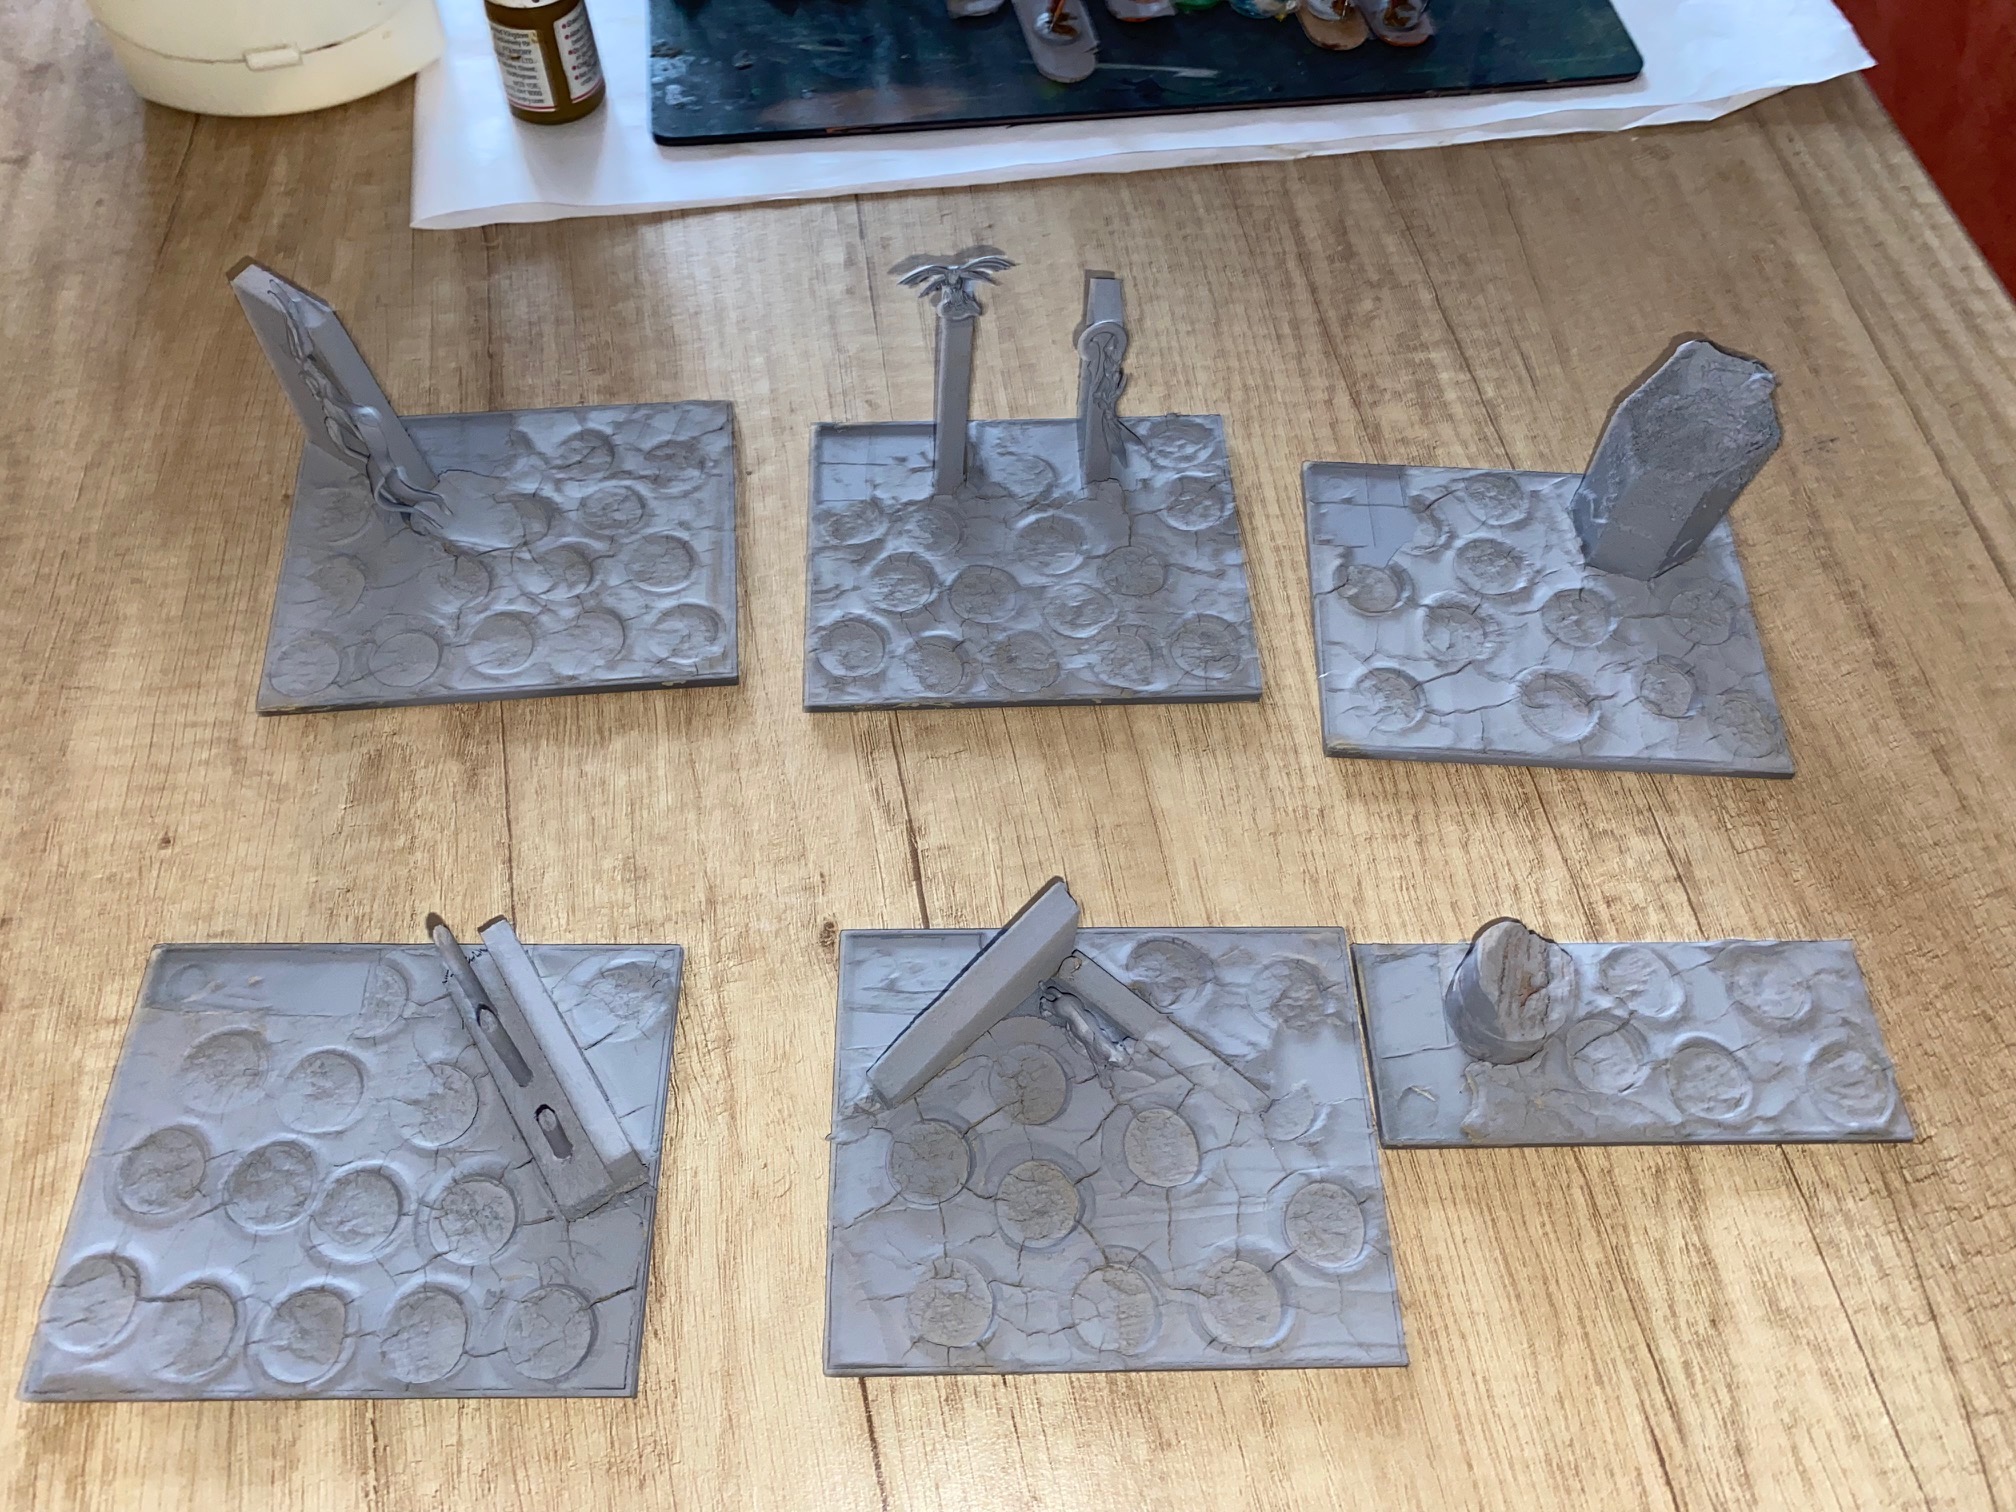
For the walls themselves I decided to try and make them look like marble. I search online for images and decided on a white/cream marble with two treads of contrasting color running through it.
To prepare the stonework, the walls etc. were painted with three layers of acrylic white paint (standard art supplies) and one this was fully dry I diluted some Sepia Shade (Vallejo 73.200) and applied this in random patches on the surfaces of the structures.
I then mixed a brown/orange color from Vallejo Flat Brown (70.984) and Pale Flesh (72.003) to make a kind of lighter brown and using a small brush applied random lines of color to the different structures.
Once this had also dried, a final mix of Vallejo German Grey (70.995) with a touch of Ultramarine (72.022) was then applied as a contrast colour.


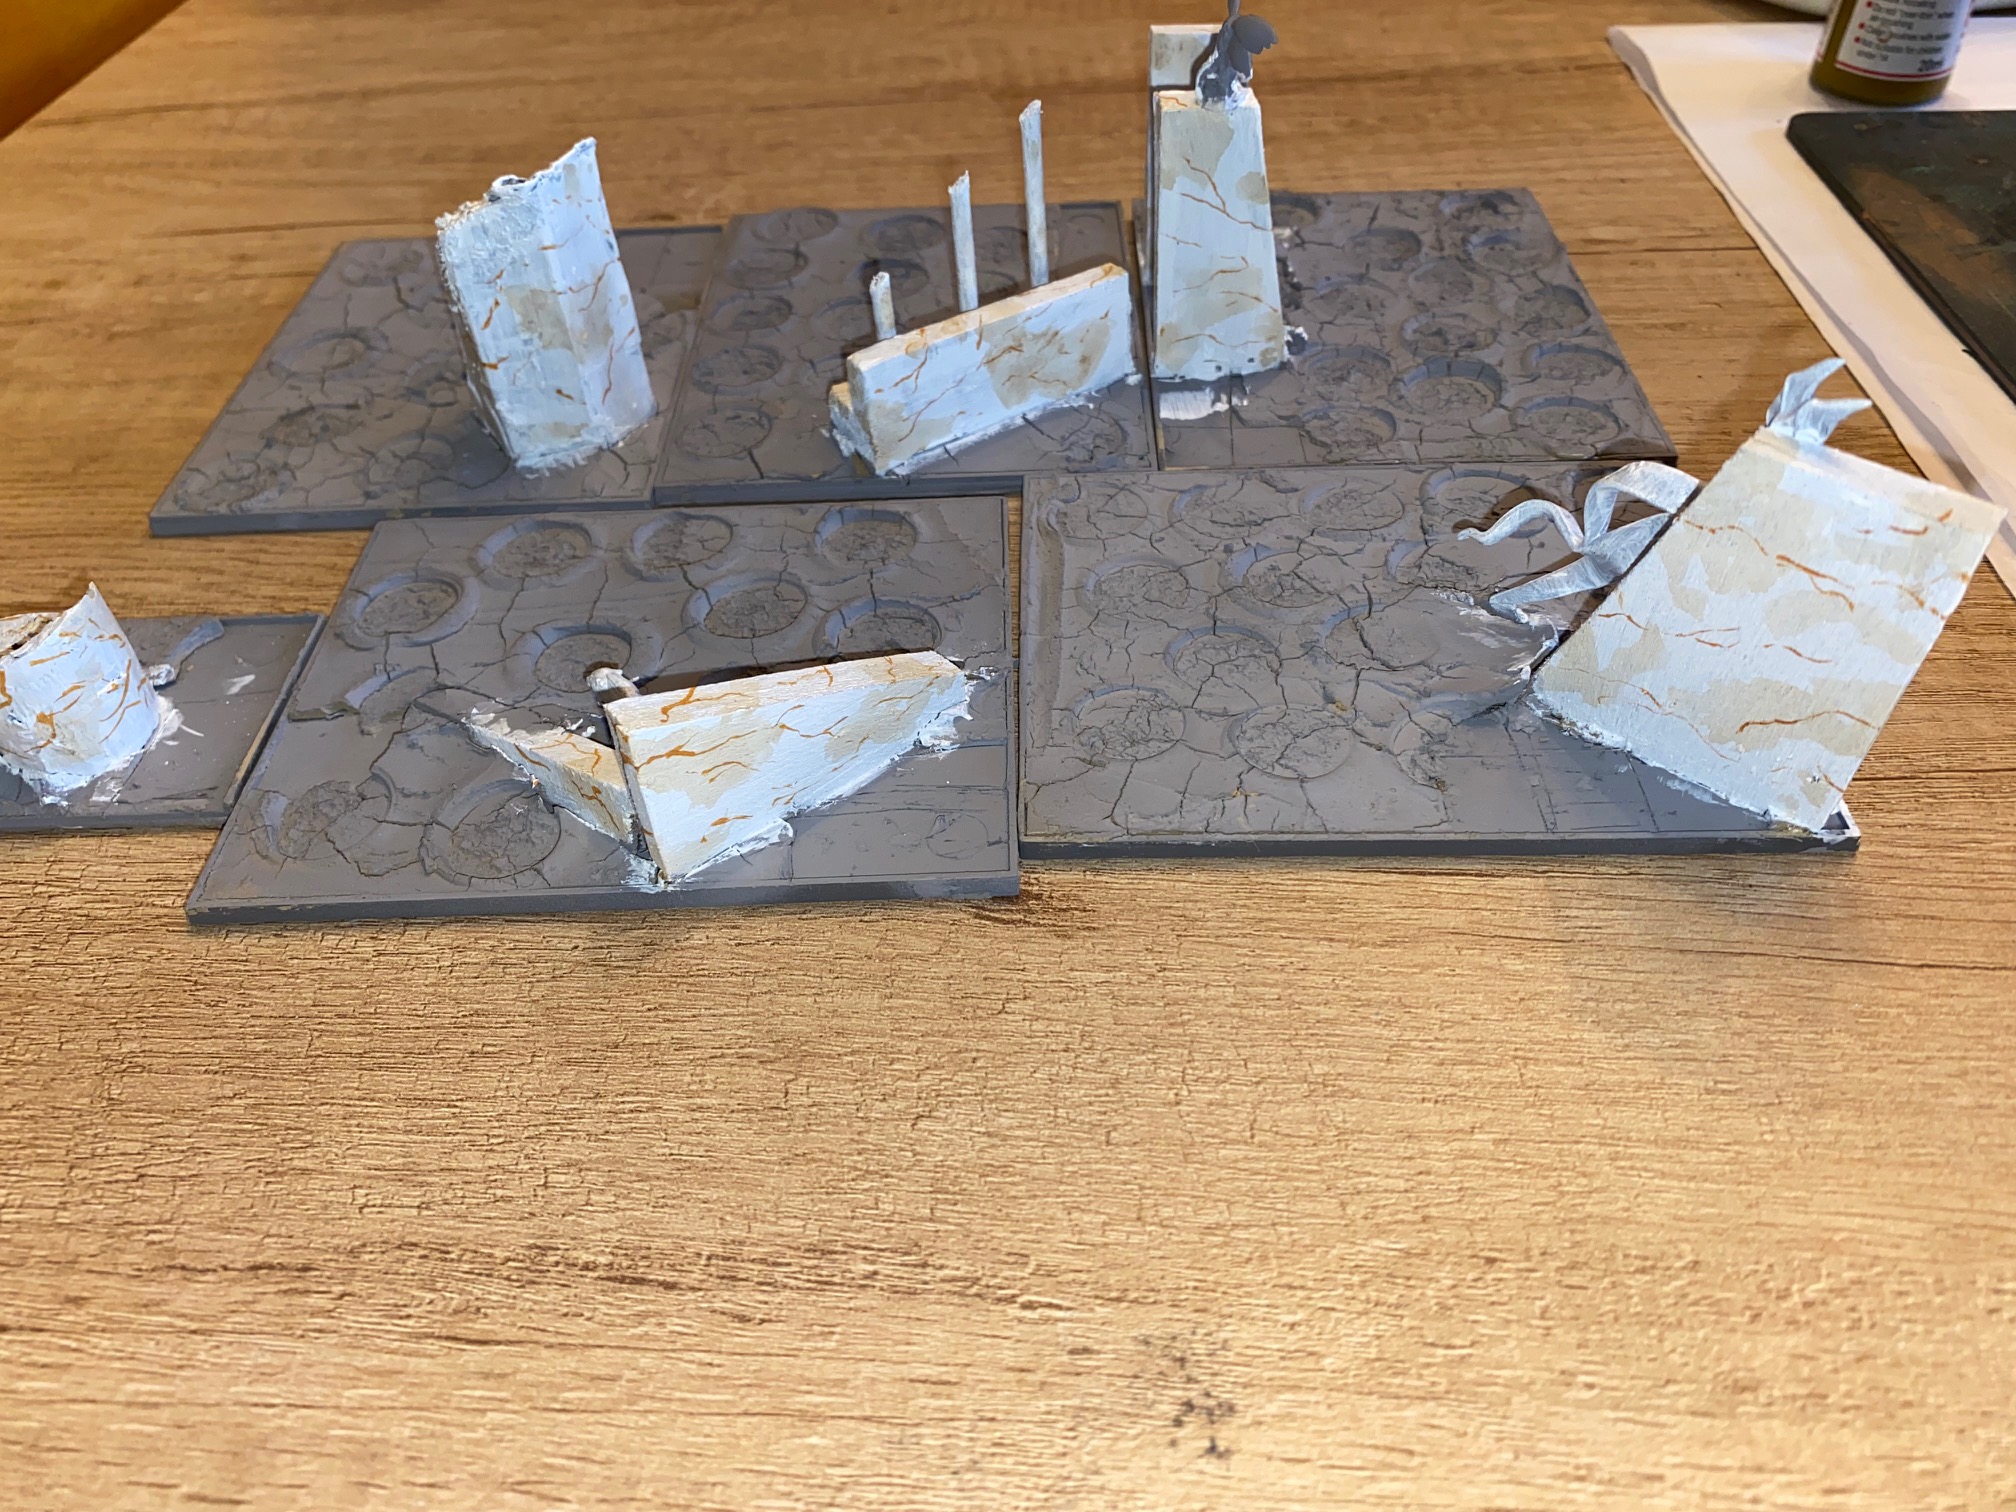
The final stage will be to add some gloss or satin varnish to the structures once everything is dried fully.
The actual models are almost finished and the next post will be the finished bases which will comprise three units of Tallspears and two of Archers, together with a troop of two-handed weapons.
In the meantime Happy Gaming!
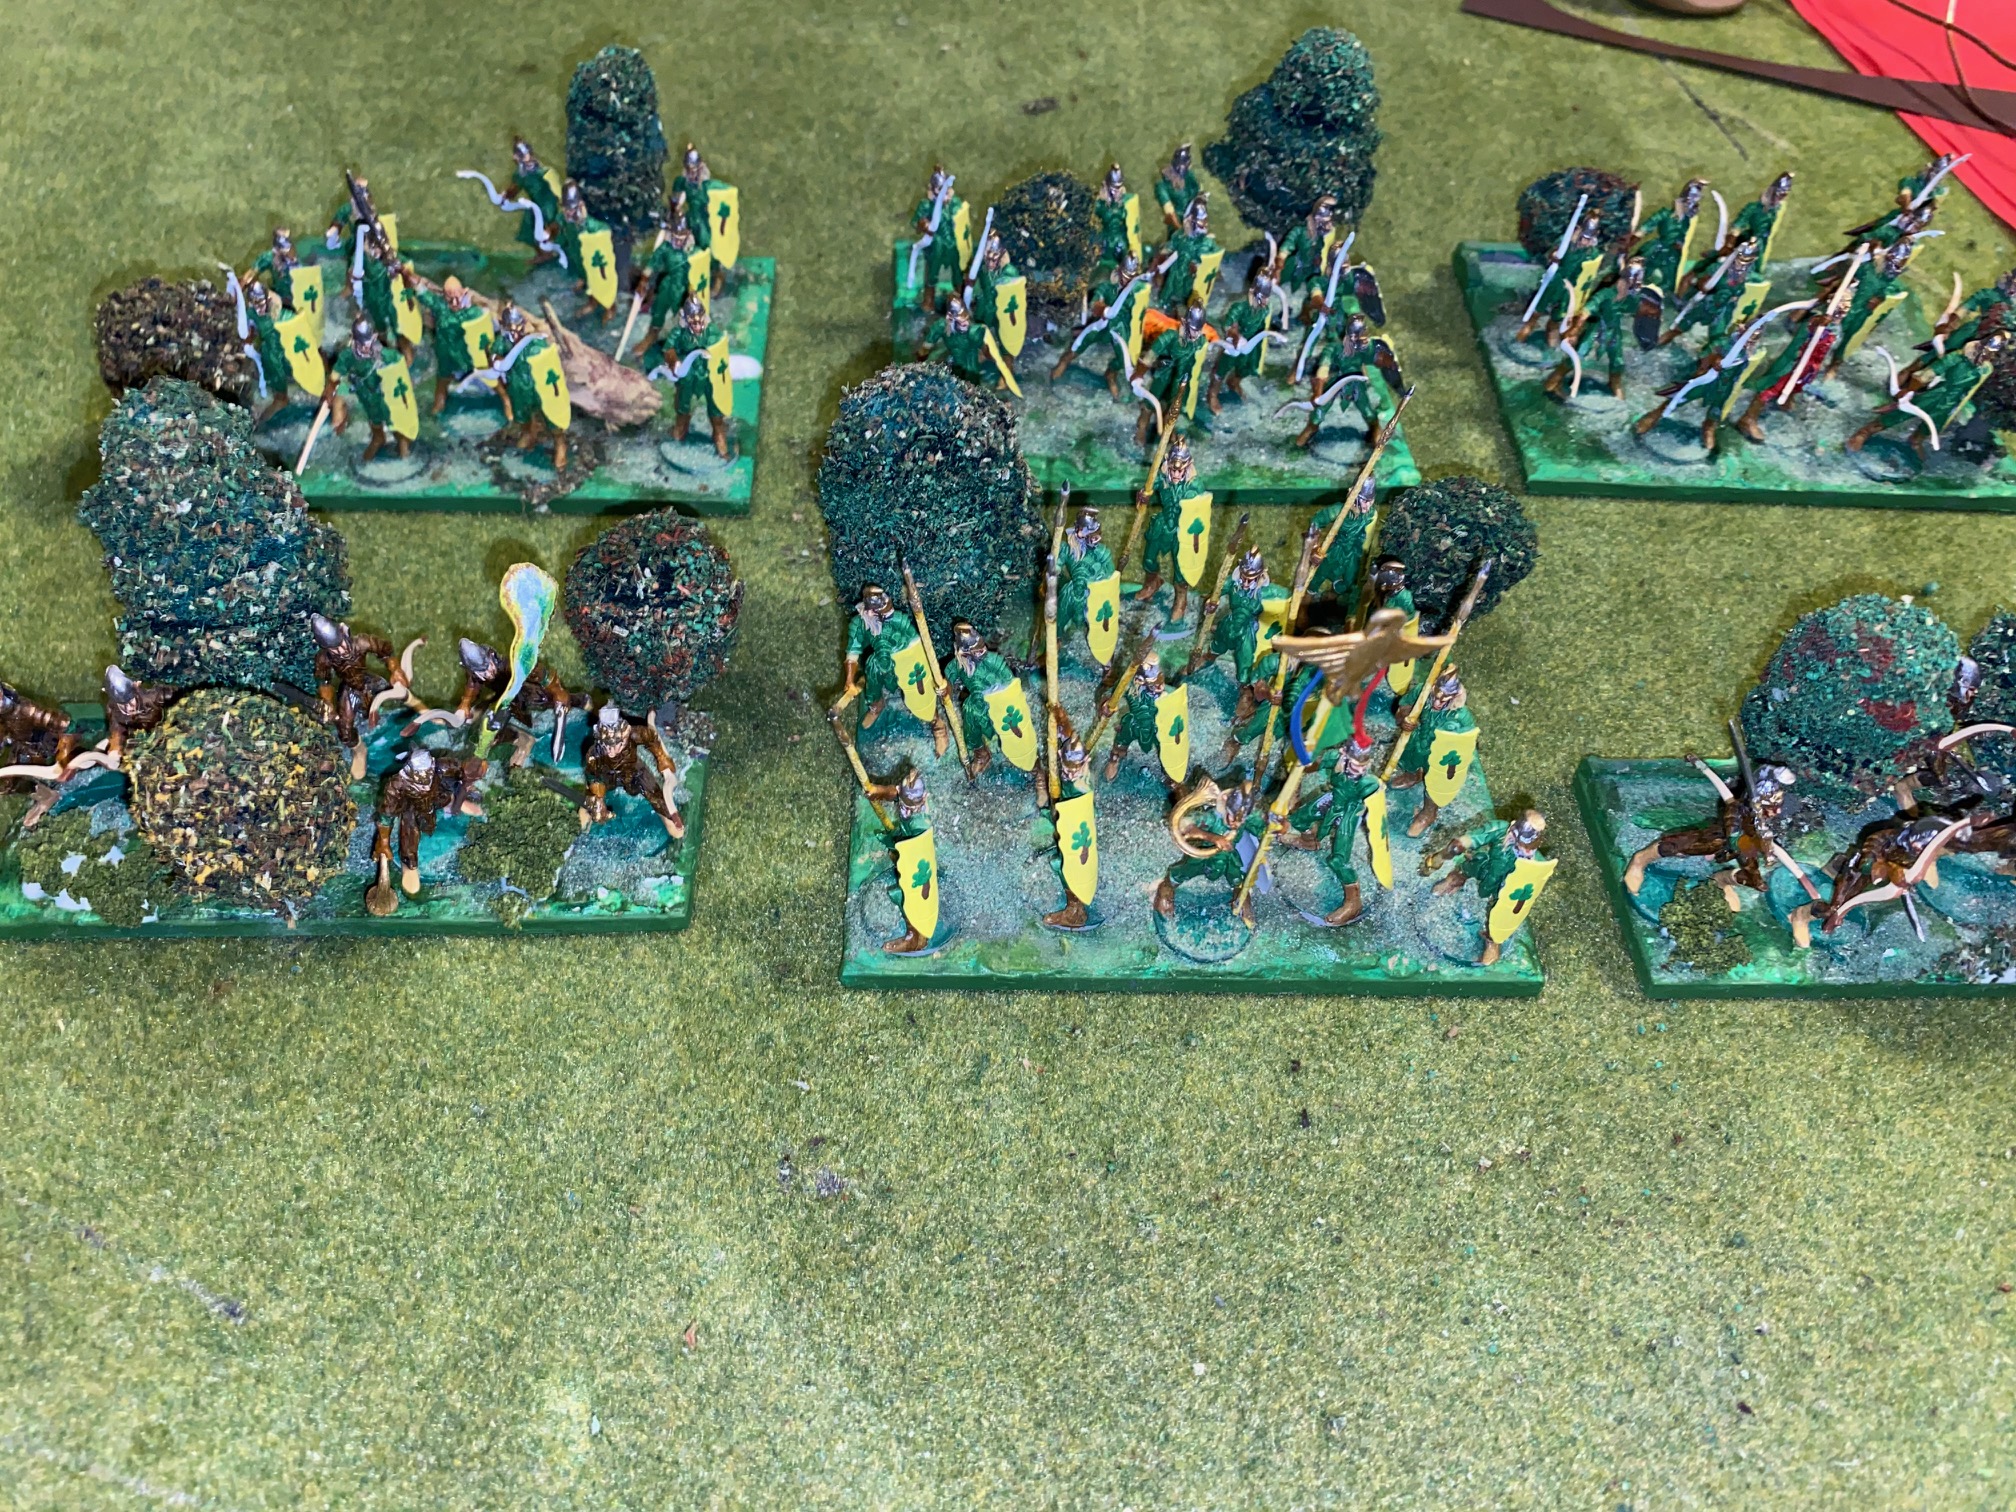
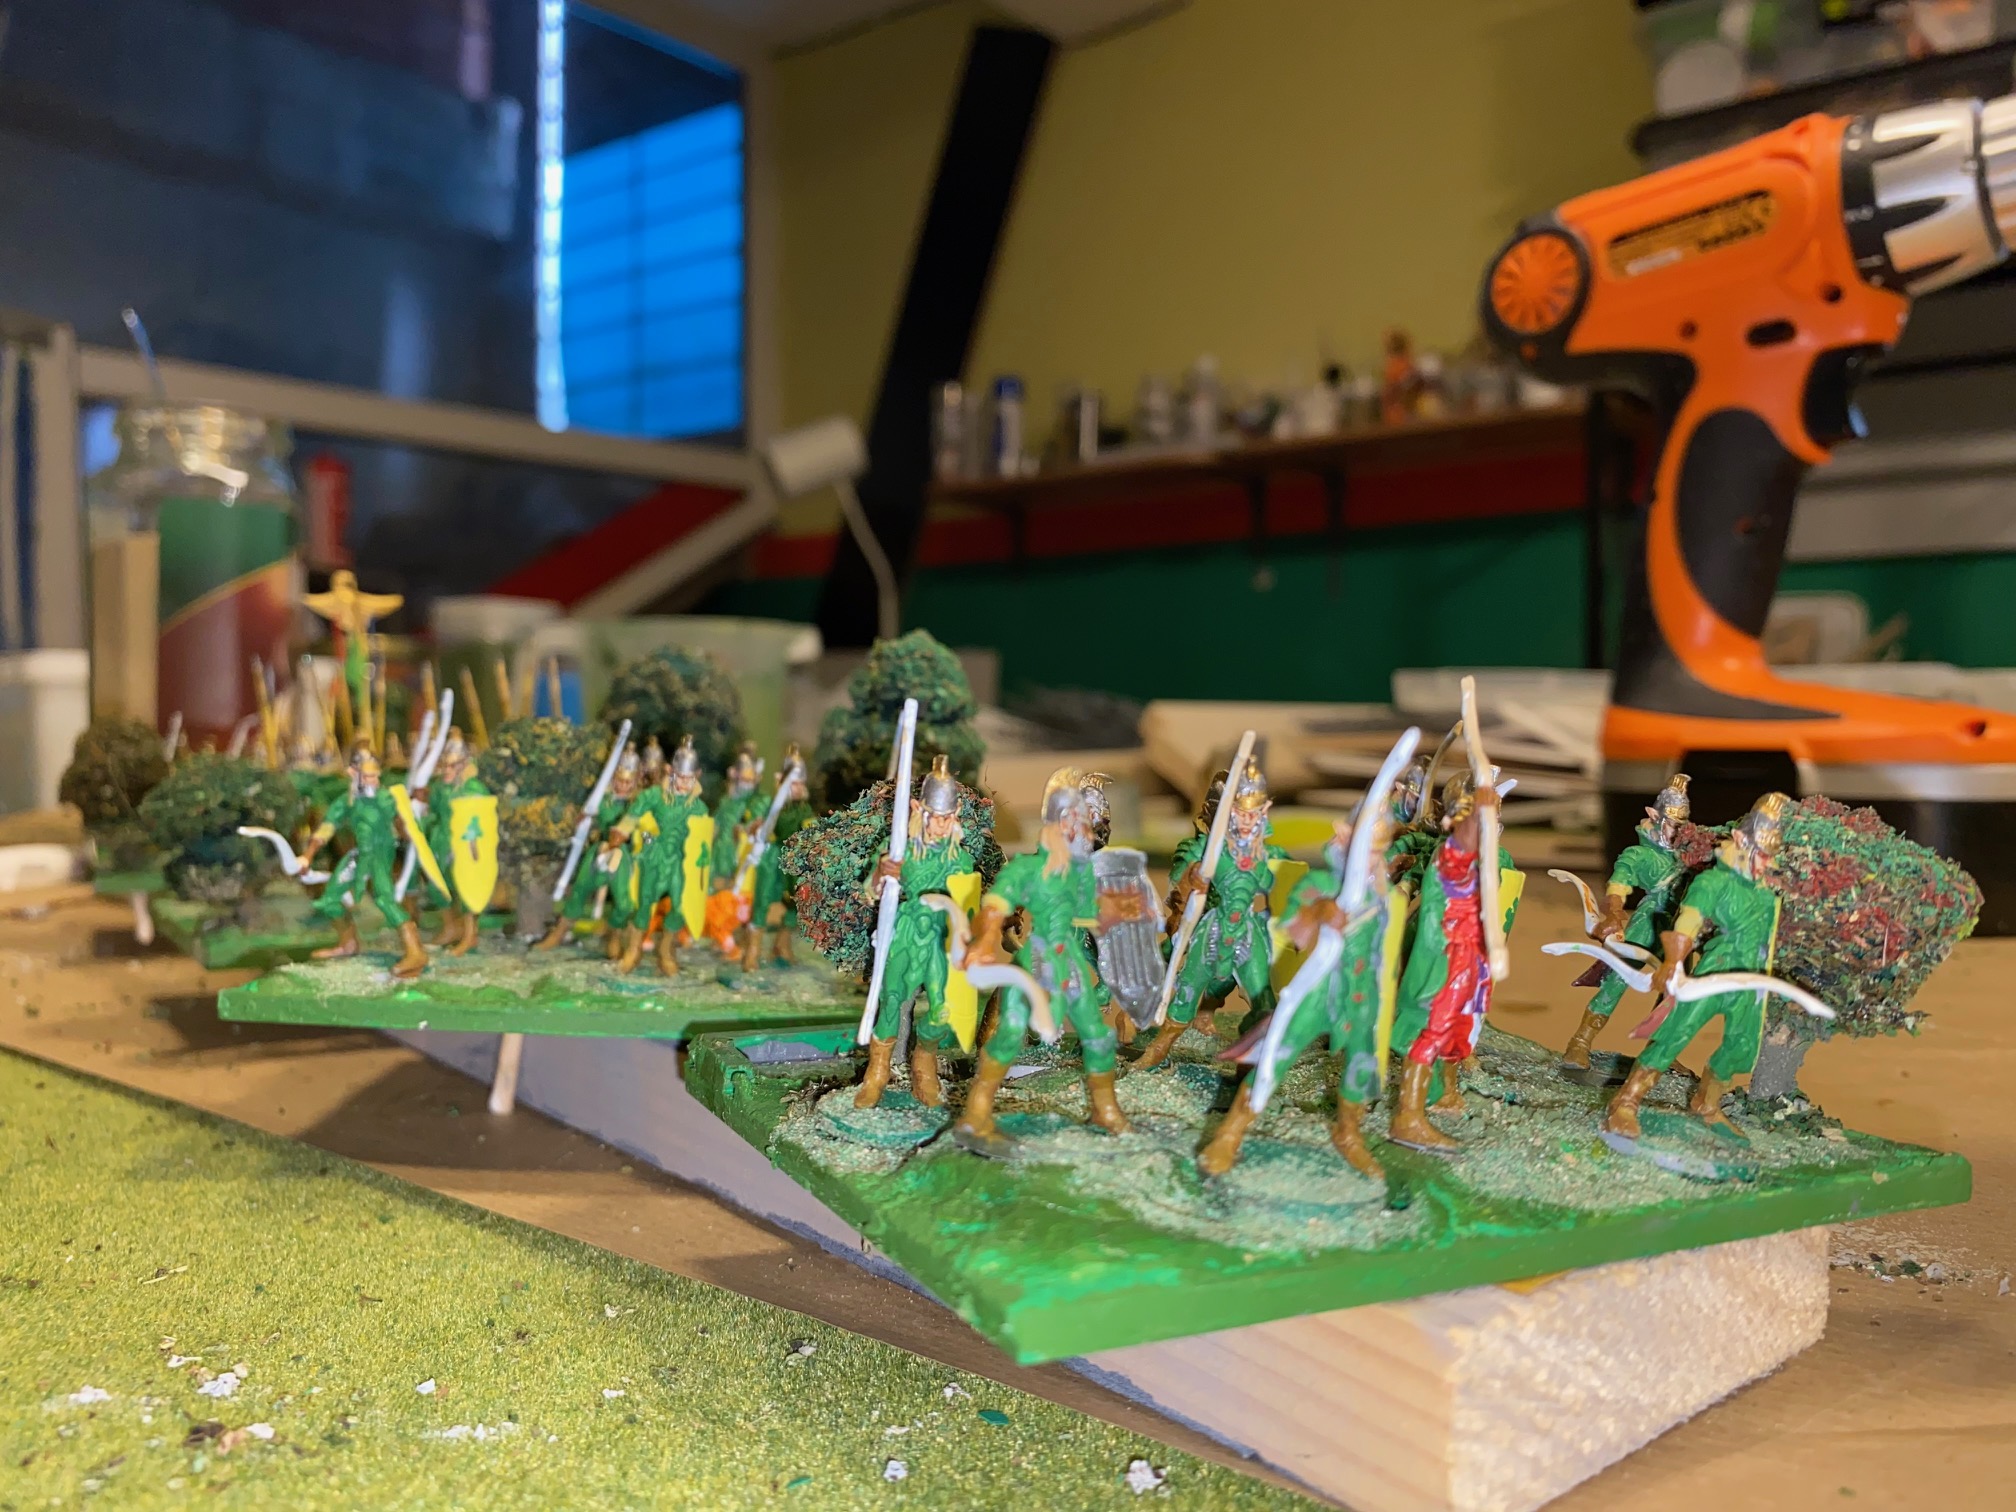
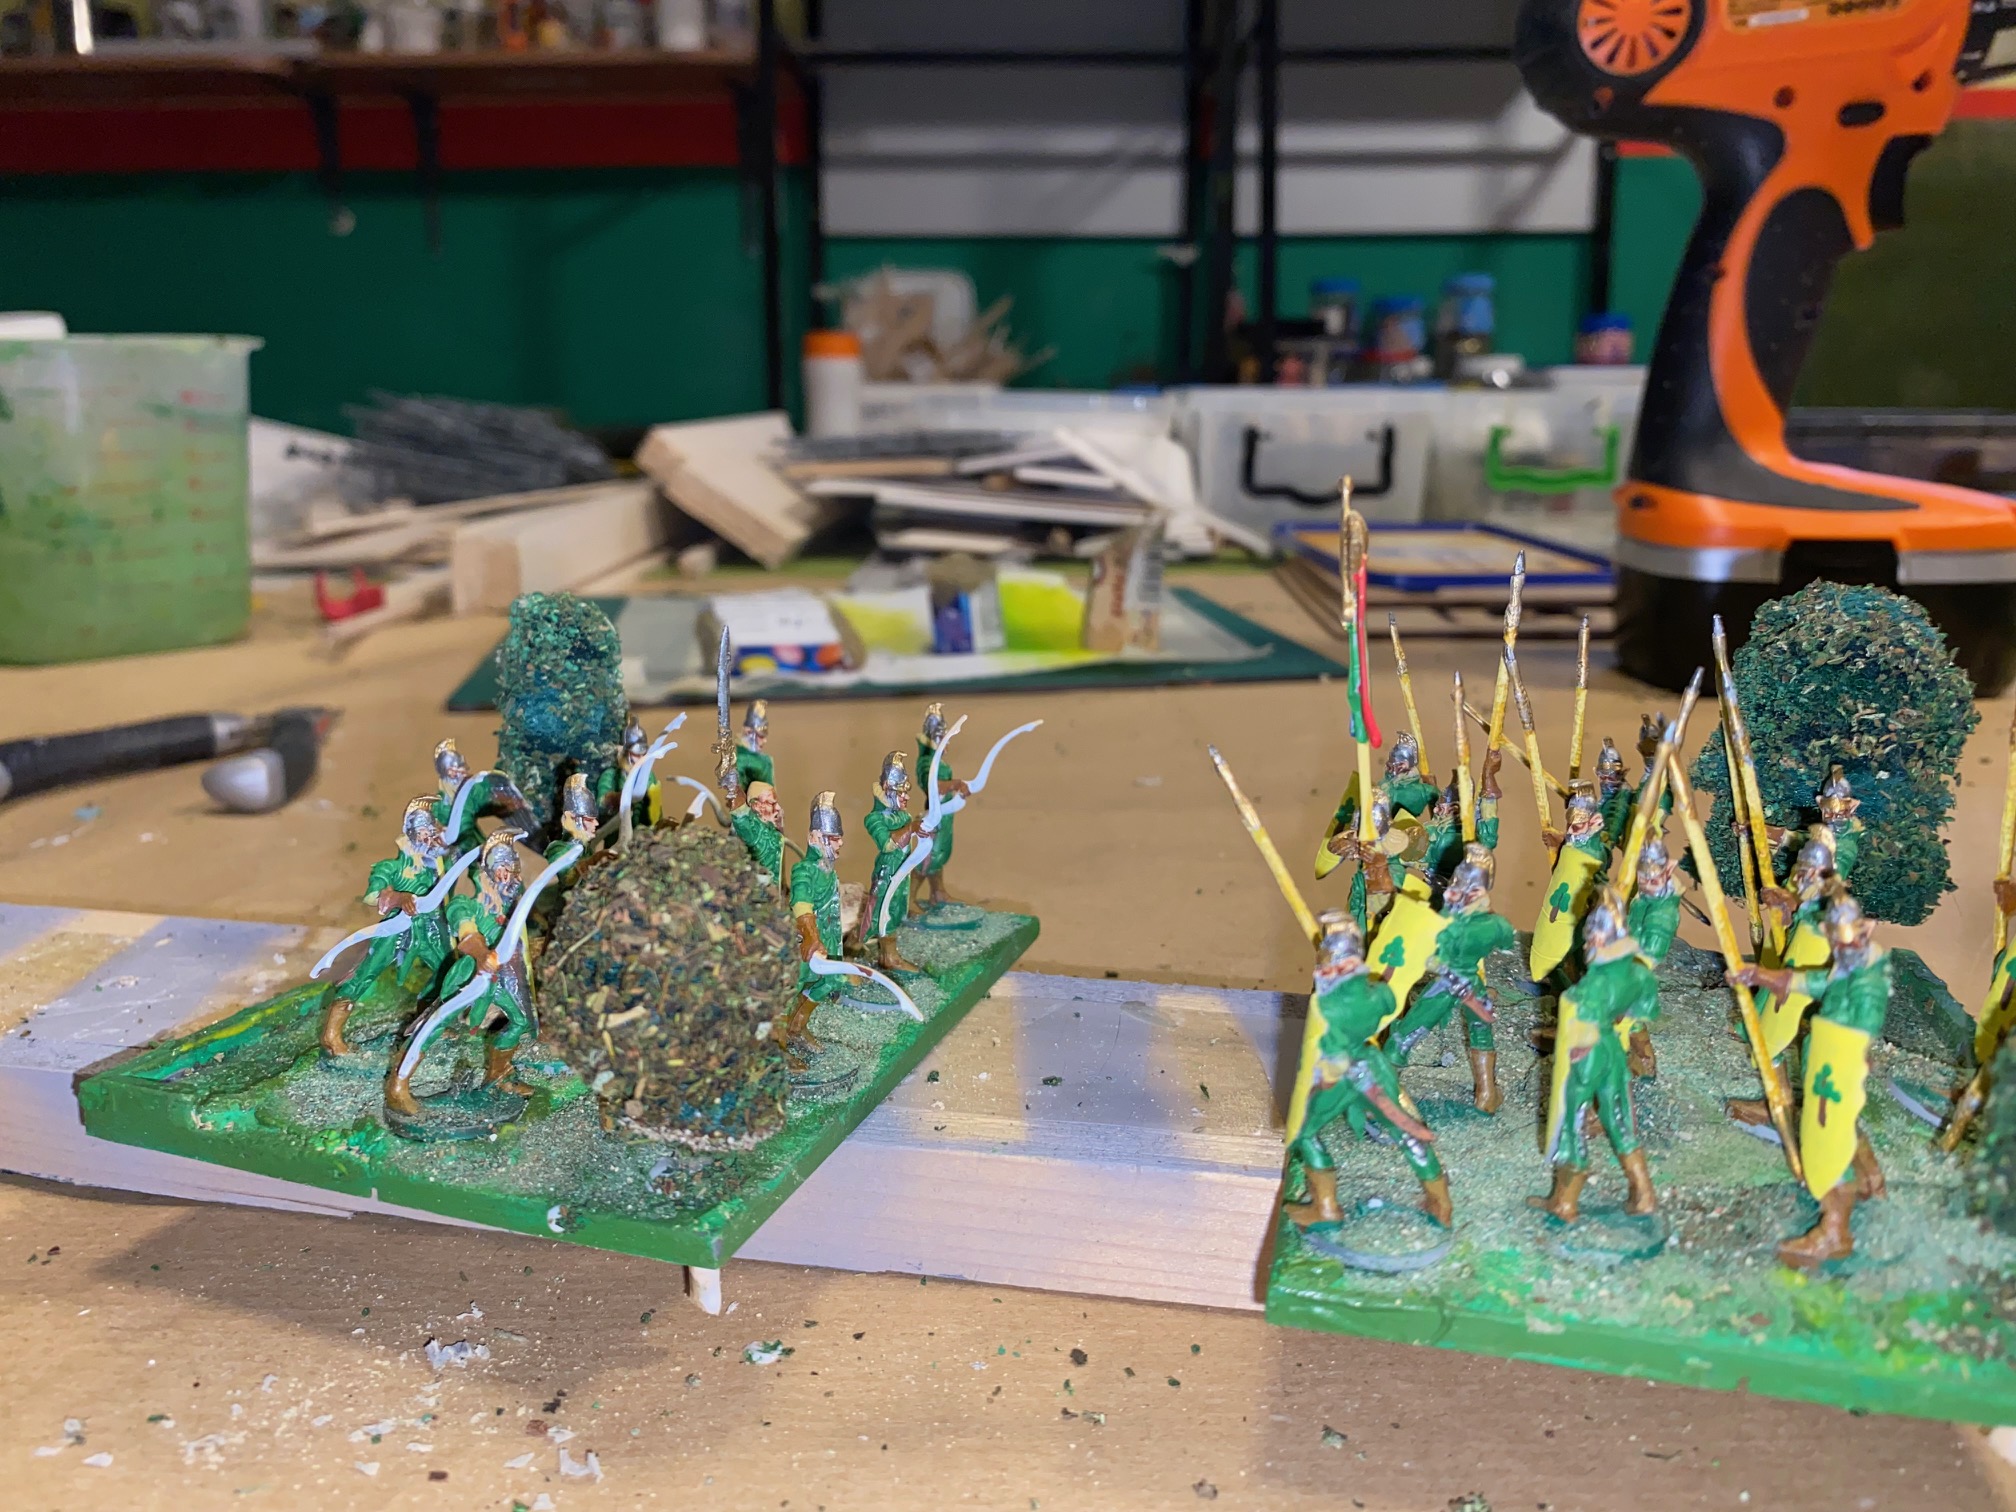
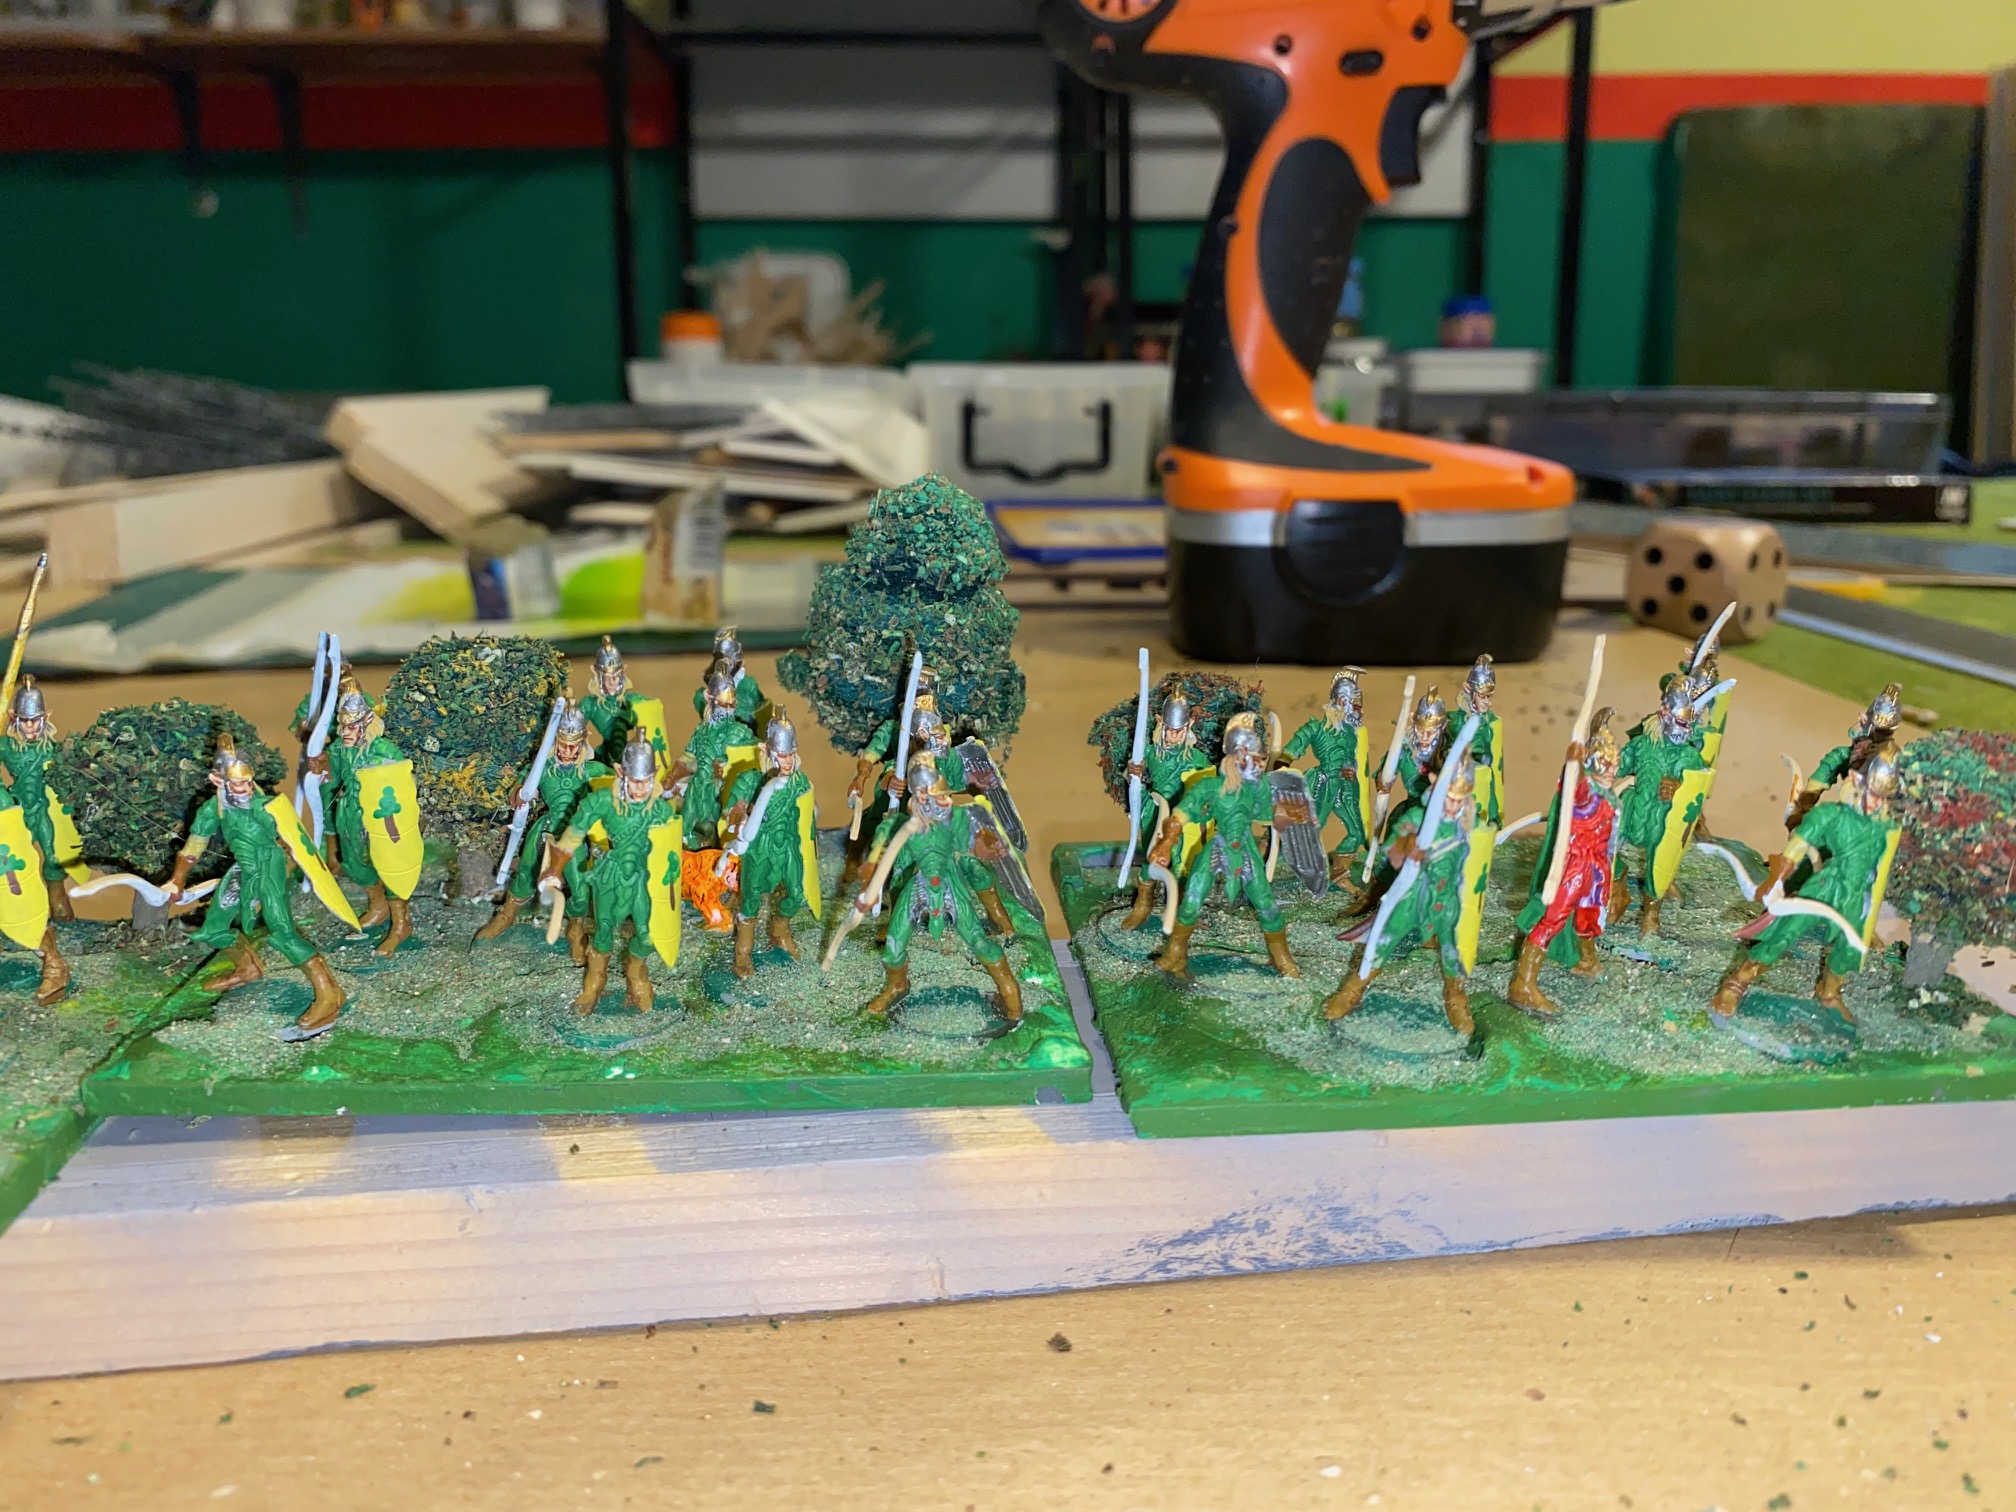
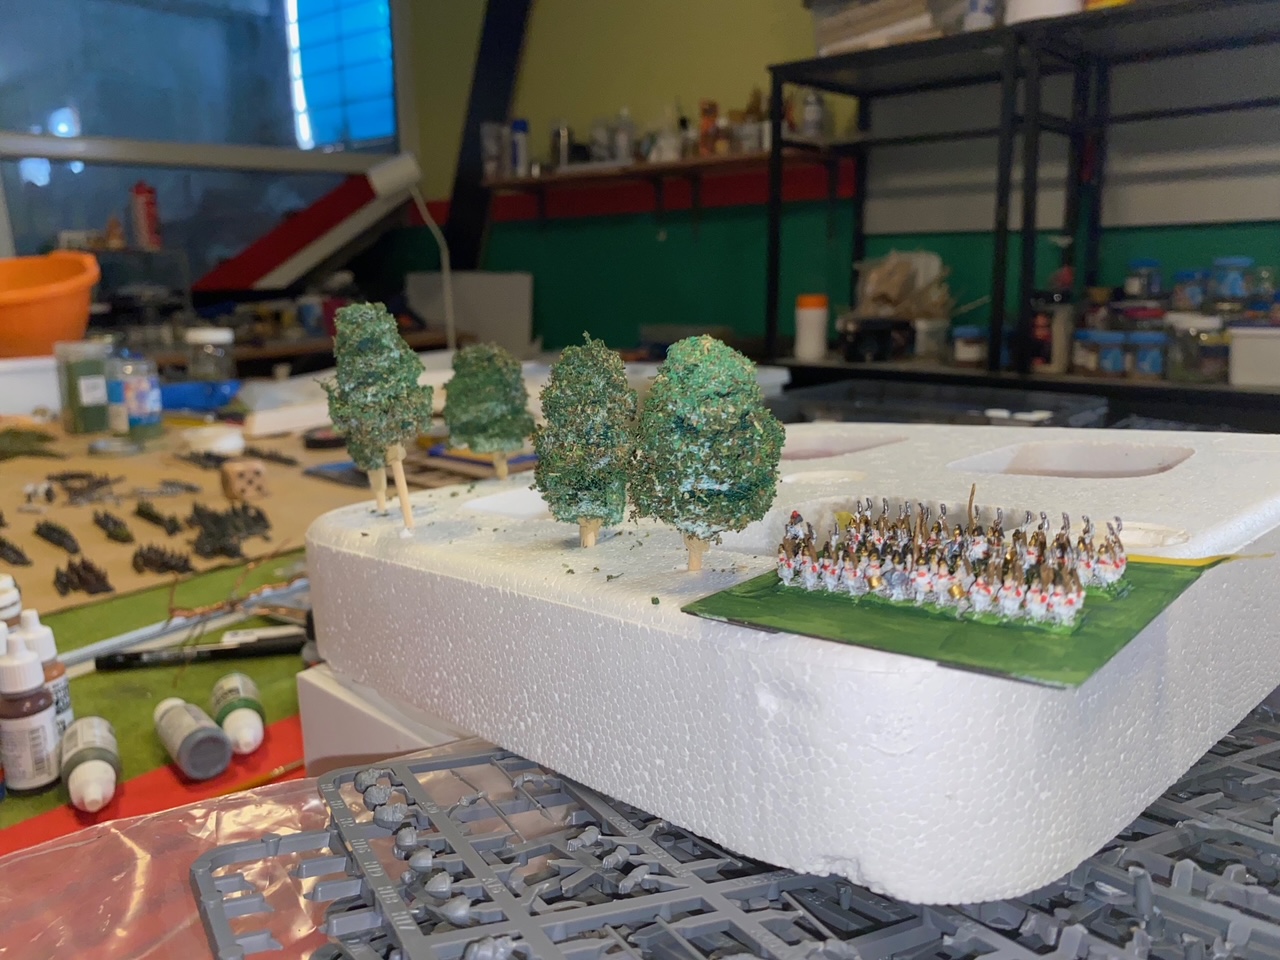
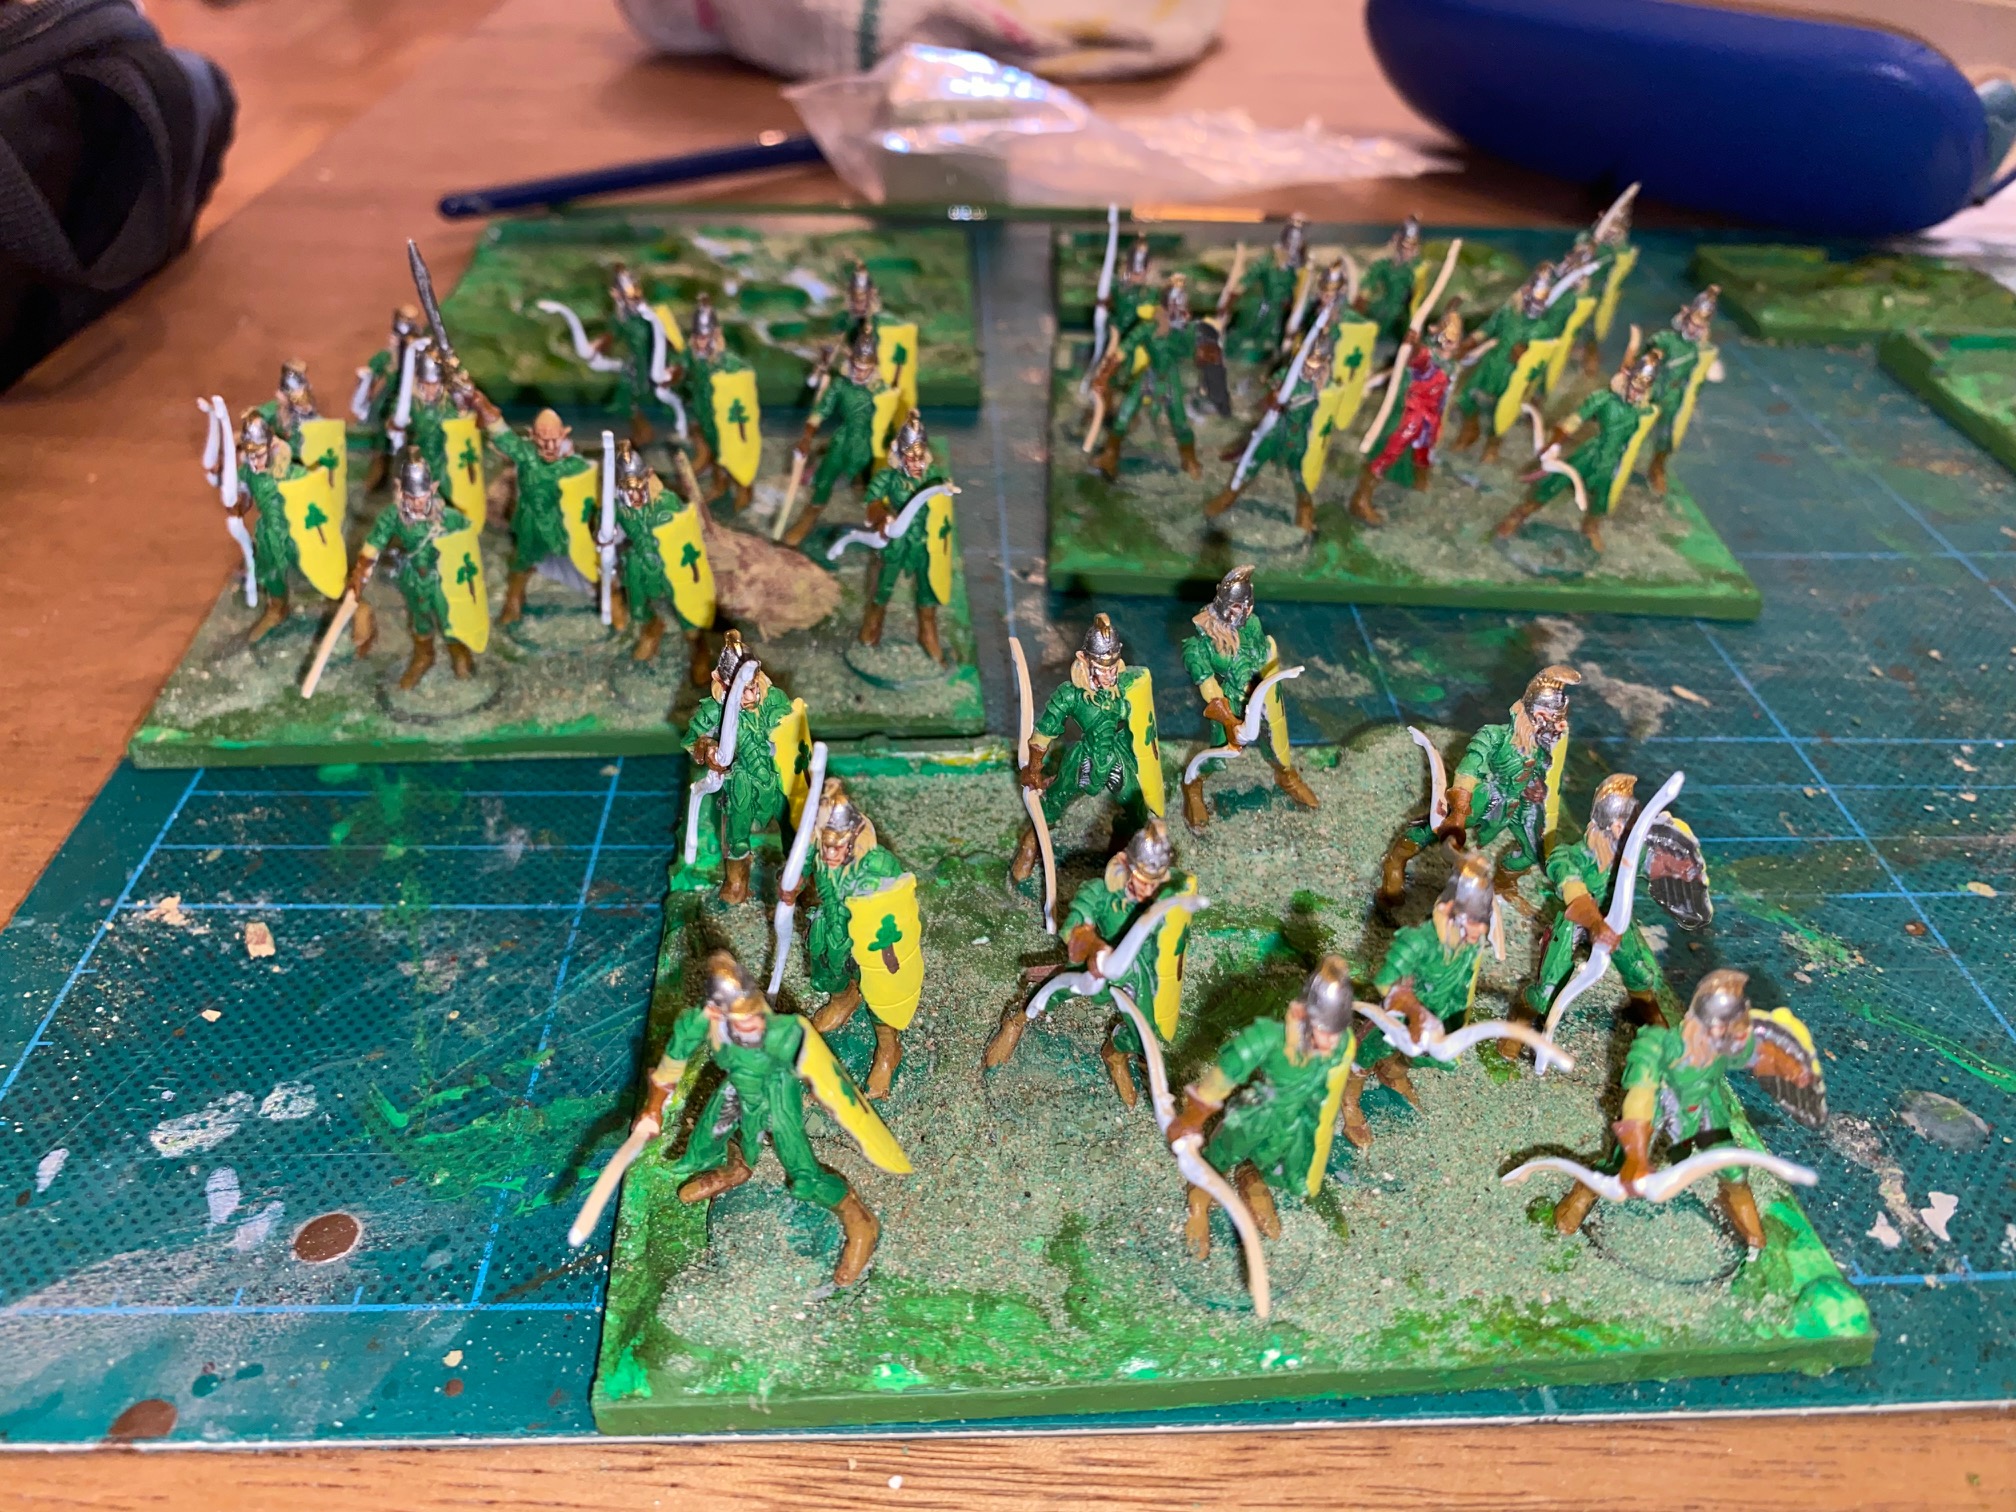
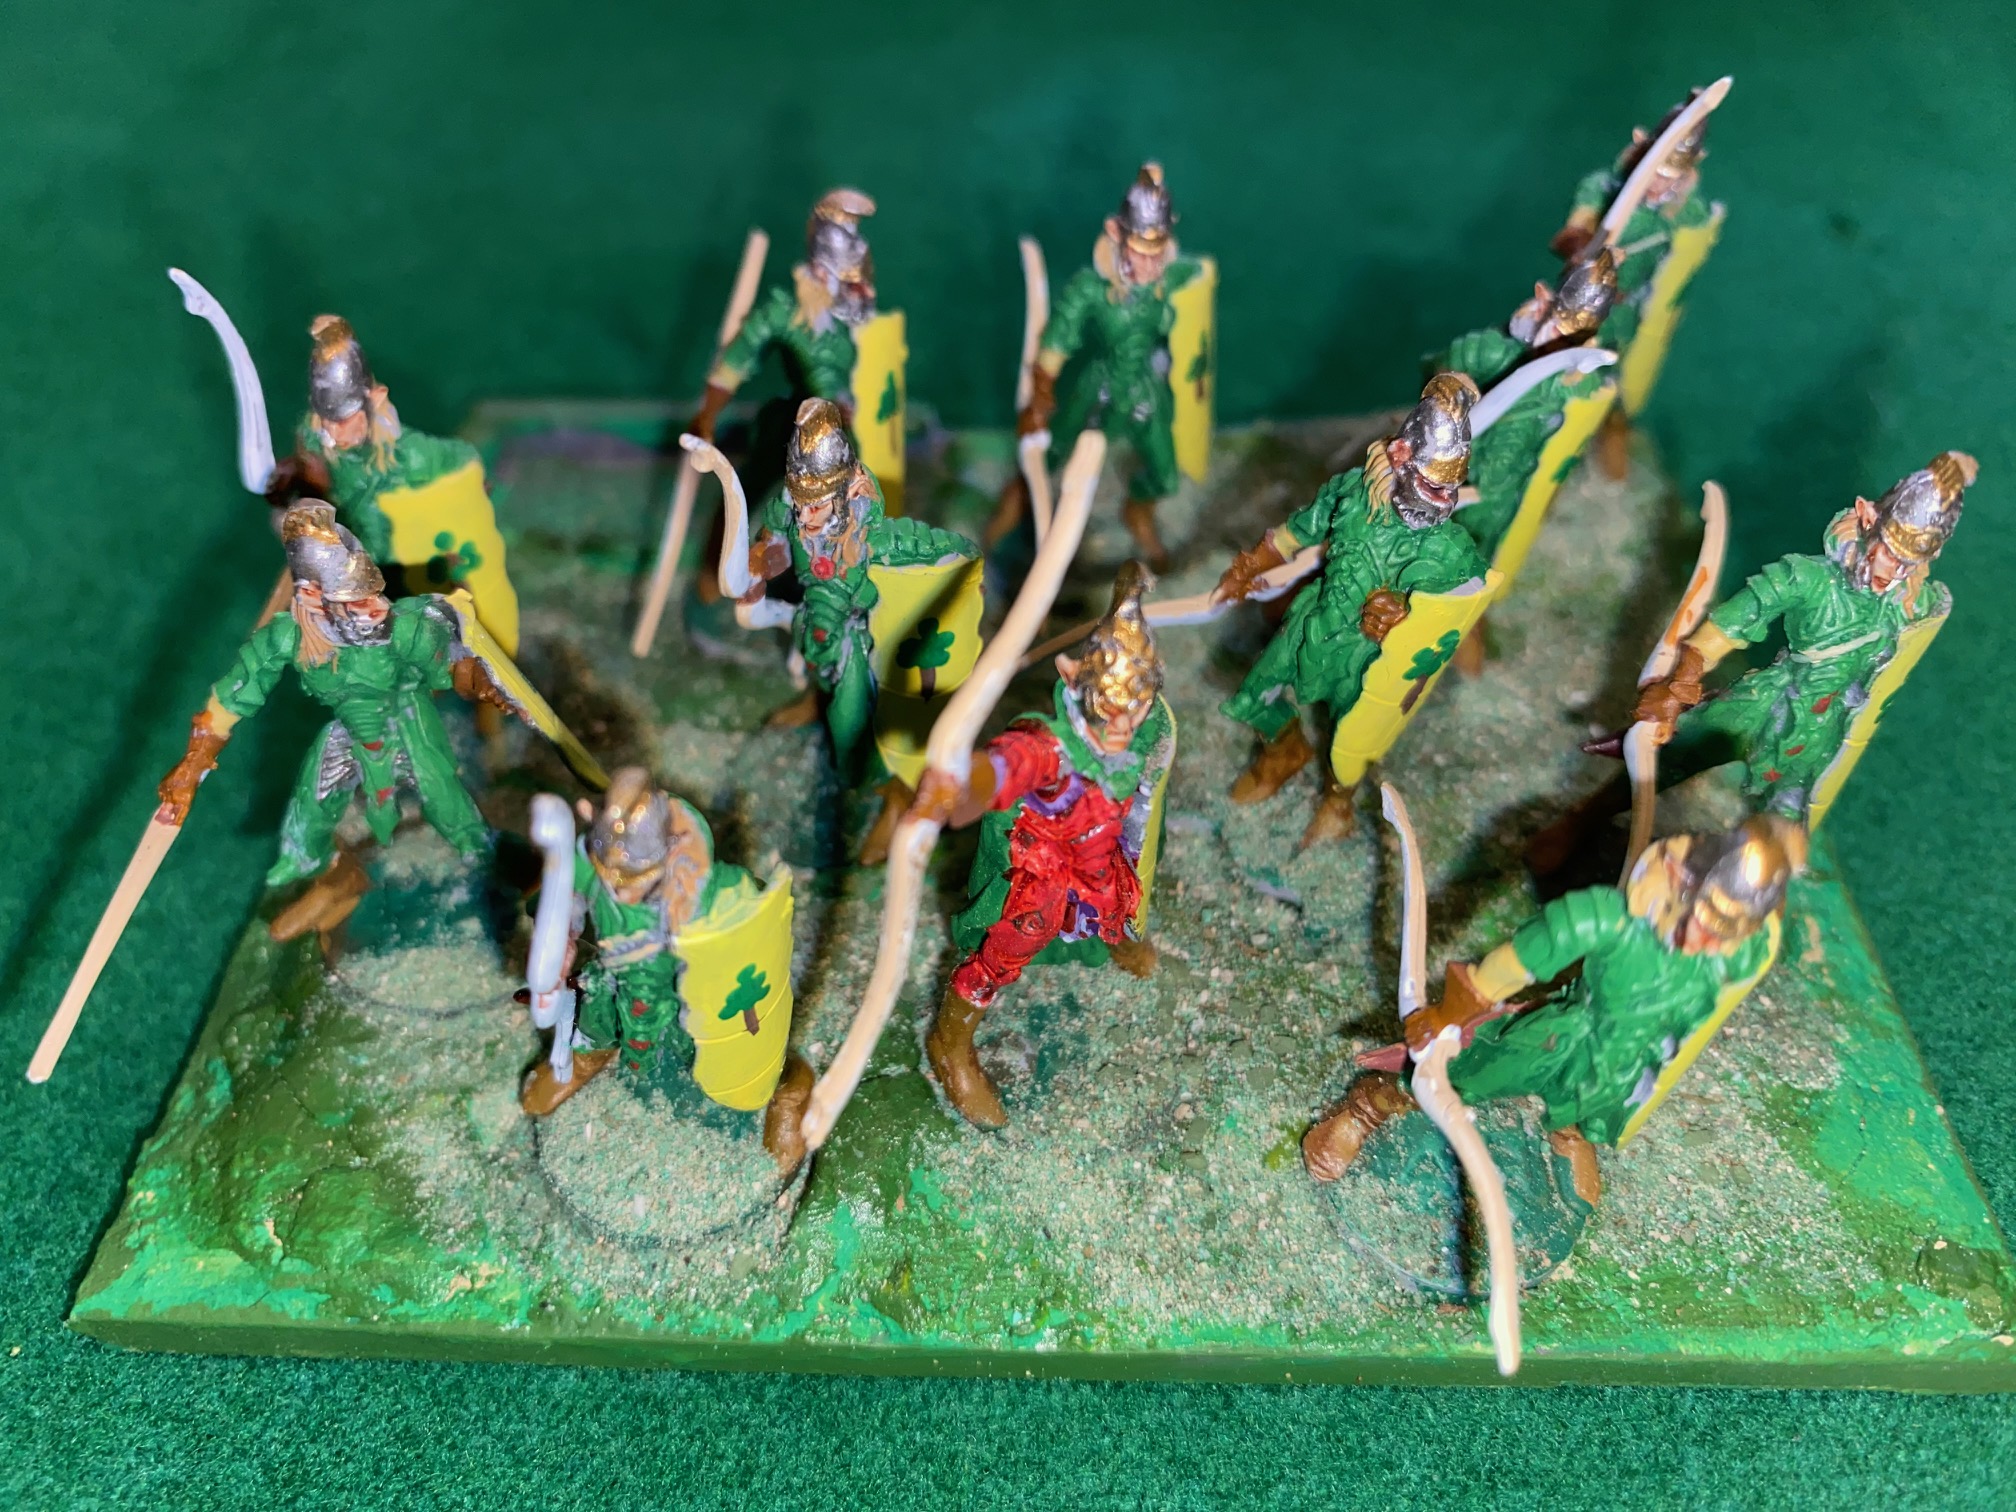
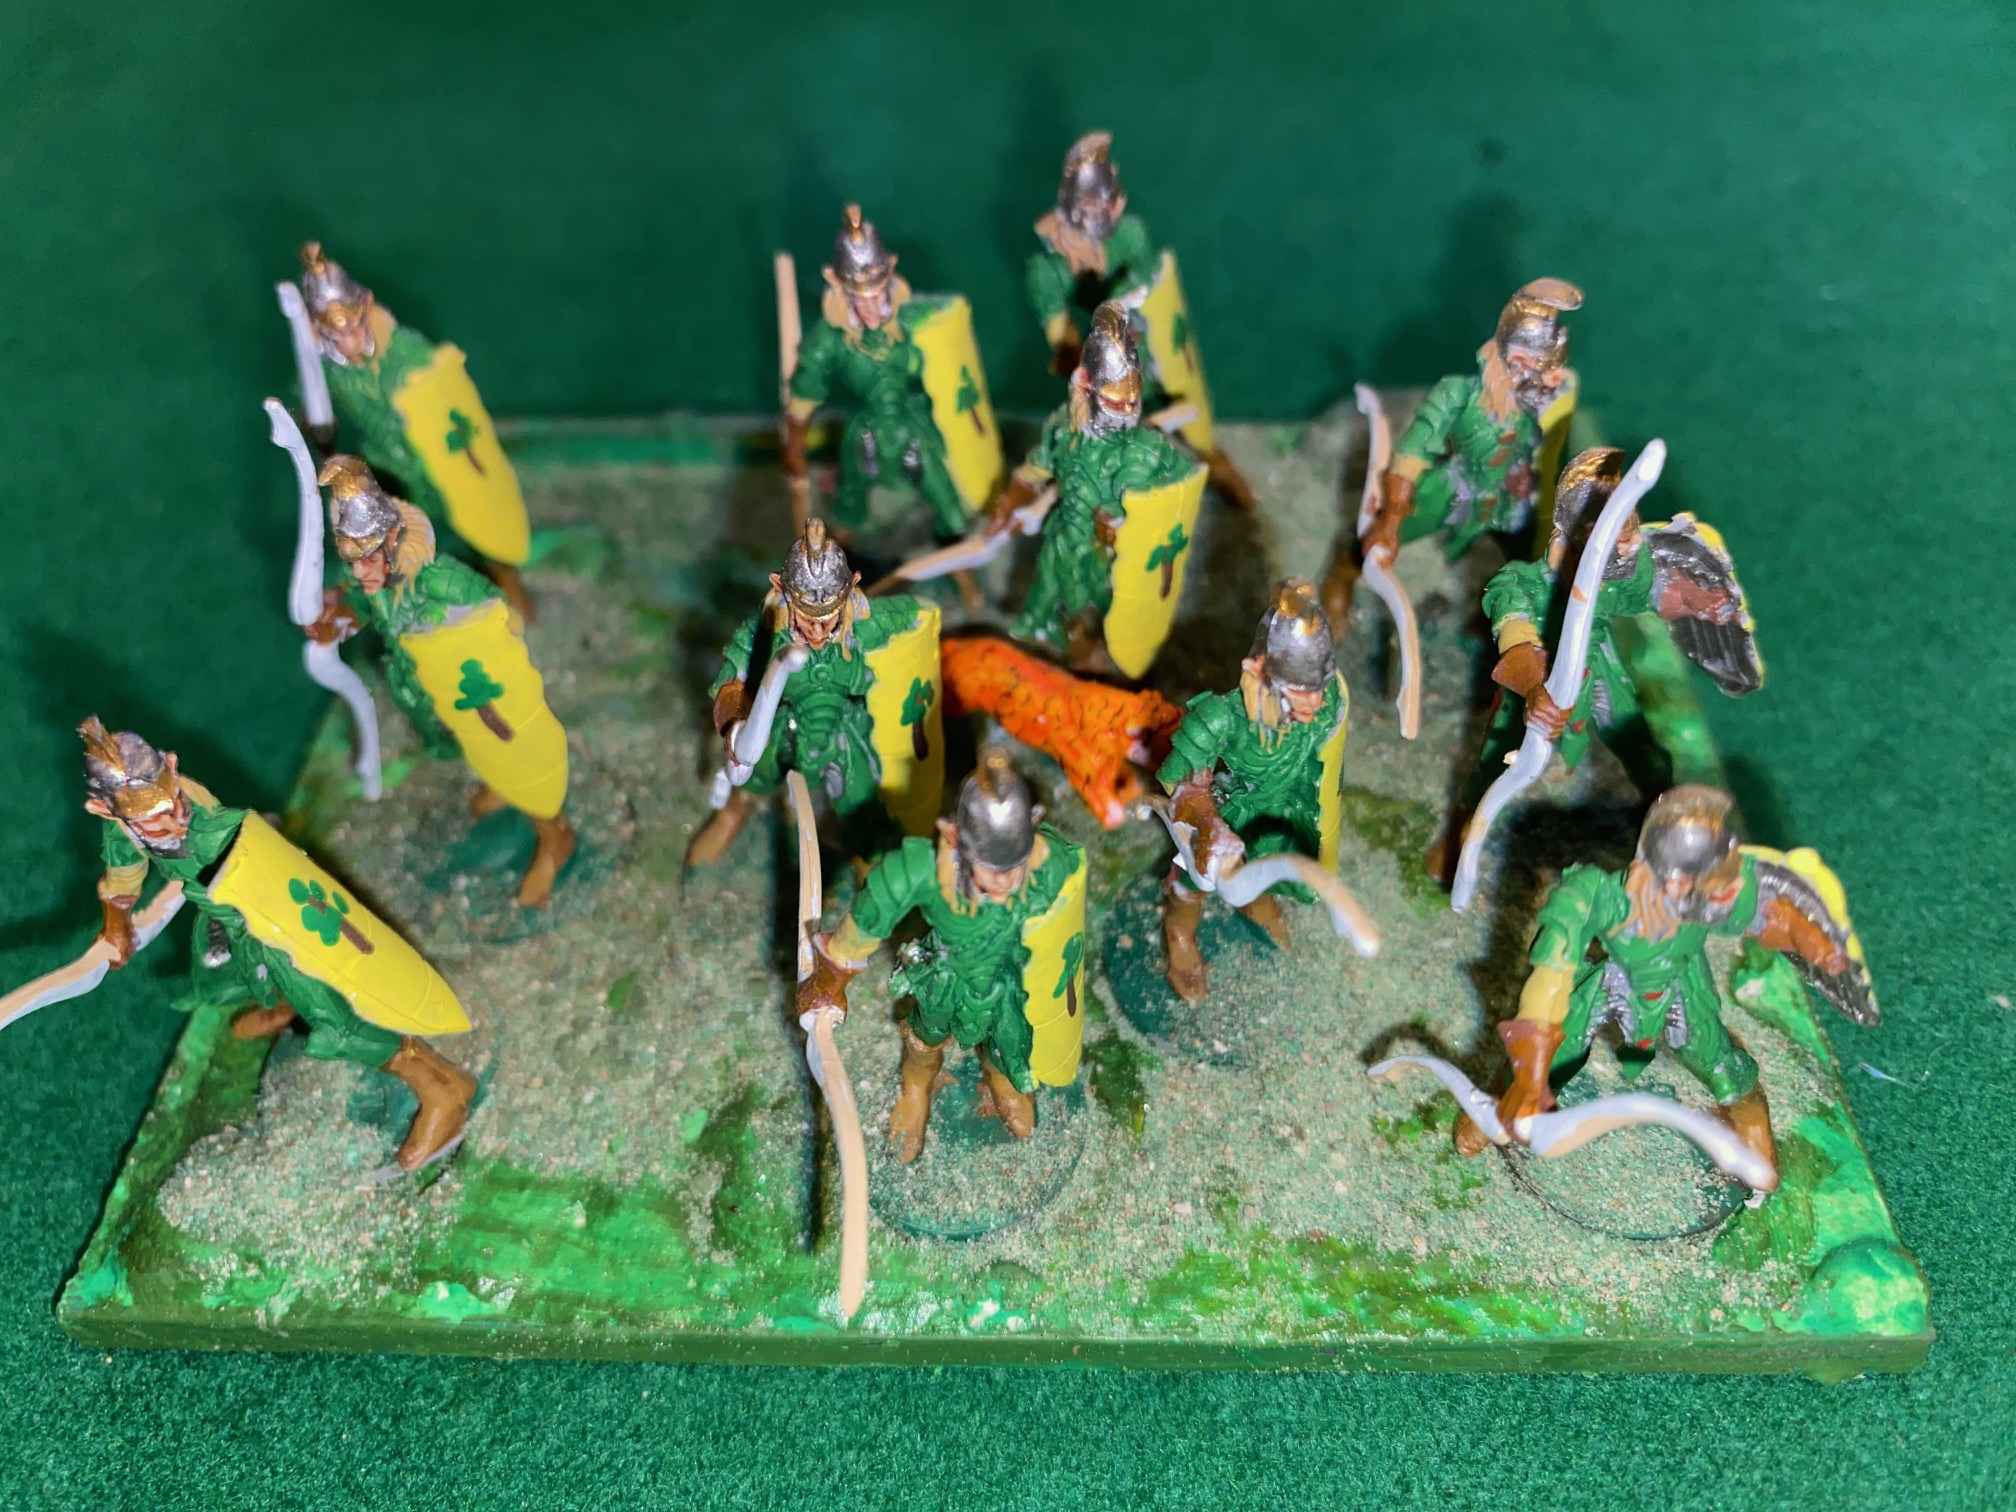
Gladestalkers
The Gladestalkers were painted in a similar way to the other main units except I tried to make their armor appear like leather, rather than Elven plate.
I picked up a Vallejo paint set for Wood and Leather which has a leaflet with some guidelines on painting various sorts of wood and leather authored by Angel Giraldez. The instructions are fairly easy to follow.
The finished paint job was a little darker than I had anticipated, but I liked the result anyway, so no loss.
The bases were adorned with trees, shrubs, and grasses as the pictures show.
So basically the six units are done, although I’m now thinking to add a couple of Bolt Throwers into the mix before starting on a second Elven clan.
Happy Gaming!

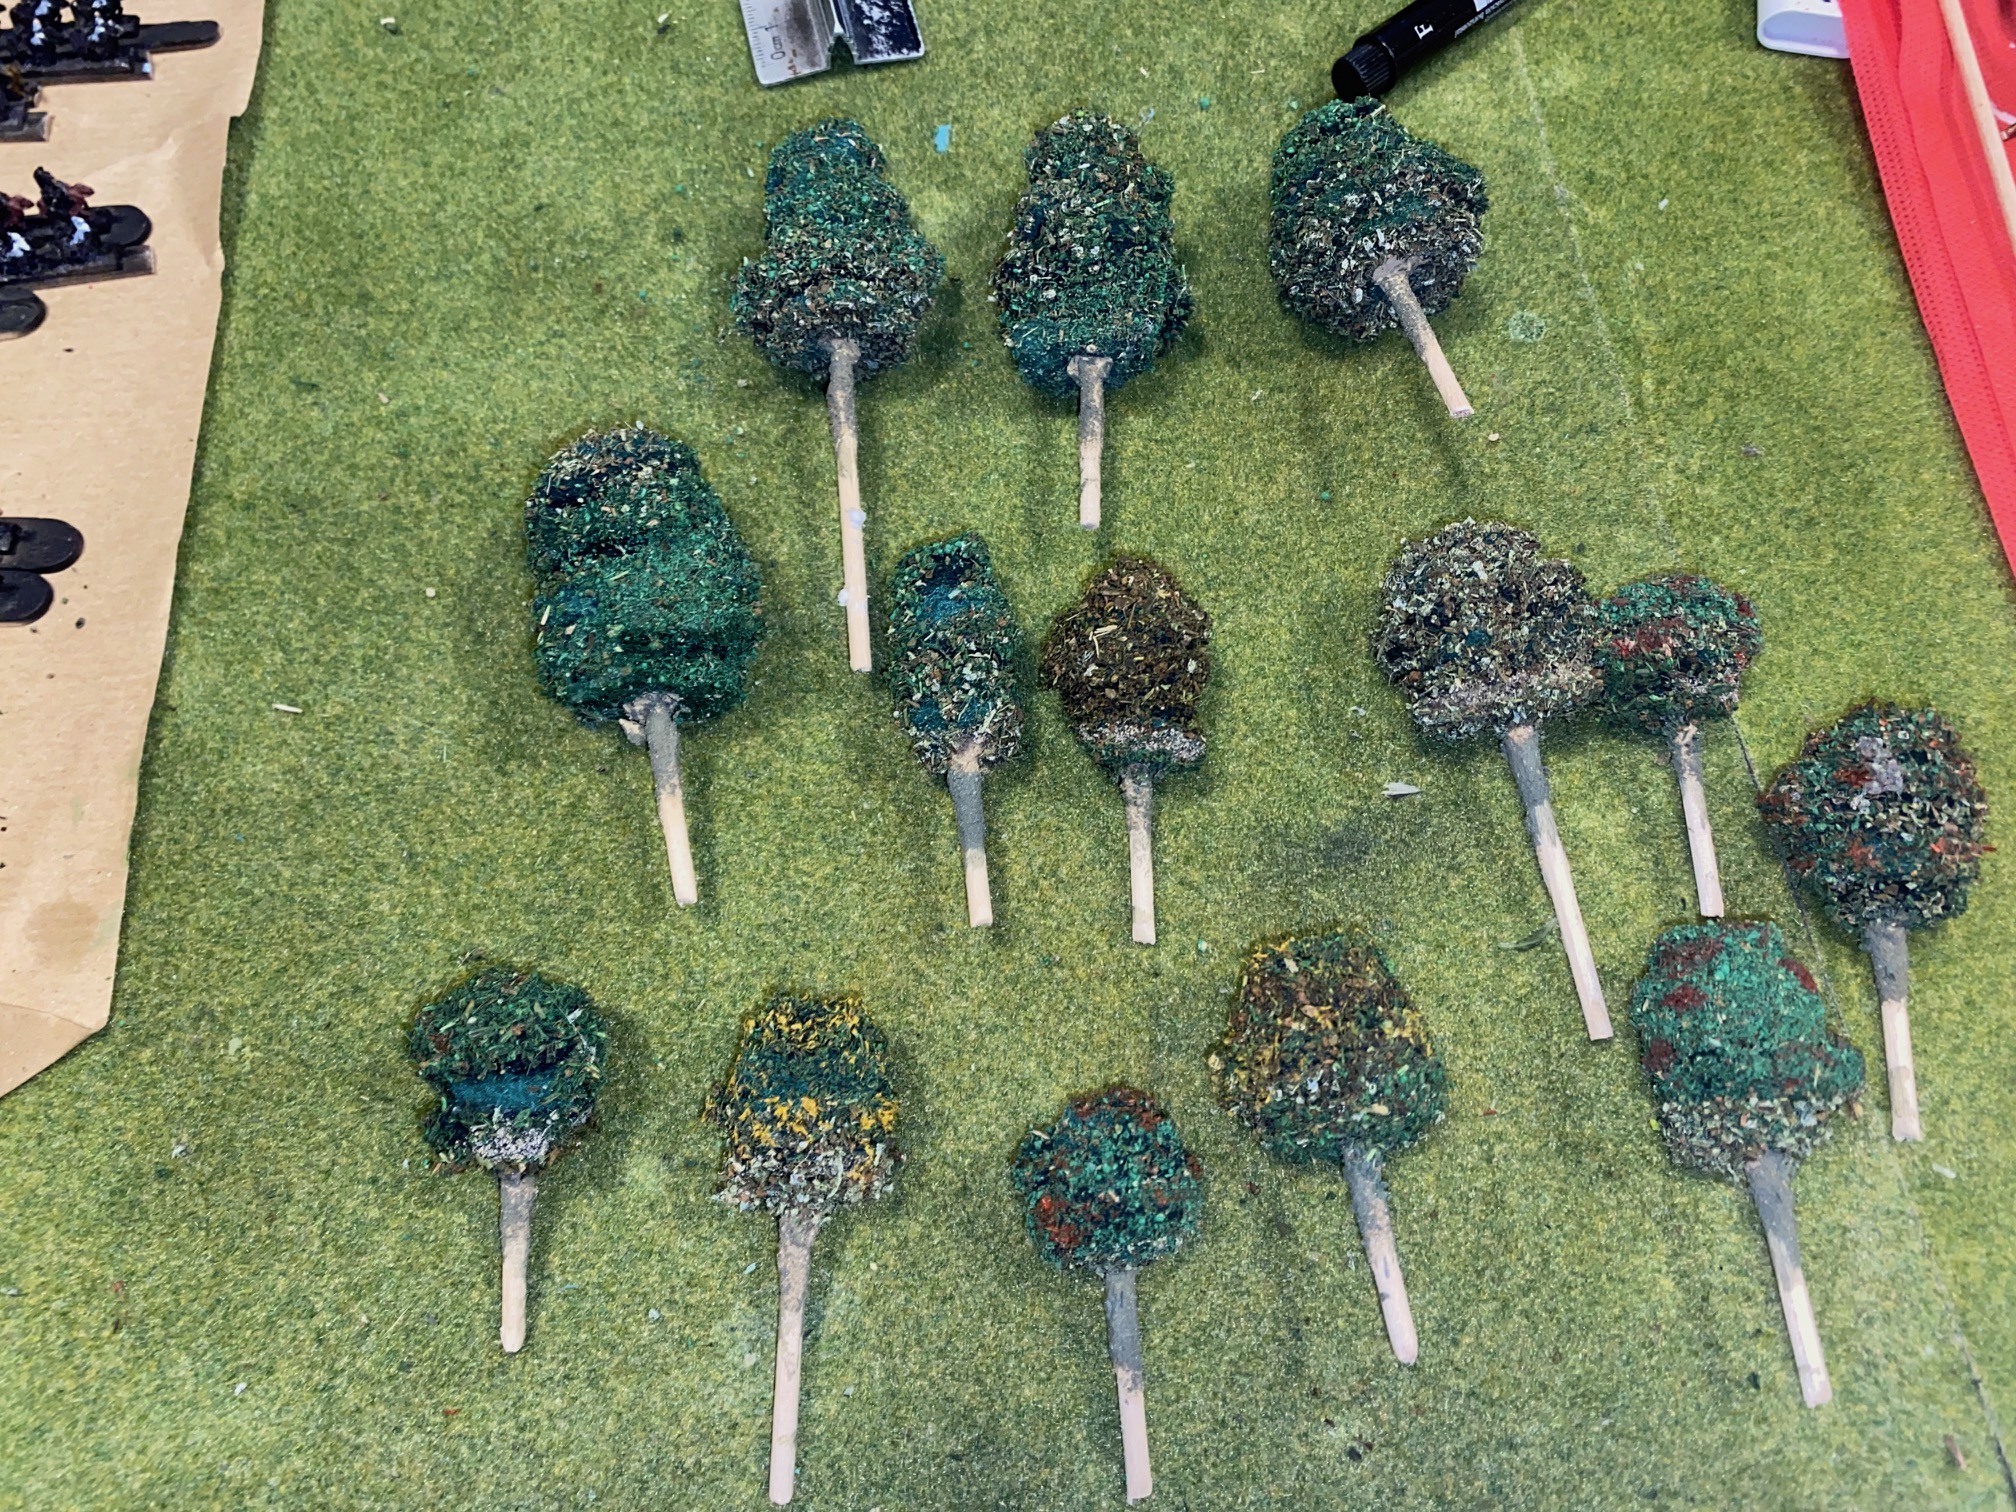
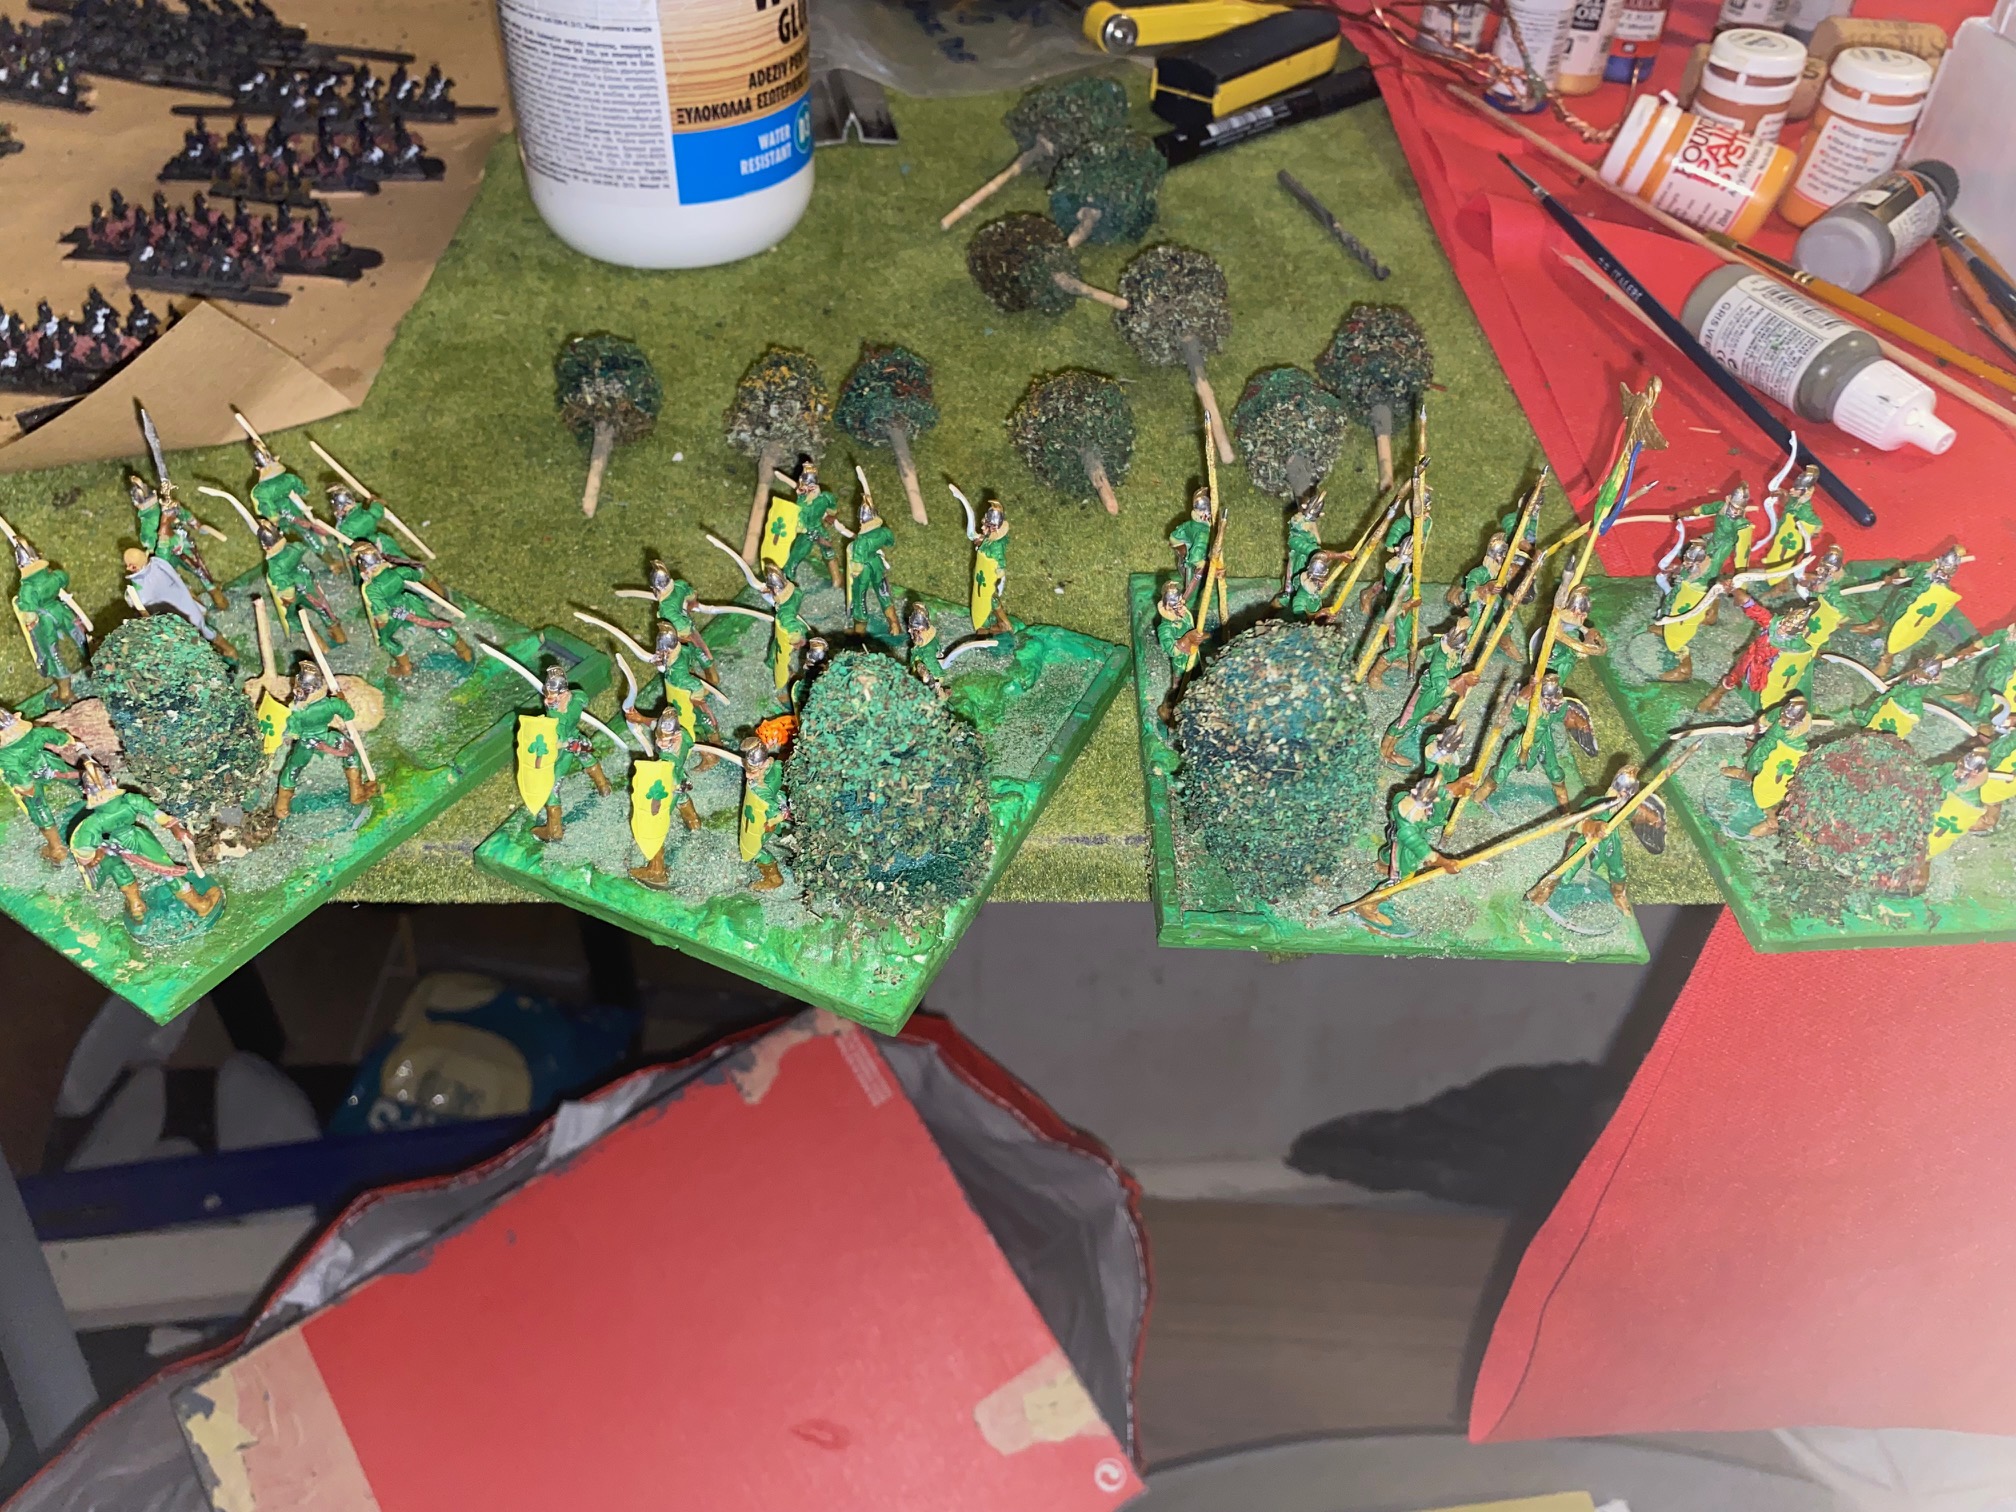
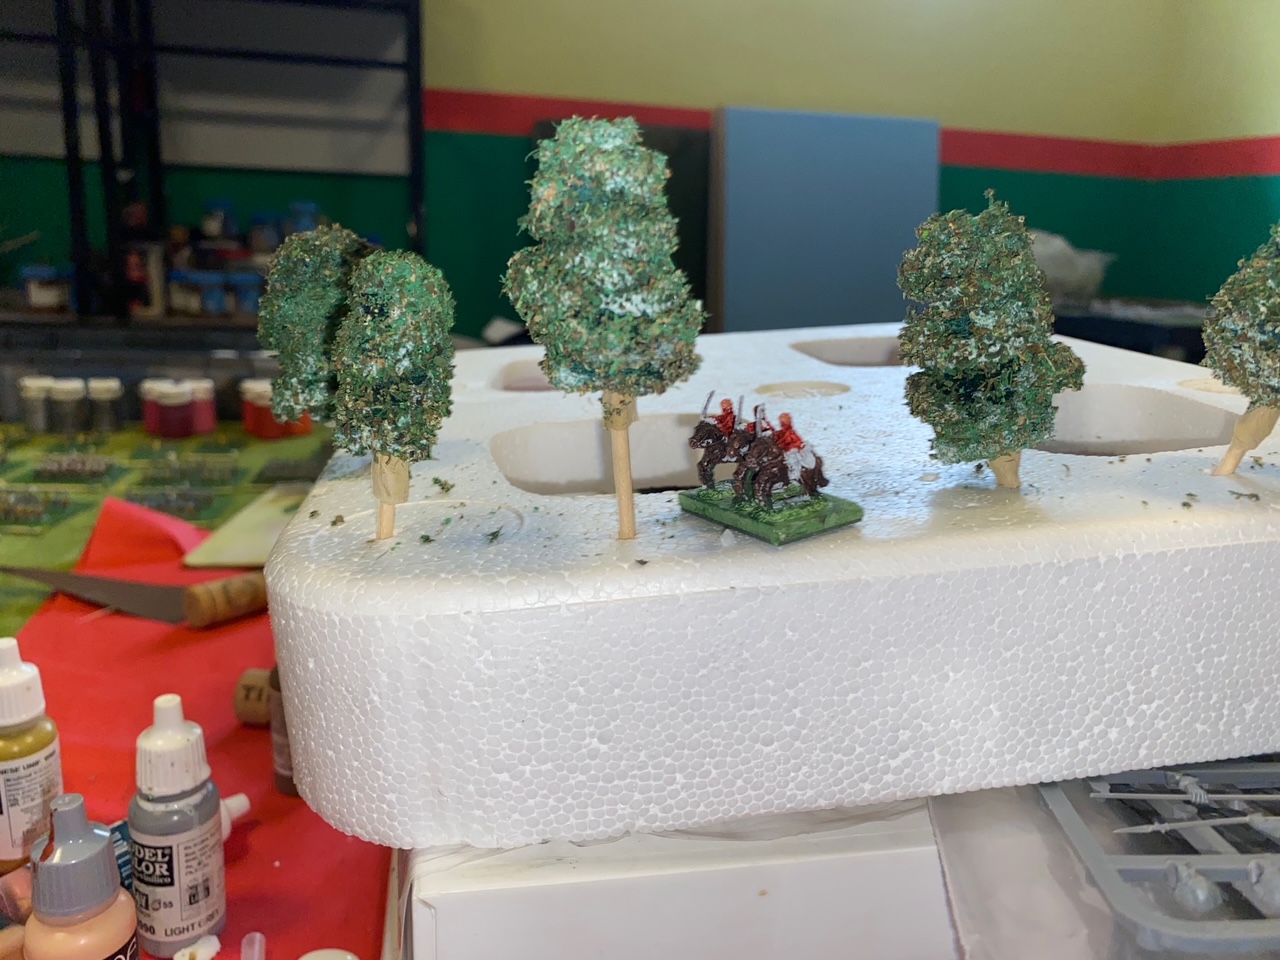
Finishing the scenic bases
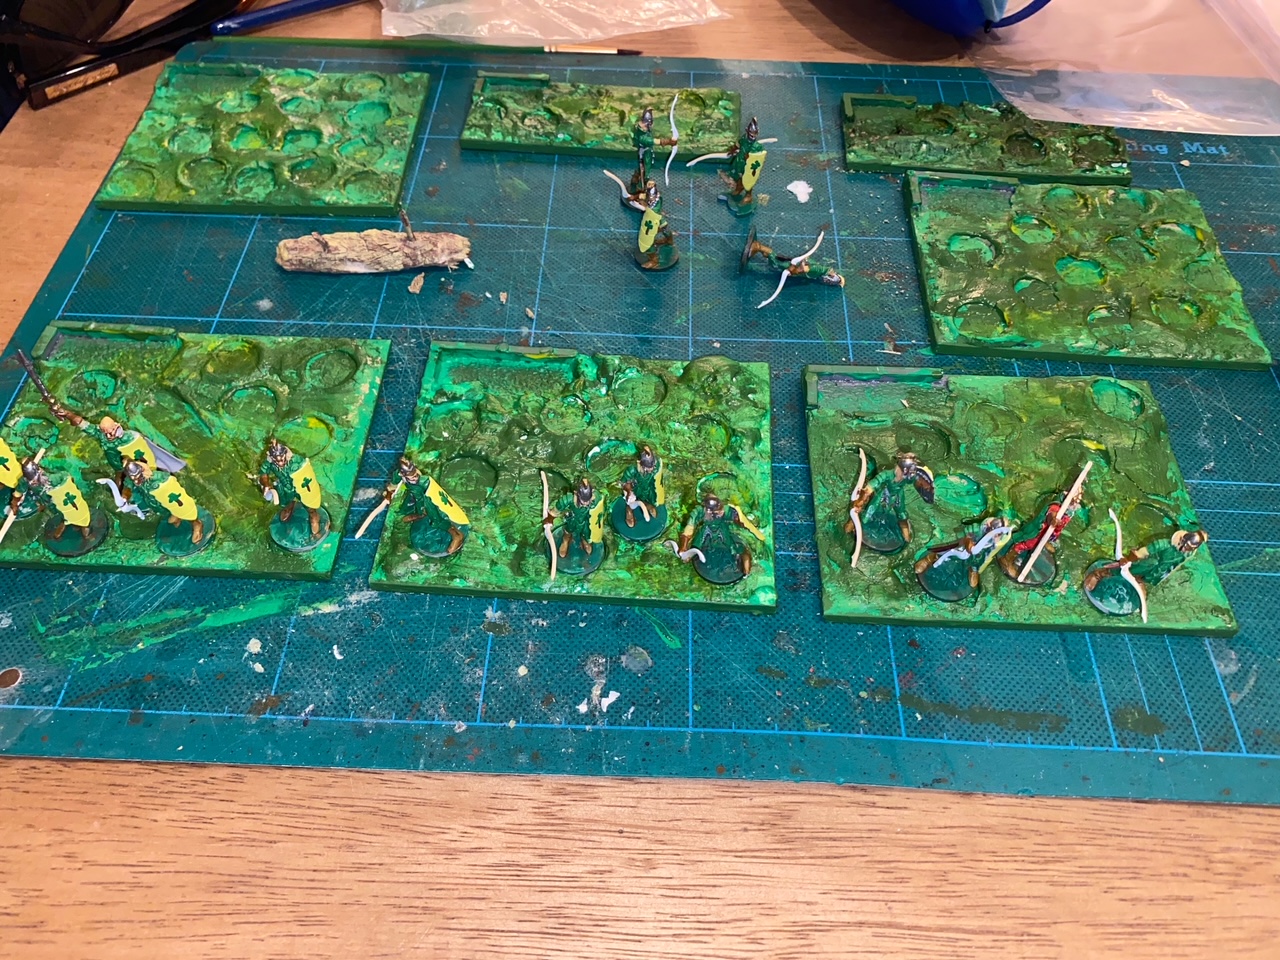
I made up a bunch of tree/shrubs and in order to secure them to the bases I used the following approach.
I drilled a small hole in the base with a variable speed drill using a drill bit as close to the skewer diameter as possible (slightly bigger). I then applied a dollop of PvA and pushed the tree all the way through until it reached a suitable height.
Additional PvA around the base of the “trunk” was applied and a small amount of ground cover added to the tree base.
Once the glue was completely dry, the skewer on the underside of the base was cut off close to the base and a small amount of fine sand was poured onto the skewer and liquid super glue was dropped onto the sand. This hardens to a solid finish which is very strong, and I hope will ensure the trees stay put during play.
Some pictures follow.
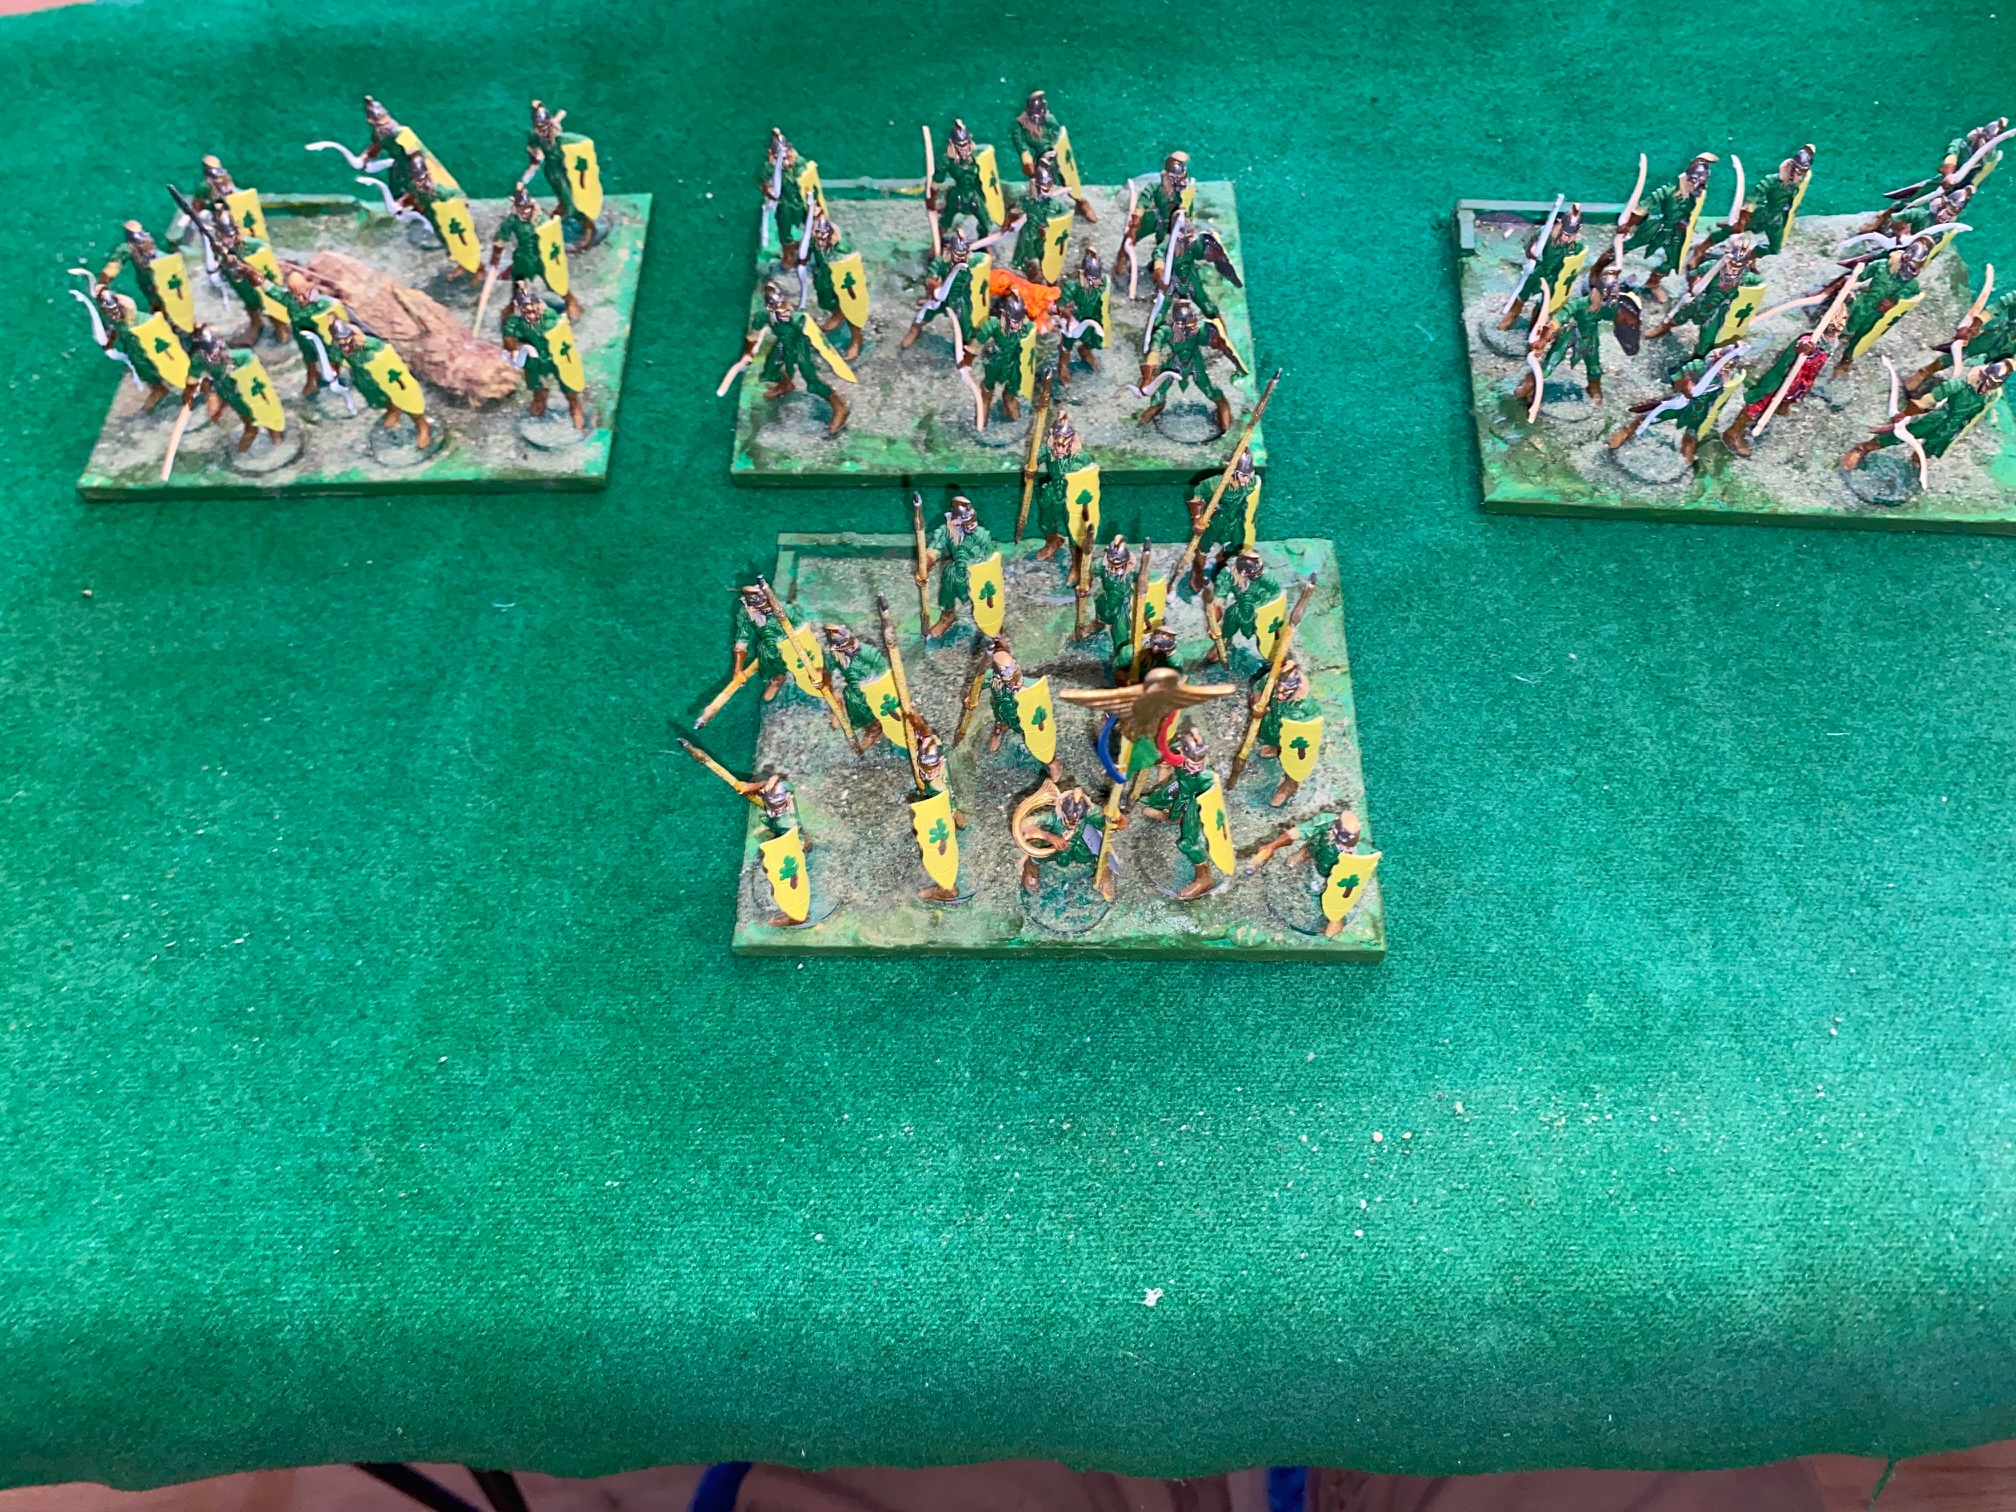
The first four Regiments are done, although I may still add some static grass to them as a last embellishment.
Next up is to compete the two Gladestalker troop bases (I’ll post some pictures of the models next time) which I intend to have more foliage on them than the ordinary regiment units. So, maybe I’ll think about different “clutter” as well as 2/3 of the bushes/trees.
Happy Gaming!
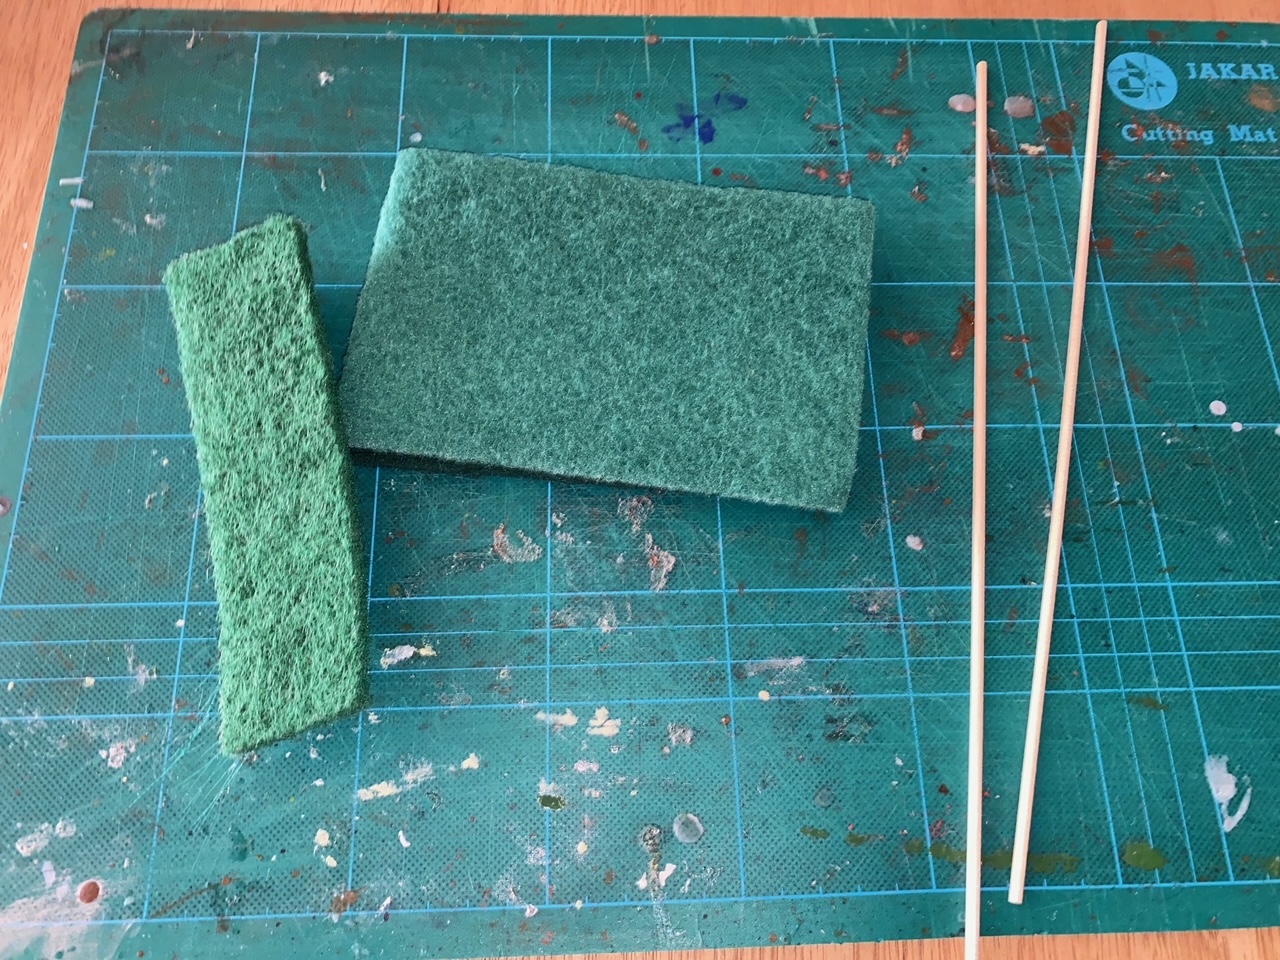
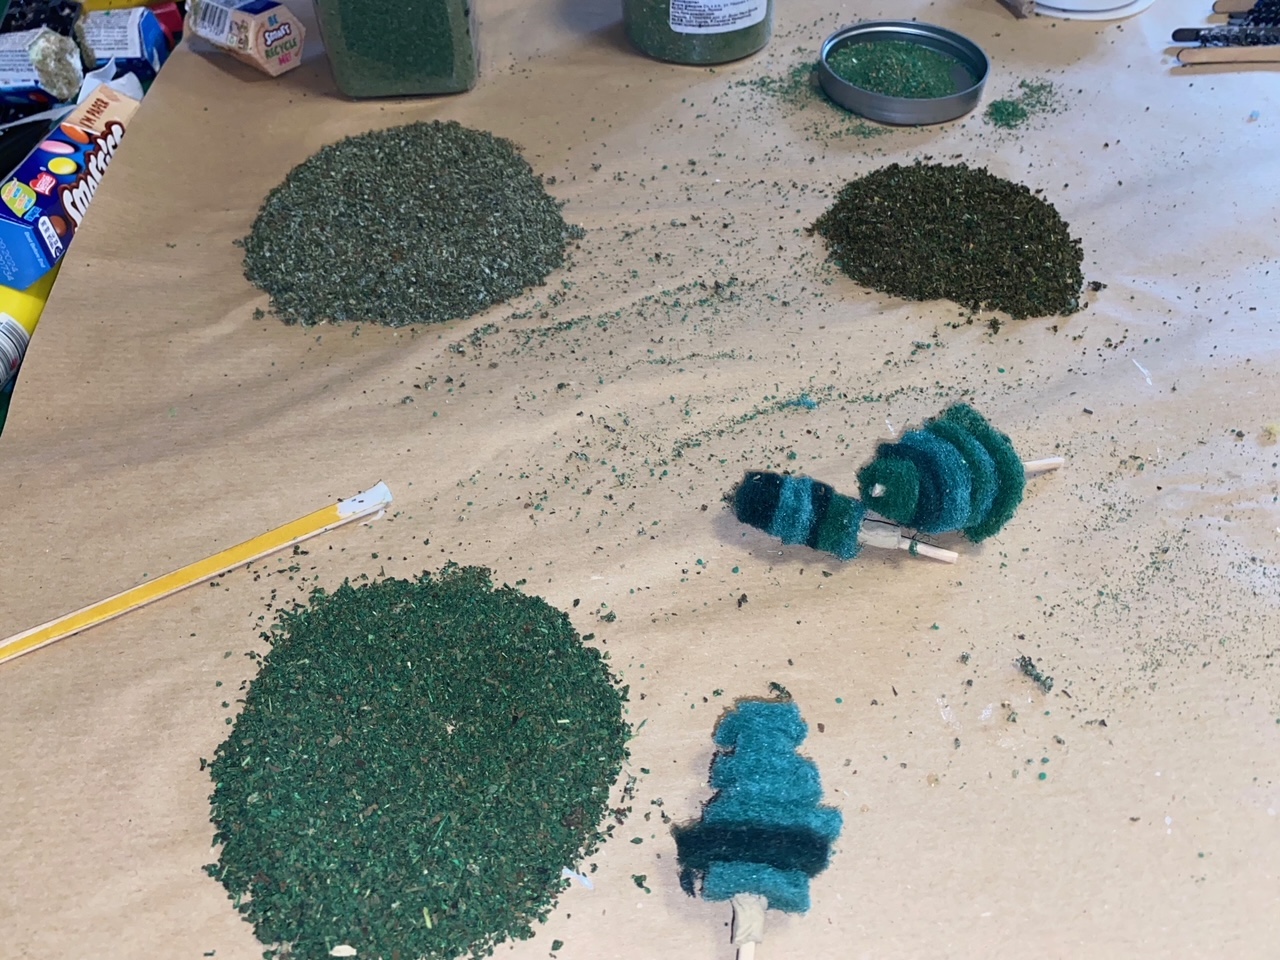
Small trees
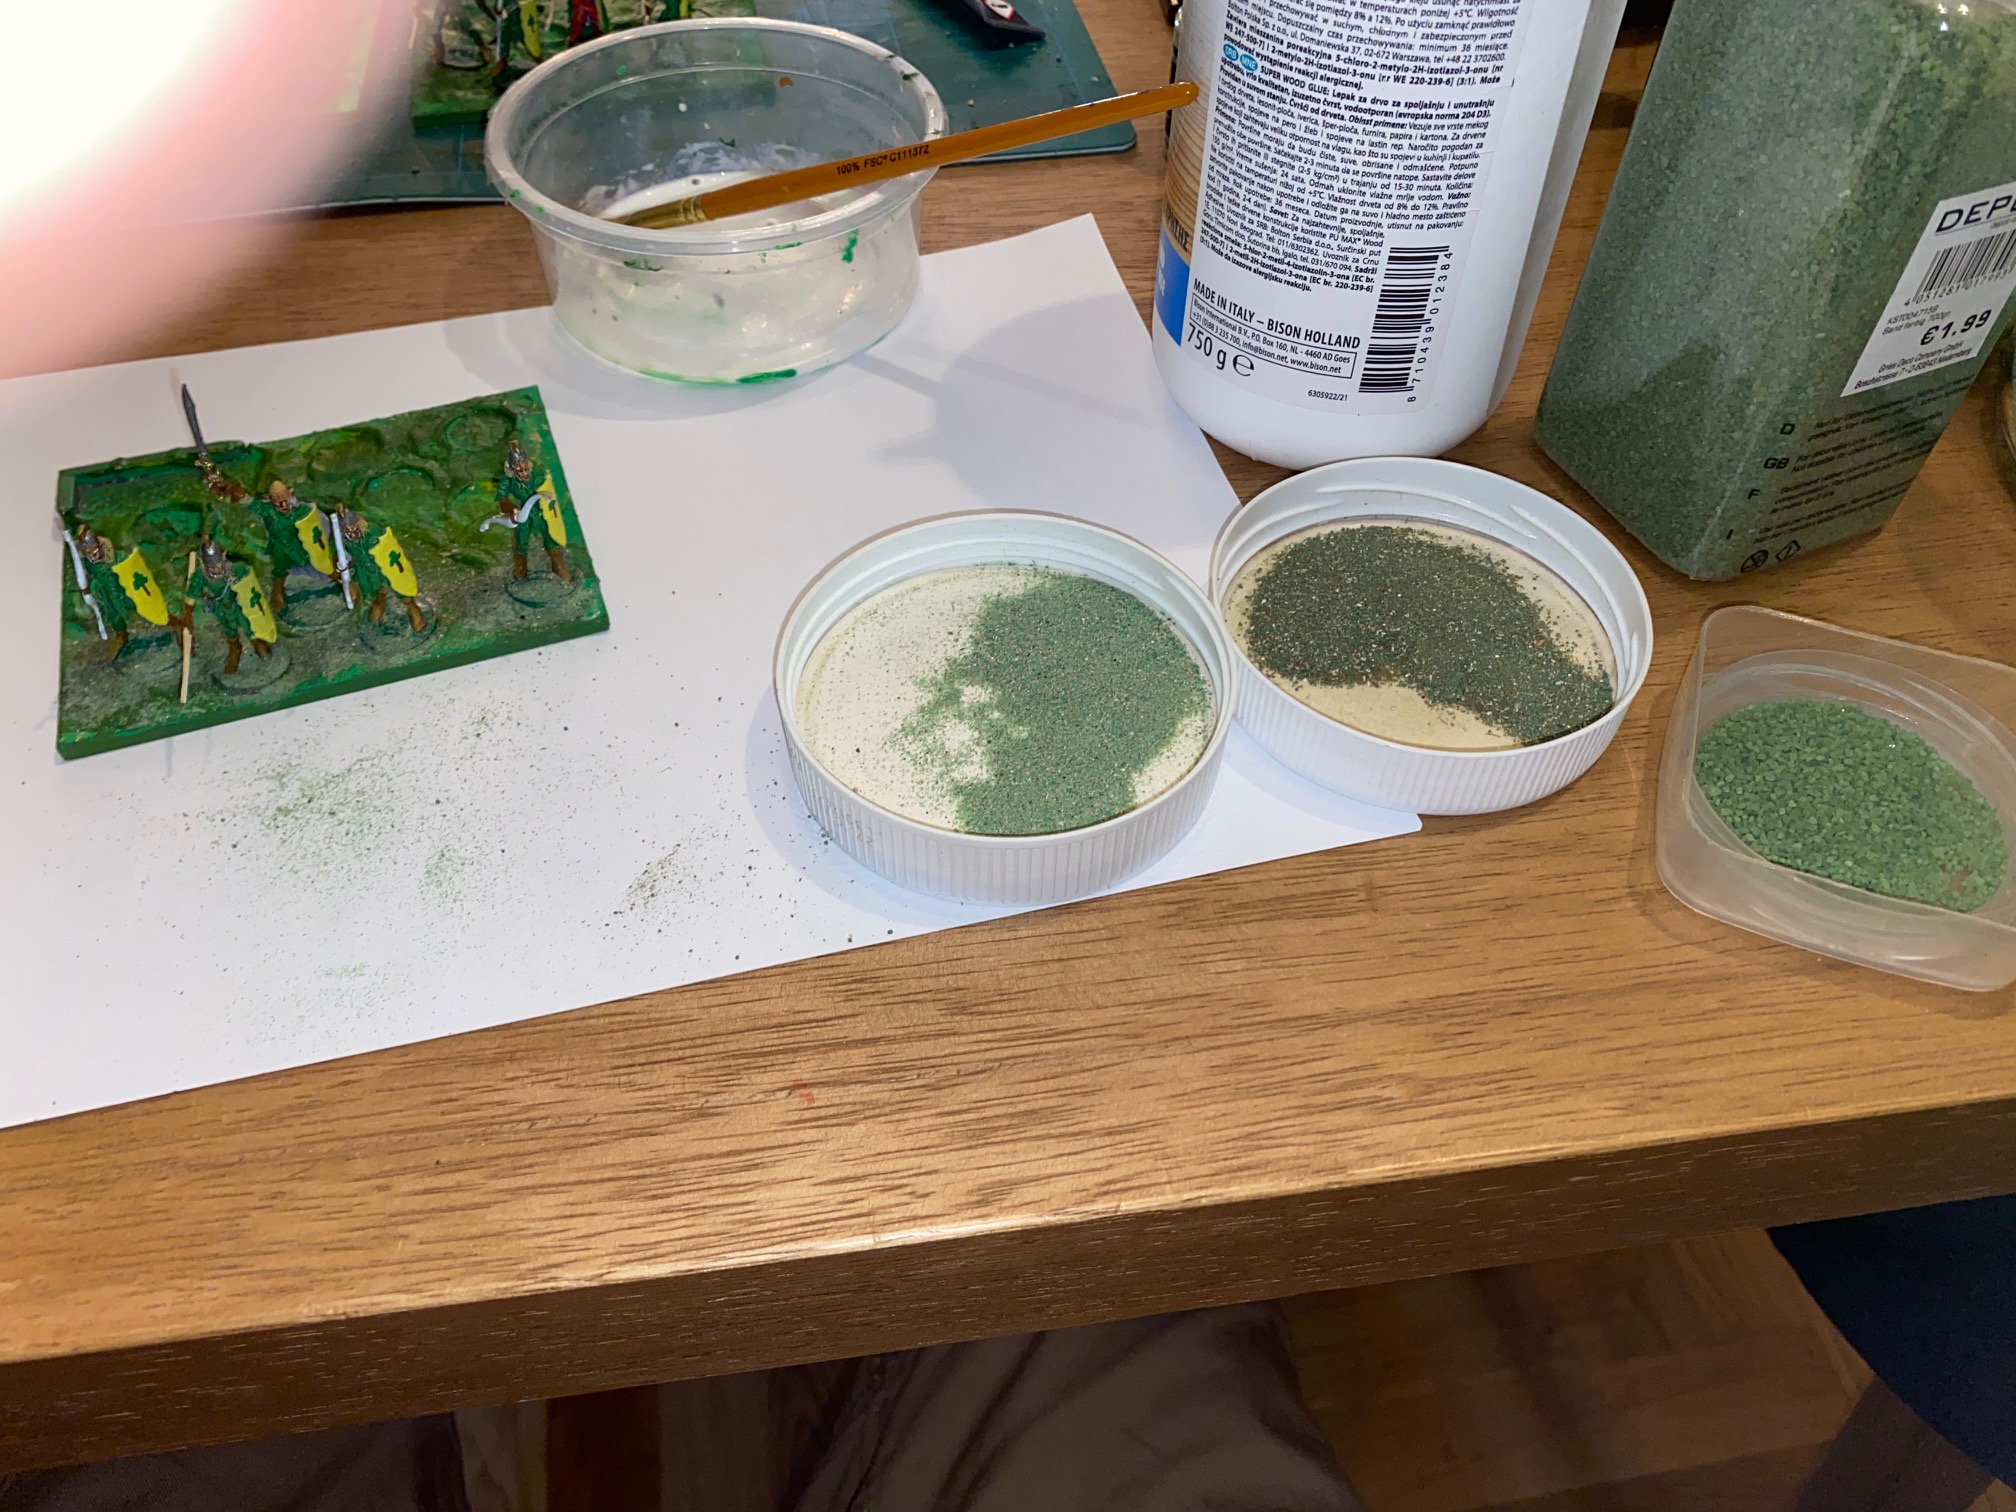
I wanted to make some small trees/shrubs/bushes to flesh out the bases and am trying out an approach using pan scrubbers and skewers. The idea is to make some rough shapes of various sizes with the pan scrubs, and secure them in layers onto the skewers with PvA.
Afterwards, the tree shape will be covered with PvA glue and various flocks etc. glues onto the tree shape.
Pictures follow.

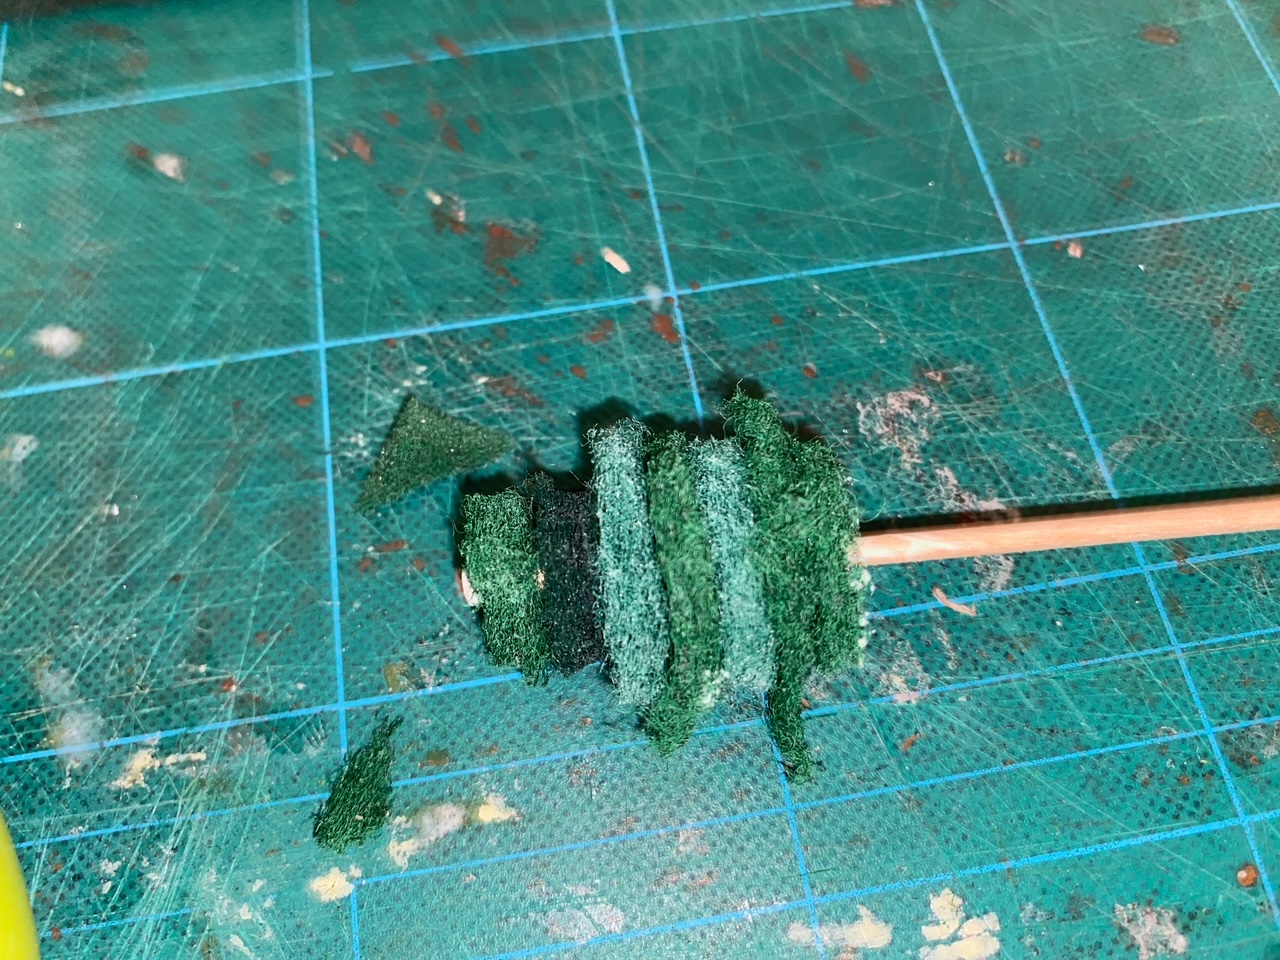

I added some DAS to the skewers, but not sure this will ‘stick’, in which case I’ll probably revert to another method and use PvA glue and sand to give the “trunk” some texture.
The tree shapes were “flocked”.
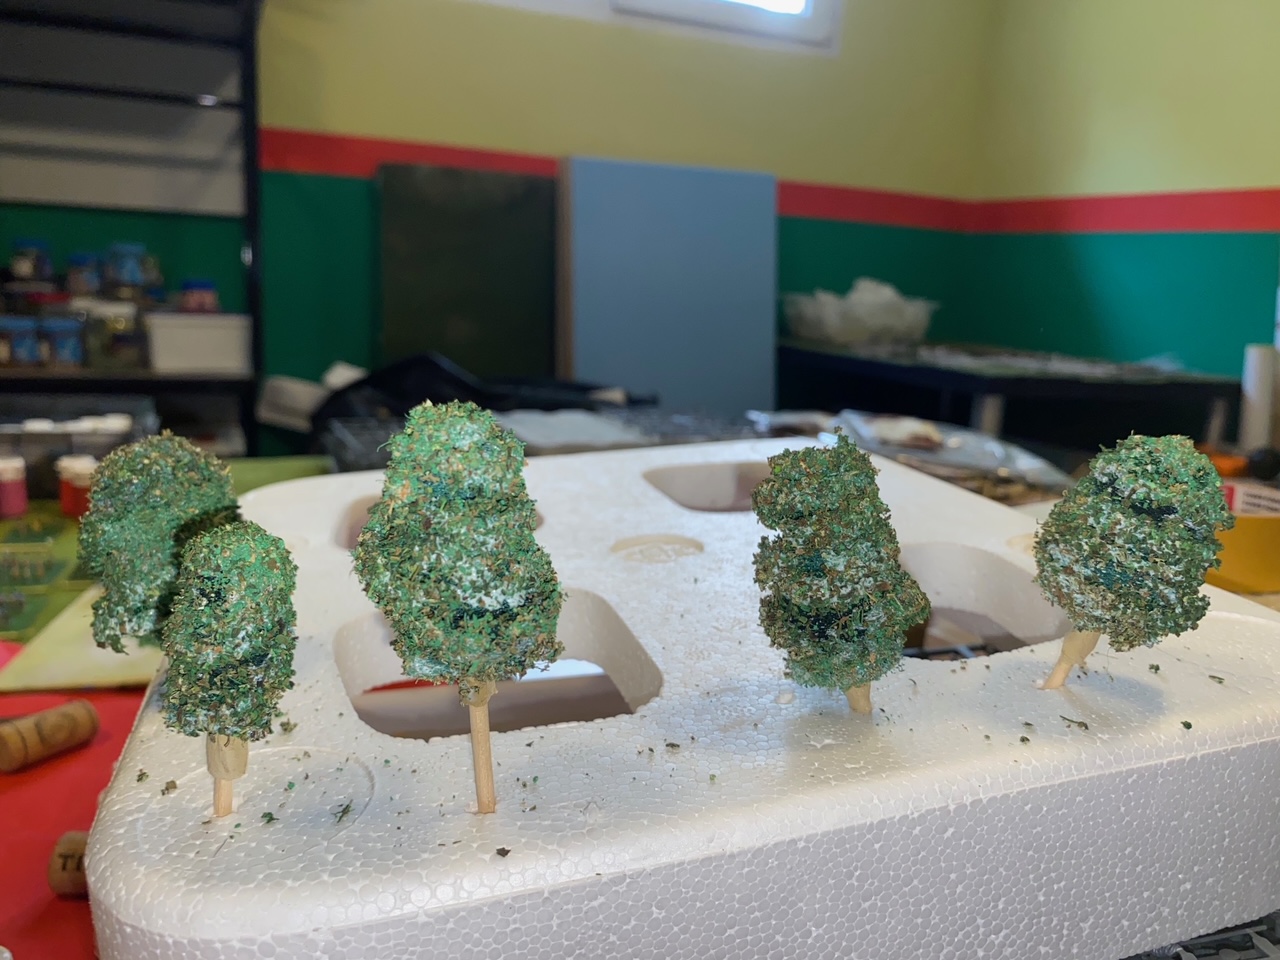
Interestingly, when I looked at the finished trees, I thought they might be a good size for other scales, and compared to my 10mm and 6mm figures, they seem to be a good fit and I might make some more just for those scales.
In any case, I’ll let them dry fully and fix some to the Elven bases in a couple of days.
Happy Gaming!
Basing part 2
Finally getting back to the project. Health-wise things are good, so no excuses!
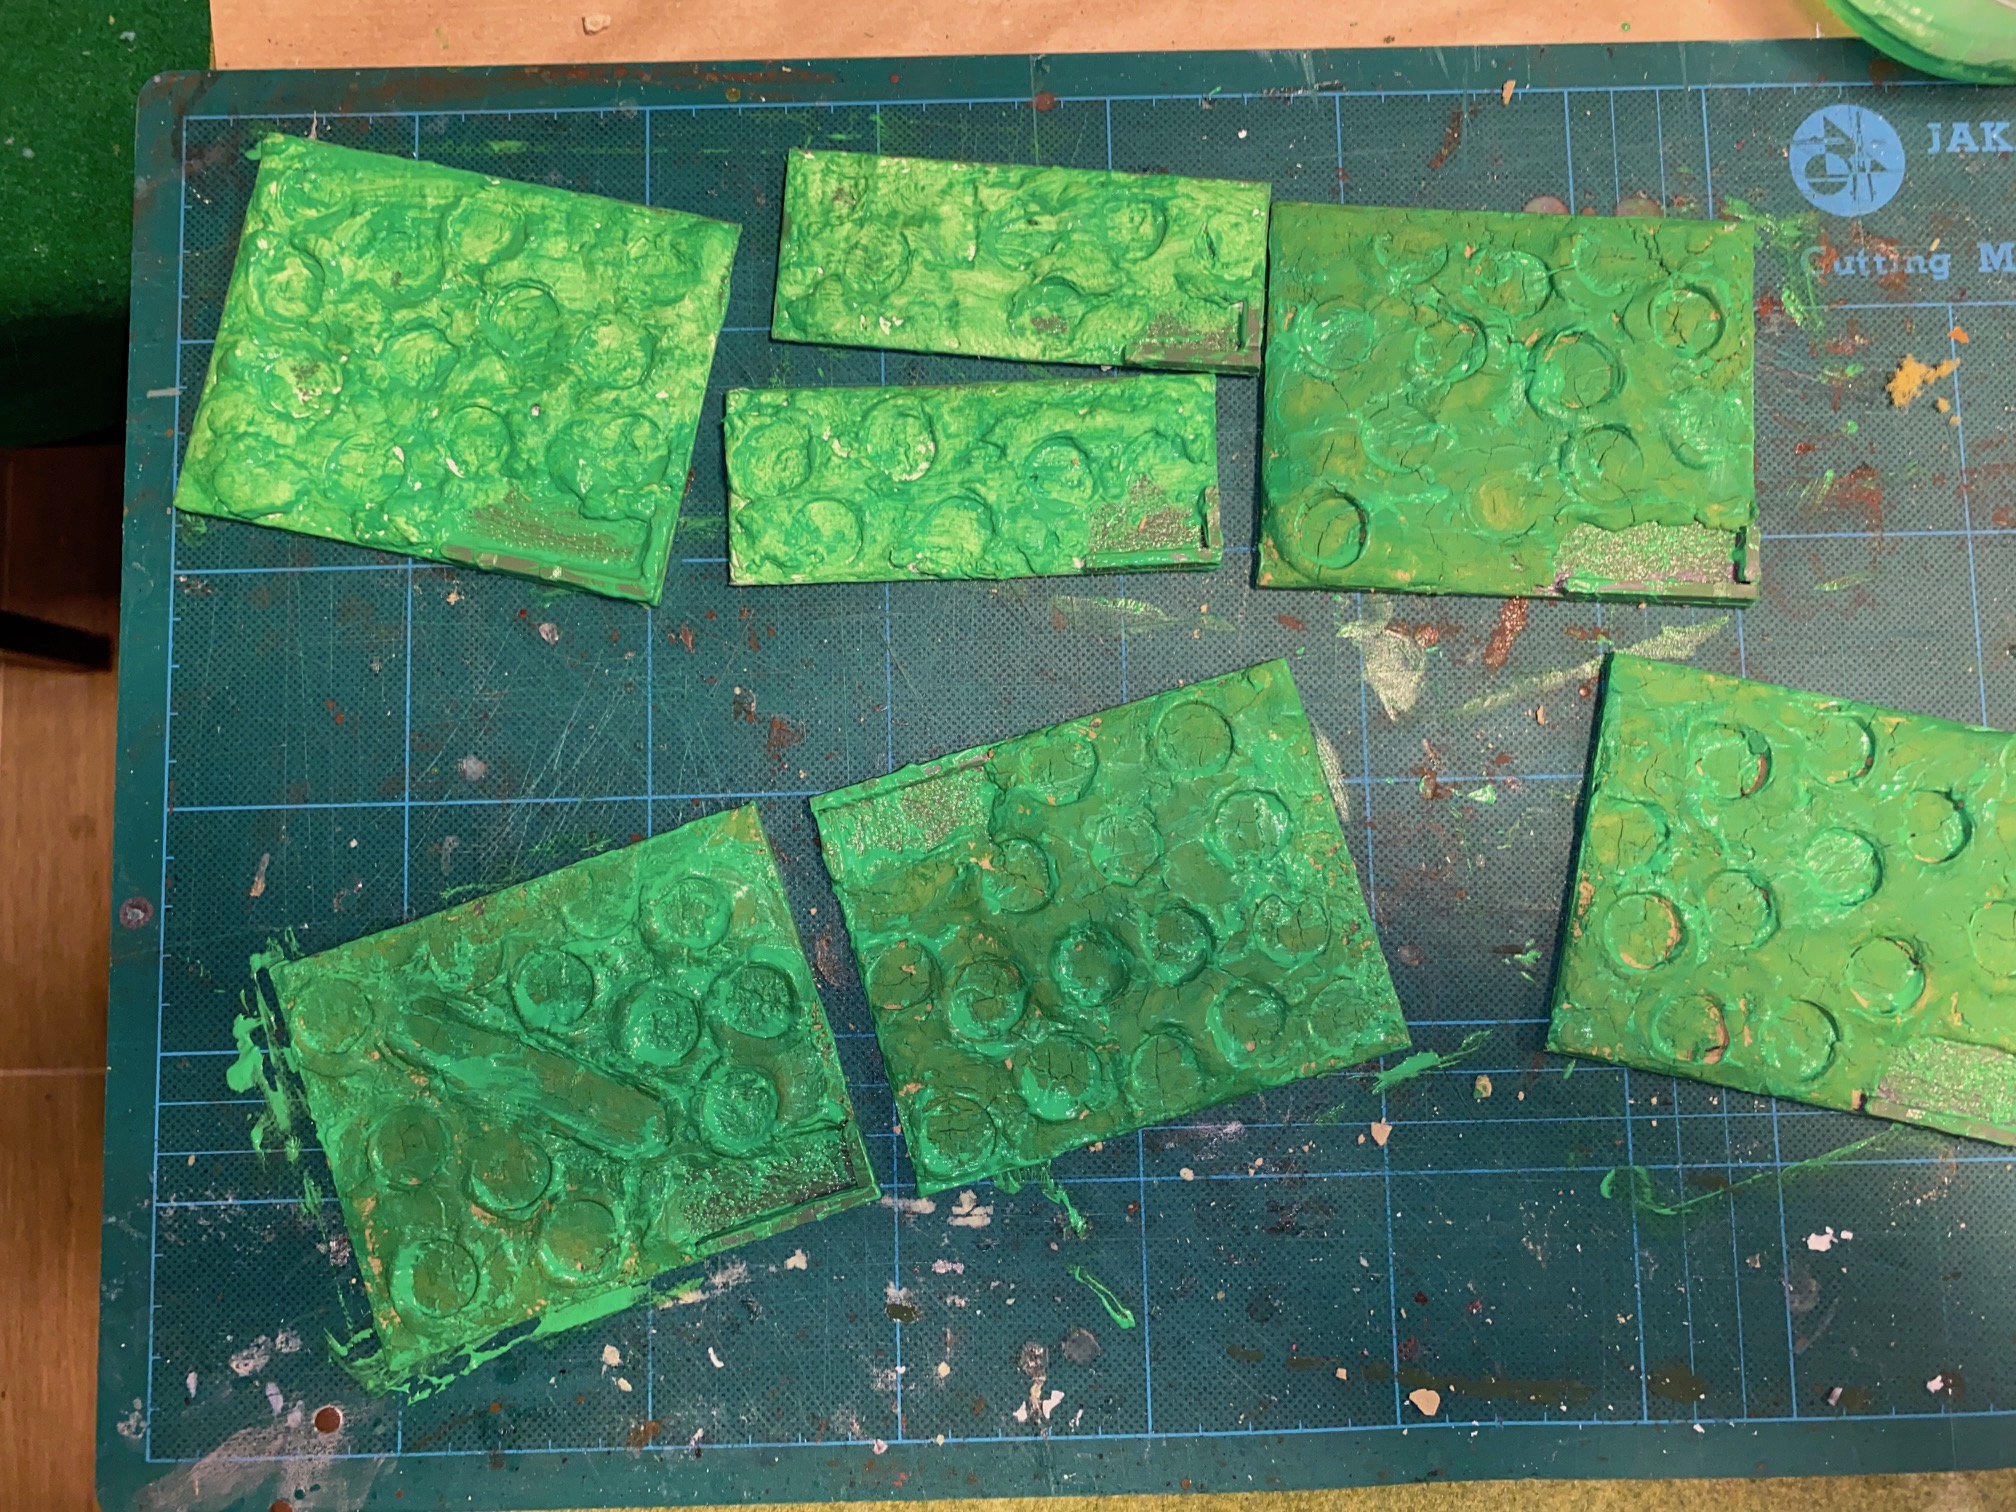
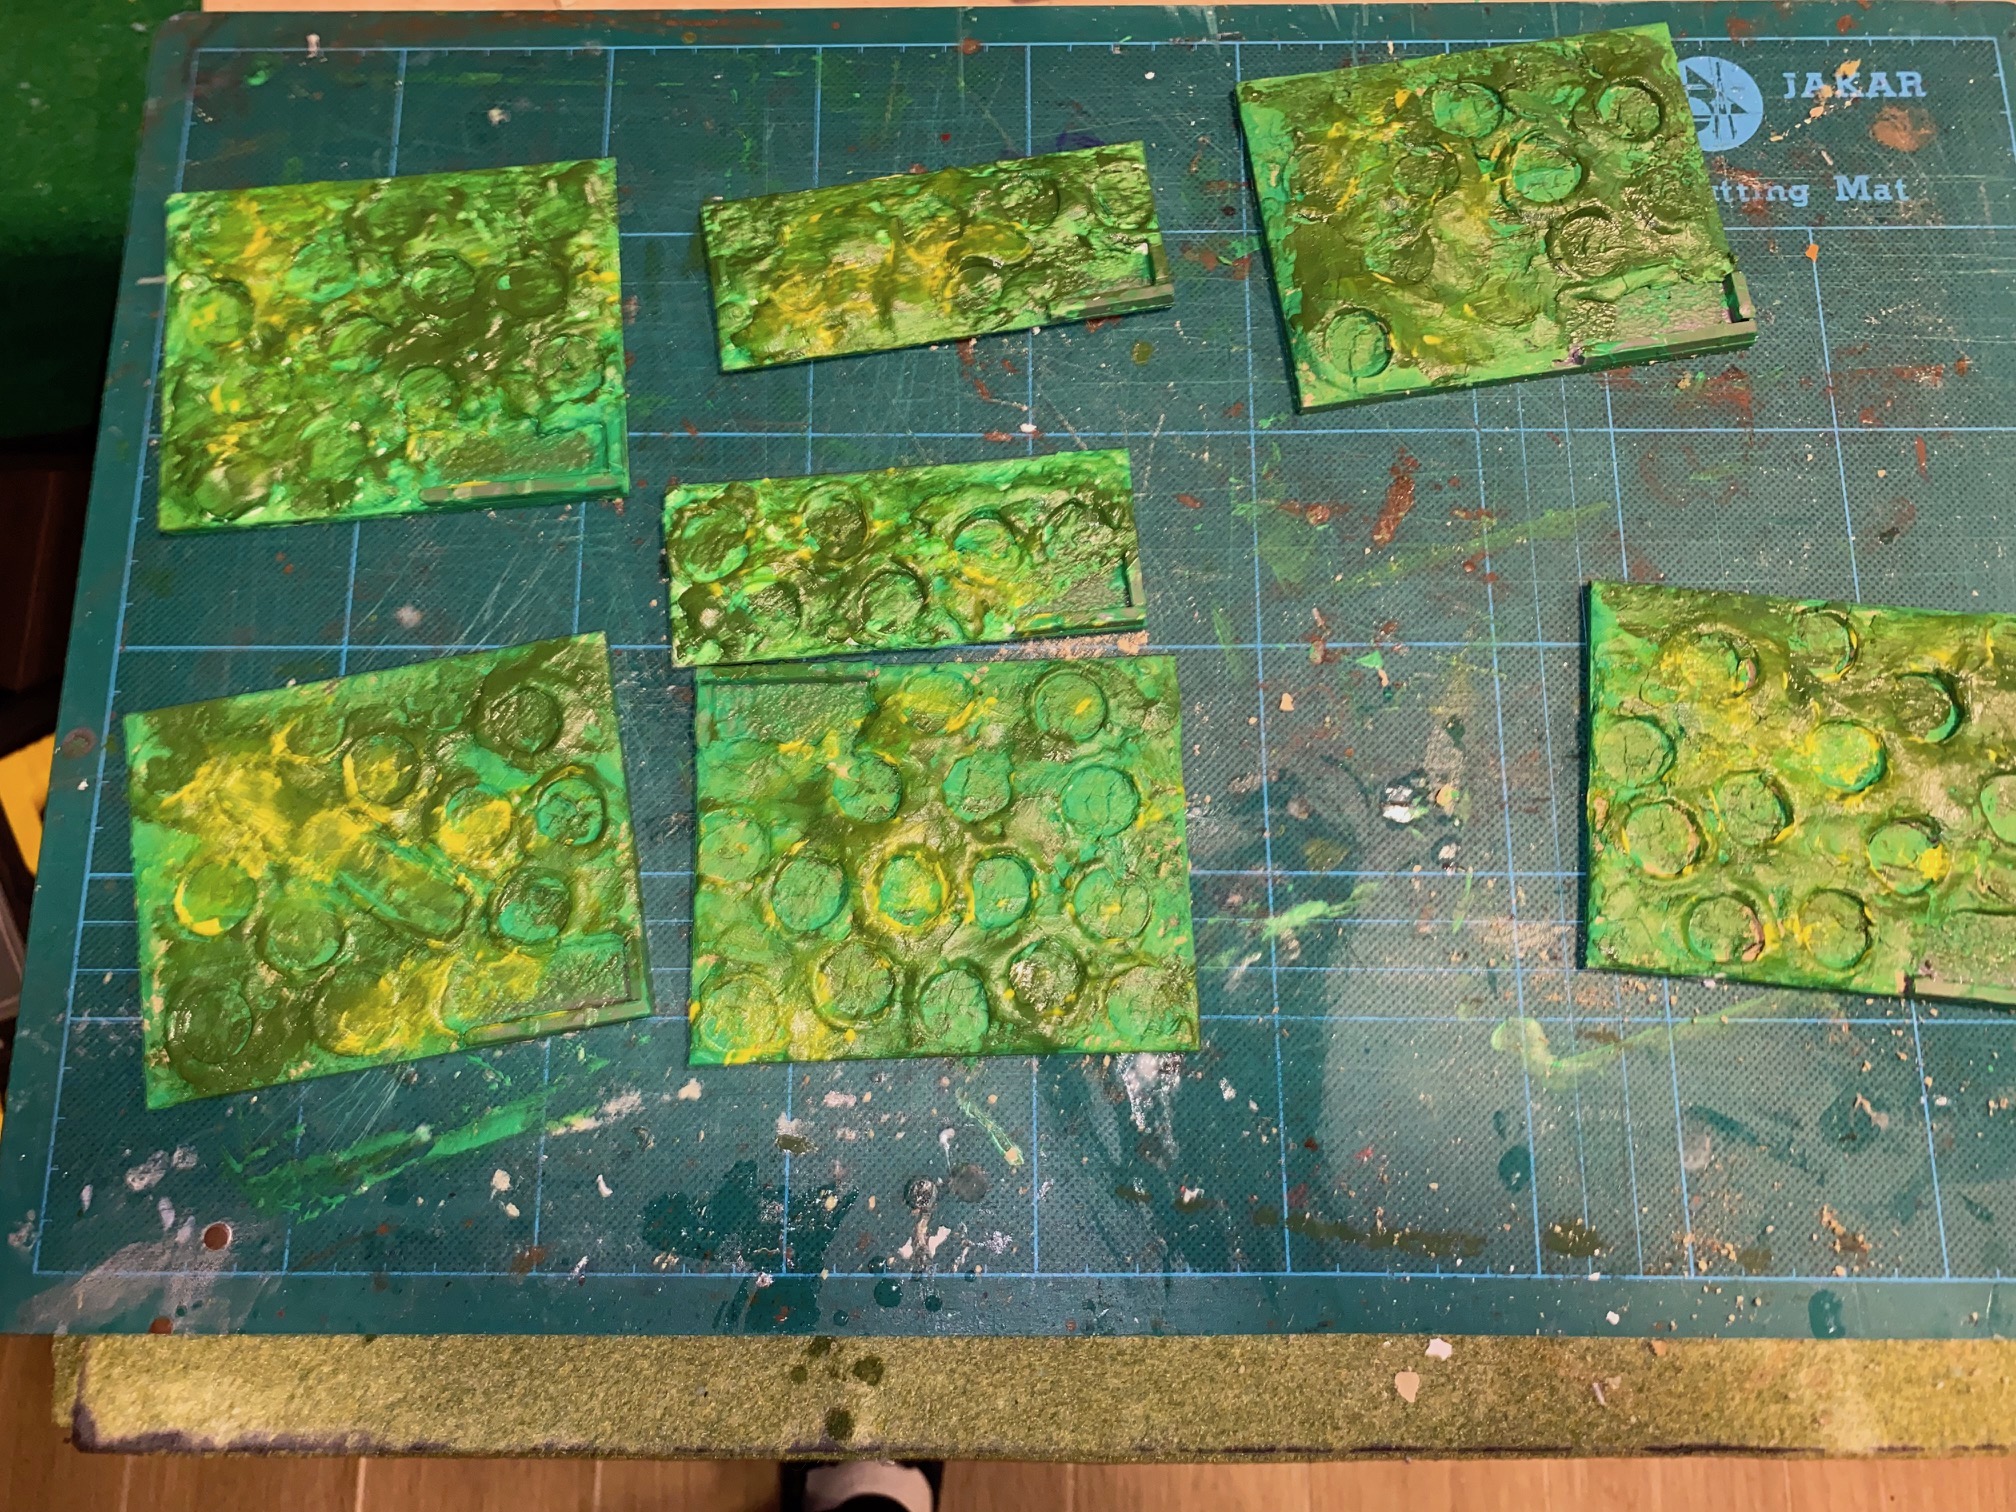
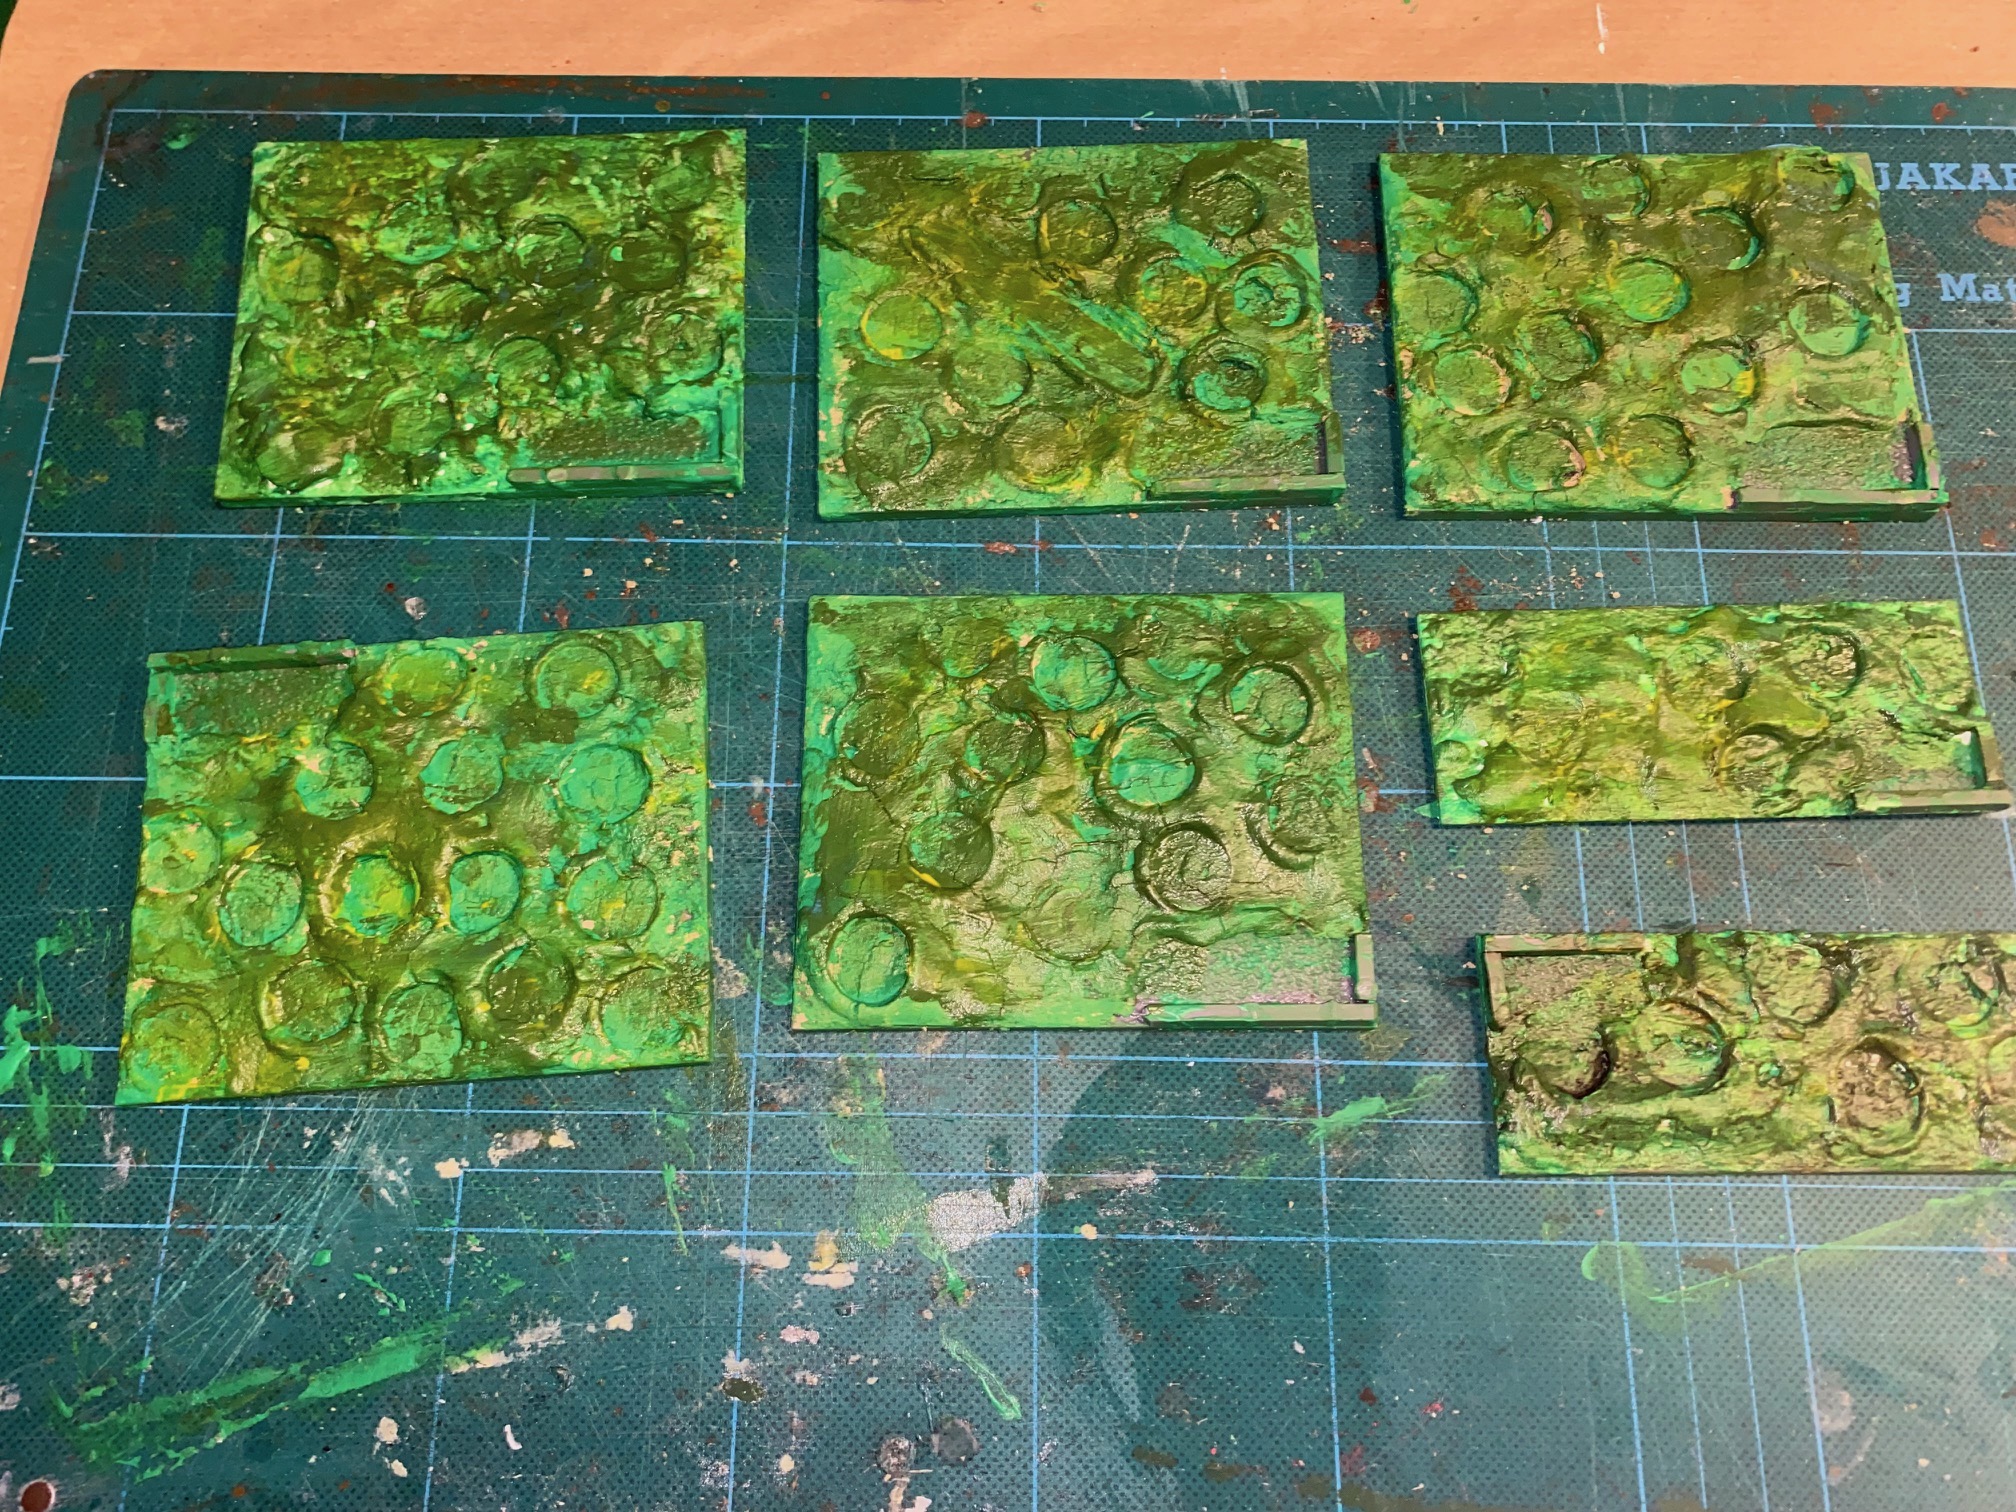
I prepared a number of bases (see last post) and the next stage was allowing 48 hours for the clay to completely dry out before layering various shades of green Acrylic paints (artists cheap colours) finishing with a light yellow. The end result seemed too bright for me, so a diluted wash of Agrax Earthshade to dampen them down and finally the edges were painted with a Vallejo green.
Colours used – Artist acrylics:
Leaf Green / Chromium green / Yellow medium
Vallejo 70922 Uniform Green
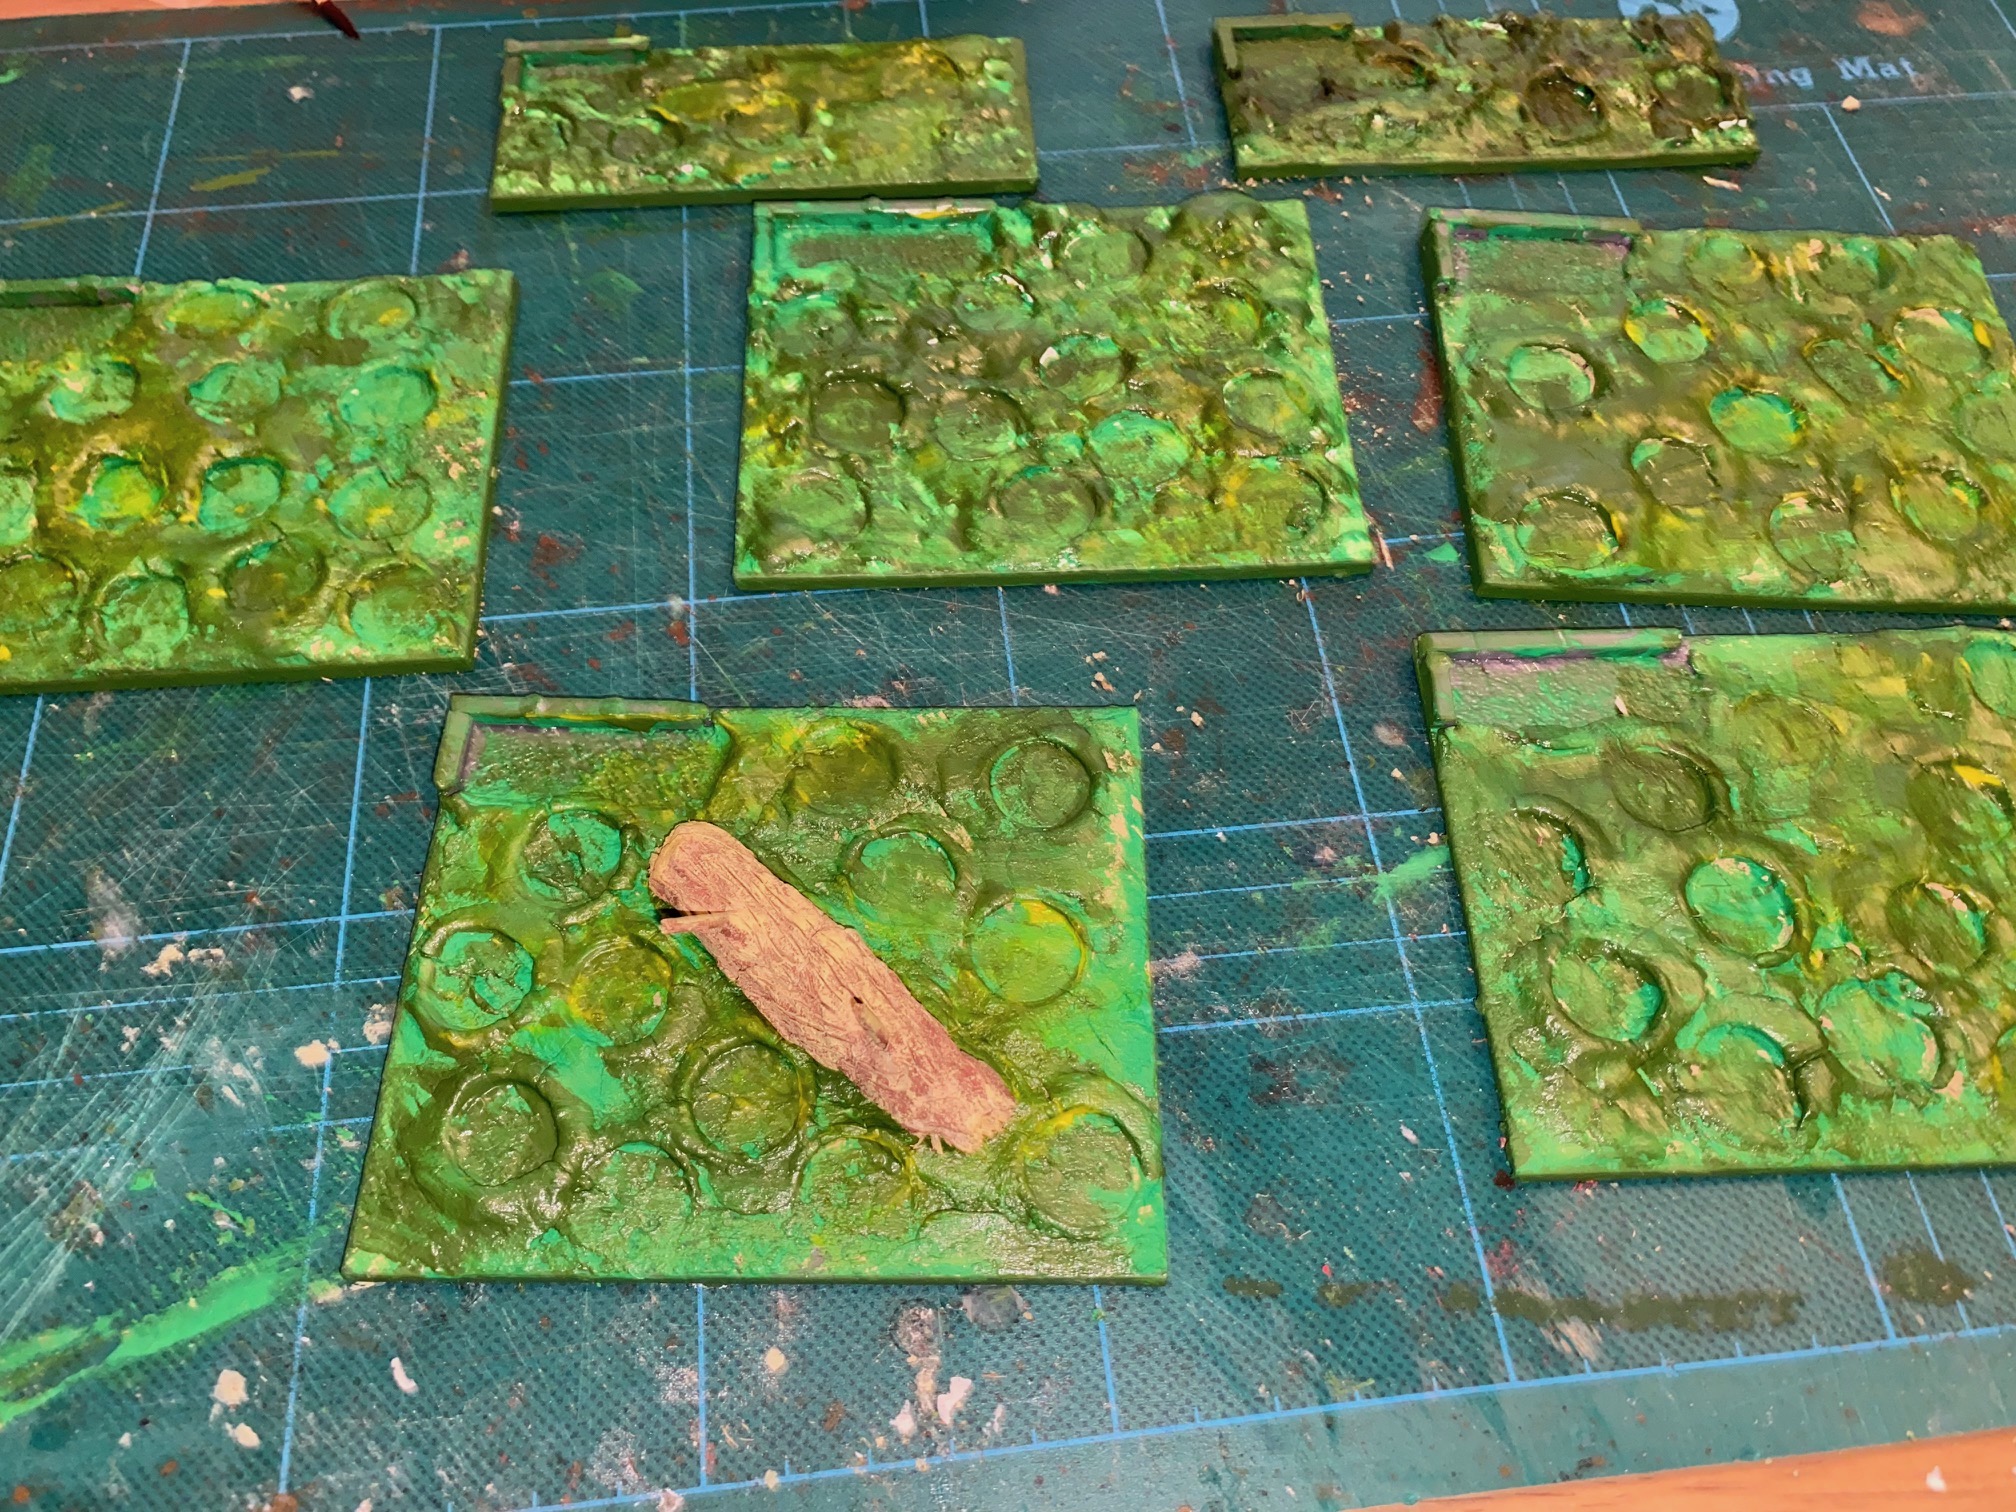
Fixing the models was a staged process. I glued down the first line then added small patches of diluted PvA (about 60/40) and dropped on to this some colored sand. The idea was to add some texture to the bases, but also the add some additional support to the figures with the PvA/Sand mix.
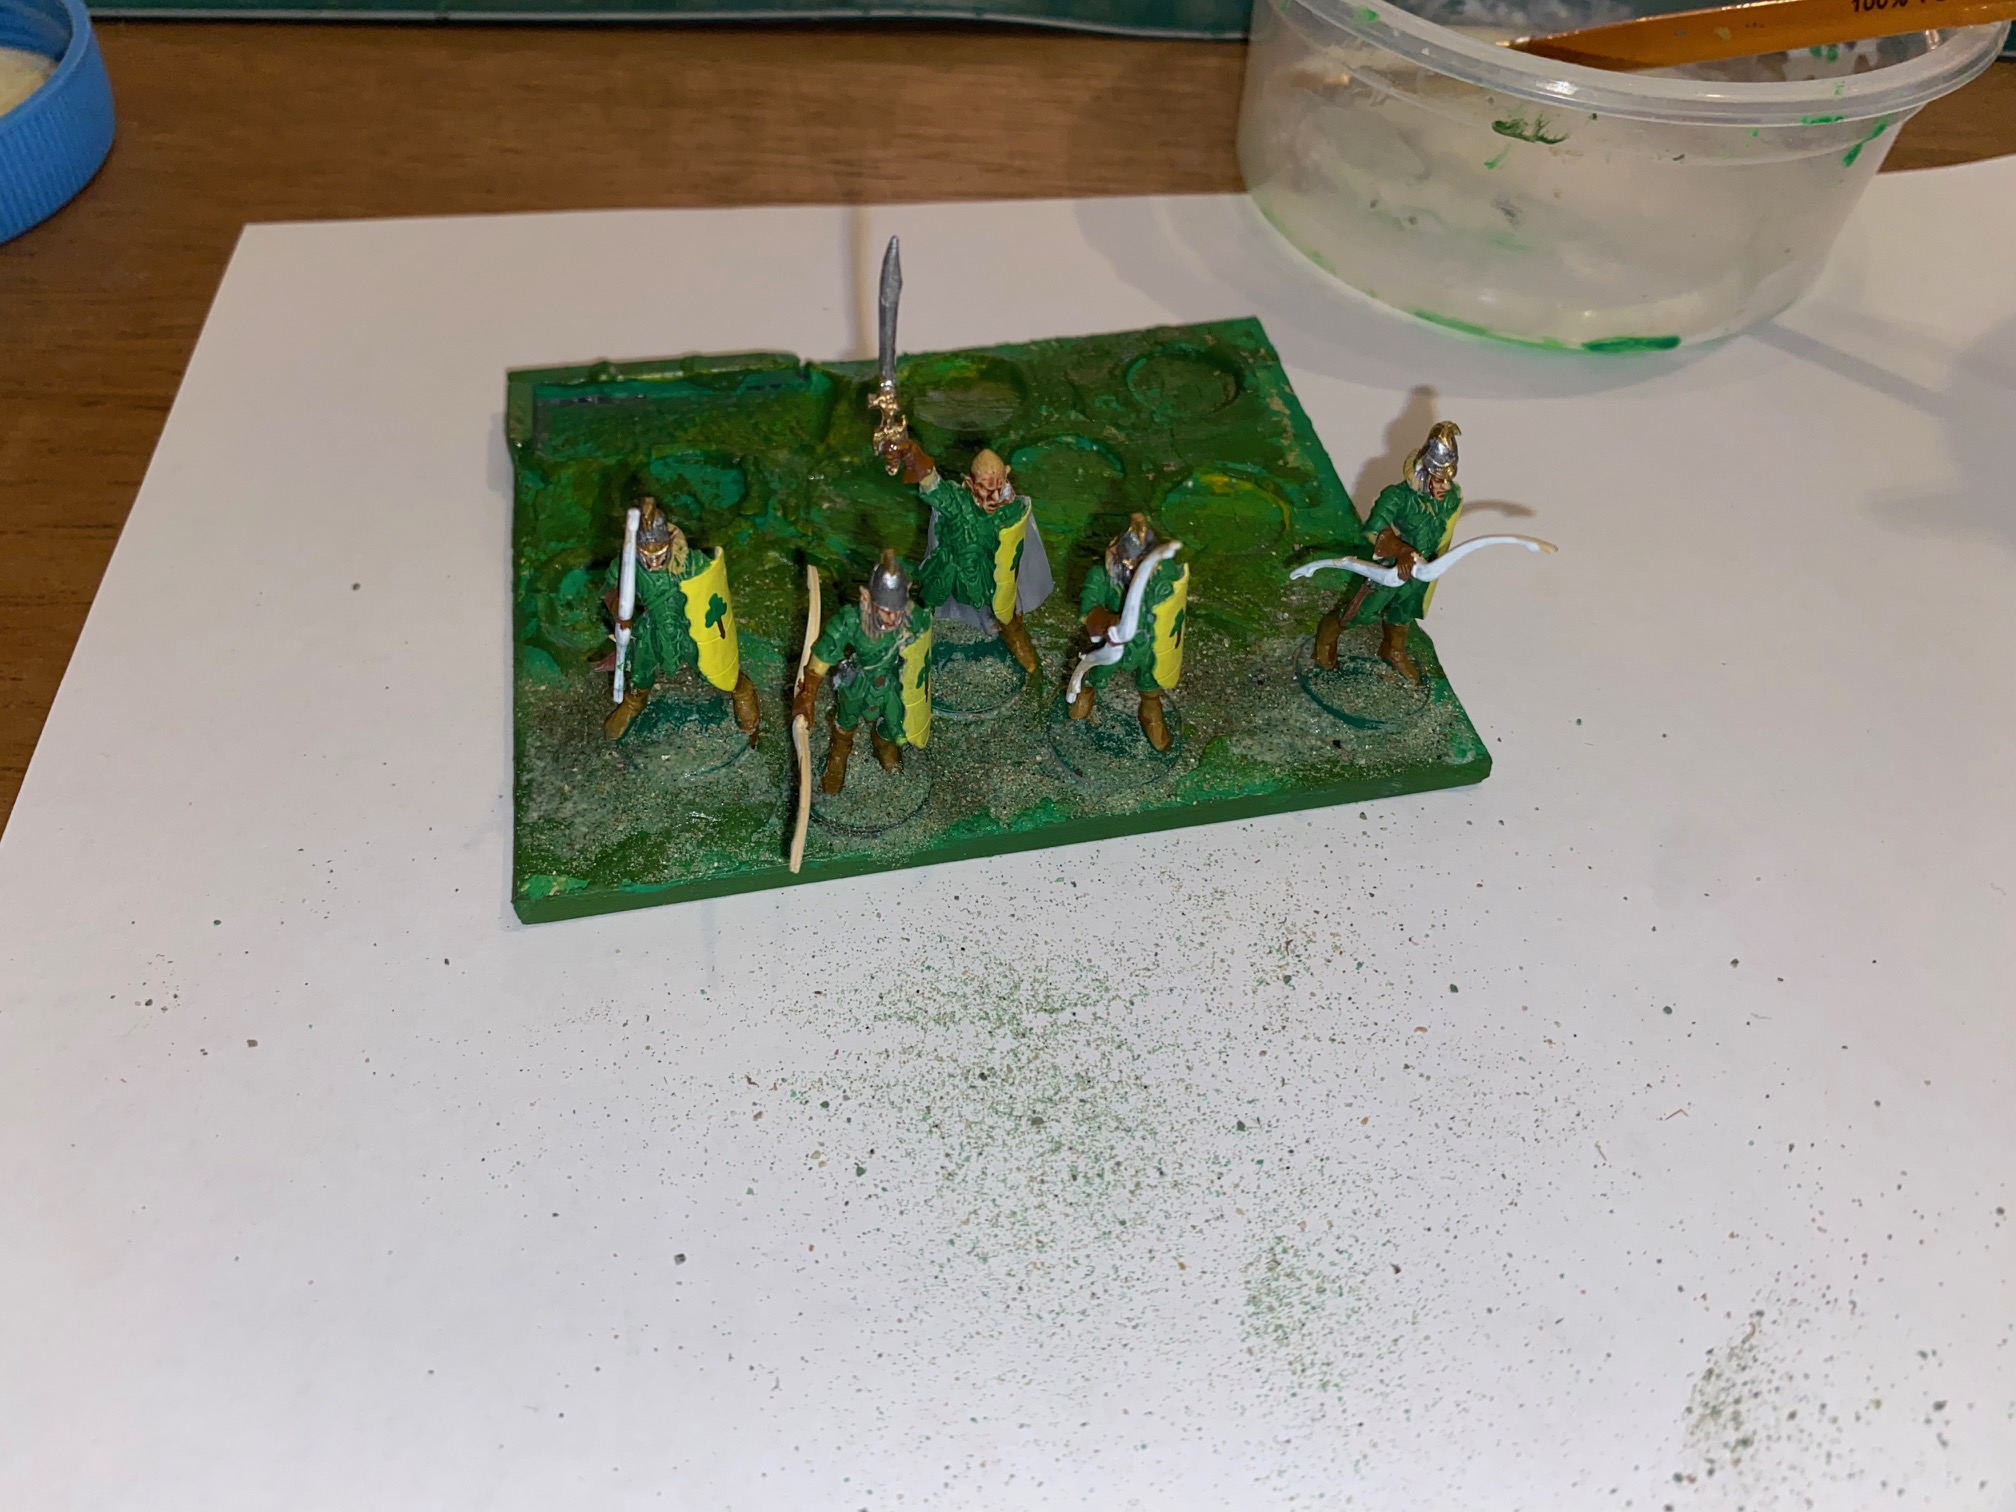
I still need to add additional foliage, eg. shrubs/trees etc. and then work on the Gladestalkers. These I think I will equip in leather rather than the Elven armor. Also I want their bases to be highly condensed with plants etc.
So, my next challenge is to make some interesting “Elven” trees etc.
Happy Gaming!


