


Manda (Amachan) goes to the Eastern Front


Recommendations: 330
About the Project
This project will follow my progress into 15mm Eastern Front wargaming. I will be building at least 2 armies, a Soviet and a German one and all the terrain I need to play. I am focussing on the latter half of 1942 so around the battle of Stalingrad, but not on Stalingrad itself.
Related Game: Battlegroup
Related Company: Battlefront Miniatures
Related Genre: Historical
This Project is On Hold
Messing Around with Bases....
So let’s have a mess around with some of the basing experiments I have been doing and add some paint. Don’t worry, no acrylic paints were harmed in this phase or used for that matter. This really just is me playing around with paints and seeing what works.
Base 1
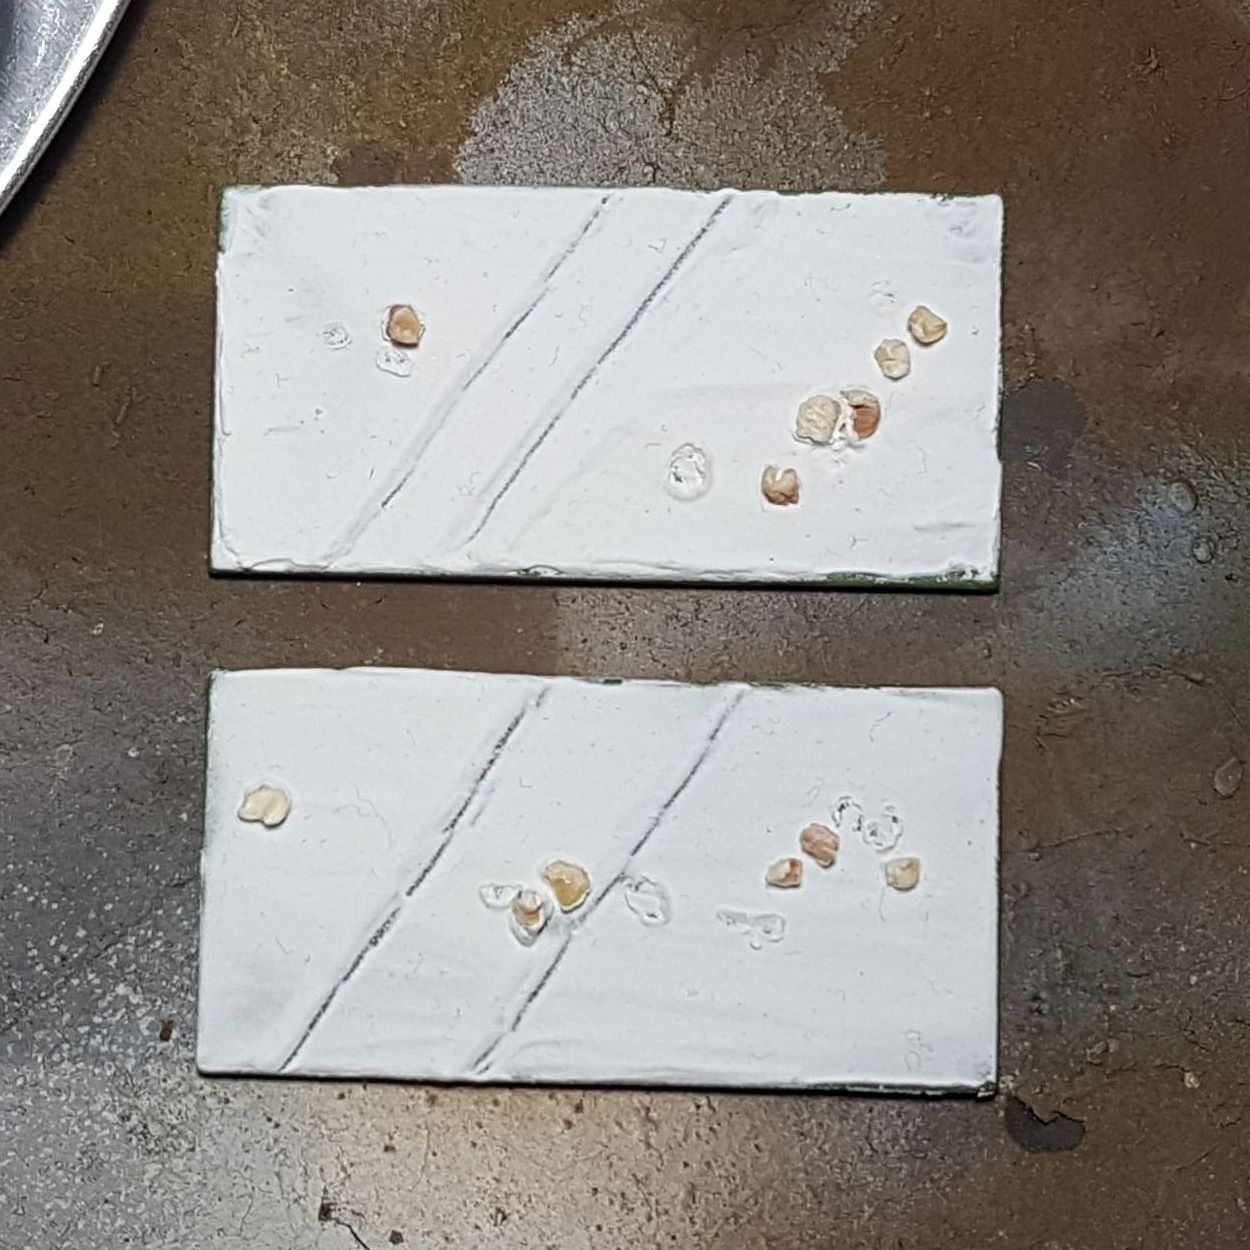
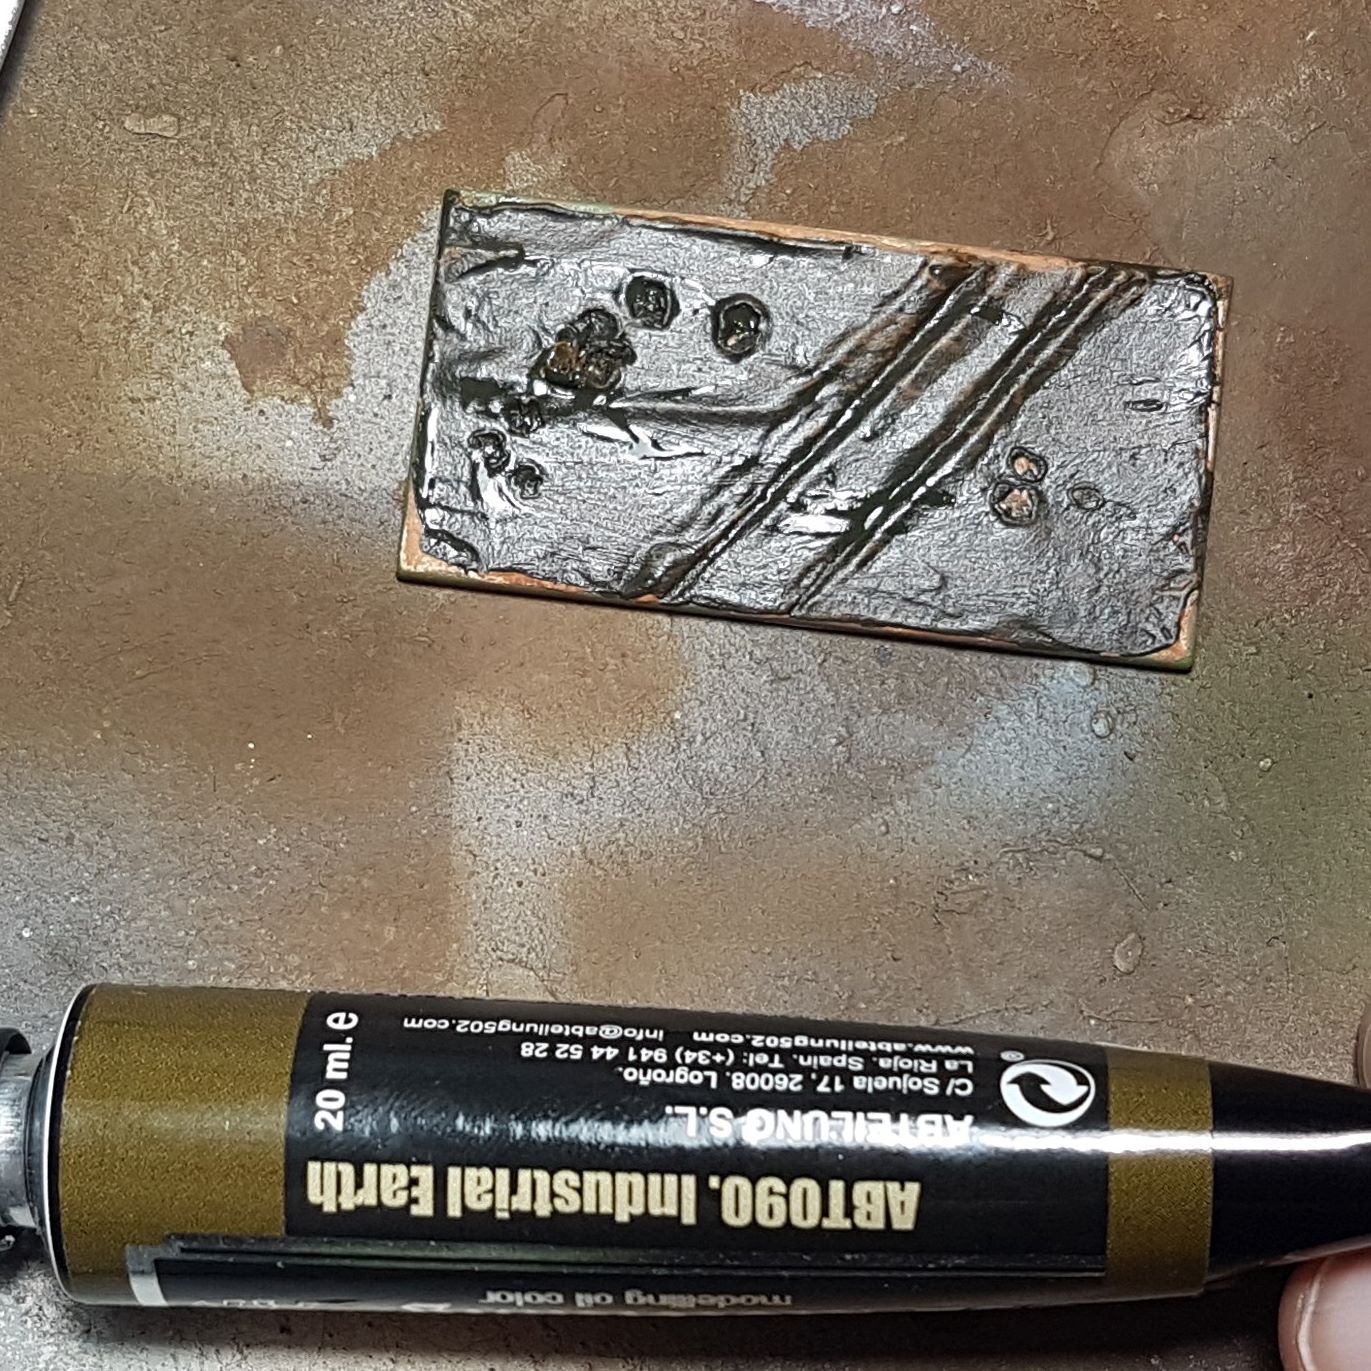
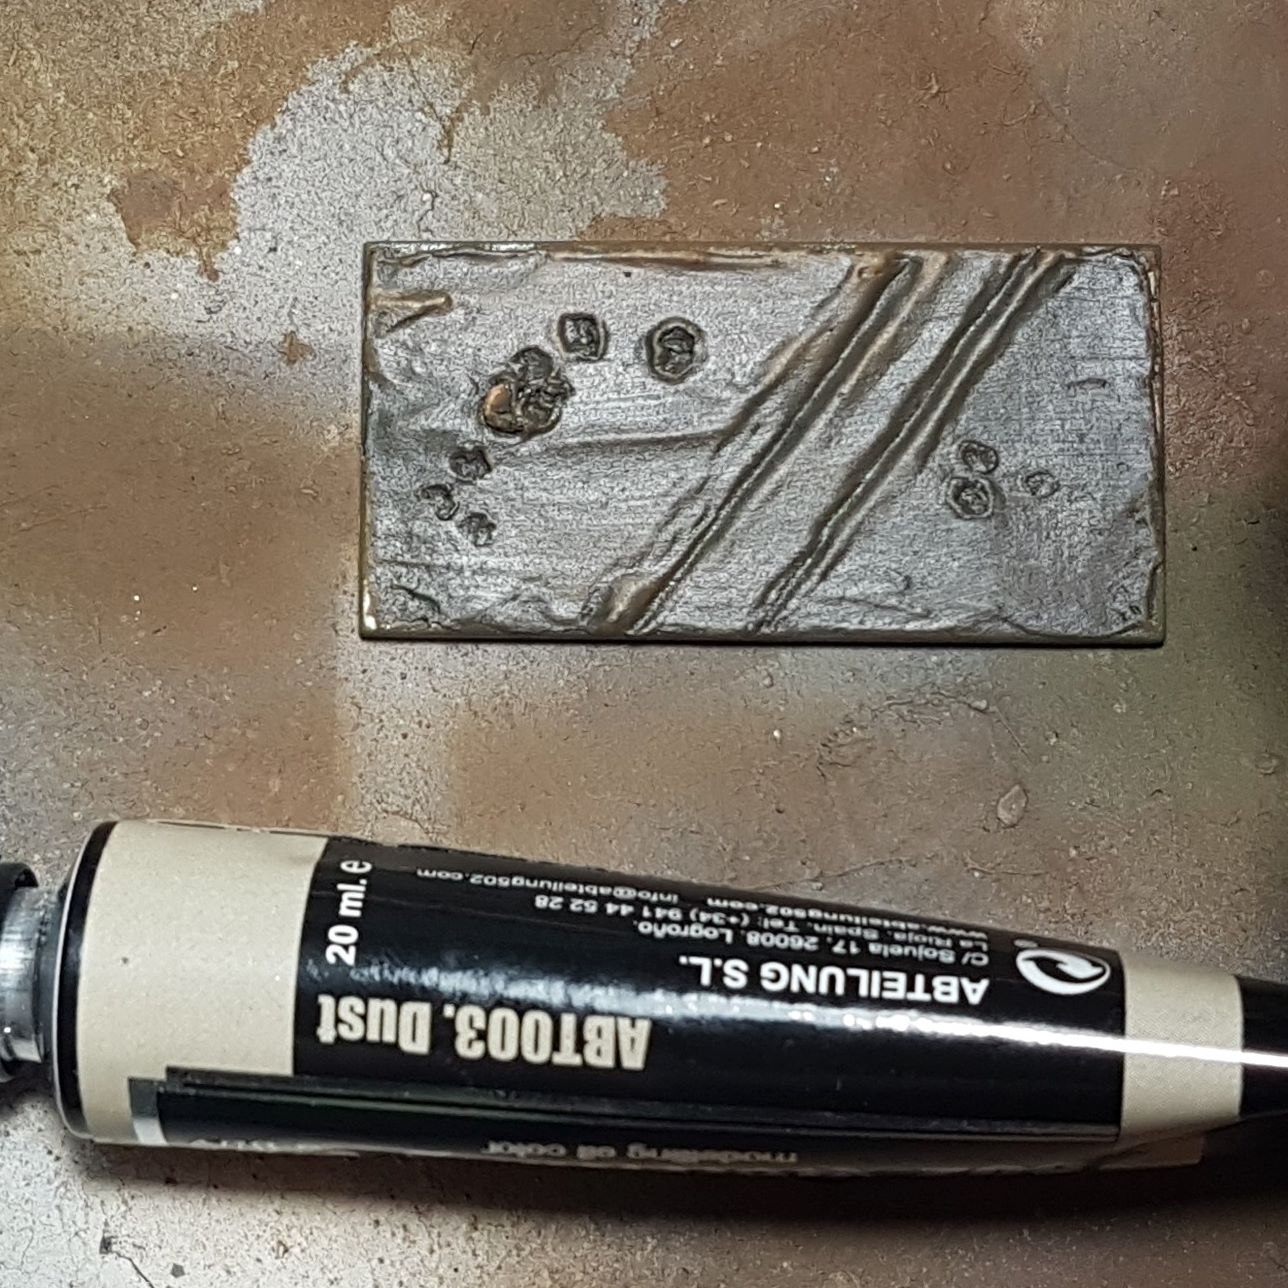
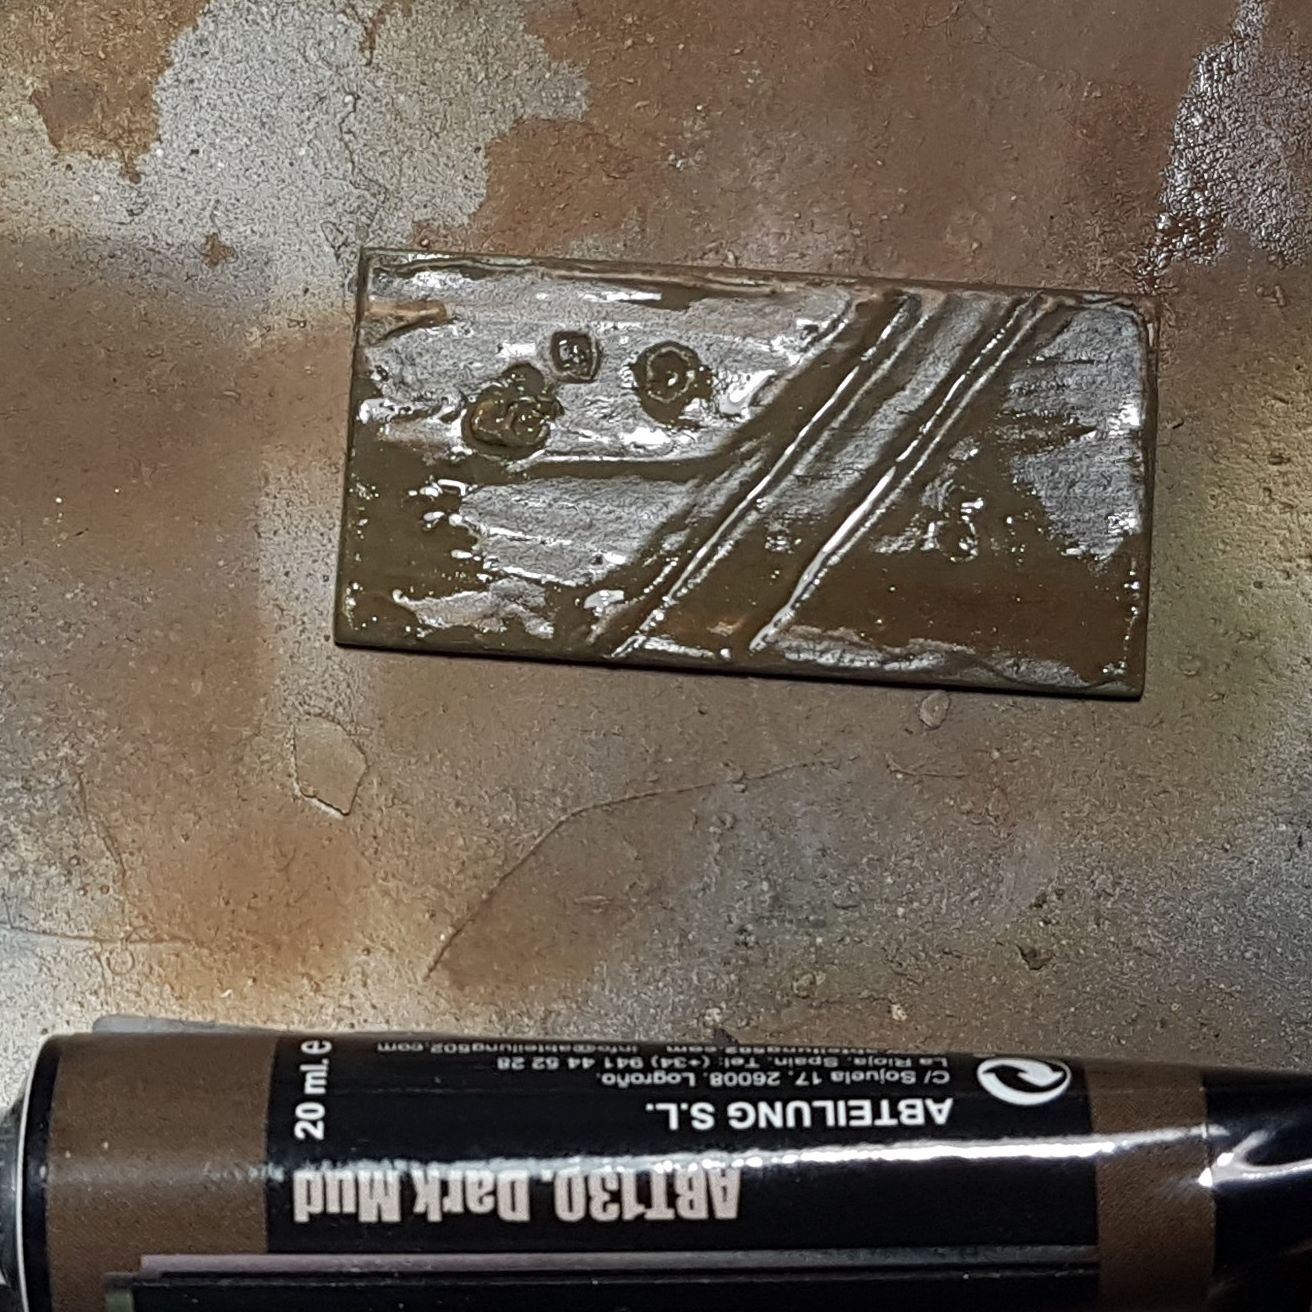
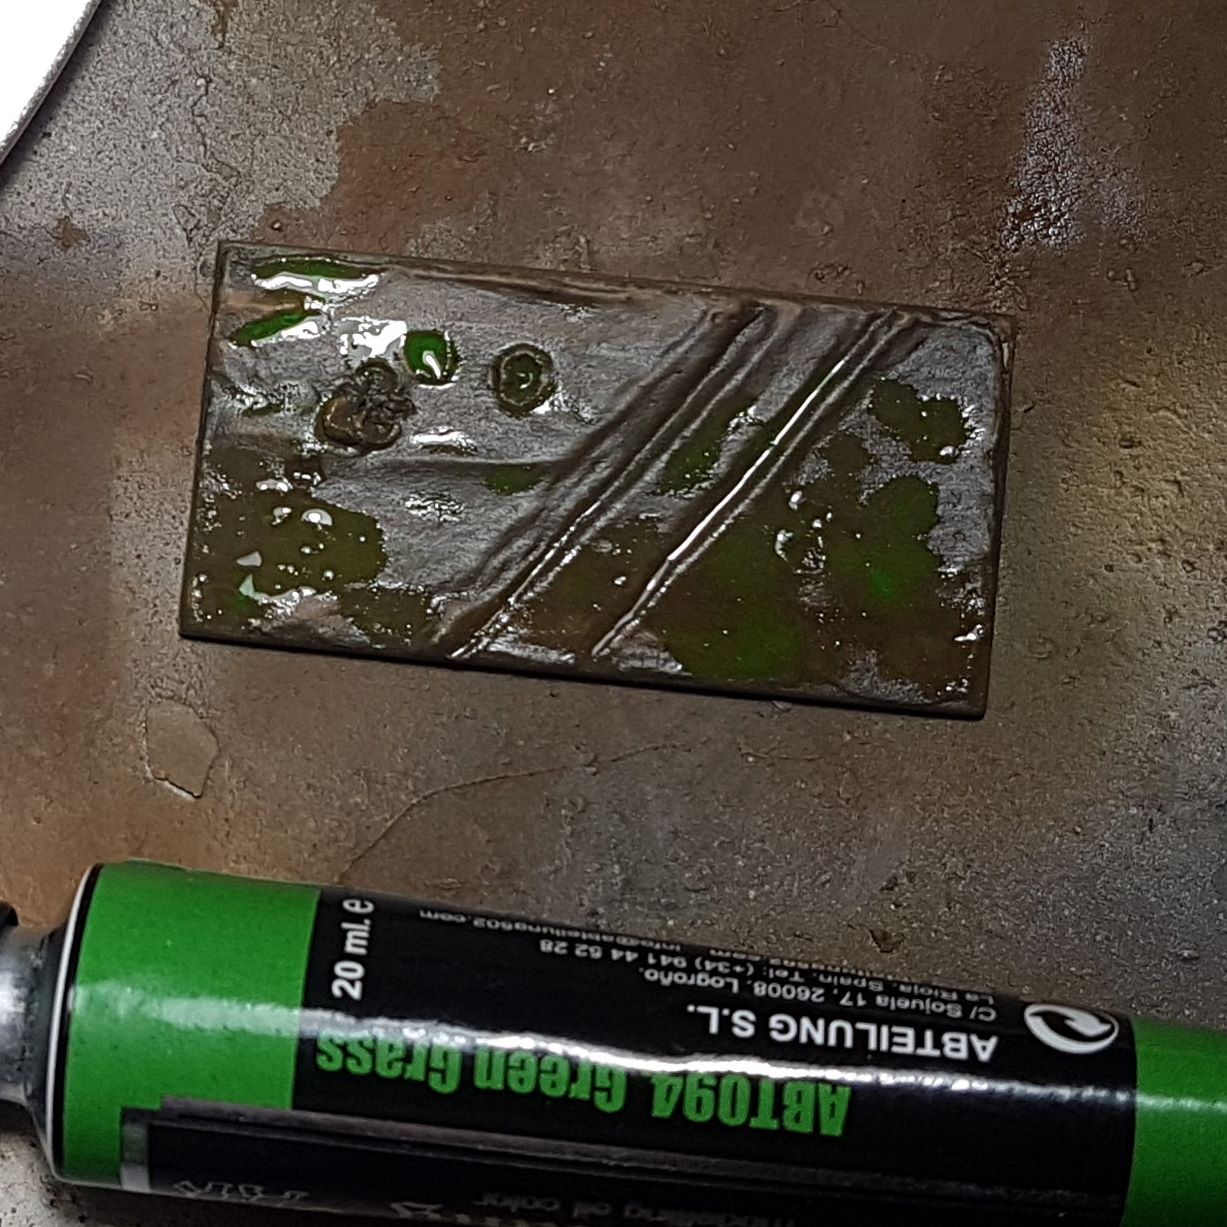
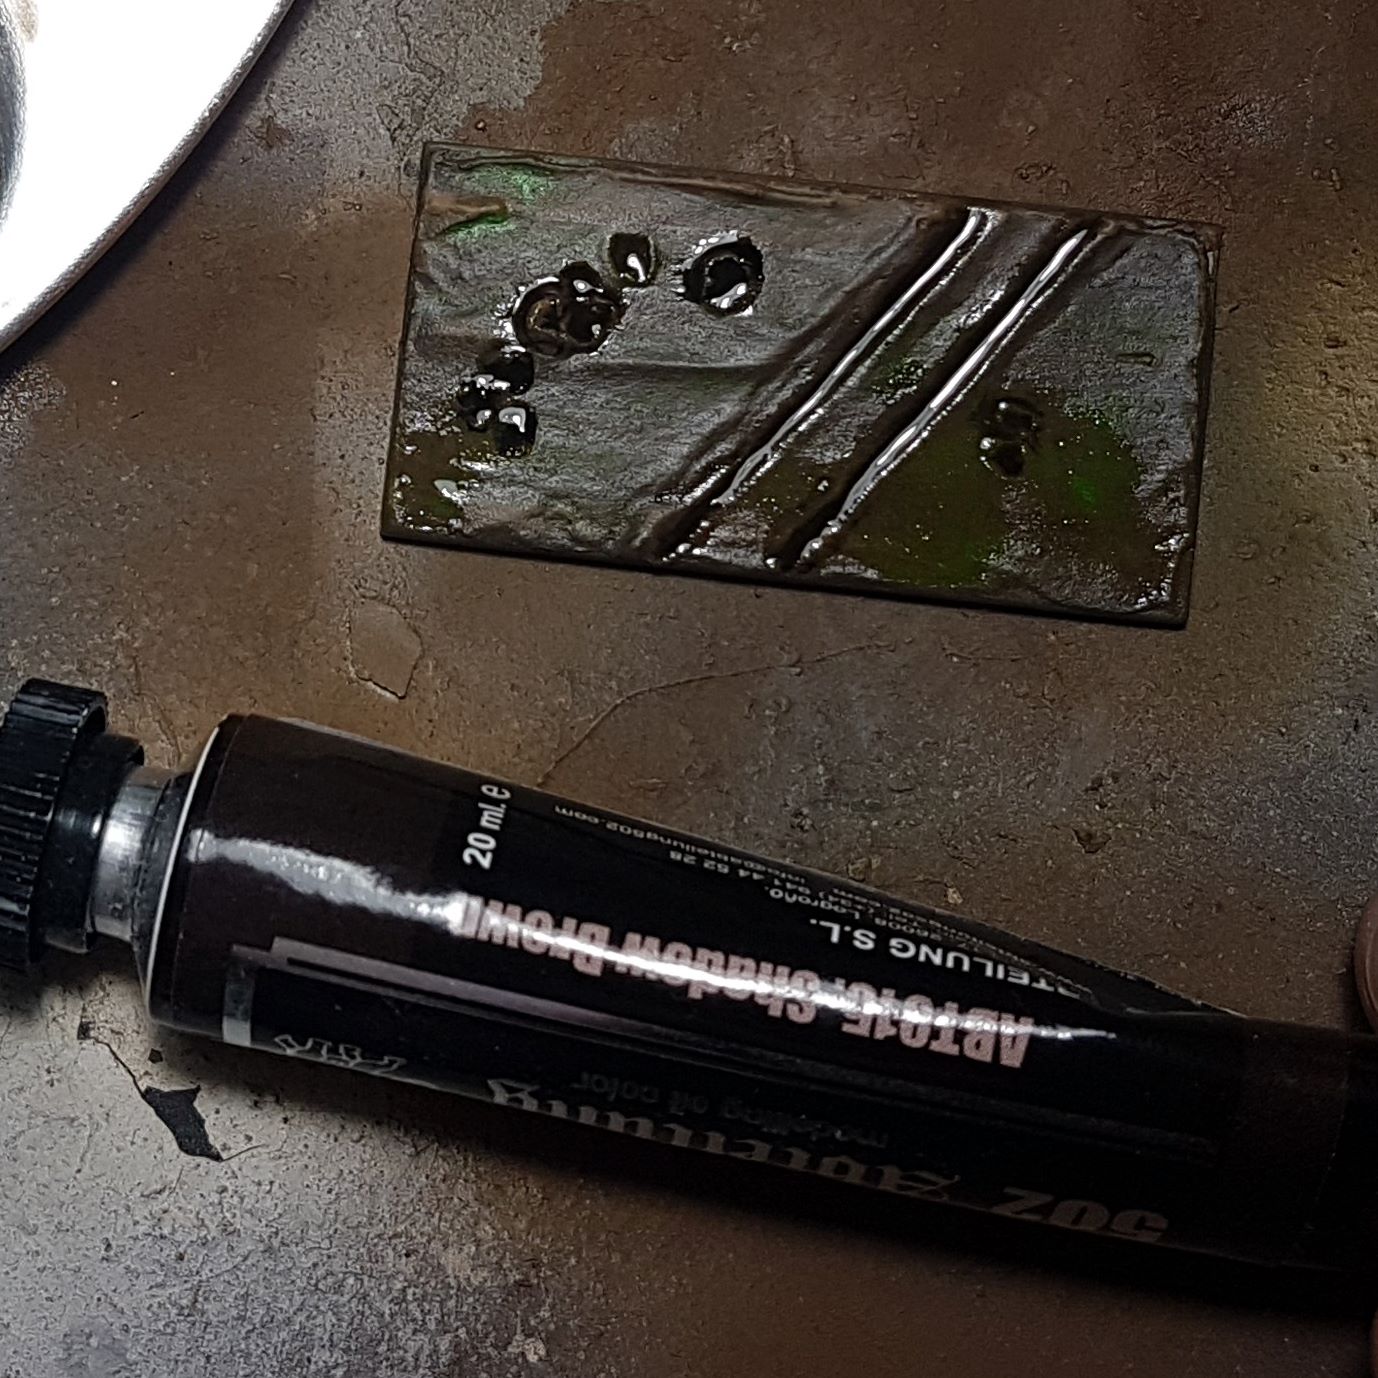
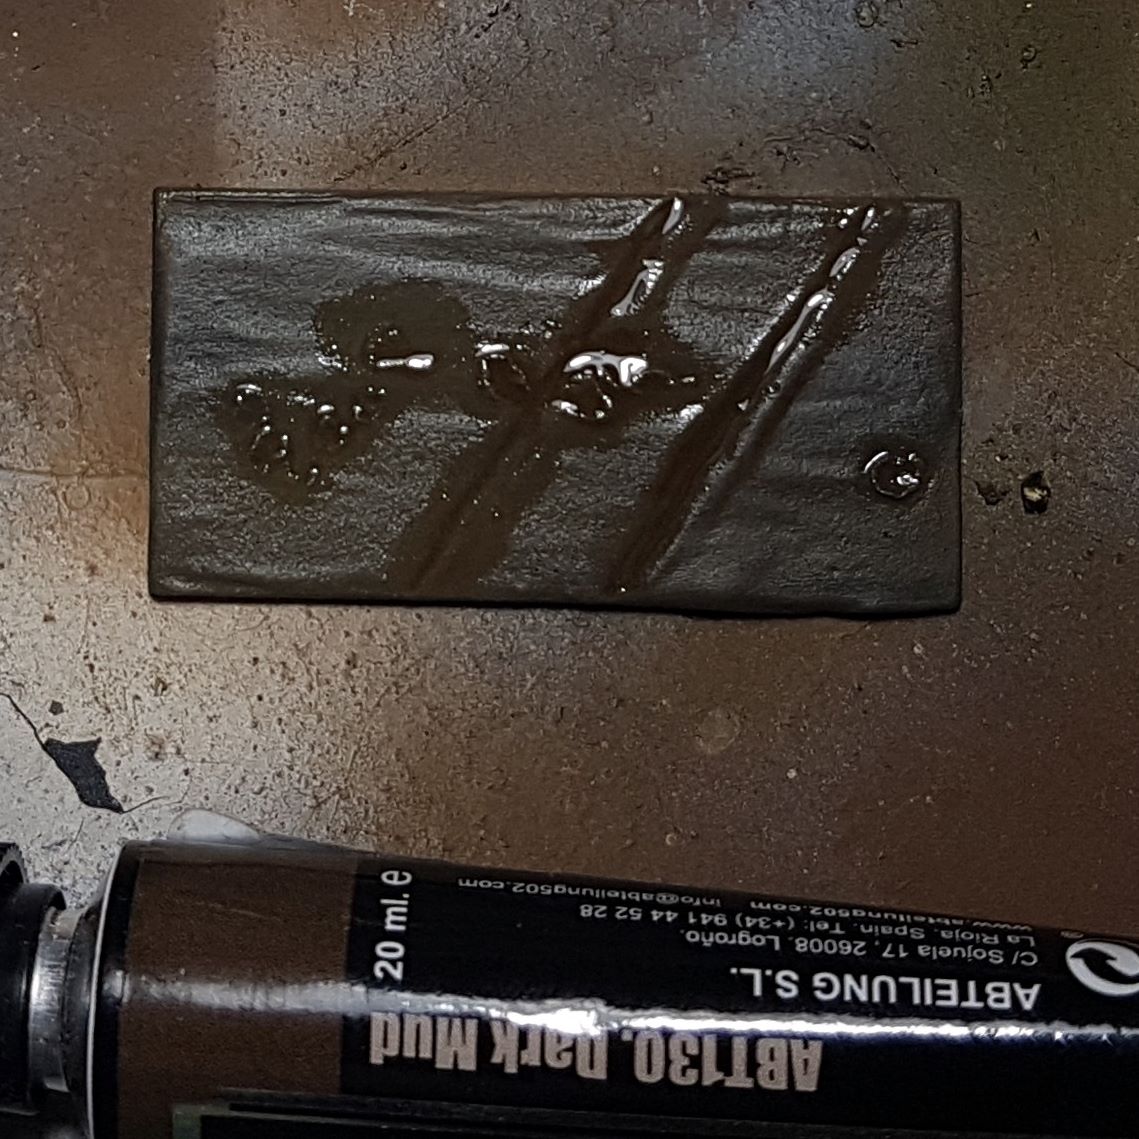
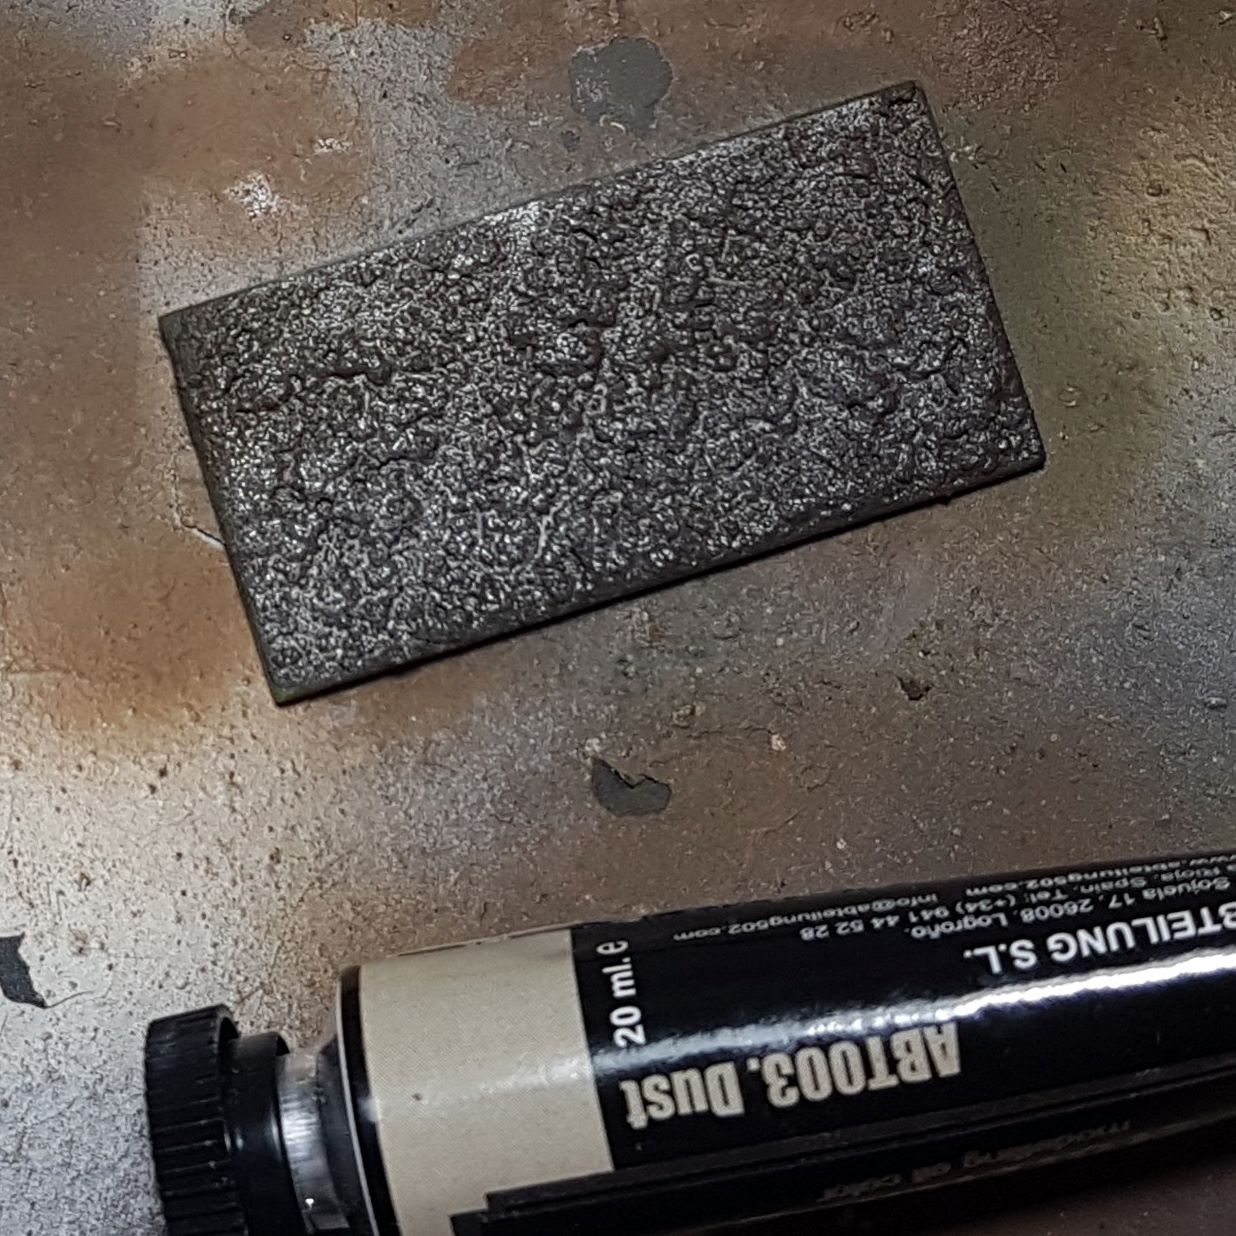
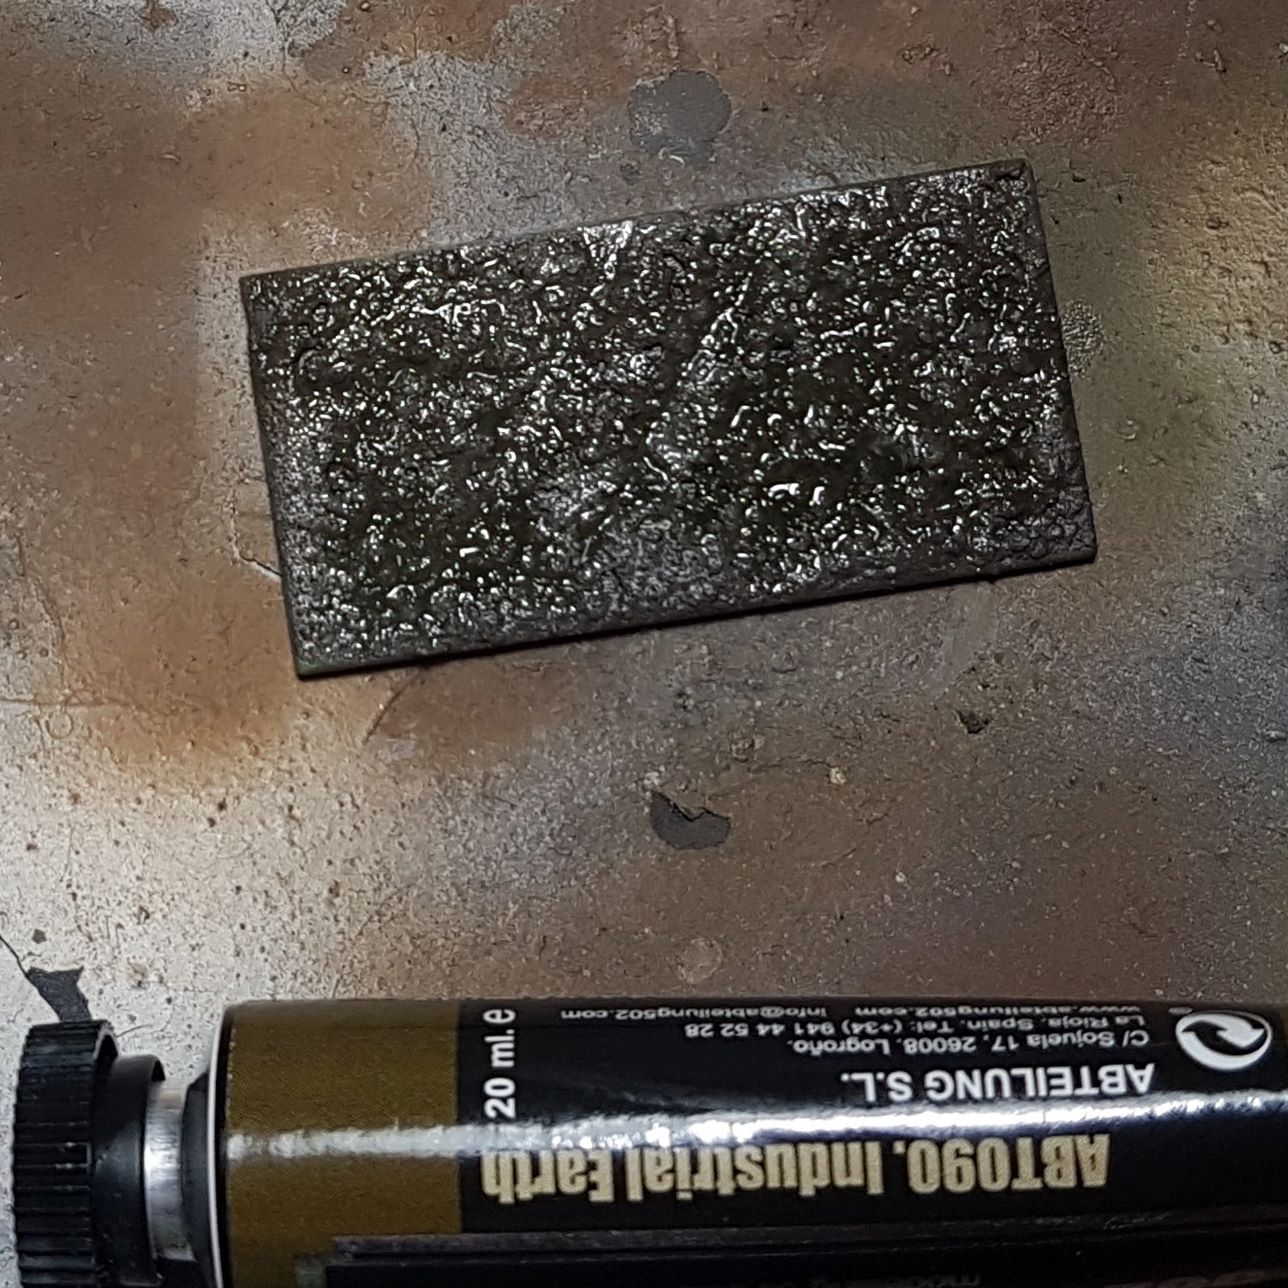
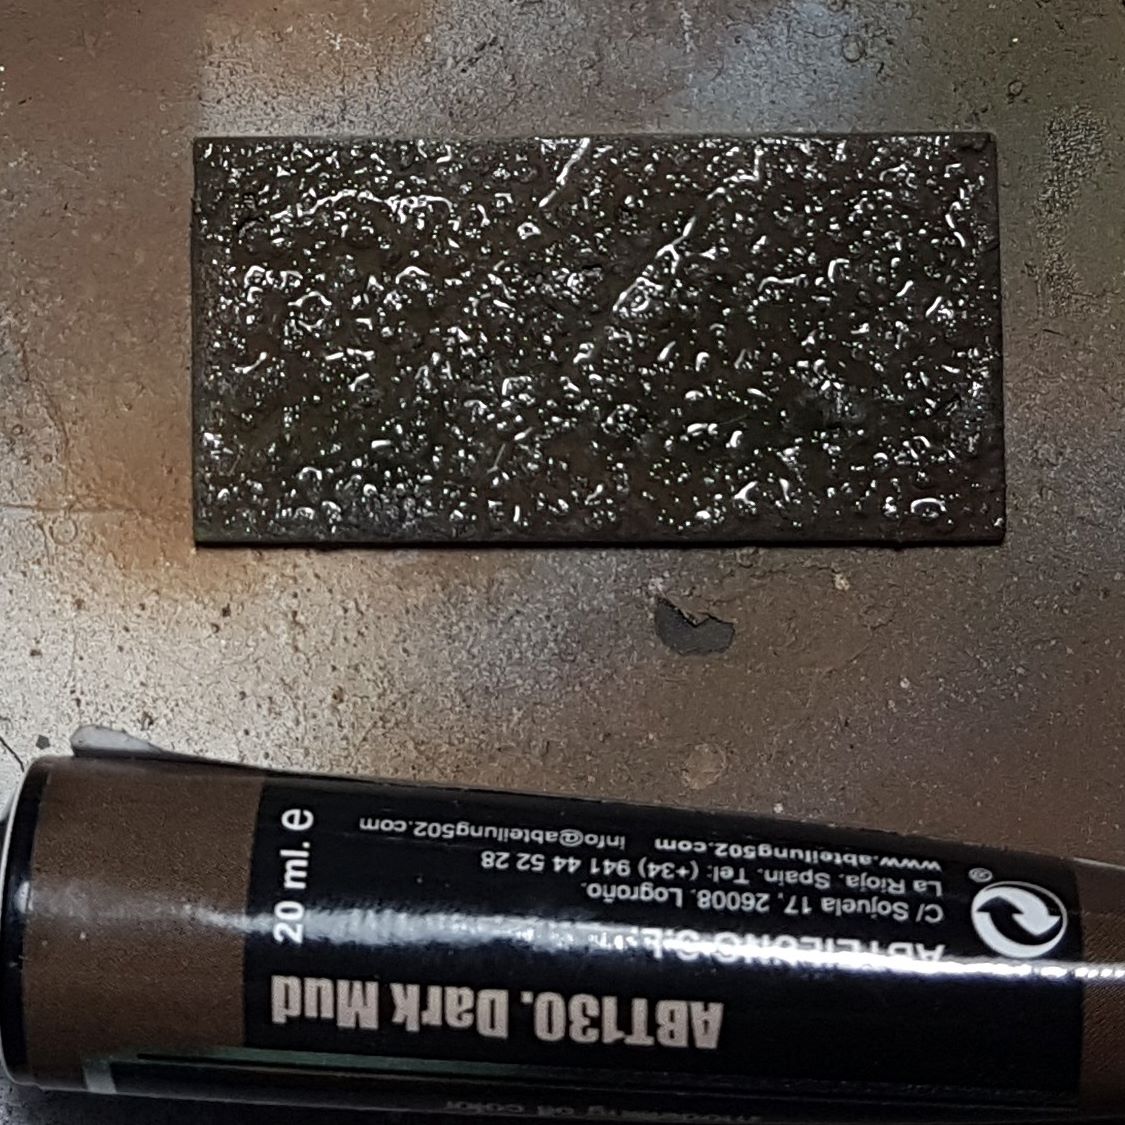
Let’s start with the texture paste. I started with an overbrush of Abteilung 502 Modelling Oil Color Sand Brown (ABT245) followed by a drybrush of Abteilung 502 Modelling Oil Color Dust (ABT003). I then added a thinned coat of Abteilung 502 Modelling Oil Color Industrial Earth (ABT090) which with the power of hindsight I should have thinned more….. Anyway, another drybrush of Abteilung 502 Modelling Oil Color Dust (ABT003). I then made a wash with Abteilung 502 Modelling Oil Color Dark Mud (ABT130) and applied it over the whole base and then made a wash of Abteilung 502 Modelling Oil Color Green Grass (ABT094) and stippled that on the base in places followed by a bit of a wash from the Abteilung 502 Modelling Oil Color Dark Mud (ABT130) in the recesses. That obviously wasn’t dark enough so I did the same with a wash made from Abteilung 502 Modelling Oil Color Shadow Brown (ABT015).

Base 2
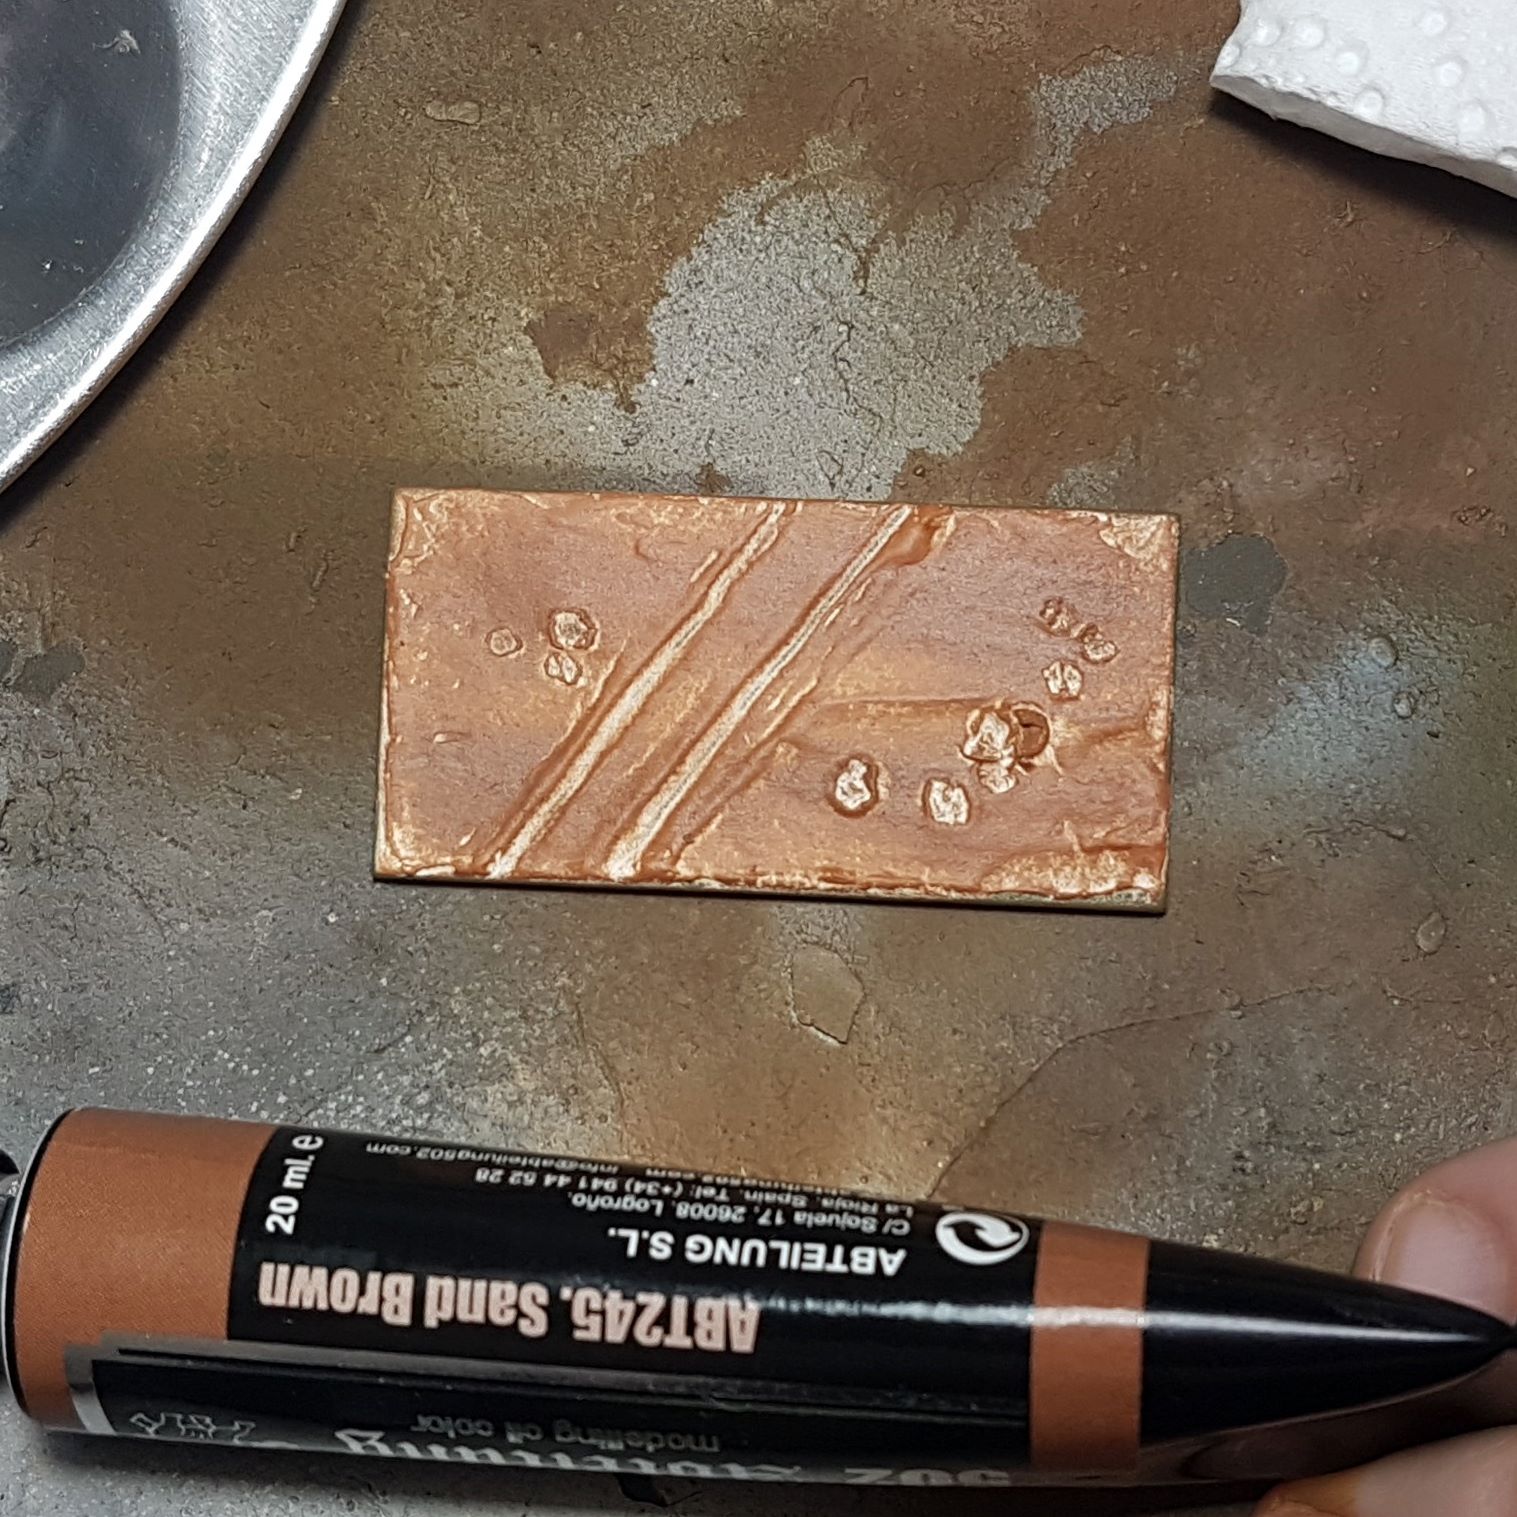
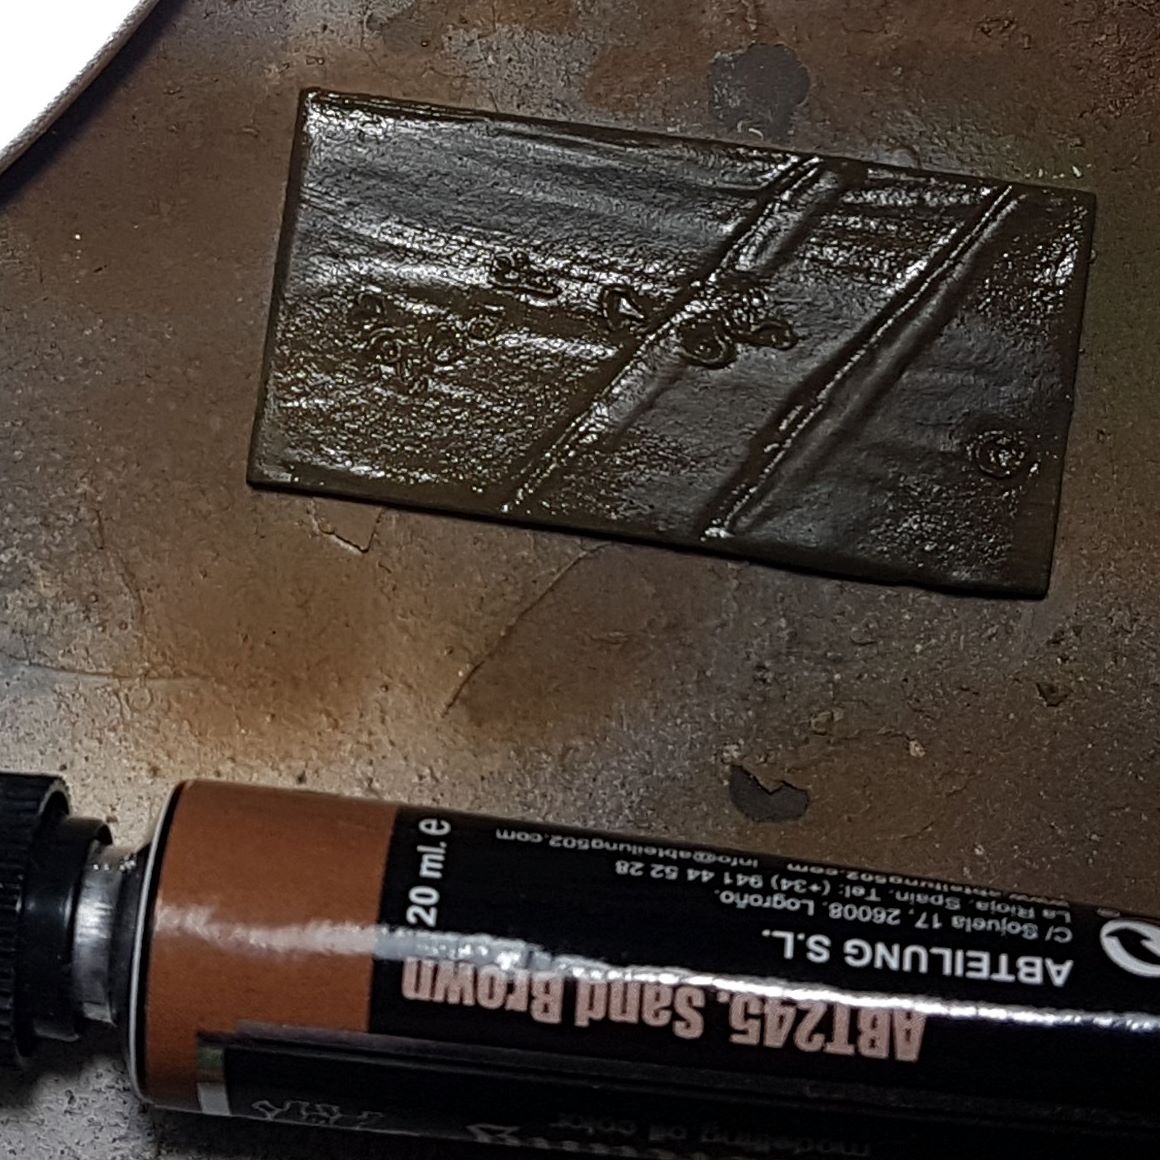
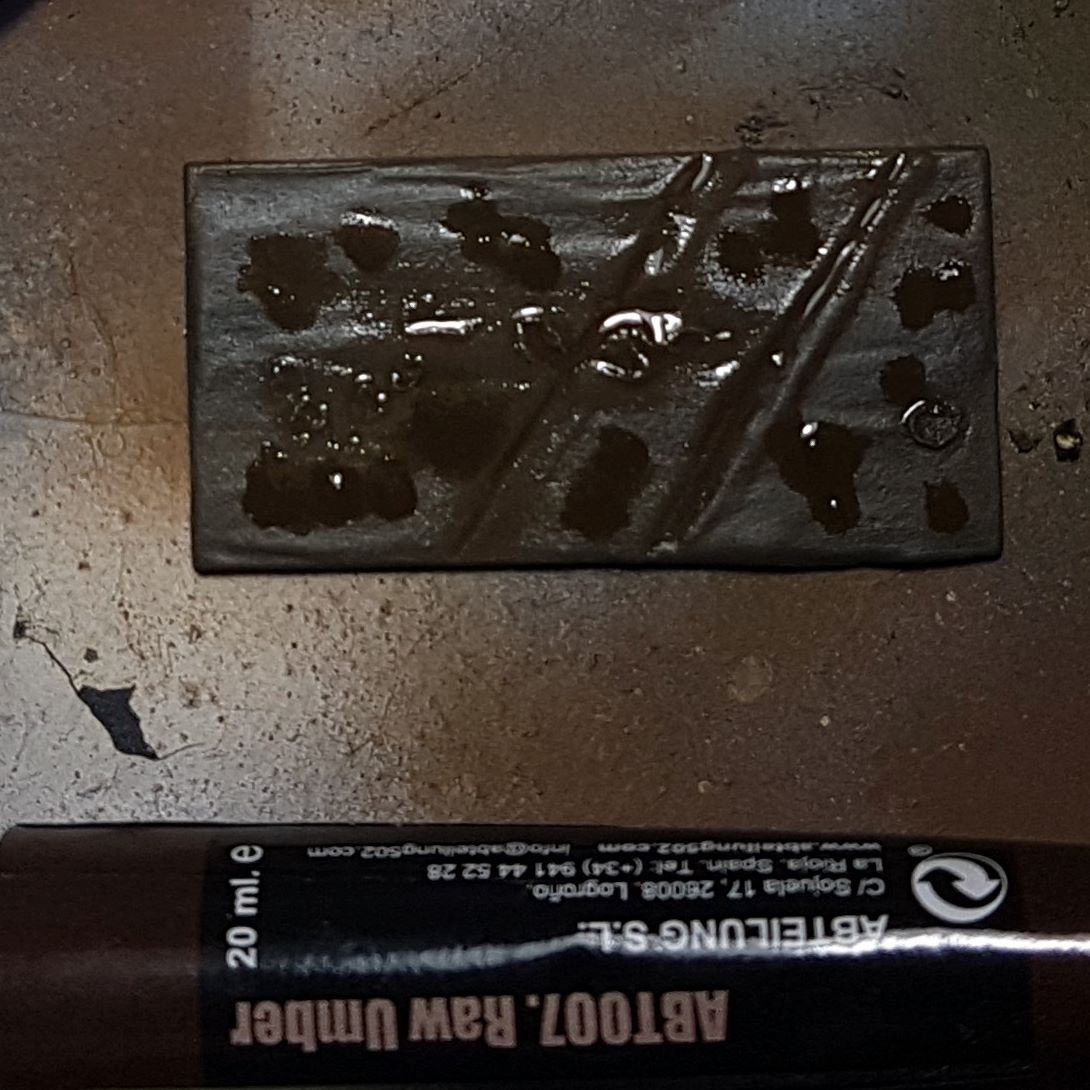
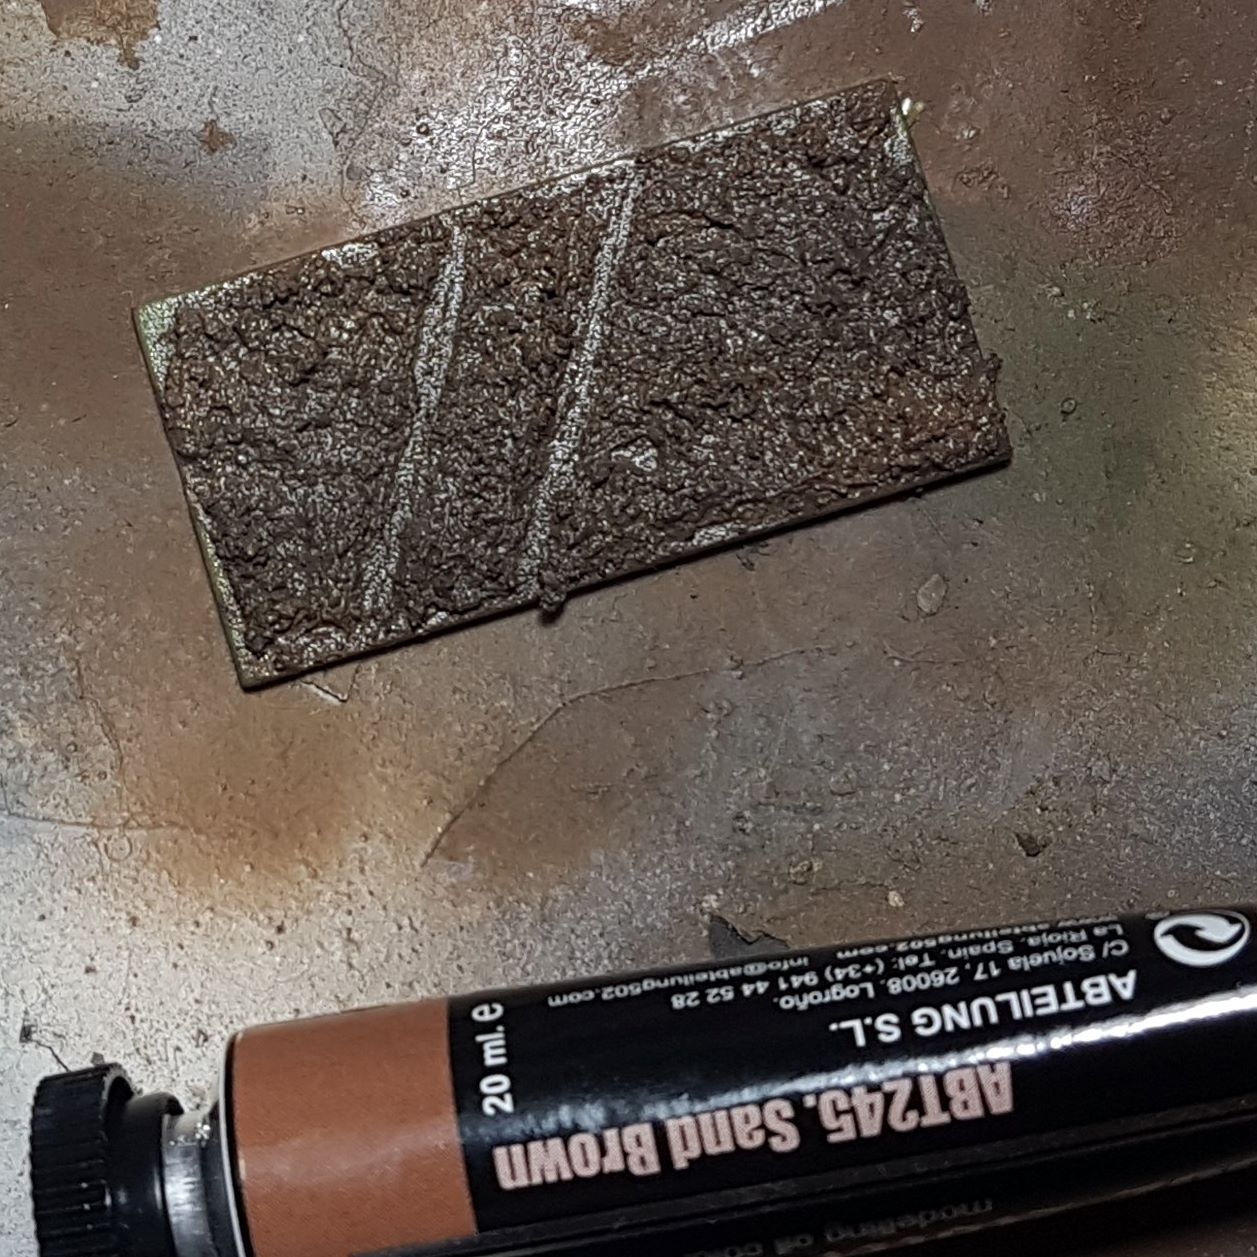
So on to the next base. This time I started with the thinned coat of Abteilung 502 Modelling Oil Color Industrial Earth (ABT090) followed by a heavy drybrush of Abteilung 502 Modelling Oil Color Sand Brown (ABT245) and then a lighter drybrush of Abteilung 502 Modelling Oil Color Dust (ABT003). I know I am drybrushing with oil paints right over oil paints, this does not give the same effect as with acrylics but rather blends the colours together, kind of what I am going for here. I then used the wash made of Abteilung 502 Modelling Oil Color Dark Mud (ABT130) in the recesses and stippled a wash of Abteilung 502 Modelling Oil Color Raw Umber (ABT007) willy nillely around the base.

Base 3
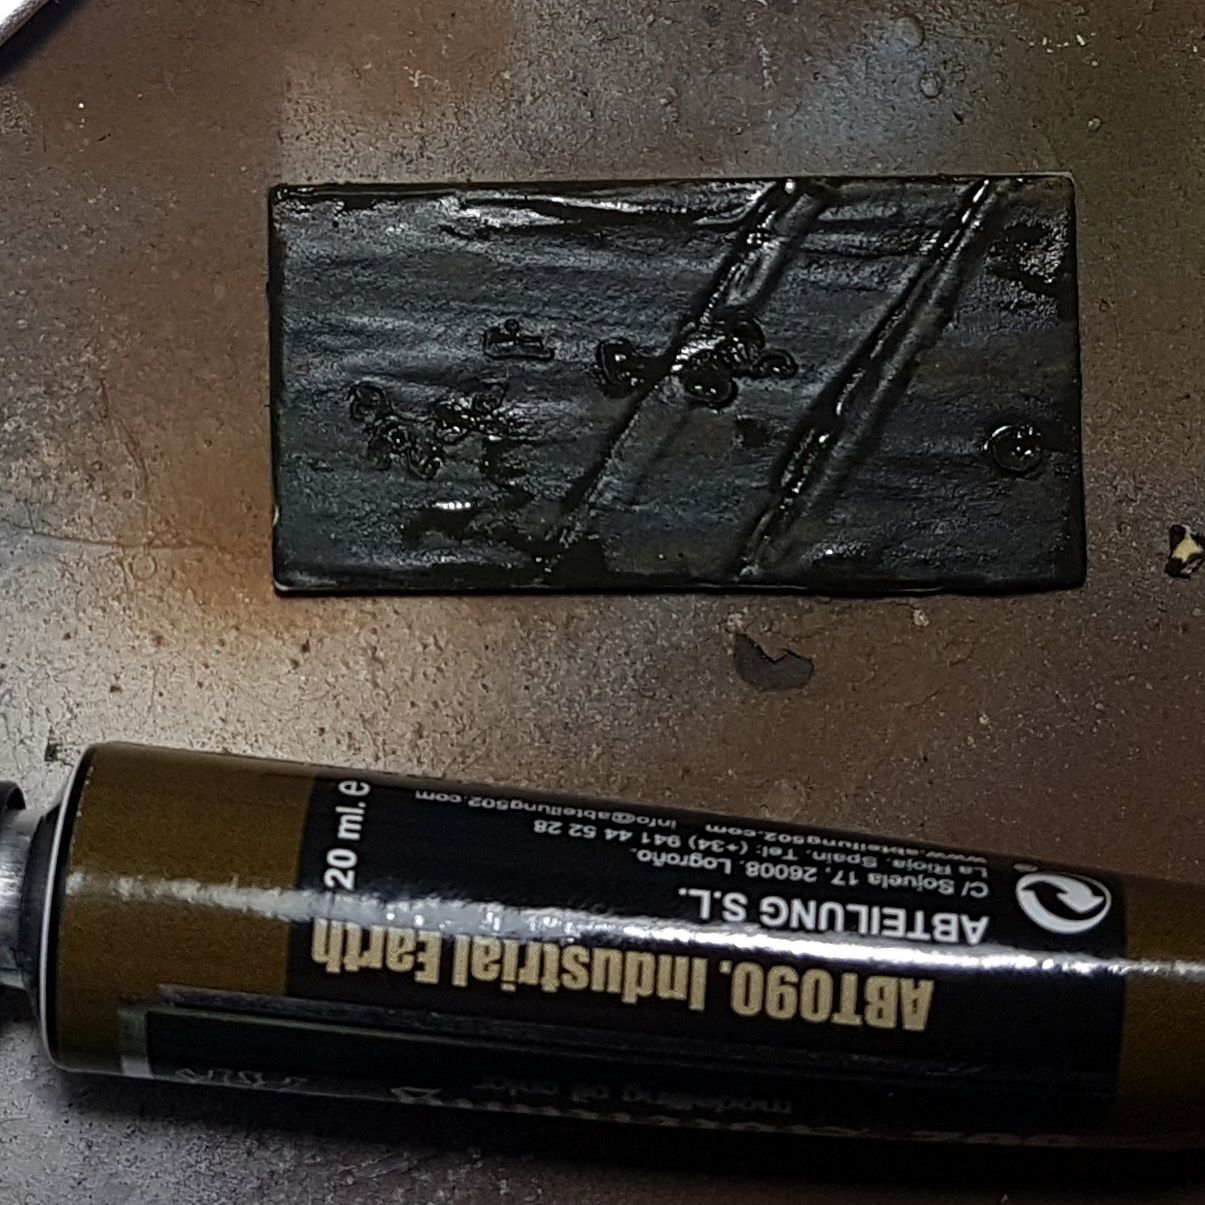
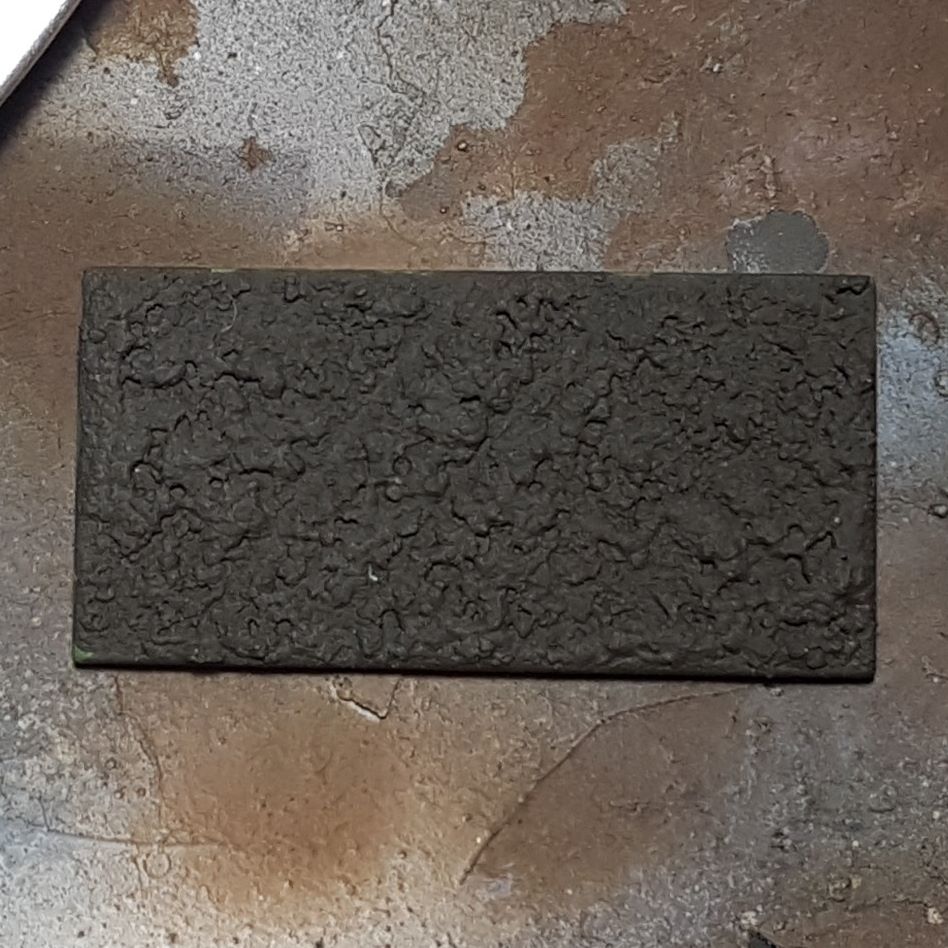
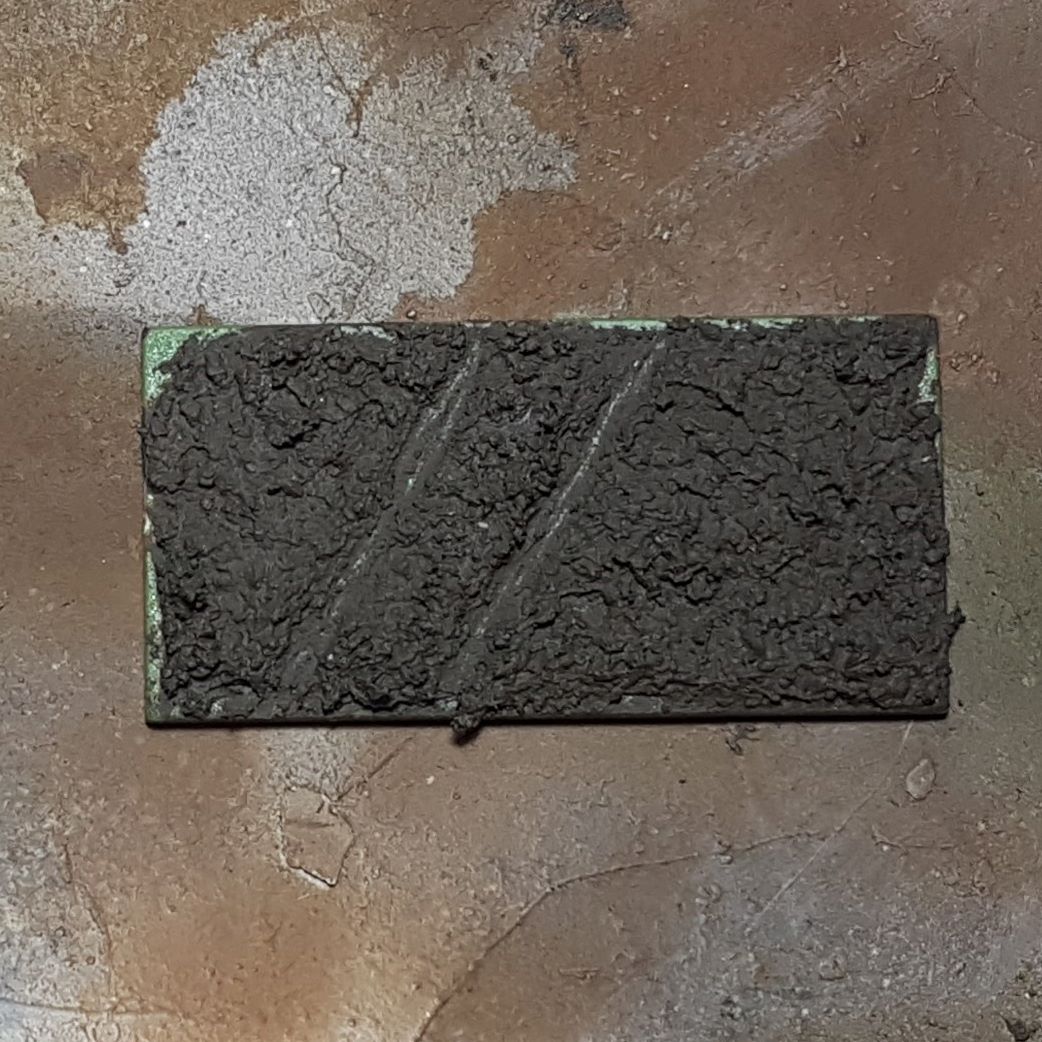
This is the first base I have done with the thinned out AK Interactive Diorama Terrains Muddy Ground (AK8017). I started with a heavy drybrush of Abteilung 502 Modelling Oil Color Sand Brown (ABT245) followed by a lighter drybrush of Abteilung 502 Modelling Oil Color Dust (ABT003). I then stippled in a wash made from Abteilung 502 Modelling Oil Color Industrial Earth (ABT090) and then did the same with a wash made from Abteilung 502 Modelling Oil Color Dark Mud (ABT130) so that they blend together.
Base 4
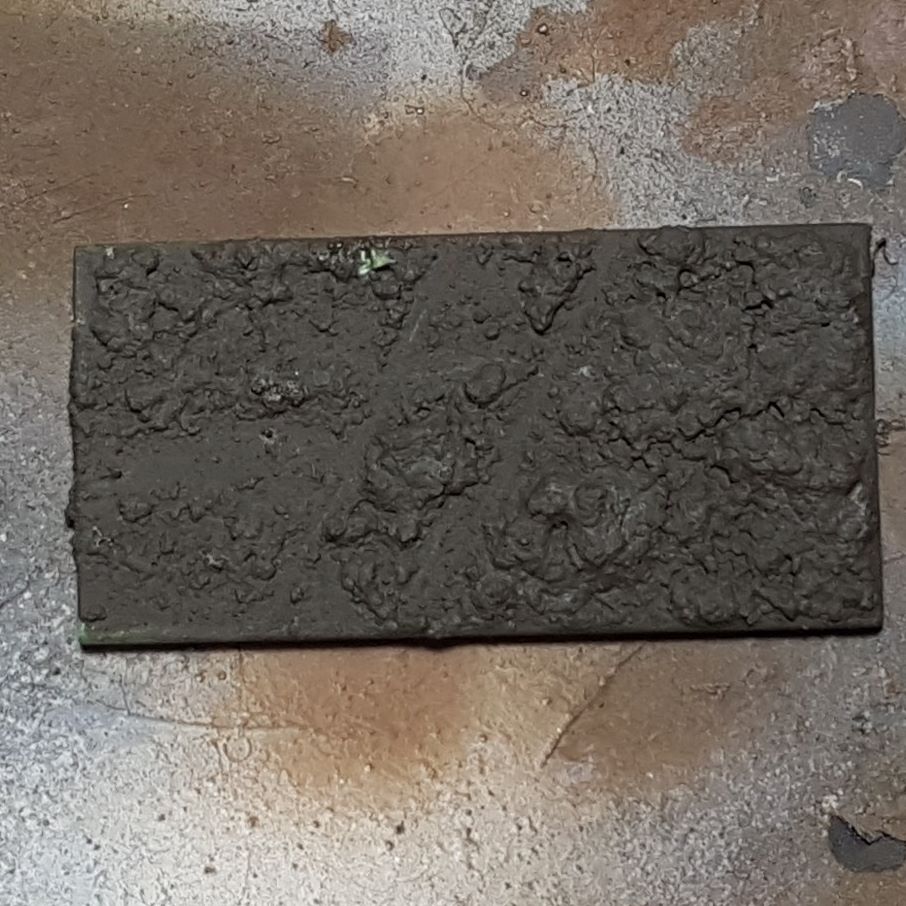
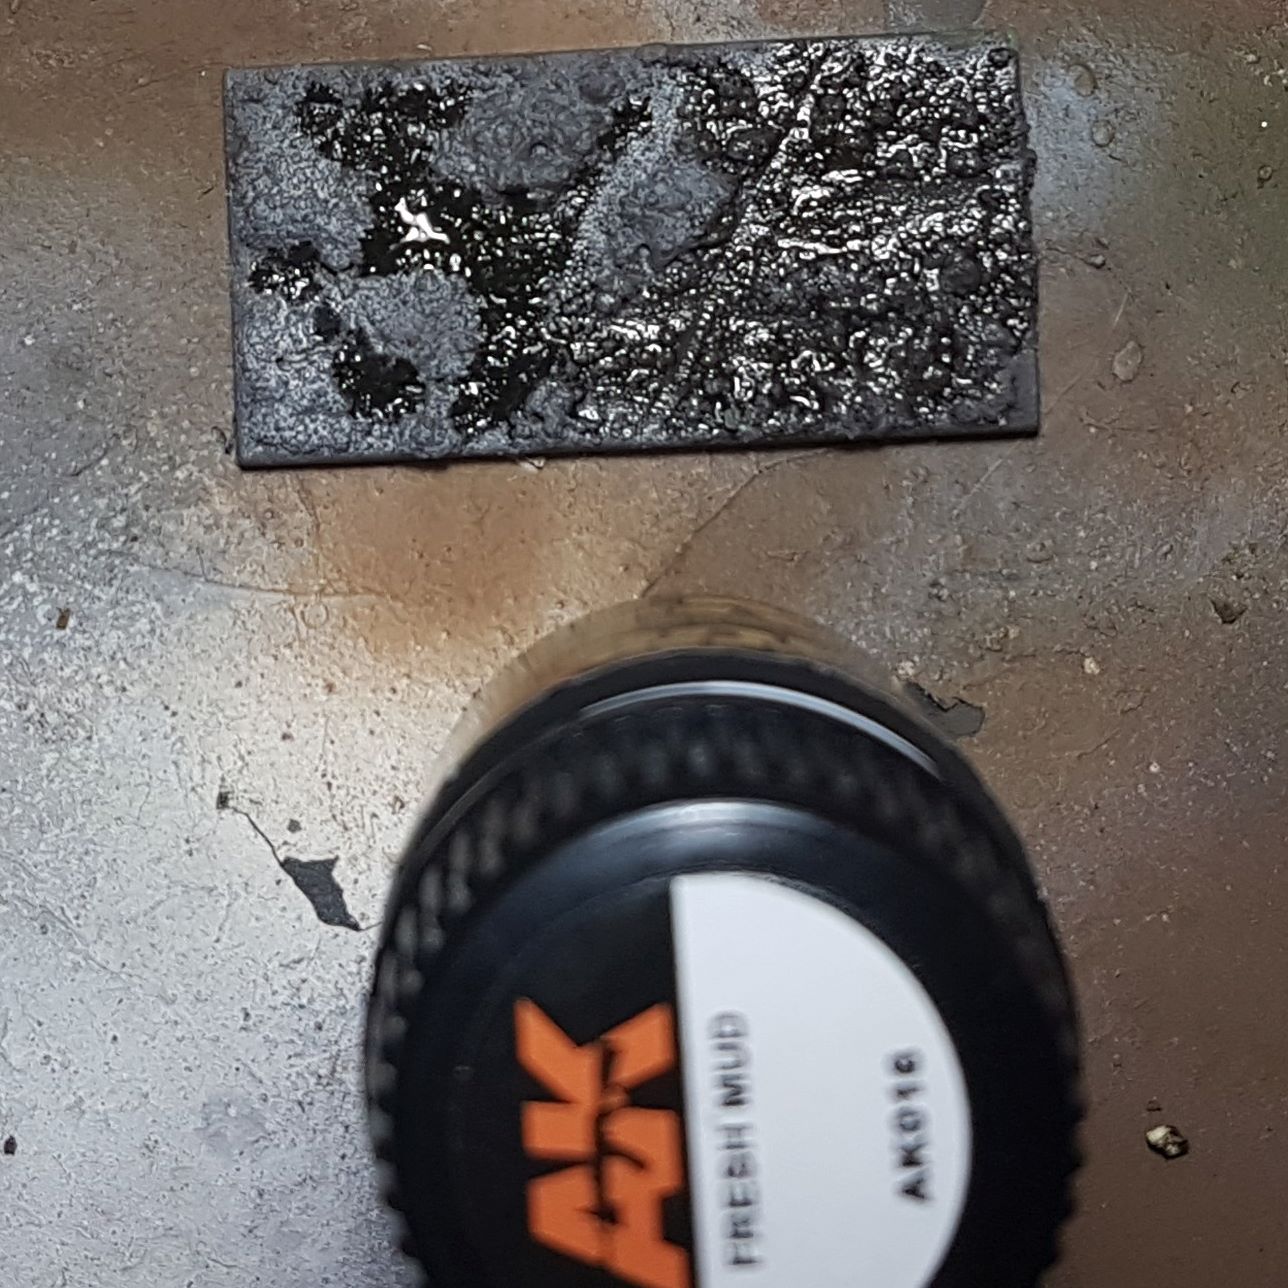
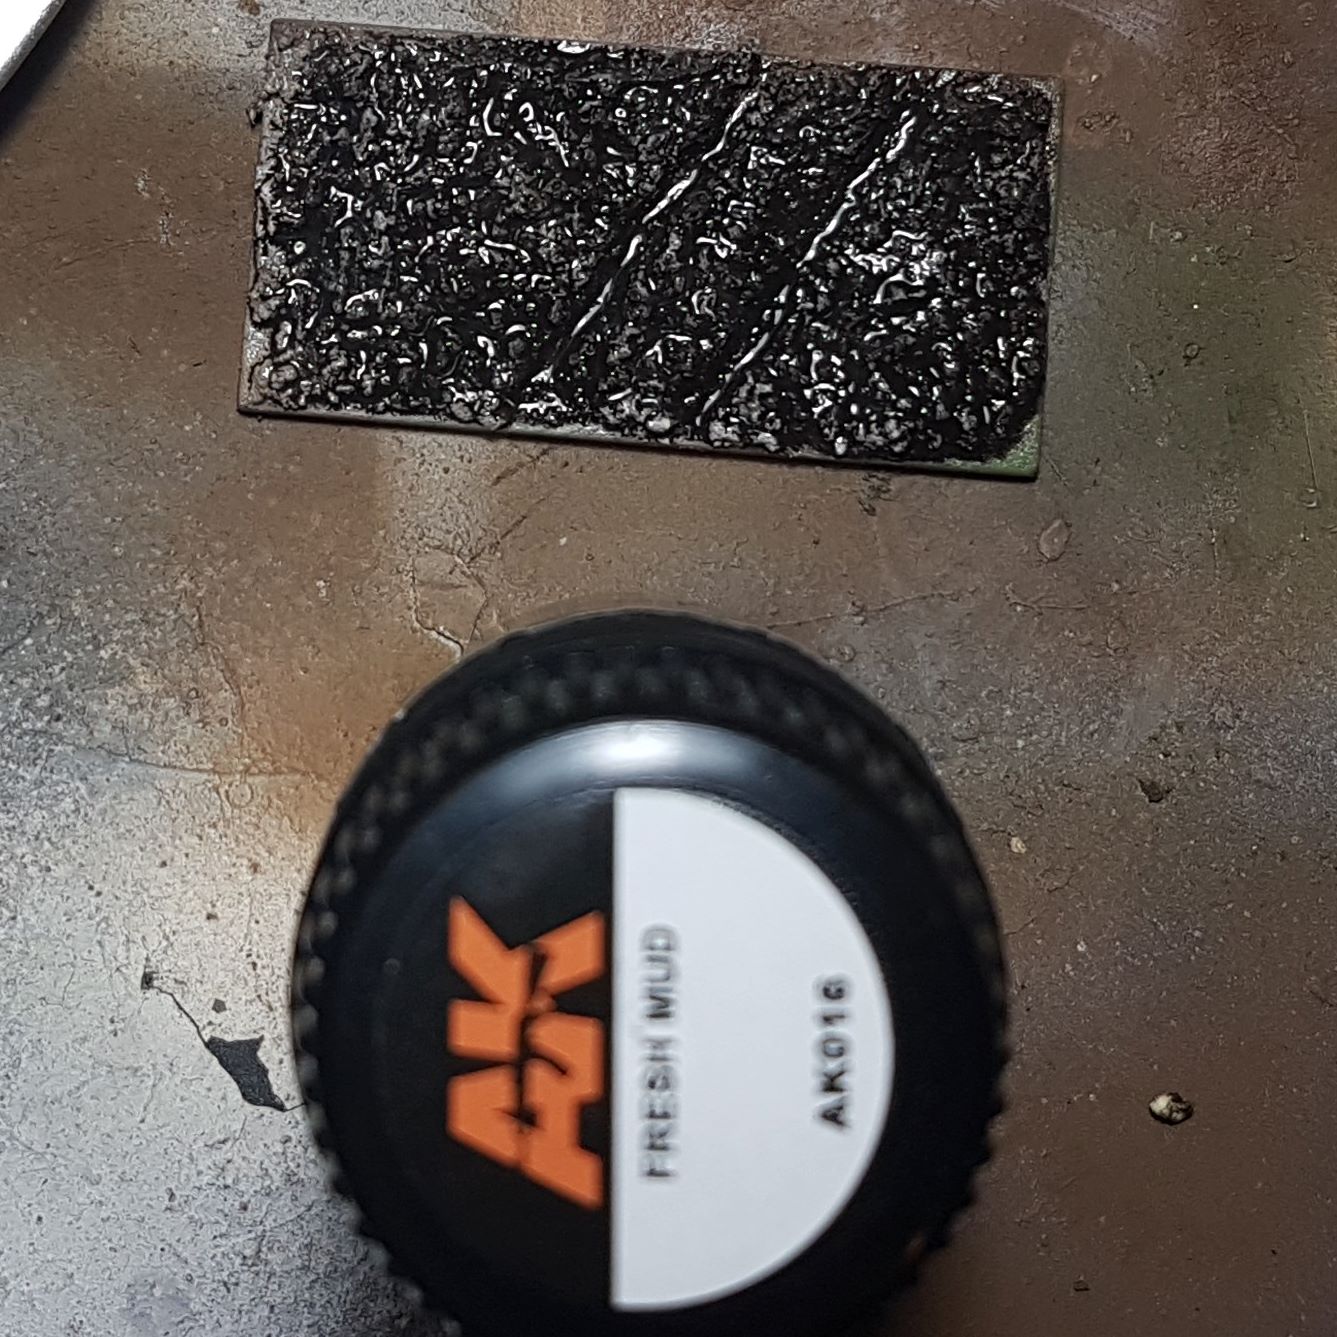
This the same kind of base as base 3, I started with just a drybrush of Abteilung 502 Modelling Oil Color Dust (ABT003) from which I forgot to take a picture. I then followed it up with on the left some pure AK Interactive Fresh Mud (AK016) and on the right some thinned out AK Interactive Fresh Mud (AK016).
Base 5
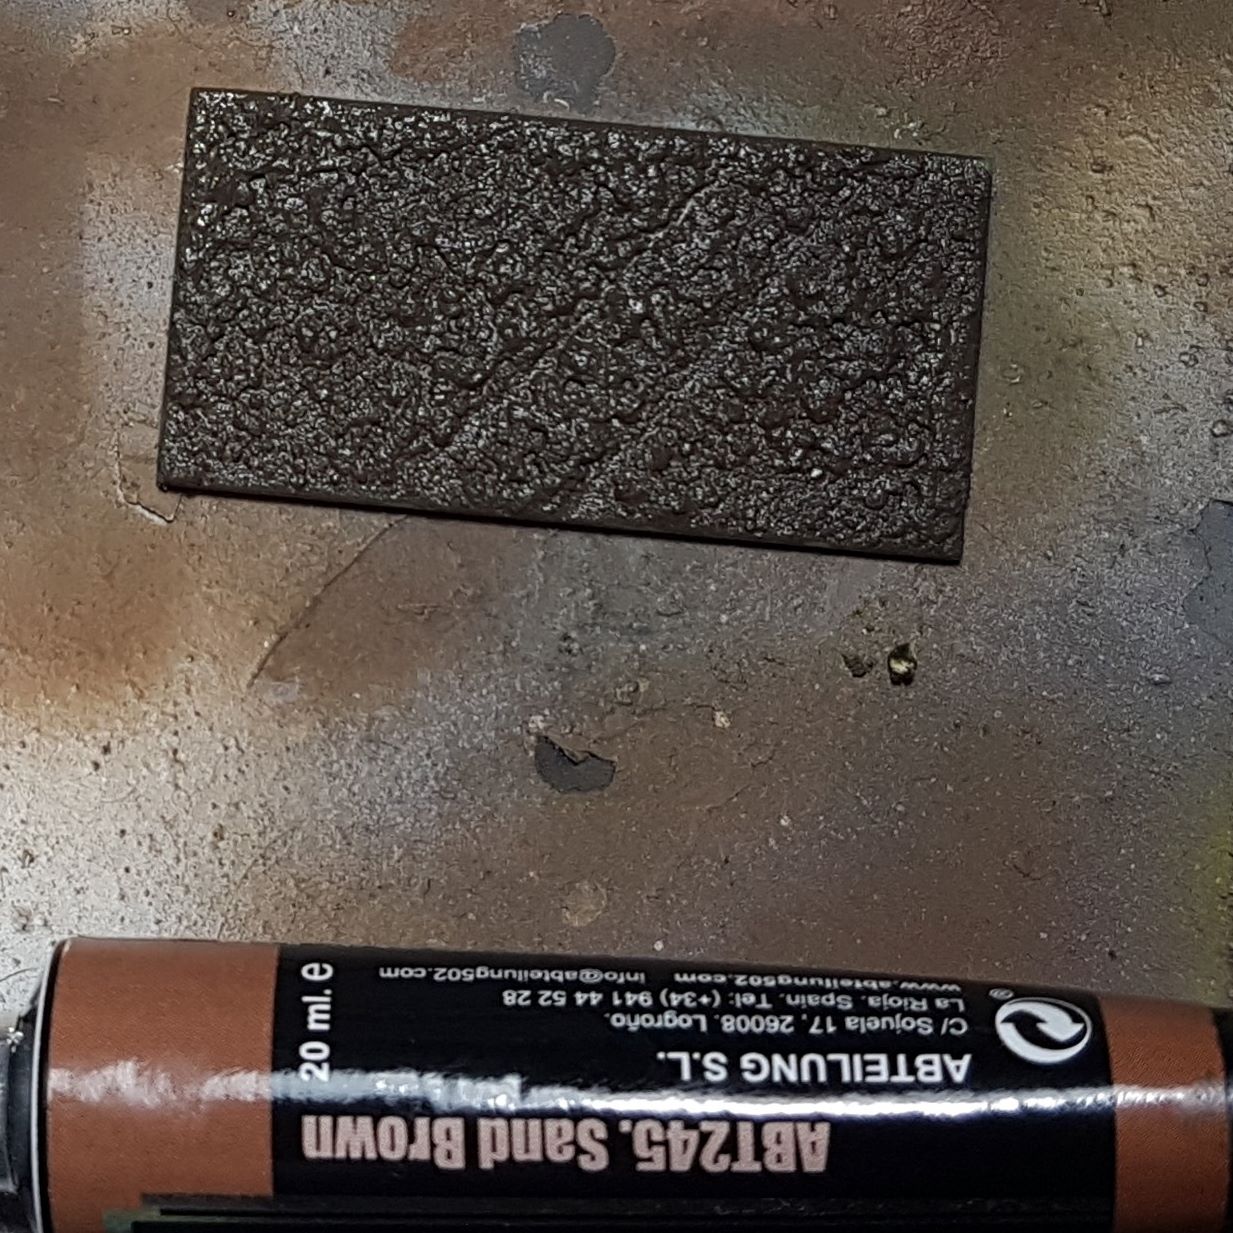
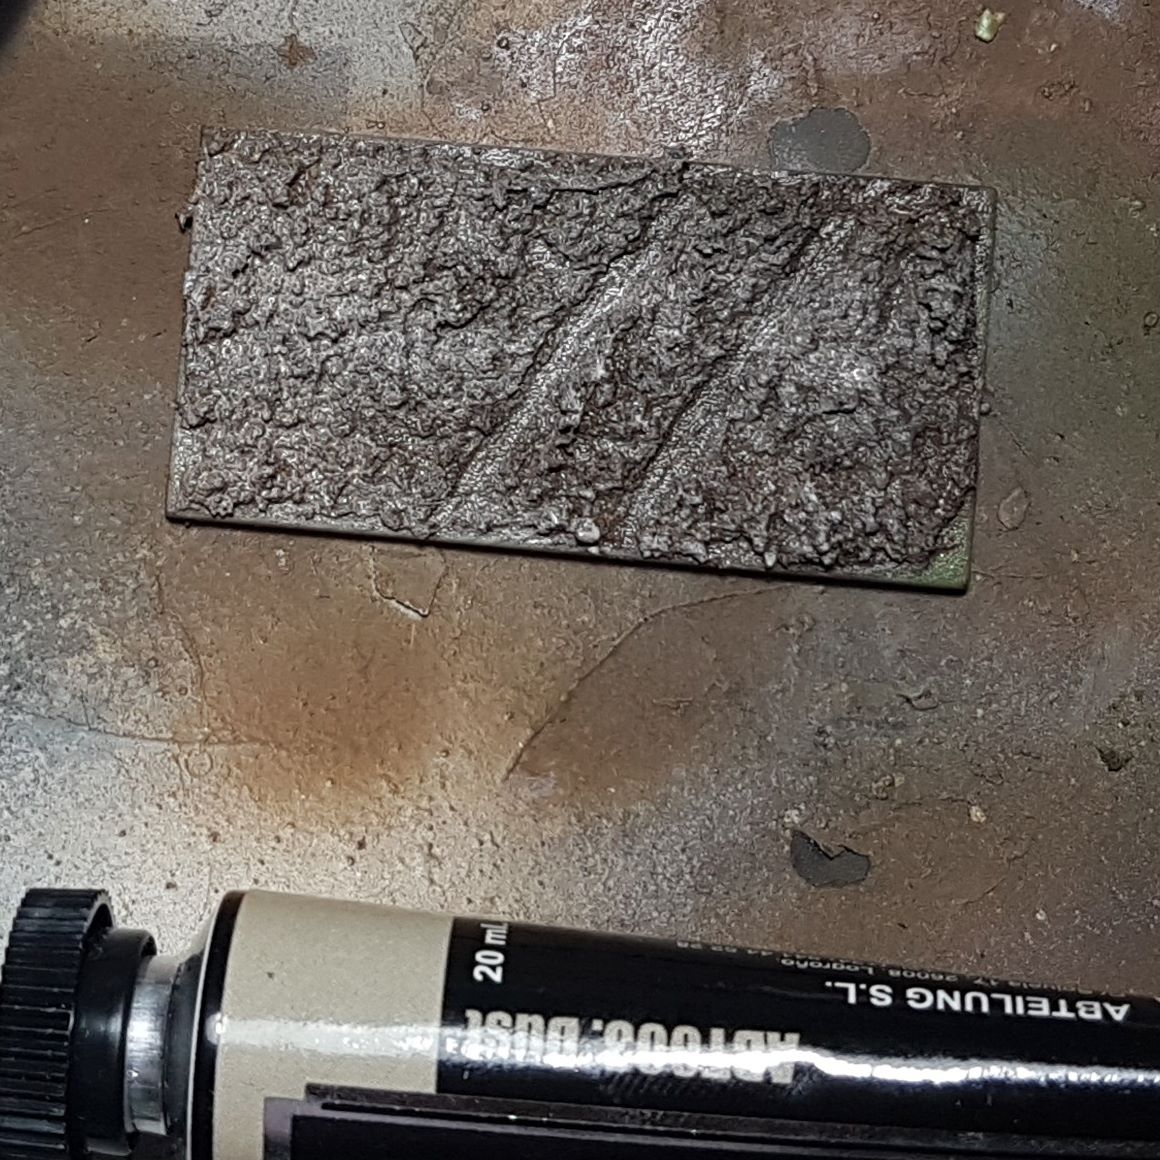
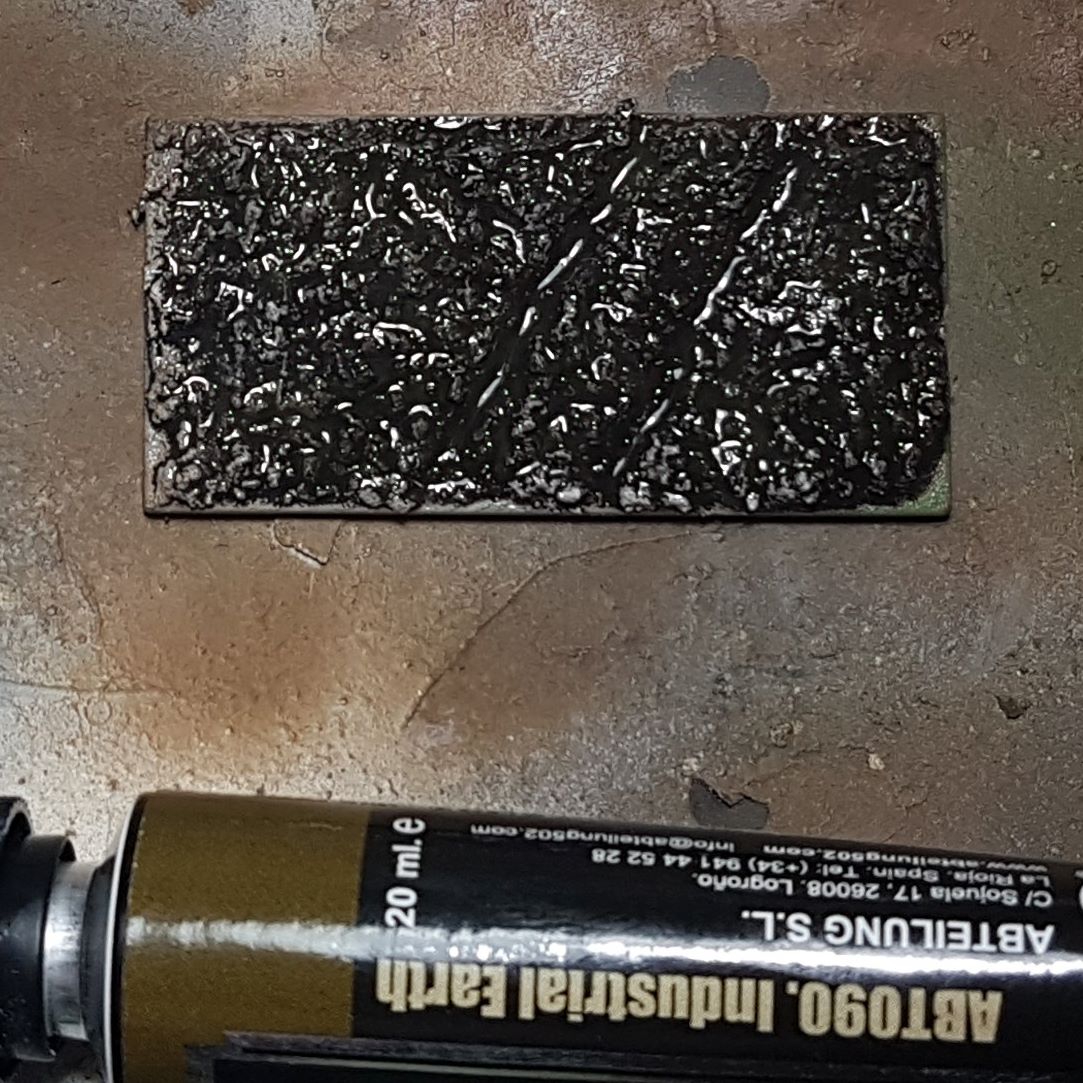
This is one of the bases with straight up AK Interactive Diorama Terrains Muddy Ground (AK8017) on it. I started with a heavy drybrush of Abteilung 502 Modelling Oil Color Sand Brown (ABT245) followed by a lighter drybrush of Abteilung 502 Modelling Oil Color Dust (ABT003). I then dabbed in some of the thinned AK Interactive Fresh Mud (AK016) followed by some of the Abteilung 502 Modelling Oil Color Industrial Earth (ABT090) wash.
I still have one base left over, but most likely going to have to prep some more. But I feel like I am getting somewhere with this, just going to have to let it all dry and see how it turns out.
The reason the paint tubes are in the picture was actually for to use as reference to actually write this piece and I honestly couldn’t be arsed to flip them all upside down.
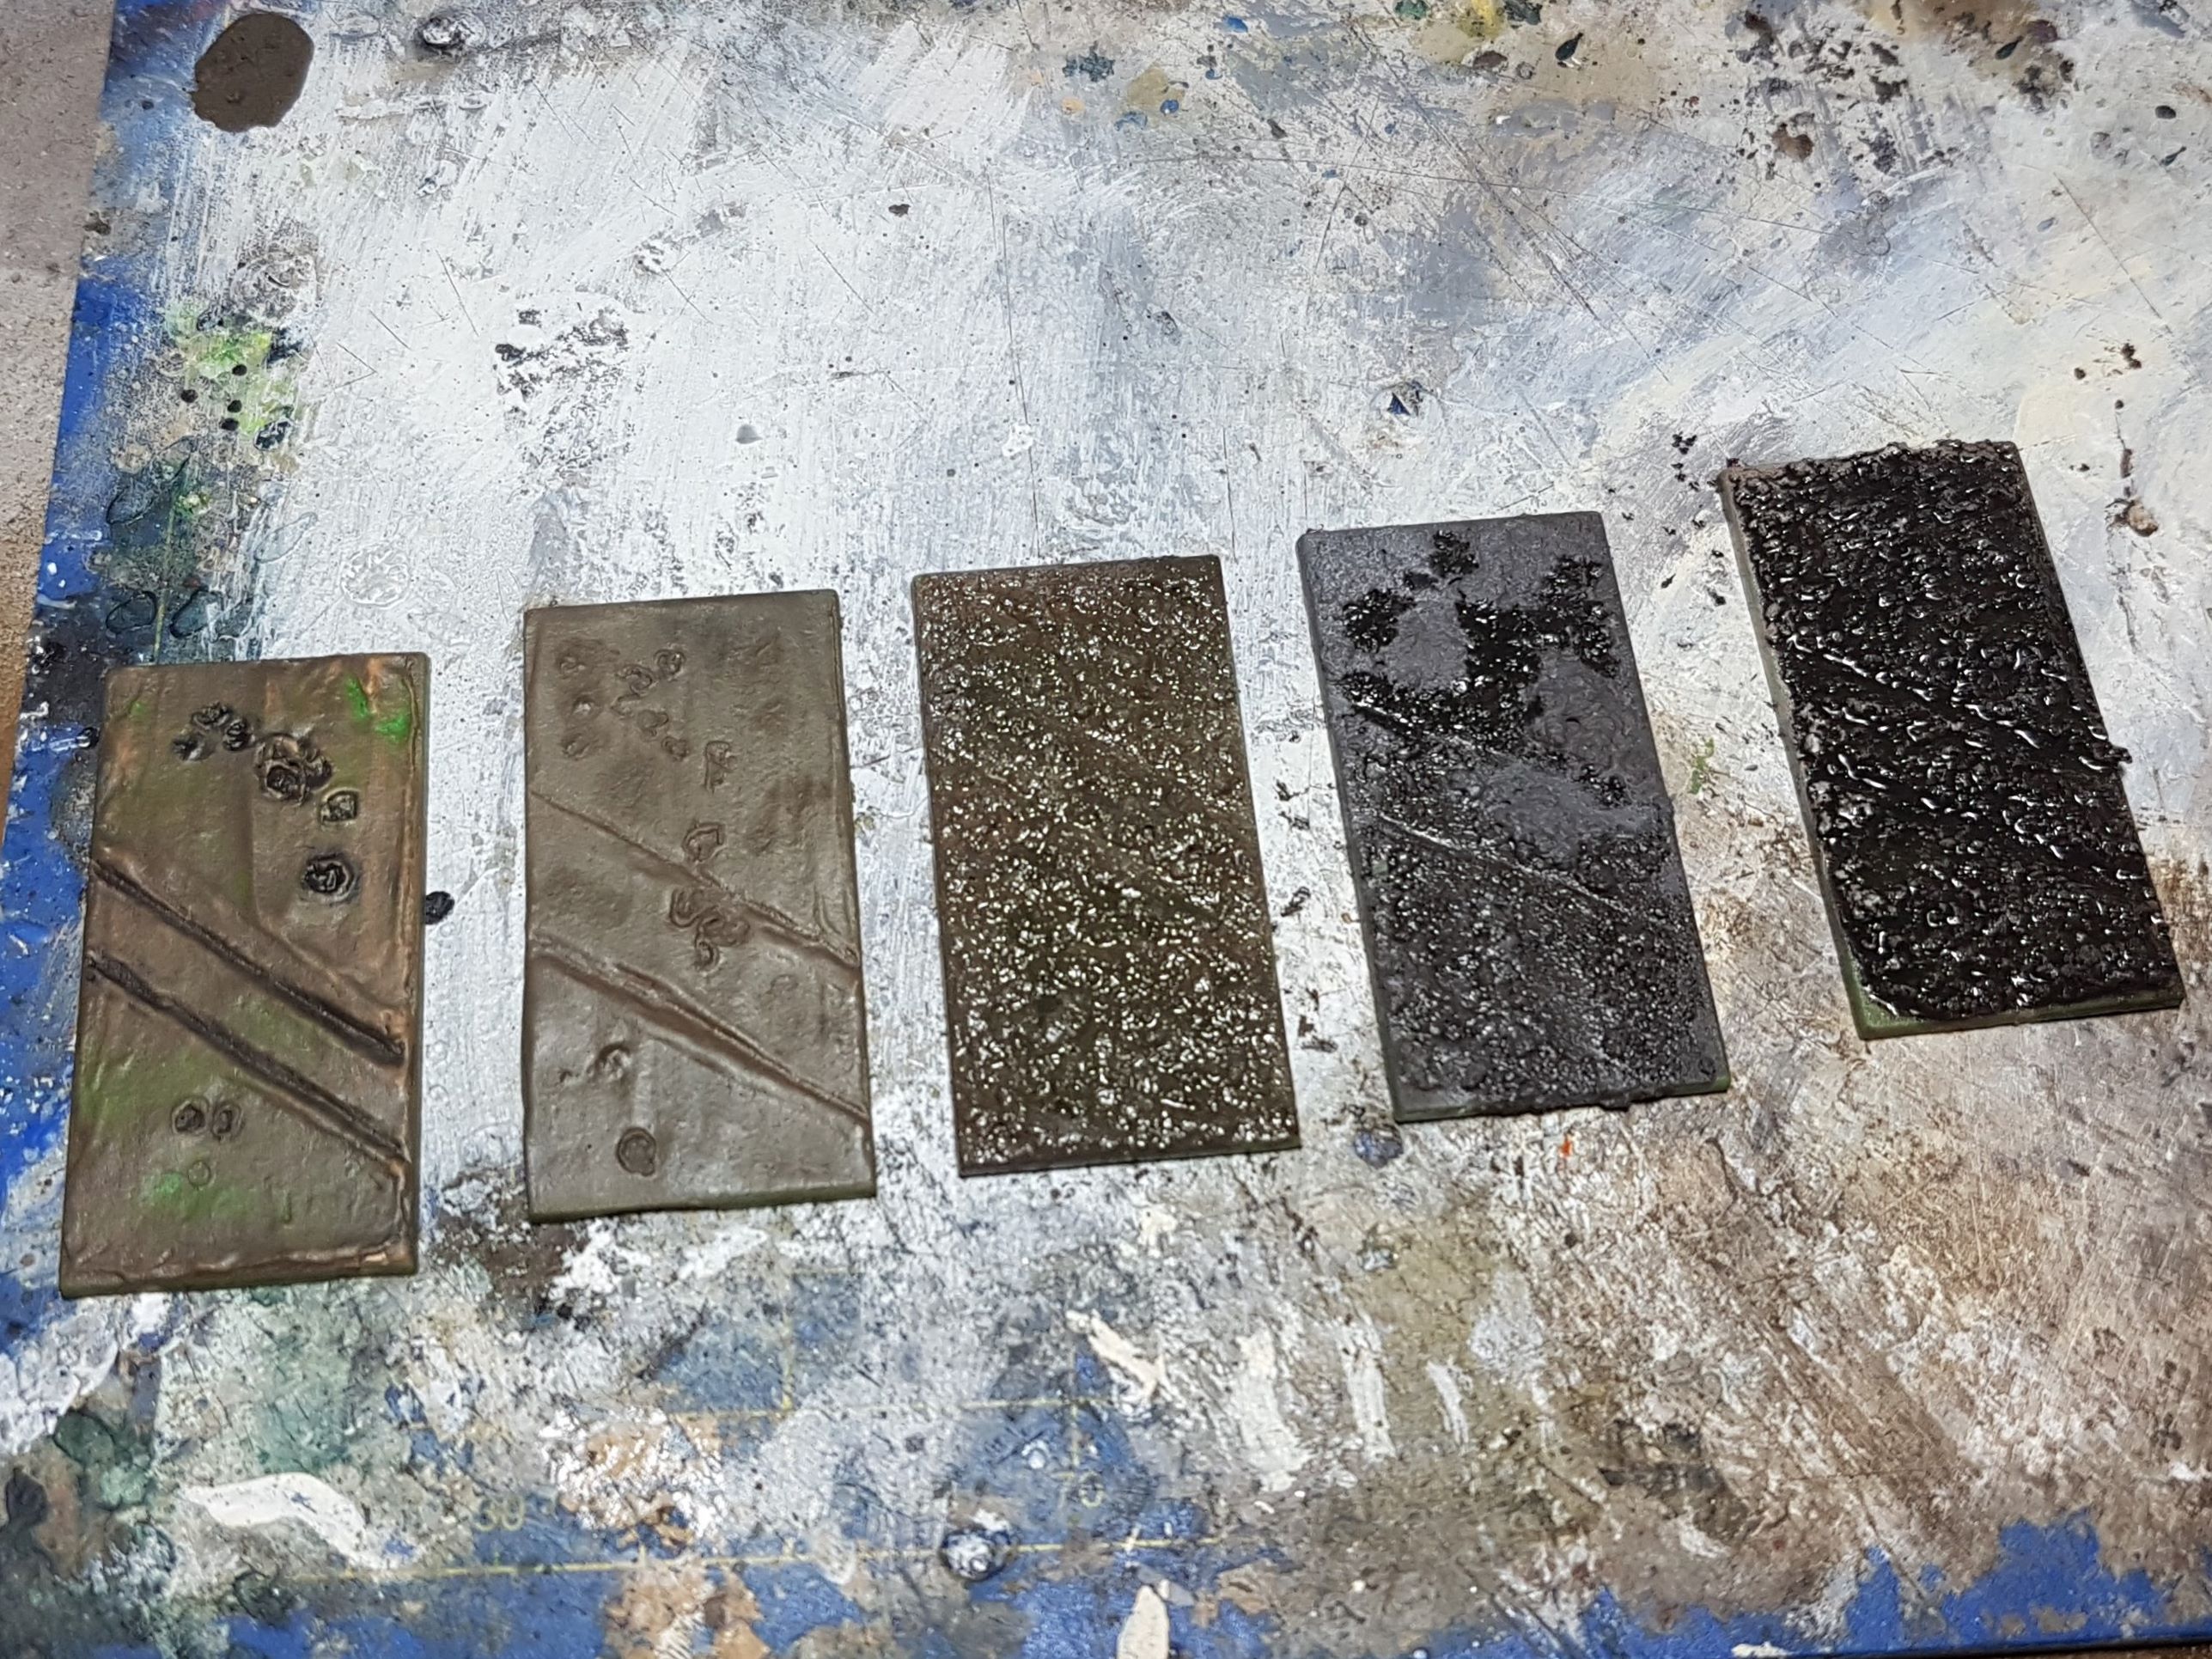 1-5 Left-Right
More Changes.
As I was priming and basecoating the 8 new Cossacks I was really struggling with thinning the brown paint for my airbrush. This made me think to look for an airbrush equivalent and that led me to do too much research in the paint scheme for both the Soviets and the Germans. I have overhauled my paint scheme to match what I want and history better. For this however, I am going to need new paints. So I am going to have to wait until next month, most likely the second week until I can do more paint work. So this project may slow down somewhat over the coming weeks, but there are still things that need to be done. So over the coming weeks I am aiming to get the following things done:
- Stripping the already painted figures, I will do a little guide on this as well.
- Figure out what I want to do with the bases exactly and potentially some historical research that comes with that.
- Build 3 Panzer III J tanks and 1 L command tank. I will also make a little guide on how I magnetize the turrets and one for making a command tank.
- And there are always more Cossack hats to sculpt.
As I have been trying to at least post an update to this project every day, I will keep on trying, but it will become harder as I run out of stuff I can do. We’ll see if I can keep it up.
Decisions decisions...
I haven’t been able to do any physical work on my project today due to tremors in my hands, I have however been to the doctor and did a lot of mental work. So here is a wall of text.
There are so many things that interest me in WWII, so to not be a hobby butterfly and focus on just one thing I have for now decided to stay in 1942 with this project. So that means that all German vehicles will be German Grey with the odd camouflage conversion done by the soldiers. The Soviet tanks were going to be some variety of green depending on which factory made which vehicle, also the odd additional camouflage may appear here.
Changes to the Armies.
The 9th Guards Cavalry Division stays, because that is really what I want to do. However the 20. Panzergrenadier Division did not exist back than, at least not under that name and since I am doing all the German vehicles in German Grey anyway I might just as well pick another division to represent the Germans in this phase of my Flames of War life. Now history time….
Wikipedia, the most reliable source of information (sarcasm), tells me that the 9th Guards Cavalry Division fought near Mozdok, Stavropol, Melitopol, Odessa, Debrecen, Budapest, and Prague. Some of these places you may recognize from a current eastern front conflict. Mozdok being the most interesting part for me as this was in 1942. “By September 1942, it had been transferred to the district of Gudermes and until January 1943 made bold raids on the enemy’s rear north of the city of Mozdok. During the liberation of the North Caucasus, he conducted offensive battles in the general direction of Stavropol, Rostov-on-Don.” (translated from Russian Wikipedia: https://ru.wikipedia.org/wiki/9-%D1%8F_%D0%B3%D0%B2%D0%B0%D1%80%D0%B4%D0%B5%D0%B9%D1%81%D0%BA%D0%B0%D1%8F_%D0%BA%D0%B0%D0%B7%D0%B0%D1%87%D1%8C%D1%8F_%D0%BA%D0%B0%D0%B2%D0%B0%D0%BB%D0%B5%D1%80%D0%B8%D0%B9%D1%81%D0%BA%D0%B0%D1%8F_%D0%B4%D0%B8%D0%B2%D0%B8%D0%B7%D0%B8%D1%8F)
So according to the following sources I am going to have a look at the 1st Panzer Army for my Germans.
 Source: Flames of War Eastern Front Mid-War Forces pg.17
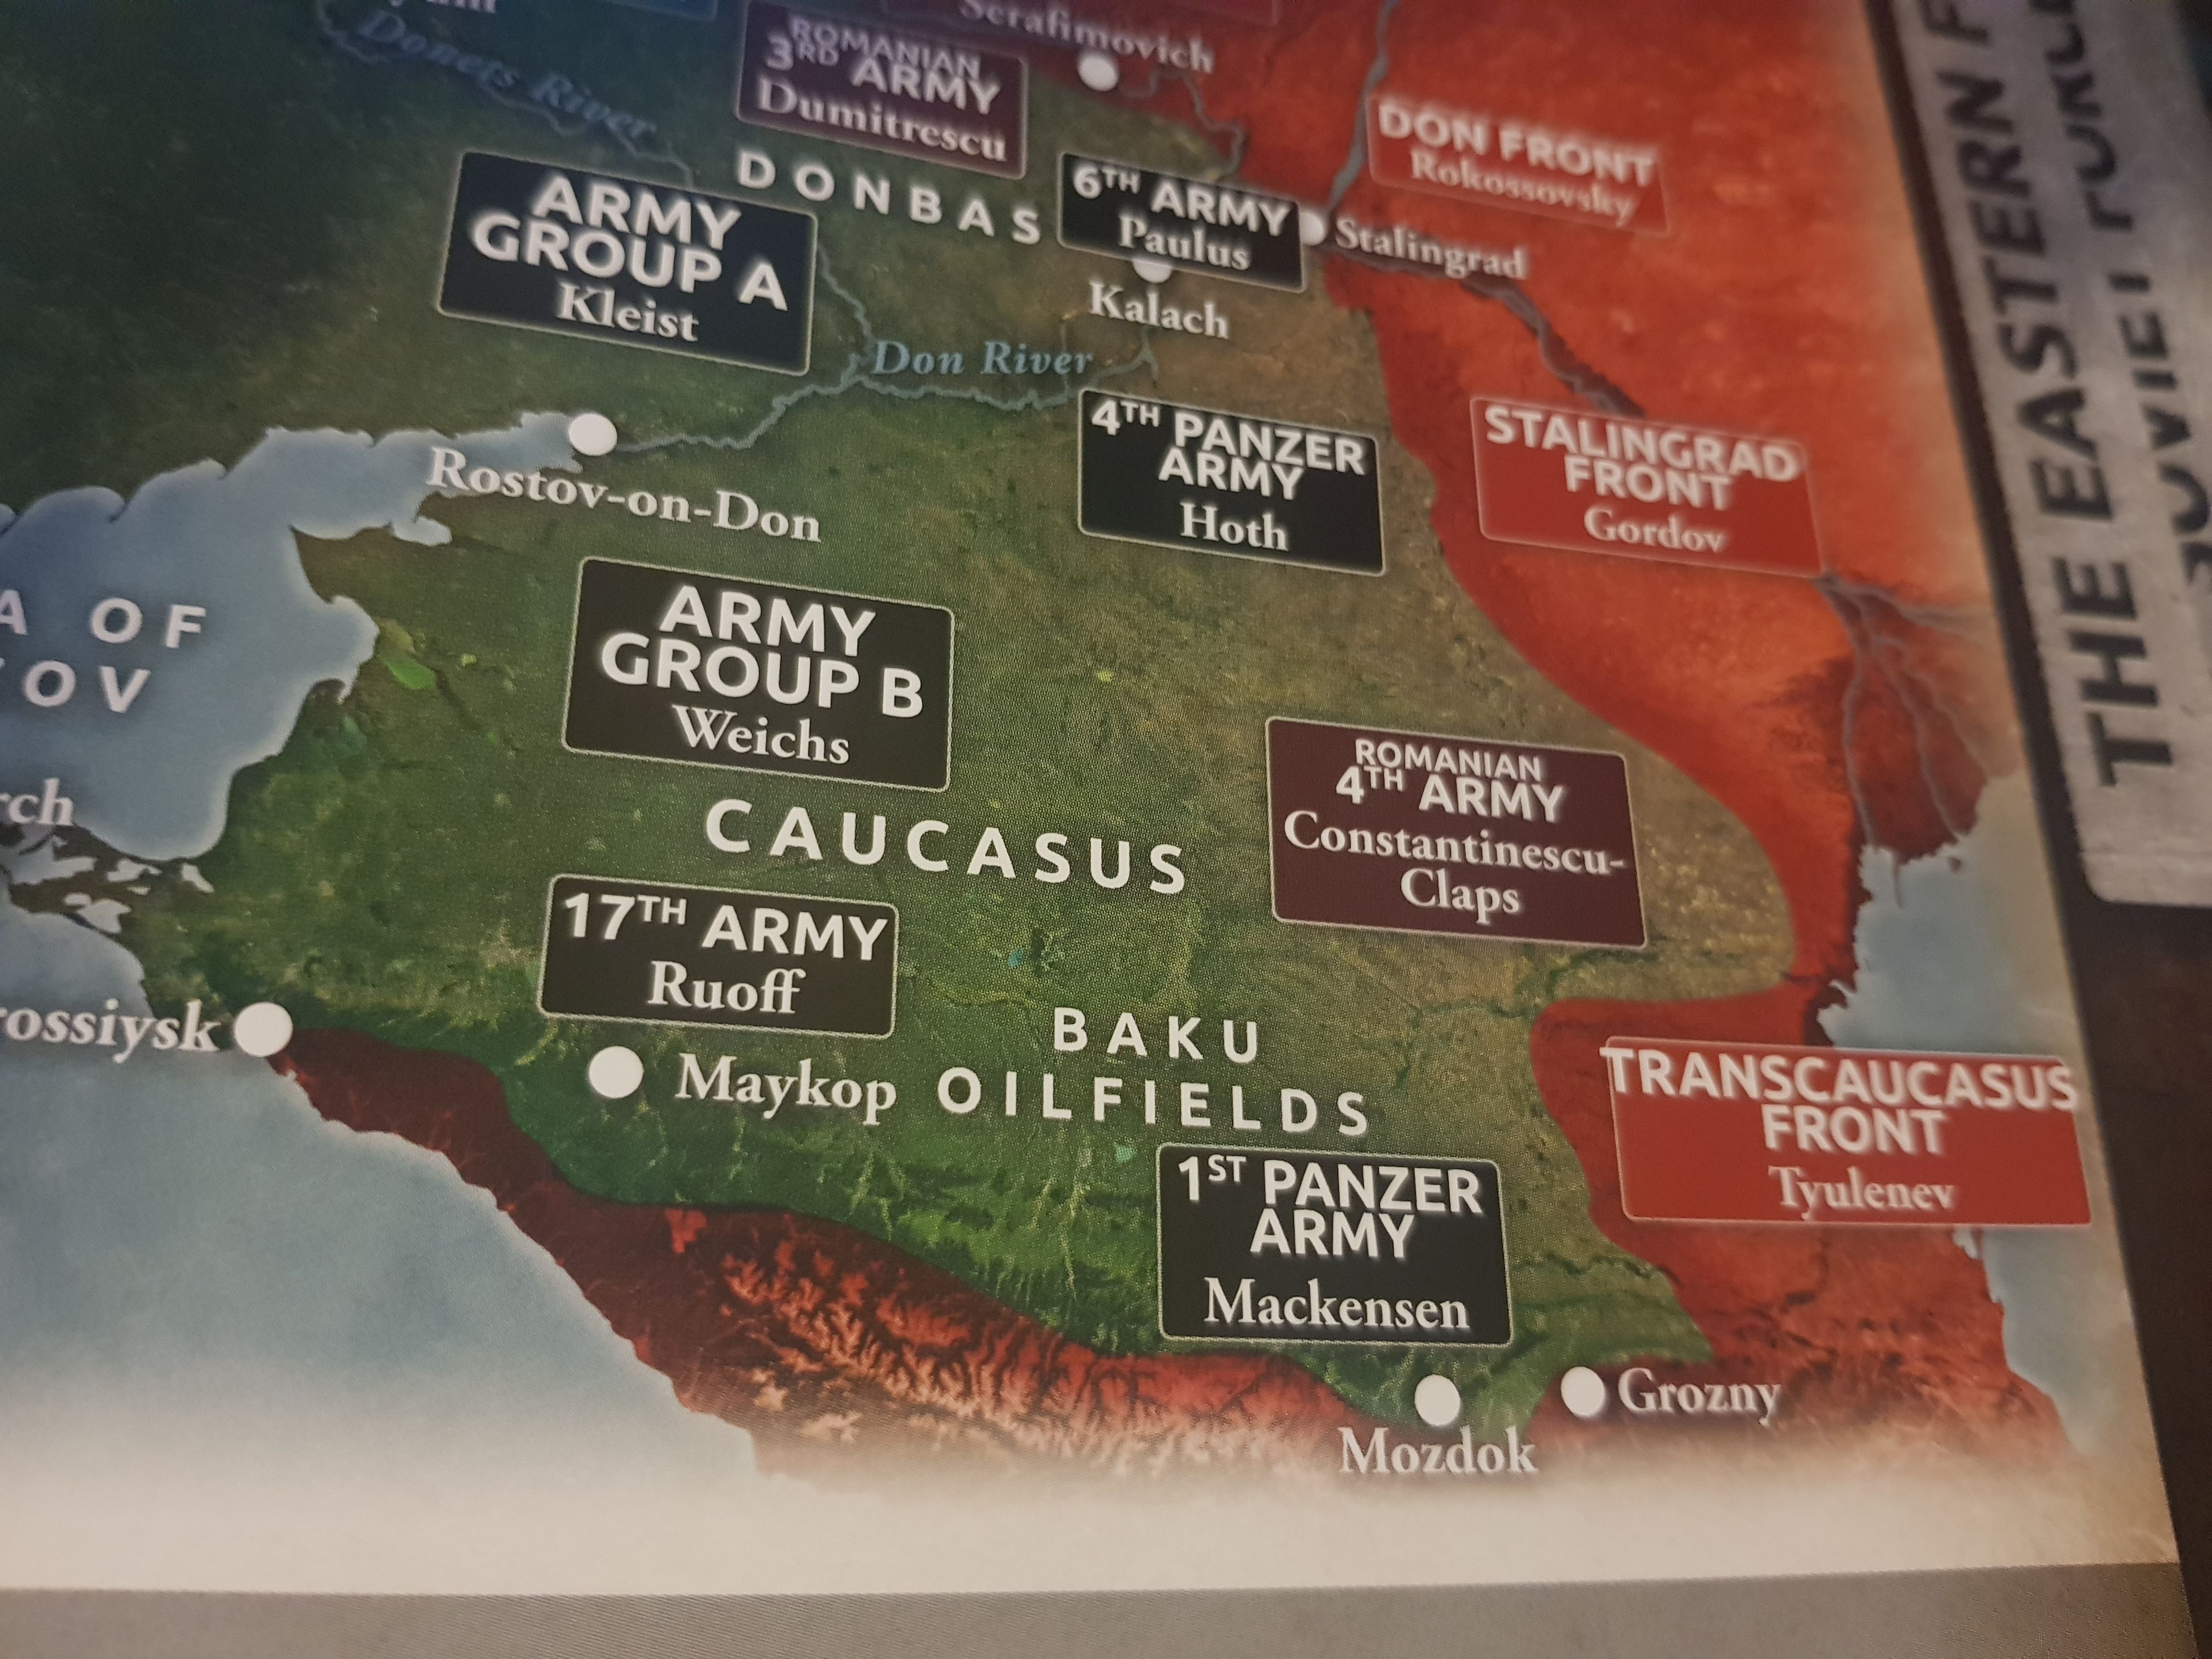 Source: Flames of War Eastern Front Mid-War Forces pg.247
Now this is an interesting looking list.
Order of battle (15 Nov 1942)
At the disposal of the 1. Panzerarmee
- General-Kommando z.b.V.
- Befehls-Stab Steinbauer
- 50. Infanterie-Division (part)
III. Panzerkorps
- Romanian 2nd Mountain Division
- 23. Panzer-Division + SS-Division “Wiking” (part)
- 13. Panzer-Division + verstärktes Gebirgsjäger-Regiment 99
LII. Armeekorps
- SS-Division “Wiking” (most) + 50. Infanterie-Division (part)
- 111. Infanterie-Division
- 370. Infanterie-Division
XXXX. Panzerkorps
- 3. Panzer-Division
(Source: https://www.axishistory.com/axis-nations/148-germany-heer/heer-armeen/2655-1-panzerarmee)
So, SS-Division “Wiking”, especially; Finnisches Freiwilligen-Bataillon der Waffen-SS. “The Finnisches Freiwilligen-Bataillon der Waffen-SS was formed in 1941 as SS Freiwilligen-Batallion Nordost and were made up of Finnish volunteers who had signed on the fight the Soviet Union (and no other countries) for two years, who also refused to take an oath of loyalty to Hitler and they were commanded primarily by Finnish officers, though there original demand to only be led by Finnish officers where never completly met.
It was sent from the training grounds at Gross-Born to the front at the Mius River in January 1942 were it was attached to the SS Wiking division (mot). It fought in the offensive battles along the Mius River and later in the Caucasus.
In May 1943 it was transferred away from the front, as the two years was at an end, and it was disbanded in July 1943.”
That sounds like a really interesting battalion to me, but I am going to struggle to really make people be able to tell that it is this battalion and this battalion only had a handful of companies of infantry and I also want do more than just infantry, so I using the entire SS-Division “Wiking” for my Germans. This should give me an interesting amount of units to choose from:
Order of battle
- SS-Panzergrenadier Regiment 9 Germania
- SS-Panzergrenadier Regiment 10 Westland
- SS-Panzer Regiment 5
- SS-Panzer Artillerie Regiment 5
- Finnisches Freiwilligen-Bataillon der Waffen-SS (until 1943)
- Estnisches SS-Freiwilligen-Panzer-Grenadier-Bataillon Narwa (1943-1944)
- SS-Panzerjäger-Abteilung 5
- SS-Sturmgeschütz-Abteilung 5
- SS-Sturmgeschütz-Batterie 5
- SS-Flak-Abteilung 5
- SS-Werfer-Abteilung 5
- SS-Panzer-Nachrichten-Abteilung 5
- SS-Panzer-Aufklärungs-Abteilung 5
- SS-Panzer-Pionier-Bataillon 5
- SS-Dina 5
- SS-Instandsetzungs-Abteilung 5
- SS-Wirtschafts-Bataillon 5
- SS-Sanitäts-Abteilung 5
- SS-Feldlazarett 5
- SS-Kriegsberichter-Zug 5
- SS-Feldgendarmerie-Trupp 5
- SS-Feldersatz-Bataillon 5
And we all know how pissed off some people can get when you make something historically accurate to represent a part of history that is controversial or sensitive.
Now most of the conflict around Mozdok took place around November and December of 1942, so am I going back to doing winter themes….. I am not sure yet.
On a side note, I was not expecting this from ChatGPT:
“When working on a historical project regarding the Waffen SS, there are several key considerations to keep in mind to ensure the project remains respectful, accurate, and ethically responsible. Here are some things you should avoid:
- Glorification: Avoid glorifying or romanticizing the Waffen SS or any aspects of their actions. The Waffen SS was a military organization associated with the Nazi regime, and its involvement in atrocities and war crimes cannot be downplayed or glorified.
- Bias and Propaganda: Ensure that your project remains objective and free from any biased perspectives or propaganda. Present the historical facts without distorting the truth to fit a particular narrative or agenda.
- Misrepresentation: Be diligent in presenting accurate information. Misrepresenting events, dates, or individuals can lead to misinformation and misinterpretation of history.
- Holocaust Denial: Under no circumstances should you engage in Holocaust denial or downplay the extent of the Holocaust. The Holocaust is an extensively documented historical event, and denying its occurrence is both factually incorrect and deeply disrespectful to the millions of victims.
- Offensive Imagery: Avoid using any offensive or inappropriate imagery that could be hurtful to survivors, their families, or those directly affected by the events of the past.
- Hate Speech: Refrain from using hate speech, discriminatory language, or promoting any form of hatred, racism, or discrimination related to the Waffen SS or any other historical subject.
- Revisionism: Avoid historical revisionism, which involves distorting historical facts to portray a more favorable or sympathetic image of the Waffen SS. Stick to well-documented historical records and reputable sources.
- Simplification: History is complex, and simplifying events or drawing broad conclusions without proper context can lead to a distorted understanding of the past. Present nuanced and multi-faceted perspectives.
- Lack of Context: Provide sufficient historical context to help readers understand the events, social, and political circumstances surrounding the Waffen SS, and avoid presenting isolated facts without their broader historical background.
- Insensitivity: Be mindful of the potential emotional impact of your work. The subject matter can be deeply sensitive to many people, so approach it with empathy and respect.
By avoiding these pitfalls and approaching your project with a responsible and respectful mindset, you can contribute to a better understanding of history while being considerate of those who may be affected by it.”
So I shall try not to tick any of these boxes, I think that should be doable mostly. Point 5 might be a bit difficult.
I Have Gone Mad
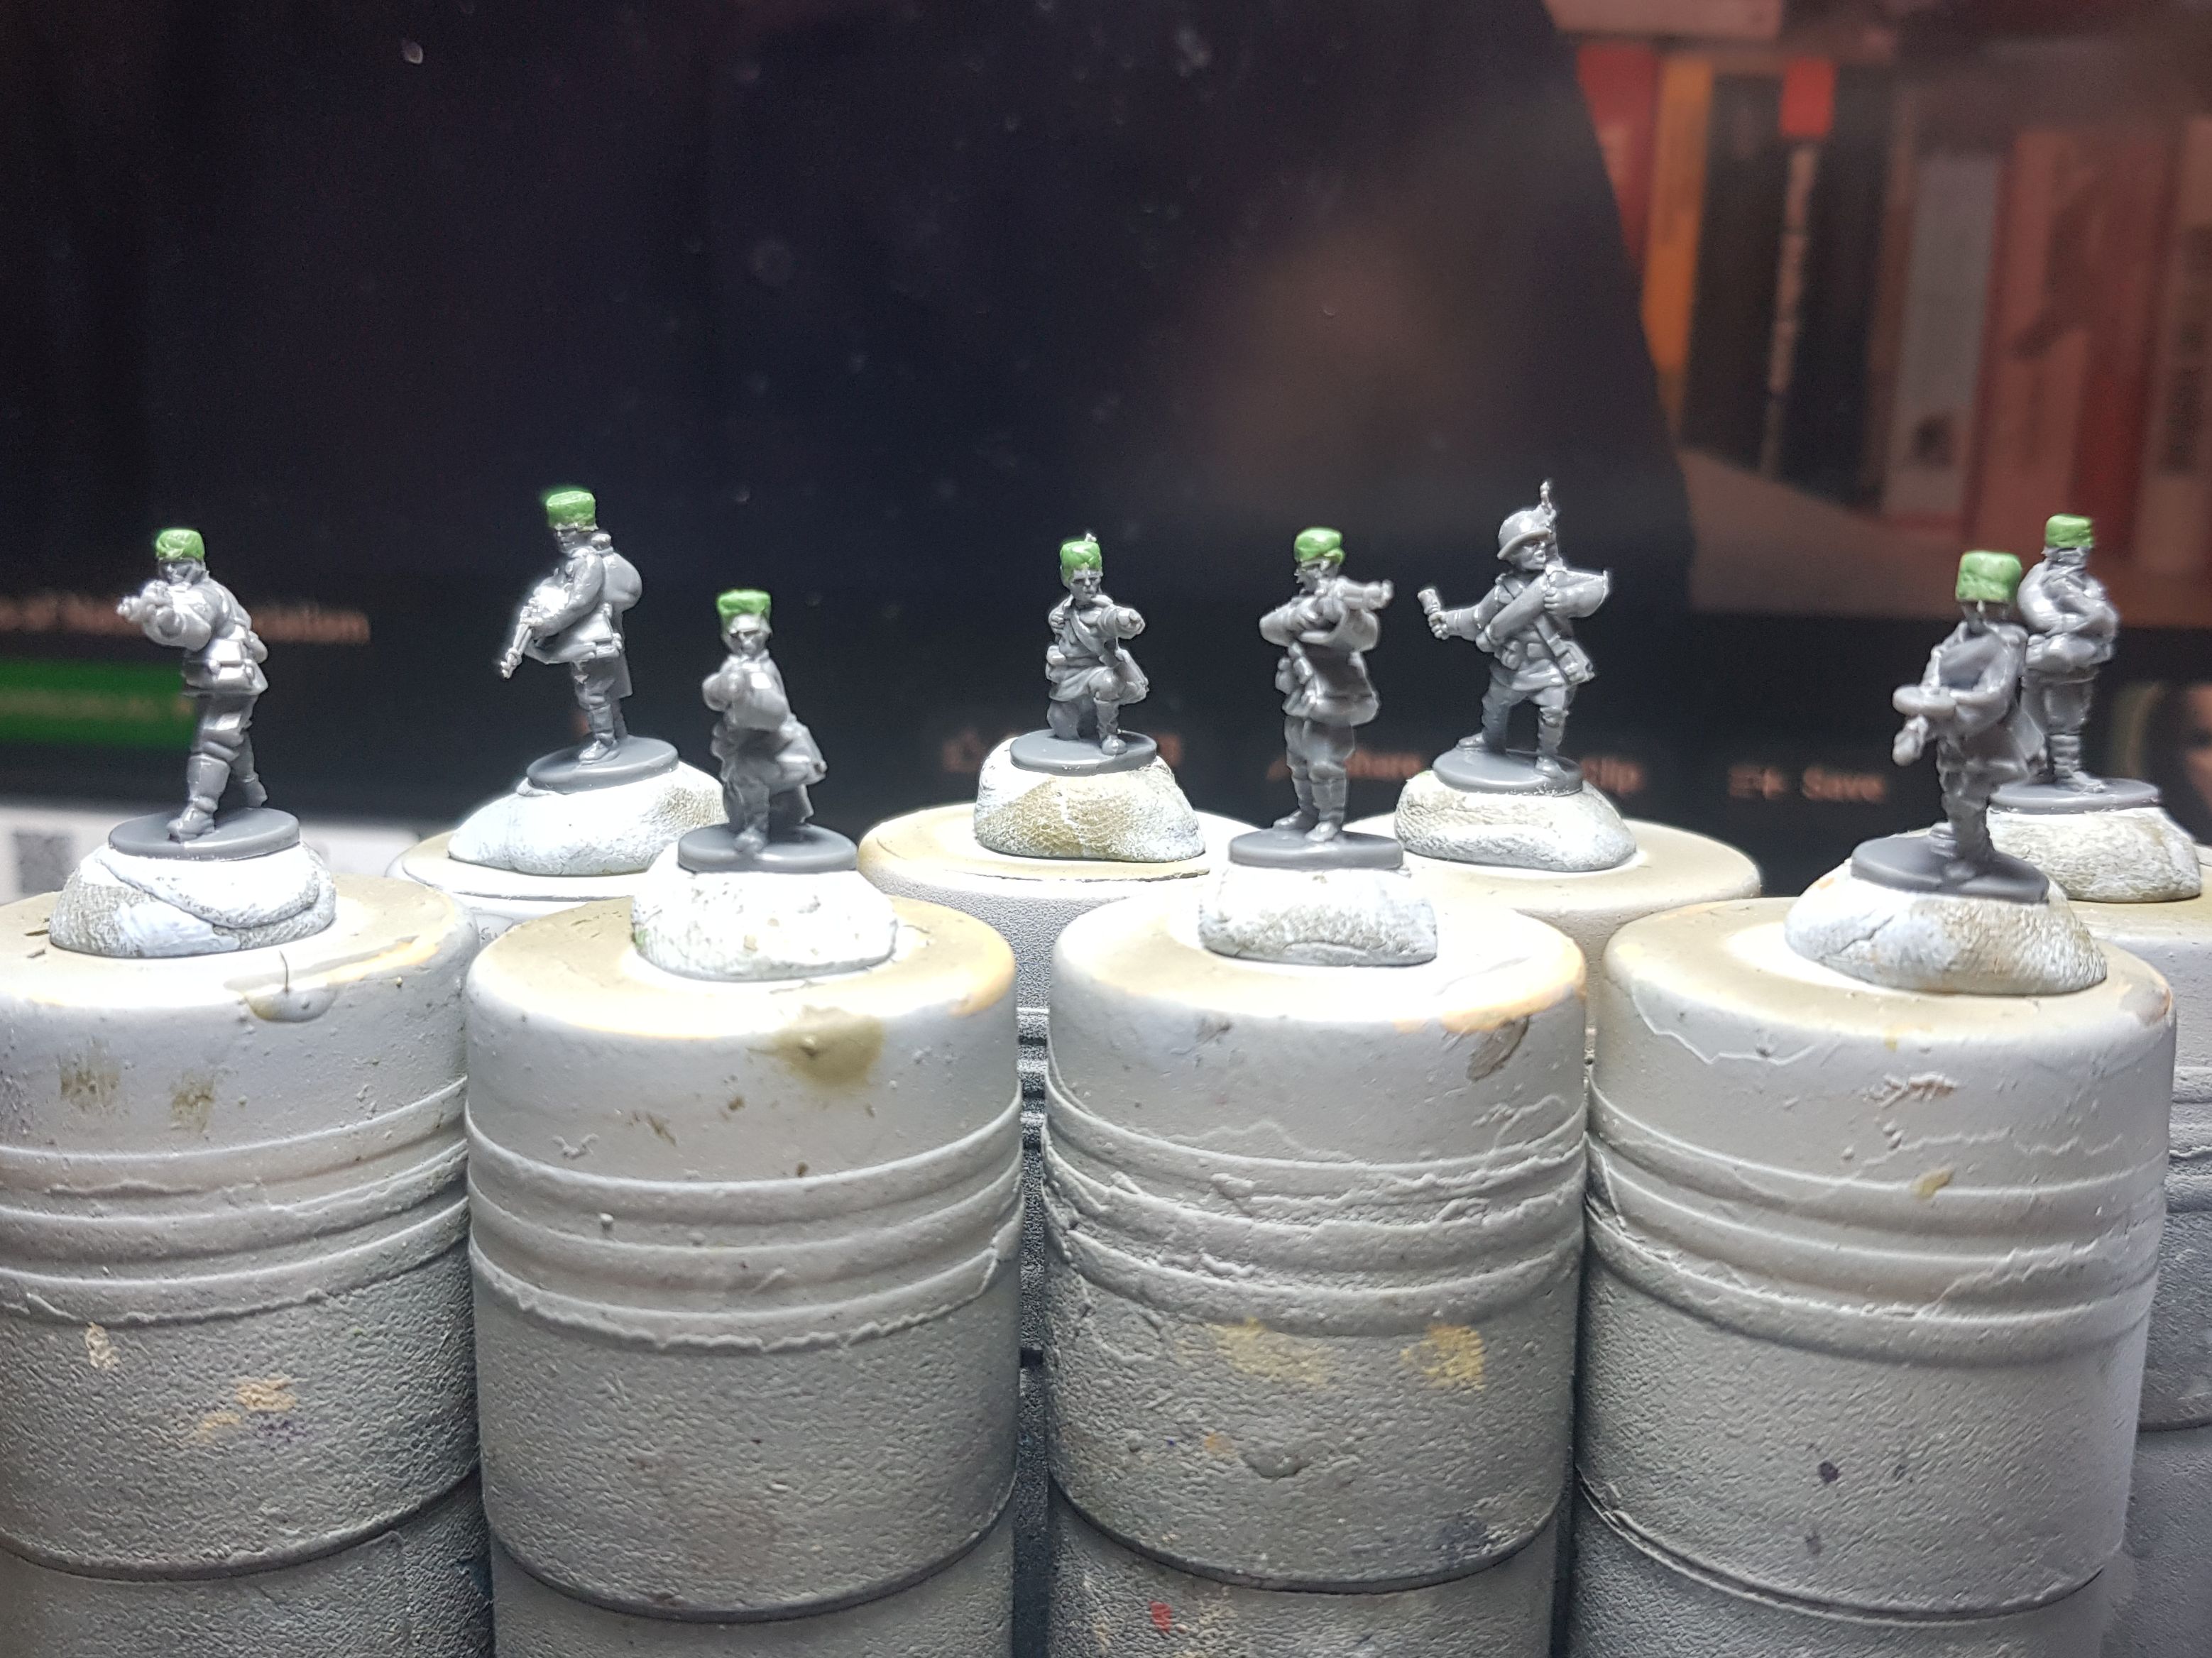
I have gone mad and I am now sculpting all the hats on the 15mm Cossacks, this is a more easier and consistent way of making decent looking hats. So here are a couple more Cossacks ready for primer.
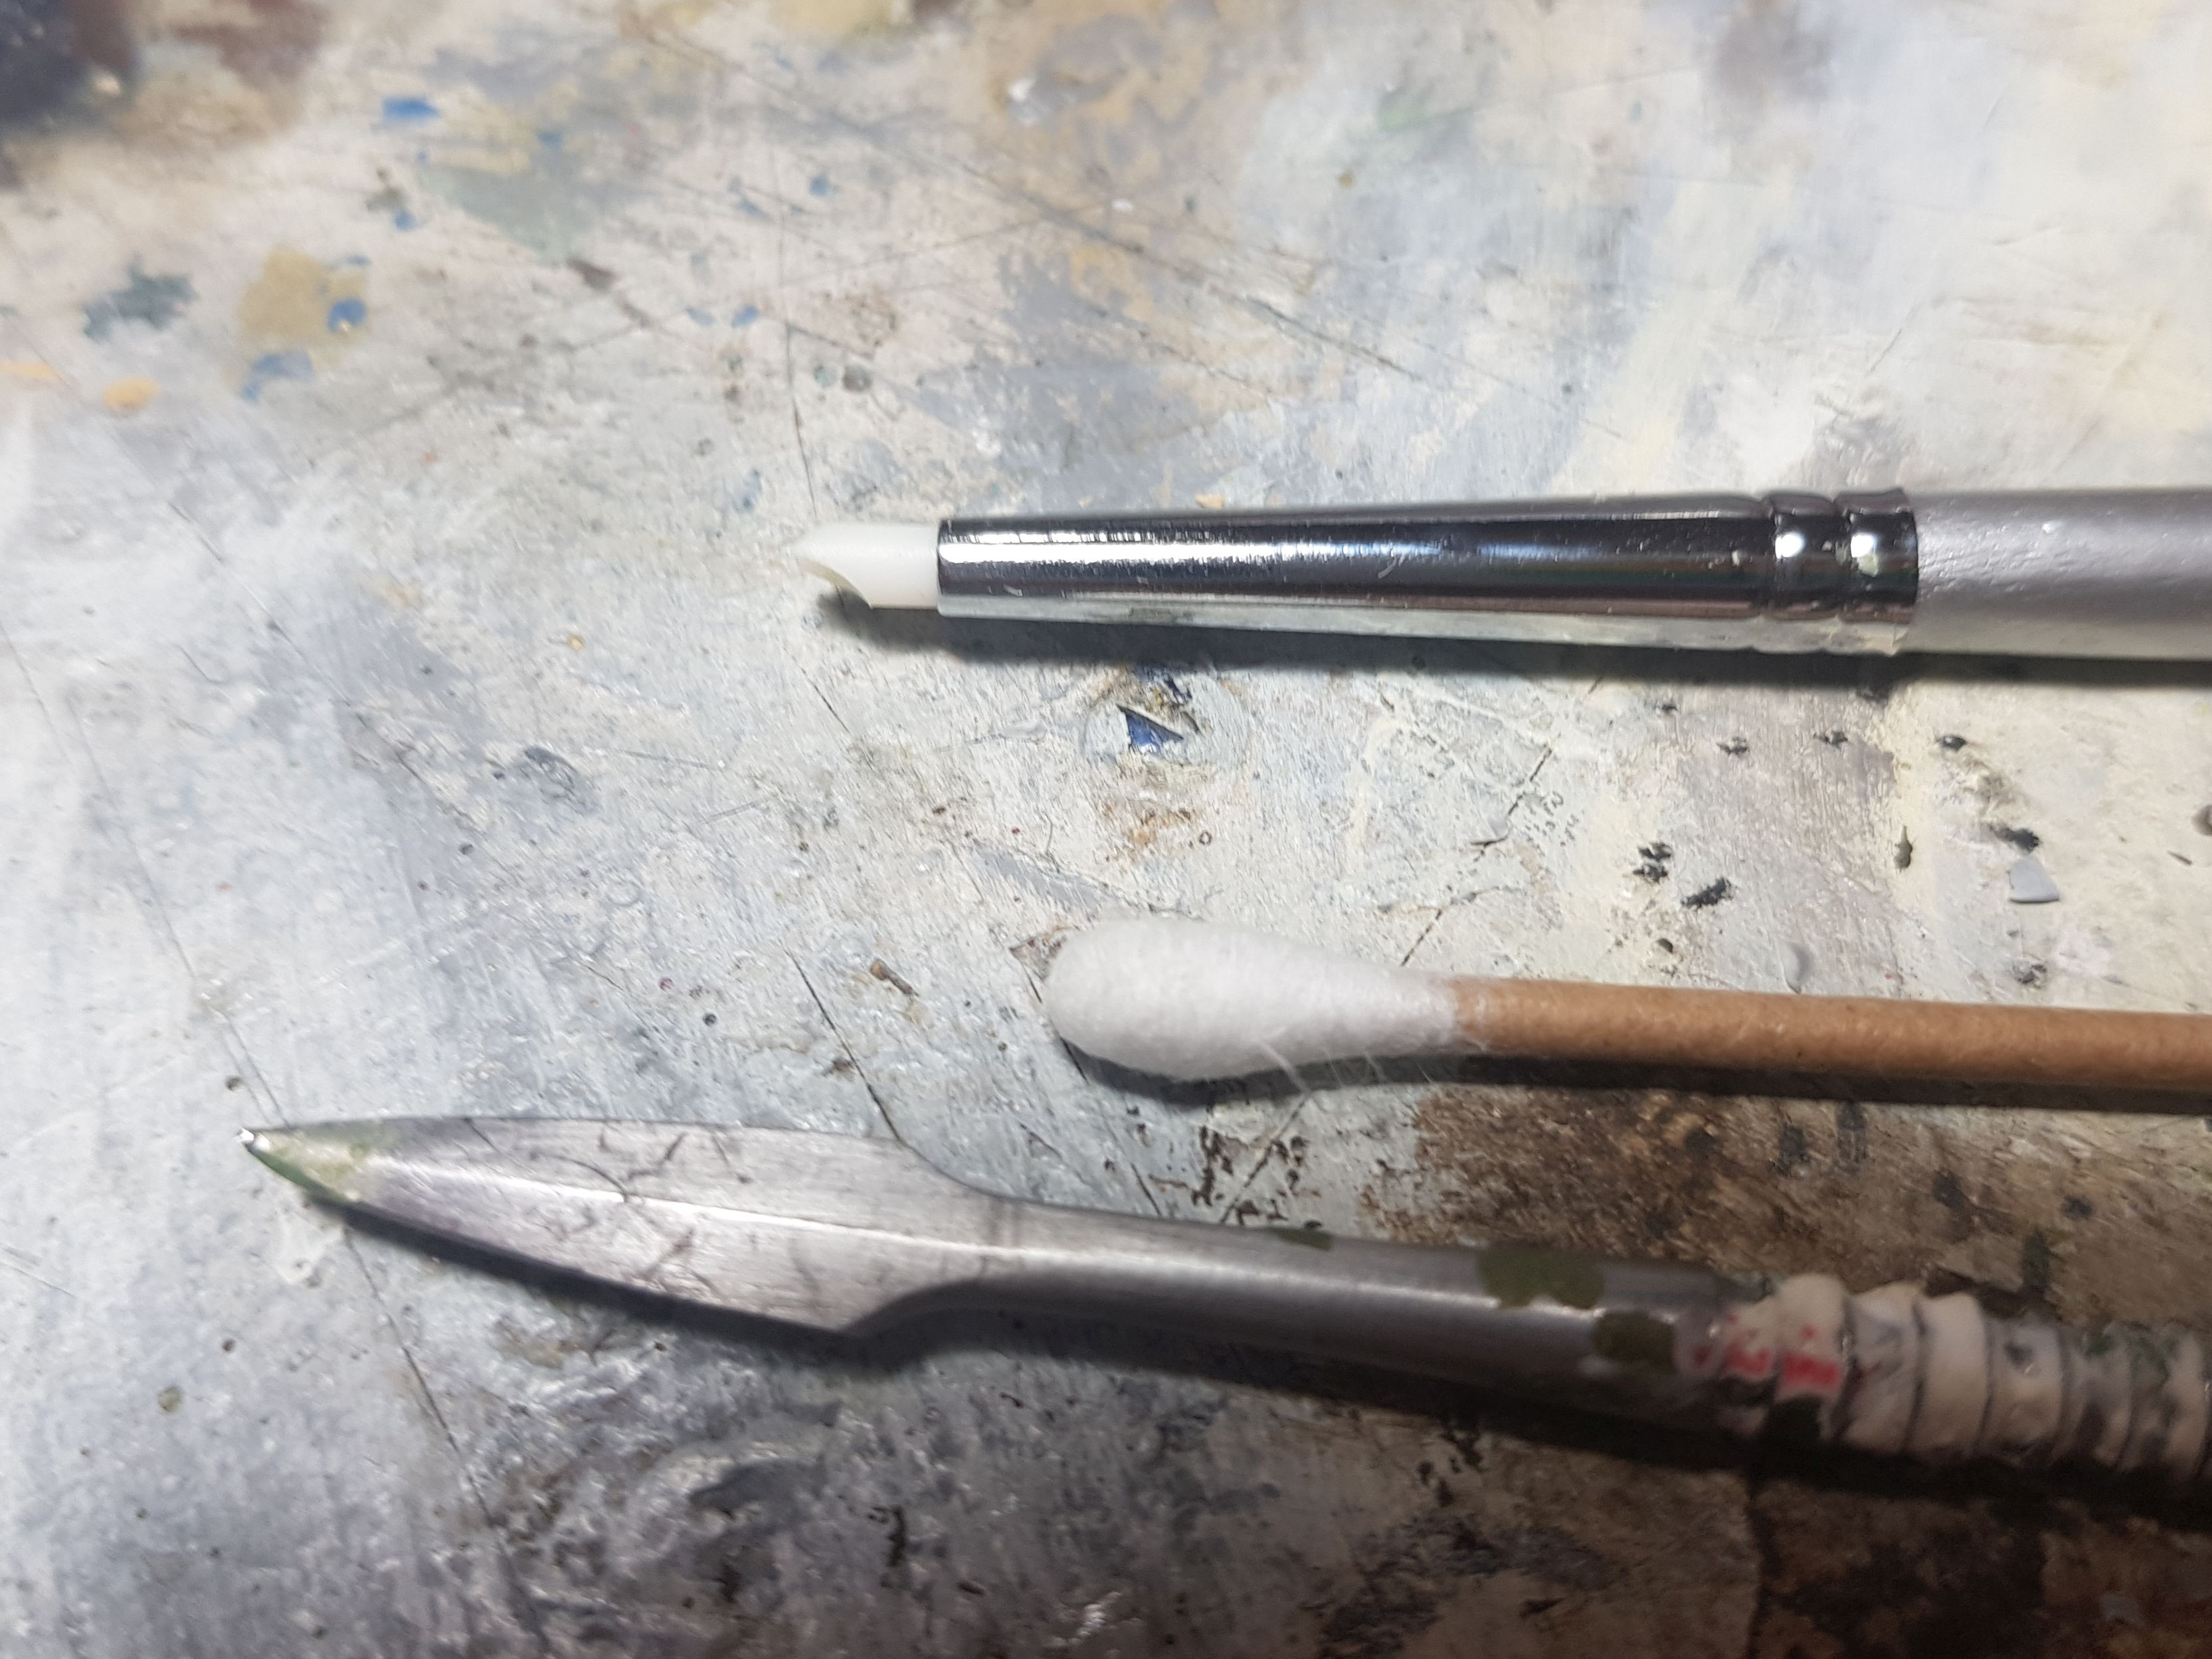
For those wondering what the tools I am using for sculpting the hats are, it is literally these below + water.
I use the metal sculpting tool mostly to cut the greenstuff into tiny chunks to put on the model and the silicone brush for sculpting it into shape. I use a lot of water in the process in order to prevent my tools from sticking to the greenstuff and thus quite often I’ll have a bubble of water on the miniature, so I use the cotton bud to just soak that up.
Grimdark Cossacks
Everyone is directly going to call them grimdark so I’ll be ahead of everyone and call them grimdark Cossacks.
For the shading on my infantry, not just the Soviets I am planning on keeping it relatively simple, well simple for me. So I coated the models using MIG Neutral Wash (P222) and let that sit for a minute or so. Probably 5 to 10 minutes, didn’t count.

And then using a wool dauber, just dry, nothing on it, I started rubbing over the model to remove some of the wash and this is the result.
 Grimdark Cossacks
Now I was feeling that this was a little bit too dark, so I picked up the wool dauber and dampened it with some white spirit and gave them another quick rub and then dried them with a hairdryer. You’ll probably not notice the difference in the picture, but in real life it is significant.
All of the Questions...
One thing that has been on my mind is whether to or not to camouflage my vehicles. I know that for the Soviets camouflage was rare and most won’t be camouflaged that is simple, but for the Germans. It is only in 1943 that Germans really started to camouflage their vehicles as standard and I am currently focussing on 1942, so it should be simple. But I am going to want to take these armies into Kursk or even Bagration after that. So do I camouflage them already or should I do the first ones not in camo?
Here is another question, do I base my vehicles or not and if I do what bases would I use? I asked this question on the forums, you can find the link below.
The Rest of the First Team
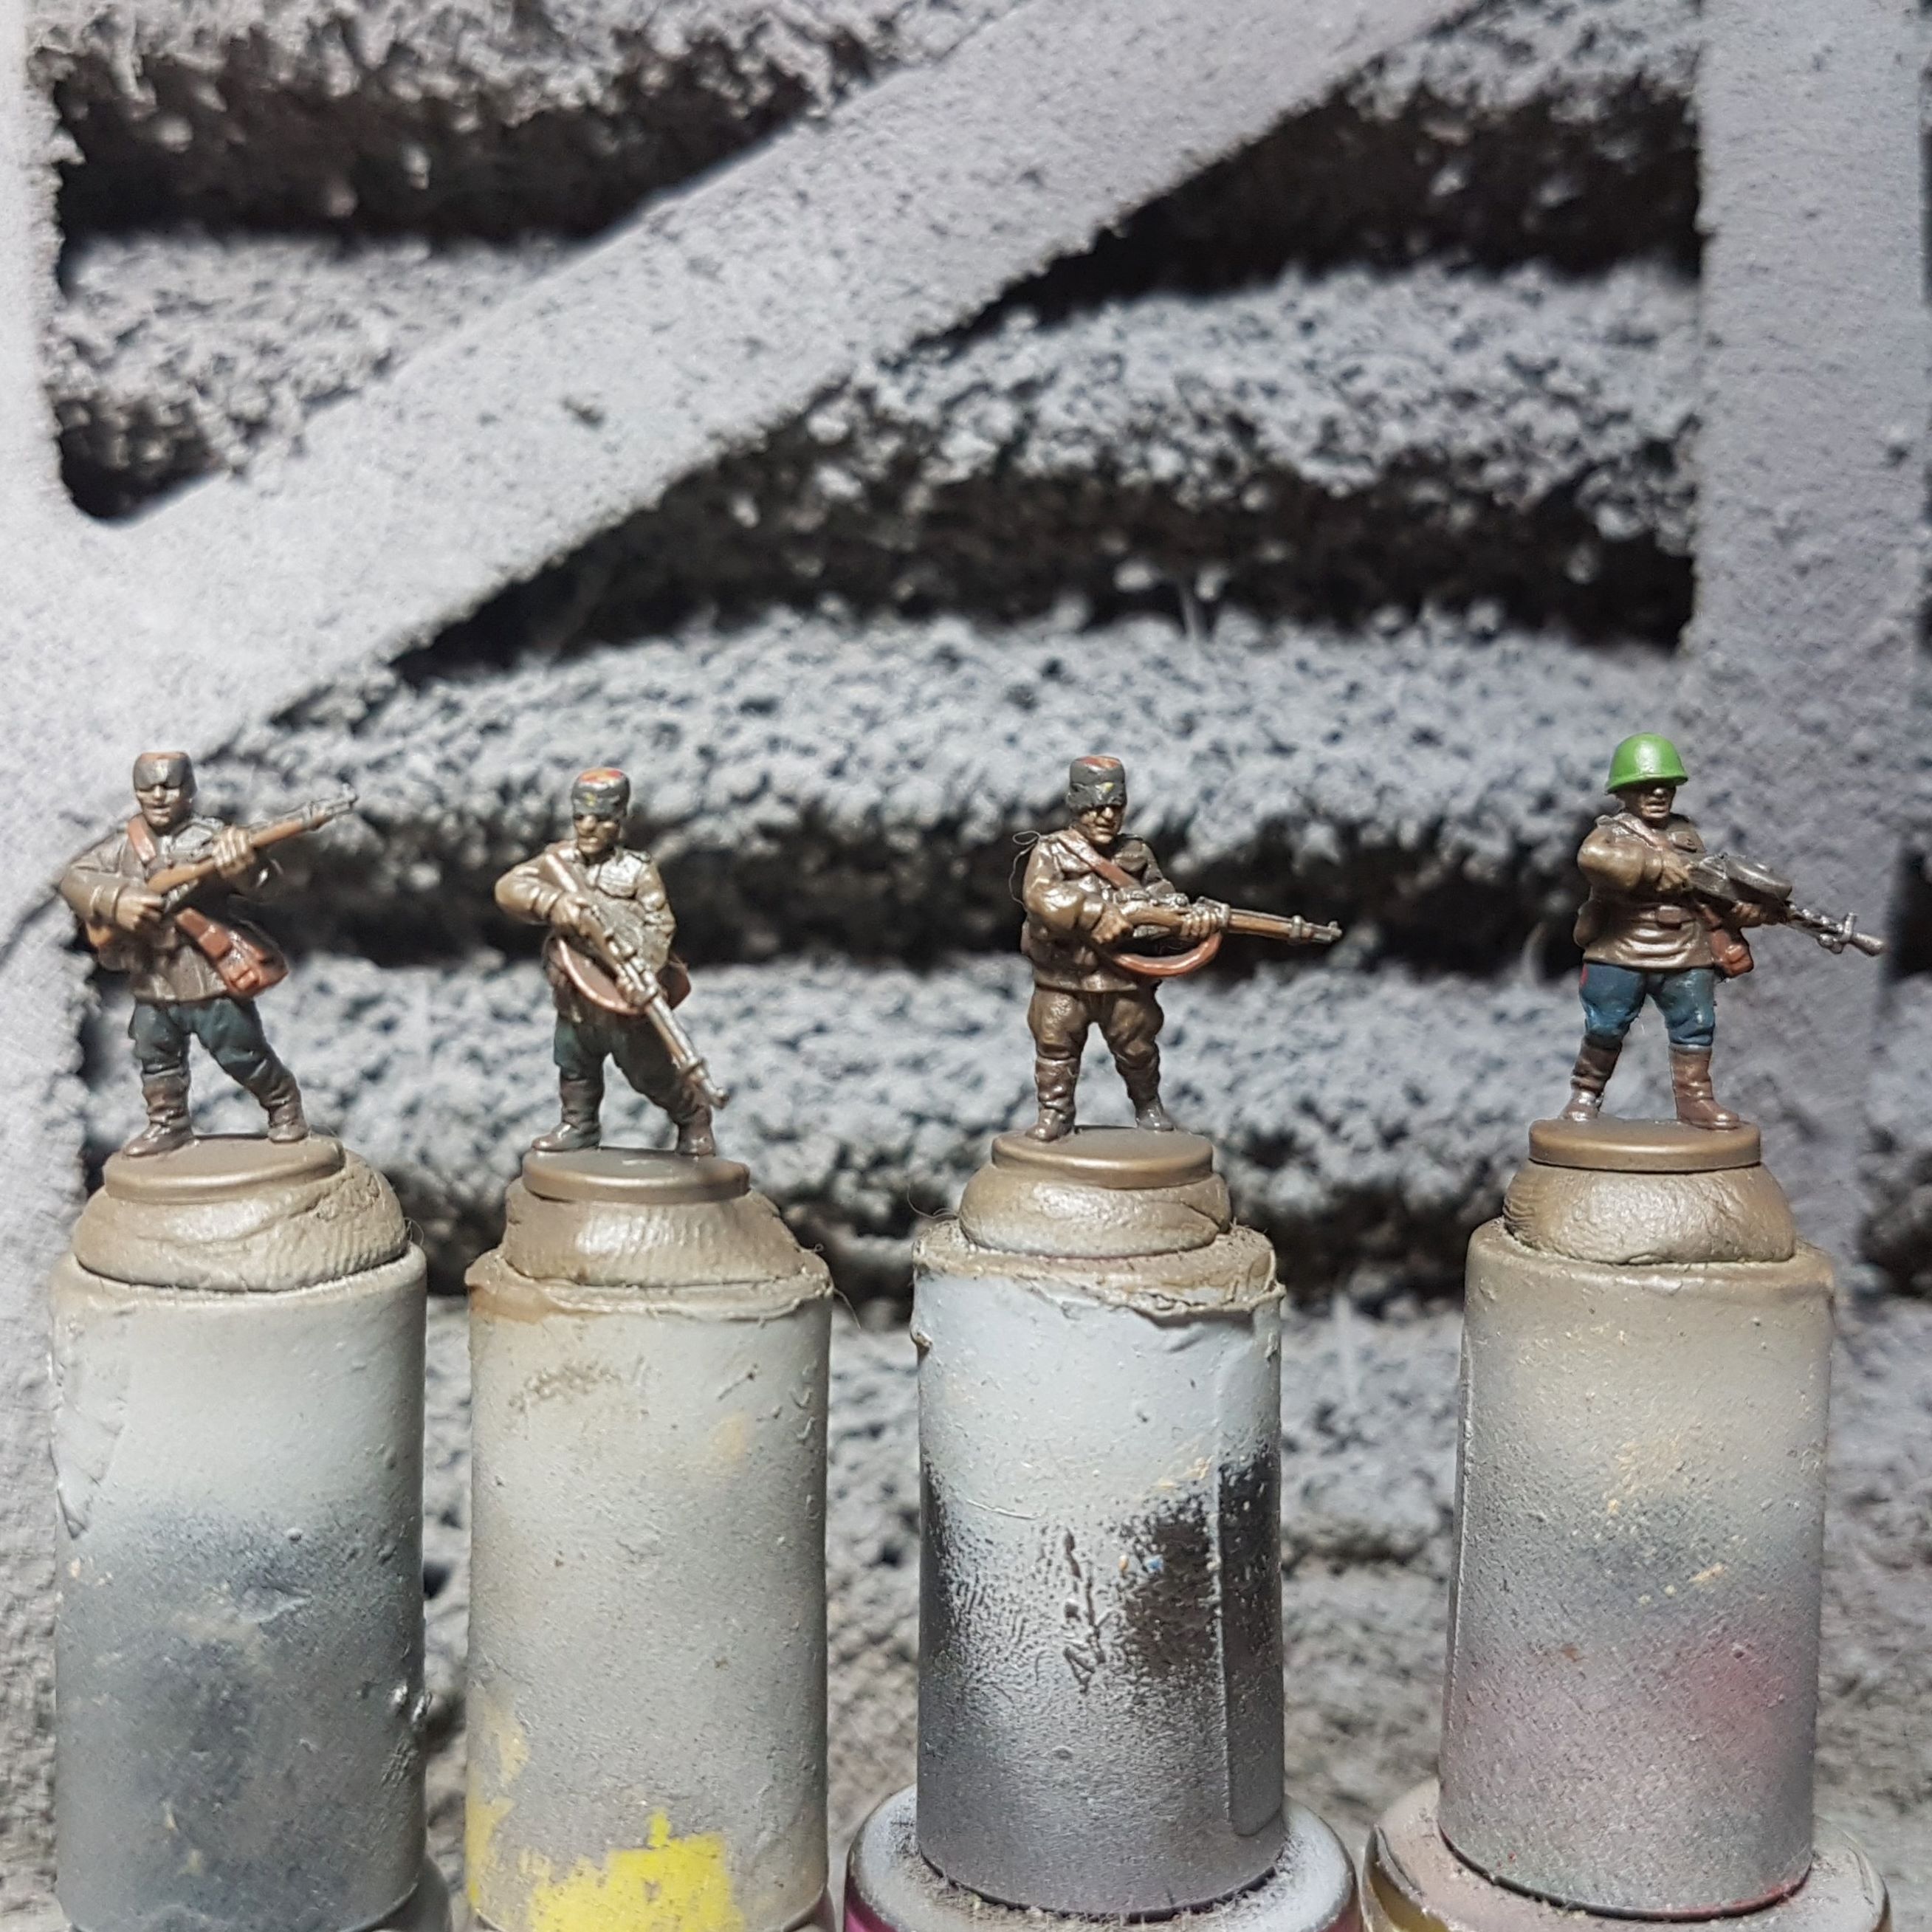
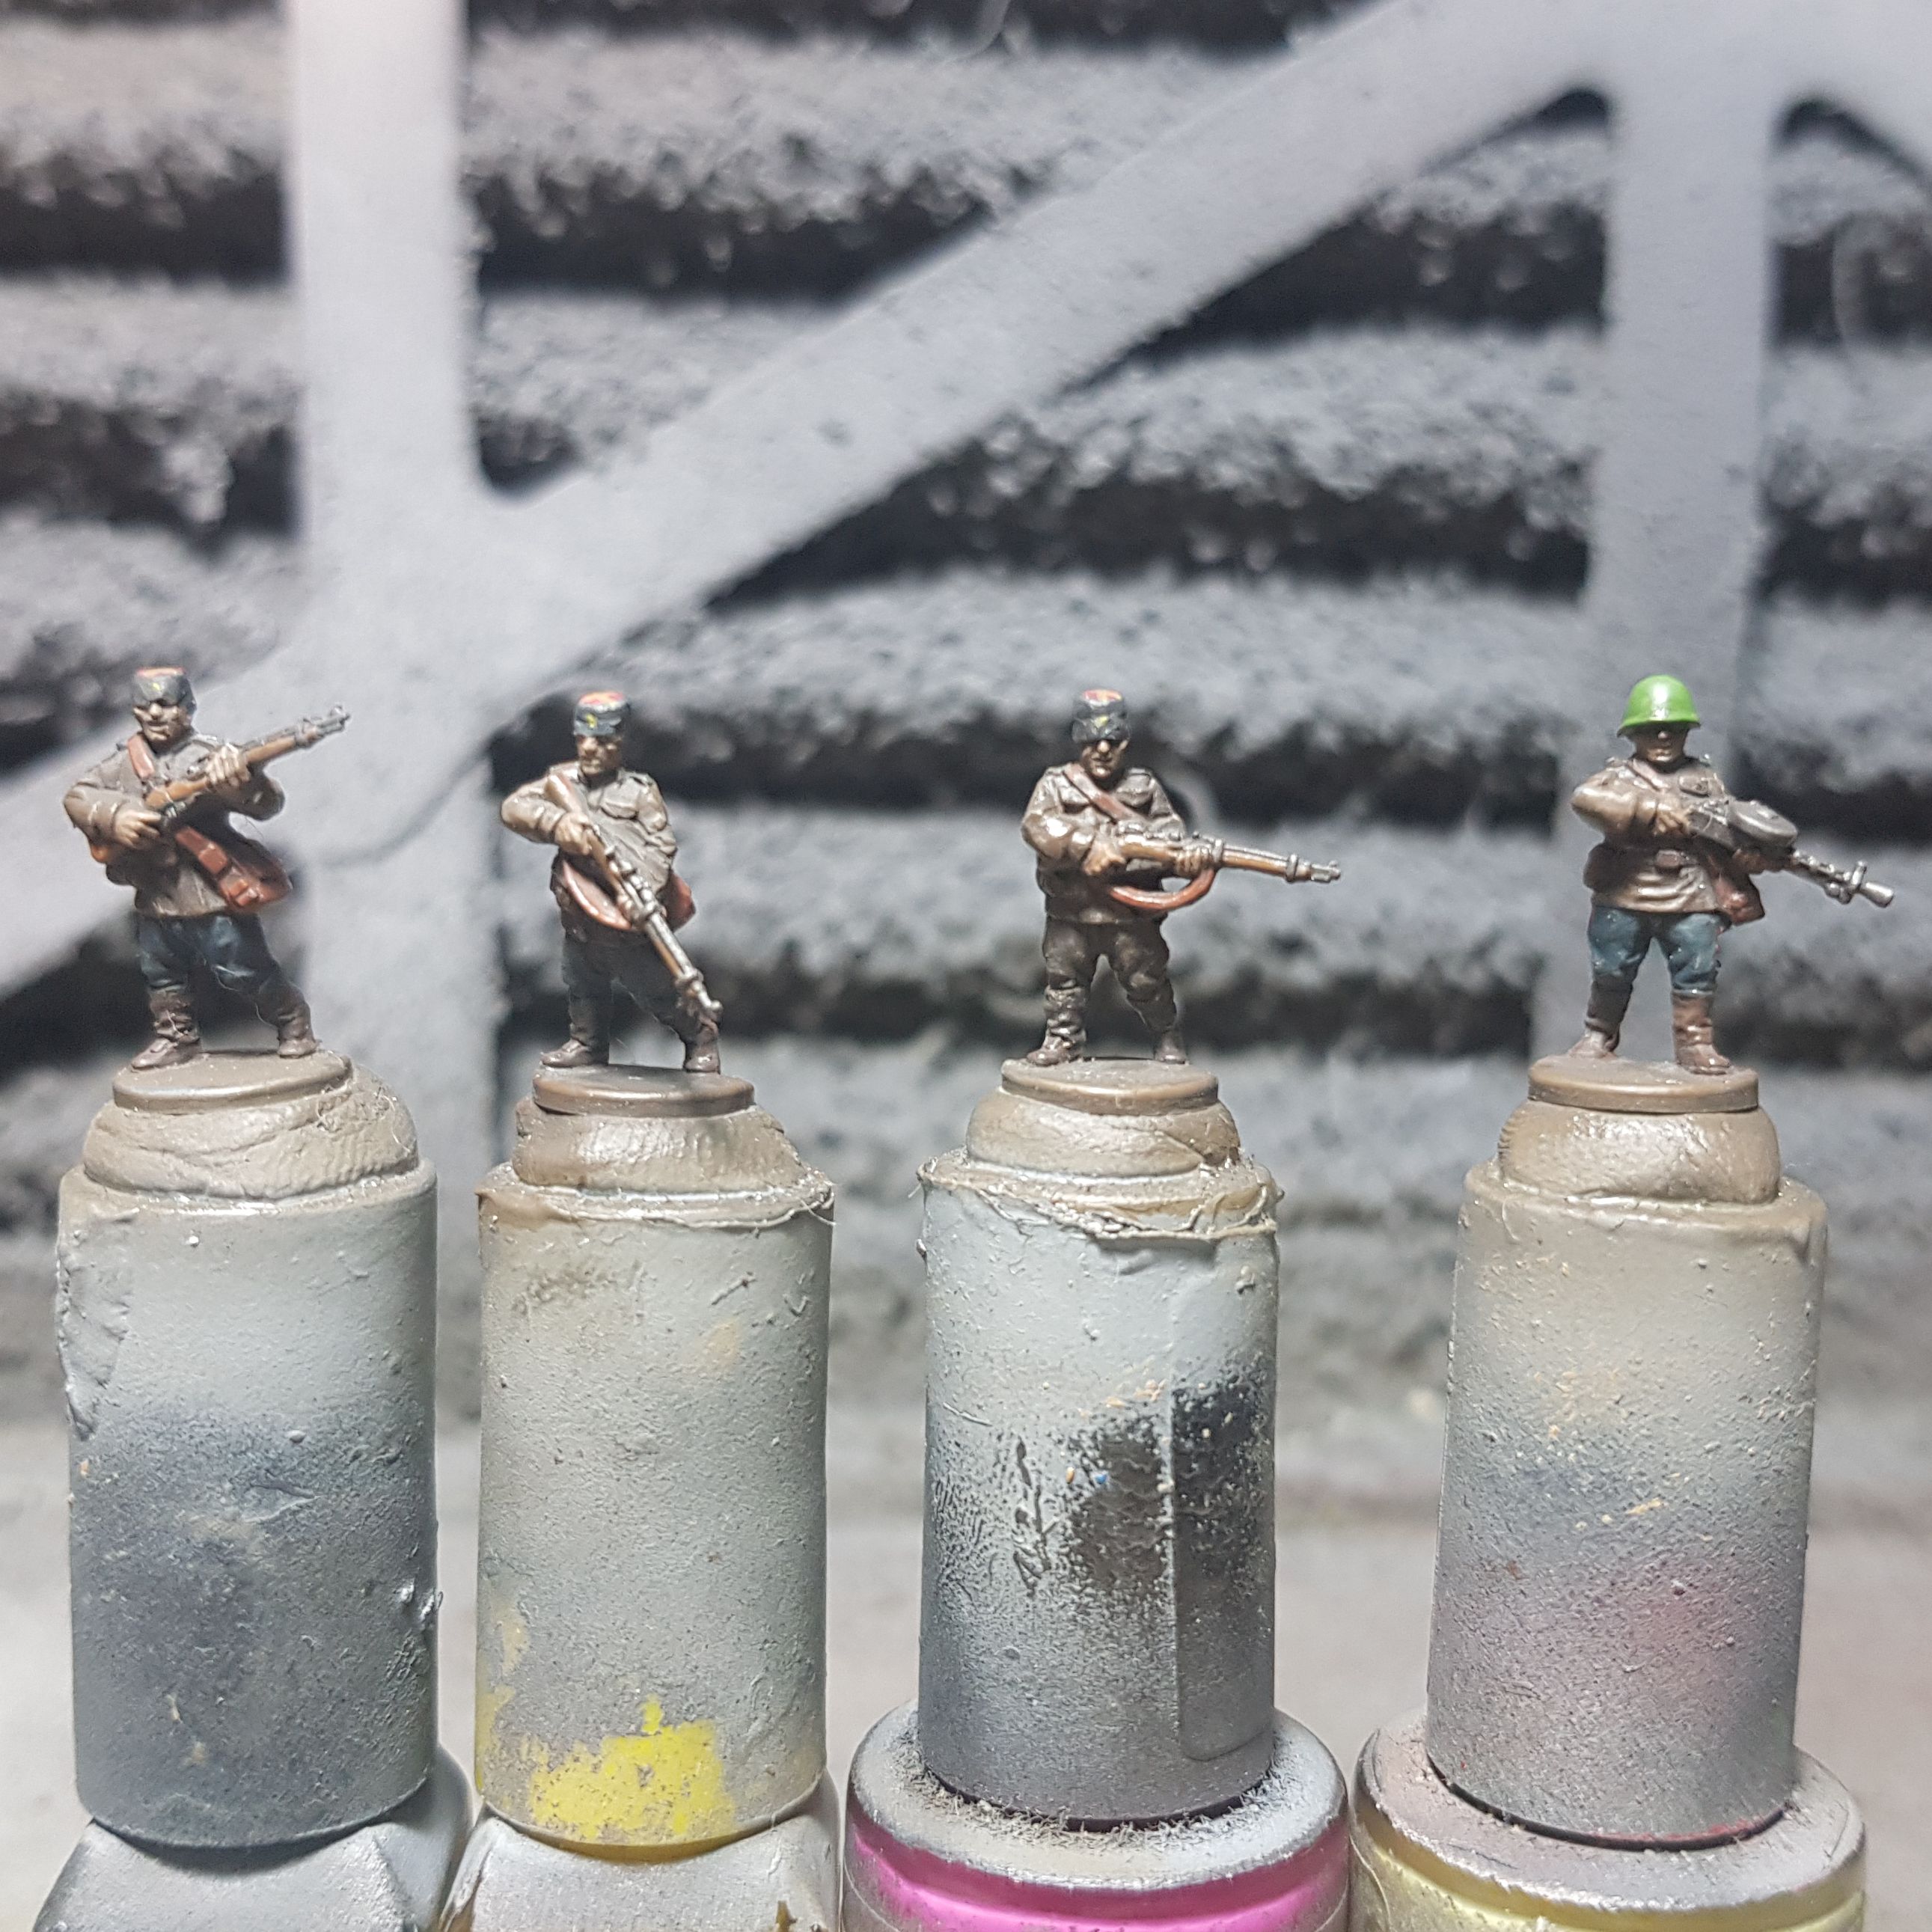
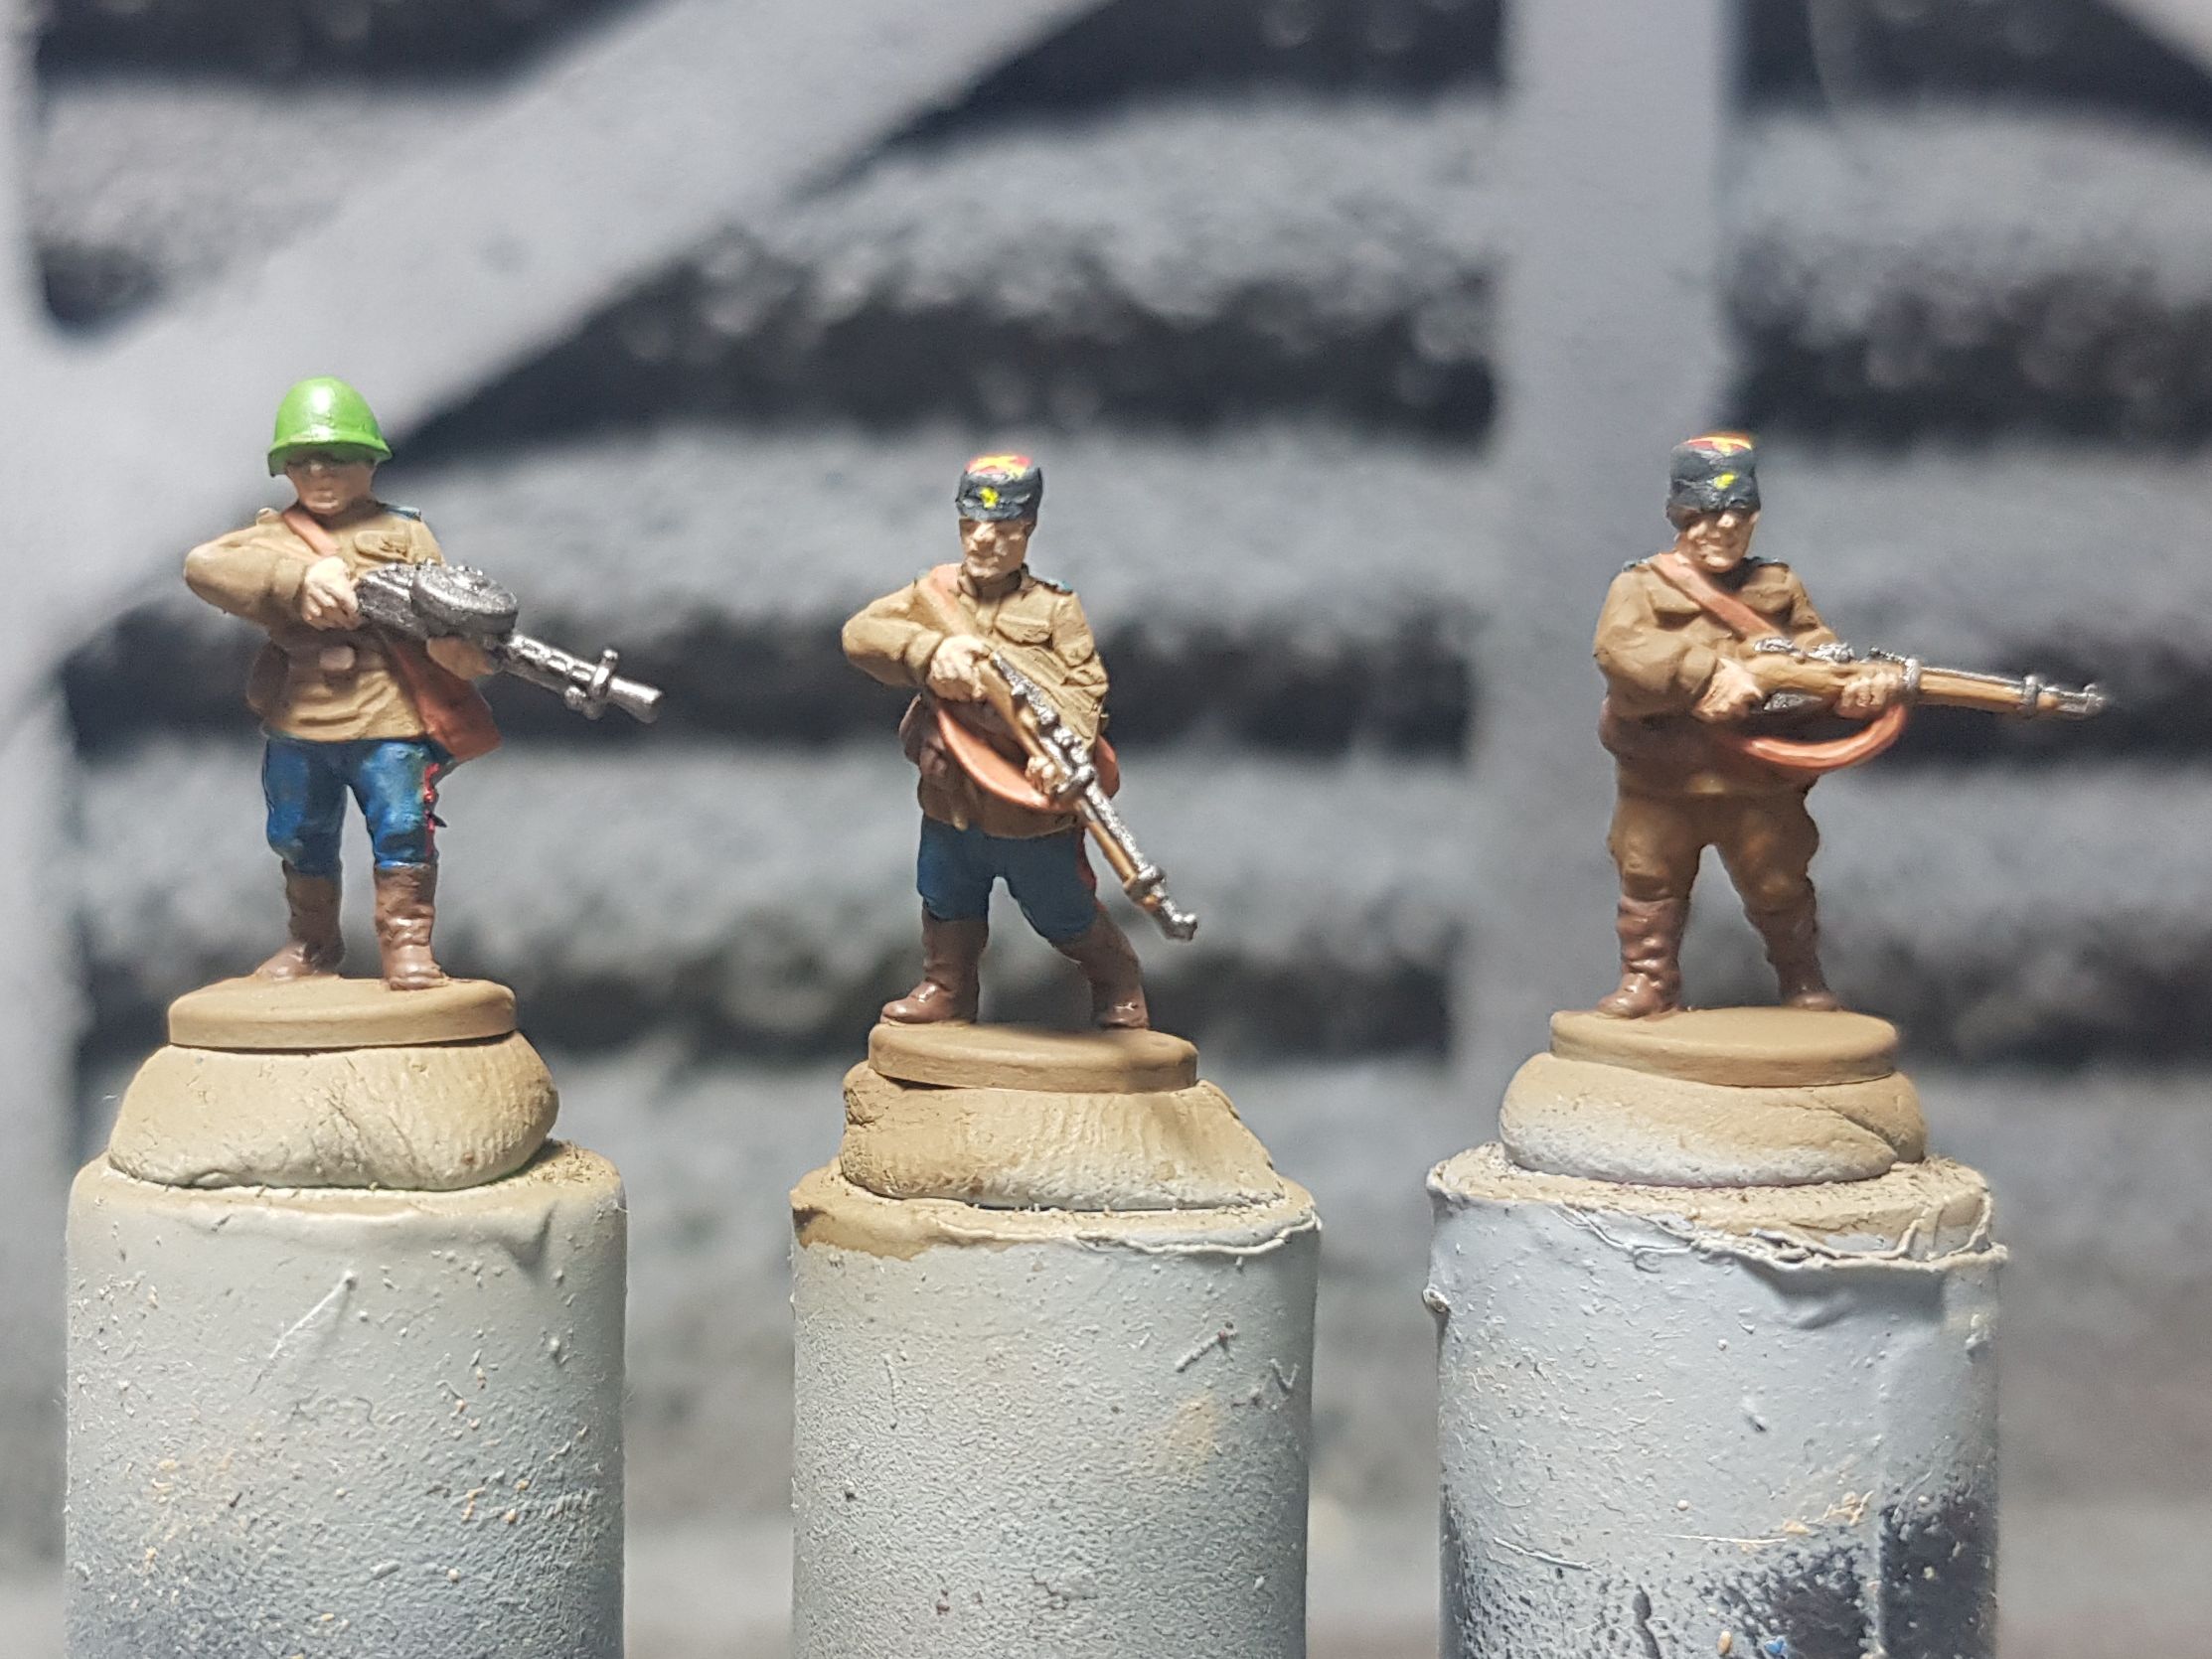
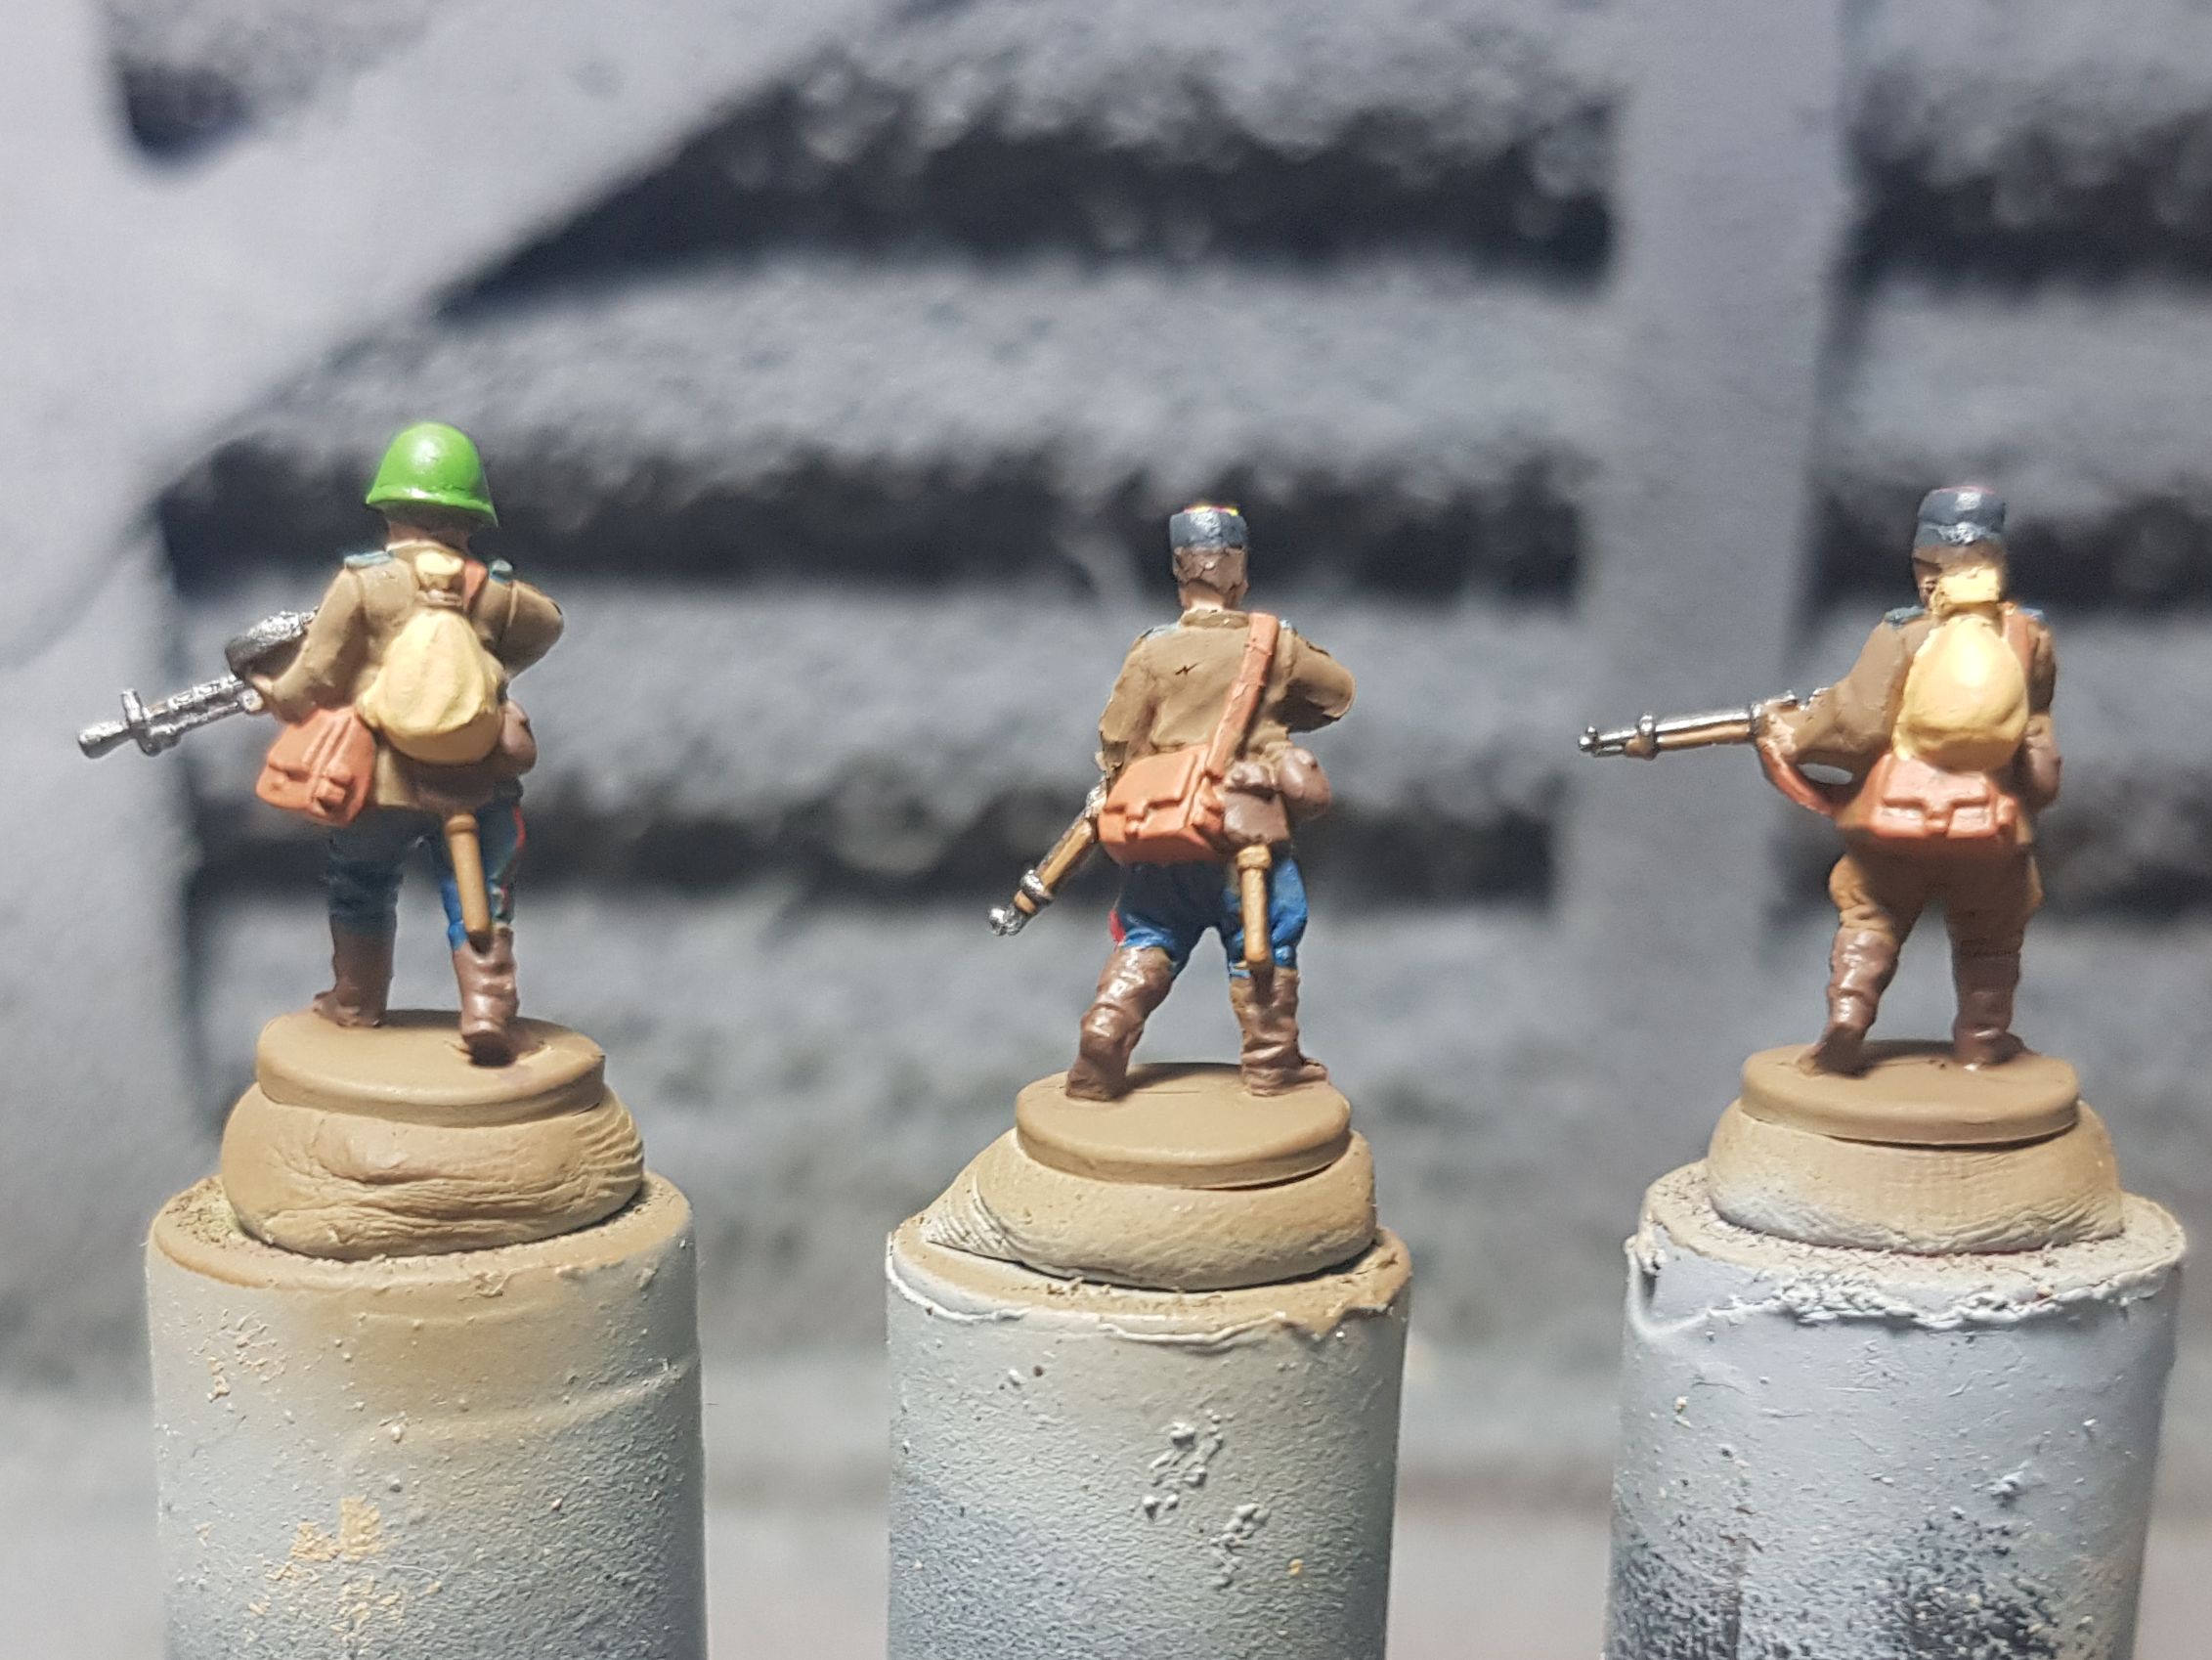
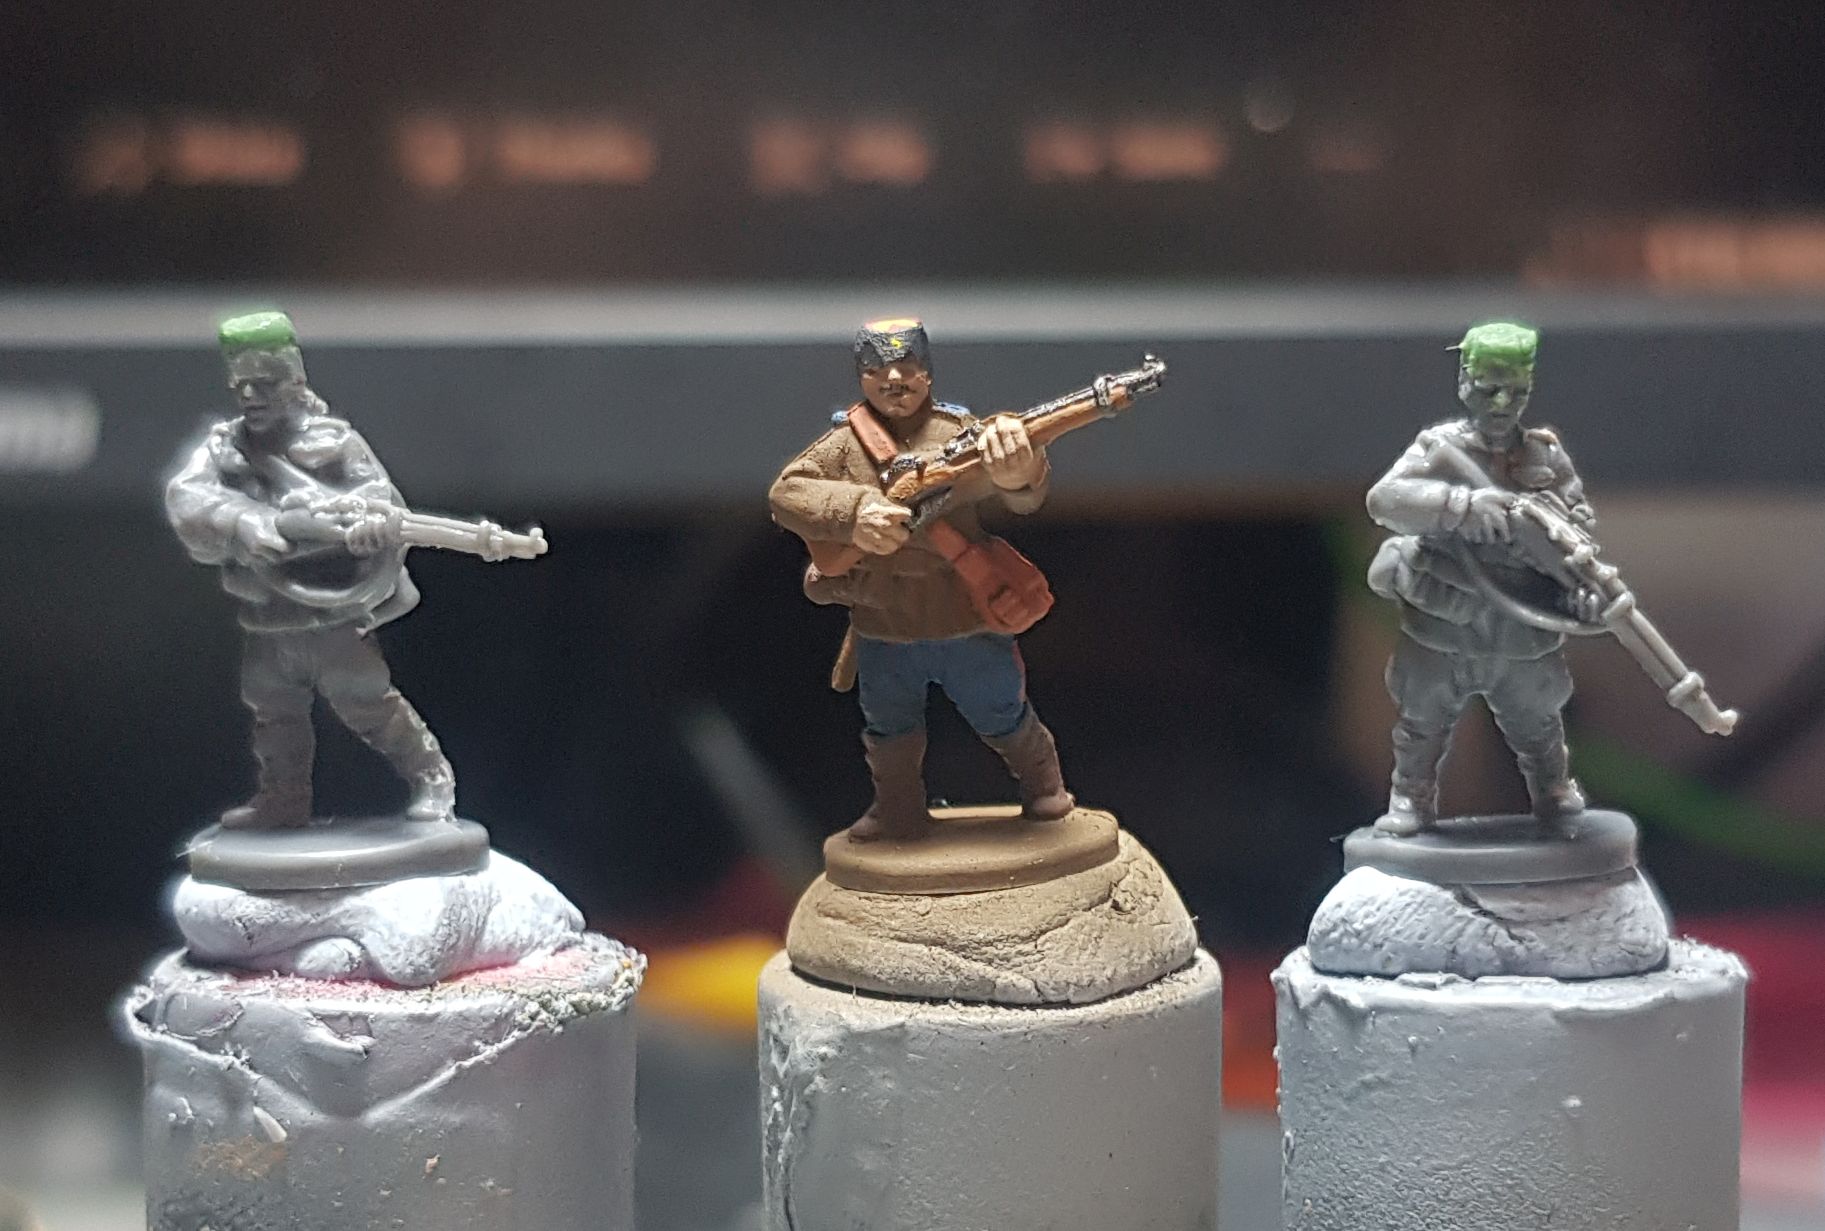
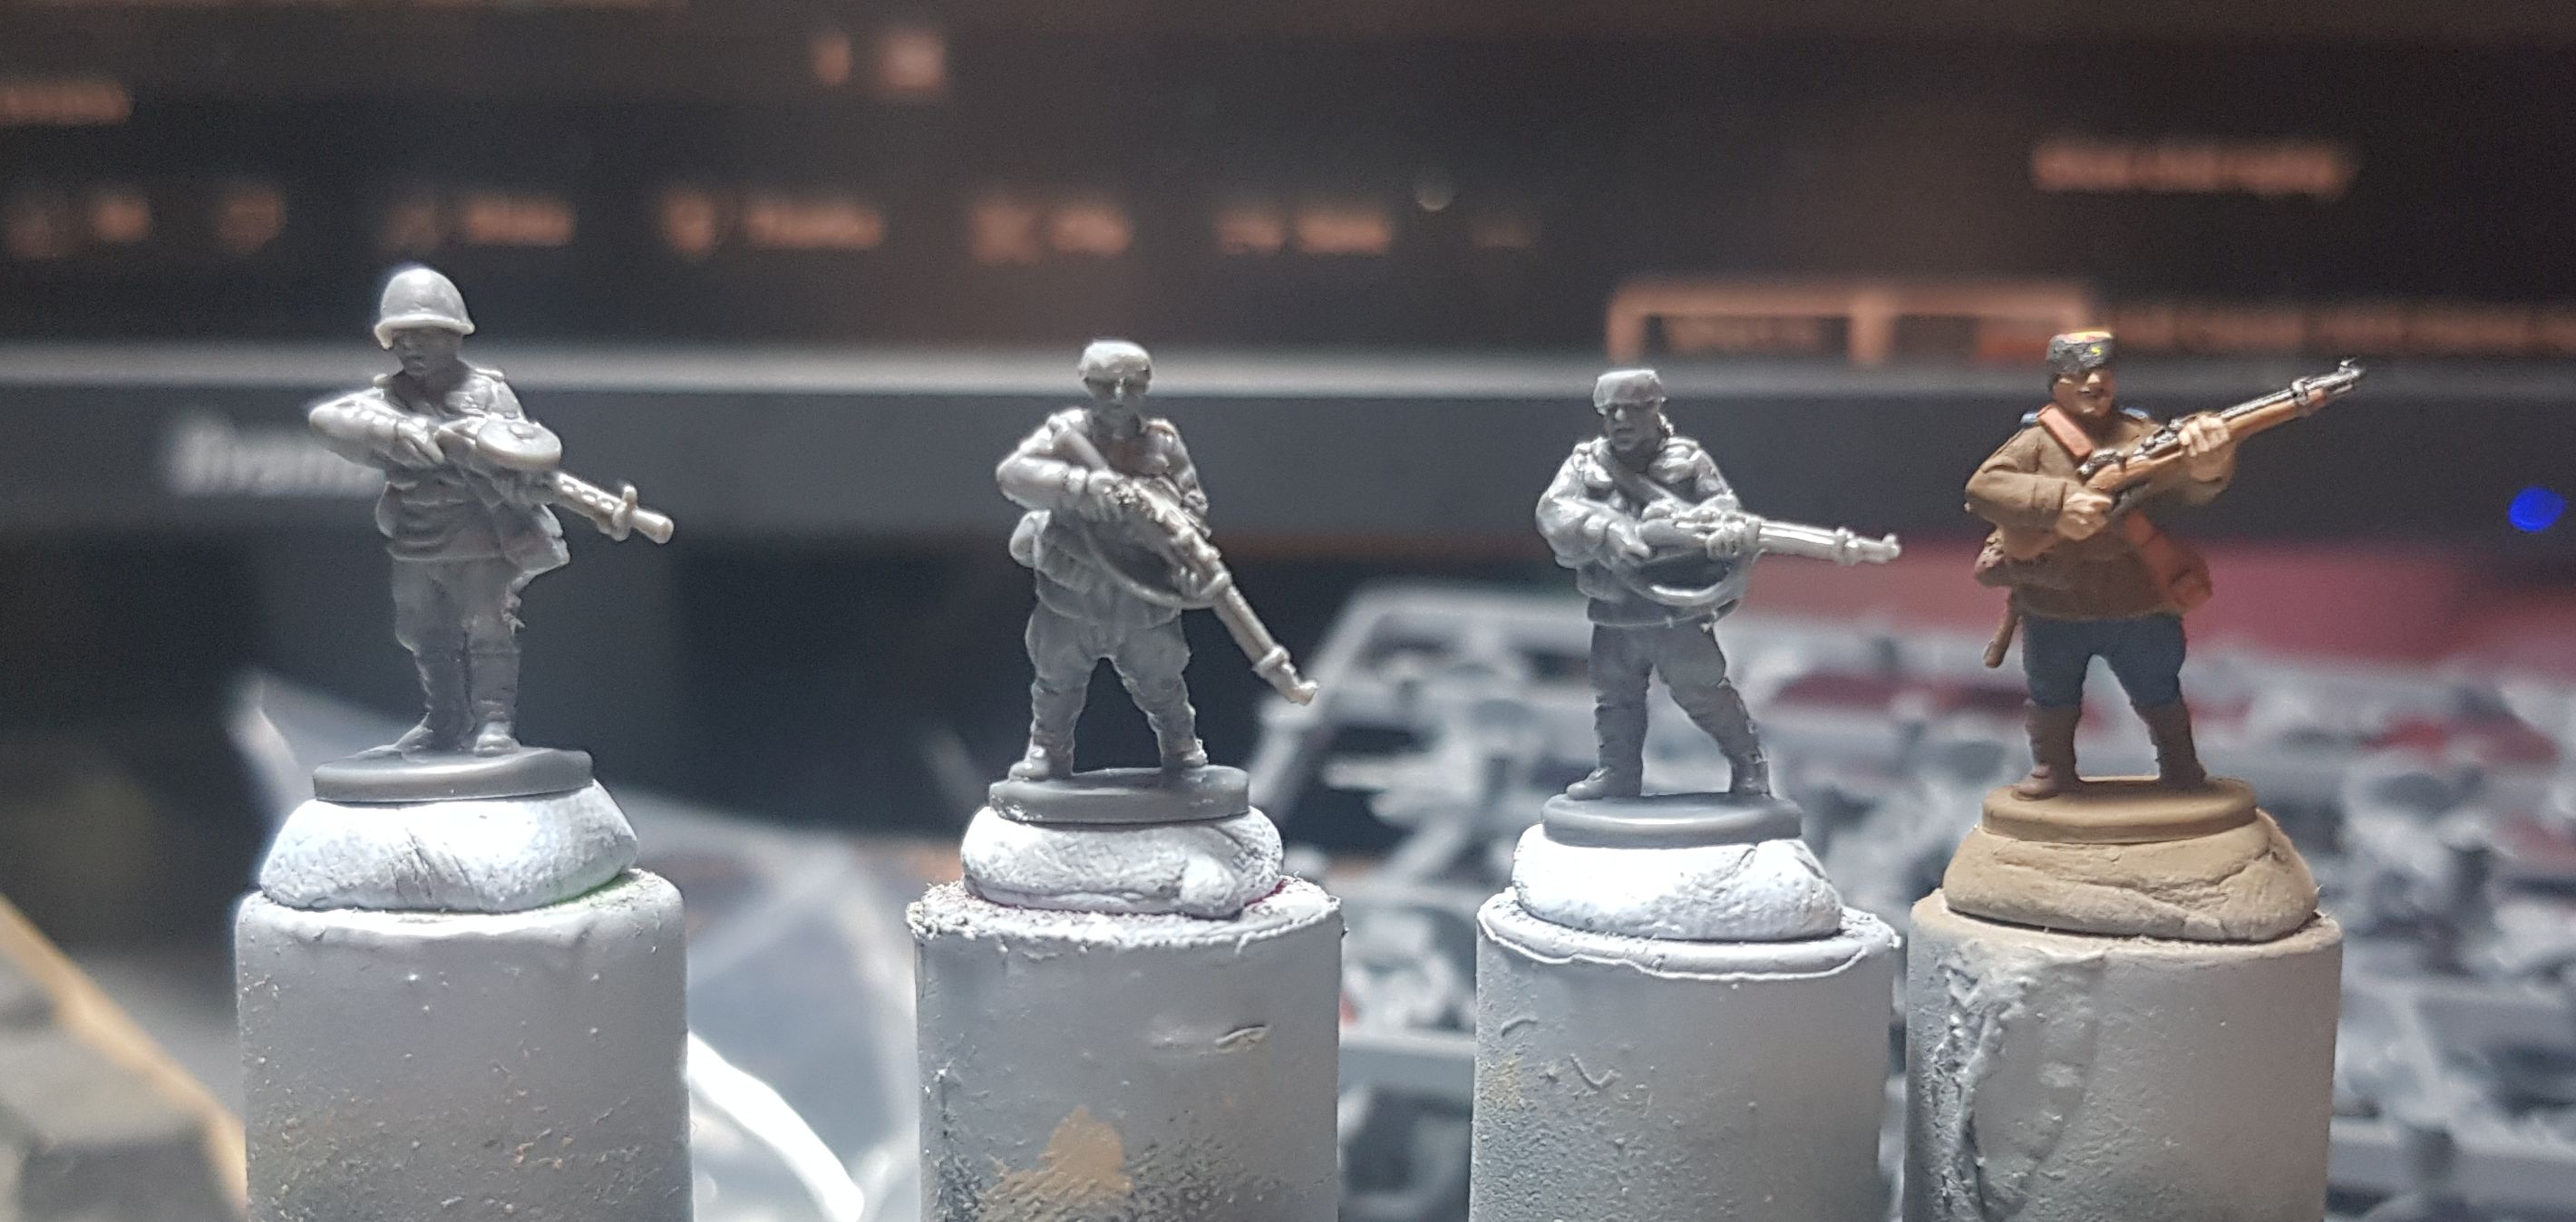
The other 3 to form the first DP MG & M1891 Rifle team of my 9th Guards Cavalry have also been basecoated. I do need to go in and check for things I need to fix up before moving on as the tremors in my hands were getting worse near the end of my painting session. I made an effort to show some of the variations that I am doing on like 1 or 2 models a team and that can include brown trousers, a helmet instead of a hat or both.
I made a couple of minor changes to the paint scheme as you may or may not be able to see, these are:
- I also painted the weapon strap in Vallejo Model Color Red Leather (70.818). The first model I painted didn’t have one so it didn’t come up.
- Any sacks that the models are carrying will be painted using Vallejo Model Color Desert Yellow (70.977). Again, the first model didn’t have one.
- I changed the hair colour to Vallejo Model Color Chocolate Brown (70.872) to better differentiate between the hat and the hair.
- And I painted the helmet in Vallejo Game Color Goblin Green (72.030) as I stated I was planning on doing before.
I will compile a full paint scheme list in the future when I am 100% sure of everything that I am going to do.
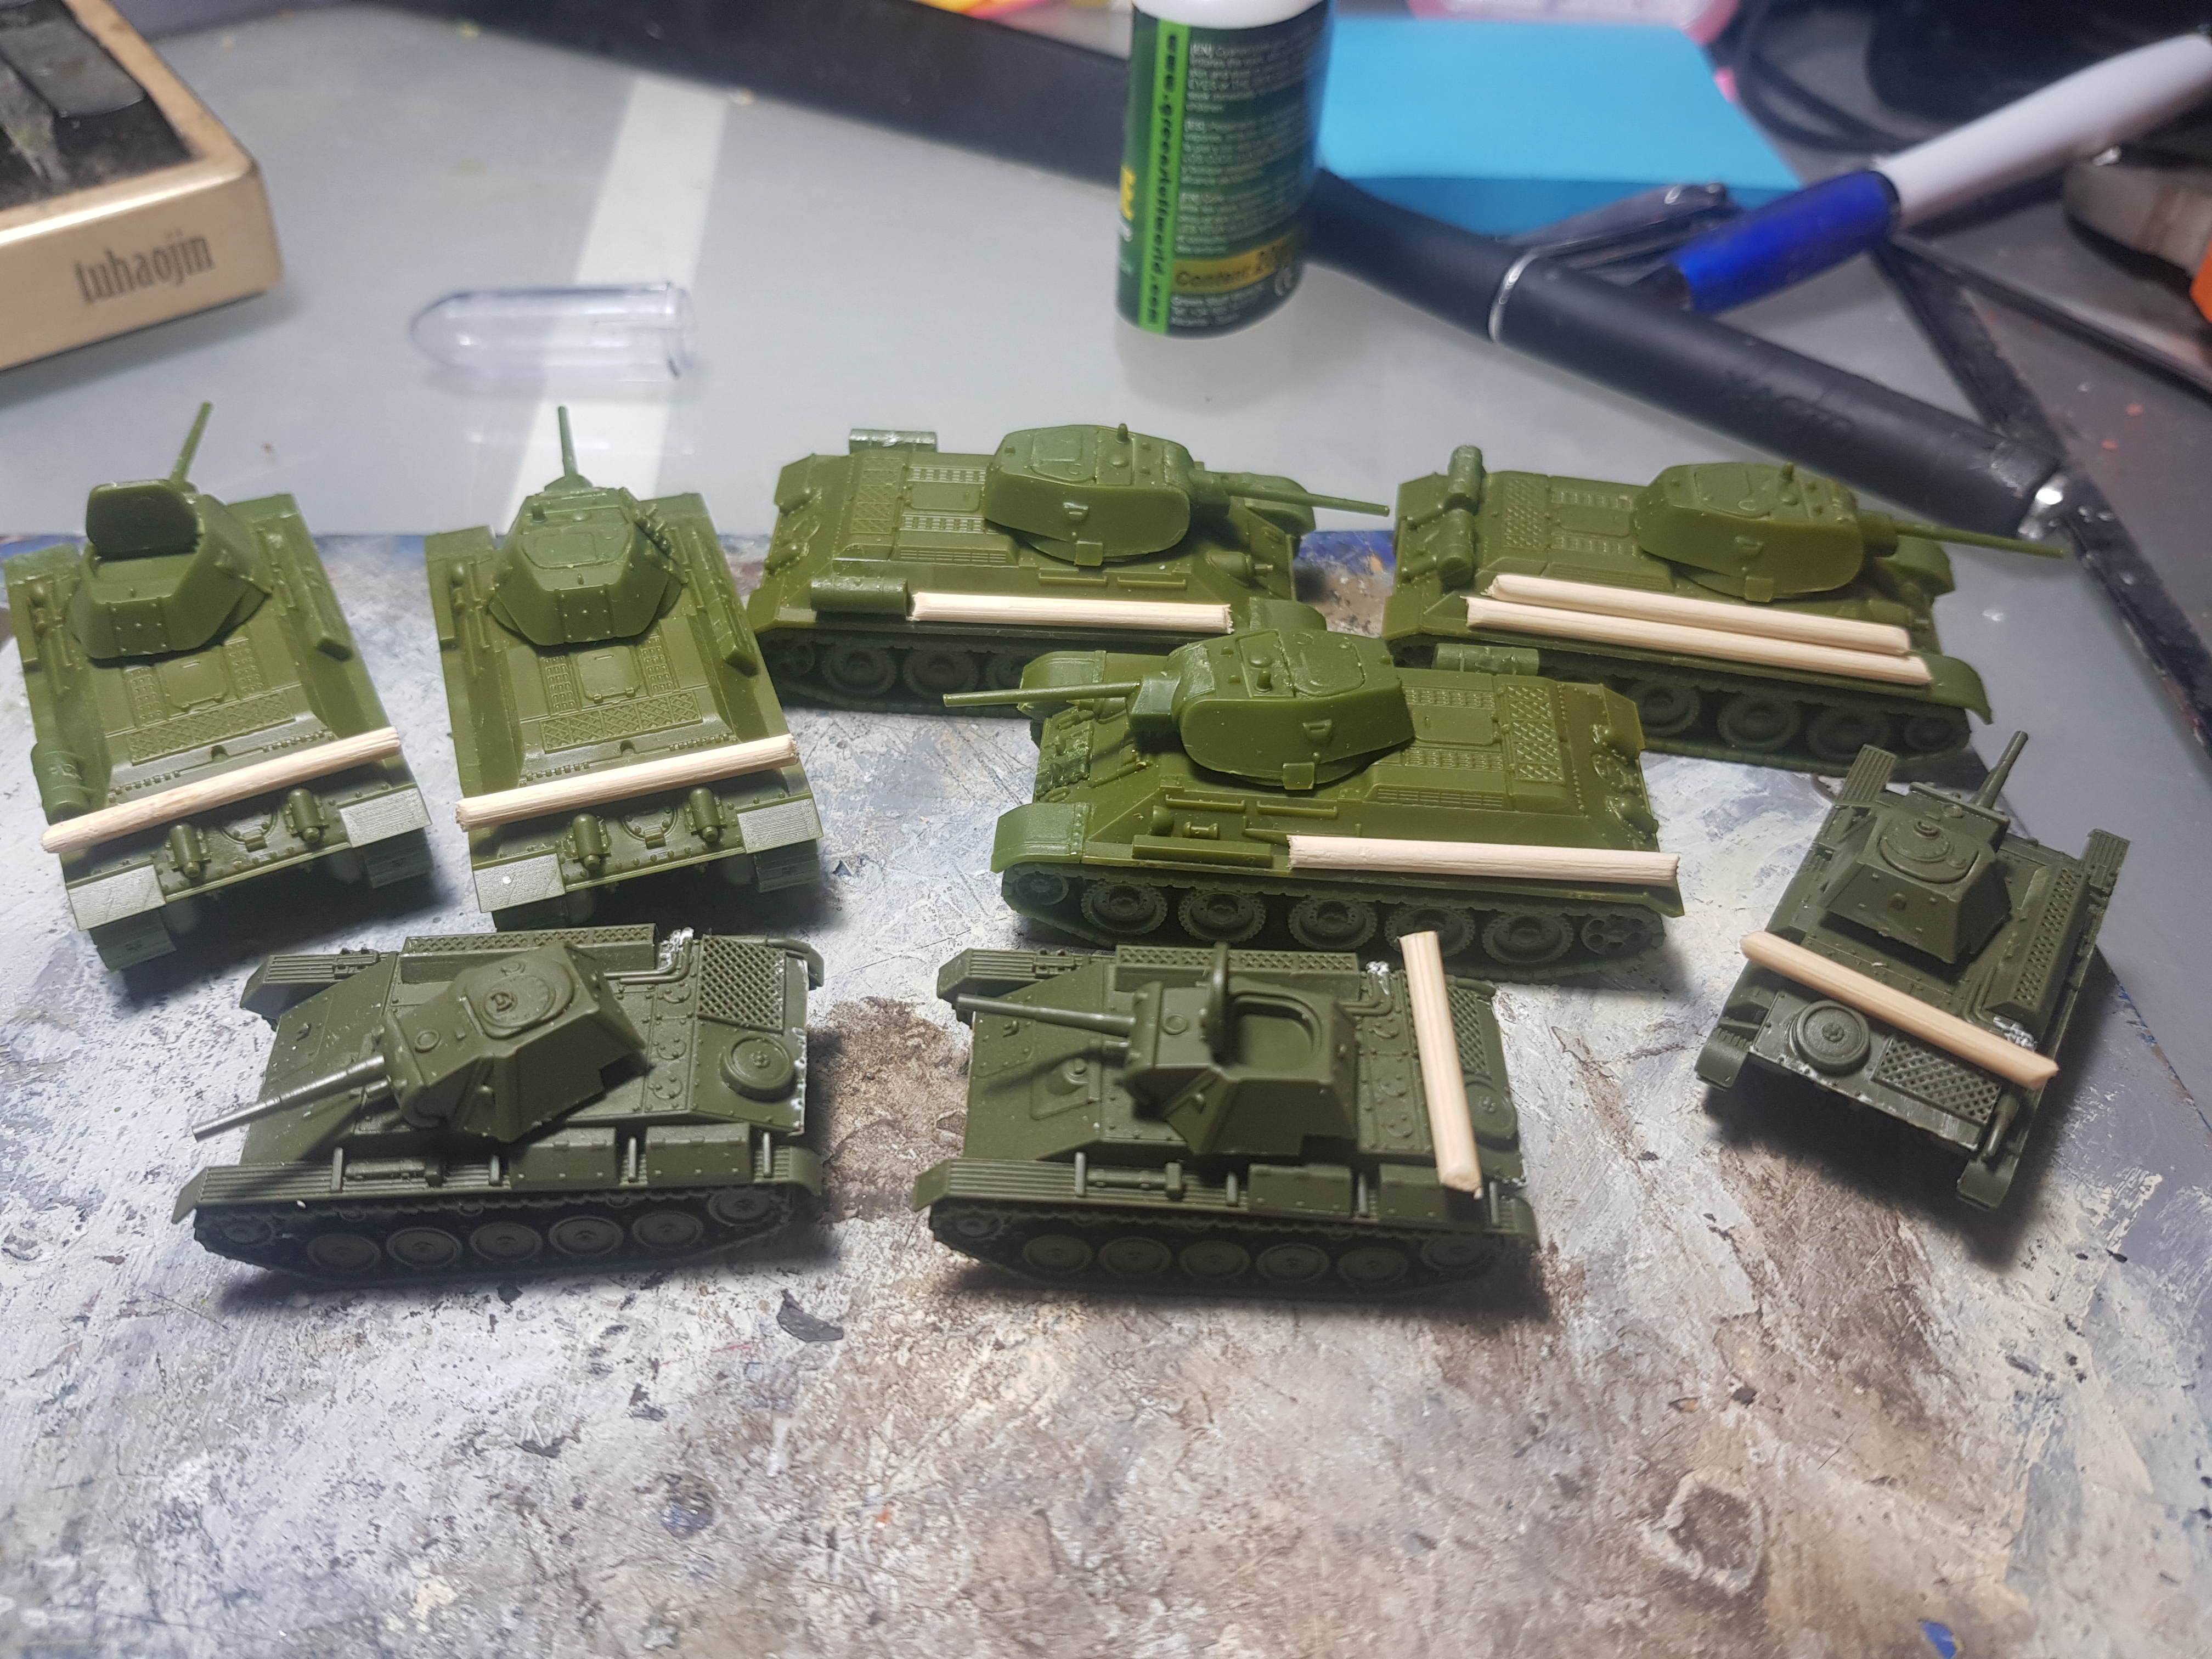
Logging...
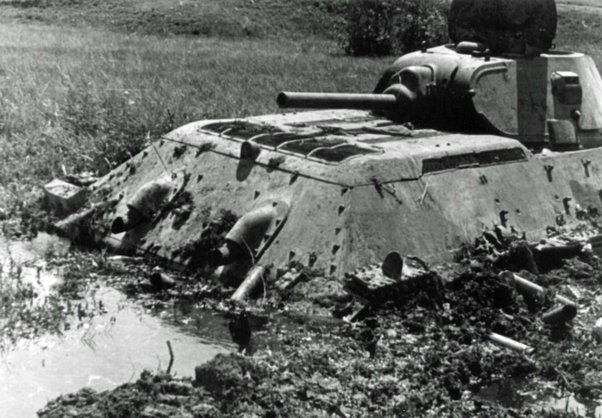
Well, let’s prevent this from happening or at least provide the tank crews a way to get their tanks out.
I found that on the Battlefront kits something was severely lacking from the Soviet tanks, logs. I got some bamboo BBQ skewers, cut them in bits and glued them on with a bit of superglue. Simple 15mm logs.
Sculpting Tiny Hats
So I went in to fix the hats of the 2 I did earlier with some greenstuff. I think it went well, the silicone sculpting brushes I bought some time ago really helped doing this on 15mm figures. I am just going to have to smooth it out when it is cured tomorrow.
The Rest of the Team
In Flames of War basic infantry teams consist of 4 models on a single base, so I prepped 3 more Cossacks to paint up and join the one I did today. Now, I did cut the hats a little bit too short I feel on these. I don’t think it is going to be a problem, but definitely something I am going to have to pay attention to next time.
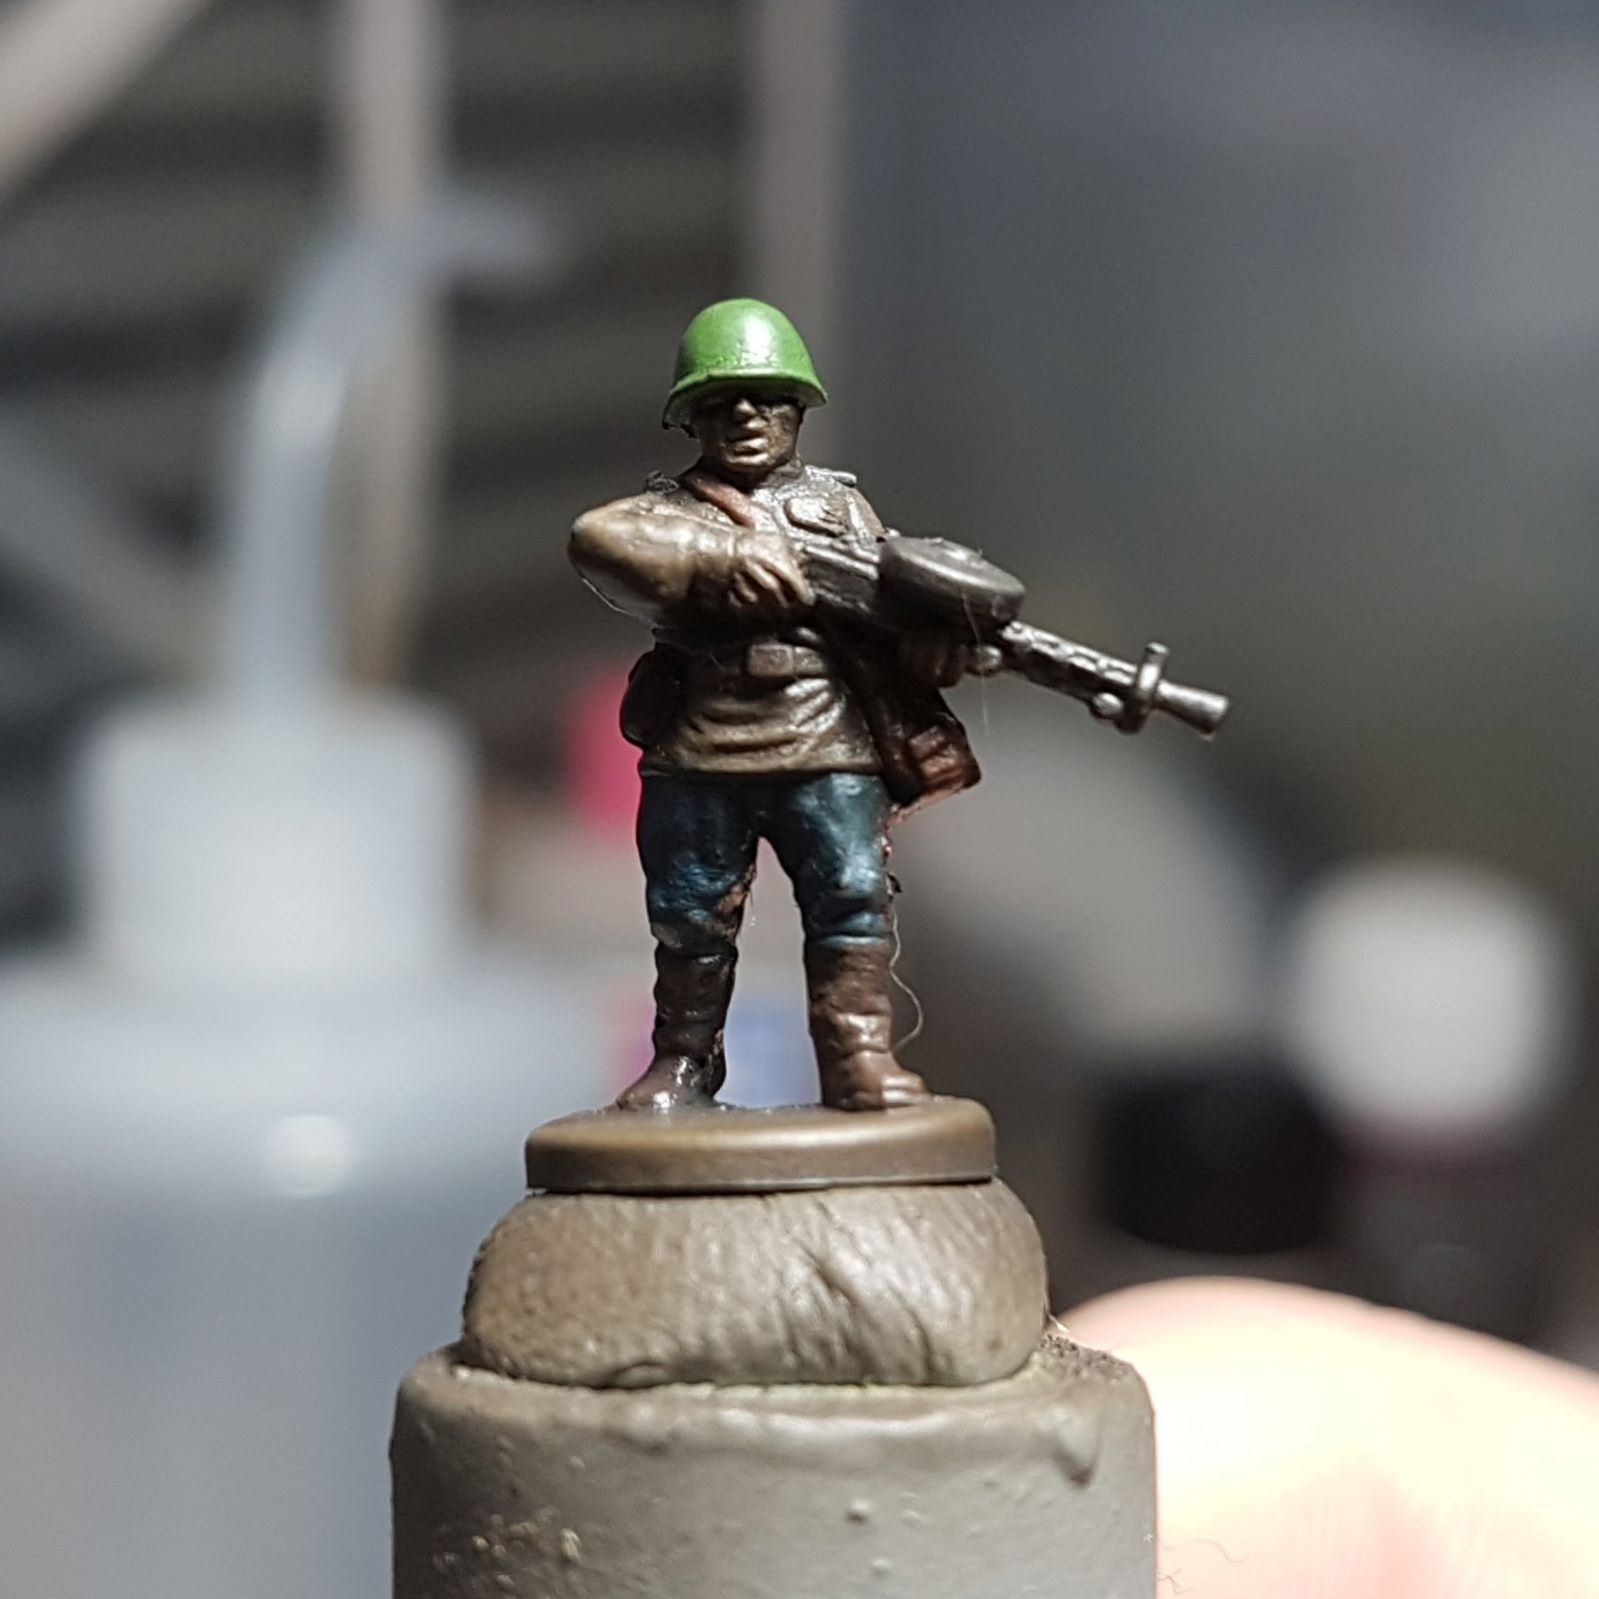
The Gerry Shot.
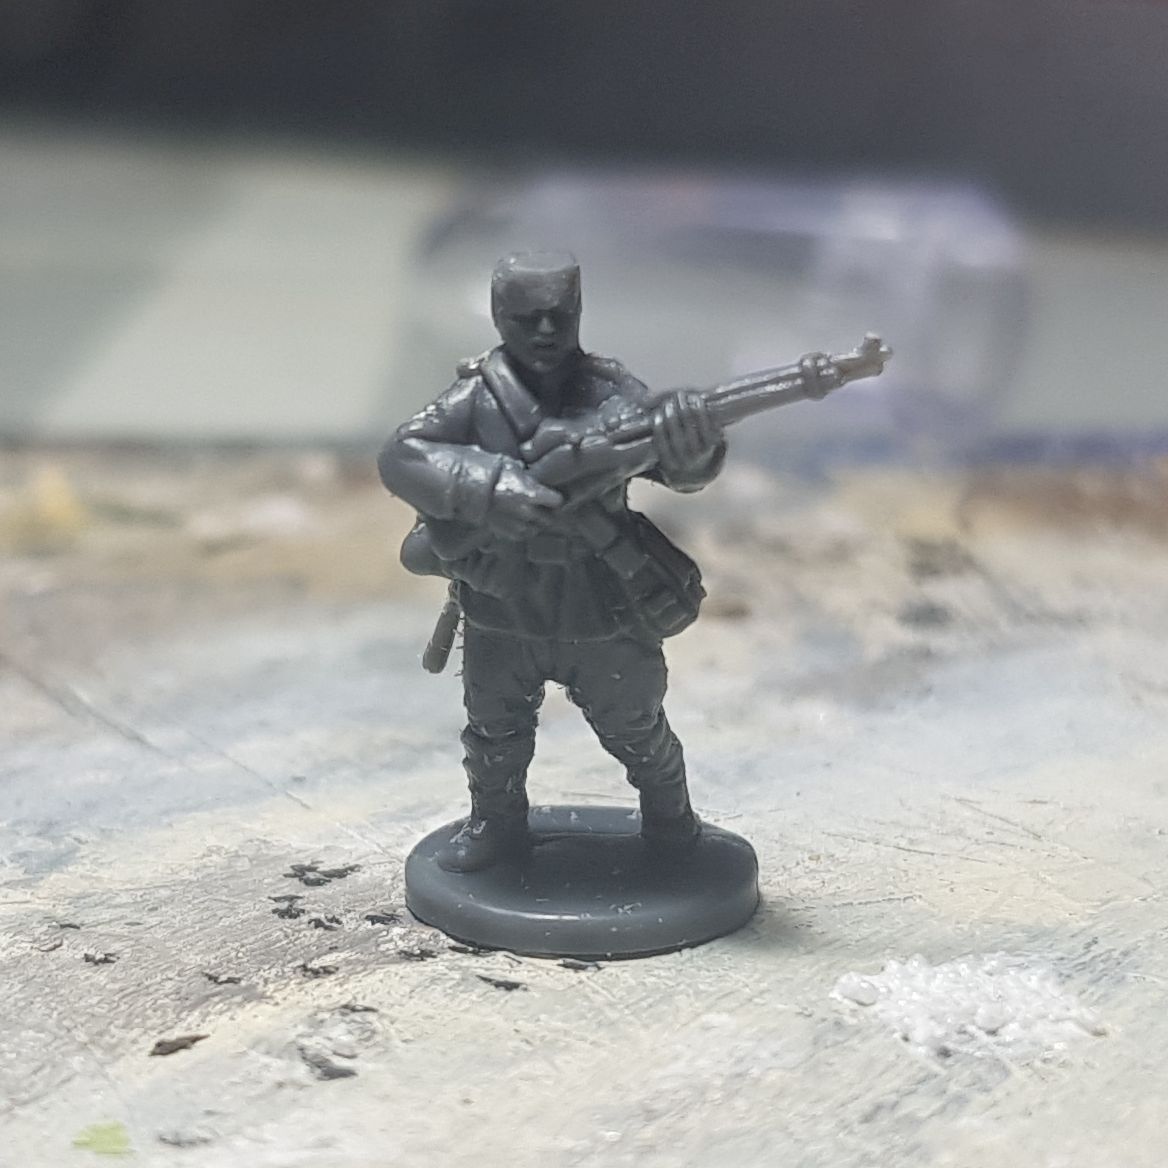
As I was painting the Cossack and making pictures along the way, it was obvious my camera struggled to focus on something this small. So here is the Gerry shot, a blurry miniature and a sharp Gerry…..

The 1st of the 9th.
 Cossacks in Steel Division 2
So, here is the test Cossack going through the painting….. blender? Not sure where I was going with that, but here we go.
I started with a base coat of Vallejo Model Color German Cam. Med. Brown (70.826) applied with my airbrush. I then painted the rim of the hat with Vallejo Model Air Dark Sea Gray (71.053) and did the trousers and the shoulder loops with Scale 75 Scalecolor Cantabric Blue (SC-53).


Next up I did the metal bits of the rifle with Vallejo Metal Color Burnt Iron (77.721). The brush I use for my metallics isn’t as well pointed as my main brush, so the sooner I did that the better. Then I did the top of the hat and the stripes on the trousers with a bit of Vallejo Model Color Flat Red (70.957) followed by the wooden stock of the rifle and the handle of the spade on his back with Vallejo Panzer Aces New Wood (70.311).


The bag he was carrying I did with Vallejo Model Color Red Leather (70.818). I then started to do the cross and the dot on the hat with Scale 75 Scalecolor Sol Yellow (SC-40) and then the skin with Scale 75 Scalecolor Basic Flesh (SC-20).


All the equipment he is packing and his boots I did with Vallejo Panzer Aces Leather Belt (70.312) and then I did the hair and my attempt at a moustache with Vallejo Model Color Black Grey (70.862).


And that is the acrylic colours on the first Cossack of the 9th Guards Cavalry done.


I really enjoyed painting him, the size was not a problem for me at all and I may actually enjoy it more than painting 28mm models. Although you should ask me if I still do after I painted hundreds of them like this…..
As you can see in my reference on the top, not all them have blue trousers and not all of them wear the hat. The trousers that I don’t do in this blue will just be in the base colour I apply in the first step and the helmets will be painted using Vallejo Game Color Goblin Green (72.030).
My camera was stuggling way more seeing the detail clearly on these models than I was, so the quality isn’t always the best due to cropping and such.
Worse than GW Failcast....
I literally found a material I loathe working with more than GW failcast…… It is the Battlefront flexible thermo-plastic. Luckily it is only the German gun crews that are in this horrible stuff, but they all have a mould line right across their helmets….. Small mould lines in the clothing you’re not likely to see, but on top of the helmet…. All you can do is cut it, you can’t scrape, you can’t sand and with my hands I am not stable enough to cut the mould line clean off the helmet. So most of them are going to have little dimples in the helmet and mould lines in places where I just couldn’t get them off. I would seriously prefer GW failcast….

Can I Thin This?
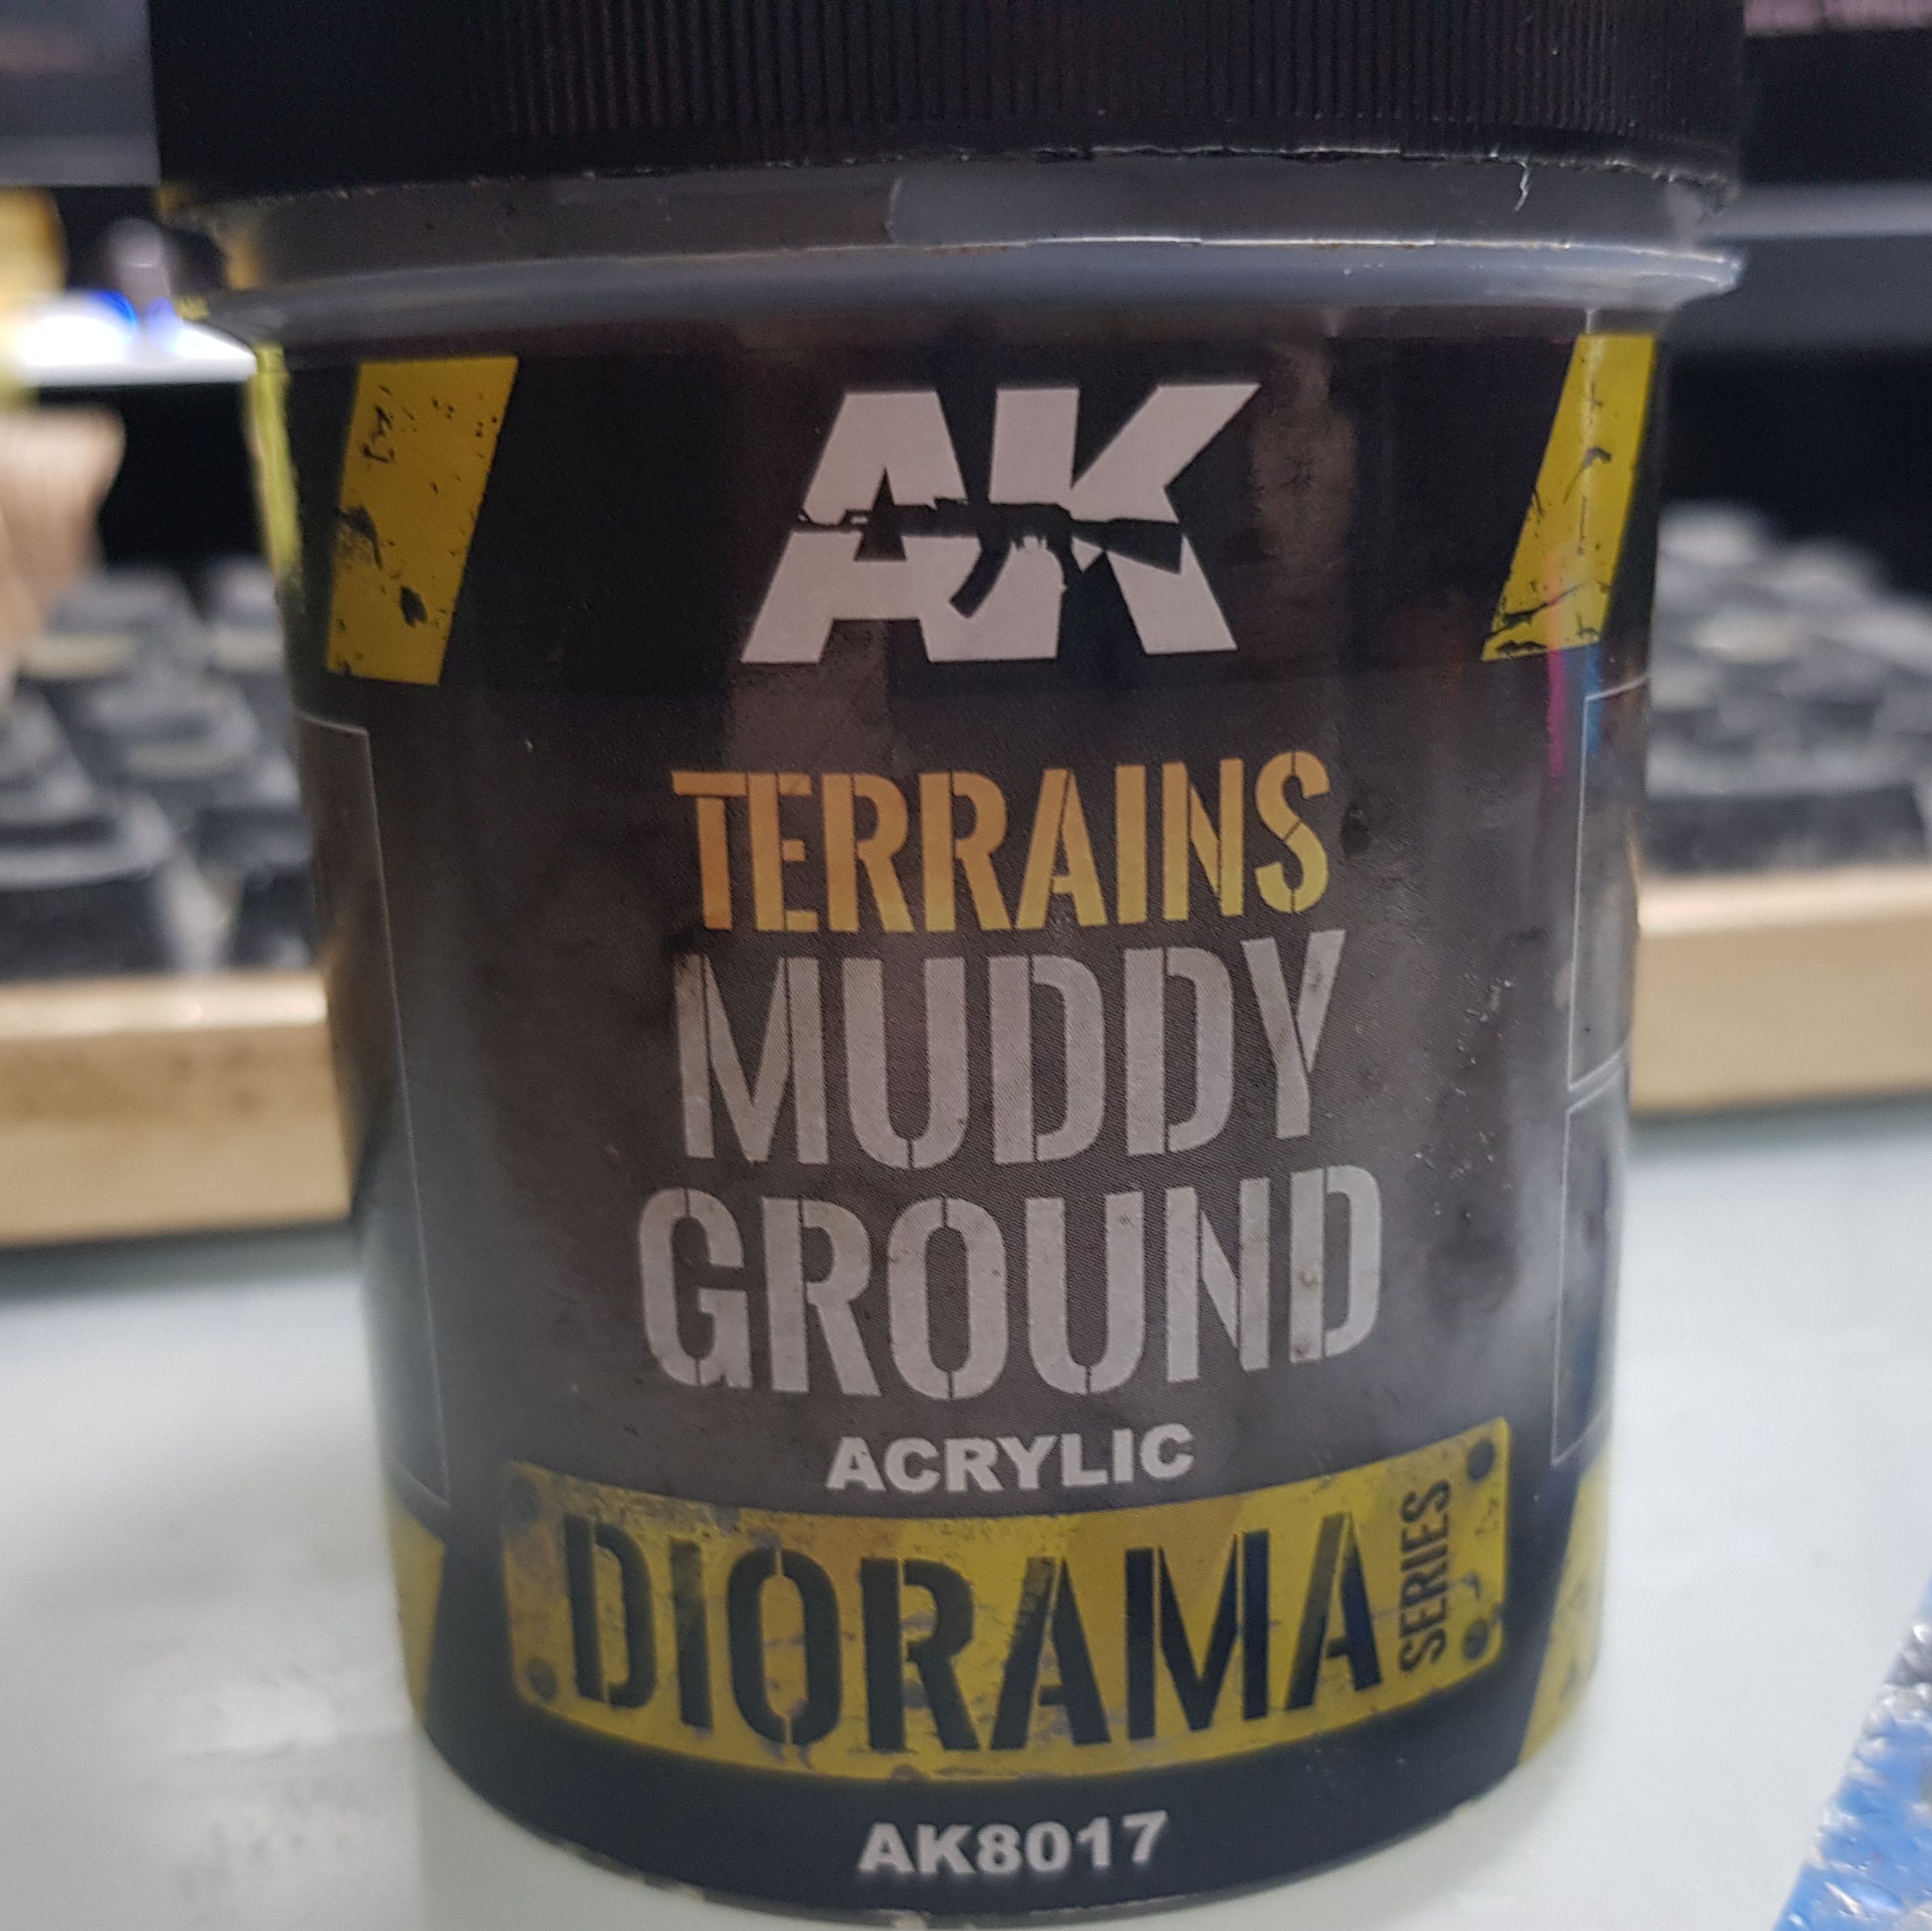
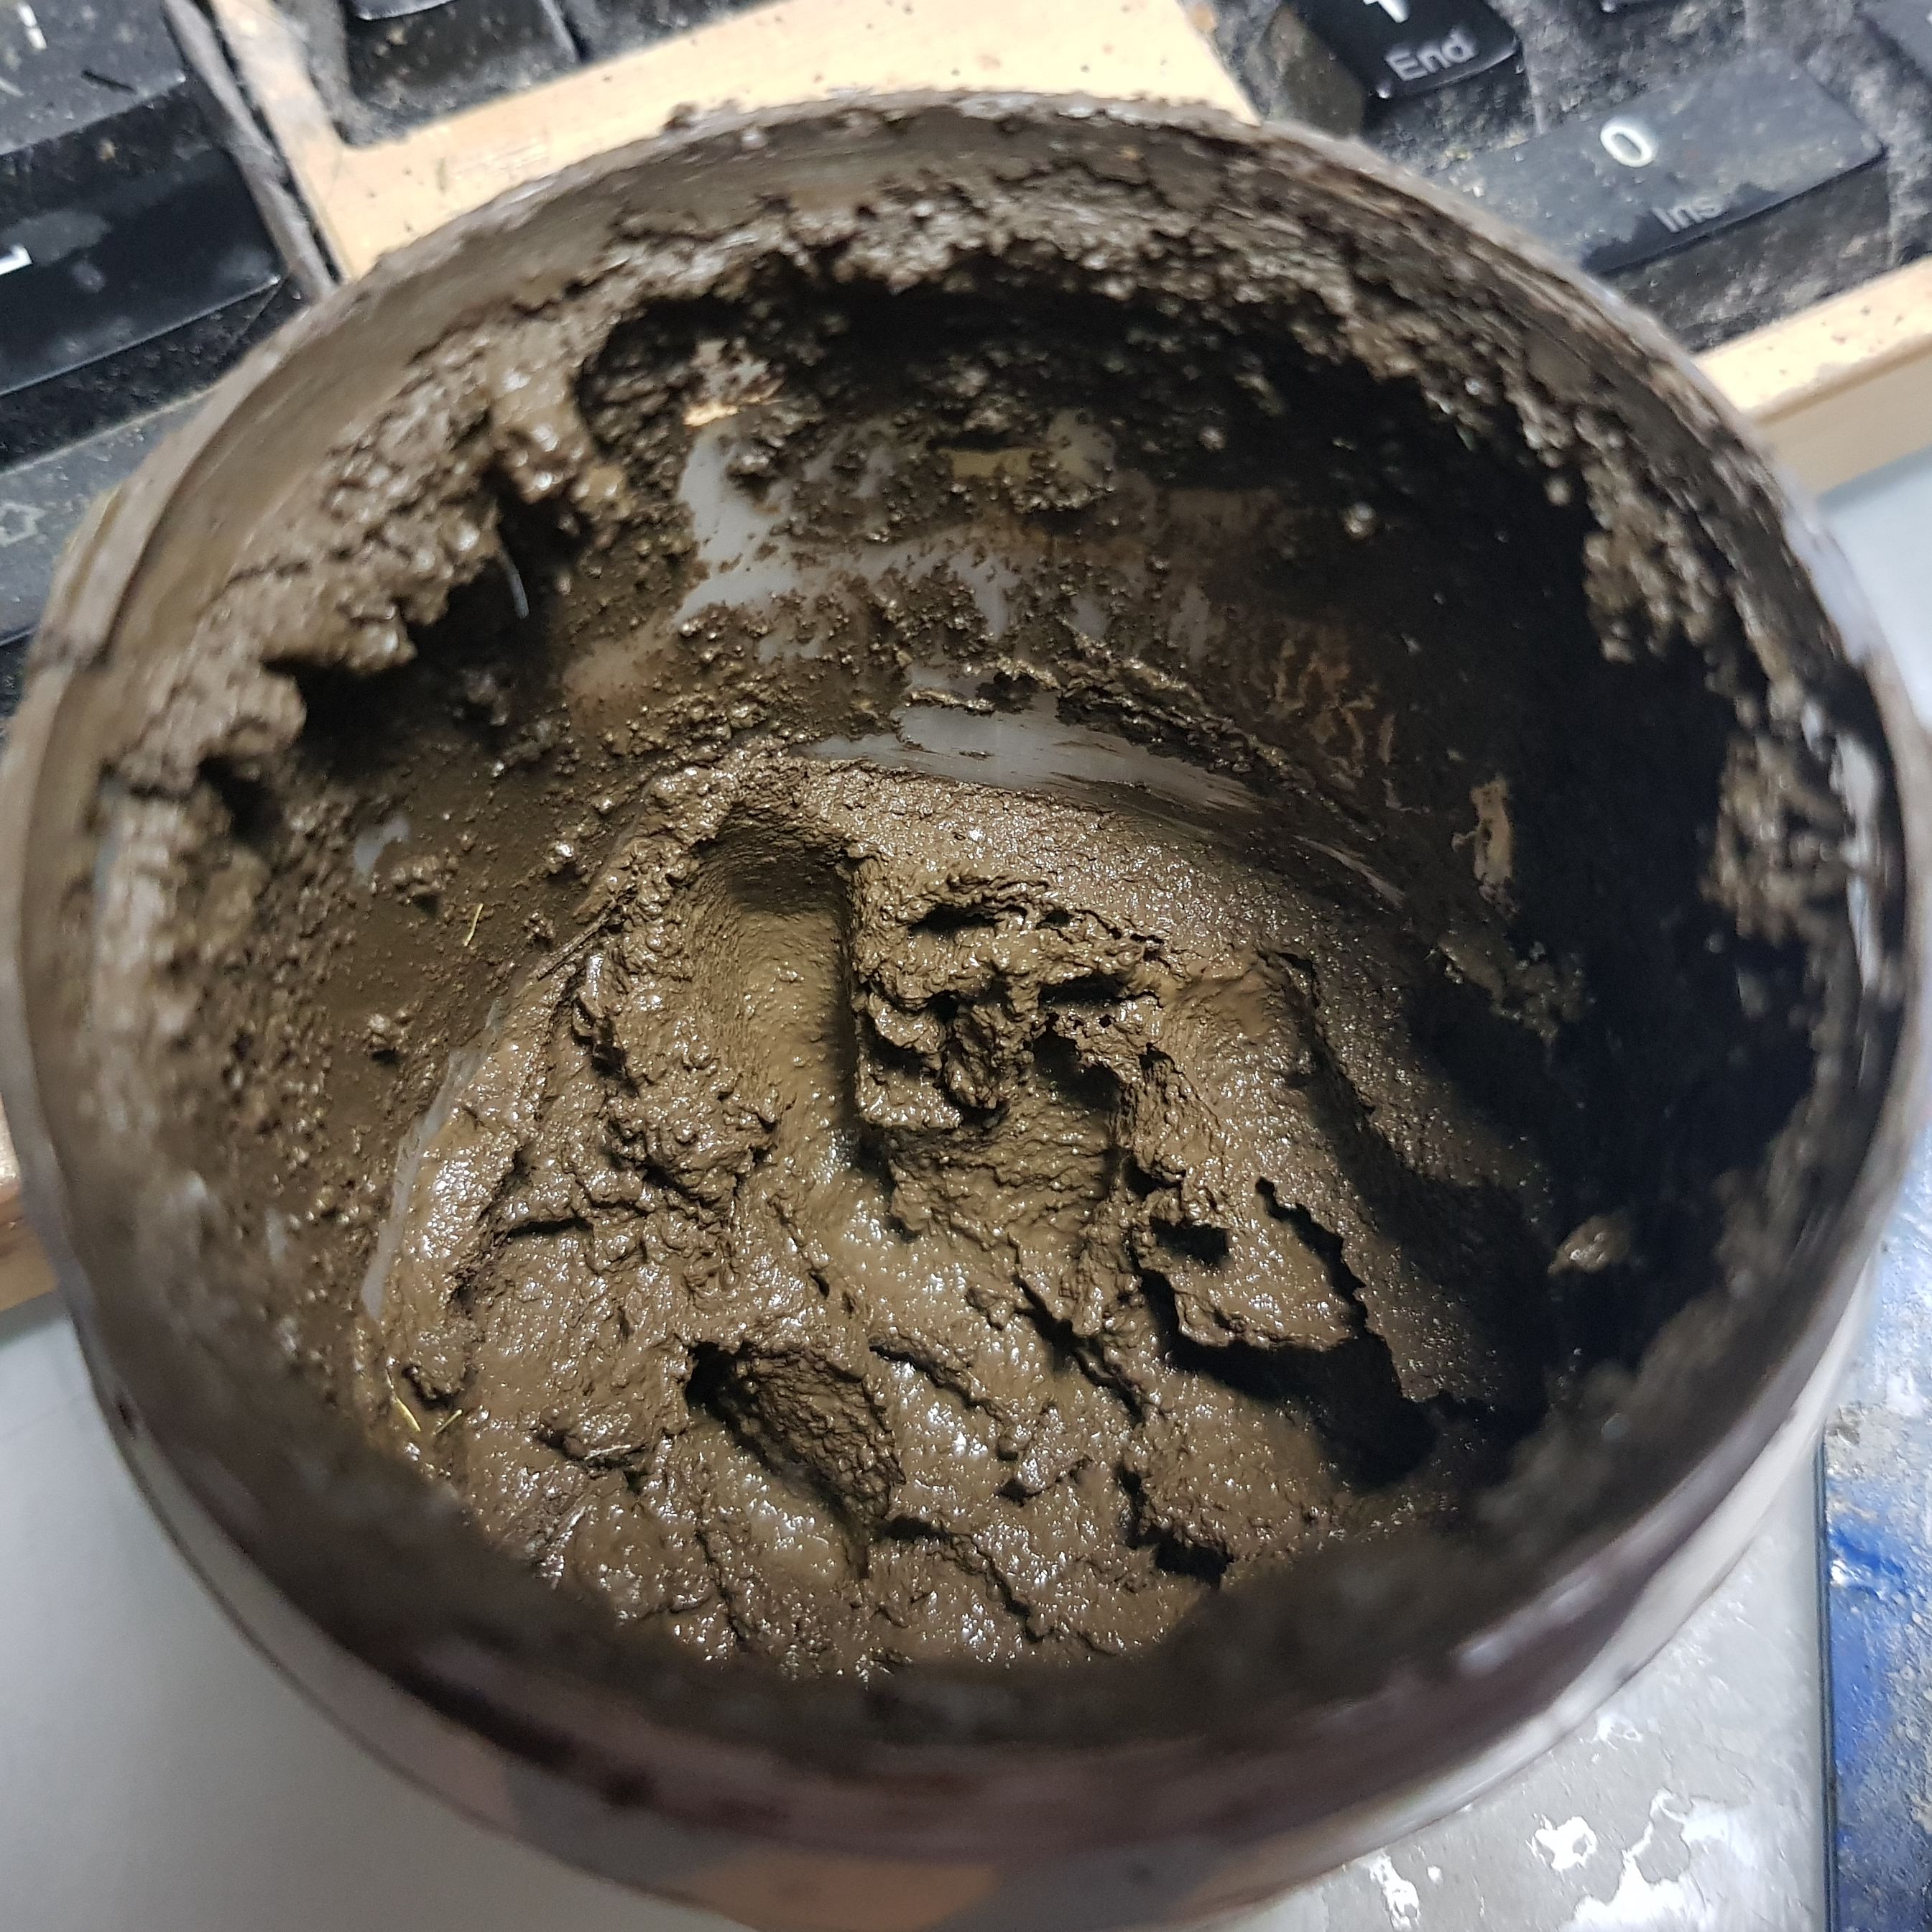
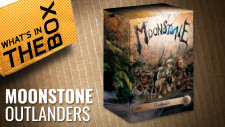
Since I am painting all the figures separately and then putting them on their base and then doing the base I need something I can easily put on for texture. Now I was first thinking of doing this straight up as I have always done, but I thought it might be too thick. So I went with the texture paste, but I’d still have to paint it. So I started thinking, can I thin this. For some reason I had not thought of this before, but it does say on the tub that you can, so I gave it a try.
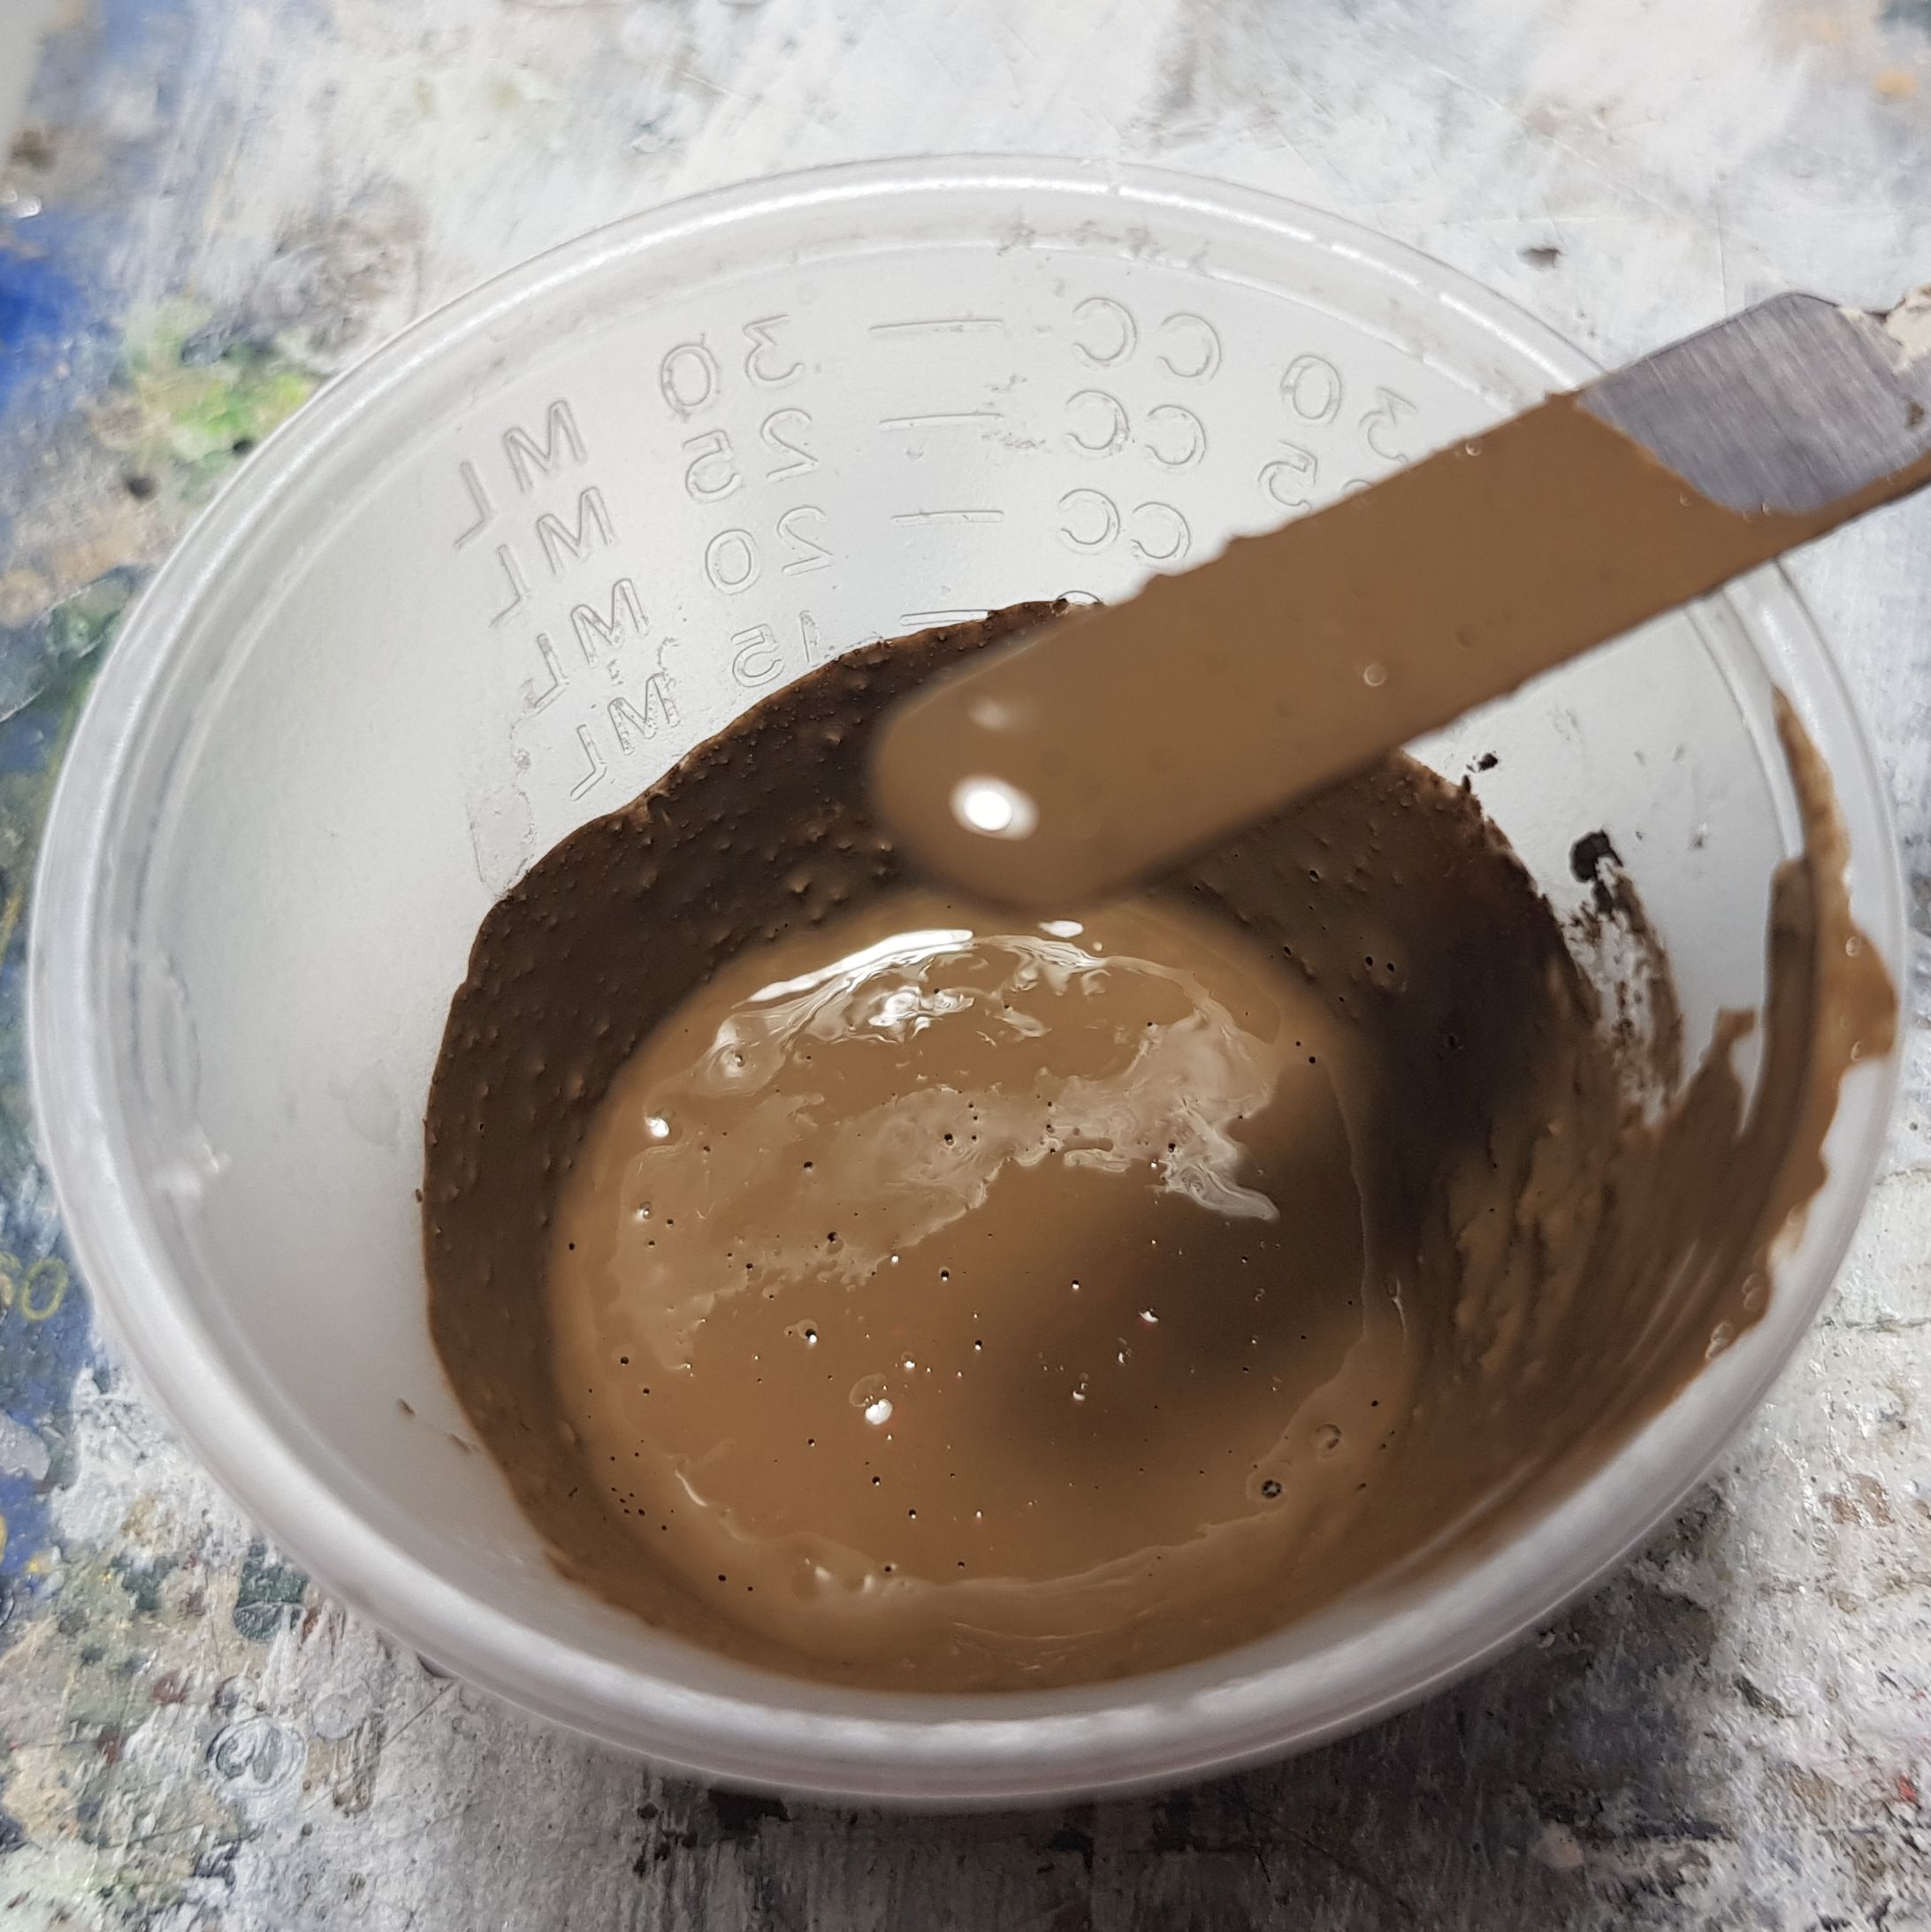 I CAN THIN THIS!!!
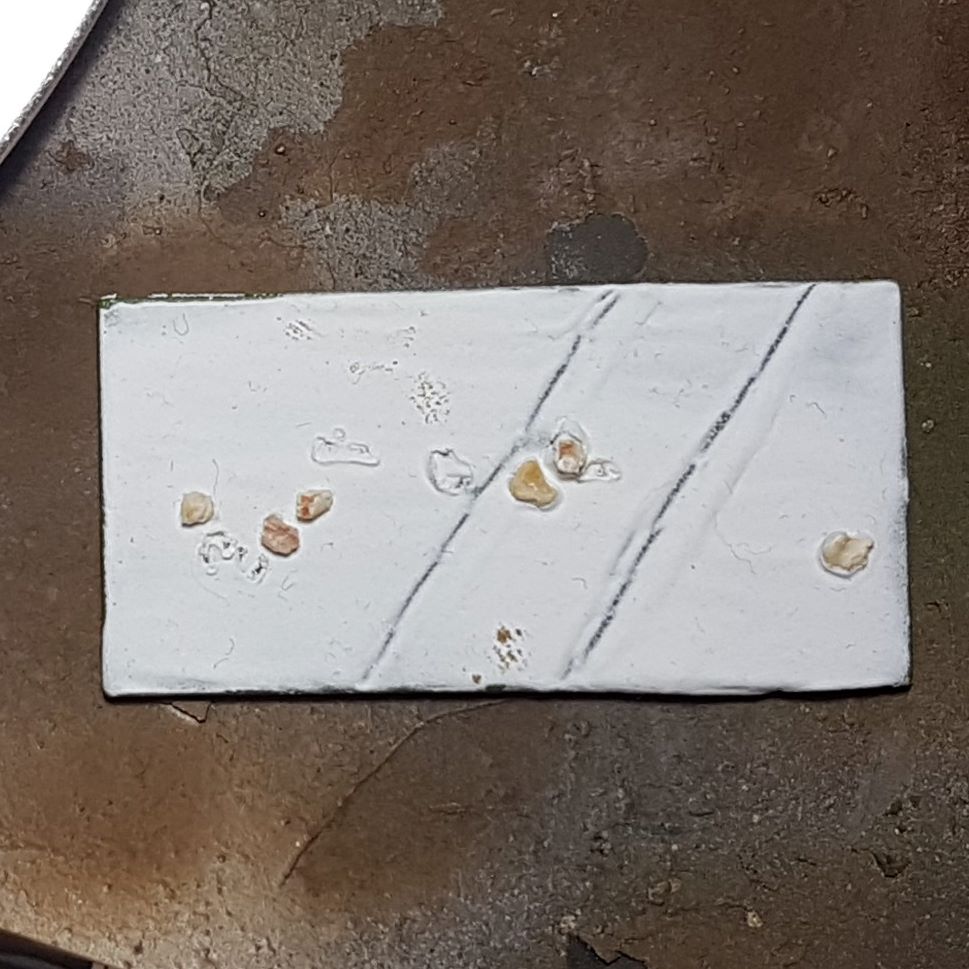
I thinned it with just water and spread it over a base, the base on the right has a thicker mix than the left and I think the thicker mix is somewhat better, but I also think both will do fine. This means I have to be less accurate with my mixing.
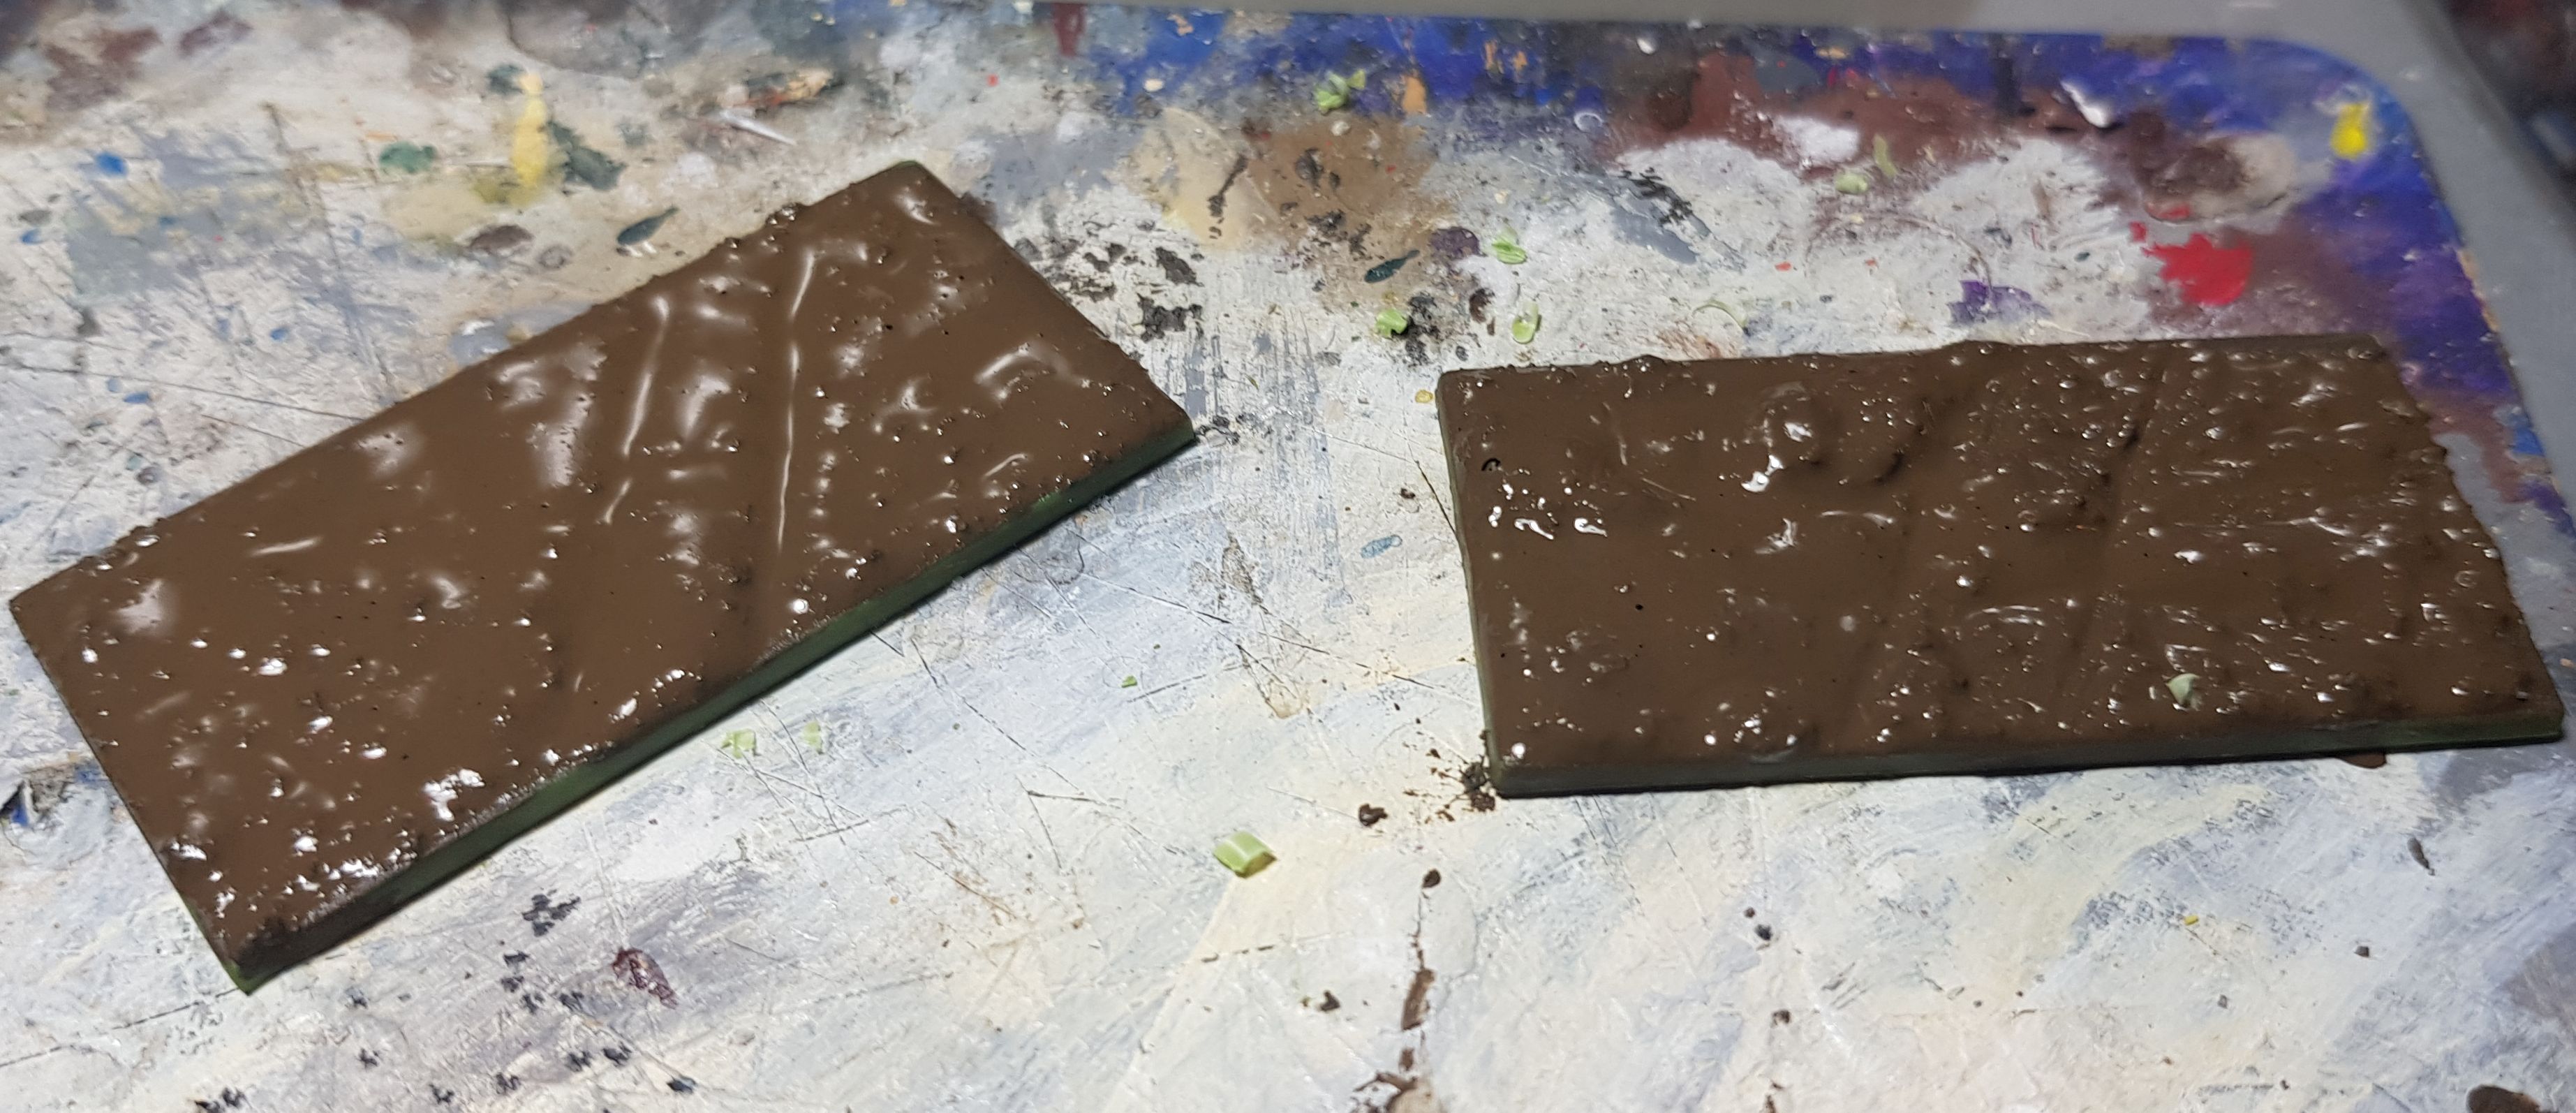
So the plan is that I prime the bases, then glue the painted models onto it and then paint this muddy sludge on. After that all I have to do is make sure the rim is painted and the models are blended it with the base.
I am also going to have to add some tufts or rubble and stuff to it, I still need to have a think about what exactly I am going to do for that.
On a side note, I am also thinking that for all the tanks that I do for the Germans, not the tank hunters or anti-tank vehicles, I may want to do a different division. I was thinking of a Waffen SS Panzer division, but I may do a Wehrmacht one instead, I am not sure yet. If anyone has any good ideas that would fit this project, let me know.
Random Baguette.
I was cleaning this Panzergrenadier MG34 team and I started wondering, why is this guy carrying a baguette on his back?

A Field Gun Kind of a Day.
Today has been a field gun kind of a day for me, so over the time of the day I slowly put together 2 PaK 38s, 3 Nebelwerfers and 4 ZiS-3 guns. I will still have to drill out the barrels, but the smallest drill bit I have is as blunt as a dodo so I need to get some new ones.
 PaK 38
 ZiS-3
ZiS-3 15cm Baguet...... Nebelwerfer.
 Another Change....
While this might seem like the most unstable project I have ever created, it kind of isn’t. This project came forth in order for me to cope with a mental health breakdown and thus it hadn’t been thought out as much as I usually do.
Because of limited space after the renovations of my apartment, I can only have a 3×4 table setup rather than the 6×4 I had before. The 6×4 was actually already too big for my apartment before, but since things have gotten even smaller it pushes this fact out a little more. Now in order to make Flames of War still a great game to play with armies of like 100 points or so, I have decided to really focus on urban warfare. The close urban warfare from the battle of Stalingrad would still be great to do at 3×4. I also said that I didn’t want to do winter stuff and the battle of Stalingrad happened way before winter started in 1942. However the battle of Stalingrad is just 1 battle and doesn’t give me much options for moving forward. So I have decided to look into the many battles of Kharkov, none of which took part in the winter and are spread between 1941 and 1943 and thus will be a perfect focus for everything I want to do mid-war.
I am also making a small change to the German army list. I am changing the Panzer III (Uparmoured) Tank Platoon to normal Panzer III Tank Platoon with long 5cm guns. This would be equivalent to the Panzer III Ausf. J rather than the Ausf. L. These were a bit more common in the early parts of mid war and the only real difference for those equipped with the 5 cm KwK 39 L/60 gun is the spaced armour that the Ausf. L has. It also brings the point balance a little bit closer. Now I could have gone for 4 short 5cm ones rather than 3 long 5cm ones as it would make the point levels completely equal, but I really like the long 5cm guns. For those who don’t know, the Panzer III Ausf. L is my favourite German tank and this way I can still build an Ausf. L command tank. I’ll get more Panzer IIIs later most likely.
Soviet Tank Factory
It’s been a bit too hot today for any painting, so I have been a bit of a Soviet tank factory today.
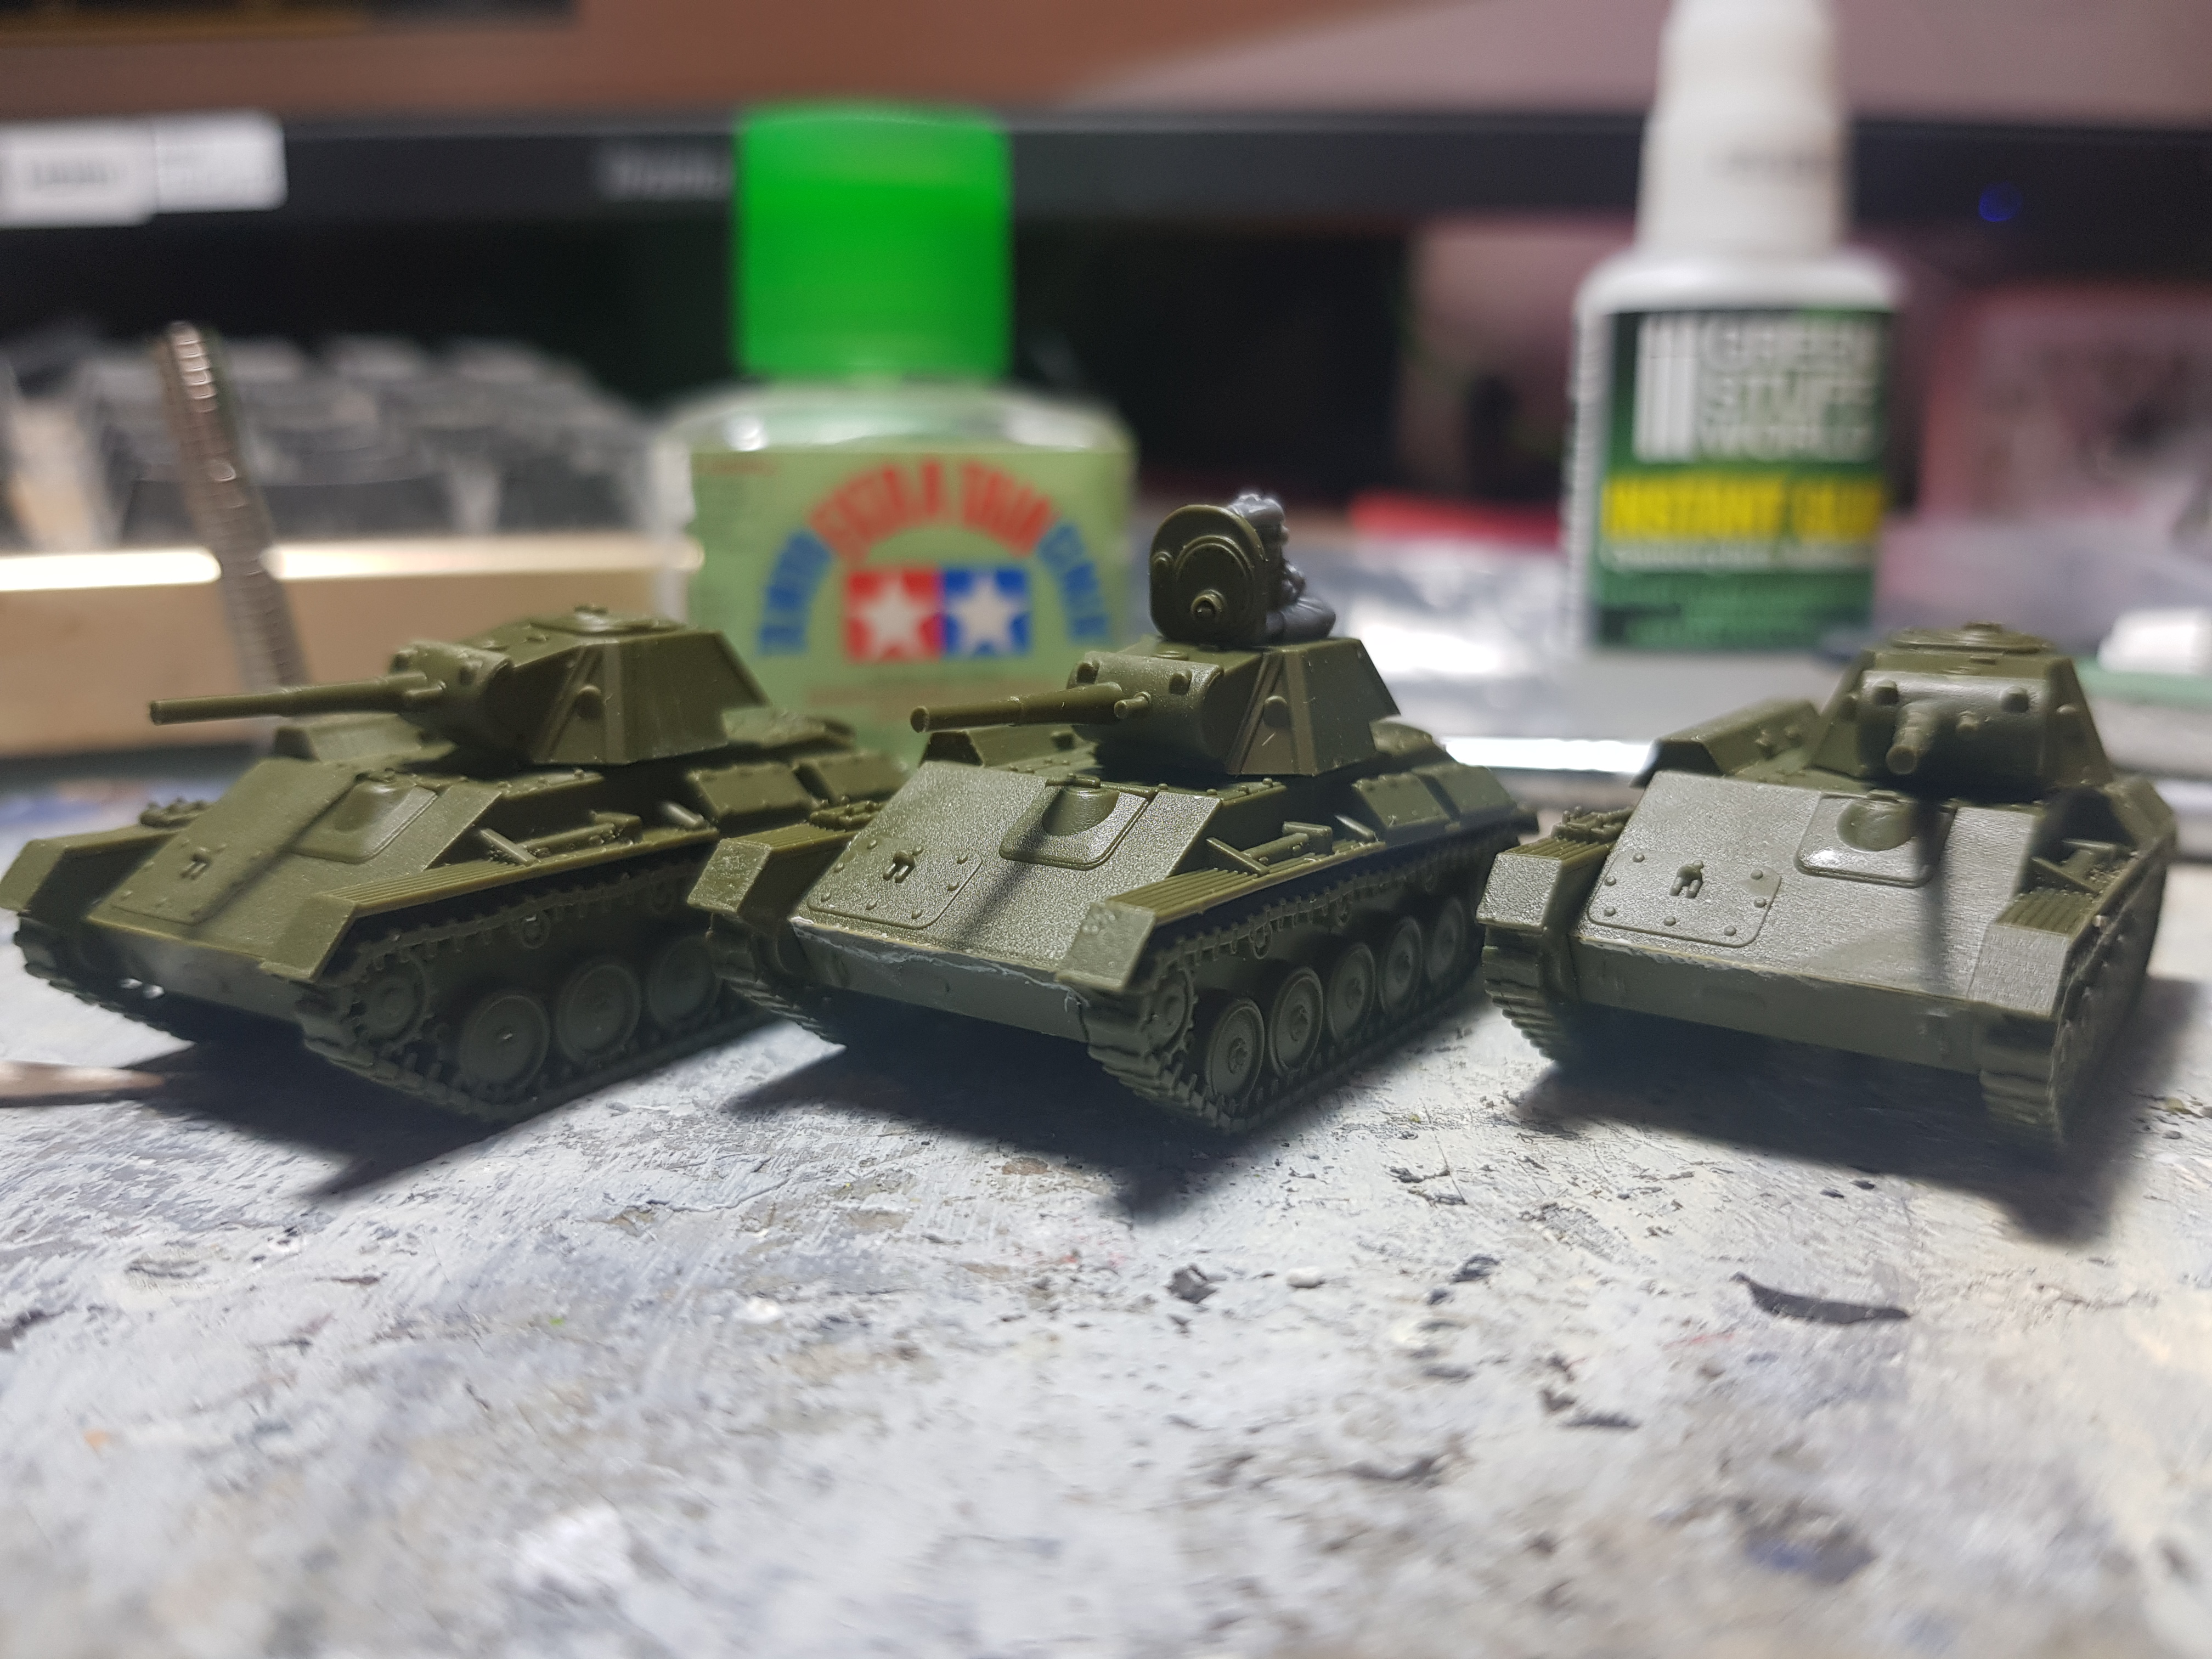 T-70
T-70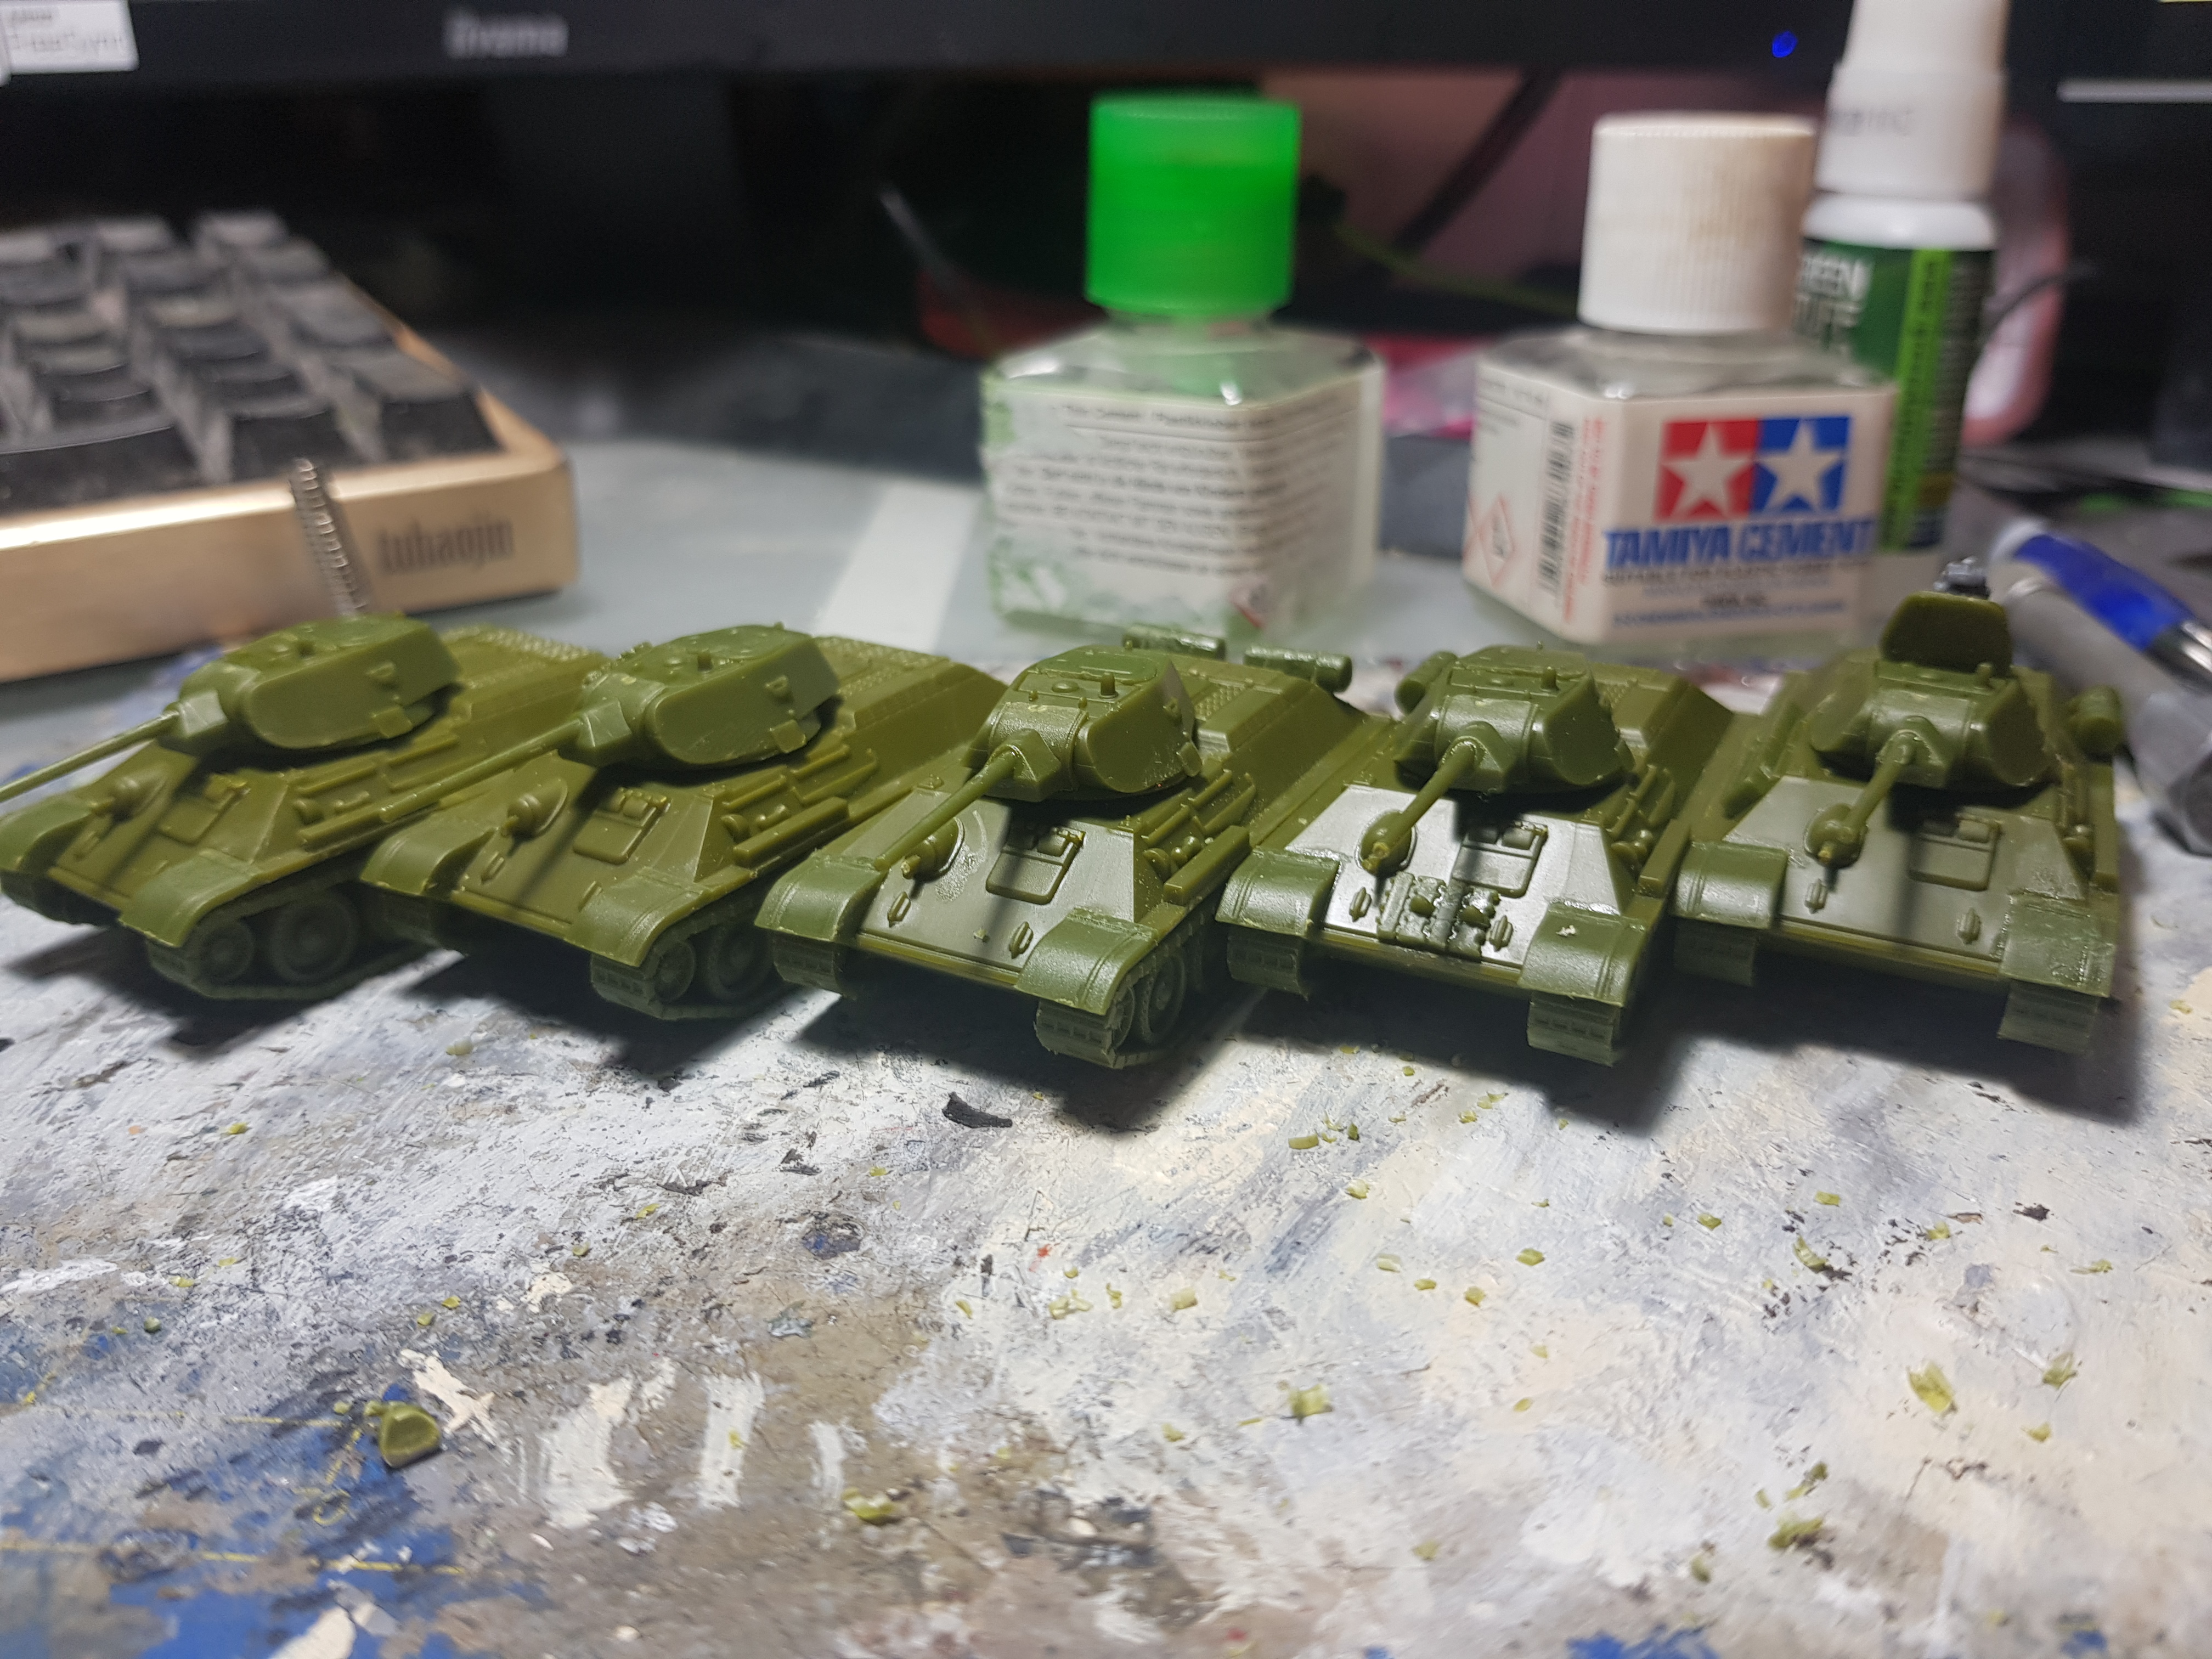 T-34/76 Mod. 1941
Biting Myself in the Foot or in the Tail....
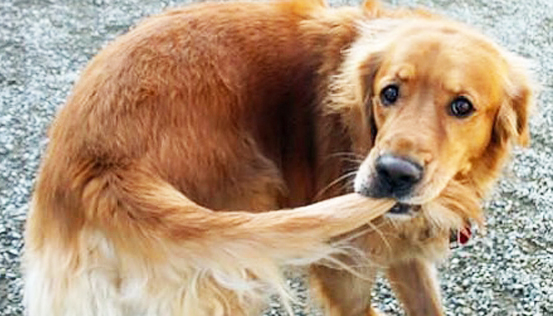
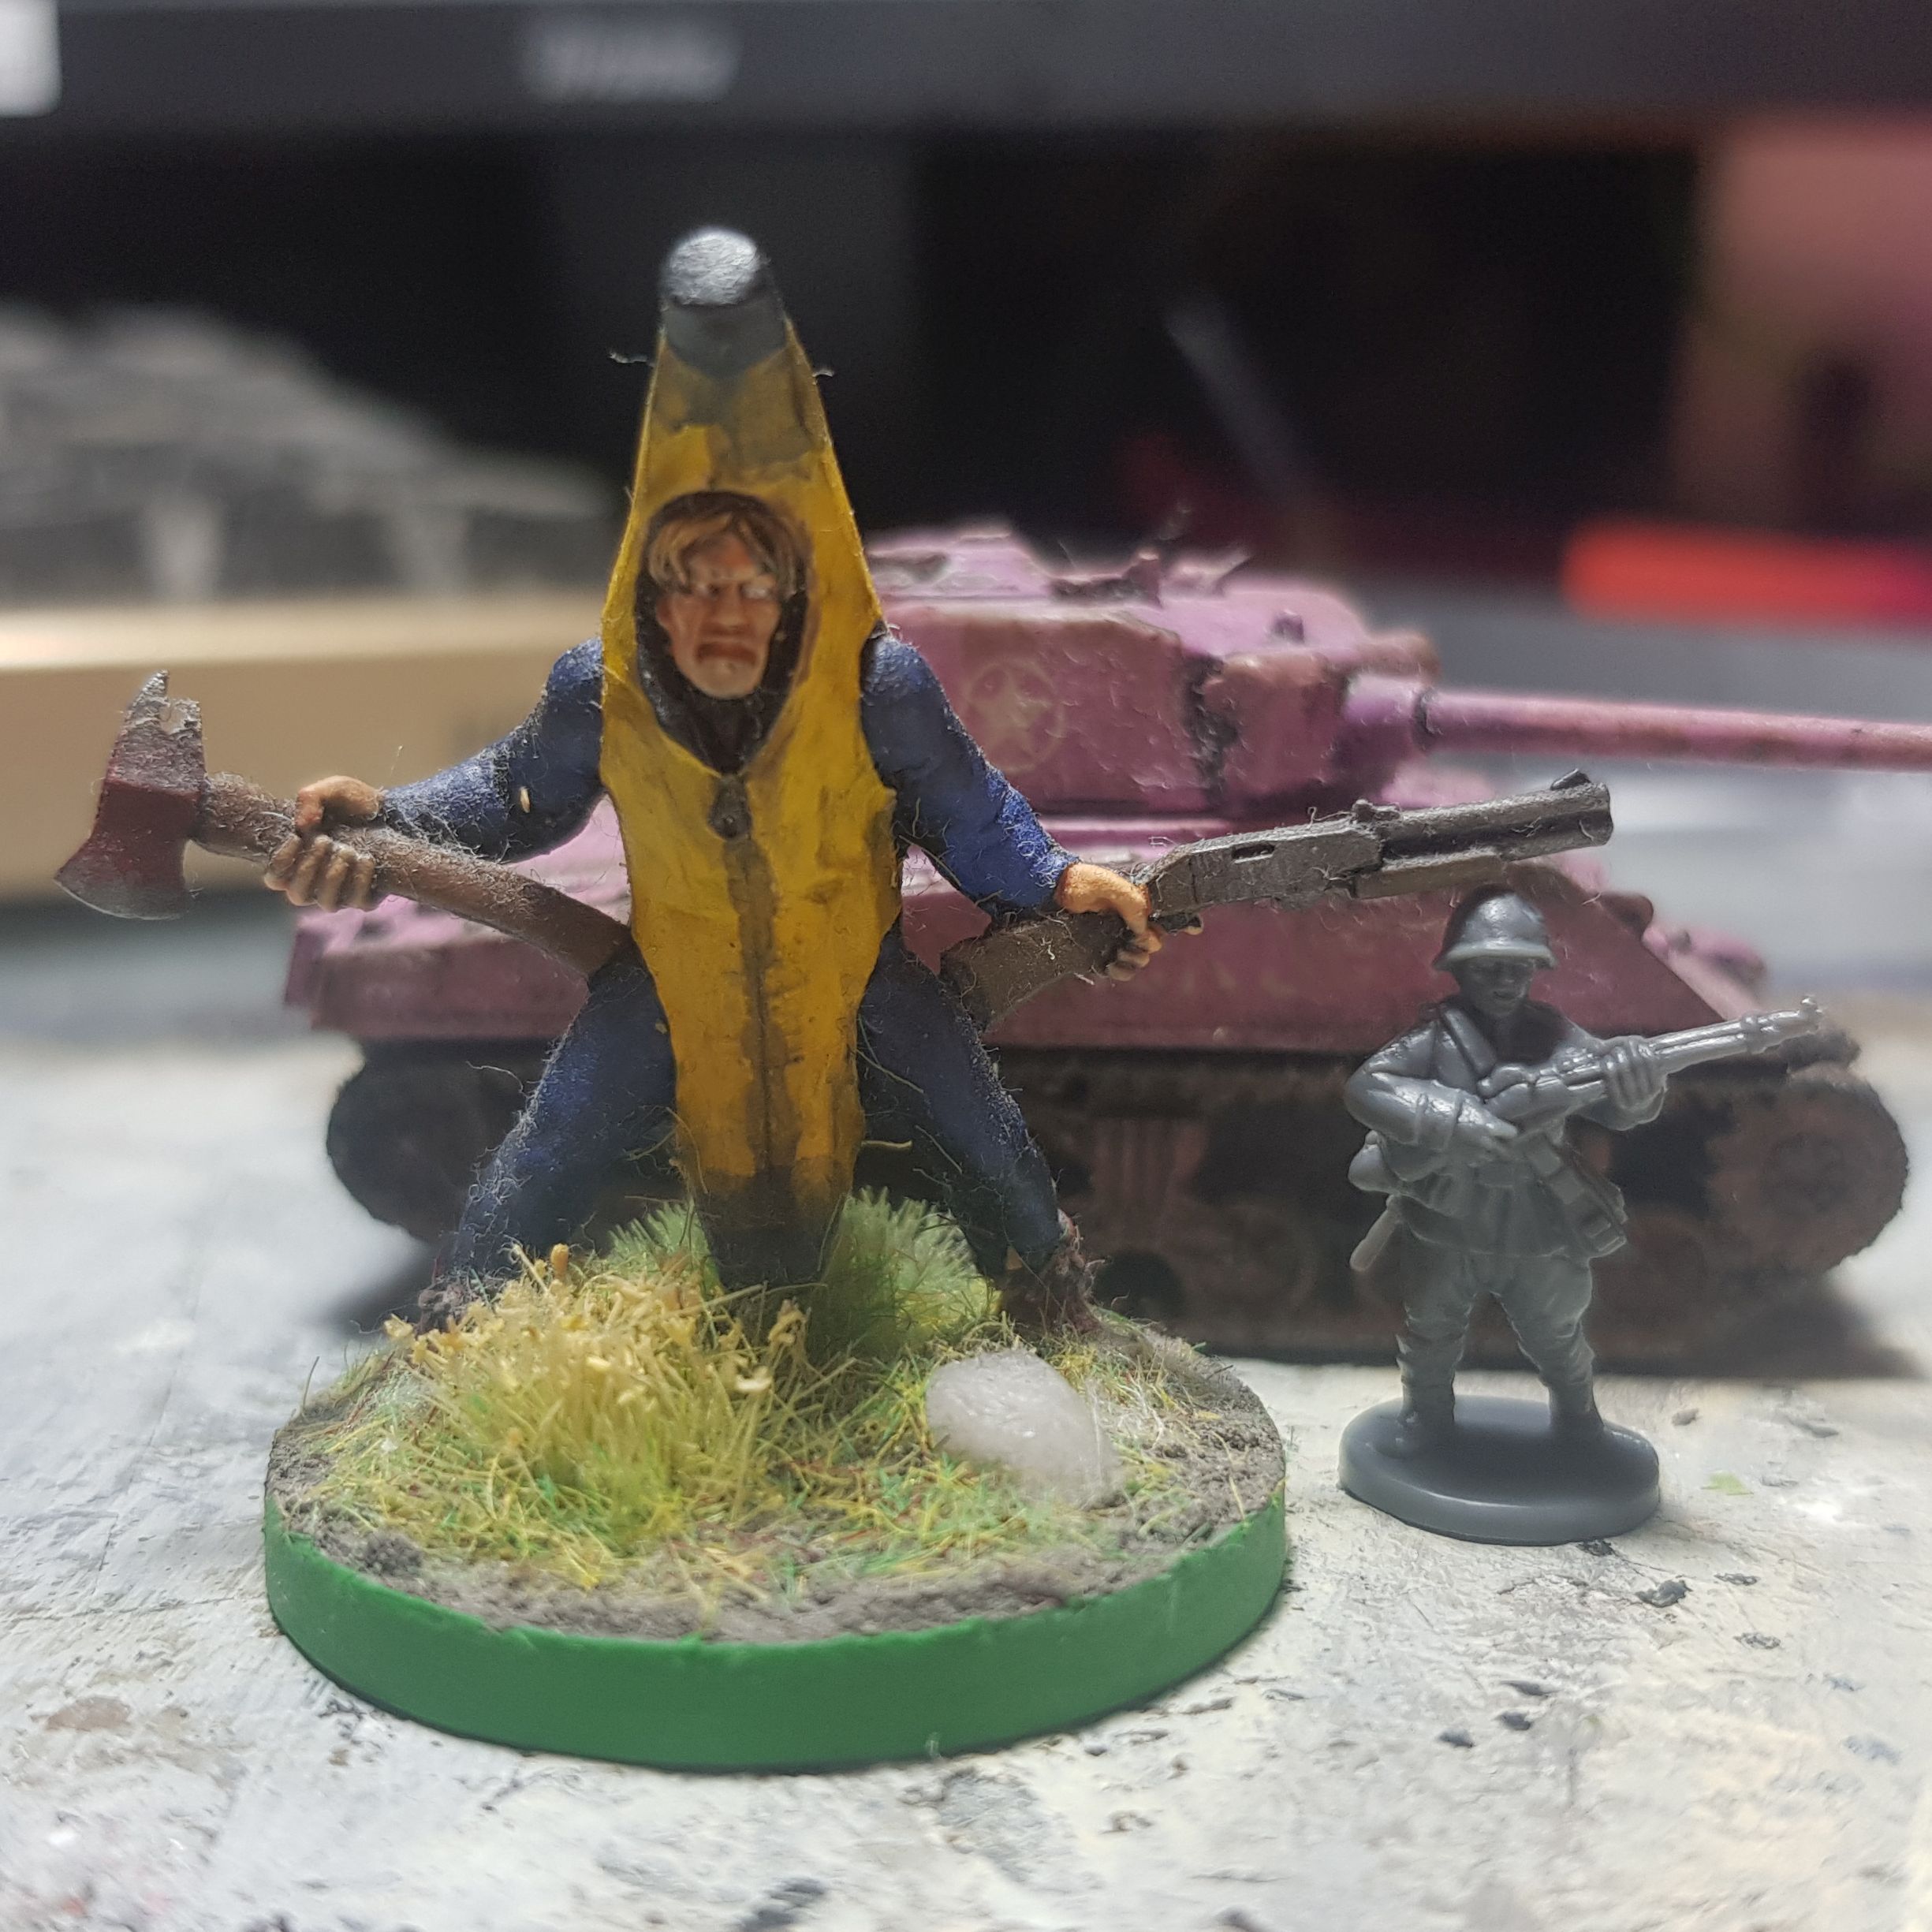
This is my first foray into 15mm wargaming, I know I did a pink tank once, but here is banana man for scale.
Cossacks…… Cossacks don’t always wear helmets as you can see in my reference from Steel Division II.

Now that means I am going to have to do some disfigurement to some of the models. By my maths with the models I have I can ruin about 10 rifle dudes to try and get this right. So…..
I’ll have to see after I painted him, but I think it will be fine.
The Plan.
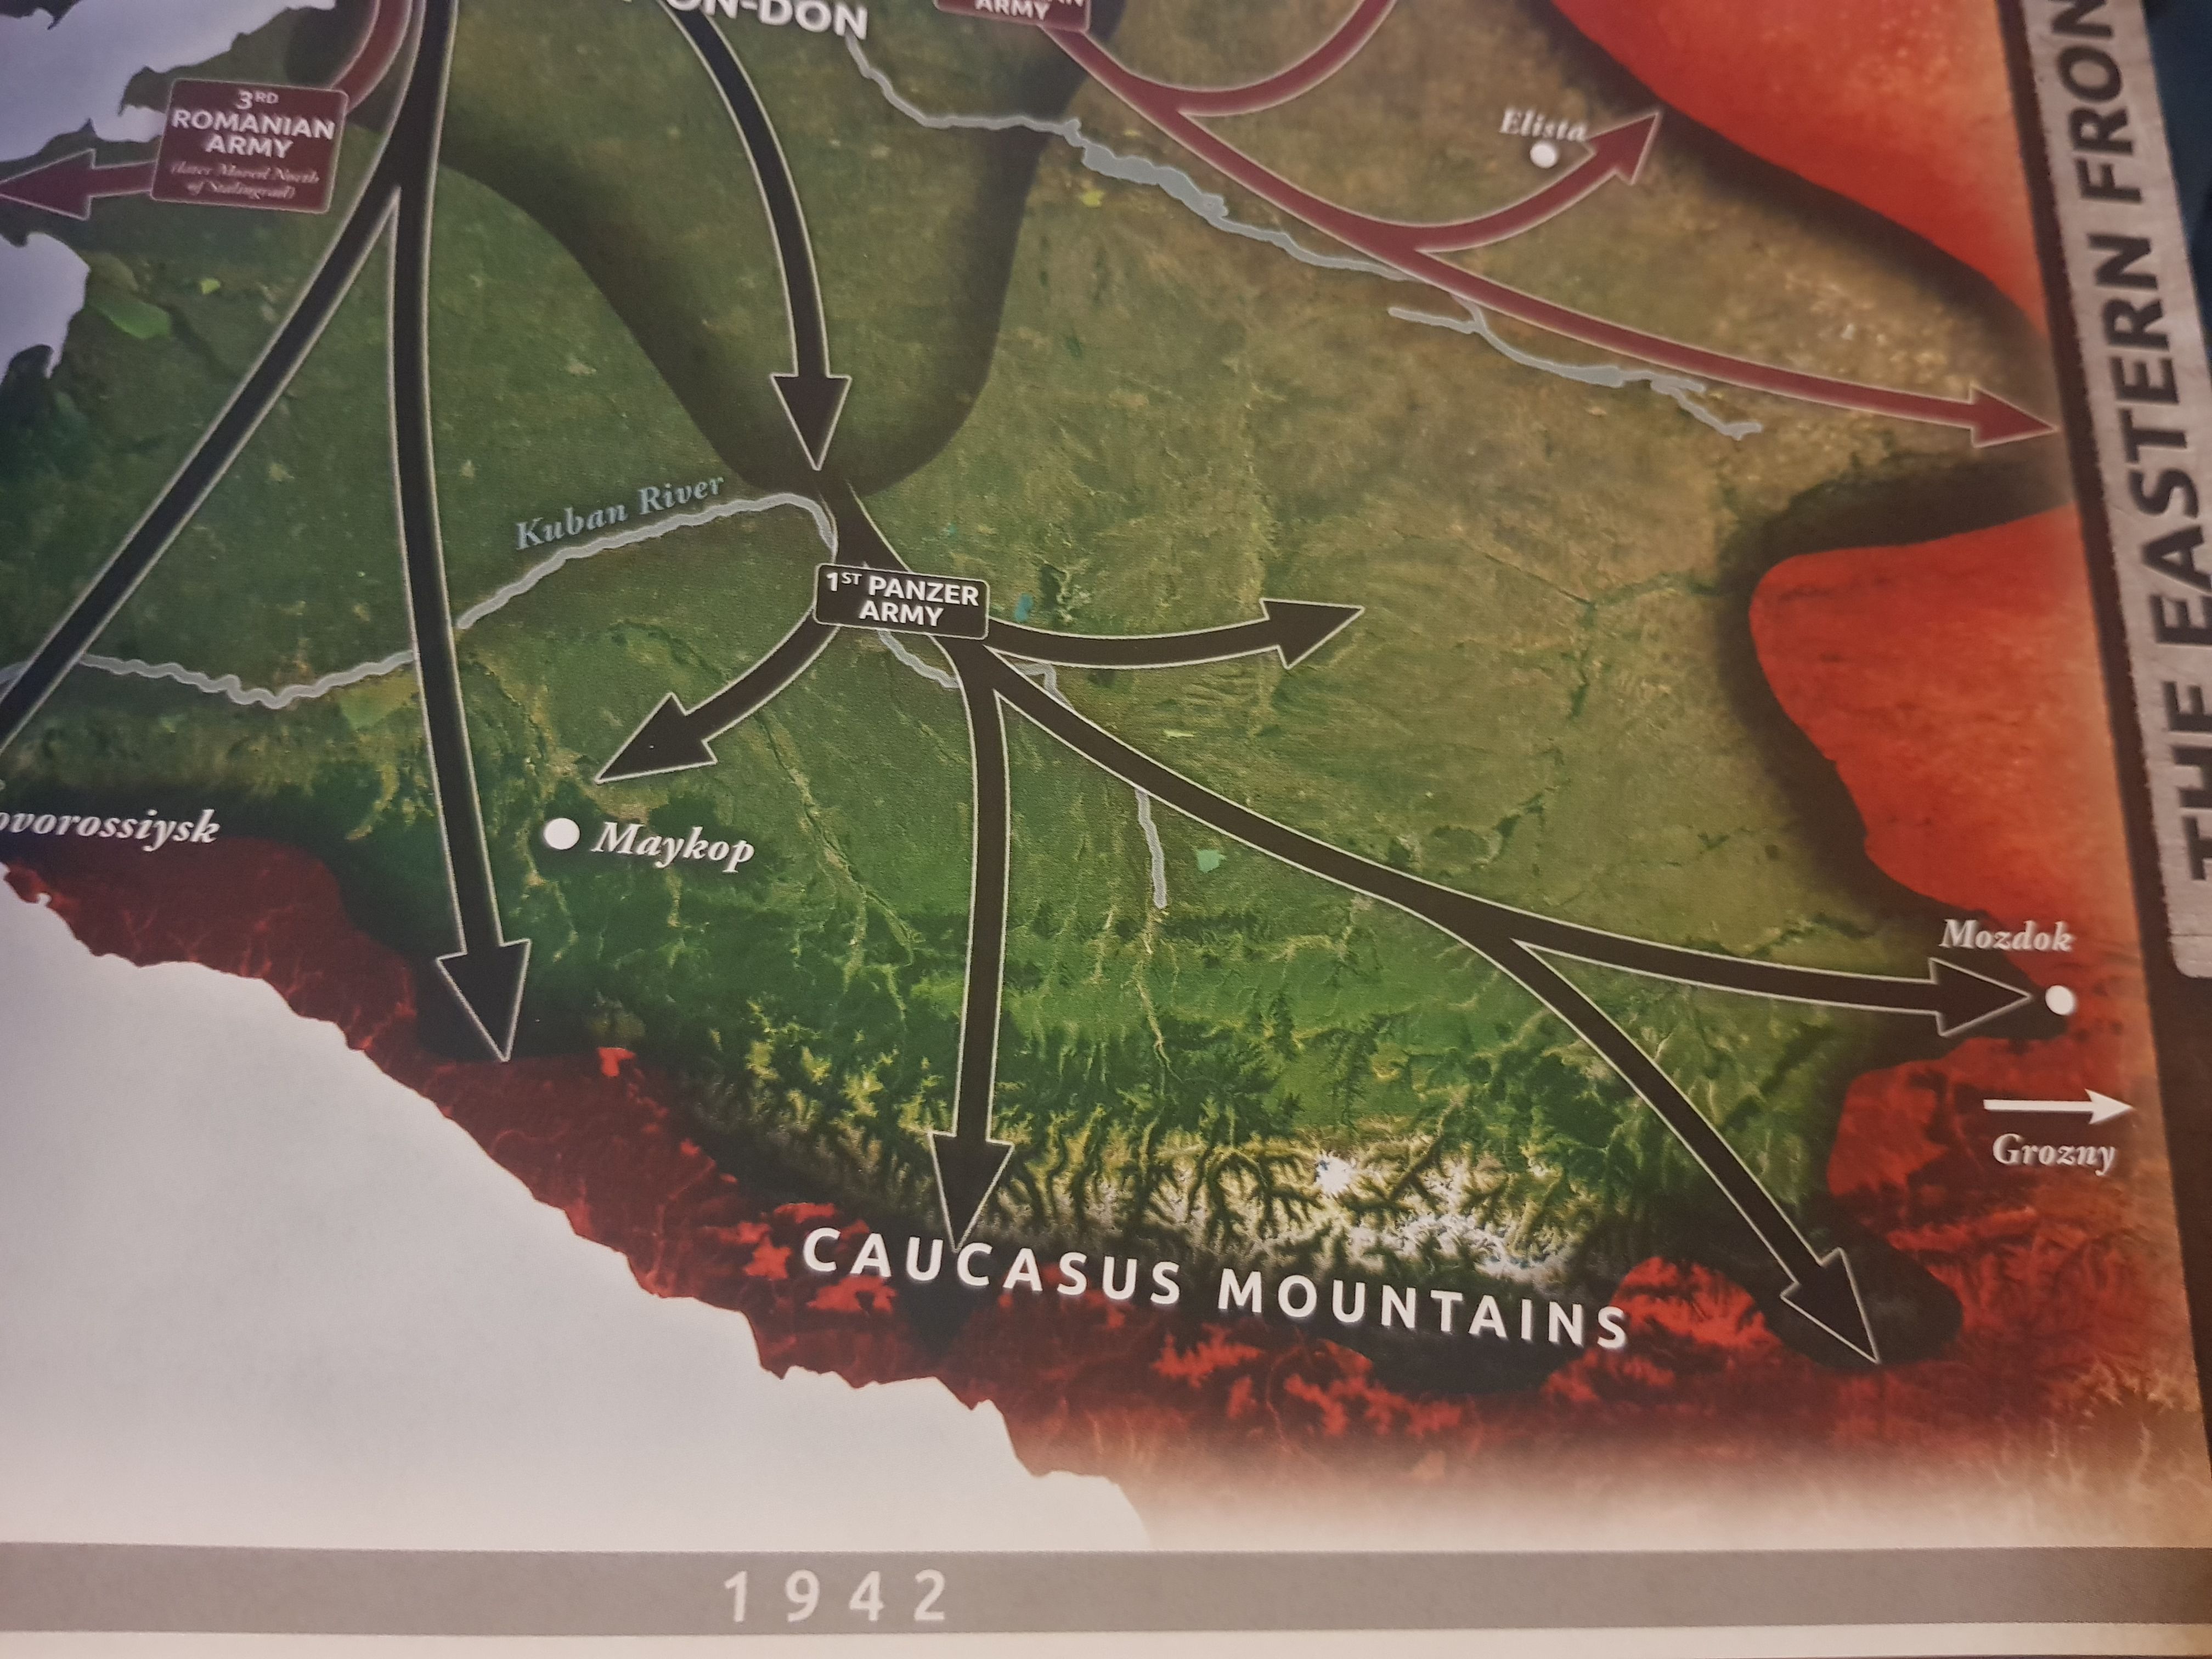
So now that I have my starting stuff in and access to the rules what am I going to make? Even though my focus has shifted somewhat from doing winter 1942/43 I am sticking to 1942 for this. The battle of the Caucasus as part of Fall Blau is what I am centring my armies around for now. Now what armies am I building? Obviously Soviets and Germans for now, but what?
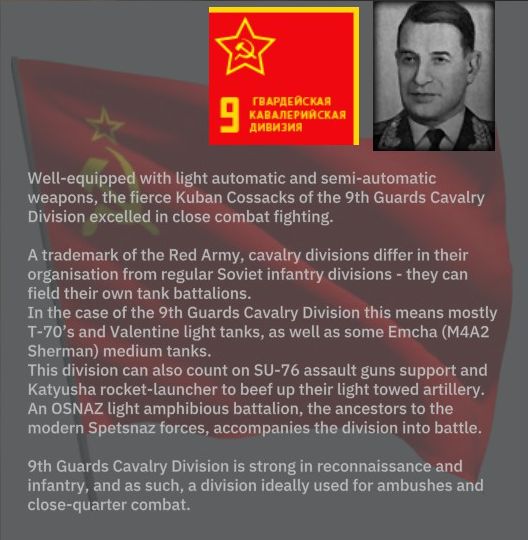
I am planning on doing the 9th Guard Cossack Cavalry Division for my Soviets, this is a very unique force by which I am already biting myself in the foot as I am going to have to convert some or most of the infantry to cossacks, not too big of a change luckily, just change the helmet to a hat.
Now for ze Germans I am focussing on the 20. Panzergrenadier-Division. Now this division was only formed in July of 1943 from the 20. Infanterie-Division (mot), which did exist in 1942 as it was formed in October of 1935. So for all intents and purposes I am painting them as the 20. Panzergrenadier-Division. This division also has a lot of interesting and weird equipment. I always like the weird, especially when it is historically accurate. They had an Elefant platoon led by the only Tiger (P) that ever made it on the battlefield. That and lots of other stuff that was kind of unusual on the battlefield is what drew me to them.
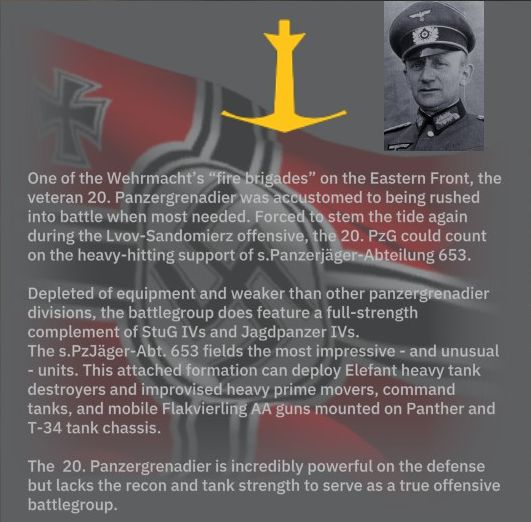
The excerpts are from Steel Division II, a PC game that I am going to reference a lot throughout this project. It may not be the most historically accurate source, but I do believe the developers spend a lot of time studying what they were doing and for tabletop wargaming it is probably more accurate than what some people come up with.
For now......
I have mentioned ‘for now’ a couple of times and as you can see by what I am planning I am not planning on leaving it at this. After I finish making the formations that I want to make for 1942 I am quickly moving on to 1943 around the battle of Kursk and then to the offensive in 1944. I am therefor planning on sticking with those 2 divisions for now, but I have desires of doing a Finnish force as well. But for now it is July to September 1942 on the Eastern Front.
Soviet Army List
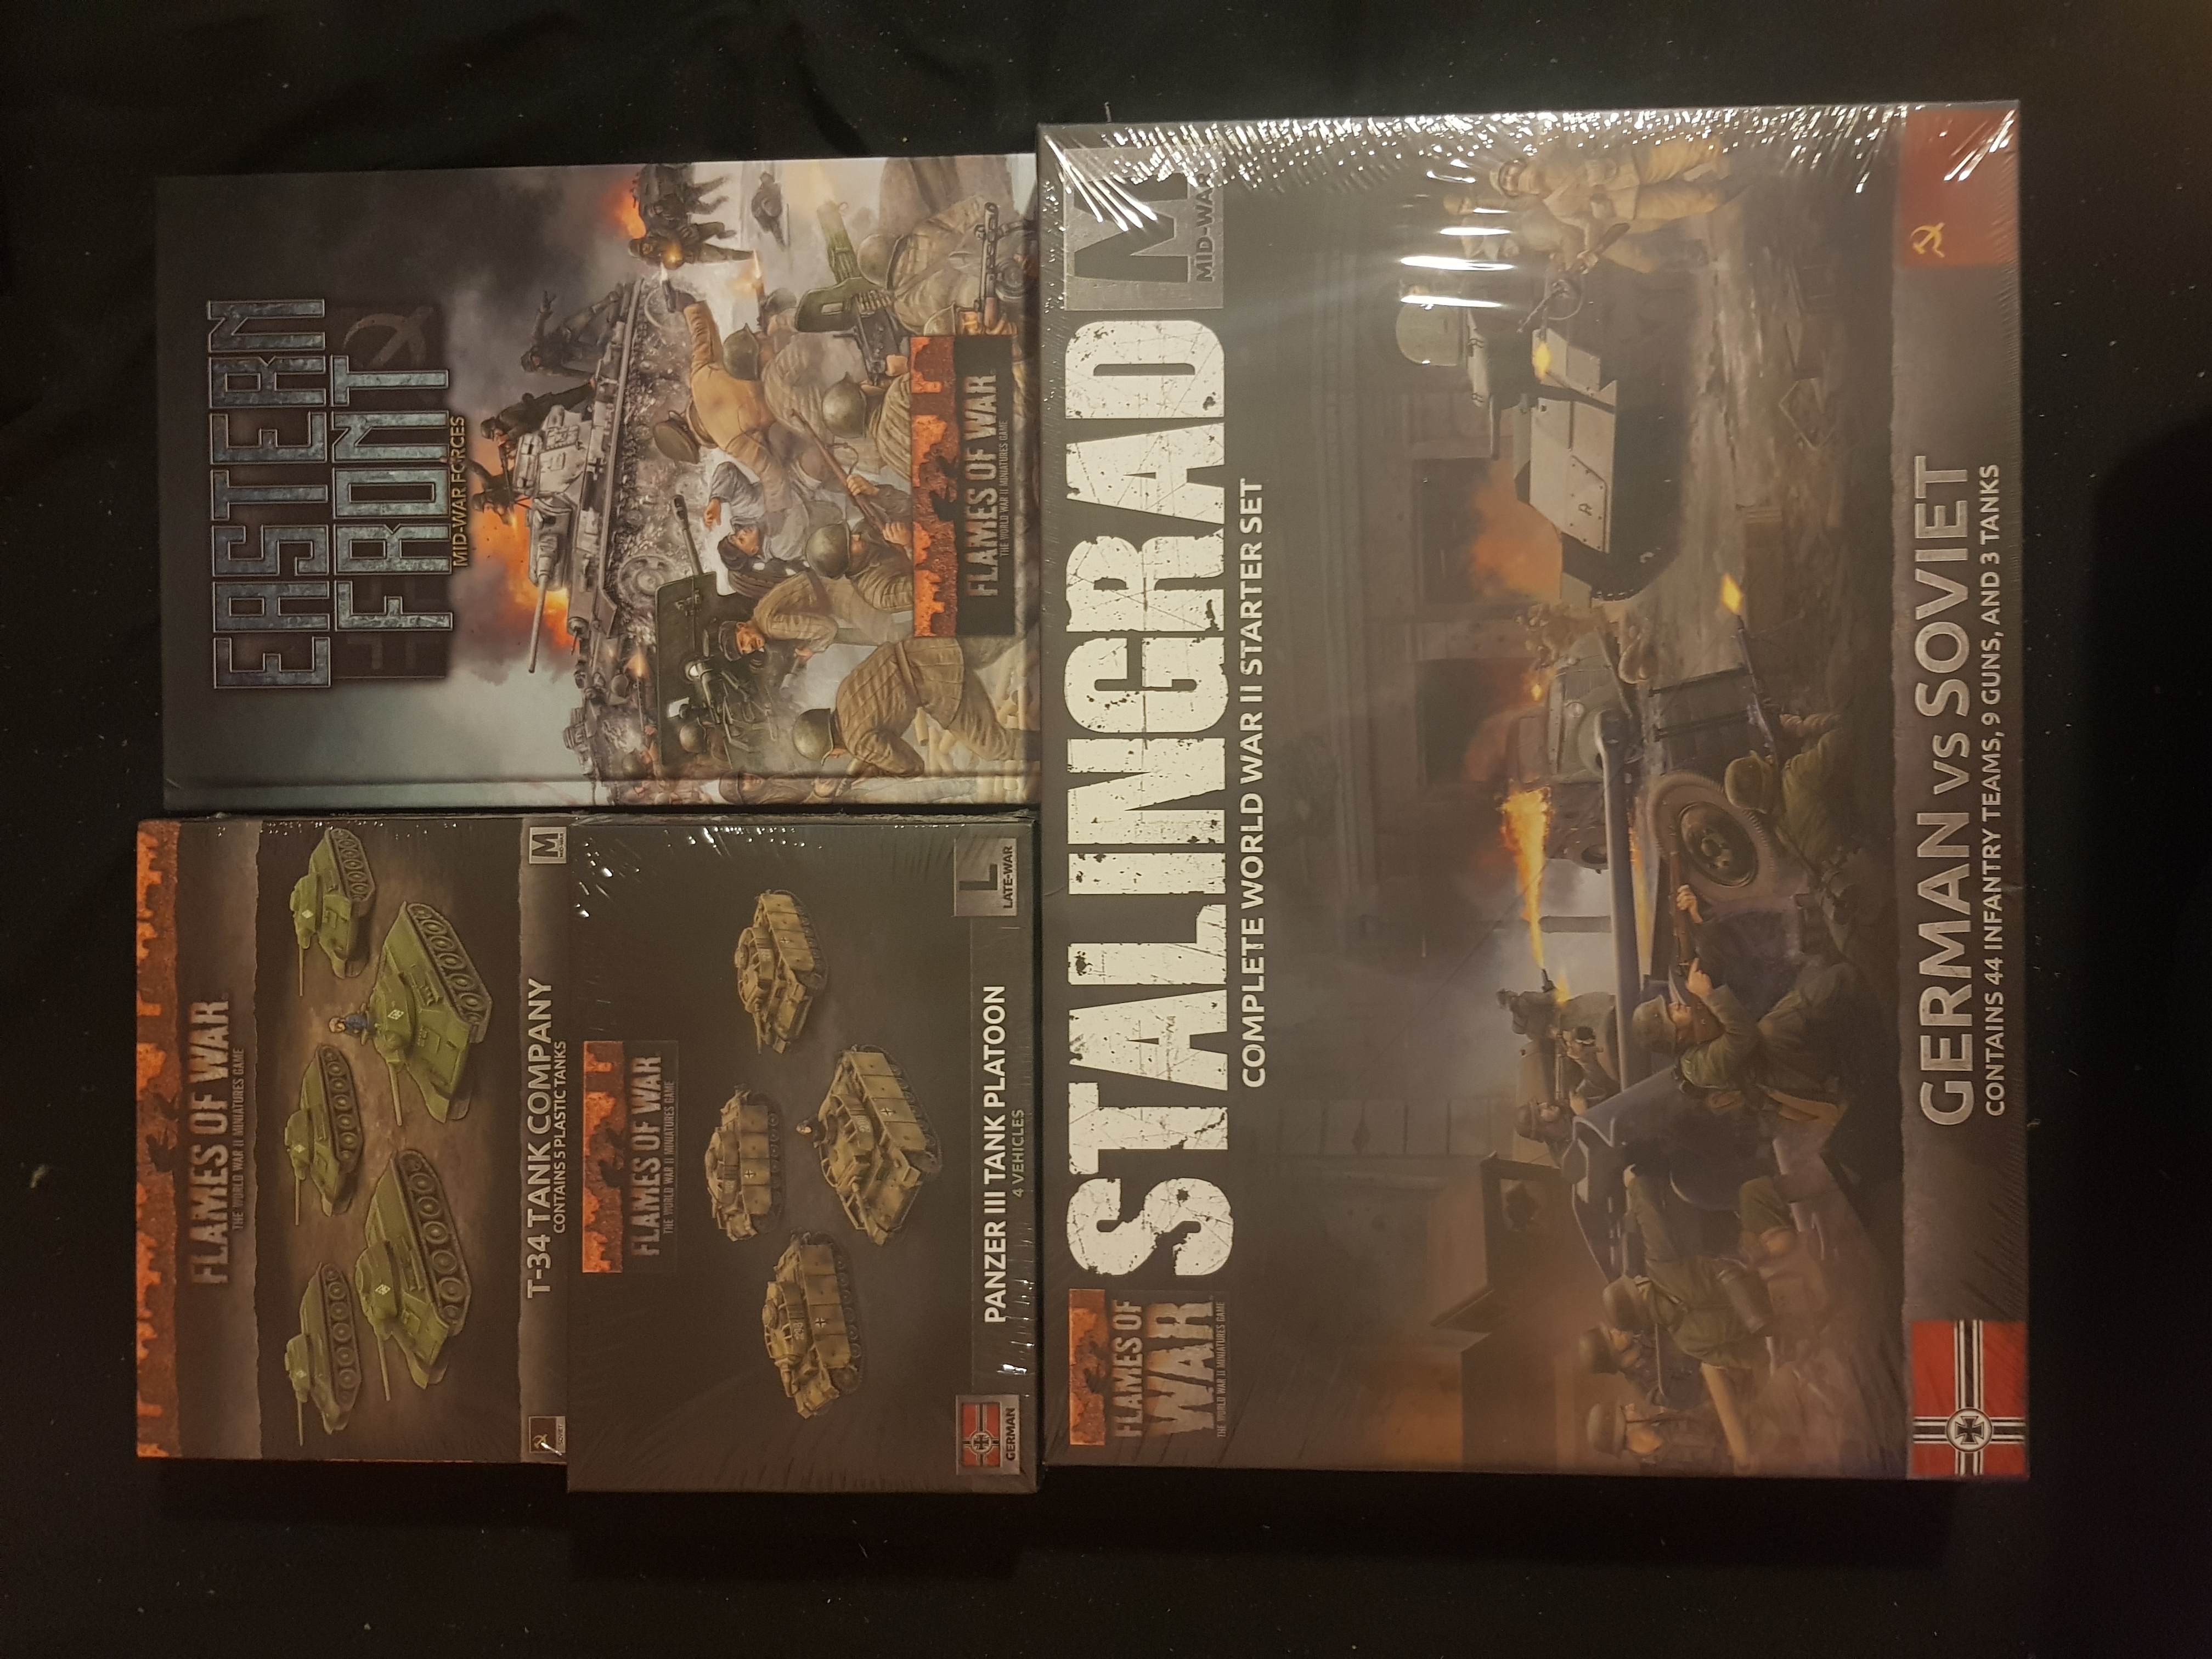
I am going to start off with the formation included in the starter set and the models that I bought extra.
Hero Rifle Battalion
- Hero Rifle Battalion HQ consisting of 2 command M1981 rifle teams for 1 point.
- 2 Hero Rifle Companies each consisting of 10 DP MG & M1891 rifle teams of which 1 is a command M1981 rifle team, a komissar team and 2 Maksim HMG teams. This is 8 points a company, so 16 points in total.
- 76mm Artillery Battery consisting of 4 Zis-3 76mm guns for a total of 8 points.
- T-70 Hero Tank Company consisting of 3 T-70 light tanks for 6 points.
- T-34 (Early) Tank Company consisting of 5 T34/76 mod. 1941 tanks for a total of 26 points.
That brings the total for this formation to 57 points.
German Army List
Again doing the same as before using everything in the starter set plus some models I got extra.
Panzergrenadier Company
- Panzergrenadier Company HQ consisting of 2 command MP40 SMG teams for 2 points.
- 2 Panzergrenadier Platoons each consisting of 7 MG34 teams of which one is a command team. Each platoon is 10 points for a total of 20.
- 5cm Tank-Hunter Platoon consisting of 2 PaK 38 5cm guns for a total of 8 points.
- 15cm Nebelwerfer Battery consisting of 3 15cm Nebelwerfers for a total of 9 points.
- Panzer III Tank Platoon consisting of 3 Panzer III (short 5cm) tanks for a total of 15 points and then I upgraded all of them with the long 5cm gun for +2 points a model for a total of 21 points. This would represent the Panzer III Ausf. J with the 5 cm KwK 39 L/60 gun.
This formation is then a total of 60 points.


