Starting Bolt Action – Fall of Singapore
Recommendations: 81
About the Project
A diary of my first steps in preparing some Bolt Action forces.
Related Game: Bolt Action
Related Company: Warlord Games
Related Genre: Historical
This Project is Active
Finishing the Japanese force
I finally found some time to return to this project and round out my Japanese forces to the full 1000 points.
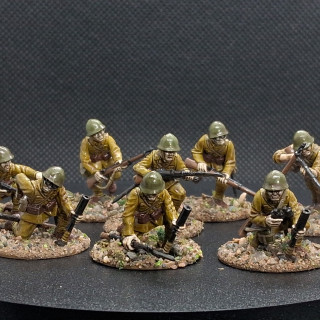
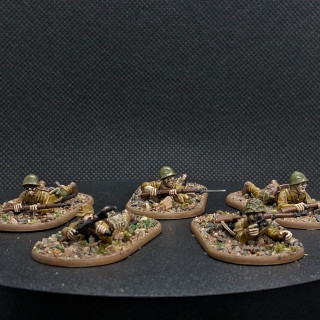
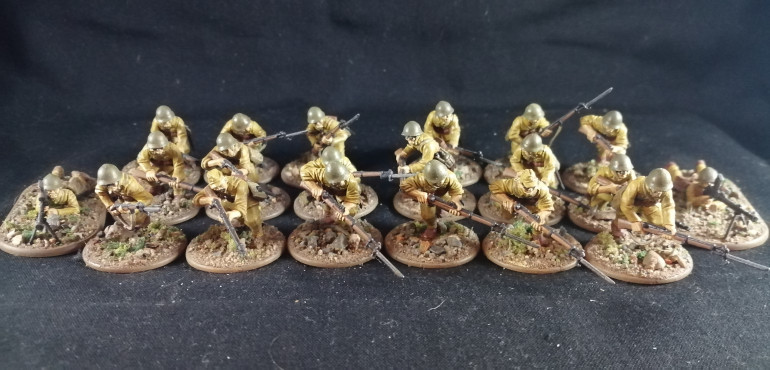
One thing I wanted to do was use as many of the models from my original army box as possible, so I assembled the prone models with some rifles (3) and a submachine gun (1). One was modelled as a spotter that I could use as either an artillery or air strike forward observer, or even as an addition to the mortar team I already have.
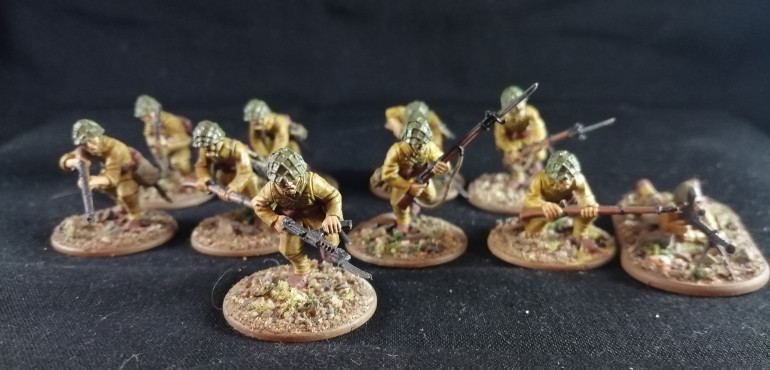
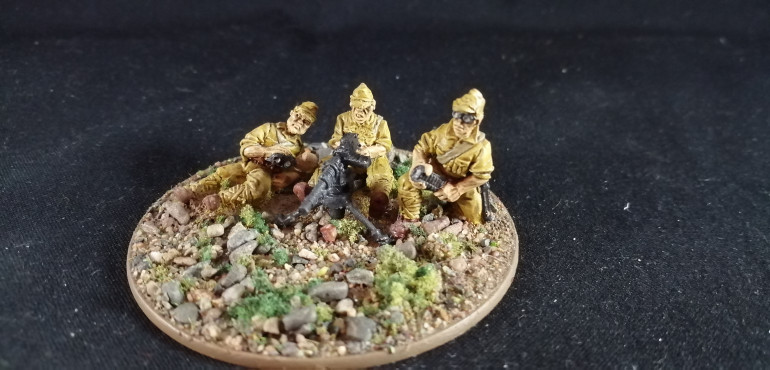
Another thing I wanted to do was use the iconic Japanese knee mortars, so I made three soldiers with these to unlock a fully equipped grenadier unit as an option.
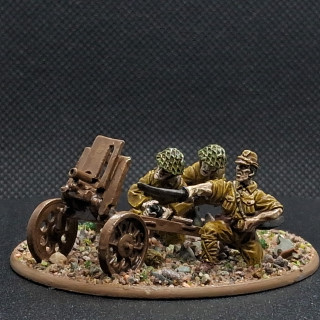
I did have to make a new purchase which was the Type 92 70mm infantry gun team from Warlord. I needed a type 41 75mm mountain gun for my list and this is the closest they do. I may look elsewhere at some point for the exact gun (cos I’m like that) but for now it will do.
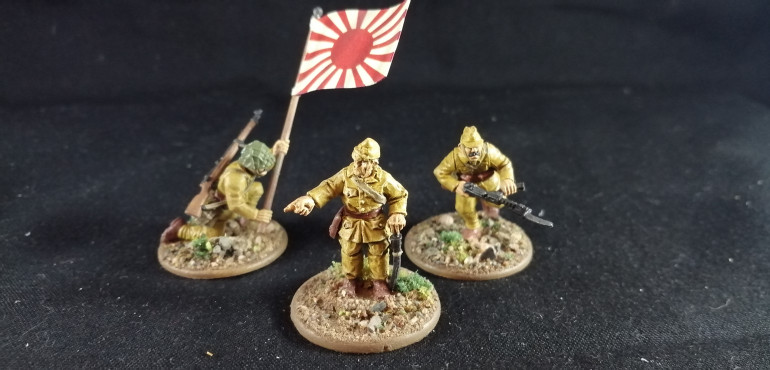
The remaining sprues I used to make 3 rifleman, a submachine gunner and a feature model with a pistol, rifle and some base details.
Painting everything
As I said previously, I used a great video from Sonic Sledgehammer Studios on YouTube to base my paint scheme on. There were some differences so I’ll put a bit more detail here.
Everything is airbrush primed in Vallejo Ghost Grey.
Everything is then airbrushed in Vallejo Model Color (VMC) Japanese Uniform.
The rest of the colours break down as follows:
Skin – VMC Light Flesh
Webbing straps, rifle straps, bread bags, ammo pouch bodies for machine gun and mortar – VMC German Camo Beige WWII
Other pouches, belt, boots, ammo pouch top flaps for machine gun and mortar – VMC Saddle Brown
At this point I dry-brushed the miniatures all over with VMC Dark Sand.
Water Bottles, helmets – VMC Brown Violet
Rifle and machine gun stocks – VMC Beige Brown
Bayonets, metal gun parts, glasses frames (a few heads only), hair, officer’s katana, binoculars, knee-mortar – VMC Black
Katana and bayonet blades – VMC Oily Steel
Glasses lenses – VMC White Grey
As a final touch I went back and touched up the strap cradles for the water bottles and the grip at the base of the knee-mortars with VMC German Camo Beige as it was easier to paint those at this stage.
I painted the mountain gun all over with VMC US Field Drab.
With the base colours done all of the models were brush painted with Army Painter Soft Tone Quickshade.
After this had dried I painted all of the exposed bases with VMC US Field Drab to act as base colour for Geek Gaming Scenics Base Ready Mediterranean Soil.
All the models were then sprayed with watered down PVA to both seal the base ready and act as matting agent over the Quickshade.
The final list
So the final finished 1942 Fall of Singapore 1000 point list is:
Regular rikugun-shoi (2nd lieutenant) with 2 bodyguards all armed with submachine guns.
Three regular 10 man infantry squads – NCO is armed with rifle and one soldier is armed with a type 96 light machine gun.
Regular forward observer (air) with a single bodyguard – both models are armed with rifles.
Regular 11 man grenadier squad – MCO is armed with a rifle. Three soldiers are armed with knee-mortars.
Regular 3 man medium machine gun team.
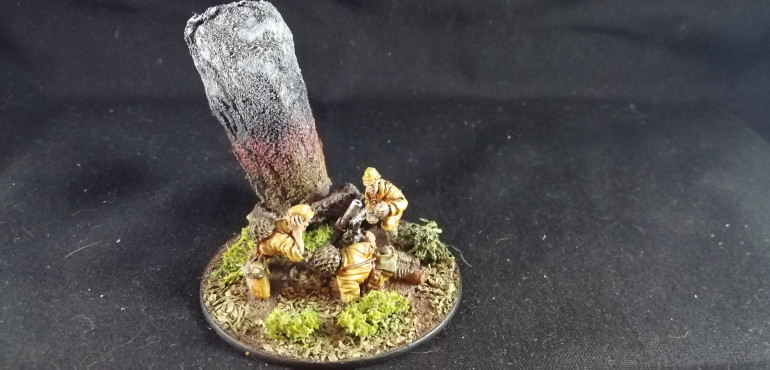
Regular 3 man medium mortar team with an additional spottter.
Regular type 41 mountain gun and 3 crew.
Regular type 97 chi-ha tank.
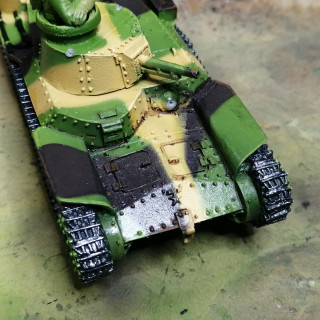
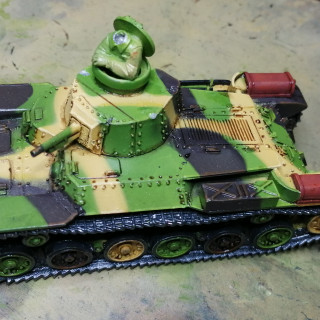
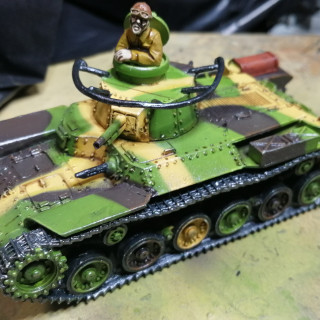
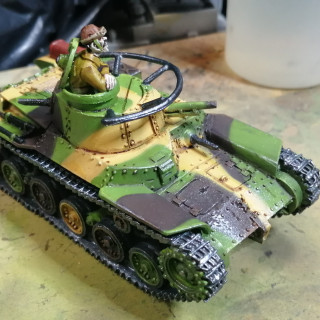
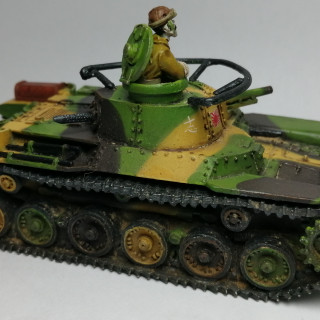
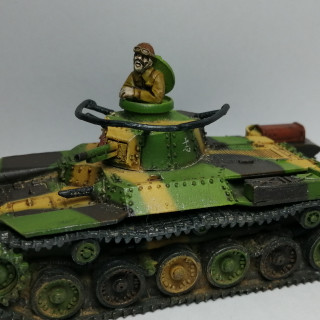
Painting the Chi-Ha
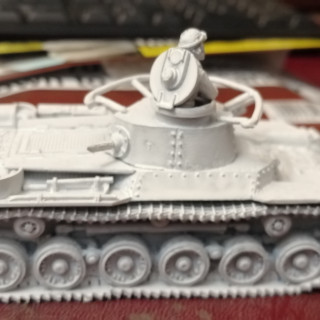
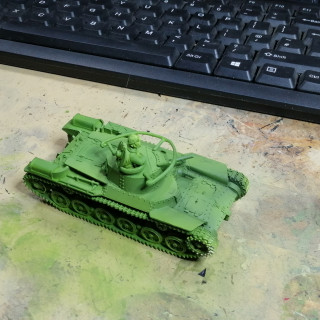
Floundering outside my comfort zone again, I am tackling my first piece of historical armour.
Cracking out my little used airbrush I began by priming the tank in white and then applying some black paint in the crevices in an attempt at, what I believe the internet calls, colour modulation.
Next step was researching camouflage patterns on the internet in an attempt to decide how to proceed. As most historical veterans will know, and I myself have since learned, there is very little standardisation of vehicle camouflage in most armies of the period, due to the large amount of camouflage that was applied ‘in the field’ with whatever was at hand and as circumstances demanded. The problem is further compounded by the fact that all period photography is black and white. There is however a huge amount of articles and stuff online from people far more learned than myself to which newcomers like myself can refer.
I didn’t find anything that specifically covered armour from the Japanese Malaya campaign with paint colours and camouflage etc., so drawing from numerous sources I came up with a plan that used a 3 colour camouflage scheme using a yellowish green, a rich dark brown and a creamy yellow.
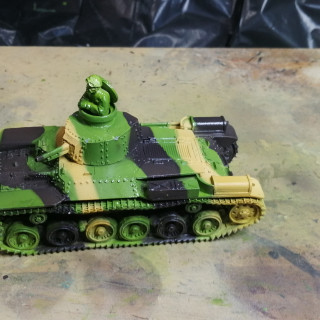
I wanted to use the airbrush and push my masking skills to create the camouflage and shade the tank, so the first step was to apply Vallejo Model Color (VMC) Olive Green over the whole tank, attempting to not obliterate the underlying modulation through over-application of paint, which frankly is a failing of mine. This done I did a bit of highlighting using a 50:50 mix of the Olive Green and VMC Lime Green to the upper edges of the turret and the outside edges of the tank armour.
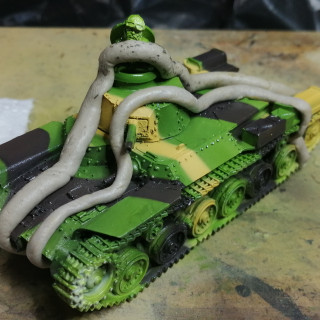
This done, I then used ‘Blu-tac’ (poster putty) and tissue paper to create irregular wavy lines over the tank before applying VMC German Camo Black Brown in the unmasked areas. Once a gain an airbrush highlight was applied with a 50:50 mix of the German Camo Black Brown and VMC Flat Earth.
When this was dry I stripped of the masks and reapplied them in a different arrangement before applying a 50:50 mix of VMC Deep Yellow and VMC Yellow Ochre, before highlighting with the original colour with a drop or two of VMC Sand Yellow in it.
At this point I spotted my first huge noob error. When assembling the tank I had placed the turret in a jaunty dynamic pose off to the tank’s left. (The veteran tank painters among you are already facepalming I know). Well, I now realised looking at the ‘finished’ camouflage that it is usually applied with the turret facing dead straight forward and that as the turret rotates the camo pattern should ‘break’. I had no intention of cracking the turret off so this was something I would have to live with. Obviously in future projects I would need to temporarily affix the turret in a forward facing position before painting any camouflage pattern, then reposition in the final model if I wanted something a little less static in my posing.
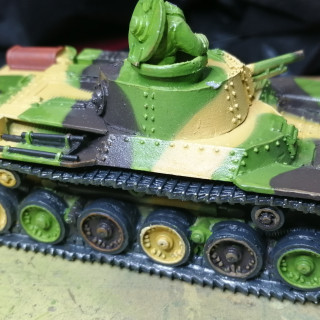
With the airbrushing done it was back to more familiar territory of brush painting. I placed edge highlights and rivet highlights on the tank using Lime Green, Flat Earth and Sand Yellow on the various areas of the tanks camouflage.
I painted the rubber rims on the roller wheels, suspension springs, hydraulics and the track itself in VMC Black Grey. The tracks, springs and hydraulics was then painted VMC Gunmetal Grey.
The exhaust mufflers were base coated with VMC Mahogany Brown, then stippled with Red Leather, Bright Orange, Light Orange and Black to get a rust effect.
With the painting almost done I then used Games Workshop Agrax Earthshade to pin-wash the tank. For those unaware pin-washing involves placing wash with surgical precision around hatches and rivets rather than flooding the model with wash and letting it find its own way into the recesses as one might do with a more highly textured infantry figure.
The last brush step was stippling the armour with Gunmetal to produce a chipping effect on the tanks outer edges and parts that get a lot of handling such as the engine compartment and main hatch.
With main vehicle painting mostly done I glued the front and rear machine guns on and the antenna rail from the turret. These items and the tools affixed to the hull in brackets were painted Black and then everything but the tools was painted in Gunmetal.
The tank commander was painted as follows:
Uniform – Japanese Uniform
Skin – Light Flesh
Tank cap – Beige Brown
Belt, Goggles – German Camo Beige
Goggle lenses – Sky Grey
After all the base colours were put down the commander was covered with Agrax Earthshade to finish him.
With this done the model is completed for painting purposes and we only have pigment powders and decals to do.
Decals and weathering
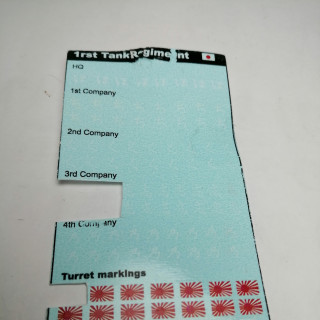
Unfortunately I purchased my kit forever ago and at this point, the Army box did not ship with Warlords decal sheet. I contacted Warlord but after a week of hearing nothing gave up on them and ordered one from the USA. Company B models do a whole range of Japanese armor (sic) decal sheets and I purchased the 1st Tank Regiment sheet. At first blush it seemed very basic but a bit of Google-fu revealed that generally the Japanese were very conservative with armour marking in the period.
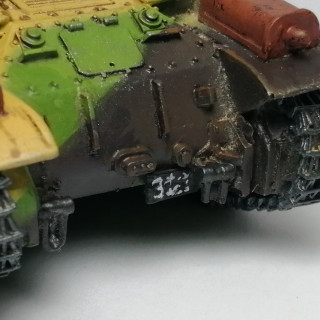
I found a great article covering camouflage and other Japanese armour information and it seems generally tanks had a kanji denoting their operating group or unit and often a variant of the Imperial Japanese flag. Vehicle number plates did however follow quite regulated conventions mixing western style numerals and Japanese kanji in white on a black background.
The decals were functional but not exceptional. They are a little crowded on the sheet and I had several decals where the ink rubbed off just while handling the wet decal.
With the decals applied, it was on to weathering with pigment powders. I have never used powders before so I studied a few videos on YouTube and then purchased the Mud and Sand multipack of the Vallejo powders for a good price online.
I started by applying the lightest colour (Light Yellow Ochre) as an all over dusting to the whole tank focusing more on the upper hull. I then used the Light Sienna in all of the seams where panels but against each other such as around the turret base and between the upper hull and the track covers. I also liberally applied this powder to everywhere on the wheels and tracks of the tank and the underside of the hull at the front and rear where visible. Finally, I used the darkest of the powders, Natural Umber, on the lower tracks and around the lower wheels.
I used Games Workshop’s Munitorum spray varnish to seal the powders in but this then muted the look of the powders and made the effects less obvious so I went in and repeated the whole process, applying fresh powder and reappling the varnish.
I am not entirely happy with the results and I feel I need to learn a ton about how to use the powders to their best effect. It seemed as if I was trowelling the stuff on but losing the effects when sealing. If any veterans at weathering want to give me some handy tips or tricks please leave a comment.
This completes my Japanese army as I want it and my only two jobs remaining are the Universal Carrier and 25 pounder for my British force, for which a blog should be coming soon.
The British Forces
As the next step in preparing for my Bolt Action games, I wanted to create a British force using the Fall of Singapore theatre selector.
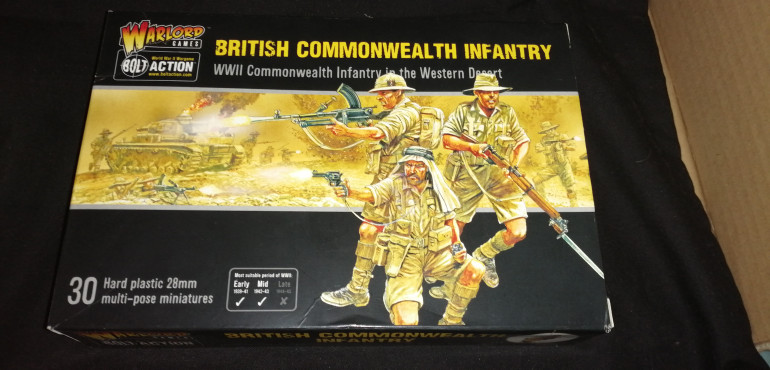
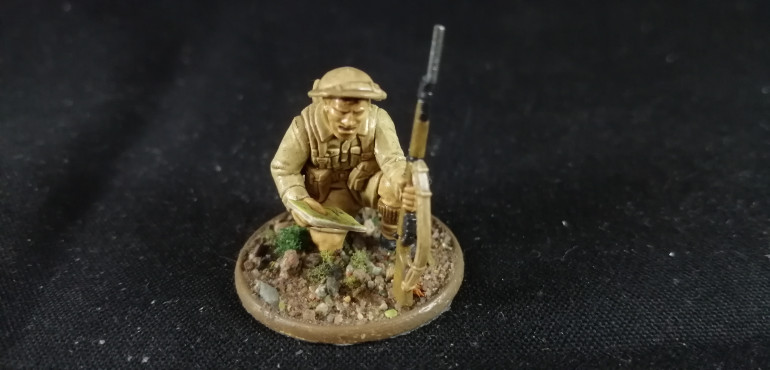
My first step was a chat with the helpful staff the Warlord stand at the UKGE this year. The correct look for my forces was probably going to come from using their British Commonwealth Infantry box.
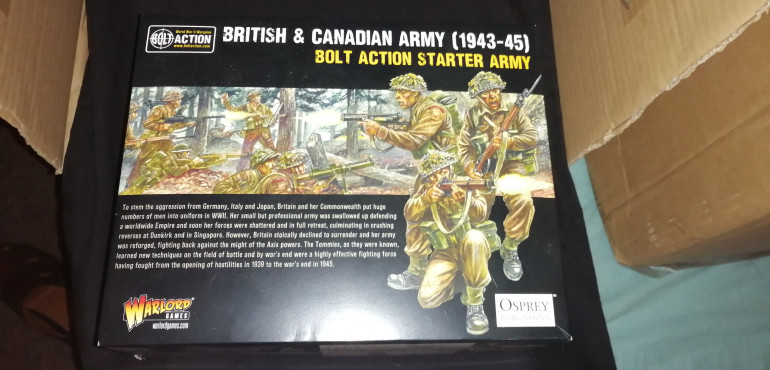
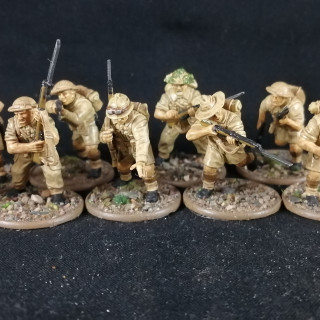
But to help my hobby dollar stretch a bit further they suggested buying the British & Canadian Starter Army alongside the Commonwealth box and mixing the shorts and bare arms from the tropical uniforms with the sprues from the army box, enabling me to make far more than the 30 models I would normally get out of the Commonwealth box alone.
With the models assembled, it was on to painting. Unfortunately for a total beginner at historicals like myself, I was unable to find a definitive painting tutorial online for British troops from the time and place I was looking to recreate, so I had to use a number of resources to pull together a colour scheme myself.
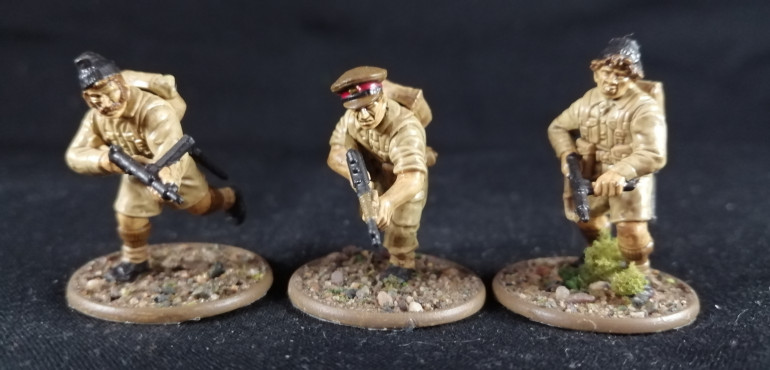
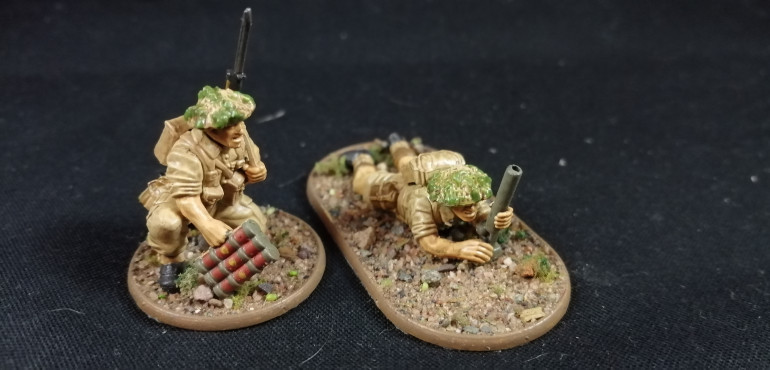
Using illustrations, photos of surviving and reproduction uniforms and painting guides for Mediterranean theatre and North Africa theatre uniforms I came up with the following scheme (note all paints are from the Vallejo Model Color range):
Uniforms, sun hats – Dark Sand
Webbing, anklets, hat bands on pith helmets, backpacks – Iraqi Sand
Skin – Sunny Skin Tone
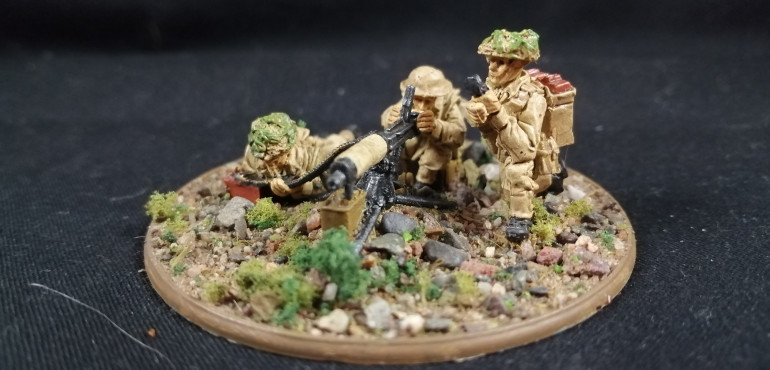
Wooden gun parts, entrenching tool handle, pick handle, Vicker’s water cannister, wooden storage crates – Green Brown
Socks, officer’s cap – English Uniform
2” mortar, mortar ammo box – Green Grey
Machine gun ammo box – Red Leather
Ground sheets, Vicker’s barrel wrap, pith helmets – Buff (note: I should have gone a shade lighter for the pith helmets, probably Sand Yellow, as I don’t feel there is enough difference between them and the uniforms after quick shade was applied.)
Cigaretttes, Mugs – Ivory
Bayonet frogs and handles, metal (on rifles, SMGs and entrenching tools etc), beanie hats, boots – Black
Bayonet blade – Oily Steel
Glasses lenses, Goggle lenses – SkyGrey
Goggles band – Flat Earth
The details on the officer’s cap were a Vermillion cap band, Gold badge and Black for the chin strap.
I felt the Bren guns and Vicker’s were too flat painted black alone so they received a drybrush of oily steel.
Some of the soldiers had camouflage woven into their helmet covers and so I picked out some vegetation on these helmets with Olive Green.
After base coating everything I went in with Quickshade Soft Tone dip applied with a brush.
Basing was exactly the same as my Japanese forces which is to say an undercoat of US Field Drab and then Geek Gaming Scenics Mediterranean Soil Base Ready Mix.
The models were then sprayed liberally with watered down PVA to seal the base material before a coat of GW’s Munitorum varnish was applied.
While the late war details on the army box models such as variations in bayonets, rifles and trousers would offend many purists, I am happy with the final result I achieved for the money I spent.
This is what I got finished for my 650(ish) point army so far.
Three infantry sections round out the core of the list.
I still have two more items to paint to fill out my full list. The first is a Universal Carrier from the army box and the second is a 25 pounder artillery piece.
This was a real hobby challenge for me and I would appreciate comments and feedback from those more experienced in historical modelling on how I could have improved on my paint scheme and other details to make the army more accurate to British forces of the Malay peninsular and Singapore around 1941.
The Japanese forces
Bolt Action is typically played at 1000 points. I have found when experimenting with new games I generally prefer to err on the small side until I am confident a standard game can be played in a typical 3 hour gaming club session with set up and tear down.
As my only experience with Bolt Action is a few 2 player starter set games I decided to pitch for a points value of 650 points, roughly two thirds of a standard game.
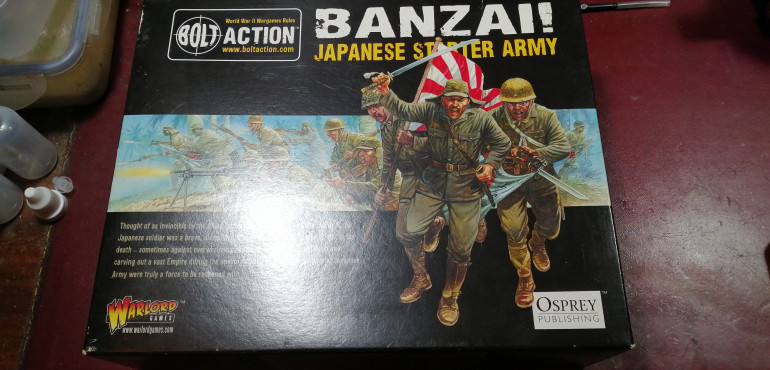
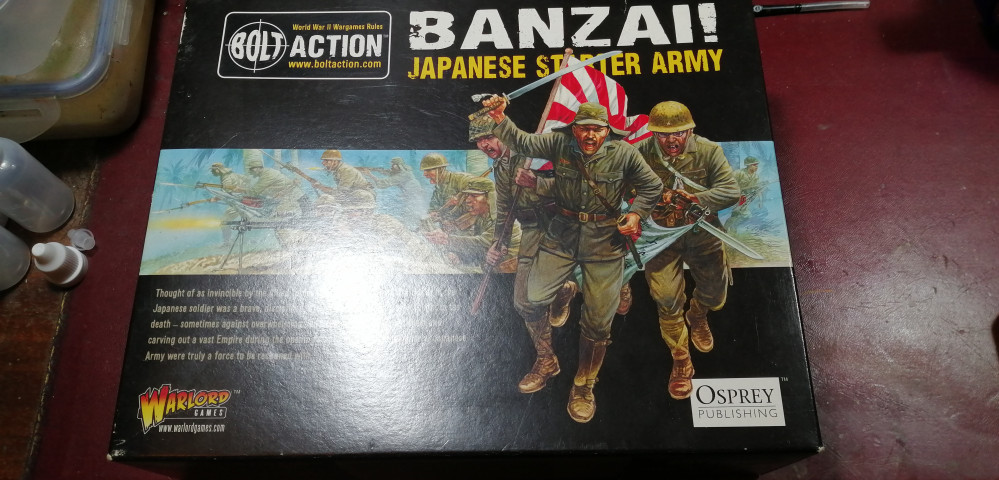
A bit of fiddling around with easyarmy.com and using only the sprues in the Banzai box I already owned, my Japanese list was set out. Using this template I then looked at how to speed paint the whole army in around two weeks.
YouTube threw up a great tutorial video (https://www.youtube.com/watch?v=WRQQpoMLhp8&t=427s), and I set to work.
The addition of the Chi-Ha medium tank (still to get painted) brought the list to 648 points.
I copied Sonic Sledgehammer’s tutorial pretty closely, except I chose Japanese Uniform as the base colour for the uniforms, as I knew that I was going to be speed-painting both armies and I didn’t want the khaki drill of the British to look too similar to the Japanese at uniforms at the end of it.
Essentially, I applied only base coats as described in the video, applied a simple drybrush all over for some highlight and then applied Soft Tone Quickshade with a brush over the whole model.
A coat of Vallejo Model Colour US Field Drab was applied over the bases before I added Geek Gaming Scenics Mediterranean Soil Base Ready mix. While the GGS Base Ready products are excellent, underpainting with a colour close to your final effect helps to hide thin spots and patches and makes the products a delight to use.
Lastly a generous varnish with GWs Munitorum spray varnish got them finished.
The whole army was assembled and painted in my allotted two weeks barring the Chi-Ha, and while not spectacular I’m happy with the result overall.
Next, on to the Brits…
A very slow start
Our story begins many years ago. After playing a few test games of Bolt Action at my local gaming club, with the club’s Bolt Action D-Day Firefight starter set, I was sure it was a game I wanted to explore some more.
Warlord’s army starter boxes are an easy entry point and looking at those I was immediately drawn to the Japanese Banzai starter army. This was based solely on my interest in Japanese culture and medieval and feudal history and was not informed by any knowledge of historical wargaming or WW2 in general.
As is often the case with hobby projects this box disappeared into storage as no one else at my club seemed interested in exploring the game further.
I did briefly reconnect with this project when I decided to paint the Japanese mortar team for a monthly painting ‘competition’ (more of a motivational tool than a quest for painting glory) at our local club, hoping this may foster further interest in Bolt Action for other club members.
Roll forward a few more years and a change of home and I decided it was time to do something with this box of models, with or without another interested party. So what to do?
As a veteran wargamer it seemed the best thing to do is complete not one, but two armies, so I have the tools to throw down a game for anyone interested, particularly as my new gaming club was much smaller with no starter sets or introductory games on offer except a few Games Workshop titles.
As a total historical gaming newb, I hit YouTube and the internet, and began looking at Japanese involvement and operations in WW2. For someone new to this, the options and permutations were frankly a little overwhelming. However, I was keen on the idea of getting a British force, and early on in the war we have the invasion of the Malayan peninsular and the Fall of Singapore.
A quick perusal of the Armies of Imperial Japan book revealed a theatre selector for this period was described. easyarmy.com allowed me to take a look at the British equivalent selector and a plan was formed.


