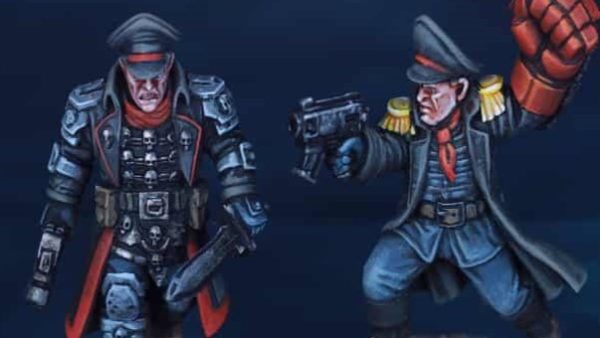
![Very Cool! Make Your Own Star Wars: Legion Imperial Agent & Officer | Review [7 Days Early Access]](https://images.beastsofwar.com/2025/12/Star-Wars-Imperial-Agent-_-Officer-coverimage-V3-225-127.jpg)


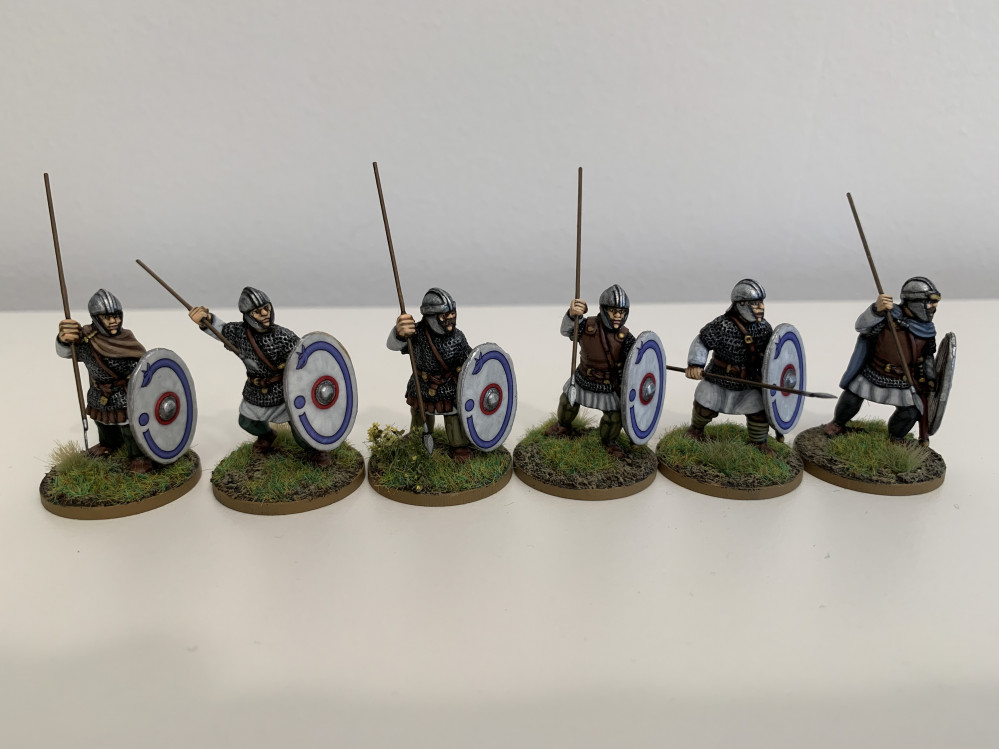
Romano-British for Dux Britanniarum


Recommendations: 1546
About the Project
This was a project started during lockdown to build a Romano-British war band for Dux Britanniarum by Too Fat Lardies. It's stalled of late, so my hope is that by documenting progress on this project I'll be incentivised to finish it.
Related Company: Too Fat Lardies
Related Genre: Historical
This Project is Active
Battle Report - Raid on a Border Tower - Turn One
In Dux Britanniarum, nobles and forces are activated when their card is drawn from a deck made up of a card for each noble and any missile troops that may be included in the force. Each side is also given a separate set of cards with special abilities that a noble may spend a command initiative to play.
Peredur Constantine’s card was first out of the deck and seeing Ceawlin’s elite forces coming towards him he decided to have his men form a shieldwall and then try and move towards the road leading to the border tower. This was a mistake on my part as troops in shieldwall find it harder to negotiate obstacles. True enough, they only just managed to make it over the drystone wall and both groups took a point of shock. I should have made the movement roll first and then formed the shieldwall, or simply formed shieldwall behind the drystone wall to get a defensive bonus. As it was, I ended up making only marginal progress towards the road and forming a shieldwall out in the open. Still, these initial games are all about learning.
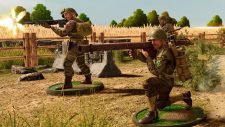
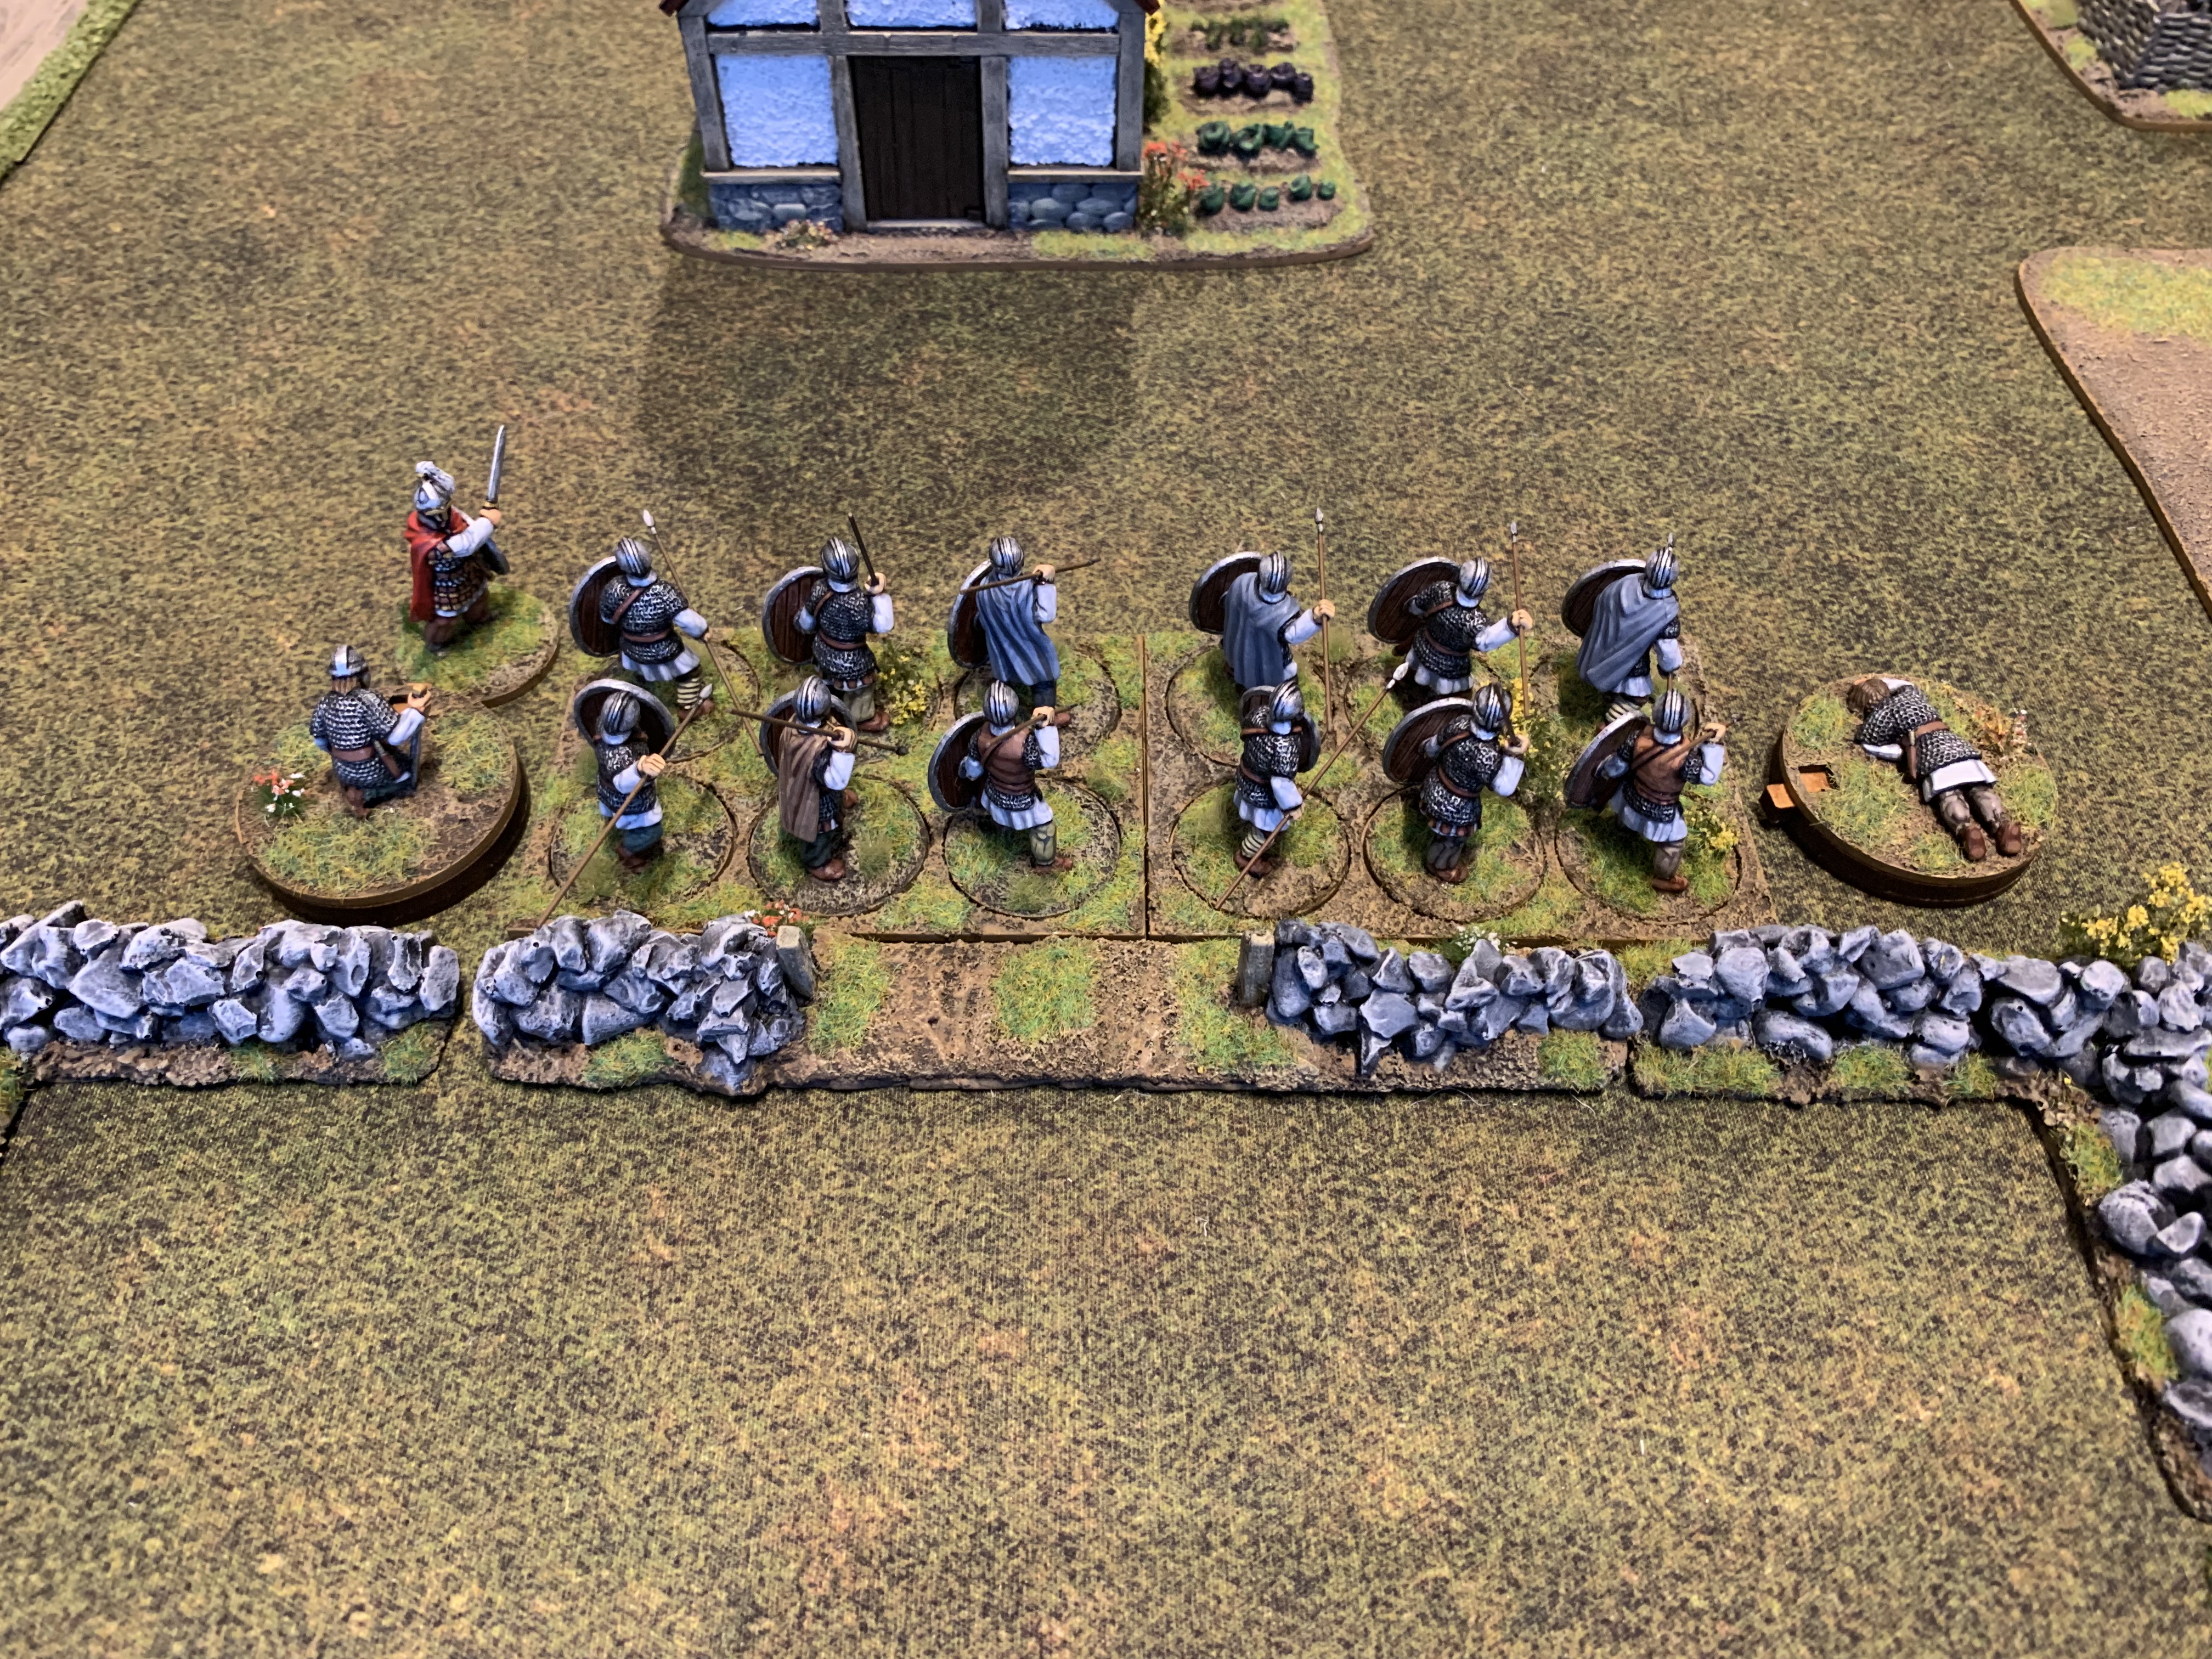 Peredur's force only just manages to clear the drystone wall...
Ceawlin however was faced with a different dilemma in that the gap between the farm buildings was only wide enough to admit one group at a time. As he wanted both groups to attack Peredur’s force together, he sent them both around opposite sides of the barn, keeping one group under his command and the other under Saebert the Old.
In the rest of the turn Garcianus and Urien struggled to get the Comanipulares and the Levy moving, whilst Berhthun the Devil brought on two groups of warriors on the Saxon board edge. Meanwhile the Saxon bowmen sent an ineffective volley against Peredur’s men, whilst the British missile troops made slow progress through the forest hoping to emerge on the other side and harass the Saxon right flank.
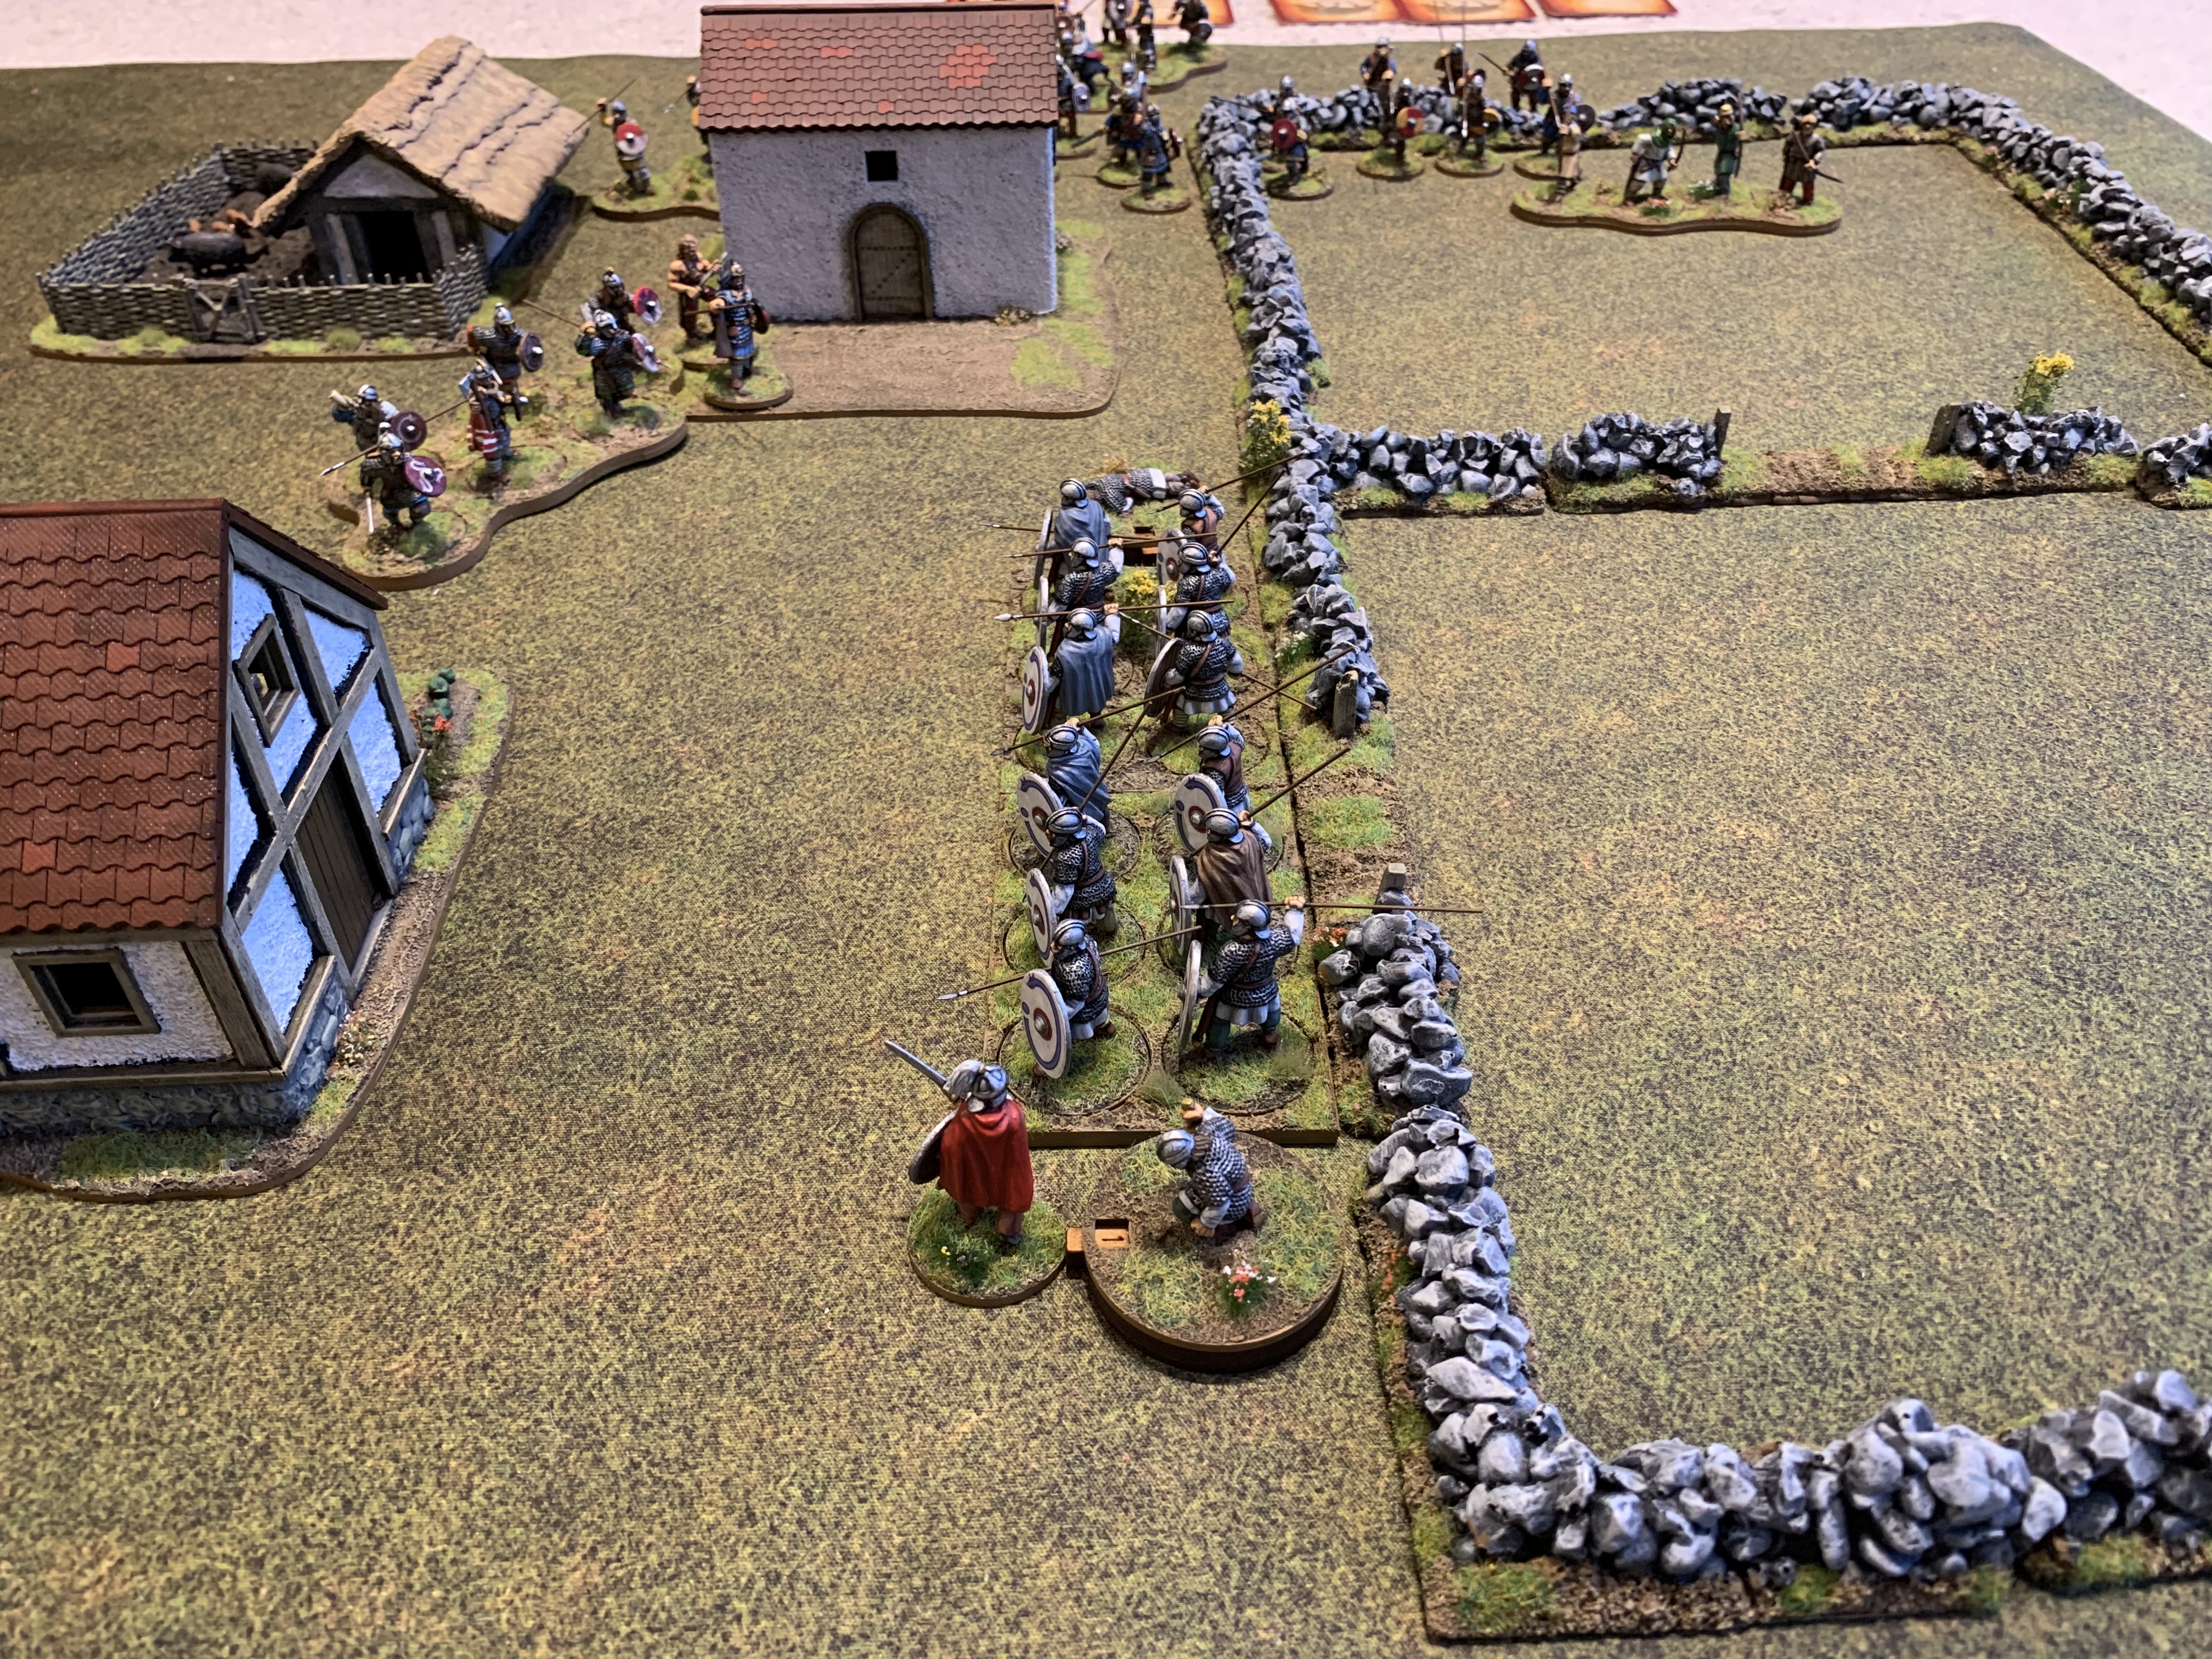 ...And finds itself out in the open facing Ceawlin and his Hearthguard.
Battle Report - Raid on a Border Tower - Introduction
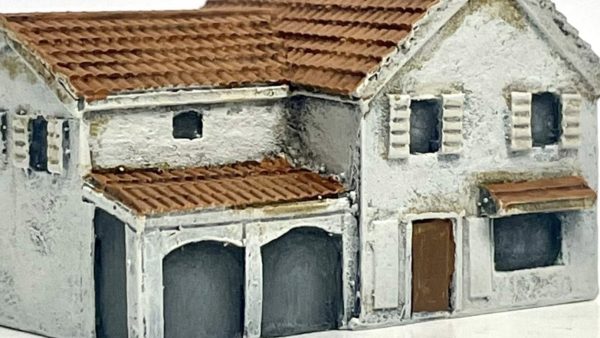
This was a semi-solo battle played out last November using one of the Raid scenarios in the Dux Britanniarum rulebook. I had met with @Avernos at Salute and said that I would use my newly purchased terrain from Lost Valley to make good on my promise to produce a battle report.
I played both sides with Son No. 1 taking control of the Saxons when he was interested. (I later learnt that he much prefers Frostgrave when it comes to tabletop gaming, but maybe an appreciation for historical gaming will come later.) This particular scenario was the Raid on a Border Tower. Technically, you should roll for which scenario will be played, but regular followers of this project will know that I spent rather a long time putting a greenstuff wall on an MDF tower last year and I was keen to use it.
The scenario begins with a British Noble returning from patrol accompanied by two groups of six warriors. The objective of the Saxon player is to capture the noble by defeating his escort and overwhelming him in close combat. The game is played lengthways across a 6×4 table, with the noble and his escort entering at one of the short board edges and the Saxons entering from one of the long edges. The remainder of the British force are stationed around a border tower at the other side of the board. They will need to get to the returning noble and his force before they are crushed by the might of the Saxon warband.

The photo above shows the setup at the beginning of play. Garcianus and his Comanipulares are by the border tower, along with Urien Cadwallder and the Levy. Peredur Constantine and his patrol are resting by the drystone wall of a livestock enclosure when they are shocked to see Ceawlin and his two groups of elite Hearthguard appear on the other side of the farm. Both sides start with a Force Morale score of 7.
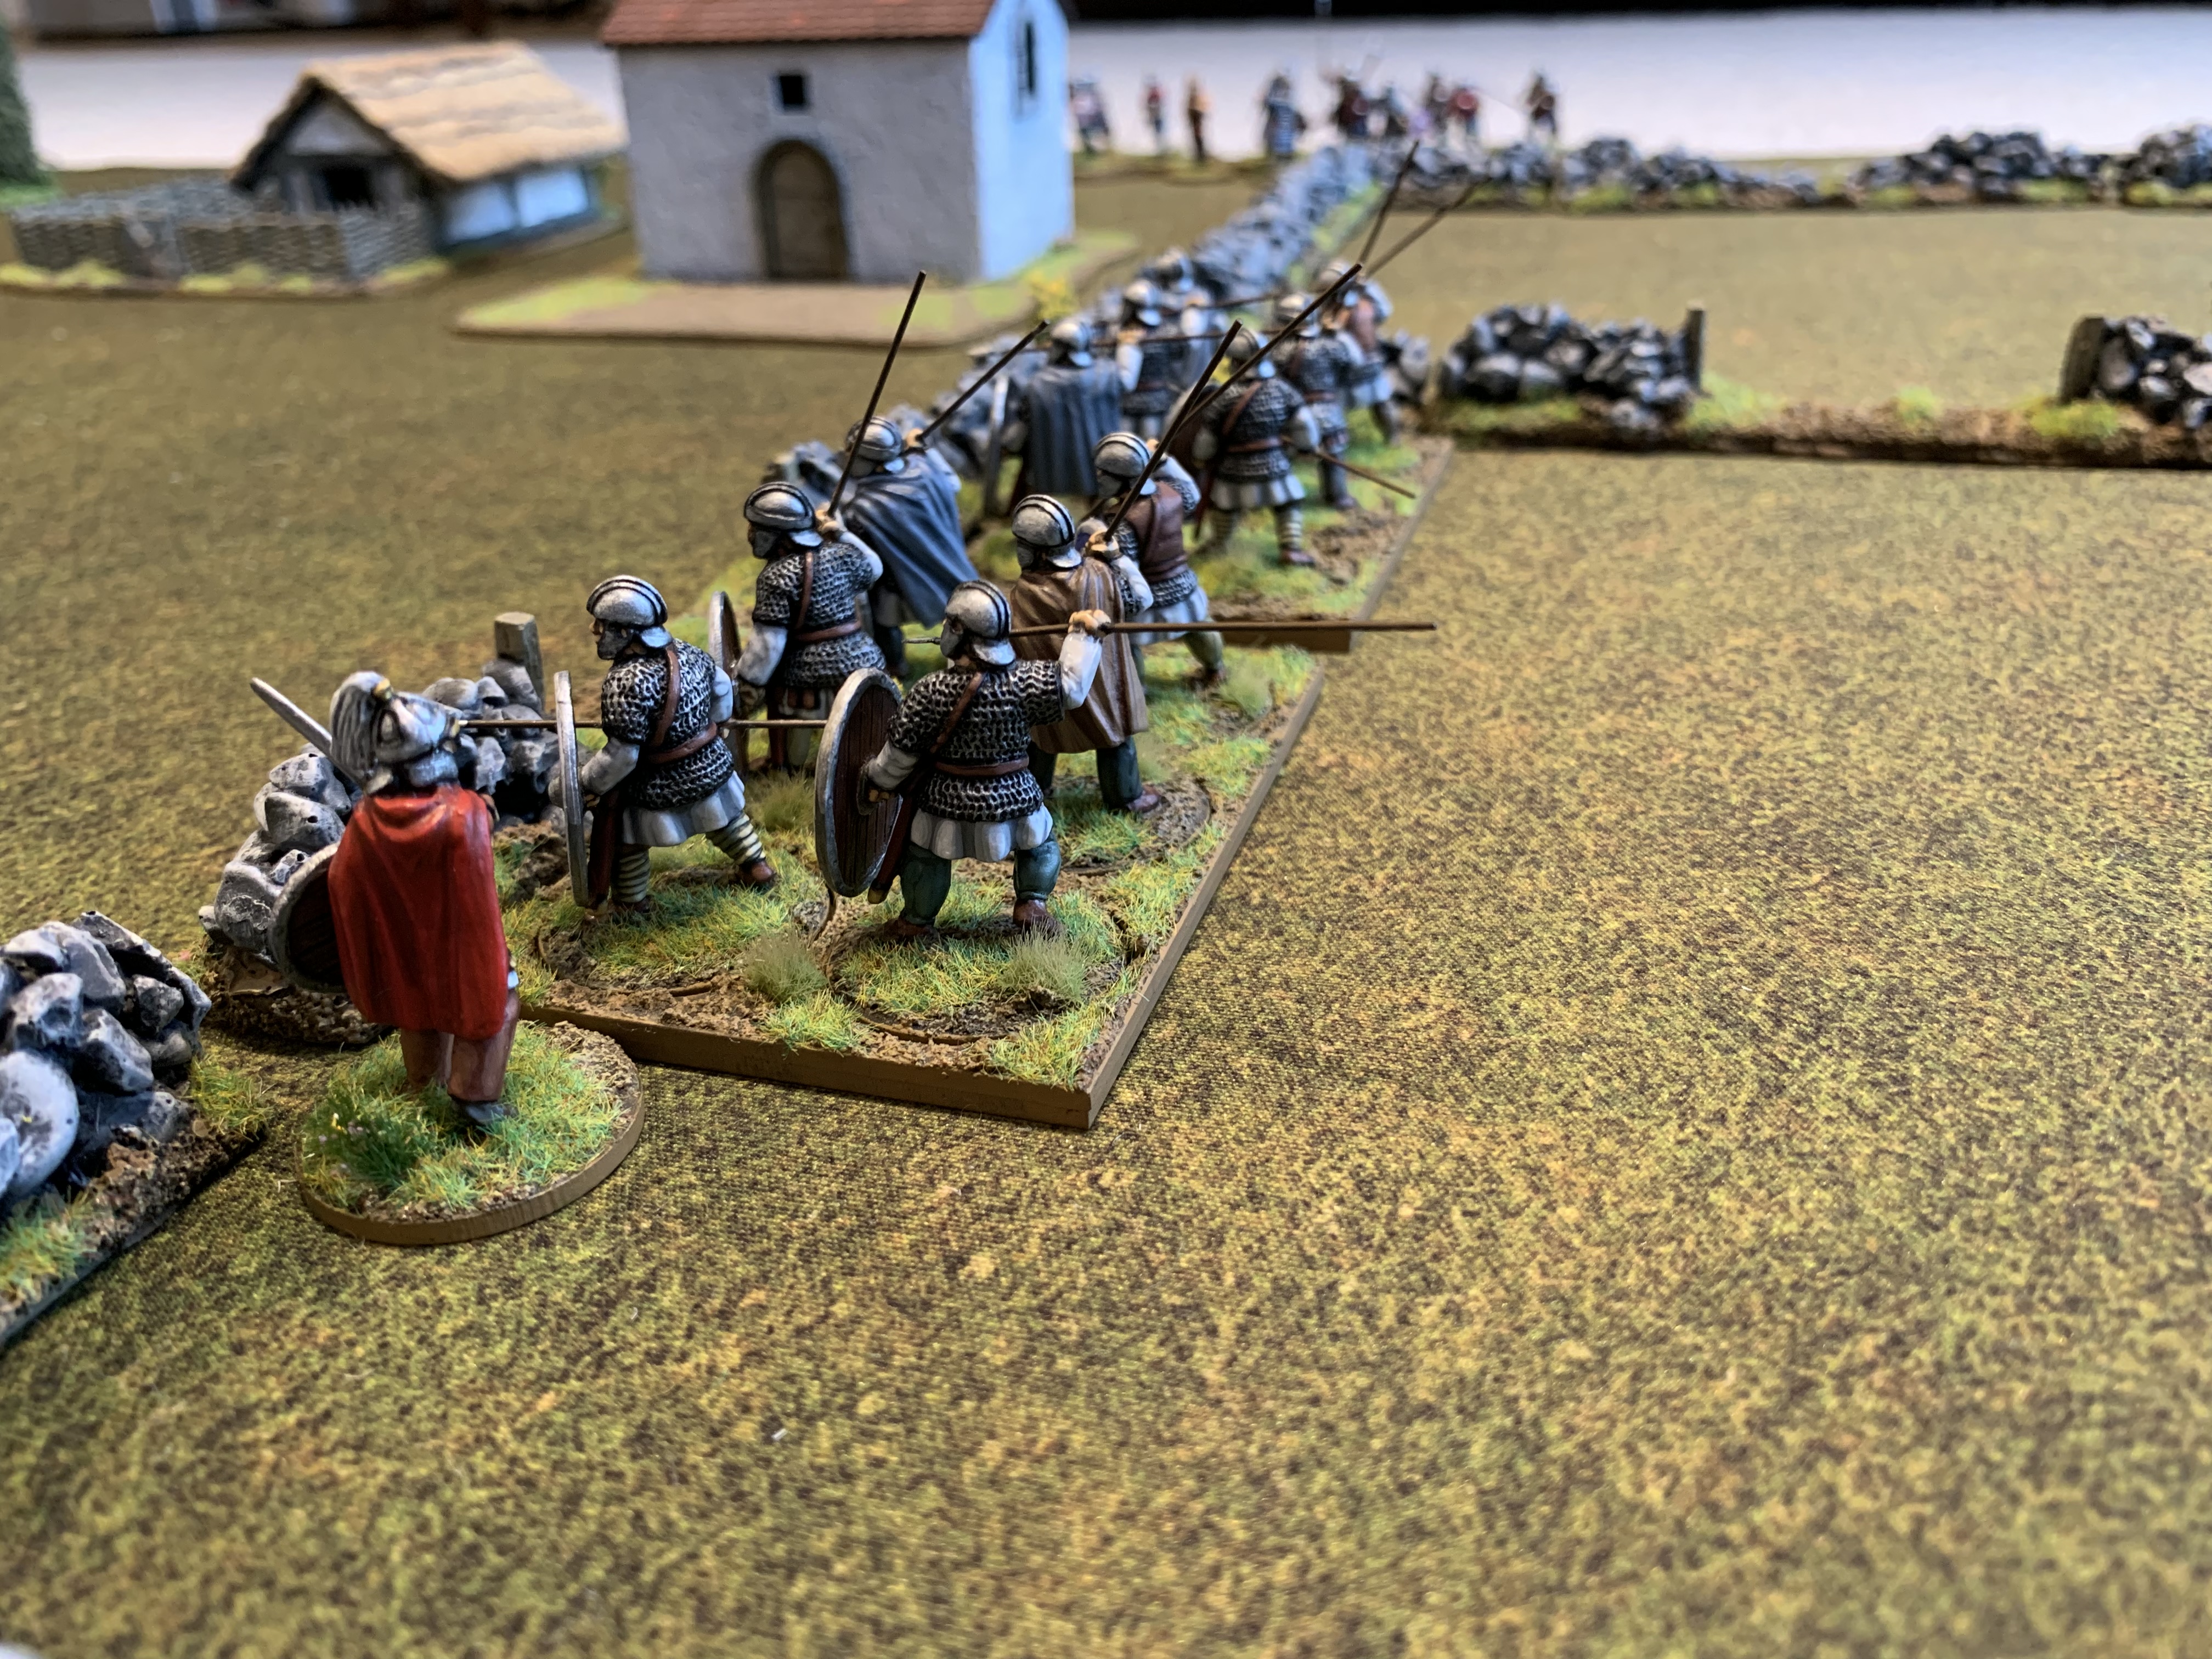 My Lord, look! The pagan beasts are upon us!
Casualty bases/Shock markers
Casualties are removed in Dux Britanniarum, but like a lot of Too Fat Lardies games there is a system of shock to represent the attrition and fatigue of battle. You can represent shock with counters, but I wanted something that would be more integrated into the tabletop.
To address this I bought some dial counters from Charlie Foxtrot to keep track of the level of shock and some casualty figures from Gripping Beast to represent the overall weariness of a unit.
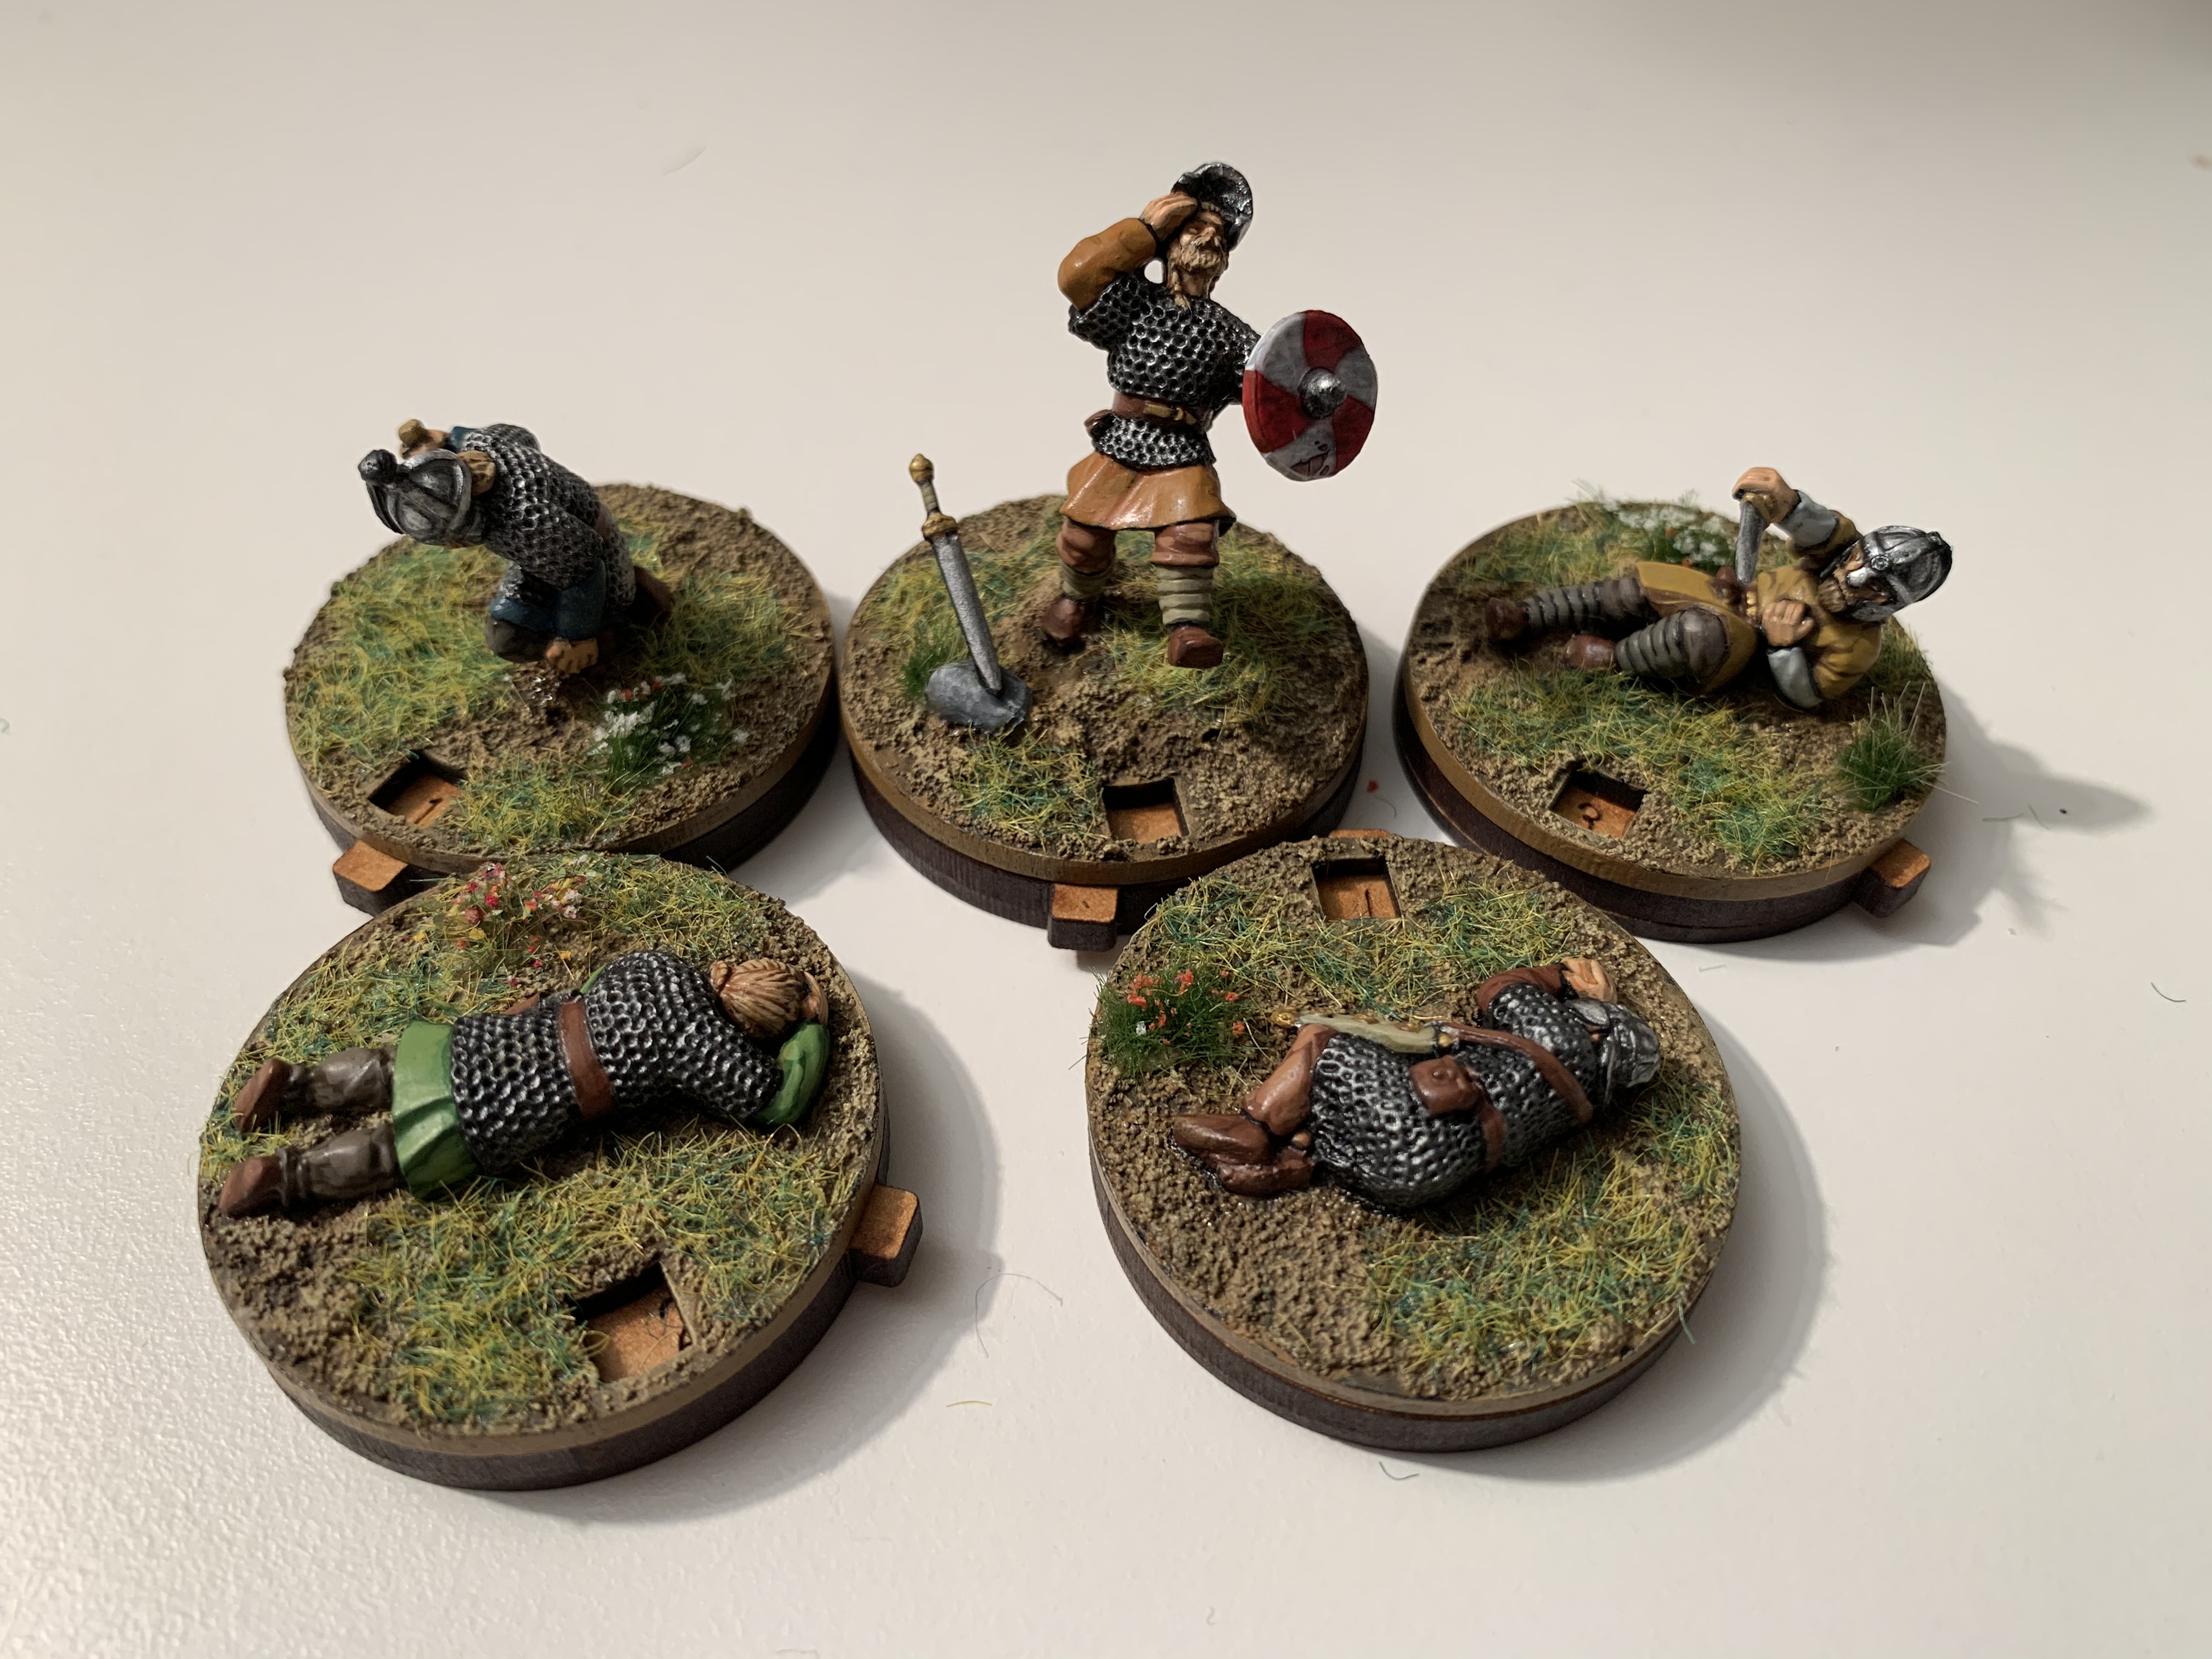 Saxon shock markers
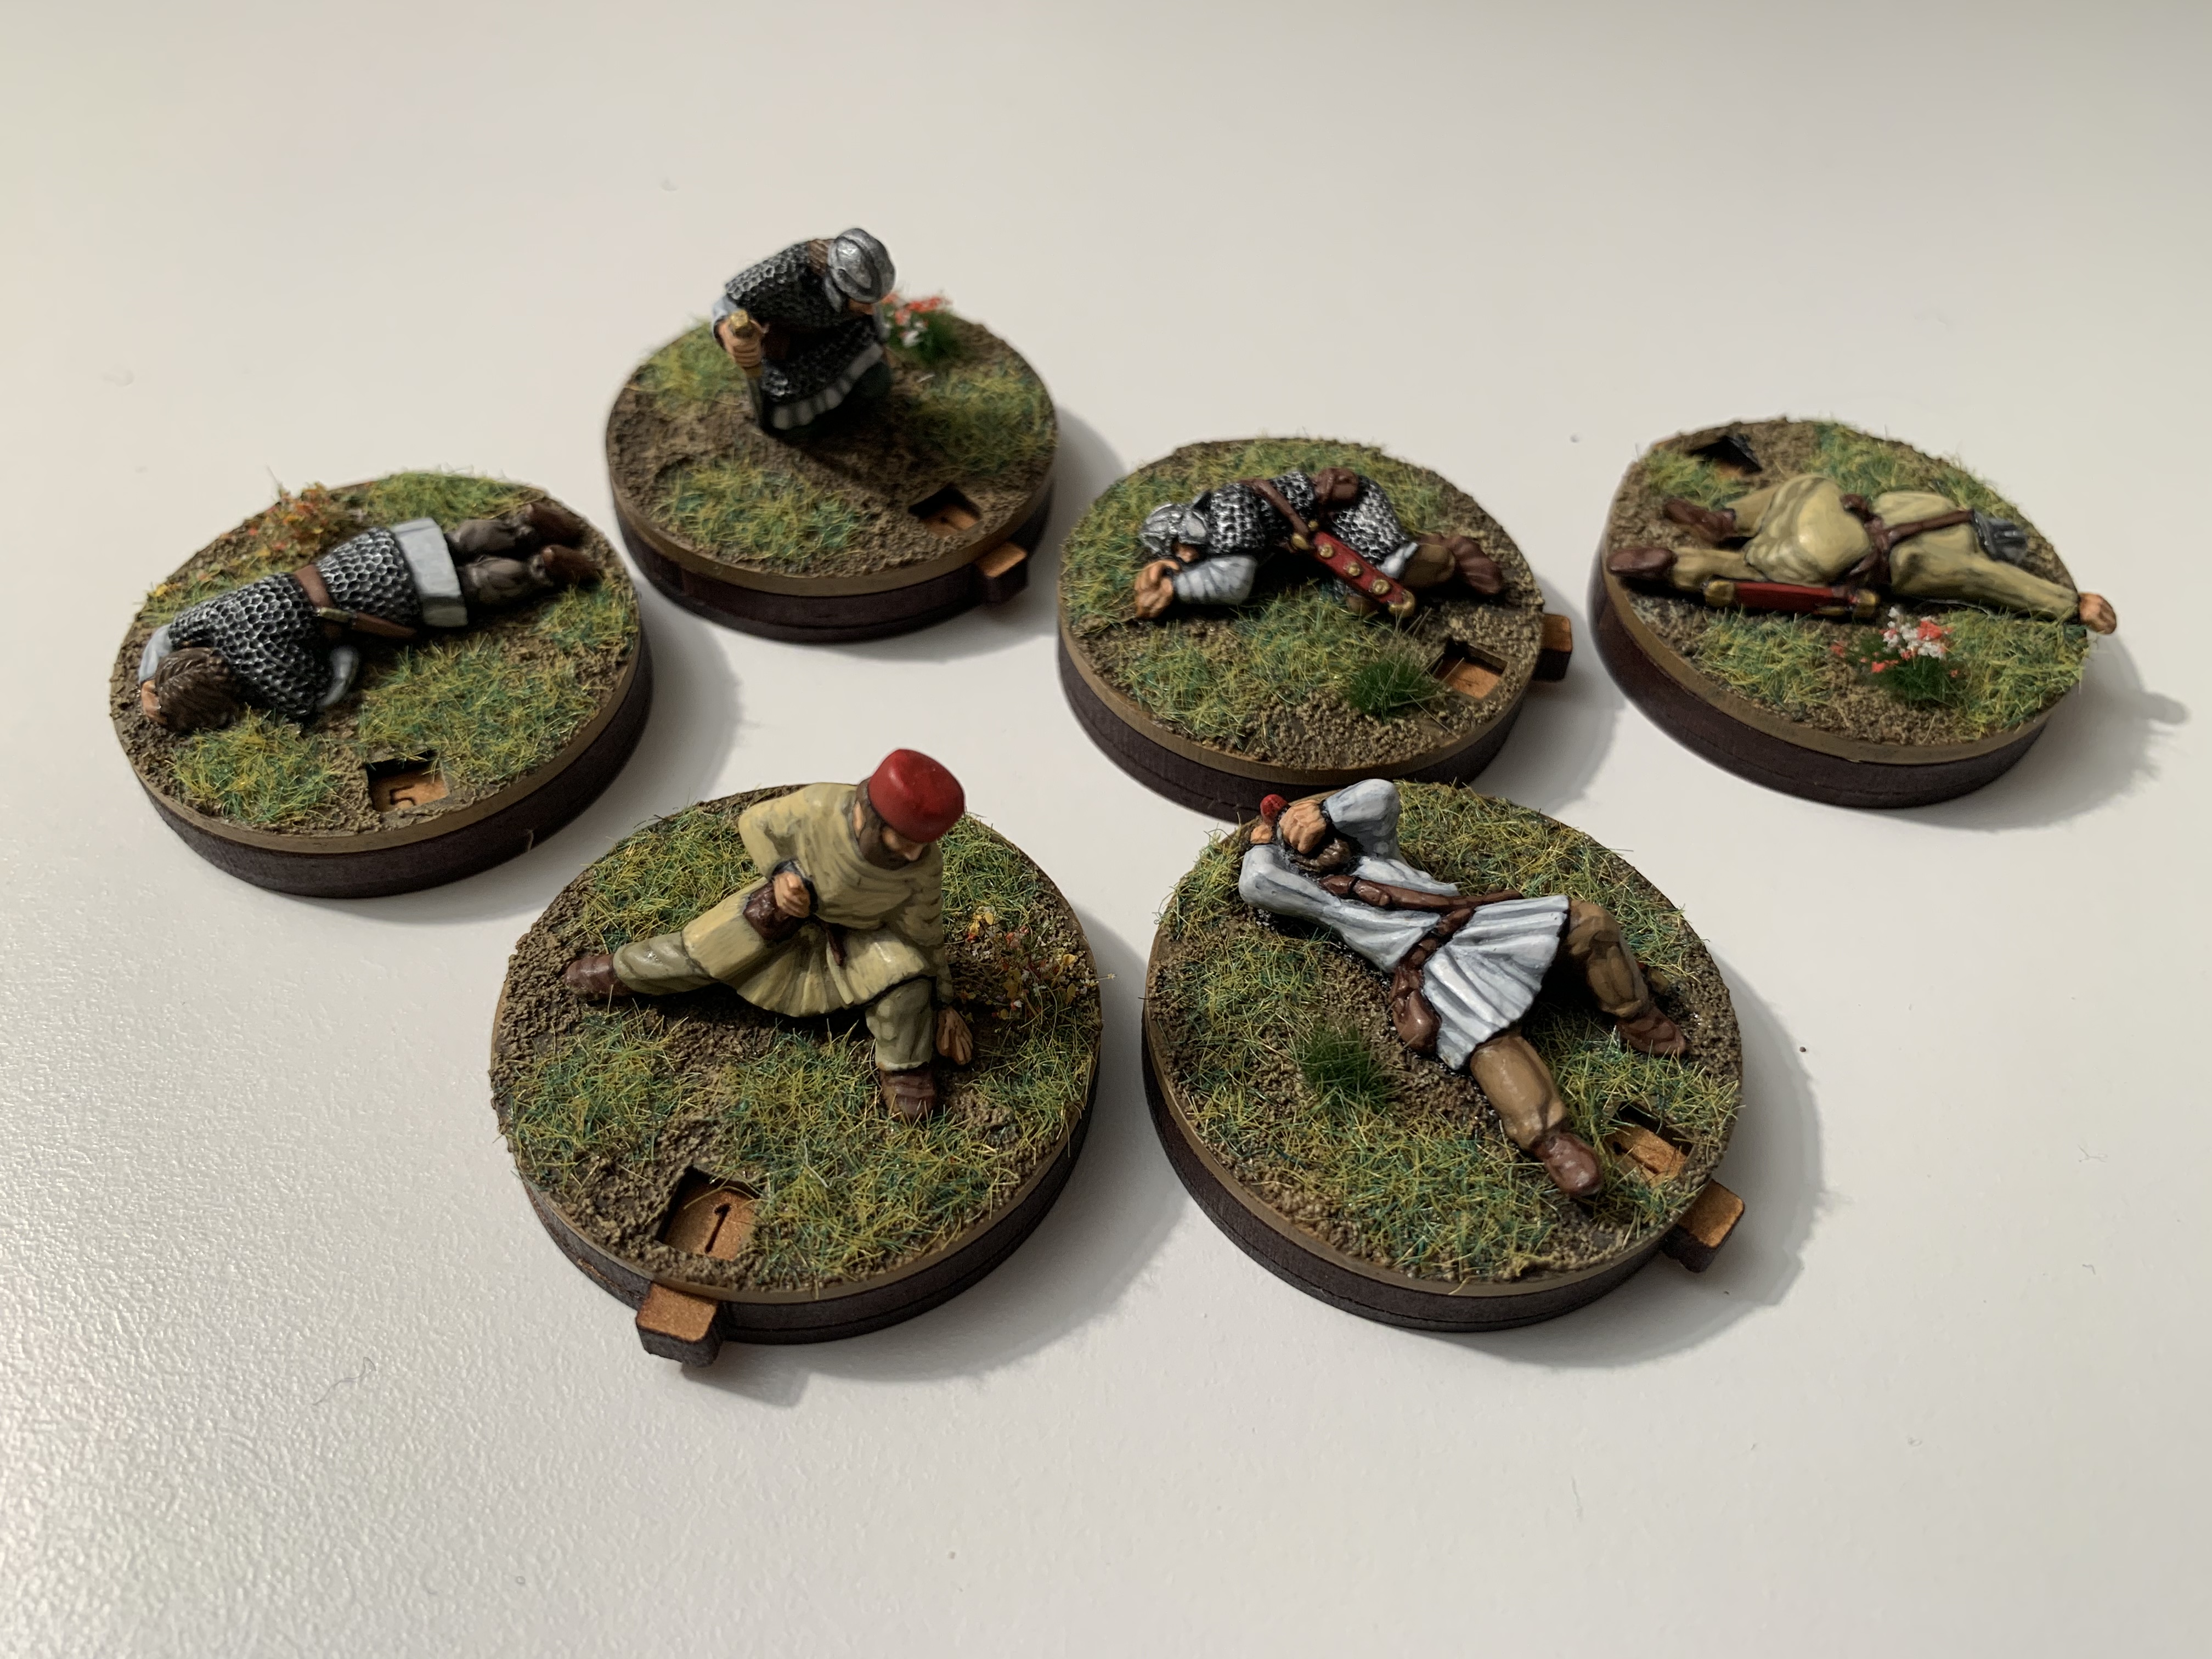 Romano-British shock markers
 Dial counter broken into its constituent parts for those who want to see how it goes together
My advice is to attach the miniature to the top base of the counter (the one with the square hole to see the numbers through) and paint and base everything on that first.
Attach the pivot to the bottom base using undiluted PVA. Use the bevel as a means of aligning the pivot to ensure it is central to the bottom base. Carefully lift off the bevel once the pivot is aligned as you don’t want it to be accidentally glued in place!
Once the pivot and bottom base have dried, place the bevel back over the pivot being sure to keep the numbered side facing upwards. Place undiluted PVA on the upper face of the pivot and then place the top base on top. Use your fingers to ensure a good alignment with the bottom base and bevel.
Be sure to keep the PVA away from the edge of the pivot when gluing down the top base. You don’t want to push any excess PVA onto the bevel, as that could glue it in place and prevent it moving freely.
Also, ensure you give plenty of drying time. Resist the urge to touch the completed assembly and try it out as it will just pull apart or become misaligned if you use it before it’s ready.
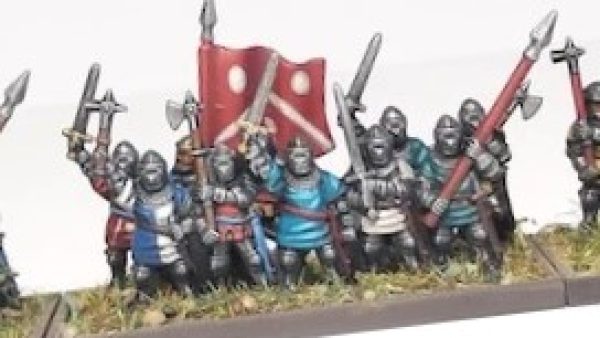
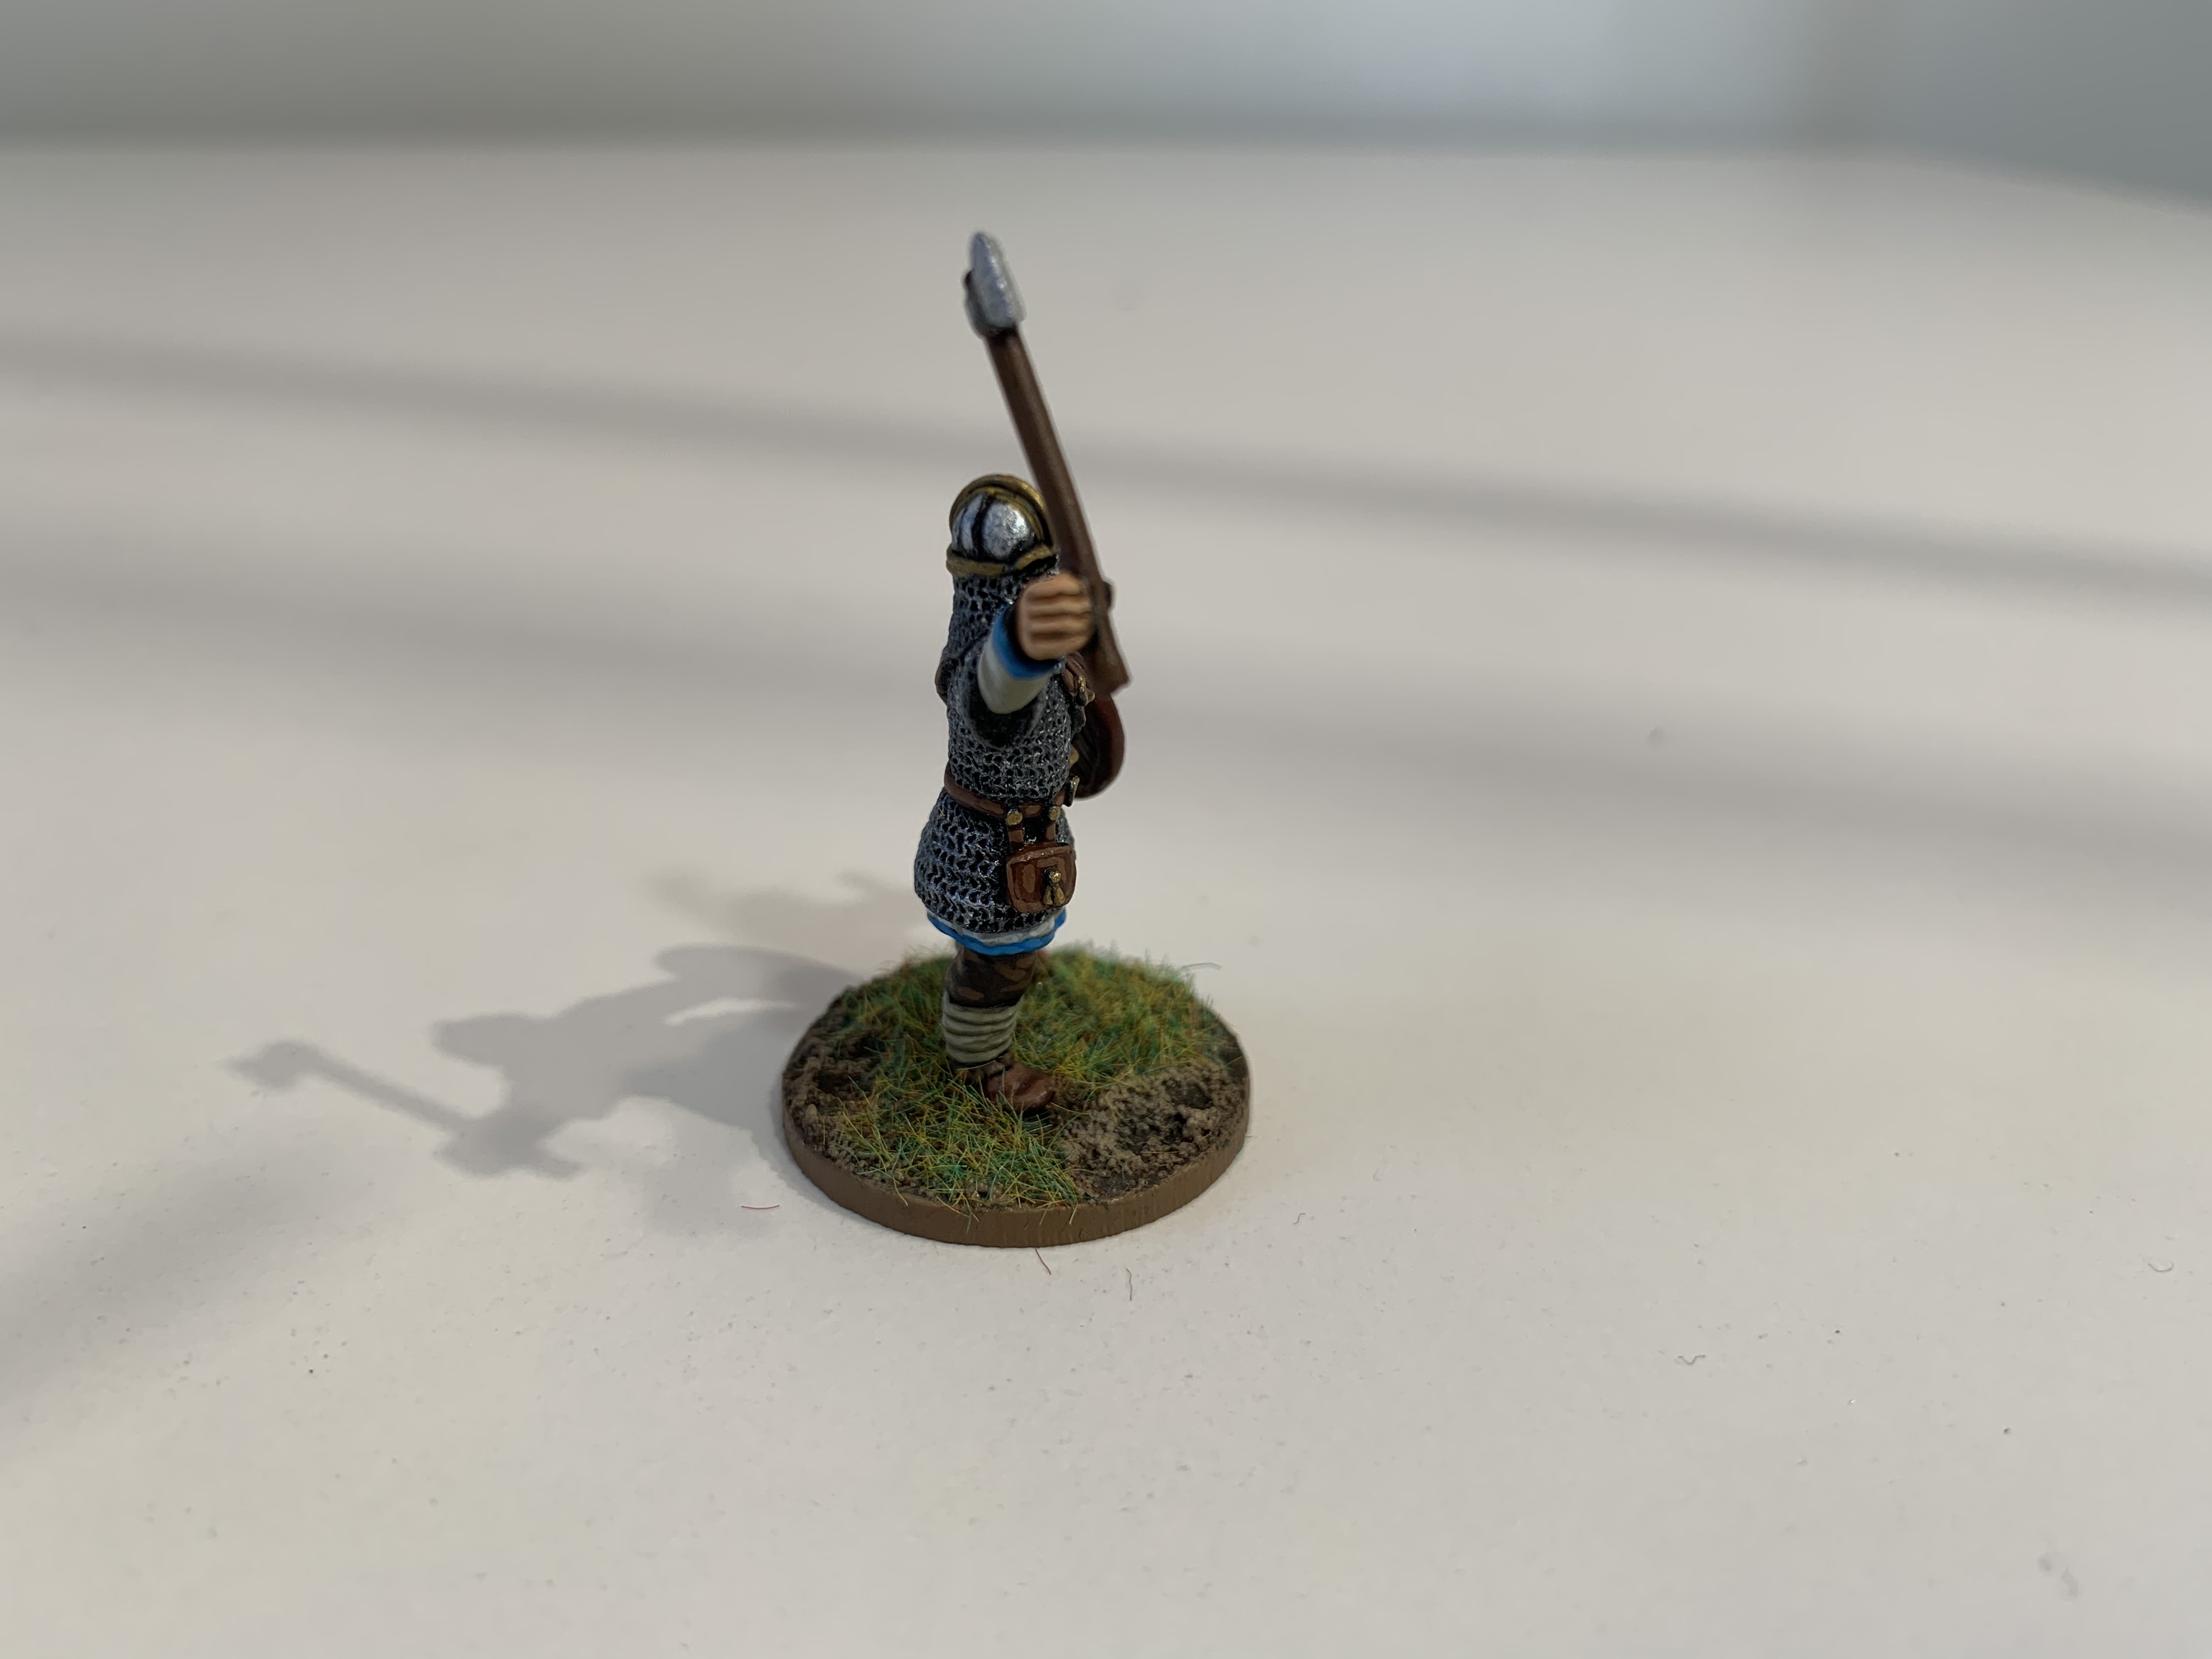
Complete Early Saxon warband
 The completed warband. Warlord and Champion at the front with archers to the left. Behind you have two groups of Hearthguard to the right and three groups of Warriors to the left, each led by a Noble.
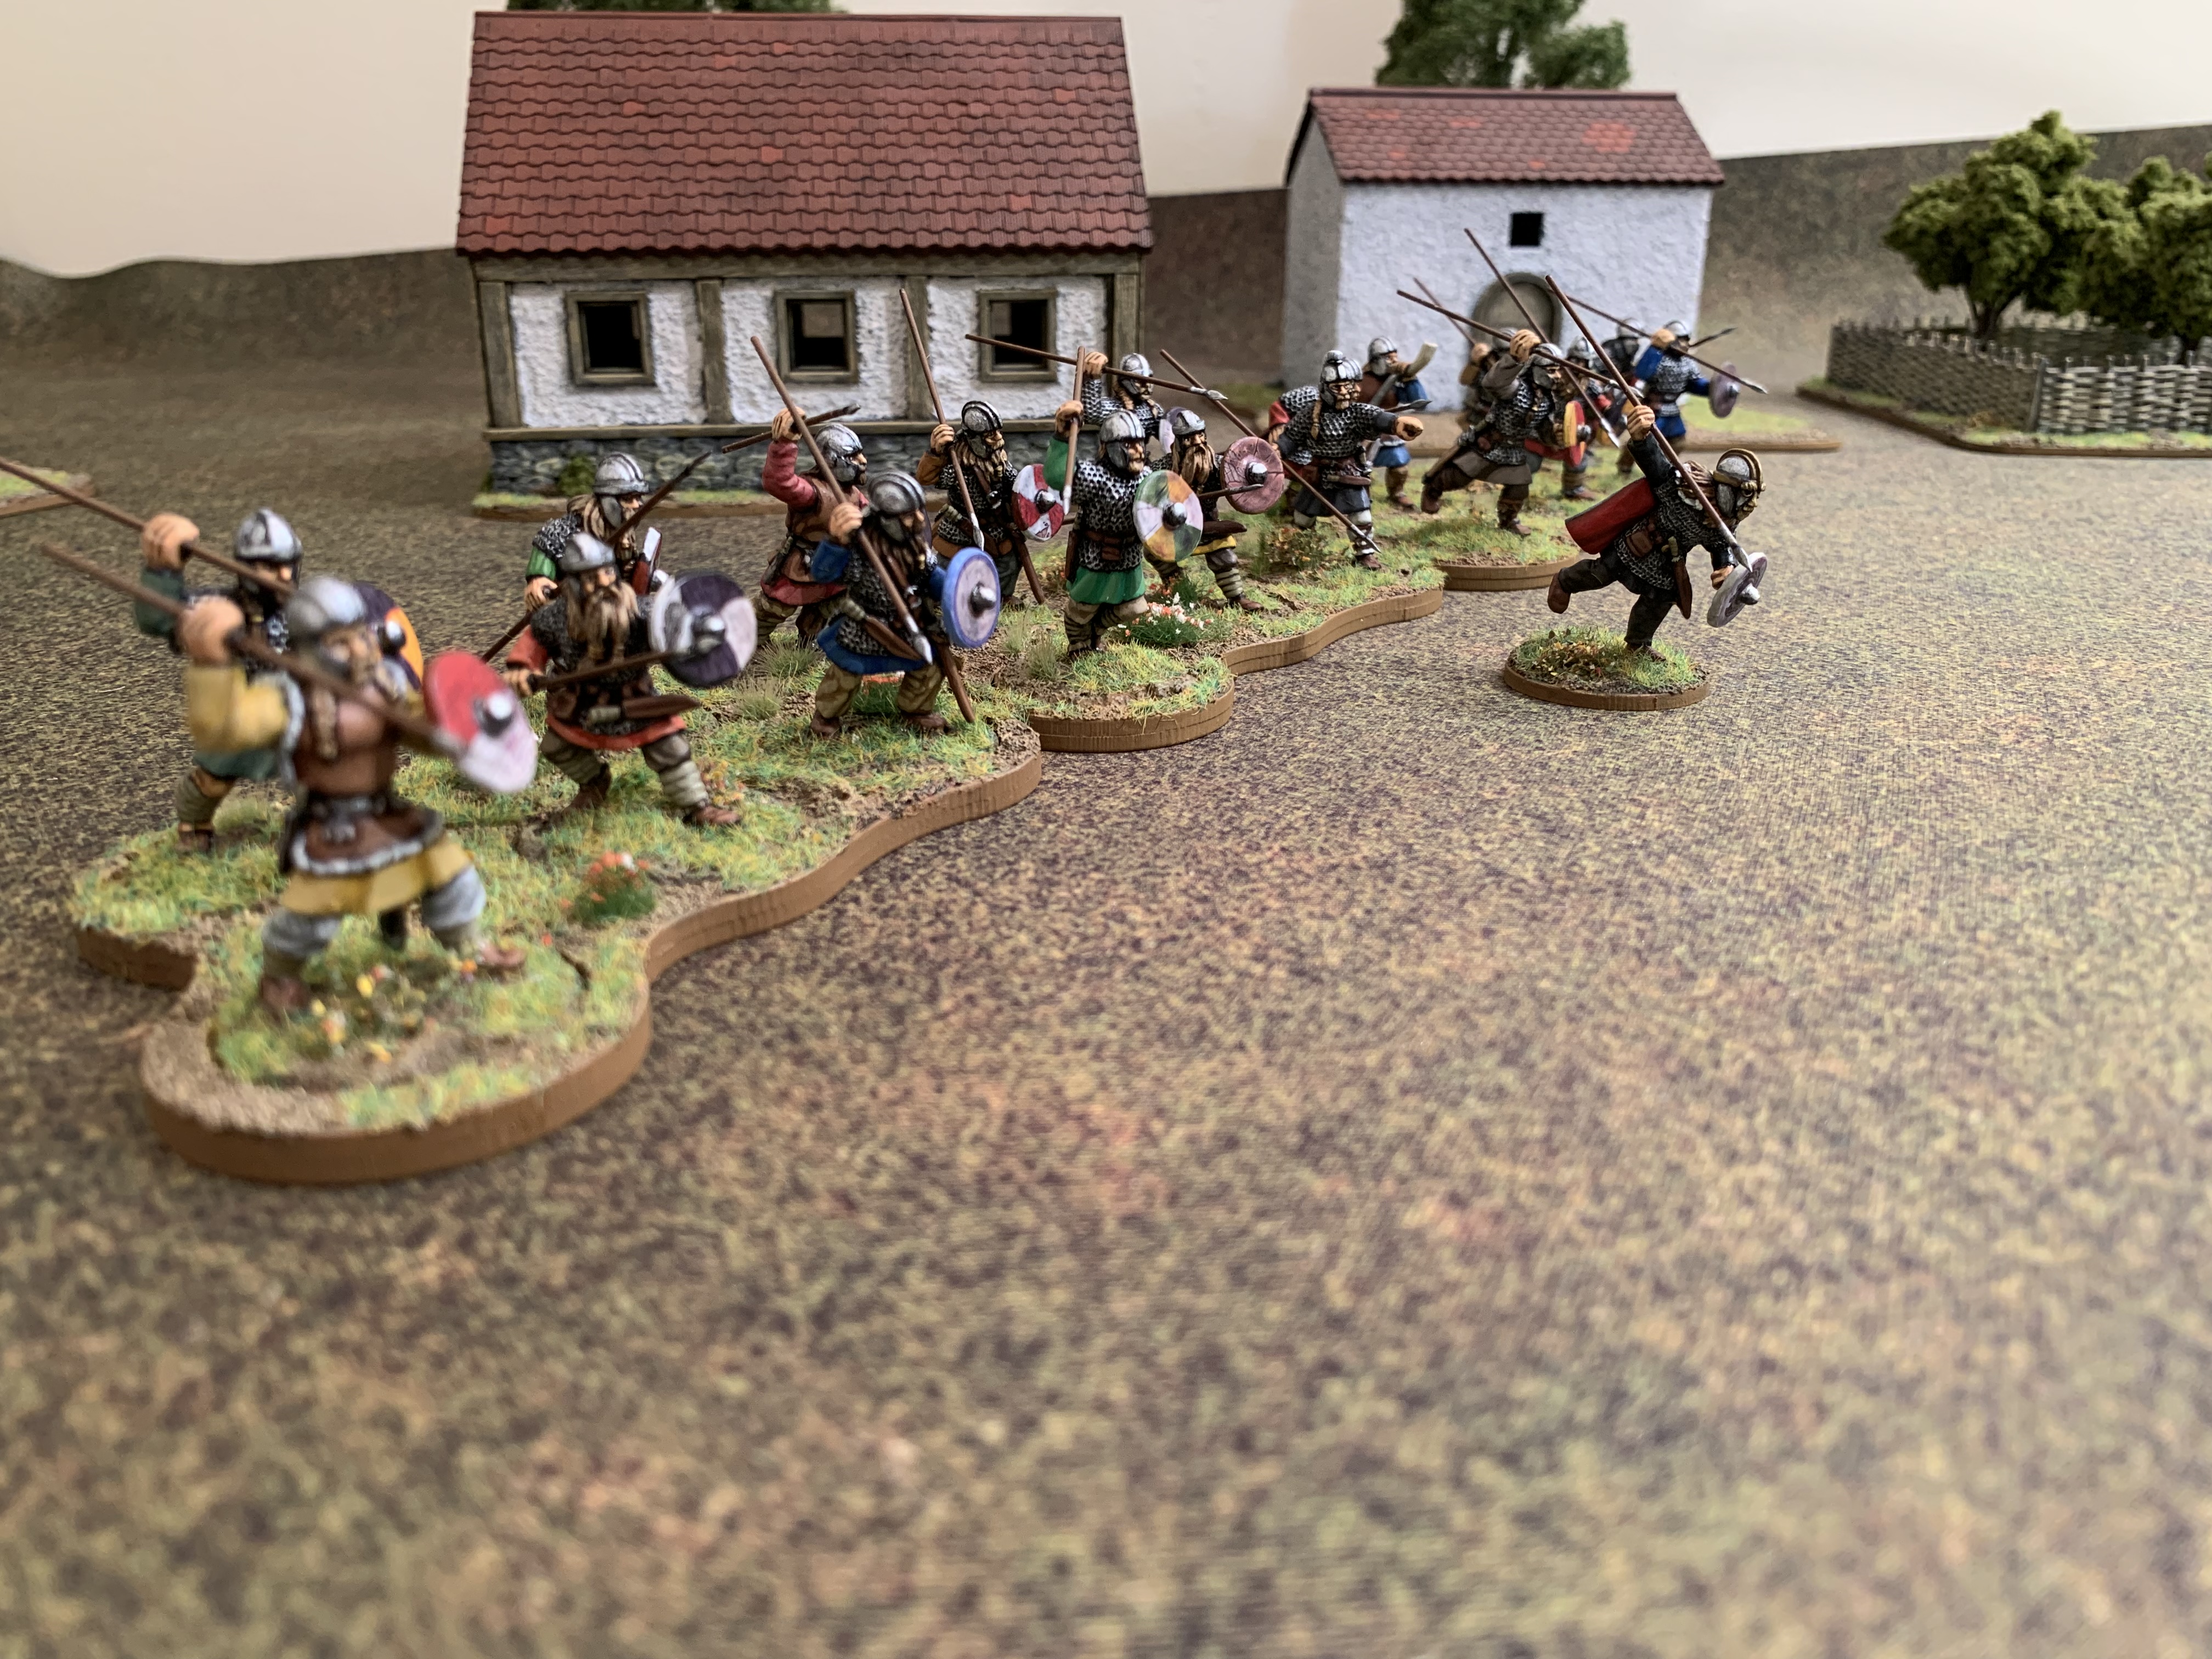 Berhthun the Devil leads the Warriors forward
 Ceawlin and his Champion Cenfus lead the Hearthguard with archers in support.
Saxon Lord - Ceawlin
Do you ever get the feeling that a miniature just doesn’t want to be painted? That you can’t get the colour combination correct or you just aren’t satisfied with what you’re doing? We’ll Ceawlin was like that and he took me far longer than he should have done.
By way of background, Ceawlin is my Saxon Lord and the last figure in this force. He is 29 and has a Man Mountain physique meaning he will get a bonus for feats of strength like breaking down a door. He also has the Lustful attribute meaning he covets the women of others, so suffers a penalty when testing the loyalty of his men (possibly he has been led astray by Saebert who had the same attribute). He is a Wodenborn aristocrat, born in Britain the son of a foederati in Roman service. He has a Tribune’s Tribute in wealth.
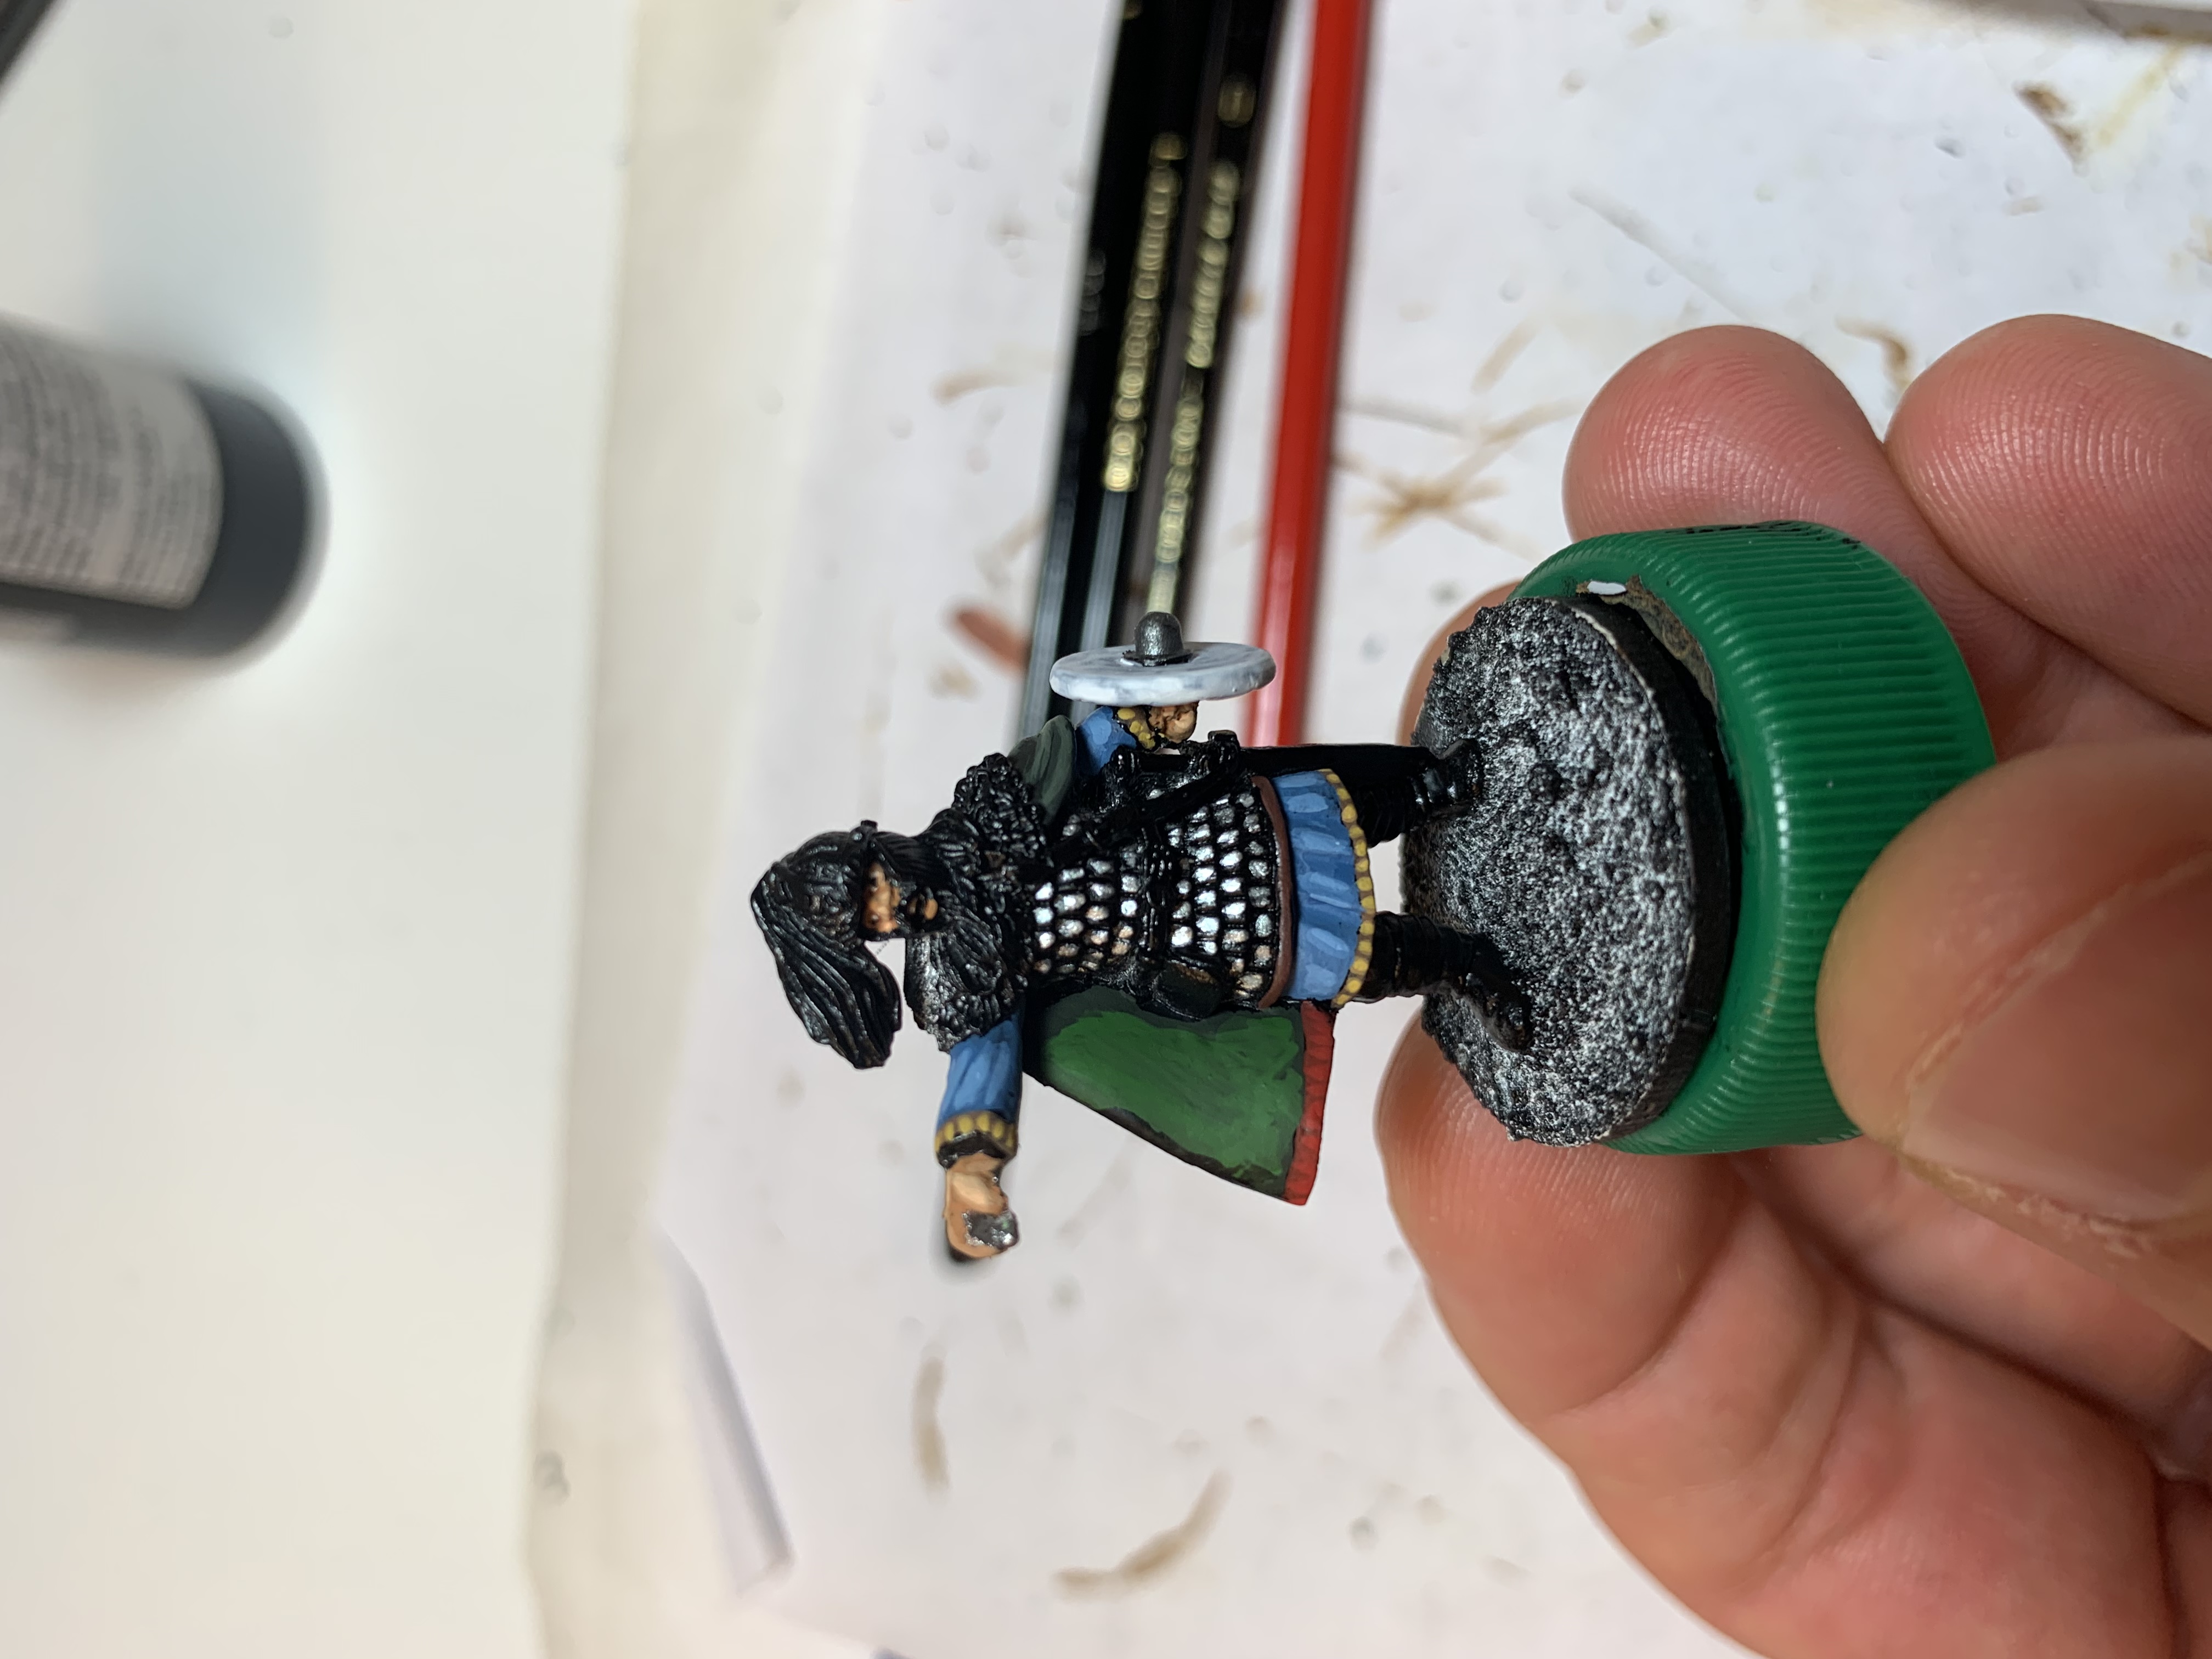 Too many colours
Ceawlin is Footsore’s Early Saxon Chief figure. I wanted to give him some finery, so started off by doing a light blue tunic with yellow trim. The blue was a base coat of 50/50 VMC Grey Blue and VMC Prussian Blue which was then highlighted up by adding White. The yellow trim was a base of VMC Beige Brown, the a 50/50 mix of Beige Brown and Yellow Ochre and then a final highlight of Yellow Ochre. So far so good.
I then gave him a green cloak with red trim and this was just too much. My wife then told me that there is an old saying that goes “Red and Green should not be seen, except upon a Fairy Queen.”
Now I fully accept that the OTT project system is a place where you stand a greater chance of spotting a Fairy Queen than you might ordinarily. But this is a historical project and I wasn’t having my Saxon Warlord described in such a way, so the green cloak was hastily painted over in black.
I then went into a bit of hobby funk with Ceawlin and couldn’t summon up the energy to finish him.
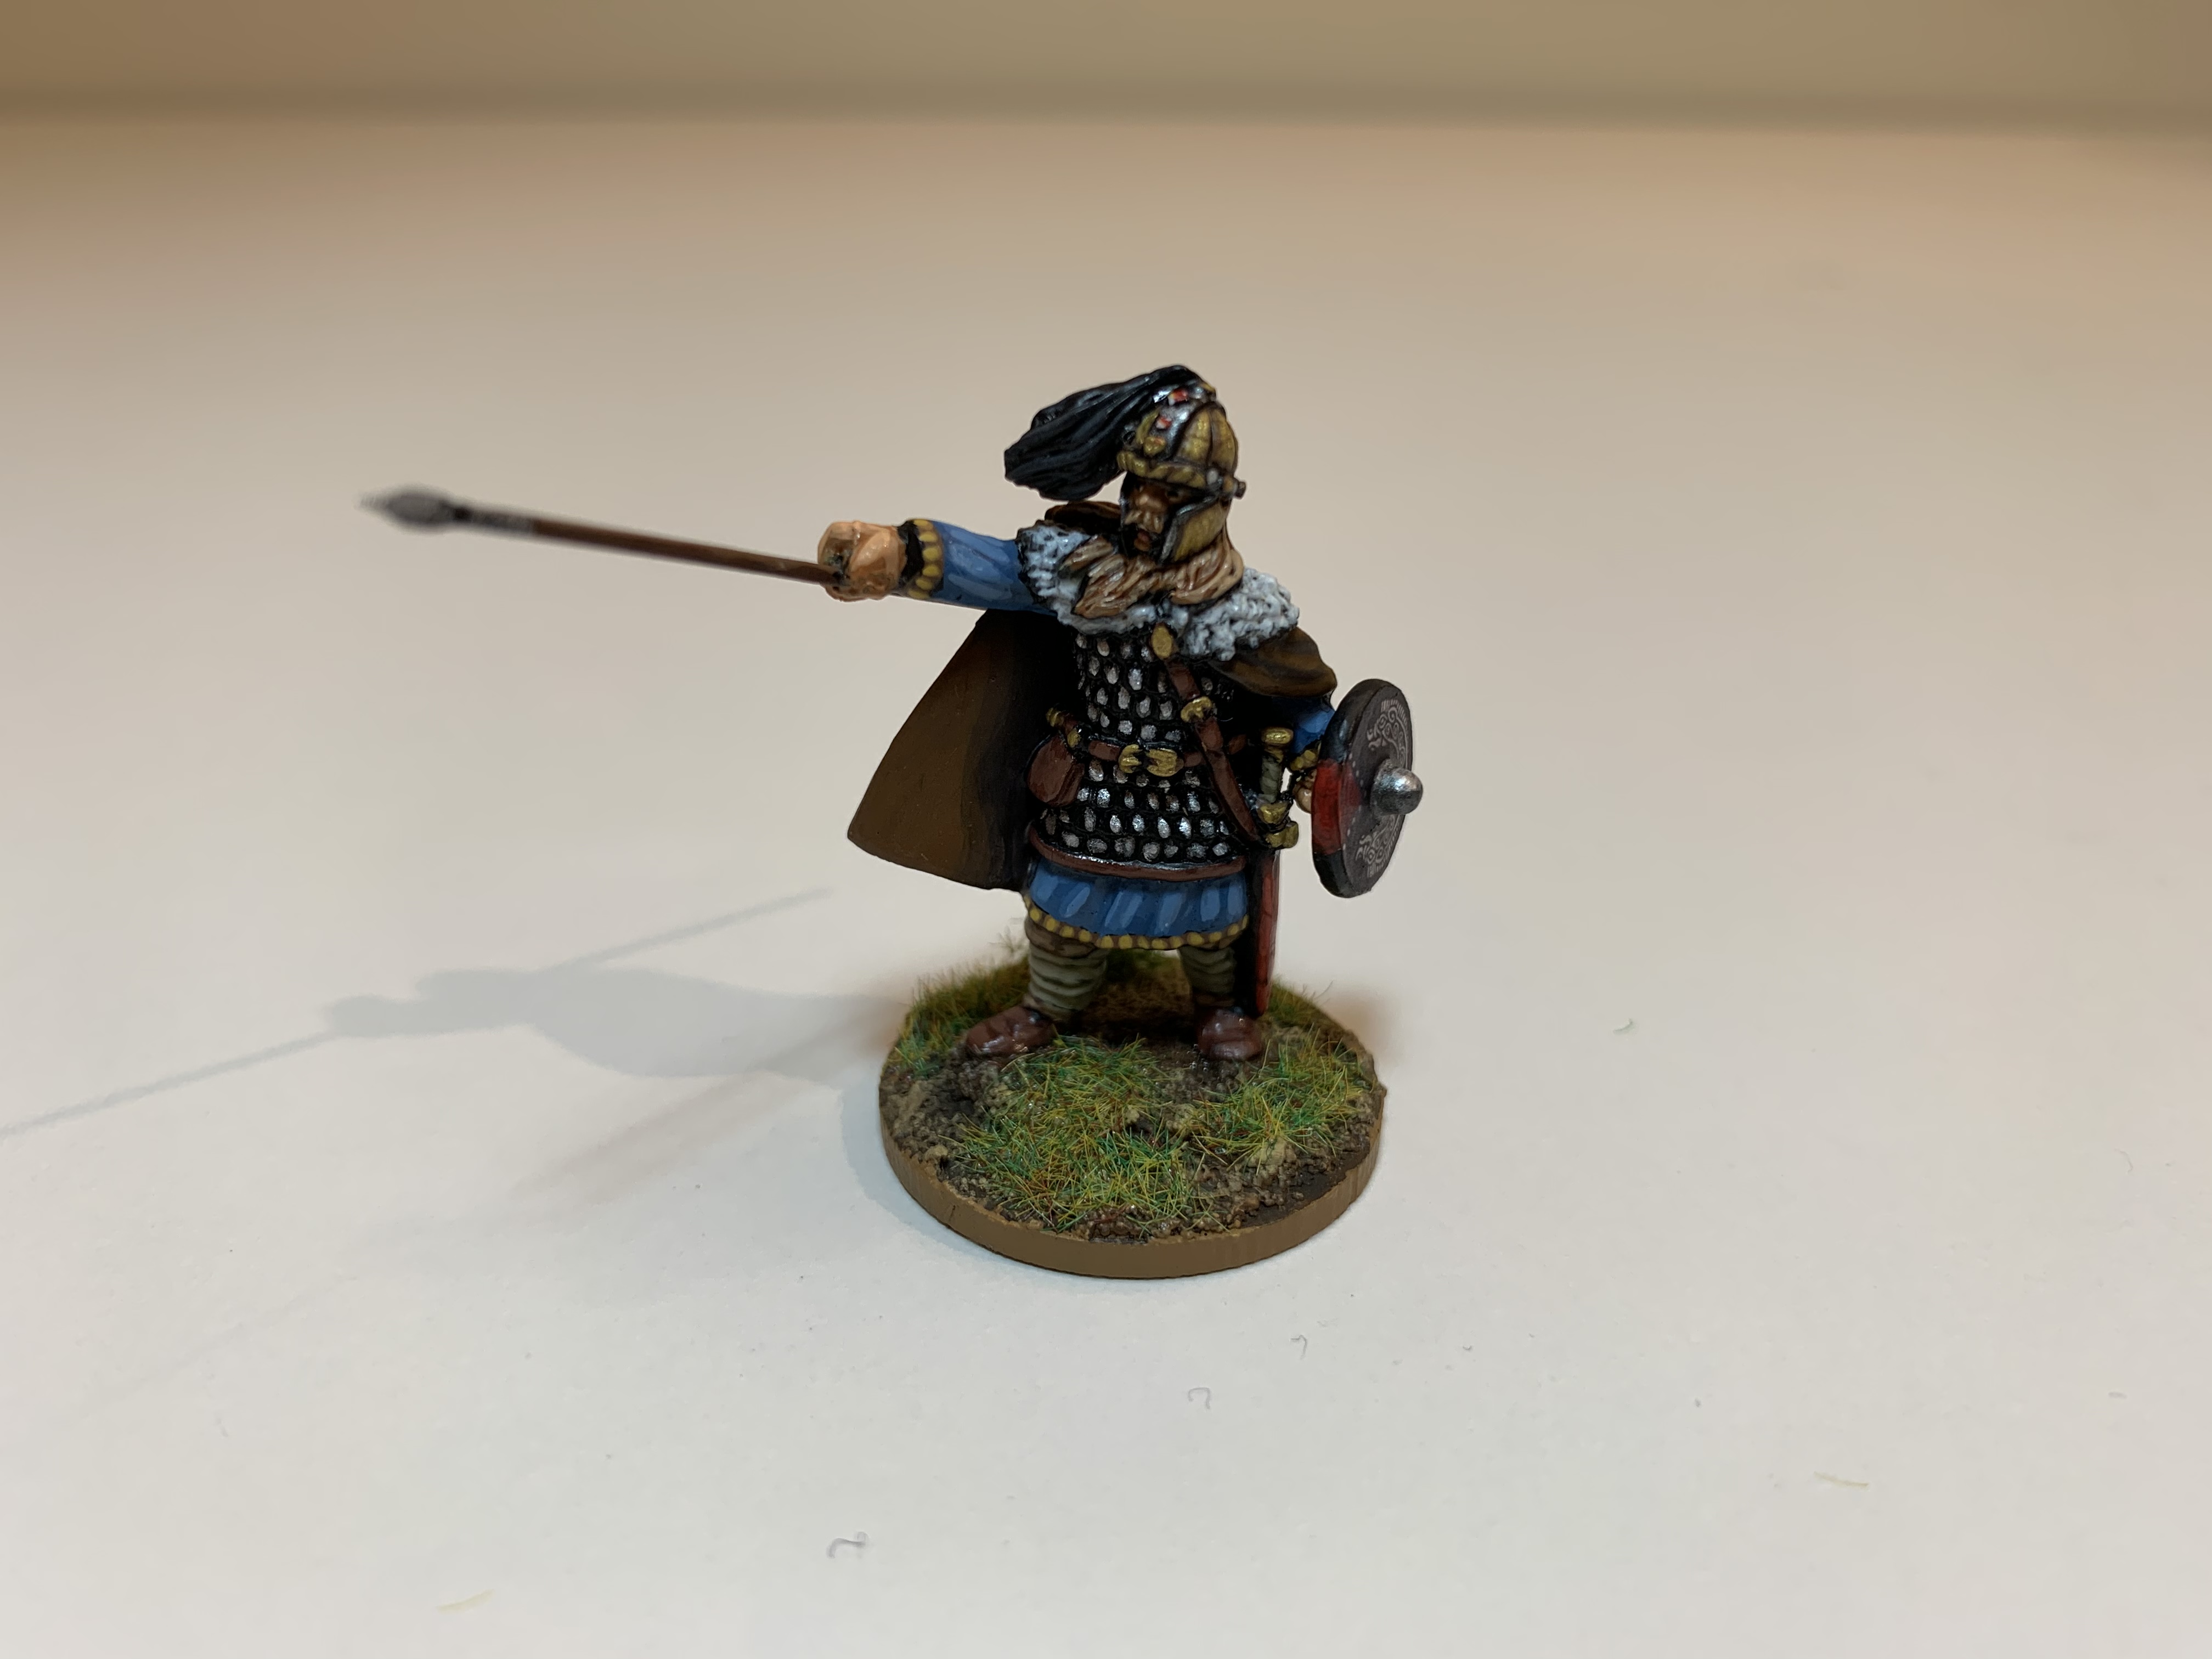
The change came when I decided to try the cloak again. This time I decided to go for a brown cloak that was less likely to distract the eye from the blue and yellow tunic. But I wanted to make it a bit finer than the norm. I therefore tried a technique from the Dark Ages edition of the Painting War series of occasional magazines. This involved starting from a base of VMC German Camo Black Brown and then gradually adding Chocolate Brown to the mix in 25% increments. In between each highlight you put in a glaze of 50% of the previous highlight mixed with 50% of the next highlight heavily diluted with water. This went on until you had a highlight of pure Chocolate Brown. This was then mixed with 50% Flat Earth before a final highlight of 100% Flat Earth. Very time consuming, but you get a nice transition between highlights.

The brown cloak was a much better counterpoint to the bright tunic and I started to feel a lot better about Ceawlin. One interesting thing I noticed about this figure is that he wears a fairly long hauberk of scale mail that comes quite a way down the front of his legs. Interestingly, this isn’t sculpted on at all on the rear of the model between the scabbard and the cloak. This seems to have been an oversight on the part of the sculptor as it should be there if it came to the same length at the back. As such, I had some fun painting on the scales (something that would have been harder if he wore chain mail) in the small area where they should appear. You can see my efforts in the Lloyd shot above and I’m quite pleased with them.
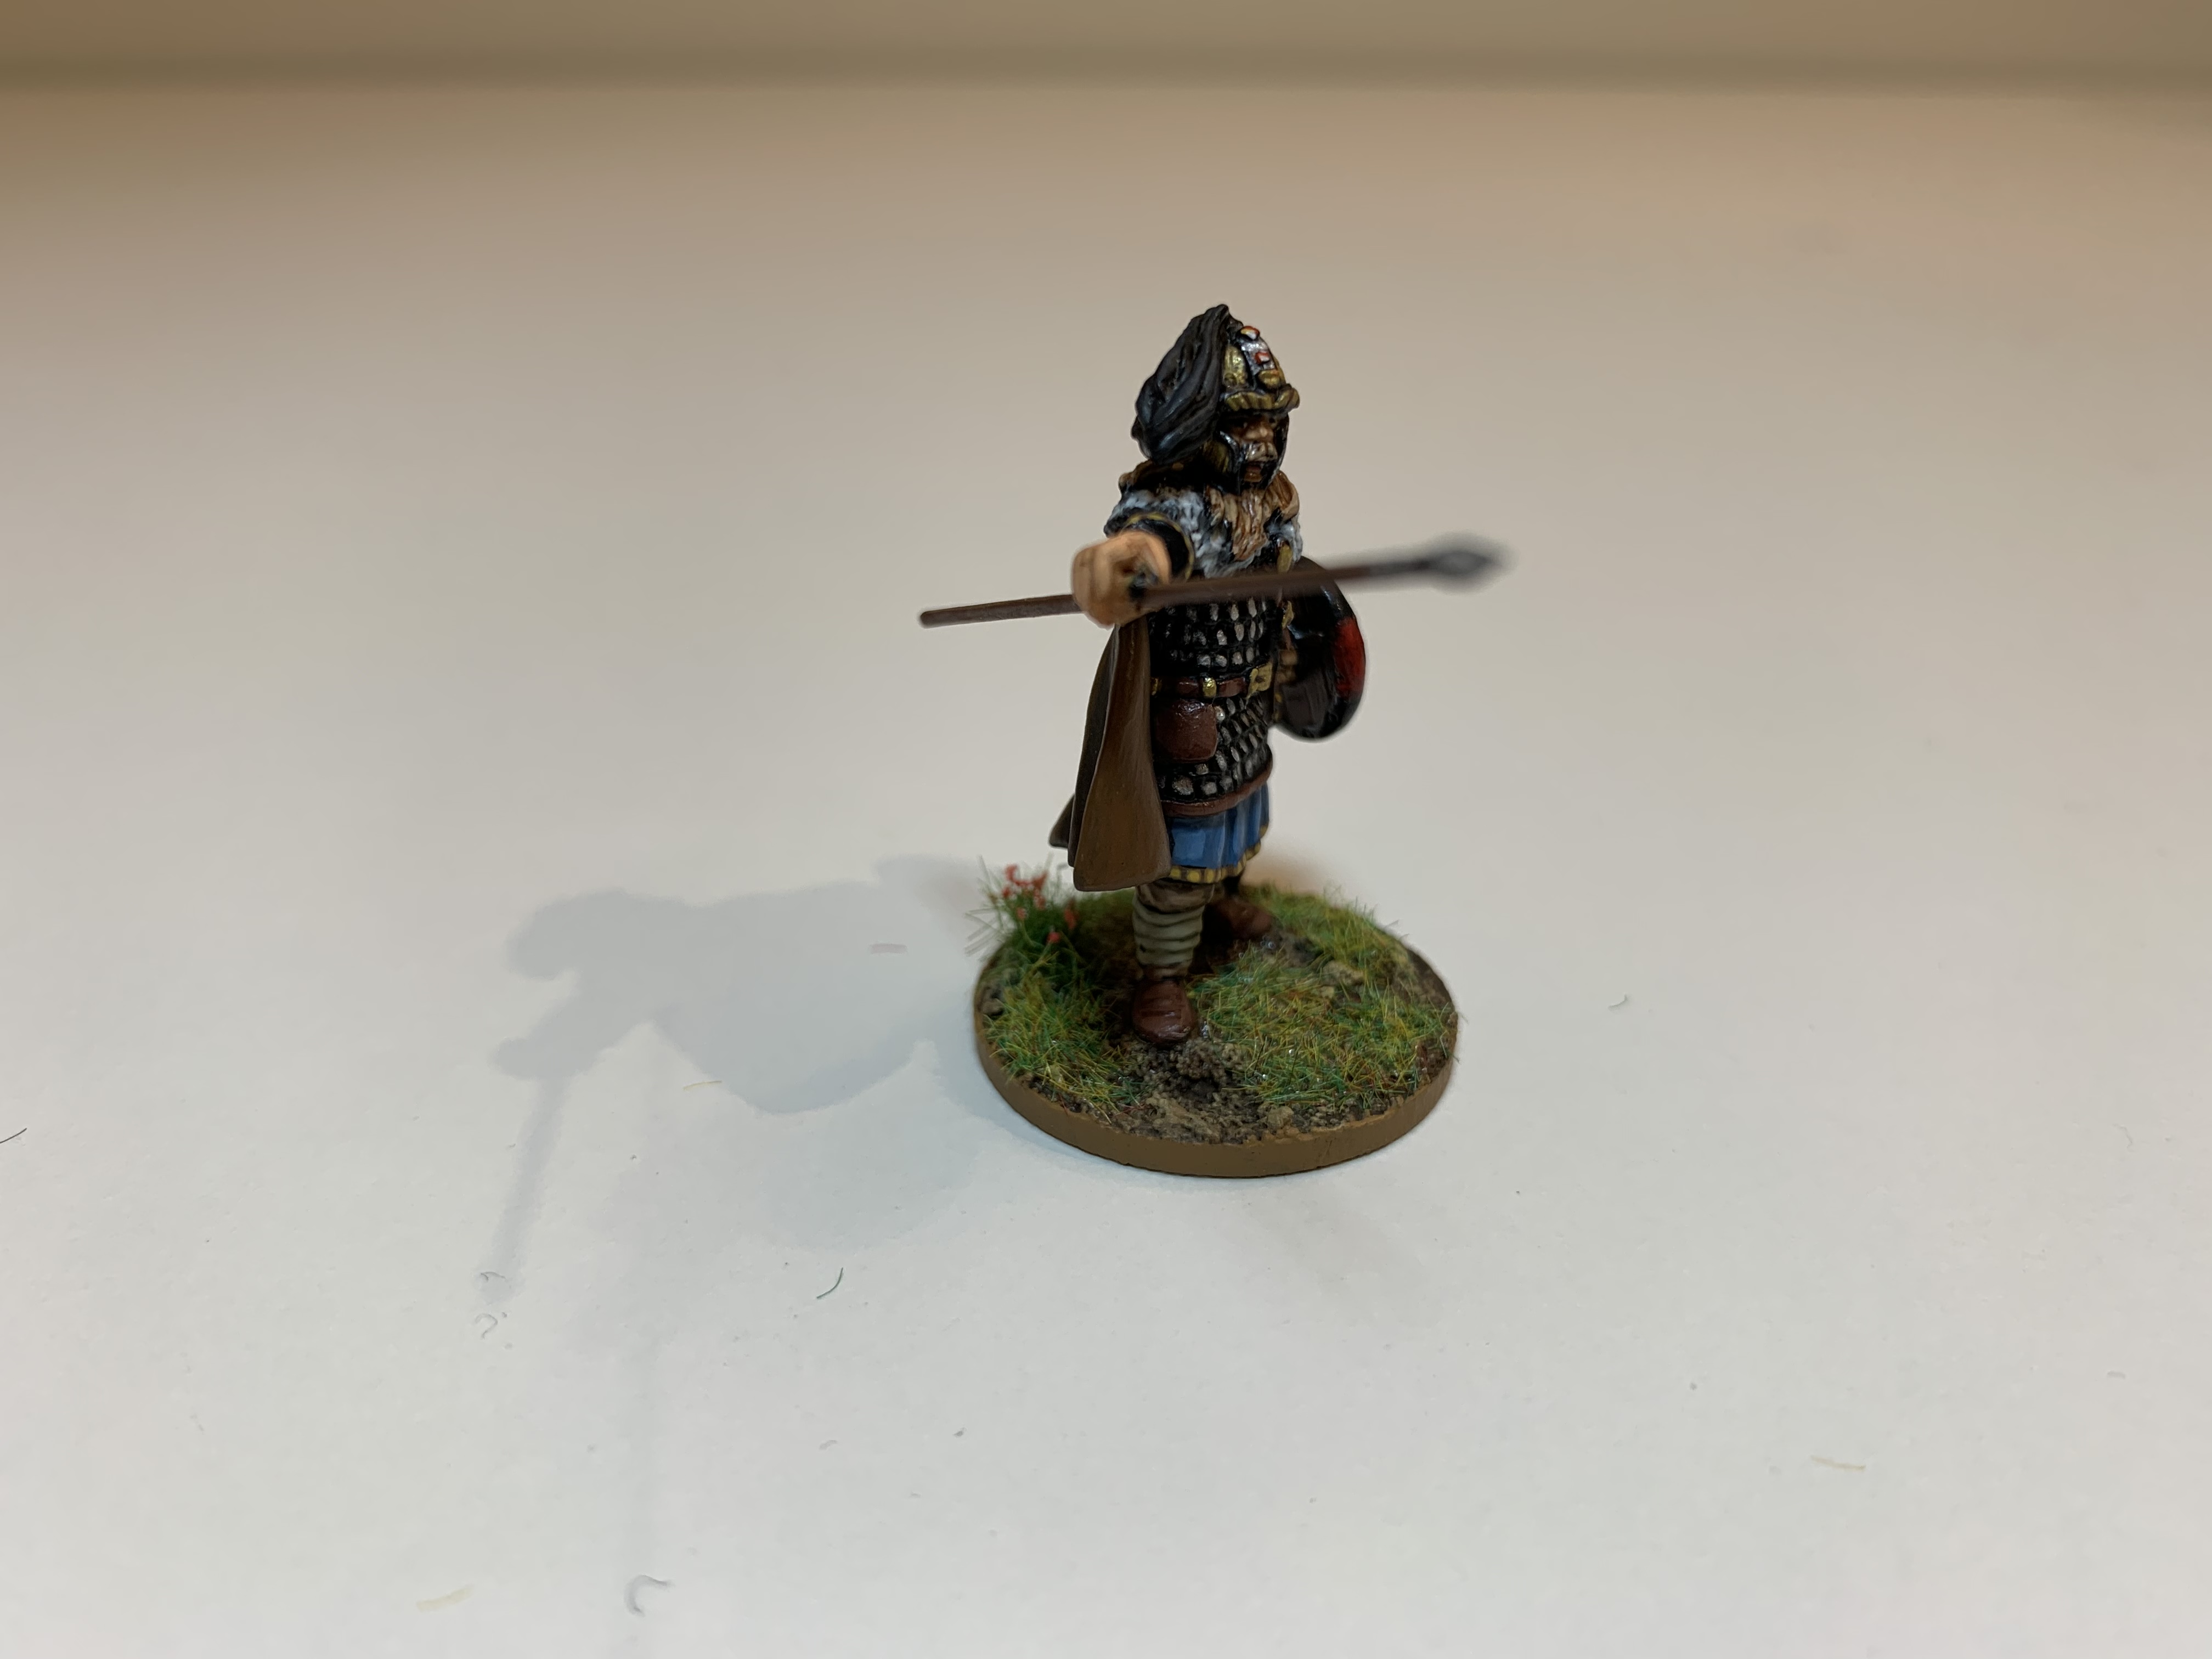
As Ceawlin is an aristocrat, I decided to risk giving him a glided helmet. It was a bit of a risk as it could have looked a bit over the top, but I think it’s worked well. I always use VMC Old Gold for this sort of thing as it has a more muted tone than VMC Gold proper.
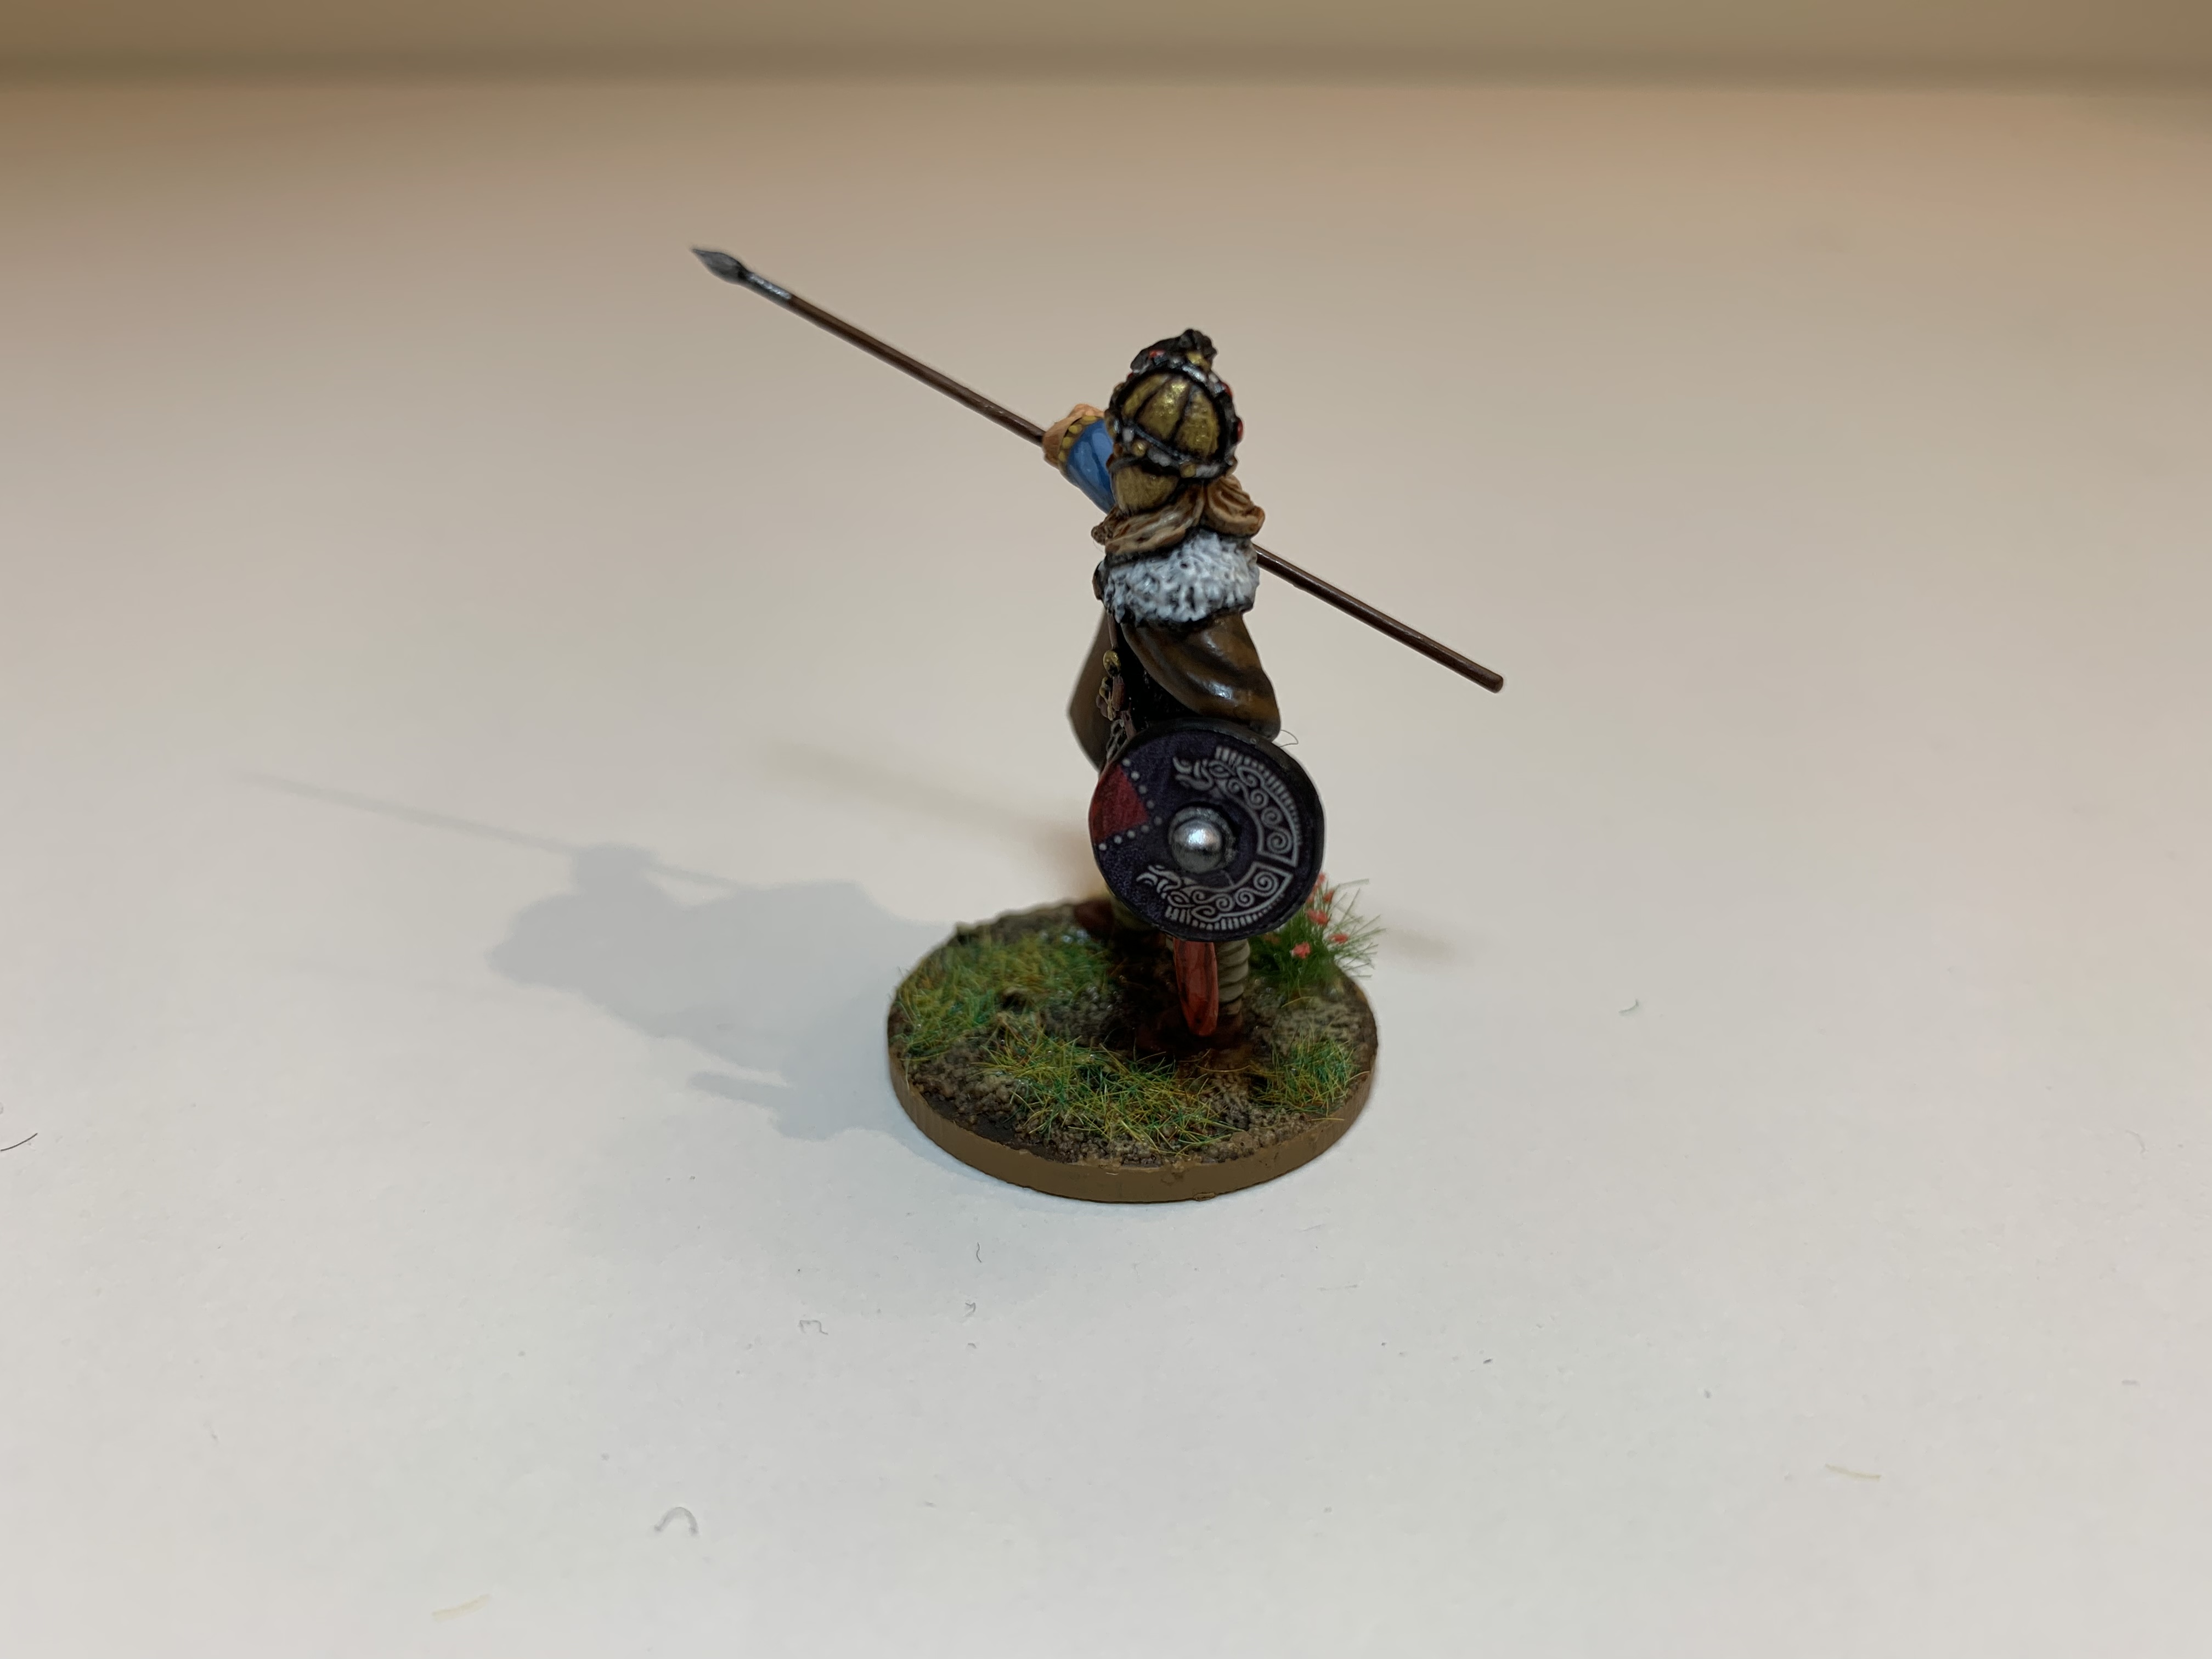
An LBMS shield transfer completed the figure and Ceawlin is now ready to lead his troops.
I’ve now completed two opposing forces for Dux Britanniarum. I think Ceawlin took so long because I couldn’t quite bring myself to make that final leap to actually finish a project.
I’ll try and post some pictures of the complete Saxon force later this weekend and then maybe actually play a game and do a battle report!
Having said that I couldn’t quite bring myself to finish a project, I should add that I have some extras and some terrain still to bring into the mix. However, I think having two table-ready forces is an important milestone!
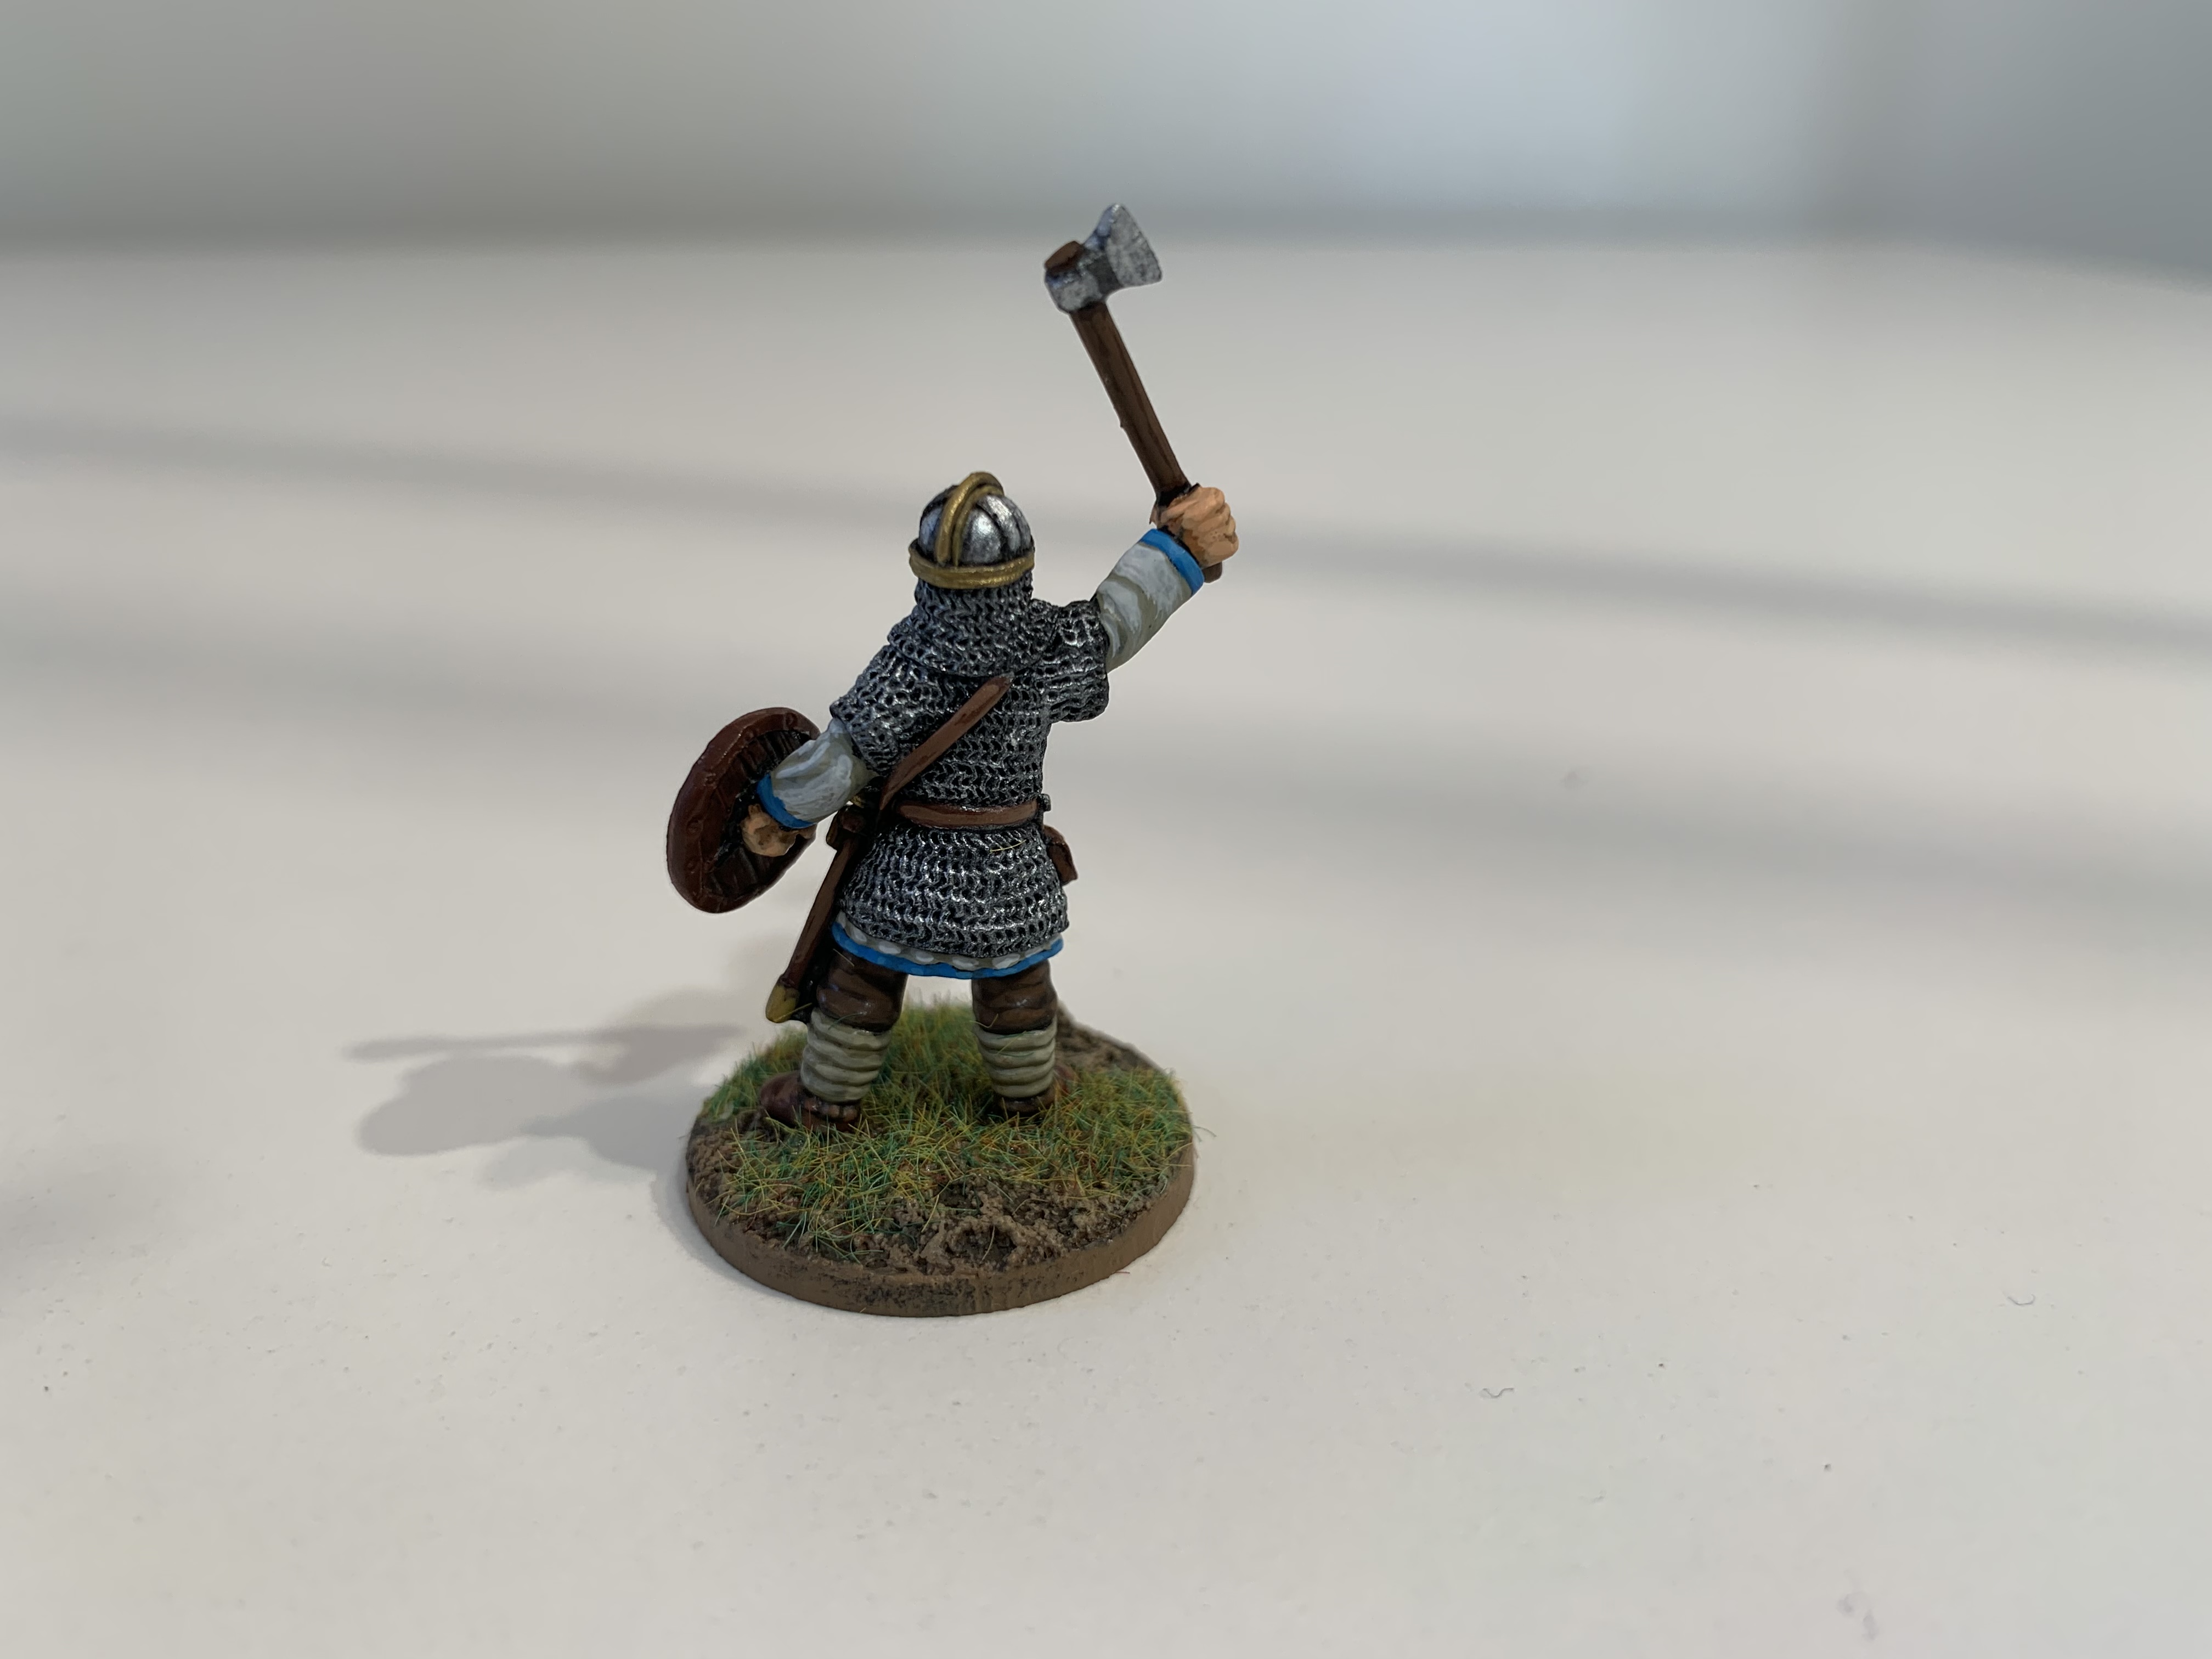
Saxon Noble - Berhthun the Devil
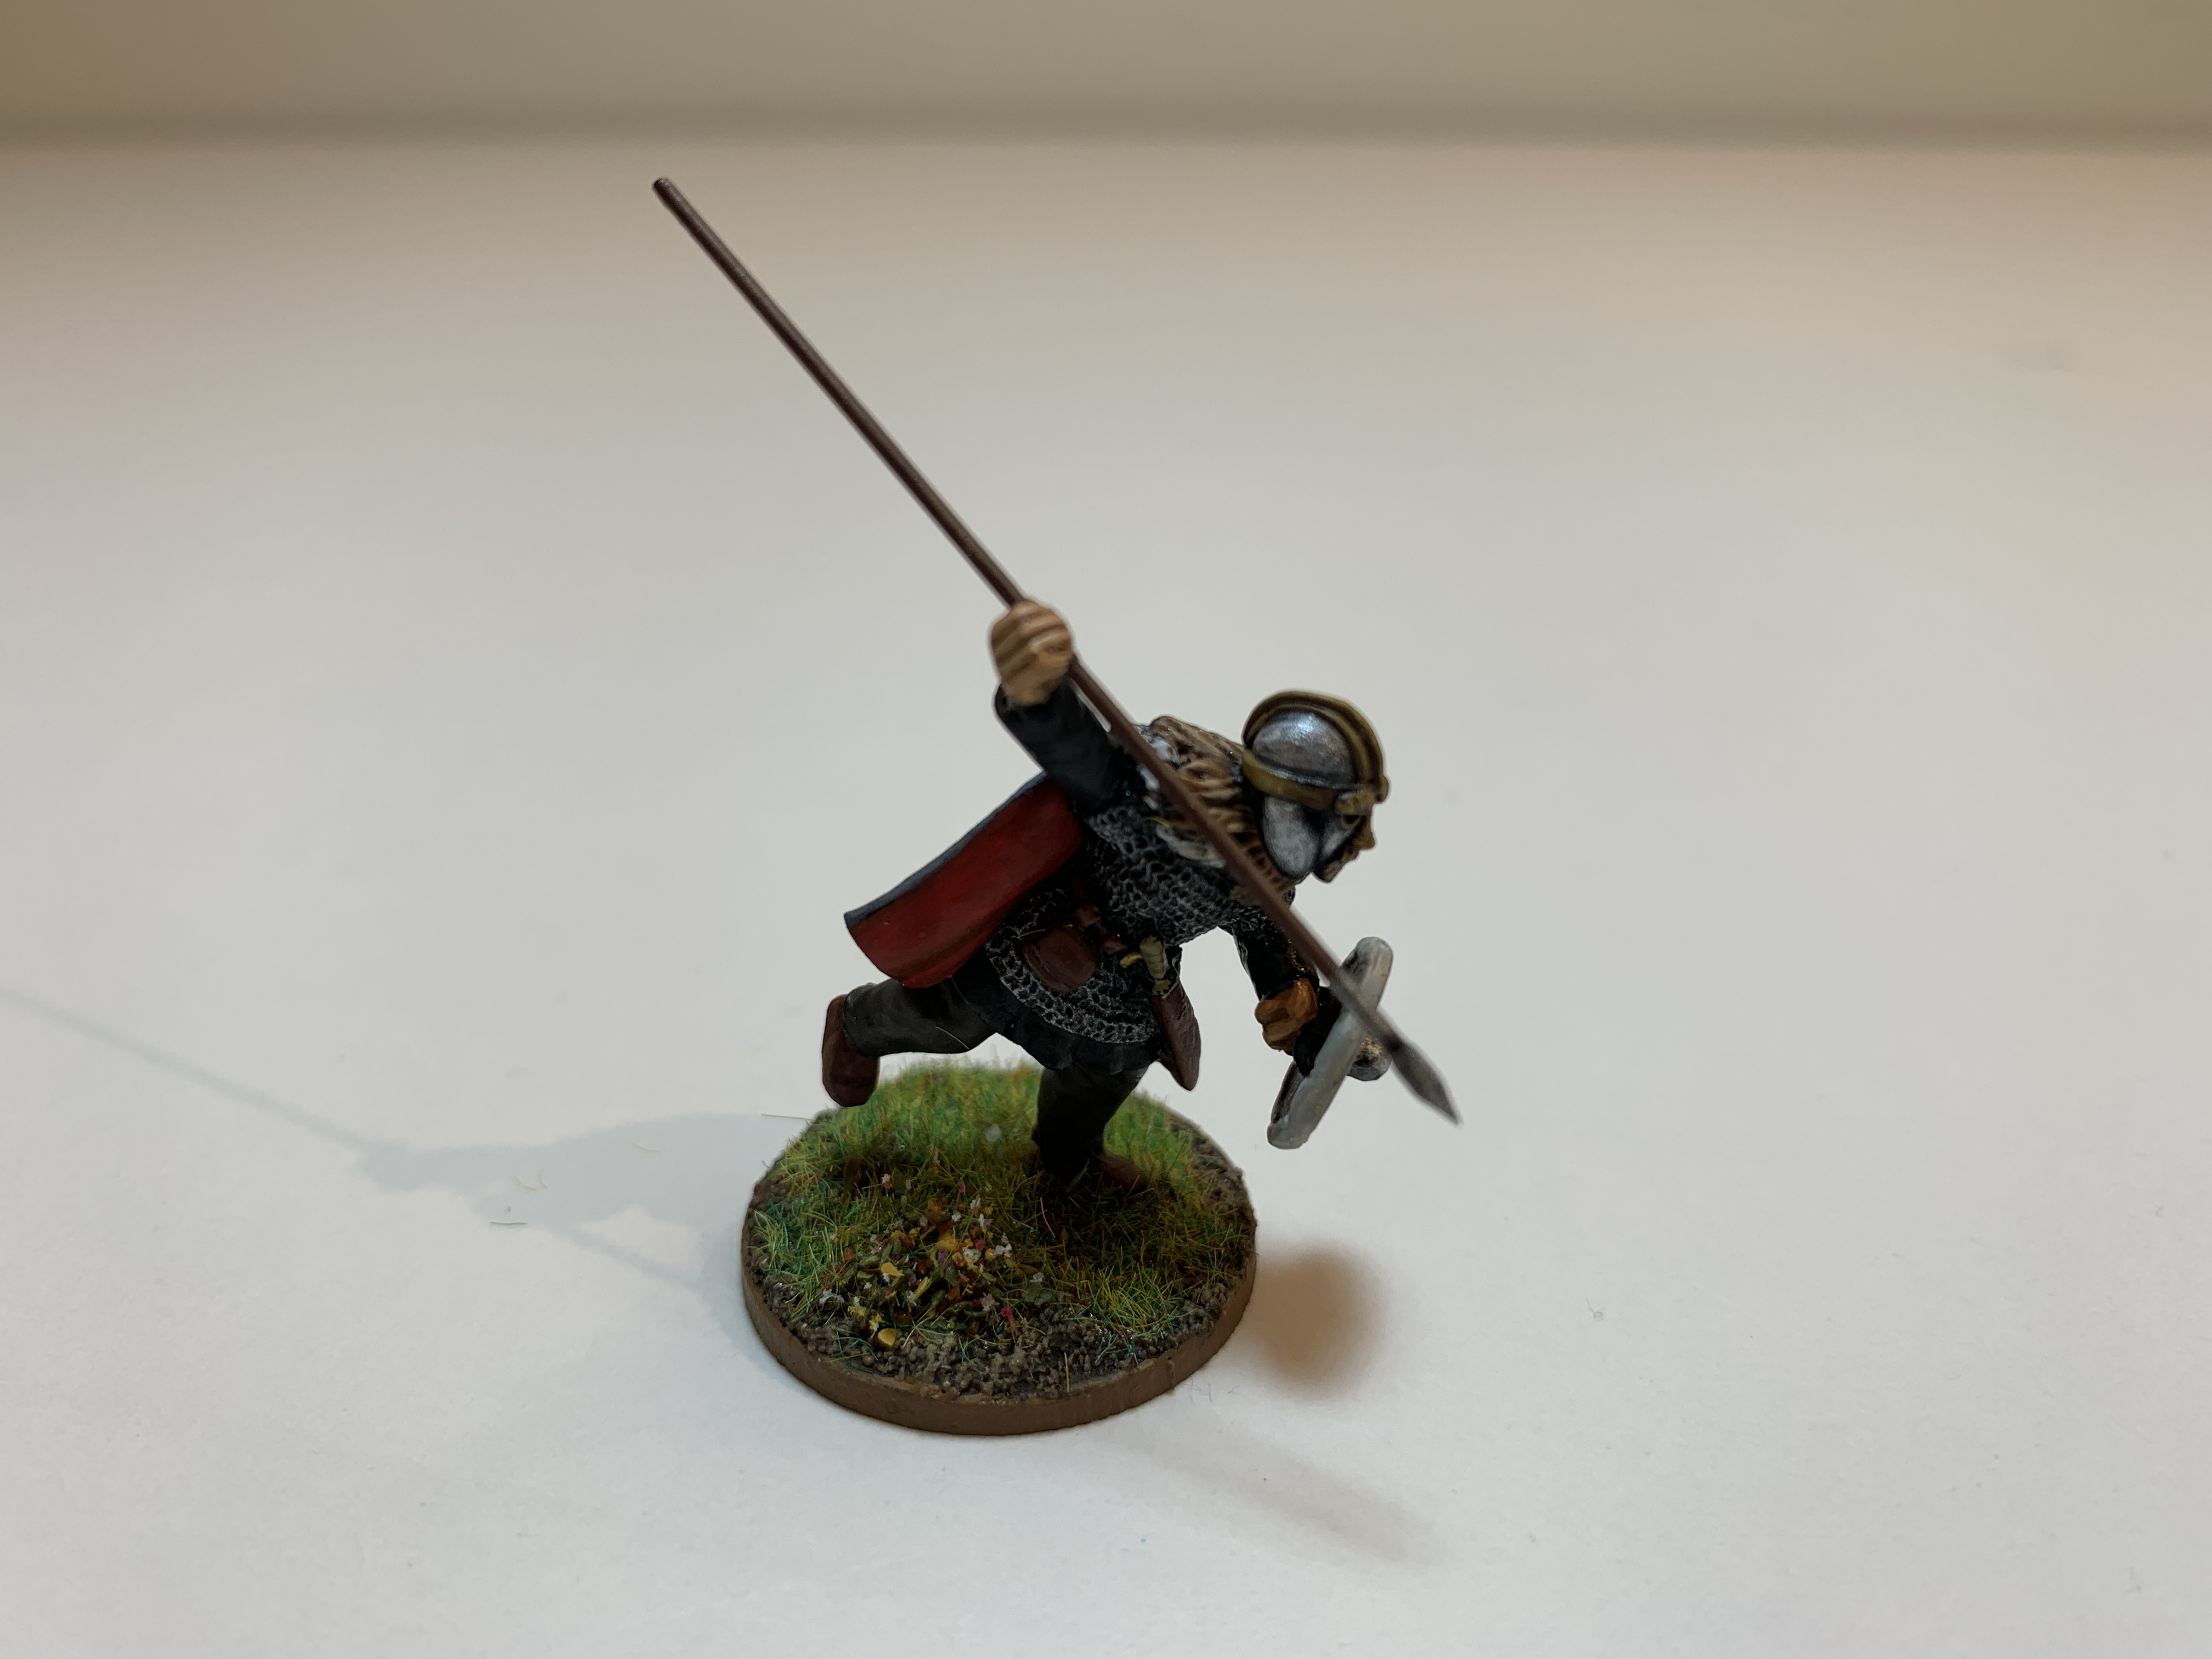
This is the second of my two Adeligs or Nobles for my Saxon force. Berhthun is 23 and has a short and wiry physique. Like Saebert he also has an existing reputation as a Devil, so clearly he is not above raiding a church or two. He has the Athlete attribute which gives him certain advantages in withdrawing from combat if he needs to. He is the son of a Peasant.
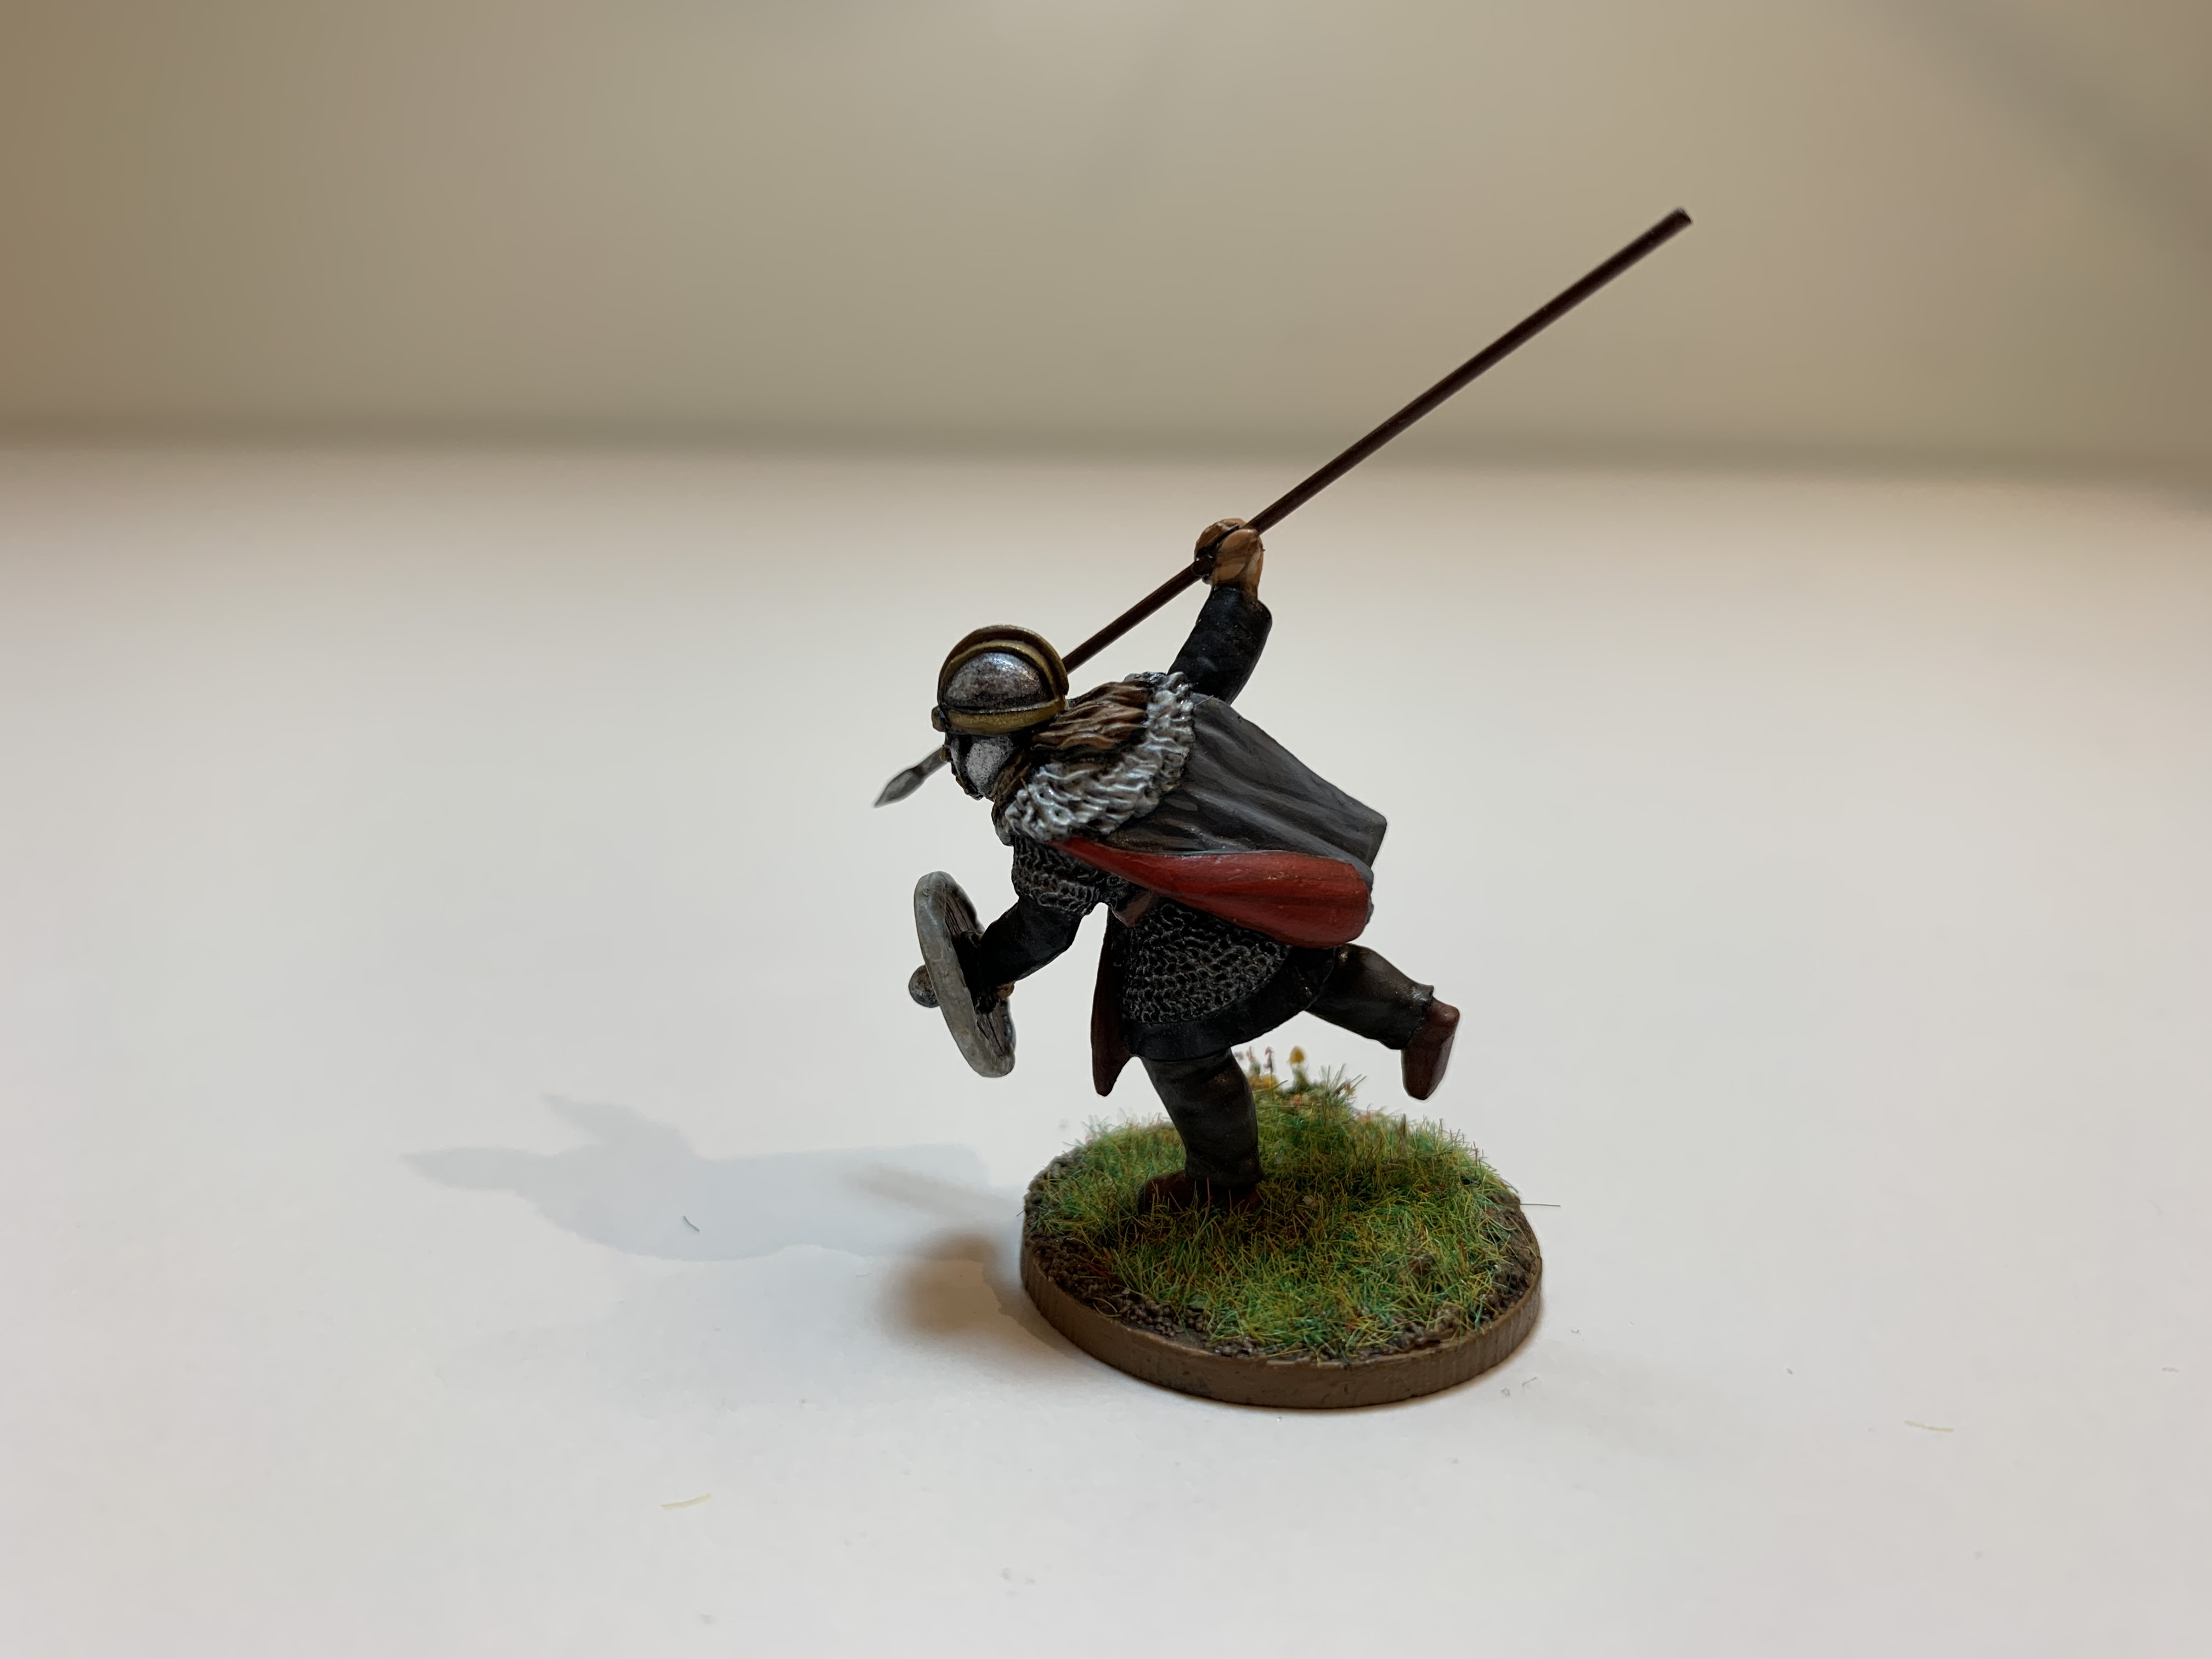
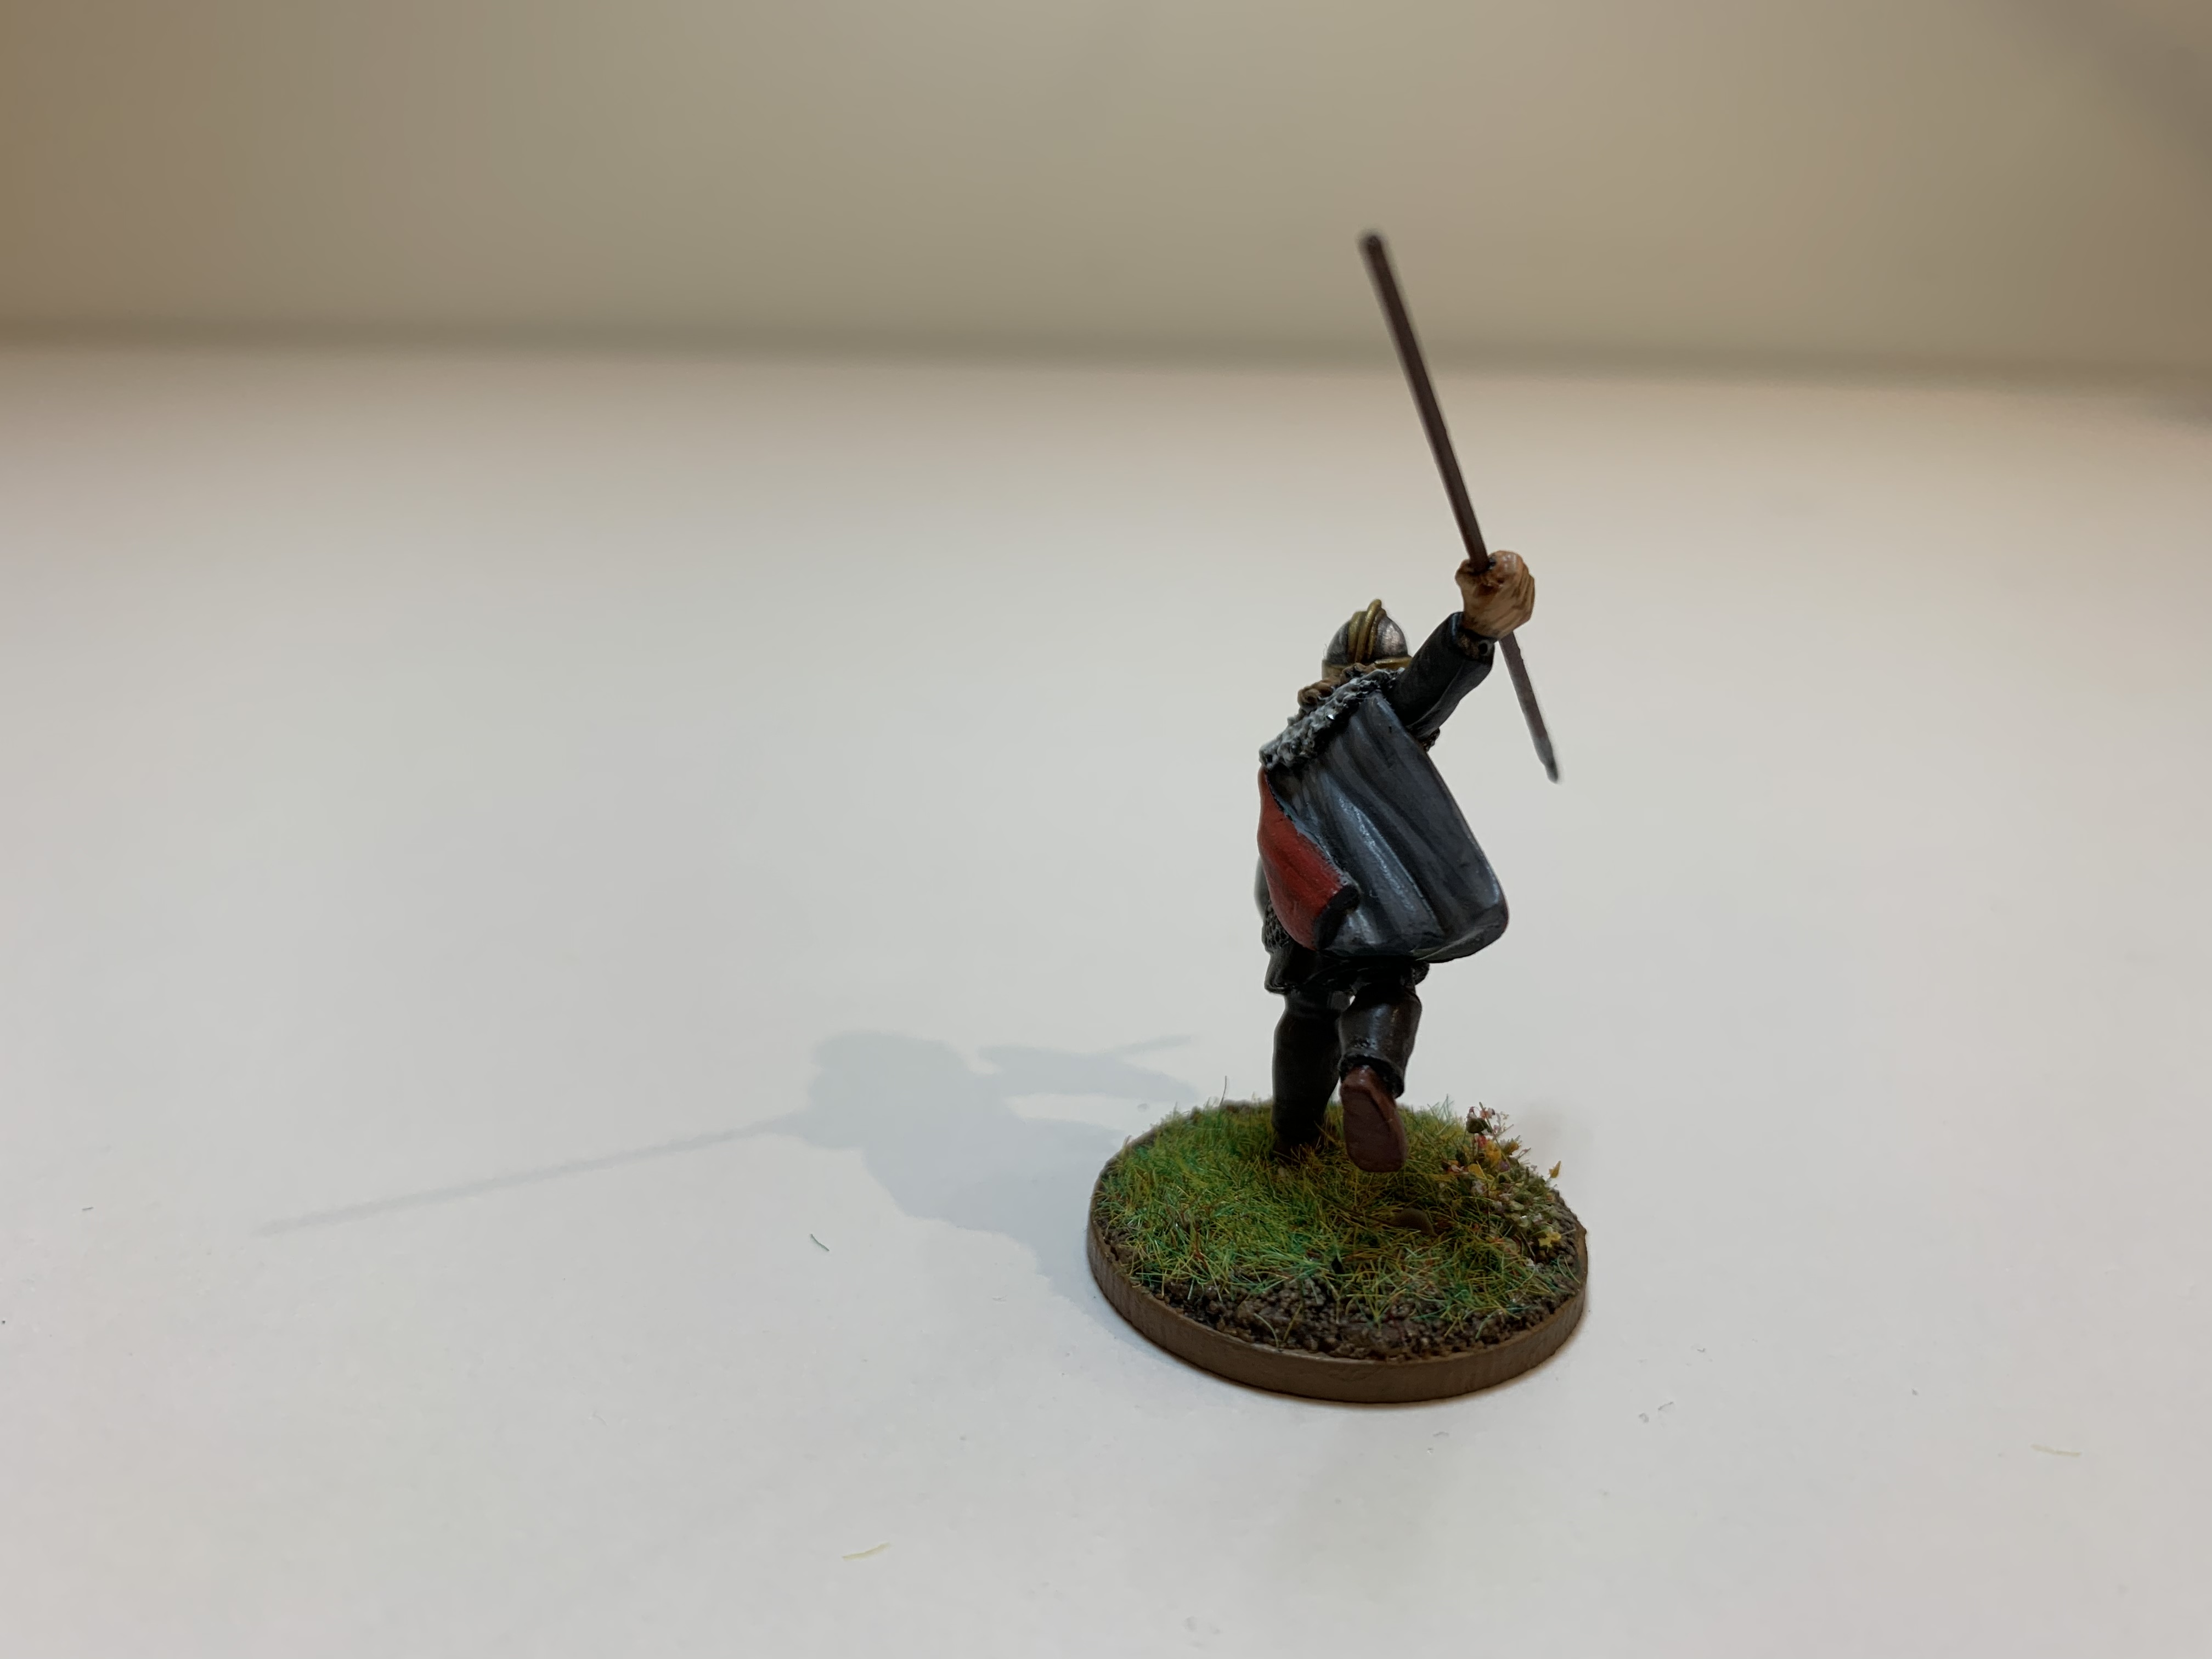
In view of the short and wiry physique, I chose one of Footsore’s Saxon nobles to represent Berhthun. I thought the darting forward pose suited the type of fighting style someone with that description might adopt.
His gilded helmet is a prominent feature of the miniature and I wanted that to be the focal point and not have brightly coloured clothes drawing away that attention. Berhthun therefore got a black tunic highlighted with an 80%/20% VMC Black/VMC Neutral Grey mix, increasing the Grey by 20% for a top highlight. He also got a grey cloak which was a base coat of VMC Neutral Grey progressively highlighted by adding White. To ensure that it wasn’t completely unrelieved darkness, I gave his cloak a red lining to give a brighter counterpoint to the rest of the miniature.
A Little Big Man Studios shield transfer completed the job.
Saxon Noble - Saebert the Old
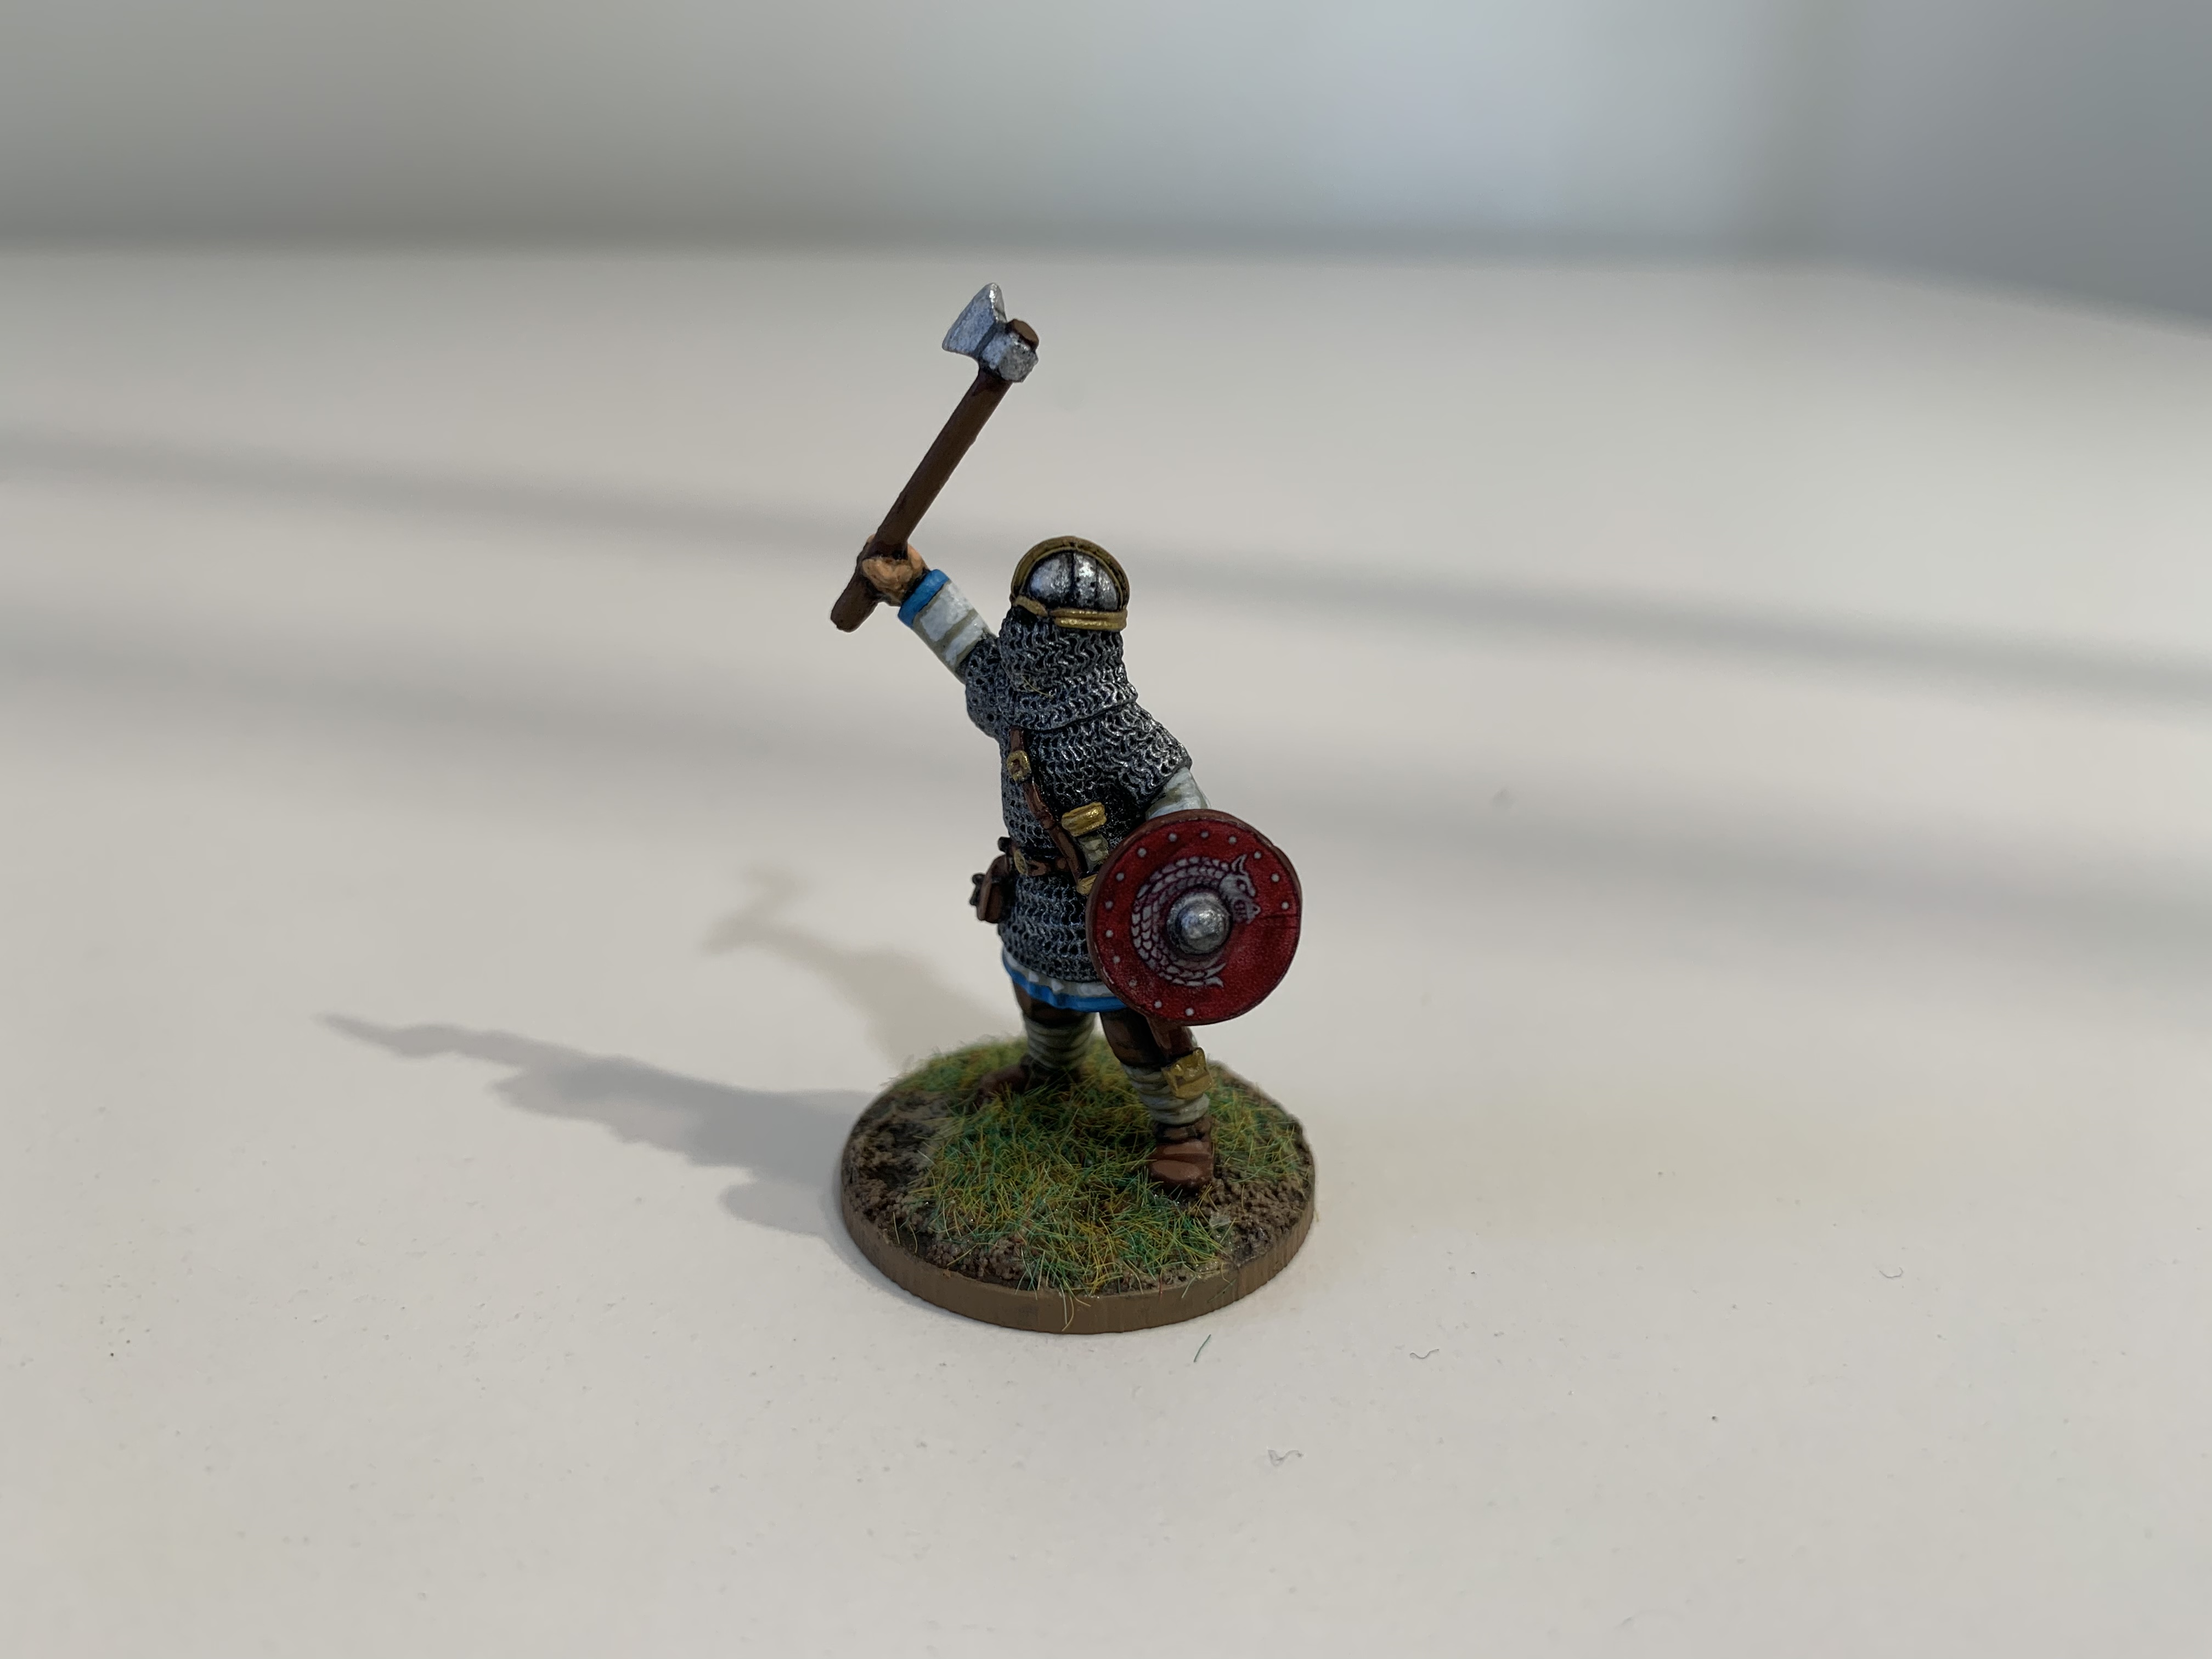
This is the first of my two Saxon Nobles or Adeligs, junior leaders that assist my Warlord.
I used the name generator on the Too Fat Lardies blog to roll up the name “Saebert” for this character. Then, using the tables in the Dux Britanniarum rulebook I found that his age was 34, quite an old man by contemporary standards. He has a physique of average build and has an existing reputation. Appropriately enough that reputation is “Old”, so clearly his men think he’s been lucky to last this long as well! Fortunately, this is not one of the reputation descriptions that have an impact on the campaign. However, what does have an impact is Saebert’s roll on the Character Attributes table where he gains the “Lustful” attribute and is described as coveting the women of others. This means that should Saebert ever rise to command the warband, he will have a penalty in gaining the loyalty of his men, although this is probably more of a problem for a Romano-British character than for a Saxon. A roll on the background table shows that Saebert is the son of a peasant, born in a hovel in northern Germany. Fortunately, he is not the Warlord as that roll would reduce his starting wealth.
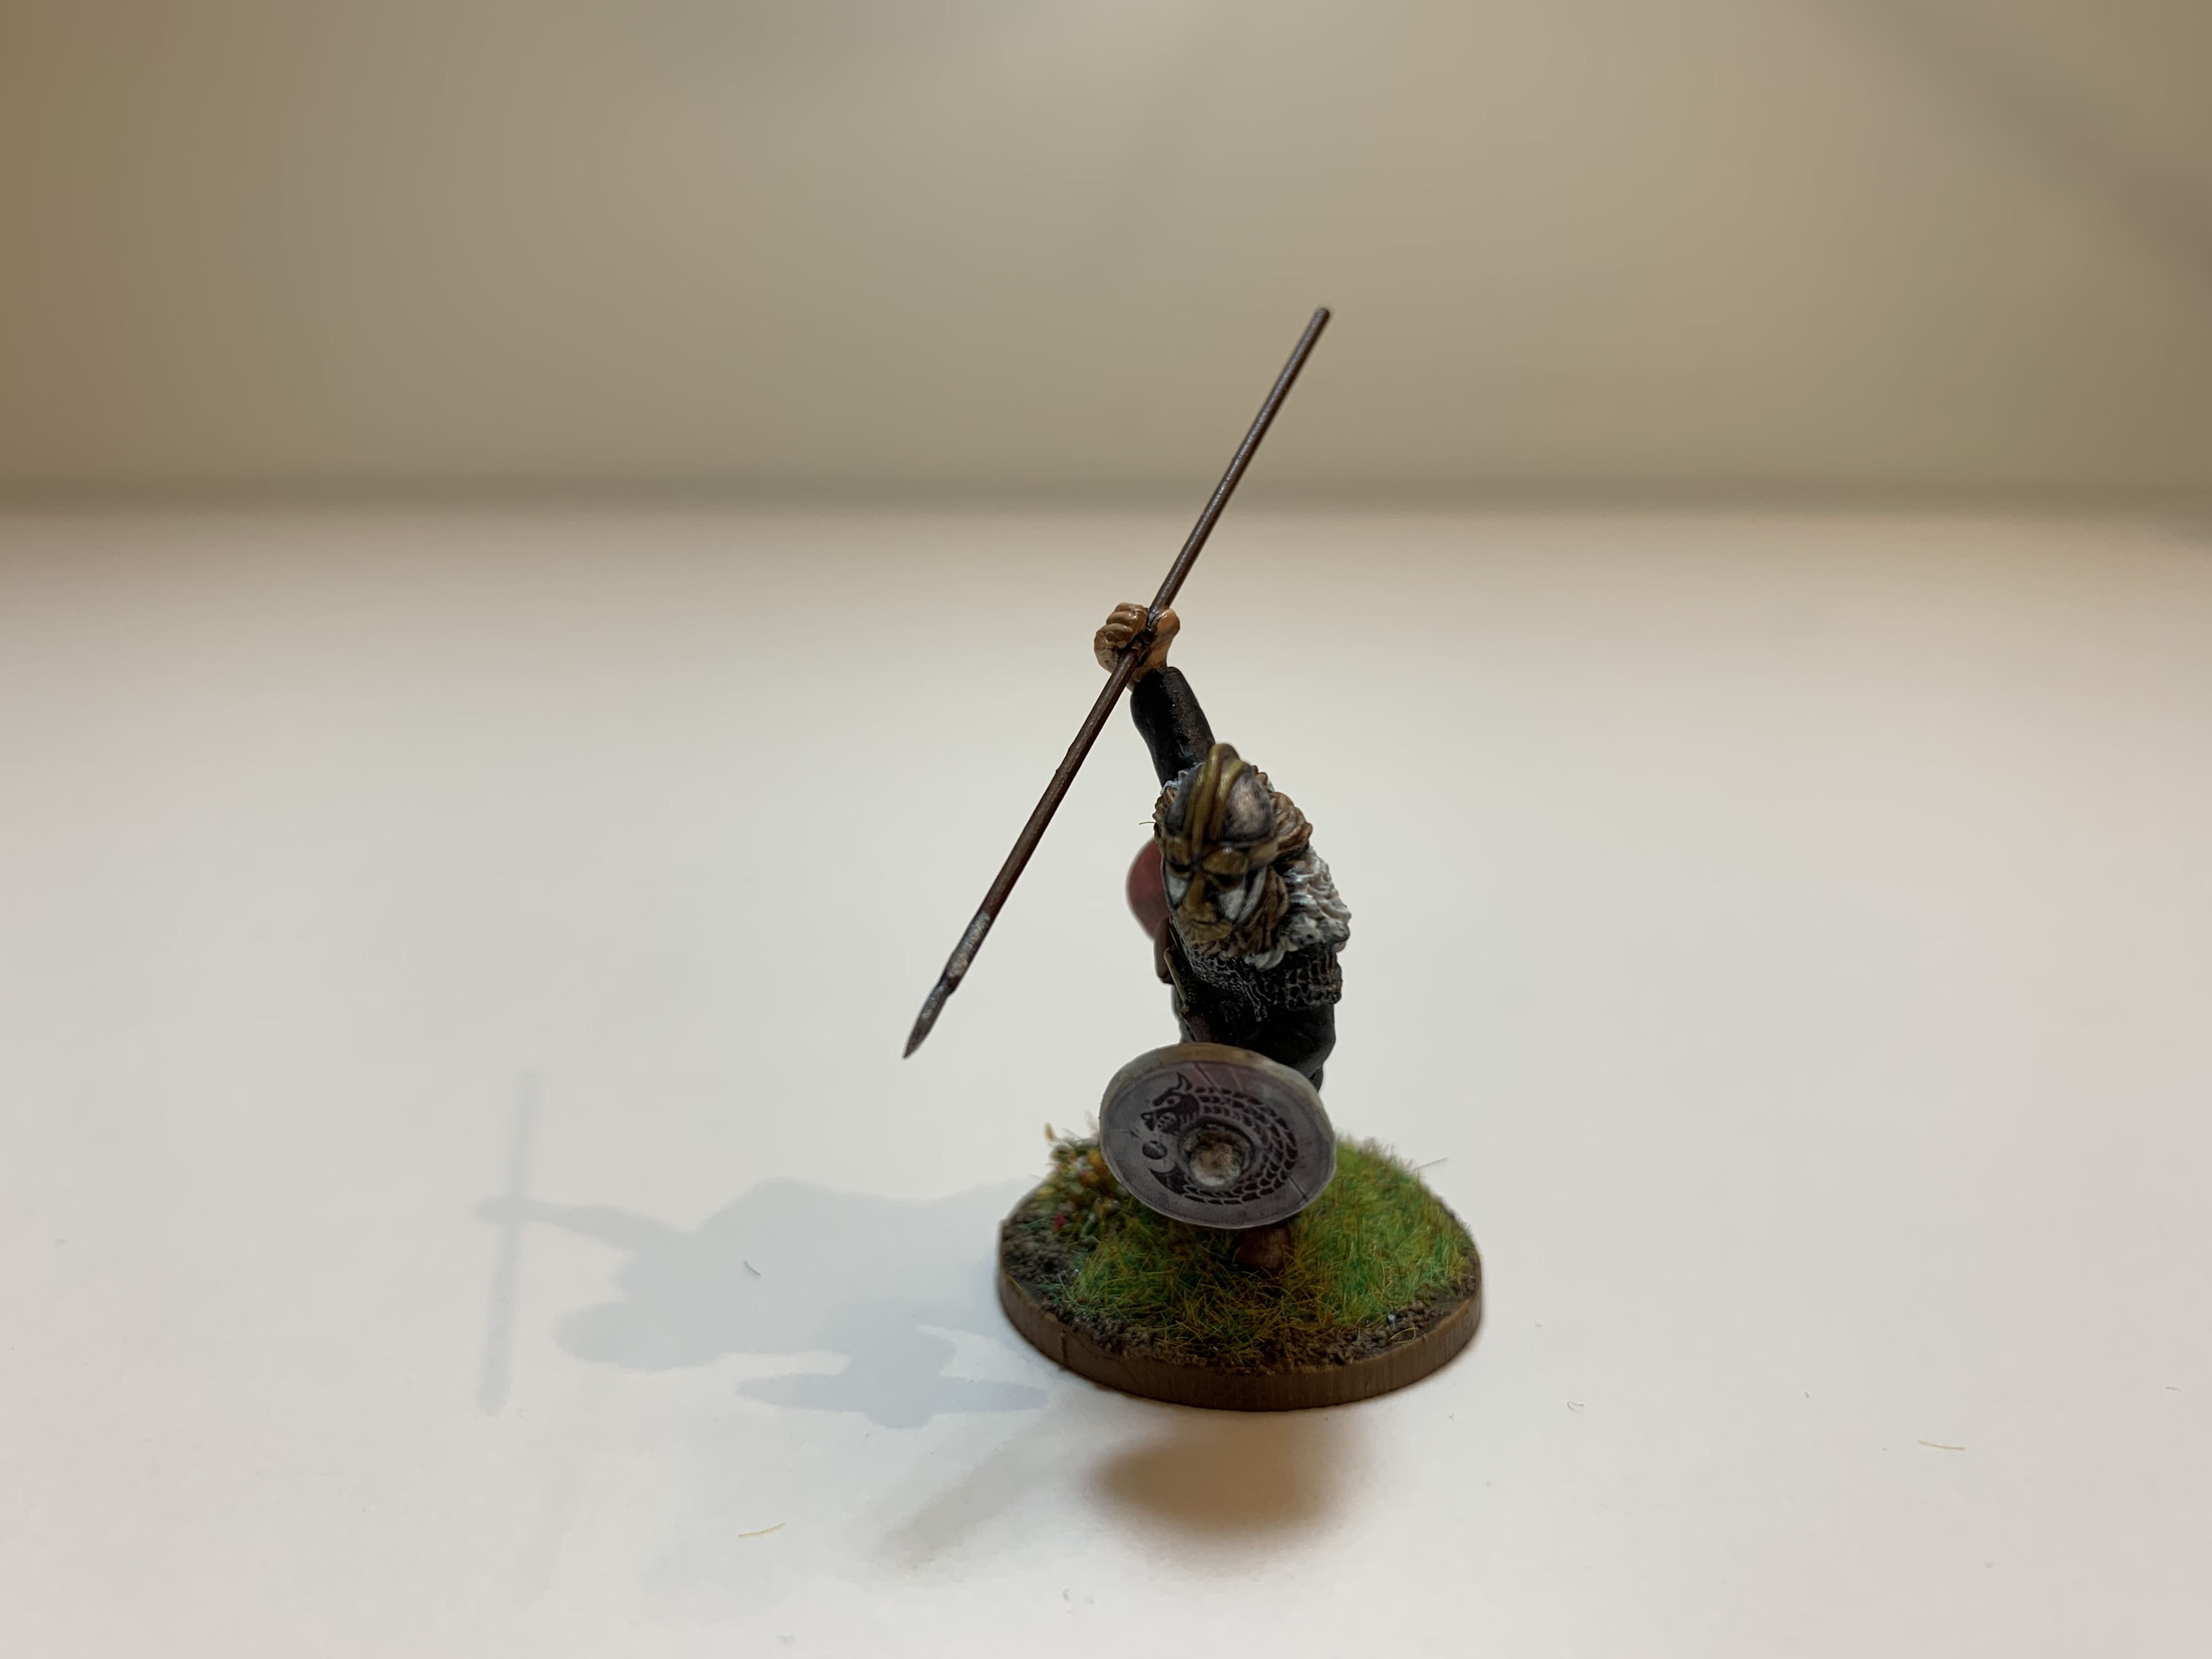
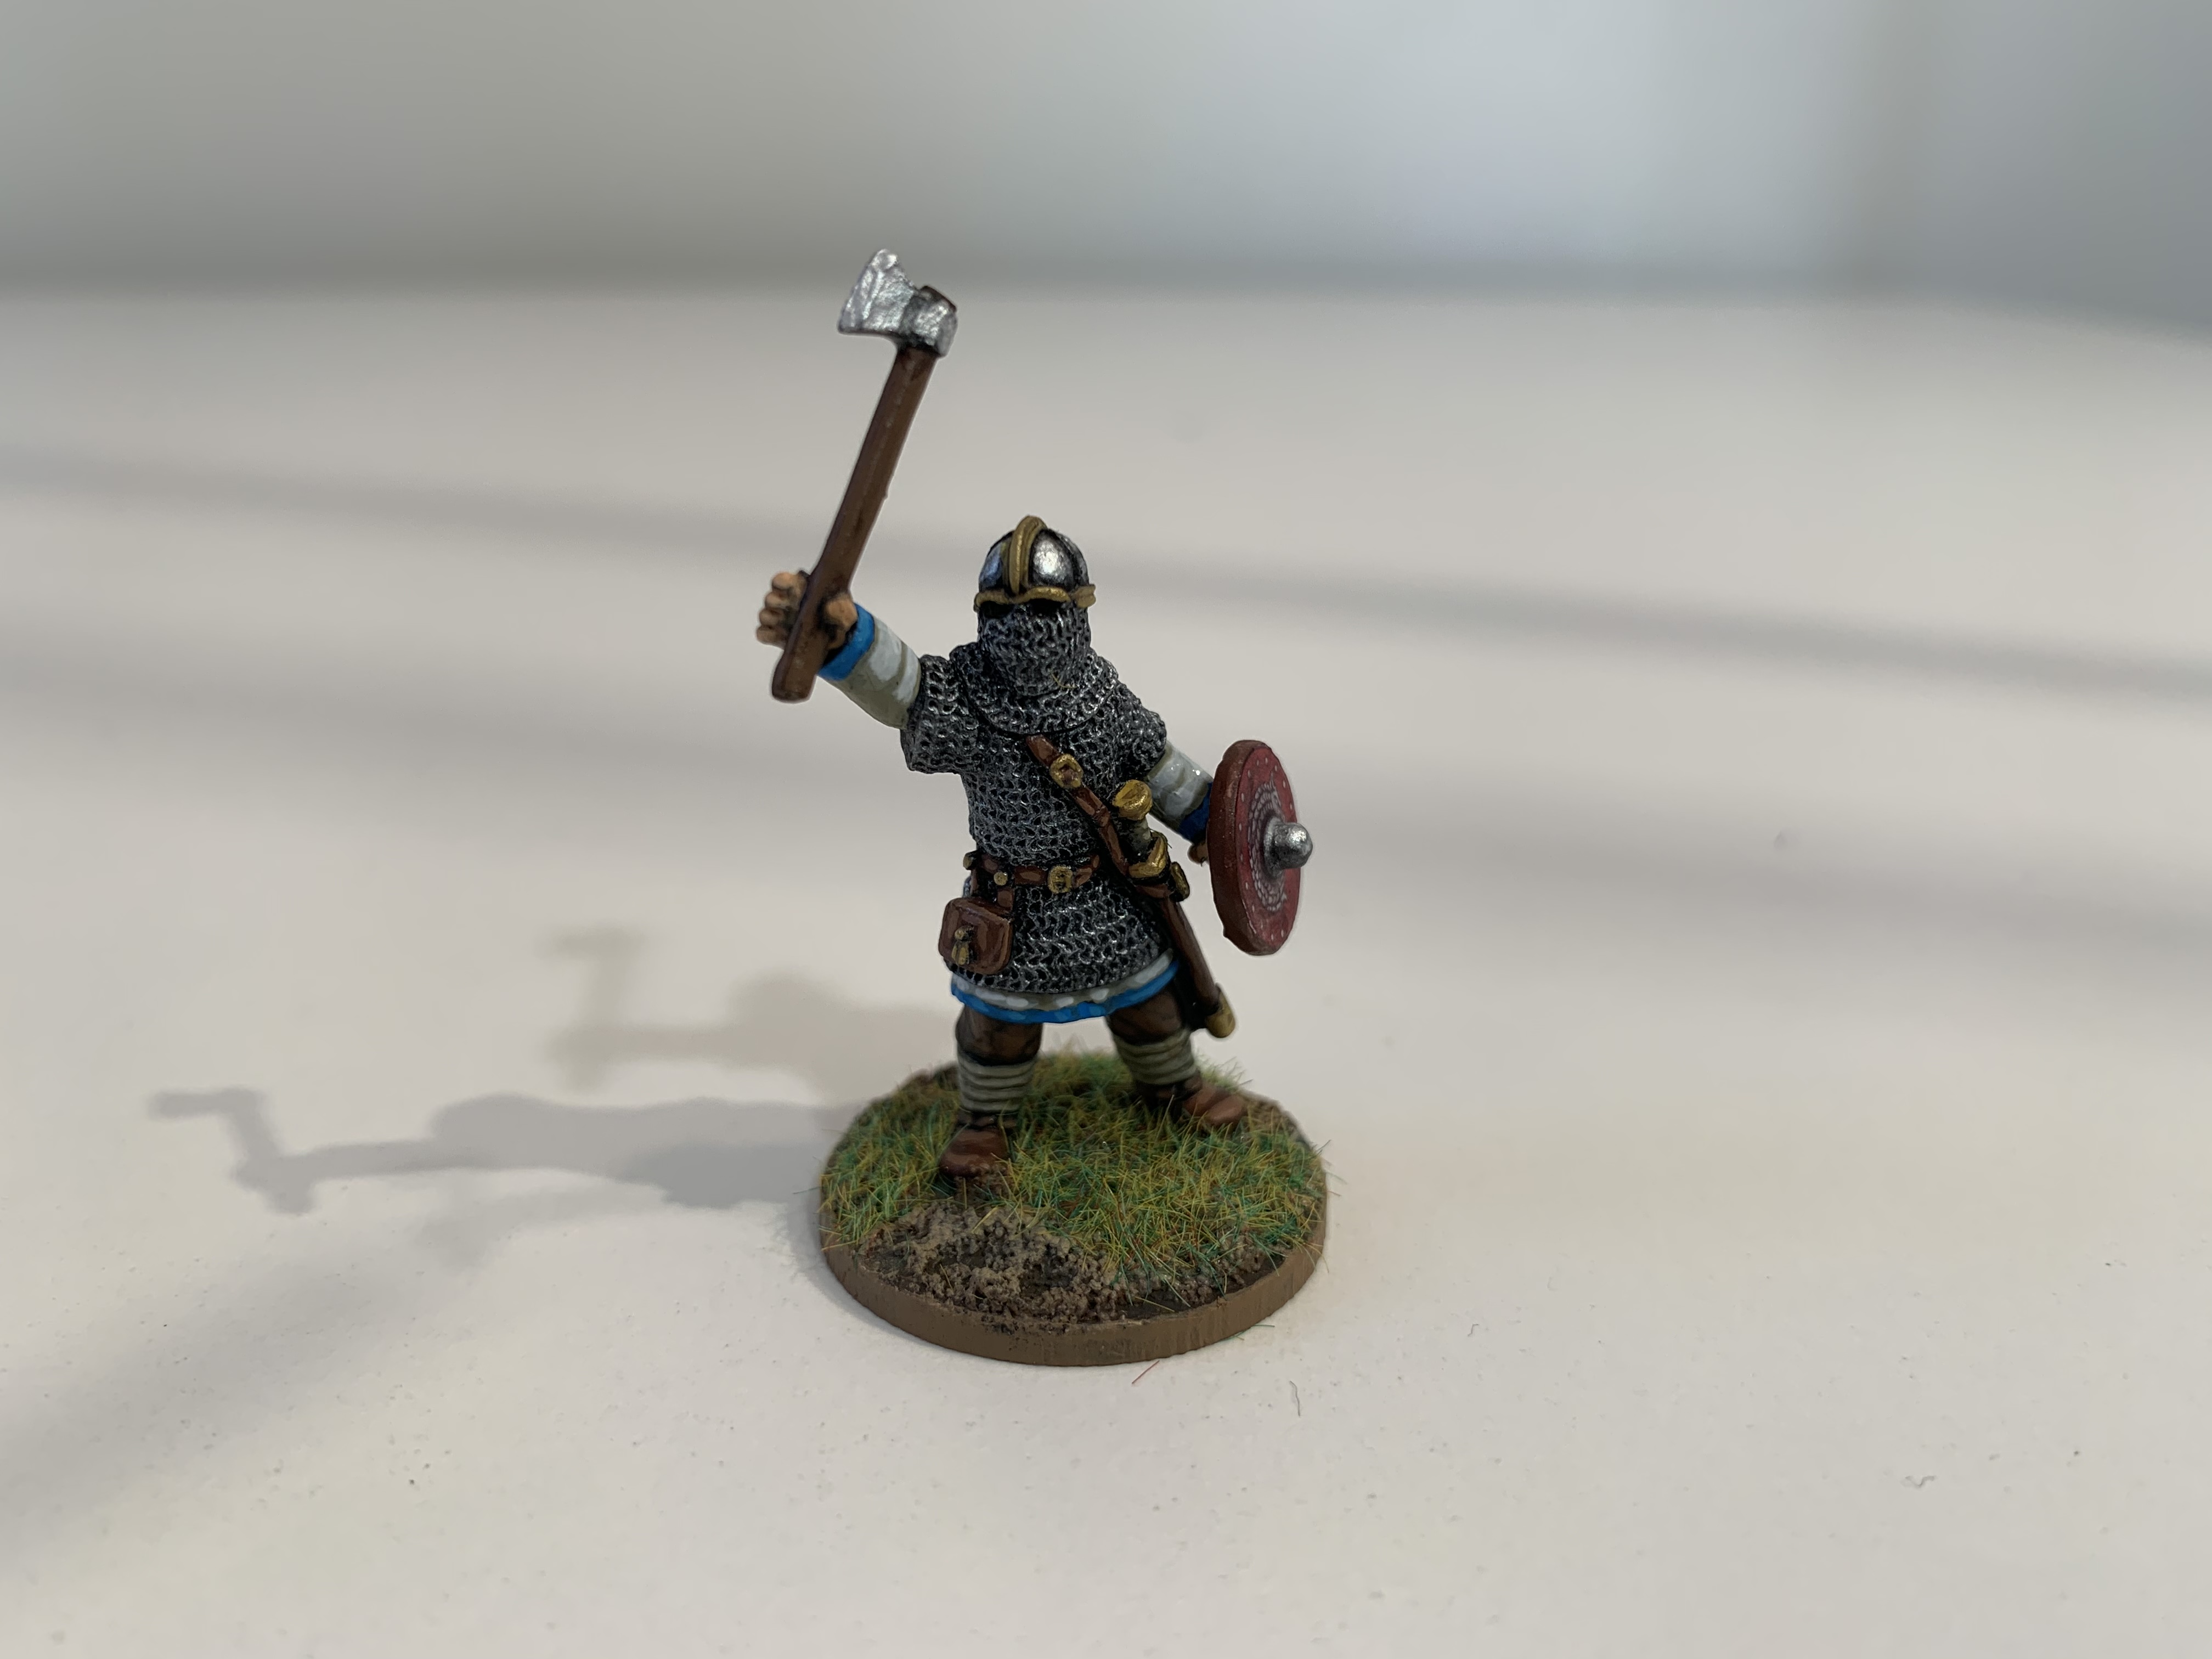
Saebert is the command figure from Footsore’s Early Saxon Heavy Infantry Command set. He had an open hand which was rather wide and wouldn’t close round my usual wire spears. Instead, I gave him a spare Gripping Beast axe cast from metal which I think looks better. A bit of greenstuff was used to extend the thumb around the axe handle slightly and to embed it in the open hand. I thought about trying to do his eyes, but then decided against it, as in real life you would have to be up very close to see through the vision slits of his closed helm.
Saebert’s fellow Adelig “Berhthun the Devil” is next on the painting desk!
Saxon Champion
Like the Romano-British, the Saxons also get a Champion to accompany their leader. He’s useful for aiding the troops in combat, taking a hit for his boss and engaging in trial by combat with the enemy champion before a battle. A quick roll on the name table tells us this particular psycho goes by the name of Cenfus (pronounced Chen-fuss).
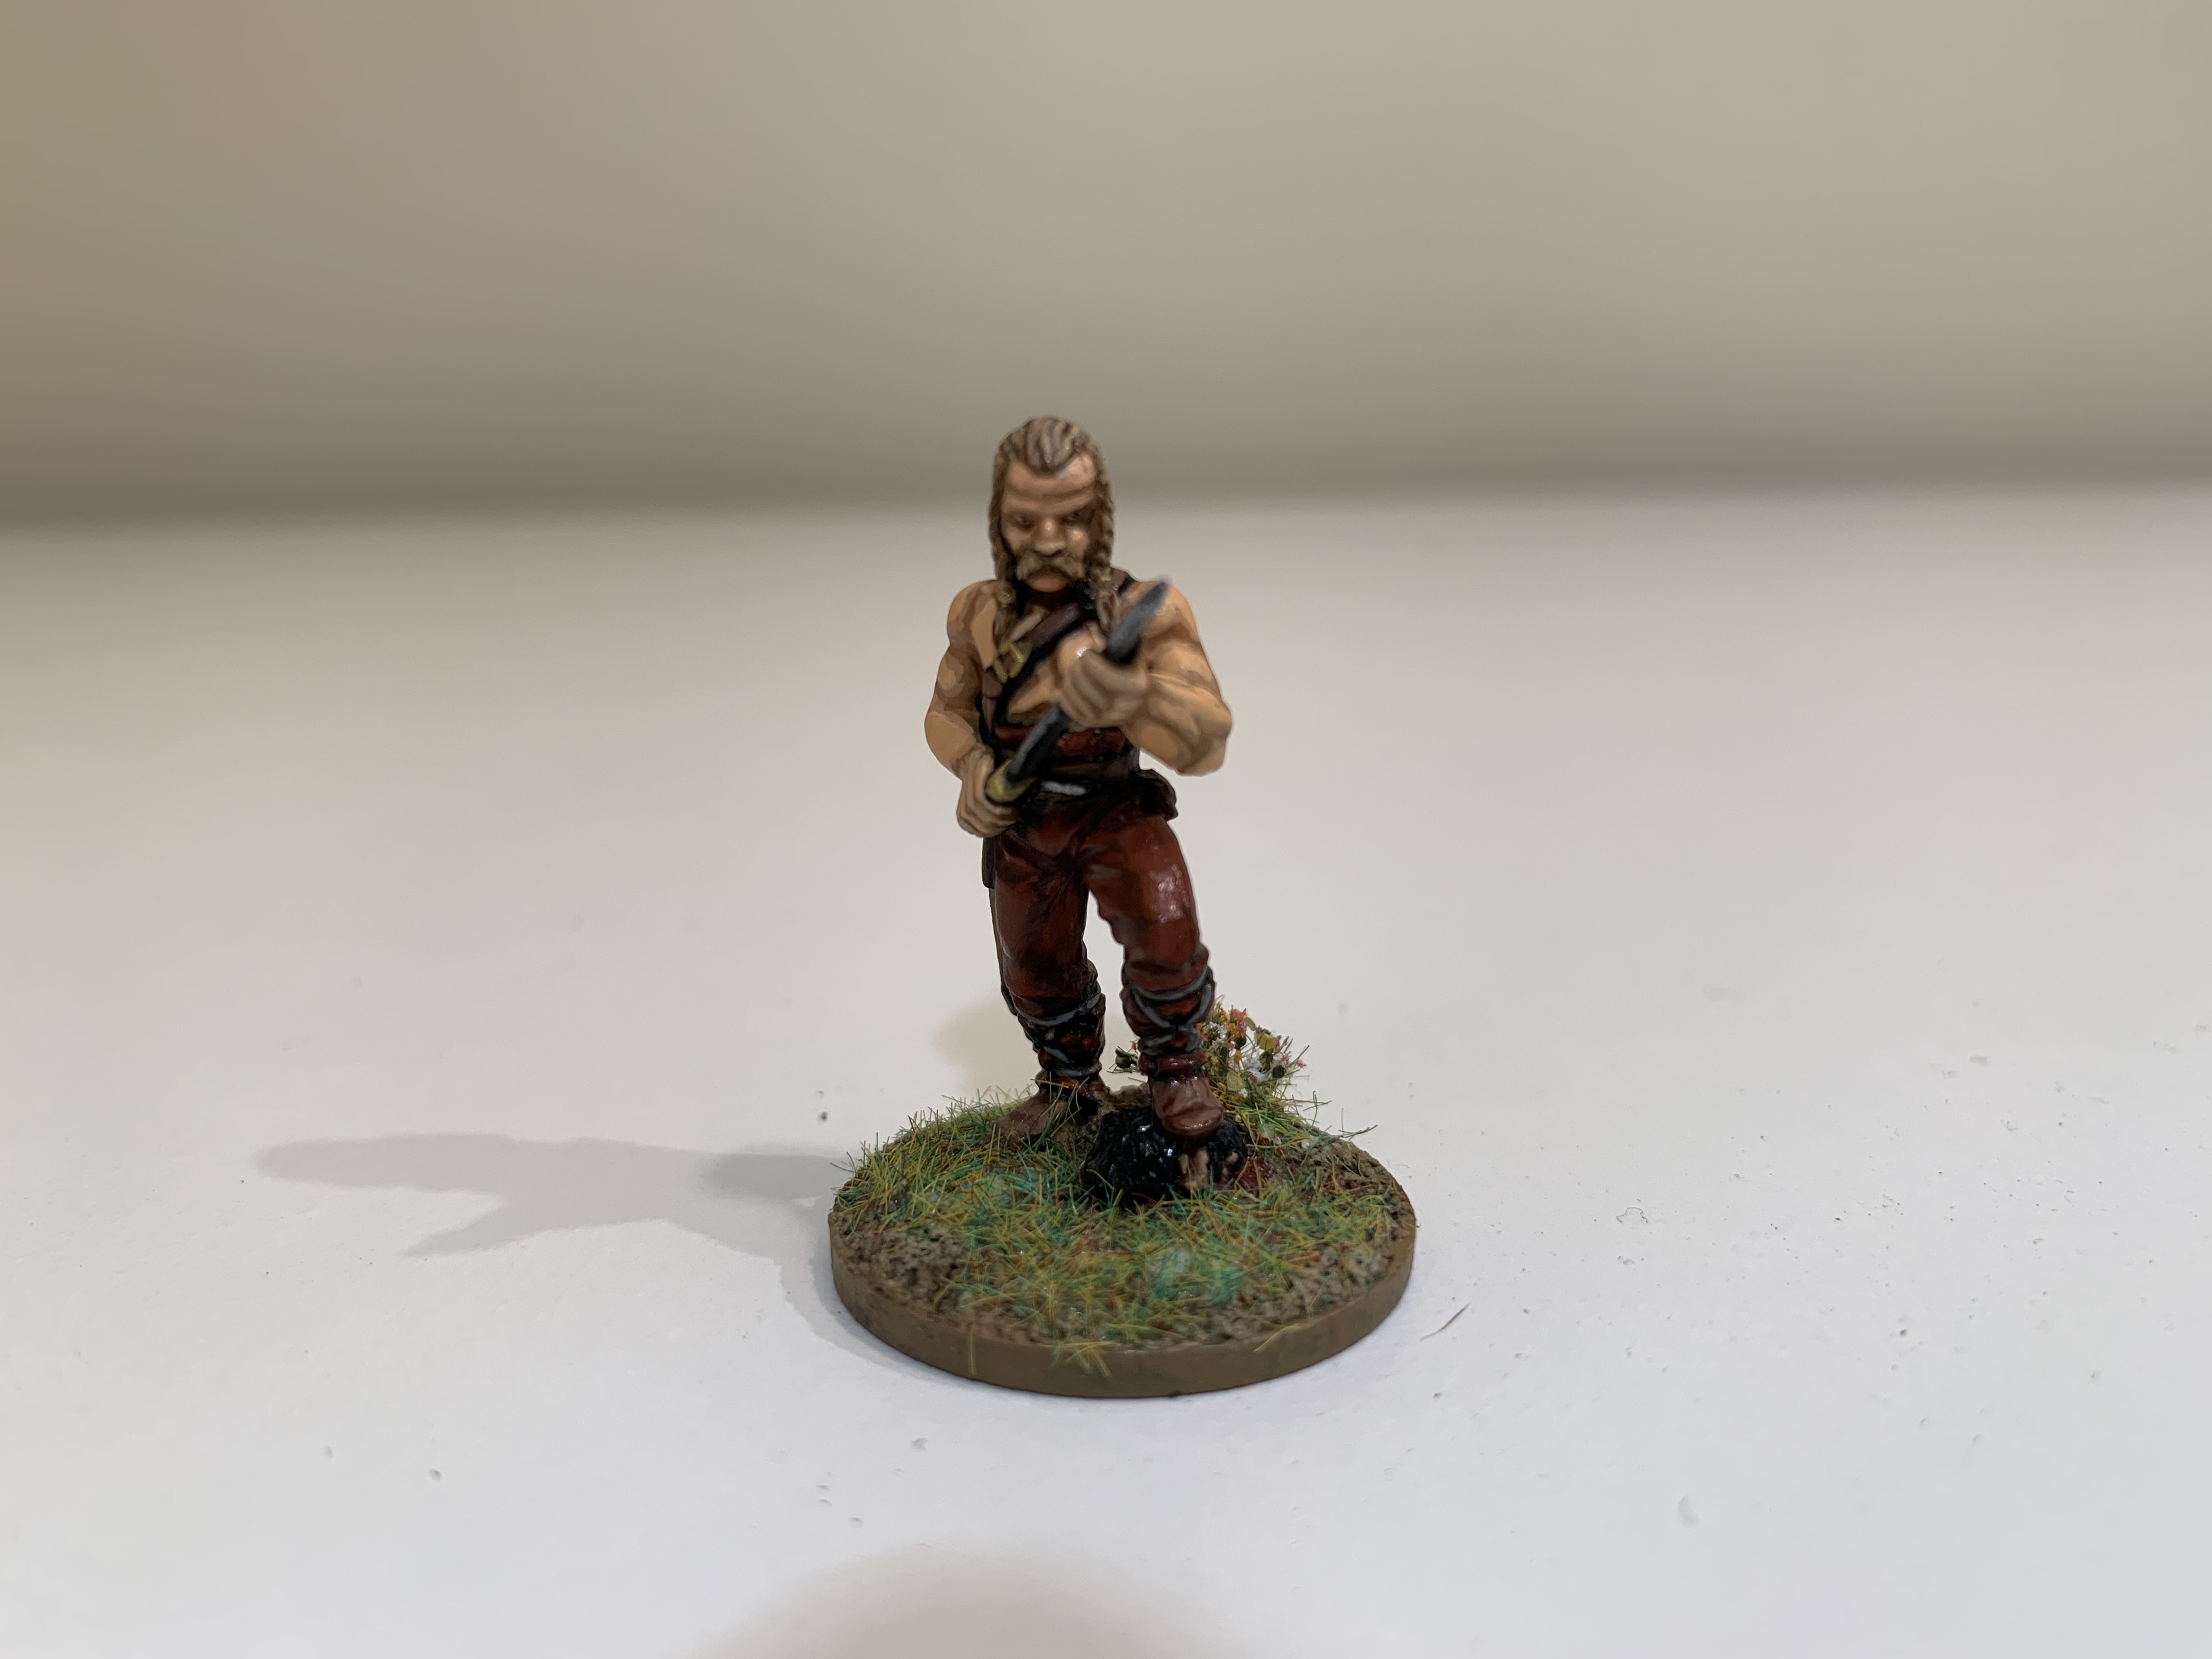 Foot on head, a variation on the classic foot on rock look
Cenfus is a Gripping Beast sculpt from their Early Saxon Characters set. I’d not really painted someone displaying so much flesh before but I’m happy with how he turned out. I started with VMC Light Brown as a base, with a 50:50 mix of Light Brown and VMC Sunny Skintone as the first highlight. I then did a final highlight of VMC Sunny Skintone and thought I was done. I then received feedback from my wife (always my harshest critic) that he looked very orange and was he meant to be a Dark Ages version of Donald Trump. Stung by this I then went for a further highlight of VMC Flat Flesh in order to tone down the perma-tanned look.
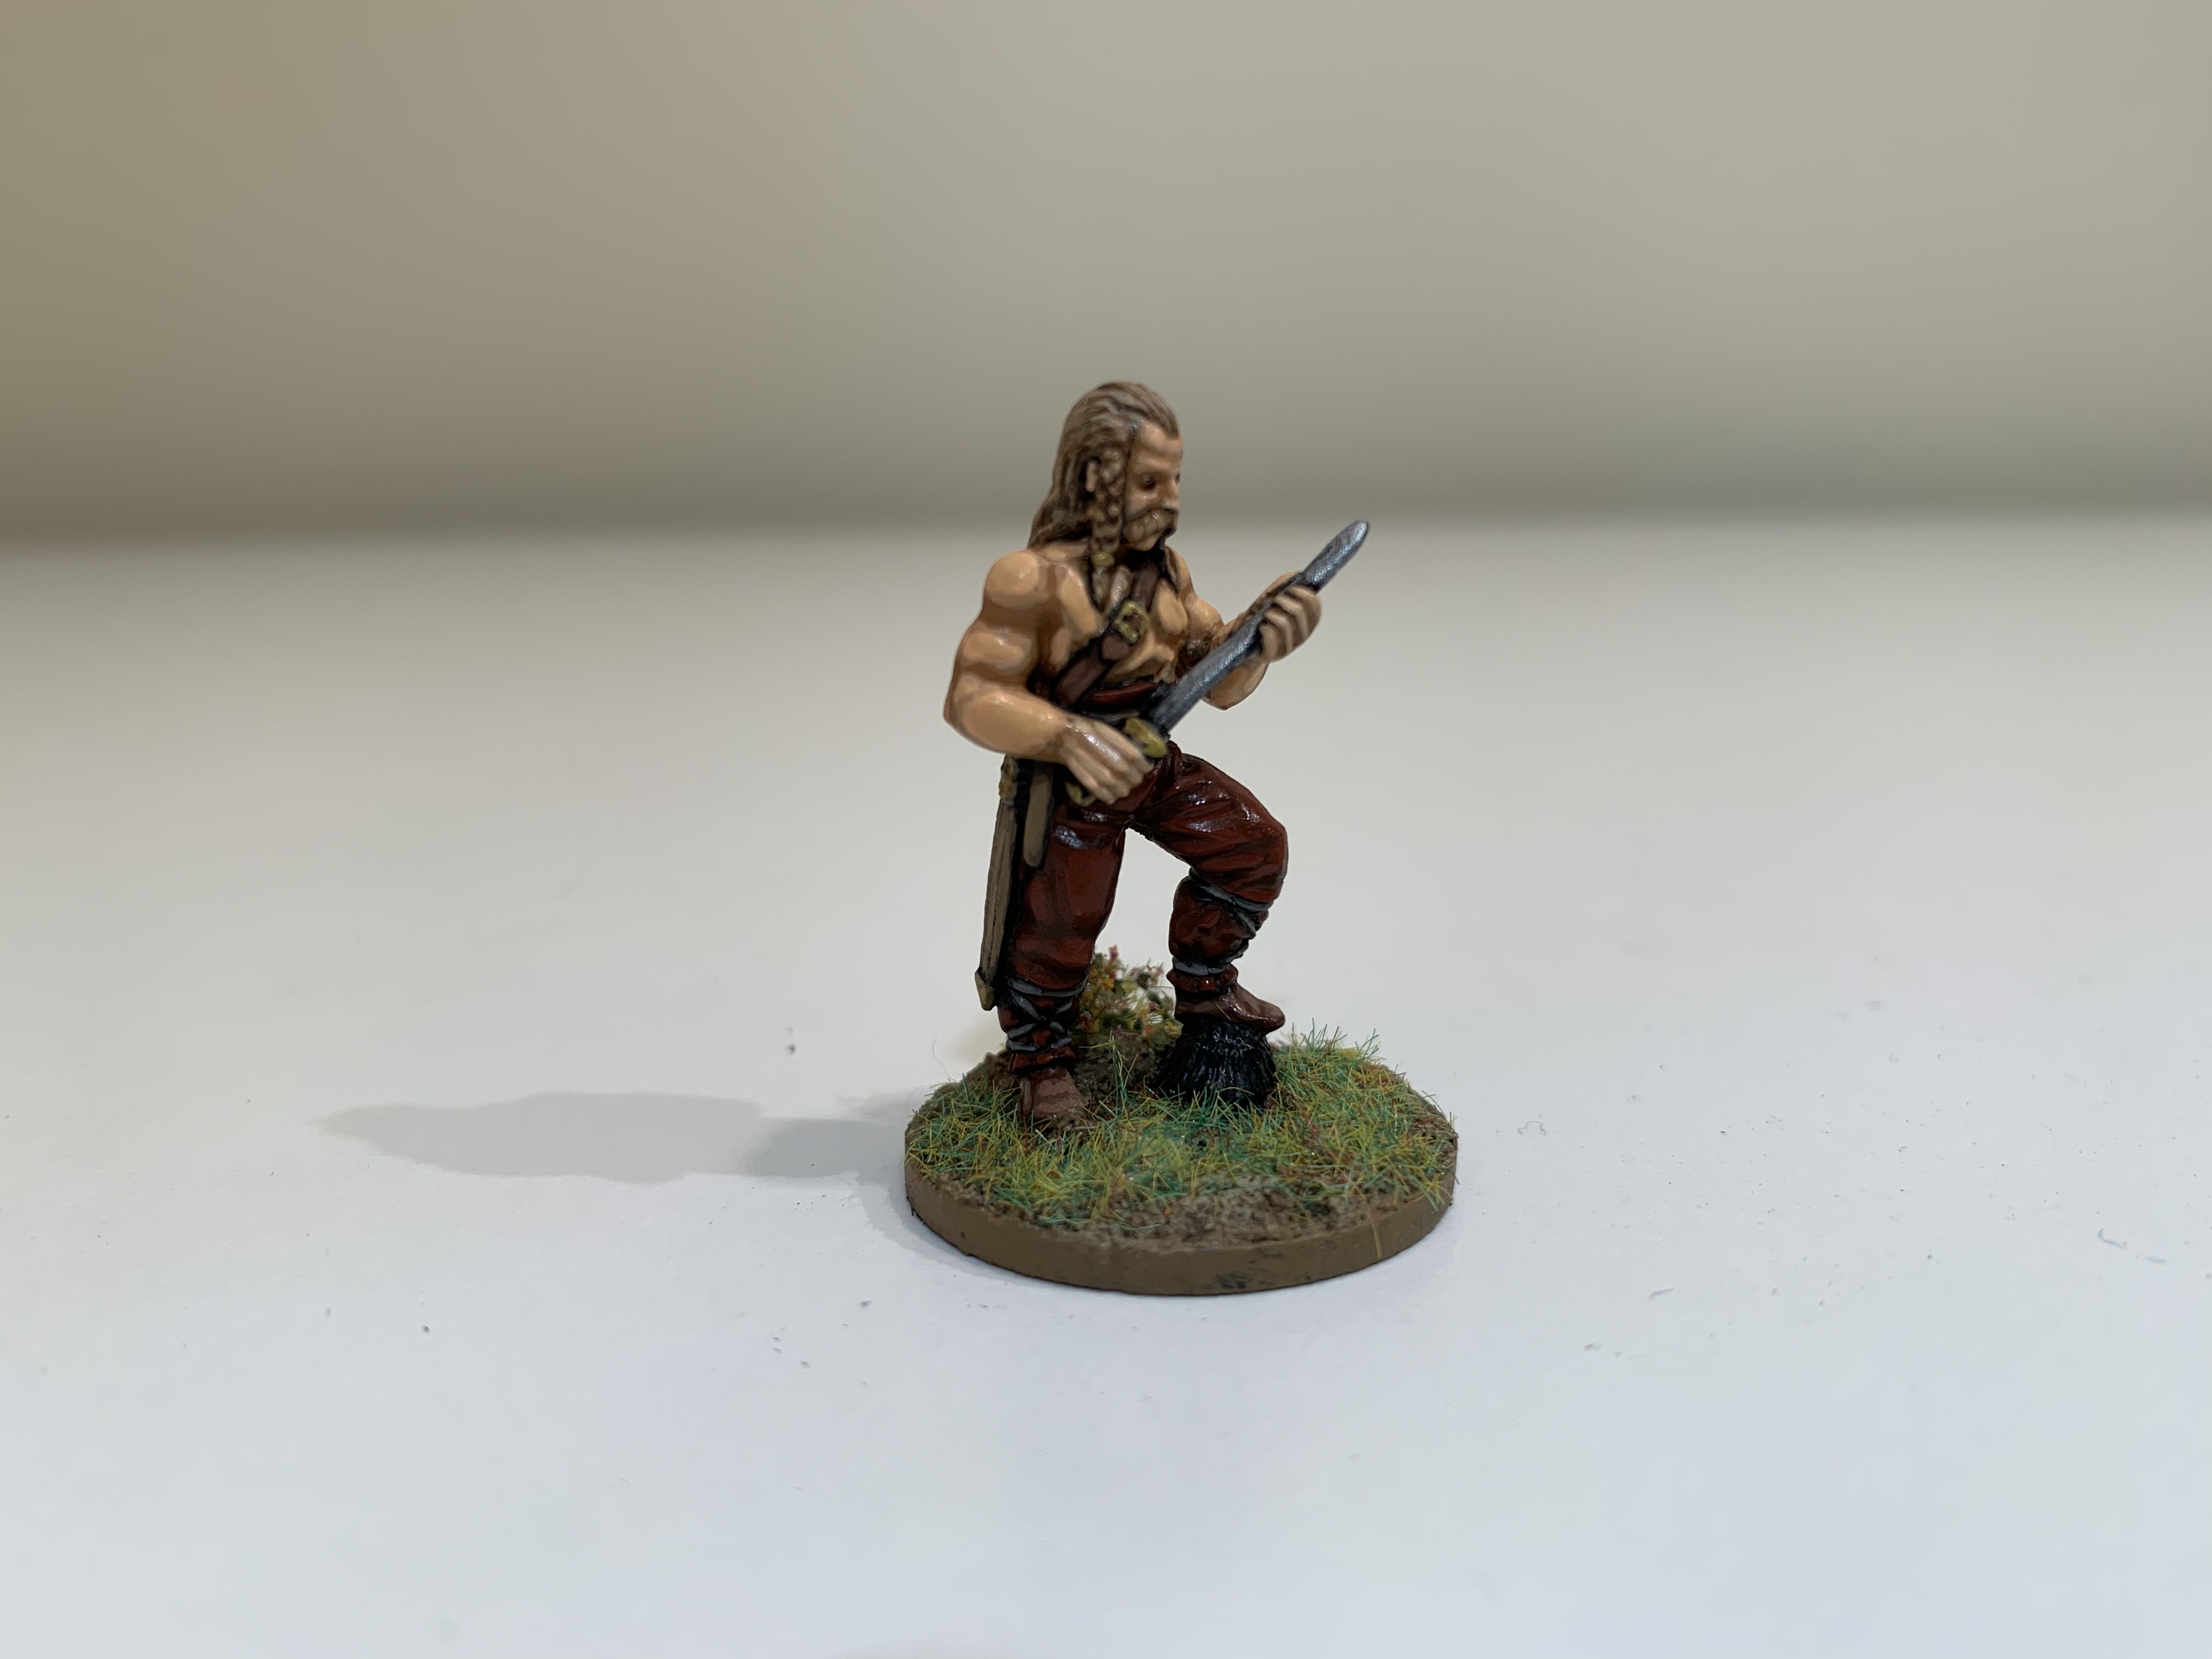 Invading Britain. Suntans unlikely.
I think I mentioned in an earlier post that I was a bit uncertain about whether or not to cover up the severed head and disguise it as some form of moss covered hillock. In the end I decided to keep it. I have to say that there wasn’t really much to work with in painting terms and I’m not sure it helps the miniature. It’s essentially part of the base and given that faces and bases are what people look at the most, it does draw attention to itself. Unfortunately, it’s then not particularly obvious what it is unless you look closely and then it’s a distraction from the rest of the figure, which is a pity as I think the rest of it is great. Perhaps I could have painted the severed head better, but I rather feel that with this miniature less would have been more.
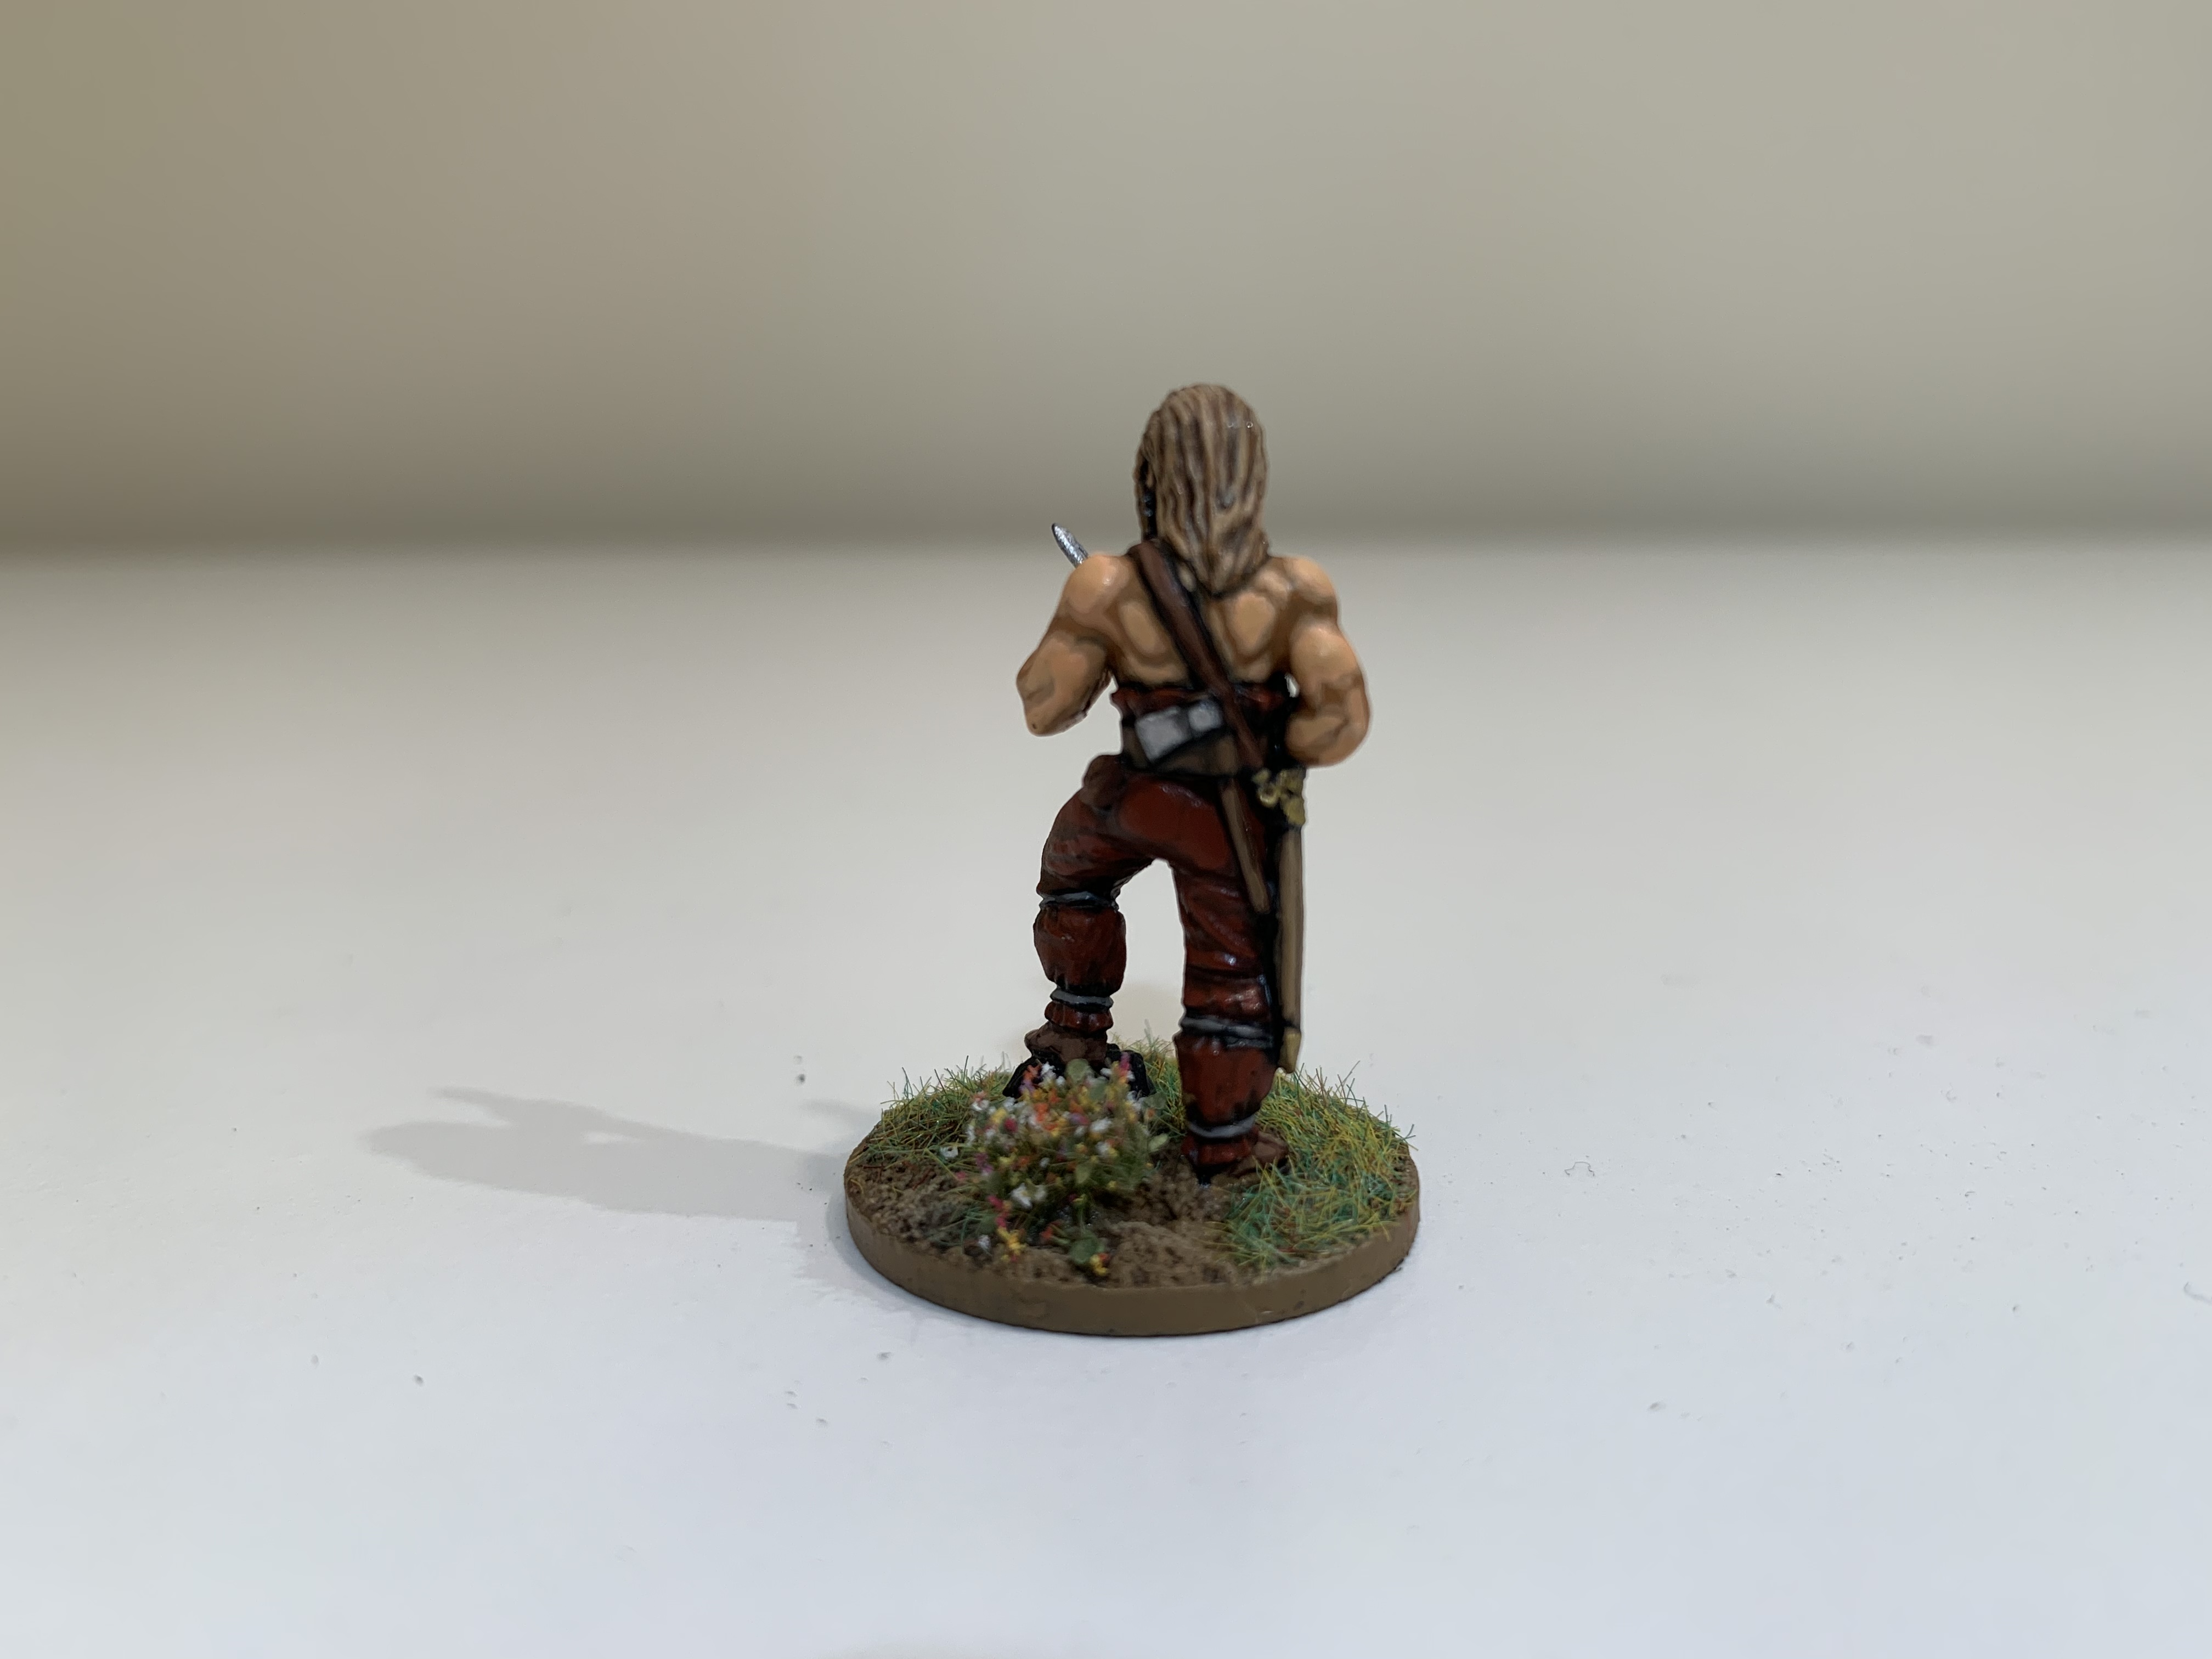 It takes work to get a physique like this…
However, this is really a minor gripe and overall I’m very pleased with how he’s turned out. I’m perilously close to finishing the warband now with just the two nobles and the warlord to come.
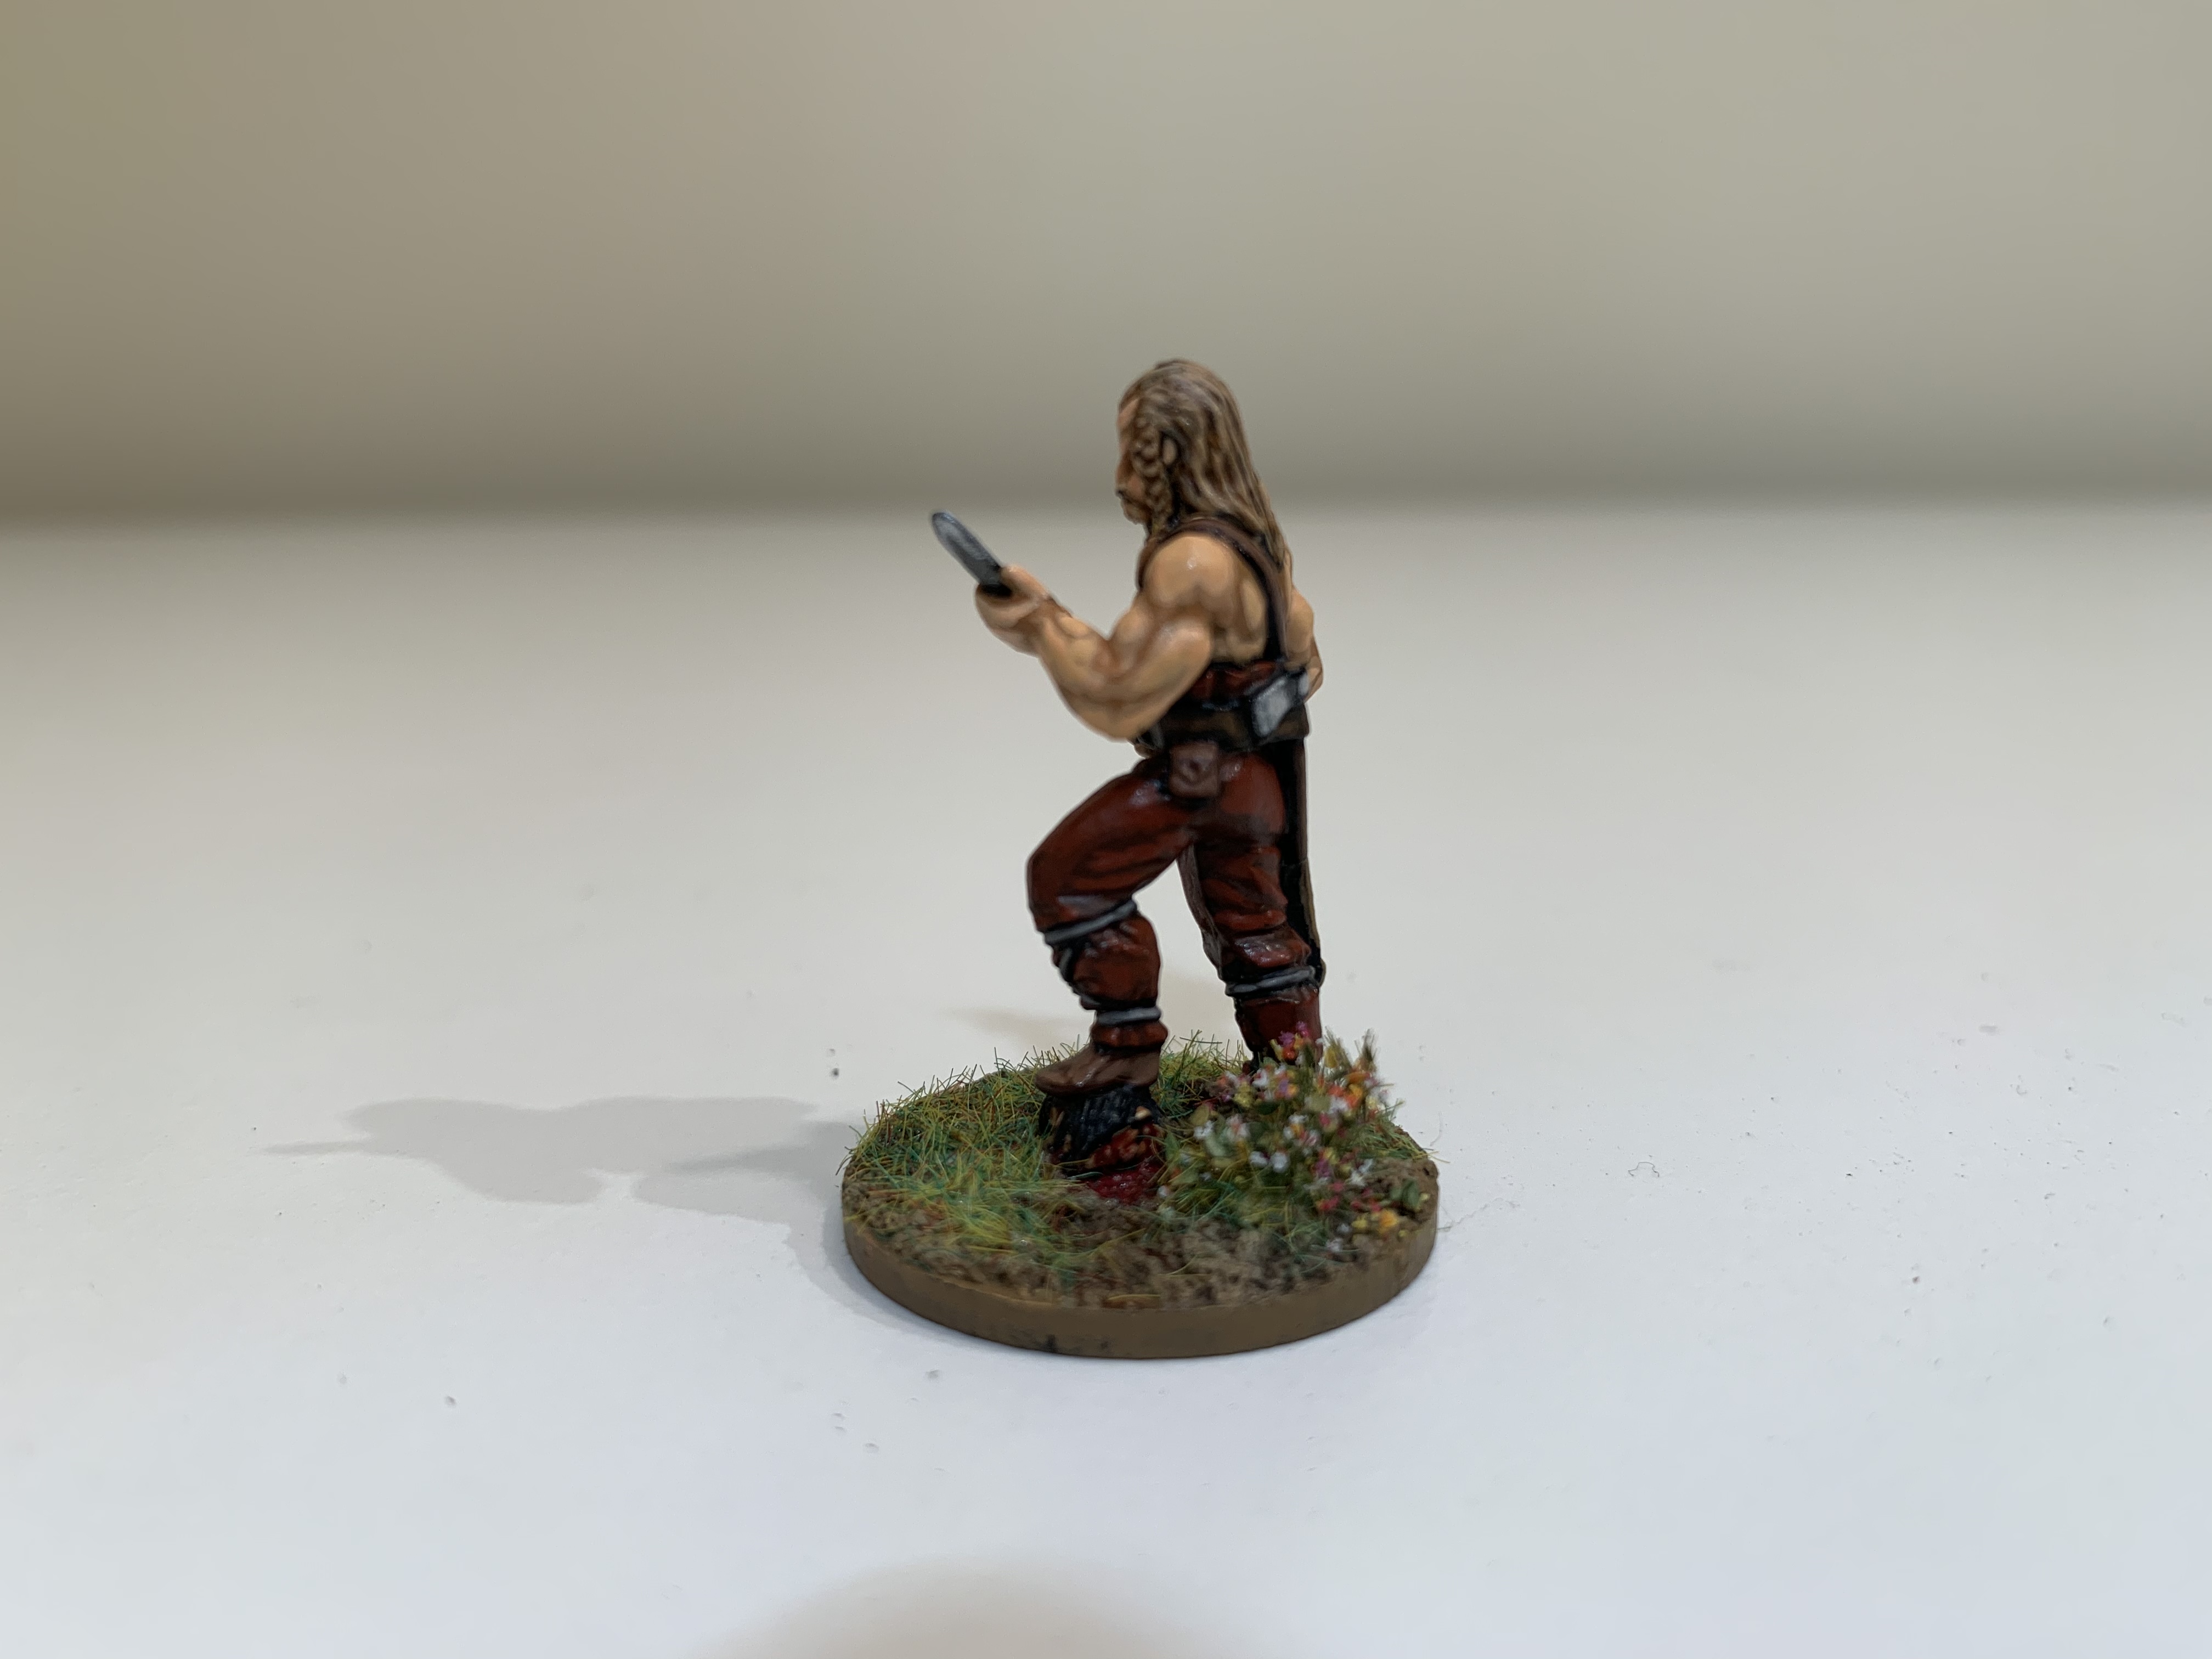 Must remember to use my axe next time I decapitate someone. This sword is blunt!