Skip to toolbar
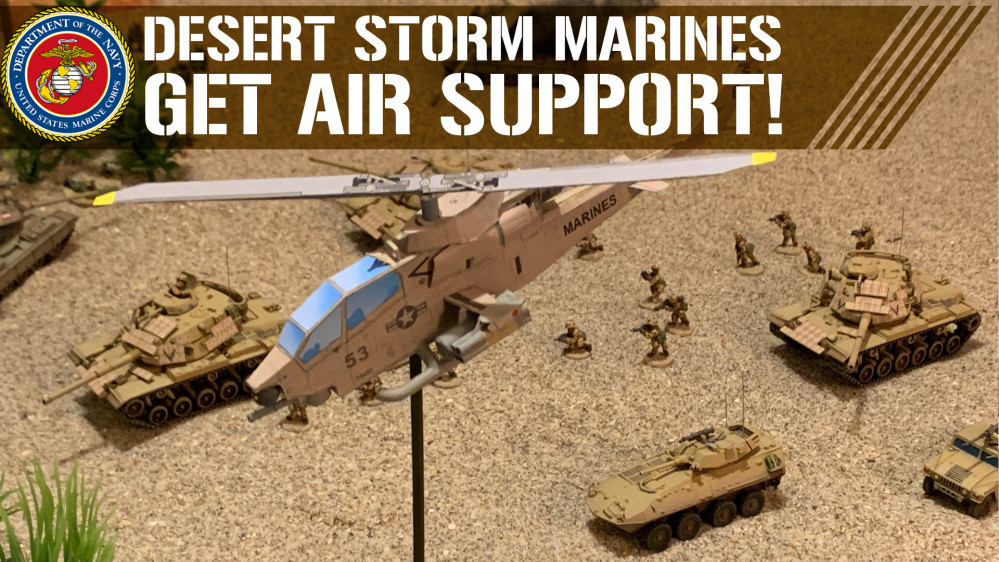
Emergency Miniature Work – 15mm USMC Super Cobra

Emergency Miniature Work – 15mm USMC Super Cobra

Supported by (Turn Off)
Project Blog by oriskany Cult of Games Member

Recommendations: 1804

About the Project

It's the return of Oriskany's Web Wargames, where we connect with YOU, members of the community, over the web to stage live wargames. This thread will go over the ideas, concept development, design, LIVE PLAYS, and after-action reports for these games, covering all periods and ranges of the historical genre.

For anyone who's ever interested in participating in one of these games, all you need is an internet connection (so software downloads required). Reach out me (Oriskany) on a PM and so we can agree on a time and a system.

Systems so far include multiple iterations of Panzer Leader (1939-2020), Valor & Victory (1918-1993), Naval Command, AirWar C21, Contact Front, and others!

So feel free to toss in ideas, reach out to play, just spectate, or just comment and +1 on the design and after action reports!

This Project is Active

Sitrep Hobby Stream: 13 Days to 13 Hours Transit Game Project

Tutoring 6
Skill 5
Idea 6
No Comments

With our summer break over (wait, we were ever on break?) we’re getting the wheels turning again on the Thirteen Days to Thirteen Hours project on the Sitrep Podcast.

This is our continuing research, design, and miniature hobby project to recreate the assault and defense of the American mission compound and embassy annex in Benghazi, Libya on the night of September 11-12, 2012.

I’m in charge of the “transit game,” the mini-game that challenges the American player to get his GRS military contractors to the embassy under attack in time, and of course the insurgent player to stop them.

Today we’ll be looking at the maps and playing pieces.

We hope to see some of you there!

SITREP TWITCH

SITREP YOUTUBE

Napoleonics Stream Tonight on Sitrep Podcast - Preview Pics

Tutoring 6
Skill 5
Idea 7
7 Comments

Here are a few pics for the set up, research, and design of our upcoming Waterloo Anniversary game (Live on Sitrep Twitch and YouTube).

SITREP TWITCH

SITREP YOUTUBE

The French Center.  Of course we see Napoleon, Ney, the Imperial Guard, the The French Center. Of course we see Napoleon, Ney, the Imperial Guard, the "Old Guard", and plenty of artillery along with Lancer cavalry.
The French left, made up primarily of General Reille's Corps.  Heavier Cuirassier cavalry, and lots of conscripts.  Often its forgotten that much of Napoleon's army at Waterloo was recently-levied recruits in the army he was trying to rebuild.  I've added those badass The French left, made up primarily of General Reille's Corps. Heavier Cuirassier cavalry, and lots of conscripts. Often its forgotten that much of Napoleon's army at Waterloo was recently-levied recruits in the army he was trying to rebuild. I've added those badass "Sapper" assault engineers with the deadly axes we'll see at either La Haye Sainte or Hougoumont (depending on what the computer does with them).
The French right wing, primarily made up of General d'Erlon's Corps.The French right wing, primarily made up of General d'Erlon's Corps.
The British center, fronted by La Haye Sainte and Hougoumont.  These are defended by King's German Legion, Coldstream and other Foot Guards regiments, and plenty more German troops.  The elite 95th Rifles stand by to jump in.  We also see Wellington, Uxbridge (Wellington's second-in-command), and William, Prince of Orange.The British center, fronted by La Haye Sainte and Hougoumont. These are defended by King's German Legion, Coldstream and other Foot Guards regiments, and plenty more German troops. The elite 95th Rifles stand by to jump in. We also see Wellington, Uxbridge (Wellington's second-in-command), and William, Prince of Orange.
The British / Allied left wing, under the command of Sir Thomas Picton (famously in civilian clothes that day).  Dutch and Belgian troops hold the forward positions at Smolhain.  And OOOF!  That The British / Allied left wing, under the command of Sir Thomas Picton (famously in civilian clothes that day). Dutch and Belgian troops hold the forward positions at Smolhain. And OOOF! That "95th Rifles" label in the center is a blatant error. They're not even on this map, that's a vestigial graphics object from an earlier template file. Ignore that.
The British right wing, under the dubious command of our boy William Prince of Orange.  We also have more allied troops in the form of Brunswick (They are labeled The British right wing, under the dubious command of our boy William Prince of Orange. We also have more allied troops in the form of Brunswick (They are labeled "Hanover", error on my part) Dutch and Belgians. We also have the famous Scots Greys and plenty of Dragoons if we want to recreate that massive British cavalry charge.
High-level map of the whole field.High-level map of the whole field.

Napoleonics Stream Tonight on Sitrep Podcast

Tutoring 5
Skill 6
Idea 7
No Comments

To commemorate today’s anniversary of The Battle of Waterloo, we’re running a short, fun live stream on the Sitrep Podcast, playing some Napoleonic-themed mods and expansions of the People’s General series by SSI.

Our British force includes flank companies of grenadiers and light infantry, Scots Greys elite cavalry, Dragoons light cavalry, 6-pounders, and of course an elite company of “Chosen Men” in the green jackets, with the extended Riflemen range, close combat, and special ammo upgrades!

Too bad our French opponents also have artillery, lancer cavalry, tons of line infantry, and of course “Imperial Guard” shock troops!

Join us on our Twitch or YouTube Channels and see how we do!

We hope to see some of you there!

SITREP TWITCH

SITREP YOUTUBE


Video Game Recording - Rasmus v. Oriskany

Tutoring 7
Skill 6
Idea 7
No Comments

Good morning, OTT!  We had a great game yesterday with community member Rasmus – recreating part of the Battle of Arras (21 May 1940).

We have Matildas vs. 88s, while more Matildas try to overrun Rommel’s personal command halftrack!  Artillery duels, close assault by Durham Light Infantry and motorized infantry of 7th Schützen Regiment, PzKpfw-38(t) tanks, Stukas, the works!

Check out of video and I hope you enjoy!

Thanks to Rasmus for the great game!

Live Game Stream Today at 2PM East US, 7PM UK

Tutoring 7
Skill 7
Idea 8
2 Comments

The Battle of Arras is one of the most famous episodes of the German 1940 Blitzkrieg.

On 21 May 1940, British and French armor launched an ill-fated counterattack against the northern flank of the German “panzer corridor,” hoping to cut it off. The Germans found to their horror that their antitank guns couldn’t scratch the heavy British A11 and A12 “Matilda” tanks of 1st Tank Brigade (4th and 7th RTR).

The British were only stopped when the frantic German division commander on the scene, Erwin Rommel, tried using 8.8 cm heavy antiaircraft guns against the British tanks.

The rest is history.

We’ll be recreating a pivotal part of that battle LIVE TODAY on Sitrep Podcast Channel (YouTube and Twitch), engaging with members of the community in a game of Panzer Leader 1940.

We hope to see some of you there!

SITREP TWITCH

SITREP YOUTUBE

British forces for the game, including what the 1st Armored Brigade (4th and 7th RTR) actually had that day.  We also have a small part of the 6th Durham Light Infantry (most of the battalion was engaged further east), and a battery of artillery that was supporting 6th DLI.British forces for the game, including what the 1st Armored Brigade (4th and 7th RTR) actually had that day. We also have a small part of the 6th Durham Light Infantry (most of the battalion was engaged further east), and a battery of artillery that was supporting 6th DLI.
German forces.  Not all these units will be available to them at first, Stukas only arrived after Rommel called for them and most of 25. Panzer Battalion's flanking counter-counterattack from the west was blunted / delayed by French armor on the British right wing.  These are the forces that were there so far as I can find, including two sections of Luftwaffe 8.8 cm FlaK 36 heavy antiaircraft guns.  This was the first time these were used against tanks in WW2 (sources suggest the tactic had been used once before in the Spanish Civil War).German forces. Not all these units will be available to them at first, Stukas only arrived after Rommel called for them and most of 25. Panzer Battalion's flanking counter-counterattack from the west was blunted / delayed by French armor on the British right wing. These are the forces that were there so far as I can find, including two sections of Luftwaffe 8.8 cm FlaK 36 heavy antiaircraft guns. This was the first time these were used against tanks in WW2 (sources suggest the tactic had been used once before in the Spanish Civil War).
Some of the research I've been cross-referencing trying to get an accurate read on what was on the field in question.  We're also keeping this game strictly scaled to history and geography, so as you can see we'll only be doing a small part (albeit the most FAMOUS part) of the battle.Some of the research I've been cross-referencing trying to get an accurate read on what was on the field in question. We're also keeping this game strictly scaled to history and geography, so as you can see we'll only be doing a small part (albeit the most FAMOUS part) of the battle.
Table is set up and ready to go.  I might have given the British a LITTLE too much firepower (I'm being generous with my interpretation of 6th DLI's and 368 / 92nd Field Artillery Regiment's position) but I want to give the Brits a fighting chance to change history.Table is set up and ready to go. I might have given the British a LITTLE too much firepower (I'm being generous with my interpretation of 6th DLI's and 368 / 92nd Field Artillery Regiment's position) but I want to give the Brits a fighting chance to change history.
Rommel himself is on the table!  He's part of that Rommel himself is on the table! He's part of that "CP" unit in his SdKfz-251 command halftrack. WAAAAAY too far forward, of course, but then again, this is Rommel. Sources have him on this ridge personally siting the 88s (note one battery is just two hexes southwest).
Here's a zoom-in of our research area (there were several maps used, but this was the most detailed in regards to military units deployed).  Notet he British breakthrough on the their left (4th RTR), while they were slammed to a halt on the right (7th RTR).  The objectives in today's game illustrate the same dynamic, the British don't have to WIN THE BATTLE to win the game (given the scenario's realism, Here's a zoom-in of our research area (there were several maps used, but this was the most detailed in regards to military units deployed). Notet he British breakthrough on the their left (4th RTR), while they were slammed to a halt on the right (7th RTR). The objectives in today's game illustrate the same dynamic, the British don't have to WIN THE BATTLE to win the game (given the scenario's realism, "winning outright" is just about impossible), but they just thev to do BETTER than historically and they win the game. Given how bad the British were halted historically, this is a pretty low bar to beat. Then again, the British player has to play with the tools available. Sheesh.

BRITISH 1940 EARLY WAR PANZER LEADER COUNTER SHEETS

Tutoring 8
Skill 8
Idea 8
No Comments

Good morning, all ~

Here are the British countersheets for early war Panzer Leader.  With these counters, you can create any historically-accurate British force that saw action or could have conceivably seen action in 1939, 40 (including Operation Compass in the Western Desert or even the defense of British Somaliland or Sudan from the Italian invasions of August – September 1940.  Yes, some colonial armored vehicles are included.

These counters also have you covered through the EARLY PART of 1941.  It’s not until Operation Battleaxe (June 1941) that you need additional tanks like  the early Crusader IIs.  For the rest of ’41 you’d need Crusader CS variants, early Valentine IIIs, and the first Lend Lease M3 Honeys for Operation Crusader (Nov 41).

Actually that’s a slight fib, to do SOME of the early-1941 British Western Desert / XIII Corps tanks you’d need captured Italian M13 medium tanks.

THIS COMPLETES THE COUNTER SHEET PROJECT for 1940 Panzer Leader.

As usual, the full-res PDFs are attached here, along with lower-res JPG previews.

Download and use to your hearts content if so inclined!

Low-Res British Infantry, Artillery, TransportLow-Res British Infantry, Artillery, Transport
Low-Res British Armour, Recce, TransportLow-Res British Armour, Recce, Transport

Dutch Mechanized Division vs. Polish Armor in Northern Germany

Tutoring 8
Skill 8
Idea 8
2 Comments

We had a stream last night where we featured PEOPLE’S GENERAL system by SSI (Strategic Simulations, Inc.).  I downloaded the COLD WAR mod and set up a battle for 1985 World War III in Europe …

But not Soviets vs. Americans.  Not Soviets vs. British, West Germans …

But a NATO Netherlands mechanized division vs. two Warsaw Pact Polish armored divisions!

Because Sitrep Podcast is where you see battles you’ll see almost nowhere else.

Check out our YouTube Channel.  You can also follow us on Twitch or Facebook.

Repost from Last Year's Omaha Beach Mega Panzer Leader game

Tutoring 8
Skill 8
Idea 8
2 Comments

A quick repost from last year’s game (so I won’t put it ALL up again) … I will post links to the original project thread if anyone is interested …

From last year —>

My God, I think there is something legitimately wrong with me.  What kind of fool tries to recreate a legitimate, full-scale, platoon-based, historically “approximate” re-staging of ALL of Omaha Beach?

Well, the map is complete.  The initial forces are set up.  Just a few special rules to iron out and it’s time to start this apocalyptic game.

The whole map. Almost six miles wide, over three miles deep. At least 5,000 men on the table already. Each hex is a 4x6 15mm table, or three 28mm tables.The whole map. Almost six miles wide, over three miles deep. At least 5,000 men on the table already. Each hex is a 4x6 15mm table, or three 28mm tables.
A close up of what I'm sure will be the bloodiest sector of a very bloody beach, Dog Green and Dog White, the right shoulder of the Omaha assault zone.A close up of what I'm sure will be the bloodiest sector of a very bloody beach, Dog Green and Dog White, the right shoulder of the Omaha assault zone.
THIRTY SECONDS! GOD BE WITH YA! A detail of the initial landing waves of Dog Green and Dog White. Note the THIRTY SECONDS! GOD BE WITH YA! A detail of the initial landing waves of Dog Green and Dog White. Note the "Ranger" counters in Dog Green. This is "C" Company, 2nd Ranger Battalion, "Captain Miller's" unit in Saving Private Ryan. They went in with "A" Company, 1st Battalion, 116th Regimental Combat Team at the mouth of the Vierville Draw. Well, you've seen the movie. The reality was horrifically worse. MOVE FAST, AND CLEAR THOSE MURDER HOLES!
H-Hour +10 minutes. 27 American platoons have been destroyed (marked by black smoke columns) across five miles of assault beach. So that's over 900 men killed, wounded, or hopelessly scattered.H-Hour +10 minutes. 27 American platoons have been destroyed (marked by black smoke columns) across five miles of assault beach. So that's over 900 men killed, wounded, or hopelessly scattered.
As expected, the hot spot is the American right wing, in front of As expected, the hot spot is the American right wing, in front of "Dog One" draw leading toward the Vierville objective hexes. This was BY FAR the bloodiest slice of Omaha, which was BY FAR the bloodiest beach at Normandy (more casualties than the other four invasion beaches plus the three divisional airborne drop zones ... all combined). To kick the historical results a little, I have thrown a lot more support here. Note the naval gunfire support markers (green target icons) and the four P-47 Thunderbolt air strikes. One plane was hit and damaged, but the strike went in and probably saved at least some lives.

Some of the project entries from the original post.


What is WRONG with me?

https://www.beastsofwar.com/project-entry/1408912/


Dear God, It’s Started.

https://www.beastsofwar.com/project-entry/1409235/


H-Hour +36 minutes. It’s Getting Worse!

https://www.beastsofwar.com/project-entry/1409637/


H-Hour +1 Hour … A Ray of Hope?

https://www.beastsofwar.com/project-entry/1410084/


Omaha Mega Game – Half Complete:

https://www.beastsofwar.com/project-entry/1410966/


Omaha Mega Game: The Home Stretch:

https://www.beastsofwar.com/project-entry/1411583/


Guns Fall Silent on Omaha – It Is Finished:

https://www.beastsofwar.com/project-entry/1411956/

Clowning around with SSI Classic: "Allied General"

Tutoring 7
Skill 7
Idea 7
1 Comment

Wednesday night we had a fun stream where we dusted off an old classic, SSI’s 1995 classic “Allied General,” sequel to “Panzer General,” more recently re-launched as a fan remake: “Panzer General Forever.”

This is a casual, fun, “operational-lite” wargame where players can recreate great campaigns in World War II.

In this stream we did the Allied invasion of Sicily in July 1943 (Operation Husky – Patton’s 7th Army, Montgomery’s 8th Army, both part of Alexander’s Fifteenth Army Group).

Panzer / Allied General allows the player to rename his units and build up their experience and equipment over time.  So I started this stream with all units renamed and “commanded” by members of our Sitrep / OTT community!

Check it out and see if we have what it takes to put the first crack in “Festung Europa!”

Community Wargame - Rasmus v. Oriskany

Tutoring 7
Skill 8
Idea 8
No Comments

Here’s a YouTube replay of Sunday’s Panzer Leader 1940 game between myself and community member Rasmus, in his first proper game in the Panzer Leader system.

This was a rough approximation of part of the Battle of Merdop, 13 May 1940, a  rare “meeting engagement” between major formations of French and German armor, pitting battalions of the Somua S-35 against the PzKpfw-IIID.

If you want to skip the historical background, preview, deployment, and initial movement, the first kill comes at 29:20.

Enjoy!

LIVE STREAM TODAY 7PM UK / 2PM EAST US

Tutoring 6
Skill 7
Idea 7
No Comments

We’ll be streaming Panzer Leader with the community live today at 7PM UK / 2PM East US time. We hope to have a new Panzer Leader player from the community with us, and introduce him in detail to this “command tactical” classic.

A small, entry-level scenario of a rare “tank on tank” meeting engagement that took place when elements of 4th Panzer Division (XVI Motorised Corps) ran into 3rd DLC (Division Legere Mechanique – part of Prioux’s Cavalry Corps) in central Belgium.

The French couldn’t often meet the Germans on equal terms during the May 1940 campaign, but this was one of the exceptions!

We hope to see some of you there.

SITREP TWITCH

SITREP YOUTUBE

Custom Counters for Community Download - Panzer Leader 1939-41 Counter Sets

Tutoring 8
Skill 8
Idea 8
5 Comments

More Panzer Leader 1940 counters for community use – French in 1939-1940.

These can be used for Panzer Leader scenarios not only in the Battle of France in May and June 1940 (Case Yellow and Red) – but also France’s Rhineland invasion of 1939, and French participation in the Norway campaign of April, 1940.

Oh, and honestly, SOME of these units can also be used as Vichy French colonial battles like Syria in 1941, Madagascar in 1942, and even Morocco in 1943.

Low res preview - French Early War Infantry, Artillery, TransportLow res preview - French Early War Infantry, Artillery, Transport
Low res preview - French Early War Armor, Light Combat VehiclesLow res preview - French Early War Armor, Light Combat Vehicles

Custom Counters for Community Download - Panzer Leader 1939-41 Counter Sets

Tutoring 7
Skill 8
Idea 9
No Comments

More Panzer Leader 1940 countersets for community use – Belgians in 1940.

Have a great weekend!

Here is a low-res preview of the Belgian army 1940 set.  The .pdf above has the full-res version.Here is a low-res preview of the Belgian army 1940 set. The .pdf above has the full-res version.

Custom Counters for Community Download - Panzer Leader 1939-41 Counter Sets

Tutoring 10
Skill 10
Idea 10
10 Comments

Hello, everyone.  So as I’ve been uploading Panzer Leader 1940 videos, people have been commenting on some of the custom counters I create for these games.  People are also asking whether these counters are available for download.

Normally I reply to such inquiries with a polite “thank you for your support, but I don’t really play Panzer Leader in a physical format, so traditional .pdf countersheets aren’t usually a thing I put together …”

However, people have asked now here on OTT private message, my personal e-mail, YouTube, and Boardgame Geek.

So I have expanded the counter sets and created printable .pdfs people can download and use if they wish.

If nothing else, maybe crosslinking to this project will get people from our YouTube and BGG community to check out OTT.  😀

Here is a low-res preview of the German Infantry, Artillery, and Transport counter set.Here is a low-res preview of the German Infantry, Artillery, and Transport counter set.
Here is a low-res preview of the German Armor and Aircraft counter set.Here is a low-res preview of the German Armor and Aircraft counter set.

BLITZKRIEG IN THE WEST – VIDEO BATTLE REPORT – P3

Tutoring 7
Skill 7
Idea 6
2 Comments

Part Three of our Panzer Leader replay of the 10 May scenario, originally played on the 80th Anniversary of the beginning of the “Case Yellow” Blitzkrieg in the West.

The game recreates the initial contact between forward elements of 1st Panzer Division / XIX Motorized Corps and the Belgian 1st Chasseurs d’Ardennais / Group Keyaerts. Furthermore (and just to get some French armor on the table), we also imagine forward elements of French 5e Division Légère de Cavalerie (DLC, Light Cavalry Division) joining the battle. Although Belgian resistance and local French counterattacks have resulted in frustrating delays and steep casualties for the Germans, the invaders have finally regained momentum and are bulldozing Allied units before them. The only question is . . .

. . . is it already too late?

It’s the classic “historical asymmetrical” scenario, where the attackers have all the advantages in firepower, support, mobility, and resources … but also carry the burden of victory.

The Germans have to take all five objective hexes by the end of Turn 10.

If even one objective hex remains contested by the end of the game, the Allies technically win, on account of German “blitzkrieg tempo” hampered to the point where the can’t take subsequent objectives later in the day.

This would give additional Allied forces more time to mobilize overnight.  More defending forces (and better organized defending forces) means MORE lost time, which means MORE enemy mobilization, which in turn means MORE lost time …

In offensives like this, lost time at the beginning of a campaign really has a way of snowballing toward ultimate loss of operational momentum and eventual failure.

BLITZKRIEG IN THE WEST – VIDEO BATTLE REPORT – P2

Tutoring 7
Skill 7
Idea 6
No Comments

May, 1940.  Spearheads of German 1. Panzer Division (XIX Motorized Corps, Panzer Group Kleist, Army Group “A”) have crashed through the Ardennes region of Belgium.

They are met by screening elements of the Belgian 1st Chasseurs d’Ardennais Division, trying to hold narrow woodland roads and river crossings.

Historically, the Belgians held as long as they could and then fell back, awaiting French reinforcement per the Allied “Dyle Plan.”

But the French units in this region of southern Belgium (5e Division Légère de Cavalerie, reporting directly to 2nd Army) were delayed by bad coordination and German bombing of communication and lines of transport.

This game imagines that the Allied Dyle Plan worked a little better, and forward elements of French 5th DLC made it to the line of contact in time to help the Belgian initial defense.

It’s a fun way to get three factions on a Panzer Leader table all at once!

Part 2 of 3.  Part 3 should be up later this weekend.

Assault on Claudine 5 - Live Stream

Tutoring 7
Skill 7
Idea 6
3 Comments

Good morning, everyone.

Later this afternoon we’ll be hosting a live game featuring “Oriskany” and “Yavasa.”

We’ll be using Barry Doyle’s Valor & Victory to recreate one of the final assaults (May 6-7, 1954) of the Viet Minh against the French Foreign Legionnaires and Paratroopers holding the doomed airfield of Dien Bien Phu.

Culminating a months-long siege, this climax to the First Indochina War would end the conflict and spell the end of the French Empire in Southeast Asia. Shortly afterwards, the Americans would find themselves embroiled in this troubled region, leading to what we remember as the Vietnam War.

Join us today at 5PM UK time for what we hope will be an epic night-assault game of desperate, point-blank infantry combat!

SITREP PODCAST TWITCH

SITREP PODCAST YOUTUBE

The map for our game today.  Hexes are 15 meters (6 inches at 15mm, a little under one foot at 28mm).  Trenches, wrecked bunkers, ride paddies, barbed wire, and some woods to the east.  The map for our game today. Hexes are 15 meters (6 inches at 15mm, a little under one foot at 28mm). Trenches, wrecked bunkers, ride paddies, barbed wire, and some woods to the east.
French force, including French Foreign Legion.  Looking at the 13th Demi-Brigade, it's pretty bad when four counters plus a light machine gun (23 men) represents the survivors from an entire BATTALION.  Welcome to Dien Bien Phu.French force, including French Foreign Legion. Looking at the 13th Demi-Brigade, it's pretty bad when four counters plus a light machine gun (23 men) represents the survivors from an entire BATTALION. Welcome to Dien Bien Phu.
Two BATTALIONS of Viet Minh (18th and 79th, of the 102nd Regiment / 308th Division).  Presented at 2/3 strength since a previous assault by these units was already repulsed earlier that night.Two BATTALIONS of Viet Minh (18th and 79th, of the 102nd Regiment / 308th Division). Presented at 2/3 strength since a previous assault by these units was already repulsed earlier that night.
French set up.French set up.
The Viet Minh first movement and opening artillery barrages onto the southern and western table edges.  CHECK OUT OUR LIVE STREAM AND SEE HOW THIS GAME SHAKES OUT! The Viet Minh first movement and opening artillery barrages onto the southern and western table edges. CHECK OUT OUR LIVE STREAM AND SEE HOW THIS GAME SHAKES OUT!

Live Stream - 5PM UK Time - Panzer Leader (Battle of Hannut)

Tutoring 10
Skill 9
Idea 9
2 Comments

Good morning, everyone.

Yesterday we featured a live stream recreating part of history’s first “true” tank battle.  This was the Battle of Hannut, starting on May 12, 1940, part of the shattering German Blitzkrieg of the West.

As General Hoepner’s XVI Motorized Corps spearheaded German 6th Army’s drive into northern Belgium, Belgian resistance was hopelessly outmatched and crumbled before them.  Following mobilization and response plans, French mechanized units entered western Belgium, intending to meet up with the retreating Belgians and combine to form a unified line of resistance against the Germans.

But the Belgians in this sector weren’t falling back.  They’d been overrun.  So the French, having not met the Belgians falling back, had no idea their Cavalry Corps (2nd and 3rd Division Légère Mécanique) was about to collide with Hopener’s XVI Motorized Corps, namely 3rd and 4th Panzer Divisions.

In a wild melee that largely surprised both sides, Prioux’s French Cavalry Corps and Hoepner’s XVI Motorized Corps rammed full speed into each other in what would become the Battle of Hannut, running from May 12-13, 1940.  In all, almost 1,000 AFVs (tanks, armored cars, halftracks) would be engaged between the four opposing divisions, making this the first time actual tank formations would square off in open combat.

SITREP PODCAST TWITCH

SITREP PODCAST YOUTUBE

The overall map, showing the corridor running east to west between the southern outskirts of Hannut and the Mehaigne river.  Hexes are 200 meters.  The overall map, showing the corridor running east to west between the southern outskirts of Hannut and the Mehaigne river. Hexes are 200 meters.
French and German forces.  Yes, the Germans seem to have a lot of tanks.  The Germans DO have a lot of tanks.  This nearly full OOB for two German Panzer Regiments, back in the days when Panzer Divisions were still built around a full brigade.French and German forces. Yes, the Germans seem to have a lot of tanks. The Germans DO have a lot of tanks. This nearly full OOB for two German Panzer Regiments, back in the days when Panzer Divisions were still built around a full brigade.
Close look at some of the French Armor.  In short, we have two-three companies of the 13th Dragoons (here is where I was a little generous with the French).  Then the 2nd Cuirassiers Regiment (four battalions, two of Somua-35s and two of Hotchkiss-39s).  First Battalion of the 11th Motorized Dragoons will be deployed forward in holding positions in Thisnes and Crehen, while the armor and motorized artillery (76th Rgt) comes in from the west.Close look at some of the French Armor. In short, we have two-three companies of the 13th Dragoons (here is where I was a little generous with the French). Then the 2nd Cuirassiers Regiment (four battalions, two of Somua-35s and two of Hotchkiss-39s). First Battalion of the 11th Motorized Dragoons will be deployed forward in holding positions in Thisnes and Crehen, while the armor and motorized artillery (76th Rgt) comes in from the west.
Here is a closeup of the German armor.  While it may look formidable, notice that 18 out of the 48 (over a THIRD) of the German panzer platoons are the practically useless PzKpfw I.  ANOTHER 18 platoons are the PzKpfw II, which was fast and decently armored for the time but again, largely useless against heavier French armor.  Again, that's the history.Here is a closeup of the German armor. While it may look formidable, notice that 18 out of the 48 (over a THIRD) of the German panzer platoons are the practically useless PzKpfw I. ANOTHER 18 platoons are the PzKpfw II, which was fast and decently armored for the time but again, largely useless against heavier French armor. Again, that's the history.
Part of the situation at the end of Turn 3.  Air strikes!  Overruns!  COUNTER-overruns!  God, how I love early-war Panzer Leader!  You could never get away with these kinds of maneuvers in 1944 ... Part of the situation at the end of Turn 3. Air strikes! Overruns! COUNTER-overruns! God, how I love early-war Panzer Leader! You could never get away with these kinds of maneuvers in 1944 ...

Now granted, this was supposed to be a live game and with some internet issues with my player, we weren’t able to have an opponent-vs-opponent live game, but as long as the Excel file is saved, the board is always set up and we can always take another swing at this later!

Panzer Leader Video Battle Report, P1

Tutoring 8
Skill 8
Idea 7
No Comments

Playtesting some slight updates to the scenario played live with Dylan on last Sunday’s stream. Now the spearhead of 1st Panzer Division (XIX Panzer Corps, Panzer Group Kleist) has a little off-board artillery from the division’s integral 73rd PzArtillerie Rgt.

Just two batteries of 10.5 cm howitzers.

How much difference could that POSSIBLY make?

Highlights from Sunday's Game

Tutoring 9
Skill 10
Idea 9
3 Comments

Here are just a few snapshots from Sunday’s game between @elessar2590 and I.

Again, the whole “report” was recorded on video HERE.

But just a few spots are highlighted below.

Here are the Germans entering from the Luxembourg border on the east side of the map, representing the leading elements of 1st Panzer Division (XIX Motorized Corps, Army Group “A”). These represent ELEMENTS of 1st Panzer Regiment, 1st Schützen Regiment, 4th Aufklärungsabteilung (reconnaissance detachment / battalion), 37th Panzerjäger  Abteilung (antitank detachment / battalion).  This is the situation at the end of German Turn 1, when they have contacted the main line resistance for the Belgian 1st Chasseurs Ardennais Division.Here are the Germans entering from the Luxembourg border on the east side of the map, representing the leading elements of 1st Panzer Division (XIX Motorized Corps, Army Group “A”). These represent ELEMENTS of 1st Panzer Regiment, 1st Schützen Regiment, 4th Aufklärungsabteilung (reconnaissance detachment / battalion), 37th Panzerjäger Abteilung (antitank detachment / battalion). This is the situation at the end of German Turn 1, when they have contacted the main line resistance for the Belgian 1st Chasseurs Ardennais Division.
Action starts off right away as @elessar2590 hooks a platoon of Belgian rifles and a section of Maxim HMGs back through the woods in the north and “close assaults” some of my light armor trying to squeeze around the extreme Belgian left.  Please remember this is the Ardennes and these cuts through dense treelines are very narrow.  Normally in Panzer Leader all you have to do to avoid this is maintain a distance from treelines of at least 1 hex (150 meters).  But that wasn’t possible here.  Also, those German light tanks and armored cars were able to fire as the Belgians charged, I just whiffed the roll with a “6” on opportunity fire.  So I guess these German panzer recon troops  were still half asleep from their drive through Luxembourg.  Also, note how Elessar2590 hooked back in such away so his advanced was screened from the follow-up stack of German light armor, so they couldn’t provide additional fire support against the charge.Action starts off right away as @elessar2590 hooks a platoon of Belgian rifles and a section of Maxim HMGs back through the woods in the north and “close assaults” some of my light armor trying to squeeze around the extreme Belgian left. Please remember this is the Ardennes and these cuts through dense treelines are very narrow. Normally in Panzer Leader all you have to do to avoid this is maintain a distance from treelines of at least 1 hex (150 meters). But that wasn’t possible here. Also, those German light tanks and armored cars were able to fire as the Belgians charged, I just whiffed the roll with a “6” on opportunity fire. So I guess these German panzer recon troops were still half asleep from their drive through Luxembourg. Also, note how Elessar2590 hooked back in such away so his advanced was screened from the follow-up stack of German light armor, so they couldn’t provide additional fire support against the charge.
More bad news for the Germans comes when I hit the Belgian center proper on Turn 2.  As I approach the town of Martelange (Belgian / Luxembourg border), Elessar pulls back from the first hex of the town on Turn 1.  This gives me a foot hold in the town for free, but also compels me to advance into the town and engage the Belgians at close range in a street fight on Turn 2.  Long-range fire support isn’t nearly as easy all of a sudden.  In a rush and not really paying attention, I send in the PzKpfw- IVDs and PzKpfw-IIIs to bulk up the “assault hex’s” defense against anticipated Belgian infantry attack (those Mark IVs will do great with point-blank HE fire, but the Mark IIIs are practically useless in this fight).  What I SHOULD have done is call in off-board artillery fire, but those batteries were left out of this game for purposes of the stream.  This aside, what I also should have done was backed off with the tanks and sent in infantry, allowing the tanks to employ fire support from a different angle.  But again, I was in a rush and not paying attention.  Elessar’s 47mm ATGs and 13mm Maxim TuF HMGs pinned down by Mark IVs, and then he followed up with a great roll on a converging “CAT” (close assault tactics) battle.  Basically, it was the “Belgian Prequel” for Saving Private Ryan, infantry mass-assaulting German tanks driving blithely through close city streets.  There go two platoons of Mark IVs ... ten tanks in all.  Ooof.  Boss-man Guderian will NOT be happy. =(More bad news for the Germans comes when I hit the Belgian center proper on Turn 2. As I approach the town of Martelange (Belgian / Luxembourg border), Elessar pulls back from the first hex of the town on Turn 1. This gives me a foot hold in the town for free, but also compels me to advance into the town and engage the Belgians at close range in a street fight on Turn 2. Long-range fire support isn’t nearly as easy all of a sudden. In a rush and not really paying attention, I send in the PzKpfw- IVDs and PzKpfw-IIIs to bulk up the “assault hex’s” defense against anticipated Belgian infantry attack (those Mark IVs will do great with point-blank HE fire, but the Mark IIIs are practically useless in this fight). What I SHOULD have done is call in off-board artillery fire, but those batteries were left out of this game for purposes of the stream. This aside, what I also should have done was backed off with the tanks and sent in infantry, allowing the tanks to employ fire support from a different angle. But again, I was in a rush and not paying attention. Elessar’s 47mm ATGs and 13mm Maxim TuF HMGs pinned down by Mark IVs, and then he followed up with a great roll on a converging “CAT” (close assault tactics) battle. Basically, it was the “Belgian Prequel” for Saving Private Ryan, infantry mass-assaulting German tanks driving blithely through close city streets. There go two platoons of Mark IVs ... ten tanks in all. Ooof. Boss-man Guderian will NOT be happy. =(
Turn 3, and here come the French (lead elements, 5e Division Légère de Cavalerie - 5th Light Cavalry Division).  Now historically these guys didn’t arrive until Day 3, long after these forward Belgian units had been virtually annihilated.  But for a fun stream we included them here anyway.  Just in time to, because the Germans have shaken off their bloody noses of Turn 1 and 2.  The Belgian left wing is gone, the Belgian center is cracked (but not quite collapsed YET),  and the Belgian right is fatally outflanked.  But they’ve delayed and blooded the Germans far more than should have been possible.  Turn 3, and here come the French (lead elements, 5e Division Légère de Cavalerie - 5th Light Cavalry Division). Now historically these guys didn’t arrive until Day 3, long after these forward Belgian units had been virtually annihilated. But for a fun stream we included them here anyway. Just in time to, because the Germans have shaken off their bloody noses of Turn 1 and 2. The Belgian left wing is gone, the Belgian center is cracked (but not quite collapsed YET), and the Belgian right is fatally outflanked. But they’ve delayed and blooded the Germans far more than should have been possible.
First, the butchery in the center.  Where German panzers have failed, Stukas and infantry (converging from two directions and bolstered by “pionier” engineers) have smashed the Belgian antitank battery, antiaircraft battery, HMGs, and two platoons of infantry. Fire from German 8.0 cm “grenatenwerfer” mortars and 7.5cm infantry guns have also helped.  Some 200 troops are killed, wounded, or captured here, along with 12 guns.  But still the Belgians cling to the center of town, pinning down one platoon of German infantry, their T-13 tank destroyers wrecking a handful of PzKpfw Is, and their Headquarters “CP” stubbornly refusing to die.First, the butchery in the center. Where German panzers have failed, Stukas and infantry (converging from two directions and bolstered by “pionier” engineers) have smashed the Belgian antitank battery, antiaircraft battery, HMGs, and two platoons of infantry. Fire from German 8.0 cm “grenatenwerfer” mortars and 7.5cm infantry guns have also helped. Some 200 troops are killed, wounded, or captured here, along with 12 guns. But still the Belgians cling to the center of town, pinning down one platoon of German infantry, their T-13 tank destroyers wrecking a handful of PzKpfw Is, and their Headquarters “CP” stubbornly refusing to die.
In the north, the Belgian left wing is gone.  Although two platoons of my light armor failed to rally from earlier Belgian close assaults and were then blown up by continued assaults on Turn two, follow-on German light armor pinned down a full squadron (company) of Belgian cavalry (150 mounts) that tried to counterattack.  None of these rallied and were then butchered by sustained German 2.0cm autocannon fire.  The same fate was share by Belgian infantry and Maxim HMG sections, already mauled by Stuka air strikes.  The way is thus open for a route around the north, across that Ardennes stream and seizing the first German objective hex.  But is it too late?  Already the French cavalry of 5th DLC has arrived.In the north, the Belgian left wing is gone. Although two platoons of my light armor failed to rally from earlier Belgian close assaults and were then blown up by continued assaults on Turn two, follow-on German light armor pinned down a full squadron (company) of Belgian cavalry (150 mounts) that tried to counterattack. None of these rallied and were then butchered by sustained German 2.0cm autocannon fire. The same fate was share by Belgian infantry and Maxim HMG sections, already mauled by Stuka air strikes. The way is thus open for a route around the north, across that Ardennes stream and seizing the first German objective hex. But is it too late? Already the French cavalry of 5th DLC has arrived.
In the far south, my panzer element that outflanked the Belgian right has also run into some terrain problems, delaying them just enough to where they French have narrowly won the race to this village crossroads objective hex.  Looks like a little tank skirmish is in the making here? In the far south, my panzer element that outflanked the Belgian right has also run into some terrain problems, delaying them just enough to where they French have narrowly won the race to this village crossroads objective hex. Looks like a little tank skirmish is in the making here?

Sadly, this was as far as we got.  Although the Belgians are mauled and on the brink of collapse, they lasted longer and cost the Germans more than they ever should have.  Thus, the Germans are really NOT in a position to engage the French for the last two or three objectives hexes.  Crazy as it sounds, this is an Allied victory as Guderian’s larger-scale timetable for 1st Panzer Division and XIX Motorized Corps in general is now totally thrown off.  They’ll be fighting here for the rest of the day and into tomorrow, by which time Guderian had expected to be halfway to Verdun.


Great game from @elessar2590!

Supported by (Turn Off)