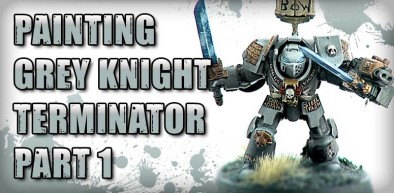
Painting Grey Knight Terminator Part 1
April 7, 2011 by beerogre
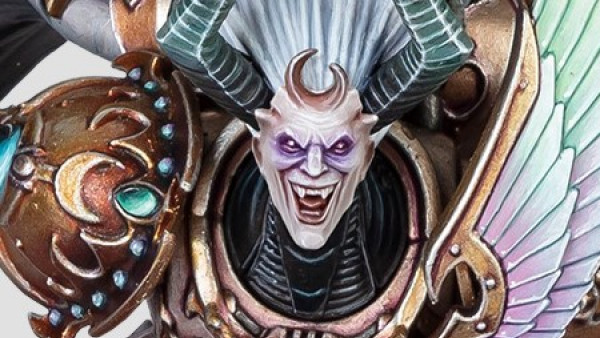
Beasts of War's new painting guru, Romain. Paints a Warhammer 40K Grey Knight Terminator with his unique Gallic flair.
This is part one of three so remember to check out the other videos.
Other Parts
BoW Justin
Supported by (Turn Off)
Supported by (Turn Off)
Supported by (Turn Off)












This is a three parter.
Big well done to @elromanozo and we’d like you guys to help us welcome him aboard the BoW team 🙂
excellent work, I aprove!
I congratulate on you on your ascension to a member of the BOW team,
I look forward to seeing a great many videos from you in the time to come.
Its really good, get the second one up!
Great Job! He has one of those smooth voices that suits the quietness of a painting video on top of being very skilled, roll on part 2!
He’s so adorable lets keep him!
lol I think we will he he
Now where did i put my Jar 😉
He really reminds me of Bob Ross. 😀
Thanks ! I’m glad I don’t have that hairdo, though…
BoW Romain
———-
Edit – Fixed that for ya! 😉
BoW Andy
I think you could pull it off though, Although all that hair may get in the way of the light when you’re painting.
Thats exactly what we were saying in the studio during filming lol
And here we have a happy force weapon.
He reminds me of a french Justin………….
Justin doing a painting tutorial… Now THAT I’d like to see…
BoW Romain
Next time on 3 colors up;
SPEED BATTLE BoW Justin Vs. BoW Lloyd!
-.- um…. yea i think we all know how that one would end……
dulux marines…… GO…!!!!!
@elromanozo :
Great job & great technique bro! Thanks for doing this for us and thanks BoW for GK Week!
Believe me, it was my pleasure !
BoW Romain
You did a top class job on it Romain 🙂
BoW Lloyd
That undercoating system is called preshading… not bad nice to see vids for army painting other than super detail painting.
The name varies, actually… To the best of my knowledge, the technique was first applied by Thomas David for the studio paints of the Hell Dorado range, and called “Pré Ombrage”… Pre-shading indeed, only in french. But of course, many painters have done this, probably before, never bothering to give it a name… Still, it’s cheap, great, it saves a LOT of time, and it’s something you can do when you don’t have an airbrush. It’s now the main technique used by the Privateer Press painters in their tutorials as well, in No Quarter magazine, and has been since the… Read more »
I think you misunderstand me I think it’s good to have a fast basic paint for army models. You can always spend more time painting but personally I put more time in the charator models. I can spend about 6-20 hour on each but army ones about 1-2 each at most. I do go back some times and add a bit here and there. But not that often.
I look forward to more vids from you.
Chuffy
The grey actually looks a lot more effective than the metallic grey knights we’re used to I think. Unfortunately I can’t paint worth a damn so I’ll probably stick to dry brushing everything silver, picking out the gold bits and hoping nobody notices…
You can achieve surprisingly good results by spraying boltgun metal (or equivalent), picking up the gold details with a brush, then using a dip or a simple black wash, and then dry-brushing the whole thing with mithril silver…
Cheap, cost-effective, and surprisingly nice.
But you might want to try your hand at some of the tricks I give out in the vids, because it’s surprisingly easy. Just do it one step at a time, and don’t be afraid to try new things, that’s the only way to make progress !
By the way, I think the grey I used is the darker version of Space Wolf Grey.
Ironic, isn’t it ?
BoW Romain
You are right!
I used this color for the my Space Wolfs. This Grey fits much better than the Space Wolf Grey. My Space Wolfs look a little bit like your Grey Knights. 🙂
That was awesome, great to see new proper 3 colours up!
Awesome job so far Romain!
I told you not to give up hope…
BoW Romain
Must admit though really enjoyed the frist part of the painting tutorial and looking forward to parts two and three. Great style of painting you have there Elromanozo.
Great work so far, just one question. It looks like the final step of the basecoating (the white) leaves little bumps of paint all over the model, wouldn’t it be better to drybrush/overbrush the white onto the places it’s needed (possibly even airbrushing for those who use them), giving a smoother finish? I ask because I’ve had problems before with spray on basecoating leaving an undesired “bumpy” finish.
Can’t wait to see the finished product!!
“Bumps” or little white drops of paint can come from two sources… One : A paint spray that’s not shaken enough. Two, a paint spray on which your finger doesn’t press enough, and which splutters little droplets as a result. Even then, it’s usually all right, because it’s covered with the other coats of paint… You will see about that later on : the grianiness just disappears on this mini. It’s all right to end up with a grainy finish. It doesn’t make “bumps”, it just makes tiny tiny dots, sort of a sandy finish. The purpose of a single… Read more »
excellent debut Romain!! very impressive work!! could watch & listen to you paint all day…..so please tell lloyd to stop with editing and just play right through…id watch regardless of the length plus the jumping about makes it very hard to follow which looks like a very classy and quality process
Lloyd didn’t do that edit. I assure you if he did, you wouldn’t know it was edited at all. 😉
BoW Andy
-.- critics they’re everywhere… 🙂
I wish he would stop making that ‘tsk’ sound when he talks… I couldn’t get through the whole video as it was just very annoying.
Sorry, this was my first. I promise you i’m doing it less and less !
don’t worry about it,
your video was epic enough I would be hard pressed to note such a small complaint.
By the end I was definitely won over by this. The blending and shifting gradients of color was very nice, especially when I was expecting a lot of dry brushing. I love dry brushing and all, but I’ve never gotten the more steady transitions from it, and it looks so effortless too. I might have to pick up a termy box just to try this out, and I like the look without metallics too. I’ve seen the preshading trick on jacks but only in pictures, so its nice to get a look at the technique in action. Hope this means… Read more »
Finally another 3 up, I’ve been waiting forever and it was well worth the wait. I miss John, but Romain you more than make up for his absence. Awesome tut cant wait for the rest =)
At first i thought Romain was watching some kind of Posh English mouse, but as he started putting paint to the very dull Grey Knight. I realized if he could make that model come alive as more and more paint went on, then this guy has to be good at what he’s doing.
So overall i like Romain he’s cool and collected and thats great, keep up the good work guys. 🙂
good so far 🙂
This series of videos inspired me to build my first army. I got some kolinsky Sable brushes, a wet pallete, vallejo paints, black, grey, and white spray paint. Romain is awesome. When I am done building my army, I am using this guide to paint it! Seriously though, Romain is talented, entertaining, and funny. I can’t wait to try these techniques out!
any chance of getting this one added back to the youtube channel? this is my favorite painting tutorial I have ever watched, but the last place it was hosted was agonizingly laggy.
What are the exact colors that you used for this? Also, are they the model line or the game line?
During the video, I always quote the exact tones that I use. I’m sorry you missed it !
Also, I don’t know what you mean by “game line” and “model line” : GW only has one line, and it’s all for their games.
is there anywhere we can find the tutorials?