How I ‘Fixed’ The Space Marine Stormtalon
July 14, 2013 by crew
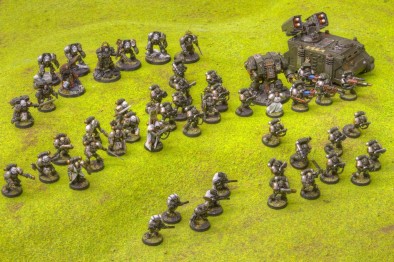
The picture below is of my Space Marine army, The Emperor's Blades. They had been doing rather well in 5th Edition and I was quite happy with their performance. Then came along 6th Edition and everything changed. At first I refused to add any flyers to my army but after one particularly brutal pummeling by a pair of Vendettas it became apparent to me that I would need to add some kind of aerial support were they to enjoy any kind of success on the battlefield.
Now at this time (before the Death from the Skies supplement had been released) my only real option was a Stormtalon. It was that or go down the Allies route. The problem is I HATE the Stormtalon model. To my mind it resembles a rather fat bumblebee, a comical and completely atypical design choice that was a real misstep by Games Workshop. Of course this is ENTIRELY my own opinion and one that I fully understand may not be shared by others. There are probably plenty of people who really like the Stormtalon (you poor deluded fools) and that is just fine. It was clear to me however that if I were to finally submit to having these models amongst the forces of the Emperor's Blades modifications would need to be made.
The Emperor's Blades. Well, all that’s painted anyway. Not 6th edition proficient.
First problem with the Stormtalon, it’s too chibi! Space Marine vehicles are not meant to look cute, they are meant to be death dealing devices of mass destruction. My main aim was to make the model more ‘horizontal’, to streamline it and make it look more like what I felt a gunship or interceptor should resemble. After having a look at the model itself and a number of conversions around the internet I felt that nobody had really managed to get it looking quite the way I had wanted. Still I did take inspiration from a number of sources and there are some great versions of the Stormtalon out there.
Step 1:
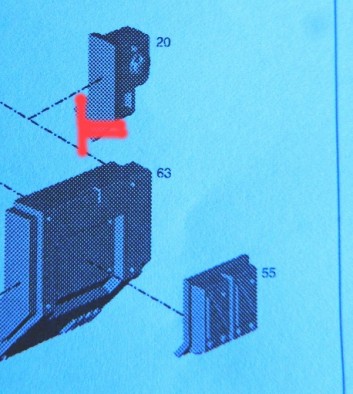
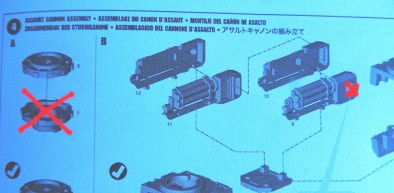
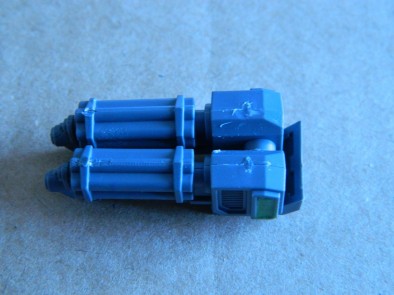
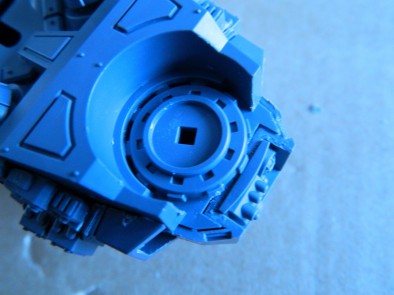
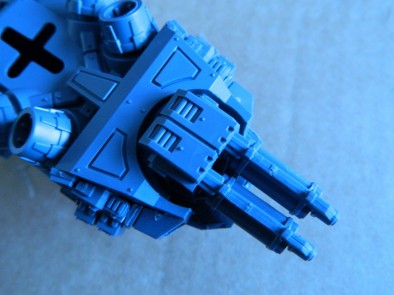
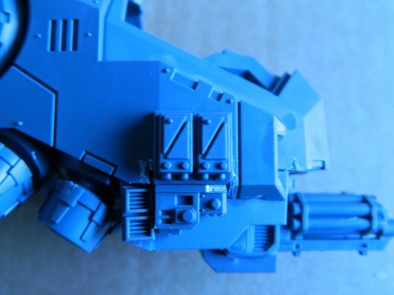
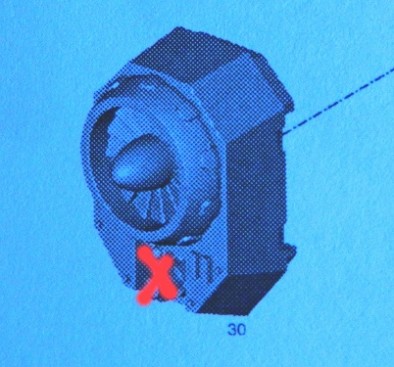
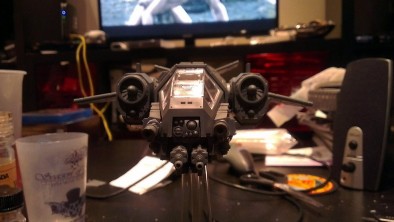
Step 1 was to sort out that bottom turret mount. It was far too bulky and influenced the silhouette of the Talon far too much. It would just need to be mounted up in the hull more and not hang down so far, so a little hacking away at the mounting gave me a place to mount the assault cannon (see picture). Small problem however, the housing for the assault cannons was far too big to fit. So off that went. I used just the two assault cannons themselves but turned them round and trimmed the bits that caused a gap between them. There was a rather awkward looking join clearly visible but the ammo hoppers for the heavy bolters covered those up nicely. Of course the parts don’t move anymore but I was never a massive fan of that anyway. So far so good!
First completely remove the original mounting for the turret from the Stormtalon model with cutters. The upper part of A is inverted and becomes the new mount for the assault cannons which lose their housing and are assembled and then joined inside out. A little trimming will be required here and there to attain symmetry
The new assembly for the Assault Cannons. A spot of Greenstuff and a trim on the other side tidies things up.
The New Mount for the Assault Cannons
The ammo hopper for the Heavy Bolters works well as a pseudo-housing
Step 2:
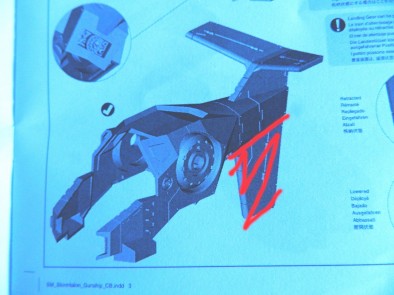
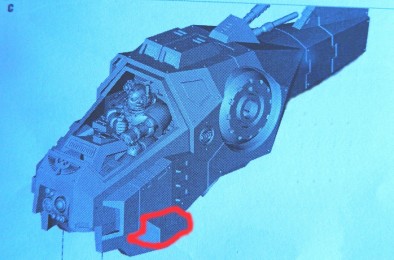
Further to my efforts to streamline the model I decided that the lower tail fin had to go. I removed it with a pair of cutters, cleaning up the ragged edges with a knife. This did leave a gap in the lower hull section that you can easily fill with Greenstuff. I felt this change improved the profile a lot but I still wasn’t happy.
That tail fin? Yeah we don’t need that, a little Greenstuff will hide the damage…..
Step 3:
Next those side pods had to go, I hated the way they just looked bolted on and the bulkiness they contributed to the model. This bit was fairly easy. First remove the pod mounting. Cutters and knife chopping away at plastic for a few minutes achieved this. Unfortunately it did leave a whacking great big hole. I didn’t really fancy Greenstuffing another section of the model so I’d have to think of something else. Thankfully the Stormtalon kit is resplendent with left over parts (especially if you are working on this conversion) so I had plenty of bitz with which to hide the hole. I think it’s a Lascannon ammo pack and the vents, but you may want to check the pictures to be sure. I feel it works well and add some nice technical detail.
More plastic butchery required here I fear…
At least two of the parts I used to hide the resultant damage. Some will require trimming.
Hole patched.
Step 4:
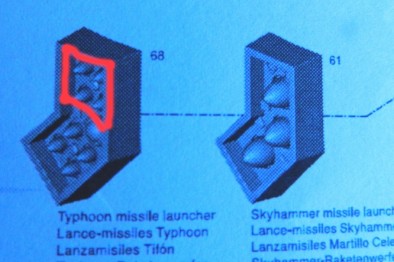
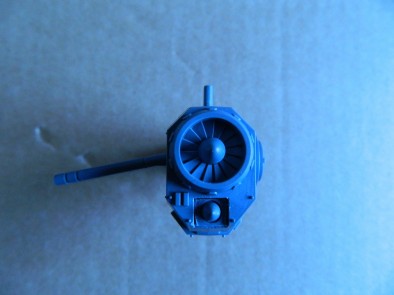
This did leave one small problem however. Where to mount the weapons? After a little head scratching and deliberation and a few false starts (I contemplated positioning the missiles on the roof - as evidenced by the missing roof vents on one of the Talons - and in the nose but neither looked right) I settled on placing the missiles under the engine air intakes. I found it best to use a clipper to remove the edges of the part and then CAREFULLY trim the remainder to size. Always aim to start out too big for the space, you can always take more off, thankfully if you get it wrong you will have a few spares.
The lascannons were mounted in the nose where the air intakes on the flanks are (a little trimming to the lascannon base is required). Now they’ll not easily magnetize but by making a plug out of greenstuff ill be able to take them in and out so I'll able to field all the different weapon load outs for the Talon.
Carefully remove the detail here to make a place to put the missiles.
…which, unless you have alternative parts you will need to cut out of here.
Et voila! That works….
So that’s it really, aside from a repair of the roof, and a few bits of tidying up here and there that’s the conversion finished. It's by no means perfect but It is something that I can live with and has certainly met my goal of making it more horizontal. I still think it will look a bit silly if you can see the power armoured pilot so ill be darkening the canopy significantly. I still haven’t got round to painting them yet though. I guess that could make for another article. I'm pretty happy with it overall especially considering it only uses parts from the kit and is a fairly quick conversion. Of course it may not be for everybody so feel free to let me know what you think. It’s what the comments section is for after all…
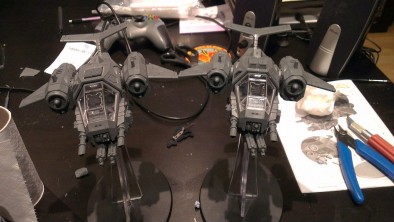
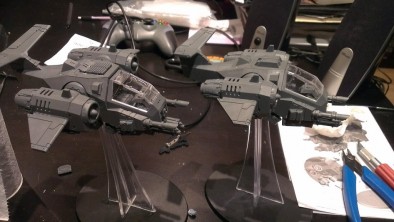
My two Stormtalons. Less Bumblebee, more Harrier Jump Jet.
Sleek and deadly, well more so than before. (in my opinion)
Allen Ward
Supported by (Turn Off)
Supported by (Turn Off)
Supported by (Turn Off)








Well, its definitely an improvement! I’m sorry, I still think the vehicle looks like arse, but it looks like a slightly more shapely one now. Good job.
Put a proppelor on top, and the problem is solved.
i really like that idea, would help explain why they have hover mode too and about the only way to make that non aerodynamic shape capable of flight
I’m sorry but chibi means “little person” or “small child” calling the storm talon chibi is a misuse of the word.
It does look like the fat baby of the Space Marine vehicle pool.
And so we called it…Cartman
I hate to be ‘that guy’ who uses Wikipedia to try and support a point, but I think its justified to use the term for a Storm Talon as the gospel of Wiki clearly states… Chibi (ちび or チビ?) is a Japanese slang word meaning “short person” or “small child.” The word has gained currency amongst fans of manga and anime. Its meaning is of someone or some animal that is small. It can be translated as “little,” but is not used the same way as chiisana [小さな] (tiny, small, little in Japanese) but rather cute. In English-speaking anime and… Read more »
Yes i was referring to the western generalization of the word as opposed to the strict Japanese meaning. To me Chibi suits the Storm Talon well with its tubby fuselage and stubby little wings. 🙂
That’s a vast improvement!
I ultimately think that the stormtalon is a flying brick! Zero aerodynamics, and ugly as sin! Awful model, and I really dislike using them, I play blood angels and really want to take one, I still have 1 in its box, I’m so reluctant to put it together until I can find a way to make it look nicer than the first one I built!
All in all tho, brilliant article Allen, congrats!
Every human flier is a un-weildly brick covered in aerodynamic no-nos.
Its kinda their thing.
Great article. Perhaps I have room in my army for a Talon or two after all…
Yeah, really like what you have done with the model, I must be in the minority because I didn’t mind the original model too much, but did think the assault cannons were a tad chunky, great job/article.
Or buy a thunder crow from PuppetsWar… It looks better, is cheaper and in tournaments will meet the same restrictions of a shrinked storm talon. Btw great conversion. When I assembled a storm talon last year I found that every alternative way to assemble it was better than the original: the storm talon is designed to maximize the uglines, aiding the conveters!
Good stuff. I couldn’t stand the stock model. This is what I did with mine. 😉
https://www.facebook.com/media/set/?set=a.496253110389107.127579.112516705429418&type=3
Looks great
Nice article. Isn’t it what this hobby is all about!? Conversion (that’s why I like my Orks)!
😉
If I ever get around to building mine storm talon I think I will use a mix of what is show in this tut and what atacam did to make it longer
Awesome conversion!! It actually looks like a plane now, not a cross breed of an Osprey and an Apache helicopter. This will be a great help to me once I get around to adding fliers to my army.
That tail just makes it look like it’s supposed to be a plane, but then you realize that it obviously would not work as one. I agree with taking off the lower fin, but I’d go further and slice off the tail completely, take the upper ailerons off and glue them back onto the top-rear of what’s left over, so there’s only a couple of mils between them and the hull. Then I’d take the wing stubs off the engine and mount them at 30 degrees under the engines. Make the whole thing something more compact and more closely resembles… Read more »
I forgot to mention that I think you did a good job, though!
Great article for modelers. However, I think this is what Freud would qualify as “the cult of the small difference”…
Sometimes, small differences make all the difference! 😉
I know you can say this in french but can you in english!? (Yeah, I live in Quebec, Canada, so my first language is french.)
I think you said it perfectly. 😀
Perhaps. I’m not a space-marine fan, so to me this basically looks like a “plane thingie” converted into an almost identical “plane thingie”. A bit like adding buttons to a napoleonic uniform to “be more specific about the regiment”.
Oh well. It IS good work, though.
Thanks! for me it was just getting something out of the kit that i could actually live with and put on the table without cringing everytime i deployed it. A more drastic conversion could most probably be acheived with a lot more work but for a quick job and using only what came in the box i reckon this is about as good as i can get, Still no looker but a bit better for sure. Now the Storm Raven on the other hand……. :p
To me it just looks Like GW tried to copy the Havoc jet-copter from G-Police. Unfortunately they did so by going off of a written description rather than a picture.
The amended sleaker version that Allen Ward posted above looks a hell of a lot better. But it’s still just adding polish a turd.
The Stormtalon truly is a hideous model.
Now paint them!
If i could paint these at work they’d be done by now, My Marines will be getting a lot of love soon hopefully 🙂
I always like seeing the multitude of ST conversions about. I was of the opinion that the existing kit just needed a good paint job and that would solve the issue. It did in my eyes when I did one for the Imperial Fists.
How does yours land? Now that you have removed the official landing skids, will you look to add some kind of retractable gear detail underneath?
I like to think they hang in a harness like a TIE fighter, After all, Landspeeders cant land either 🙂
I guess I’m the only fan of the vanilla ‘Talon. This ones nice too mind, but I prefer mine pugnacious, and flying in defiance of aerodynamics. Its is a Space Marine flier after all.
Still the “flying brick”, but really not that bad ….
Some really funny comments guys, but don’t really get it!, the talons not that bad, sure the assault cannons are a tad chunky, the missile launchers could do with been a bit smaller, so could the two engines and maybe a larger wingspan, and also slightly lengthen the rear fuselage………………… ha ha……no I really do like it.
I like that the Marine is sitting right above the assault cannons. He would just have to fly at whatever he wanted to shoot and pull the trigger. Should get a +to hit bonus for that.
Very nice model. Looks like it would fly more smooth the way you did it.
Good job, that is the best conversion of a stormtalon i have seen.
Simple changes but I think you hit it right . Only other thing would be to completely rebuild / kit bash a few models and have $175 talons. Nice job . Clean , simple , affordable , and made a noticeable change.
My wife just brought me home one from a trip, I think I’ll convert it with this in mind.