


My Attempt At Painting: Fallout Wasteland Warfare – The Tabletop Hub


Recommendations: 249
About the Project
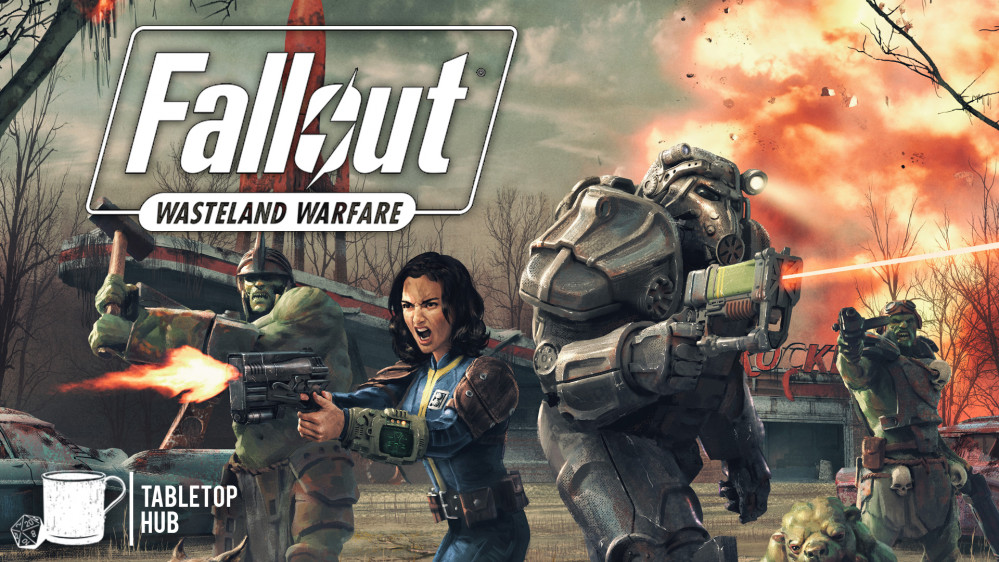
Hey everybody! Sam here, aka MrStainless, aka Sam from the Tabletop Hub. Fallout Wasteland Warfare is a game I've been super excited about for a LONG time and now that we're drawing nearer to the release in a couple of months I thought I'd put together this project to help you get inspired and motivated to paint your Fallout Miniatures! The 'My Attempt At Painting' series is a series for the amateur and beginner painter out there, I'm still a fledgling painter myself but hopefully by watching these videos and posts it'll help you progress on your journey. If I can do it, so can you!
Related Game: Fallout: Wasteland Warfare
Related Company: Modiphius Entertainment
Related Genre: Post-Apocalyptic
This Project is Active


Thankyou! - Raider Faction Core Set Giveaway
“The women of New Vegas ask me a lot if there’s a Mrs. New Vegas. Well, of course there is. You’re her. And you’re still as perfect as the day we met.“
Hey everyone! To celebrate the launch of the Raider Faction for Fallout Wasteland Warfare I’m giving away a copy of the Raider Core Set to celebrate. Equally I just want to do this as a way of saying and thankyou for the support you all have given me on my Tabletop Hub YouTube channel as I’ve gone on this journey but equally the support you’ve all given this project blog, it’s been really something.
If you want to enter the competition here is the link to where you can find it, but in the meantime I’ve got to get back to my Vault to keep painting up more mini’s:http://bit.ly/2YiE6yY

My Attempt At Painting Nora the Sole Survivor - Fallout Wasteland Warfare
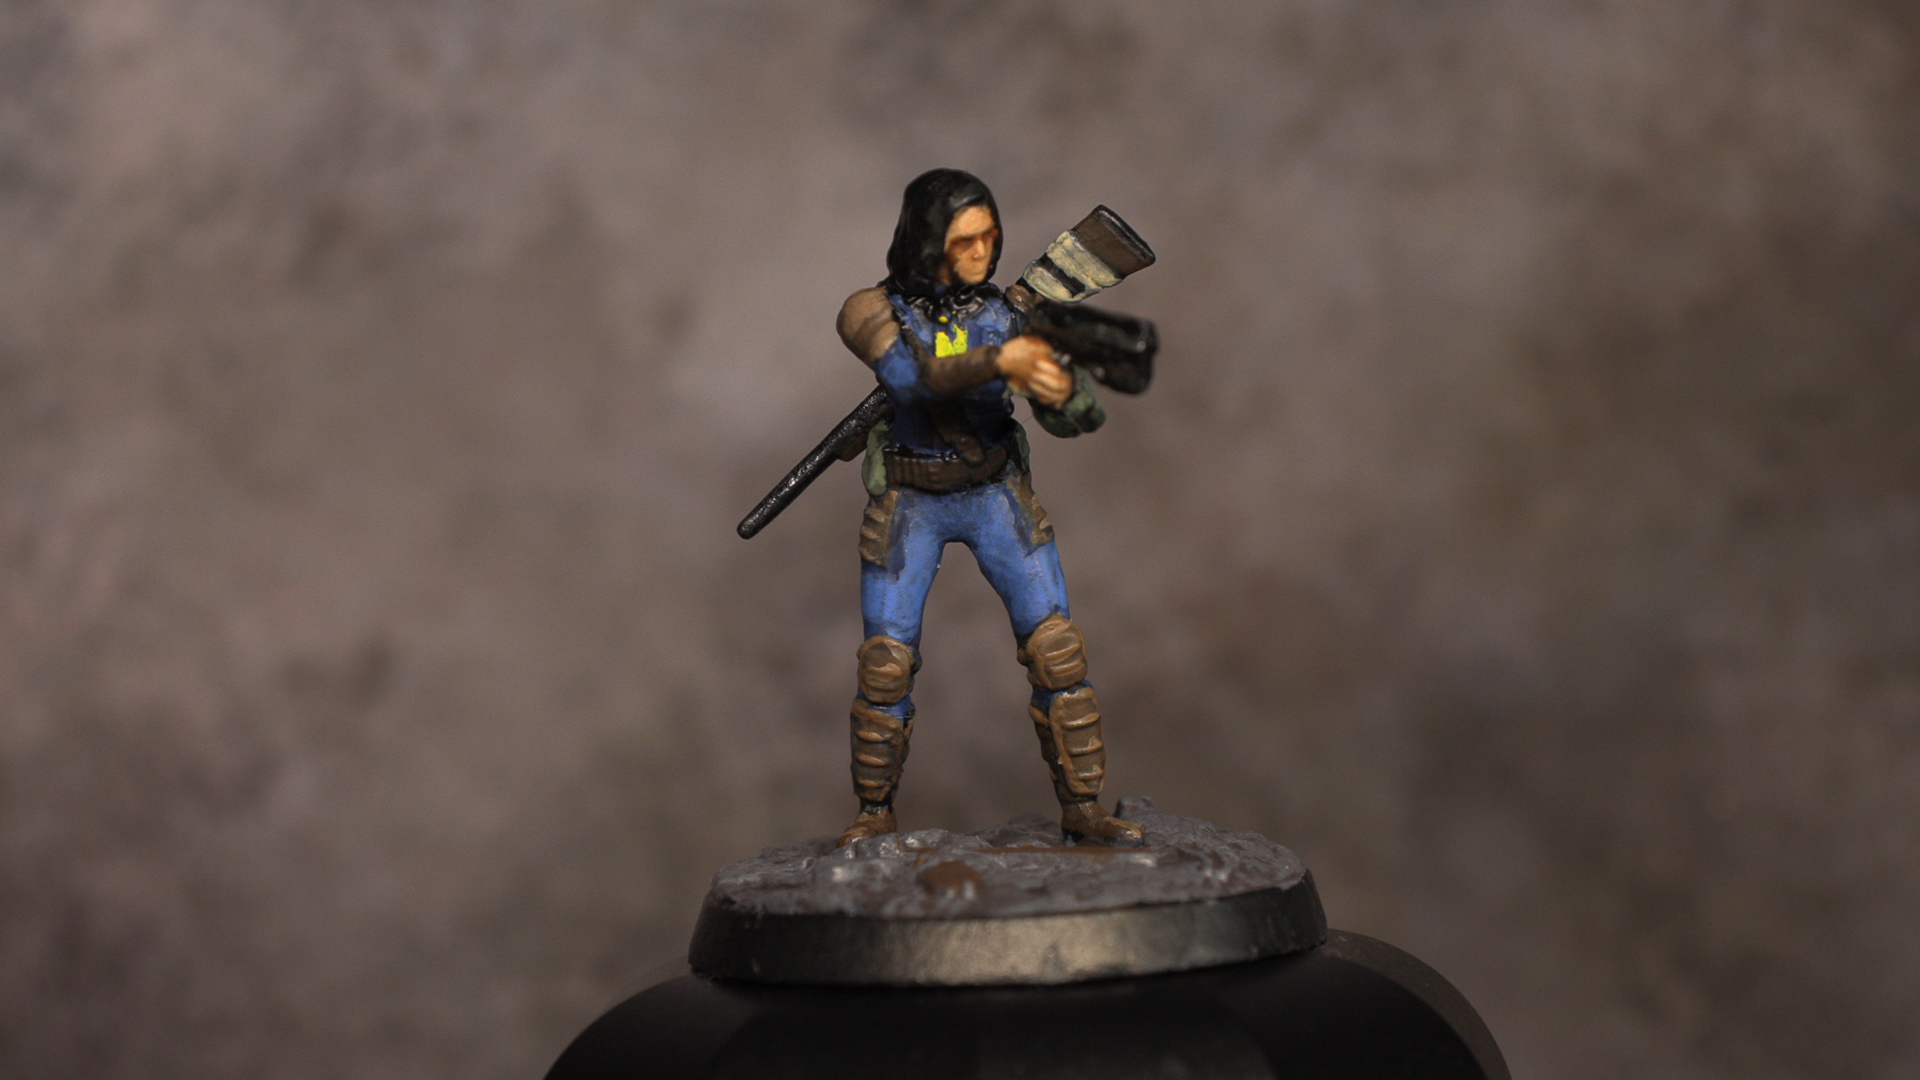
Hey everyone Sam here and I’m back painting some more Fallout Wasteland Warfare today. Now, this may be the last Starter Set miniature before we start diving into the add-ons and expansions so what I wanted to do was put together a paint scheme that was quick, simple and would look good on the tabletop. So let’s get stuck in.
First off I actually started with the base, I knew I wanted to do a bit of dry-brushing and didn’t want to get any of that on the body of the model, since this is the PVC starter set the base and model are already sealed together. So first off I took some Army Painters Dark Stone and quickly and messily covered the majority of the base. Once this was dried I then dry-brushed some Army Painters Dungeon Grey onto the stones before adding a final drybrush highlight layer with Army Painters Uniform Grey.
Then we were onto the main bulk of the model, so first off I took Army Painters Deep Blue and began painting the Vault-Tec overalls. Now in the interests of speed here you don’t need to be overly careful, so feel free to take a decent sized brush like you see me doing here and just making sure you get a nice even coating over the model.
Once this was dried I got some Army Painters Leather Brown and painted the kneepads and shoulder pads that Nora is wearing. I then took Army Painters Oak Brown and painted the wrist guards, the wood of the rifle on Nora’s back, the wooden planks on the base and also the belt and shoulder strap. The main reason I used a different colour here was simply so there’d be a bit of variety on the model itself.
Next I took Army Painters Army Green and painted the little pouches on Nora’s belt, I felt like these would likely be something that had been scavenged from a military checkpoint or something similar so I wanted to give it a kind of khaki/ camo look. I also used Army Green to paint the body of the Pip-Boy.
For the skin I used Citadel’s Kislev Flesh and this was really the main part of the miniature that I’m unhappy with. When the PVC starter set shipped there was what was known as ‘melting Nora face.’ Basically, for whatever reason, the details on Nora’s face weren’t really very well defined and as such it’s hard for the wash and for me even as the painter to decipher where everything is and highlight it accordingly but we shall trooper on regardless.
Speaking of washes, I used three of them on Nora, first of all I got some Drakenhoff Nightshade from Citadel and applied that to all of the blue areas of the Vault Tec overall. I then took Nuln Oil and added that to all of the knee-guard, shoulder guards, basically all of the armour. Finally I added Reikland Fleshshade to the skin, all of the washes are from Citadels range of washes and in fact you can get a great selection of them in a little boxset that they do, I’d highly recommend it.
Next it was on to the highlighting, now this is something I’m not great at but I’m trying to get better. Basically, every model I do now I force myself to do some form of highlighting or edge highlighting because if I don’t practice it I won’t get any better at it. One of the biggest things I’ve found with highlighting is that you’ve got to have conviction with it, after the first brushstroke when you highlight you can be left thinking ‘oh crap what have I done’ but if you persevere, I’ve found that it can be worth it. At the end of the day we’re here to learn so we need to take risks.
With that said I began highlighting the leather armour with Army Painters Monster Brown and just went around picking out edges and areas for highlighting there. For the areas of leather armour that I’d painted Oak Brown though, I highlighted those with Leather Brown. Then came a scary bit, for the Vault Tec overalls I highlighted using Army Painters Electric Blue, now the paint was pretty runny, could just be that I didn’t shake it enough but I applied this to the main parts of Nora’s legs at the front of the model, the tops of her arms, the tops of her shoulders and the top of her butt. Once it dries it really just raises those areas a little and I think acts as a nice subtle highlight that I was pretty happy with.
The final touch is to add the dash of yellow to the Vault 111 logo and to the trim on the front of Nora’s overalls and to do this I used Citadels Flash Gitz Yellow.
And folks there you have it, a relatively simple paint scheme for Nora from Fallout Wasteland Warfare. This is a finished product I’m relatively happy with, I just wish I could have perfected the face a little more. There are more painting guides on the way now that I’m back in a permanent workspace again so keep your eyes peeled for those but in the meantime thankyou so much for taking time out of your day to check out my project.
If you like the video tutorial, feel free to check out the rest of the videos on my YouTube channel, maybe you’ll like them! See you all next time!
S.
The Sole Survivor Enters The Wastes
It feels like an age since I was last updating this project and I’ve finally had some time to paint up another miniature. This time I took another stab at Nora from the Starter Set and while the lack of detail on the face led to some issues I think I’m pretty happy with how she came out.
Full video coming soon!
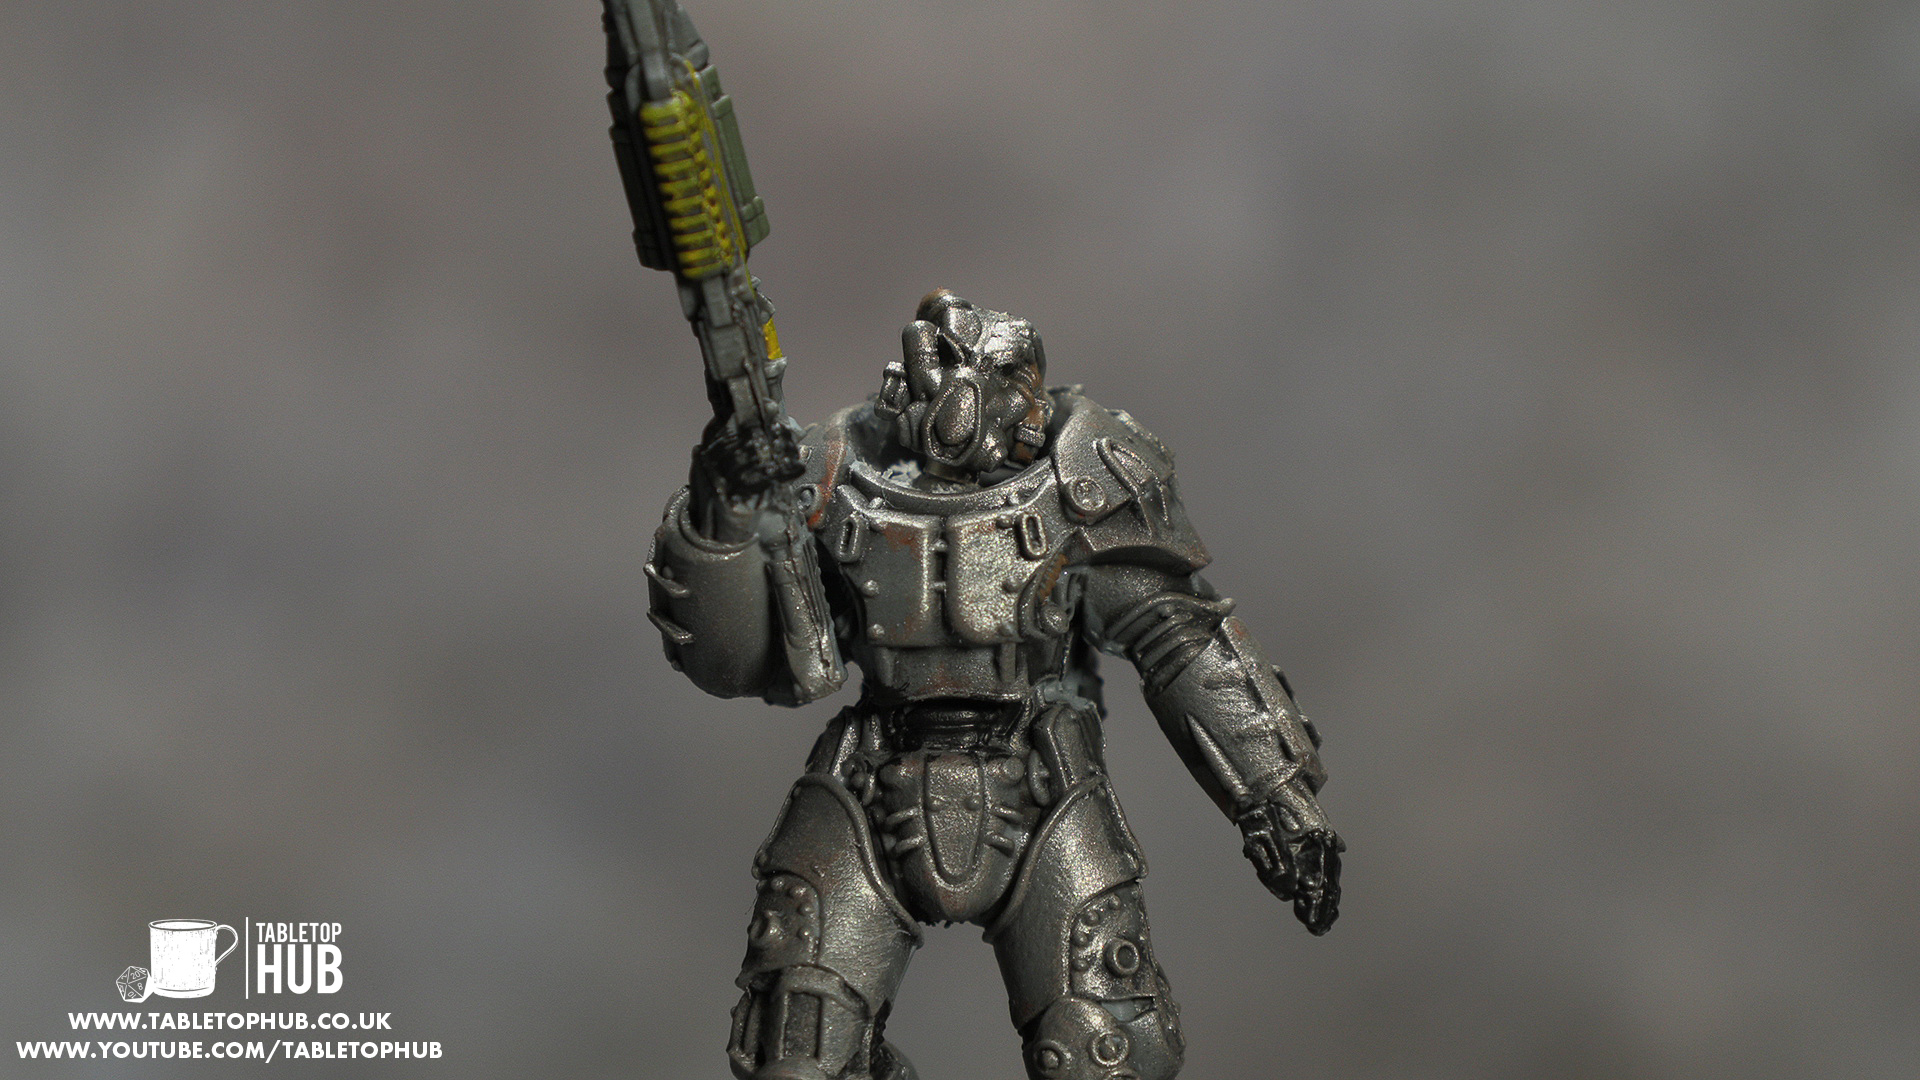
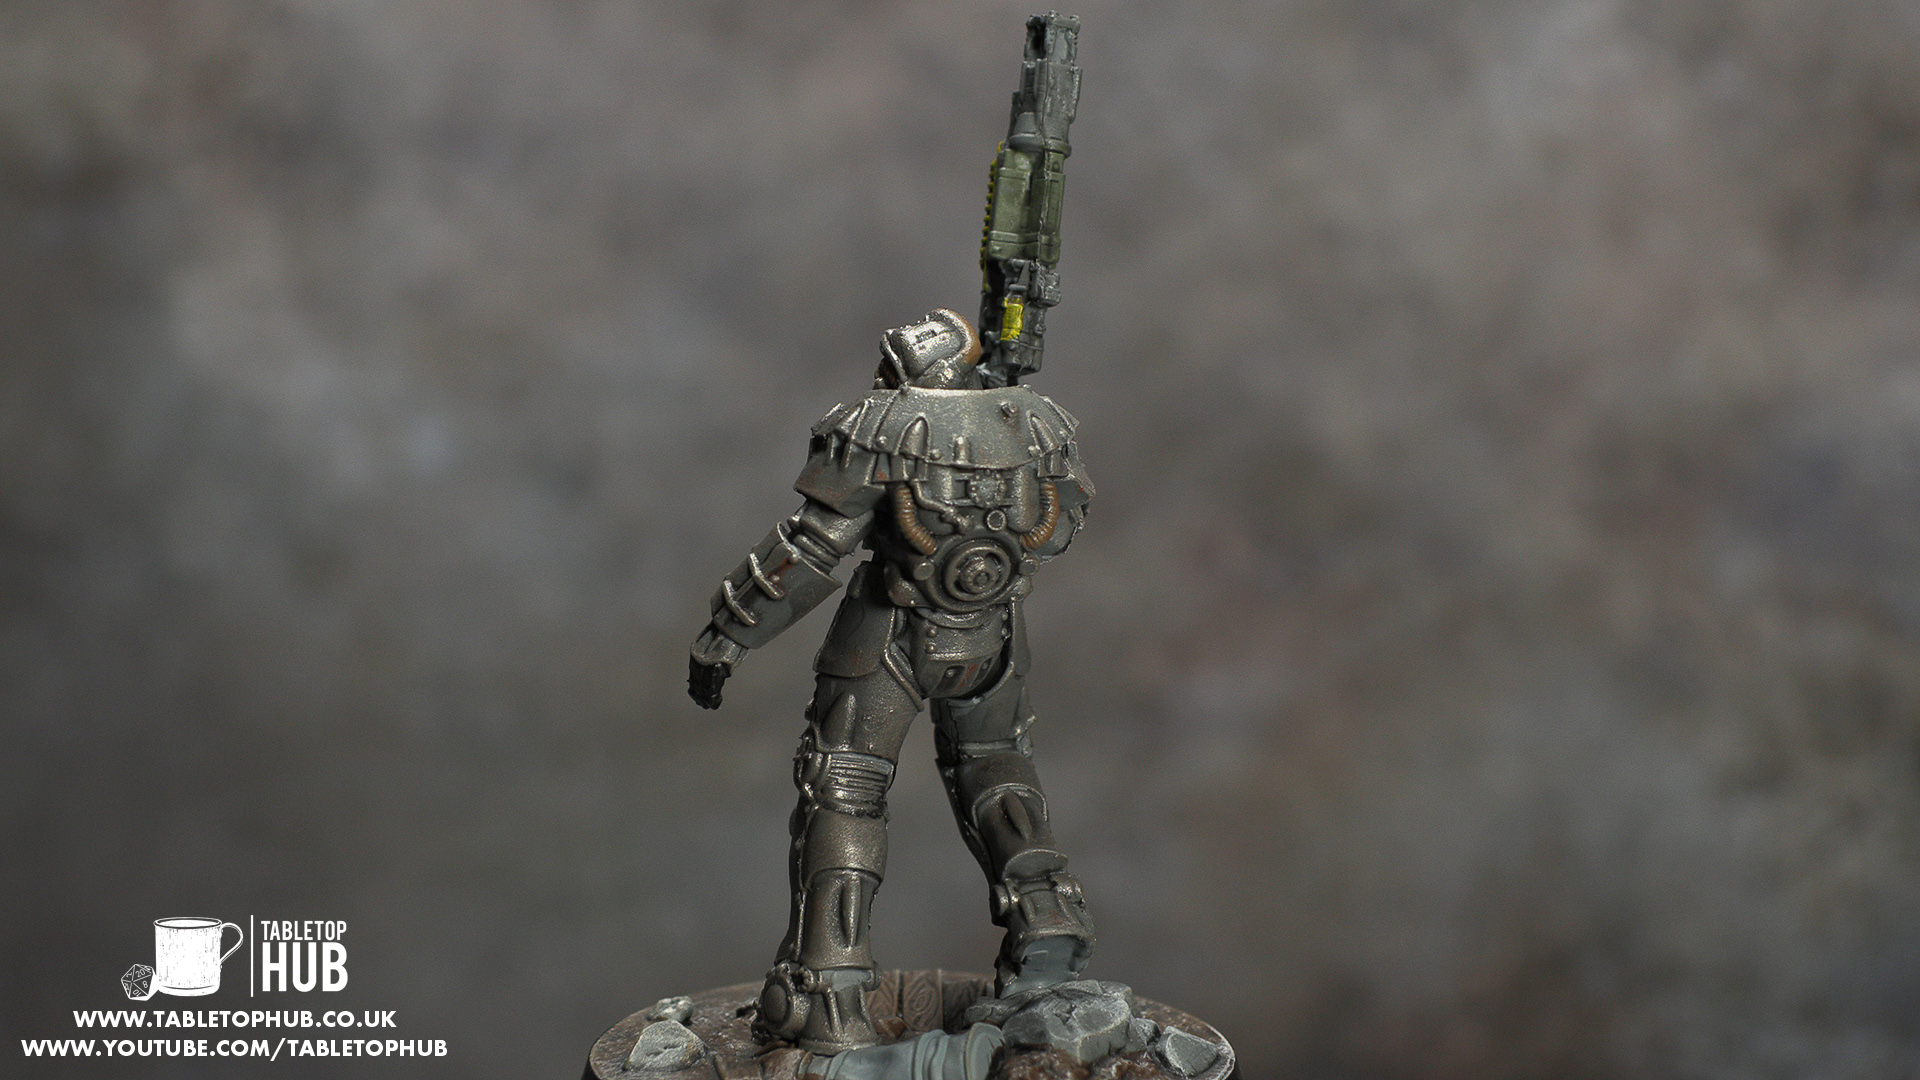
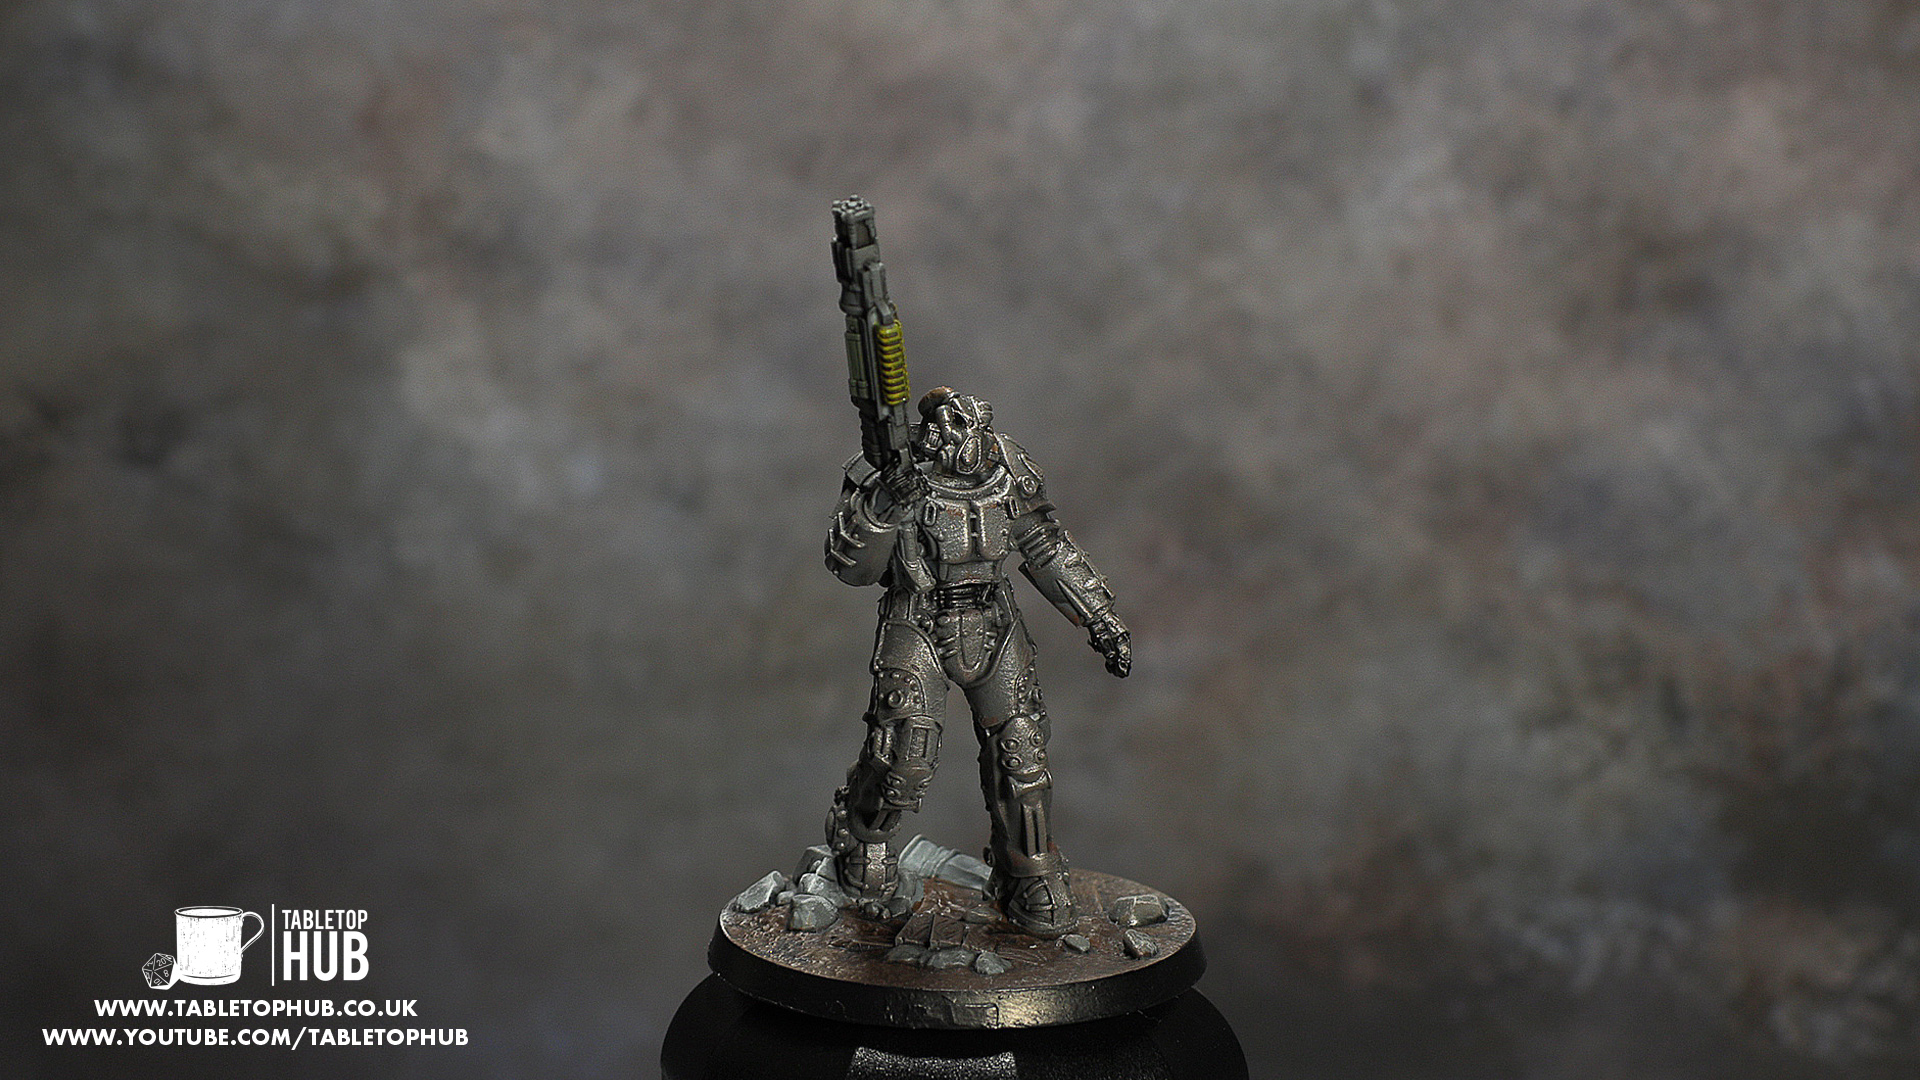
My Attempt At Painting T-60 Power Armour - Fallout Wasteland Warfare
Today I’m going to show you my attempt at painting the T-45 Power Armour from Fallout Wasteland Warfare.
So to start off with I primed the model in Army Painters Uniform Grey, I wanted to go for a brushed metal look for the power armour which you’ll see as we progress and I though just covering the model in a metallic colour at this point would be too much.
Next I began work on the Laser Rifle, so for this I used Army Painters Army Green for the main chamber of the rifle, Necrotic Flesh for the grip that you see on the underside of the barrel, at least I think it’s a grip, and then I used Army Painters Daemonic Yellow to paint the energy cell at the back of the rifle. For the cabling on the top of the rifle I used Army Painters Dragon Red. One thing I will say is that when you’re using the Daemonic Yellow, make sure and give it a good shake before you paint, you may find that you need to give it a couple of layers to get an even coat as mine was quite watery.
Next I took Army Painters Dry Rust effect paint and began picking out the occasional crack or pit in the armour, I’d recommend adding this sparingly as I almost added too much really. And you do only want to add this to those deep recesses in so that it gets covered well by the wash that we’ll add in a moment, so prioritise the knees, the underside of the ridges near the feet, areas that may almost be in shadow.
Next I took Citadels Nuln Oil and added two was layers to really darken the model down.
Once it had dried it looked like this, so already at this point its looking pretty cool and while you could probably finish off here I wanted to add that brushed metal look so I took some Army Painters Gun Metal and dry brushed the entire mini, the idea here is that this will pick out the highlights, give it a scratchy look and all in all just look pretty awesome.
After this was done I took some Army Painters Necromancers Cloak and painted the parts of the power armour that are the joins, I’m not sure how to describe this but they look slightly tubular as opposed to the metal sections, they’re kind of like the under-armour I guess.
Next I took Army Painters Oak Brown and painted the breathing tubes on the helmet and the tubes coming from the canisters on the Power Armours back and highlighted these tubes with Army Painters Leather Brown.
For the little light on the helmet I used Army Painters Crystal Blue and then it was onto the base.
If you’ve seen any of my other Wasteland Warfare videos or tutorials the process here is pretty much the same, give the slabs a coat of Necromancers Cloak, dry brush Dungeon Grey and paint any of the wood with Oak Brown before giving the entire base a was with Nuln Oil.
And folks that’s it, that is how I painted the Power Armour from Fallout Wasteland Warfare, we’re very nearly done with the Core Set then it’ll be on to the other bits and bobs from the game but hopefully you’ve found this helpful. Power Armour is one thing that you can exercise some creative freedom with as there are so many different styles out there, this is just one of them and I’d encourage you to experiment and have fun with it.
I should be starting work on Nora and the other survivors in the core set next but aside from that I hope you’re all having a great week and I’ll speak to you all soon!
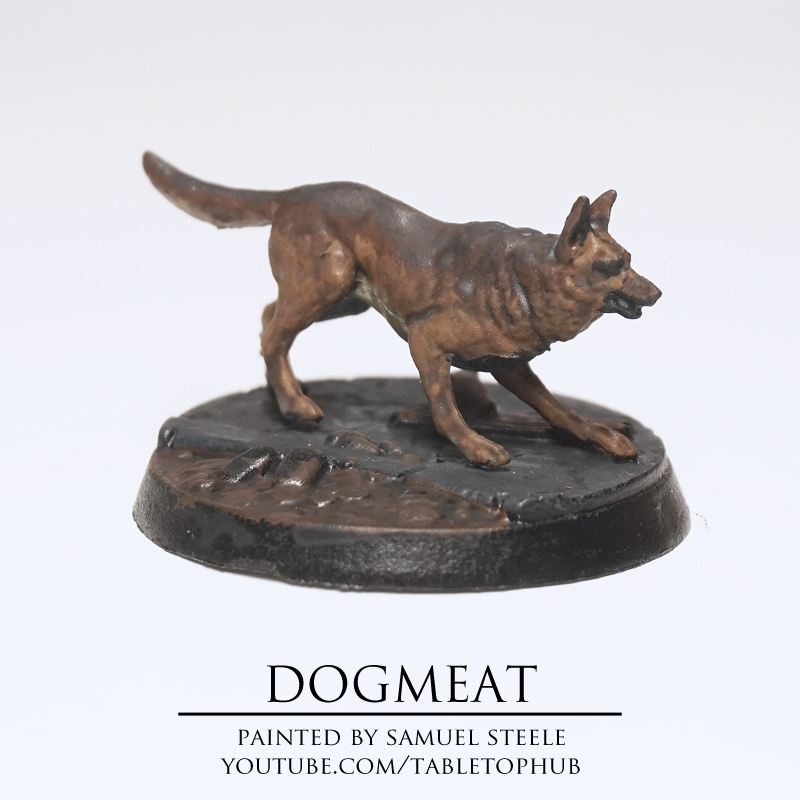
My Attempt At Painting Dogmeat - Fallout Wasteland Warfare
Hey everyone Sam here from the Tabletop Hub, and today we’re back for another Fallout Wasteland Warfare painting guide.
Once again I’m trying to keep things simple with my paint scheme for Dogmeat, we’re only going to be using four paints and one wash. This model is pretty tricky to do though in my opinion, German Shepherds are lovely dogs and one of their distinctive attributes is how their fur has that natural fade of colours and Dogmeat is no exception, what makes this tricky to achieve on this miniature is that there isn’t a massive amount of fur definition on the model. The torso is quite smooth and as such you’re going to spend most of your time while painting this model doing a lot of feathering, and judging up where those fade lines should be.
Before we jump in, I would recommend tackling Dogmeat one side and one limb at a time, because of the amount of feathering we’ll be doing here it’s just easier to keep track and work with the model if you aren’t trying to do the whole thing at once.
So, first of all I took some of Army Painters Leather Brown and began painting the hind leg of Dogmeat, this is going to be our main or base fur colour for Dogmeat so you’re going to paint the bulk of the legs, the underside of the tail and Dogmeats midriff in this colour.
Next I took some Army Painters Skeleton Bone and painted Dogmeats belly, you may find this paint to be pretty watery so don’t be surprised if you have to give it a coat or two to get an even spread.
Next, while the Skeleton Bone was still slightly wet, I took my brush with Leather Brown on it and began painting Dogmeats midriff and tried to feather the two colours as I went, if you do this and find that there’s too much Skeleton Bone getting into the middle of the torso don’t be afraid to wait a little while and do another coat of Leather Brown to cover it up, take your time with this, it’s tricky, it’s annoying but in the end it’ll be worth it if you get a nice smooth fade.
Next I took some Army Painters Oak Brown and used the same process to apply the paint to the top of Dogmeats torso, again trying to feather as best as I could as I went.
As for the face, for Dogmeats nose I used Necromancers Cloak, and for the rest of the face apart from the eyes I used the Leather Brown. It really helps to have a reference photo or two of Dogmeats face up on a screen near you when doing this and that’ll really help you figure out what colour should go where when painting the face.
For the base I used Necromancers Cloak for all of road surfaces and mixed two parts Leather Brown with one part Necromancers Cloak for the dirt just to give it a bit of a darker look. For the plank and Nuka Cola bottle I painted those with Oak Brown.
While the base was drying I took some Army Painters Necromancers Cloak and gave the top of Dogmeat a dry brush in order to get the final fade. I didn’t use black for this as I felt it would be just too dark and we’ll be adding a wash to this in a moment to bring down the colour slightly anyways so don’t worry if it doesn’t look dark enough.
Once the entire model has dried, give it a wash with Citadels Nuln Oil to finish it off, this will really help bring out any definition that is in the fur, especially near the front of the model and really helps mask those fade lines a bit better if like me you’re not a pro at it.
And folks that is it, this was my attempt at painting Dogmeat from Fallout Wasteland Warfare, I hope you’ve found it helpful. If you’re learning to paint miniatures and want to showcase your work or get some tips feel free to join my Discord. There’s a number of us in there painting a whole range of miniatures with a whole range of skill levels too and I can’t tell you how helpful it can be to have someone to bounce ideas or get advice from when you’re learning how to paint.
If you enjoyed the video equally do feel free to subscribe to be kept up to date with when my other videos go live but until next time folks, have a great week and I’ll speak to you all soon.
S.
Dogmeat Photo Gallery

Hey everyone,
So 2019 is off to a good start and I just got Dogmeat finished up from the Fallout Wasteland Warfare Core Set. I was a little worried about painting this one as I’ve not done a lot of fur/ animals before but I think he turned out well.
Video guide coming soon!
S.
Super Mutant Photo Gallery

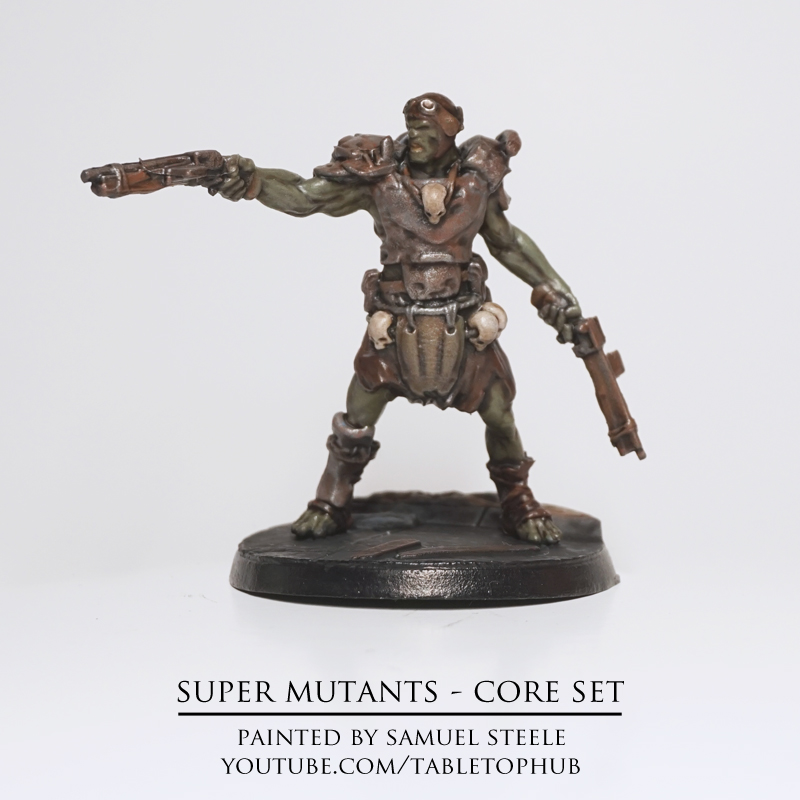

Hey everyone, as always here’s the image gallery for the latest painted addition to the collection, the Super Mutants.
Apologies for the lower quality of images, I haven’t got a proper photo setup prepped for these yet with a decent lighting setup.
Dogmeat is next!
S.