


Spring Cleaning 2025 – Reviving my old Warhammer Empire for Old World to a standard my teenage self wanted now that I’m old.


Recommendations: 191
About the Project
After much thought, I have decided to revive my old Empire army from me teenage years for the 2025 Spring Cleaning Challenge. I loved Warhammer Fantasy as a kid and that game and this army is really what started my war gaming hobby. Unfortunately, it's also the army I started to learn how to paint on. In one's formative years what is seen in the mind's eye doesn't always make it into reality. Now that I have, gracefully aged and grown in skill, I felt with the return of Warhammer, The Old World, it was time to make my first army look more like what my younger self had always dreamed of. Maybe... So, break out the paint striper and get ready to go on a journey, it's time to time travel.
Related Game: Warhammer: The Old World
Related Genre: Fantasy
Related Contest: Spring Clean Hobby Challenge 2025
This Project is Active
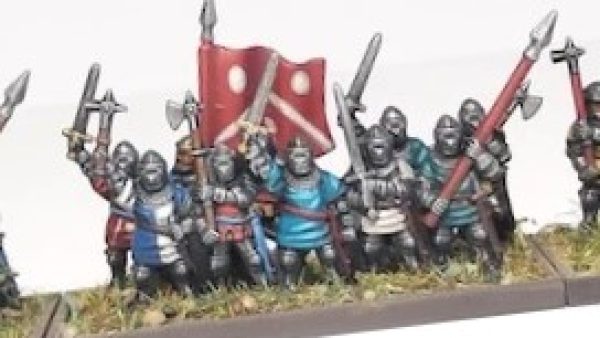
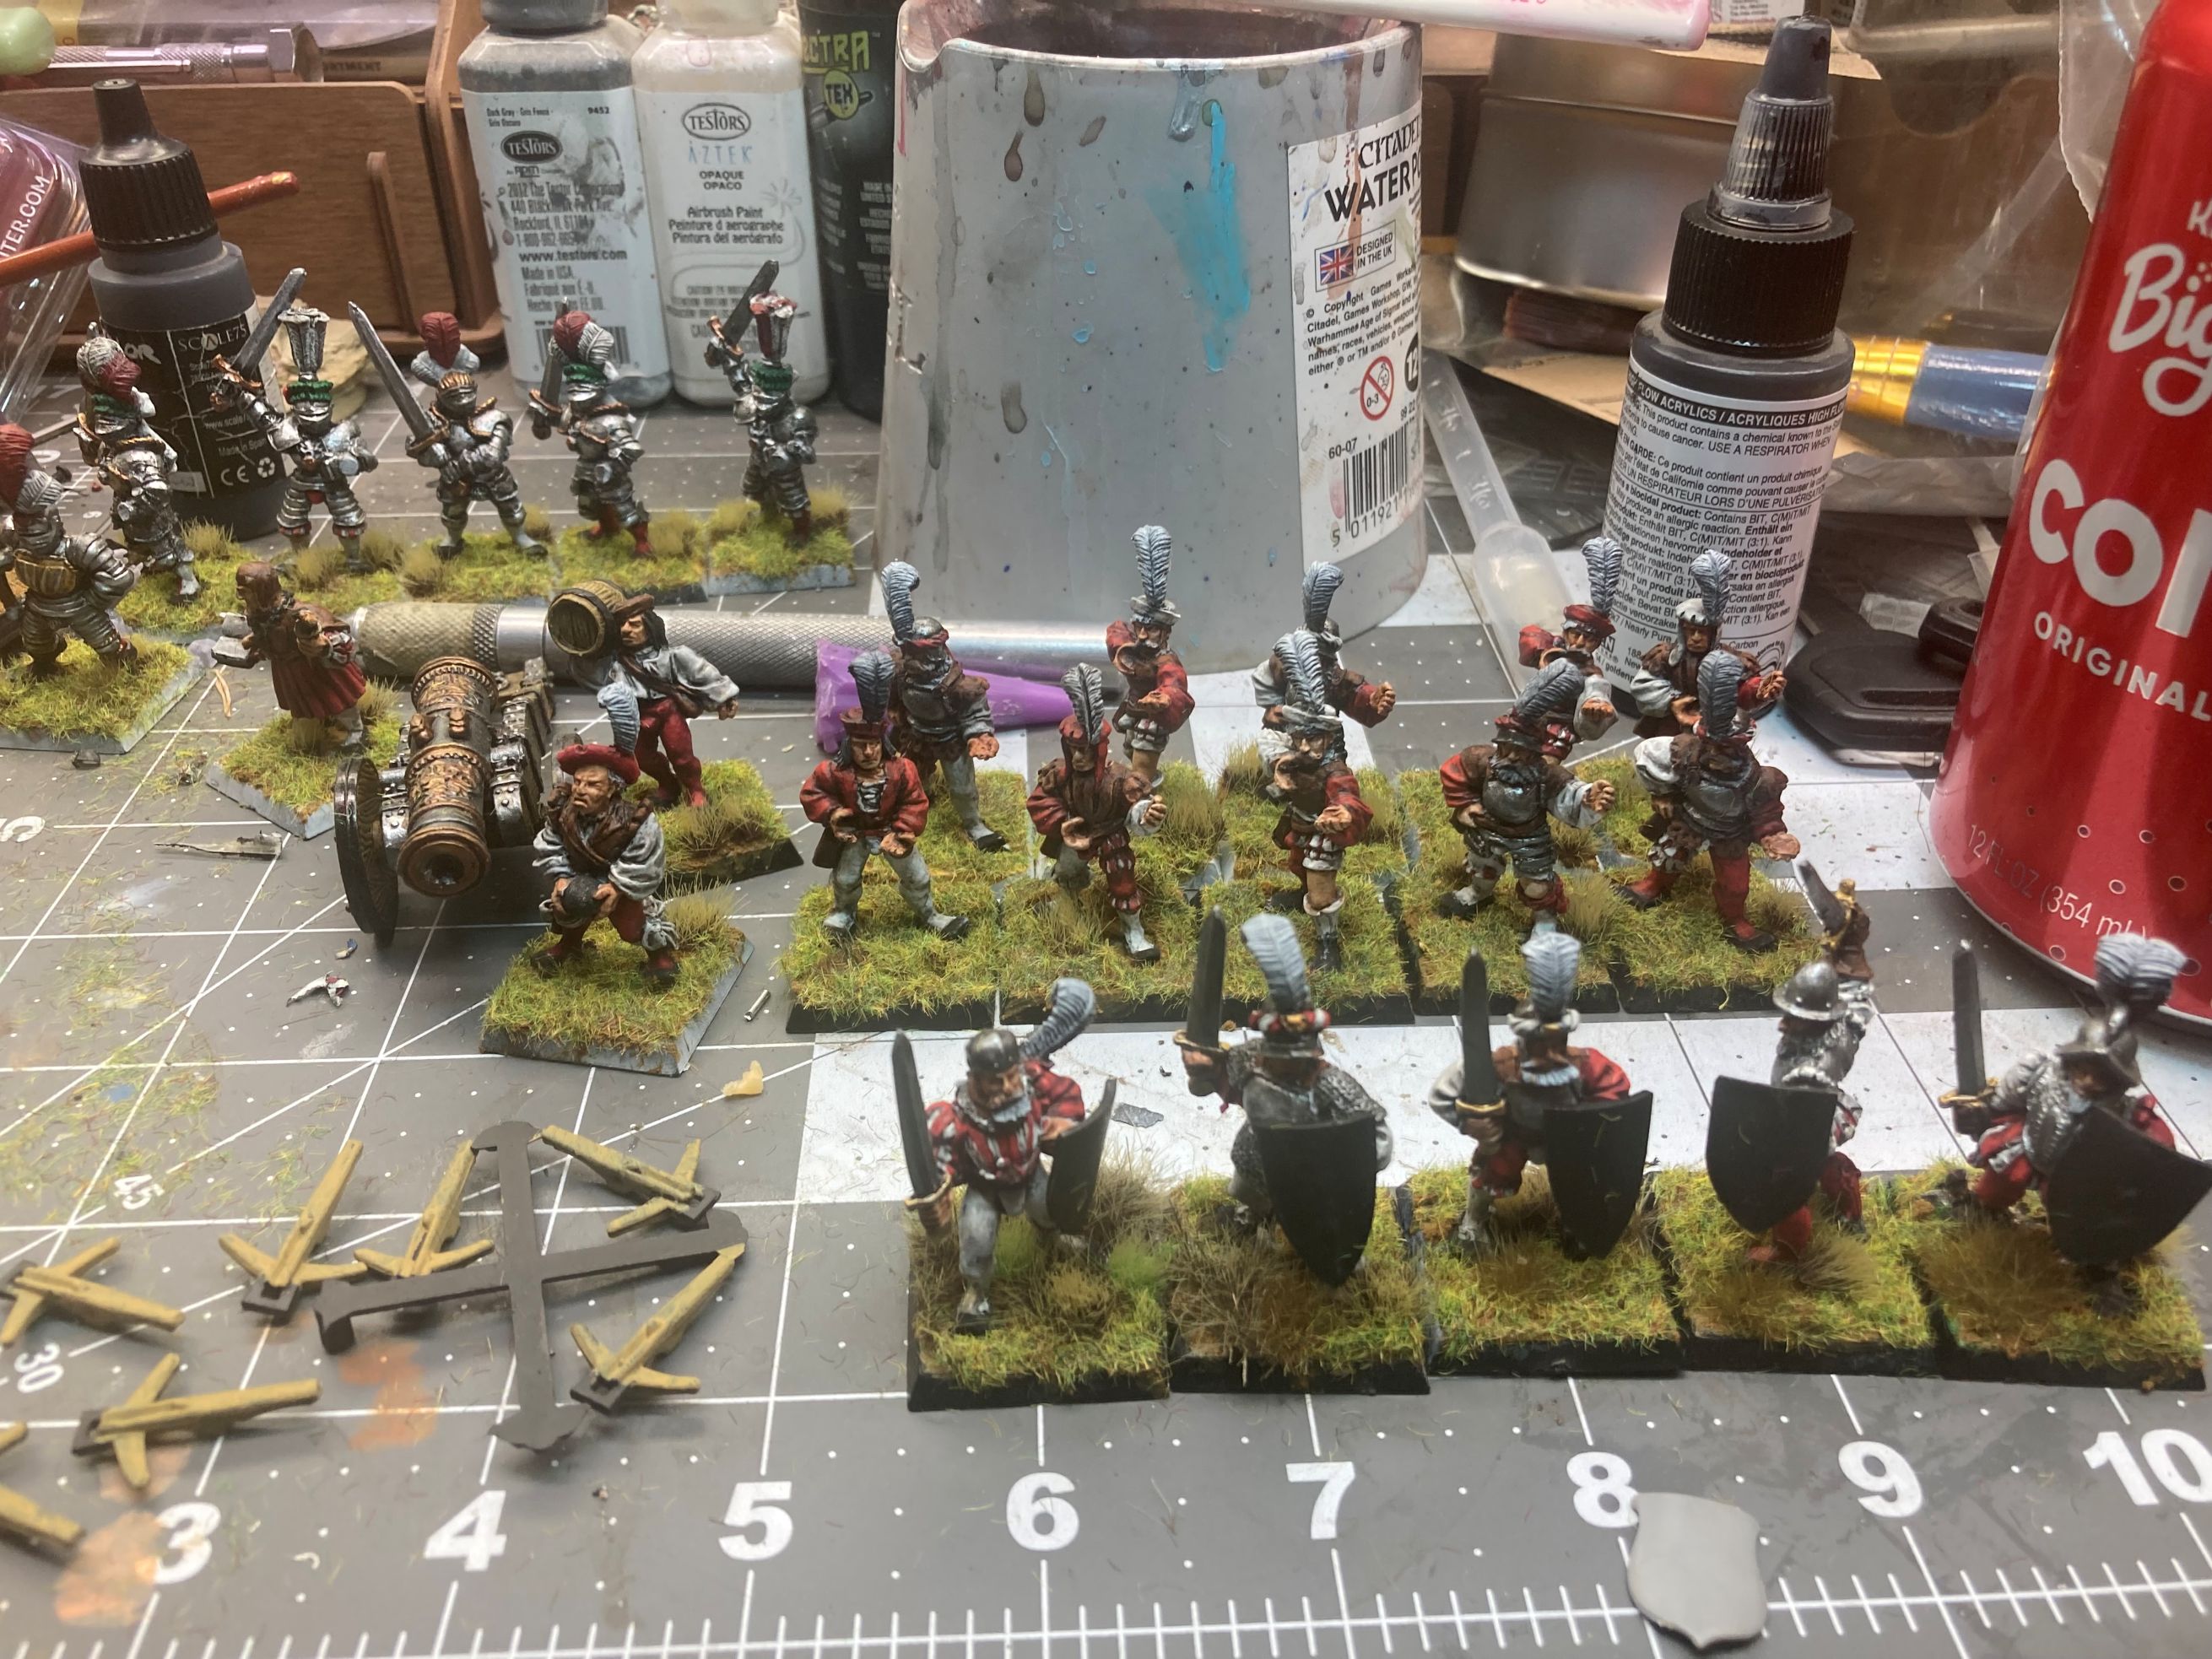
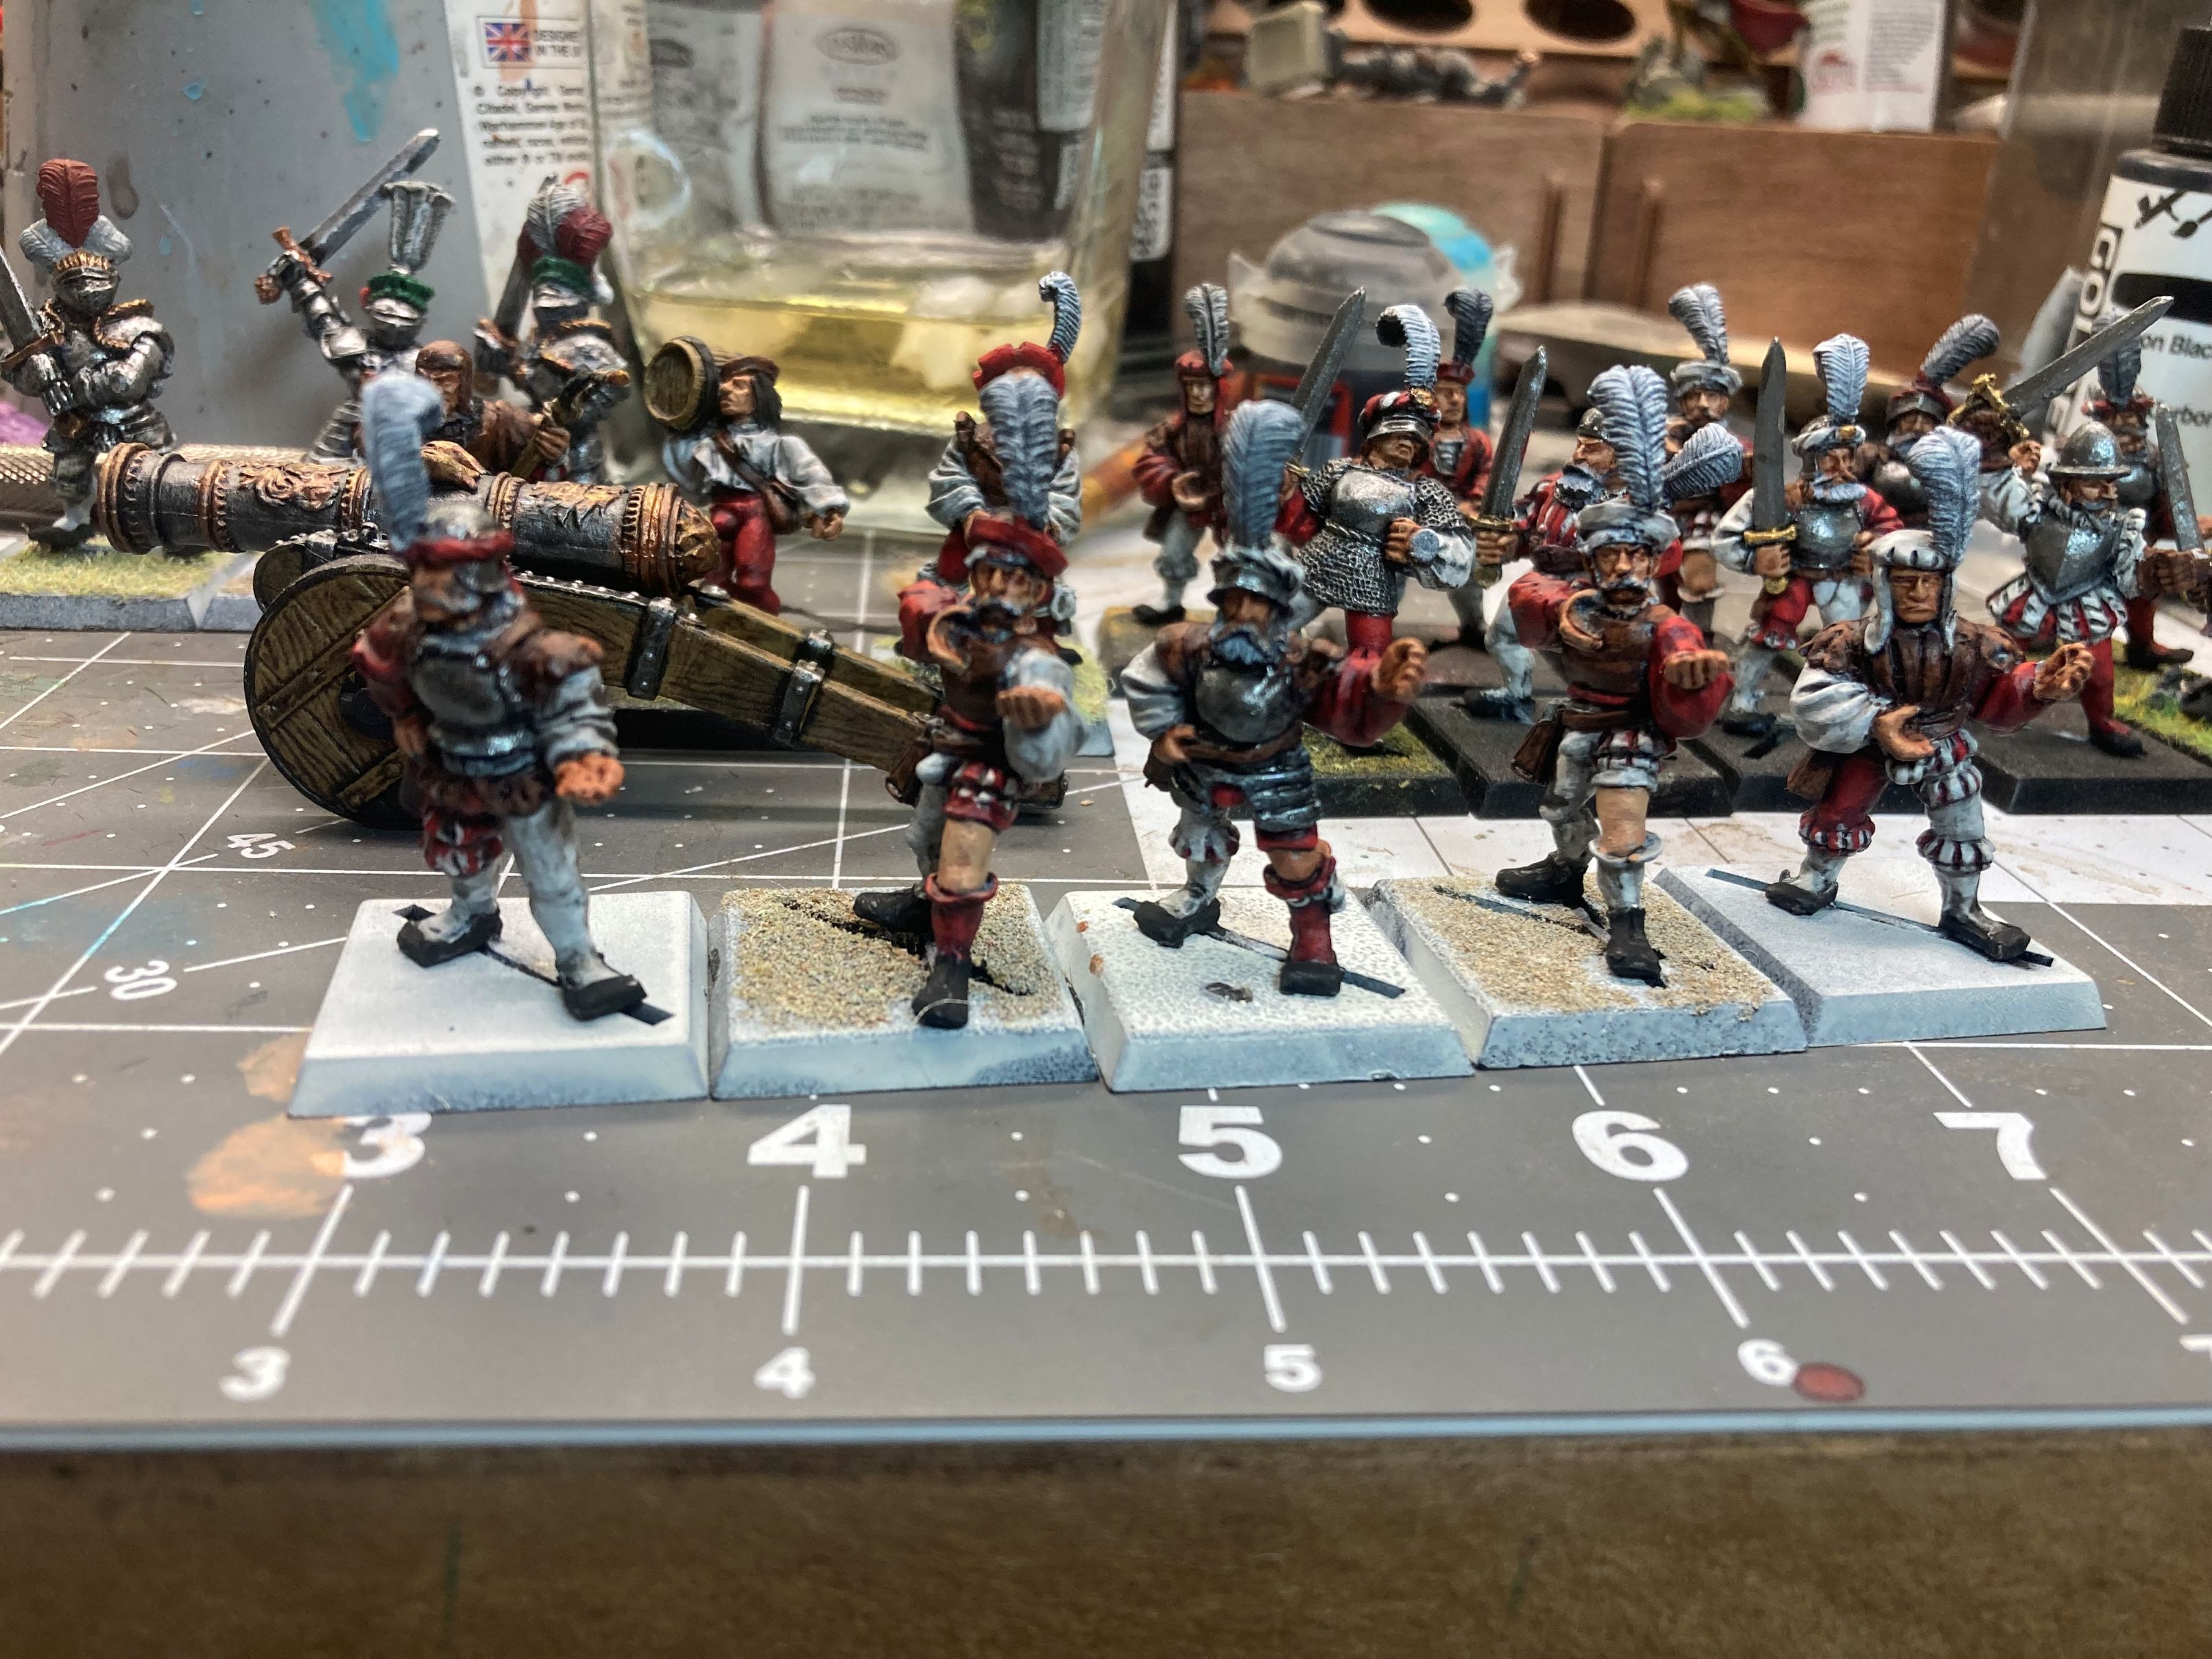
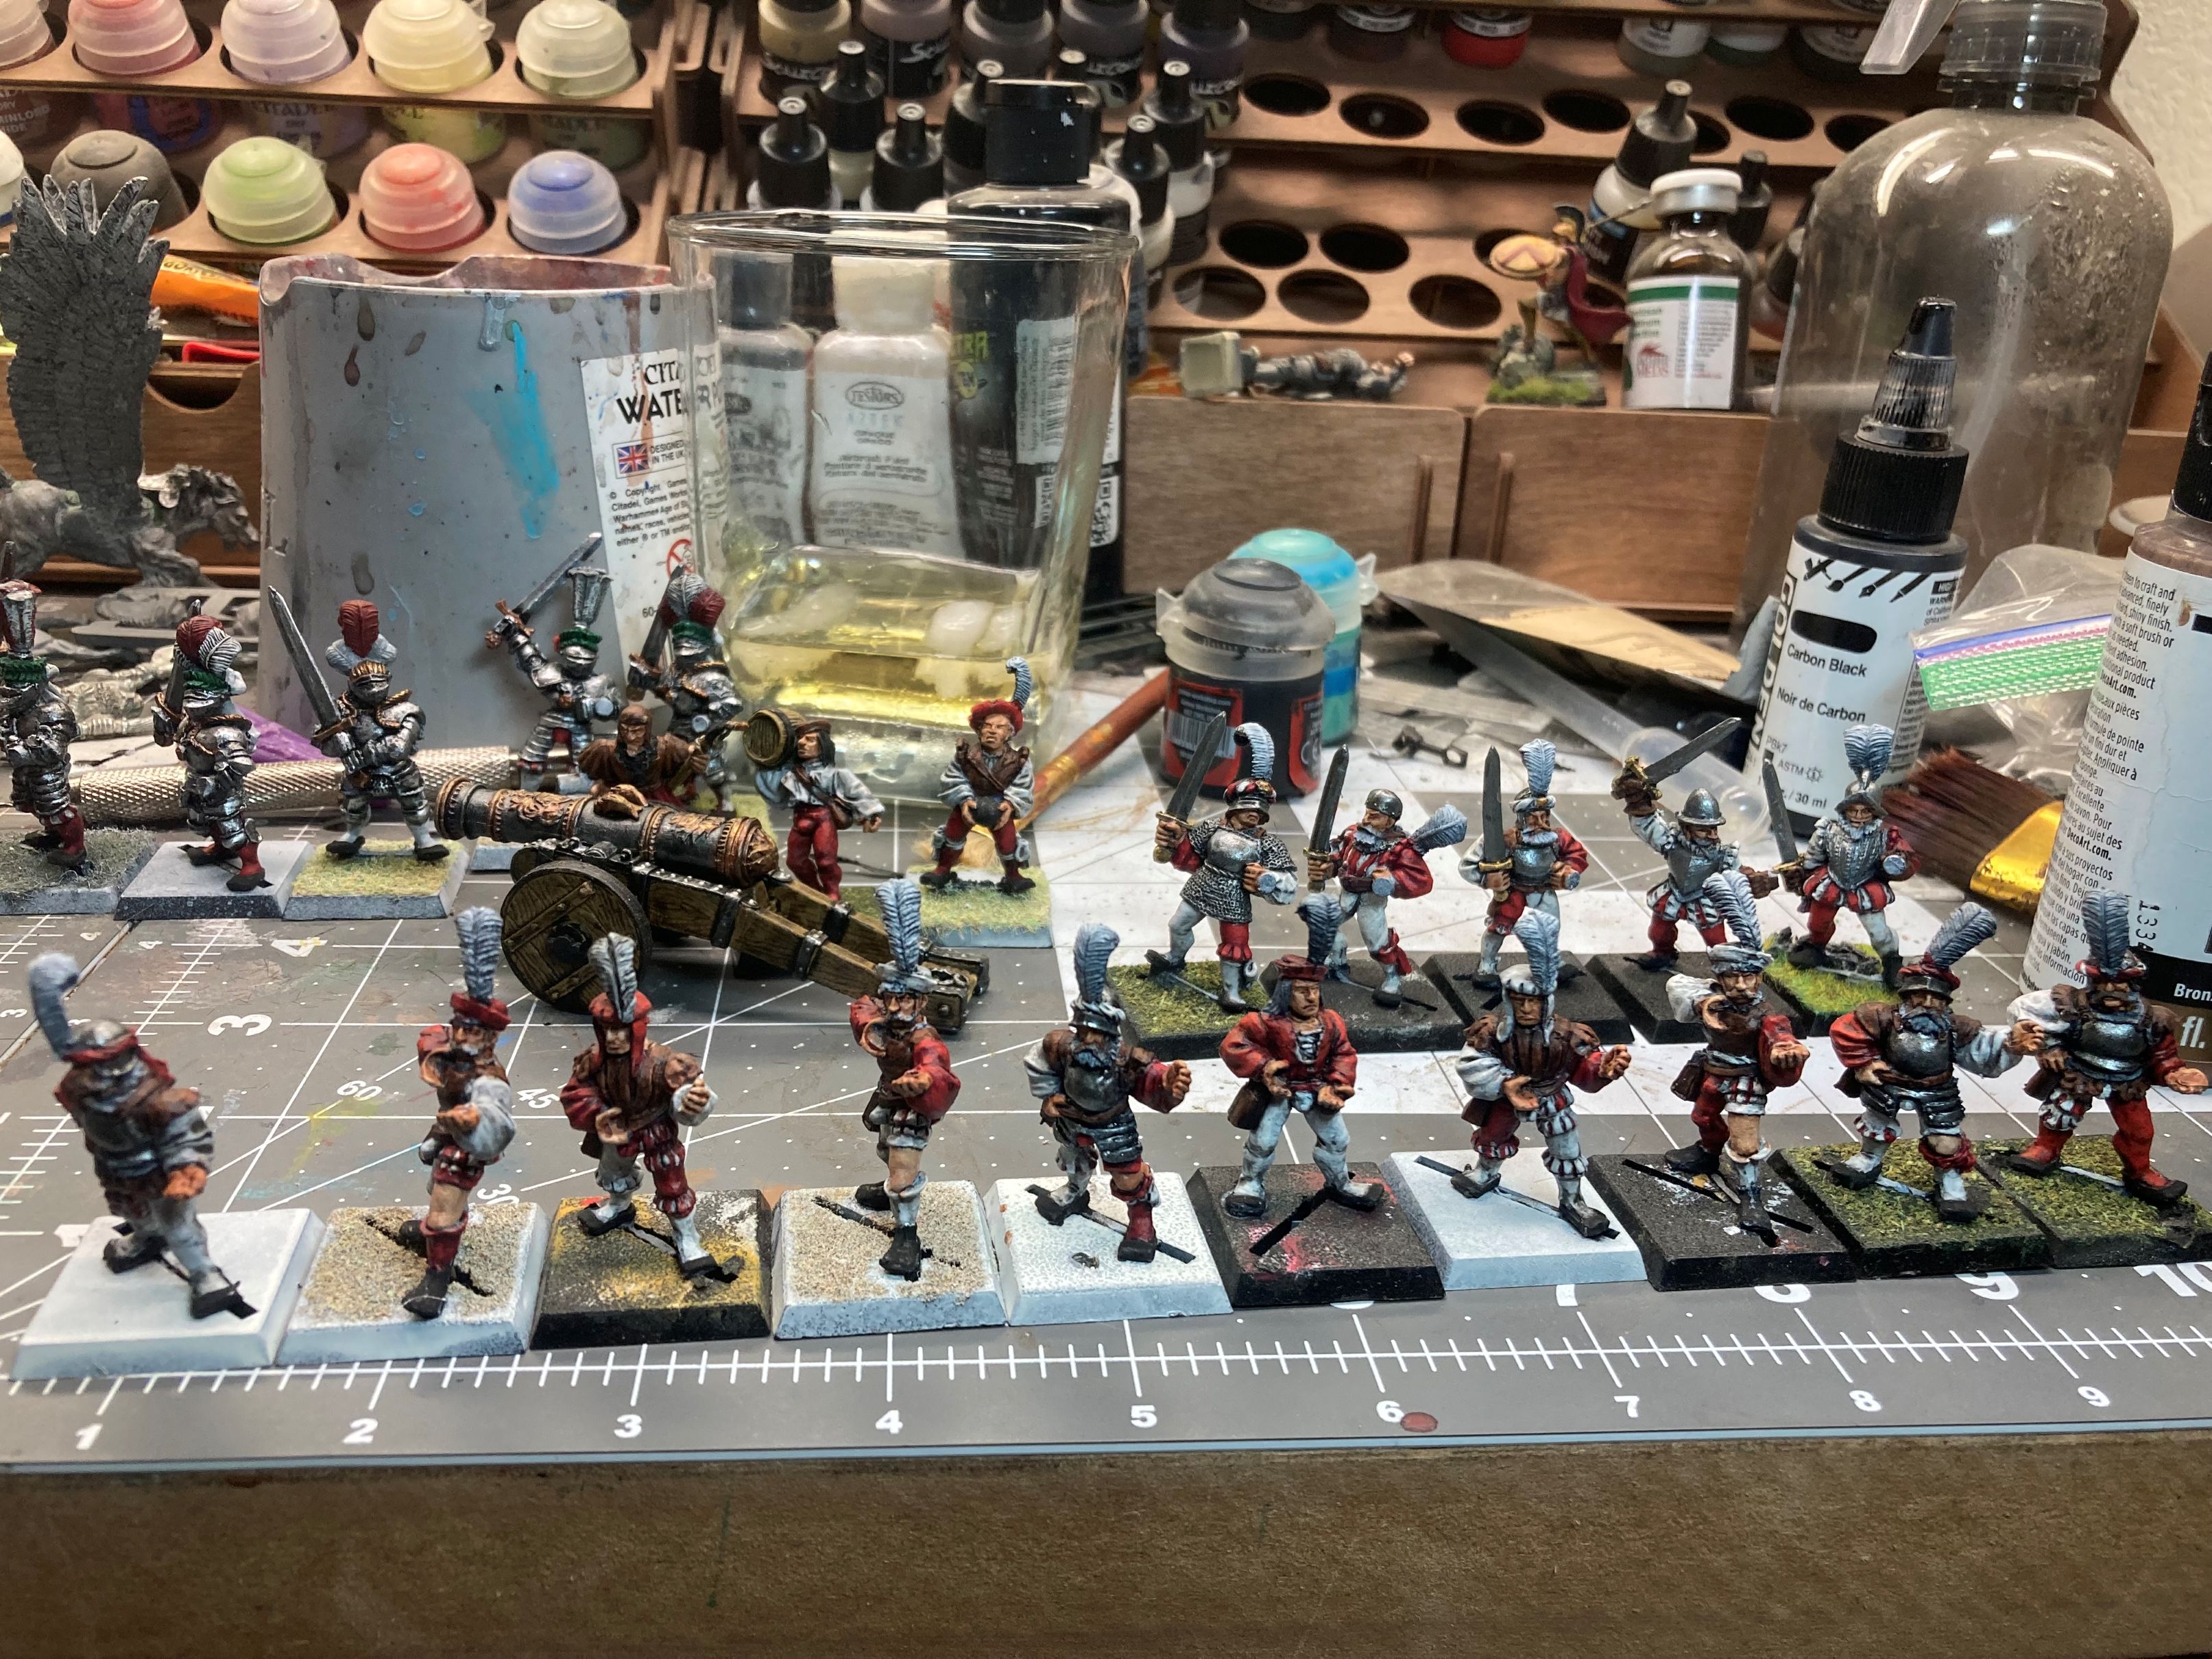
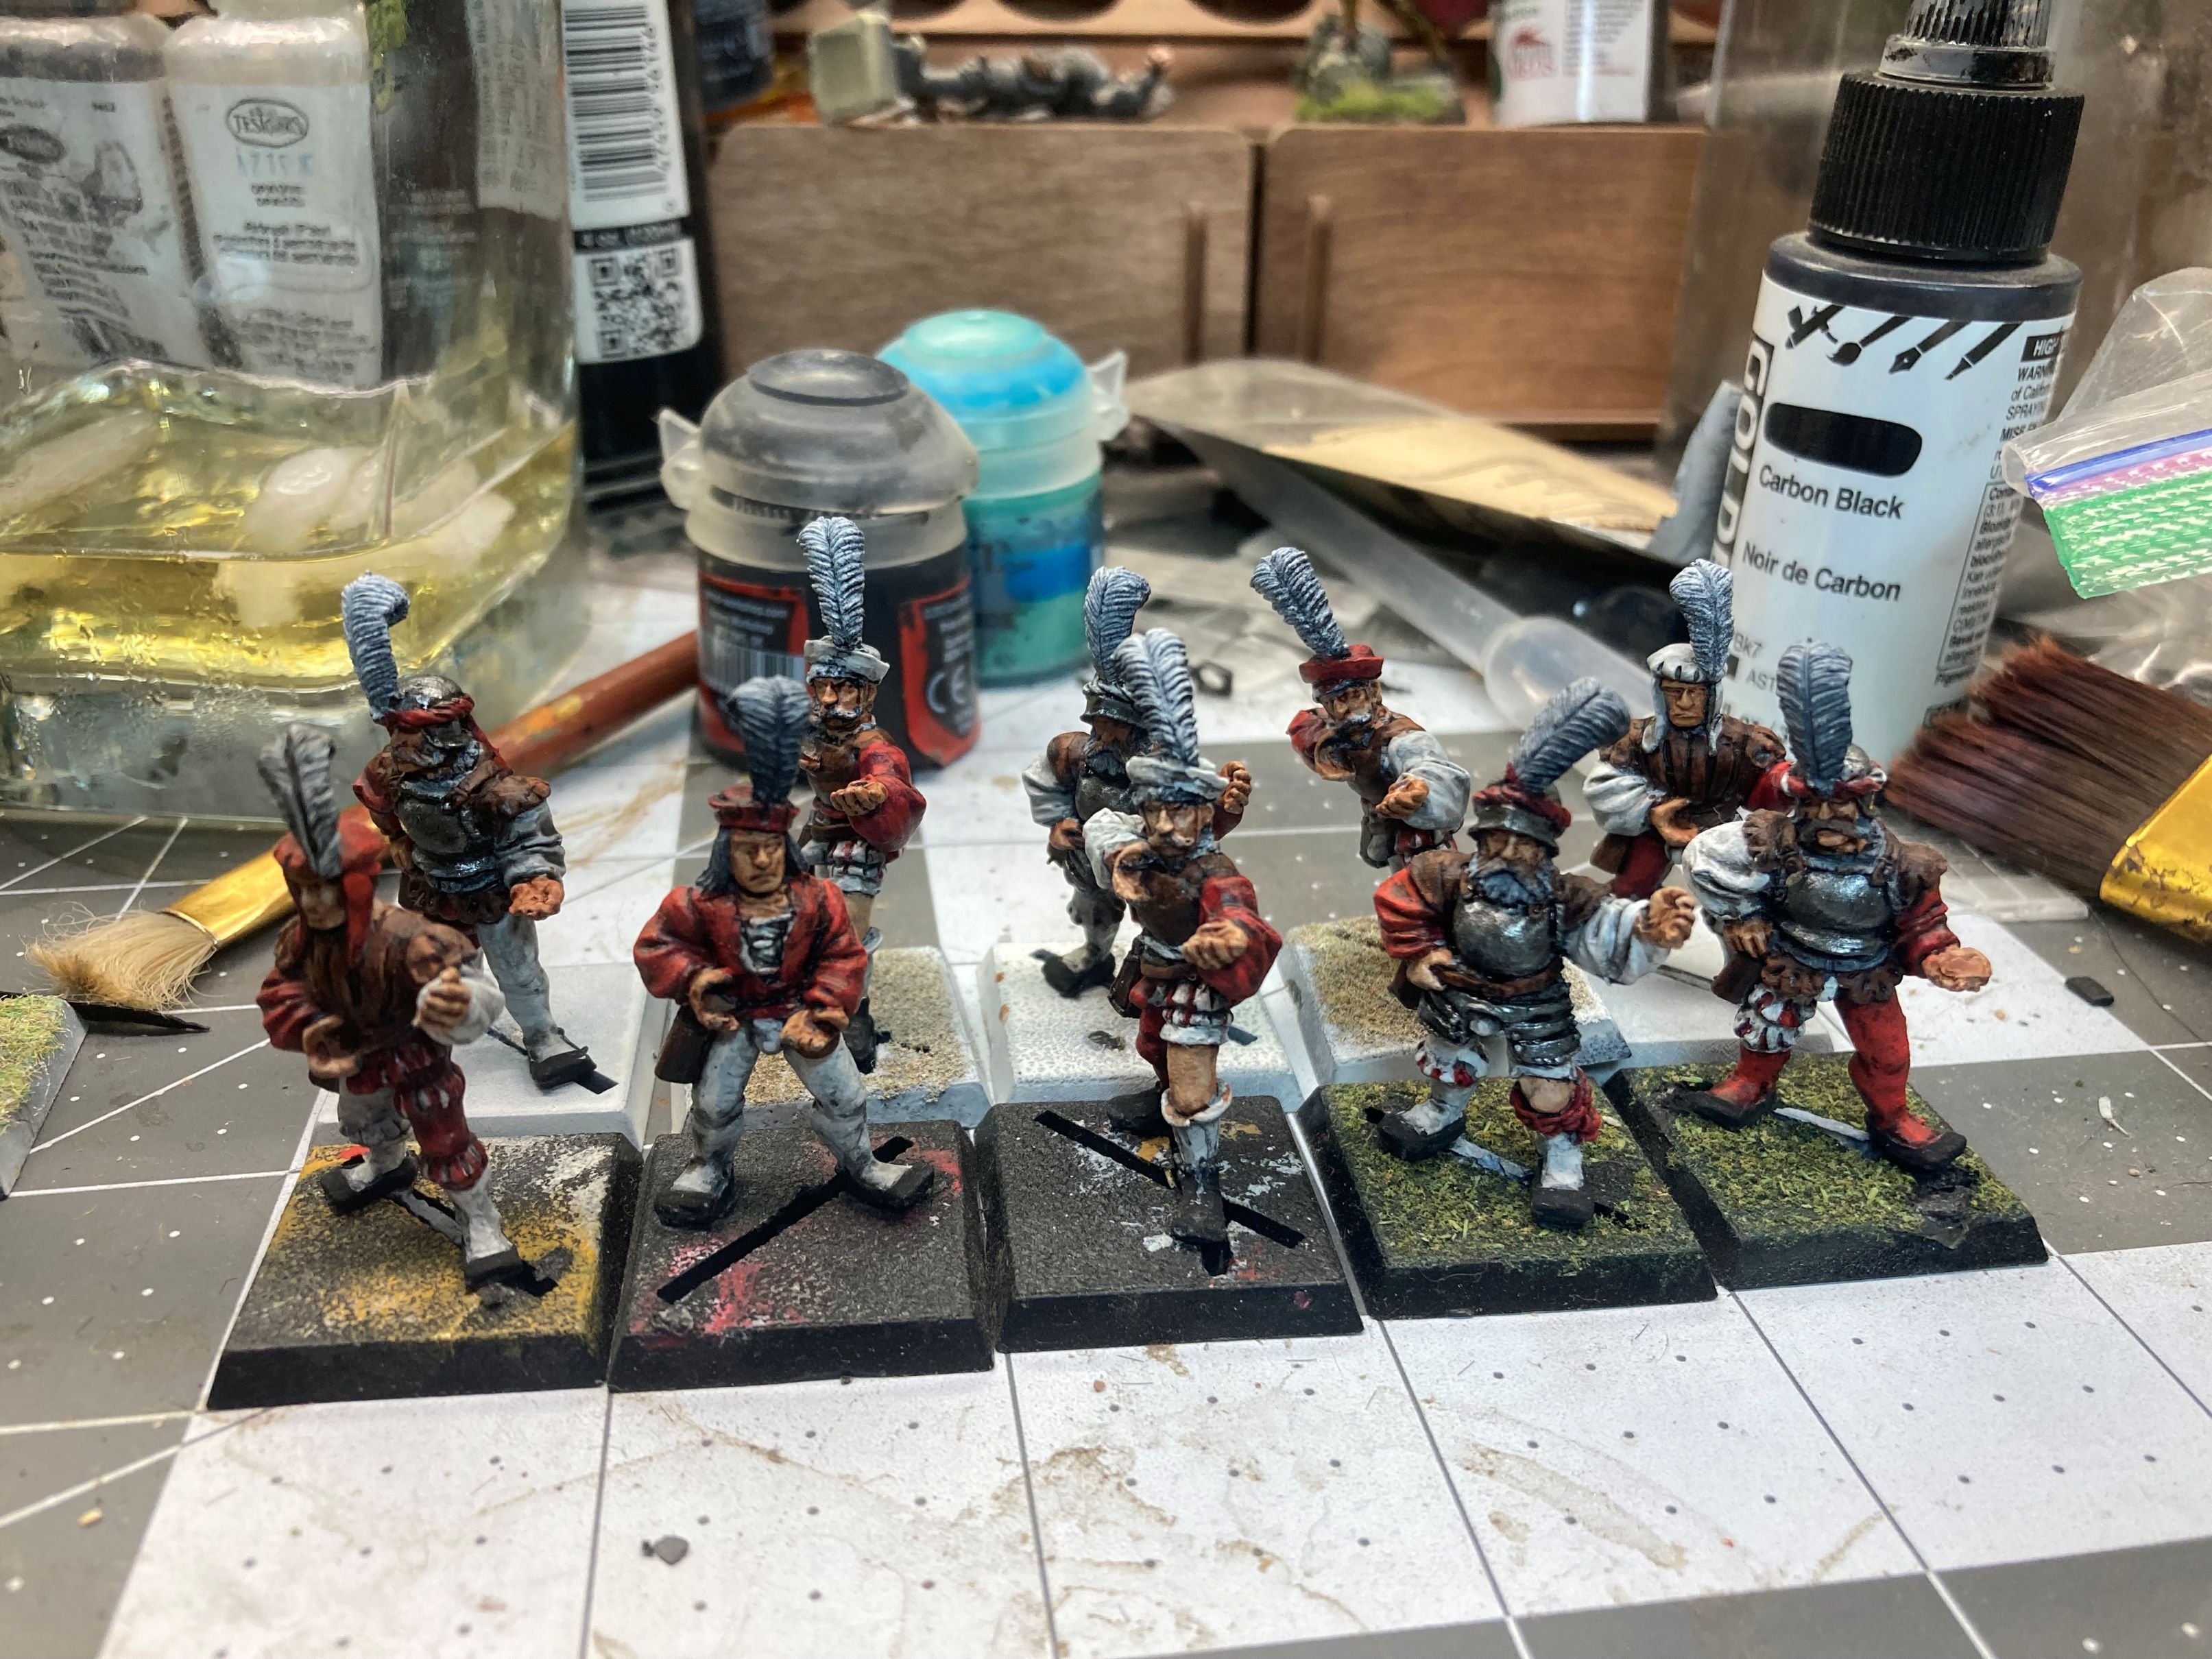
And finally, the infantry
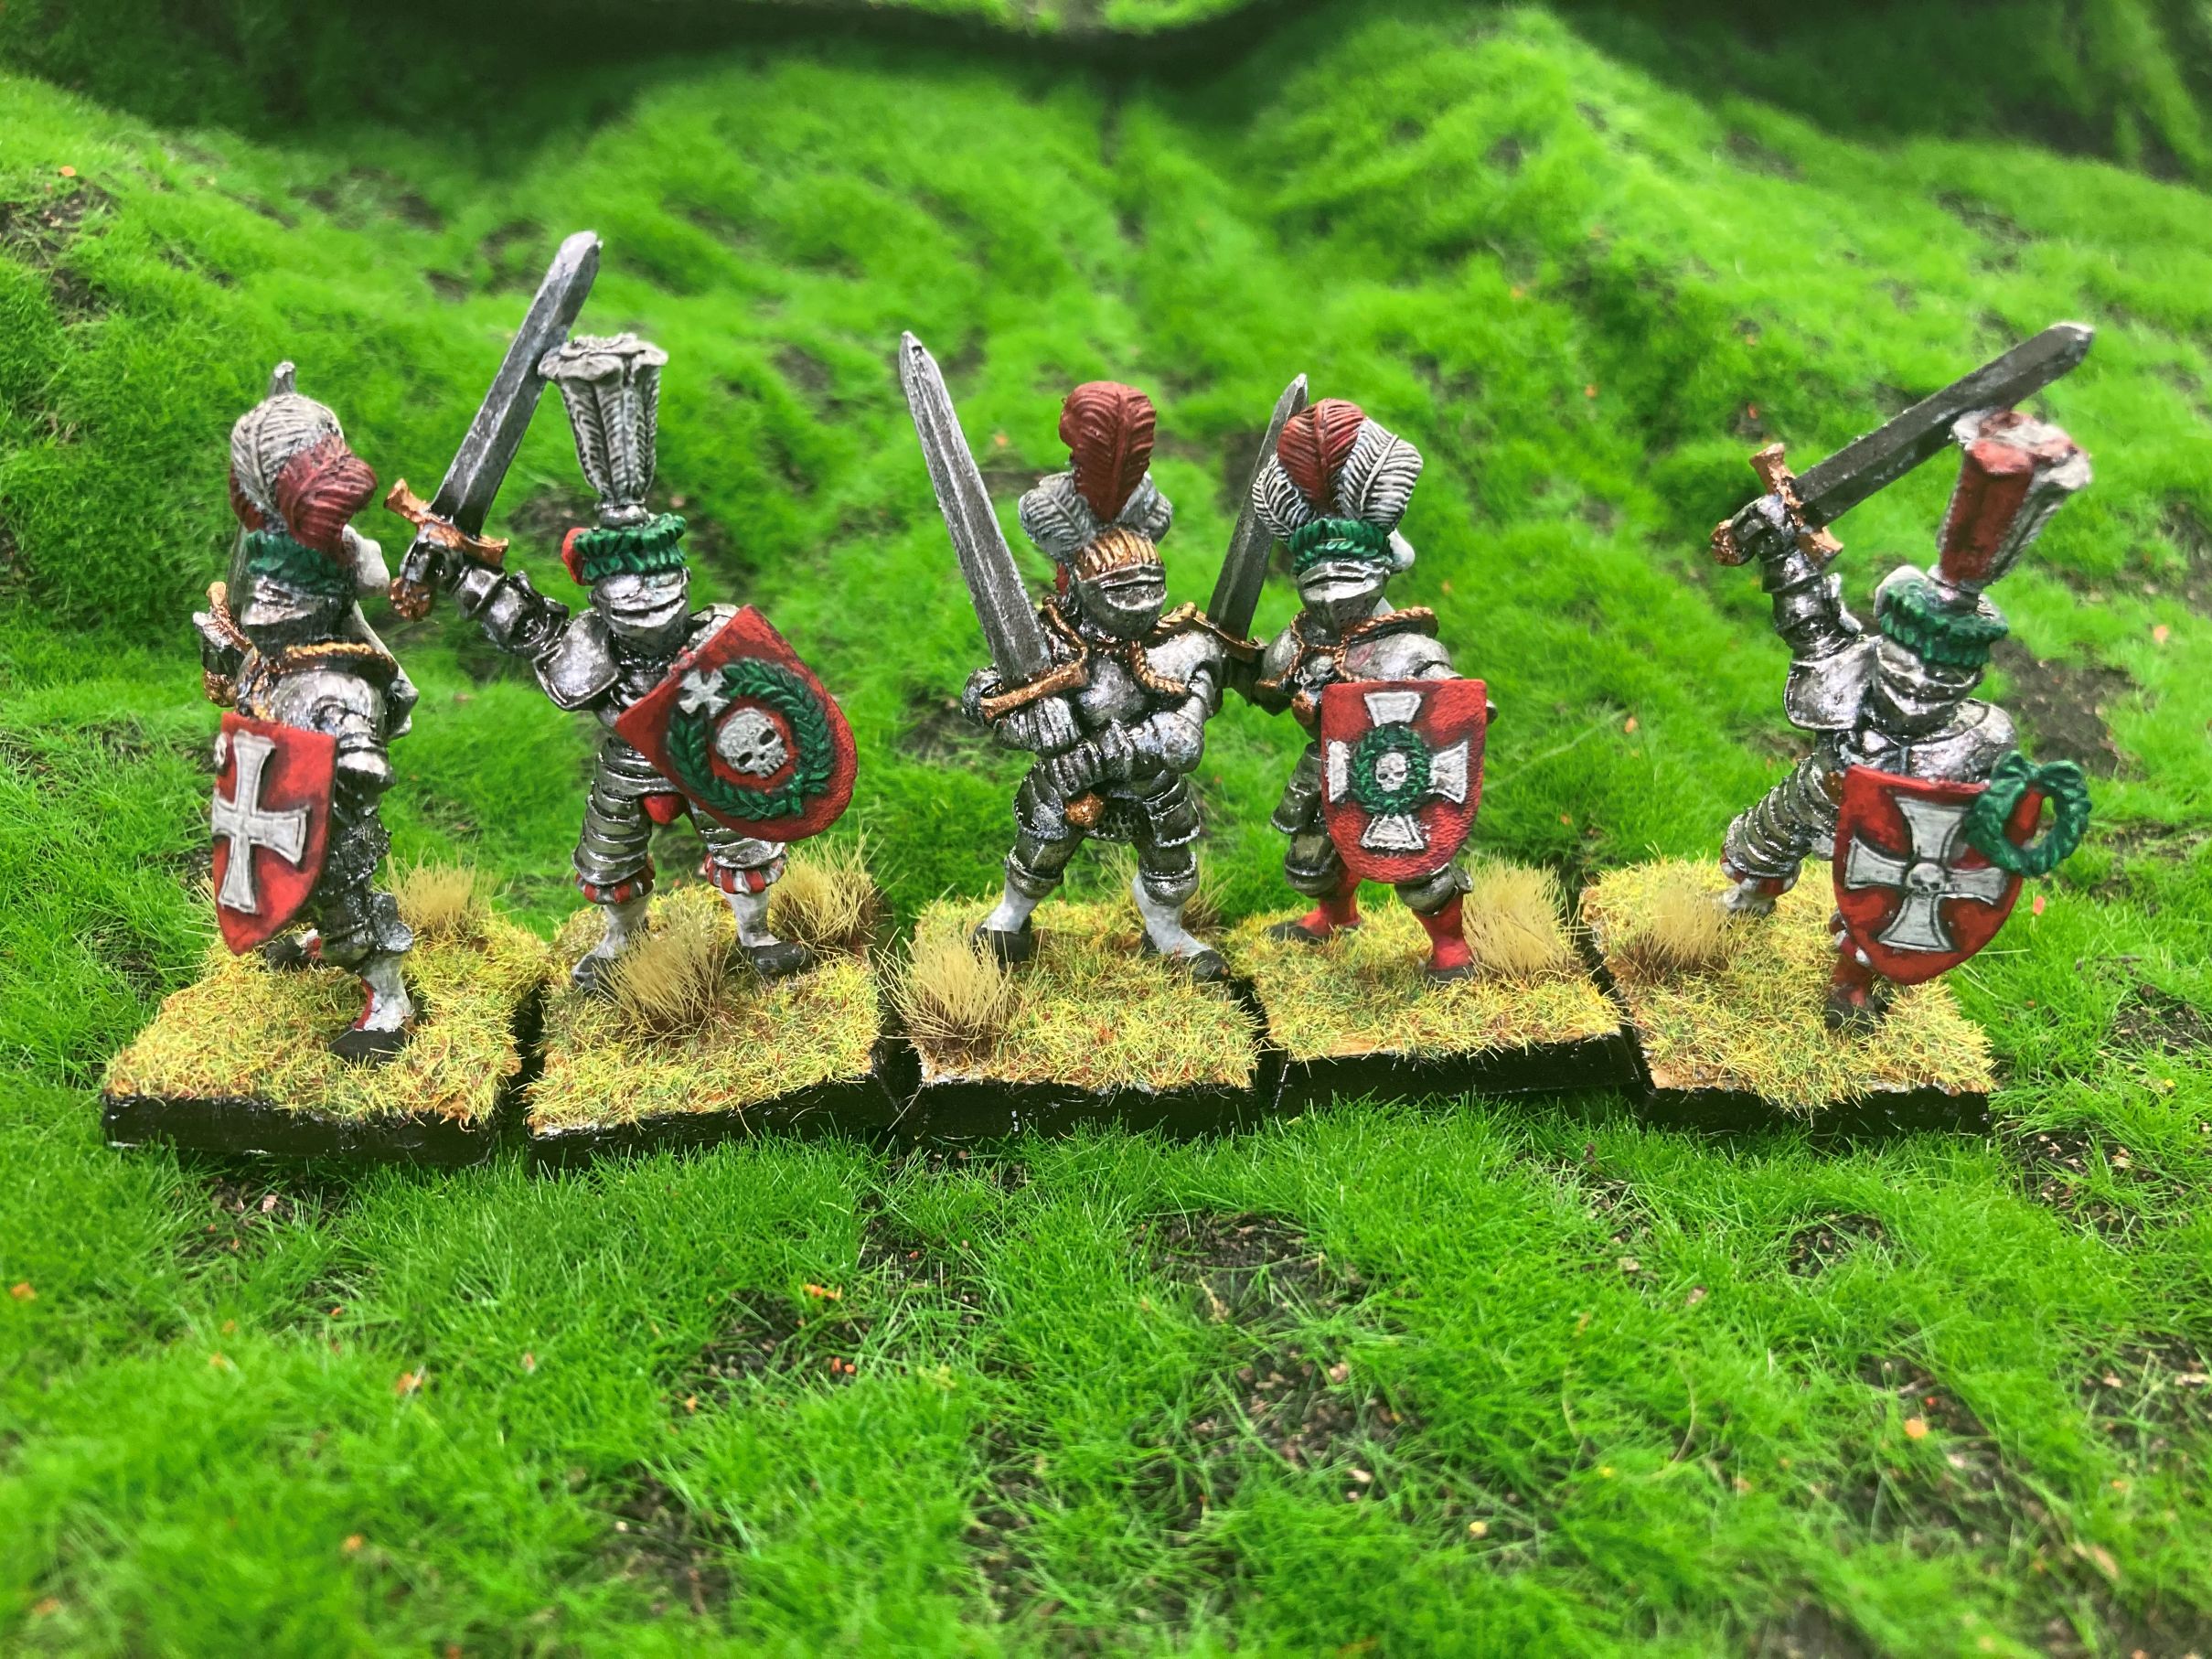

Well, that’s it for now, but I really enjoyed breaking out this army, which was started somewhere around 35 years ago. After 2, 3 and for some of these minis, 4 paintings, I feel like they have finally been painted to a much high standard than I could do in my formative years and in most cases painted completely. Some things of note I you feel like taking on one of your old armies. Many of these older models, especially if they’re lead, are flat sculpts and as you work your way around, you’ll find parts and details sort of just blend into another part of the mini. In many cases you’re just going to paint in your own textures or separations. Speaking of textures and details, again, with the older metal sculpts you’ll find details can be shallow or missing. You’re going to again have to use your paint brush to fill in detail or fool the eye with textures. If you want to add to an old army or start your own from the ground up, you’re going to have to either be dedicated to the hunt for deals or be willing to spend because a search on eBay shocked me at going prices.
I’m definitely going to be keeping this project blog going. likely until I completely finish the whole collection. If its something people enjoy I have several other Old Hammer armies to go. Chaos (warriors of, and demons), Beastmen, Undead….uh, I mean Vampire Counts, Dark Elves, Skaven…
 Next batch on deck.
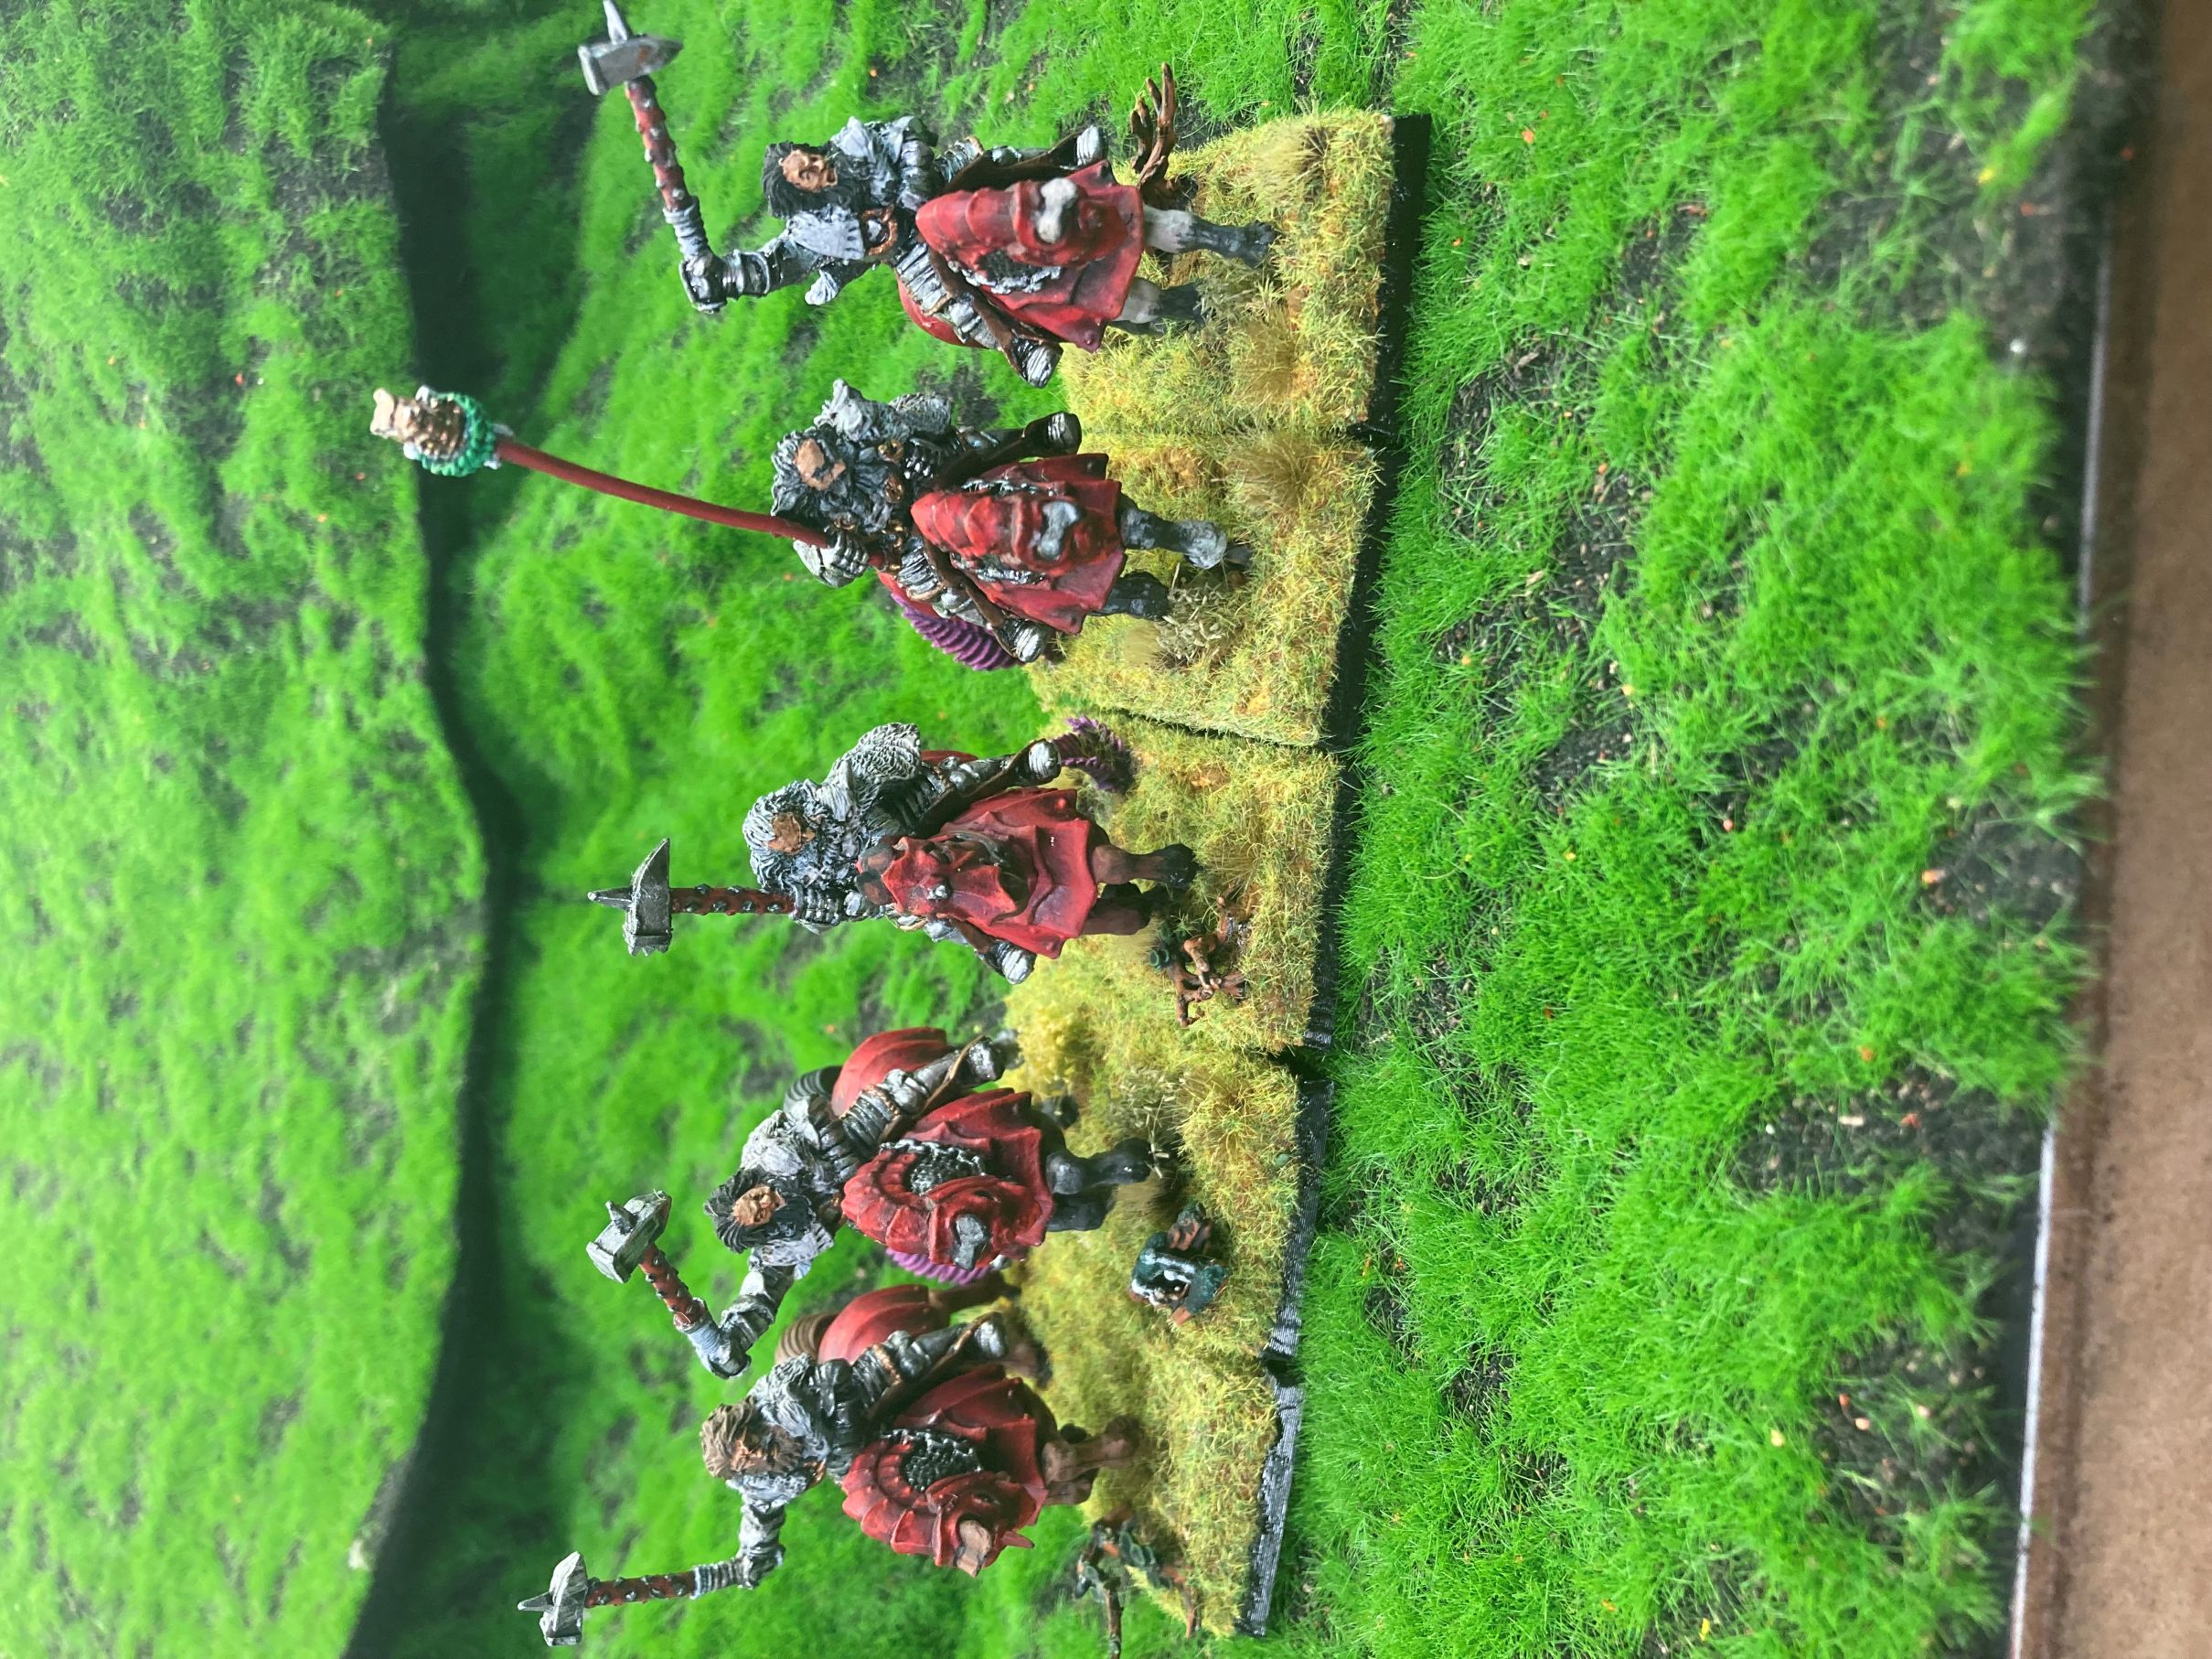
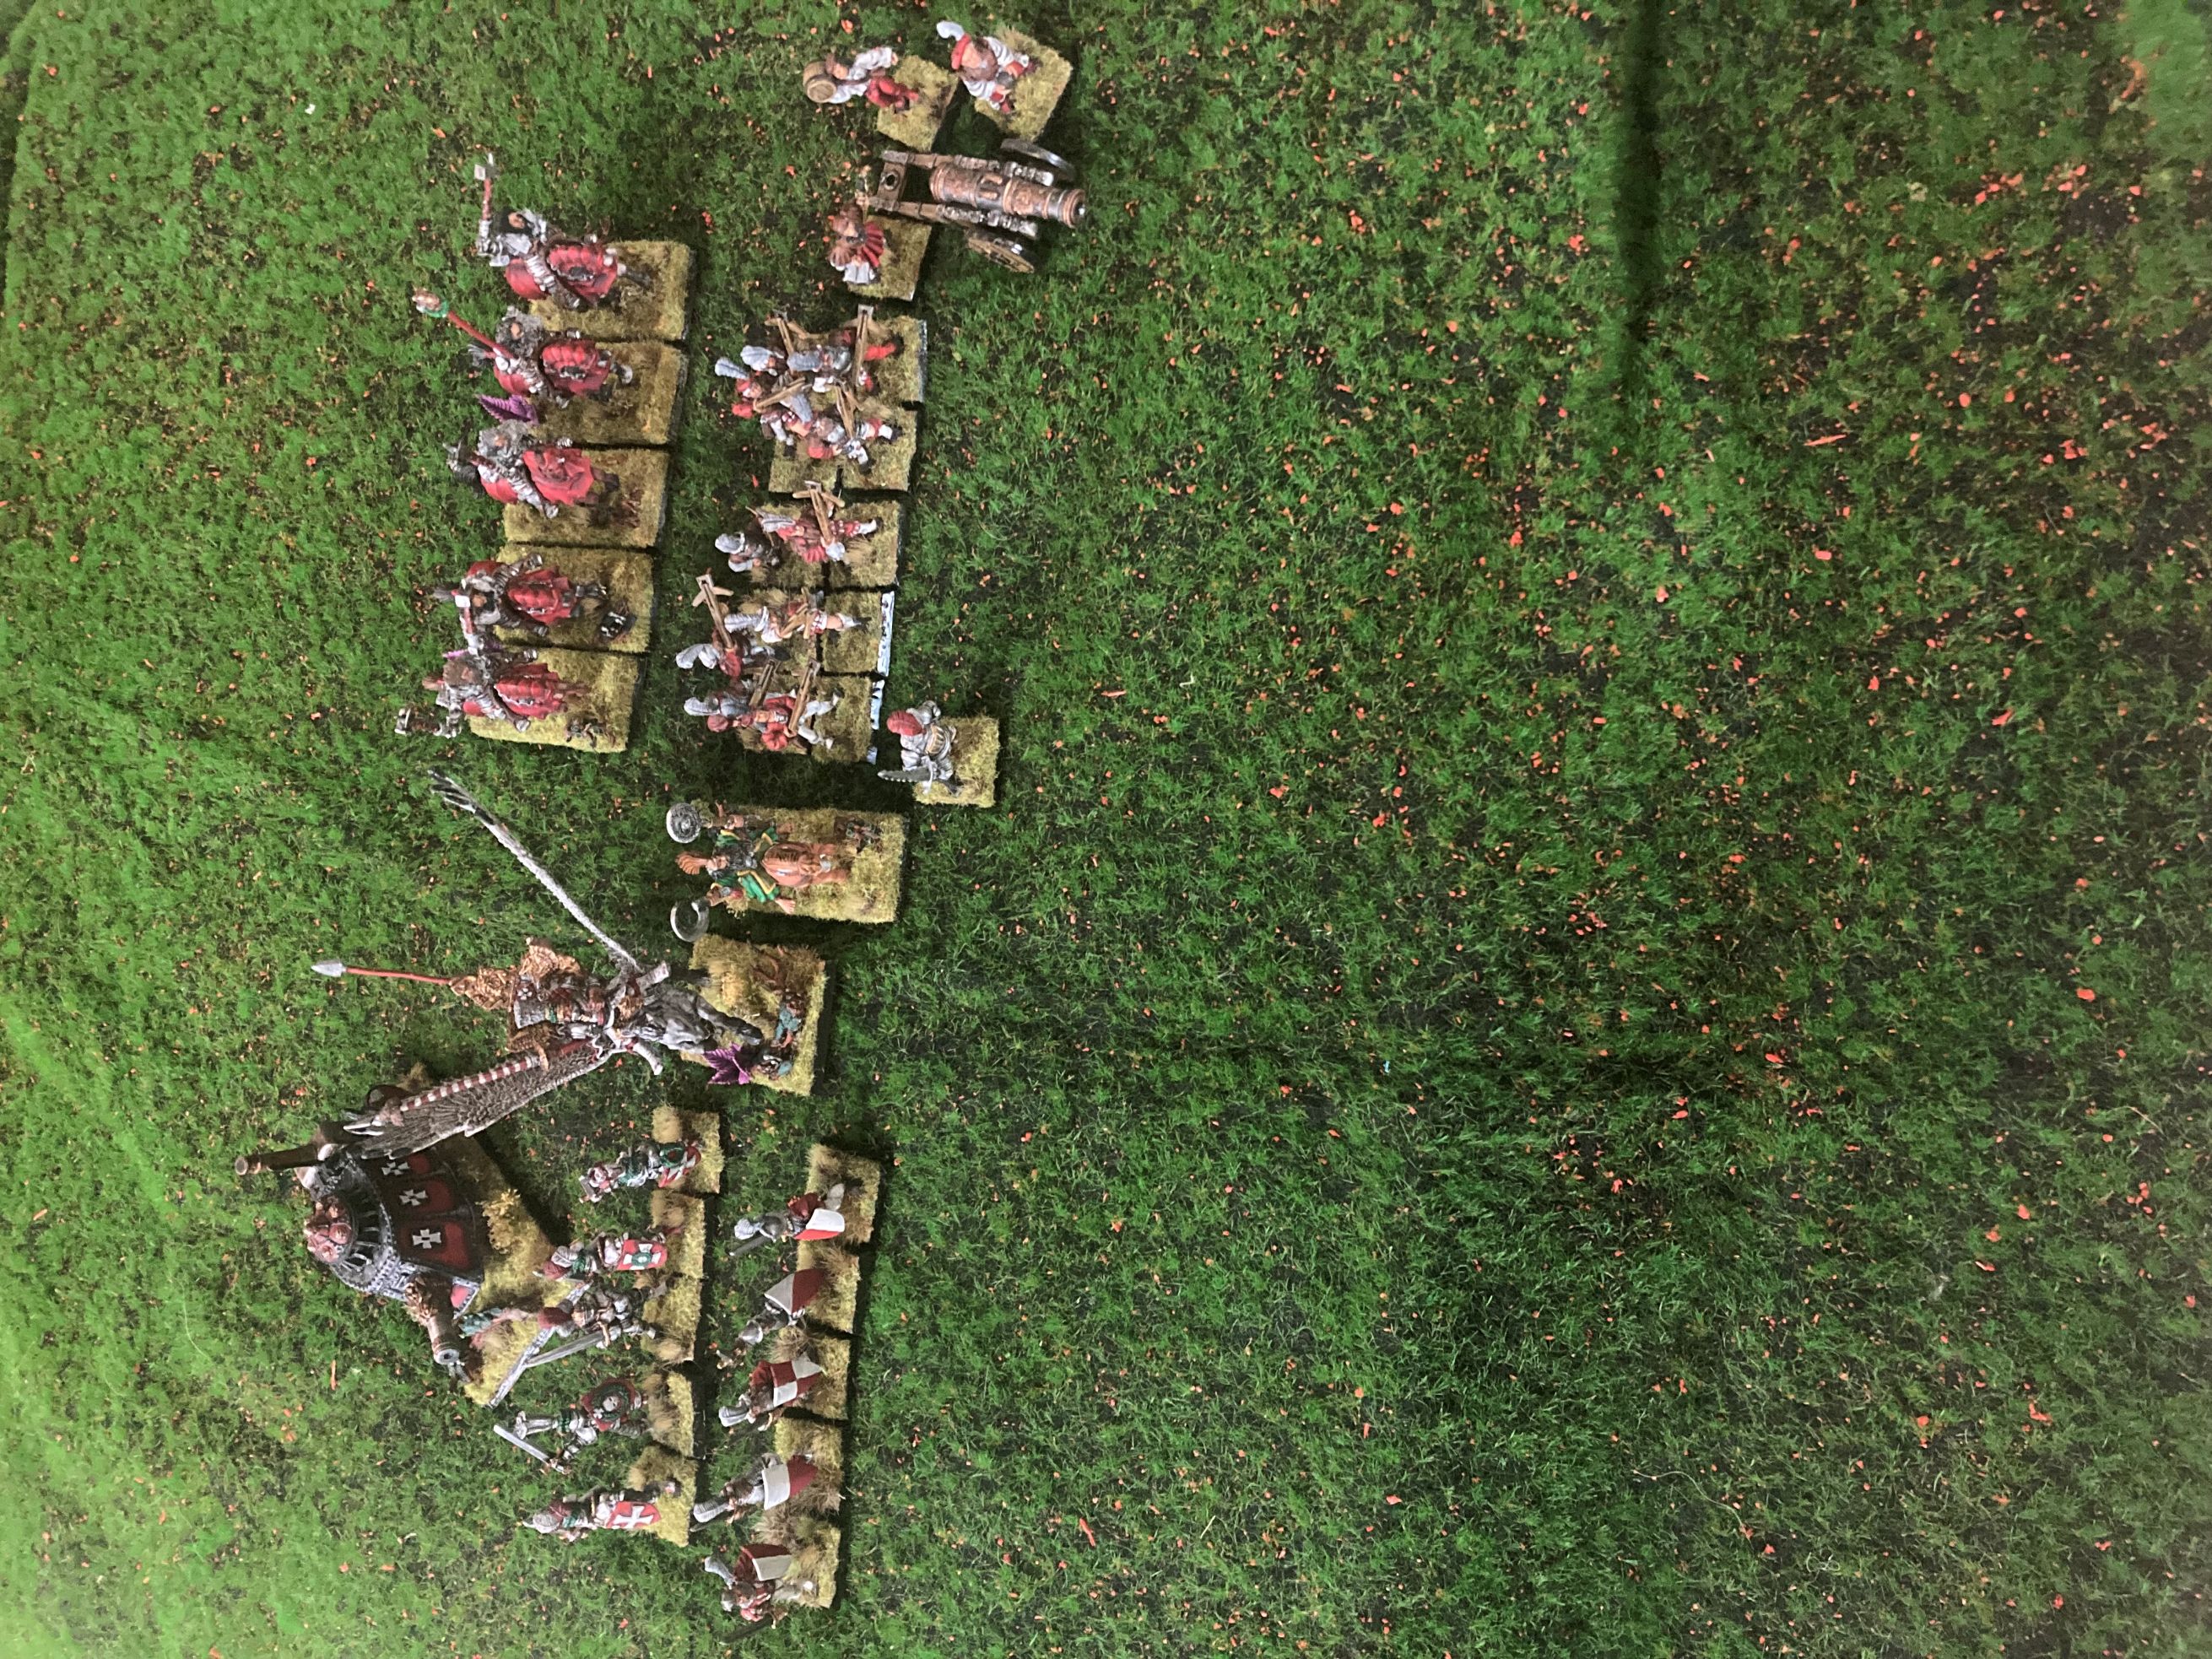
Glamor Shots
 No. Not that sort of Glamor Shot.
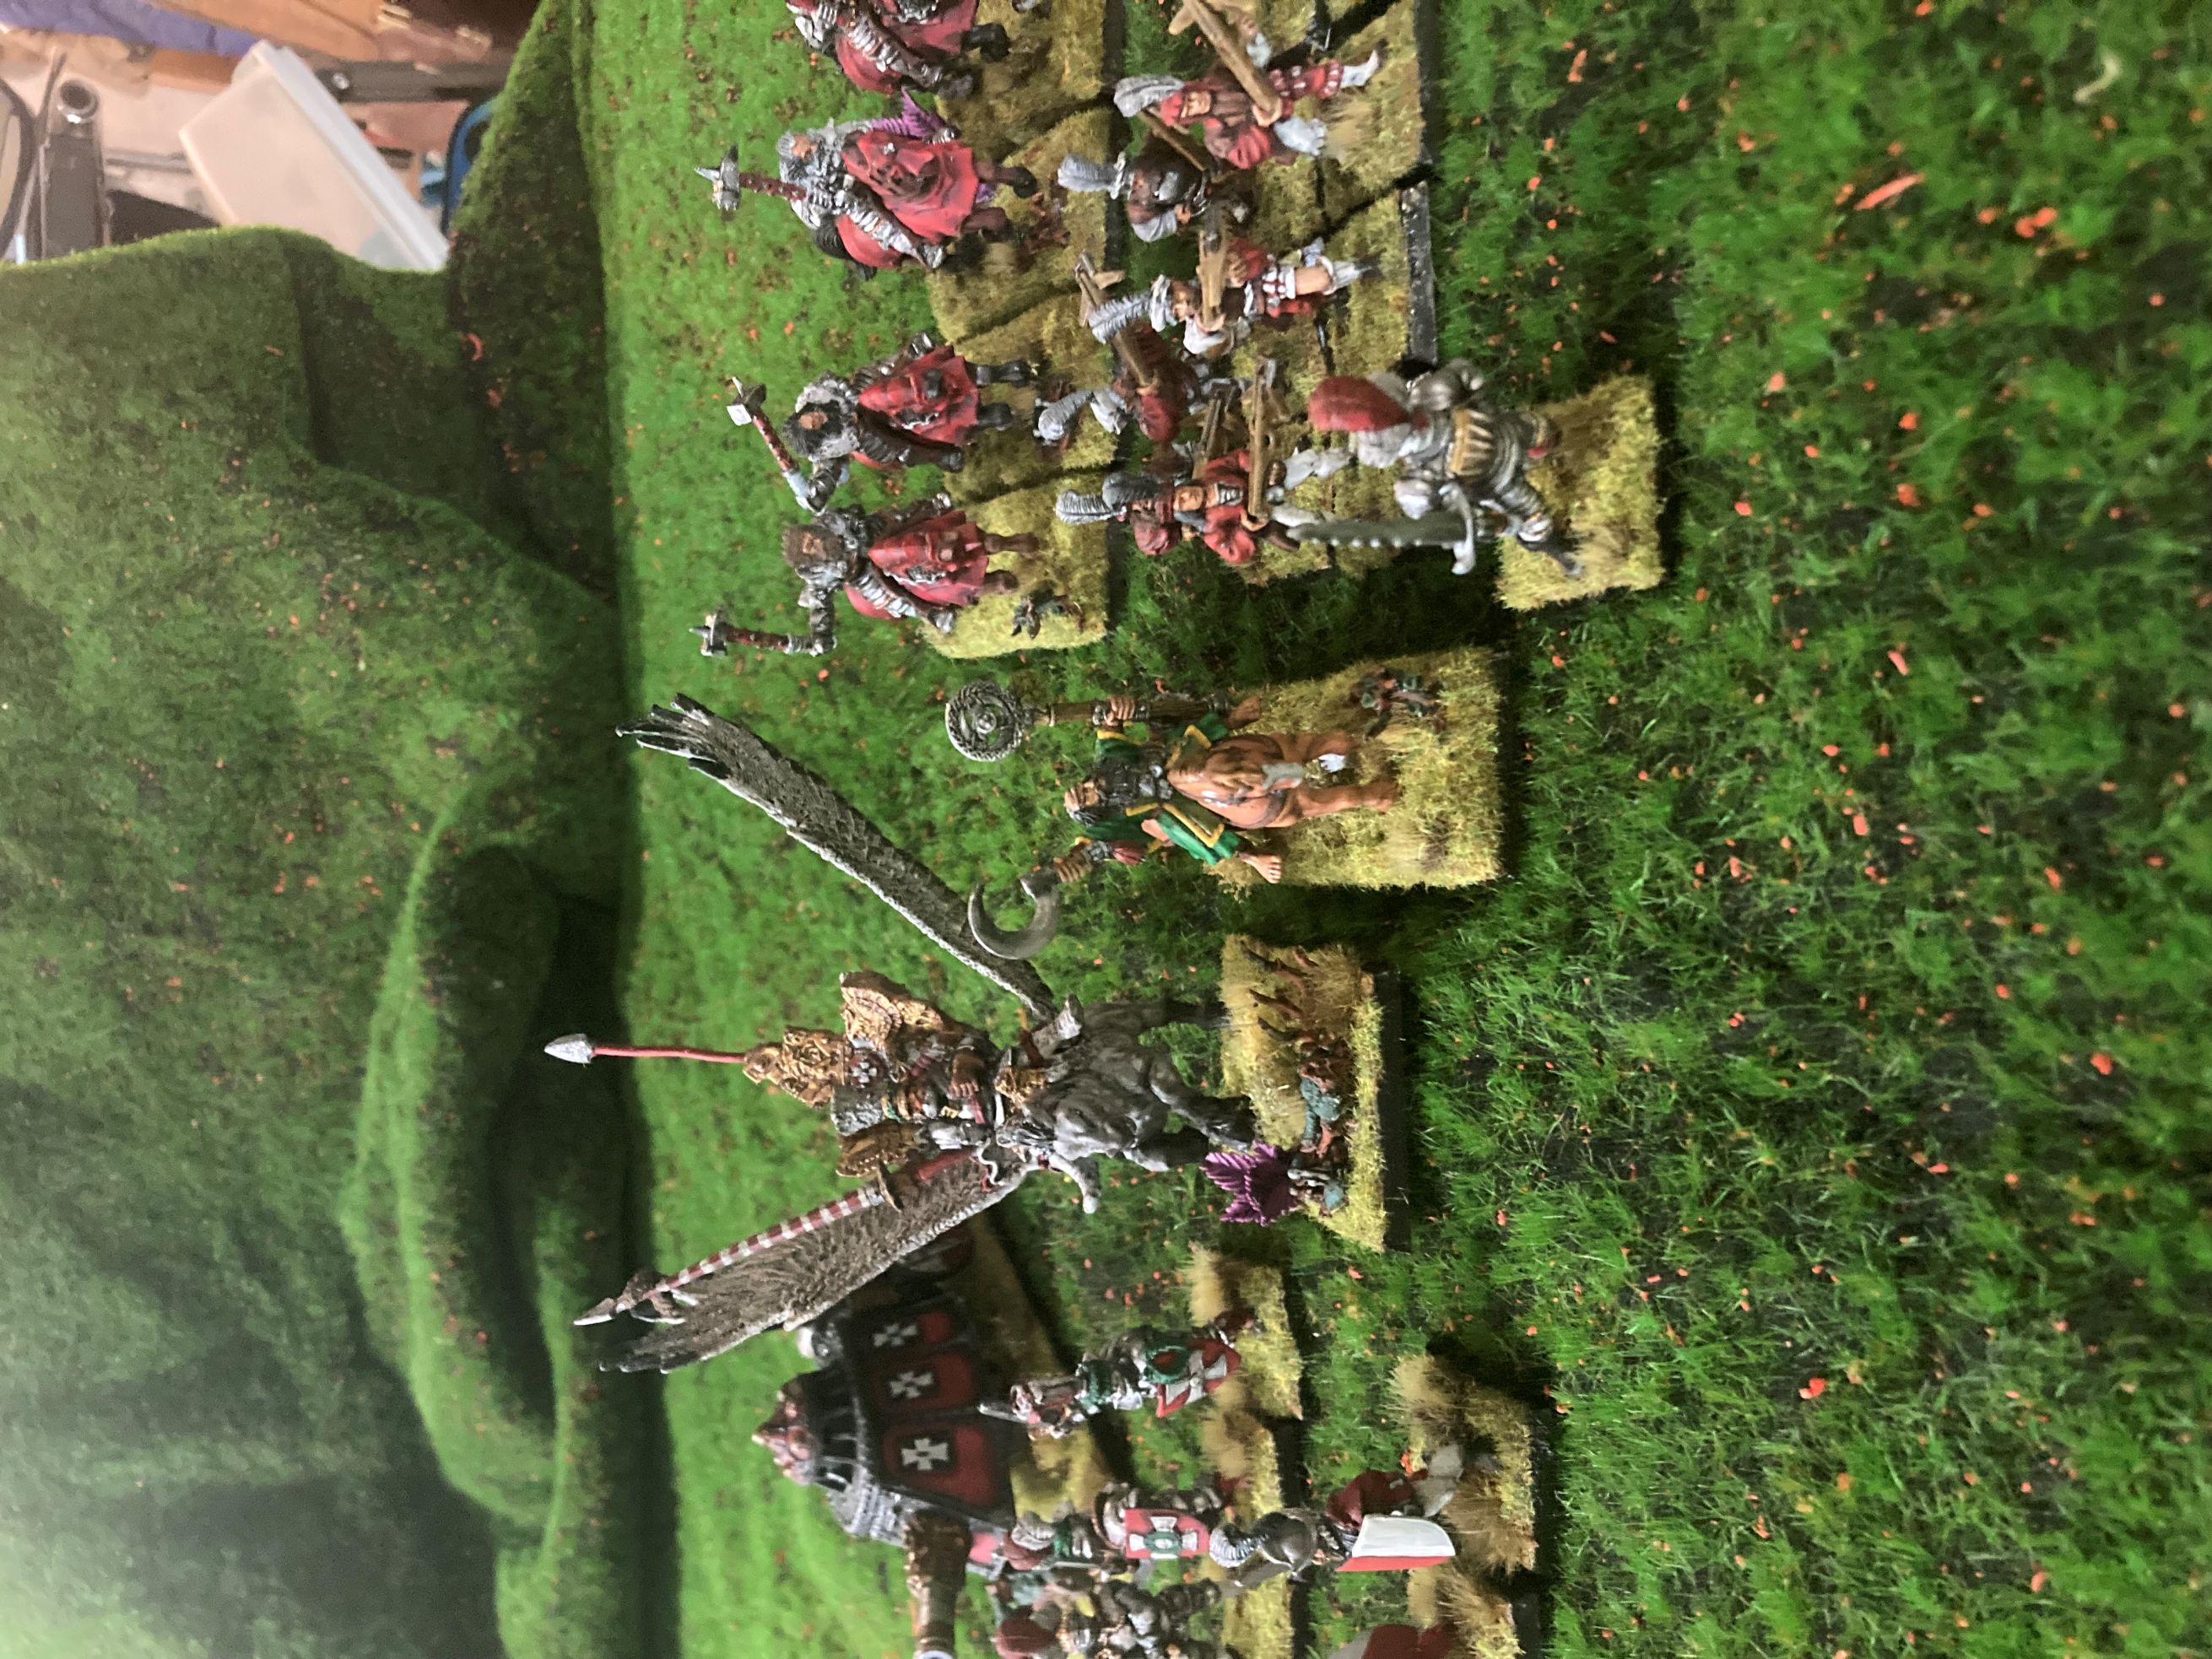
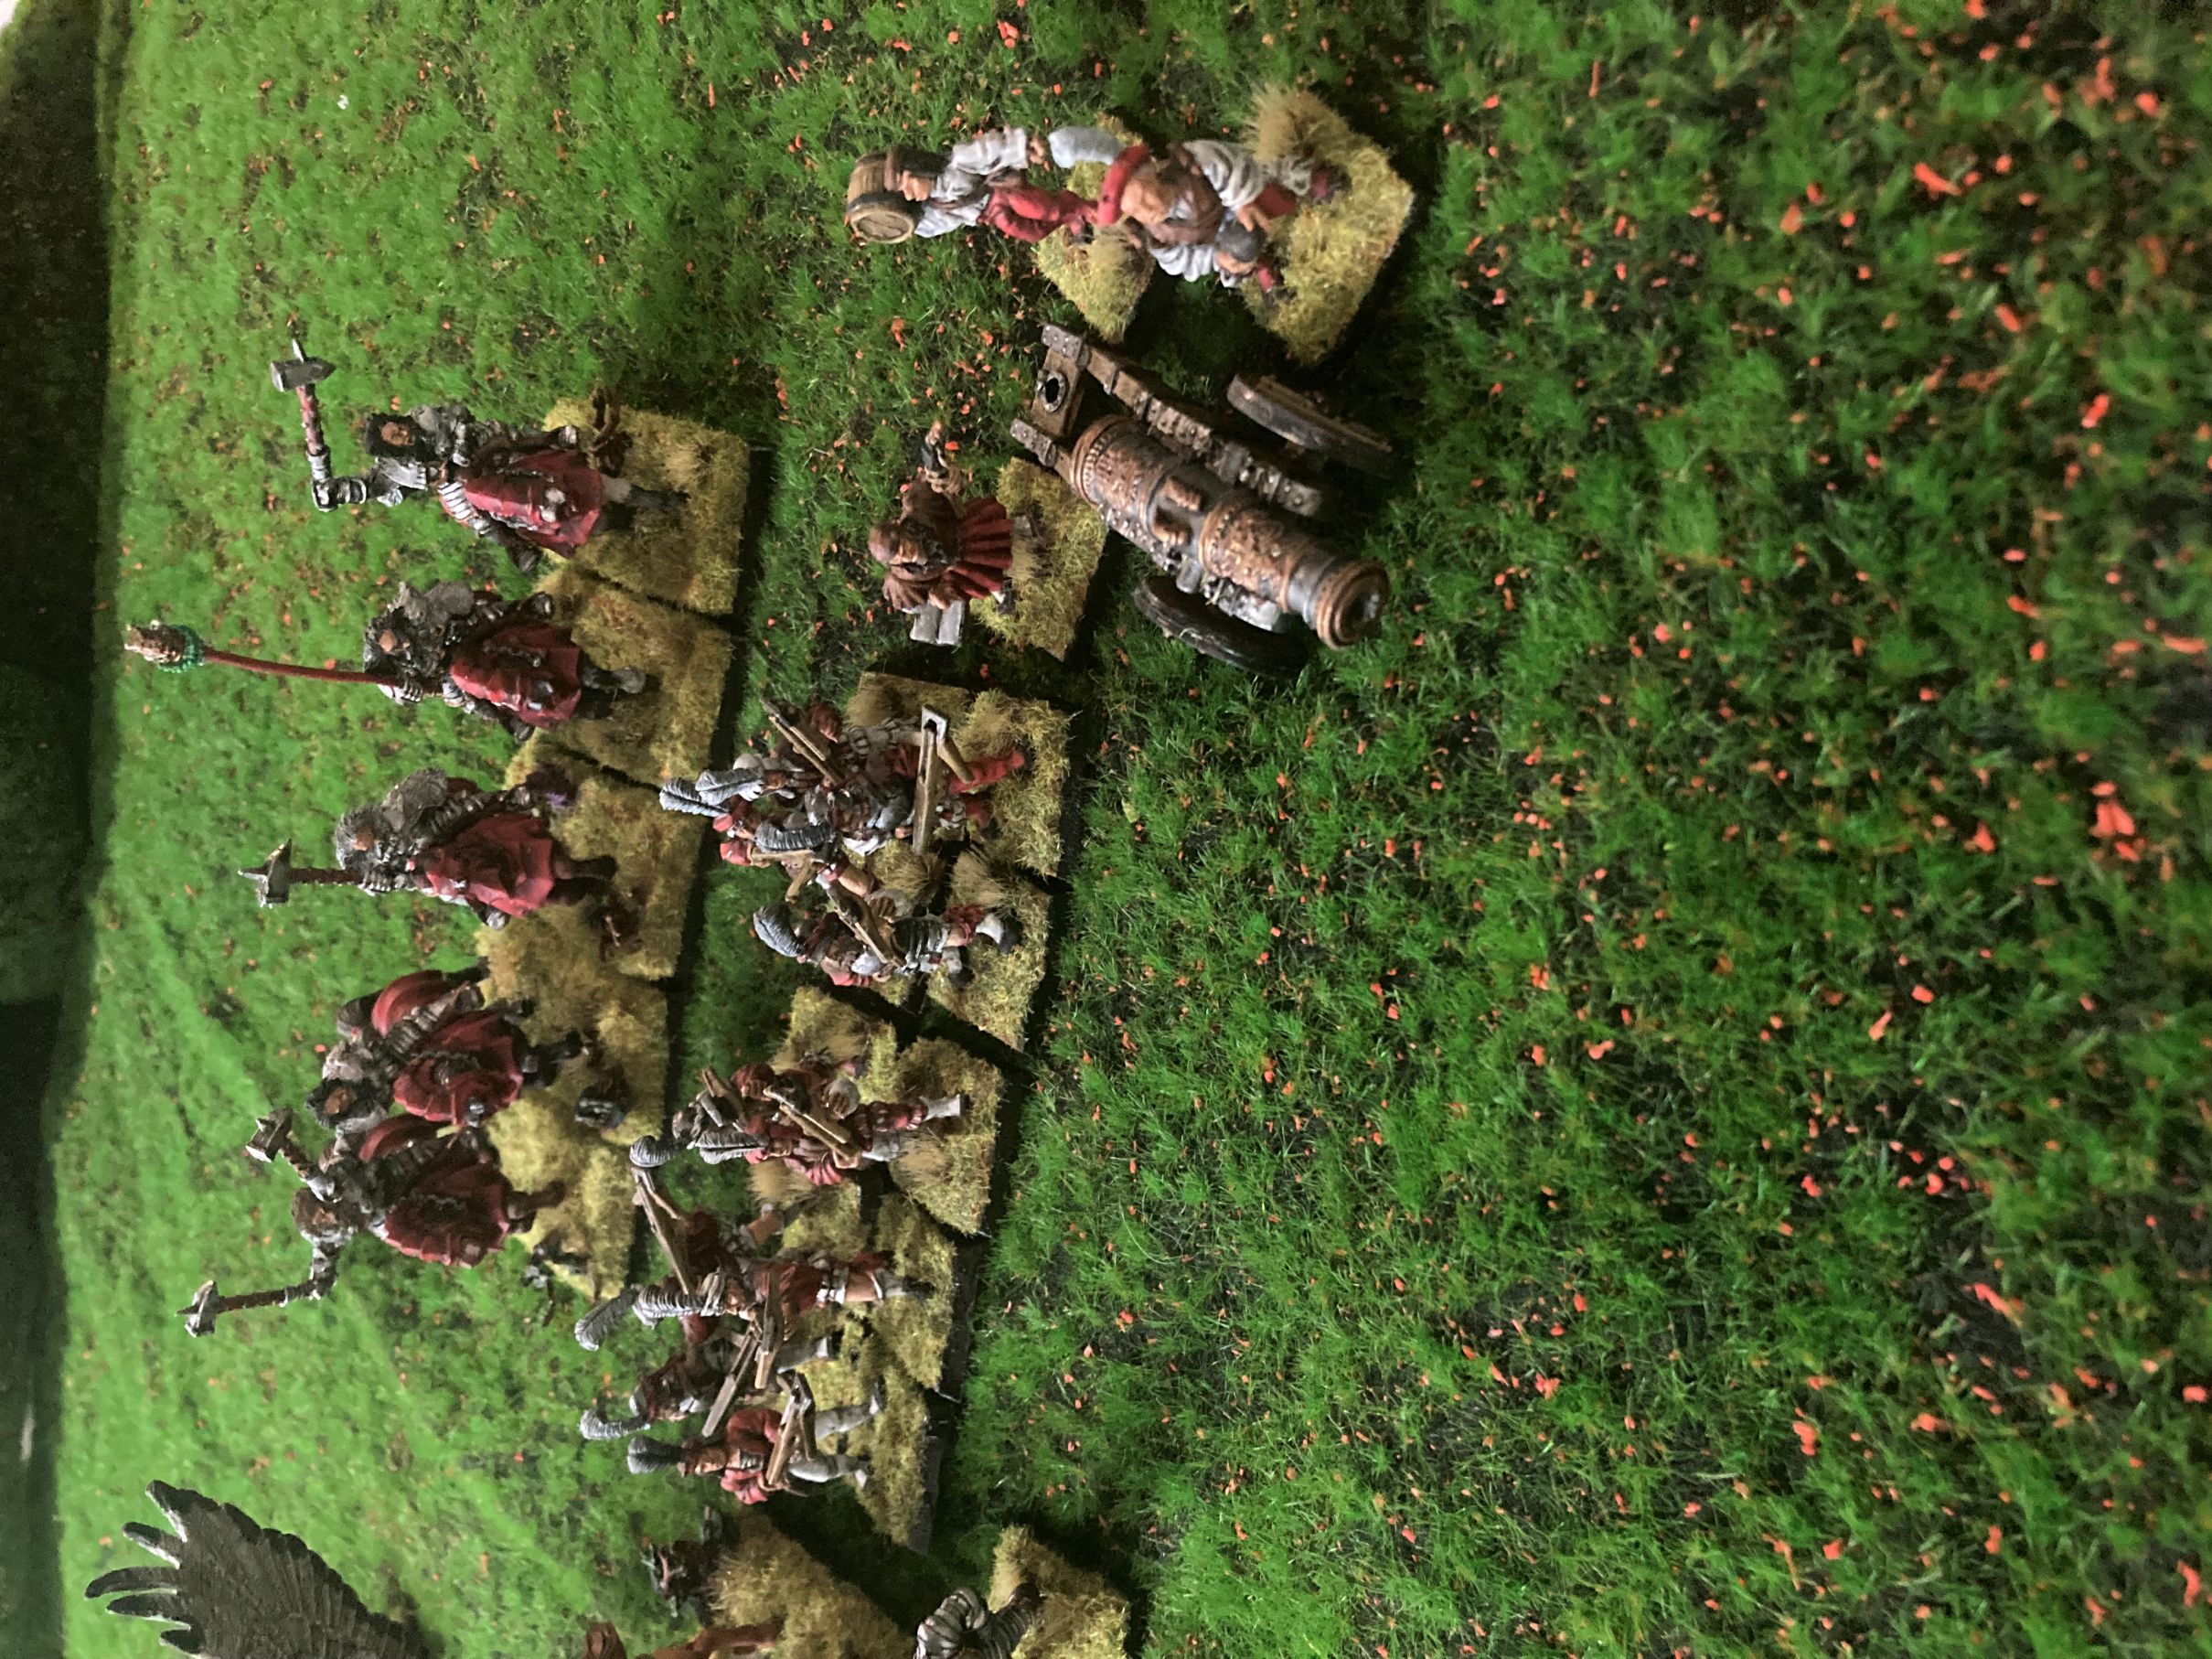
With the day running down it was time for start taking some photos of the army as it has been completed and some closer photographs of the individual models and units. So, without further ado, a grand(ish) reveal…..
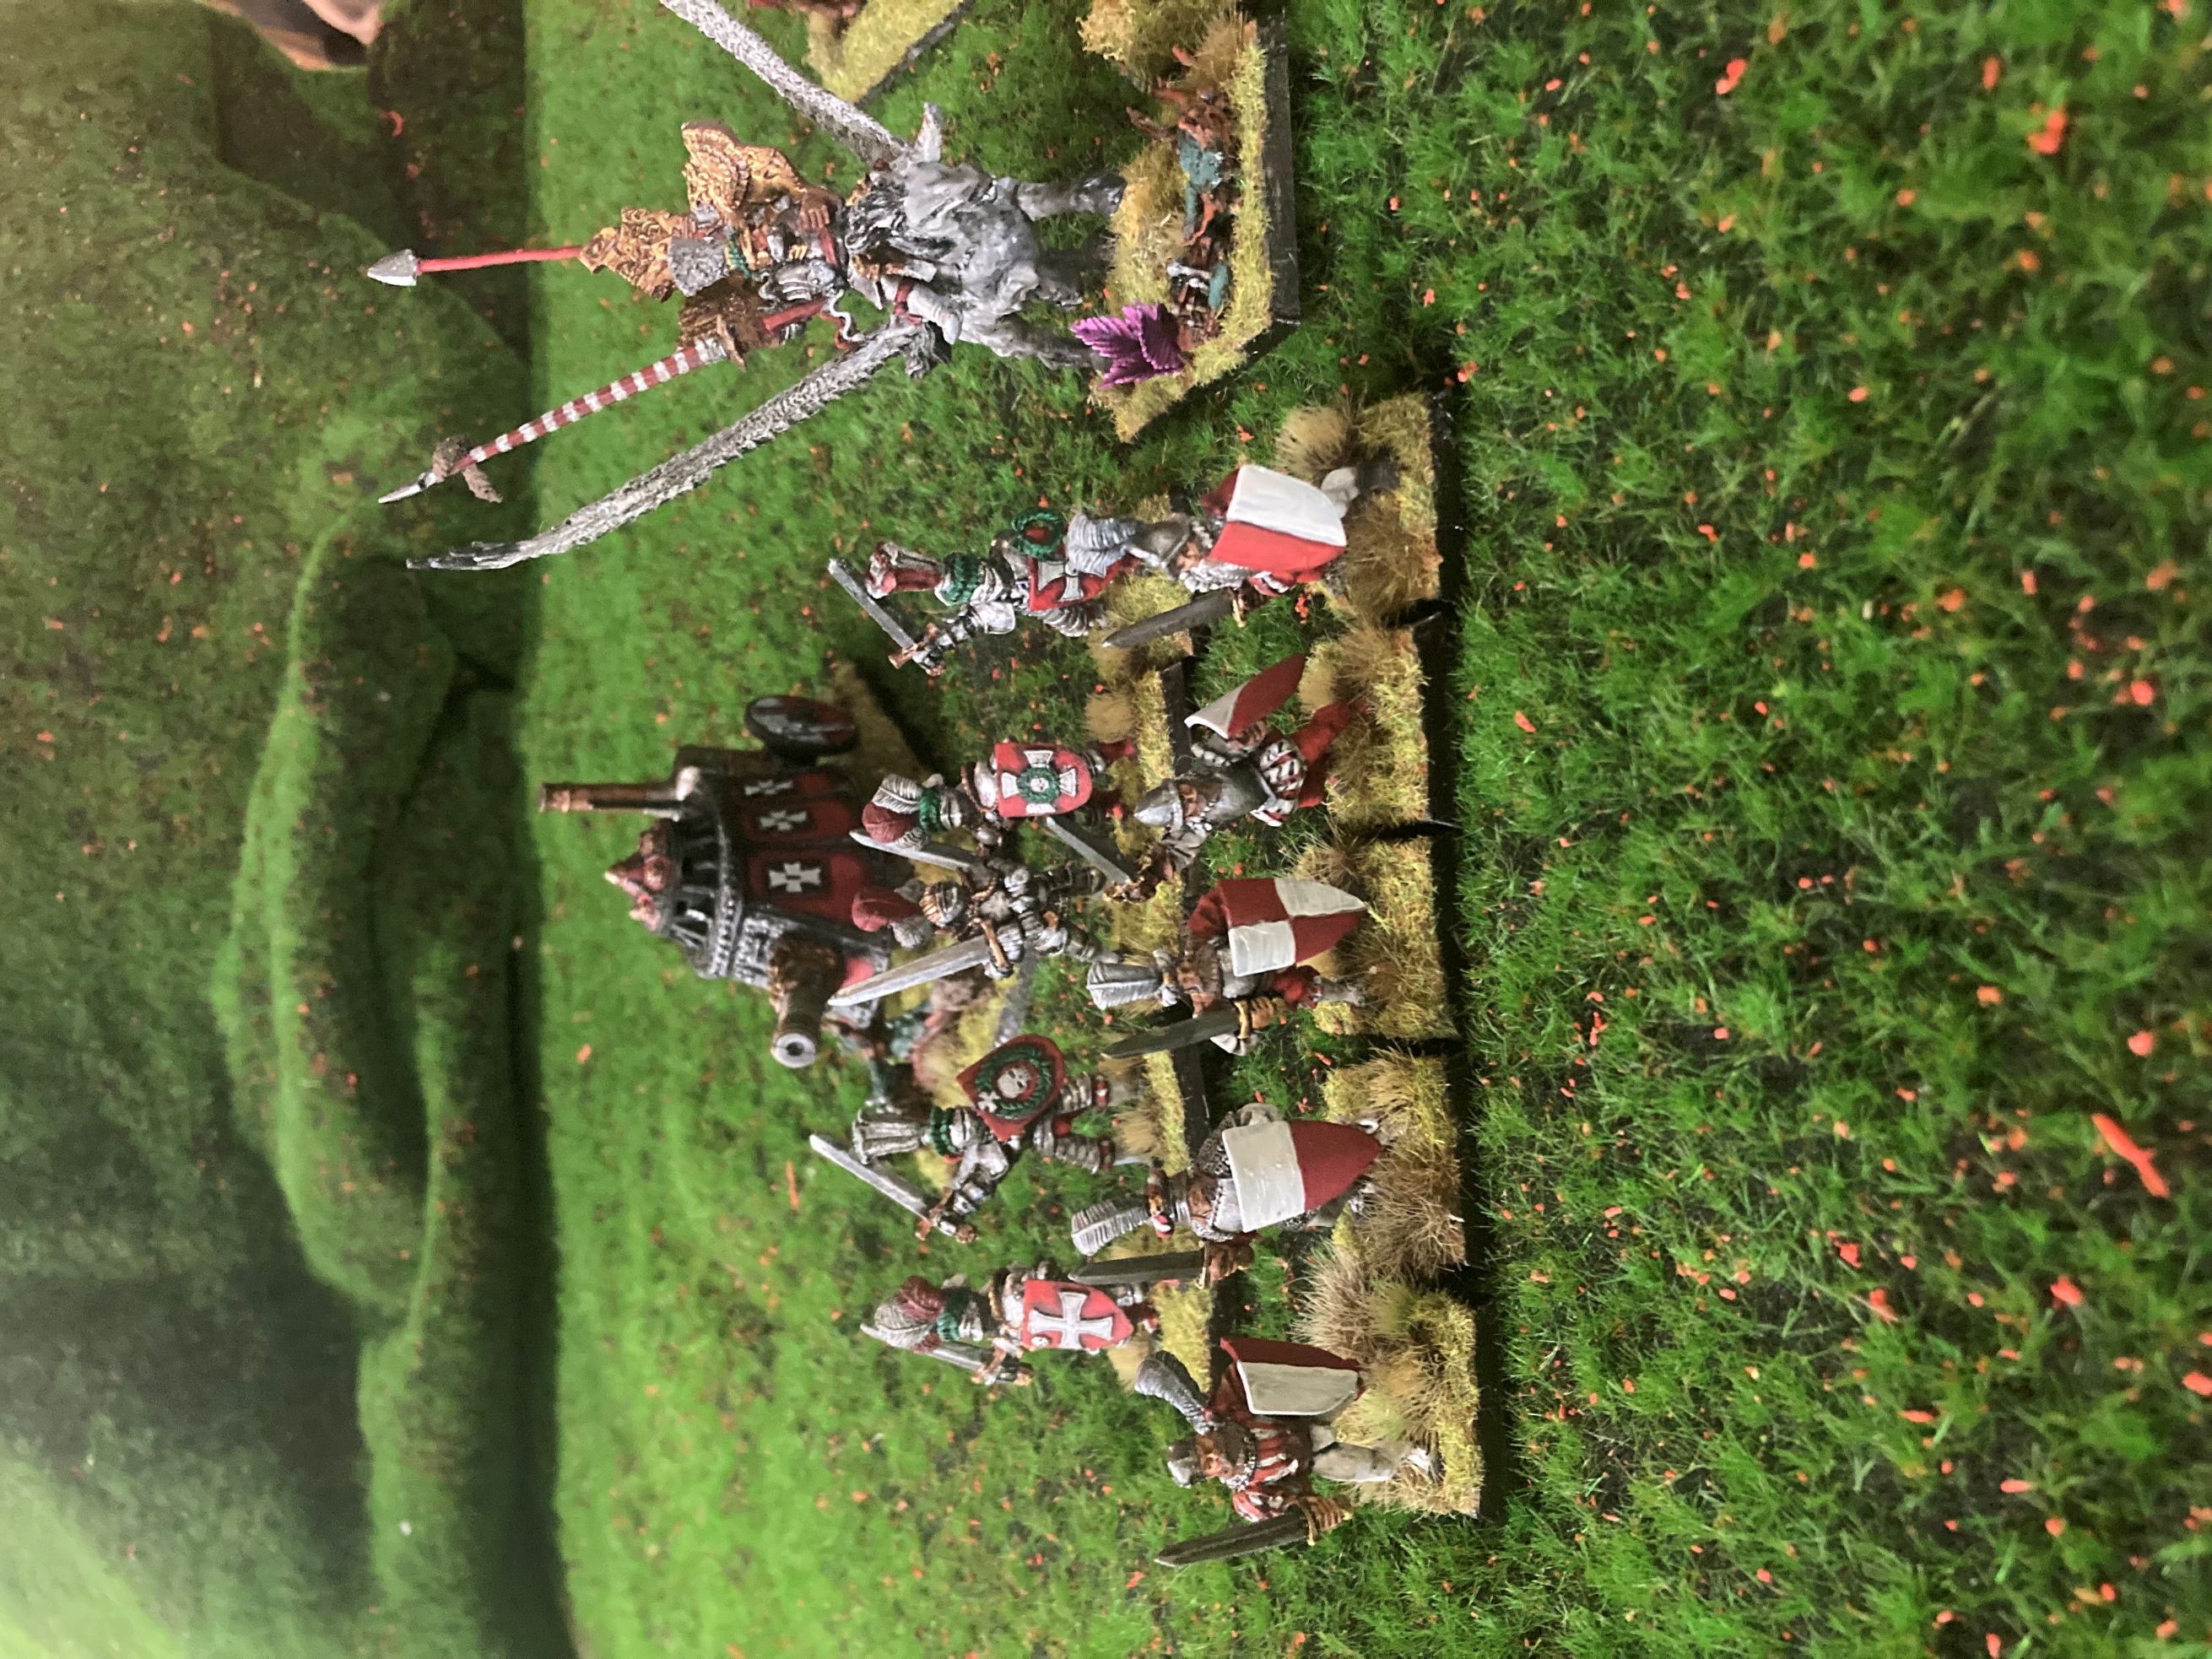
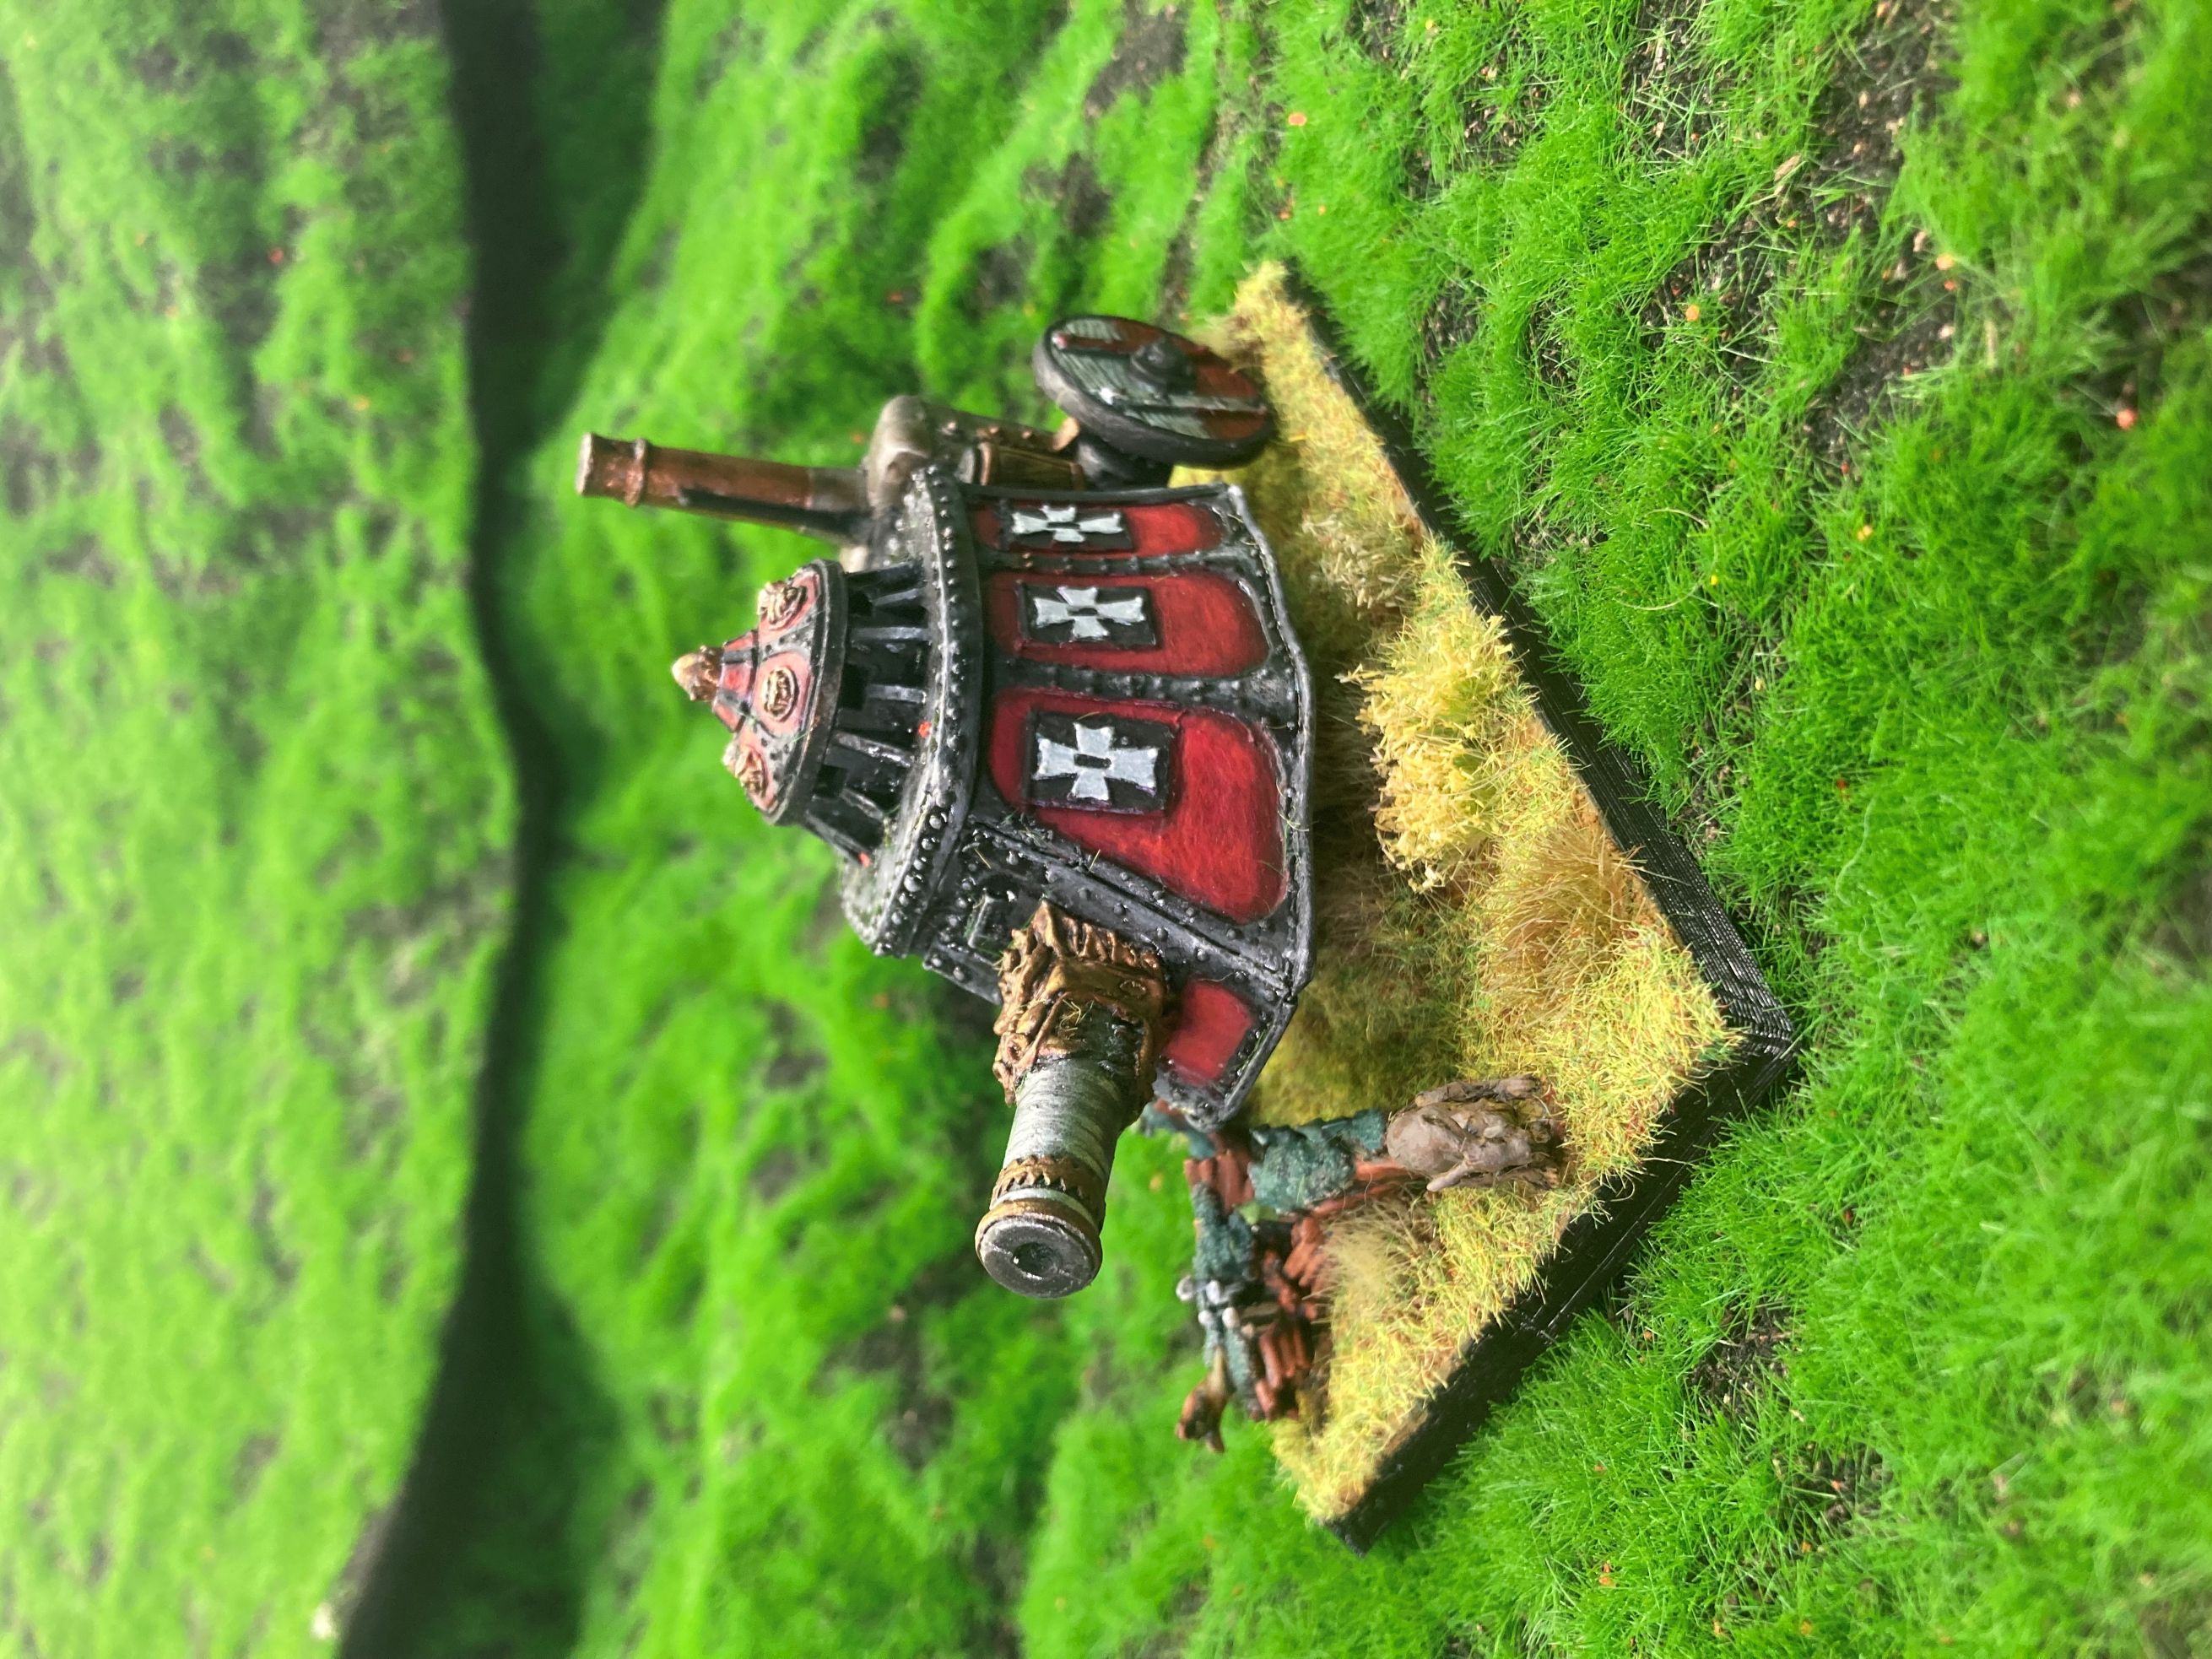
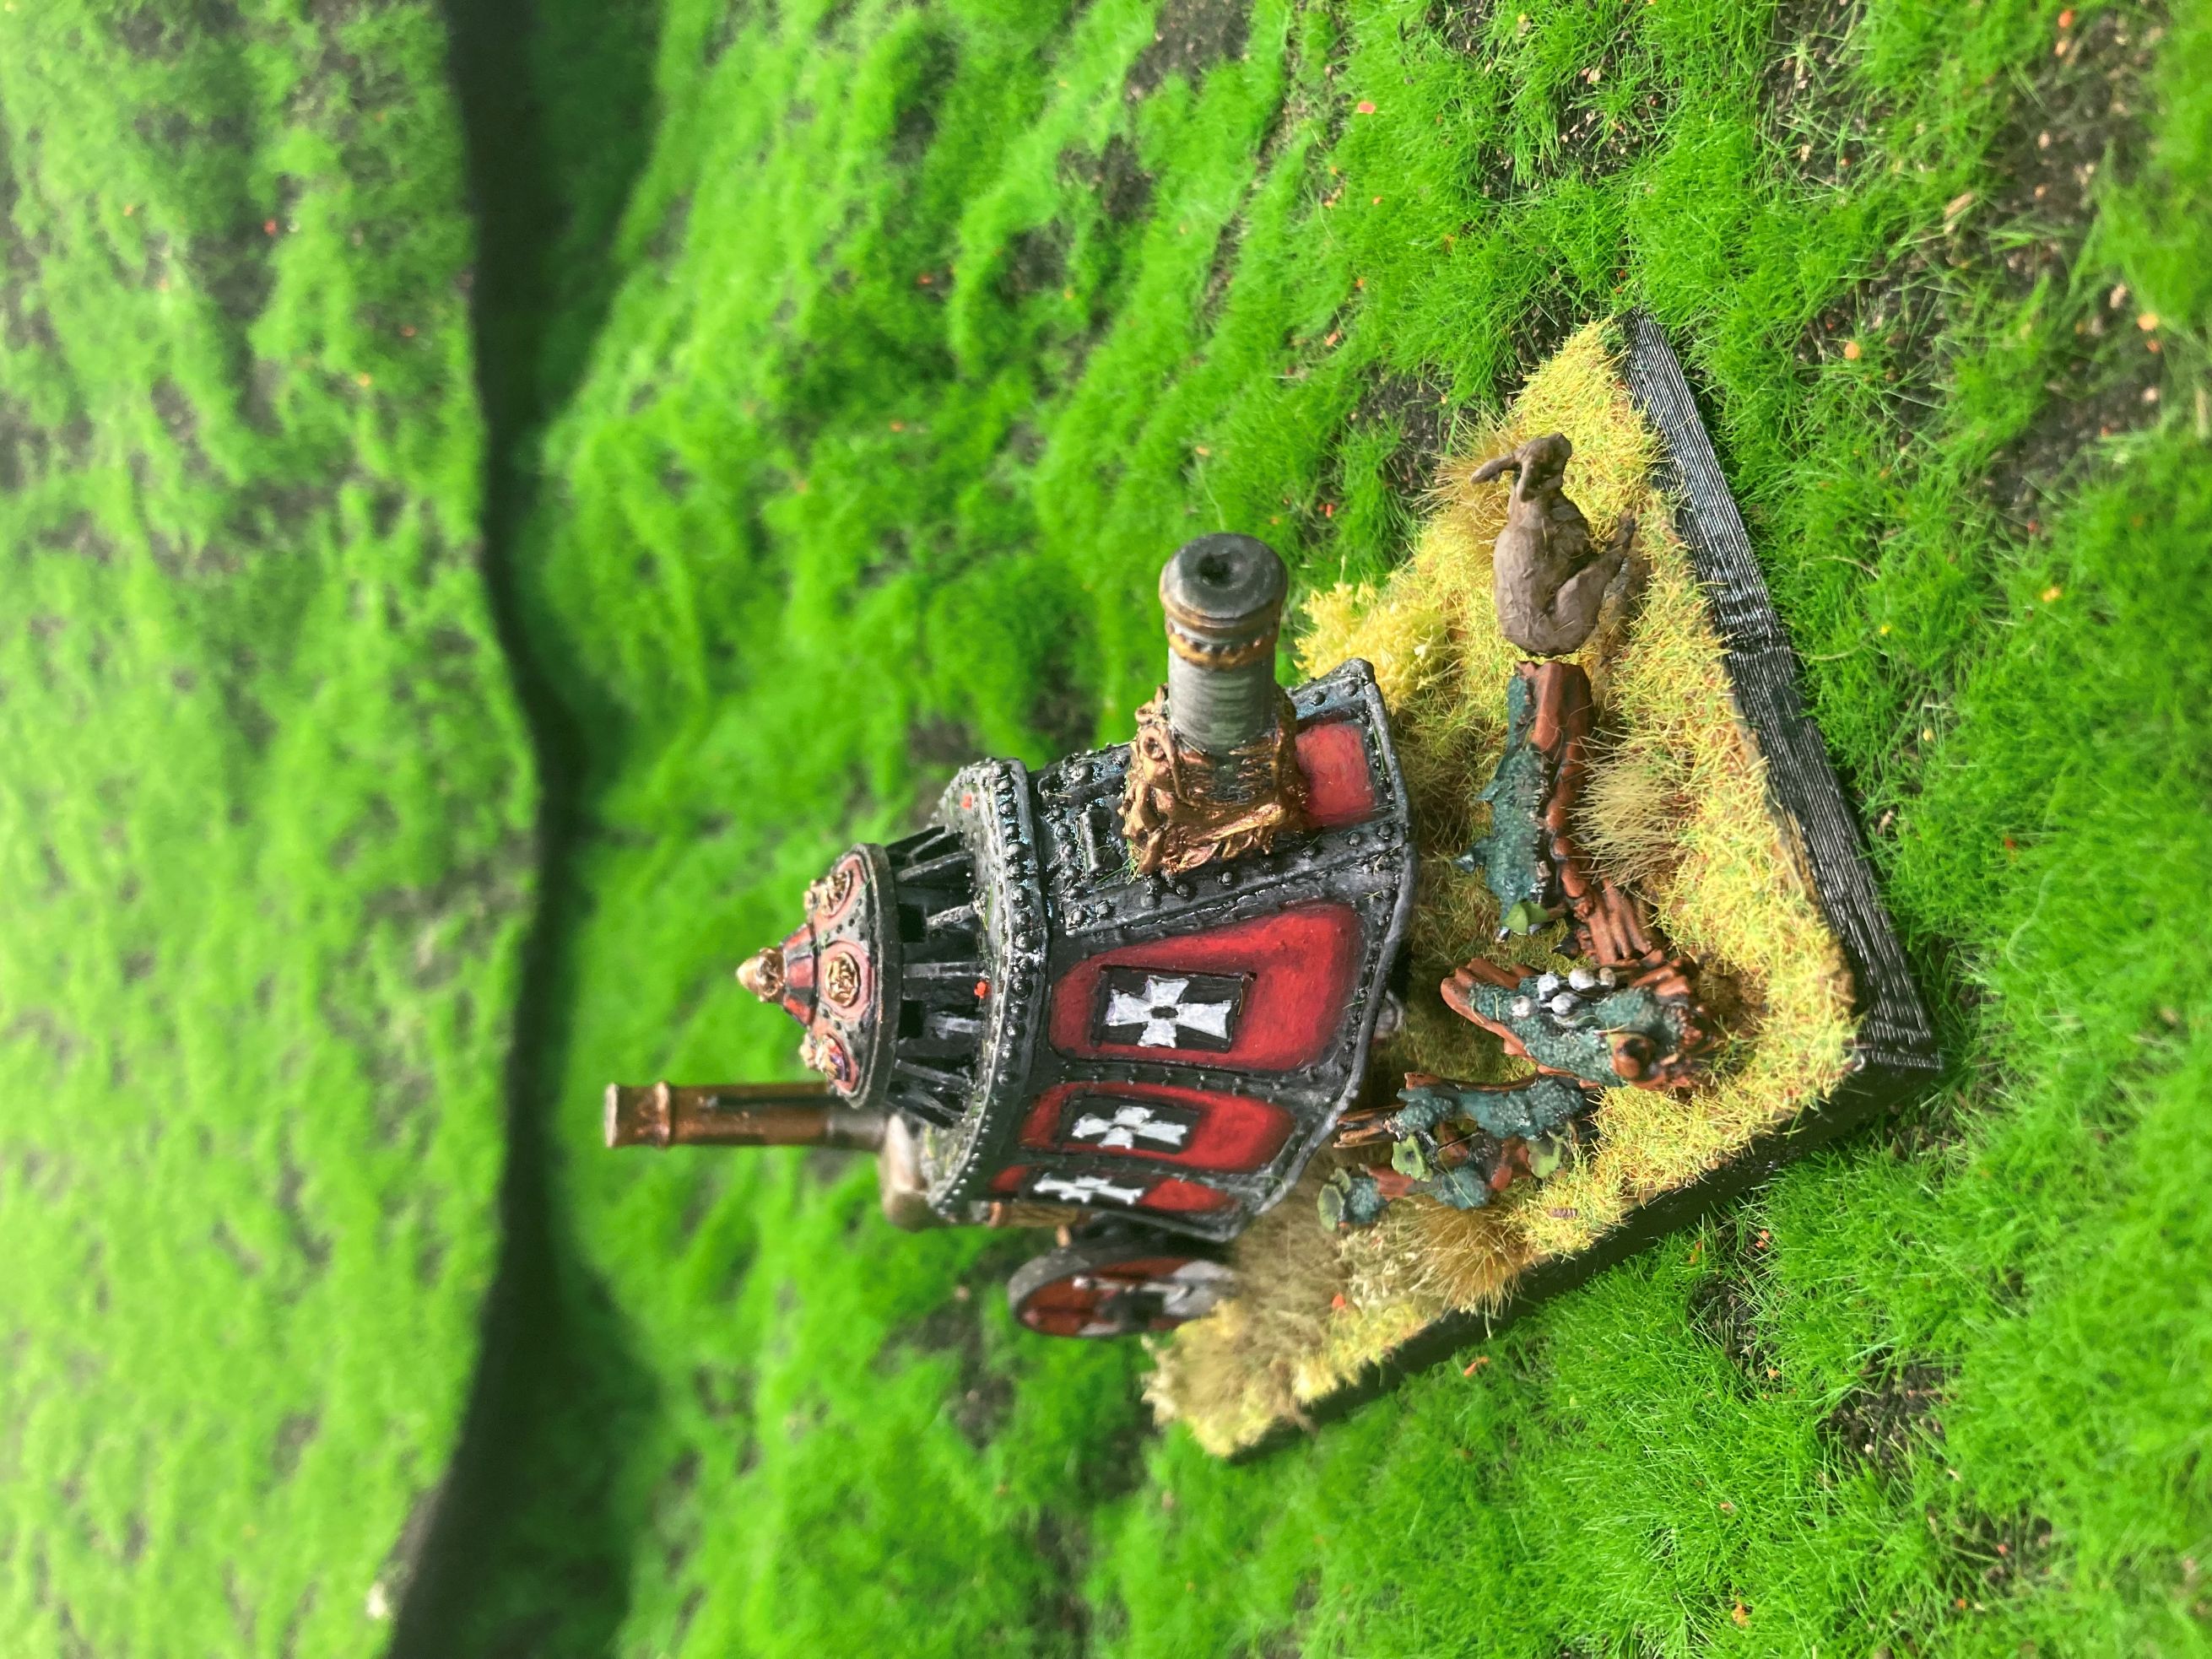
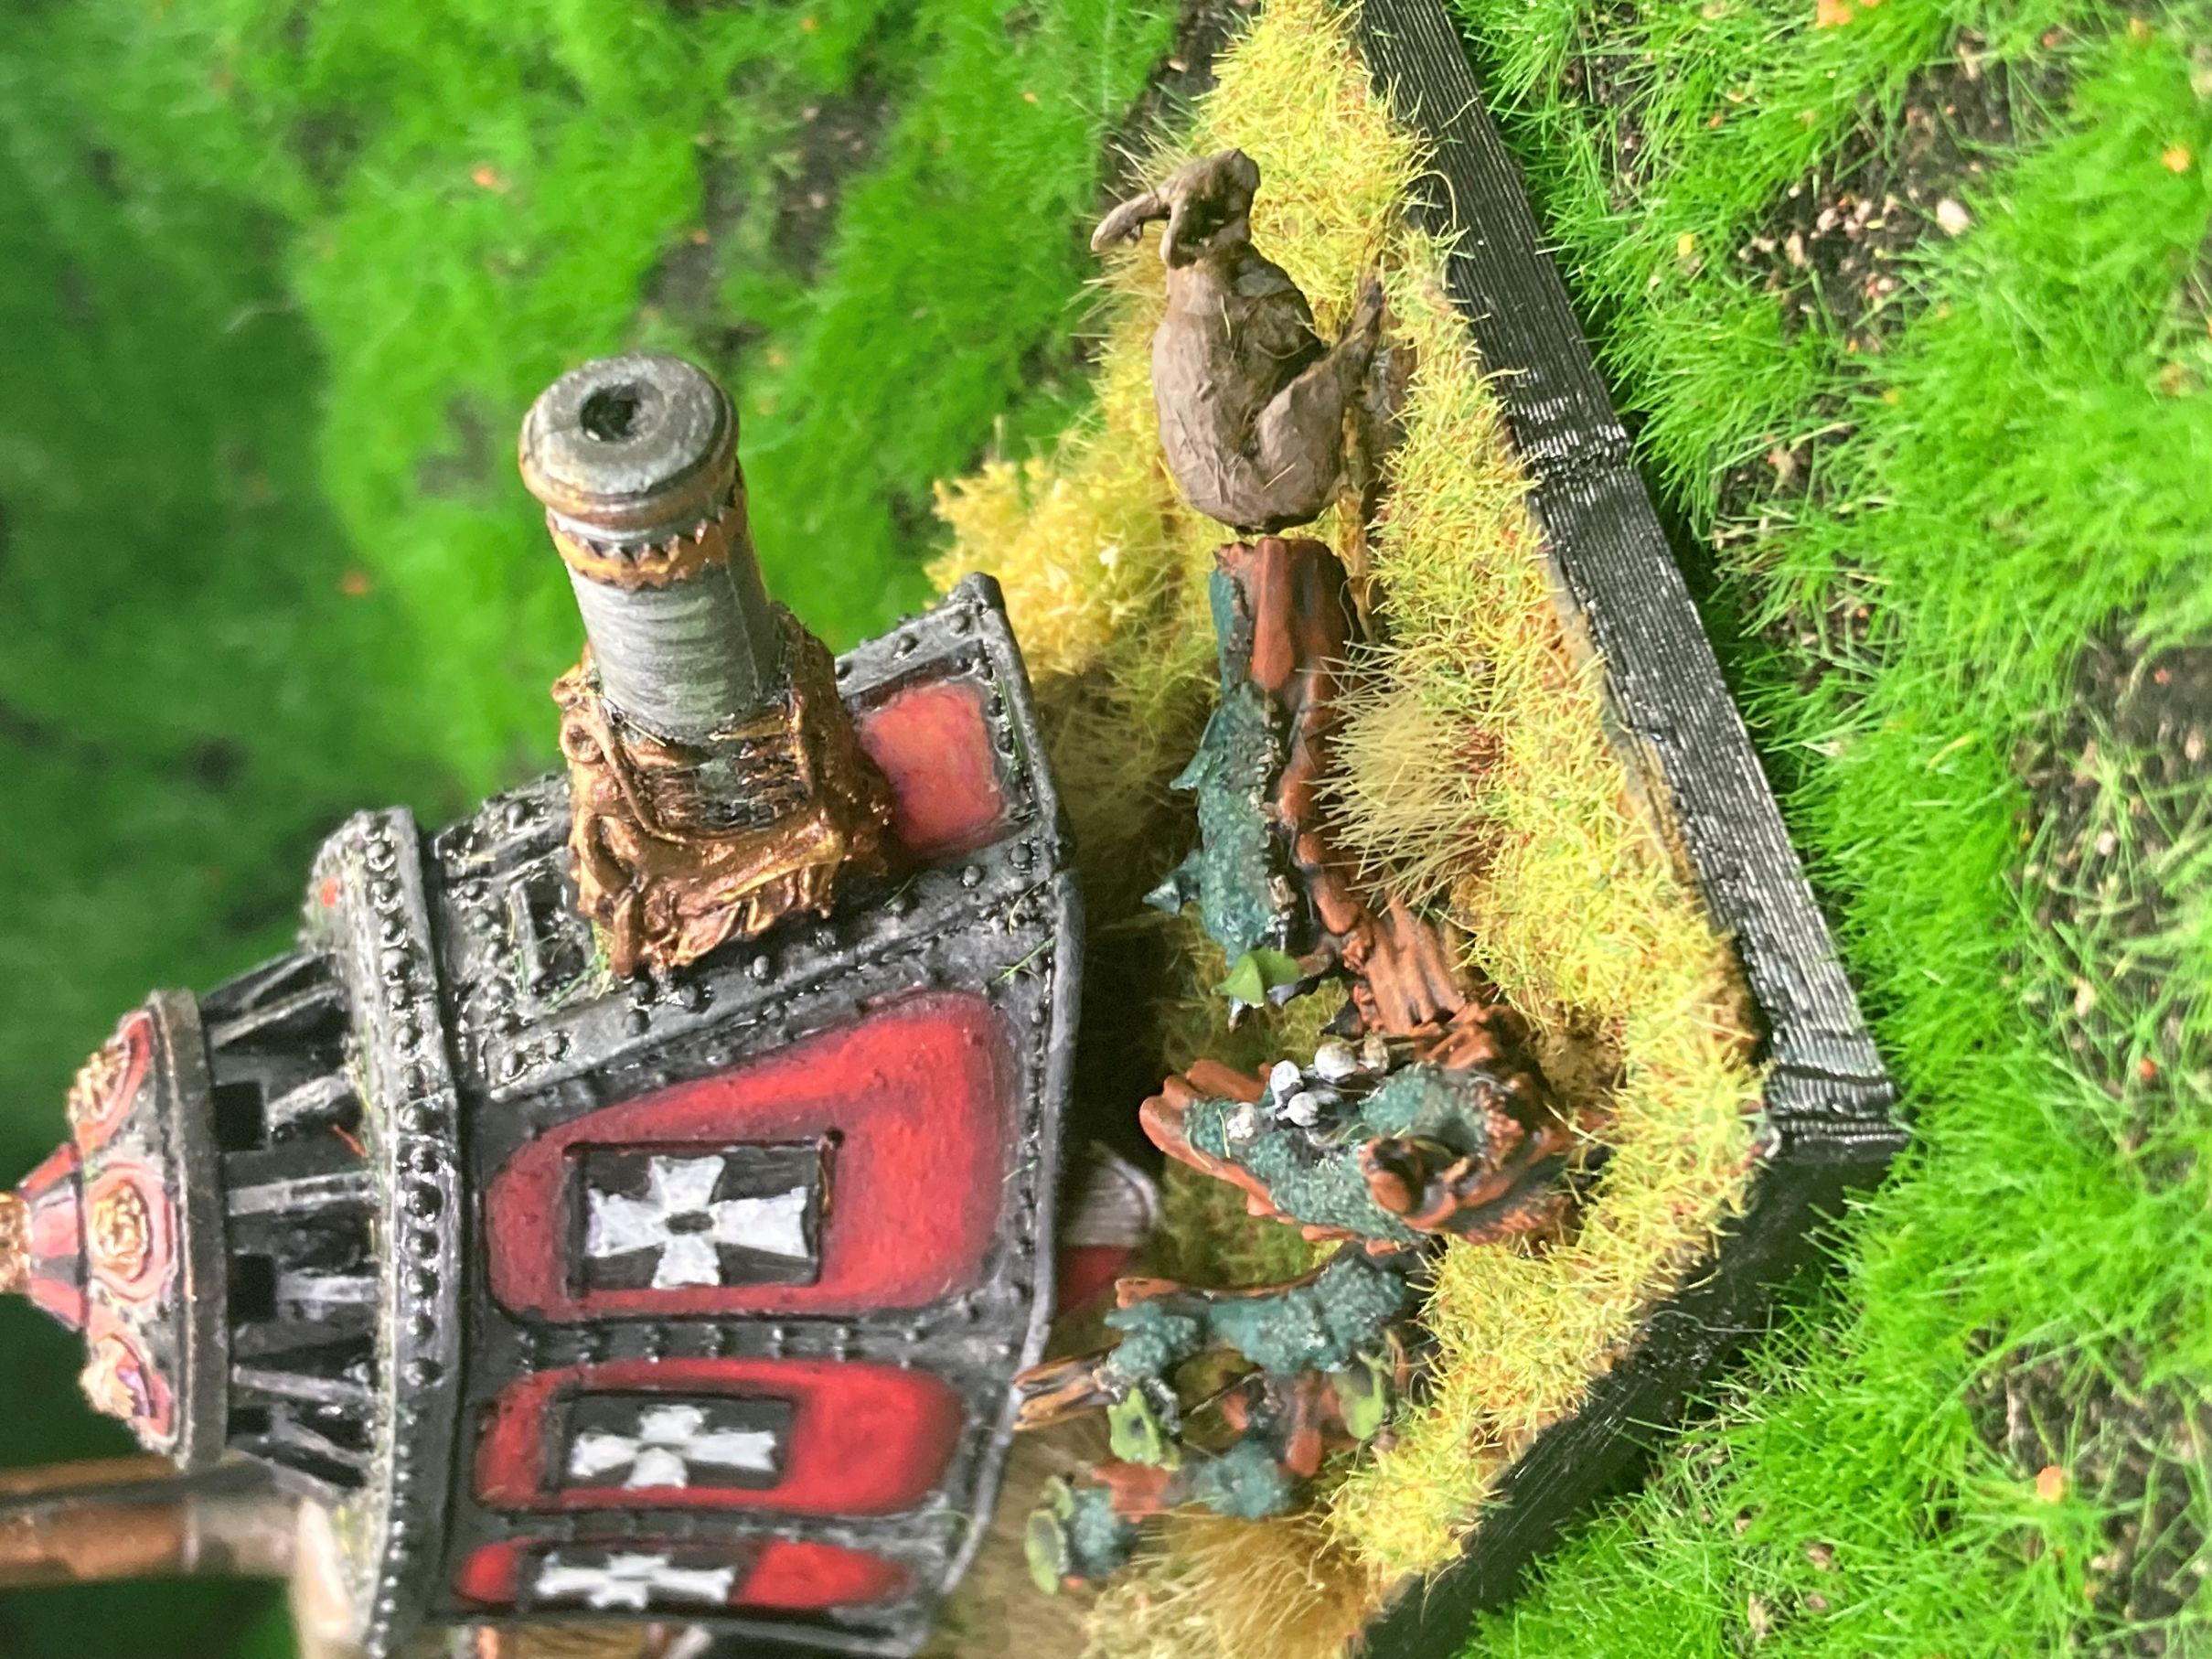
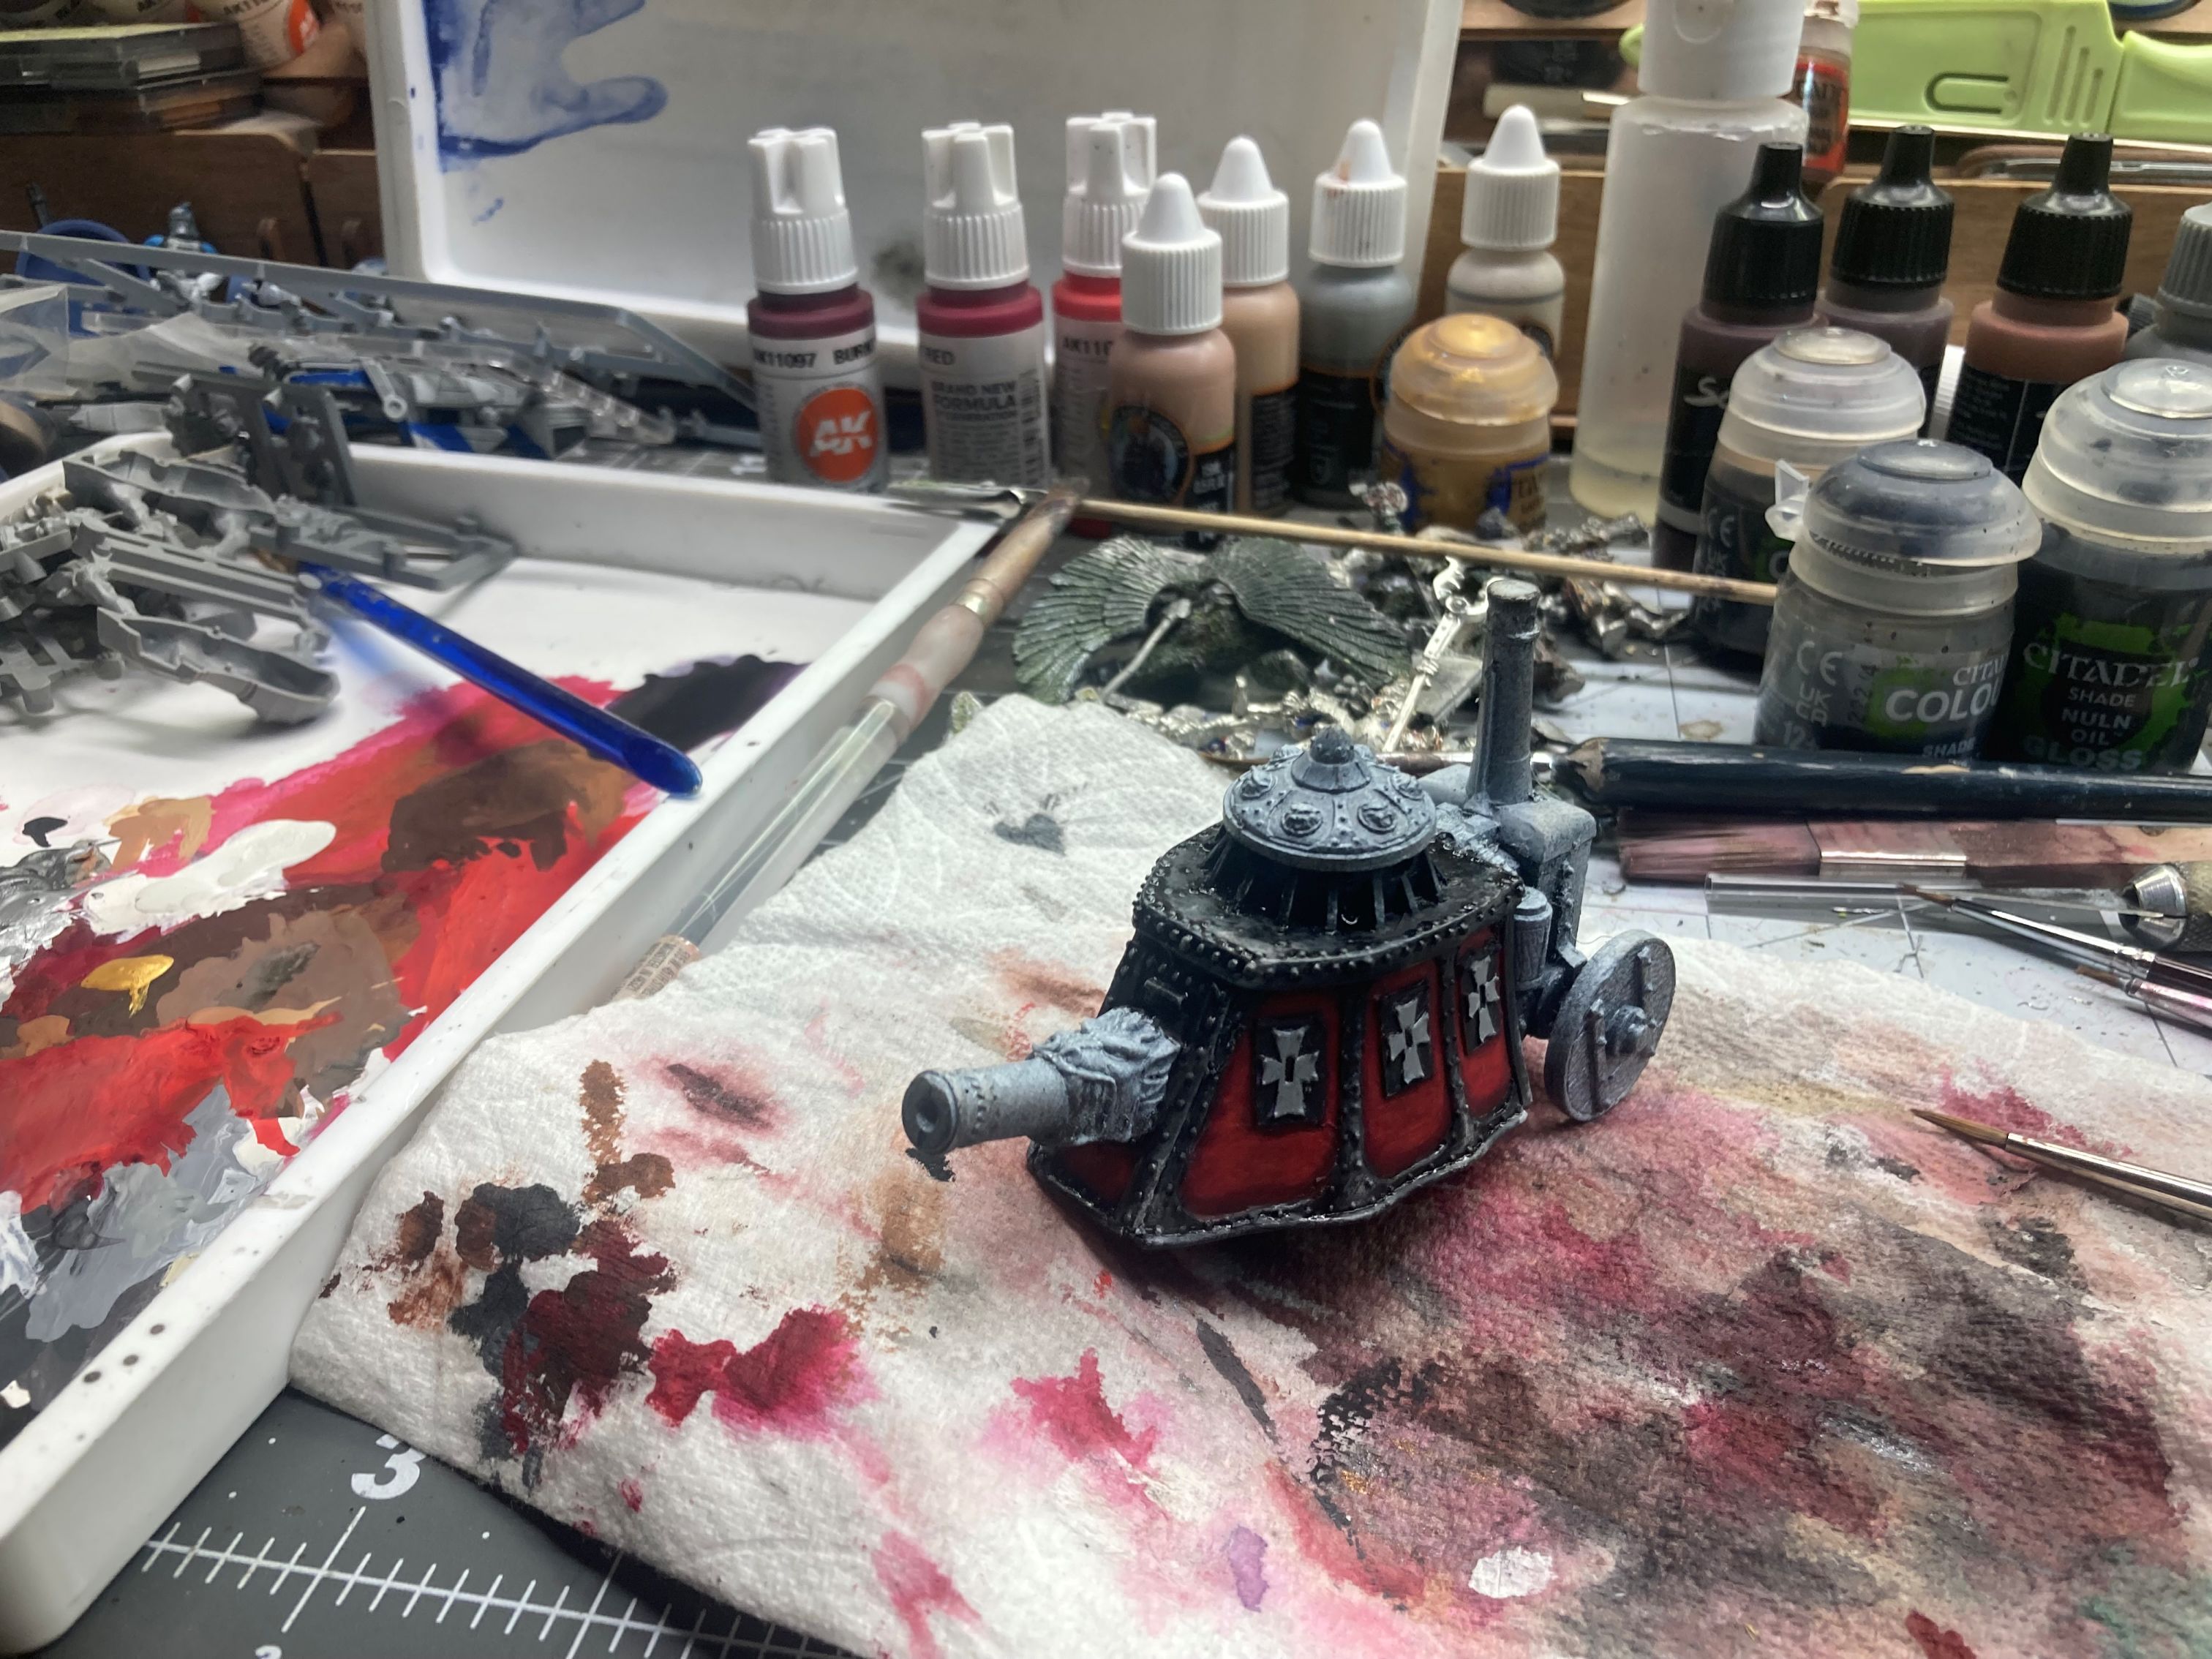
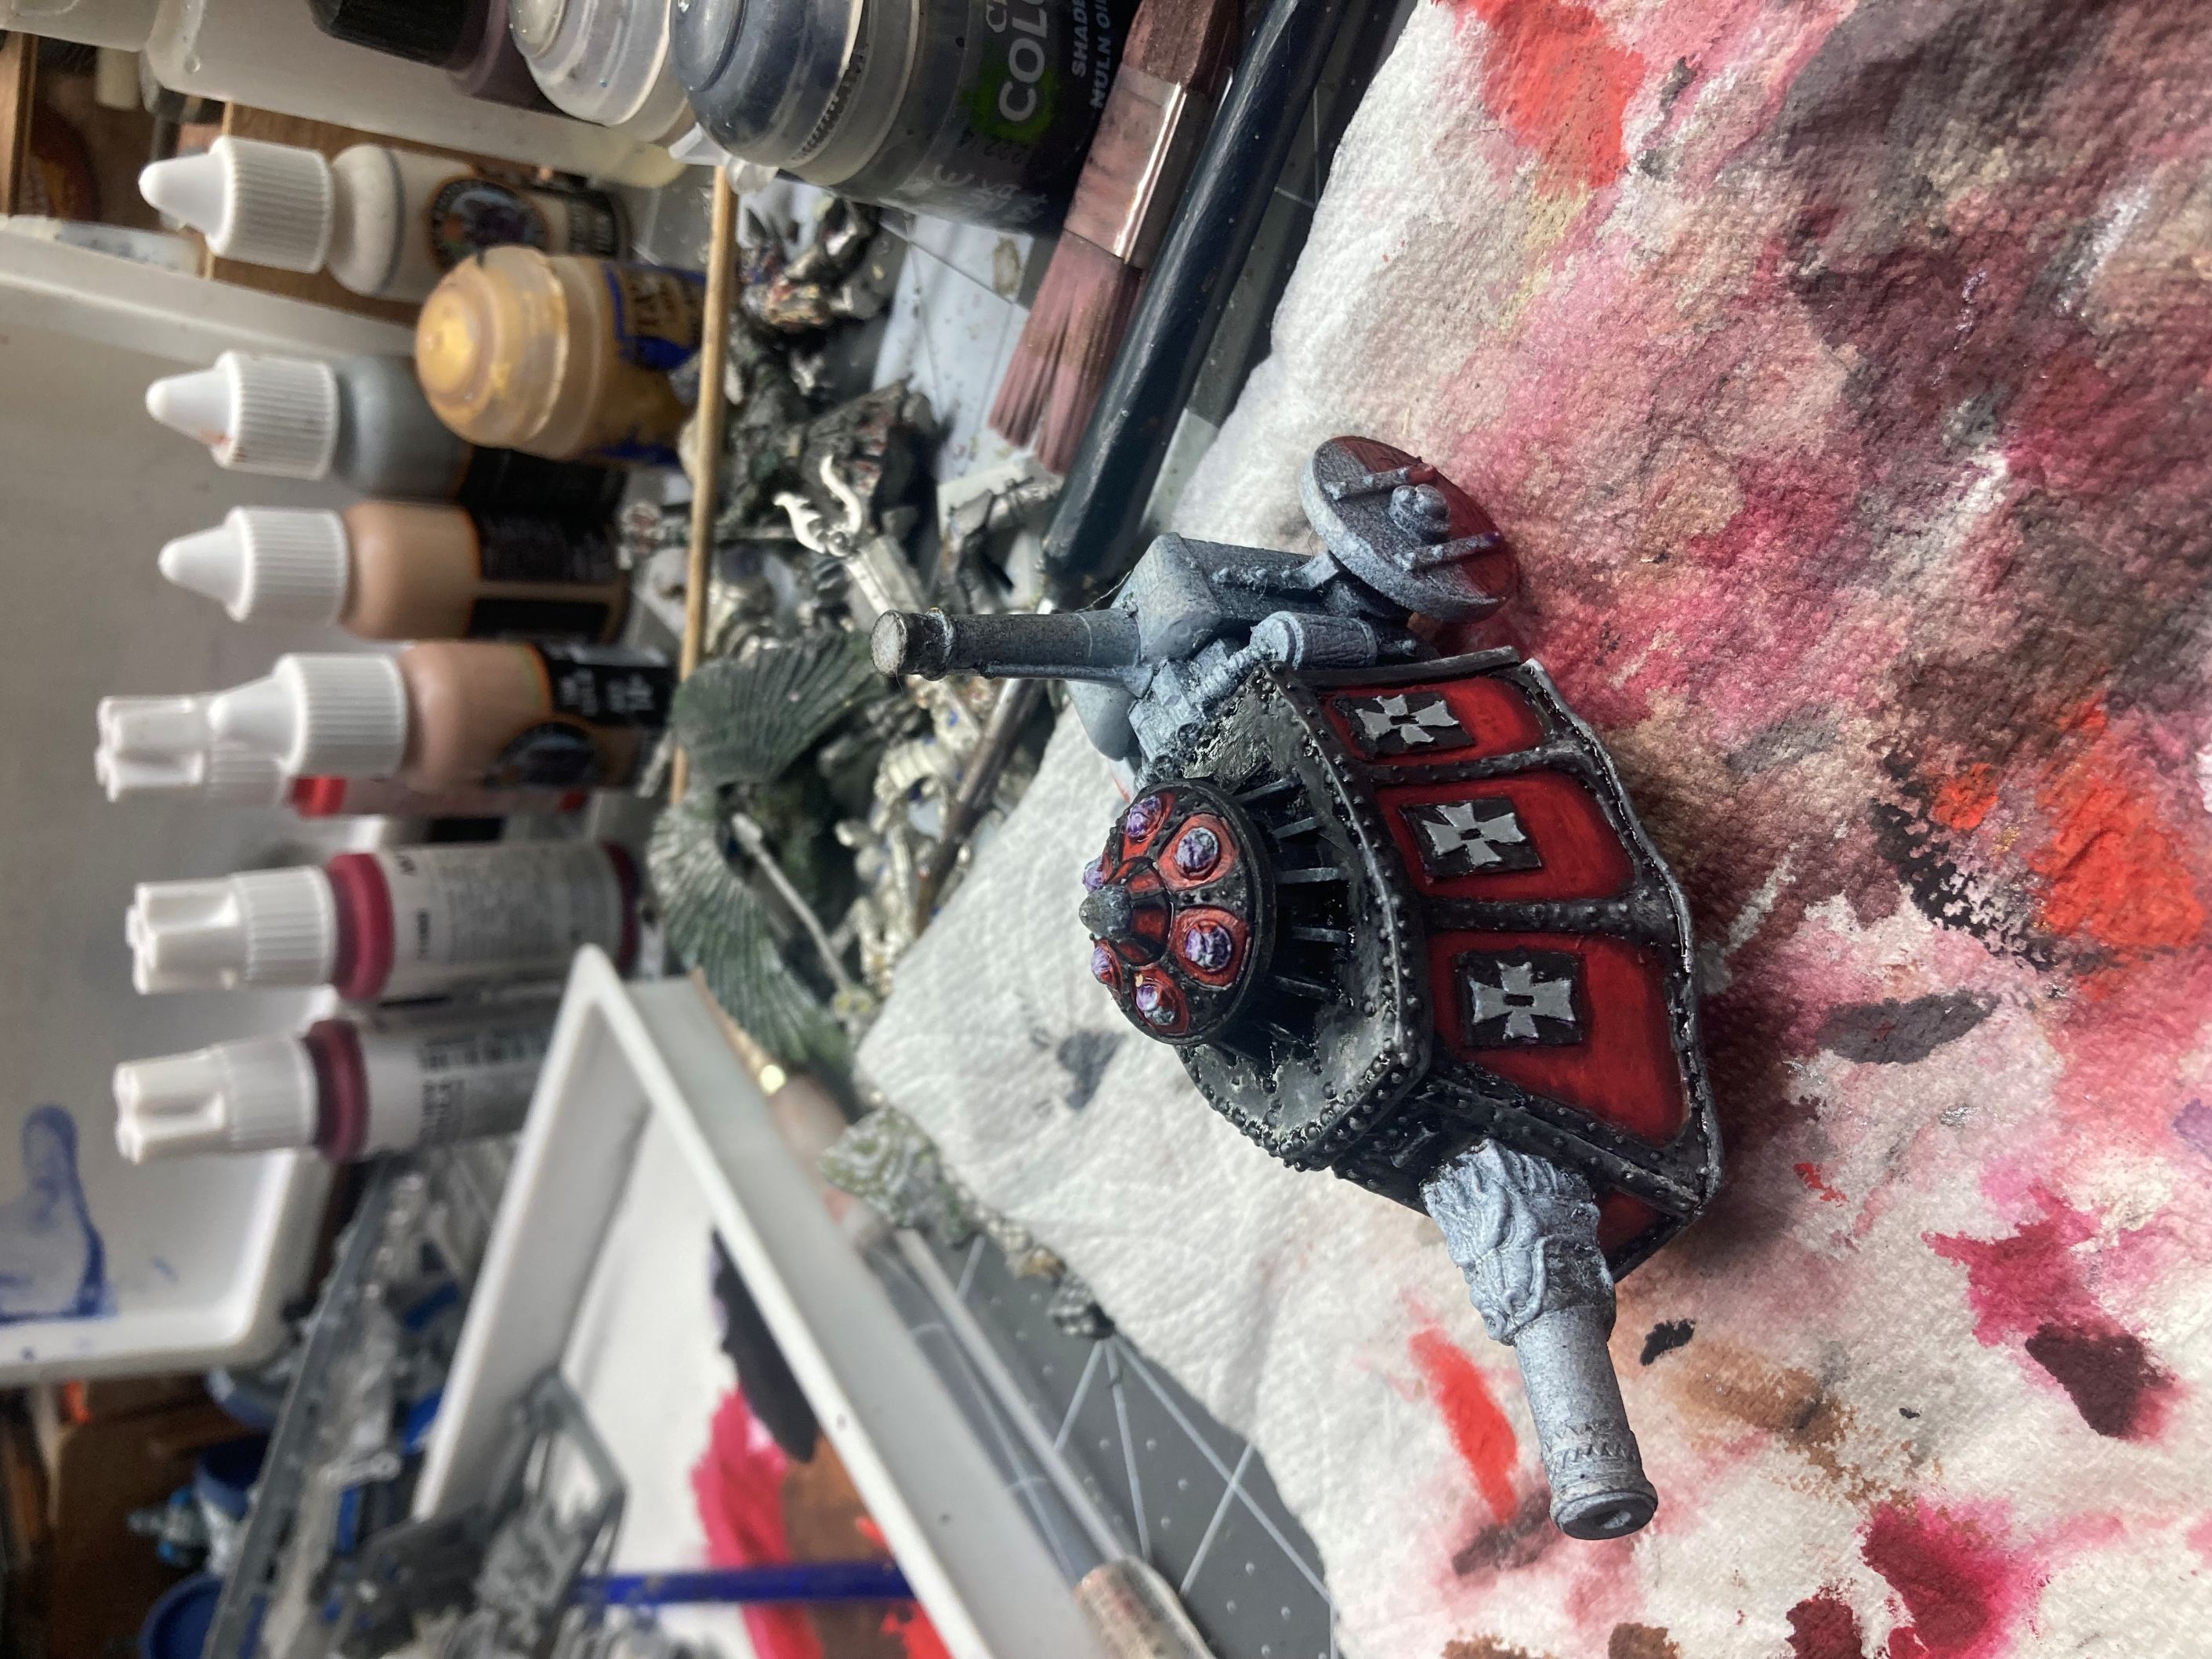
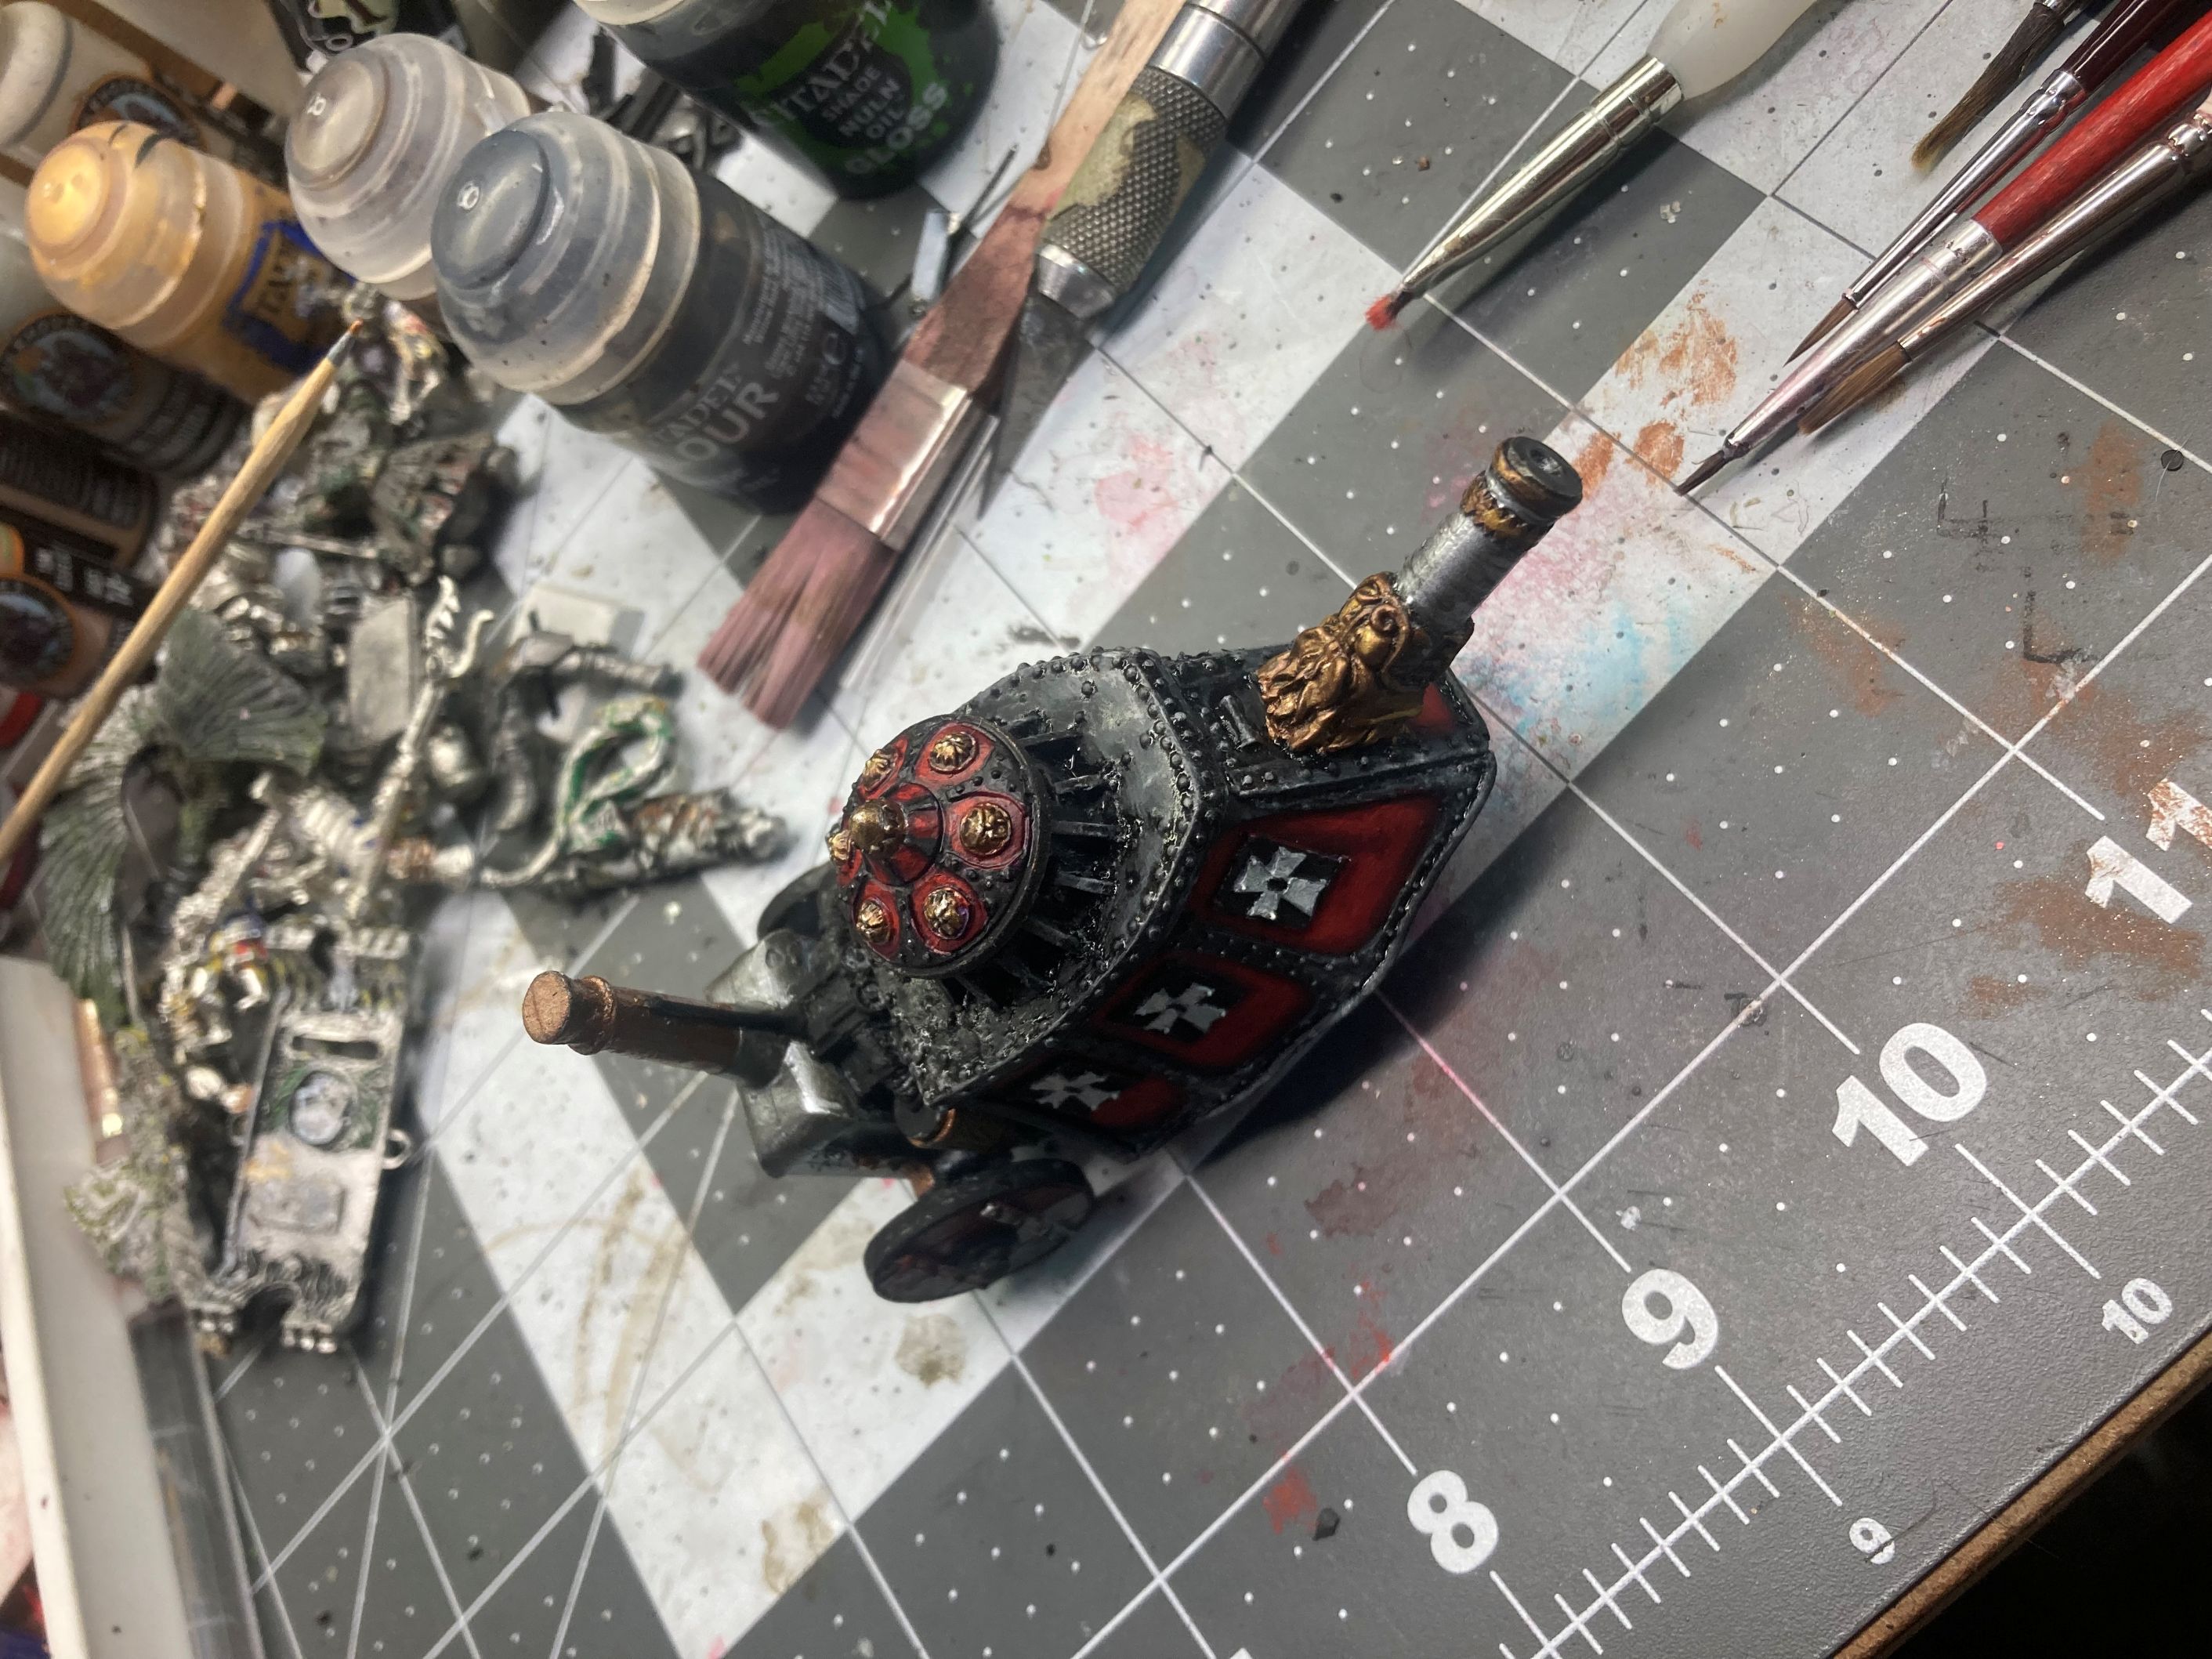
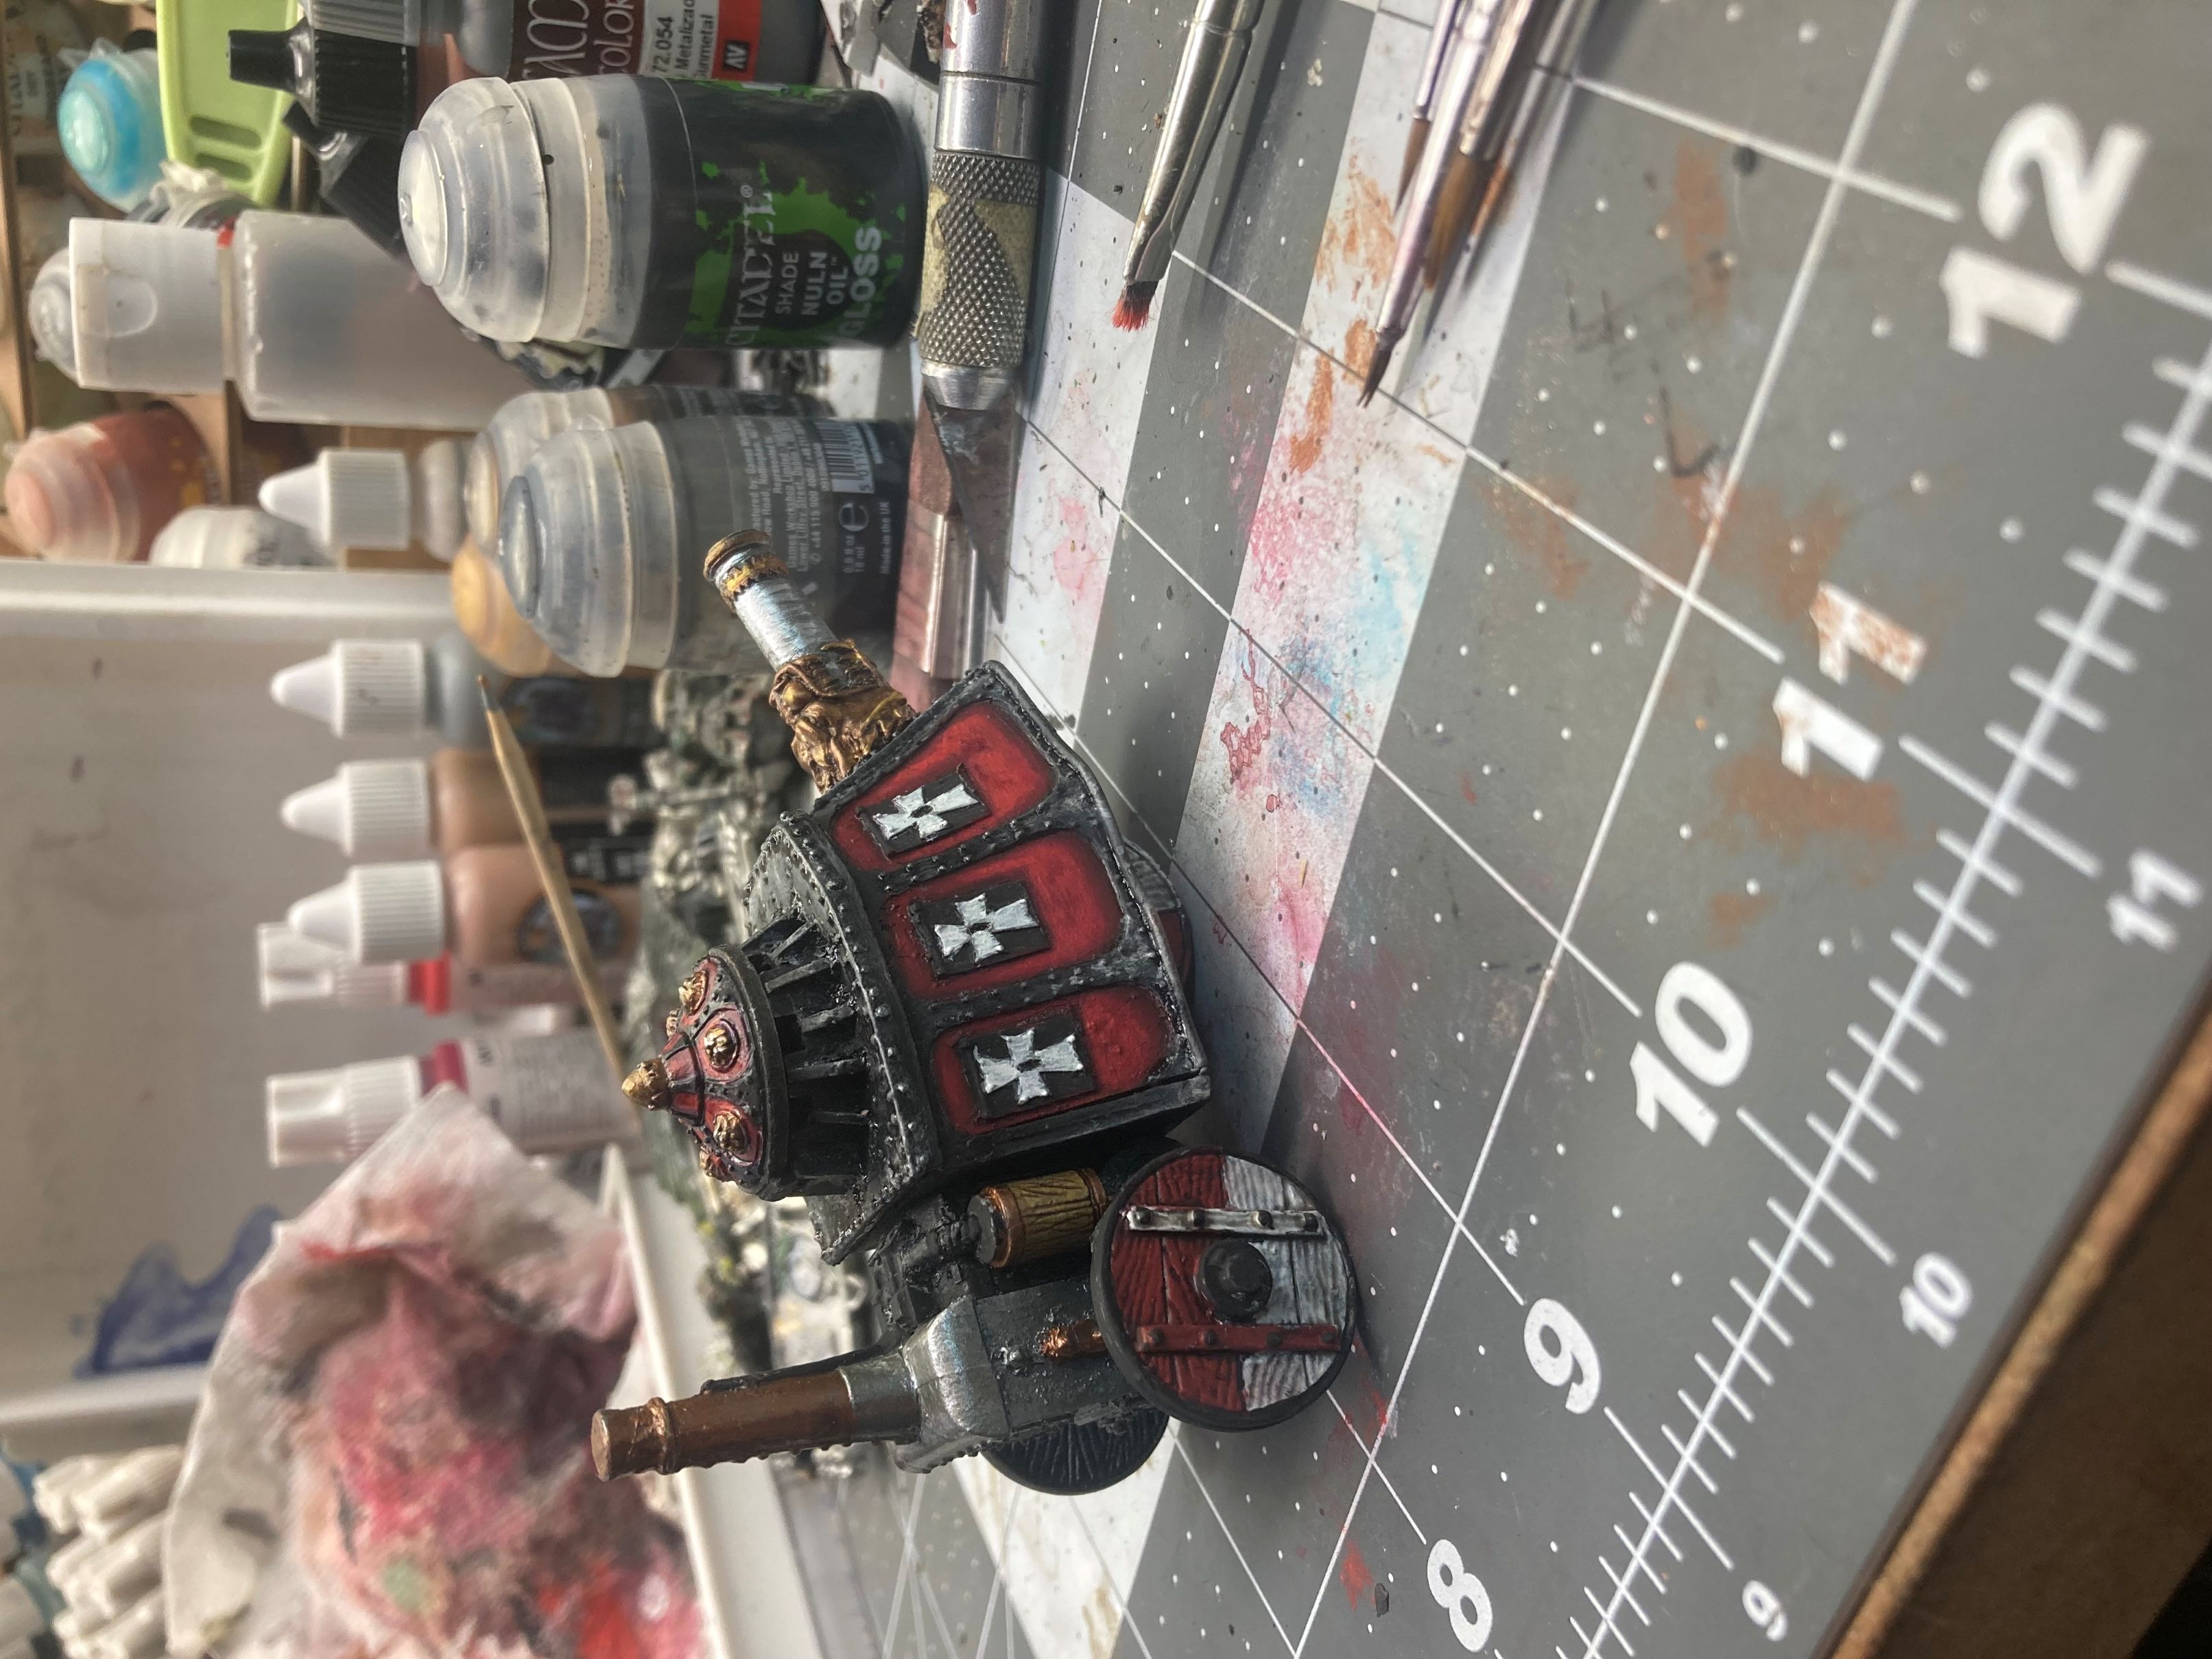
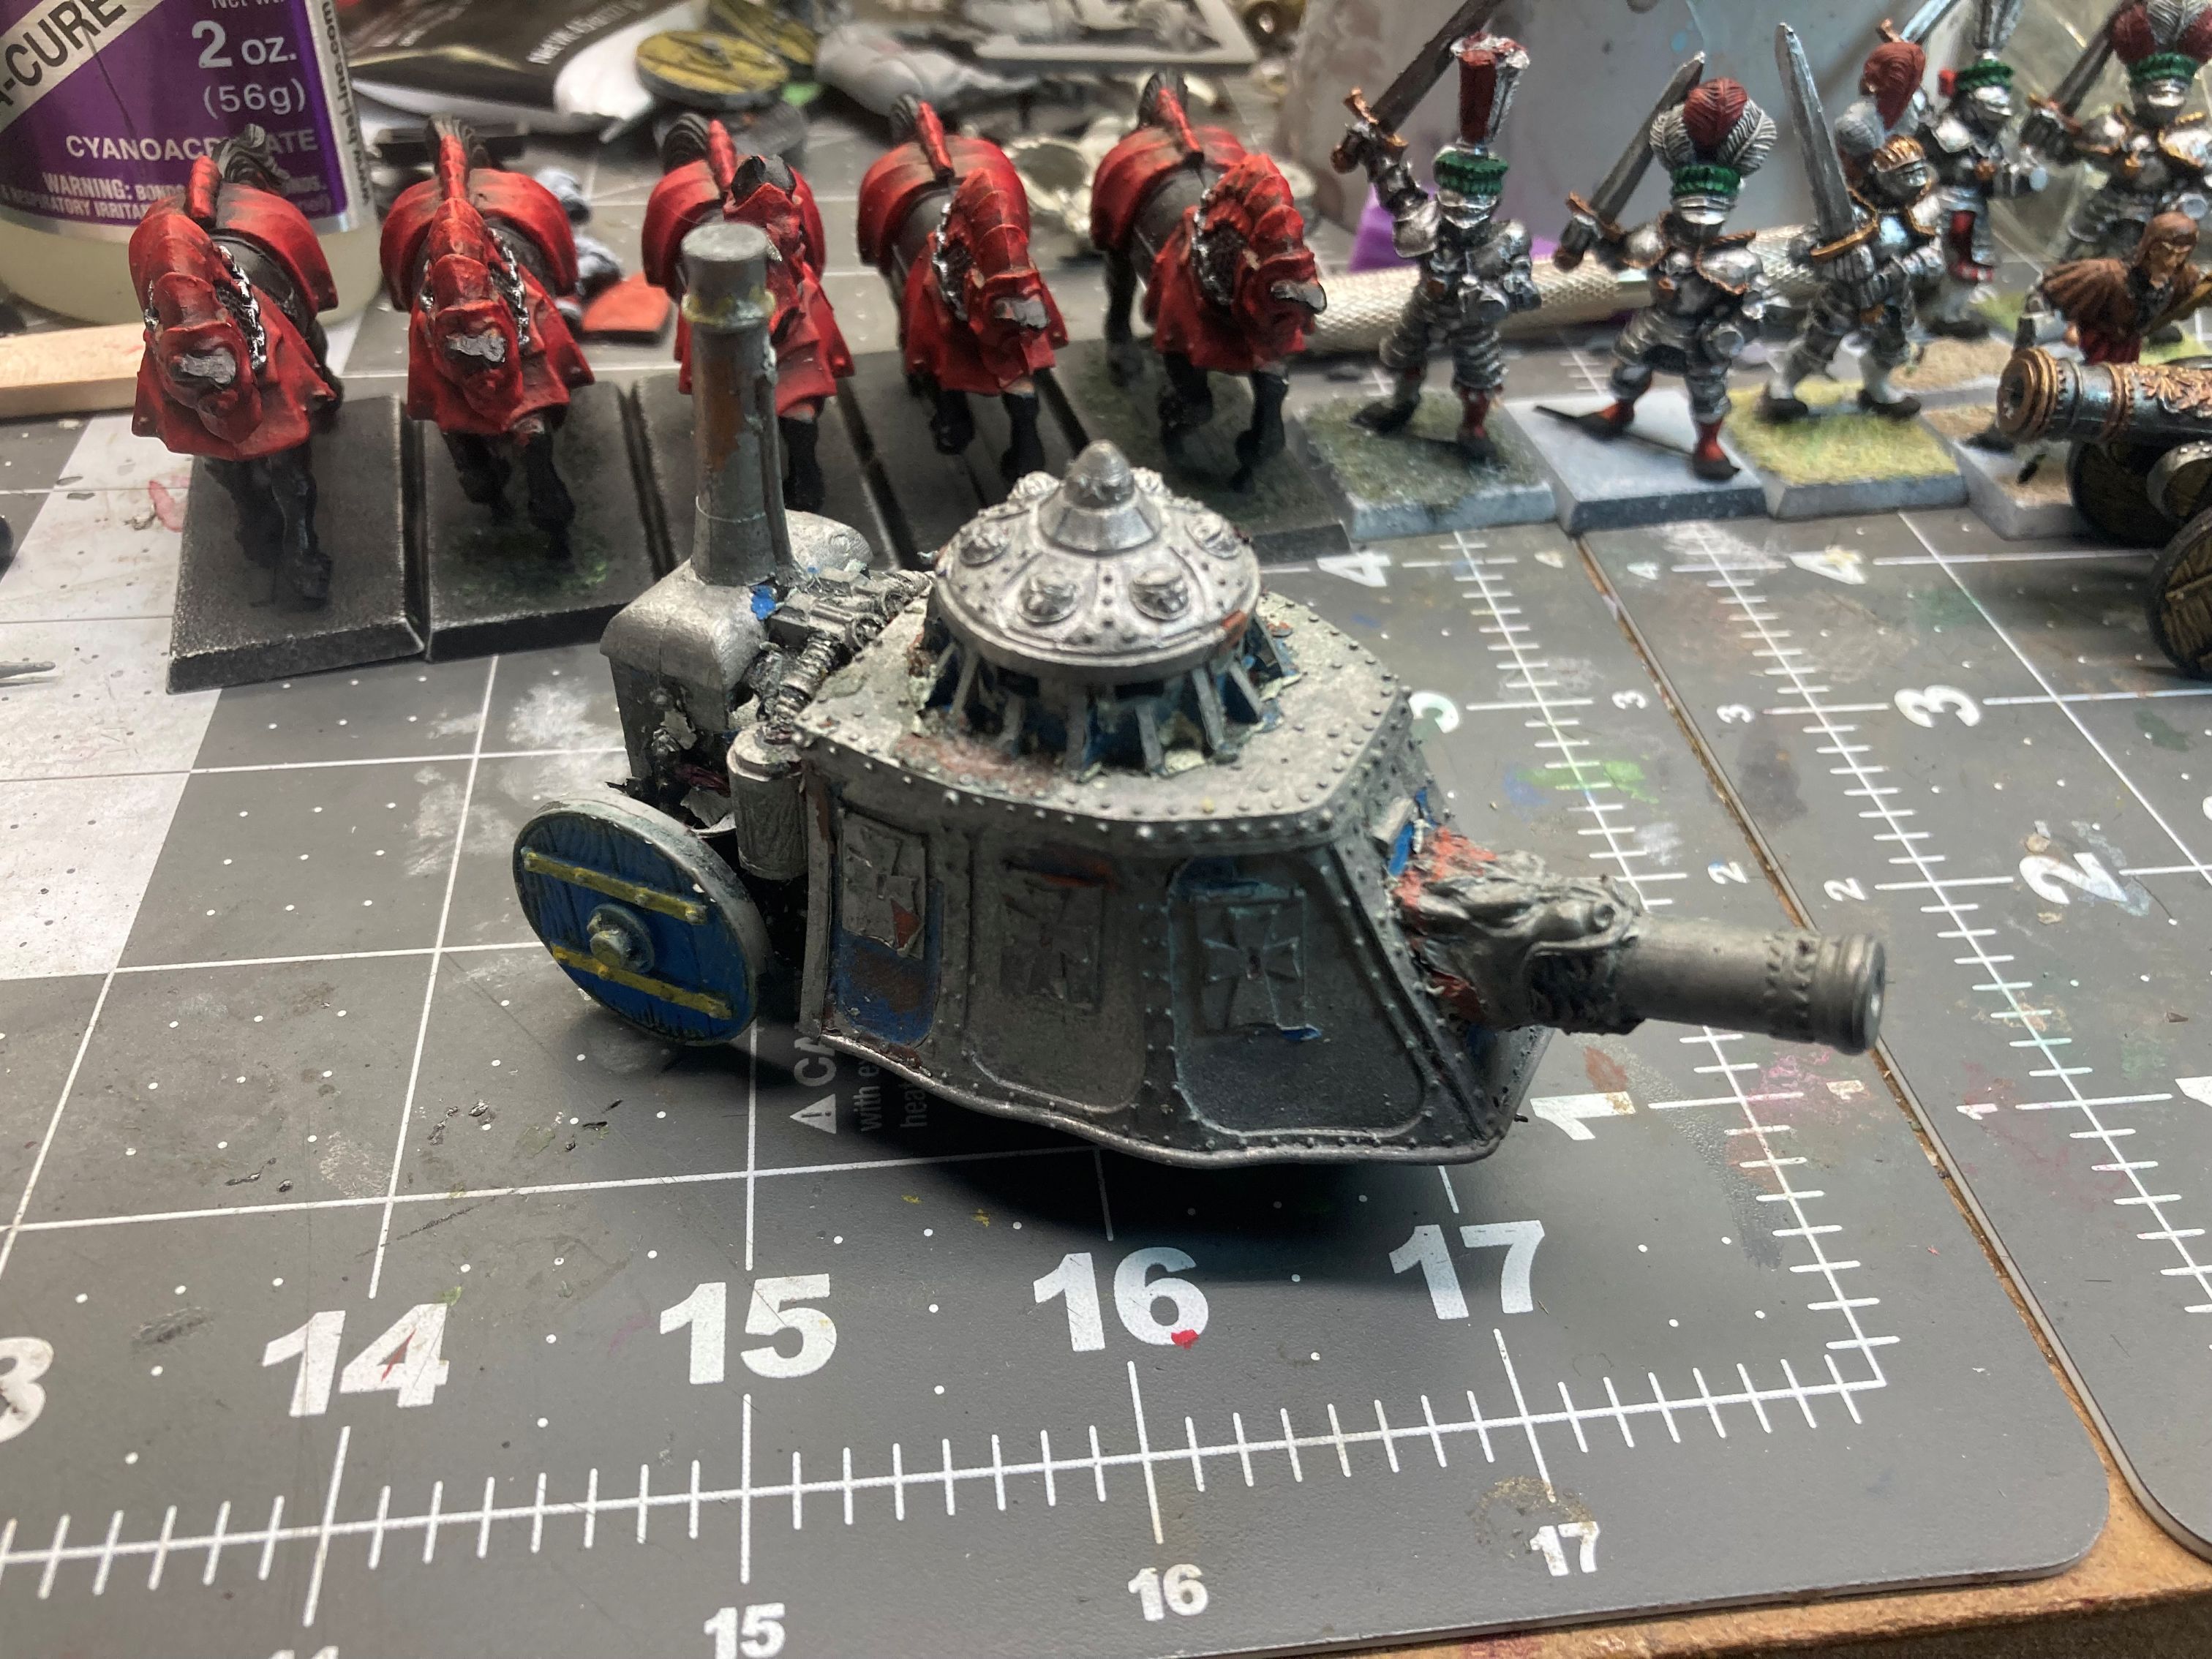
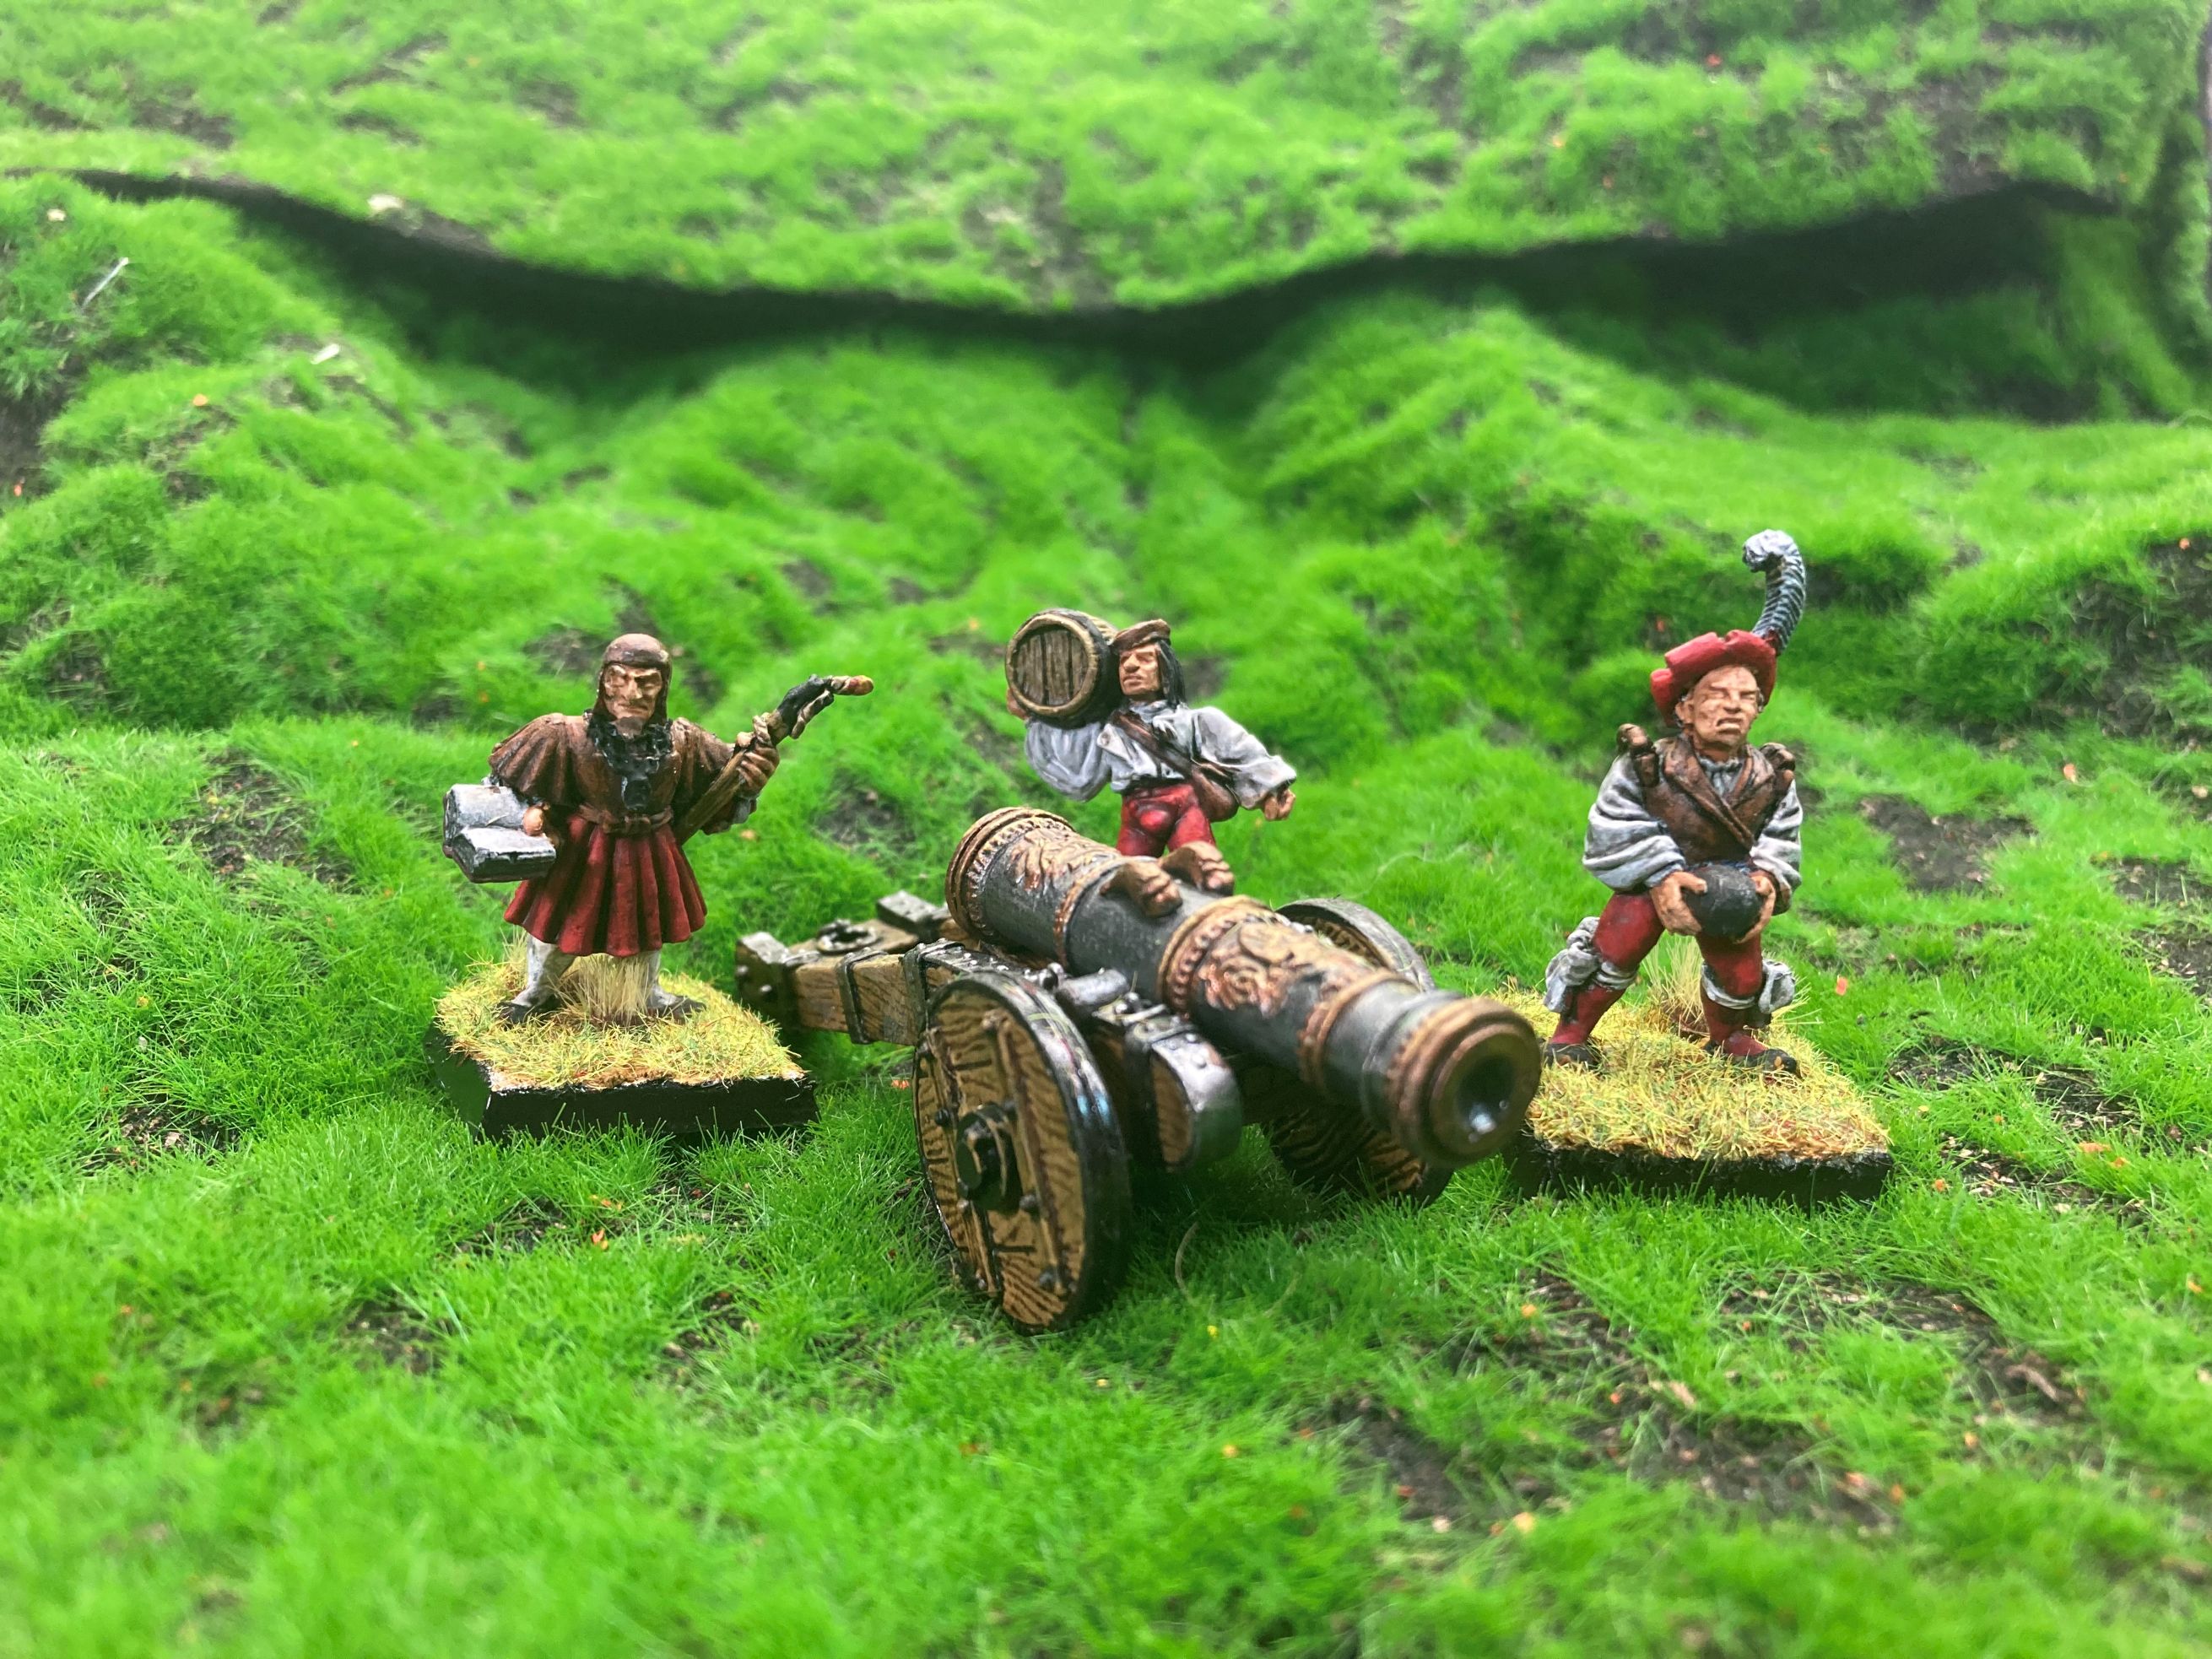 Cannon go boom
Steam tank disturbing the wildlife.
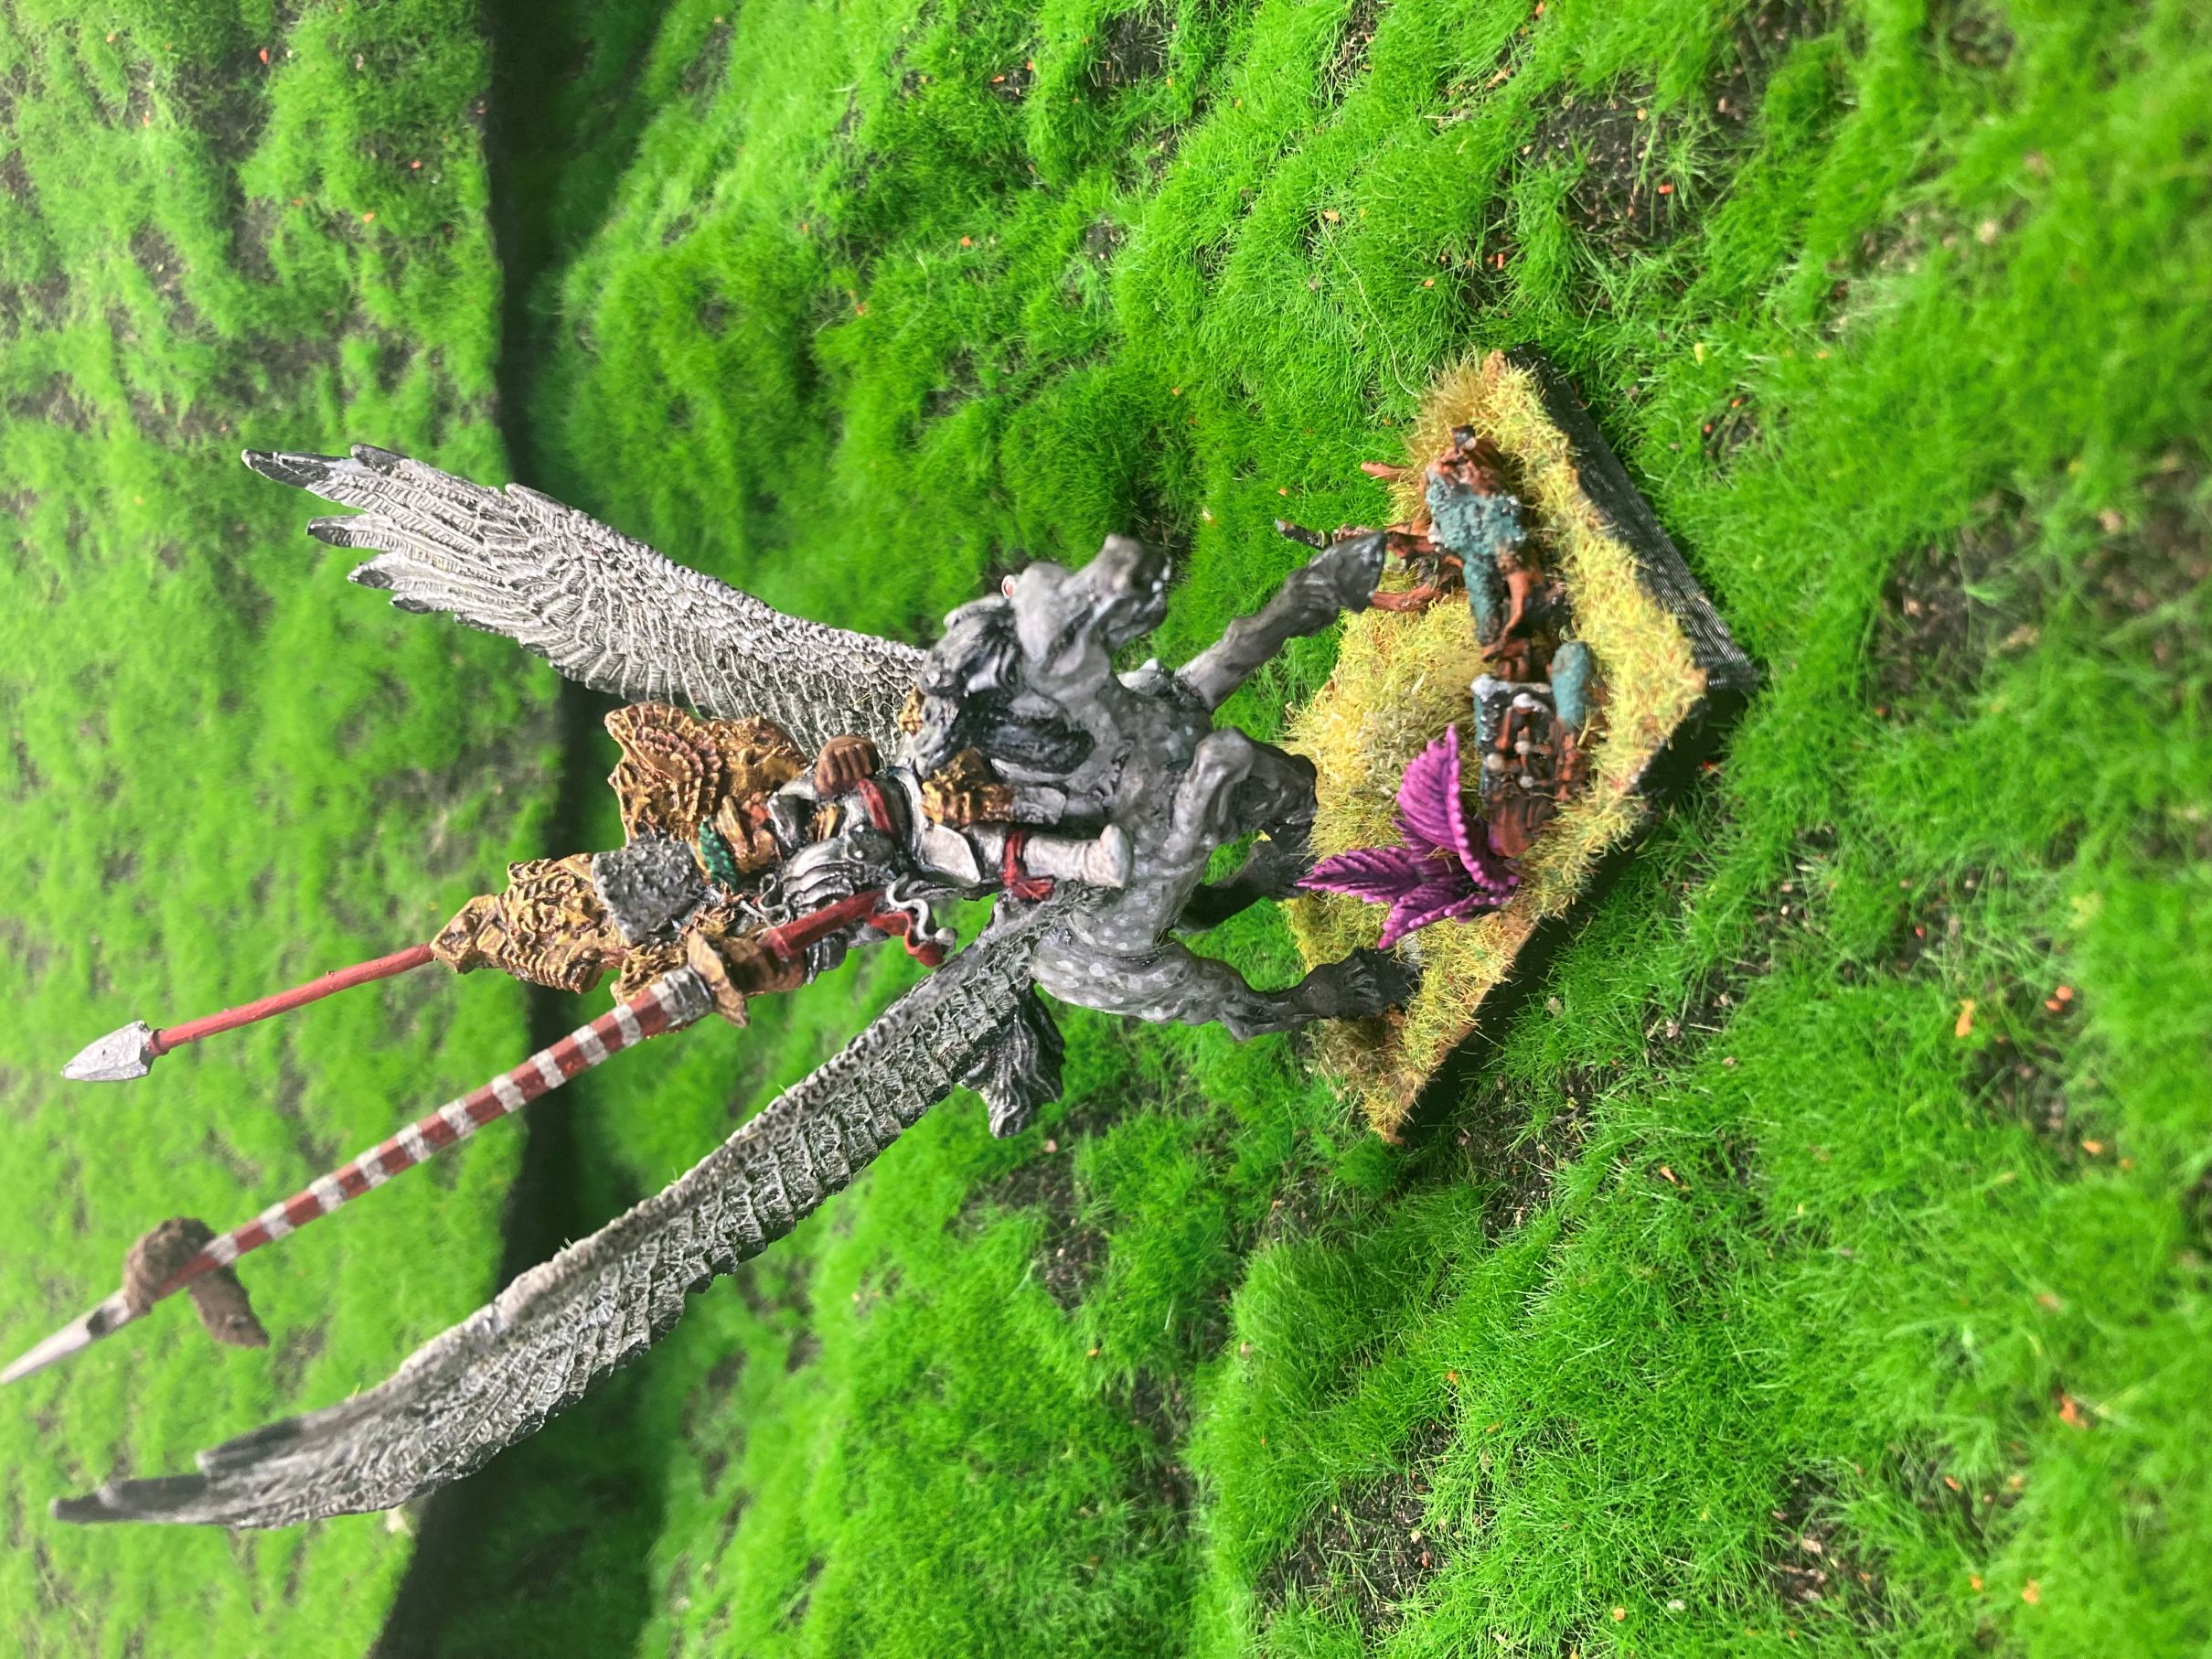
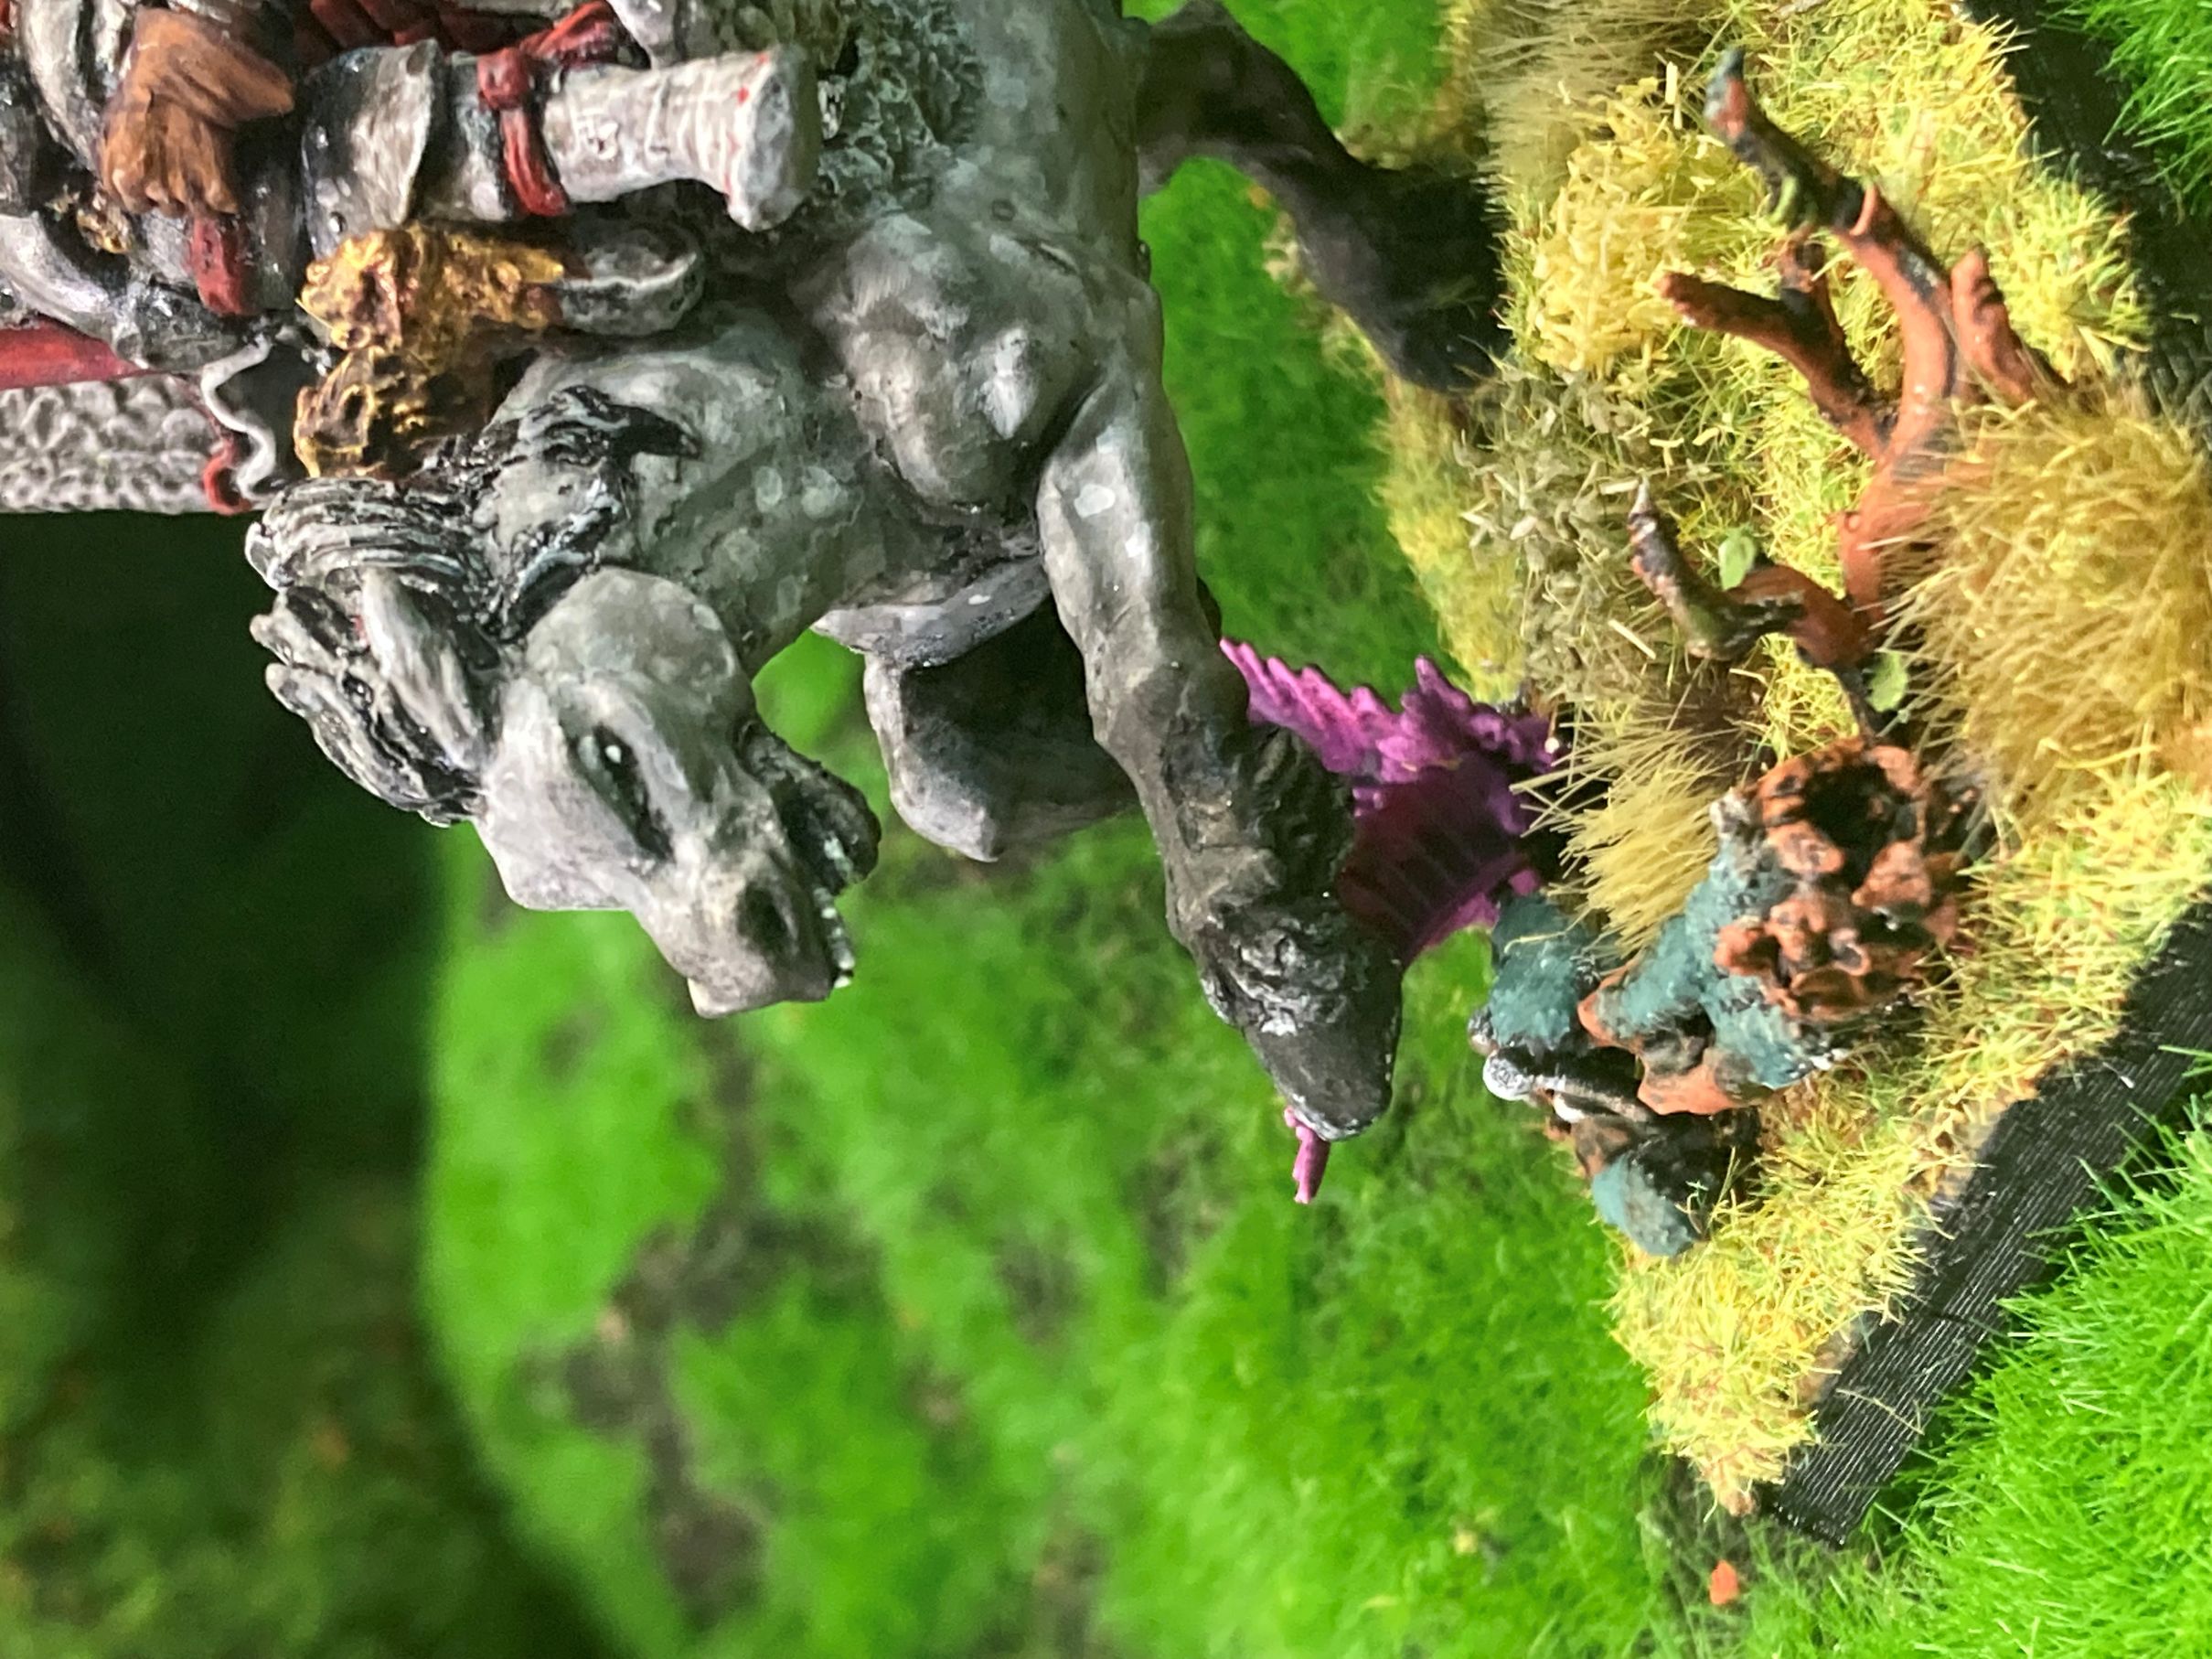
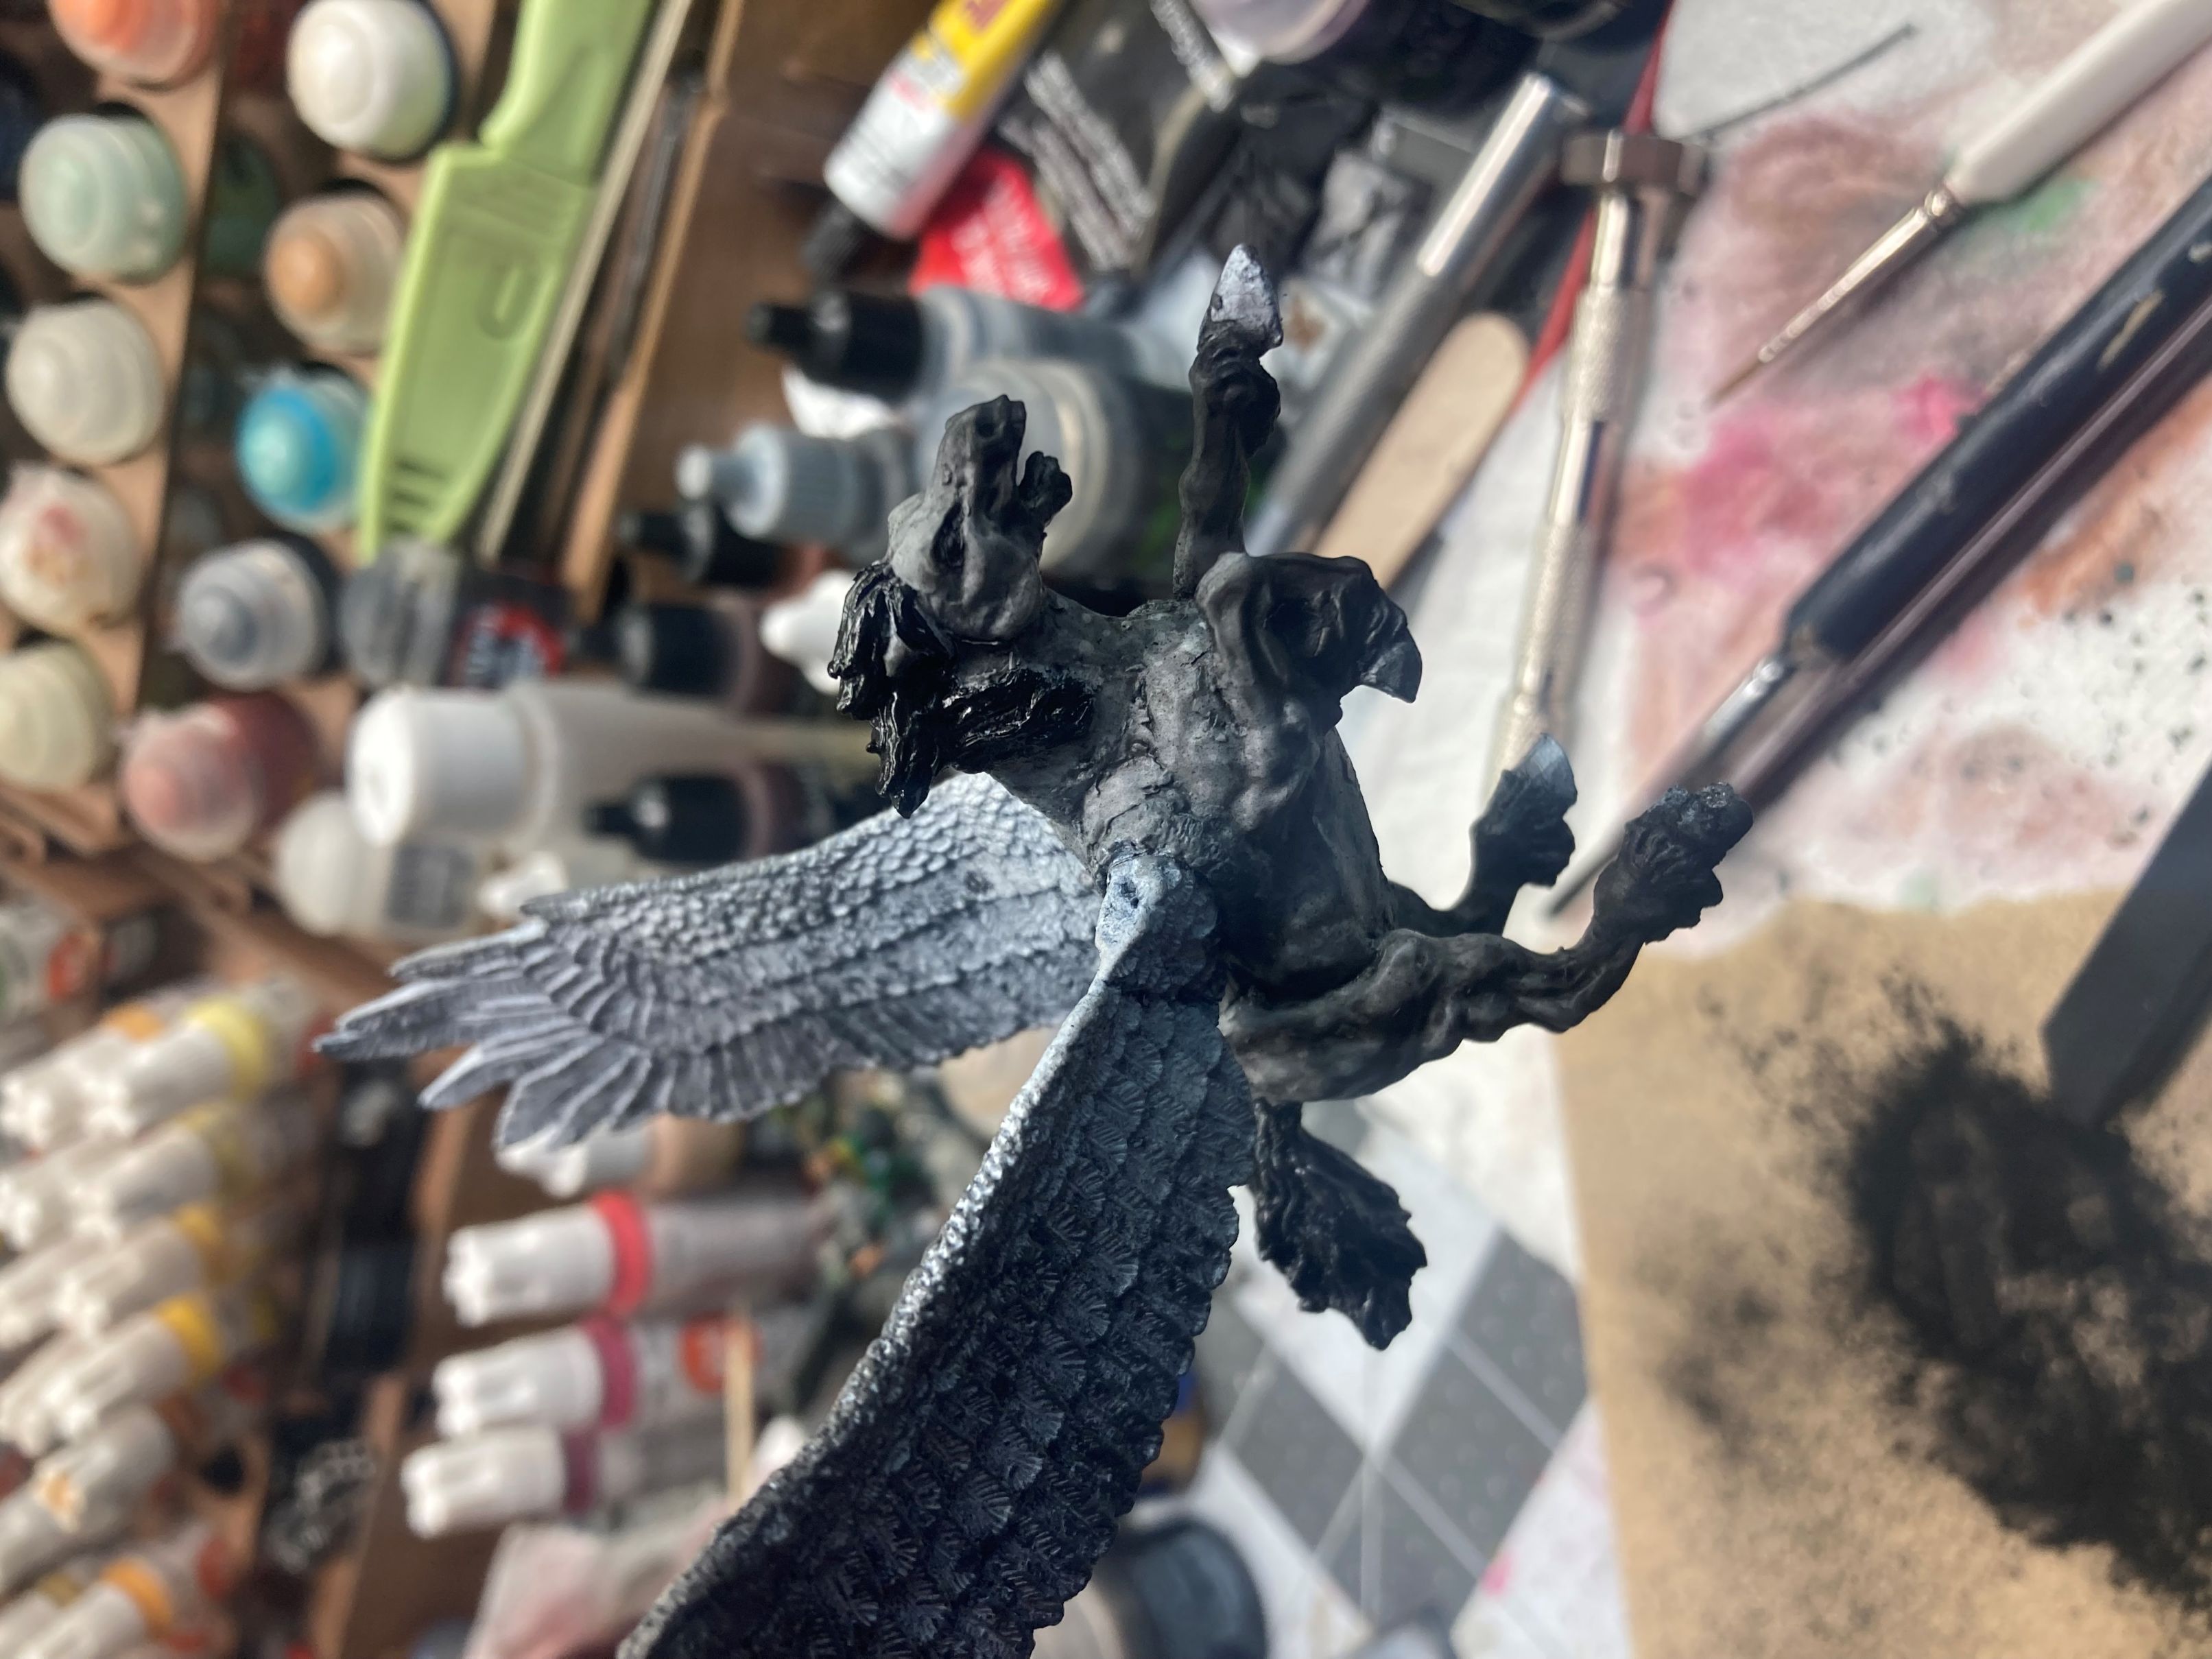
Possibly the angriest Pegasus ever.

The beginning of the end...of the Spring Cleaning posts
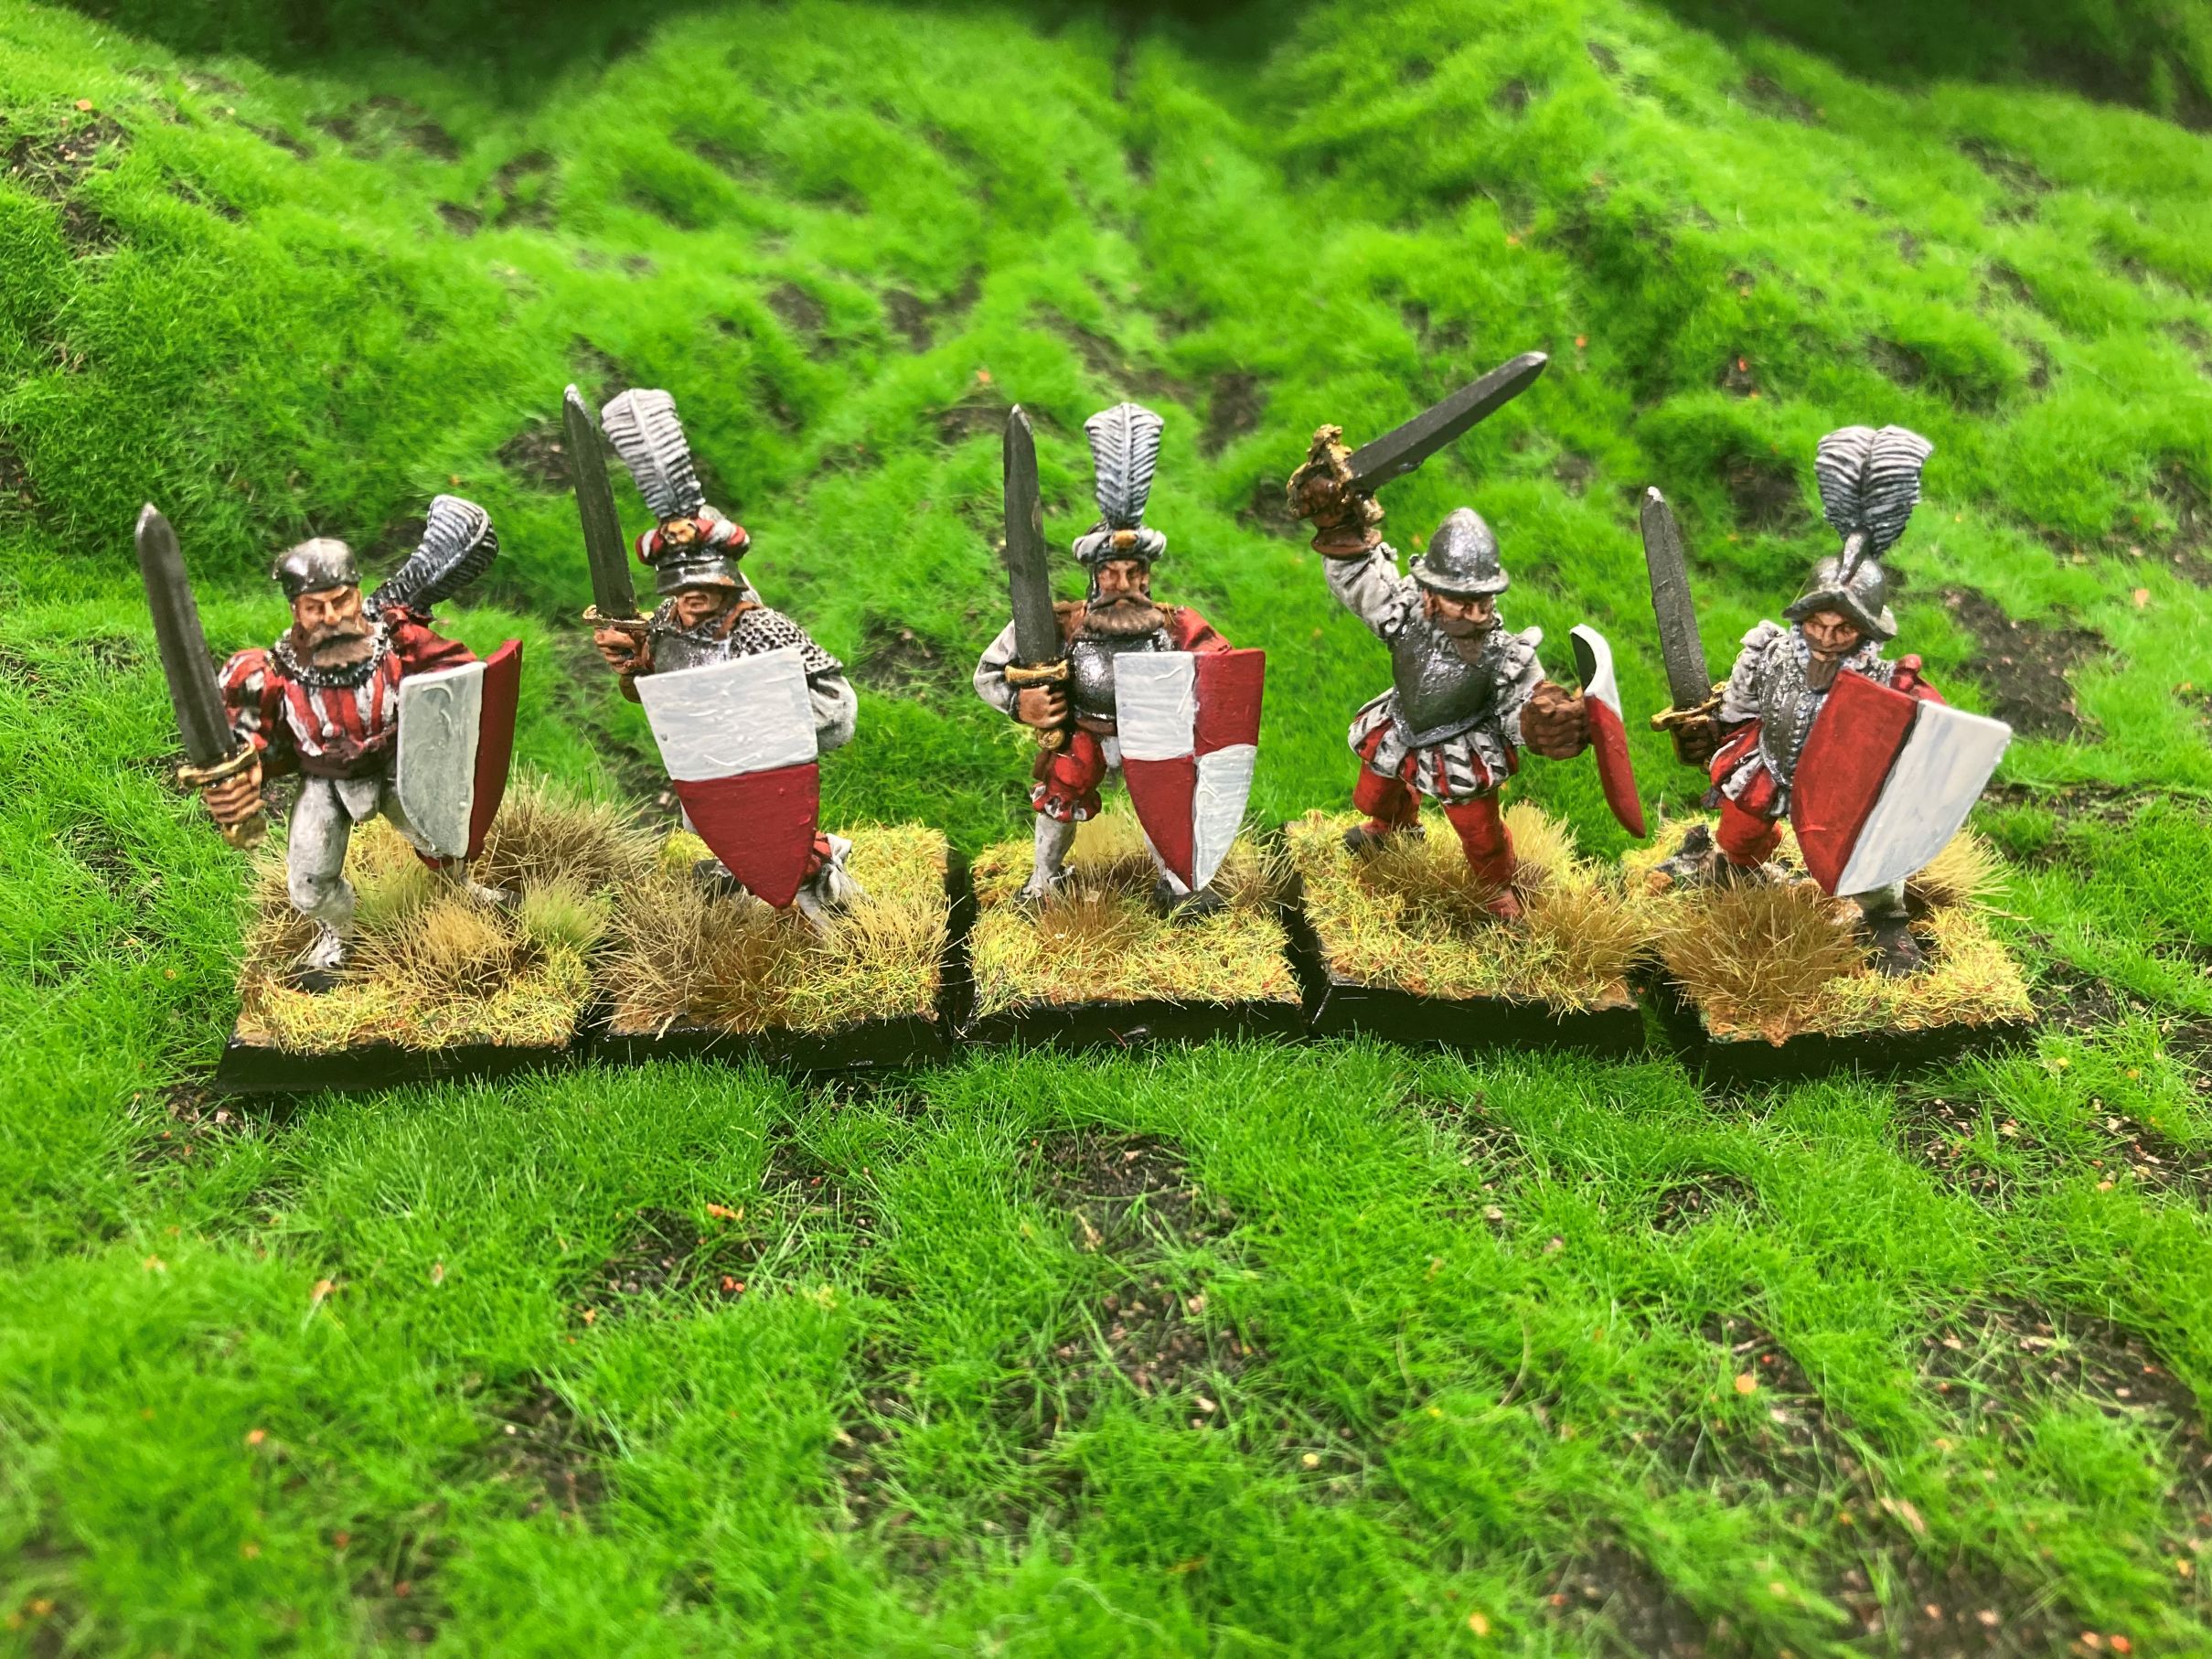
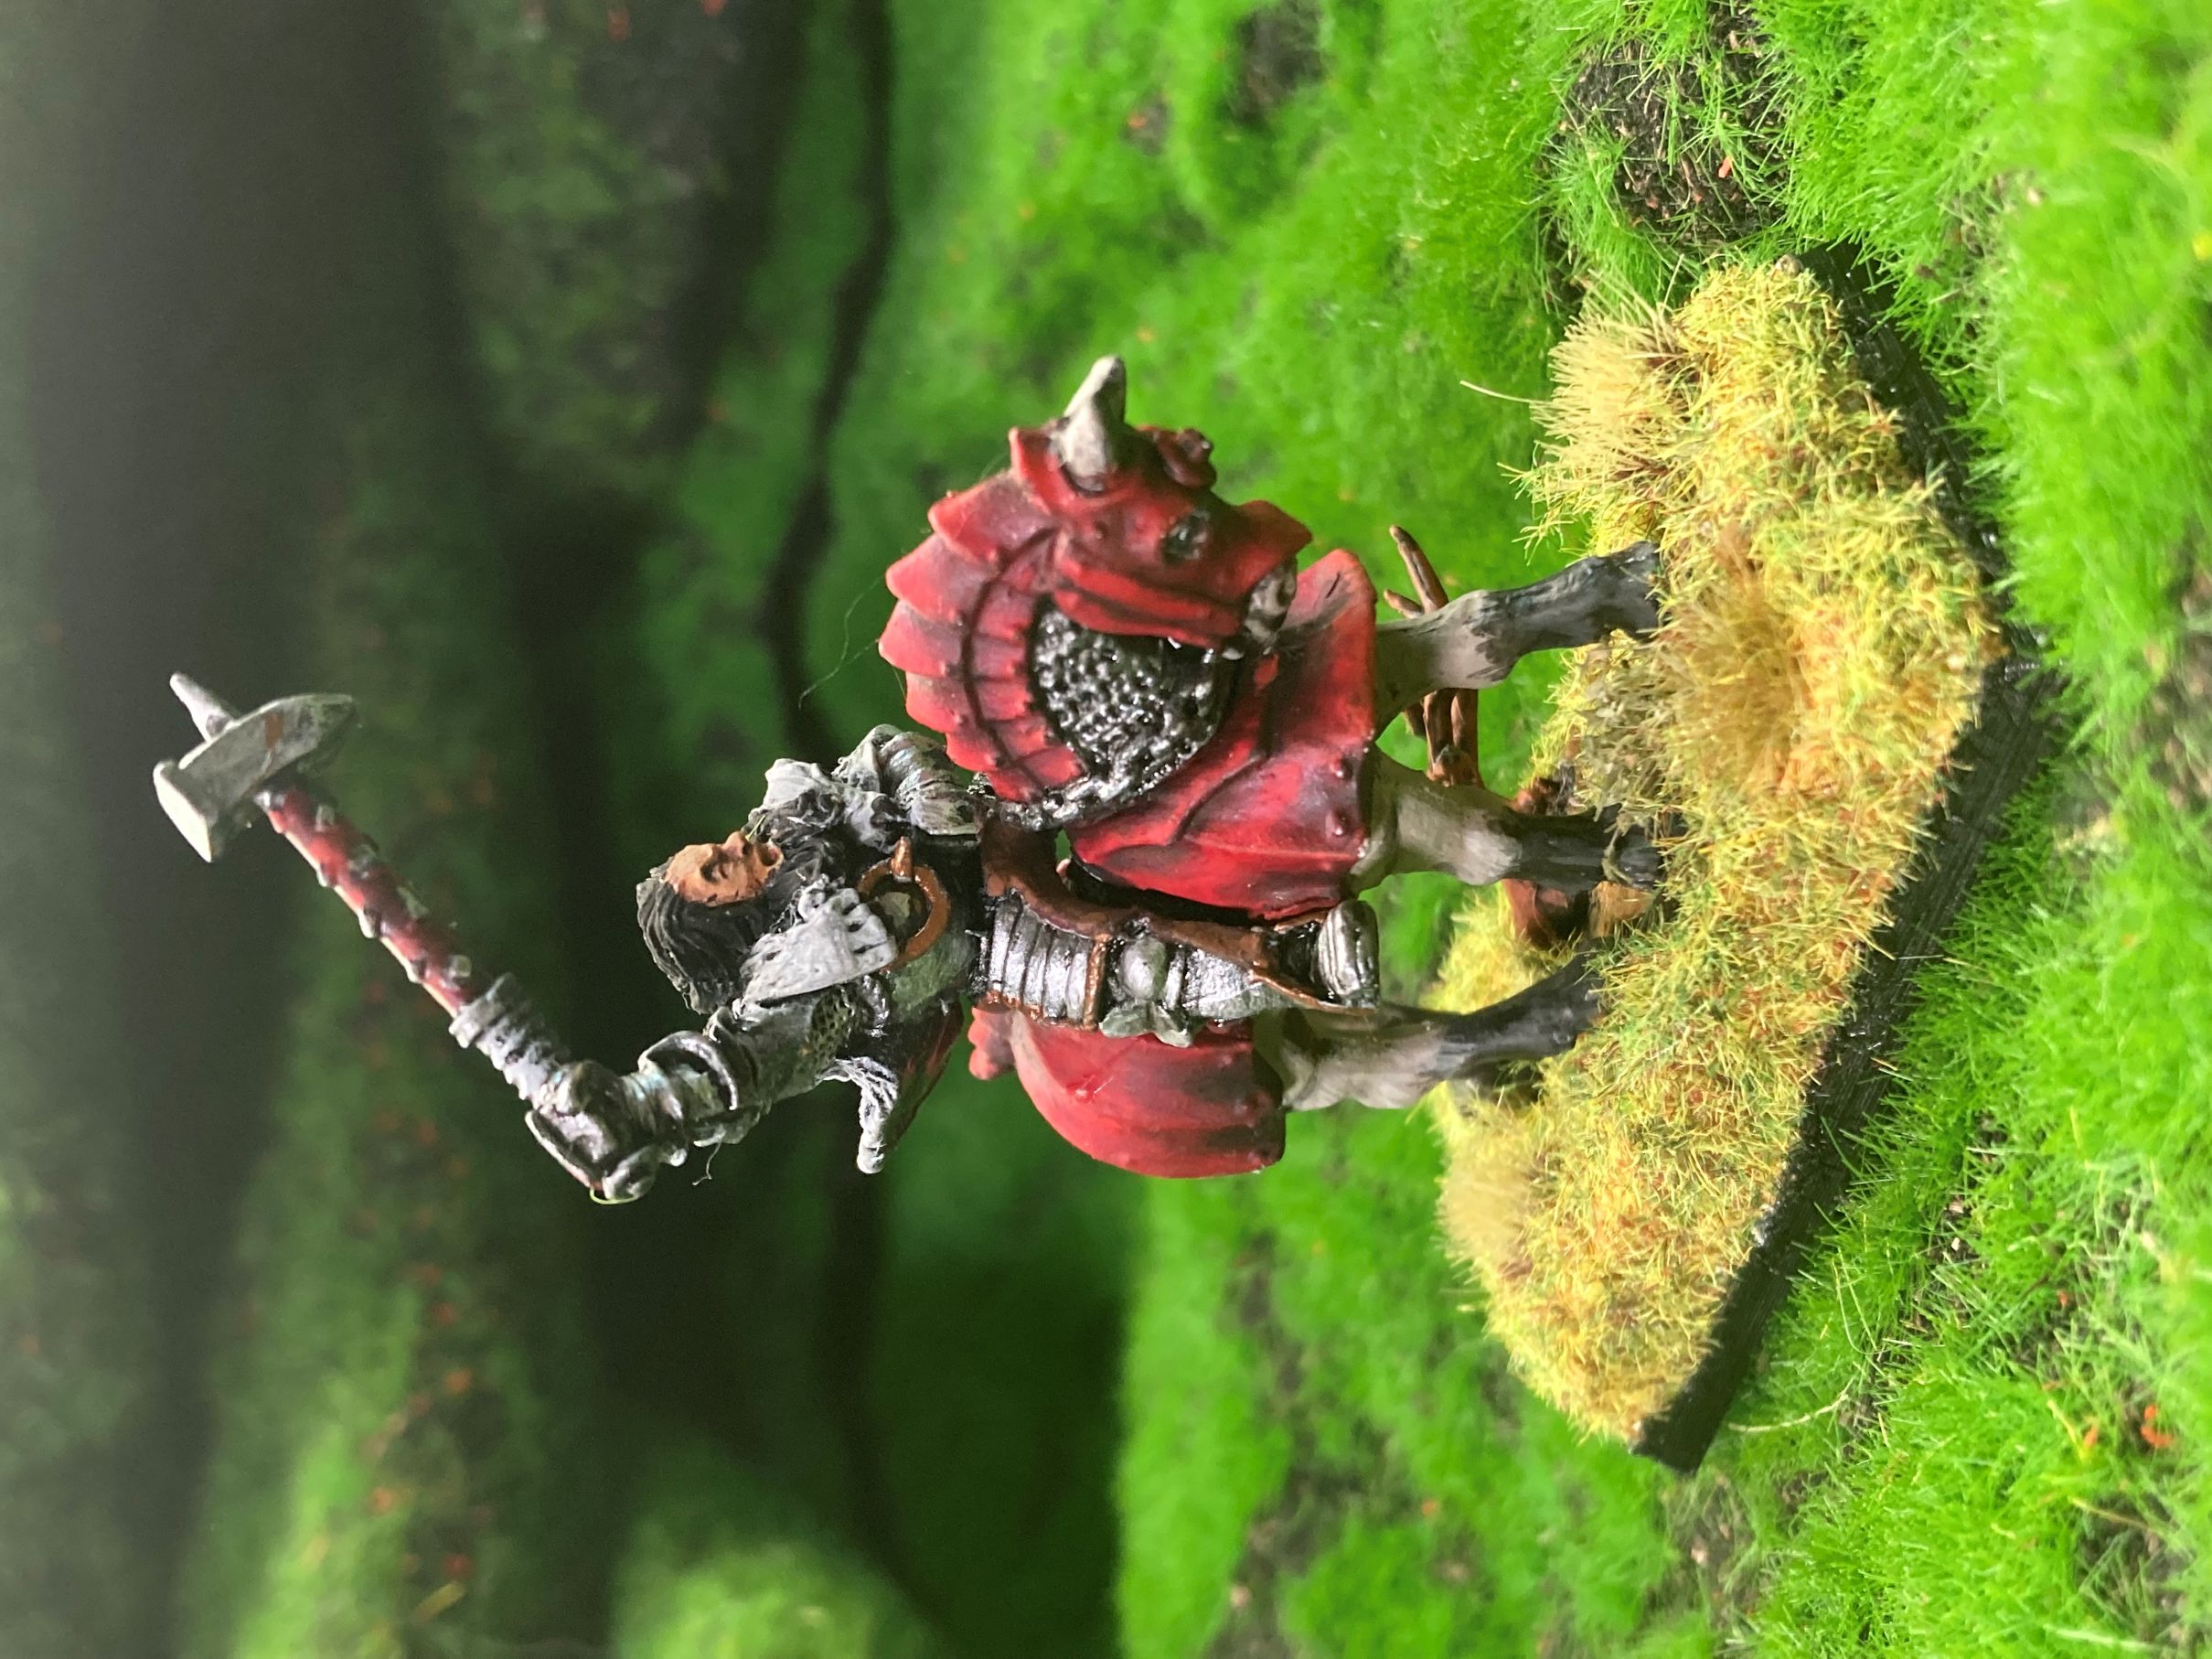
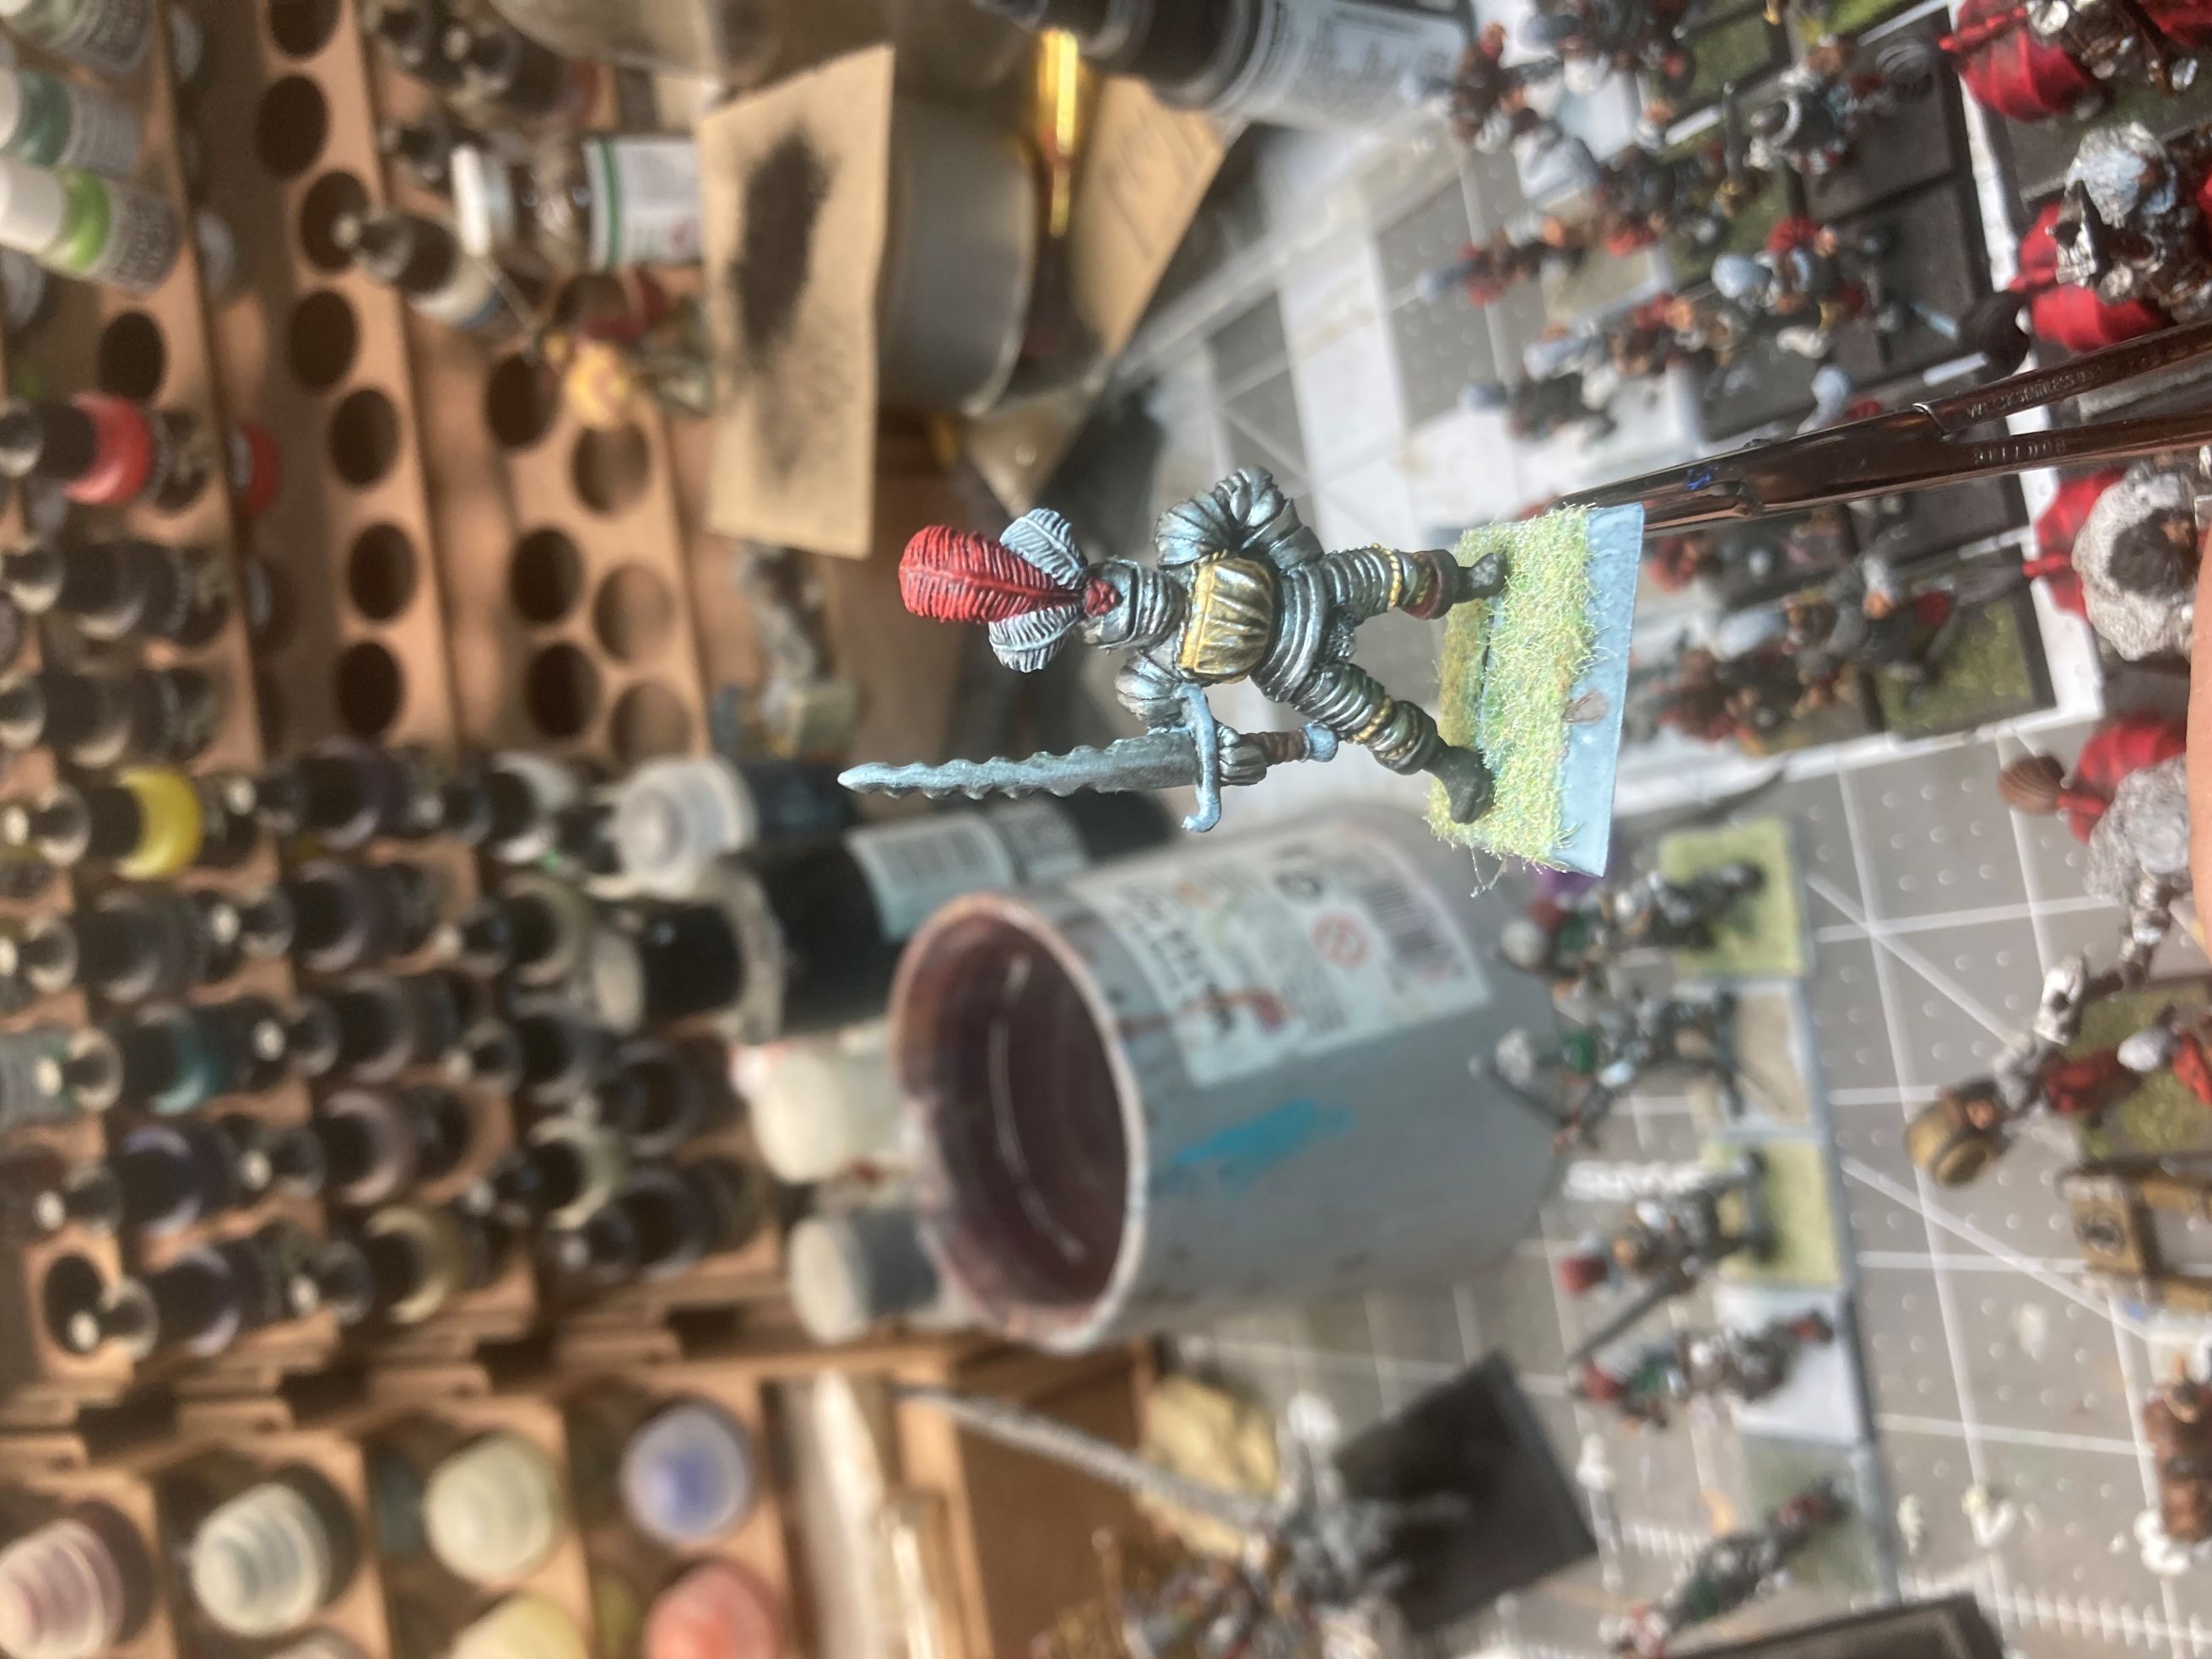
And here we go for the final postings and photo dumbs for this portion of the challenge. I’ll start with the Captain, who had been left out of earlier posts.
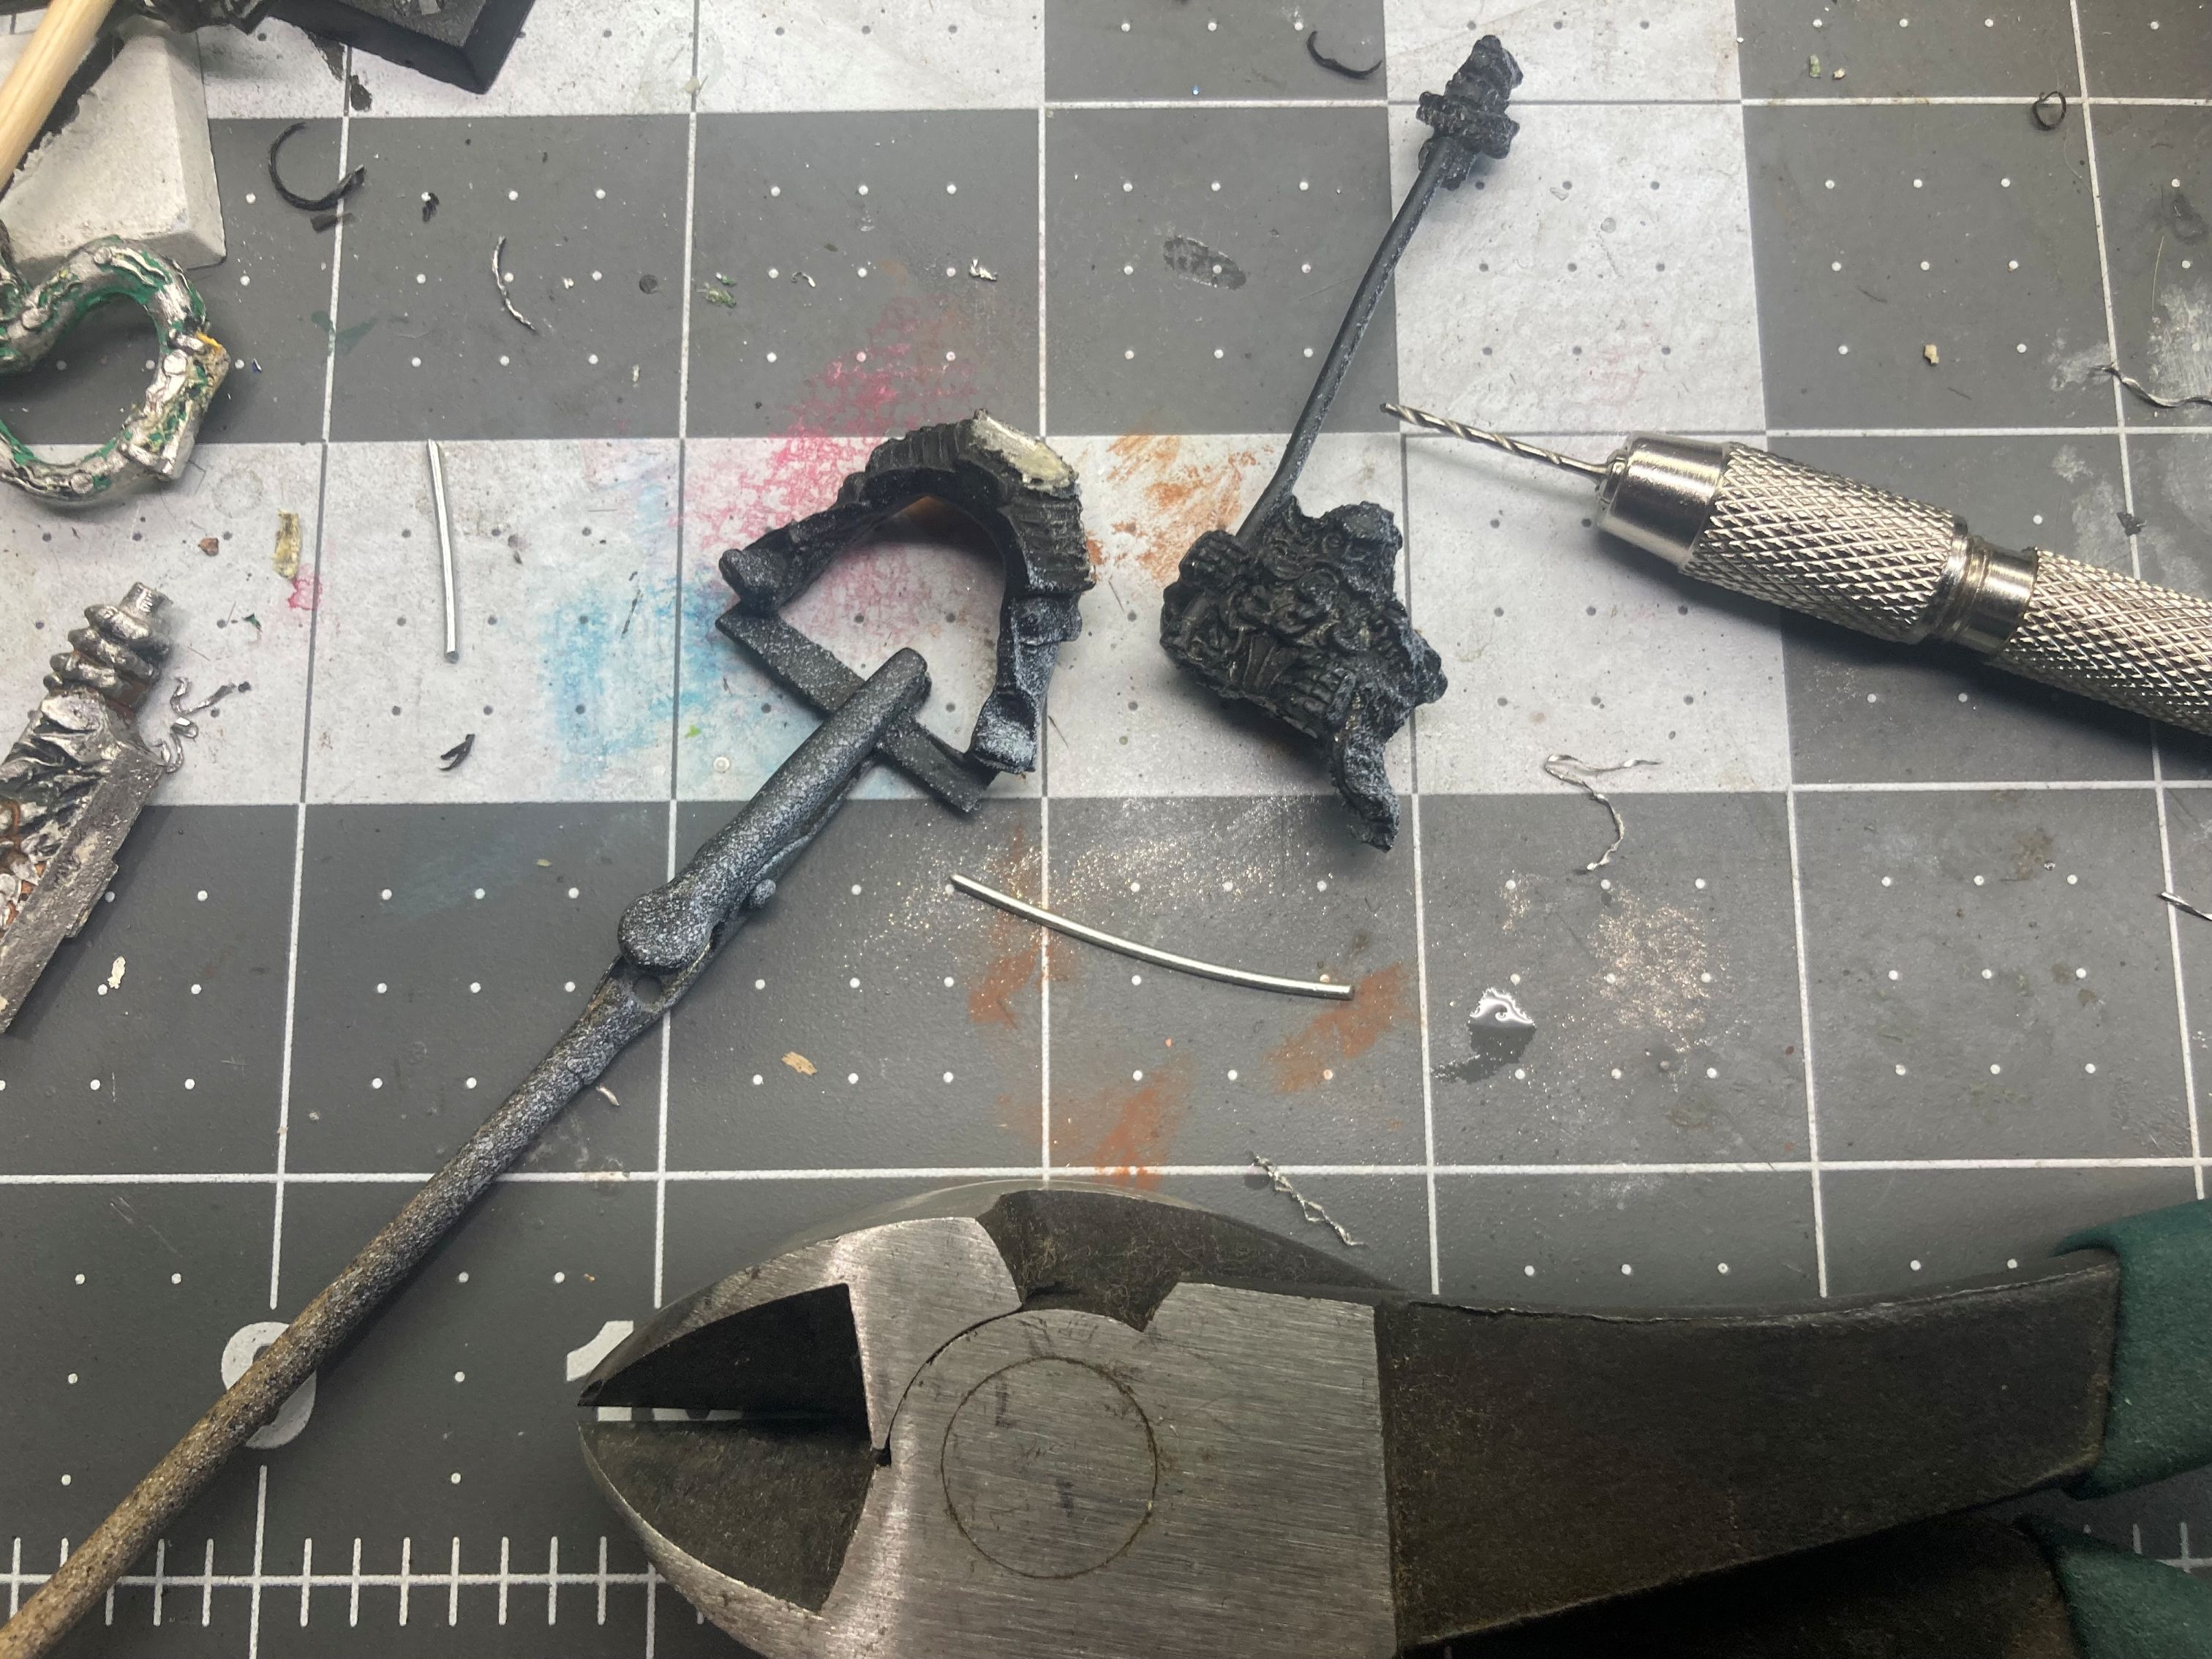
Of note with the Captain, is a reminder of early GW lead minis and the fairly common mis-casts that would show up in blisters. Depending on where you lived and the stocking of your FLGS one might just have to make due with the one and only option on the rack. With that I present Captain “Left Leg” Stumpy.
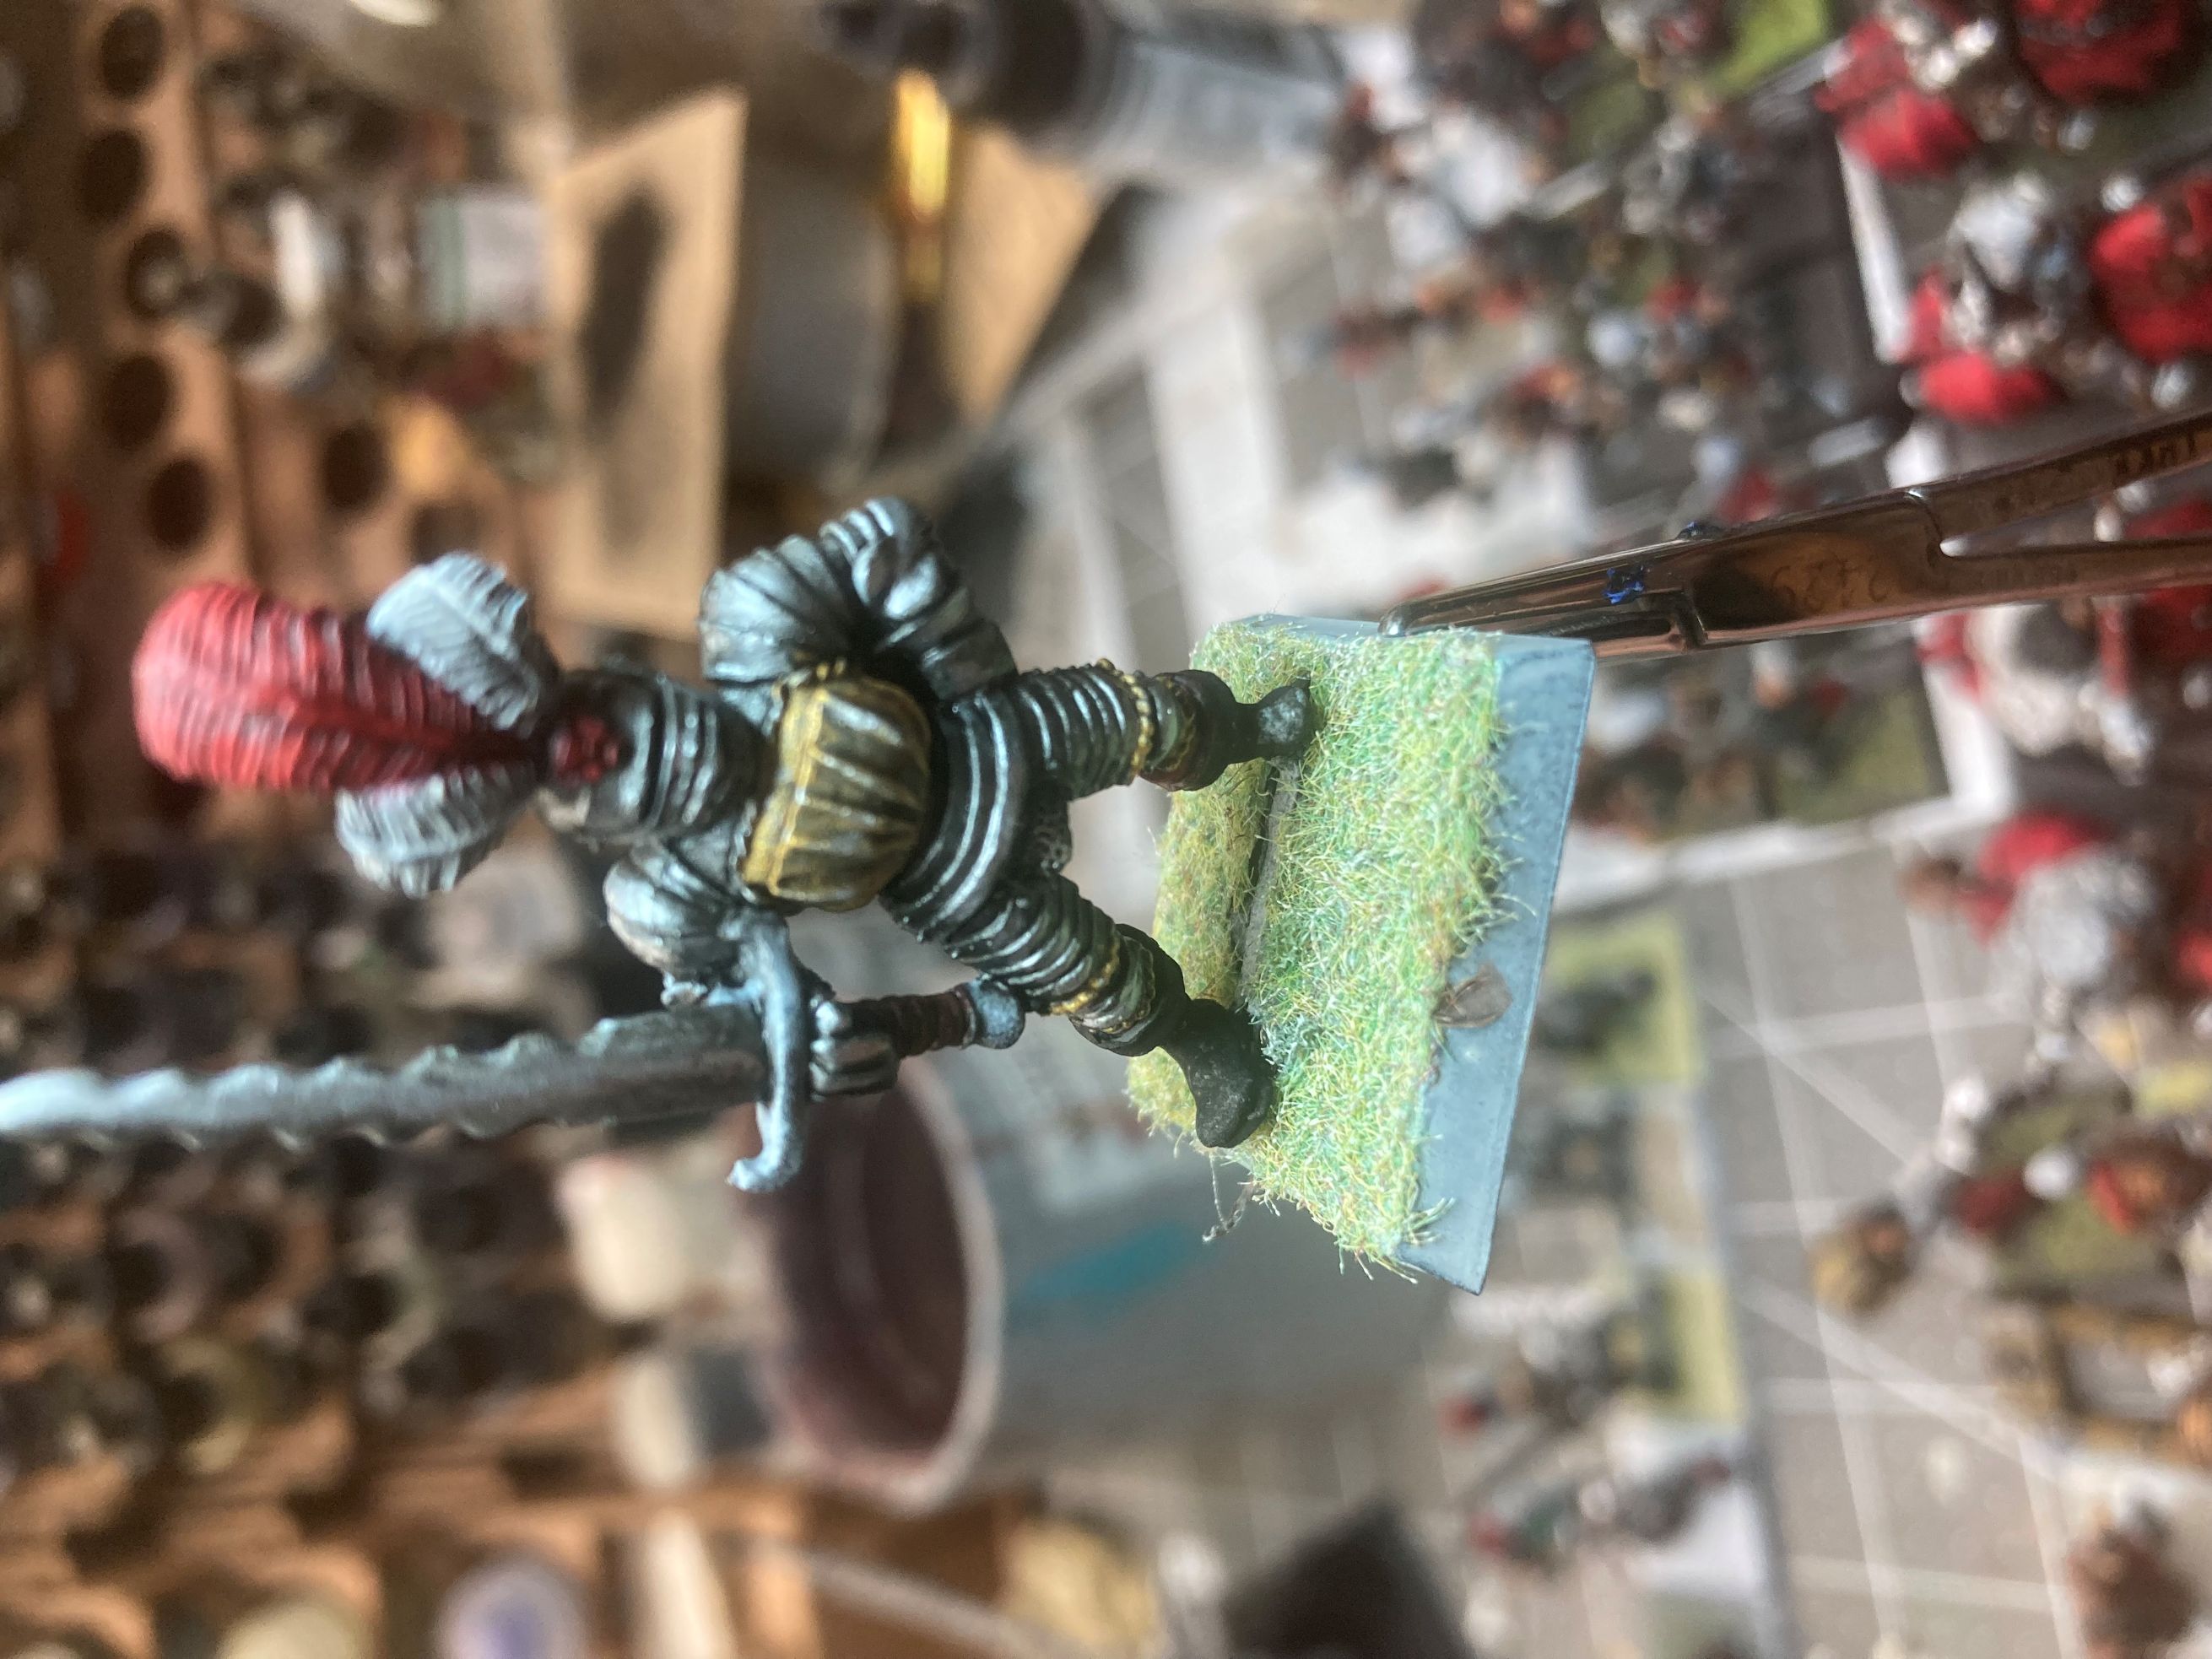 GW quality control in the 90s was the best.
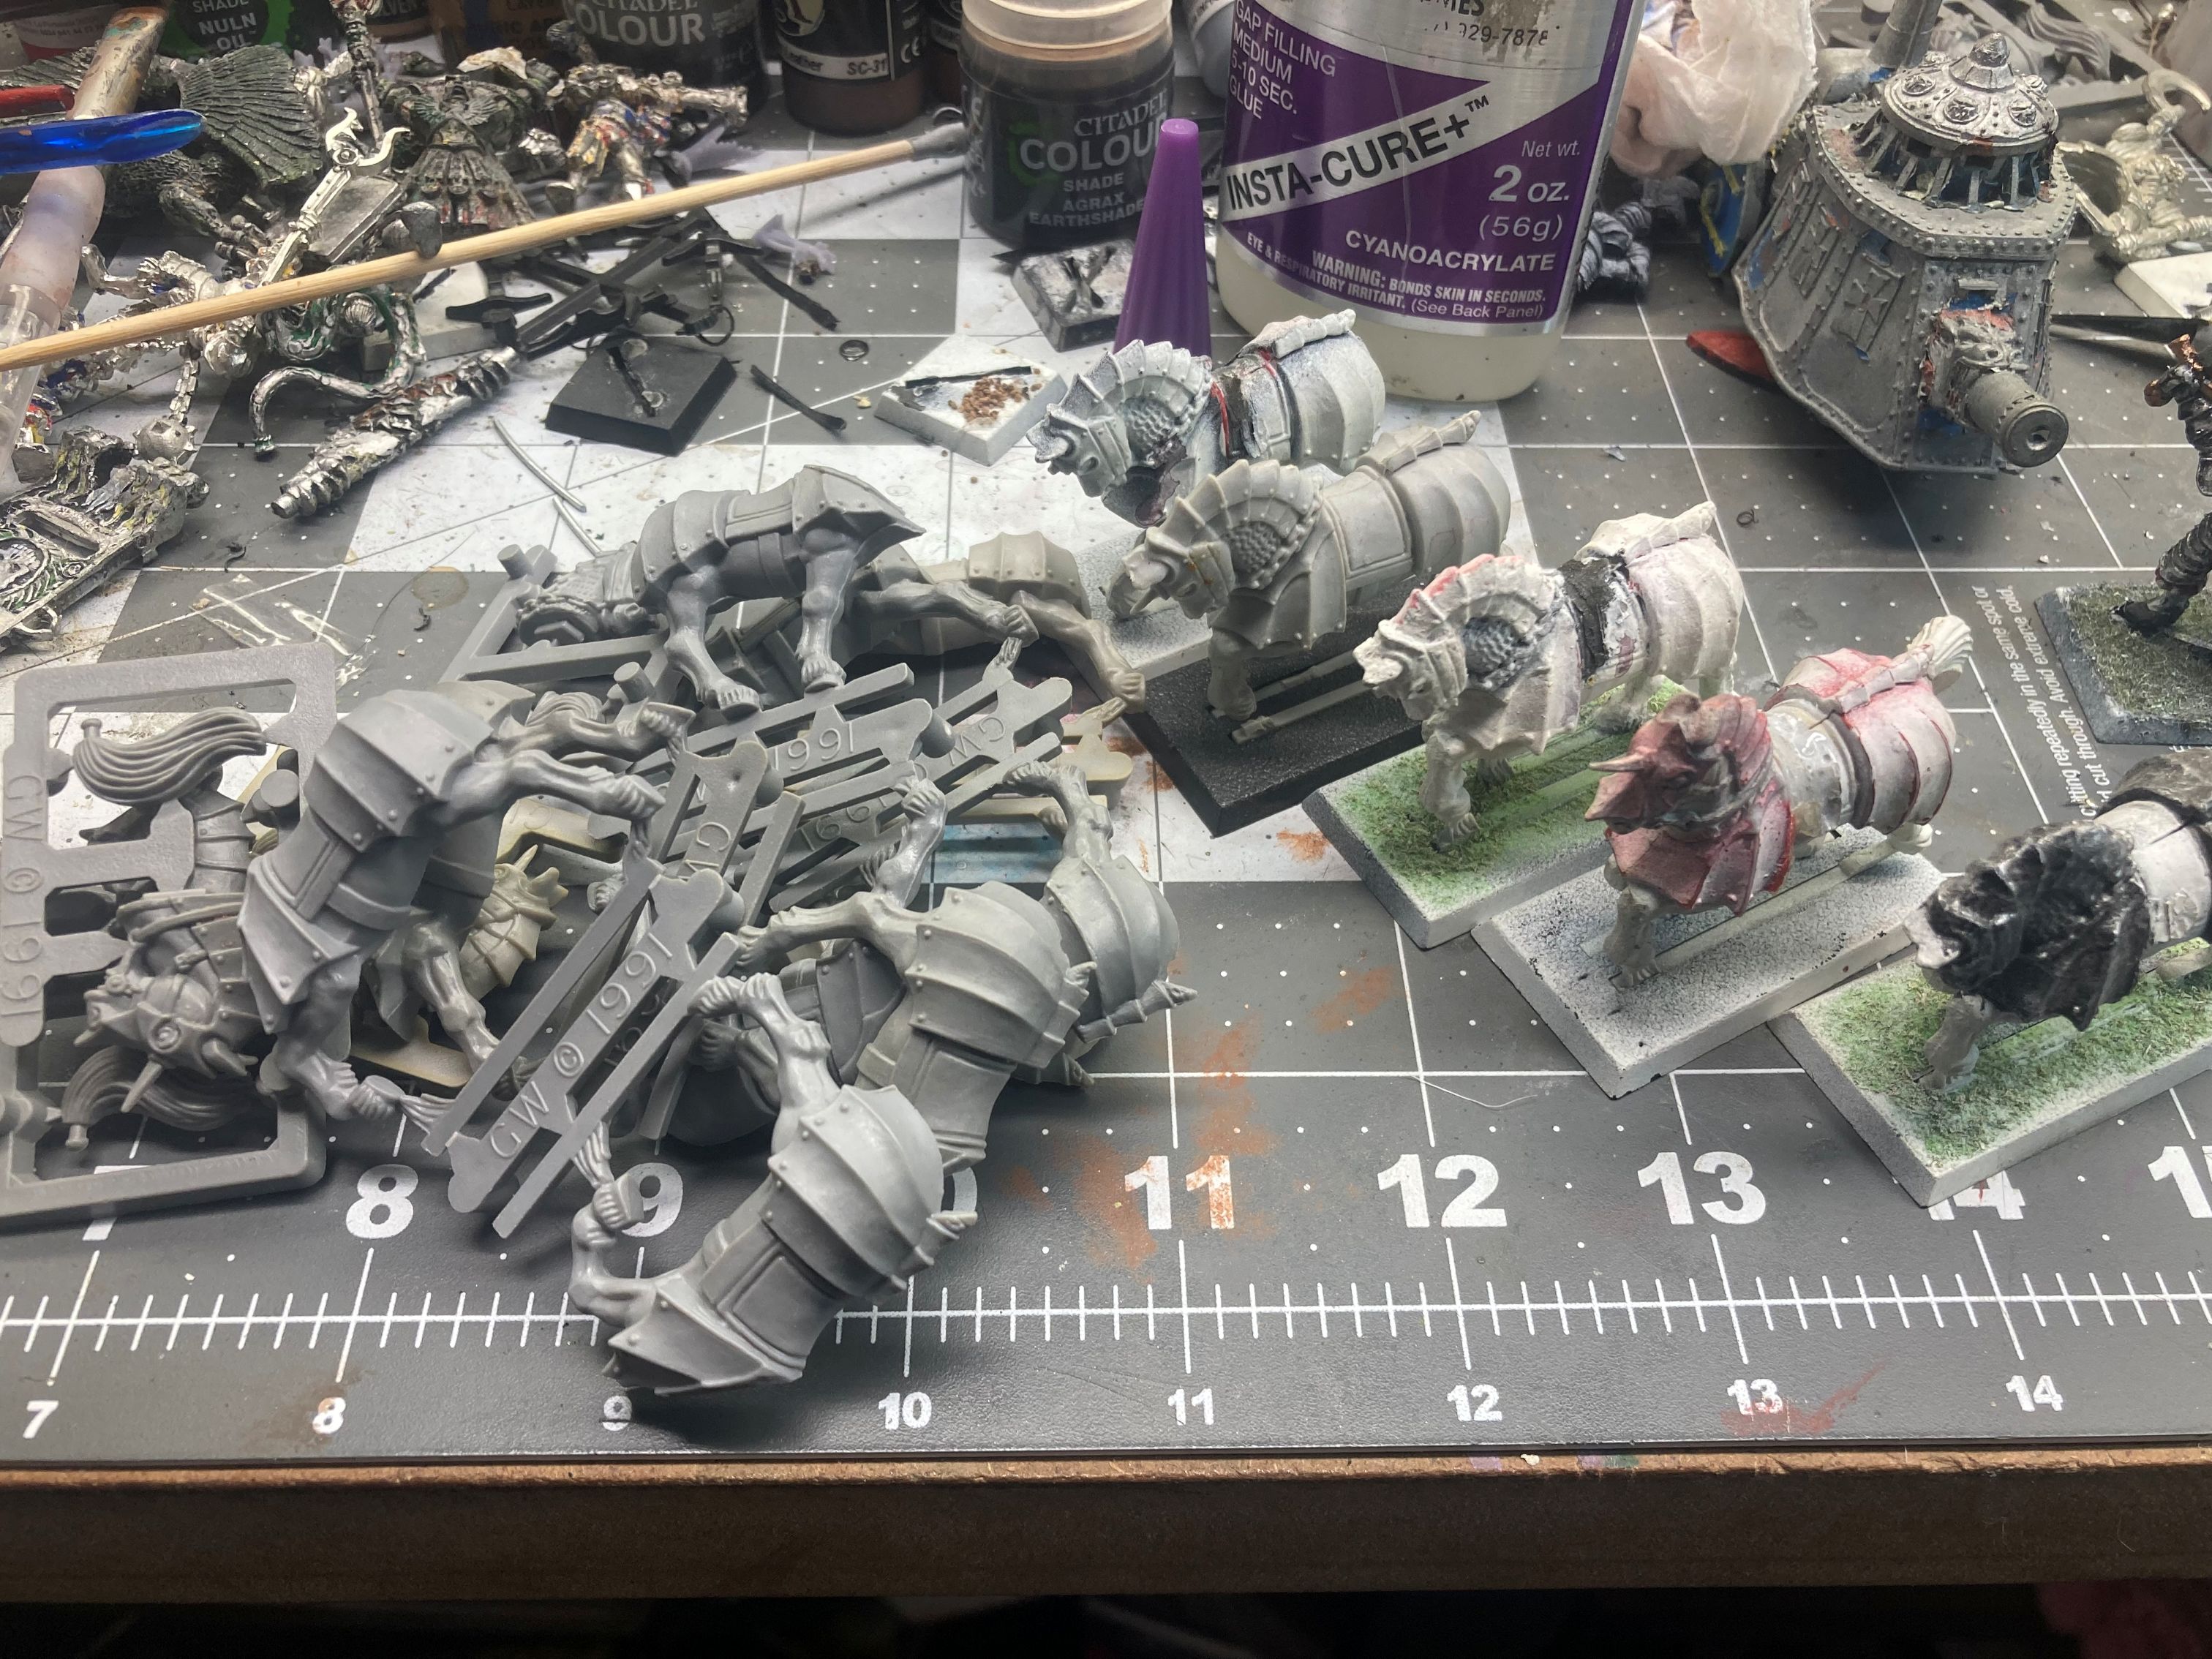
Now for basing. I had plenty of the proper up sized bases for the infantry, but I needed to find options for the steam tank, calvary and Pegasus. A fast search for stl files on yeggi and I had the new size bases printed out. For the cavalry I decided to keep them mounted on their old bases and just build up some epoxy on the edge of the new base to even it up a little.

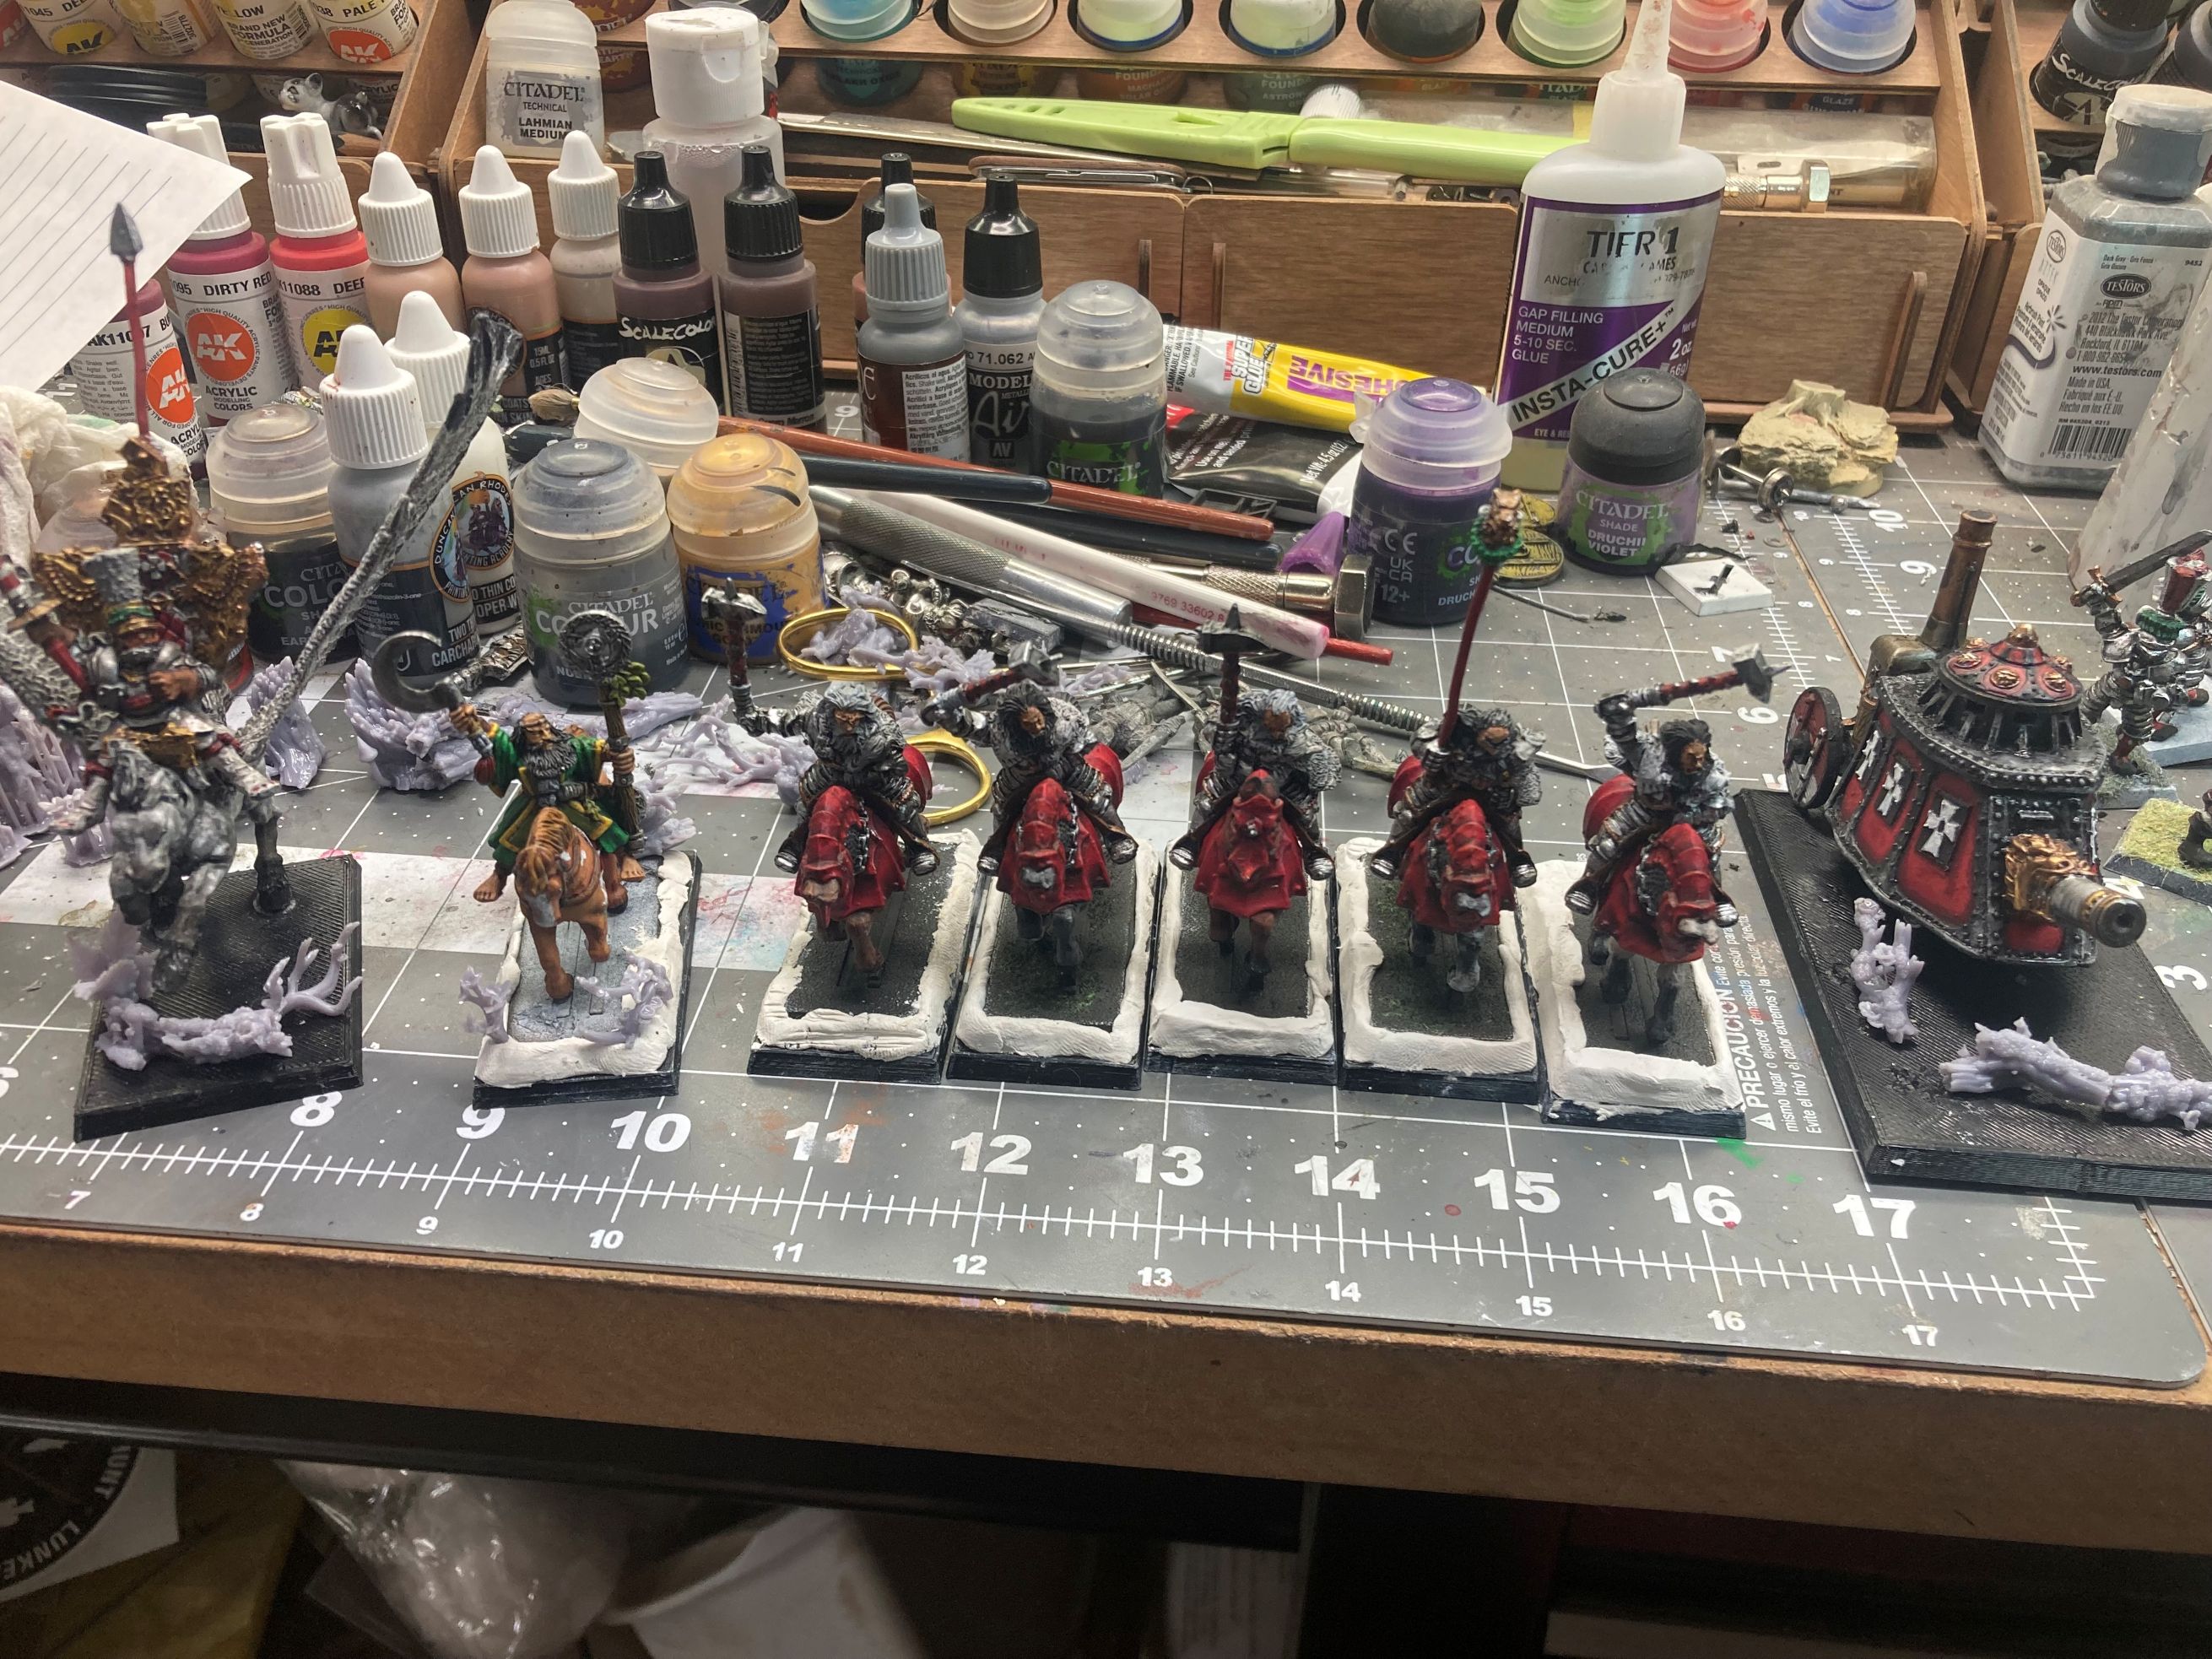
I began printing out some bits for the bases from Epic Basing and coating the bases with acrylic texture paint.
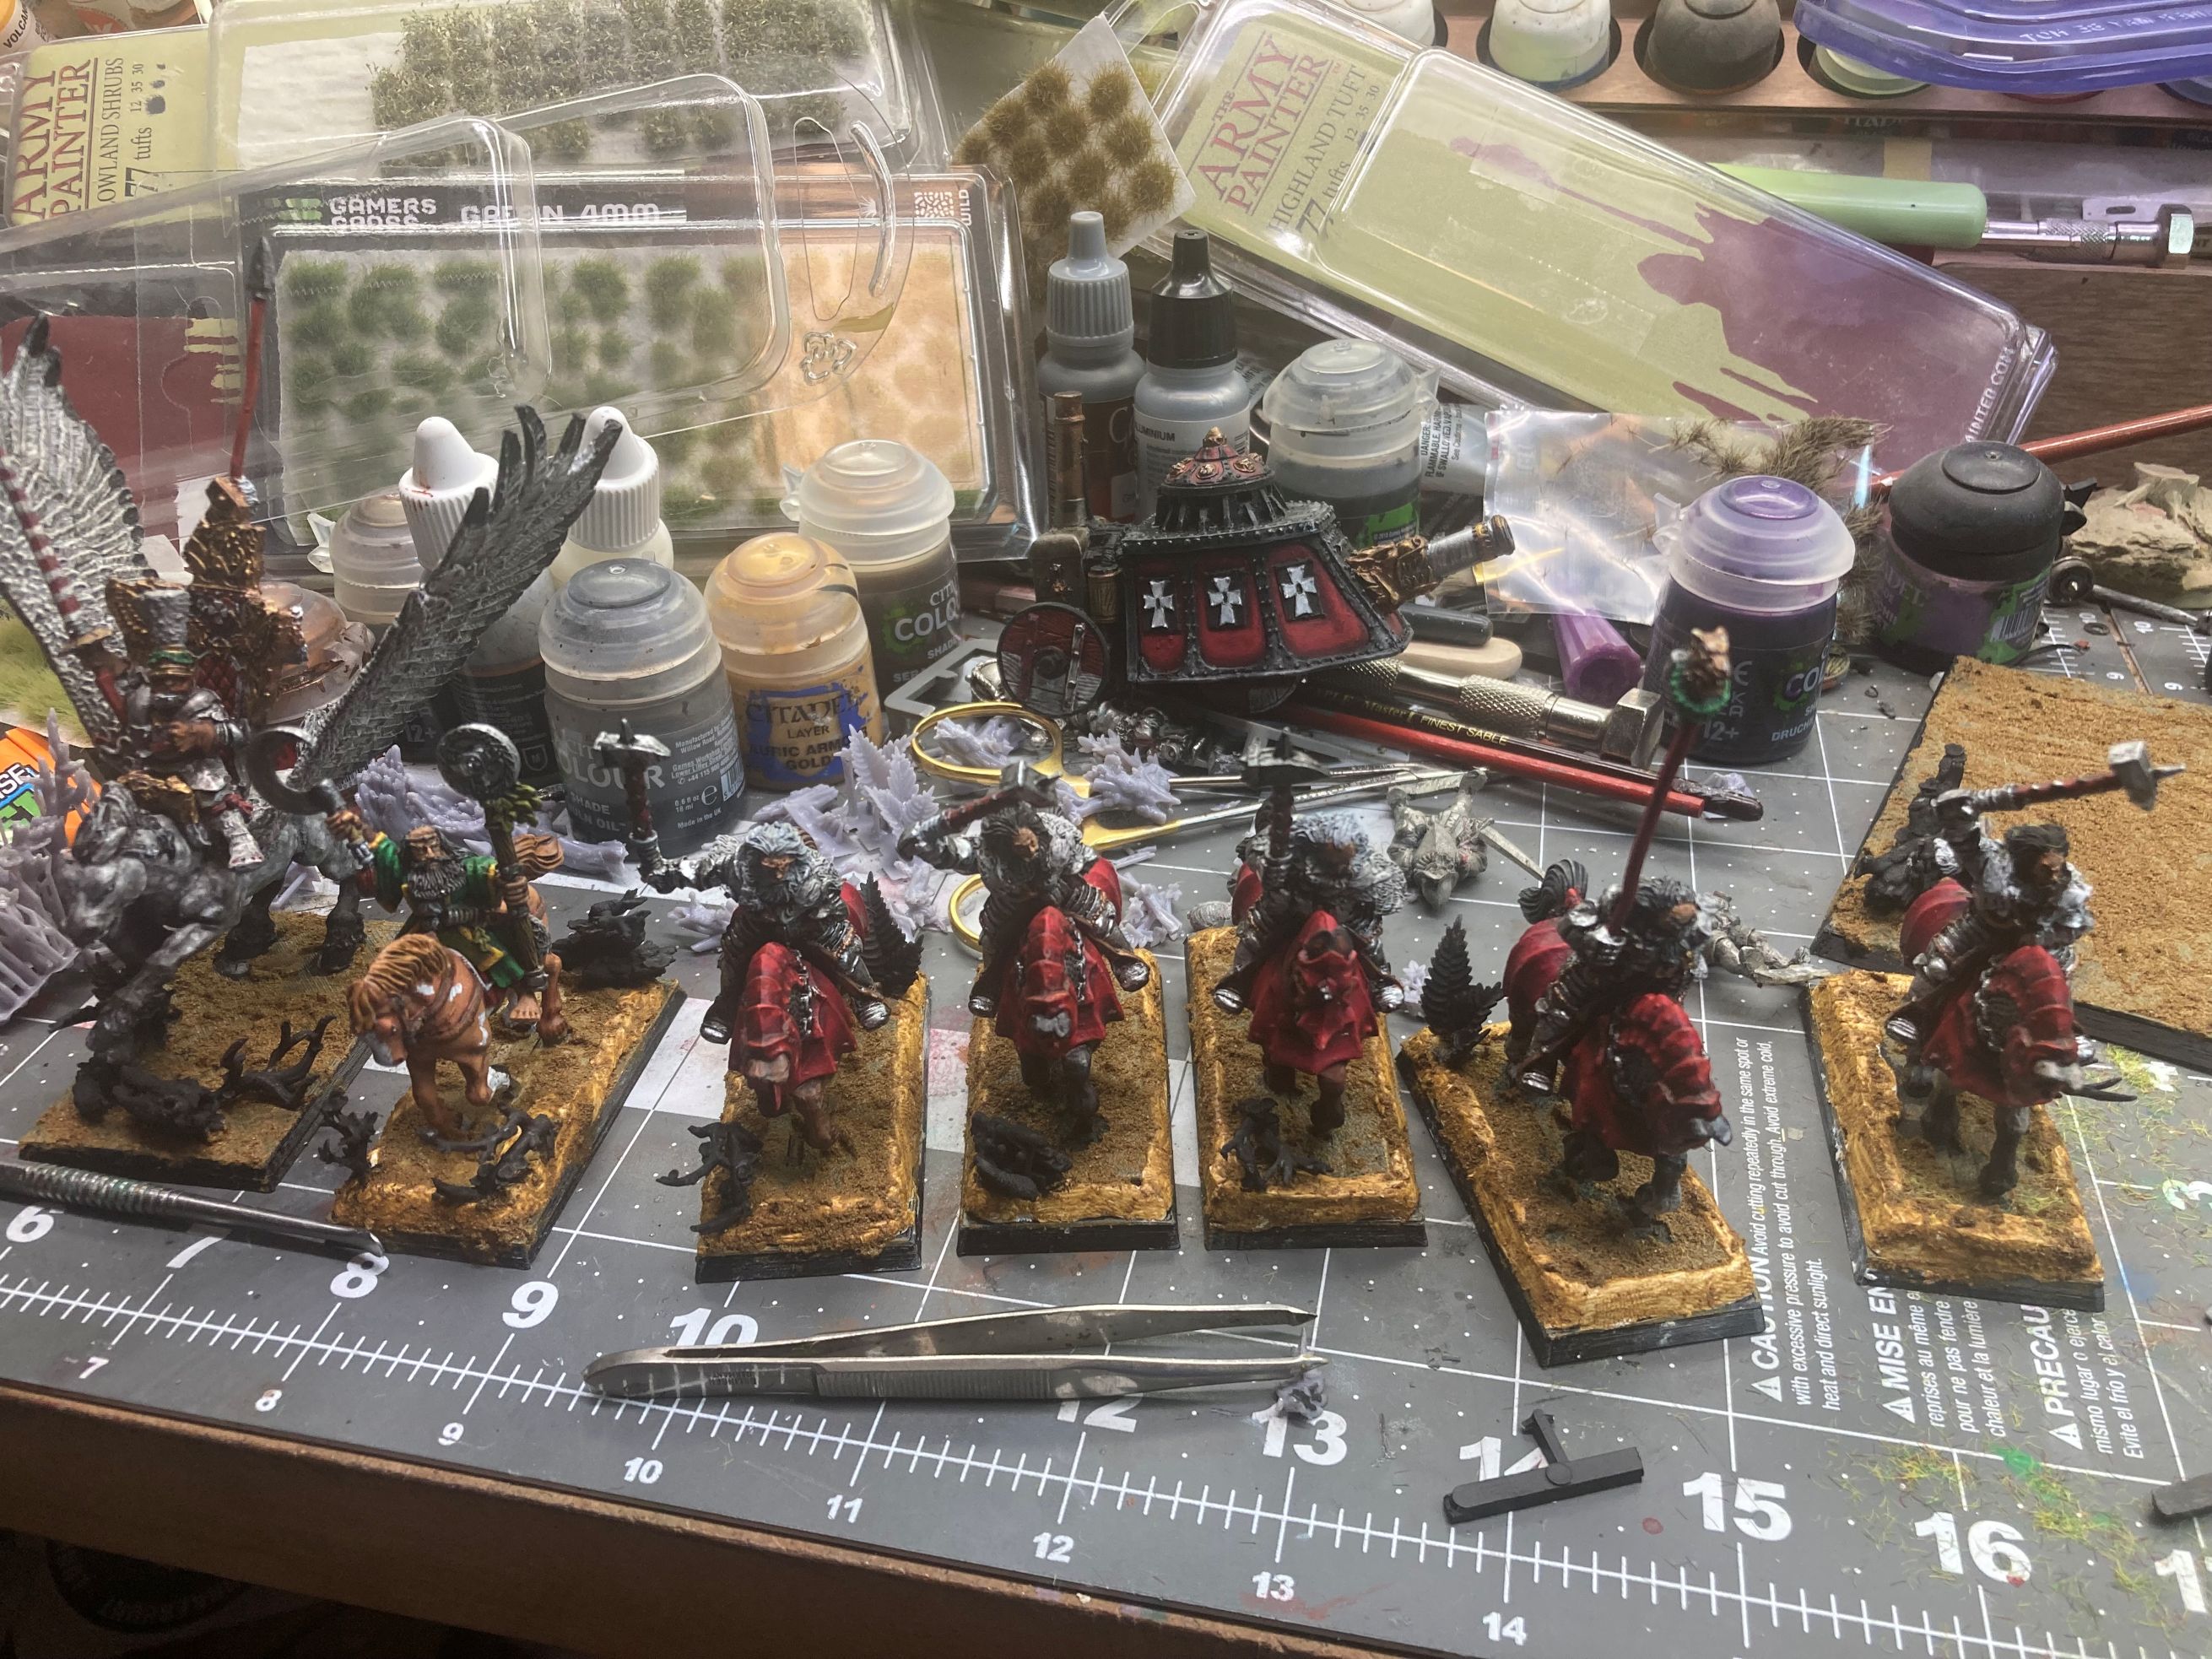
The next blog posts will be for total army and individual unit photos.
In the home stretch for the initial set on miniatures
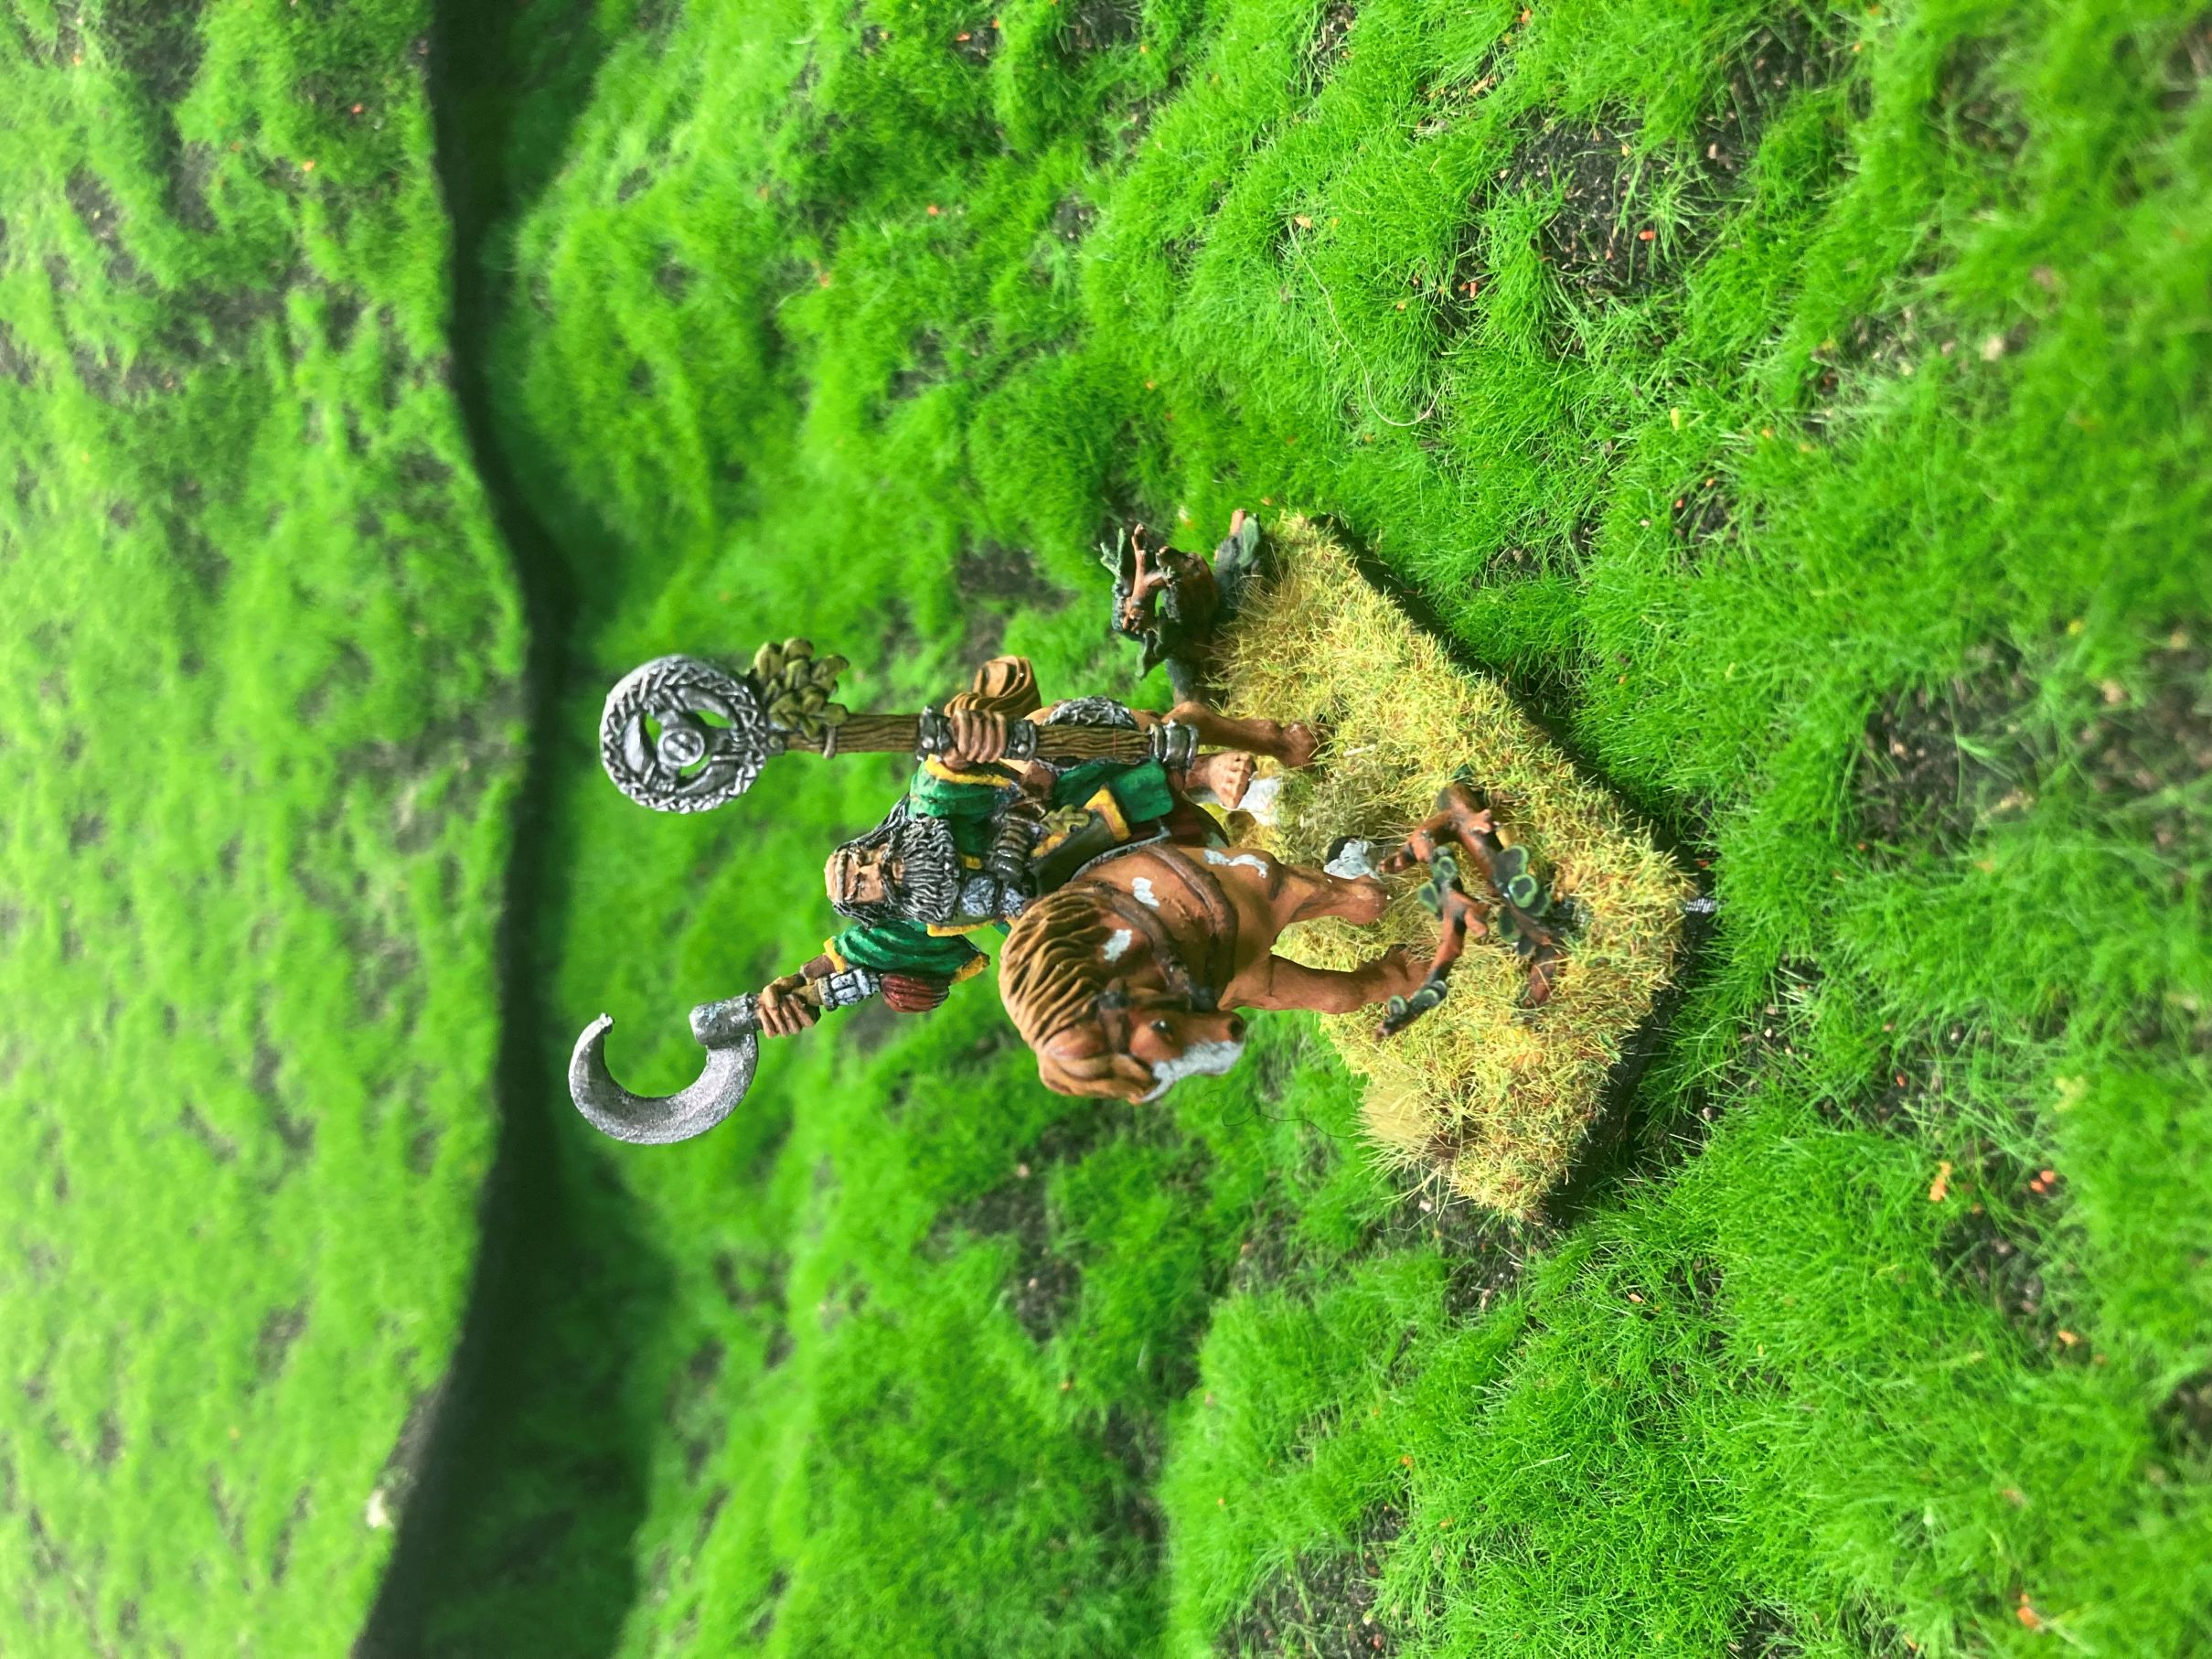
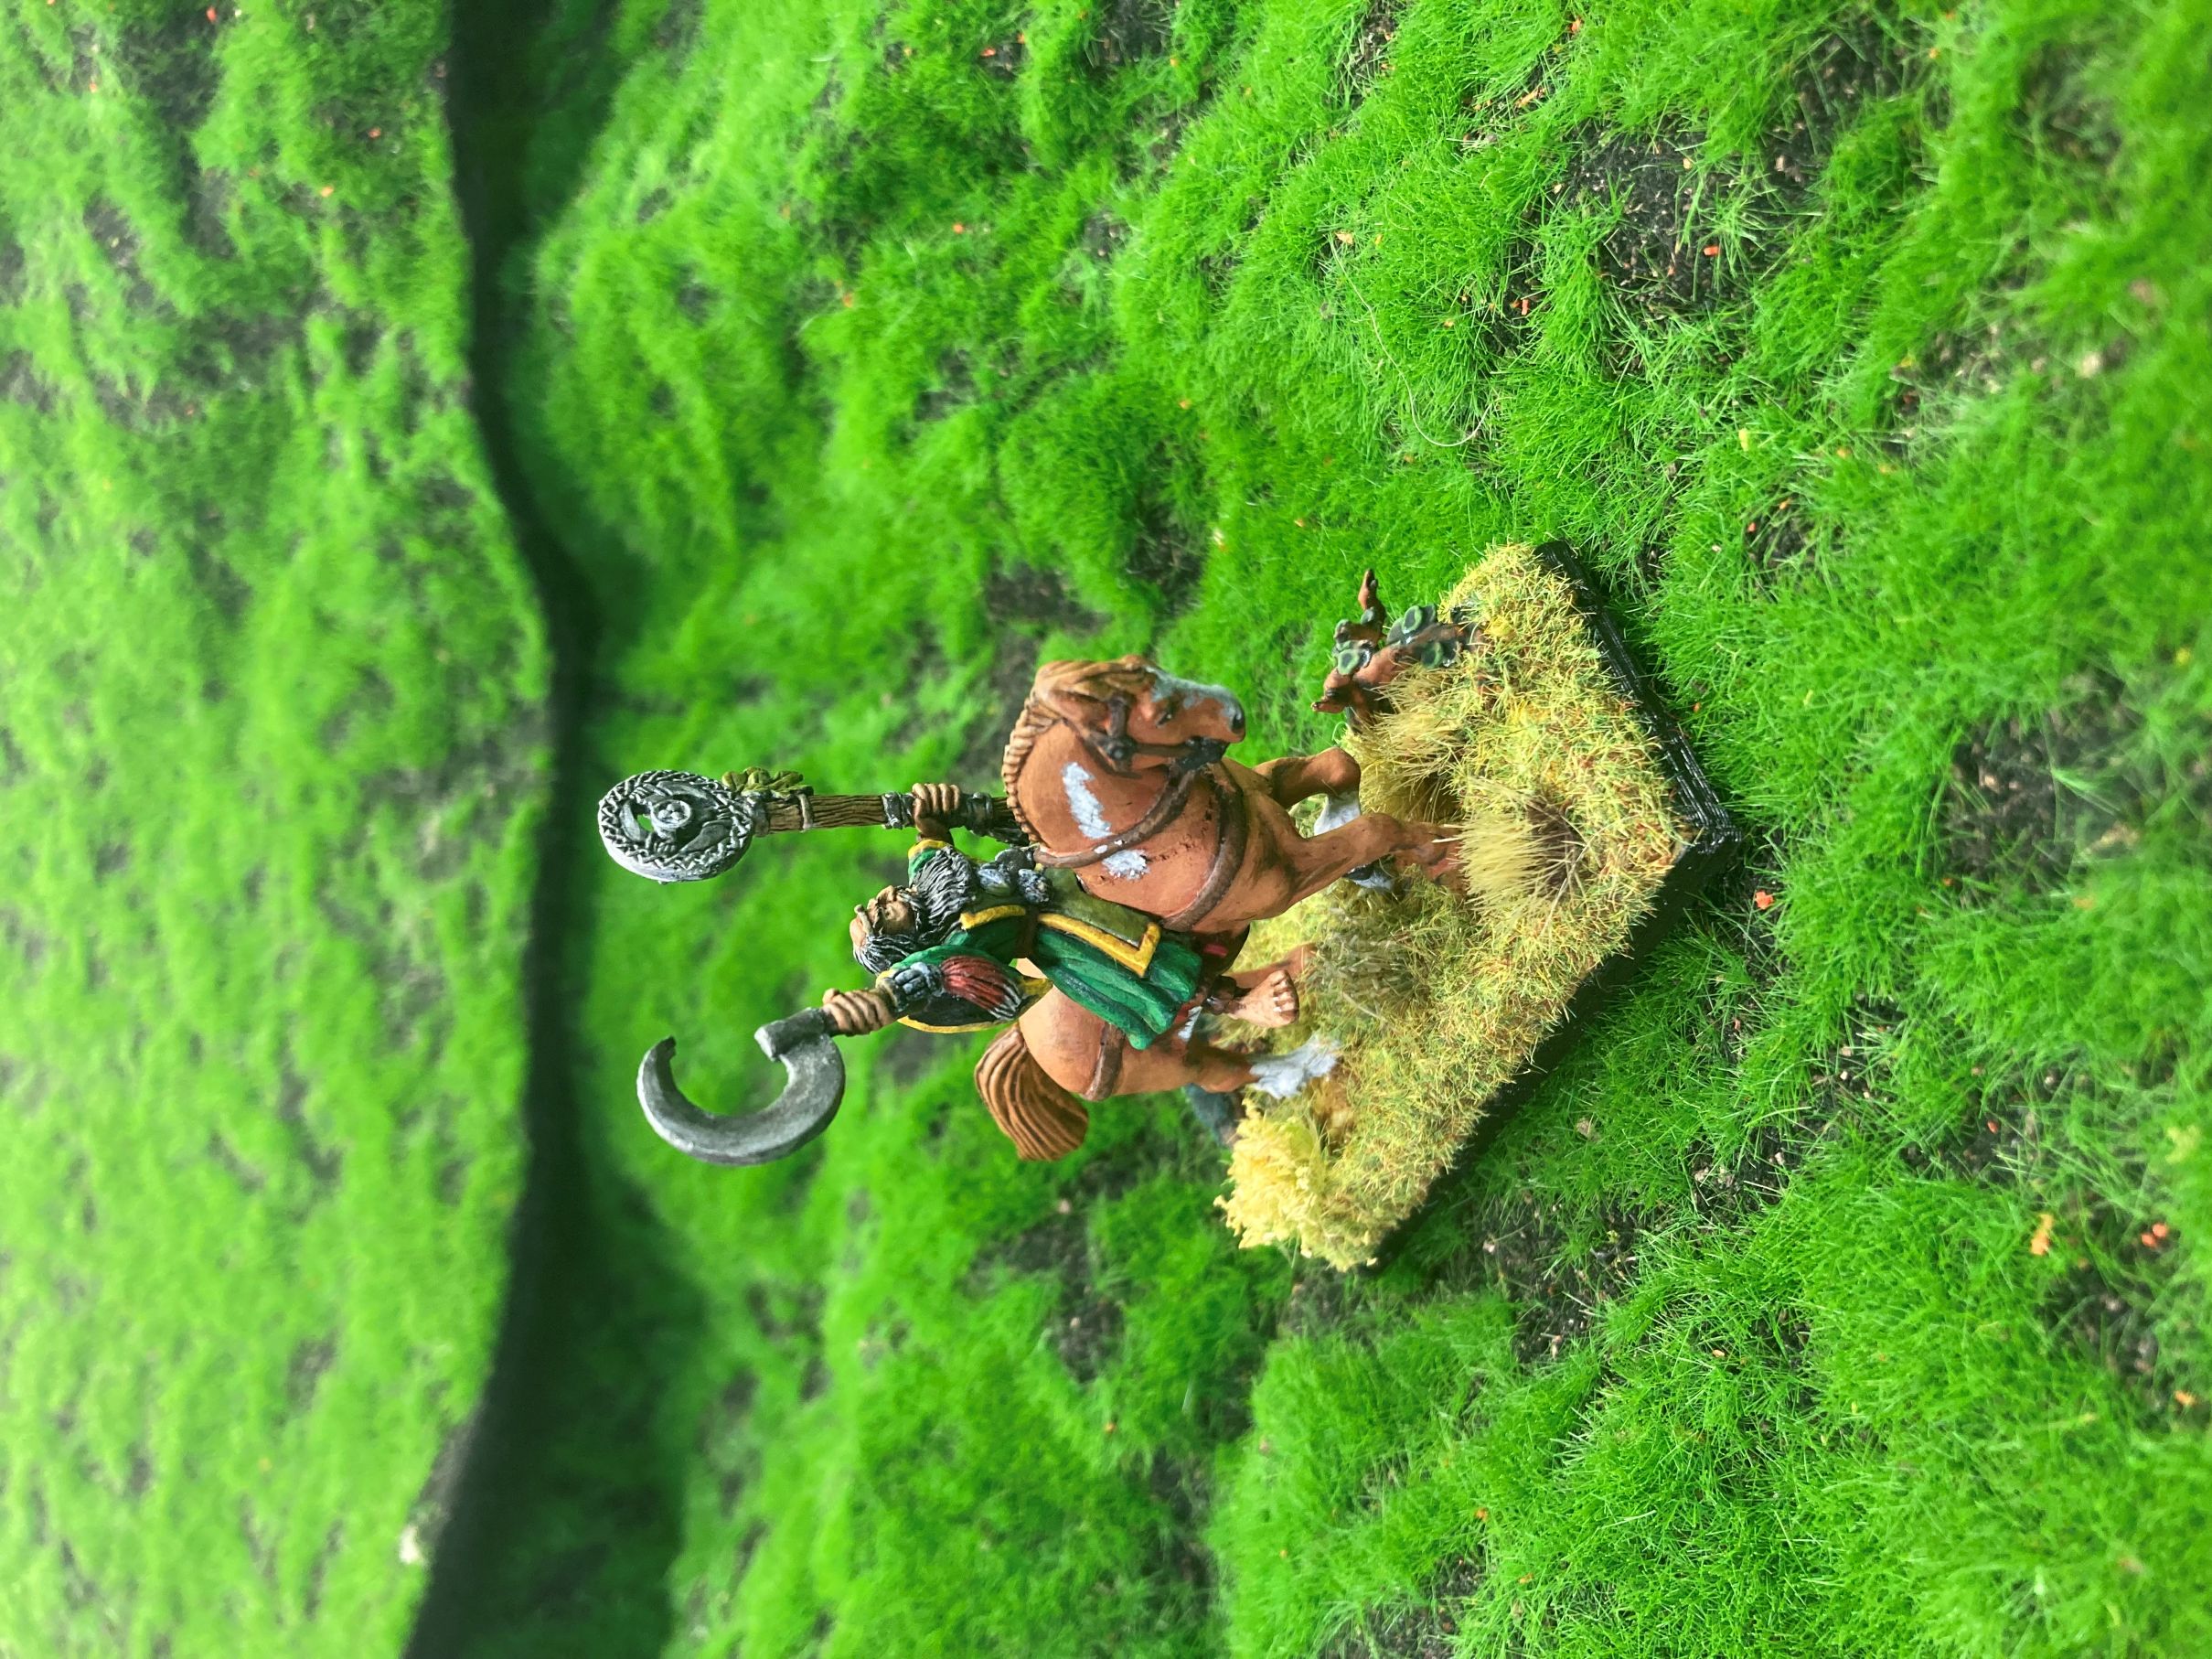
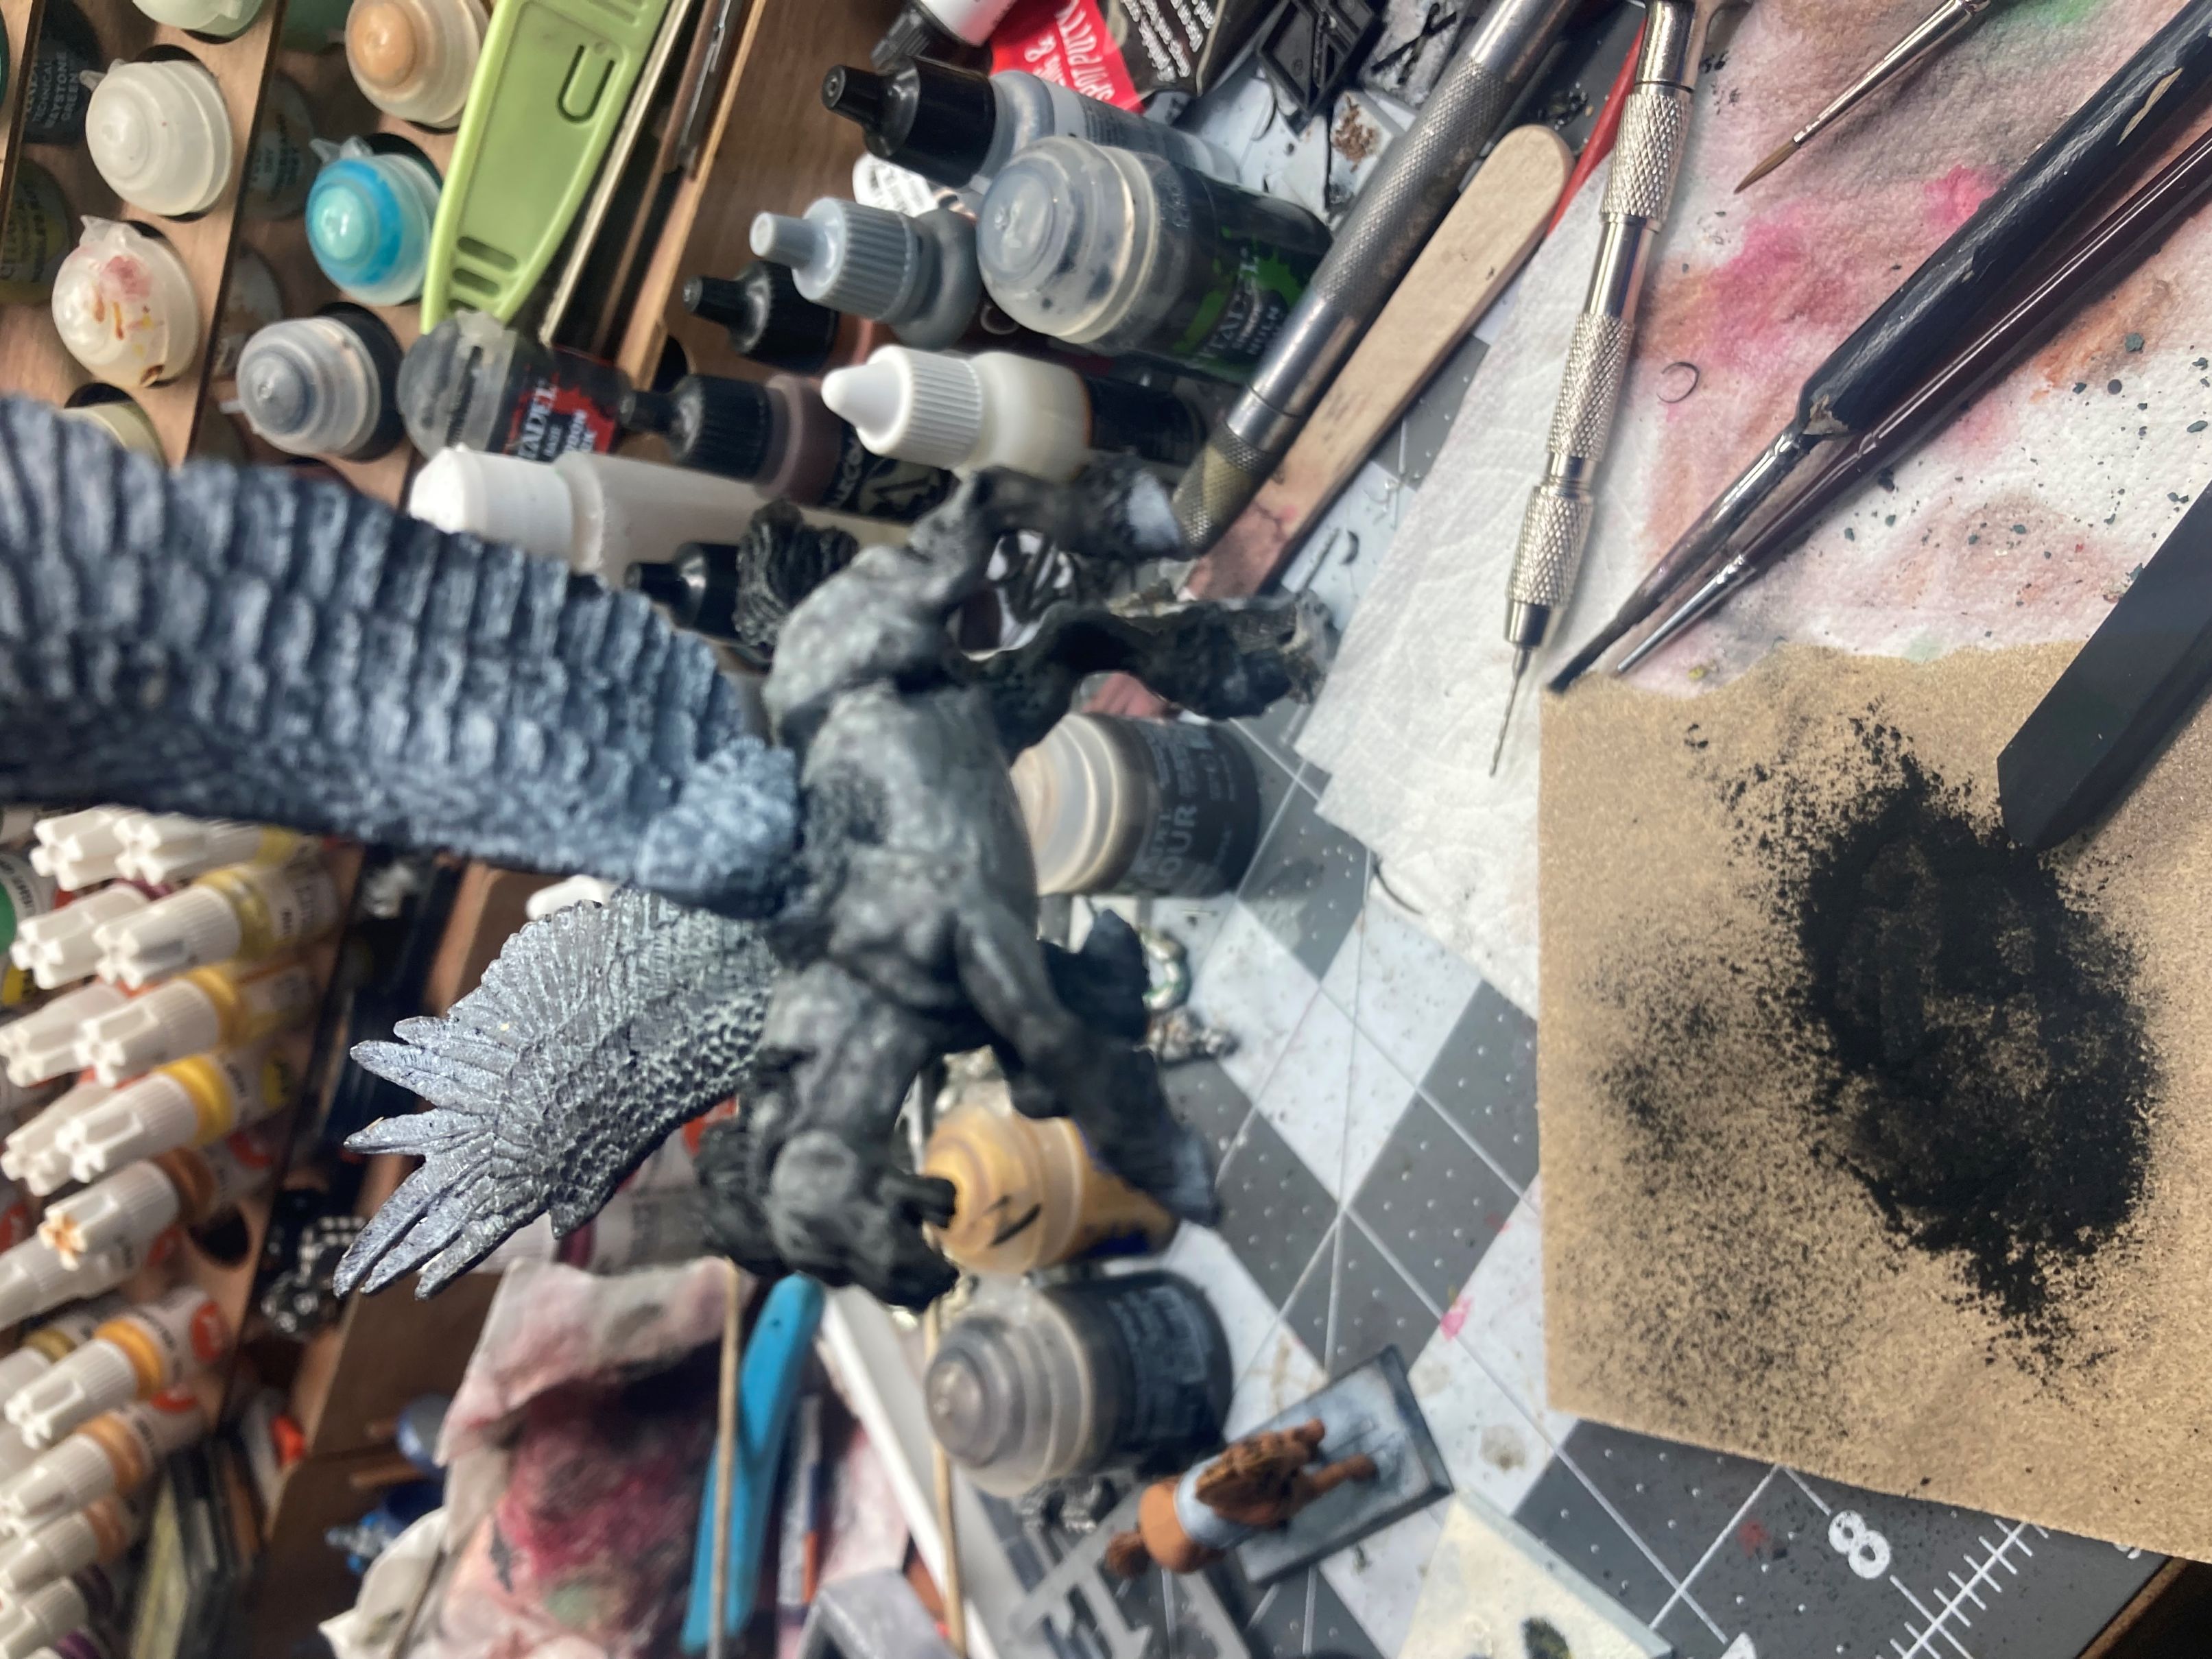
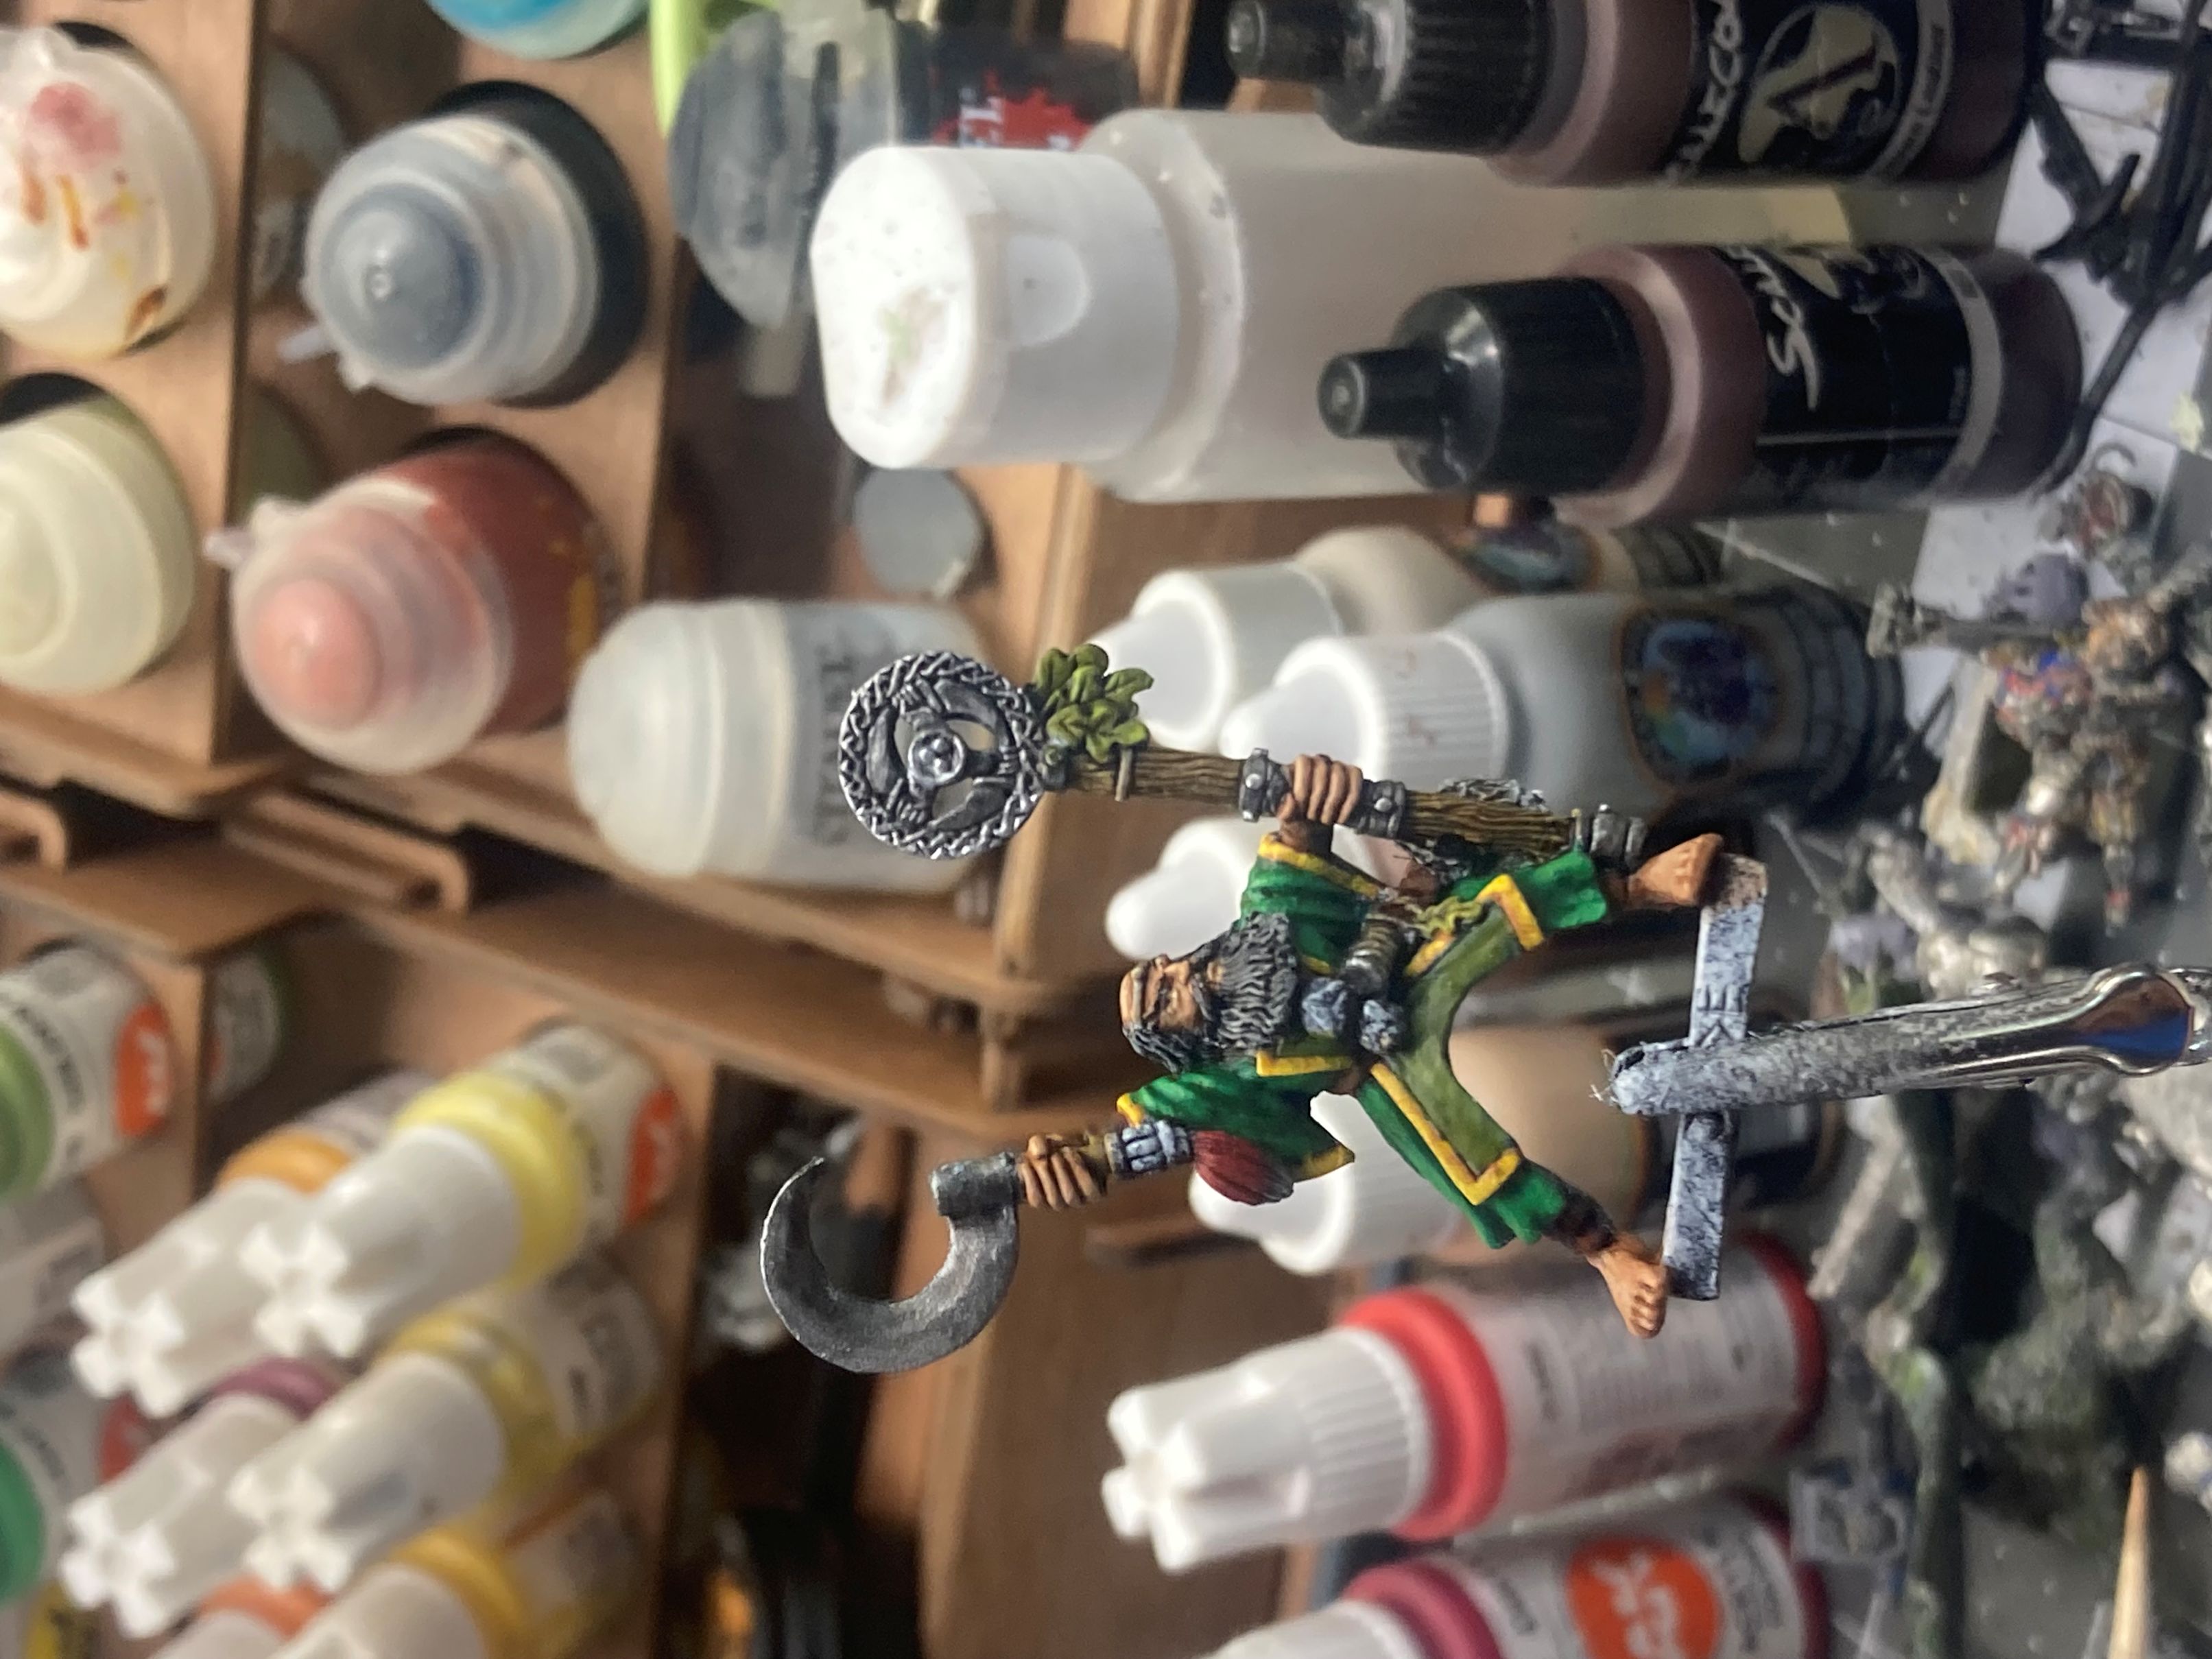
As May rolled into June I started work on the last miniatures I had selected for the start to the repaint. I started attacking the general on Pegasus and while various layers were drying, I started on the mounted Jade wizard.
For the Pegasus I didn’t want to do just a basic white so I tried my had at dapple gray. Interesting side note, almost all gray horses turn white as the age.
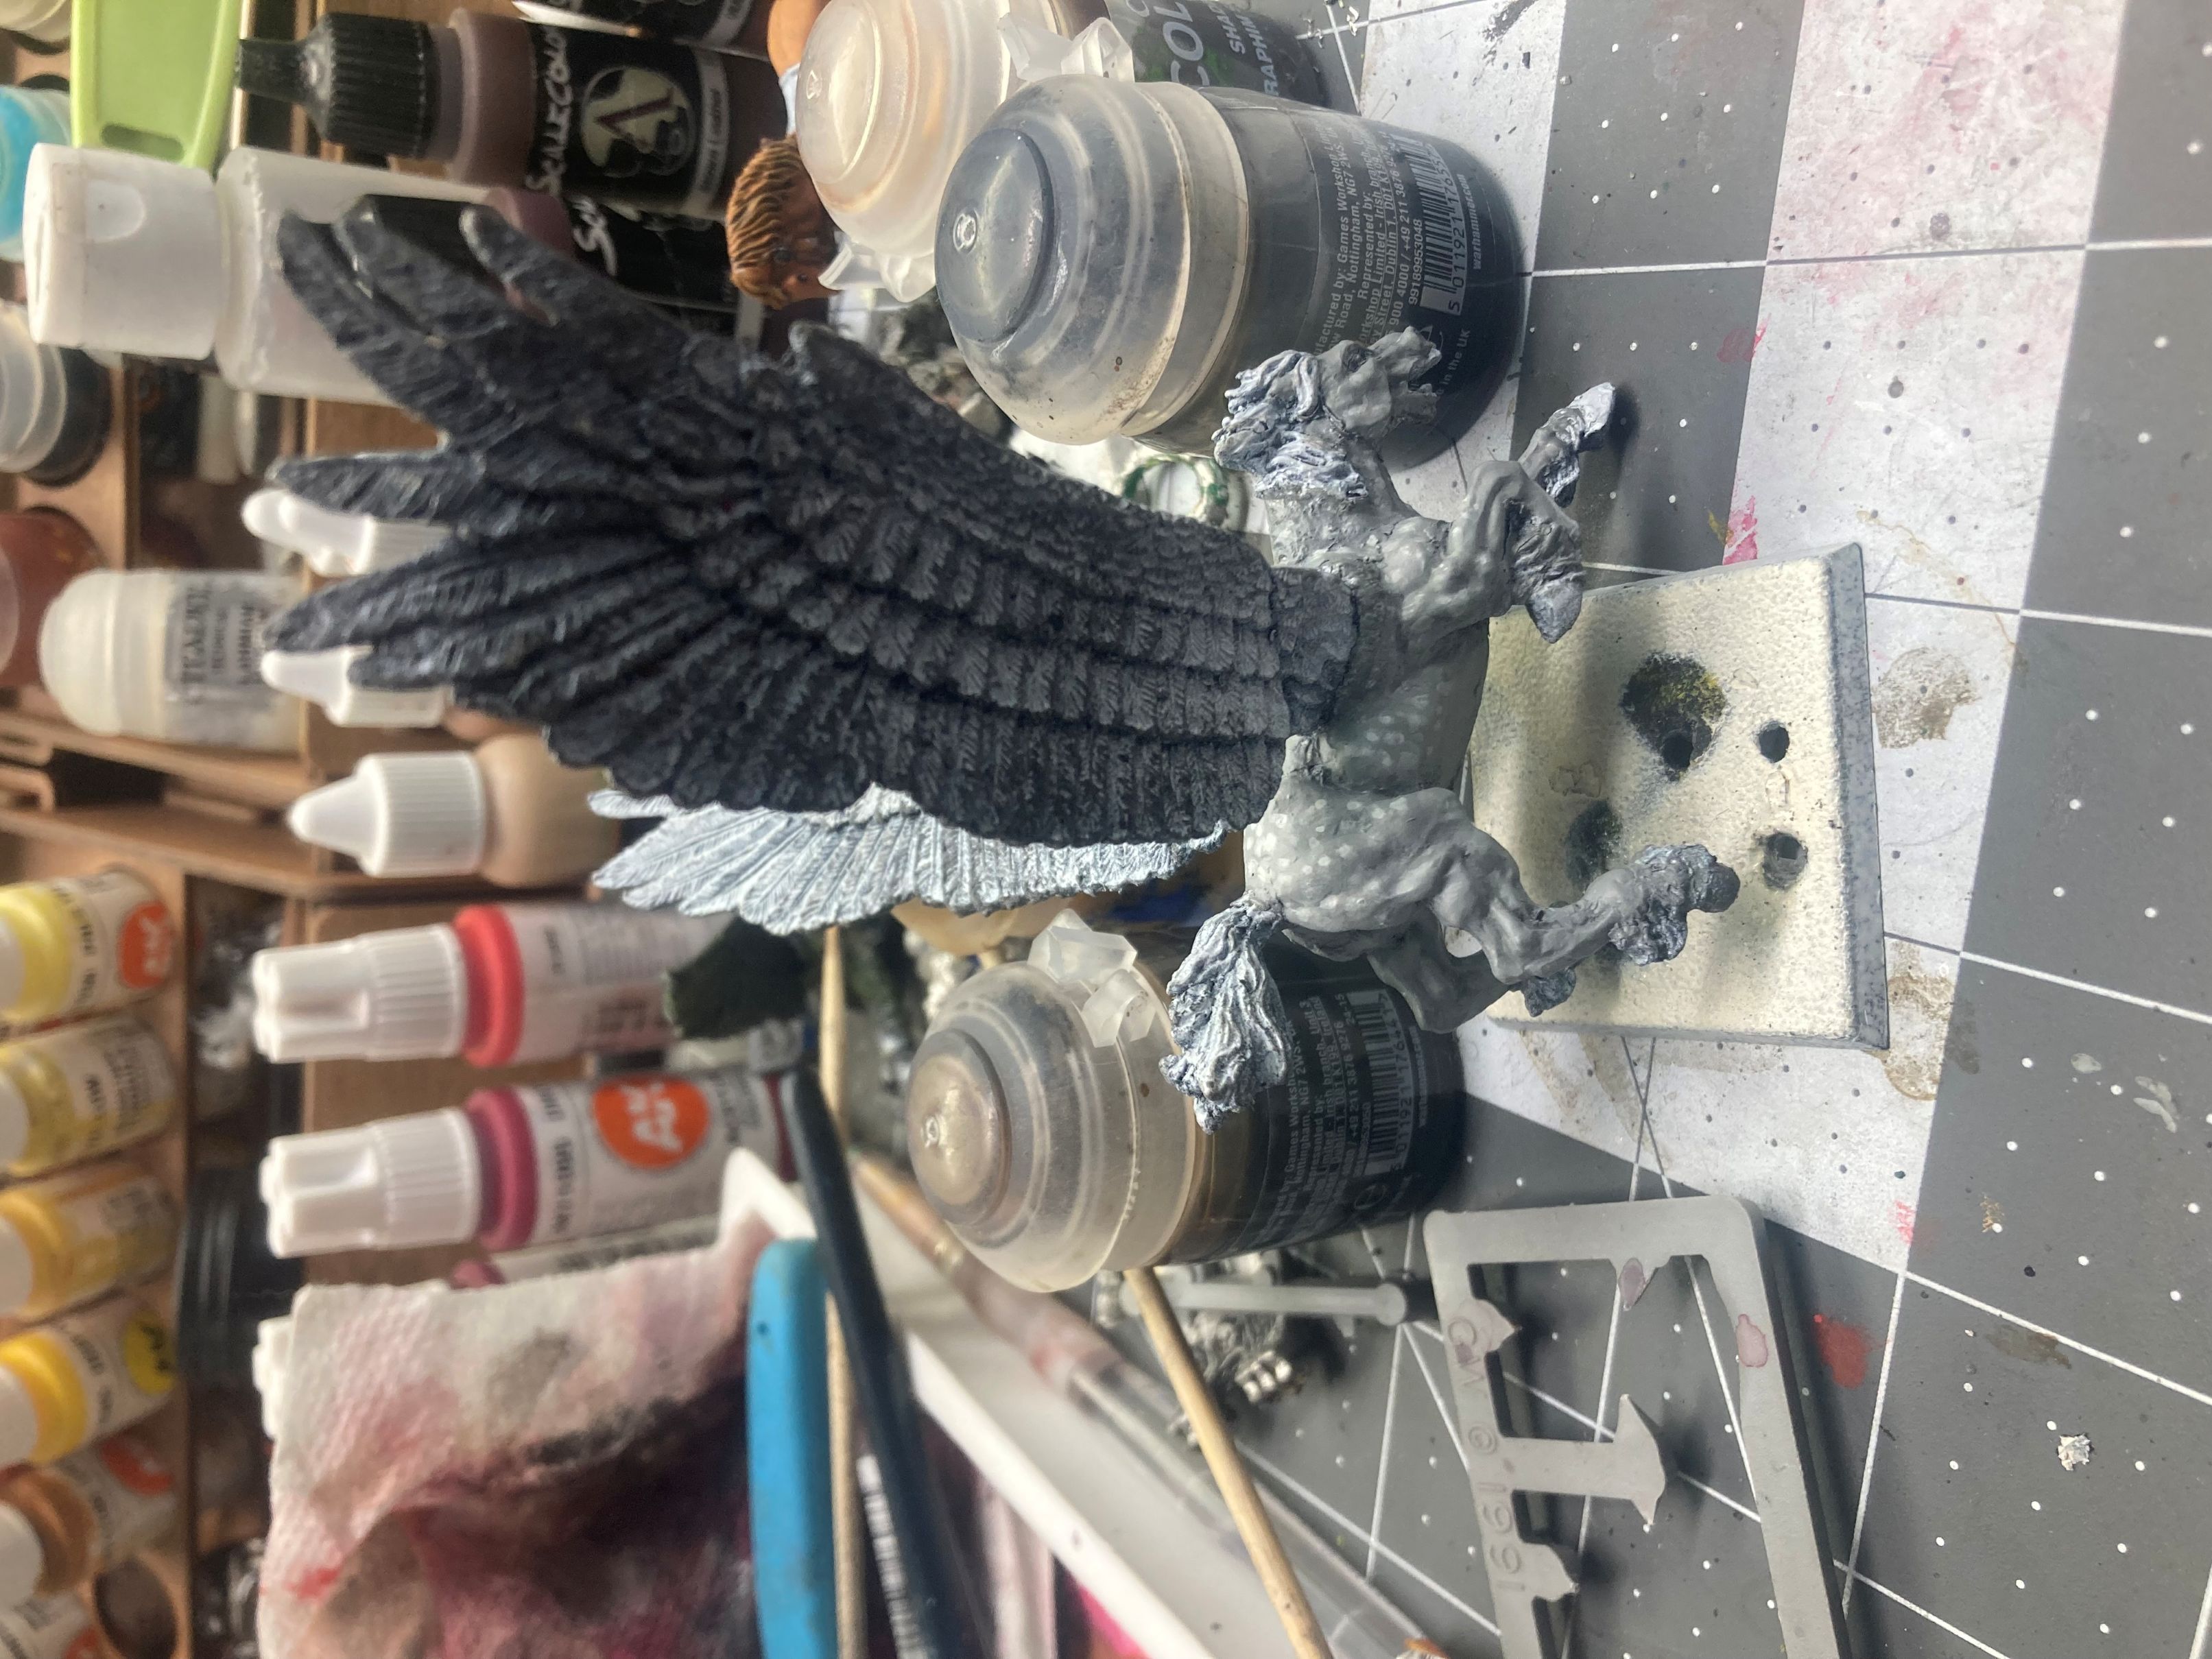
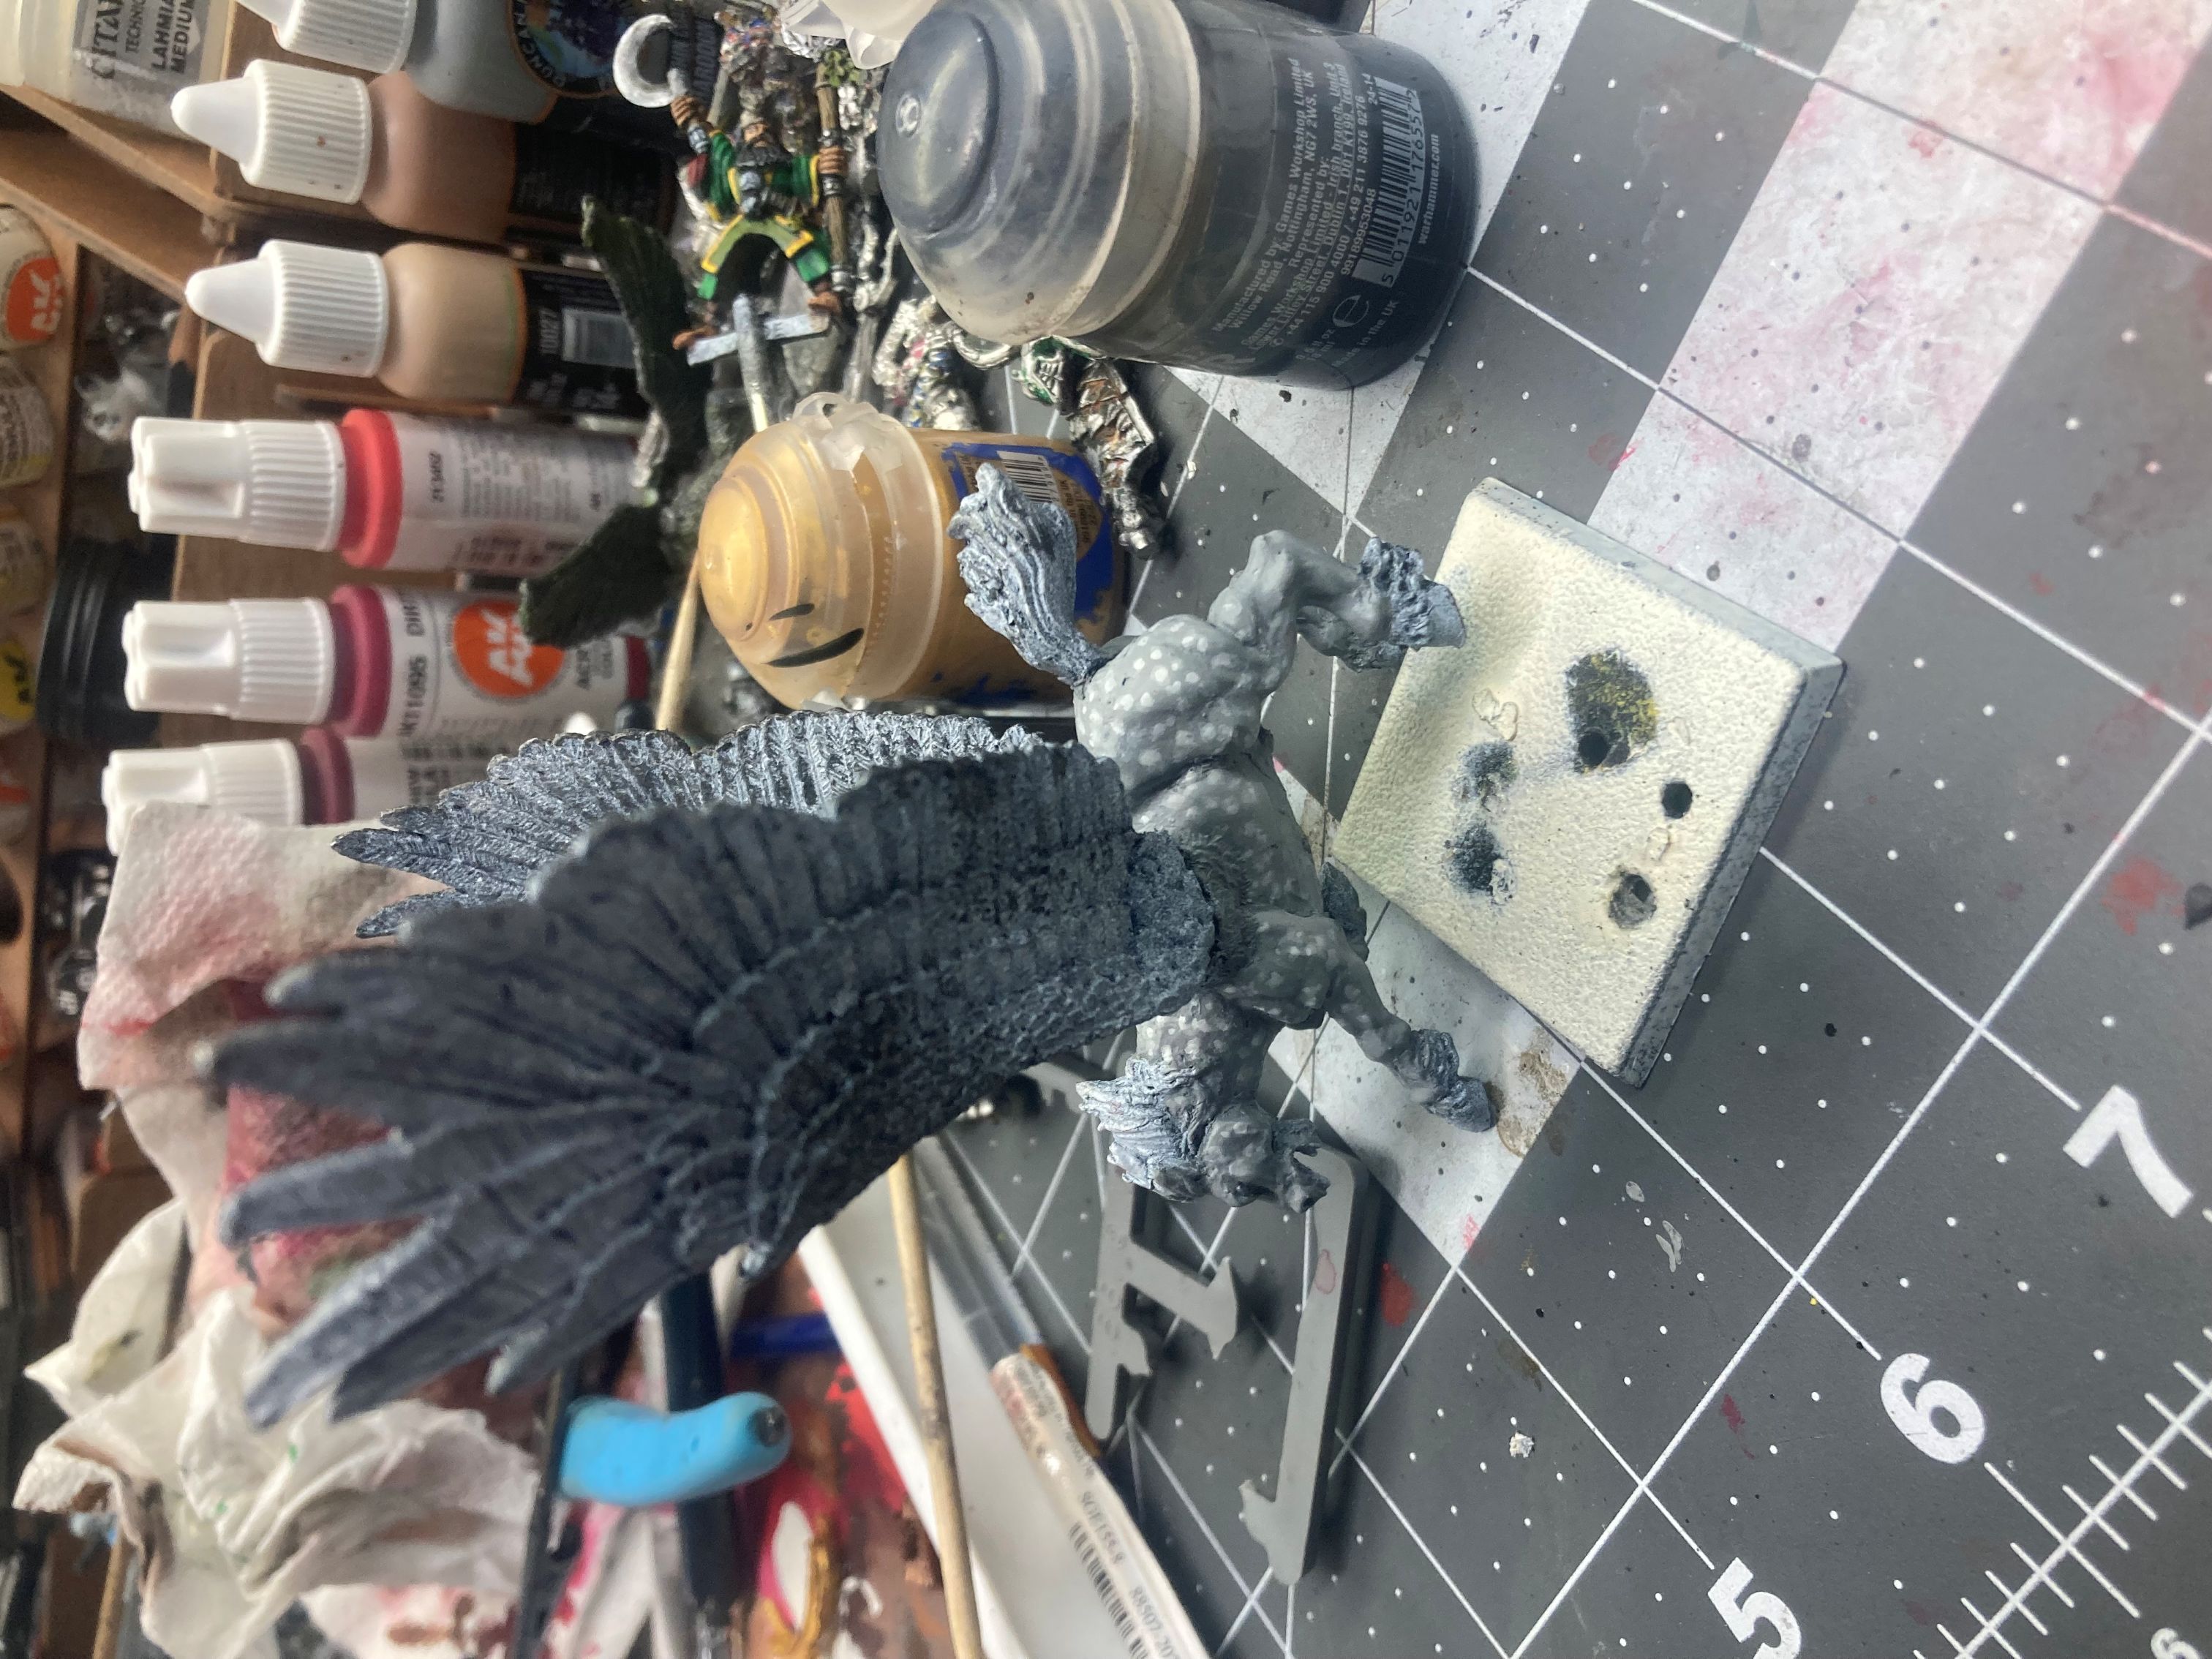
I also didn’t want the noble Pegasus to just be full gray either, I wanted to have black socks and muzzle. After watching one of my daughter’s favorite YouTube creators, “Daisy Stalls”, who does custom builds a repaints of model horses, I decided to try one of her techniques of using pastel chalks instead of painting the black parts. I was pleased with the end result and it was also much faster than painting.
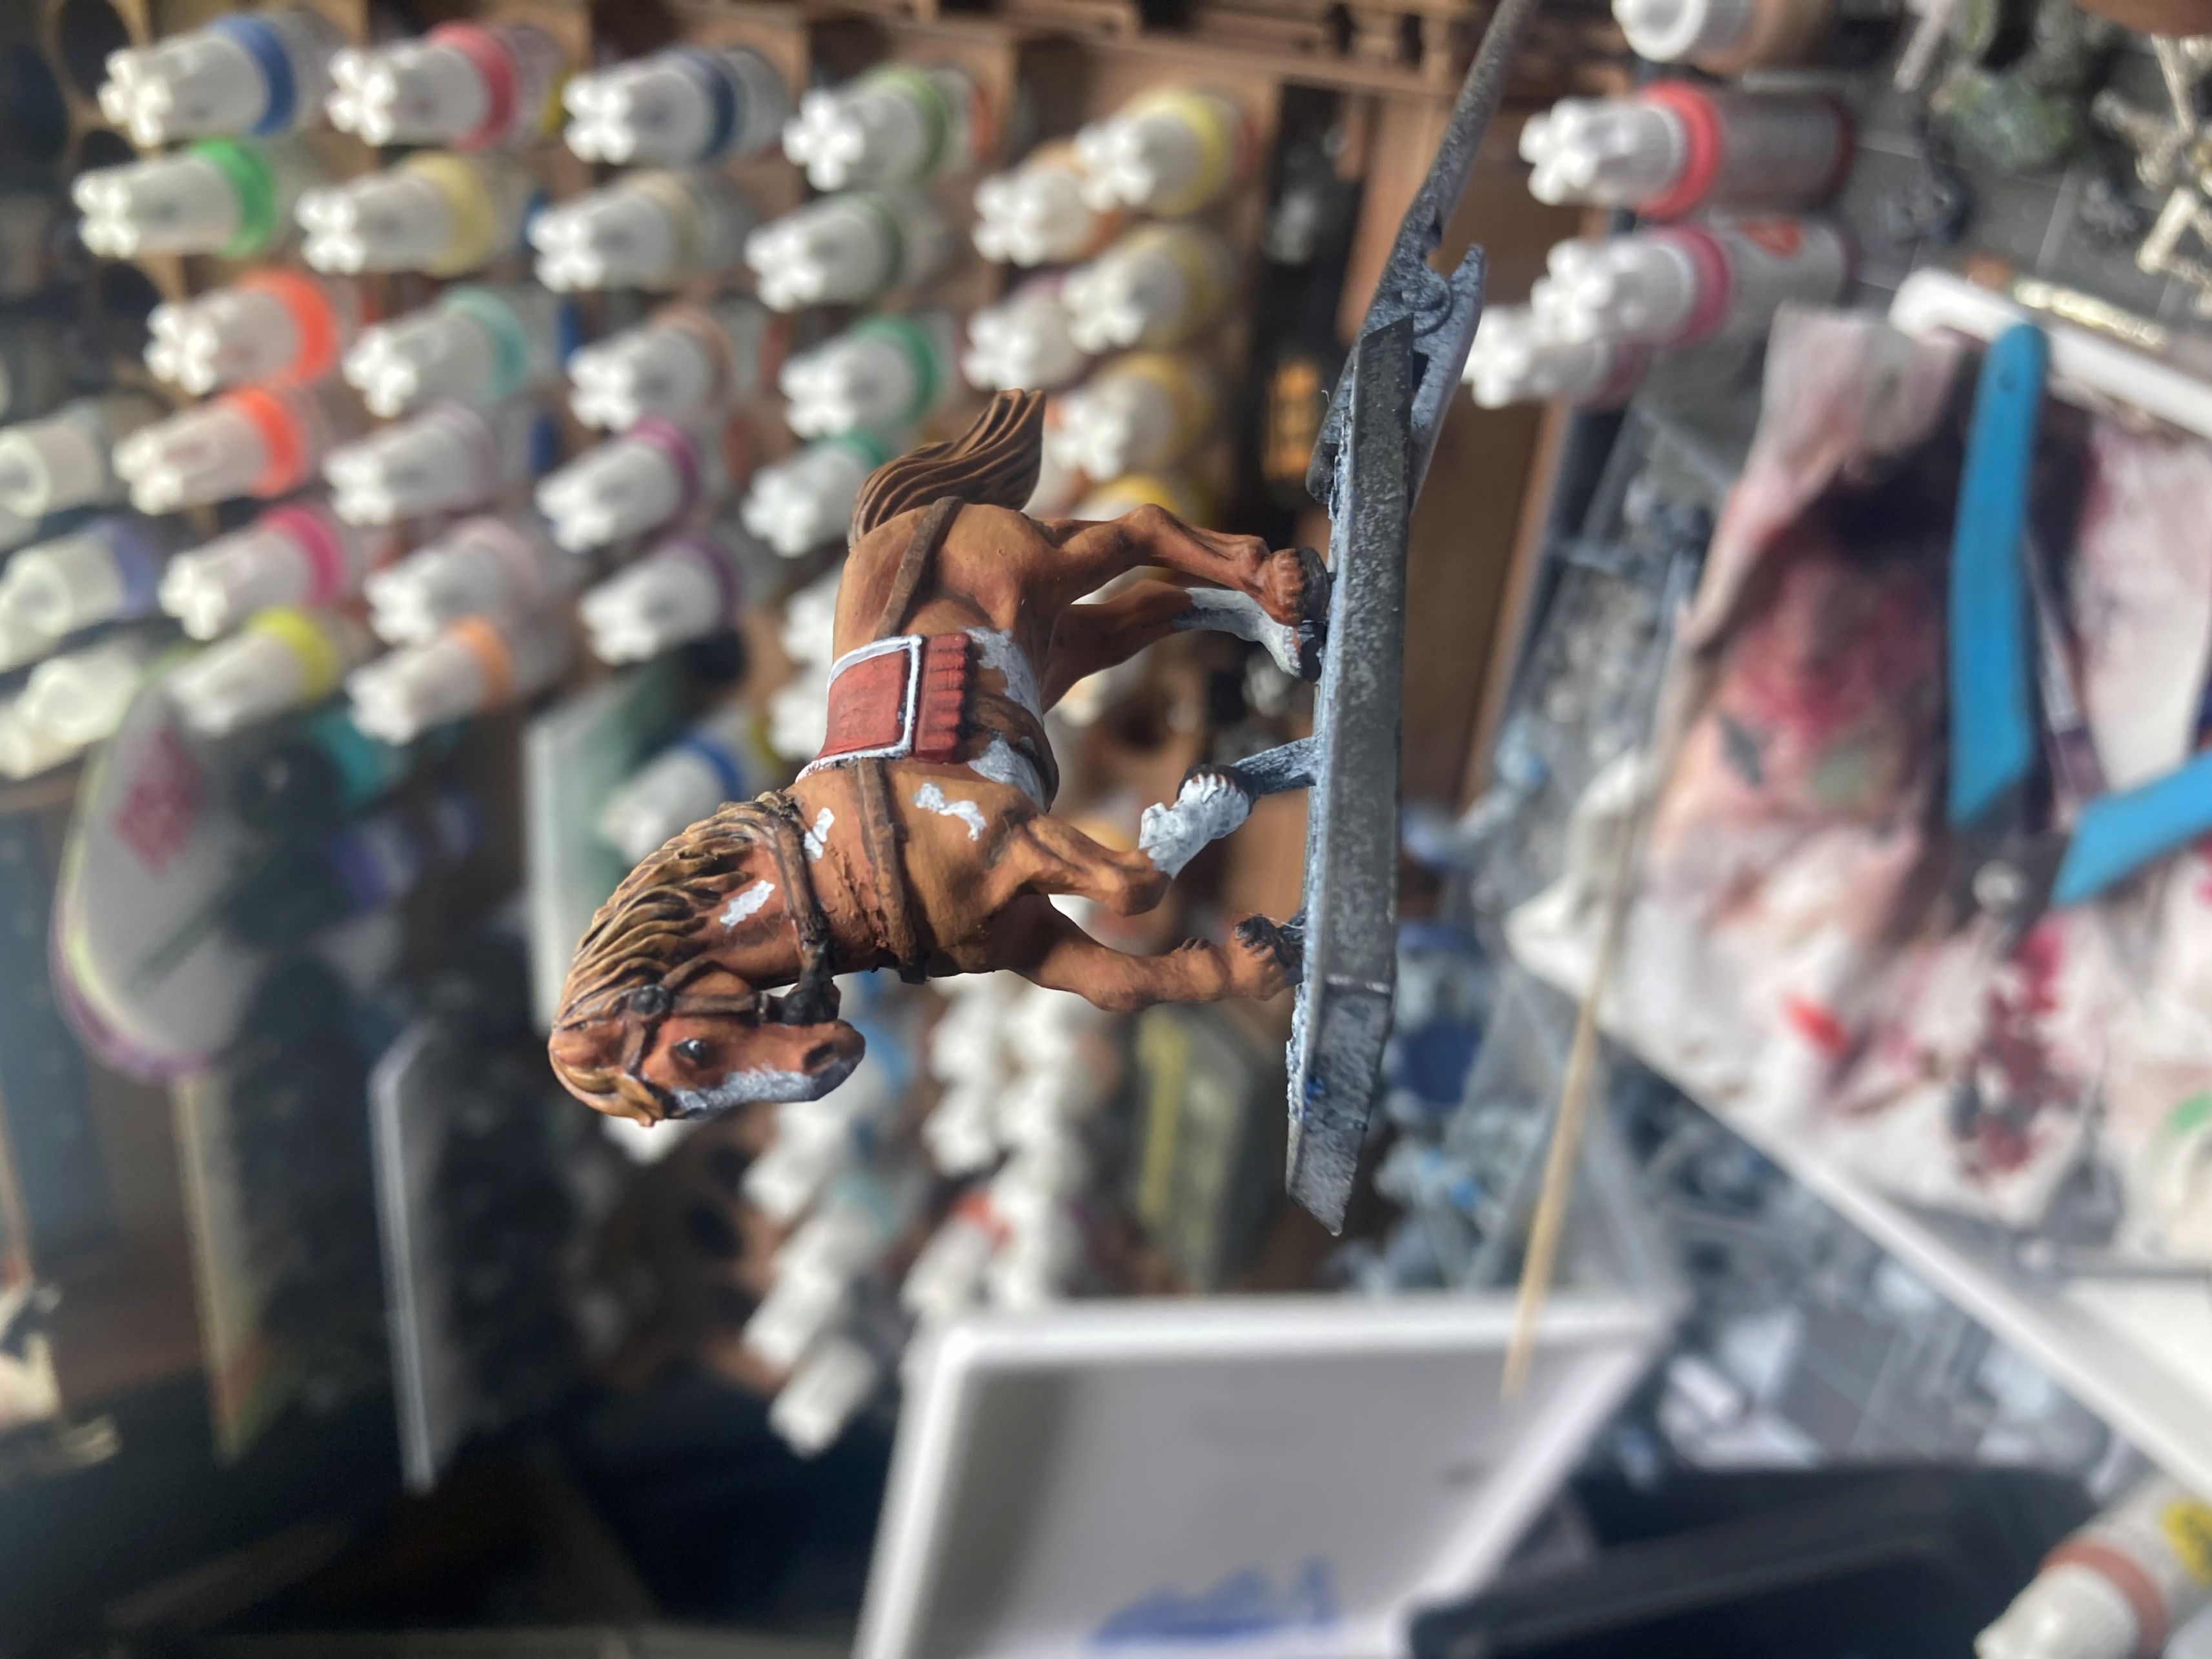
For the Jade wizard I wanted to give him a fun mount since it wasn’t going to be covered by armor. I decided to paint the mount paint…as a paint, uh, a painted horse painted with paint? I drew inspiration from a nearby friend in the barn, “Ace”.


Of course, I needed final inspection by the model’s model…
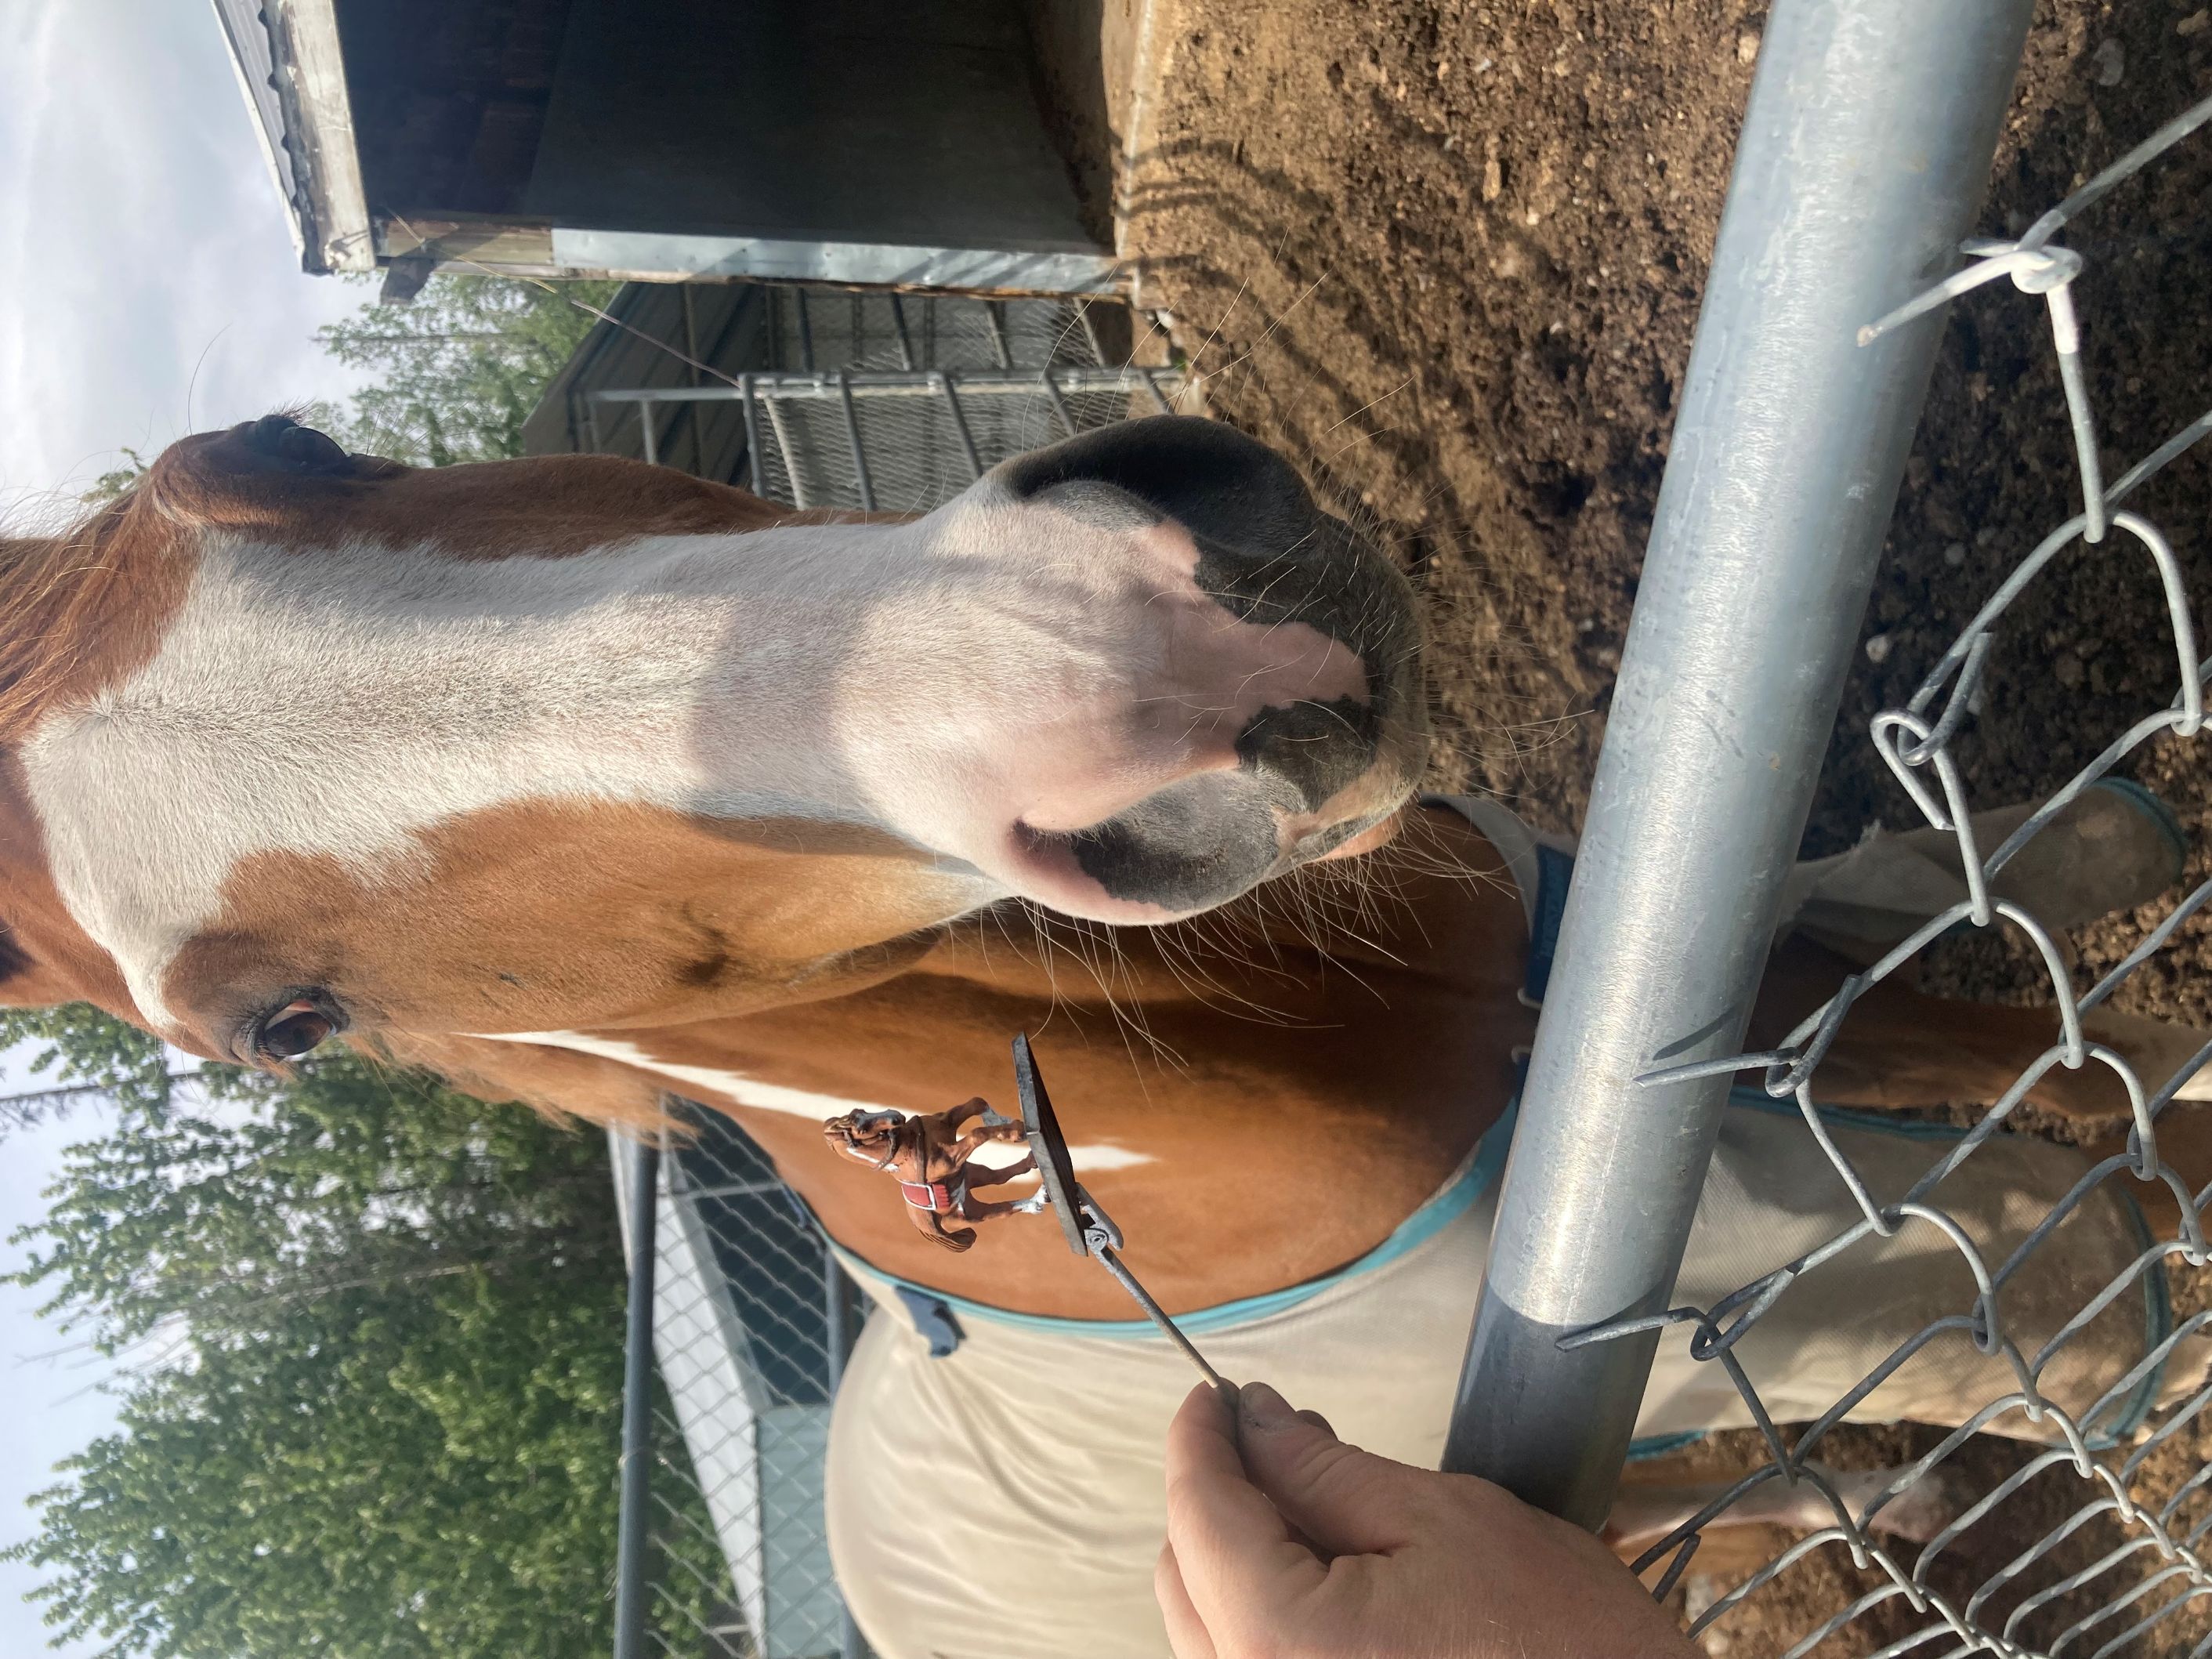
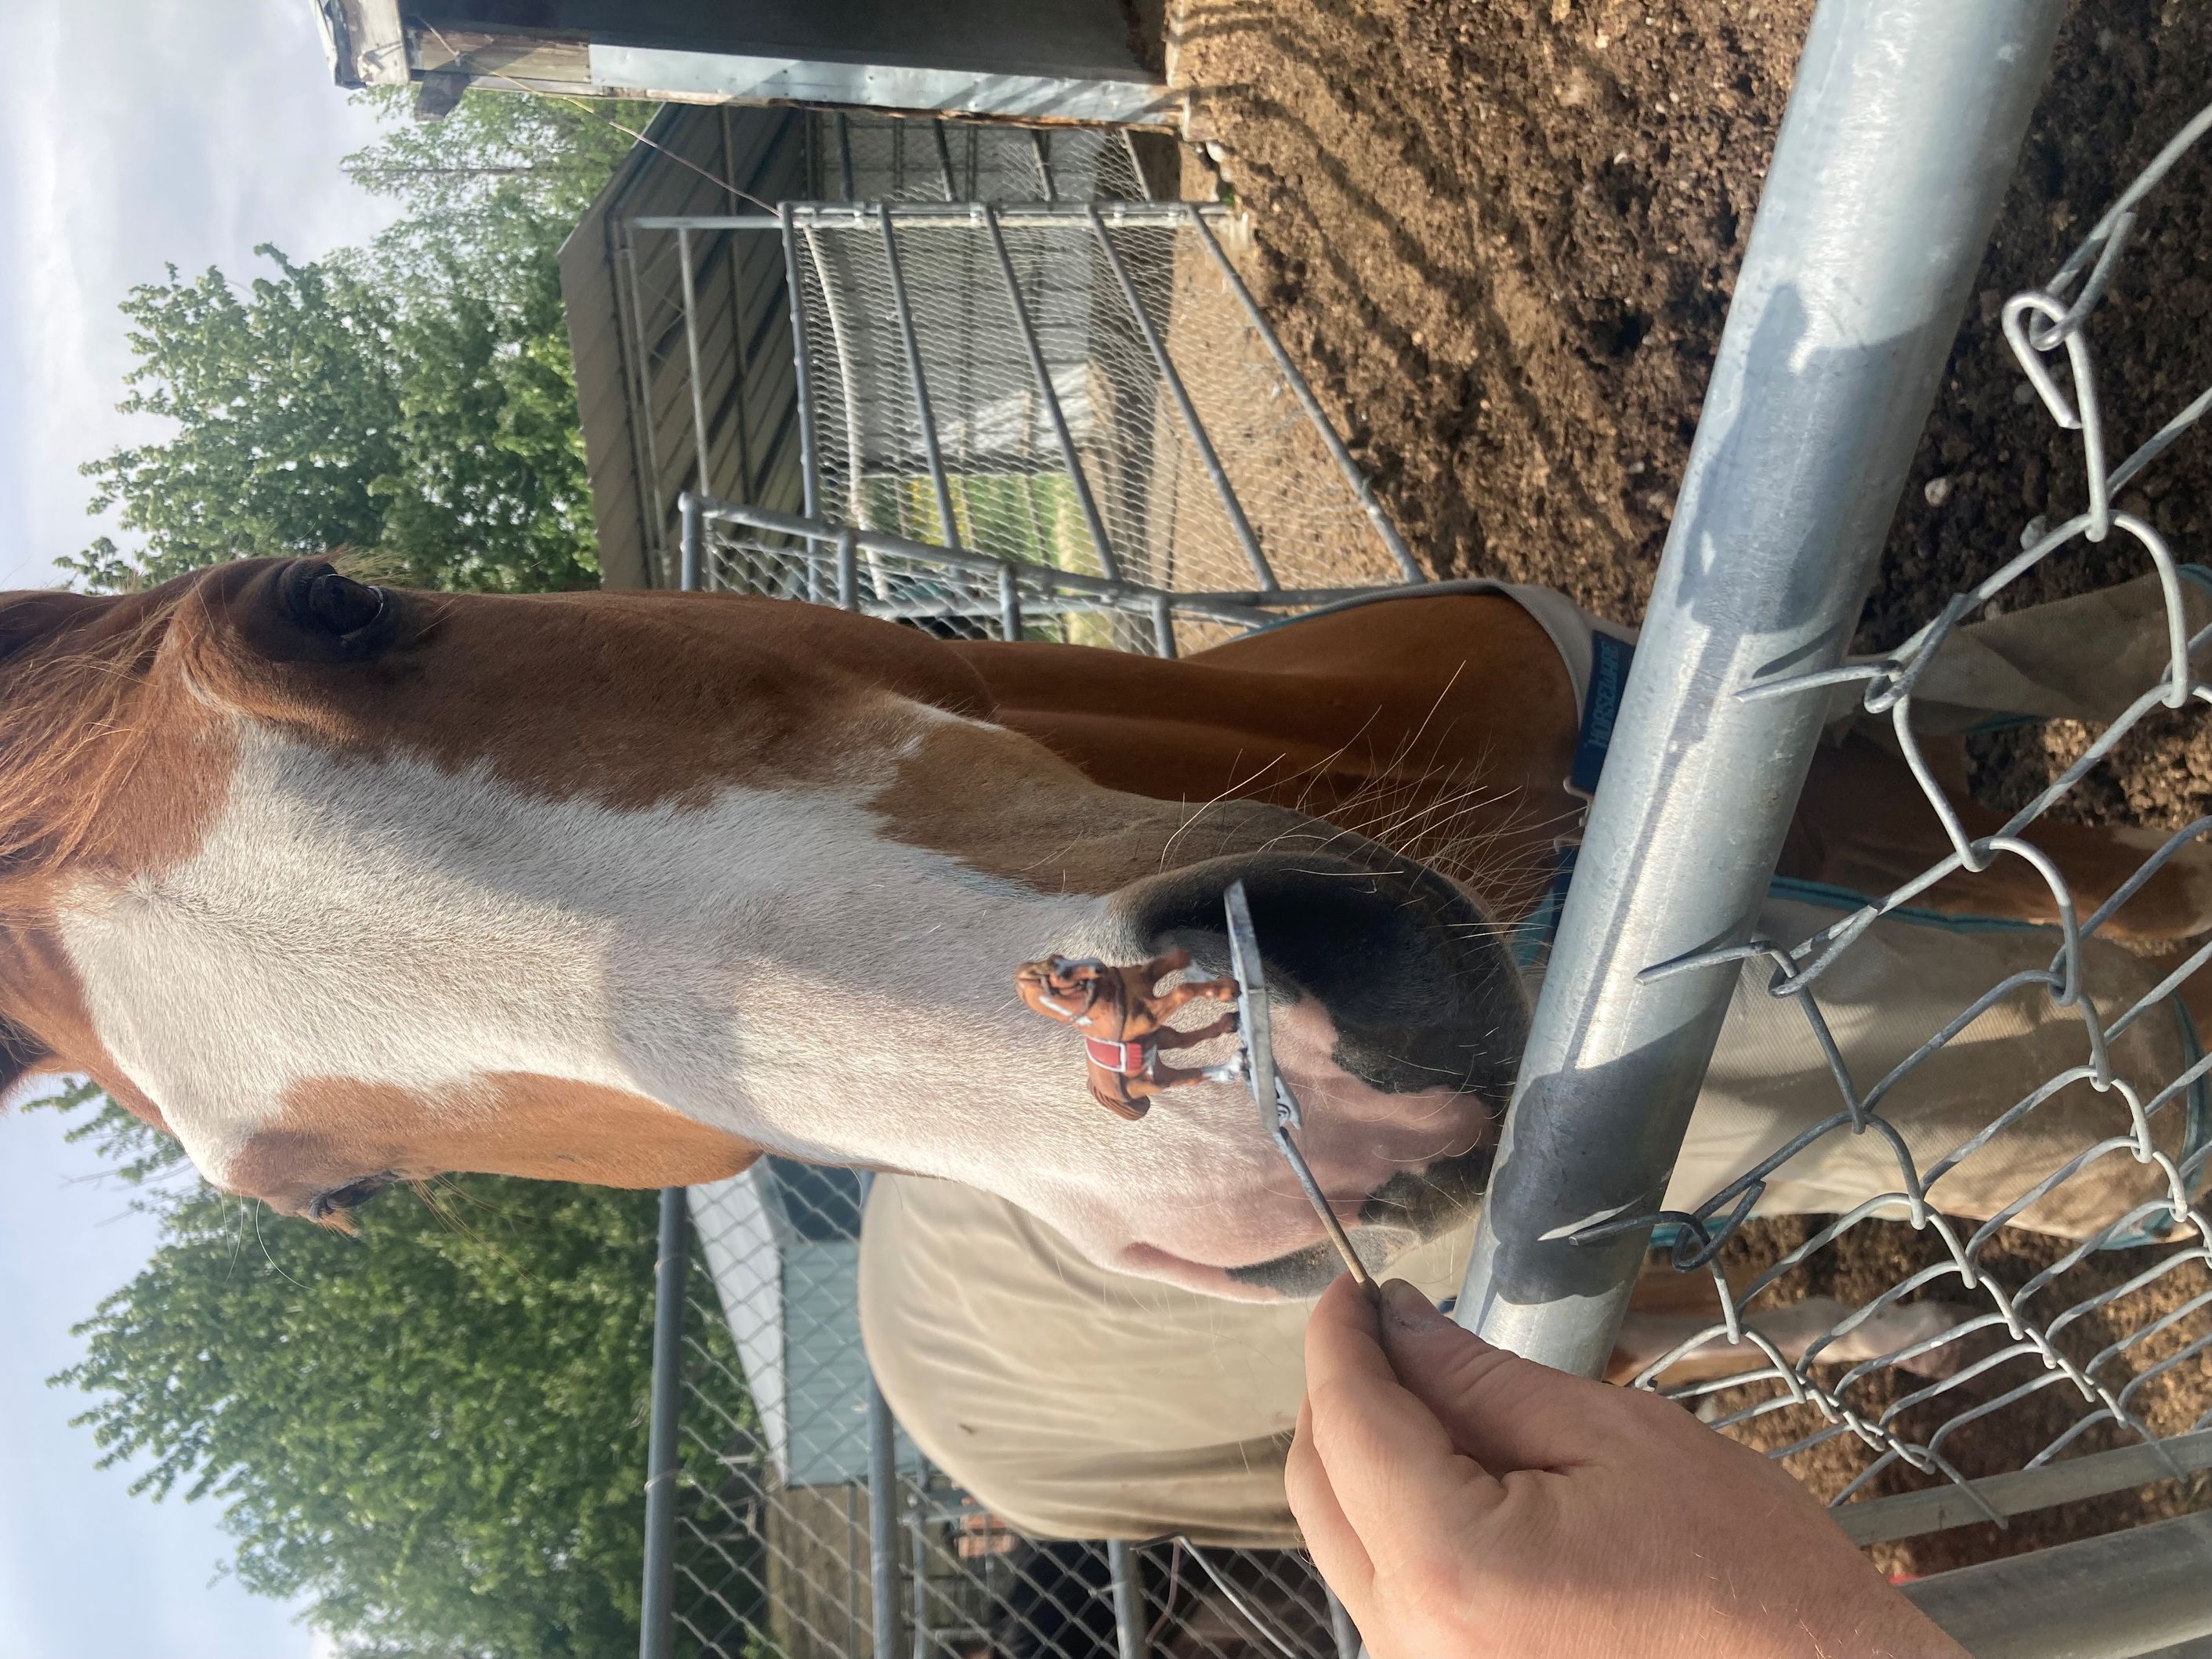
 Good boy Ace. Yes, I love you too.
Calvary and Steamtank work.
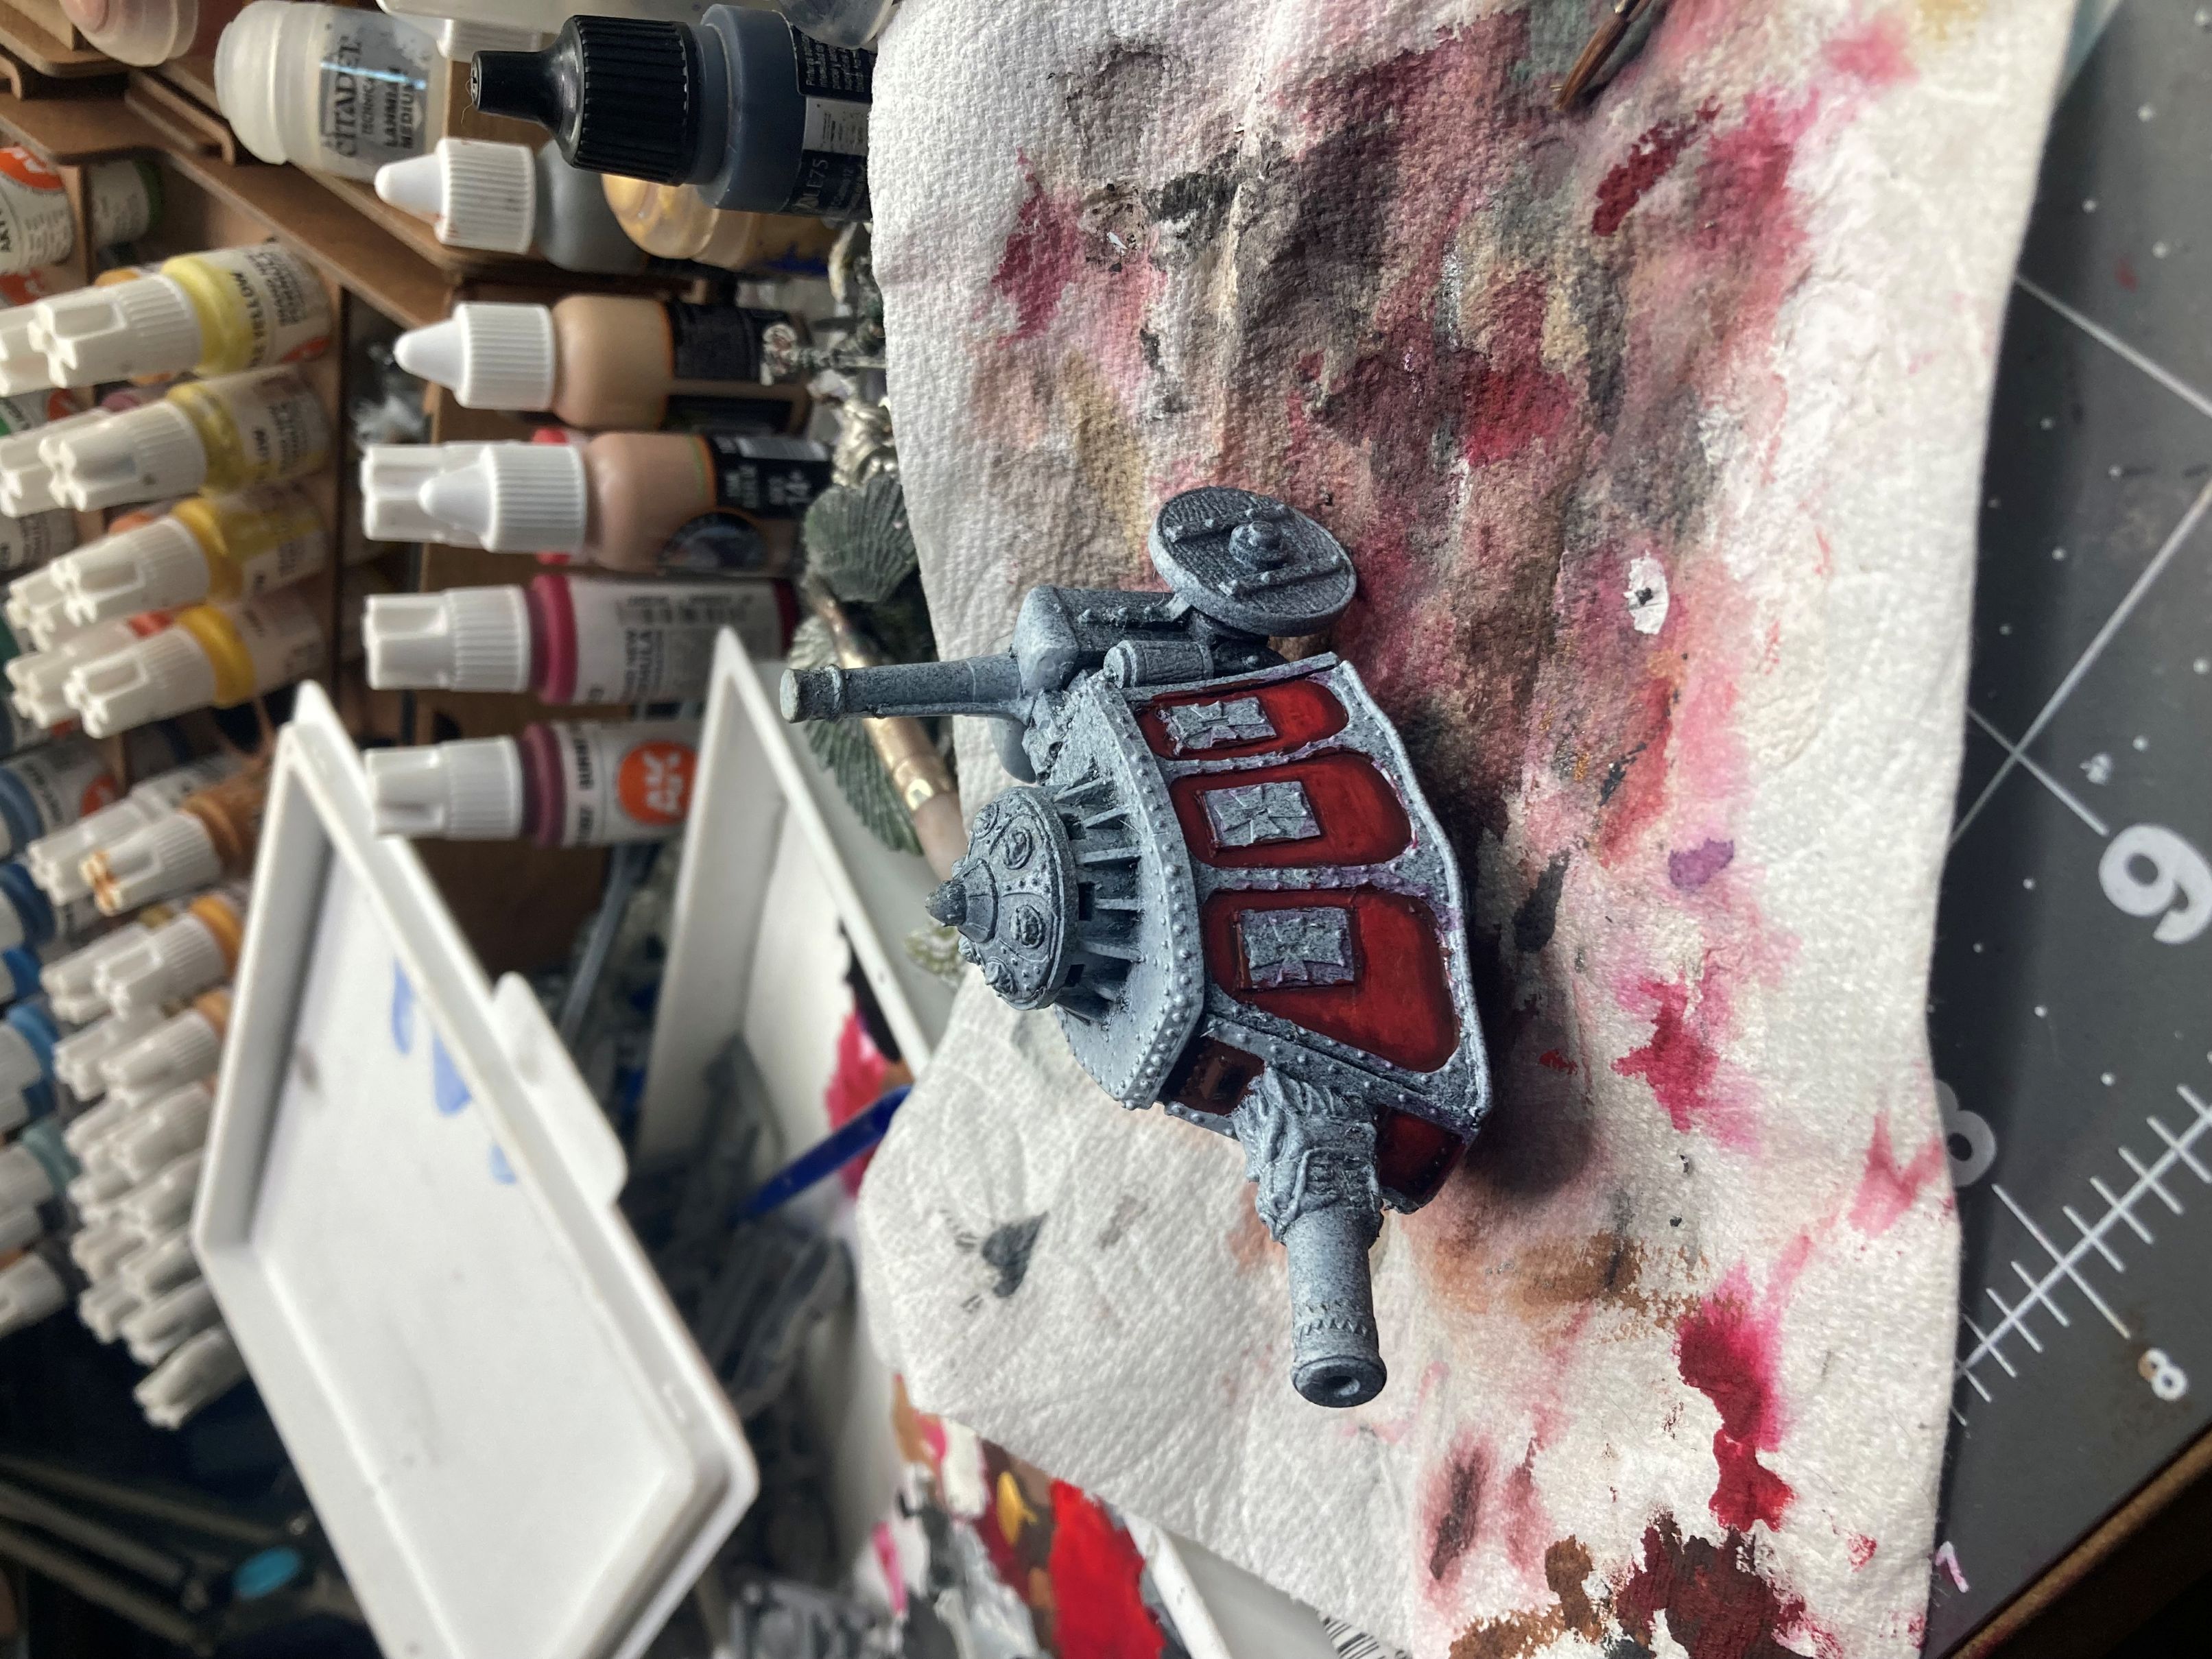
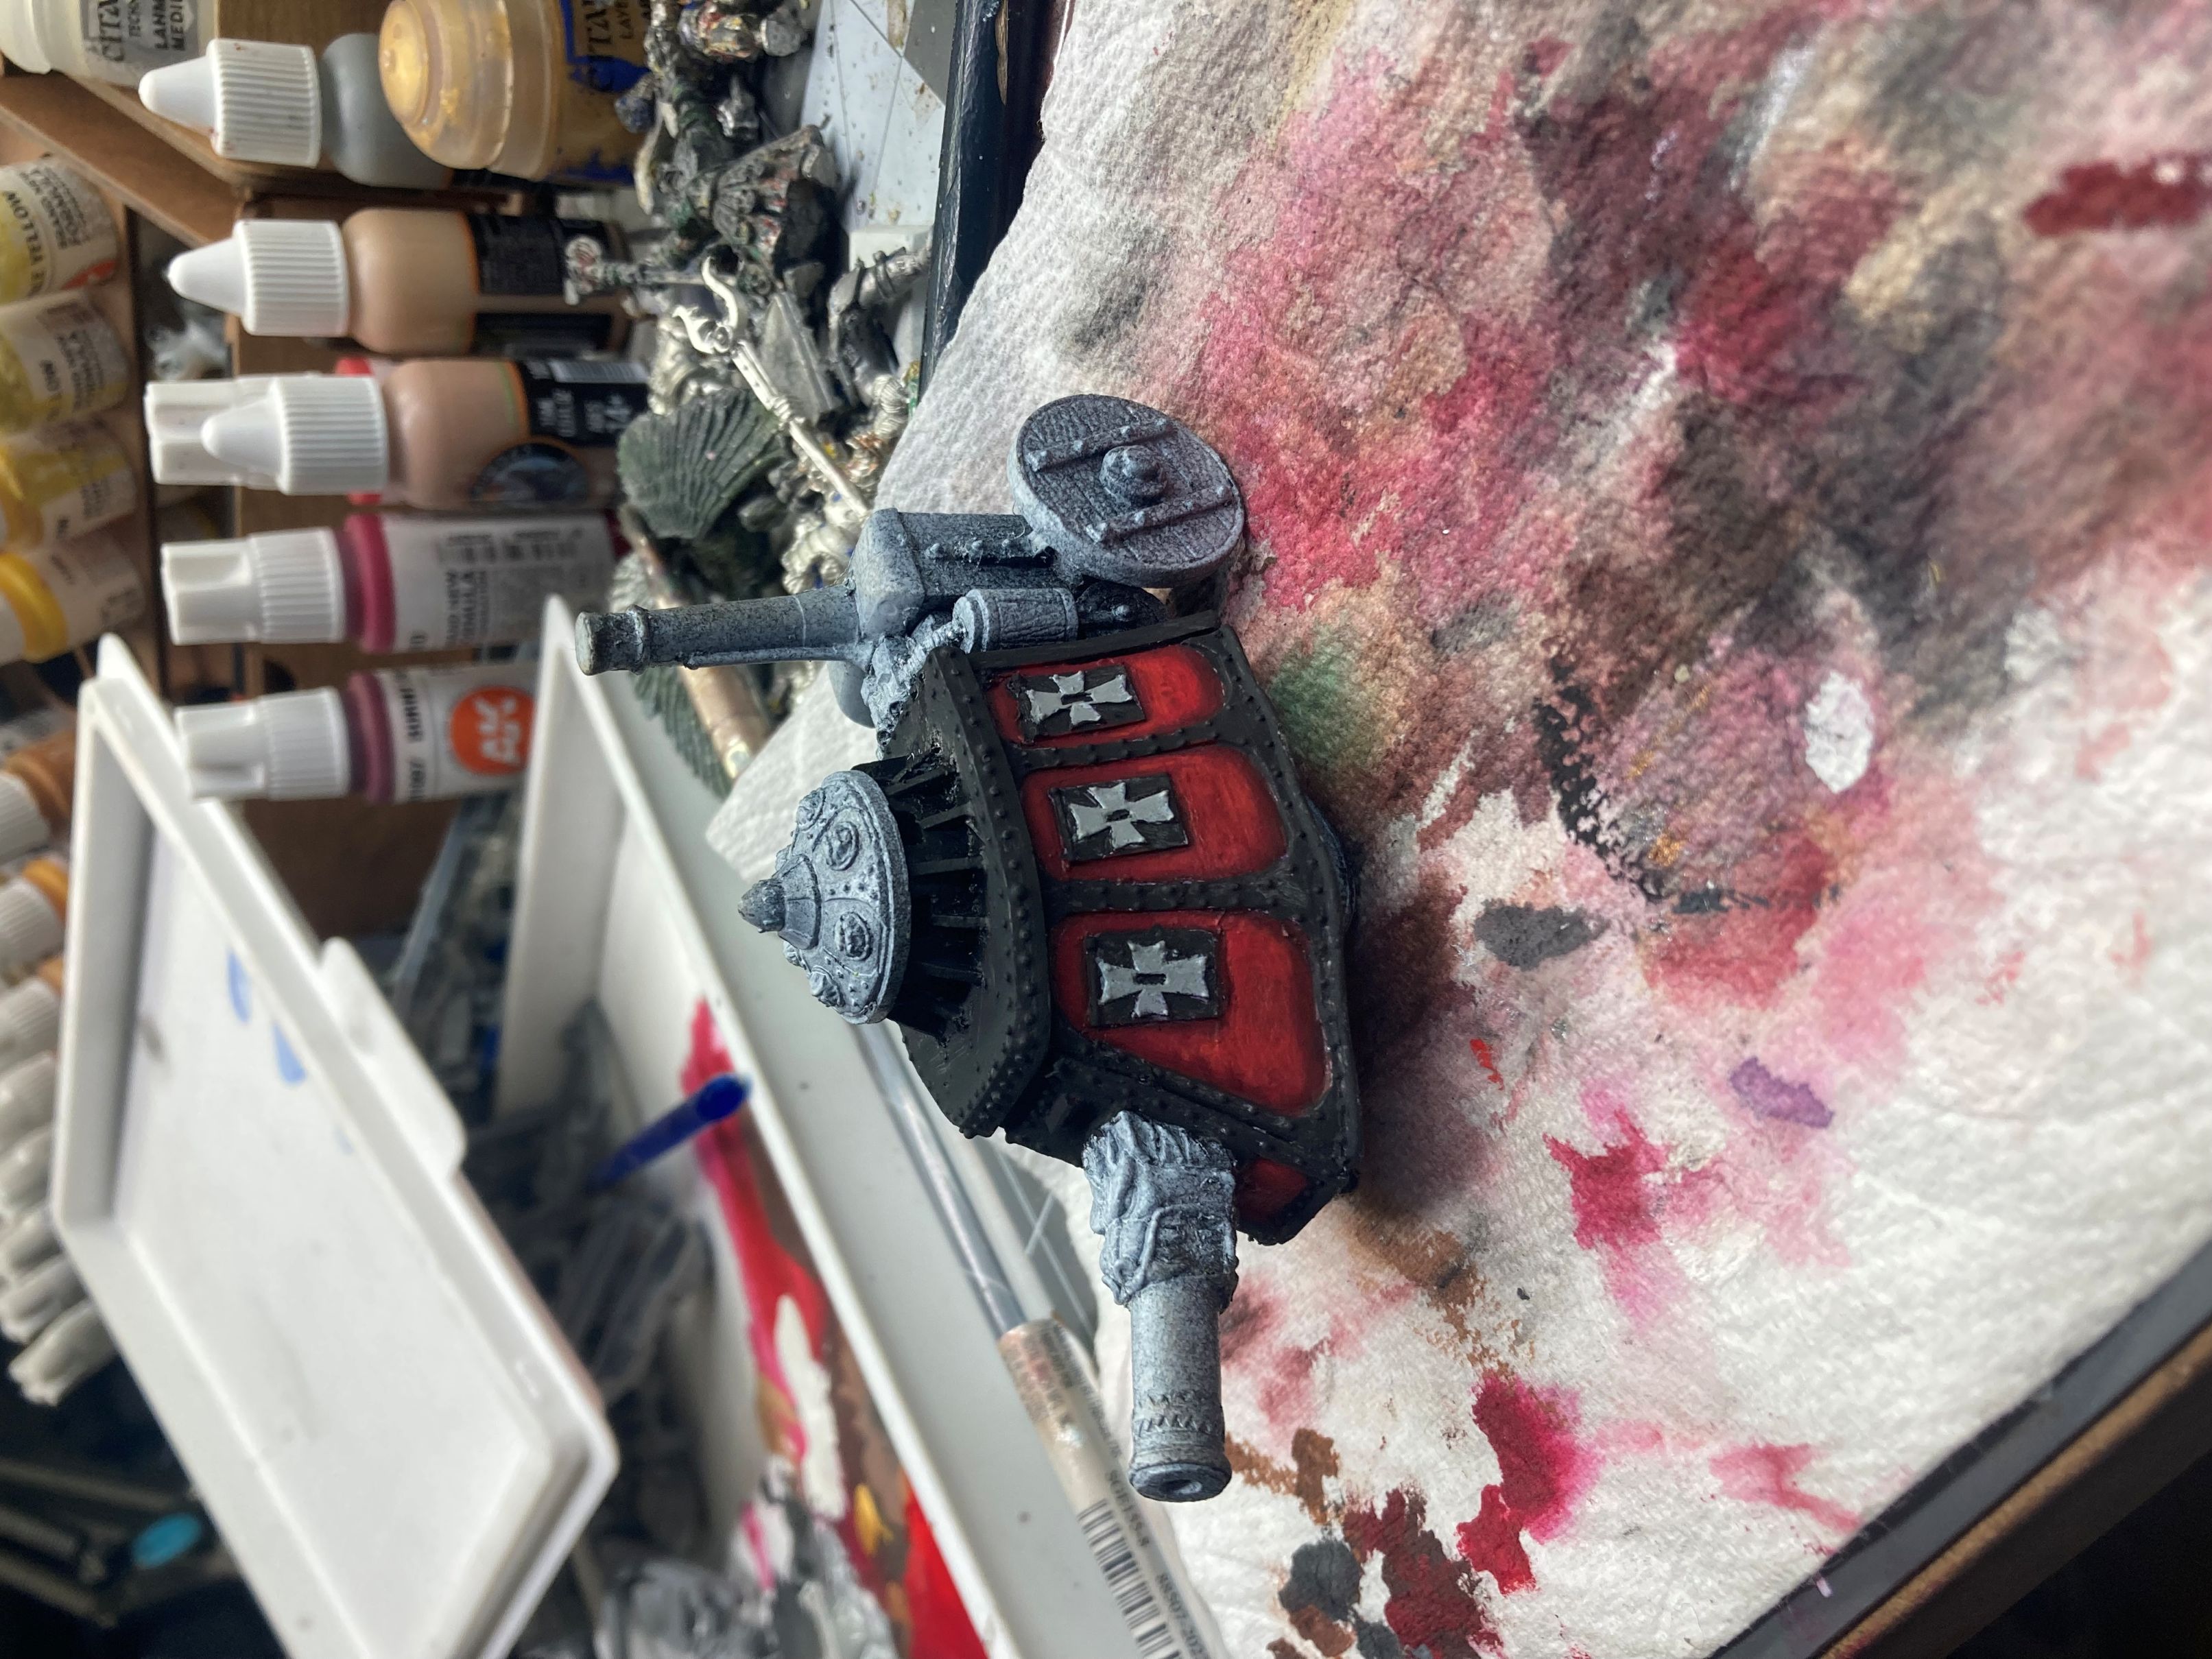
Over the last week and a half or so, I have been pushing to get as much of the calvary and steam tank done. With the calvary it’s pretty much having to pain two models to complete one model as the I’ve focused as much or more time on the horses.
As for the steam tank, it’s been painting up pretty quickly and so far, I’m pretty pleased with how it’s turning out.

“It was at this point during the blog update he realized he had f*&^ed, up” and only taken close up photos of one of the horses. More to come later, especially since I was pretty pleased with how they painted up.
The steam tank was painting fast. I wanted the main armor of the tank to be black, so I spent a little extra time blending in the white, reflective highlights.


With the end of the challenge quickly approaching, I’m going to be pushing hard to finish off the last of the original selections for the project. That will include the captain, the general on Pegasus and the mounted wizard. I have a good feeling I should be able to get those last three done pretty quick and add in some more state troops.
After some adulting we're back at it.
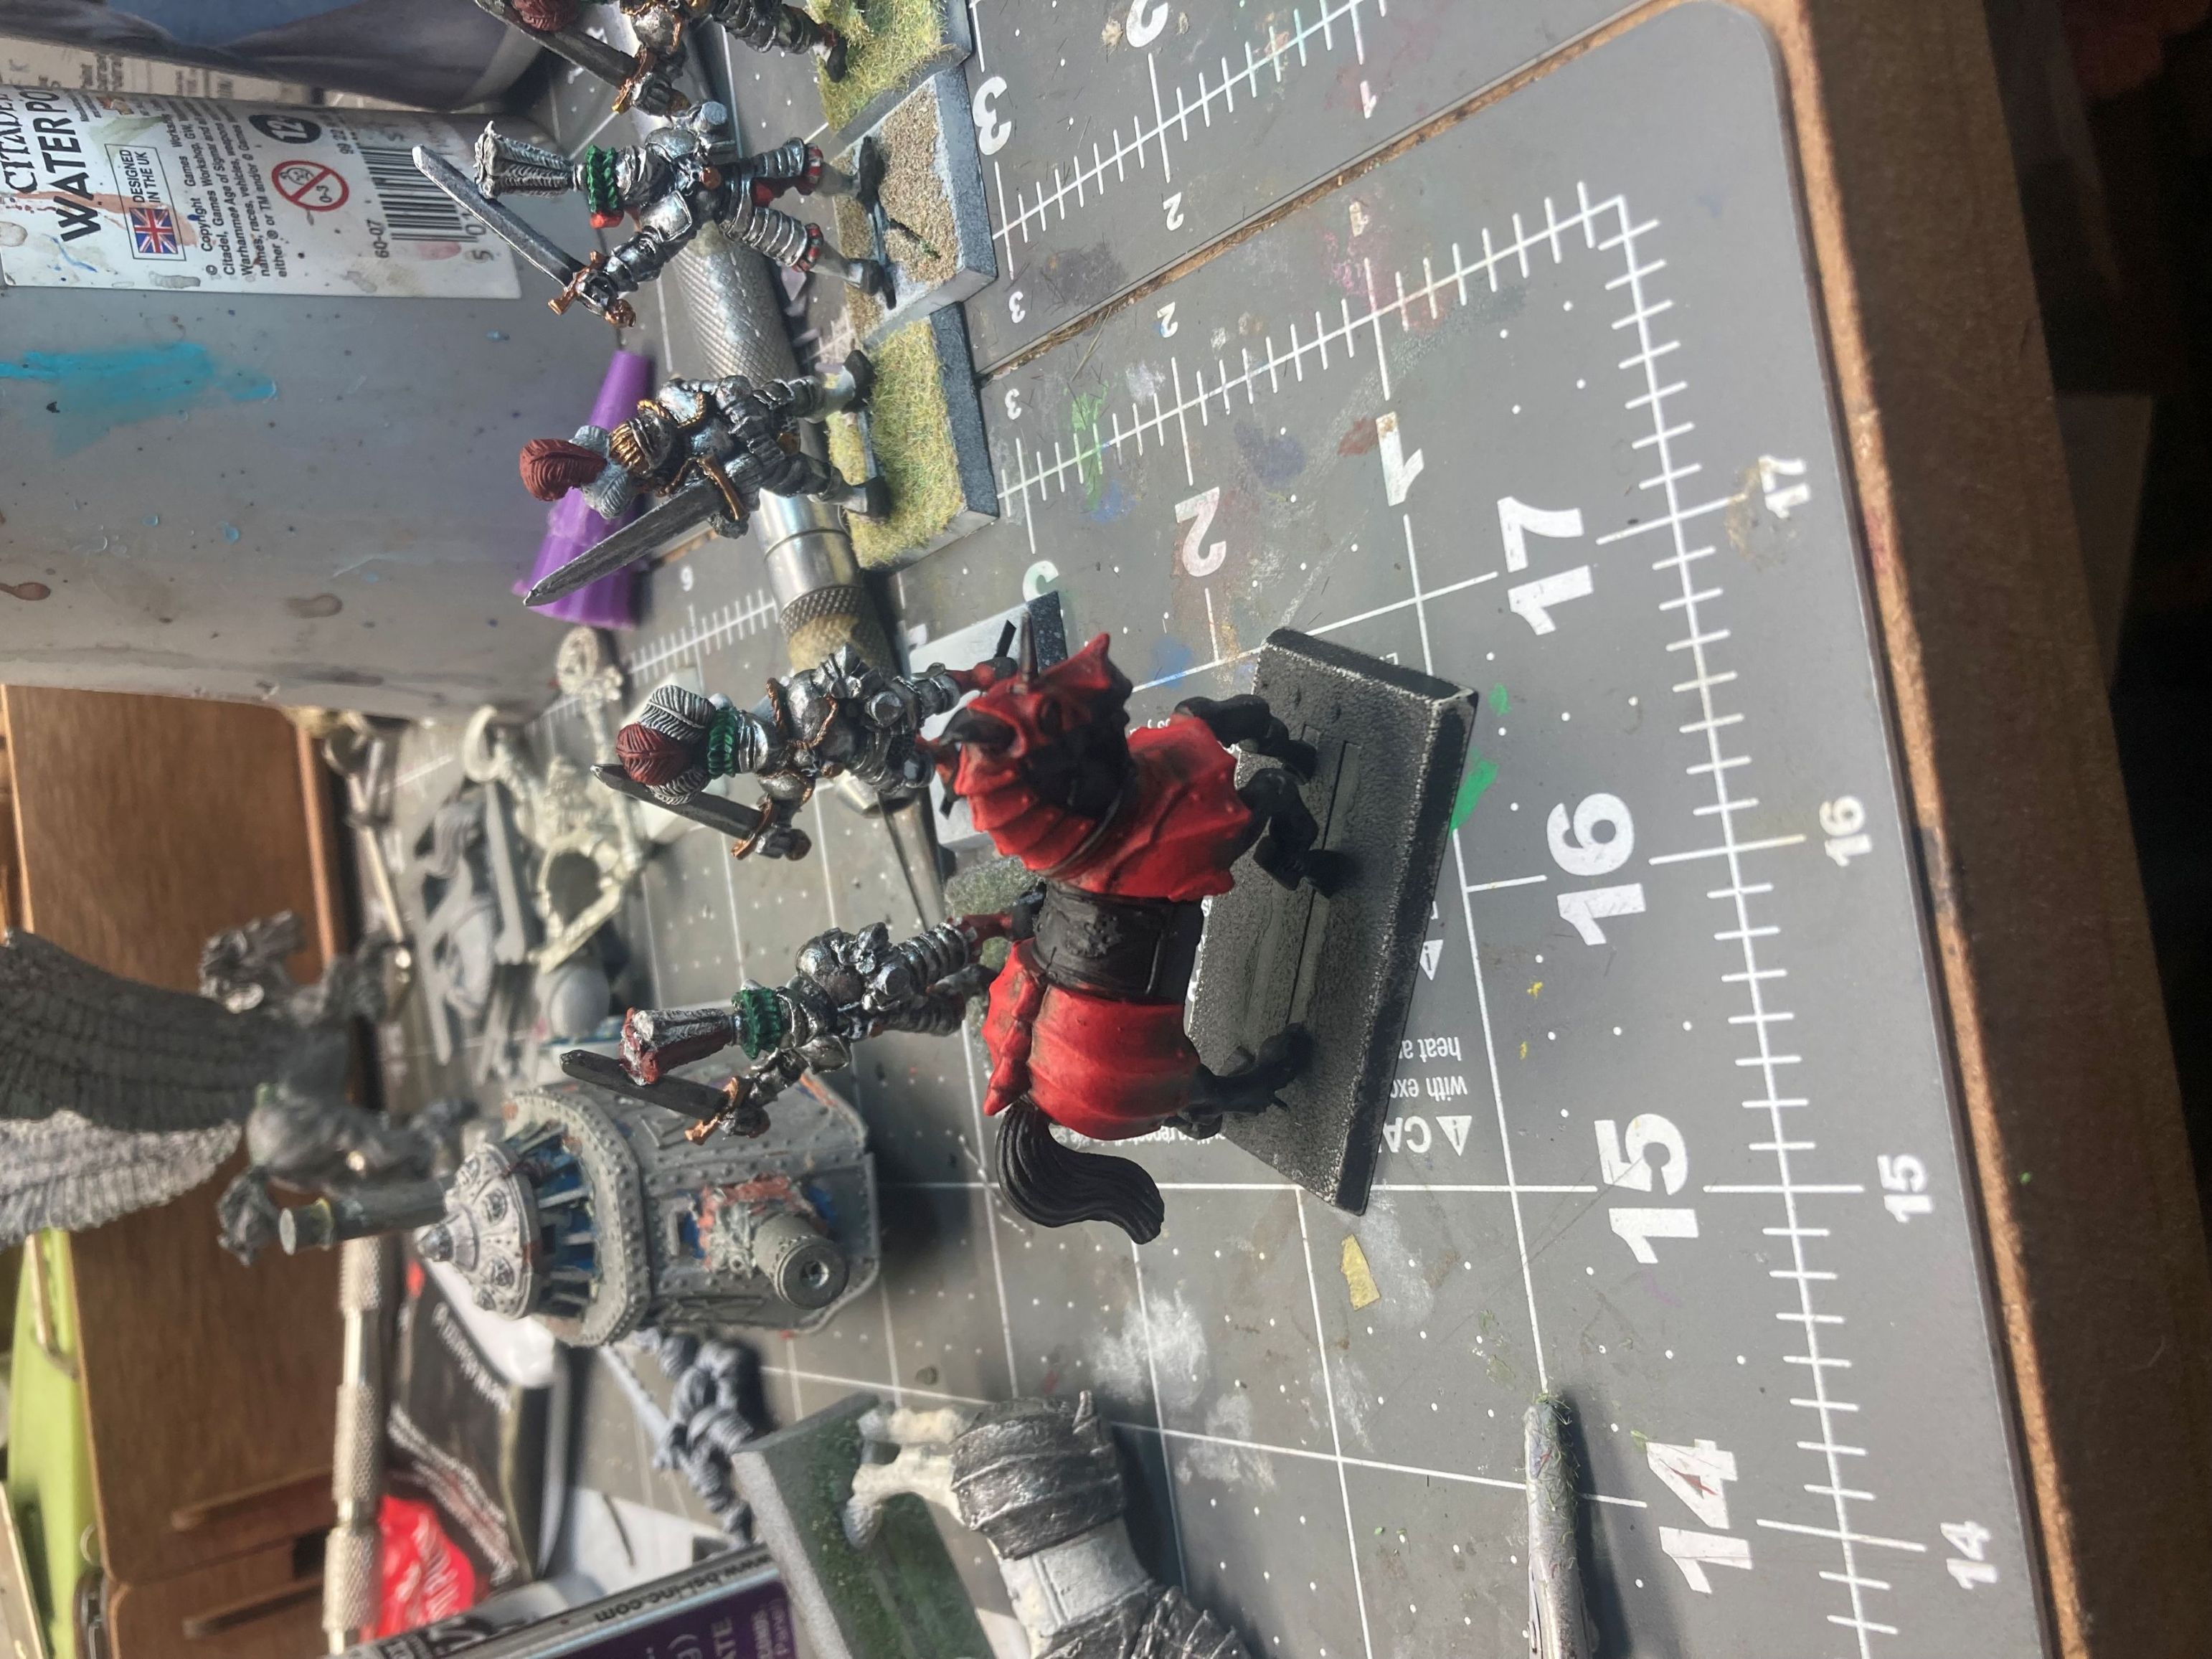
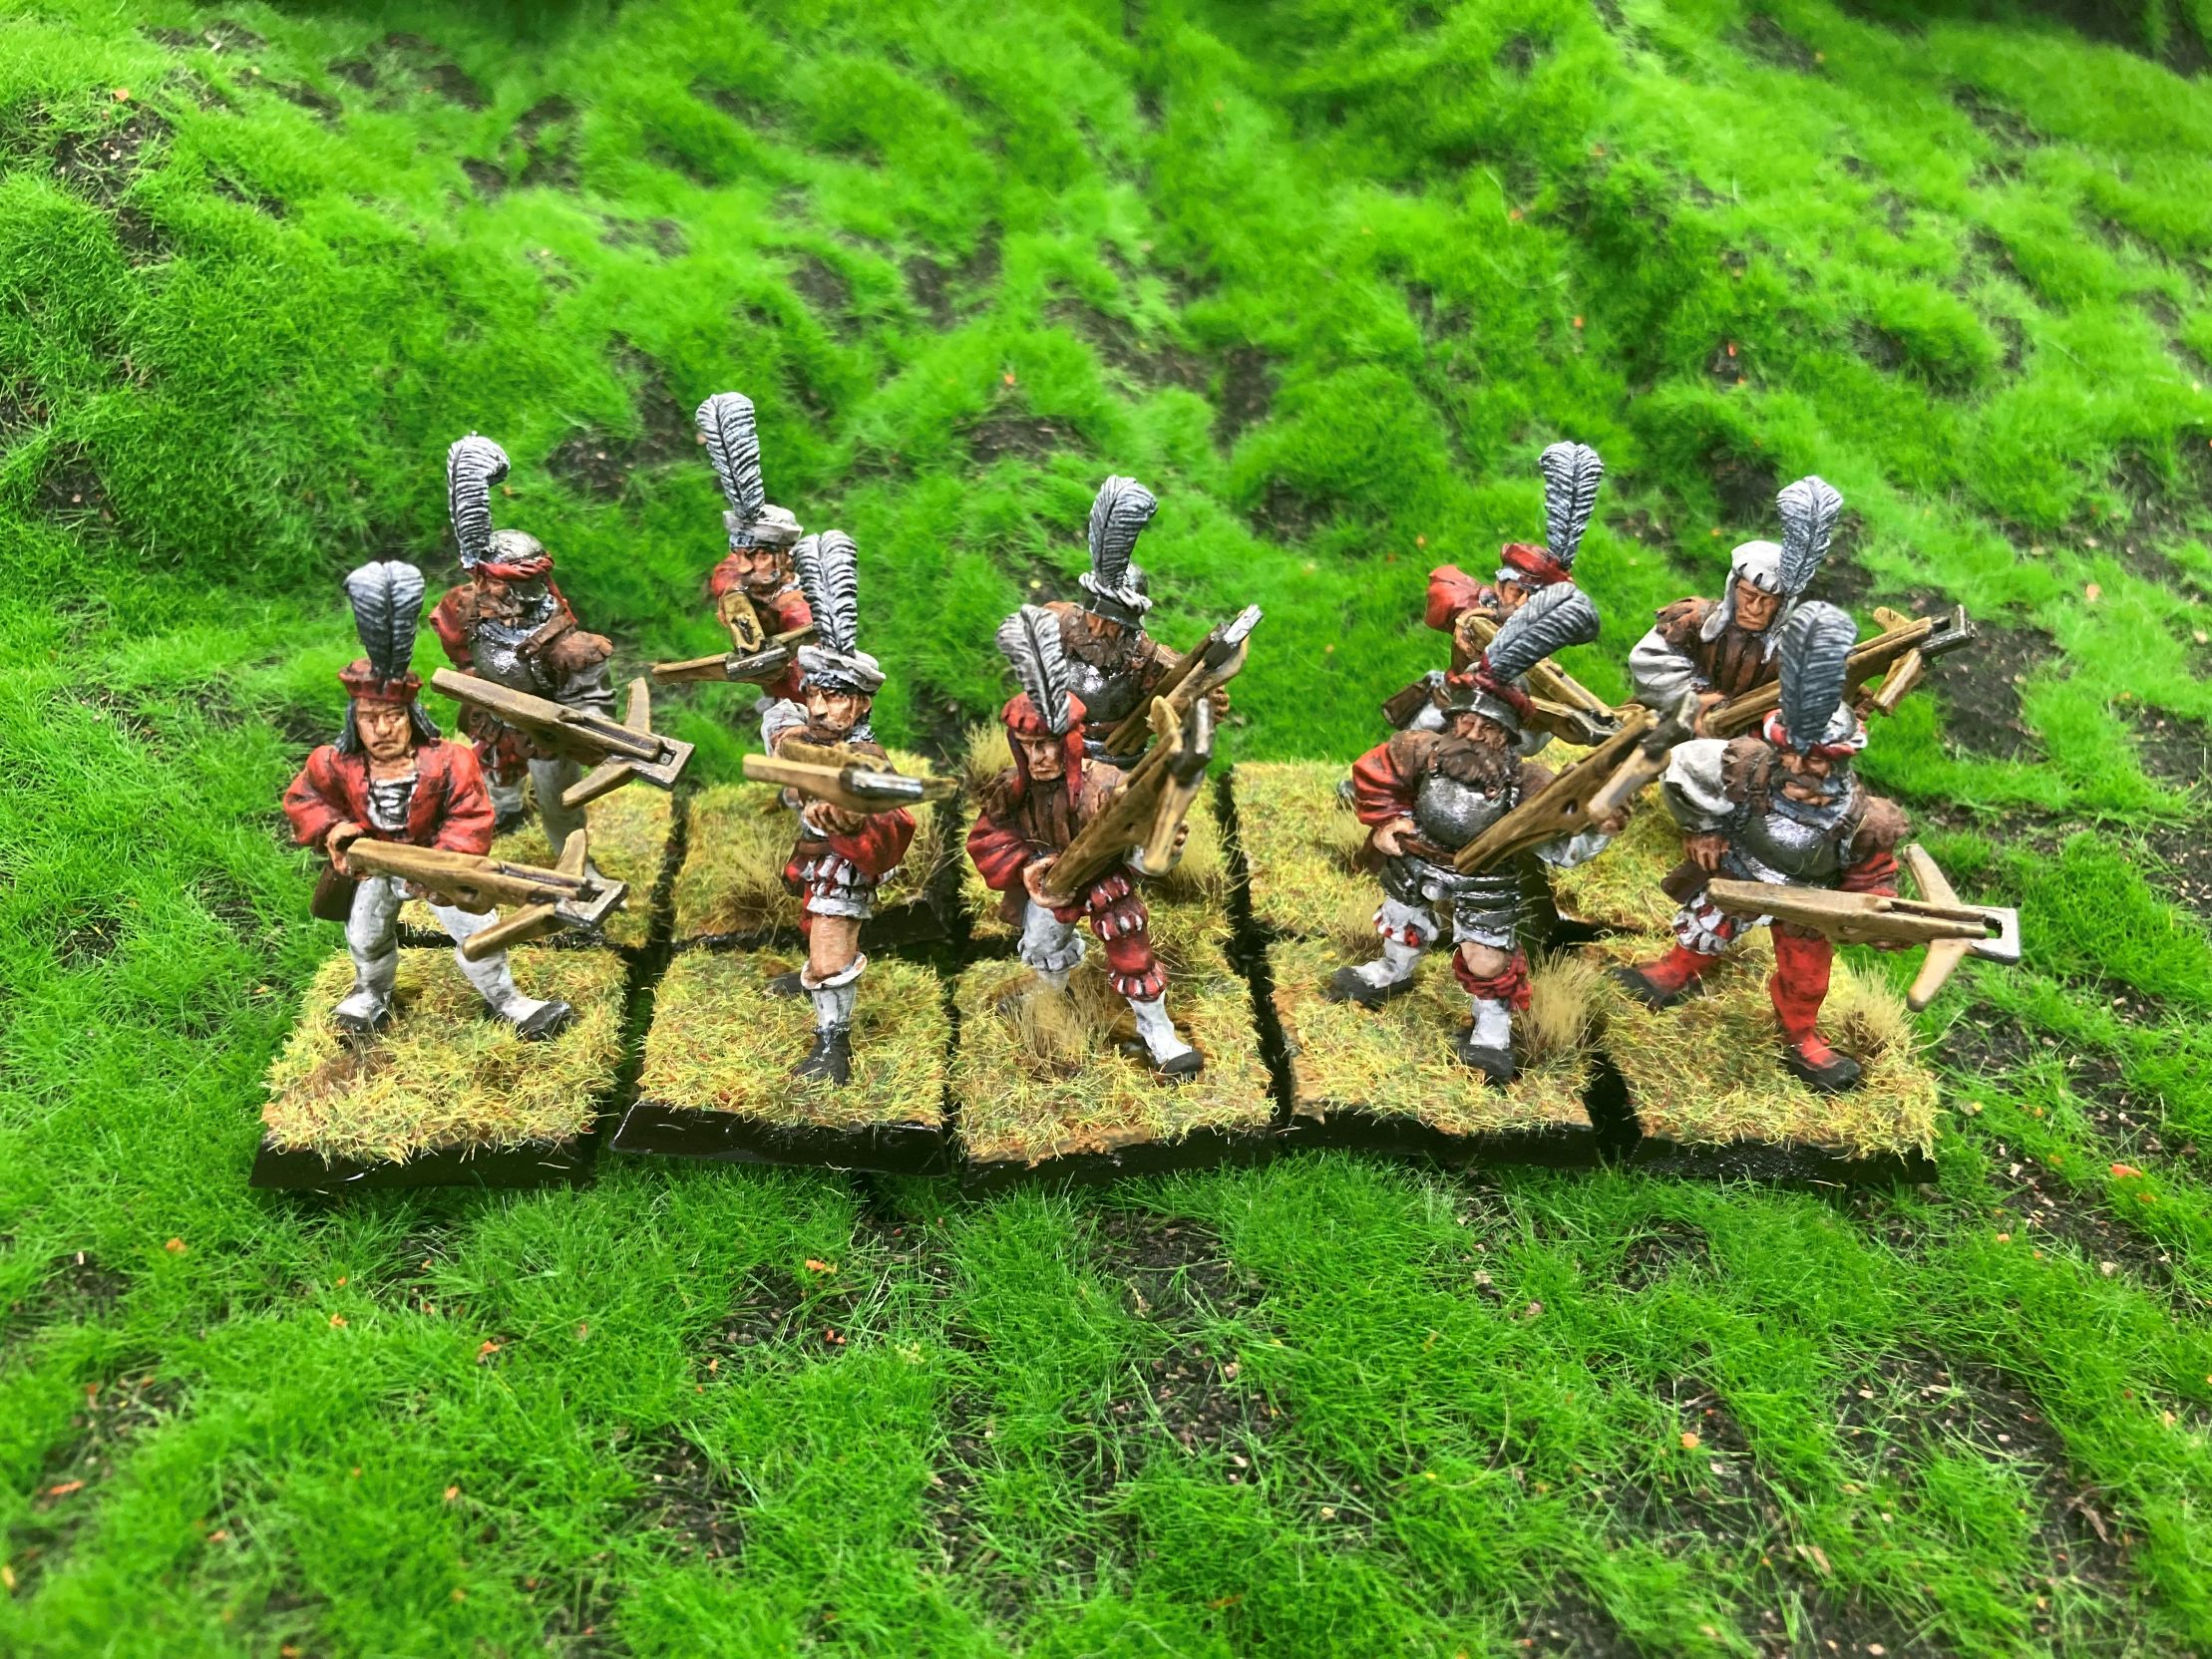
Progress was made on the Knights of the White Wolf and I’m hoping to have them done by the end of the week. Watch for updates. I also got another 5 crossbowmen into the line, and remember, feathers and hair will all be done at the end of the project.
I was also thinking about working on the single unit and characters for this first round of the army. 1st up was the steamtank.
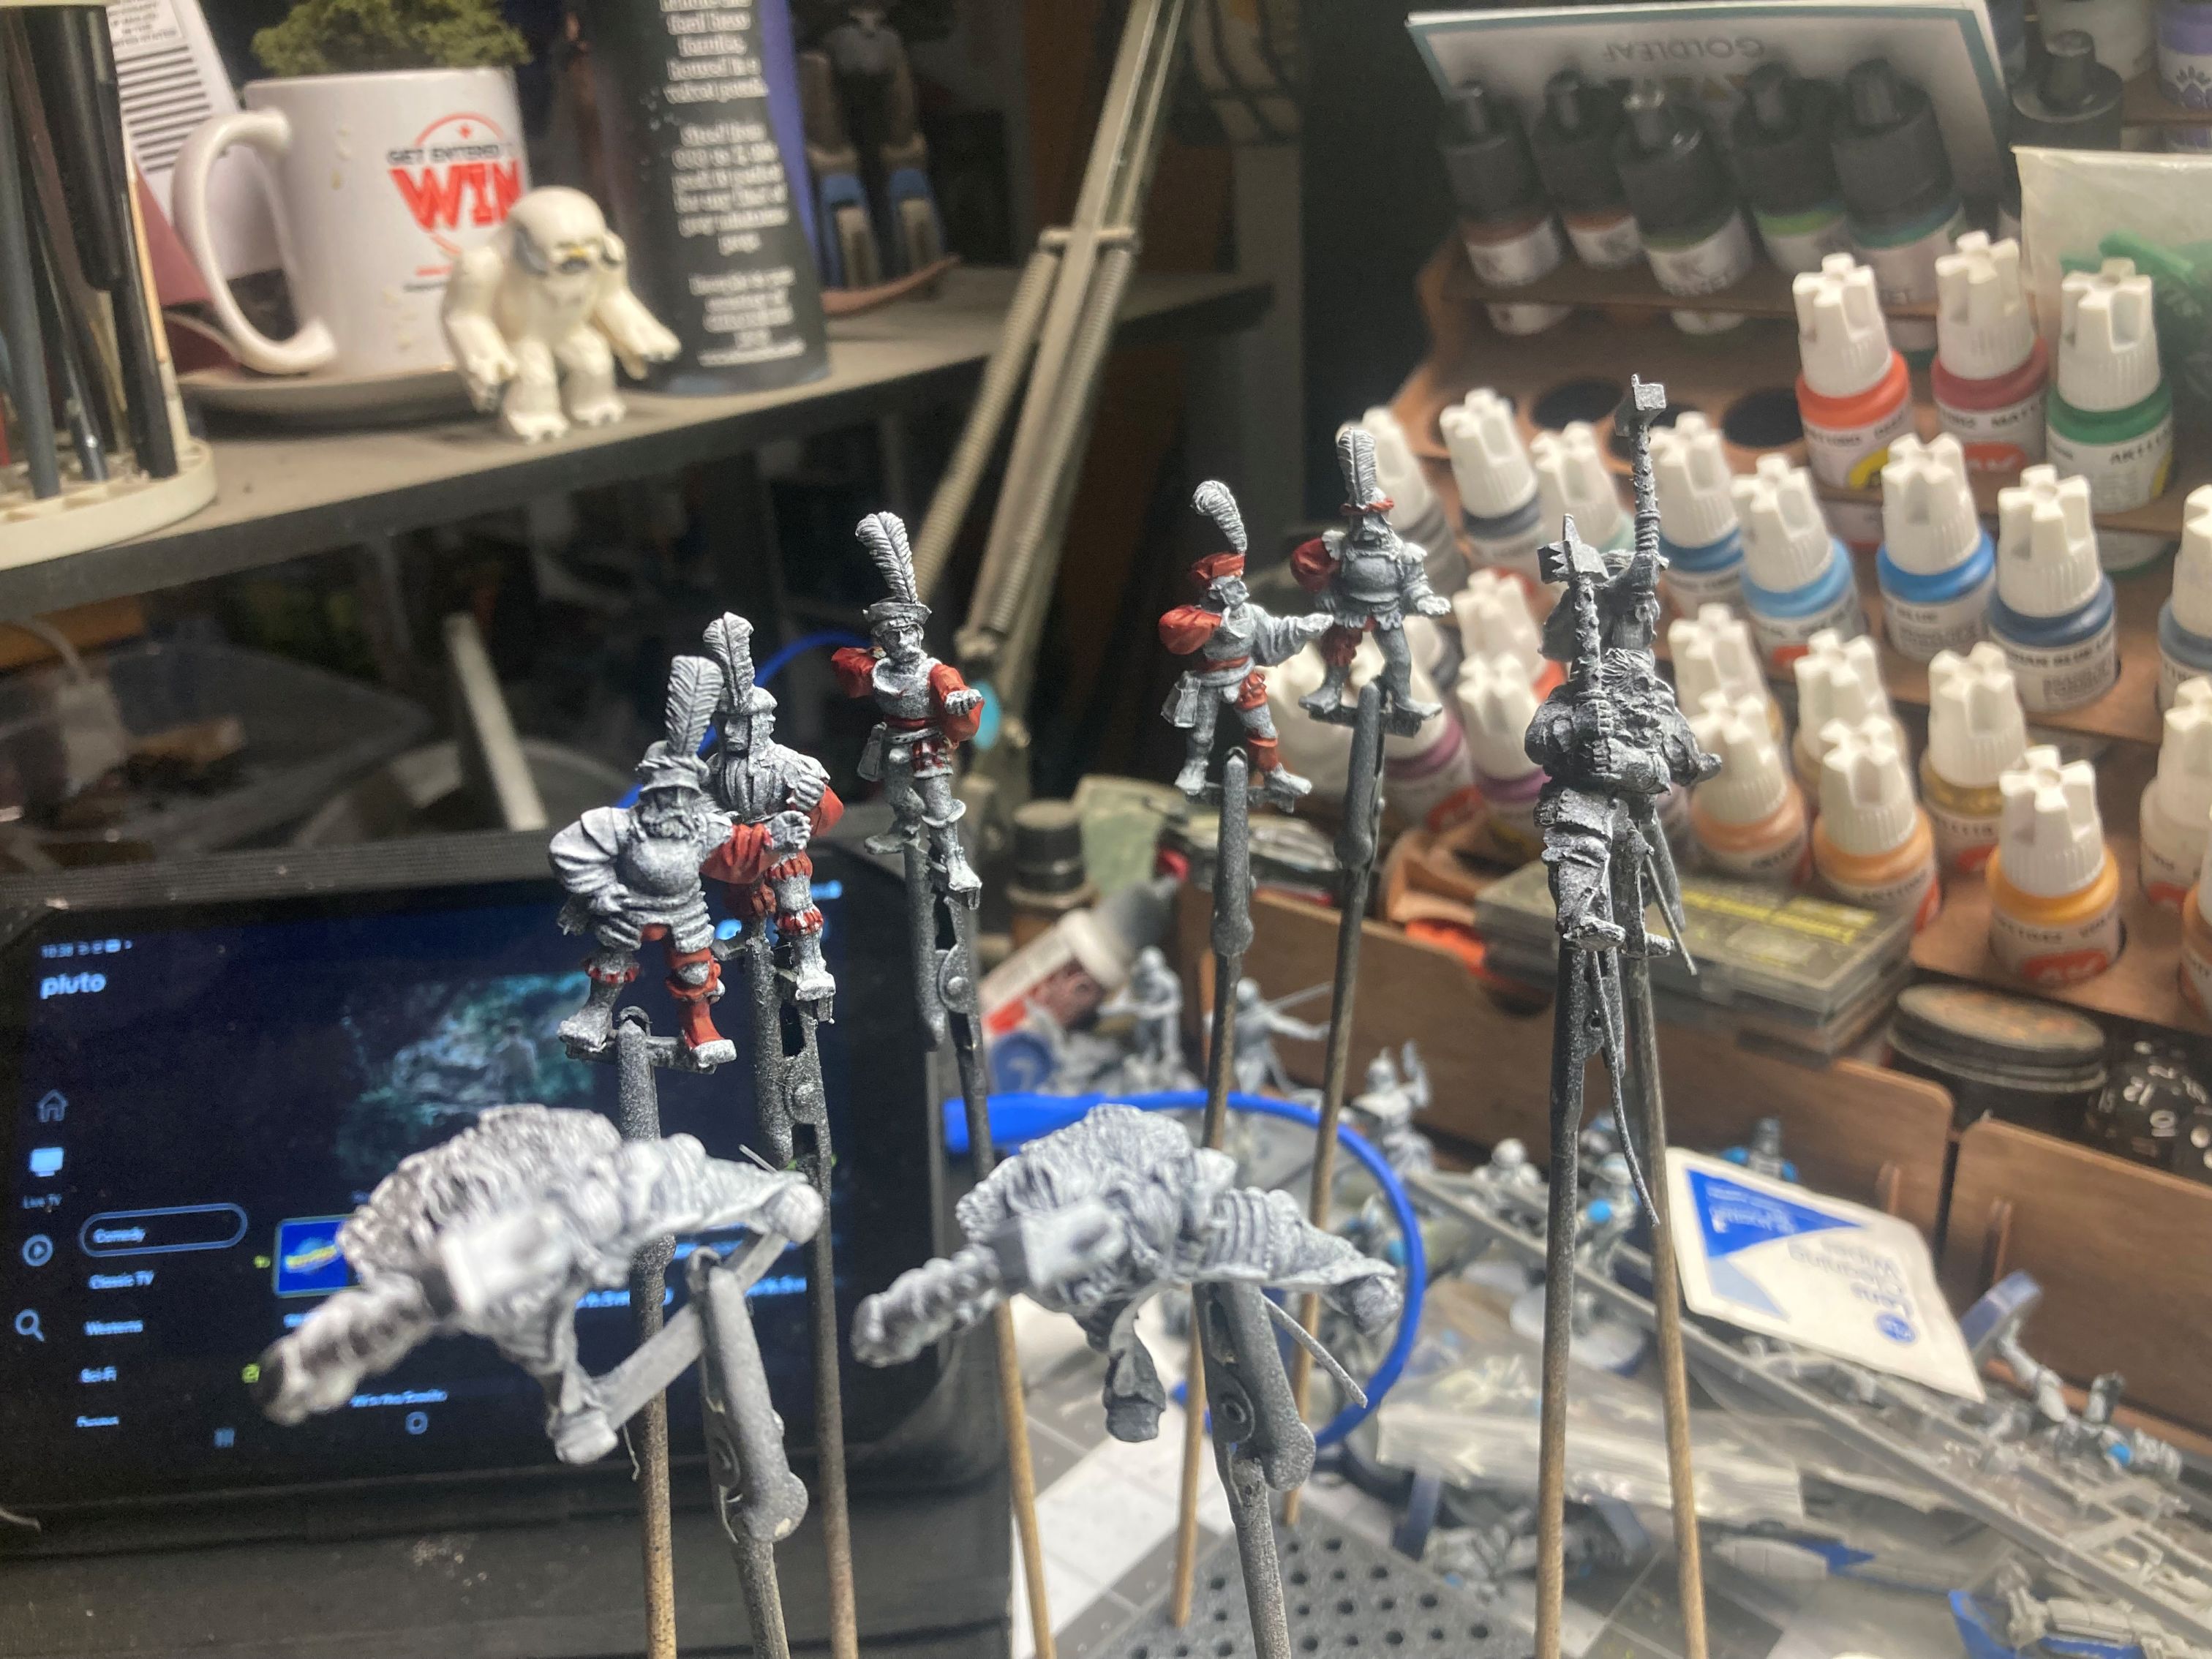
 To fully clean up the old paint I had to do like LL Cool J from the movie "SWAT" and...
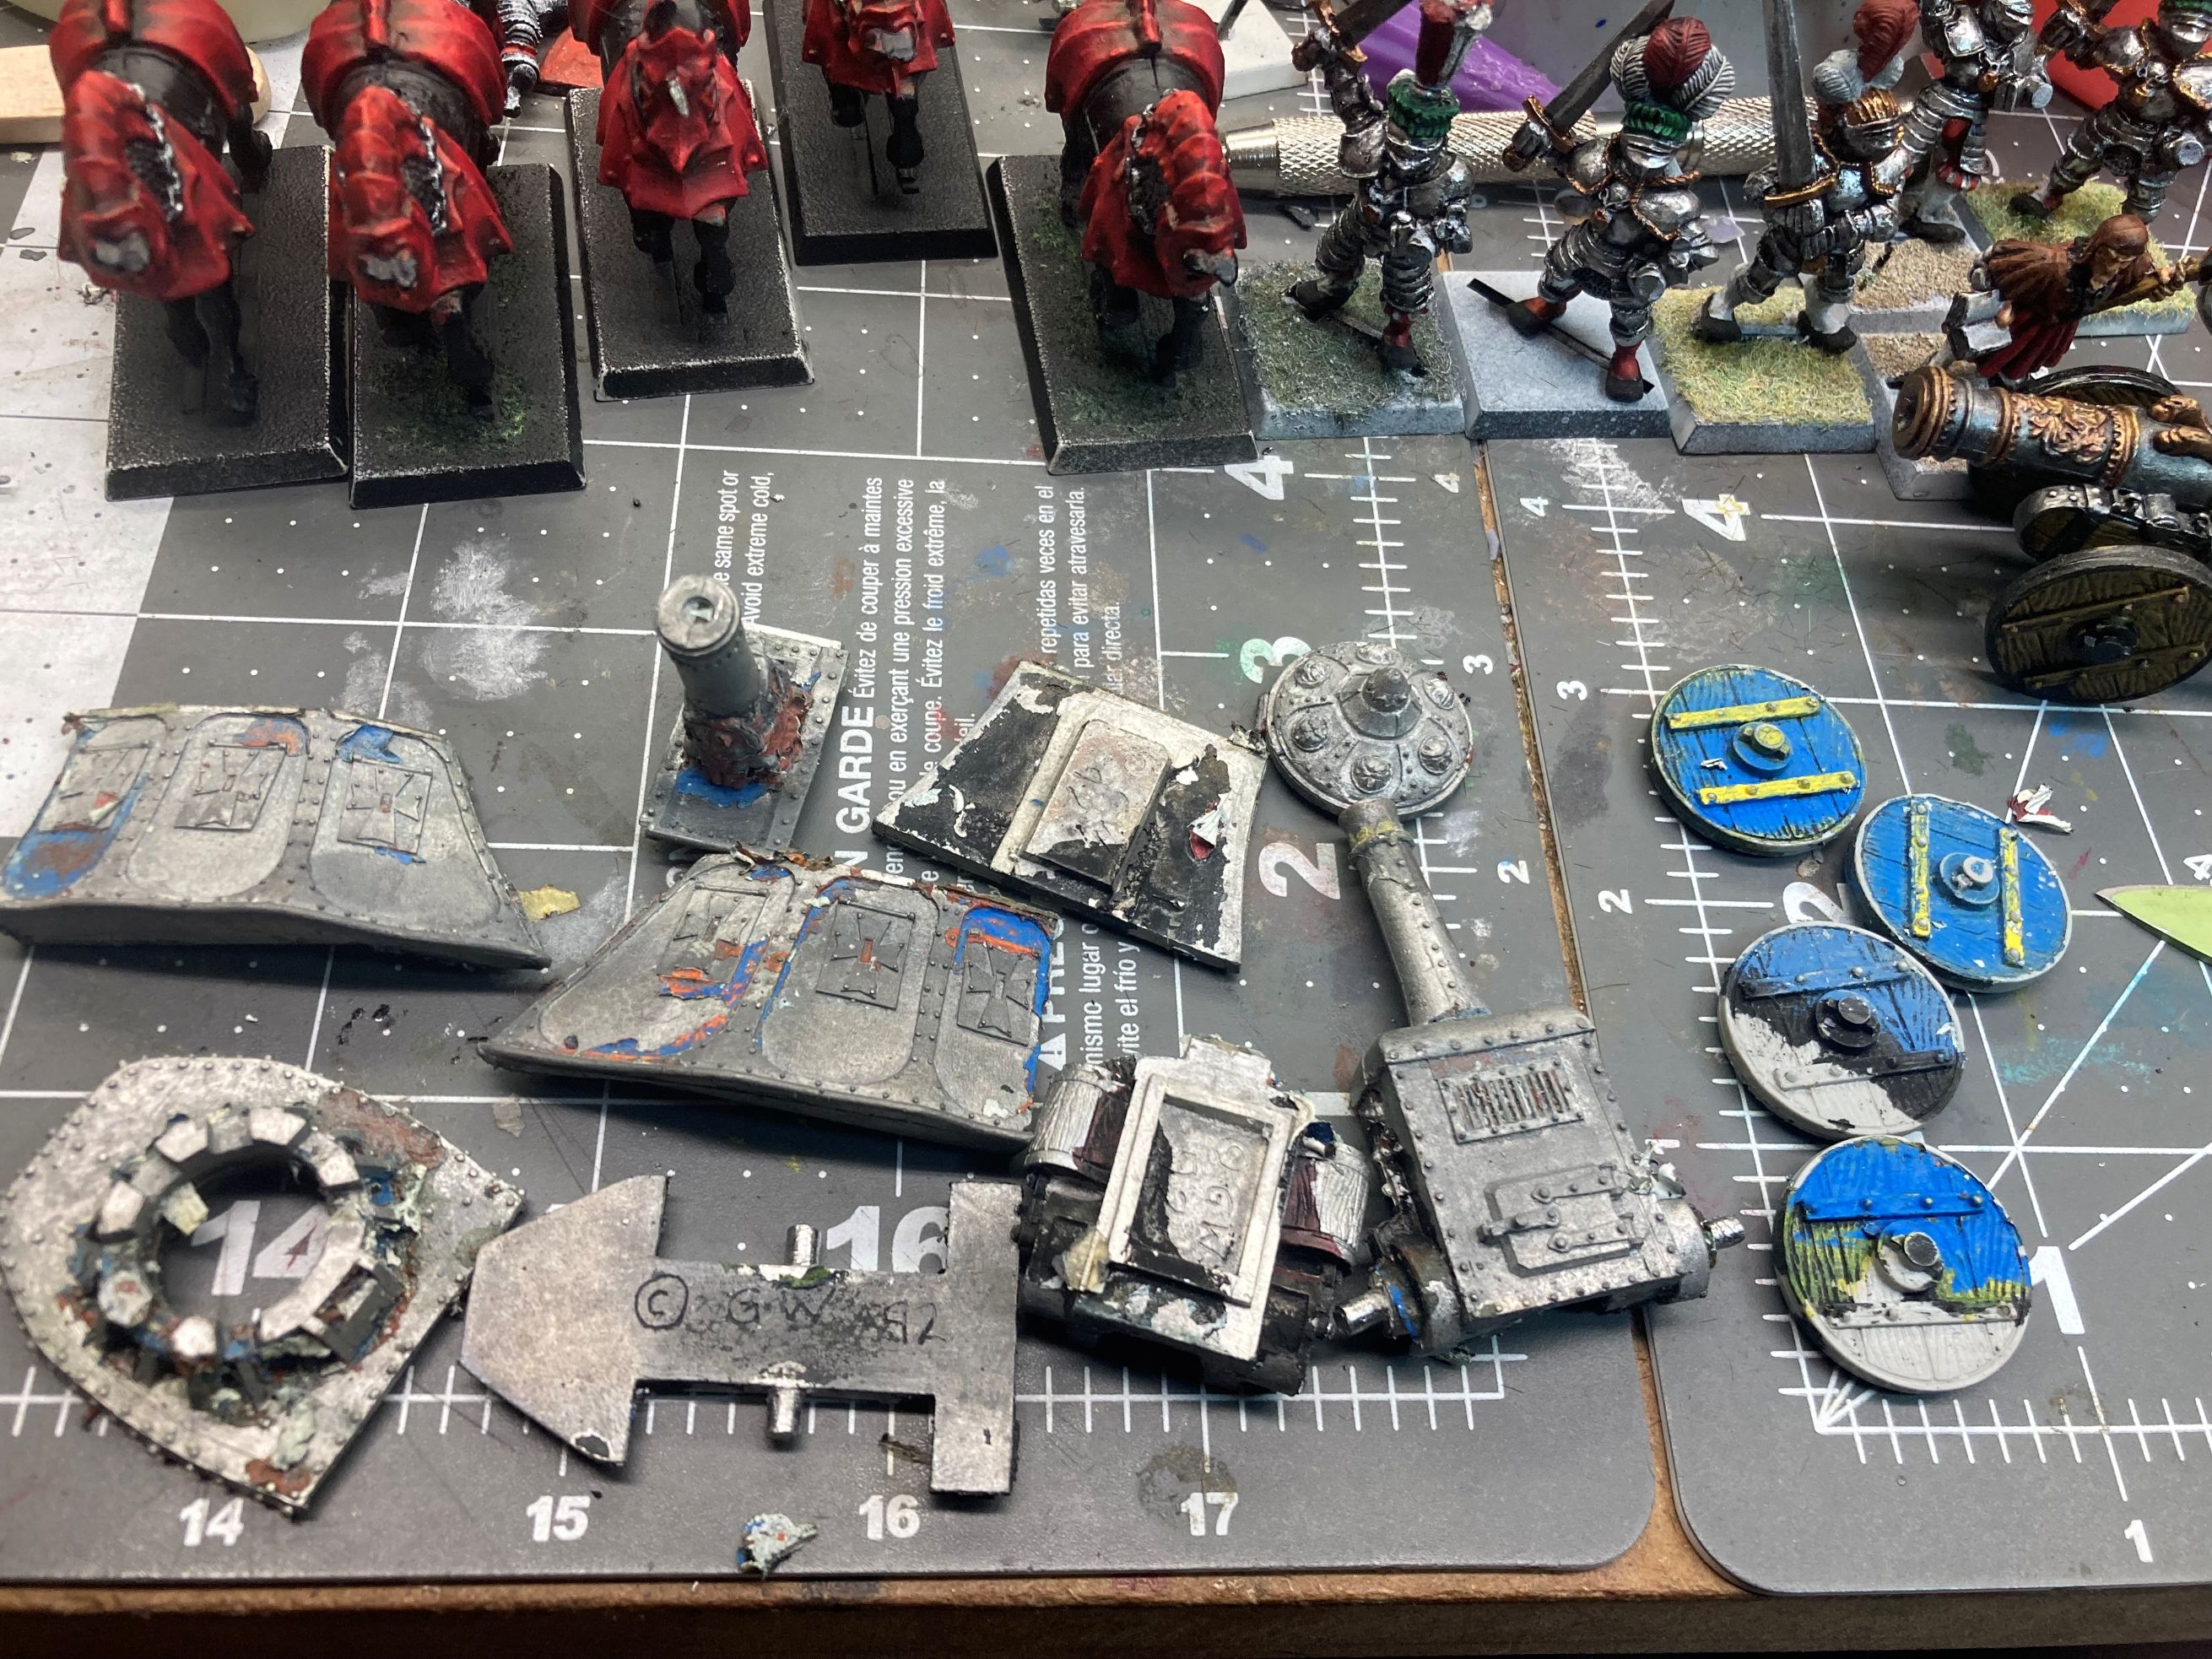 "Break it down like a shotgun". I never figured out what that meant in the scene.
I also started working out the next unit to get the stripper, uh, paint stripper treatment. As Steve Buscemi stated in the Movie “Desperado” Hand cannon time…
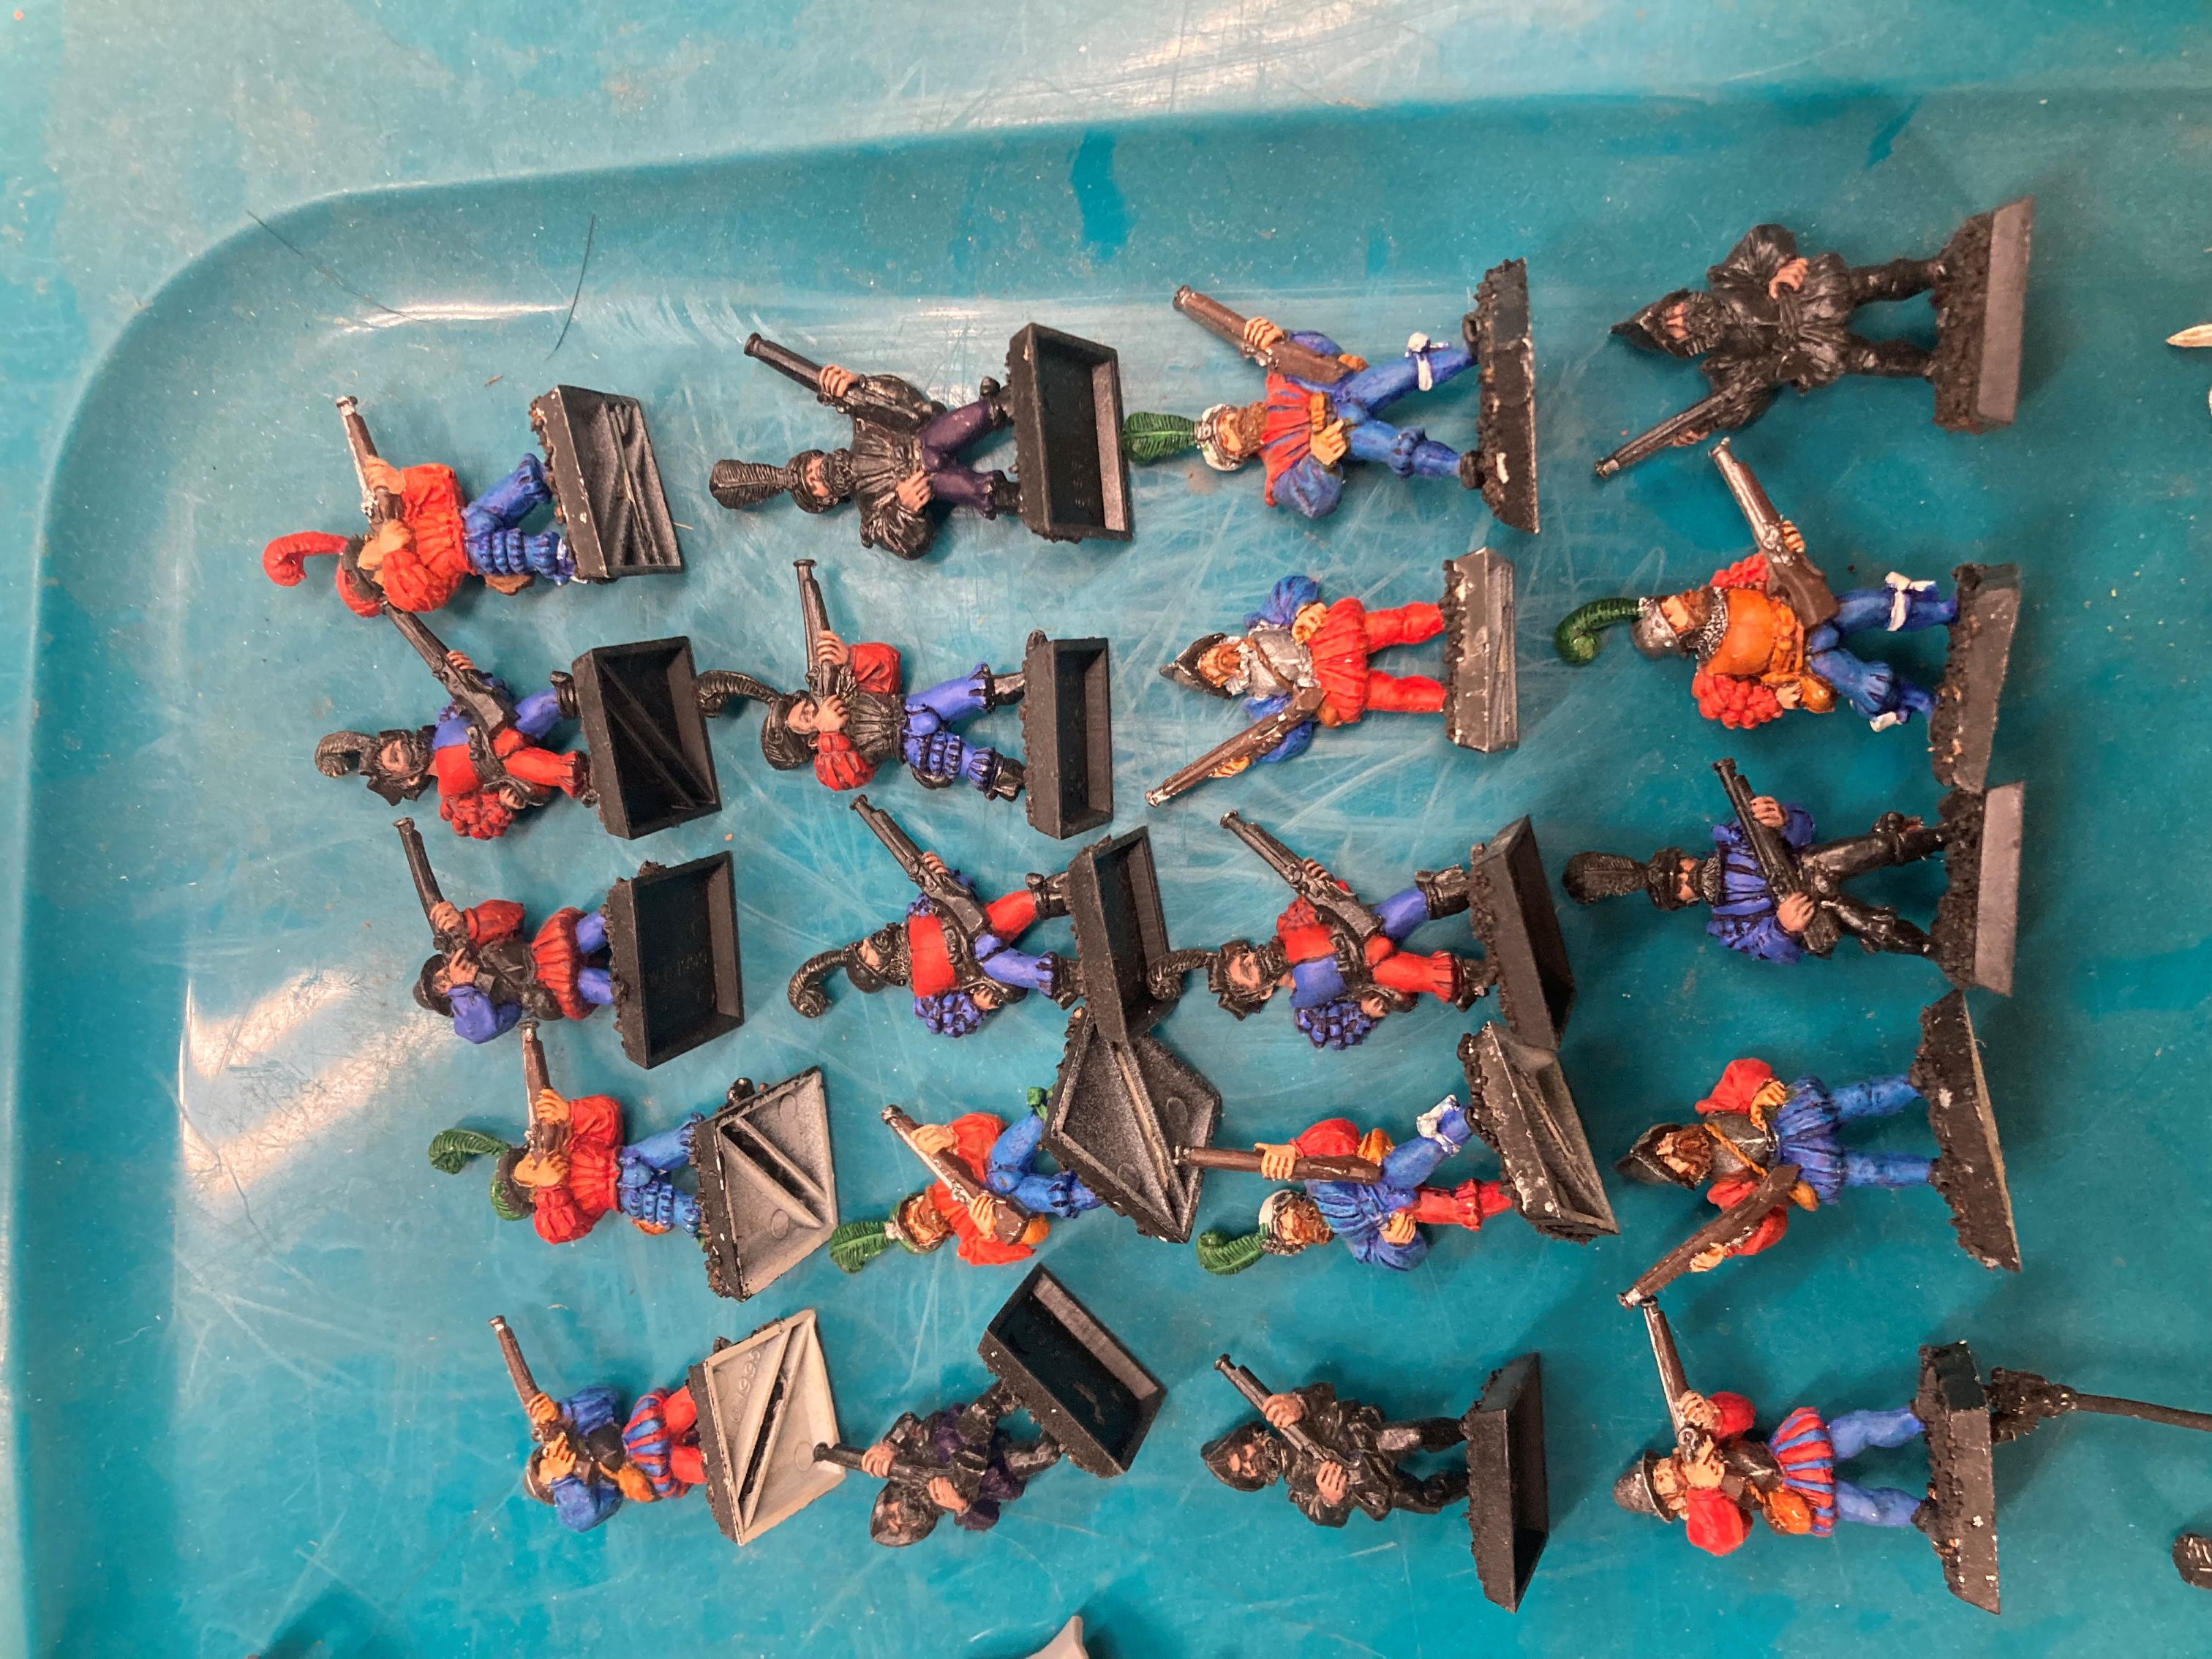 Hand cannon, no, handgunner time....
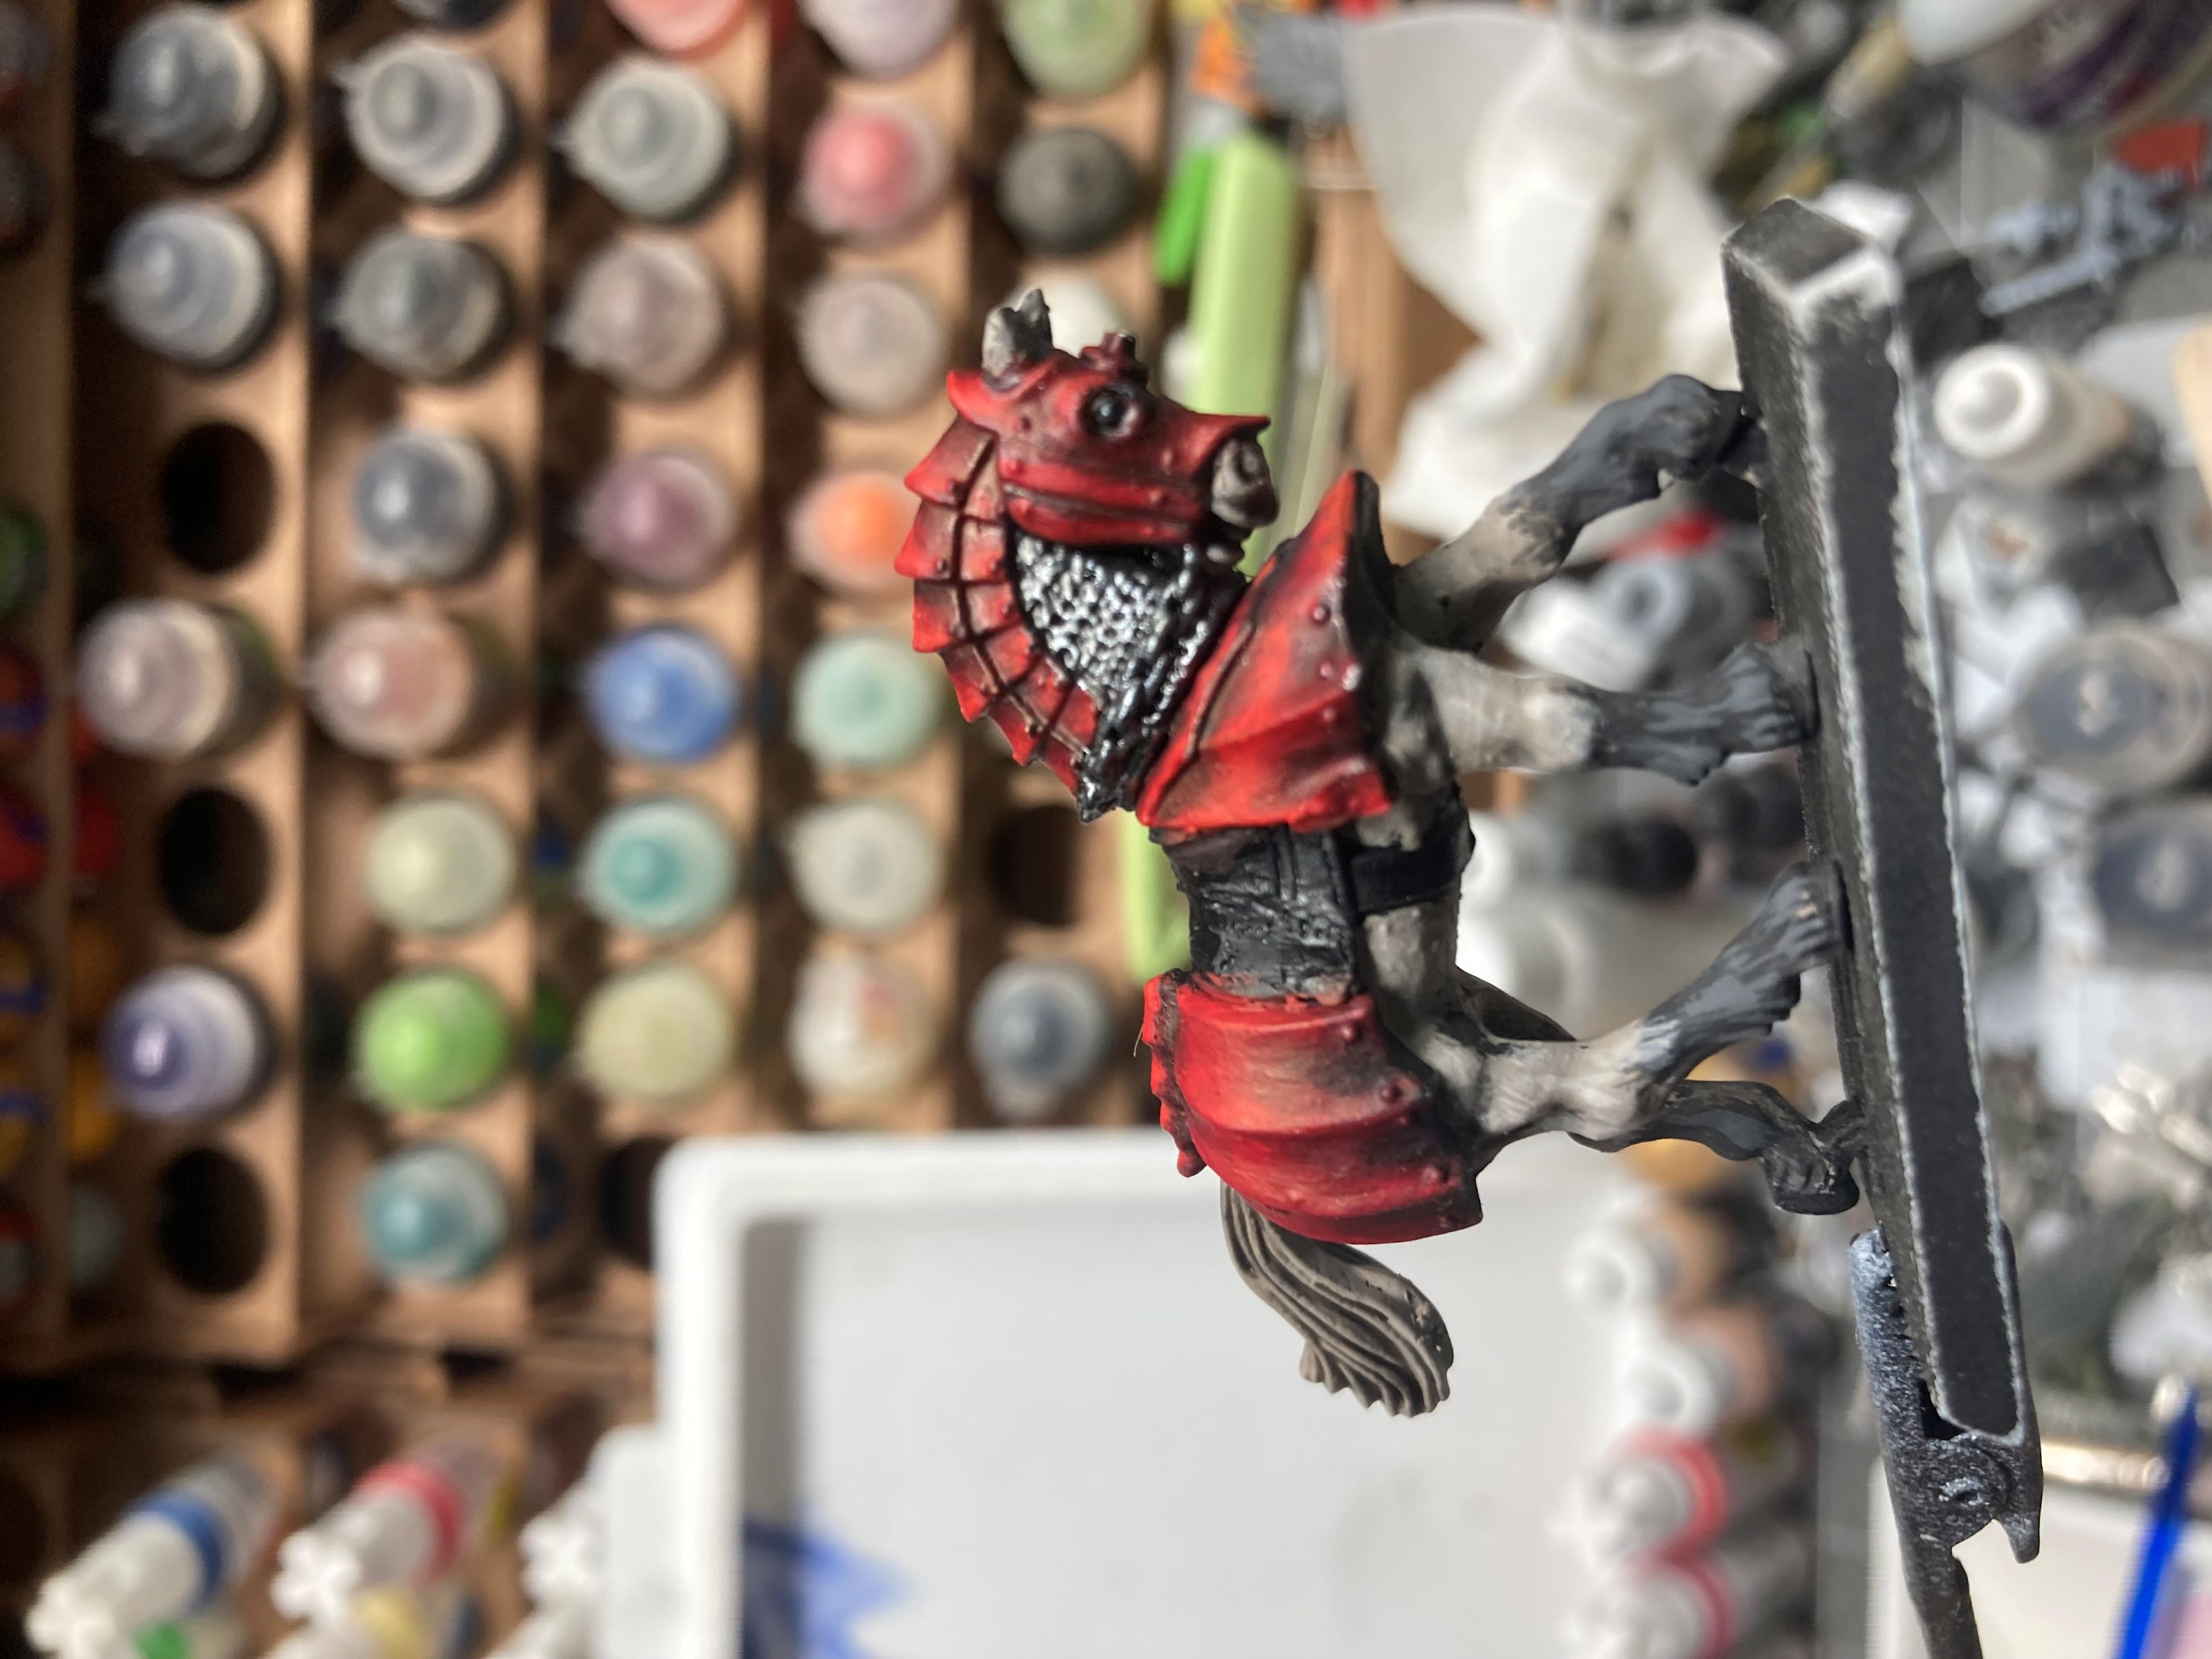
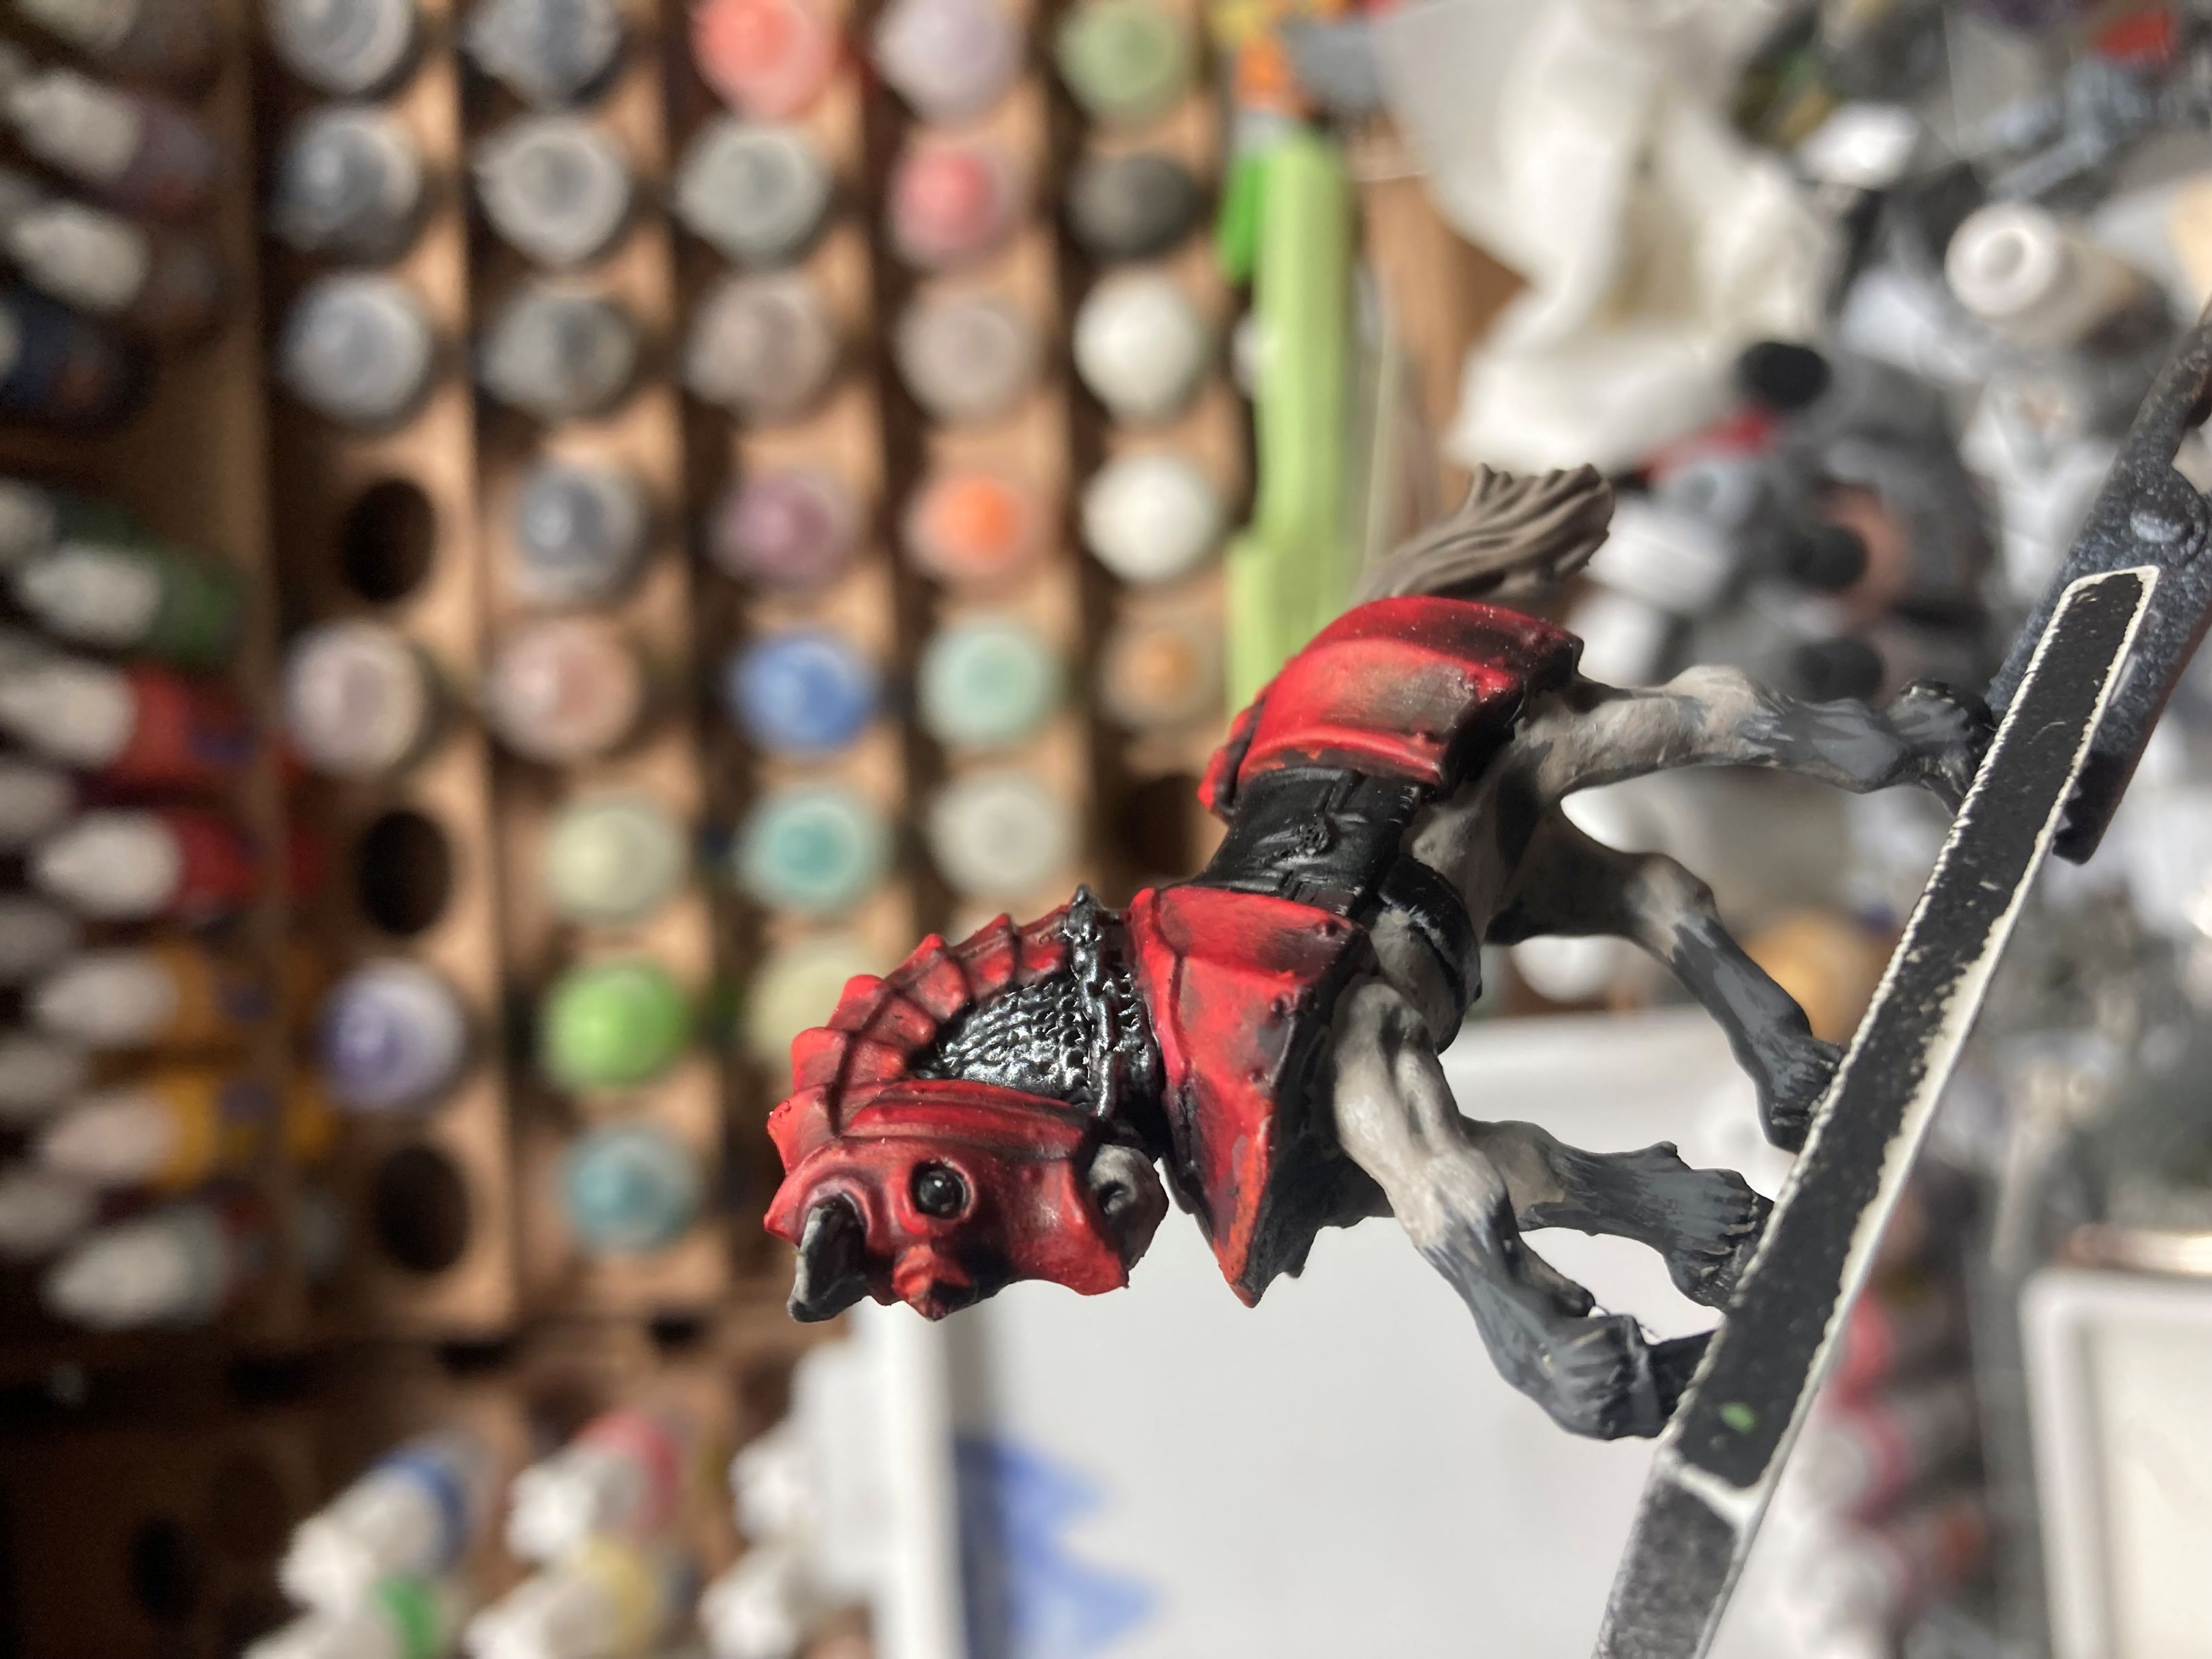
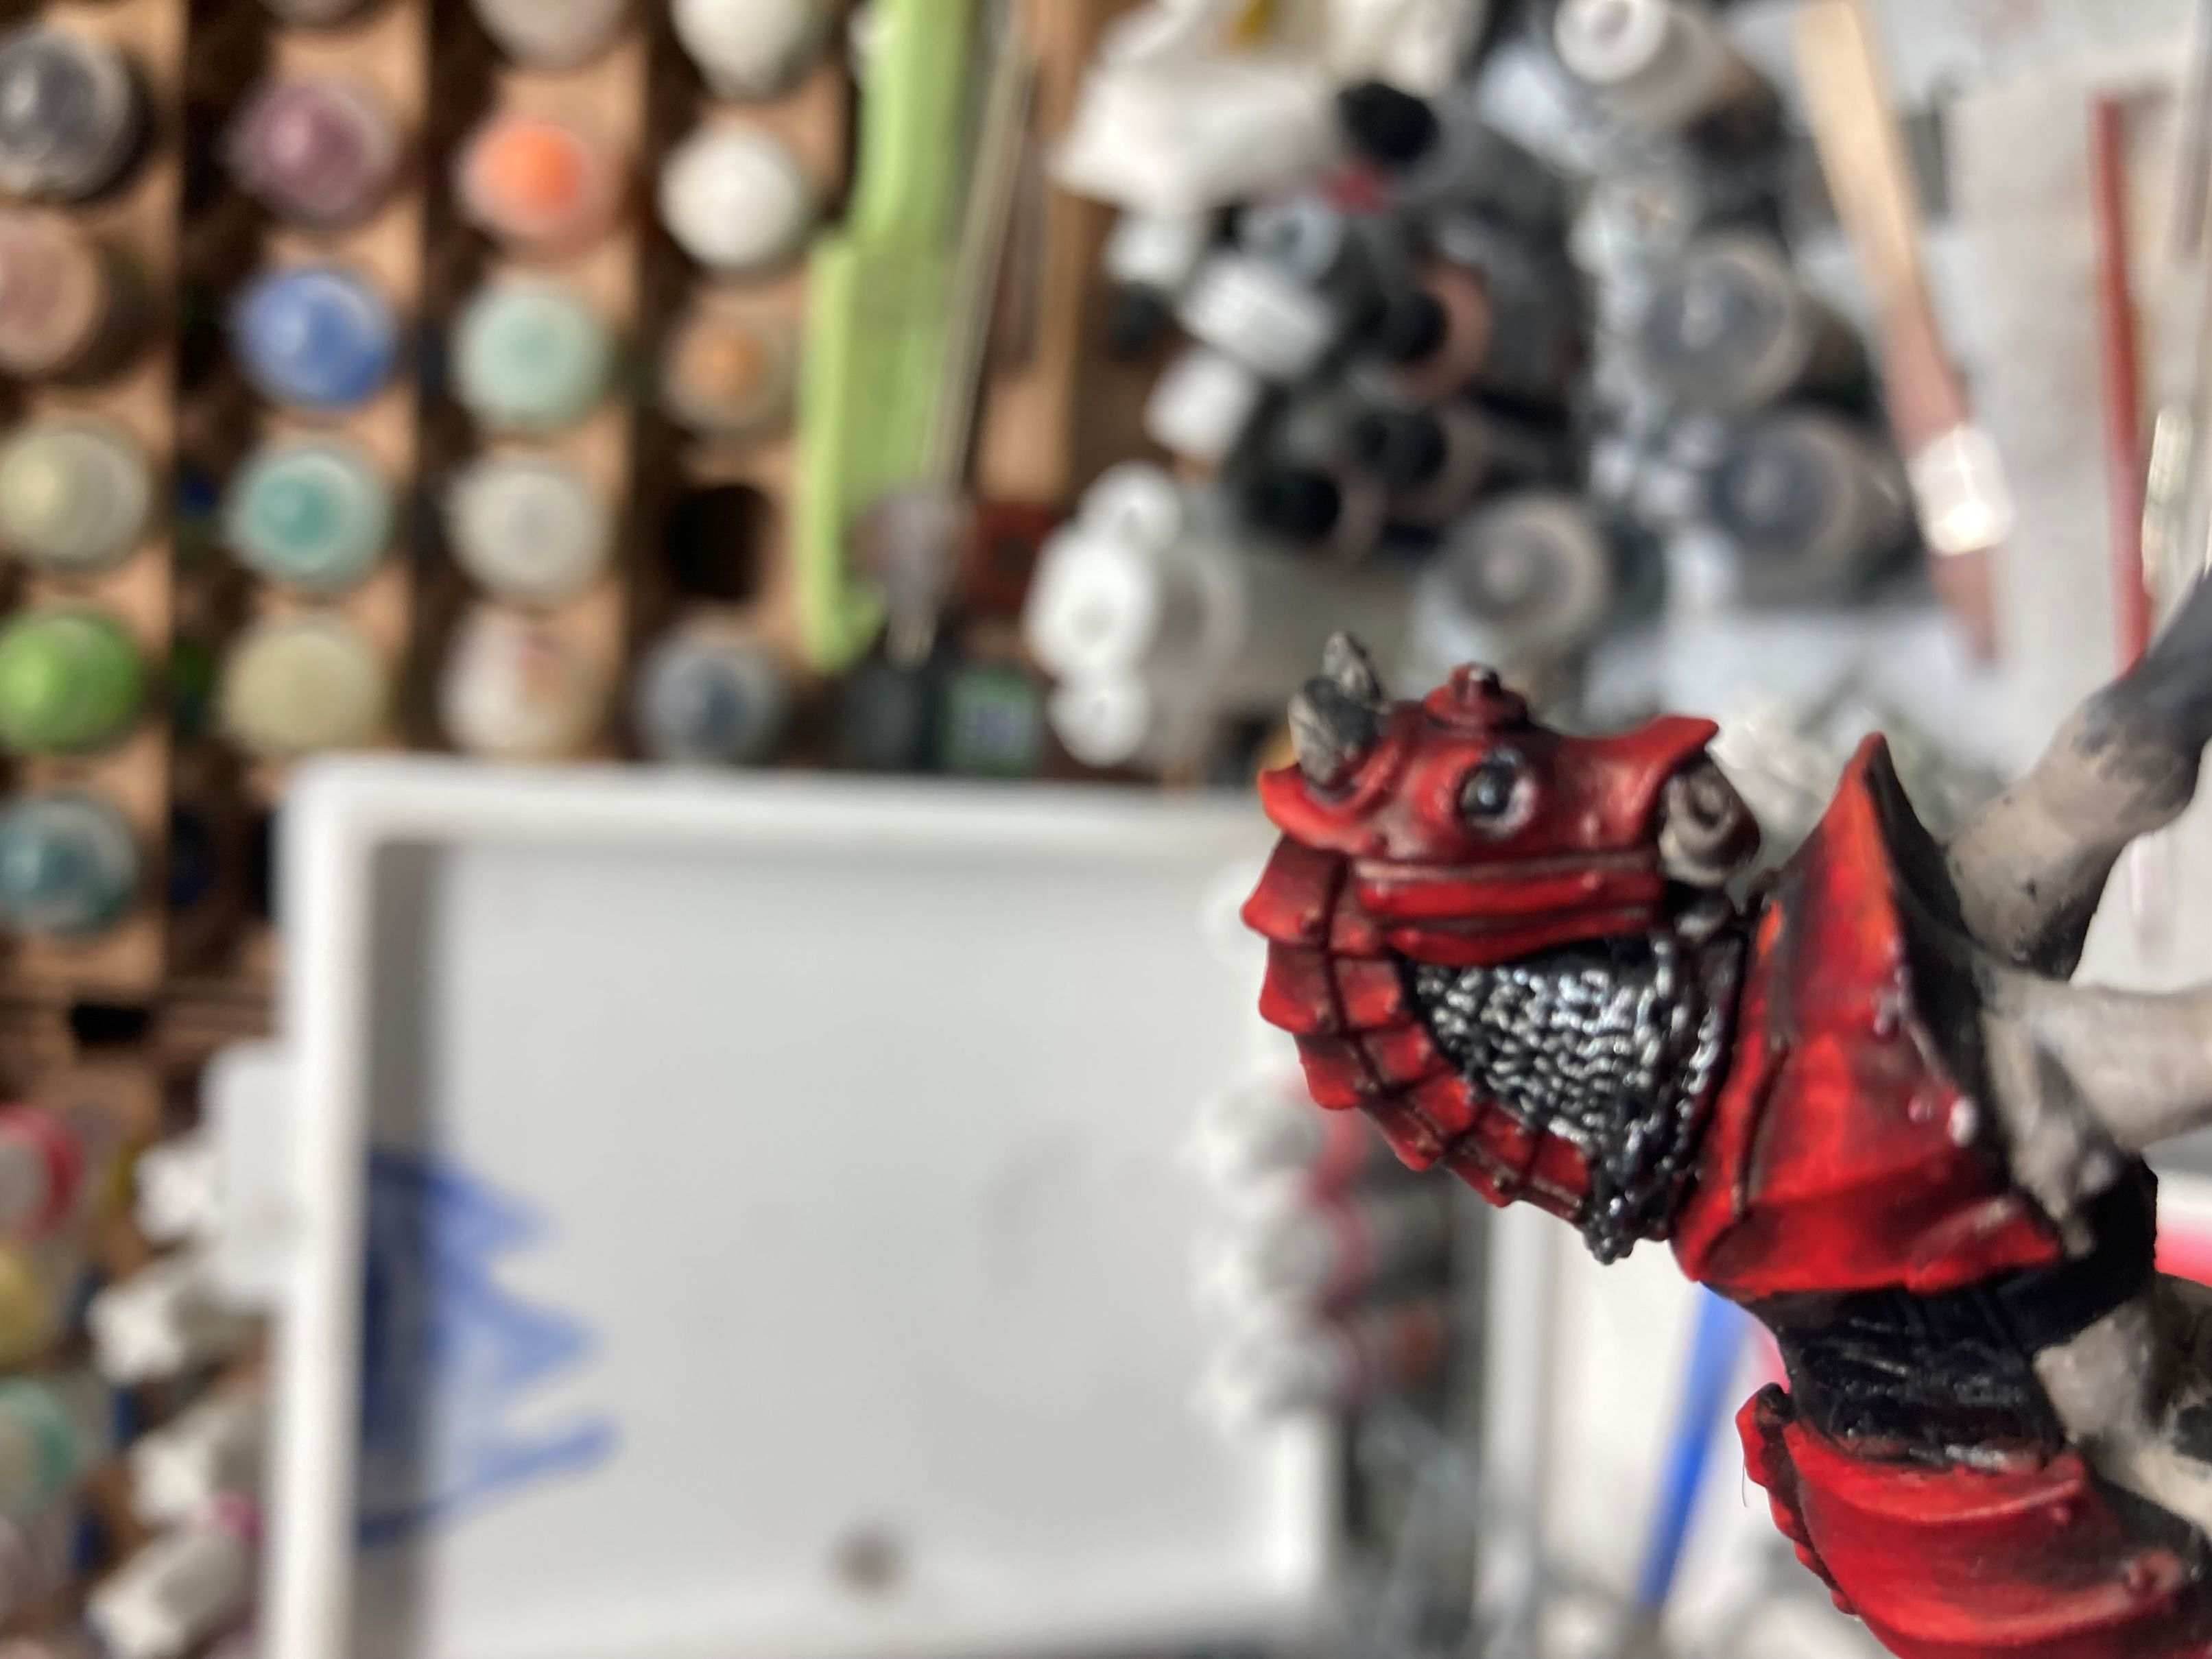
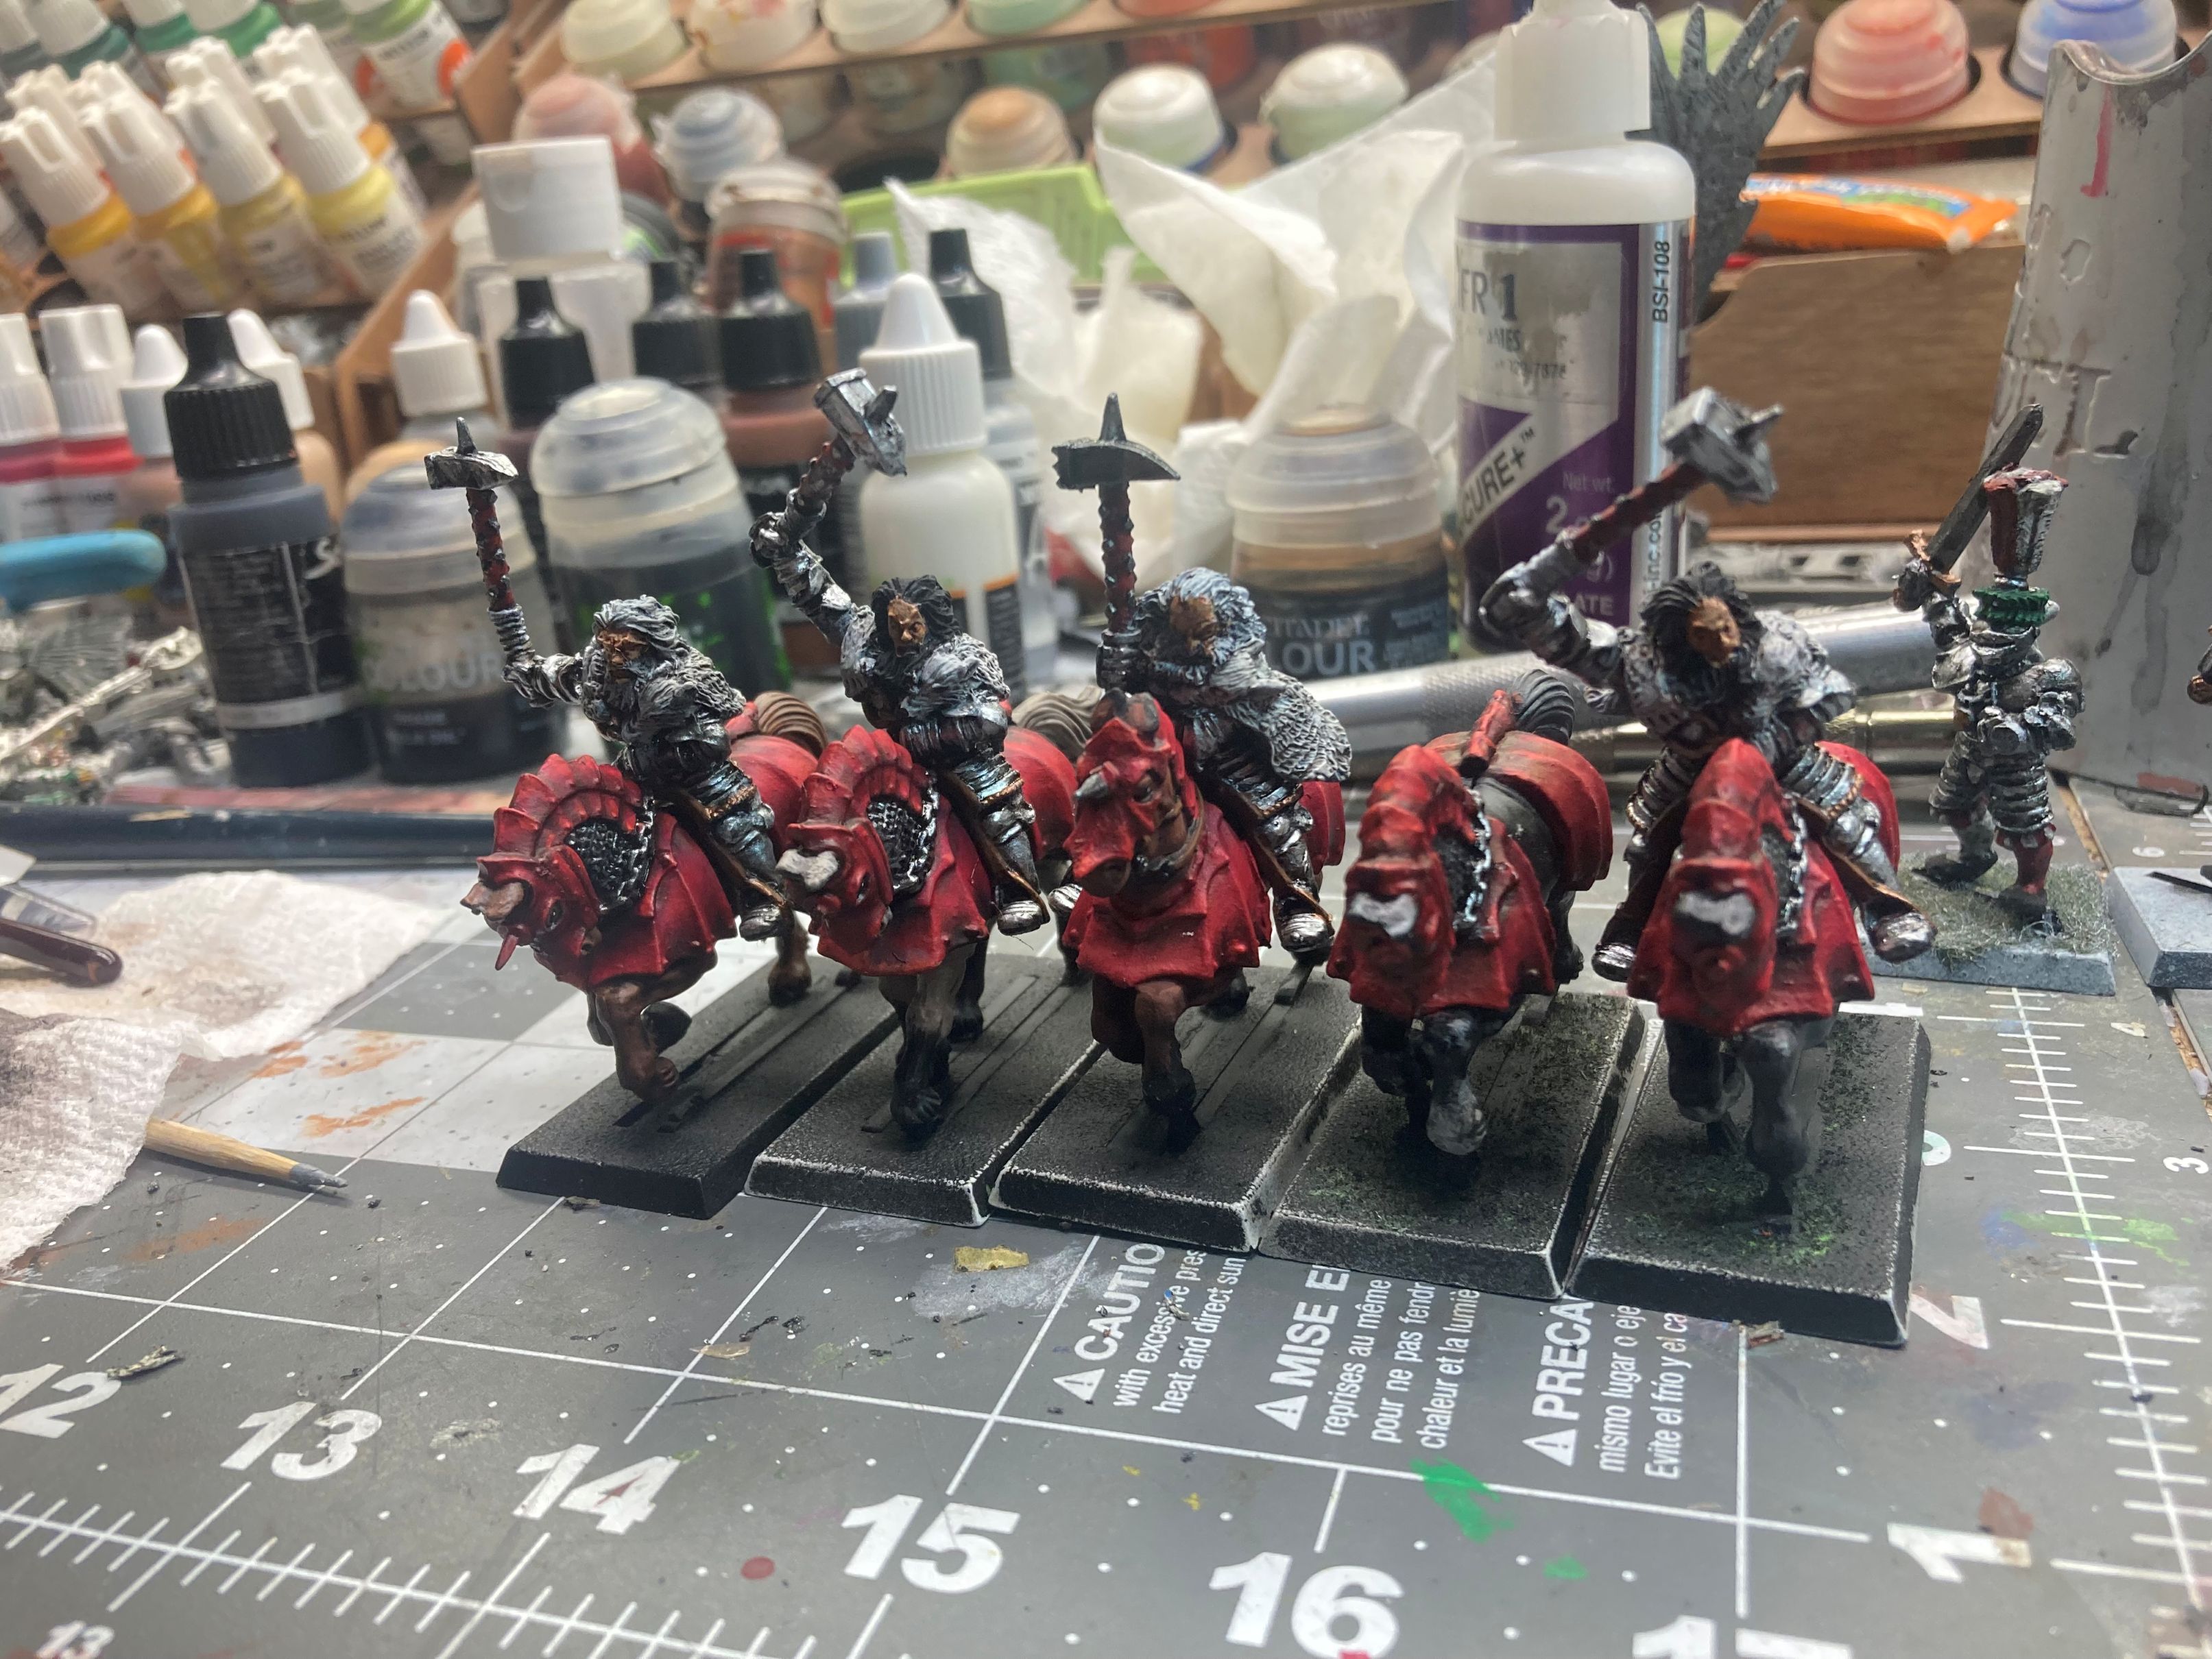
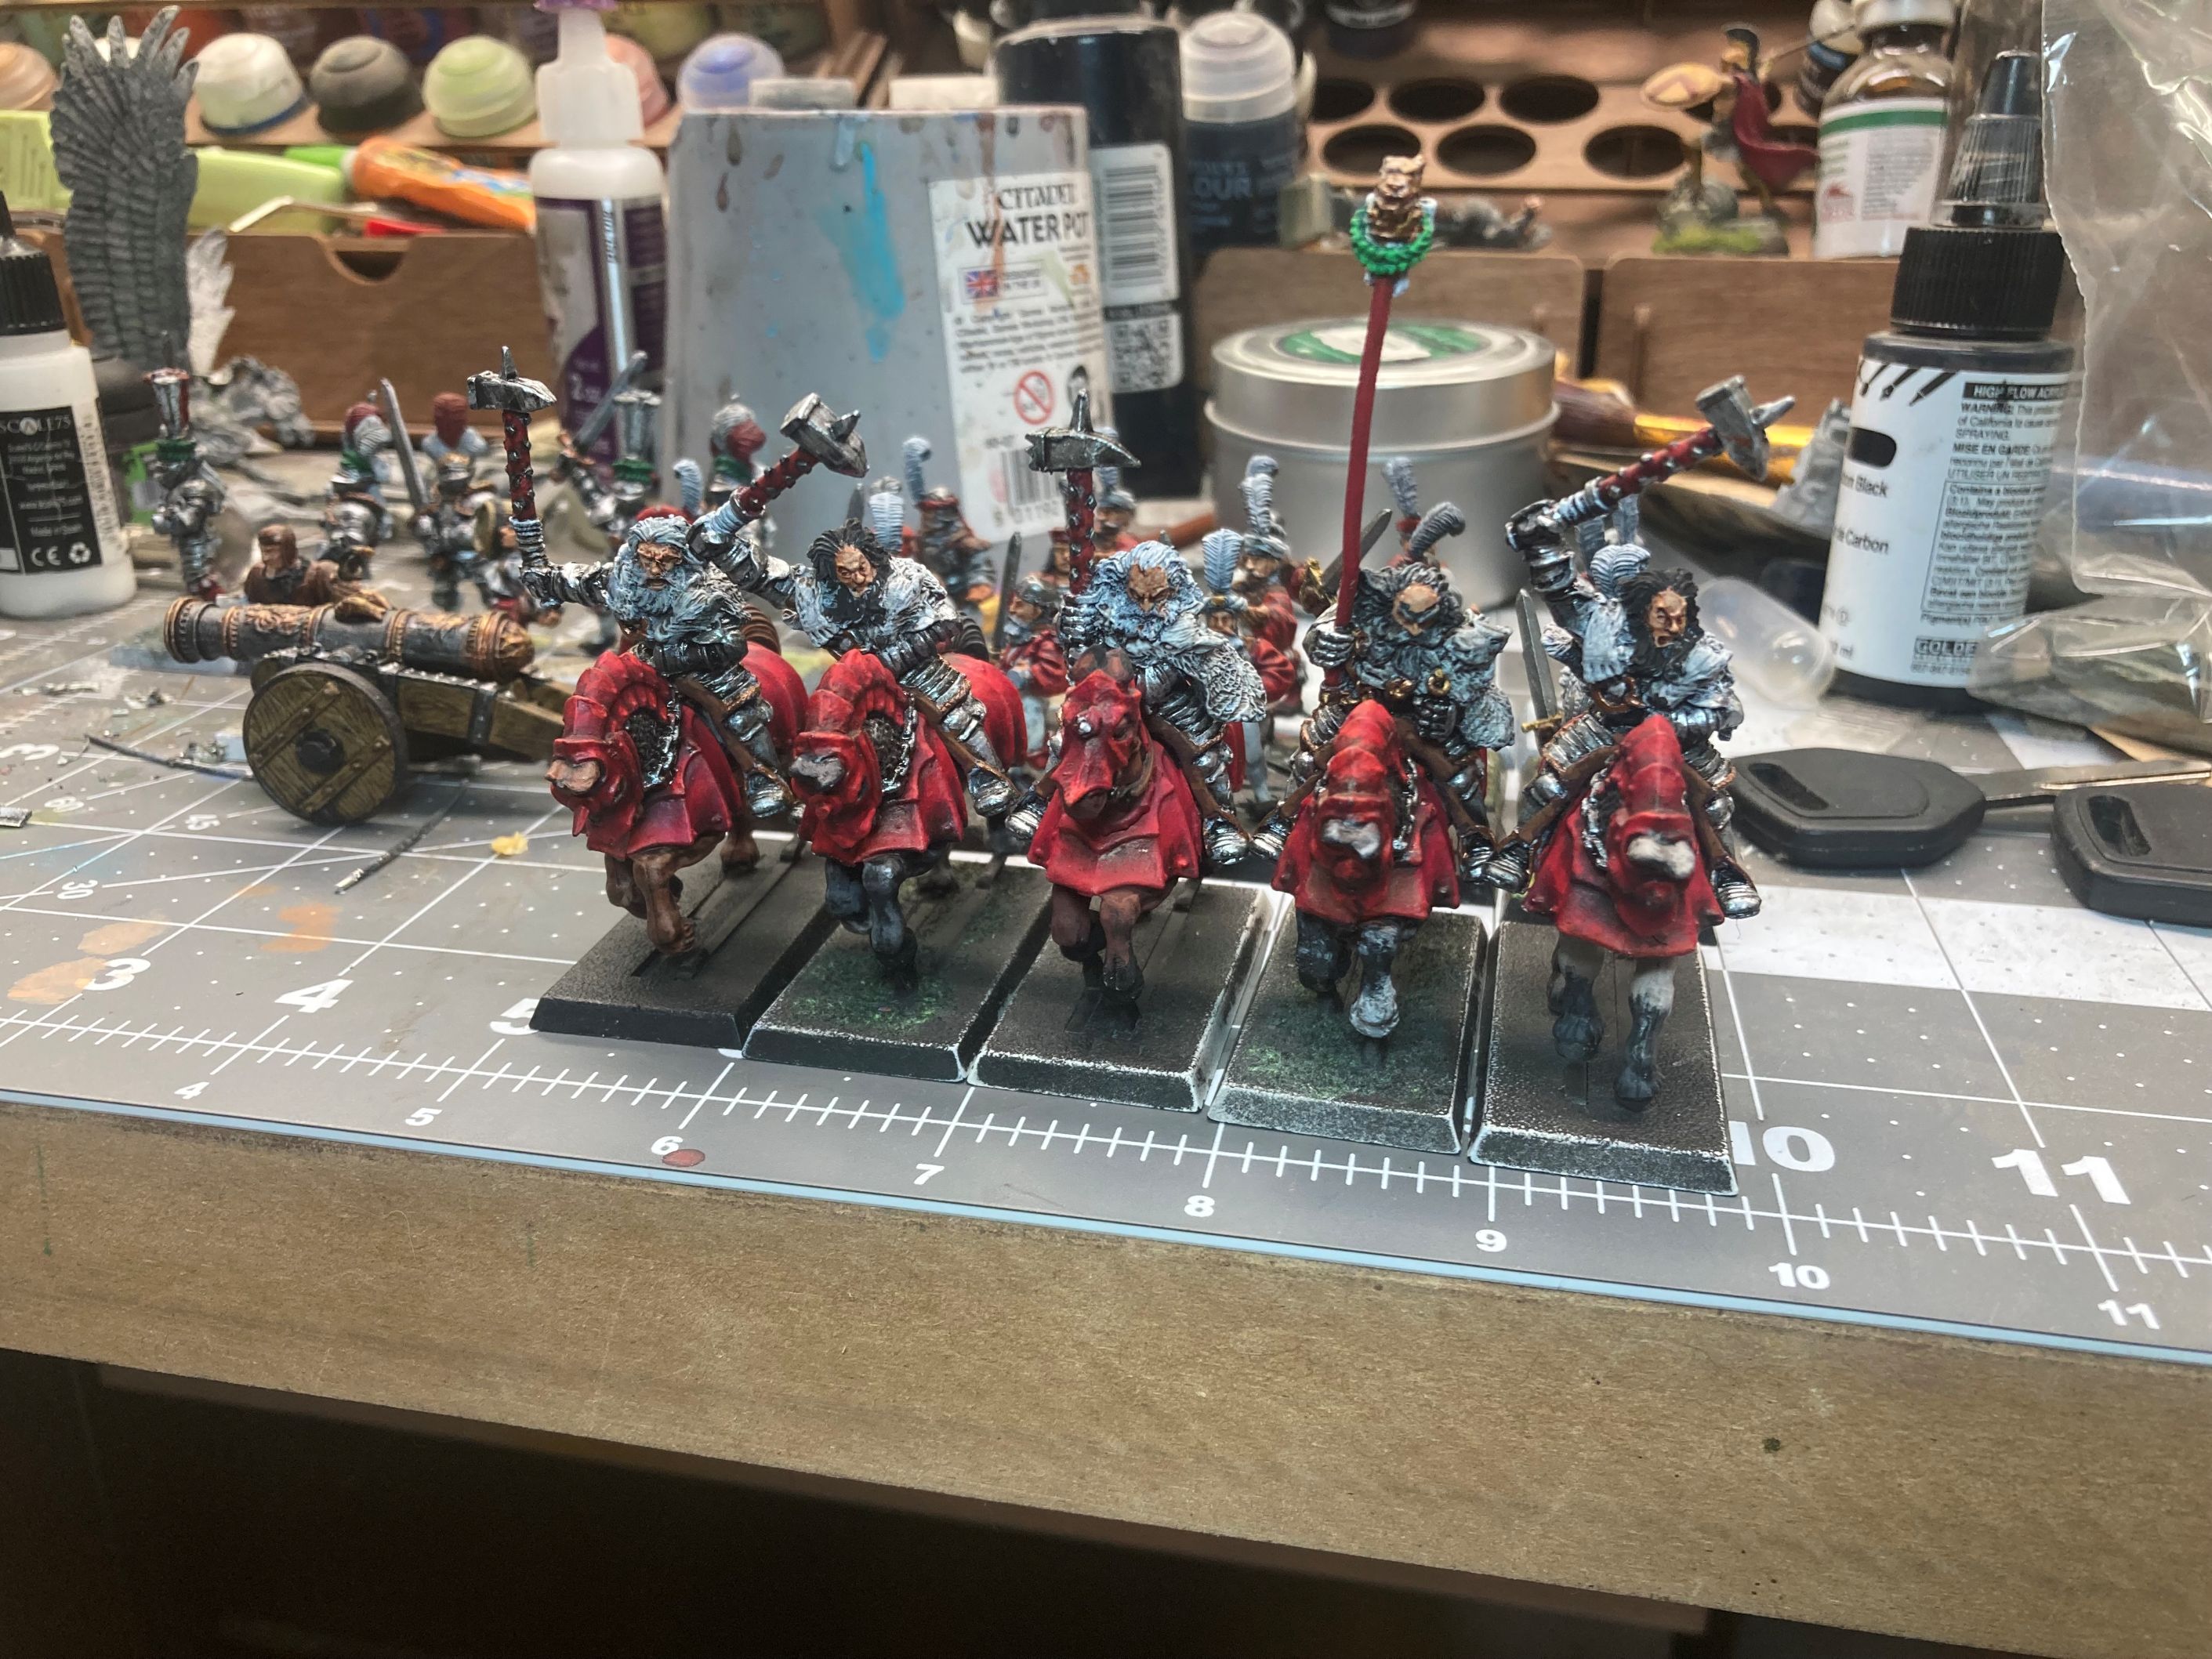
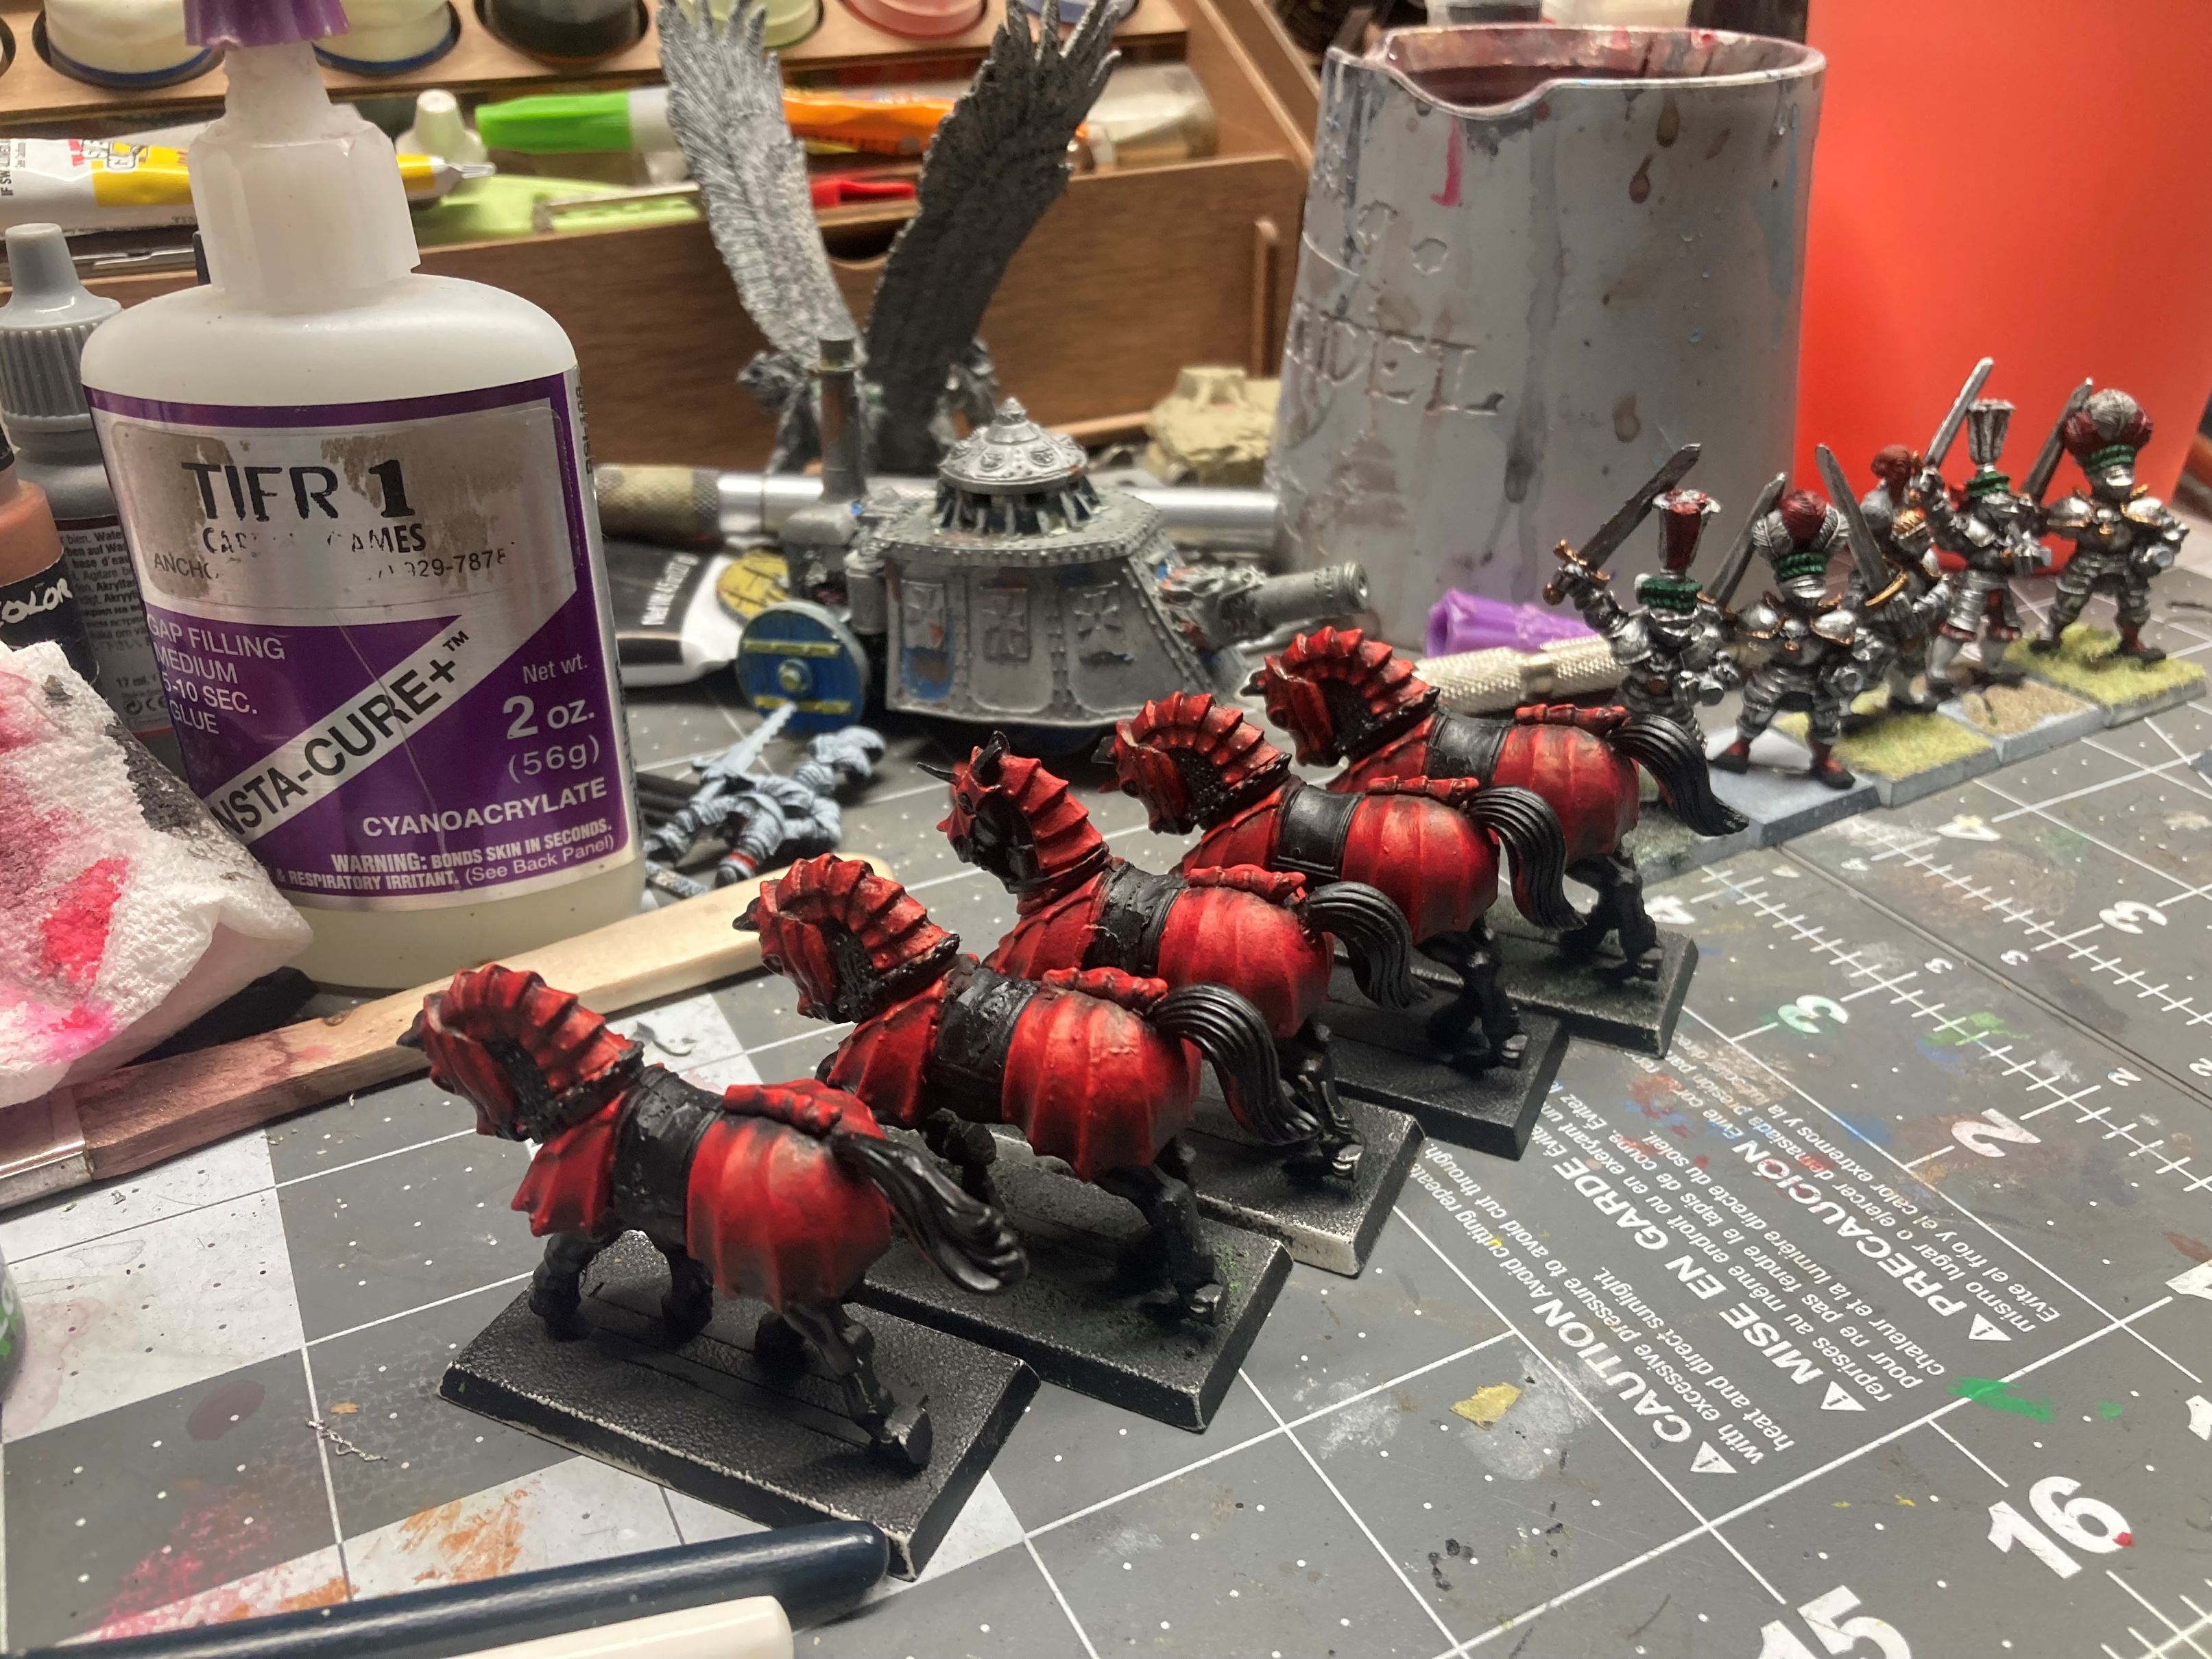
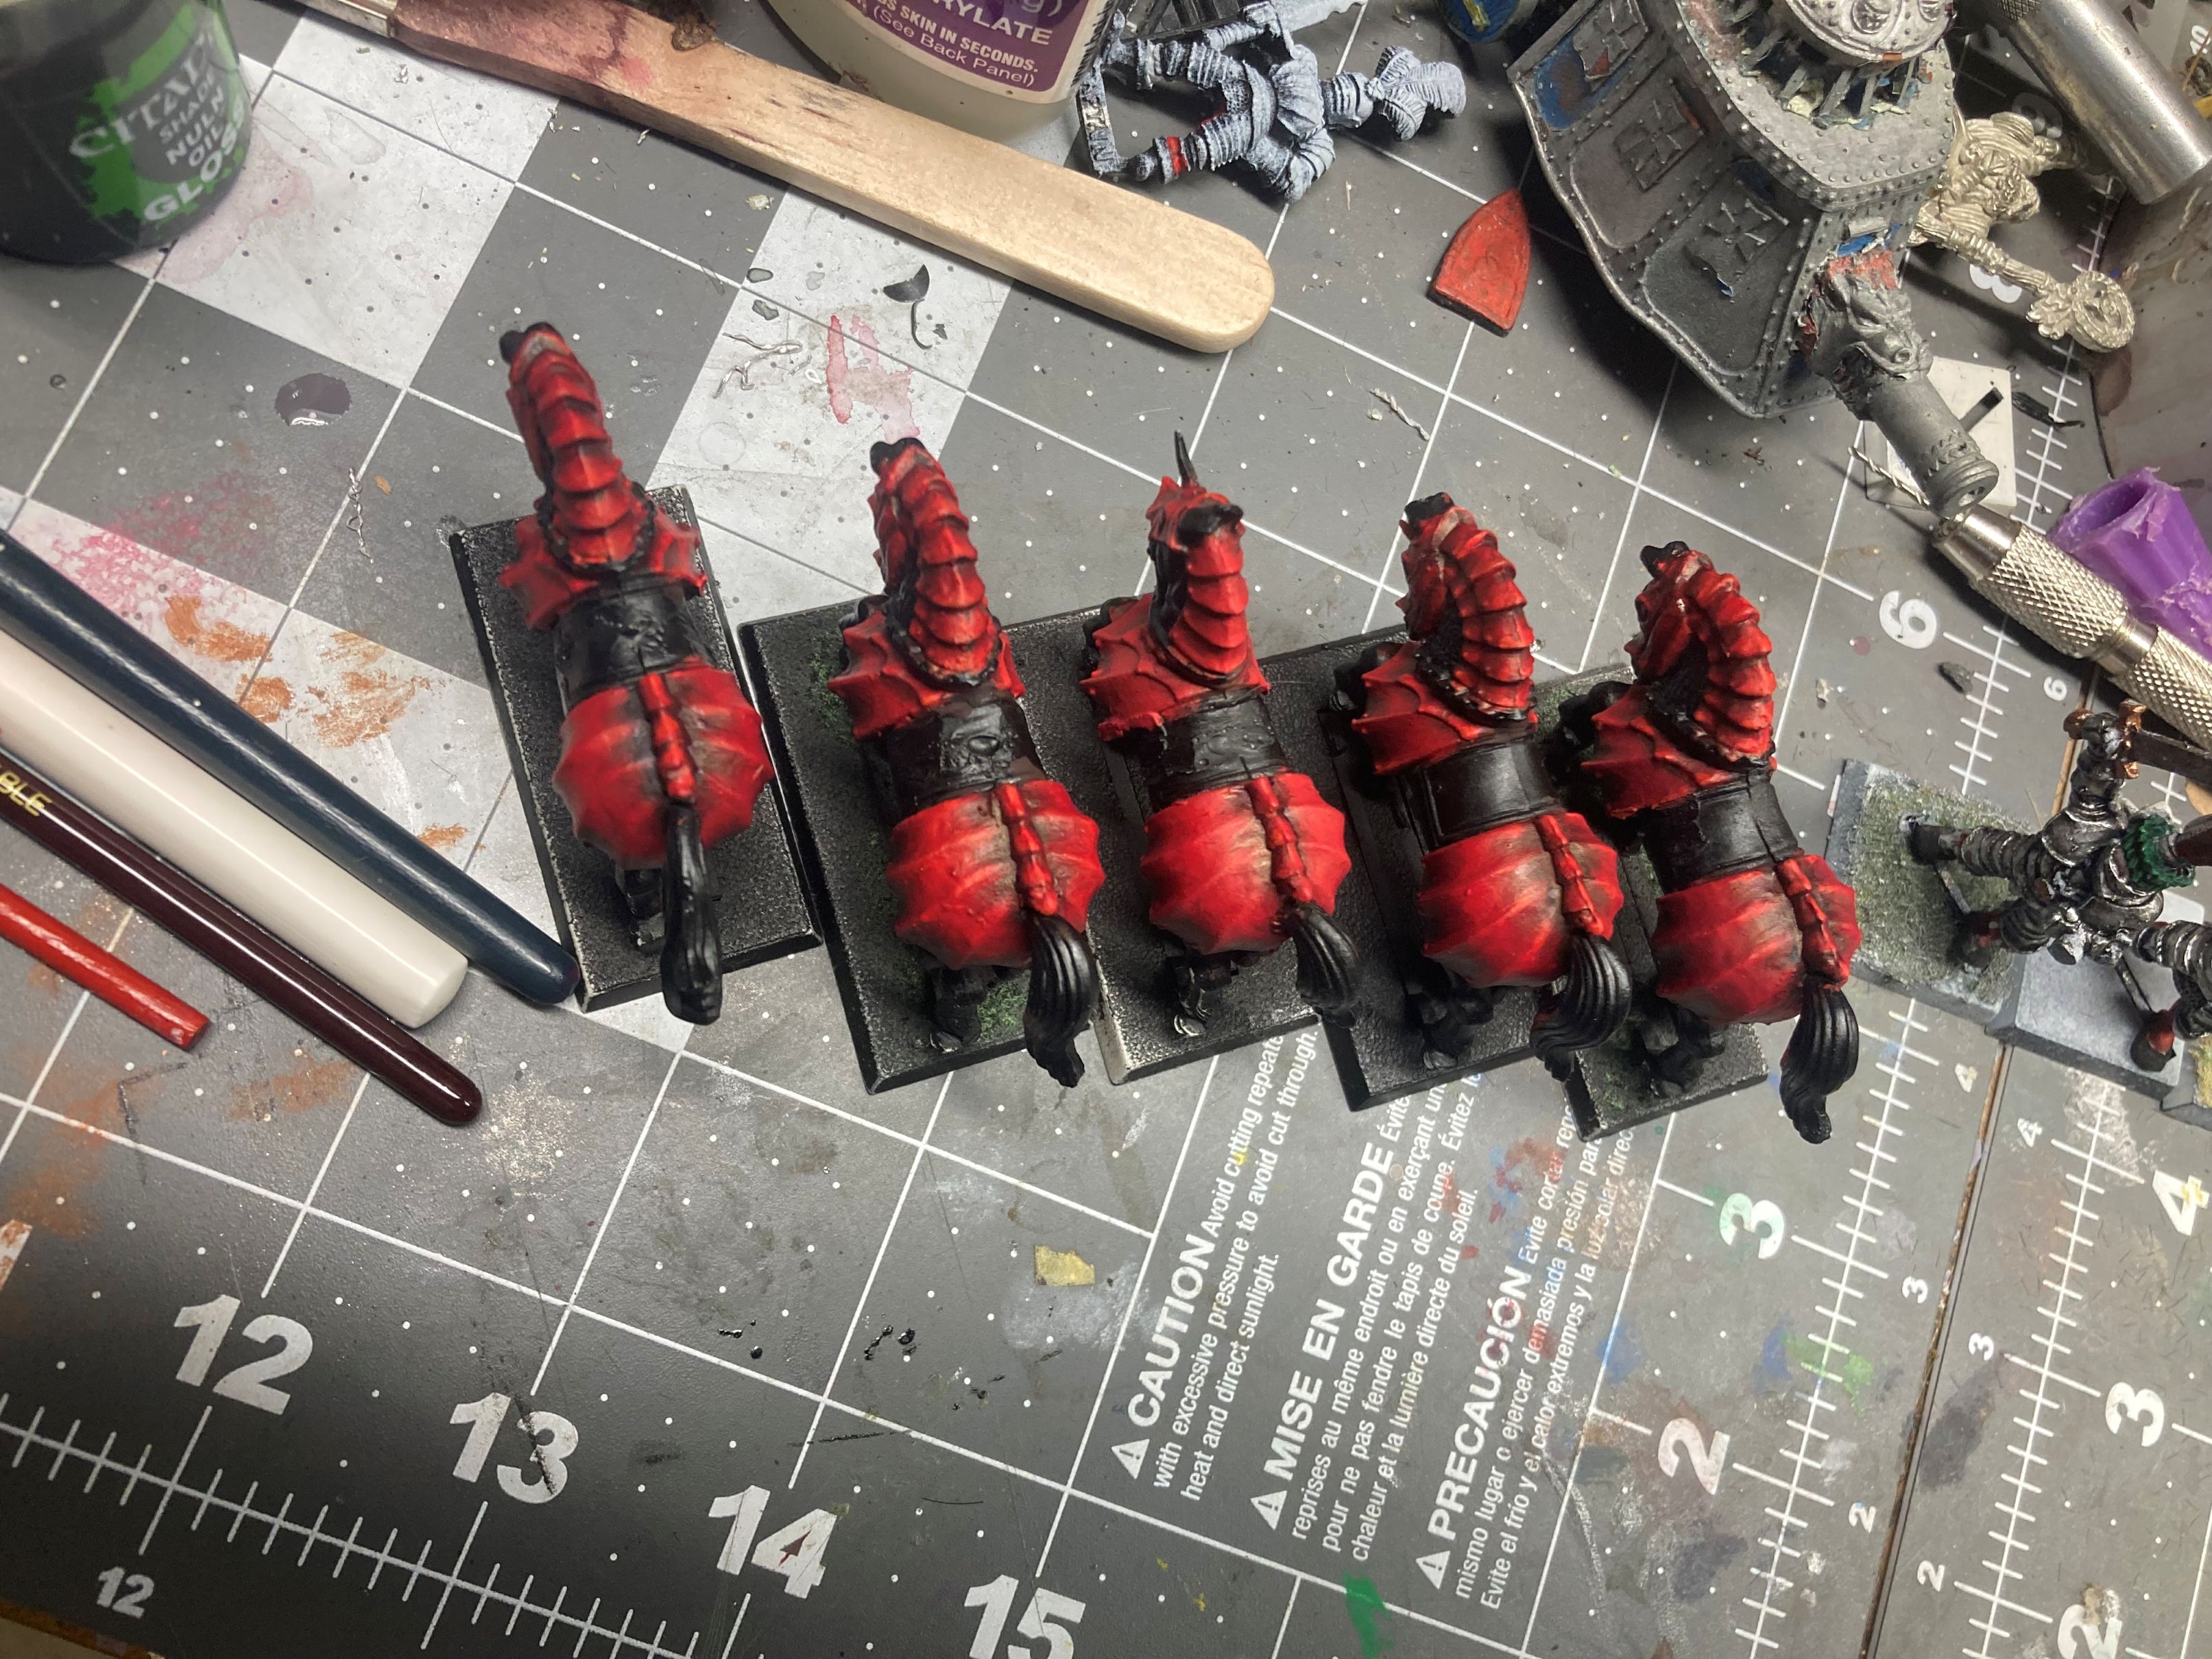
Getting back after the project with a slight change and figuring out cavalry painting.
After doing my parenting duty for kid’s school projects, I was back free to focus on the Spring Clean Challenge. As I was getting ready to decide on what was going to get the paint stripping treatment, I figured I should go ahead and paint up another five crossbowmen I had already brought back down to bare metal. I also decided to figure out how I wanted to paint the Knights of the White Wolf.
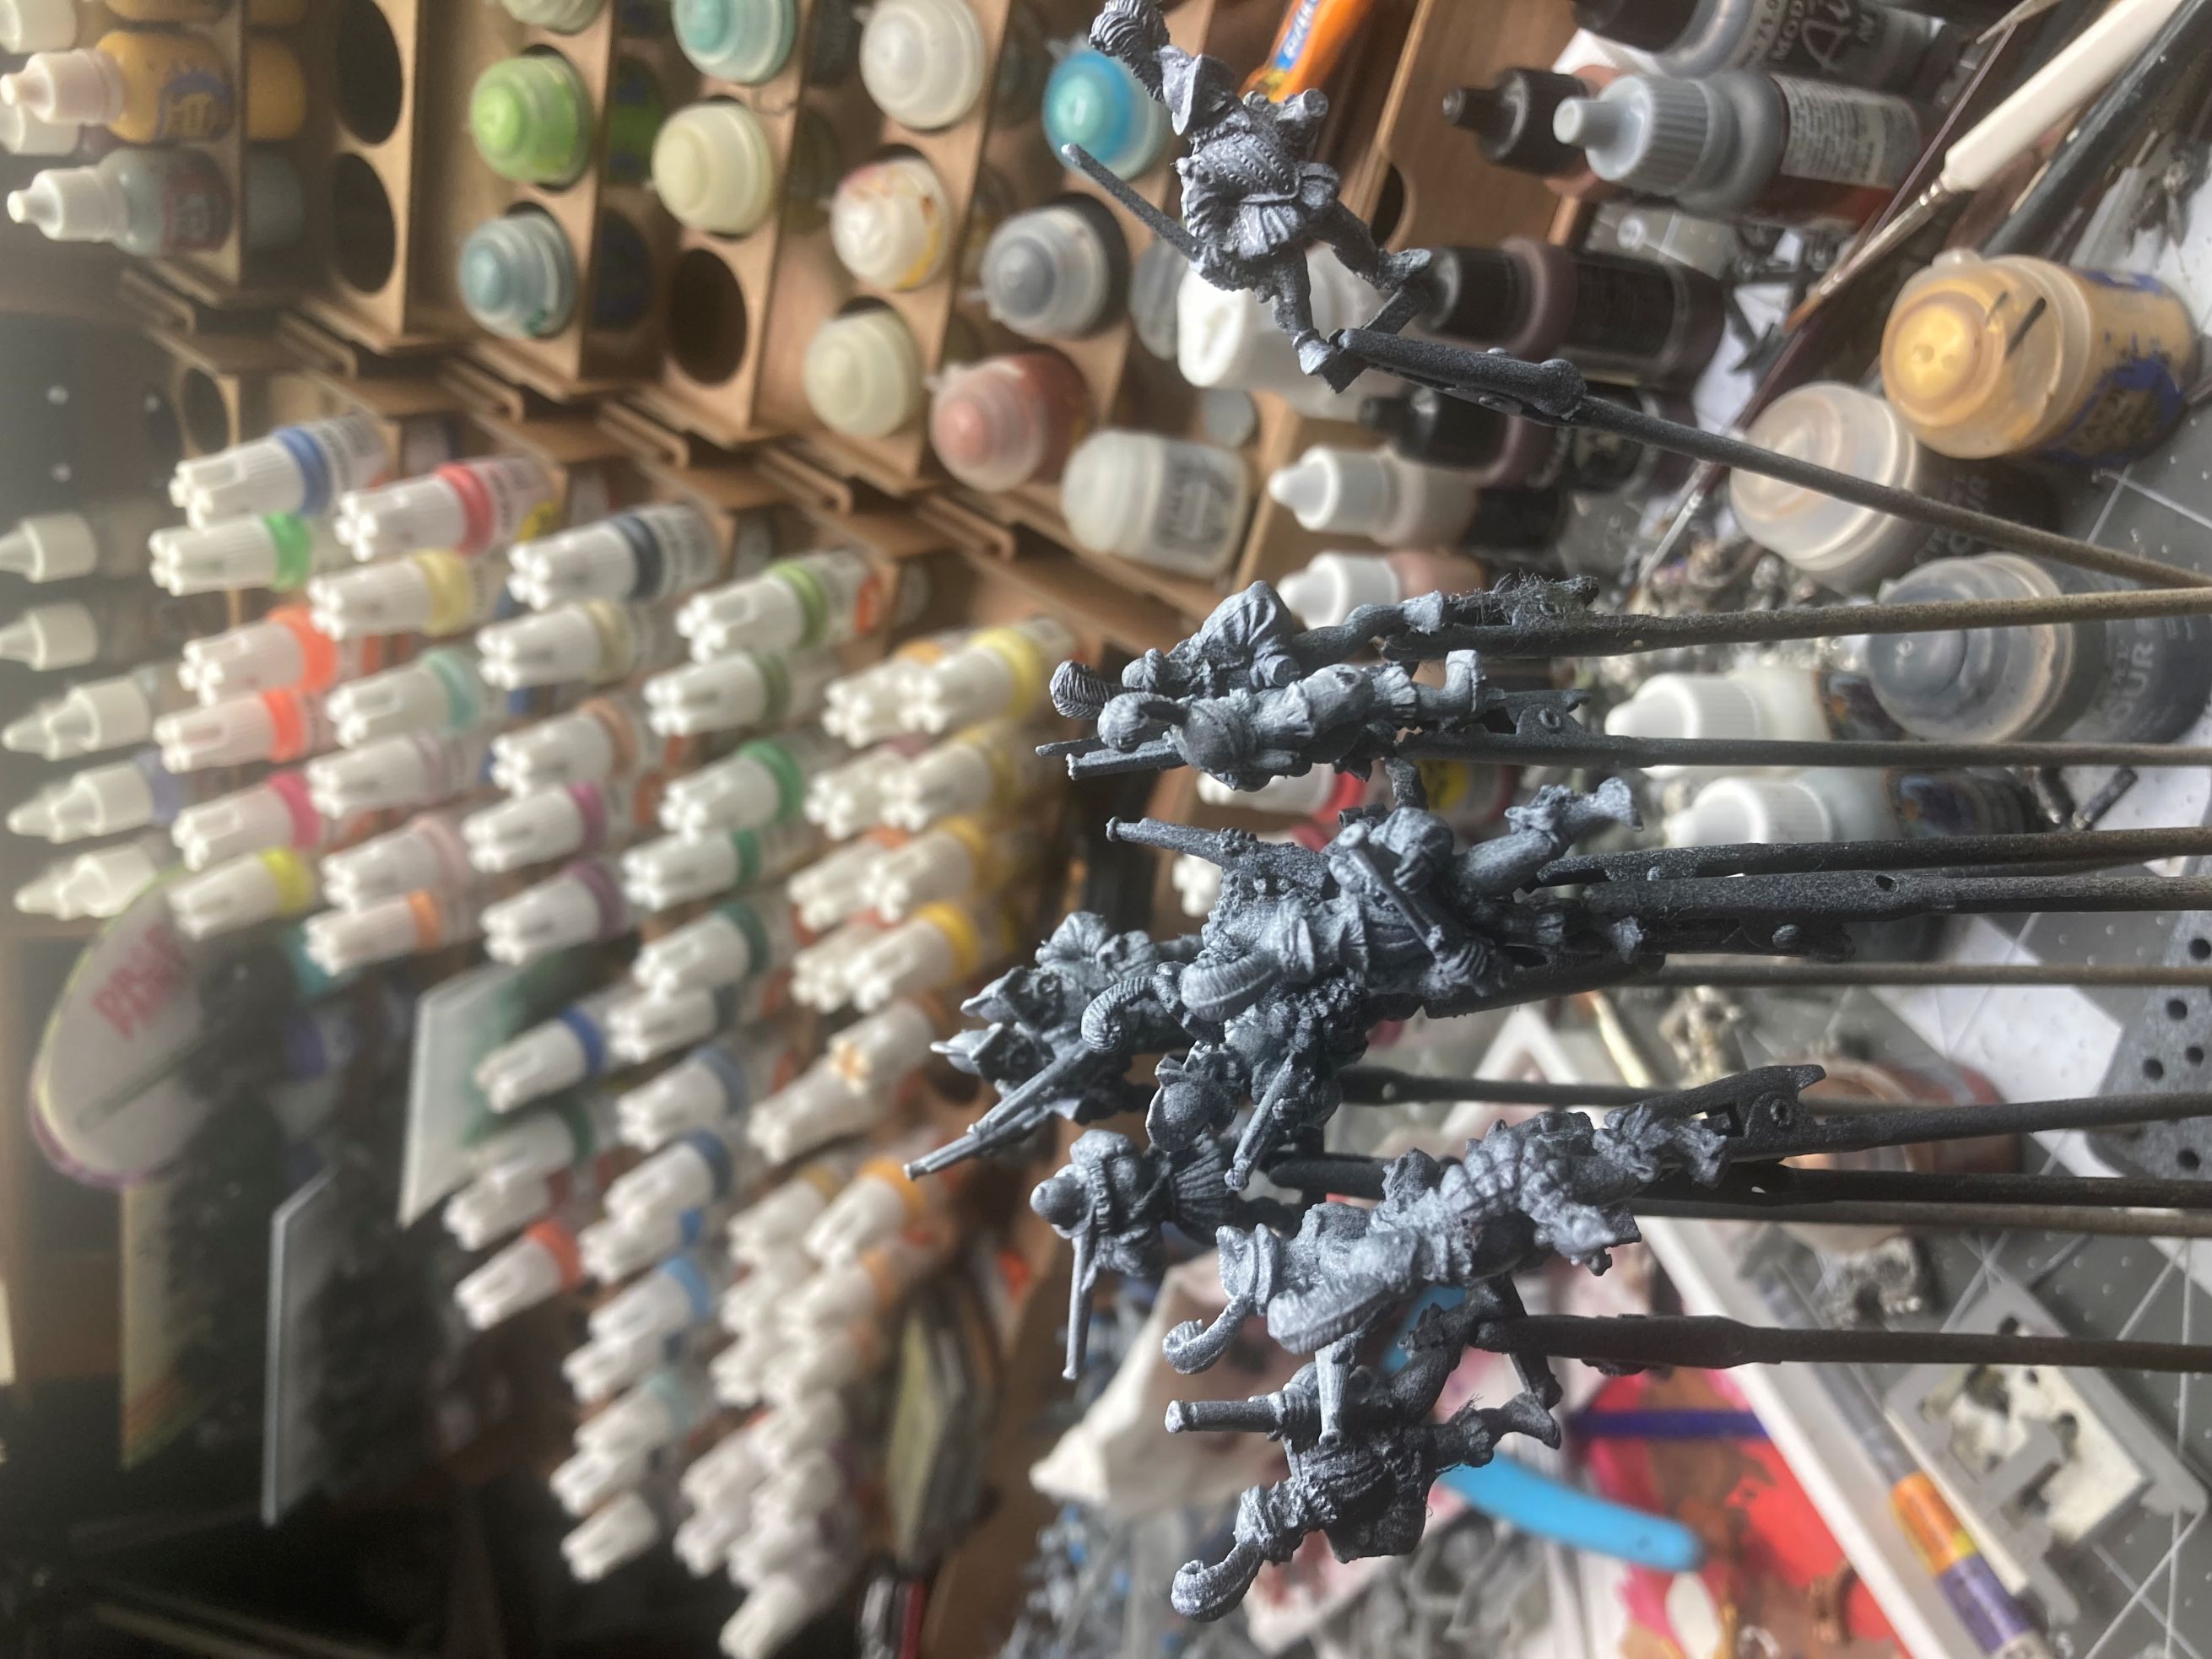
 The next round of miniatures primed and starting to get paint layered on.
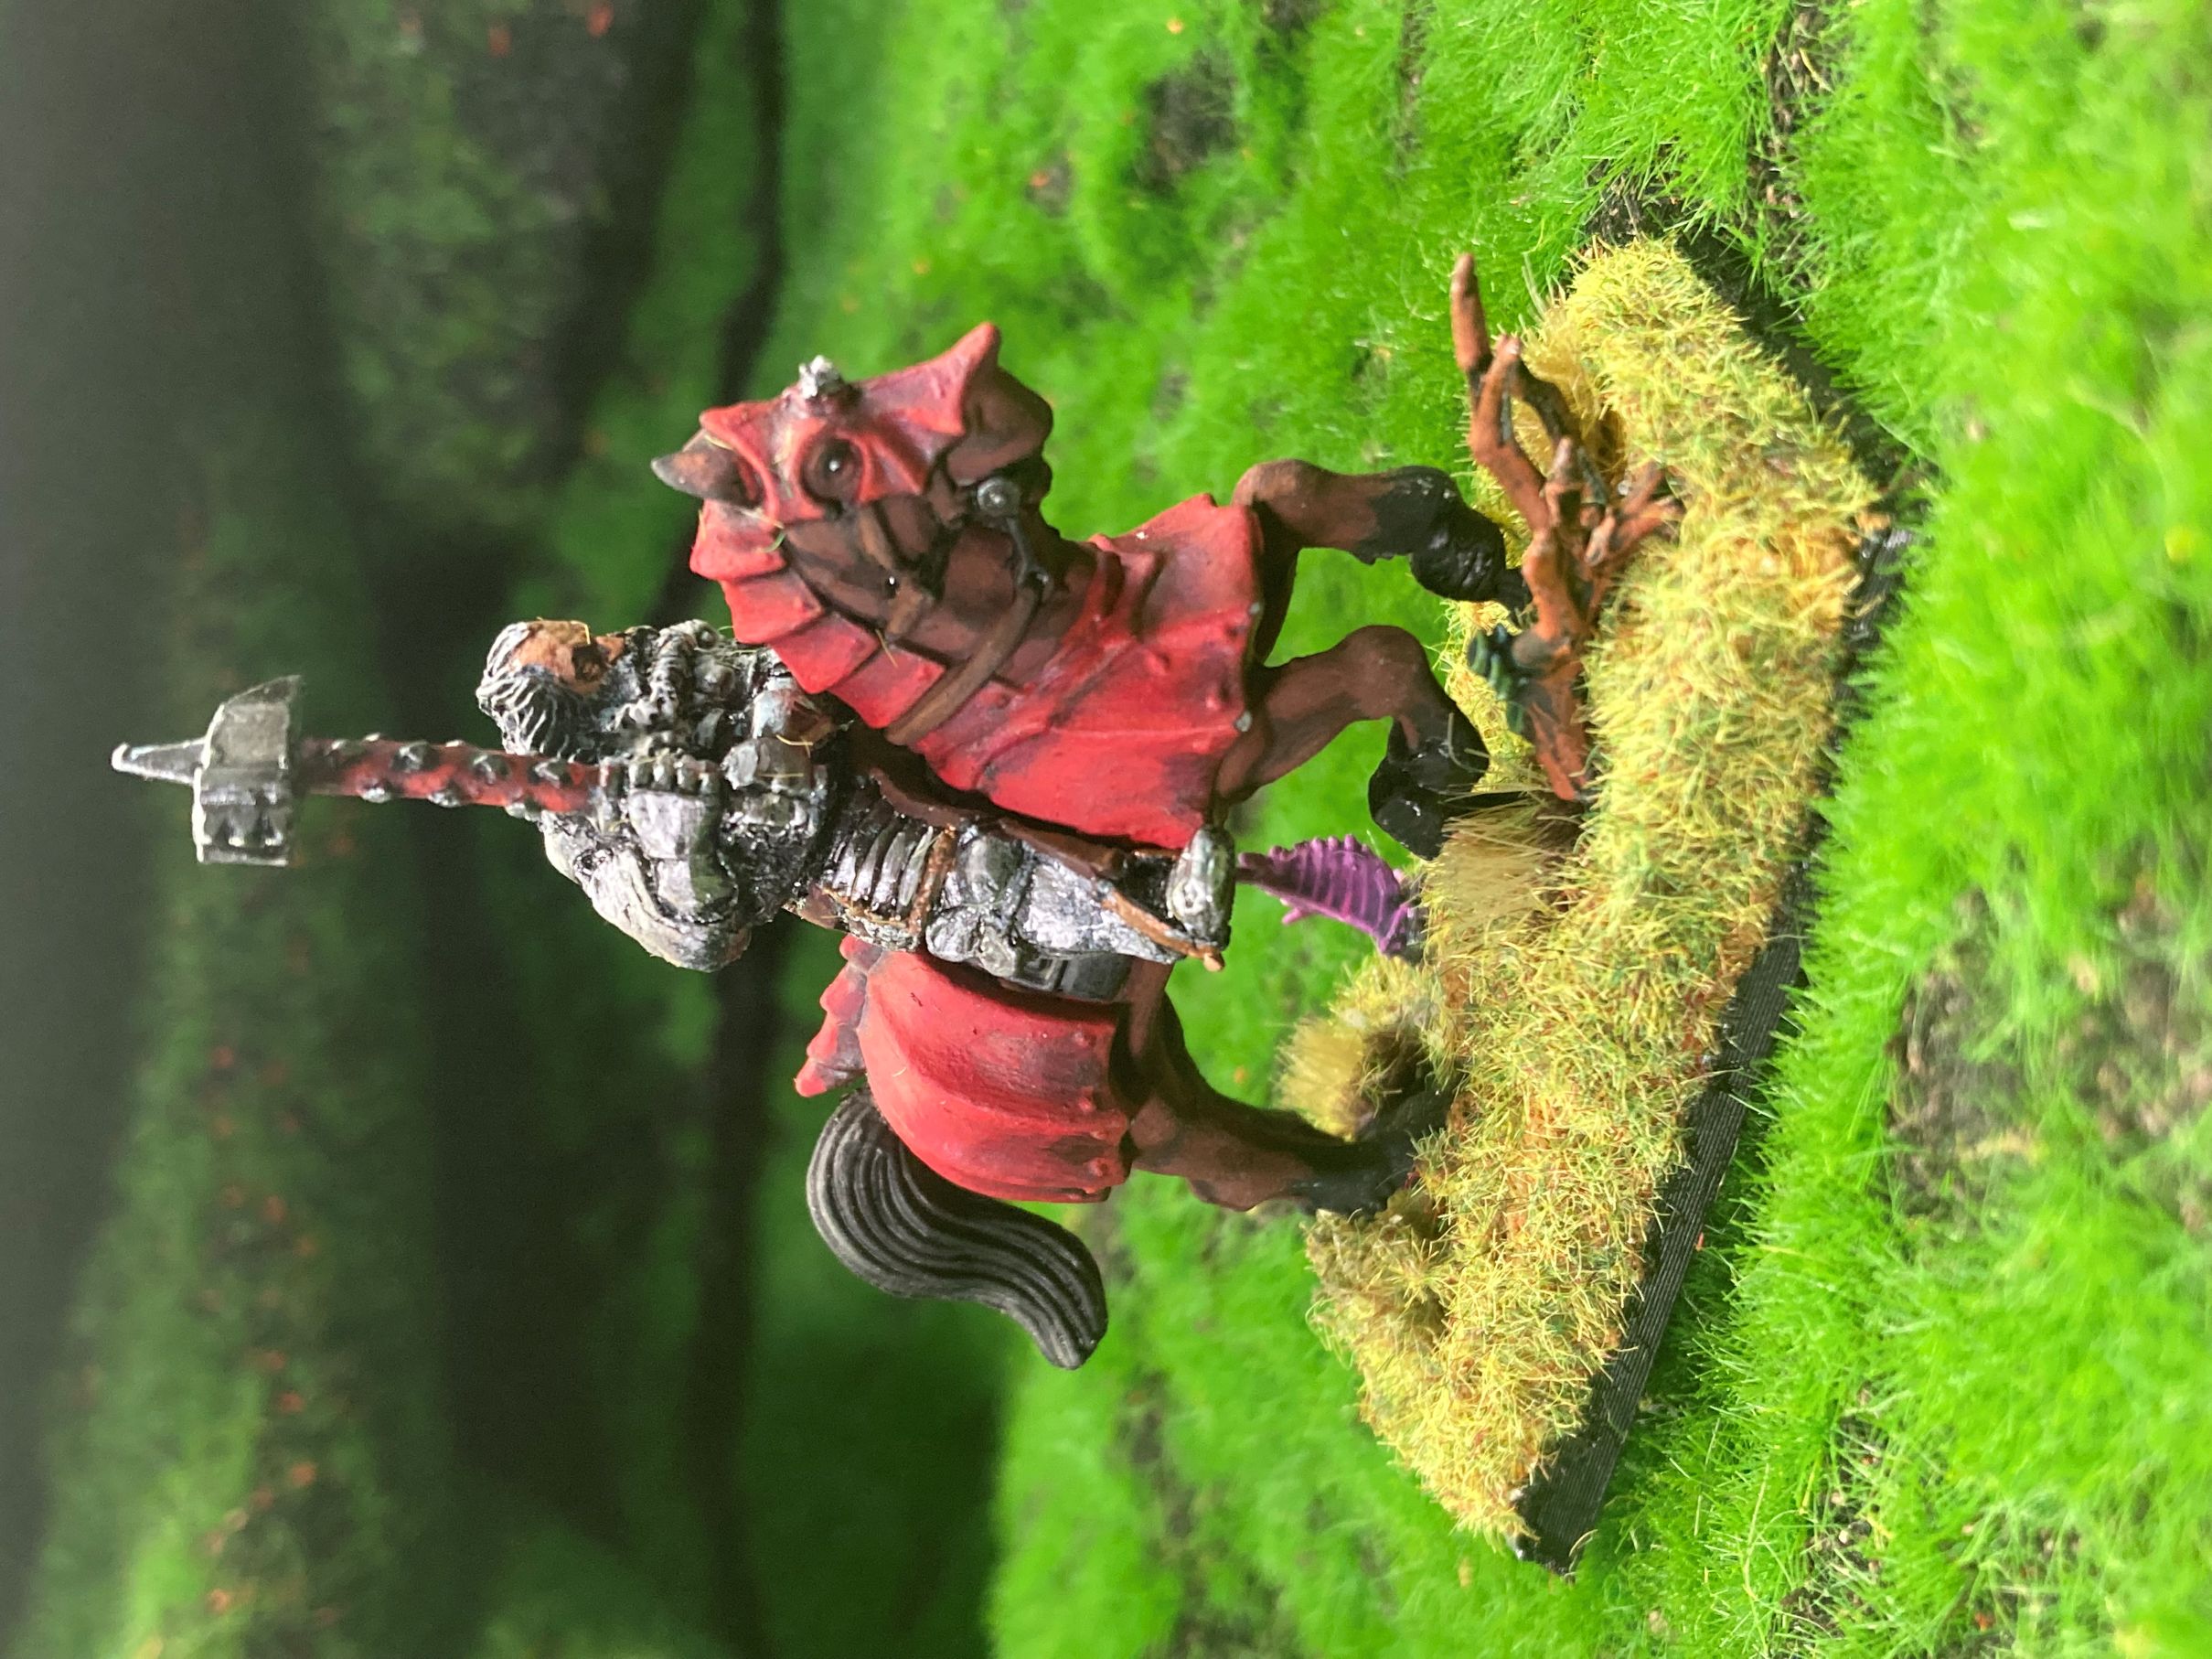
Several of the knights needed to put back together after 30 something year old super glue finally gave it up, especially after going through the paint stripping process. It was time to break out some tools, wire, a pin vice and glue to properly pin and reglue the minis.

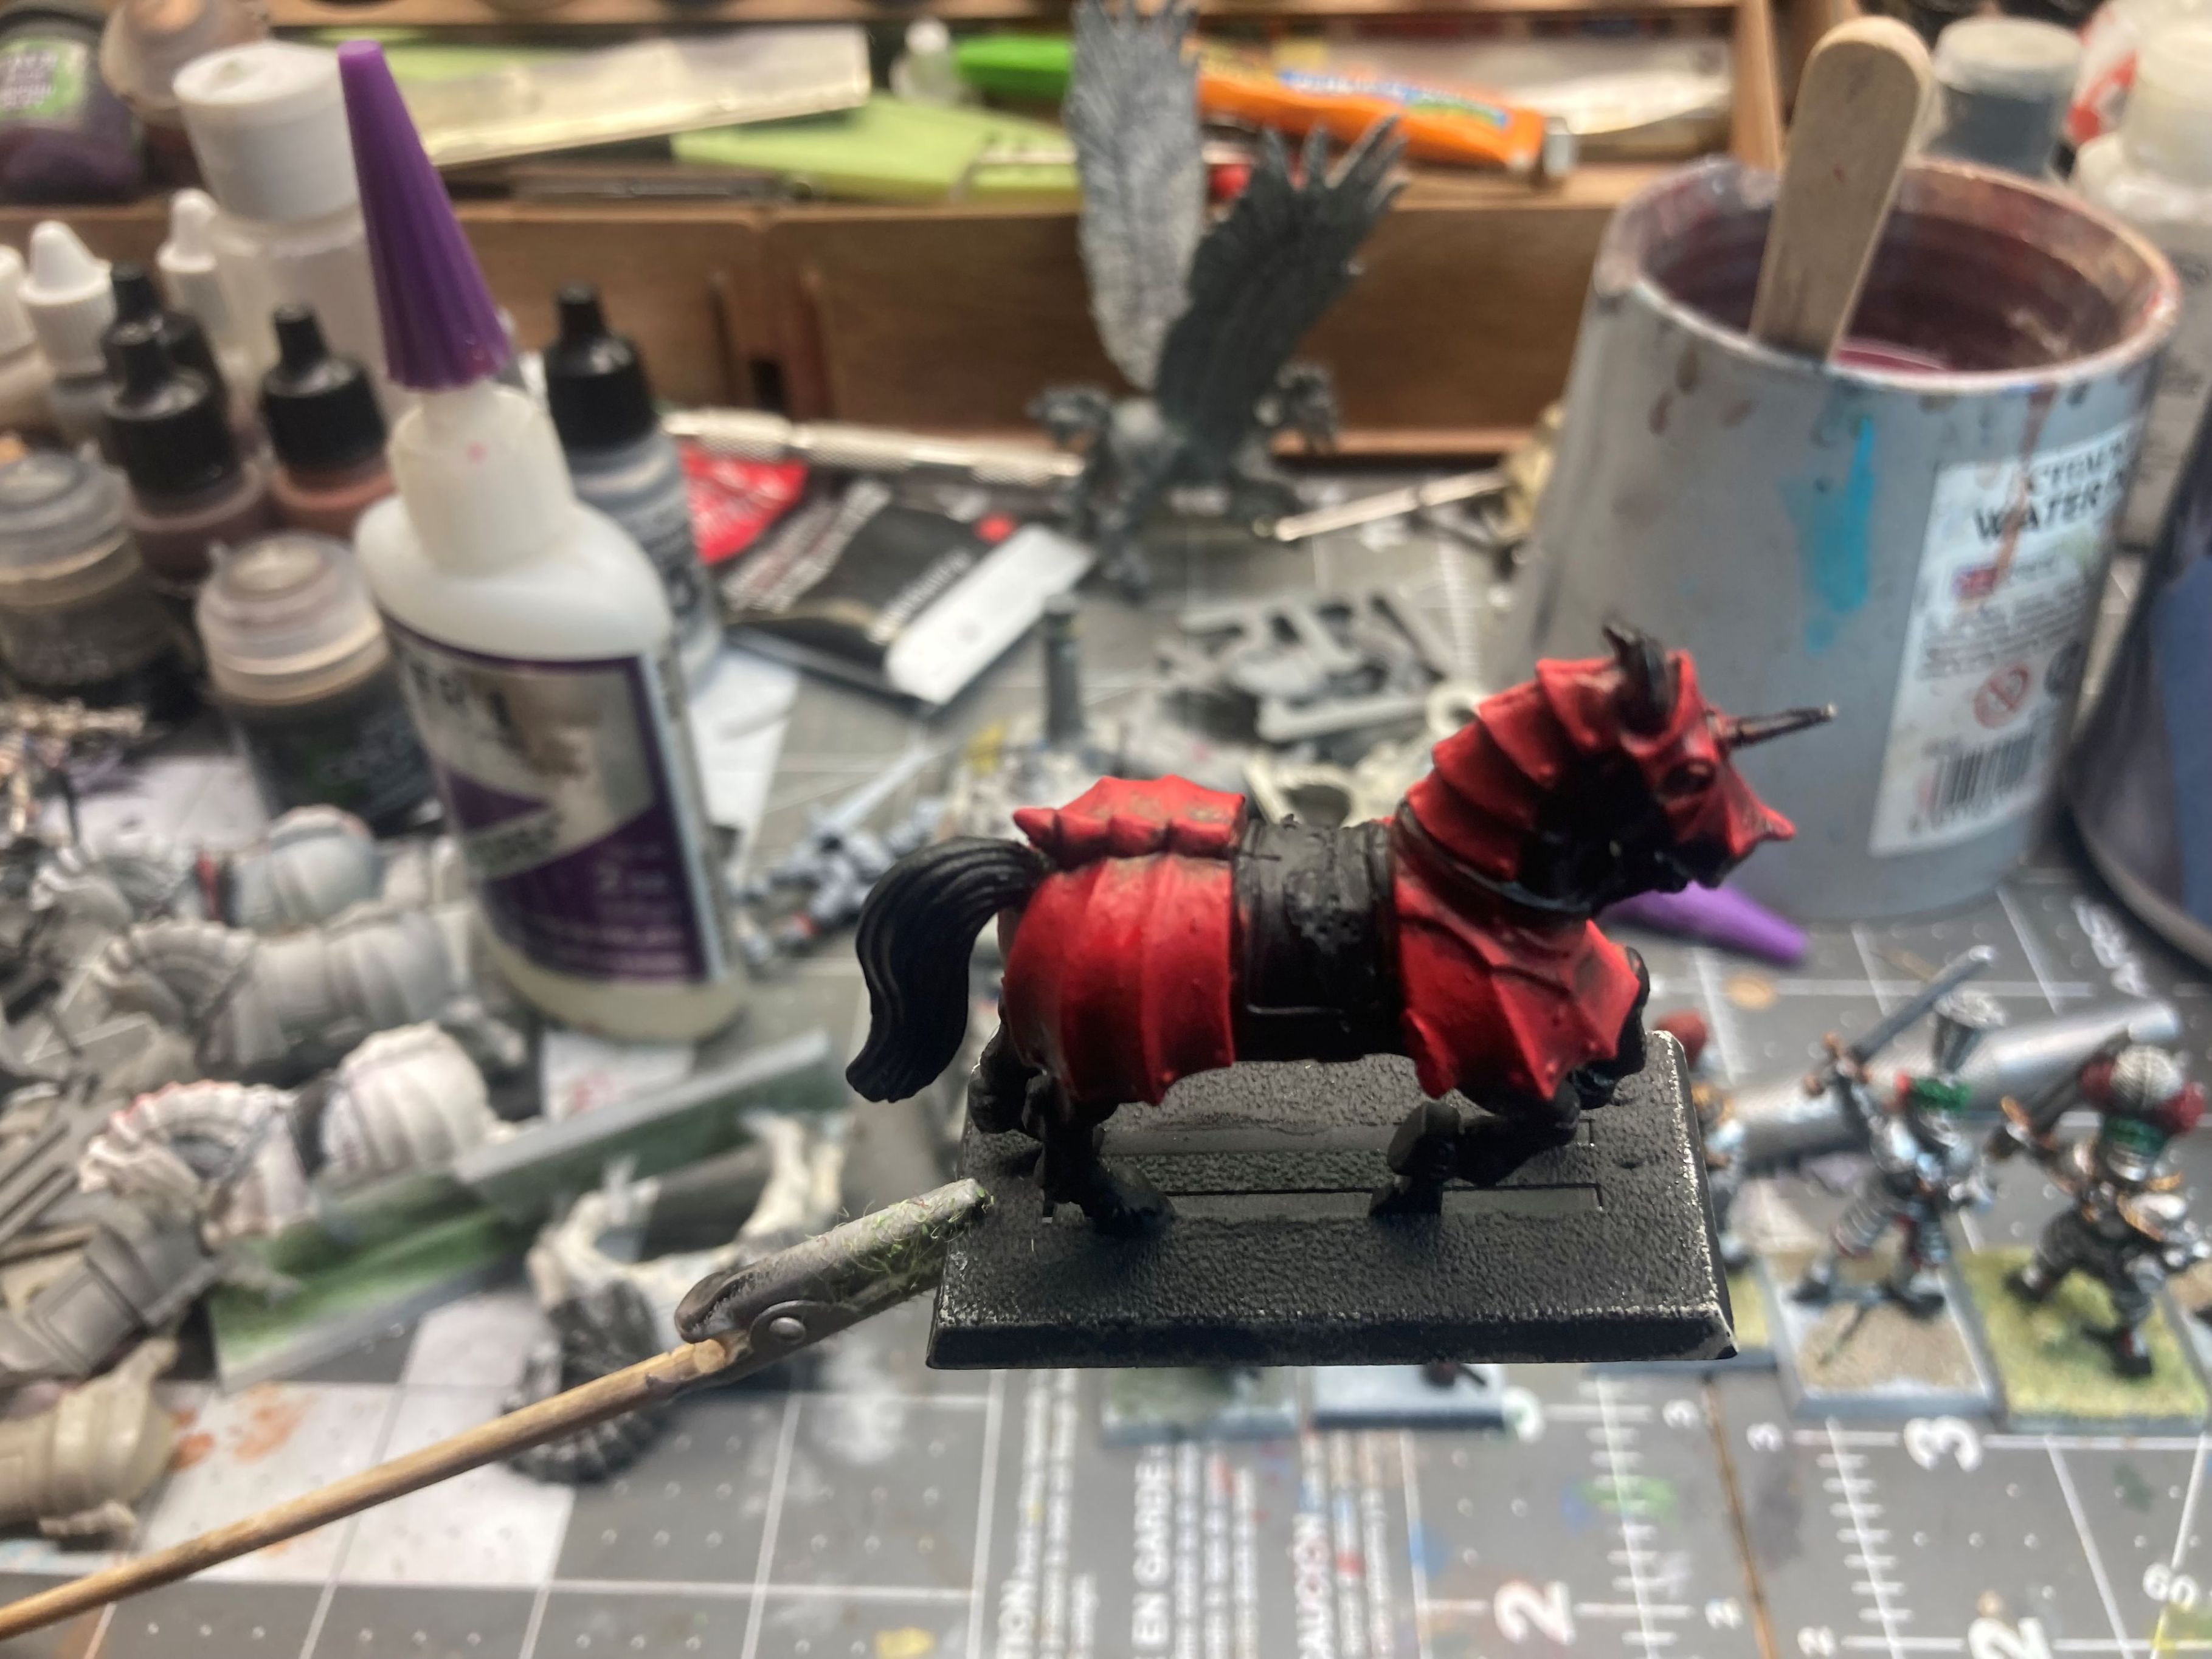
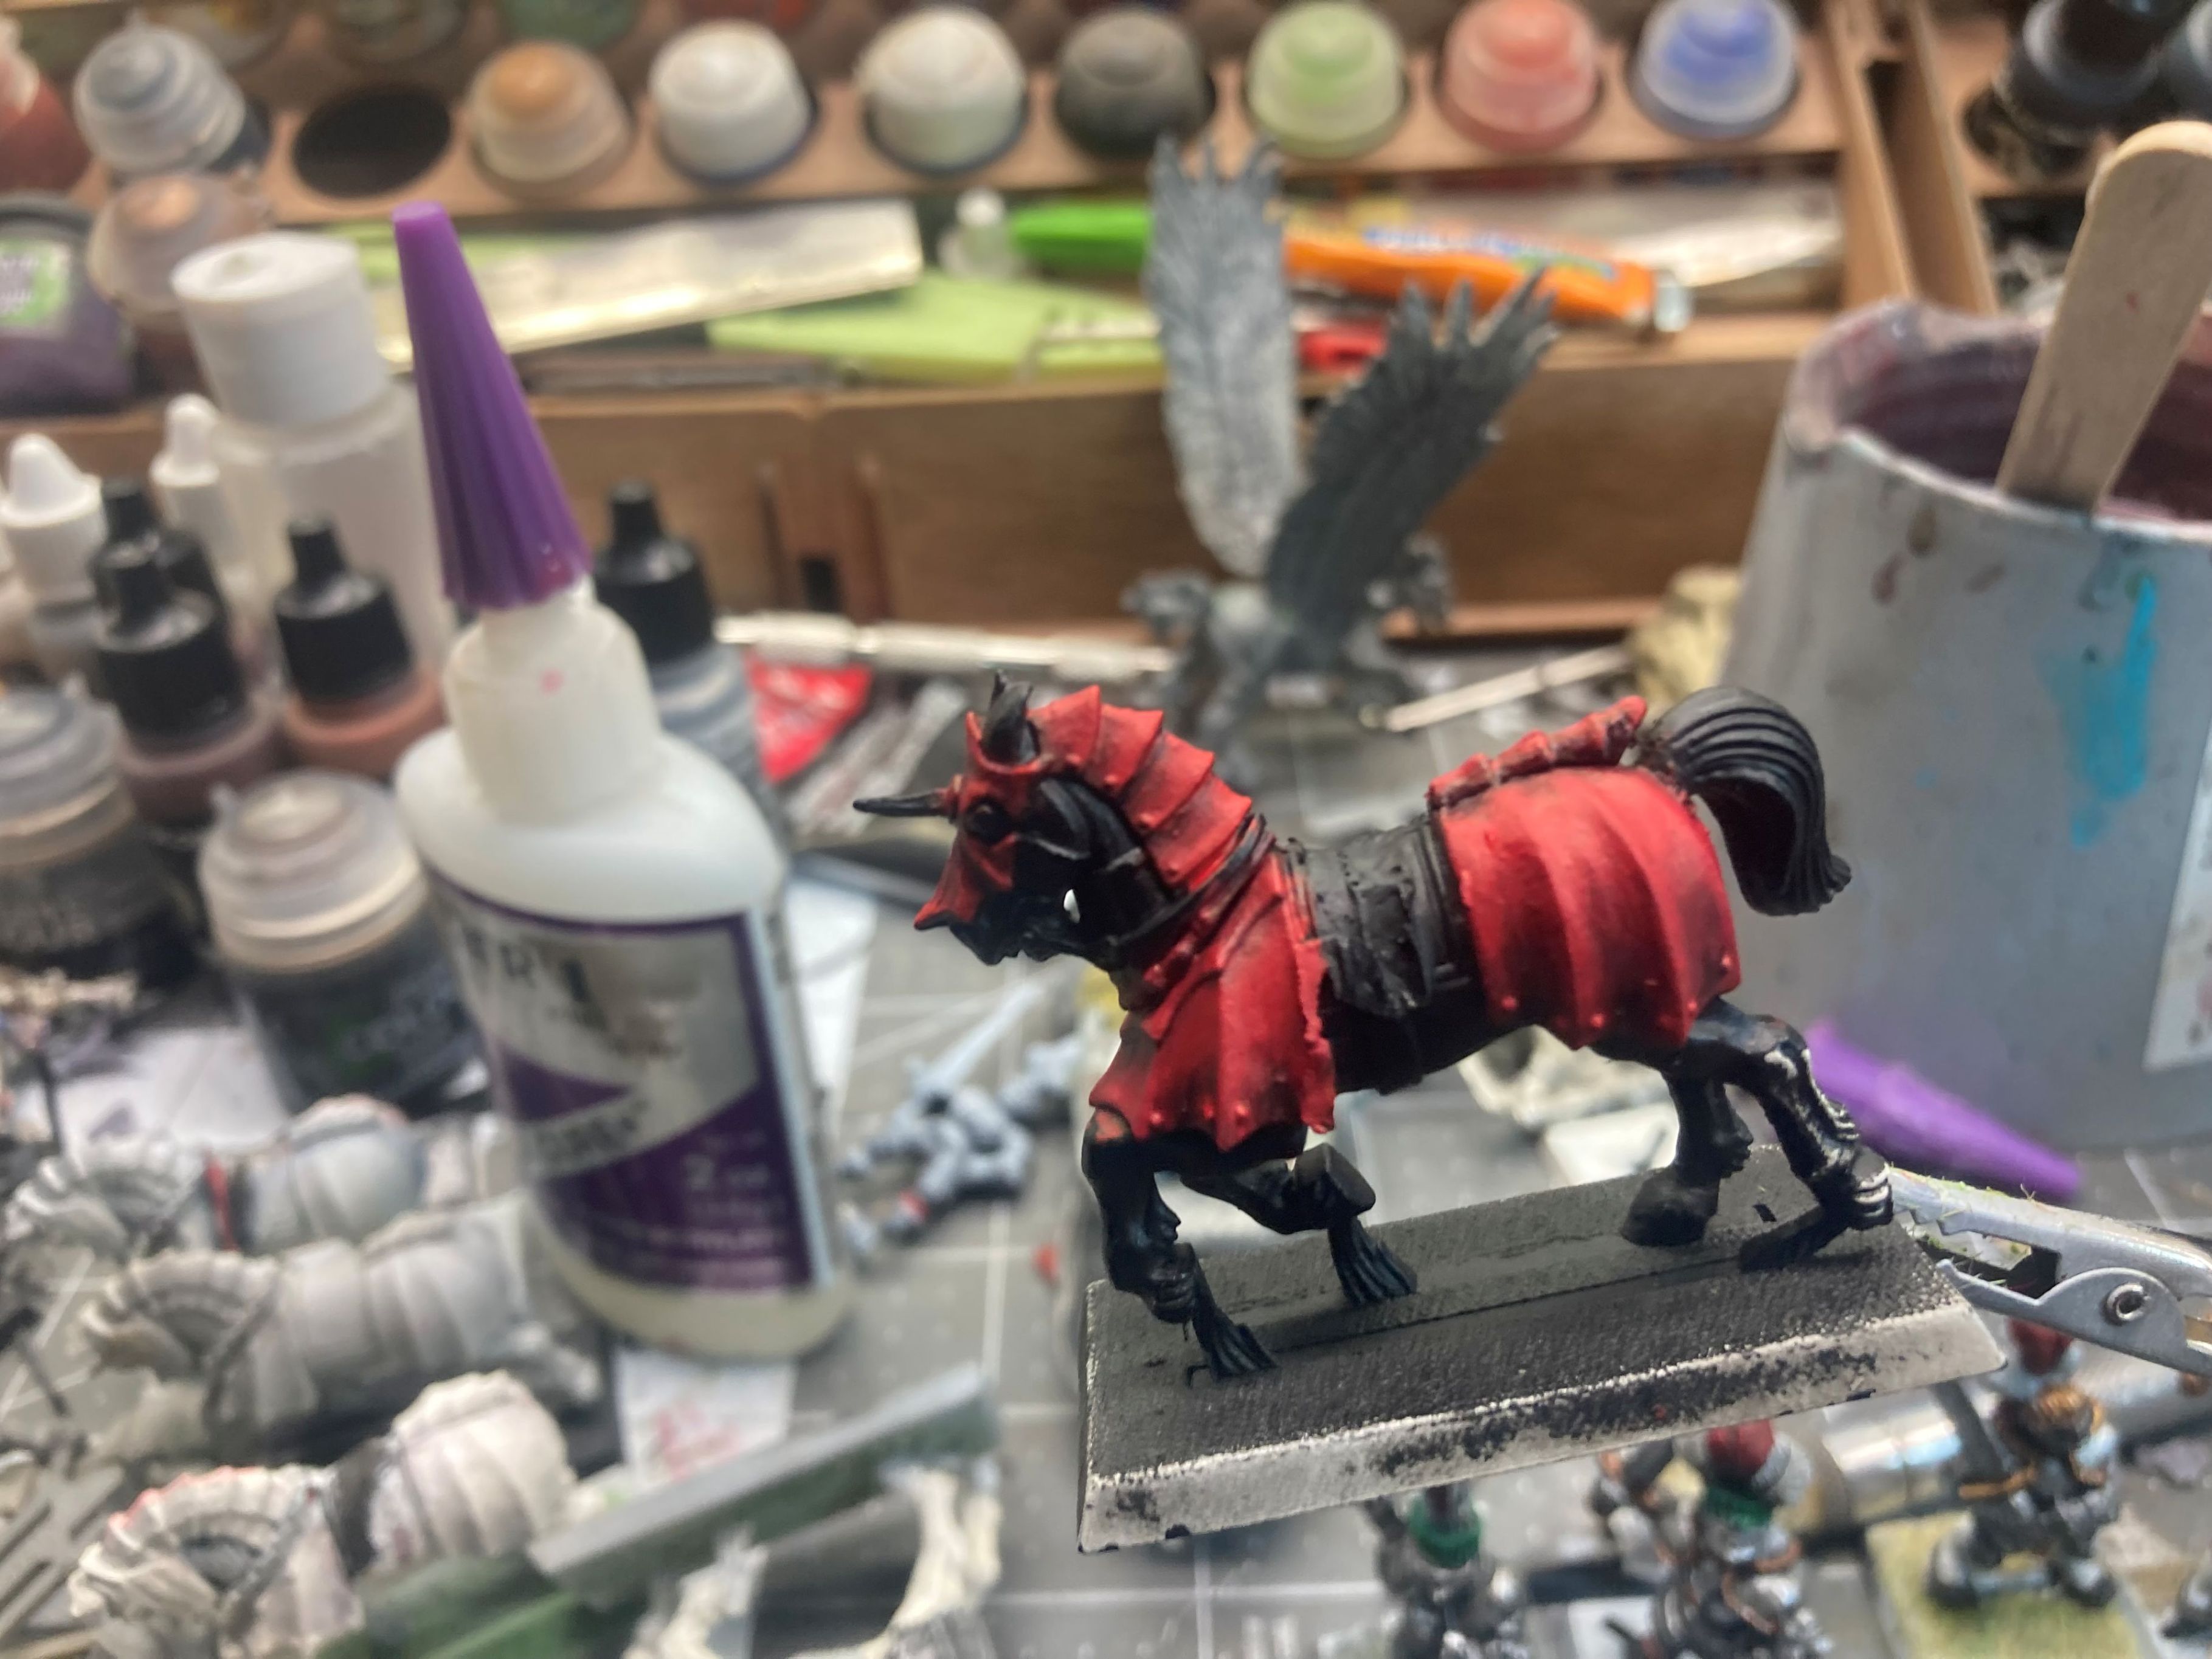
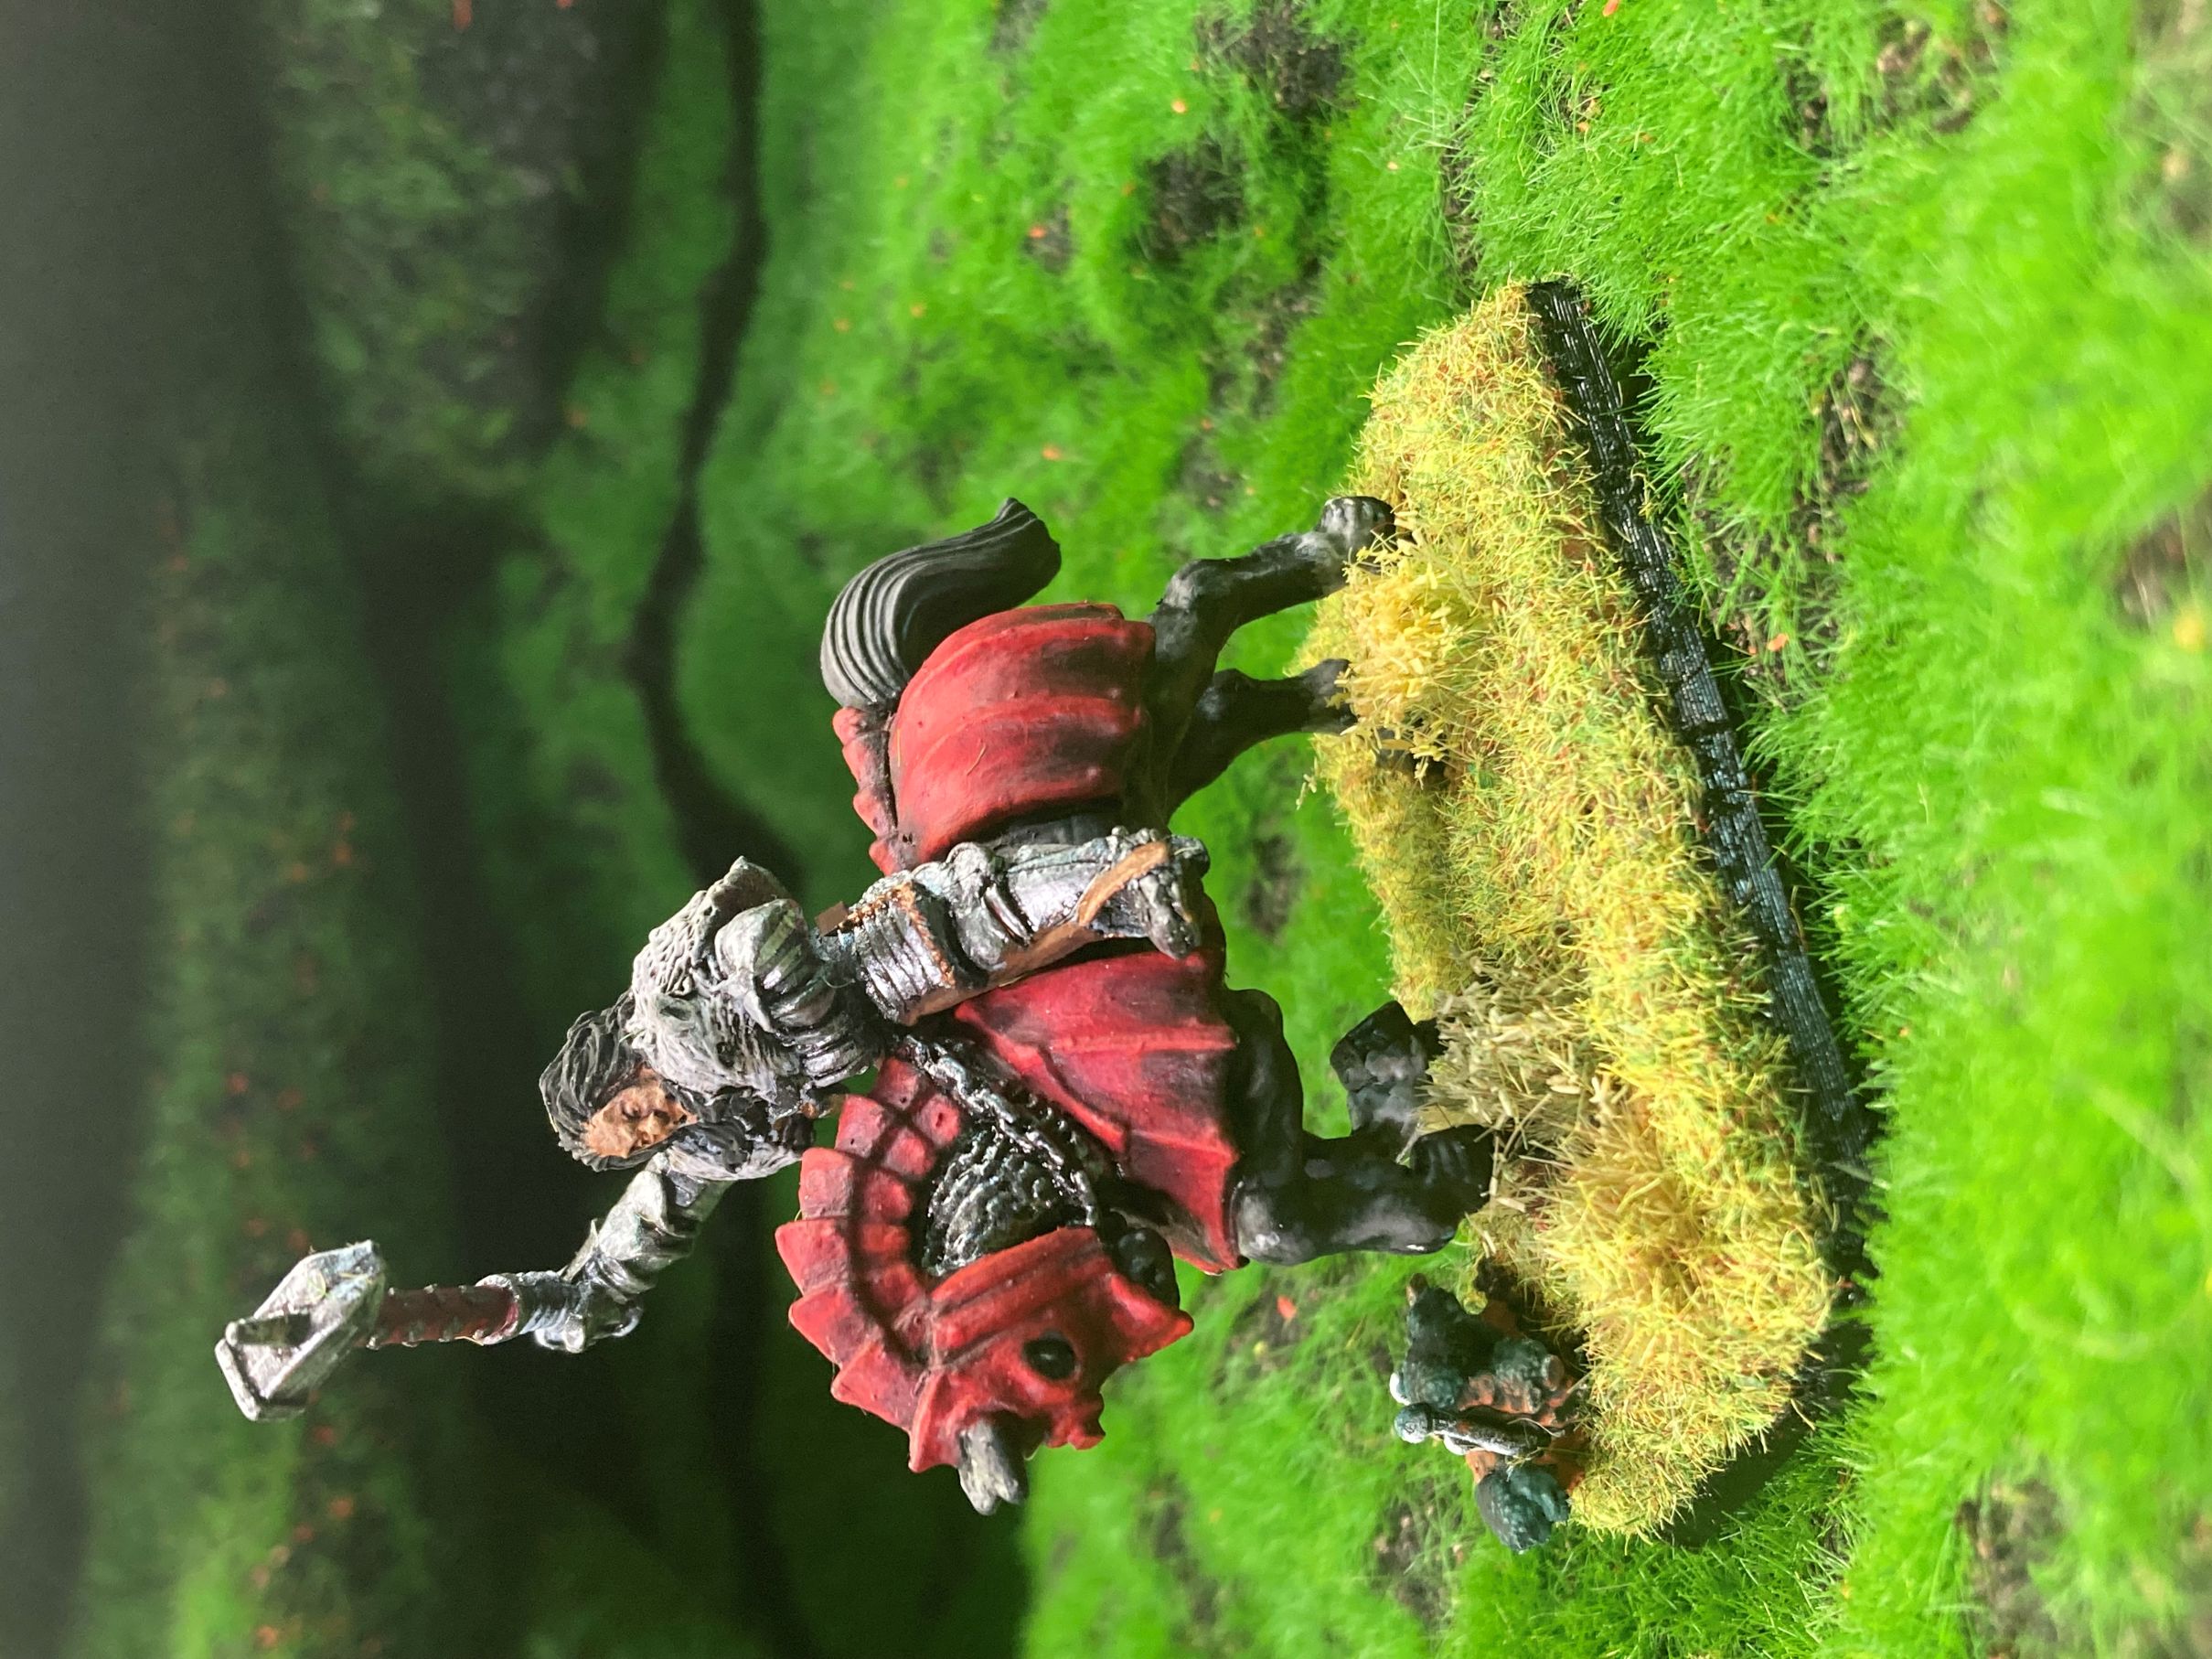
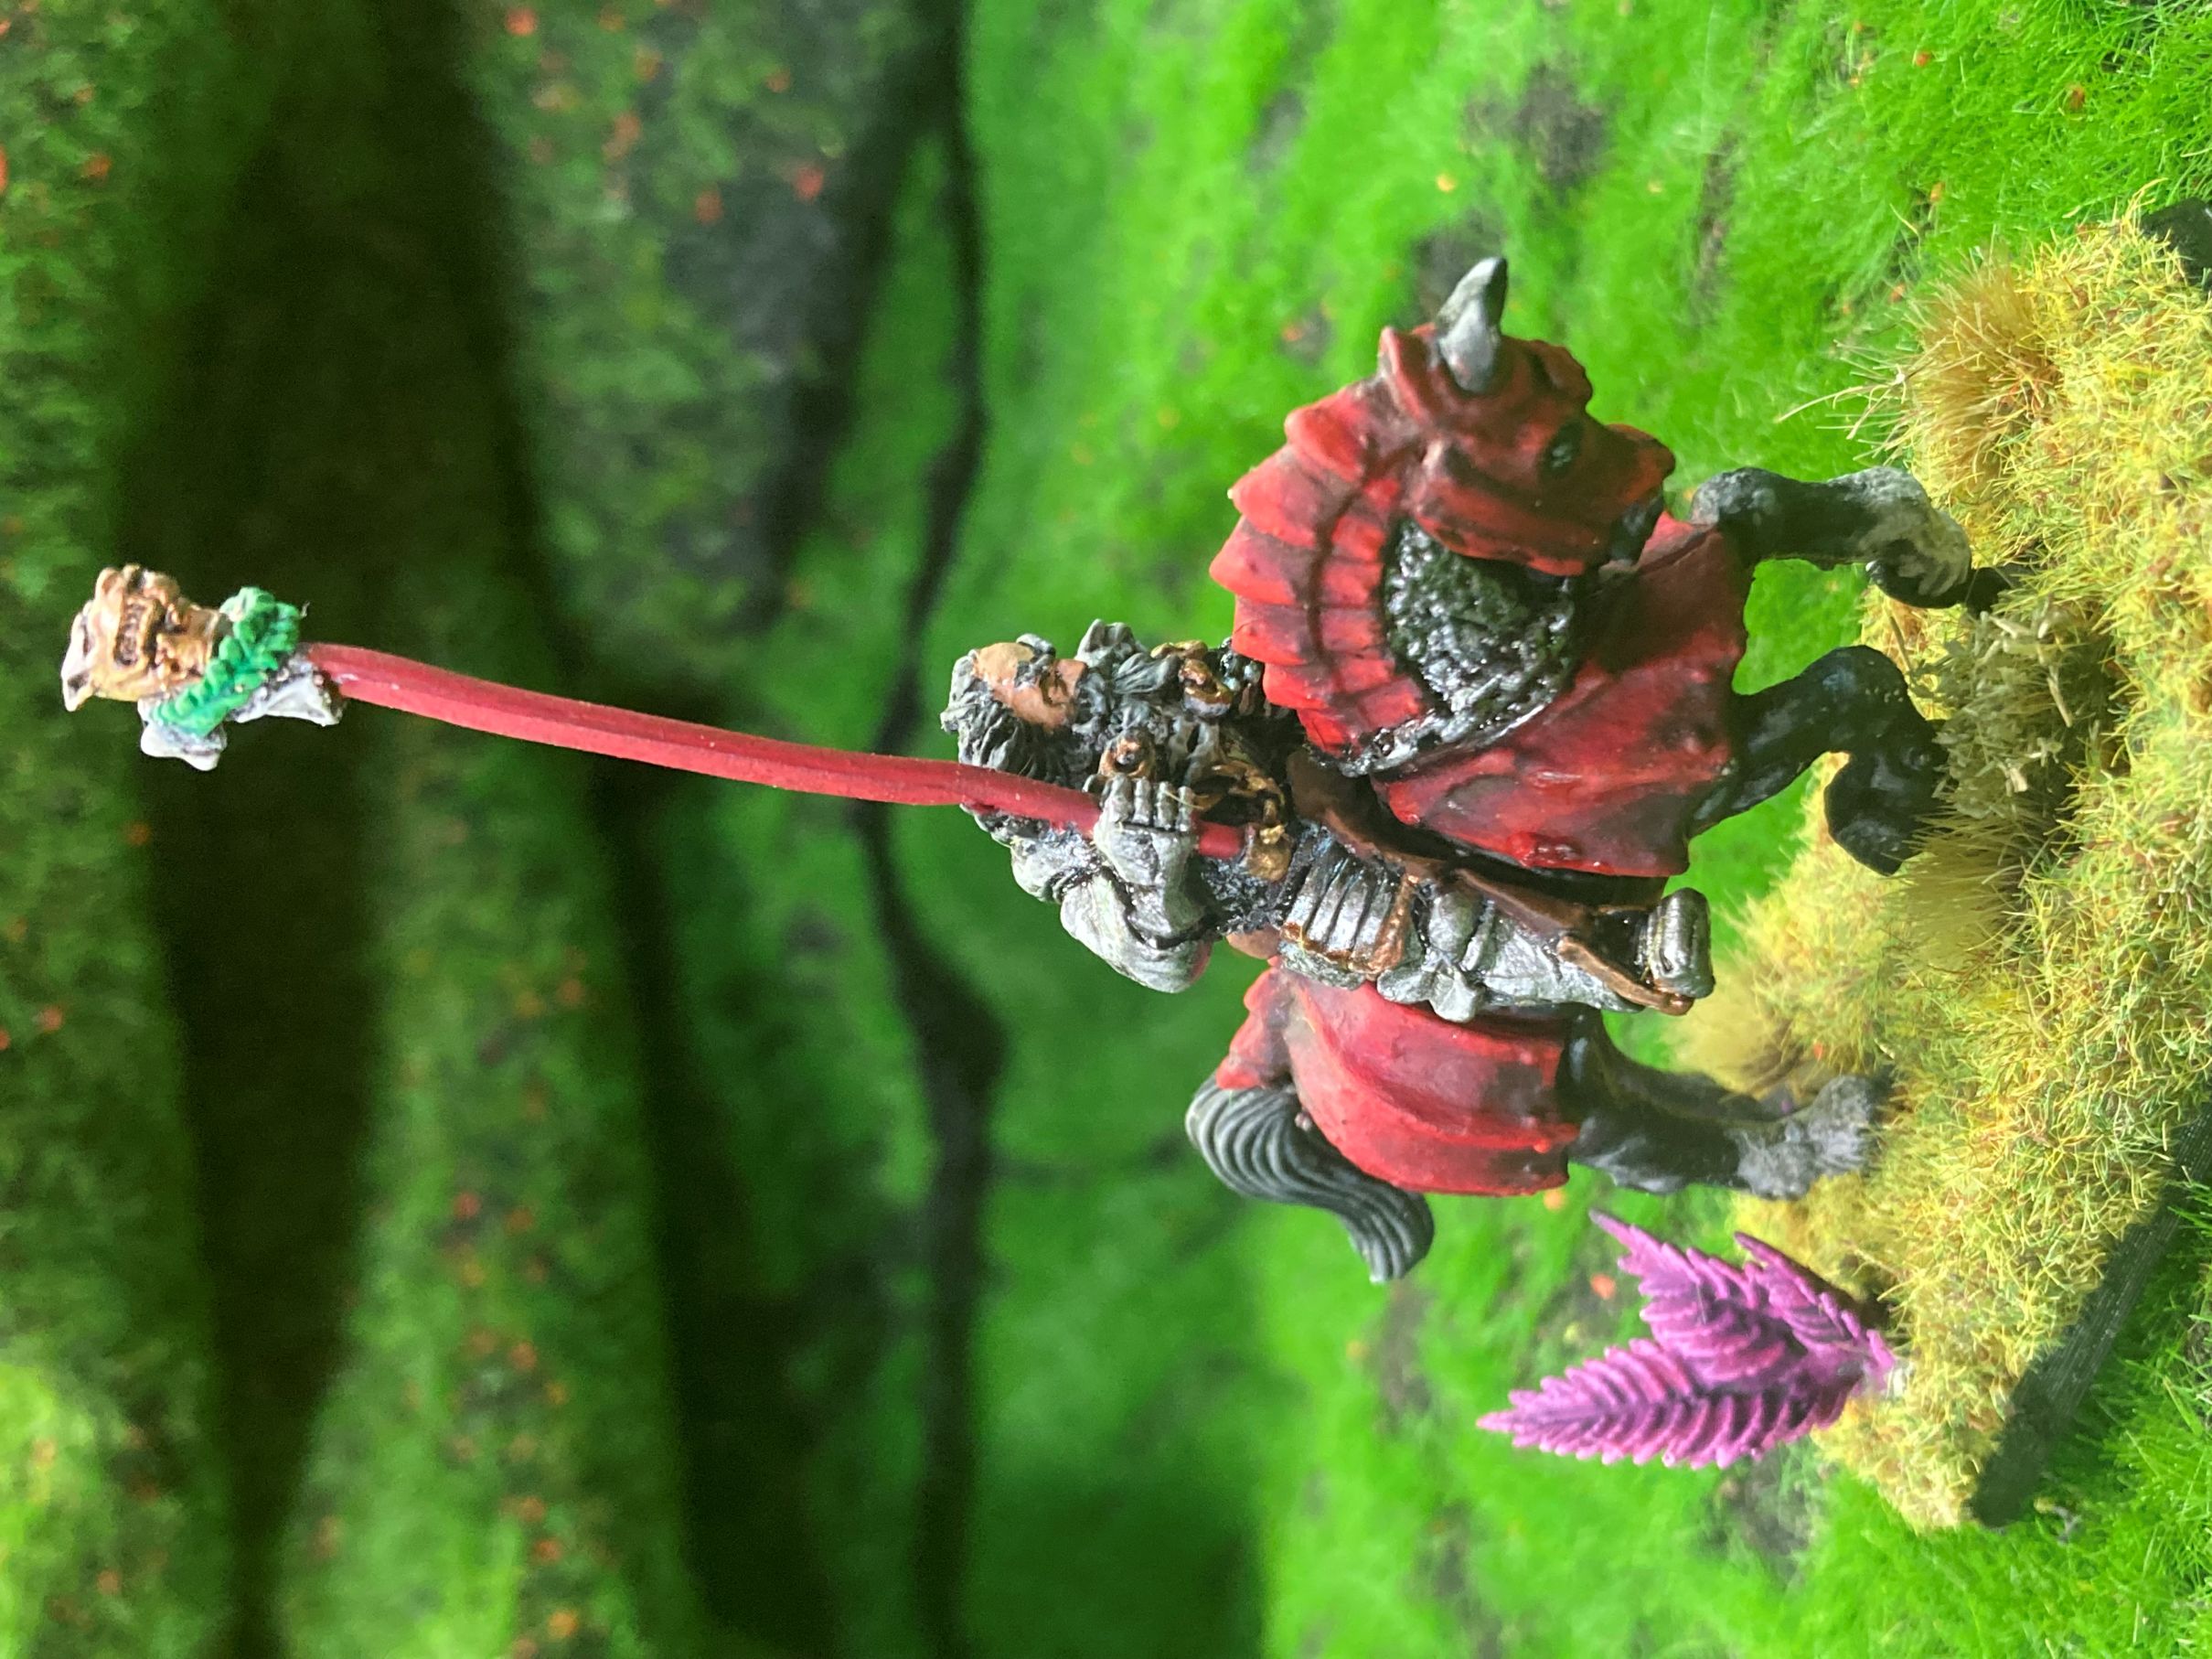
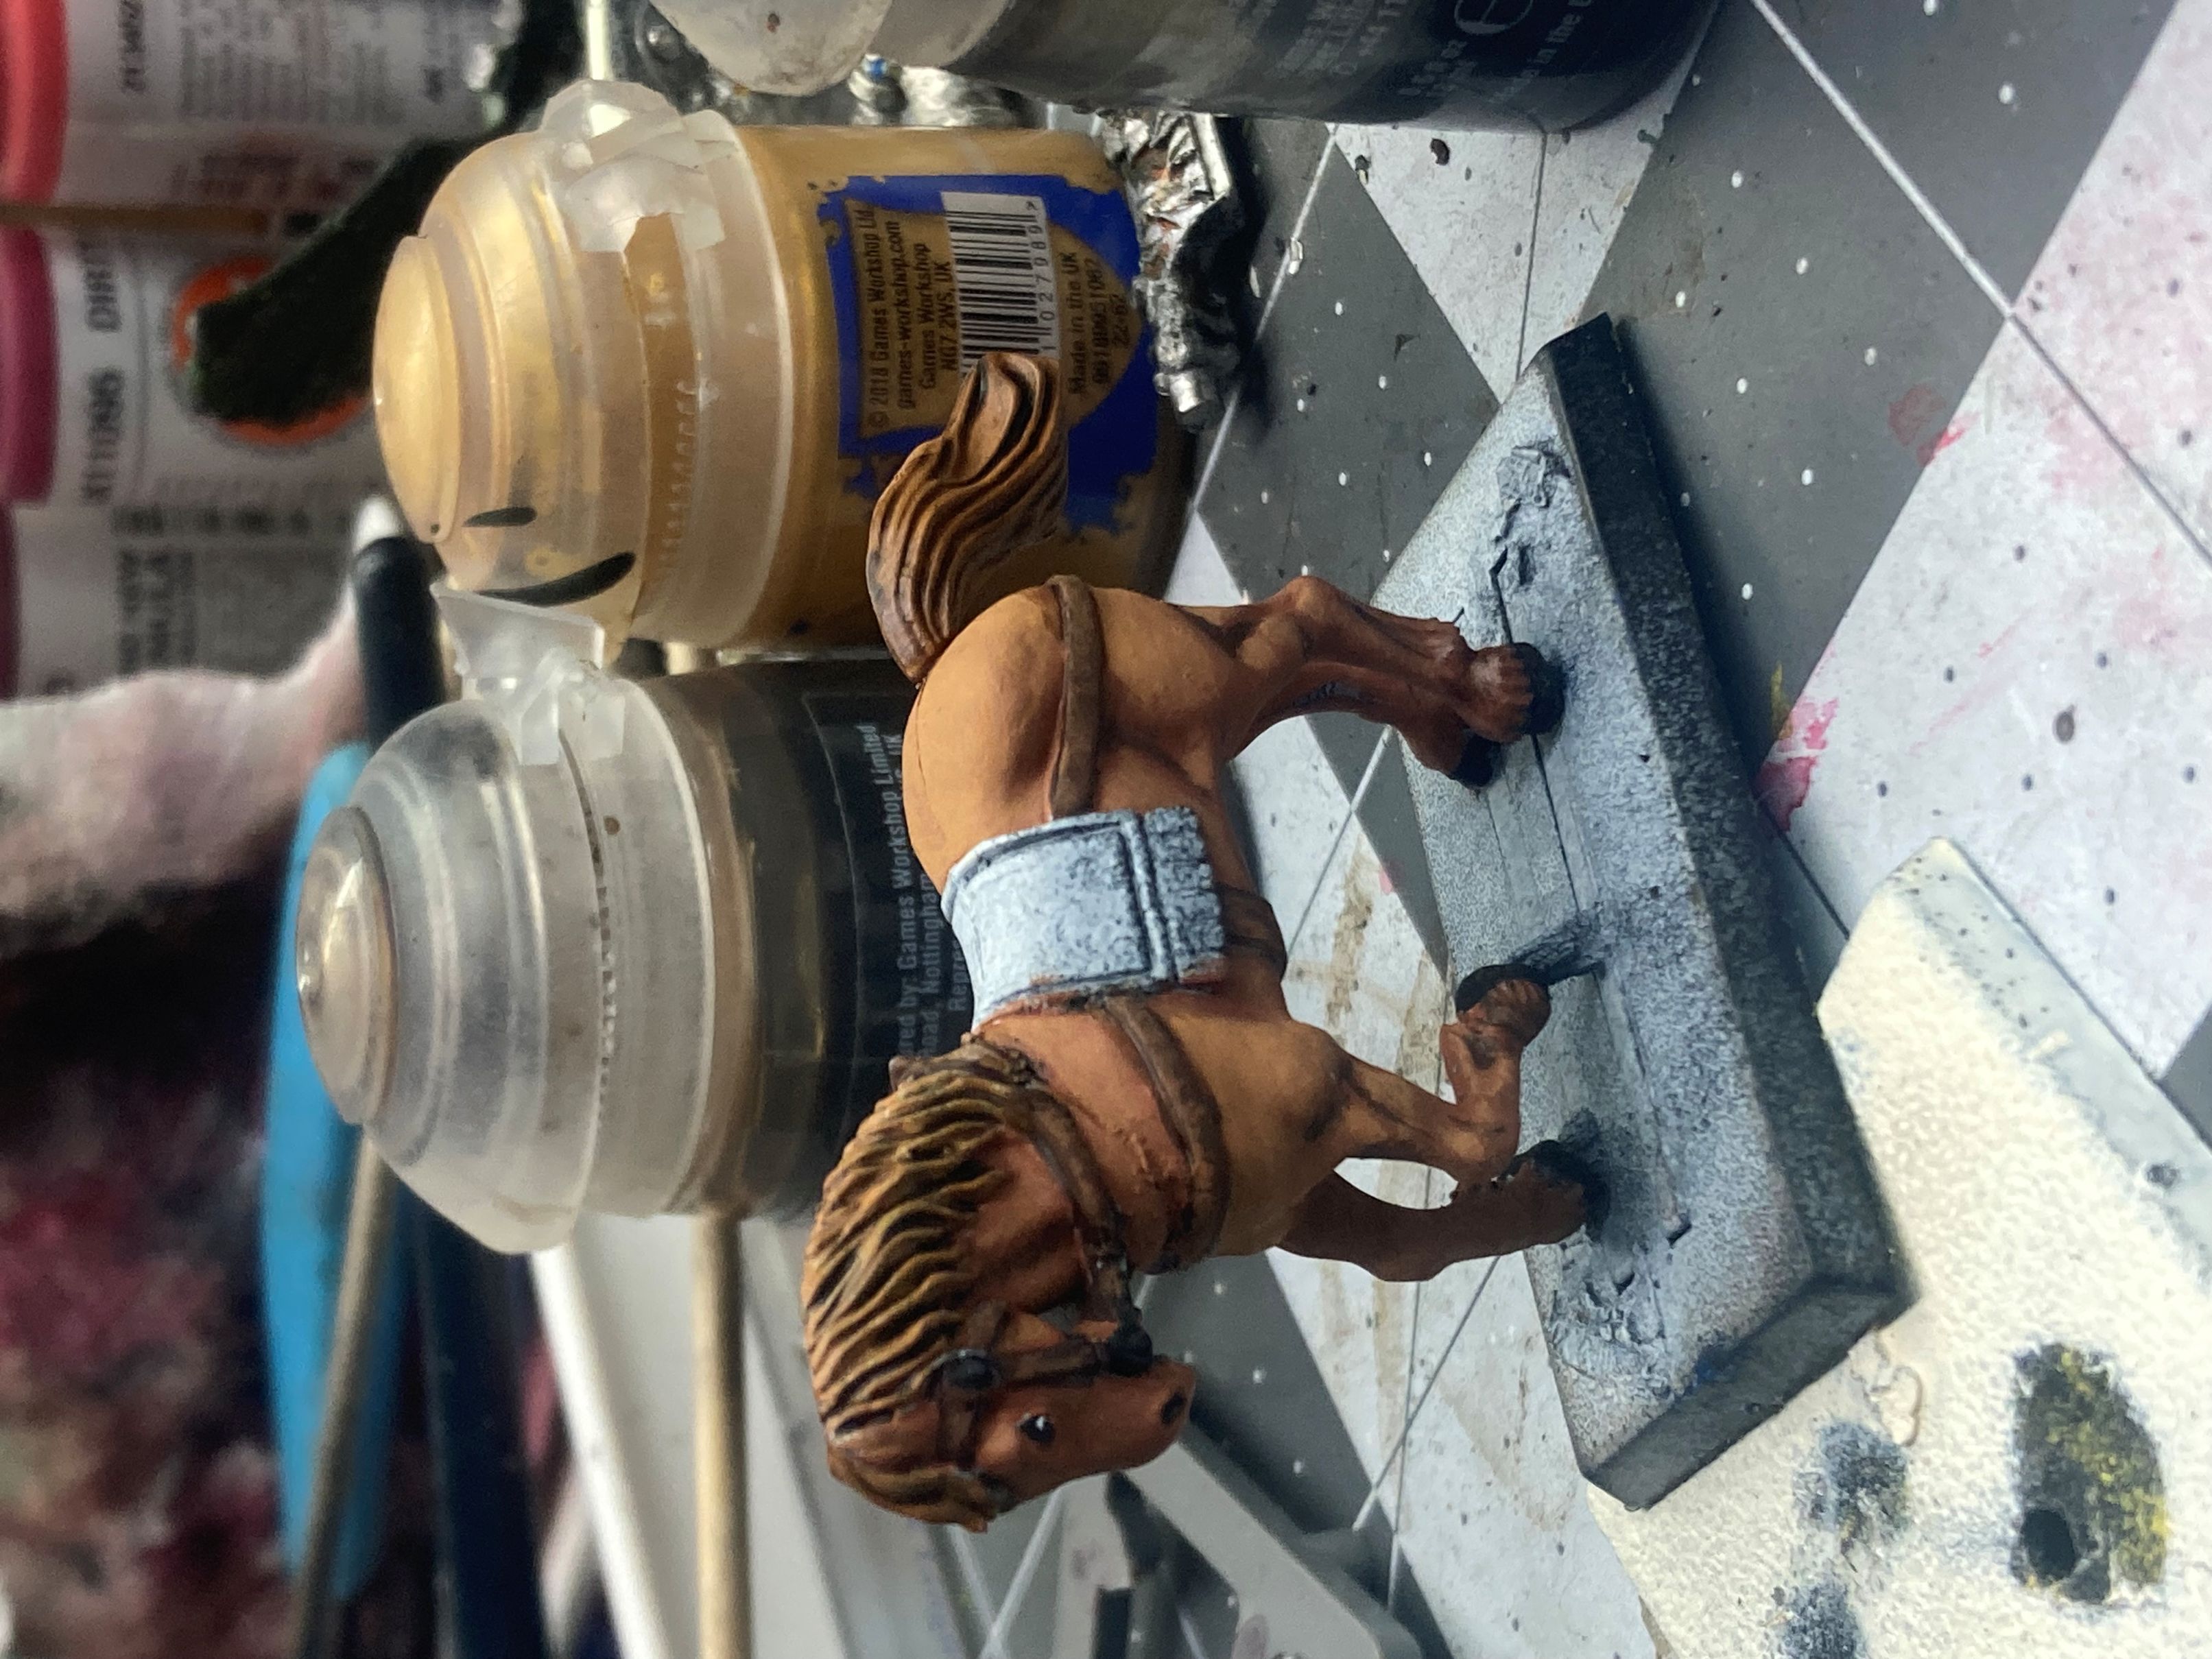
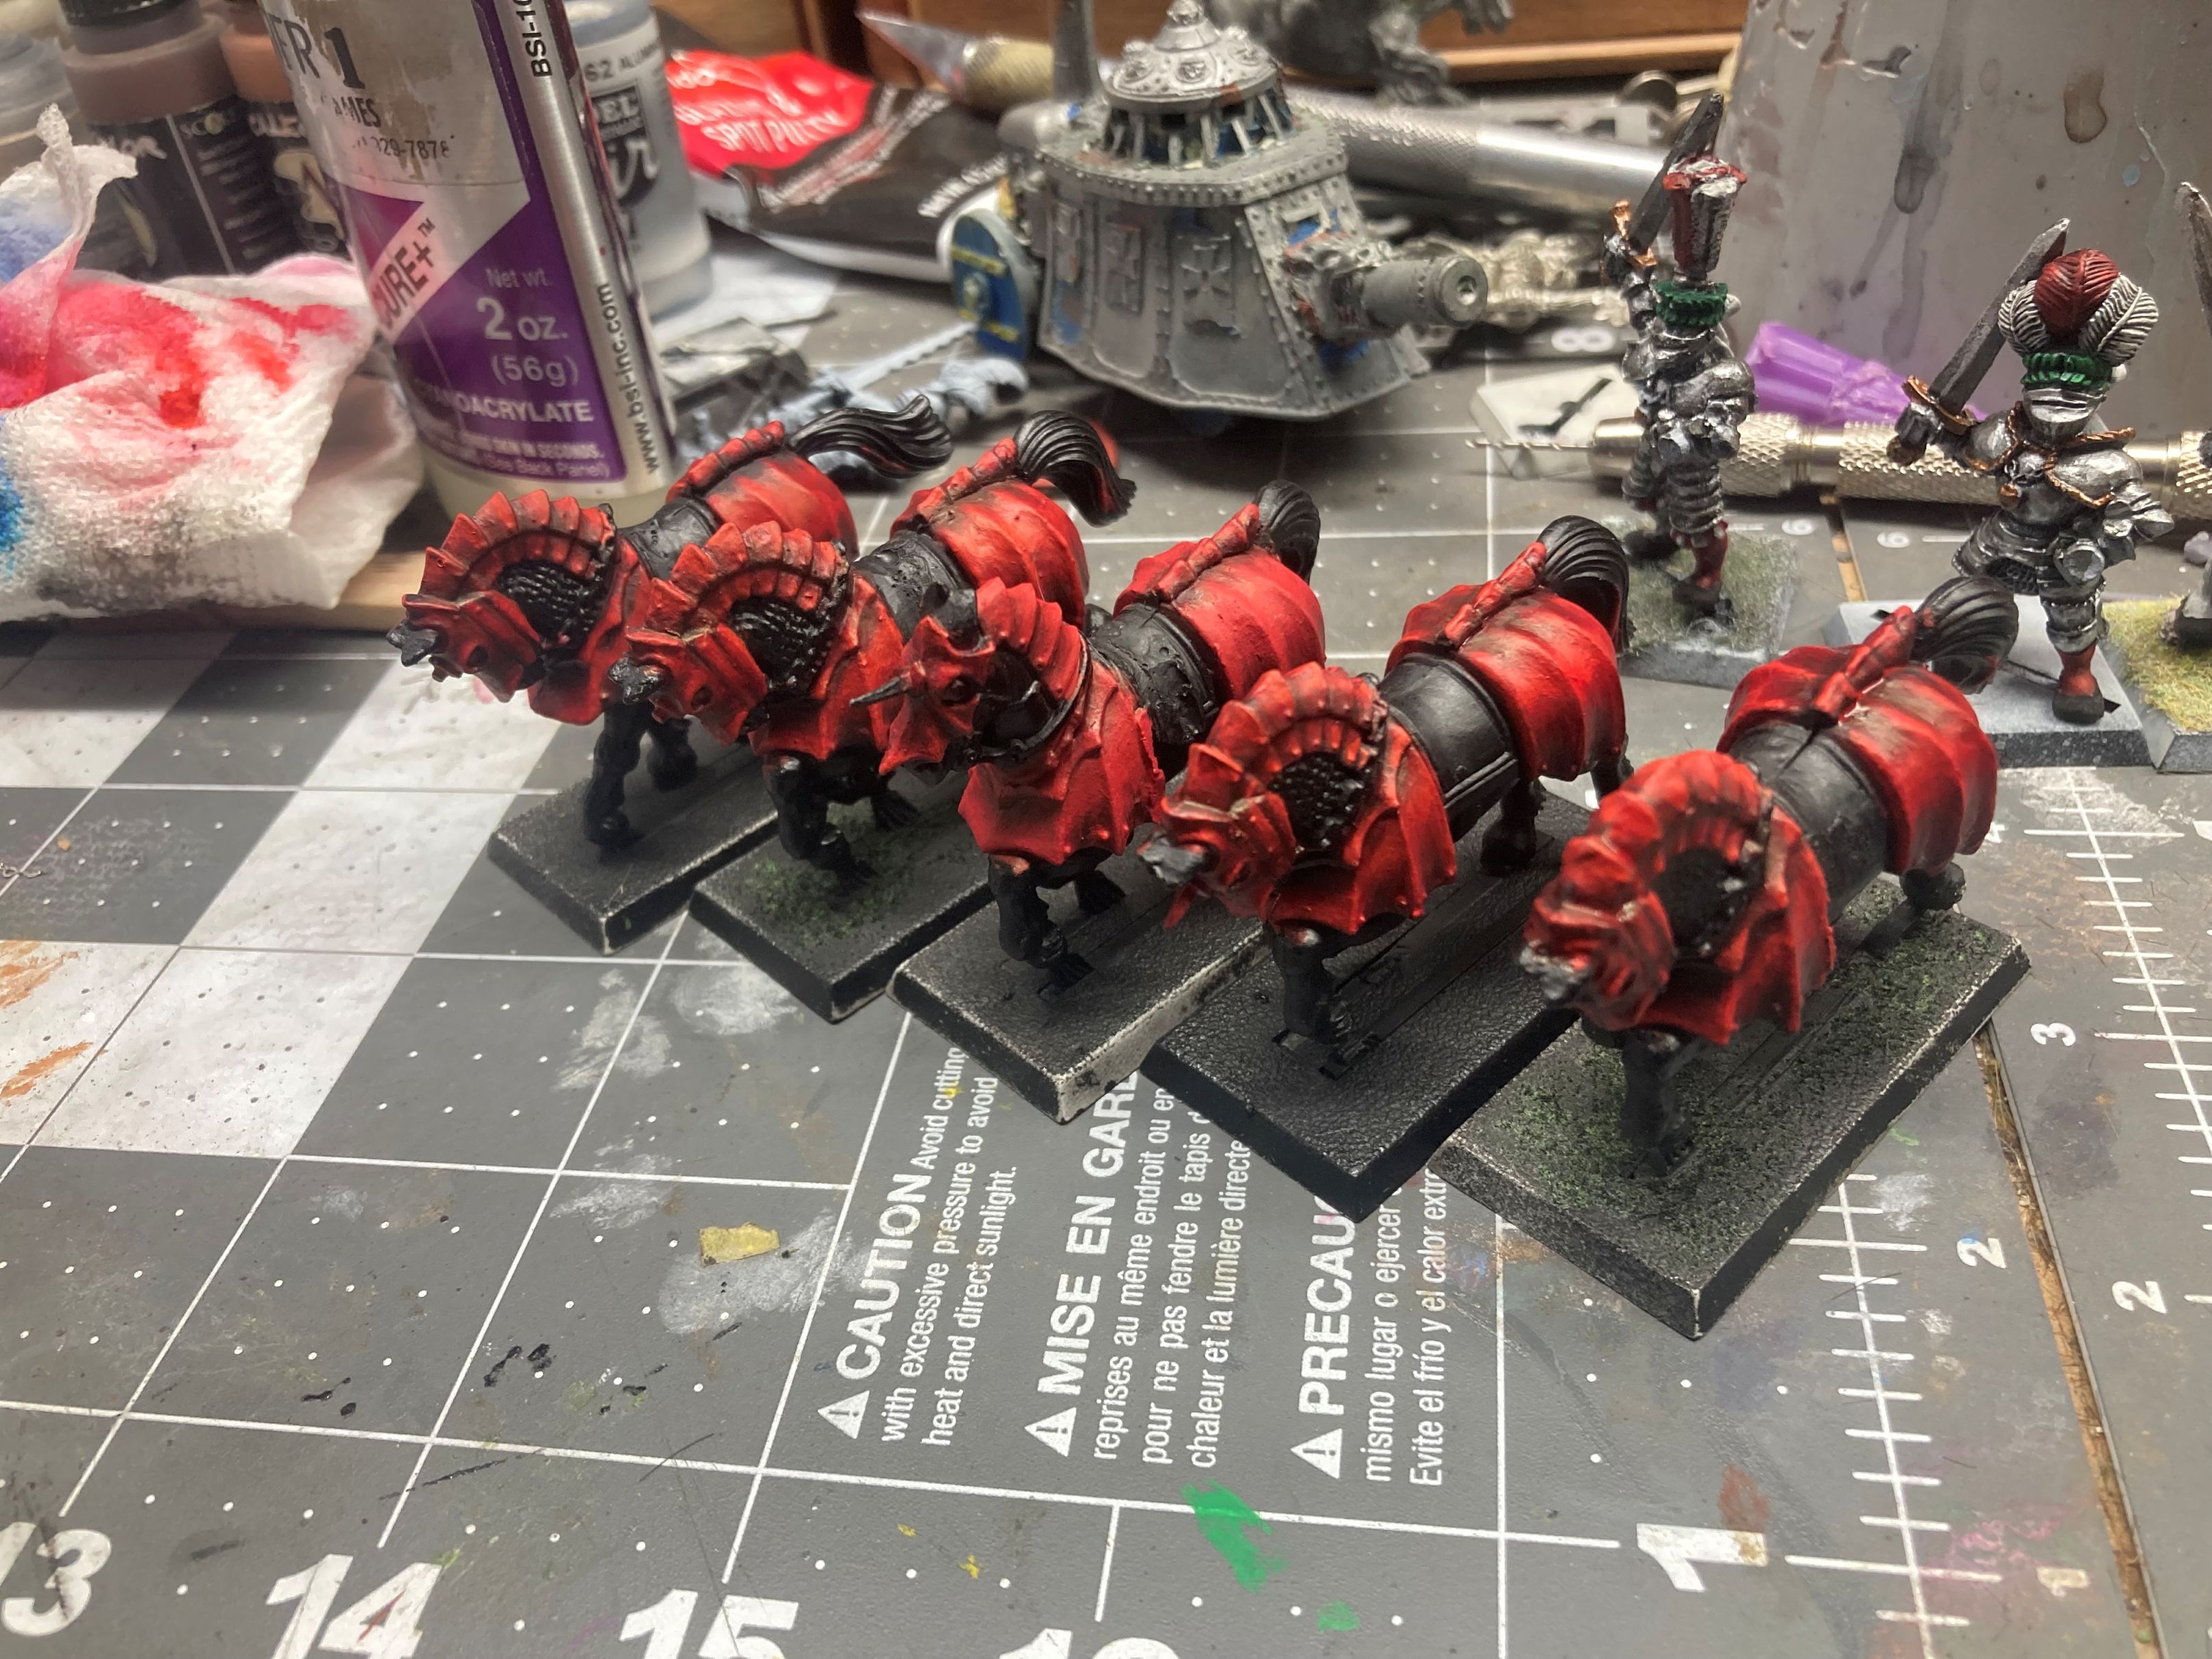
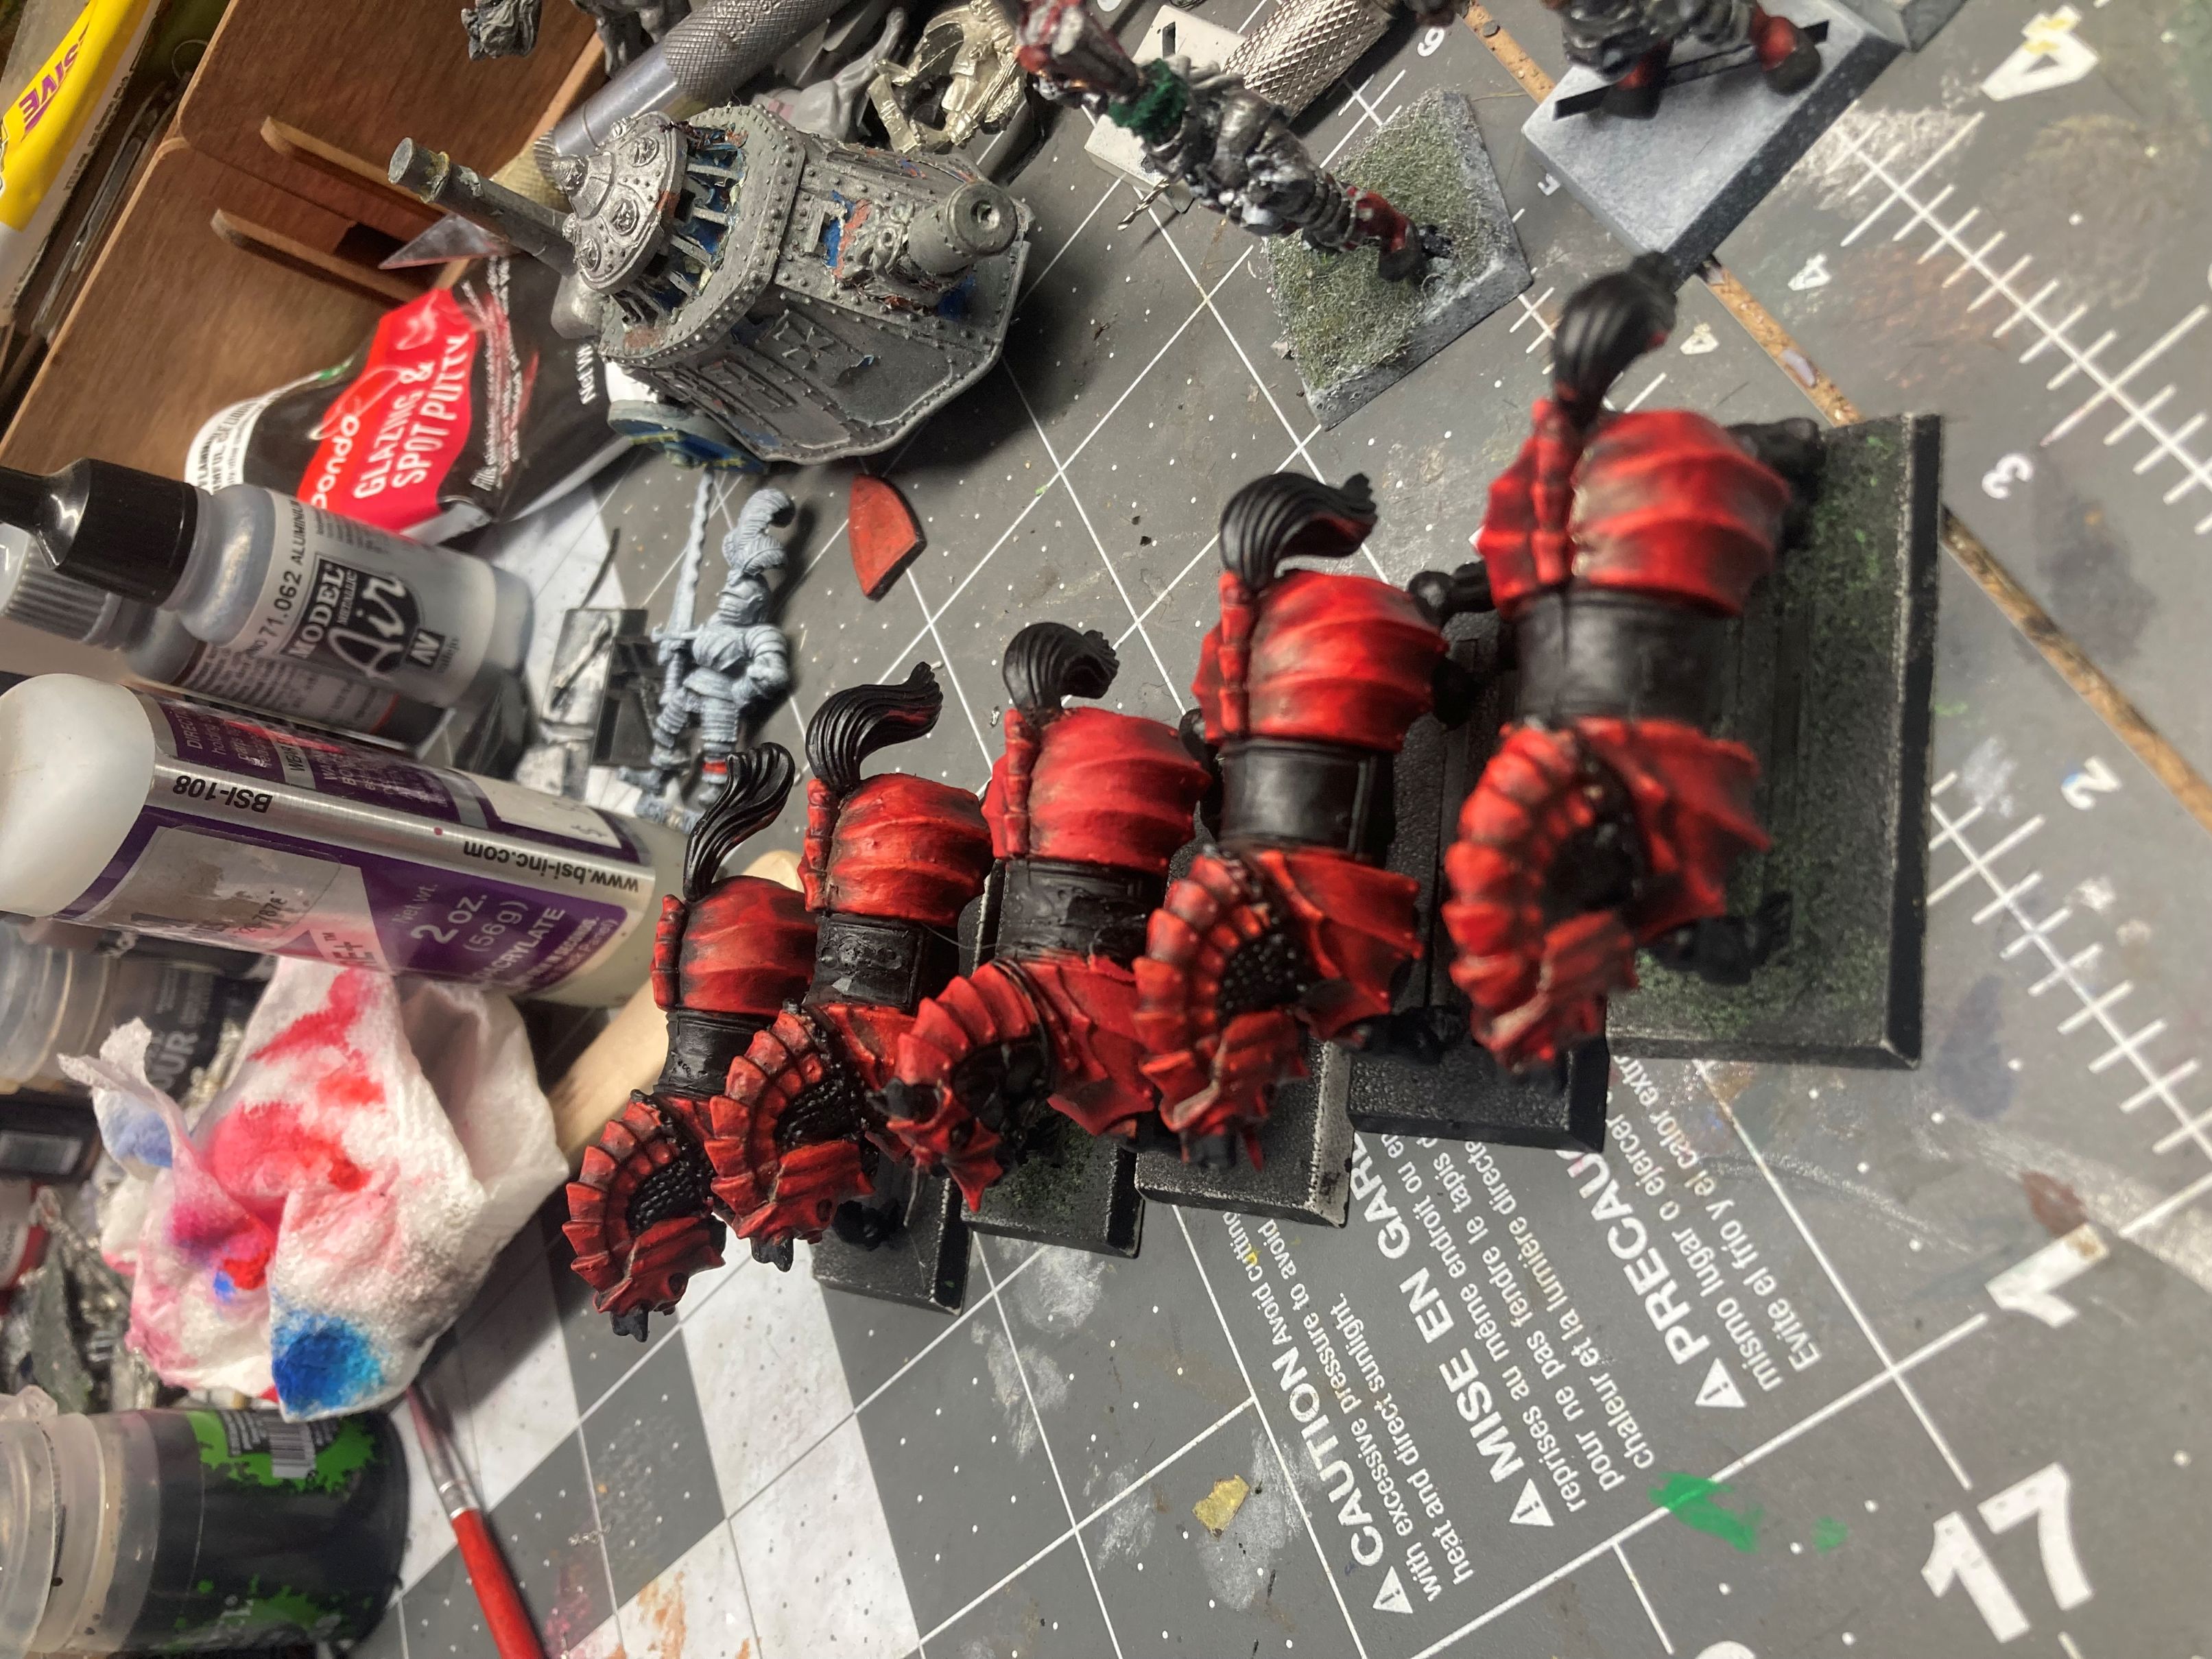
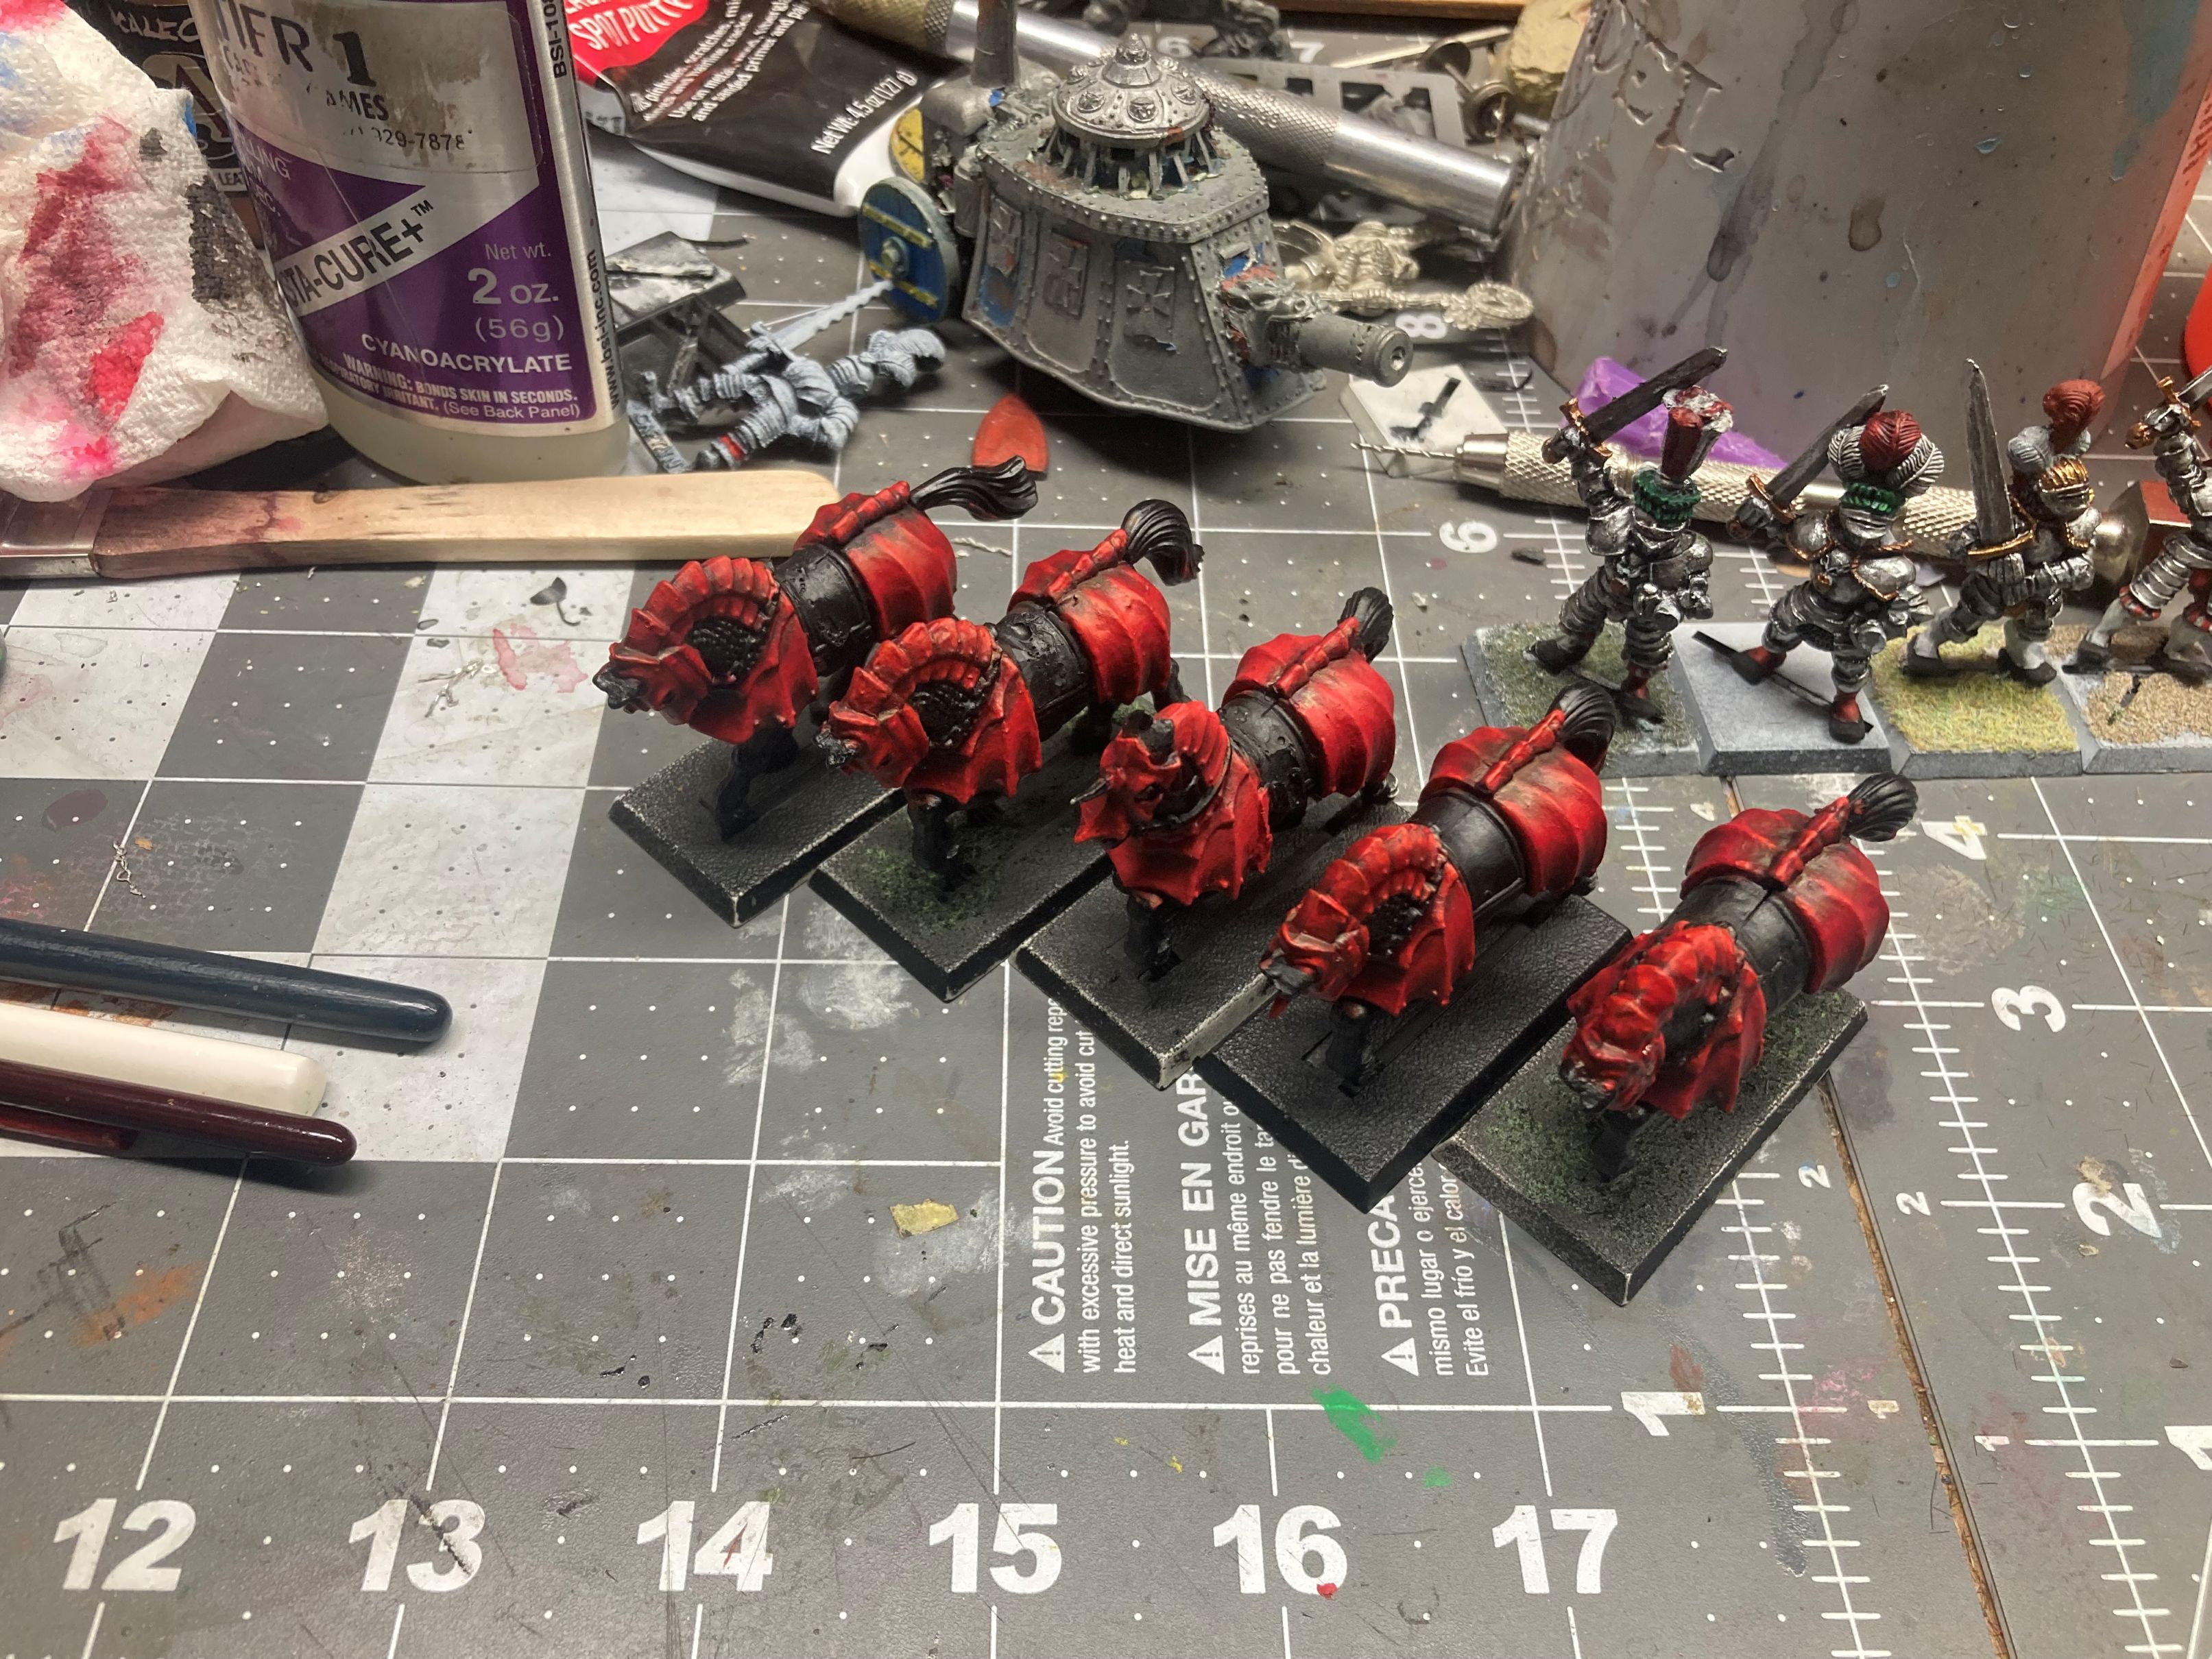
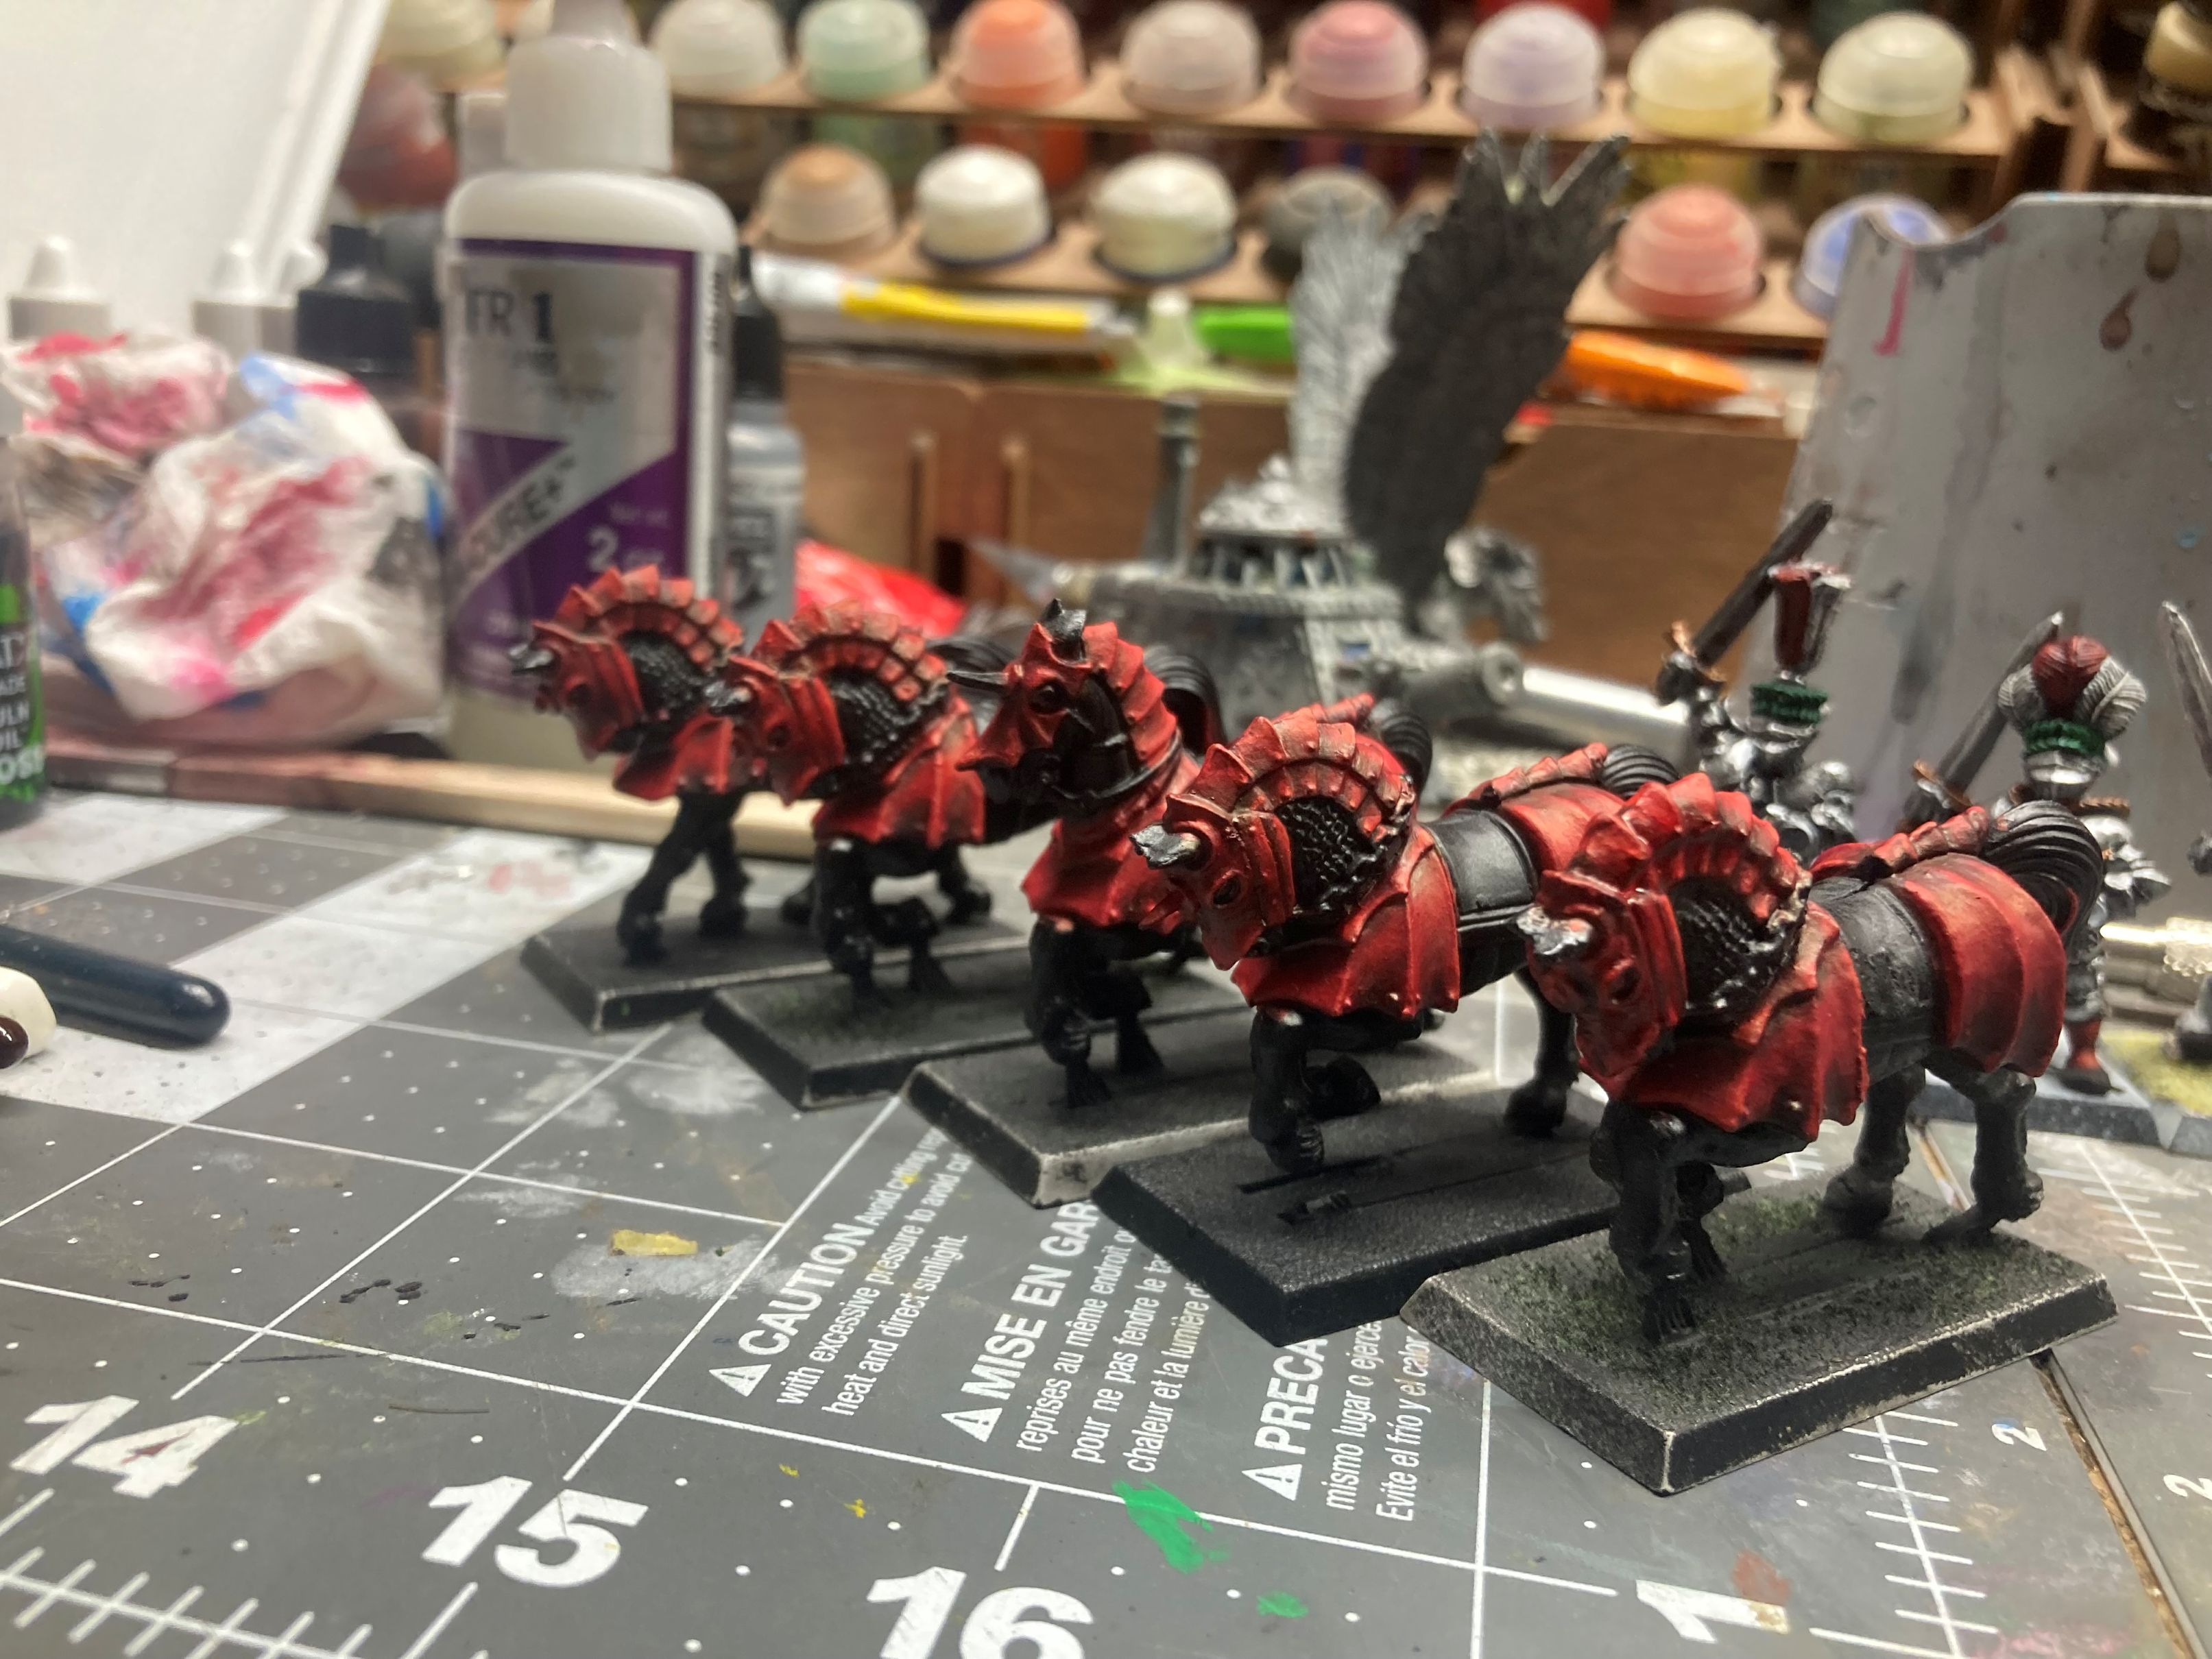
For the knight’s noble steeds, I needed to decide if I wanted to assemble new on sprue horses or repropose their old mounts. I decided on sticking with the repaint plan and went for the ones with tabletop experience.
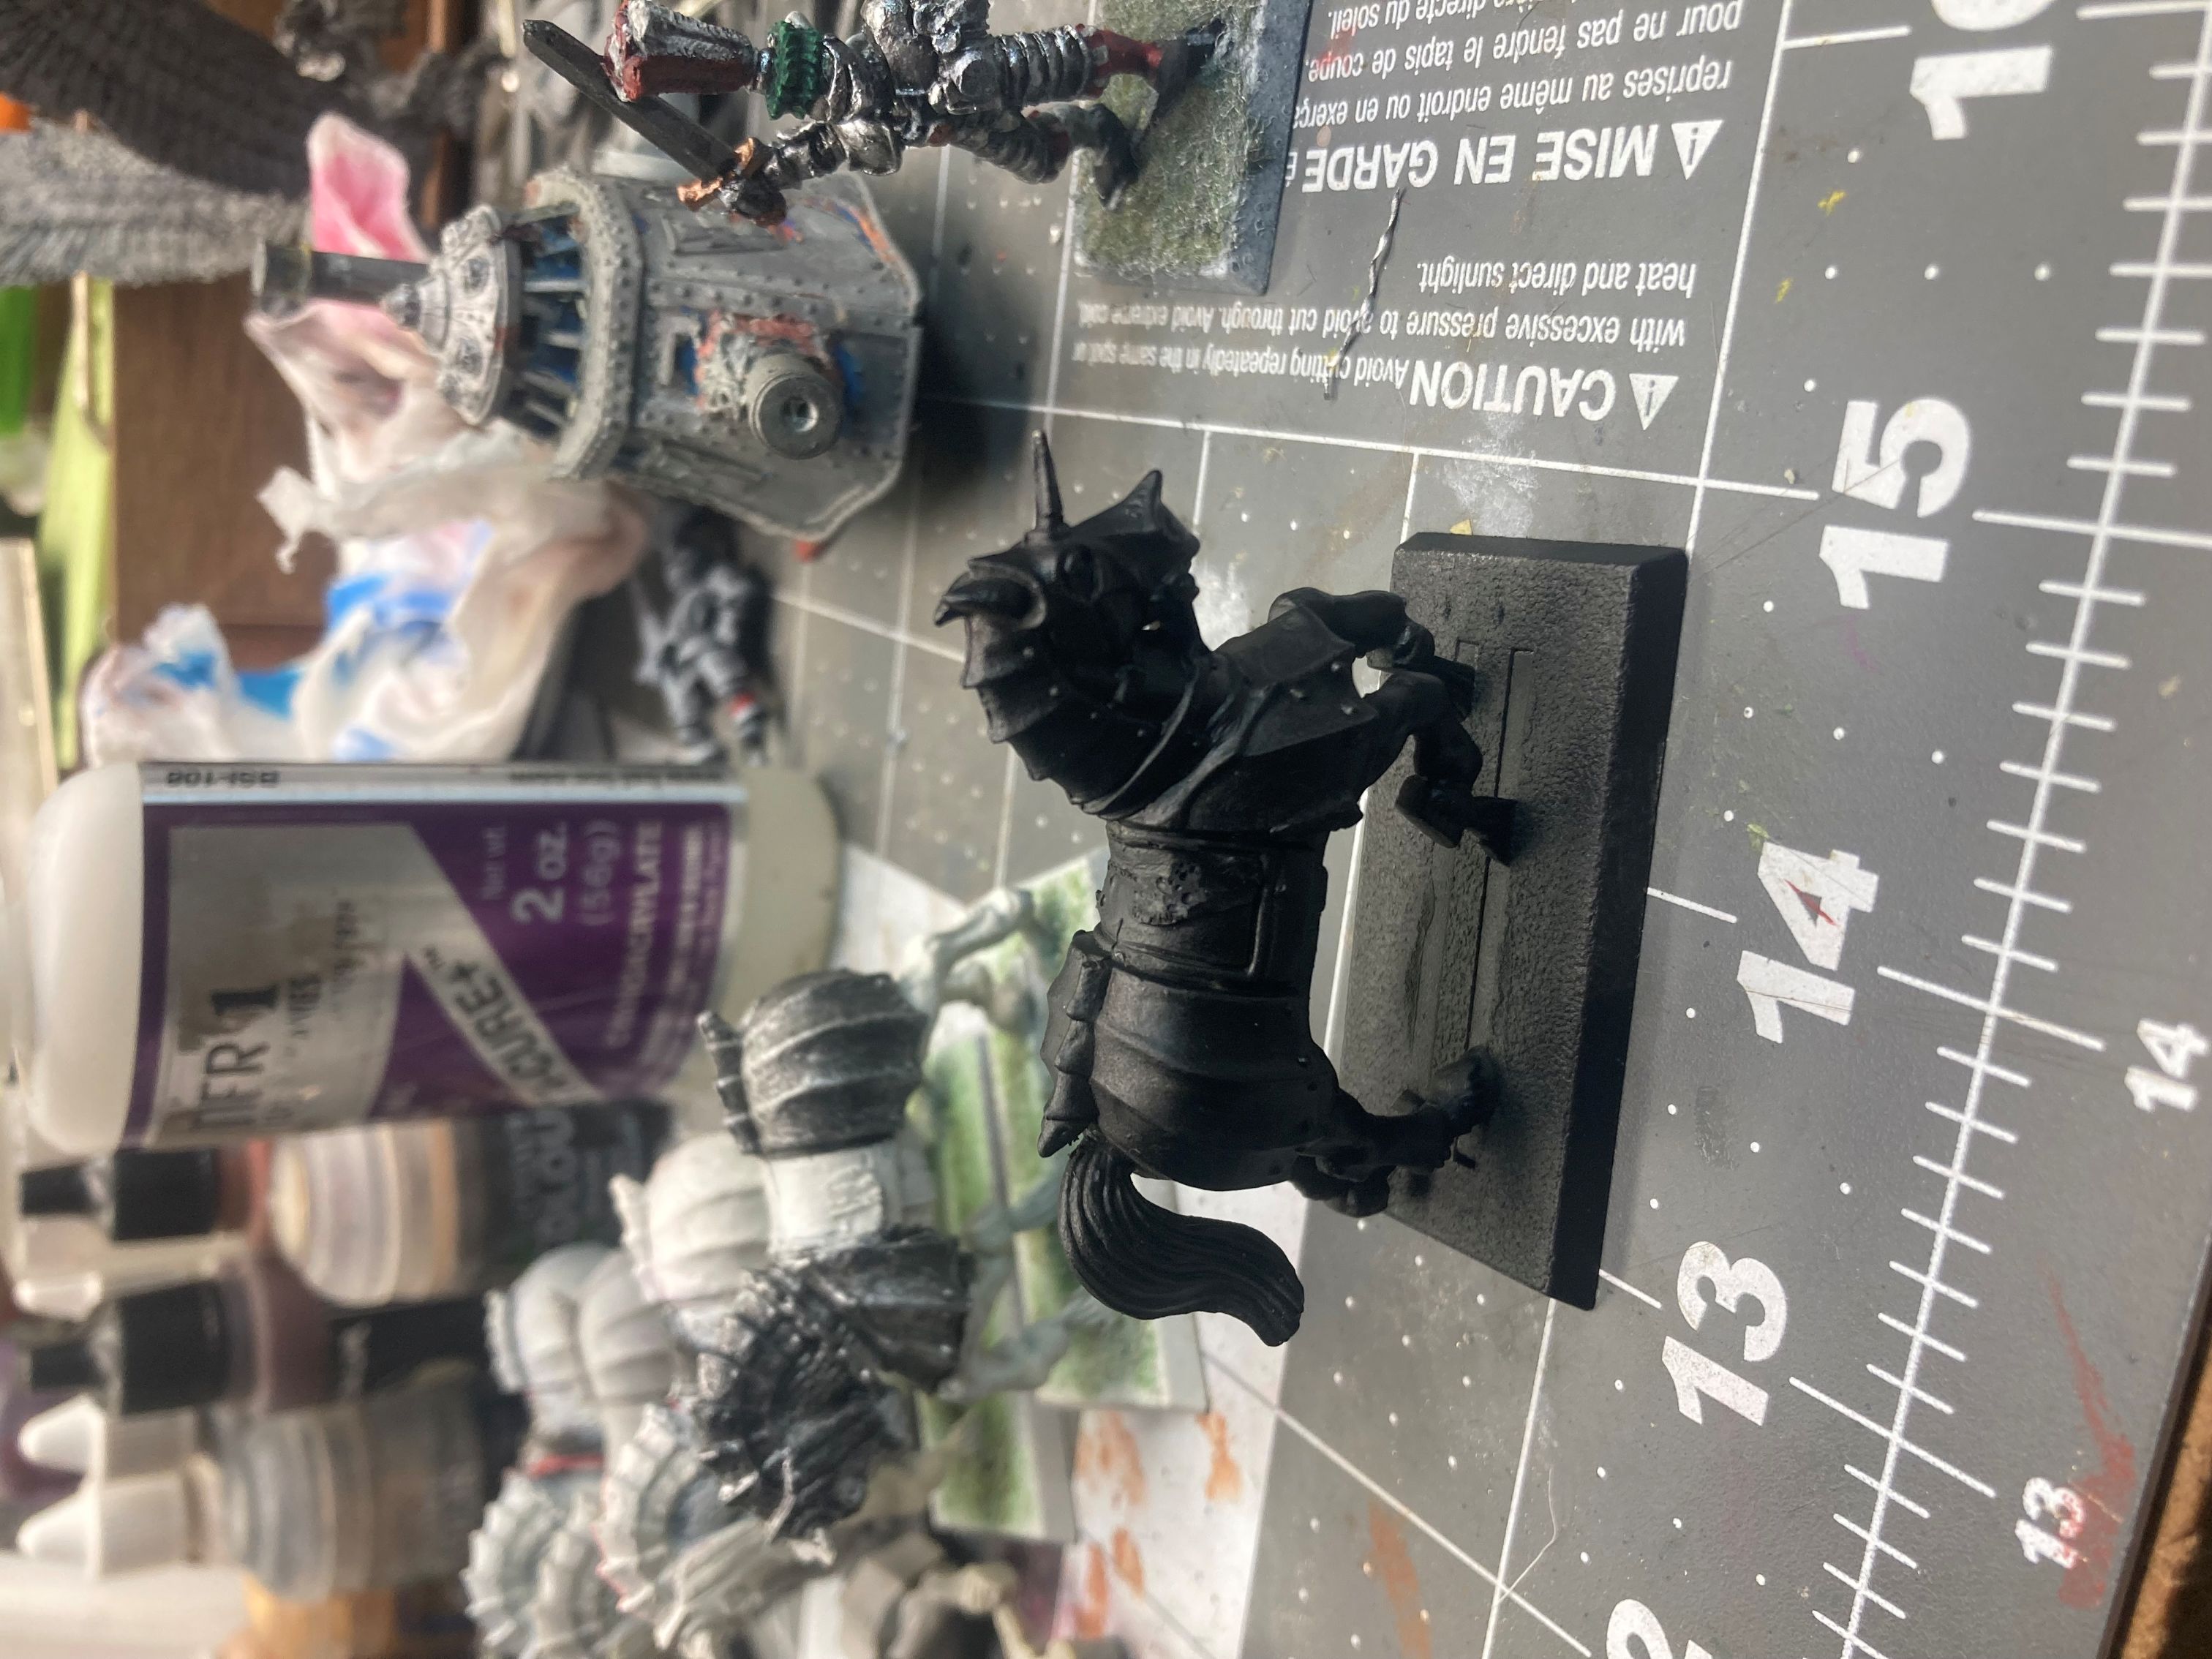
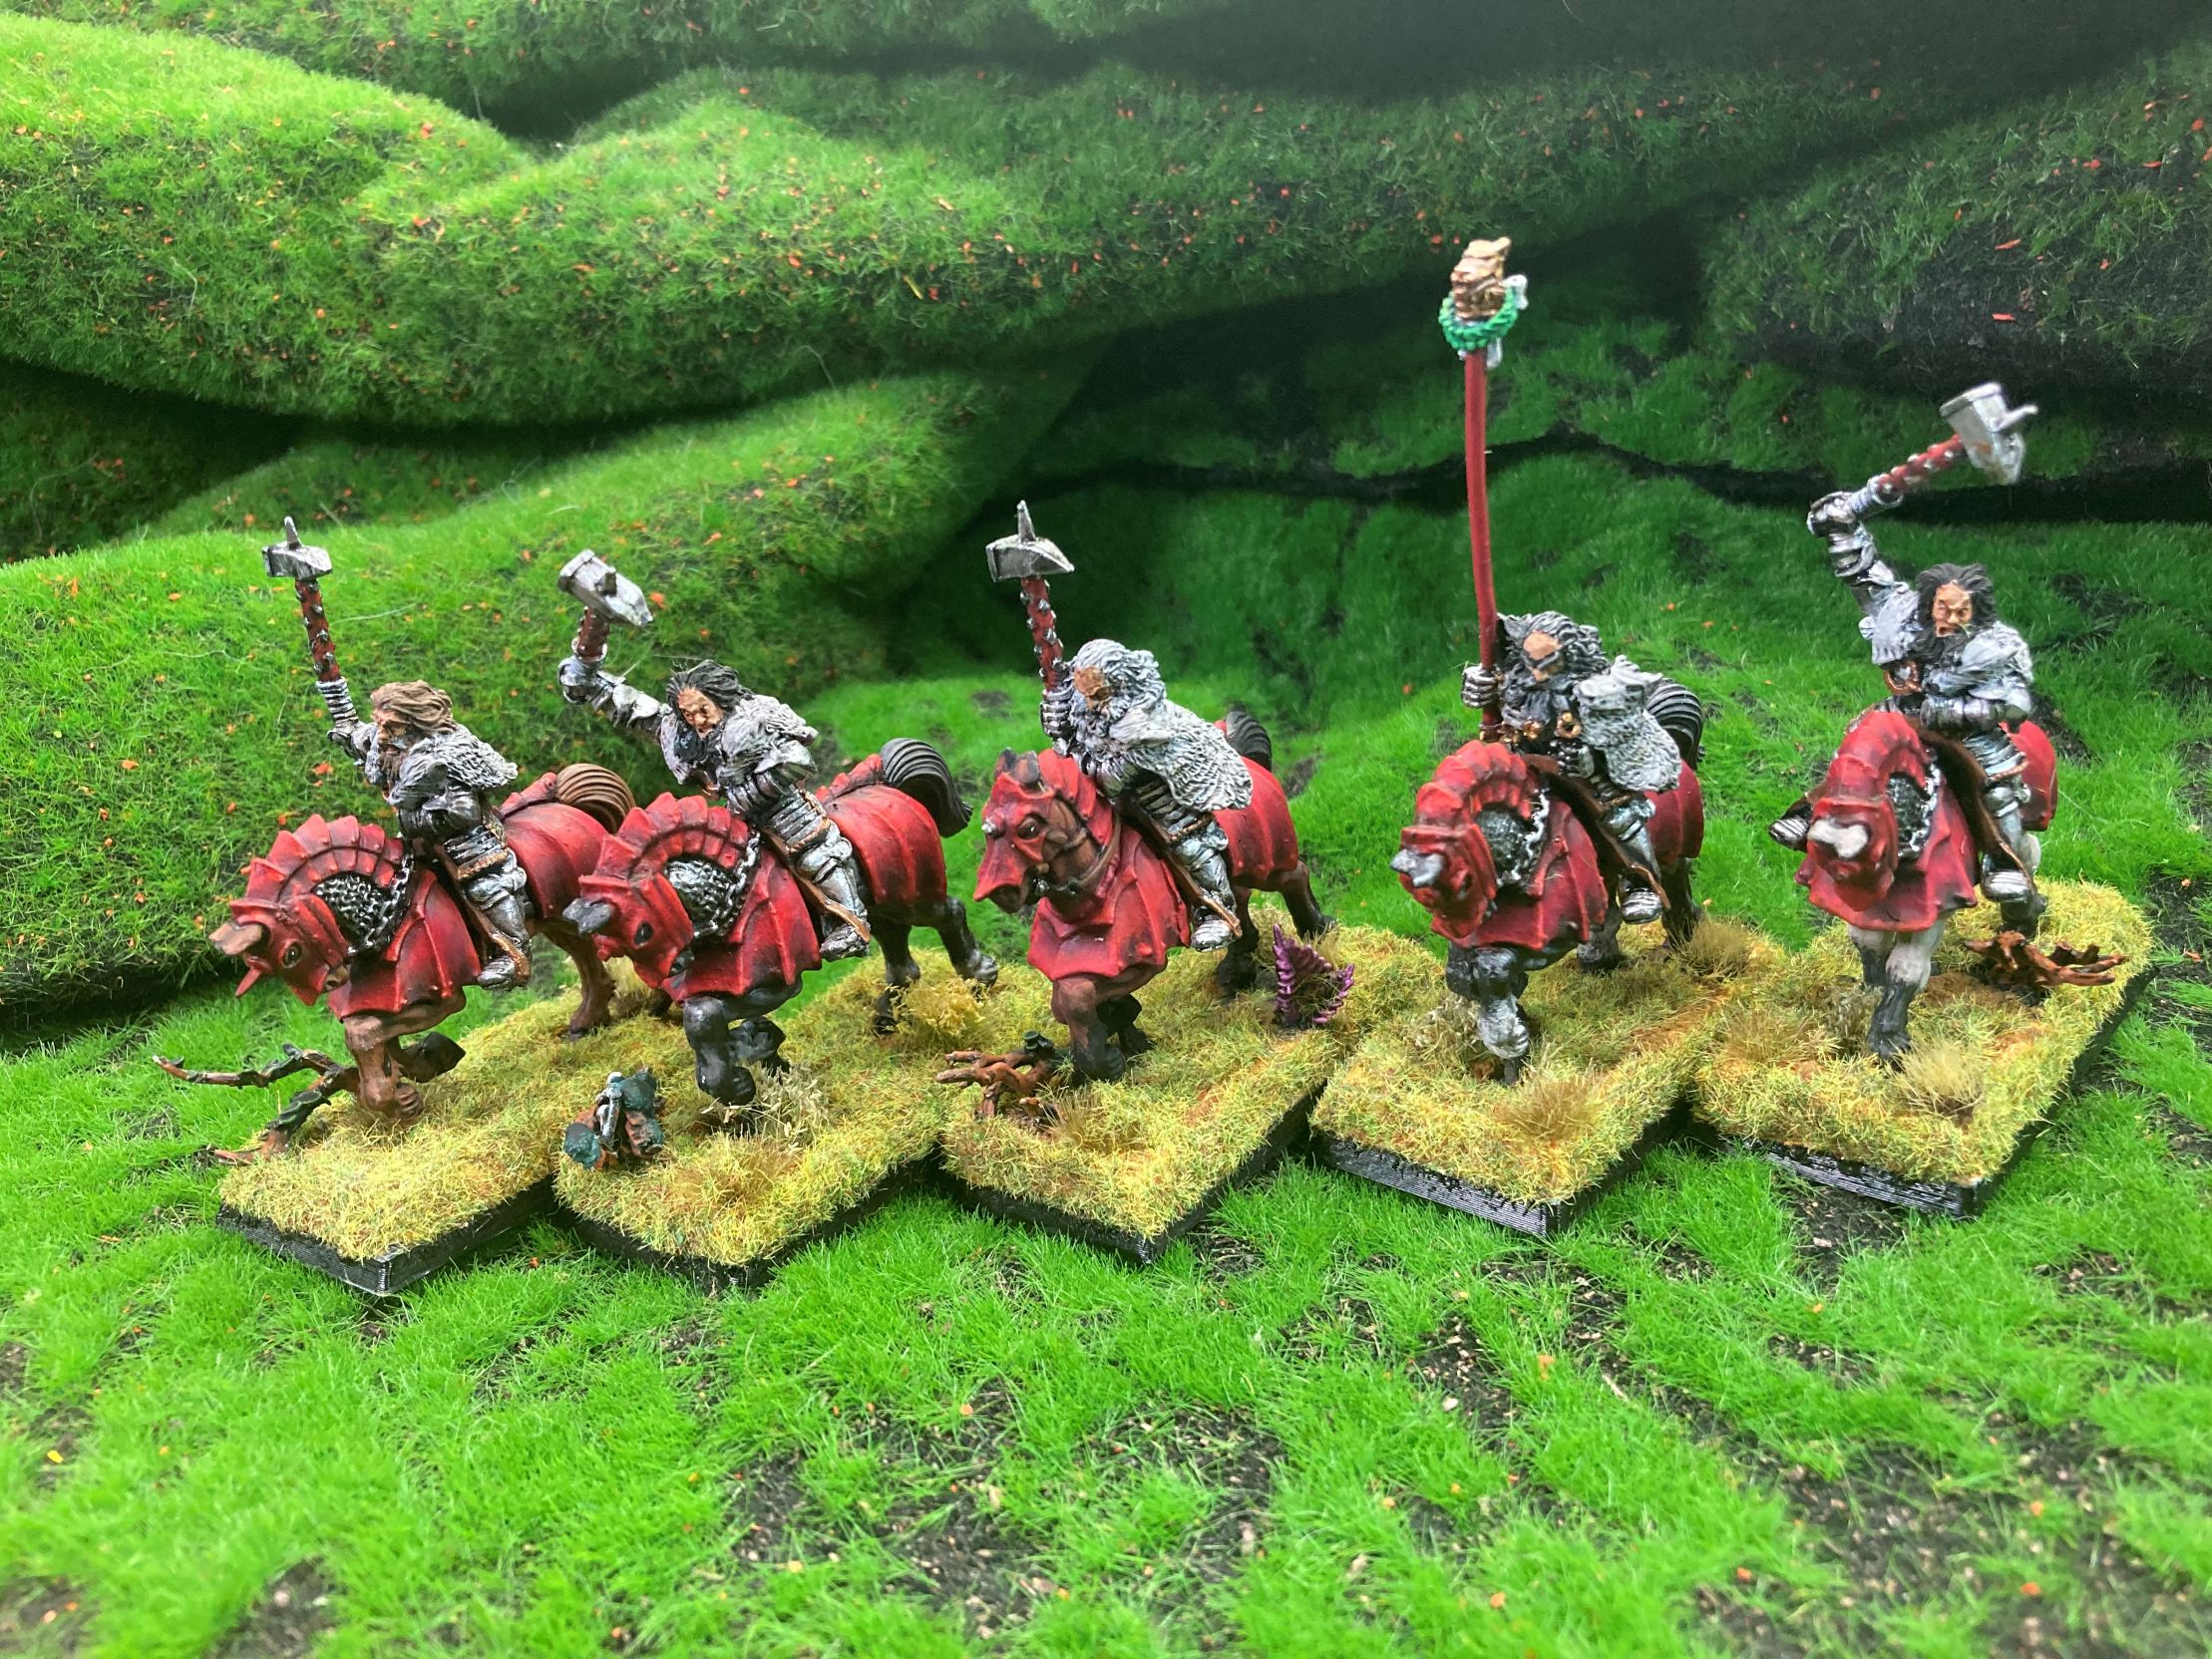
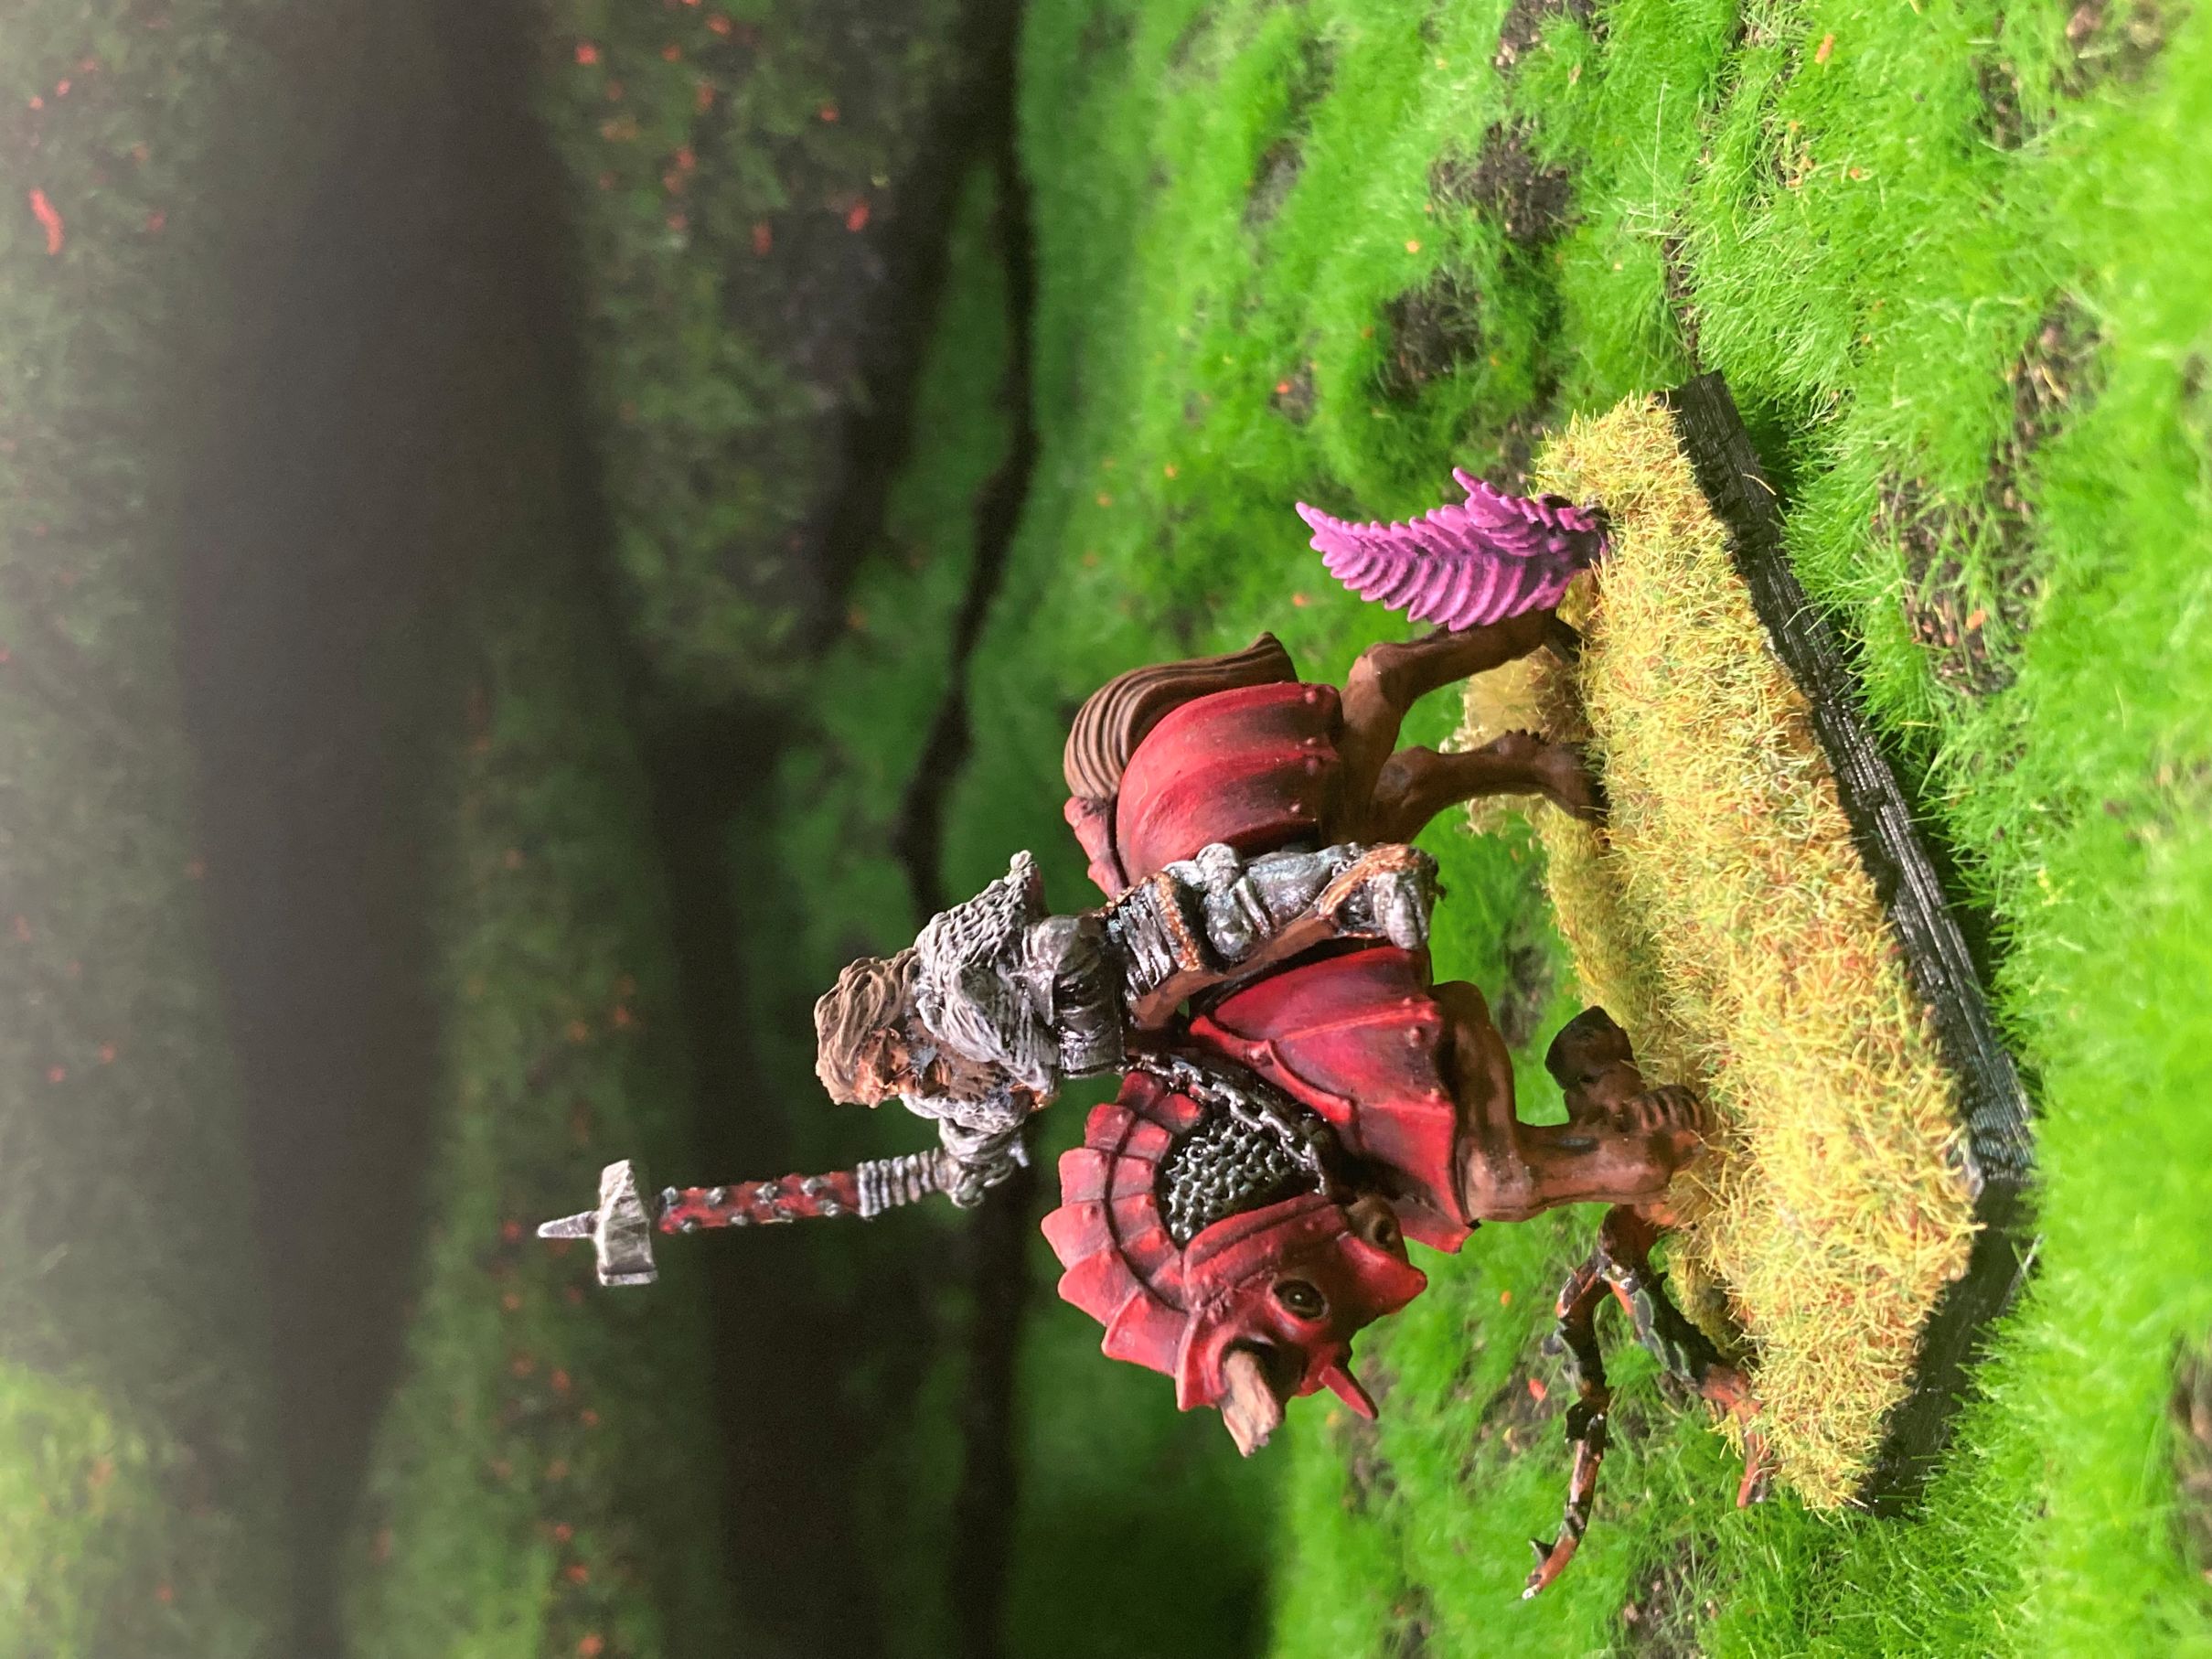
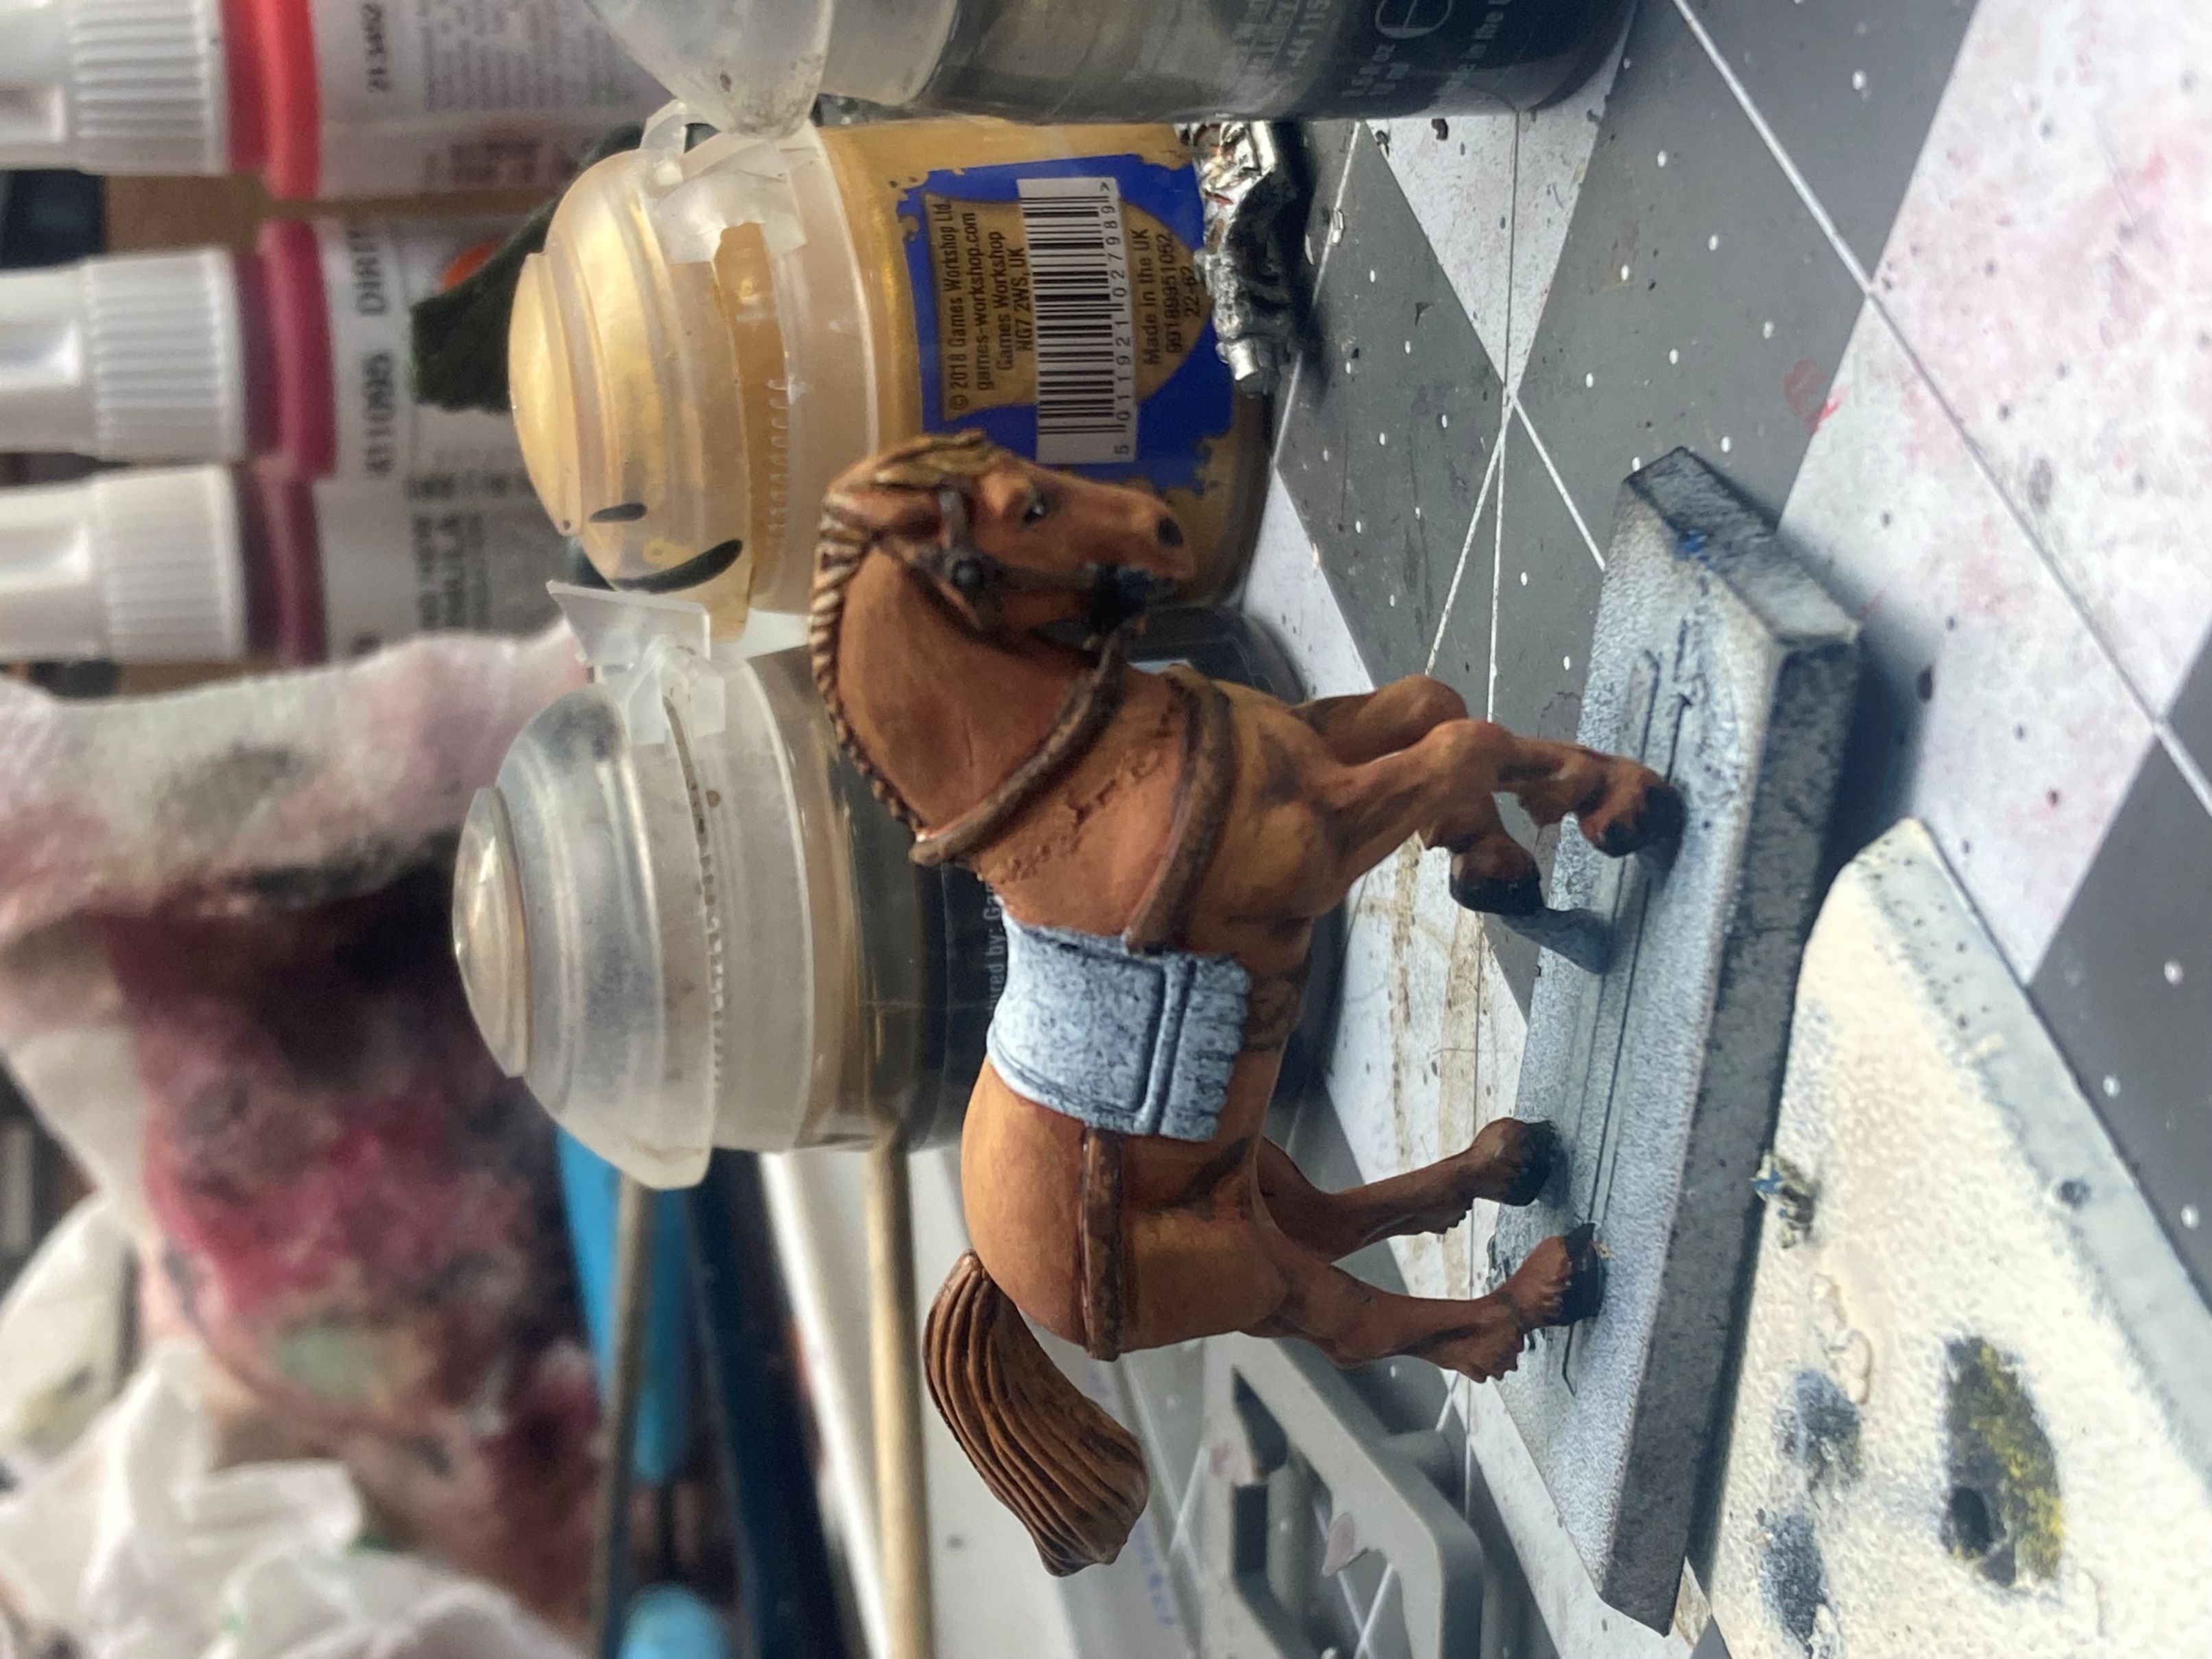
Now, one of the things I don’t think I’ve really written about yet is my vision for the look of the army. I wanted to paint the army to a good tabletop standard but not go too far on the highlights. I wanted these solders of The Empire to look like their living and fighting in the forests of the Old World. A little dark and gritty. Not full “Grimdark” I suppose but touching it ever so slightly. As I started to work on the first horse for the Knights of the White Wolf I was going to stick with the classic red armor. I was liking the buildup on the first run, but after taking some photos and staring at it for a minute, I decided the paint did look cool, but I was going the direction of a single piece framed in a way requiring it to be looked at from a particular angle. I didn’t think this would look good for a unit being pushed around a table. The highlights popped and the purple wash pushed everything, and this made it easy to build on.
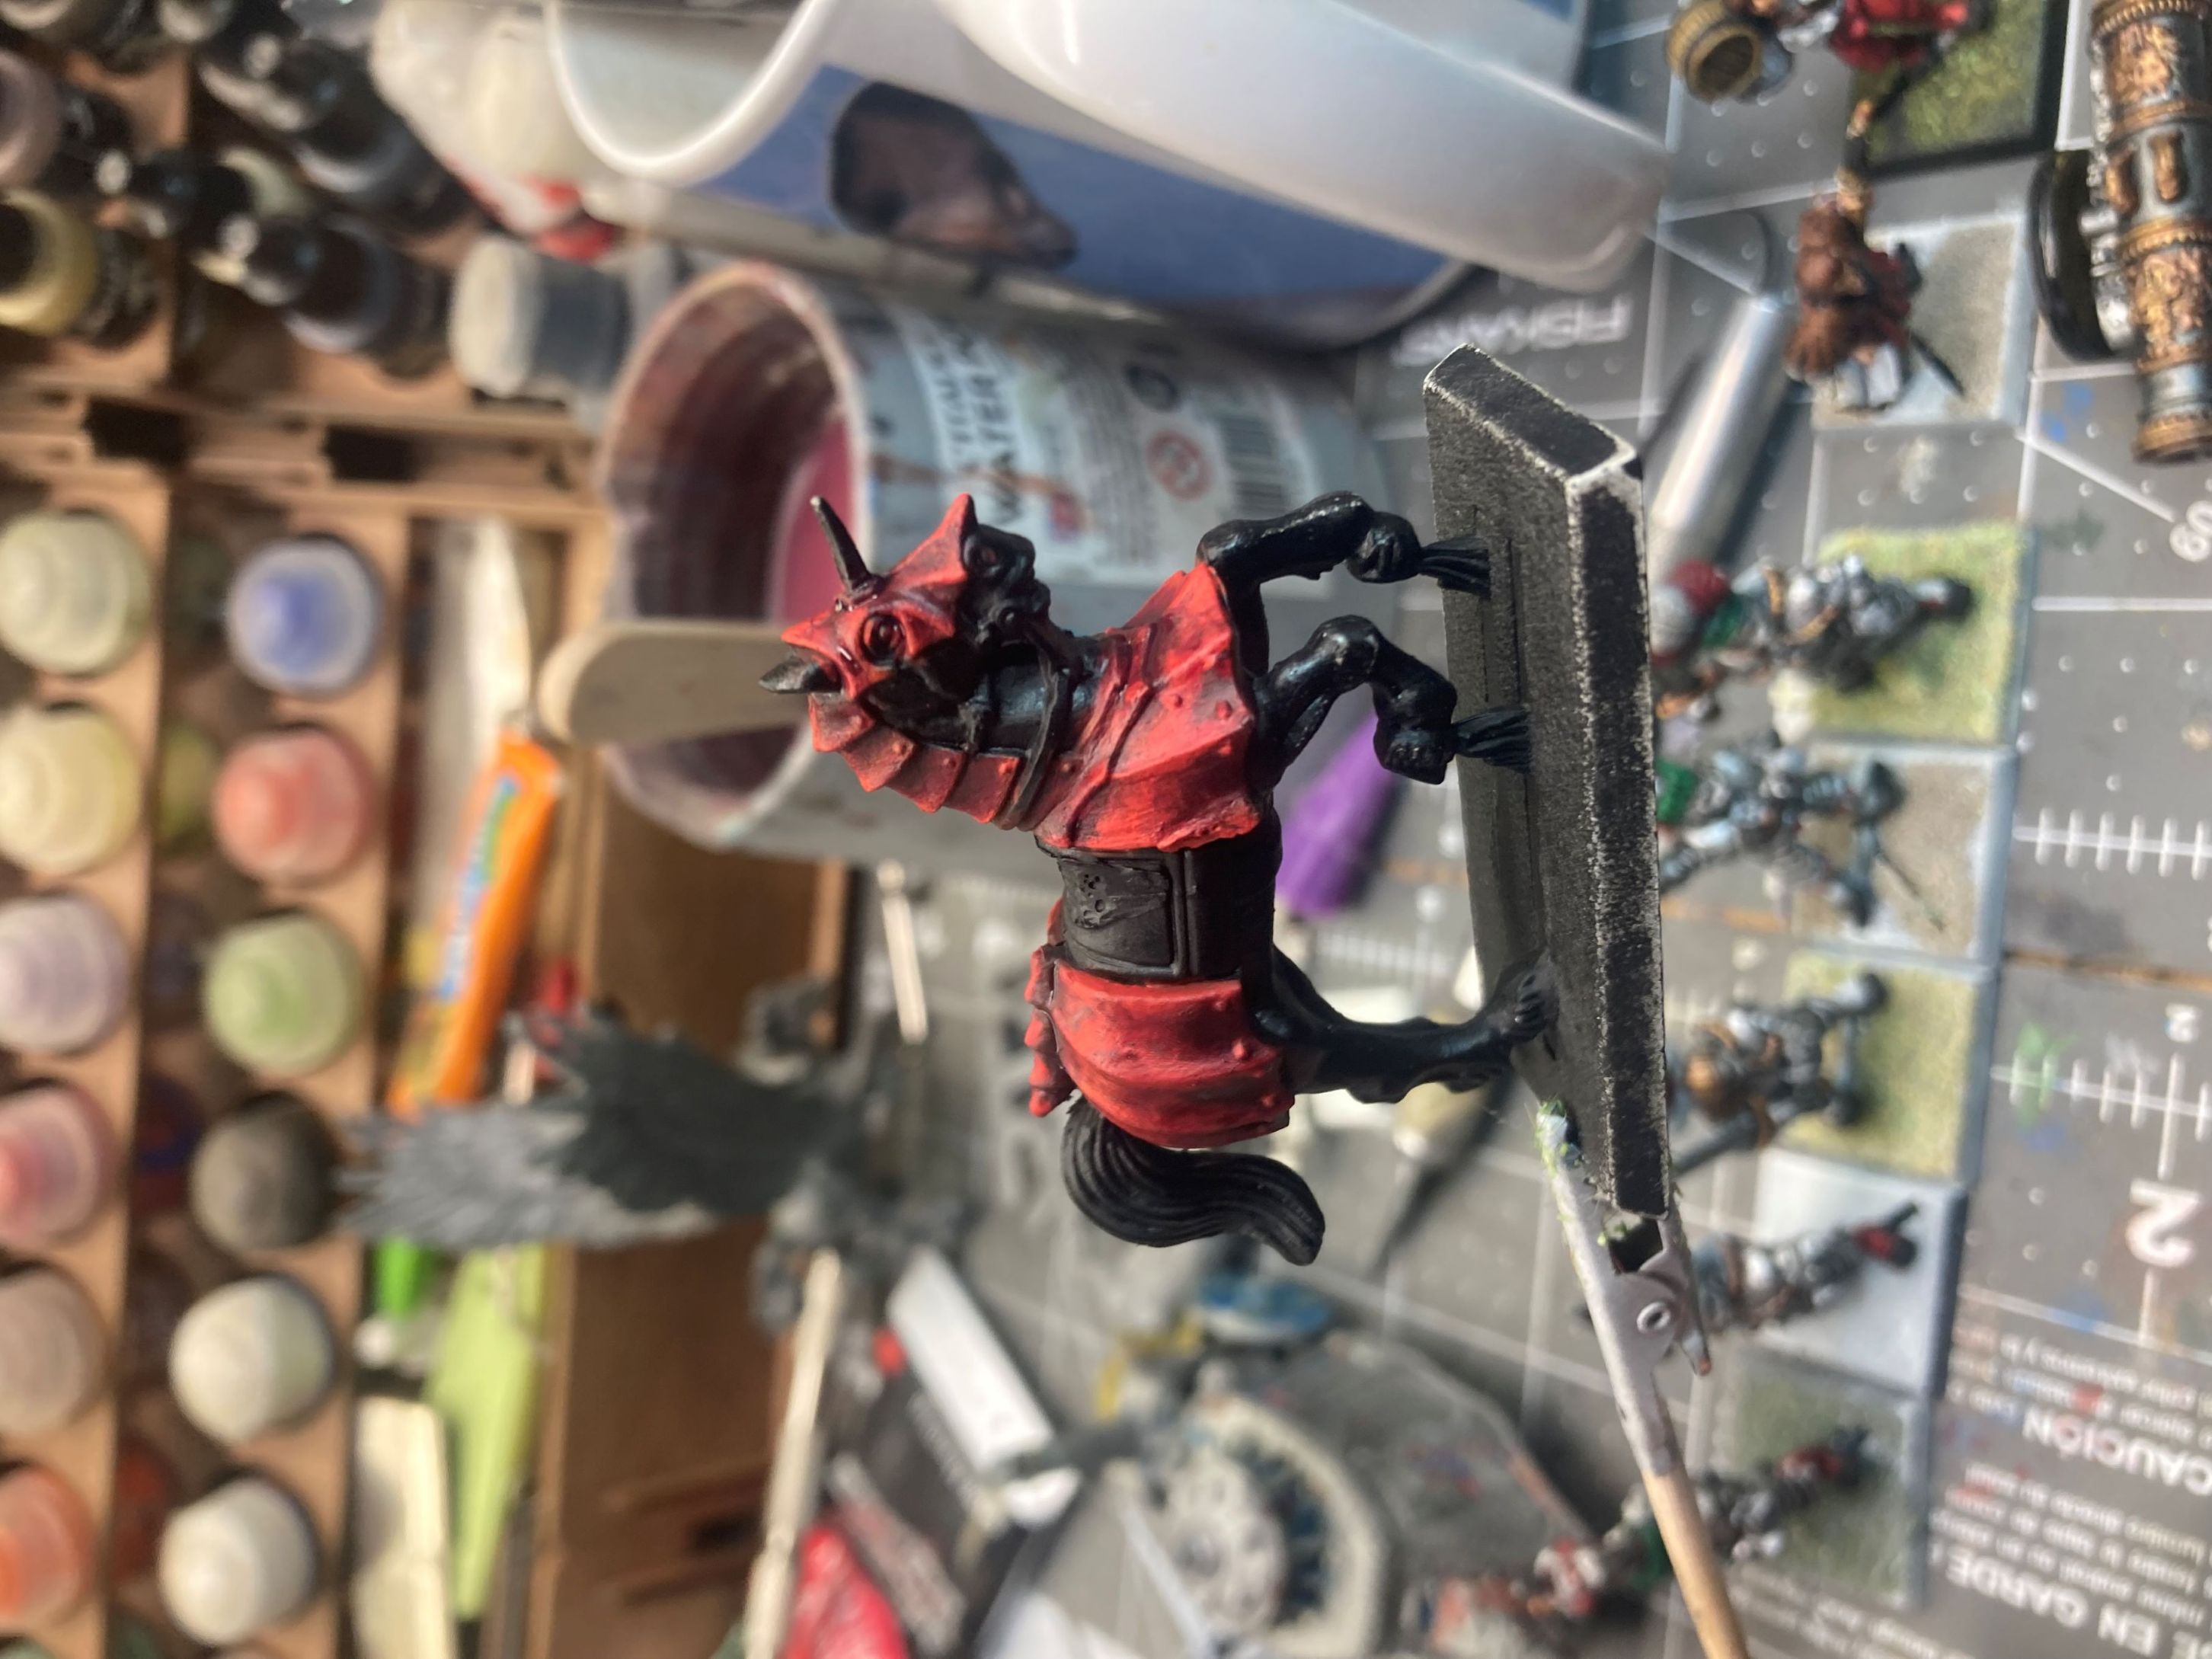
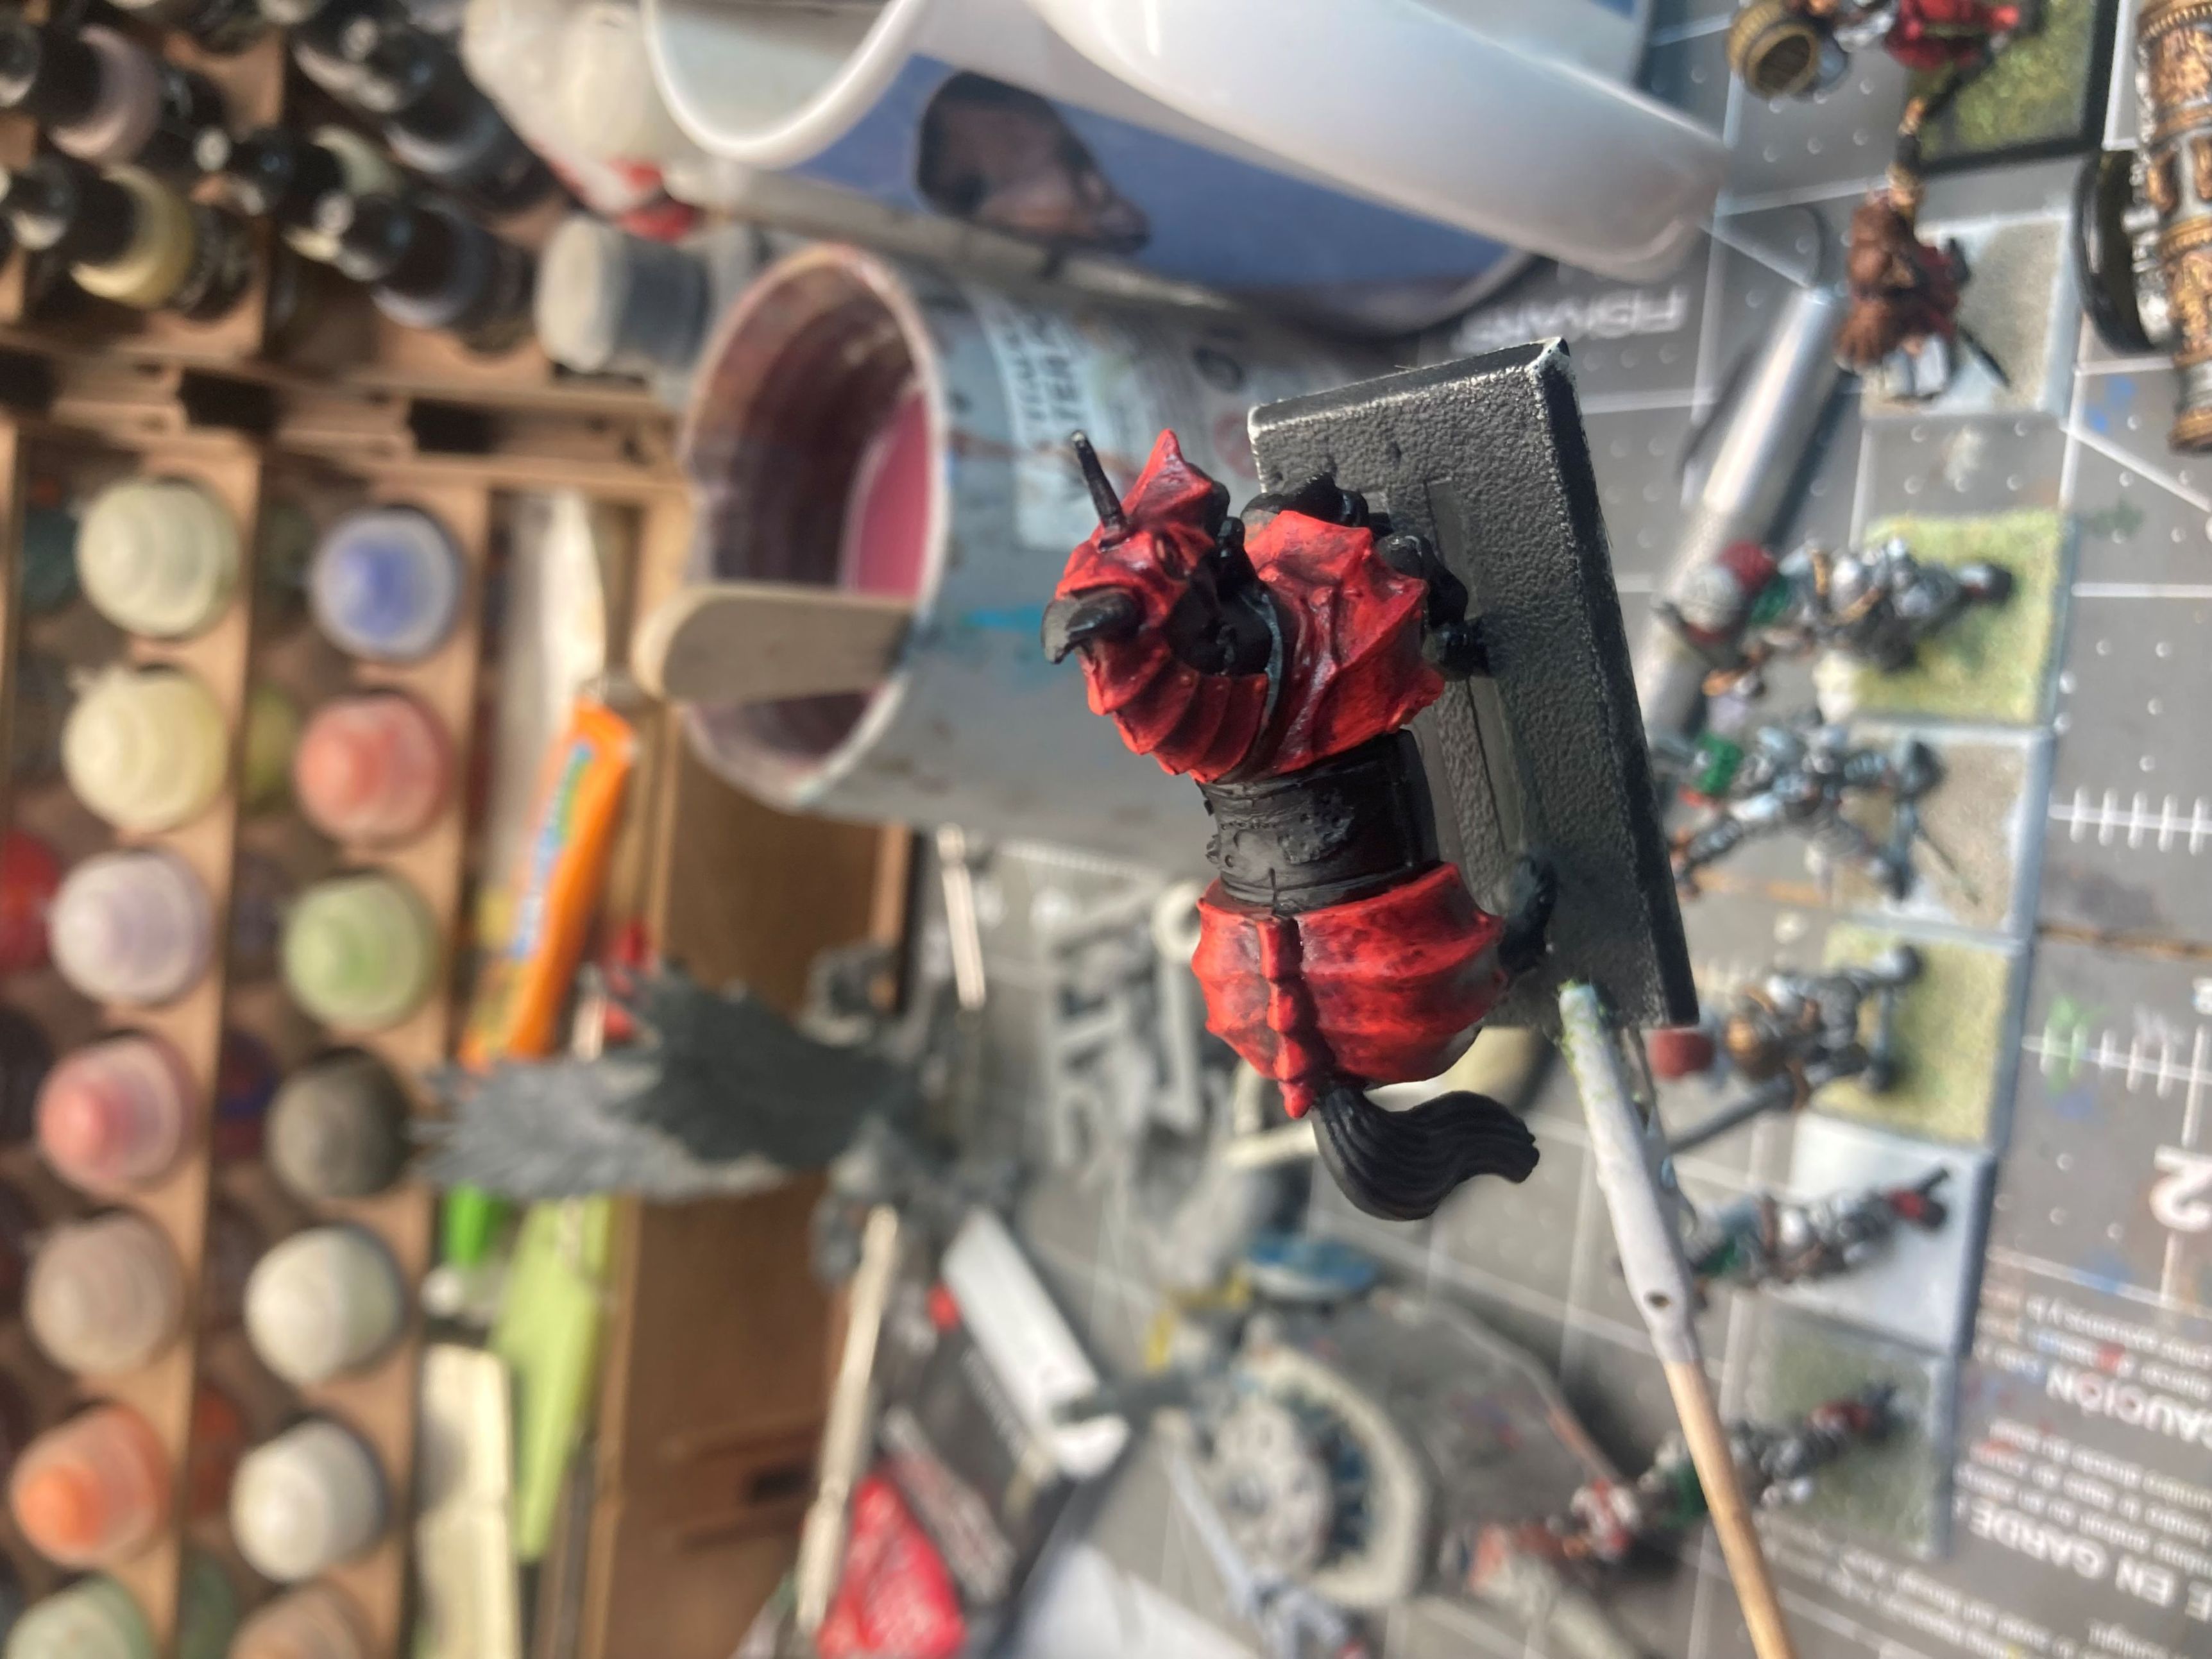
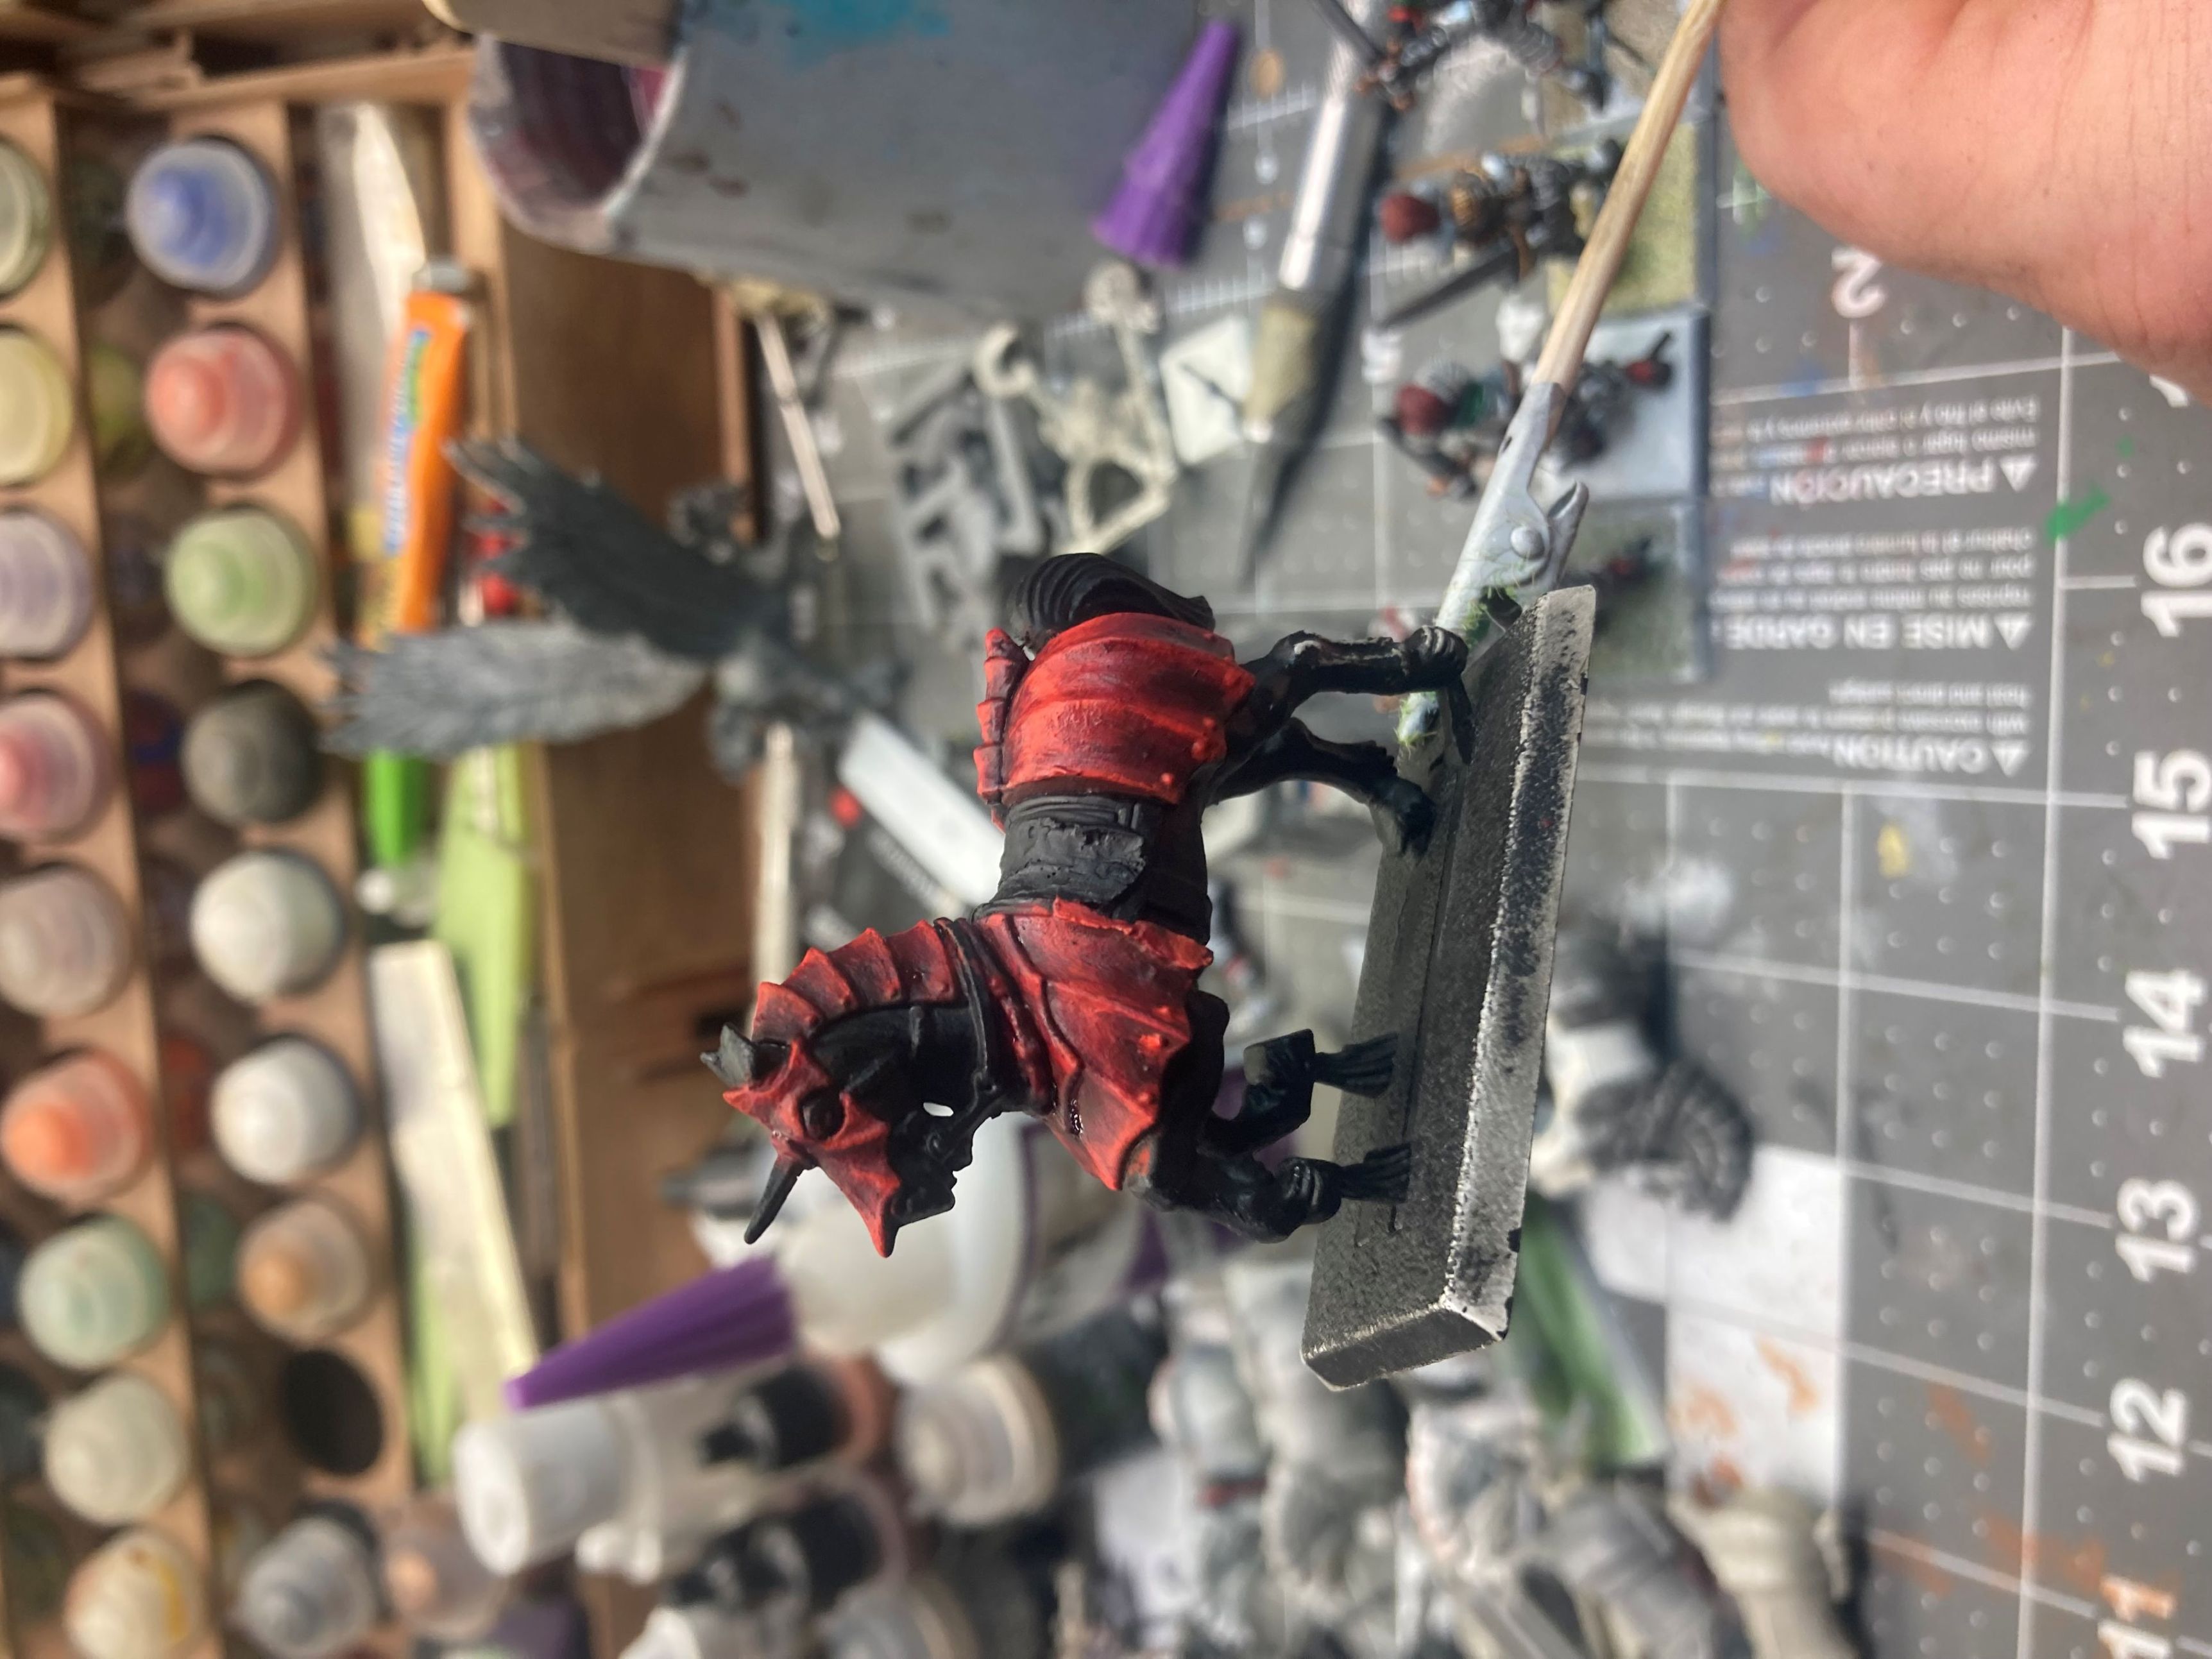
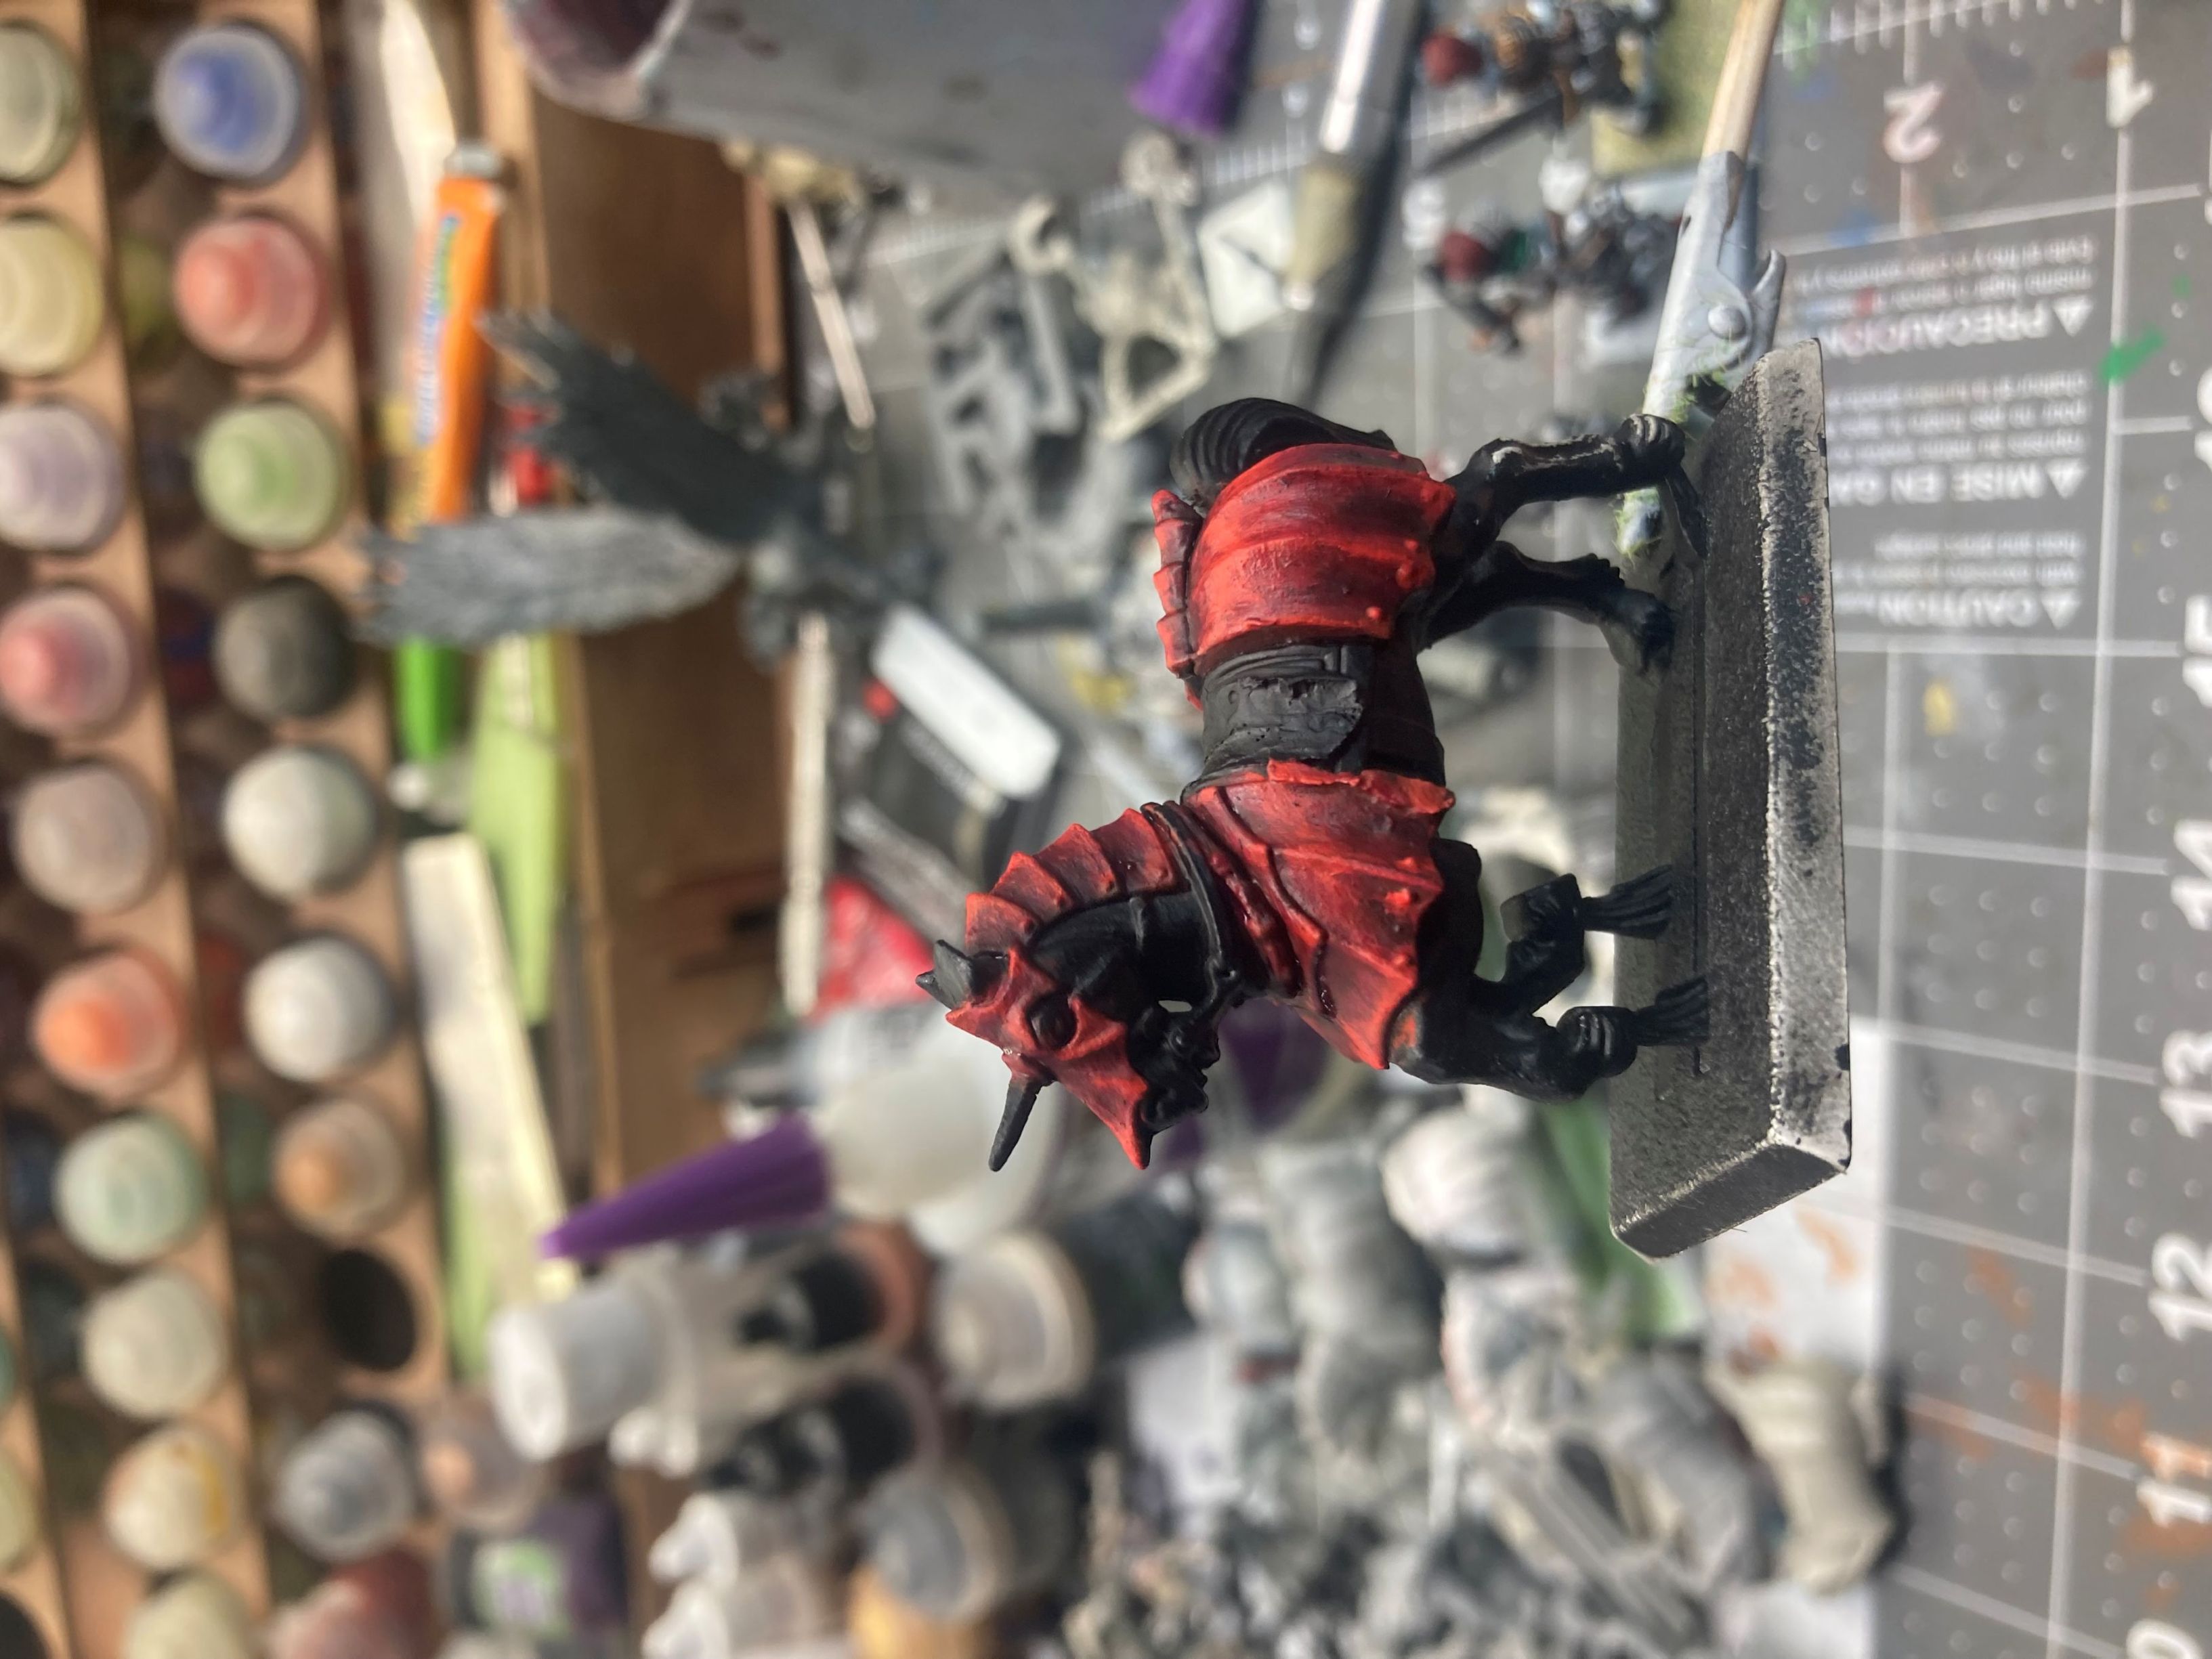
I went back to my mid-tone and thinned it down to almost a glaze. I started on the high points of the model where the natural light would be hitting it and started pushing down. With this new layer begin fairly translucent, it allowed the previous highlights and shading to peak through. I added in my highlight tone and slowly built up to a level I was pleased with. I’m hoping to go for a feeling as if the army is being dimly lit through the canopy of the Old World’s deep and dark forests. Now I just need to repeat the process.