


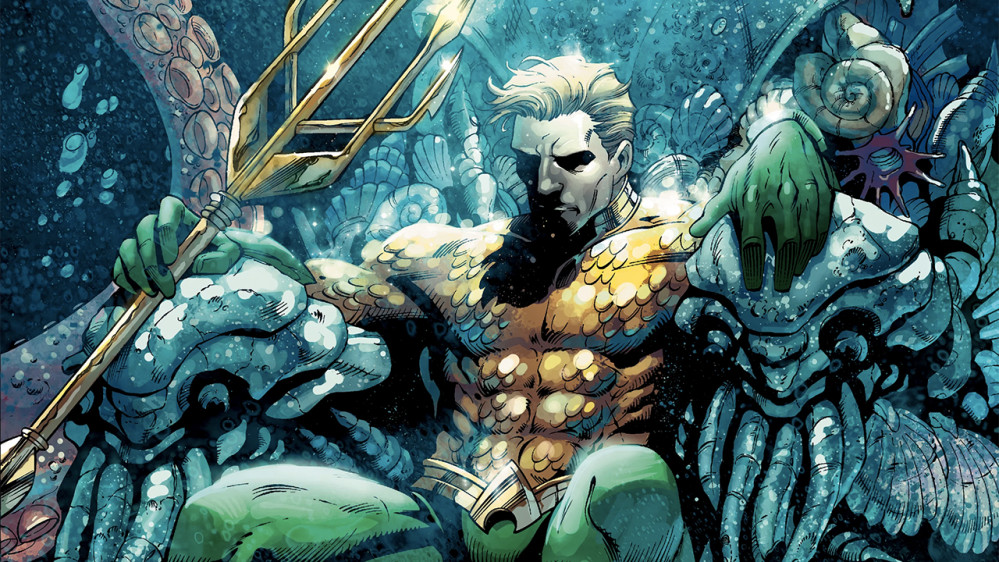
The Real Arthur Curry (Wappelmania)


Recommendations: 198
About the Project
This is my first attempt at painting a display figure in oil paints. The figure is a cheap second-hand plastic model I found on Ebay. It seemed perfect to try out some new techniques and see if I can come close to my level in acrylics with oils (which I enjoy painting in more). Most of the techniques employed, I learned from James Wappel on Youtube and Twitch for anyone interested in cultivating a new skill set. Painting in oils is not a style for everyone, but I have come to love and enjoy it greatly.
Related Genre: General
This Project is Completed
The Project Begins.
Hi everyone,
The past year I have been experimenting and practicing with oil paints, after stumbling on some Youtube videos by James Wappel.
Oil paints have revolutionized the way I paint, in that I now actually enjoy painting and find it relaxing. The biggest hurdle with oils is the steep learning curve. It is like the old saying, ‘You have to first empty the cup before refilling it’. This was the hardest part; putting a side the way I paint with acrylics and adjusting to the need of the oils.
If anyone is interested in using oil paints, then there is one lesson you need to learn before picking up a brush – and that is the oils set the pace of the work flow and not the painter!
Anyway, I stumbled on several cheap plastic figurines on Ebay and bought a number of them. These are ideal for me to practice on. They are also very well sculpted and if done properly are just as good as any resin model.
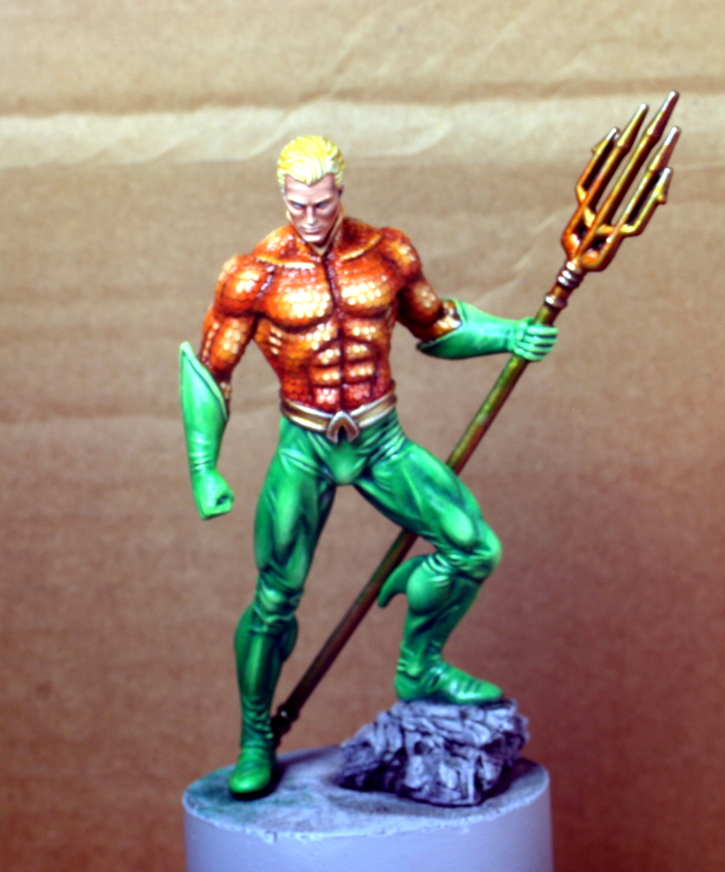
The first figure I attempted was Aquaman, because of the relatively simple two colour scheme. It is roughly a 70mm scaled model.
 The original plastic figurine exactly the way it arrived.
The next step was the cleaning of mould lines which was a bit tricky because of the potential for the material to burr. With a lot of patience and a gentle touch, I managed to clean it up and primed the whole model grey.
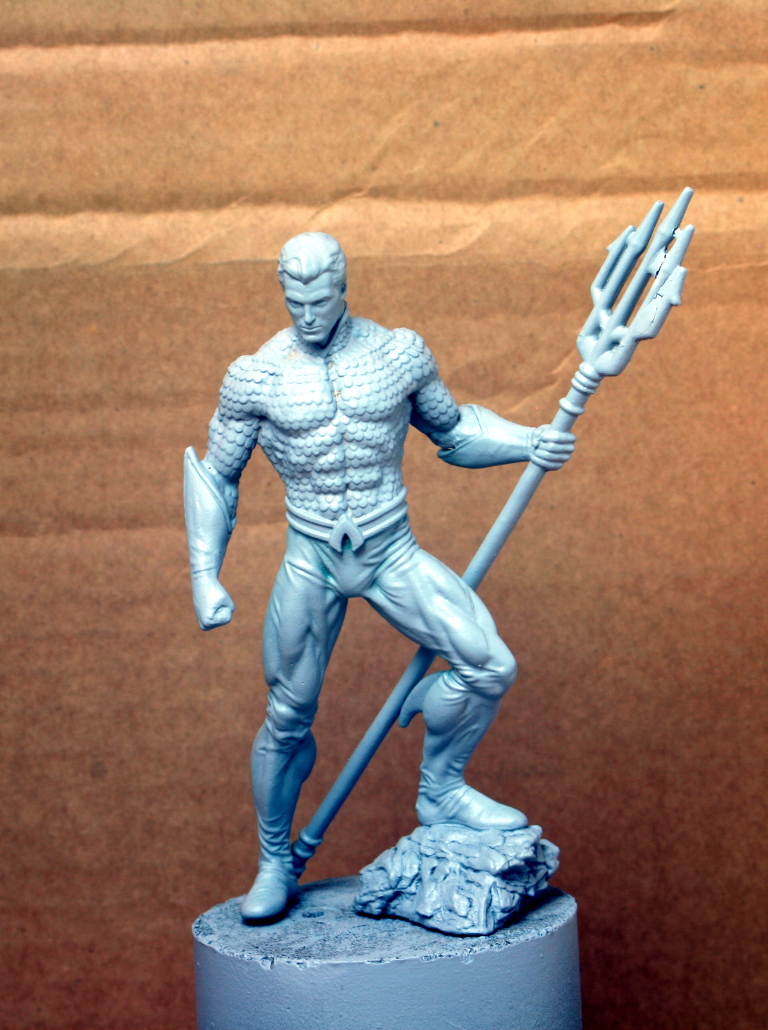 Cleaned, primed and ready for painting.
 The next step was to add an oil wash of a dark red and a dark green and after letting the paint set and the spirit evaporate, wipe most of it off. This creates a base on which to build the following layers.
When ready I painted on the basic orange and green with a dry-brush technique using very minute amounts of paint. I always choose colours that are opaque for this part, ensuring good coverage. The dry-brushing mixes and blends the orange with the dark red beneath. The same goes for the green.
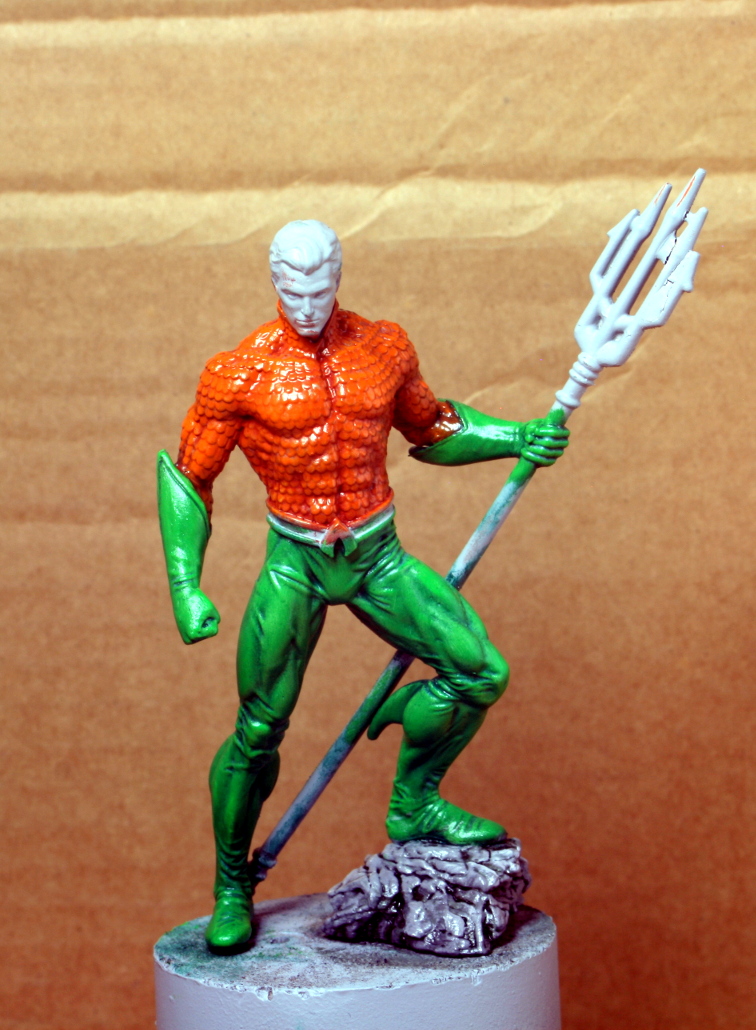 Colours are basically dry-brushed on!
After letting the paint set for 20 minutes, I went back in with lighter colours and started to blend in the first highlights and lowlights. After which, I let everything set overnight.
I will proceed with the second row of highlights and lowlights tomorrow. The paint will be semi-dry, but still workable.
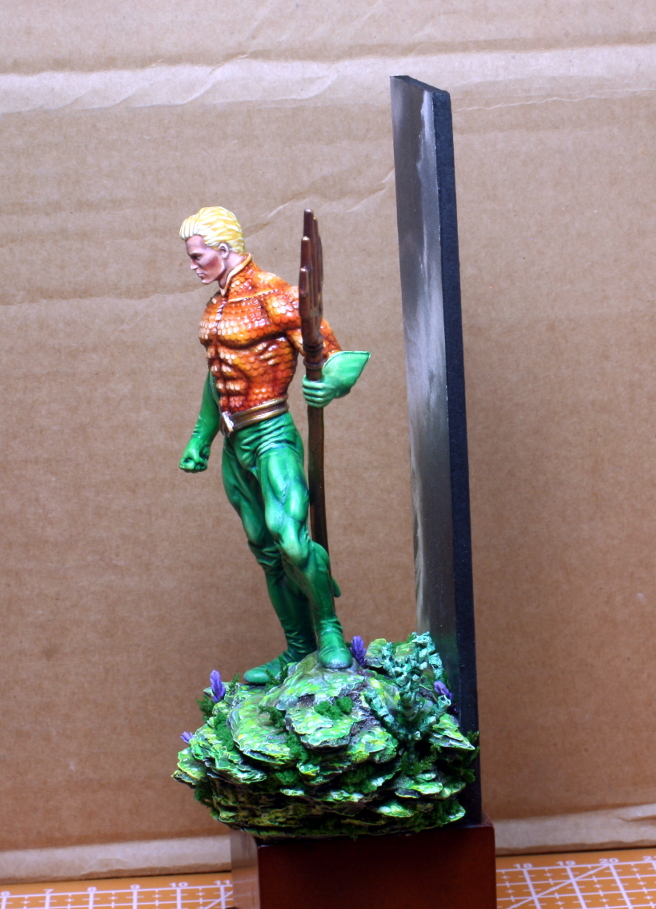
 The first highlights and lowlights.
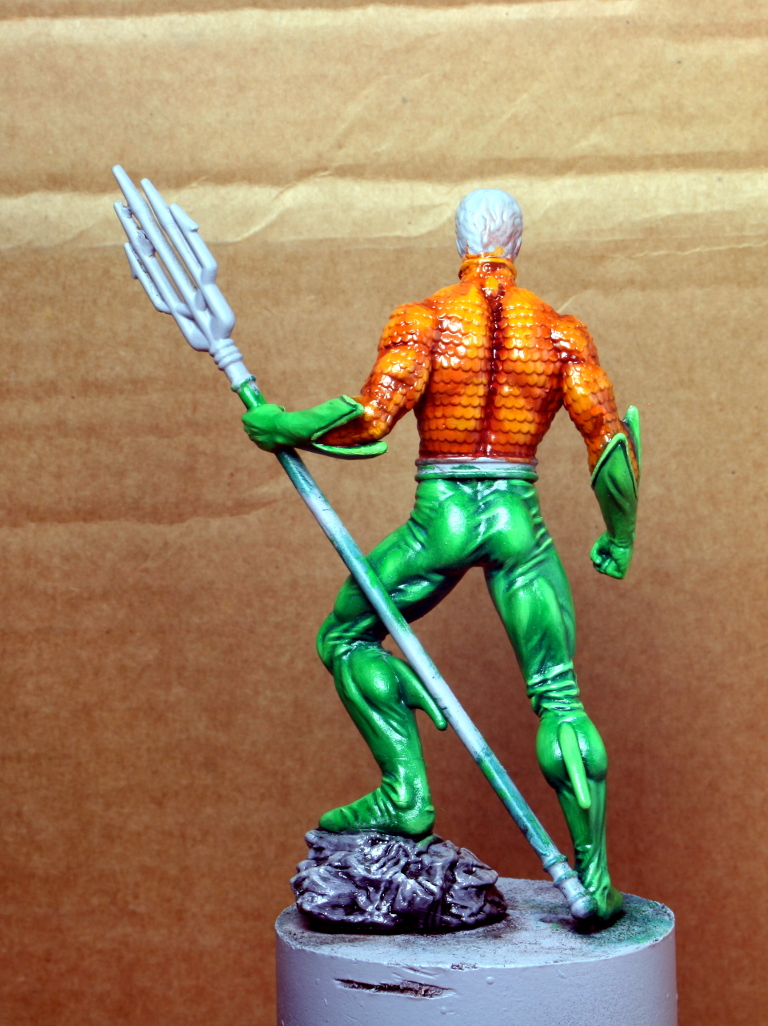 A Llold shot of the work.
I will continue the work tomorrow, so the next post will be in a few days. Until then stay safe and have fun.
NR
Another Step with Highlights.
Hi everyone,
After letting the first layer of highlights set overnight, I went back in and added another layer. The paint was still partially wet and allowed for limited blending, but enough to get the job done.
I also painted in the face and the metallics in acrylic. I added some reflections to Arthur’s trident as well.
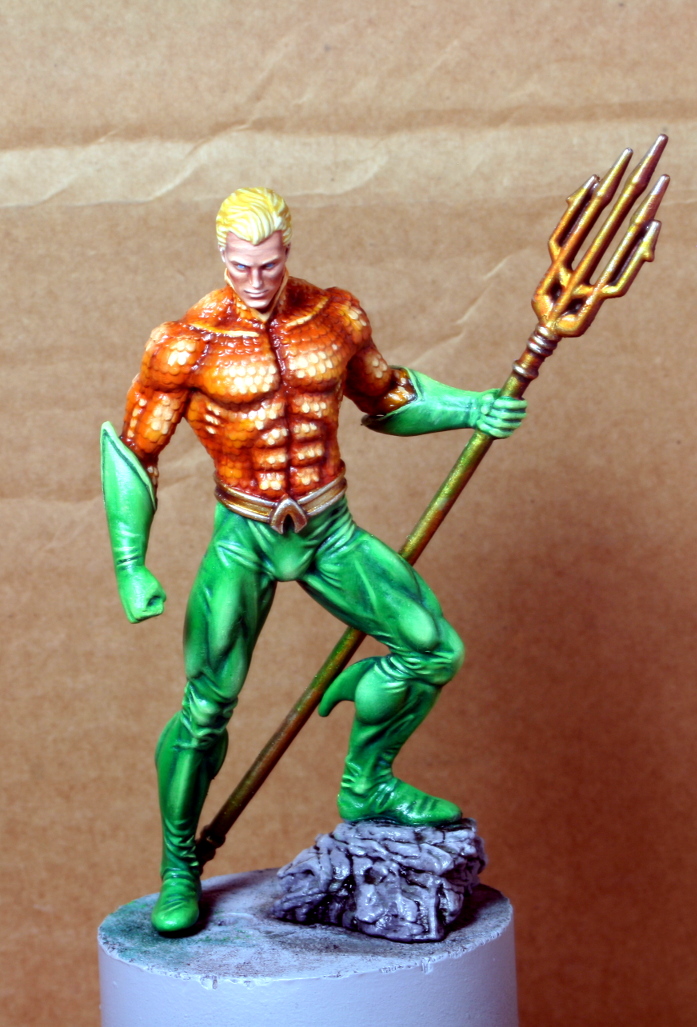 A second level of highlights and painting in the rest of the details like the face.
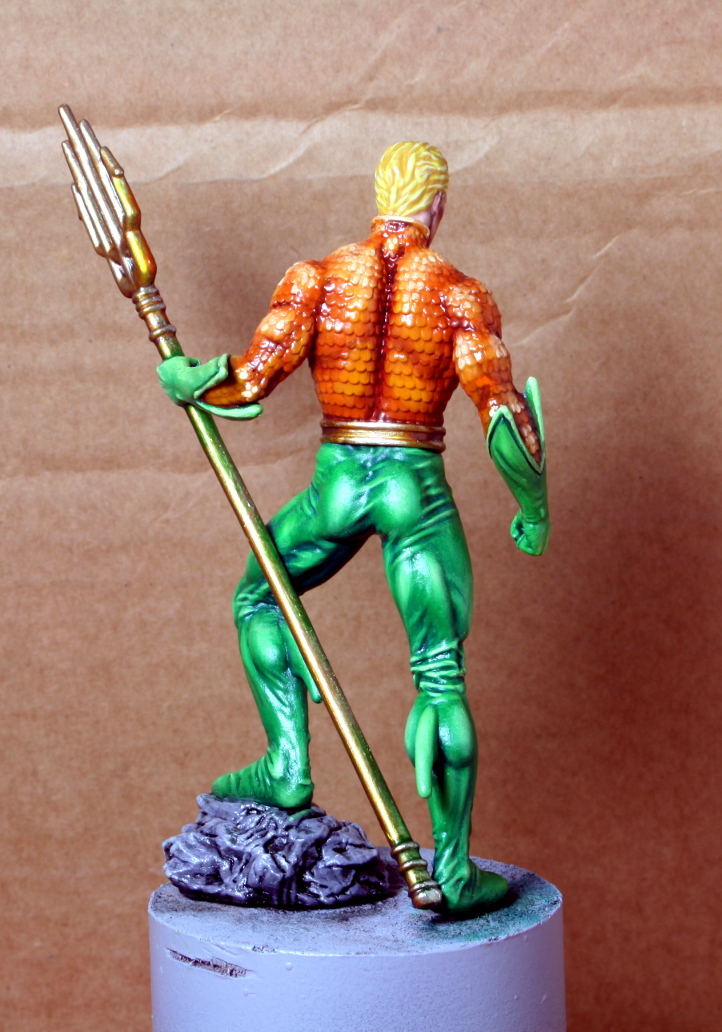 Rear view of the work-in-progress.
That is all for now. I will let the whole thing dry before coming in again to deepen the shadows a bit more. At the moment the model is quite glossy, but this diminishes as the paint dries.
Until next time, stay safe and have fun.
NR
Final Touches.
Hi everyone,
Now that the model is dry-to-the-touch, I can go back in and enhance the shadows and highlights with washes and filters.
I do this with the medium Liquin. This is a quick-drying medium for oil paints that also thins down the paint and allows it to be used as a filter or even a wash.
The only drawback with Liquin, is that it dries with a very glossy finish, but when dry I will give it a matte varnish – problem solved.
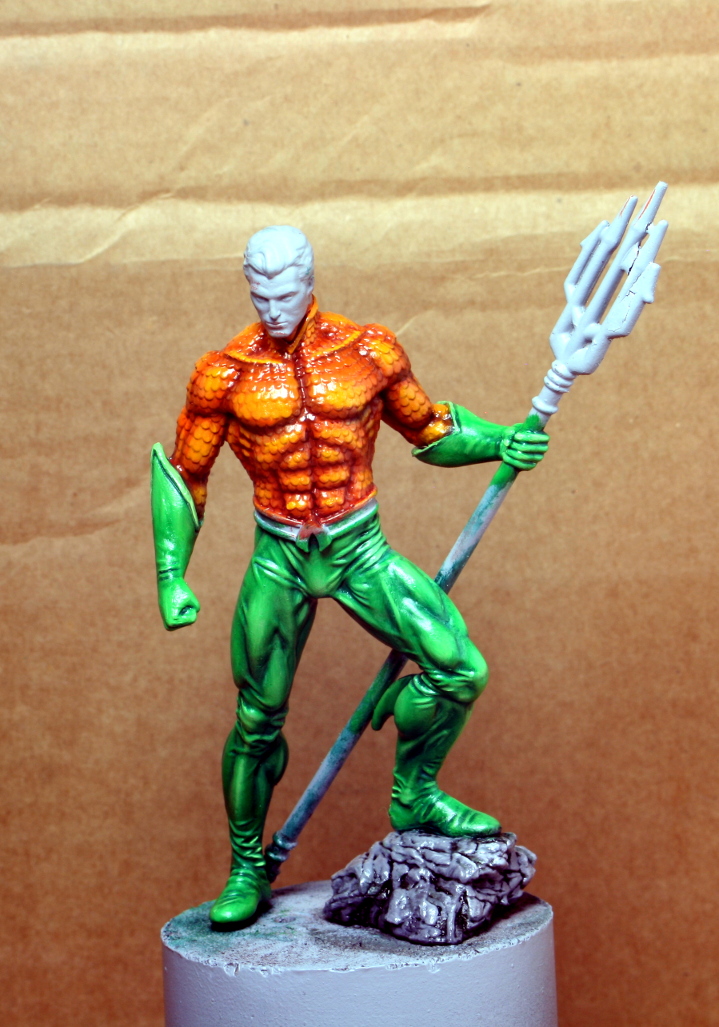
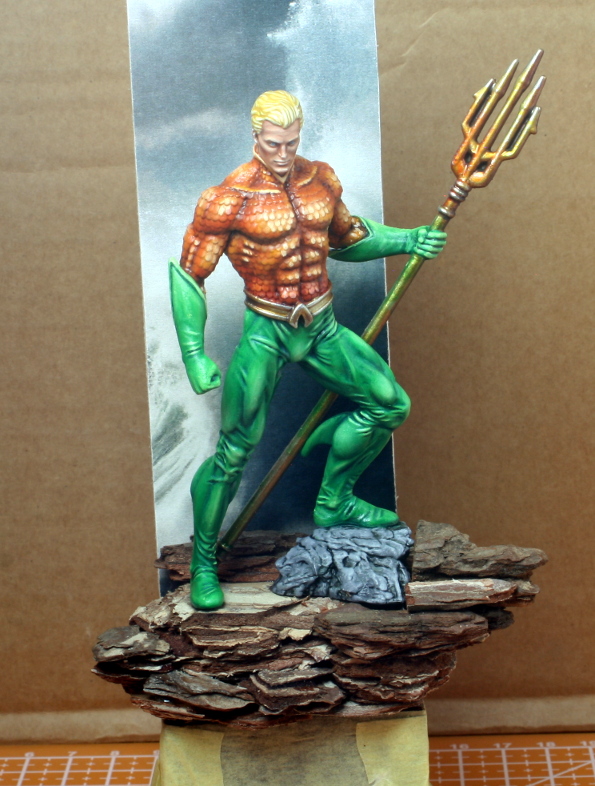
 Enhancing the shadows and deepening some of the highlights.
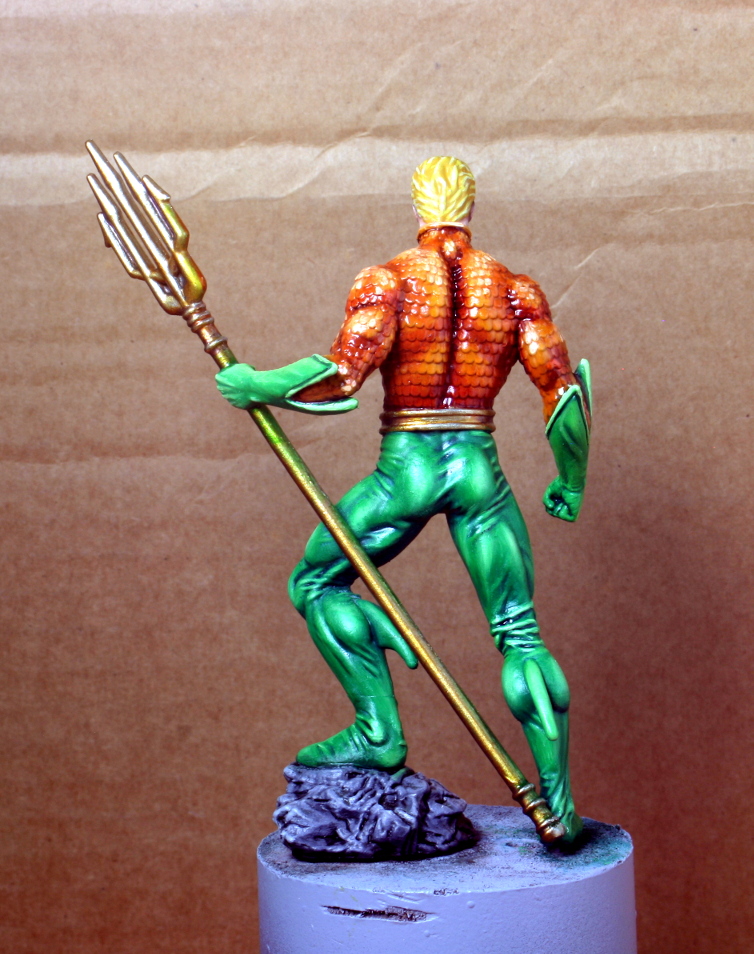
The next step is to start working on a simple base for the model. I will address that next week after the Liquin has dried up properly.
Until next time, stay safe and have fun.
NR
Building a Simple Base
Hi everyone,
After the Liquin filter and shadows dried to the touch, I gave everything a matt vanish to kill the shine from the Liquin.
The next step was to build a small and quick base, and put everything on a plinth. I used bark chips to build the base up and extend the it. I then used milliput to fill in the gaps.
The background at the back came out crooked! I swear I did not notice before taking the picture. I might try to fix it, if it bothers me enough.
 Added matt varnish and built up the base with bark chips.
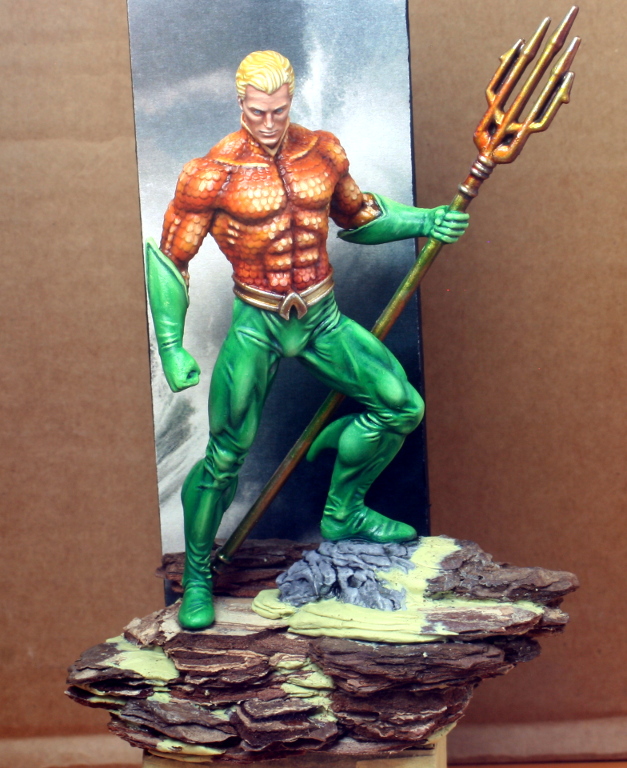 The base glued into place and all gaps filled in.
All I have left to do is paint the base, which I will also do mostly in oils. That will have to wait a bit though, since I have other things to work on.
Until the next post, stay safe and have fun.
NR.
Painting Up the Base - Part 1
Hi everyone,
I managed to find some time to work on this project, and since all I have left is the base – well I worked on that!
The painting is very basic for this post – a base coat, then drybrushing and afterward several washes.
An hour of work, and maybe two more hours to go.
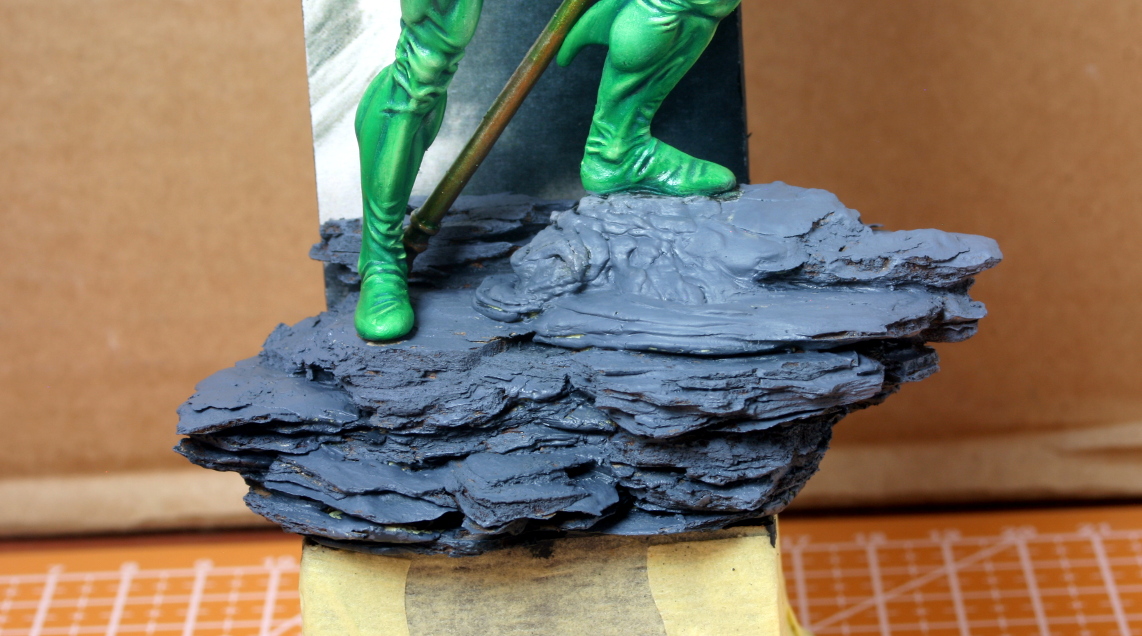 A heavy grey base coilour is chosen.
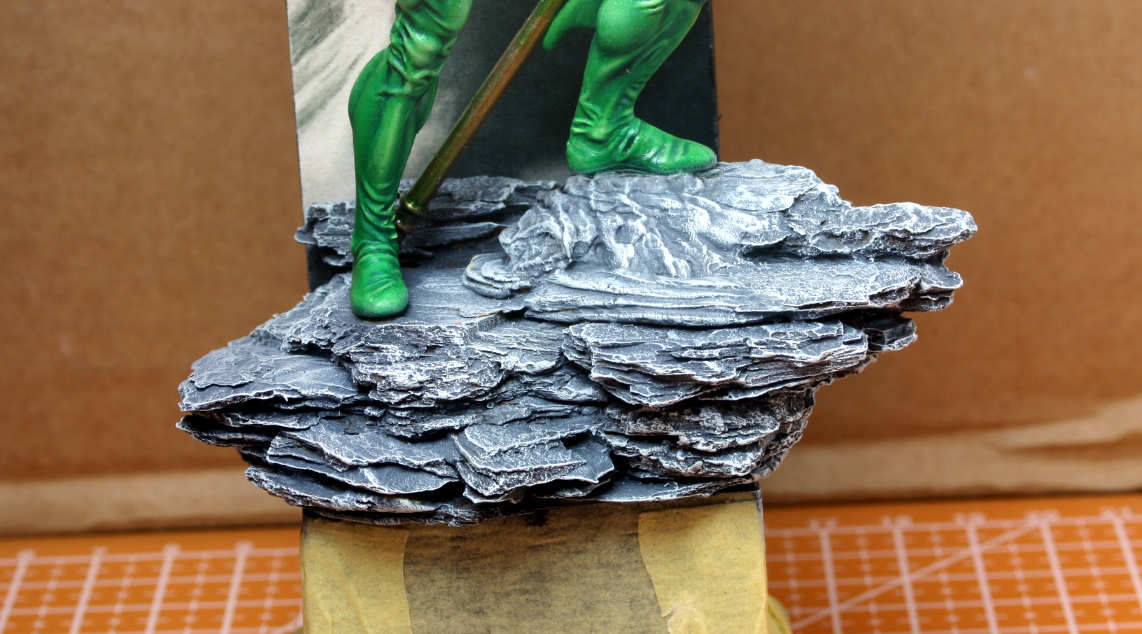 Severaly layers of drybrushing.
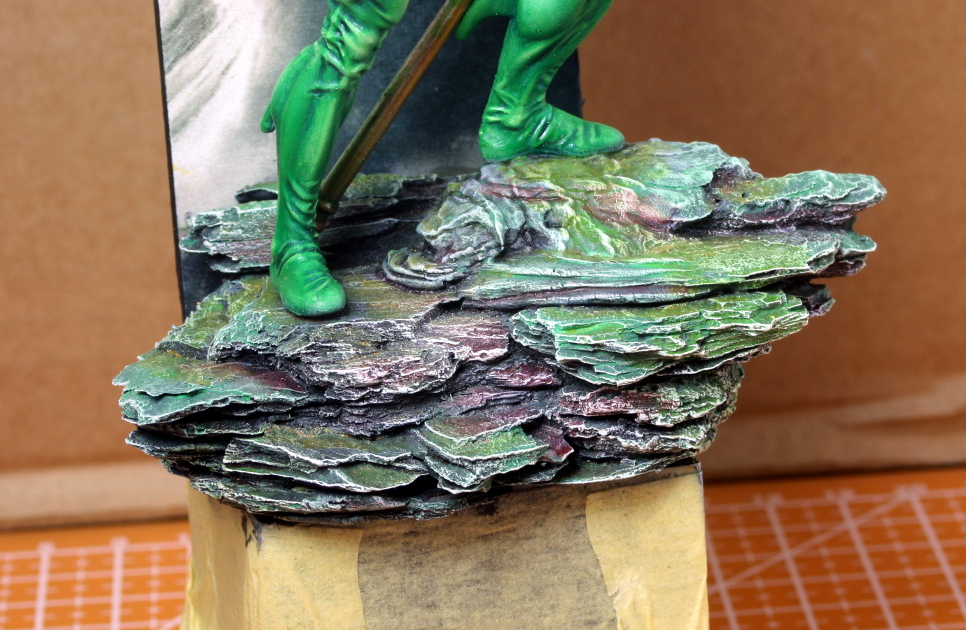 Some washes to give the neutral grey some tone.
The next stage, is to continue painting up the base and add some vegetation.
Until next time, stay safe and have fun.
NR
Painting Up the Base - Part 2
Hi everyone,
A quick update. I found some time to render and add some details in oils (mostly lichen) to the base to make it more lively in colour.
I let the base dry for three days, just to be sure, before taking a picture (to avoid the glossiness).
The next step is to add some vegetation, and the whole piece will be ready. I hope to do this in the coming week, so by next Sunday this project should be ready as well.
 Added some details with oil paints and left to dry before adding vegetation.
That is all! Next week, as I have just said, this project will come to an end. Then I will choose another side project, in the same vein, to do.
Until then stay safe and have fun.
NR
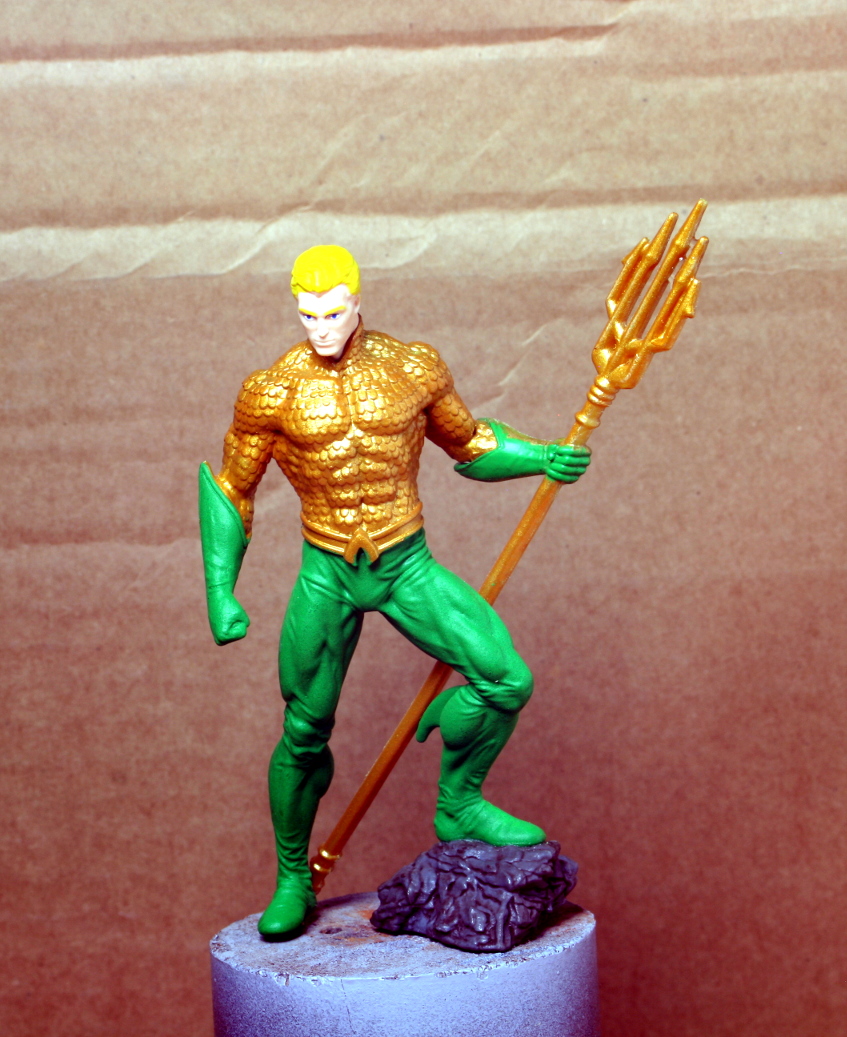
The Project is Now Complete.
Hi everyone,
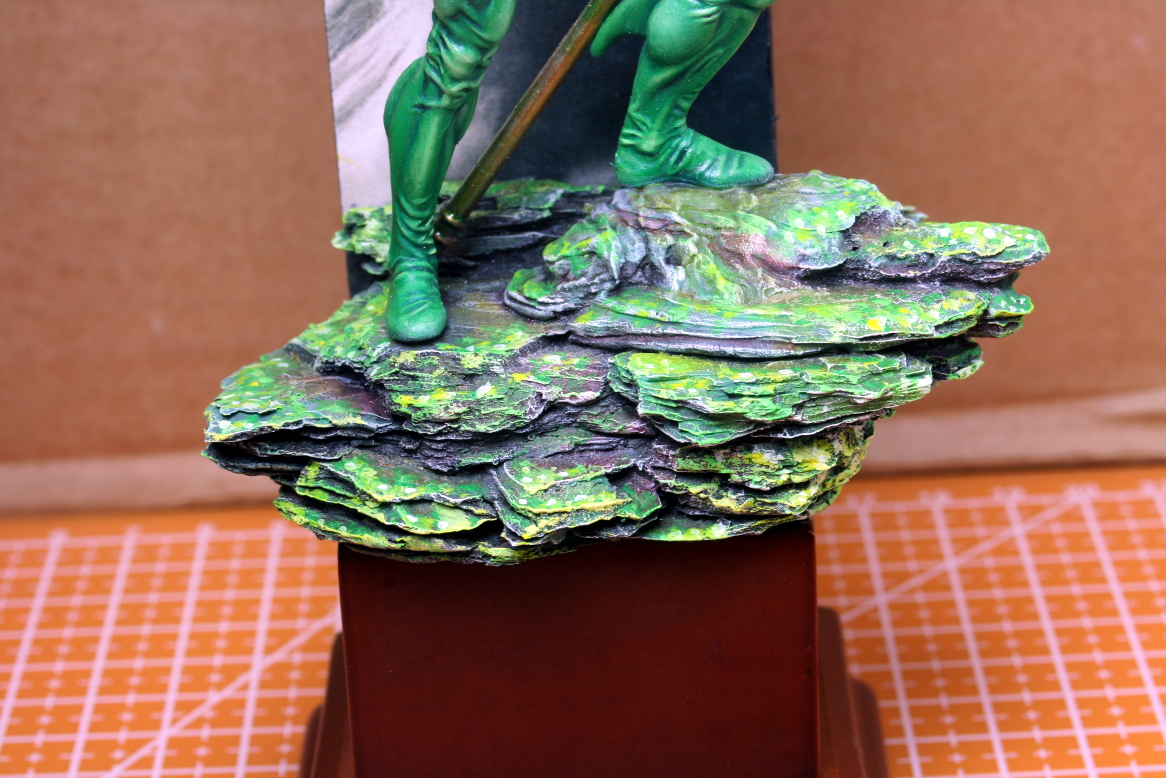
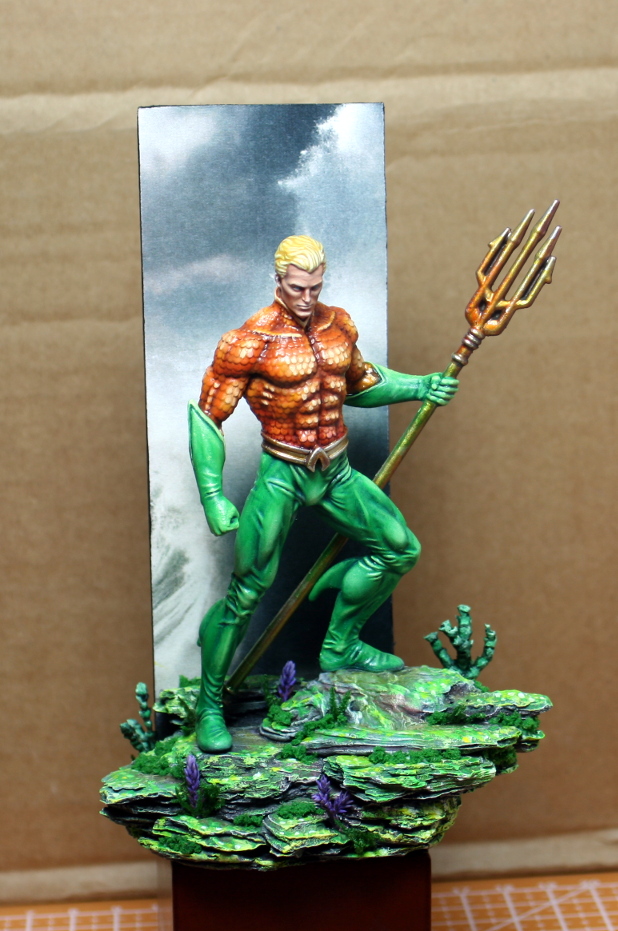
Just finished adding the vegetation to the base, and took several photos to boot. I am quite happy with this little project and I plan on doing more like it.
The vegetation is basically dried local flora that was given a paint wash and highlighted when dry. It really looks like coral!
I also used some dried Xmas moss that is sold in bulk and some foam scatter in the cracks and crevices.
It is always a conundrum deciding how much vegetation to put on. I decide that less was more in this case, as I didn’t want to divert attention from the model.
 Added dried plants painted up and some scatter material.
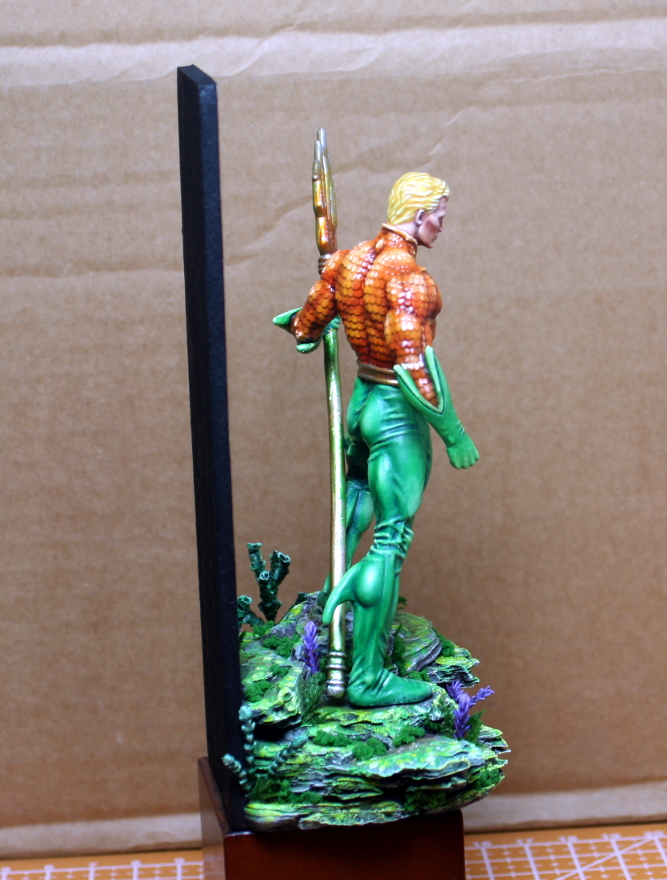

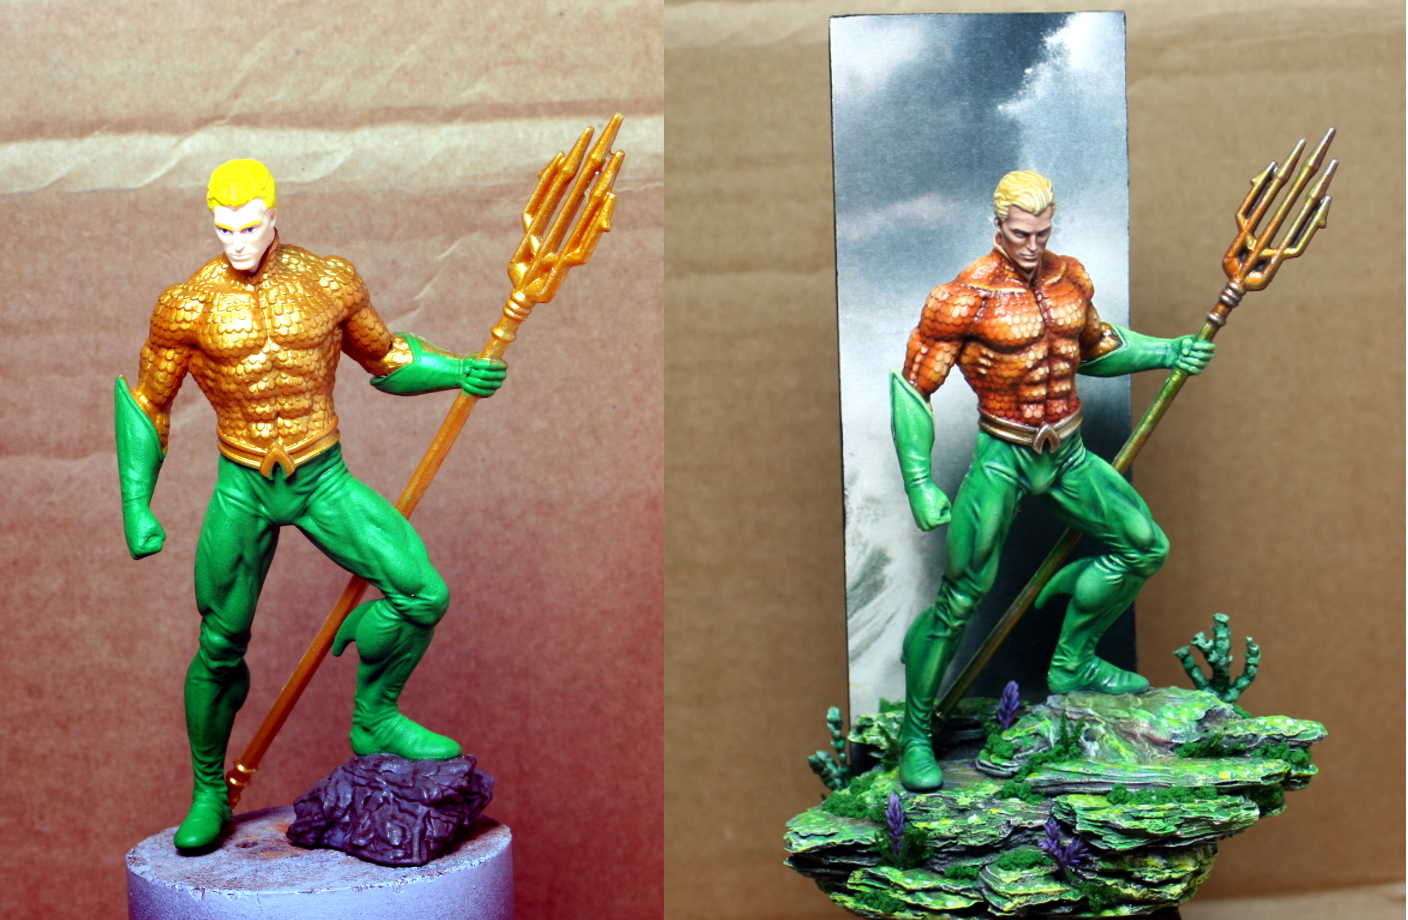 A side by side comparison of the begining and end result.
That is the end of that. I will start a similar project from the mountain of stuff that I have stored in boxes. I just have to decide what to do. In the meantime, I will continue with my Bronzecast Ogrion army.
Until the next project, have fun and stay safe.
NR


