


Modular Gaming Tiles


Recommendations: 117
About the Project
Create some modular tiles that can be used for skirmish and RPG that don't require too much storage.
Related Genre: Fantasy
Related Contest: Dungeonalia 2023
This Project is Active
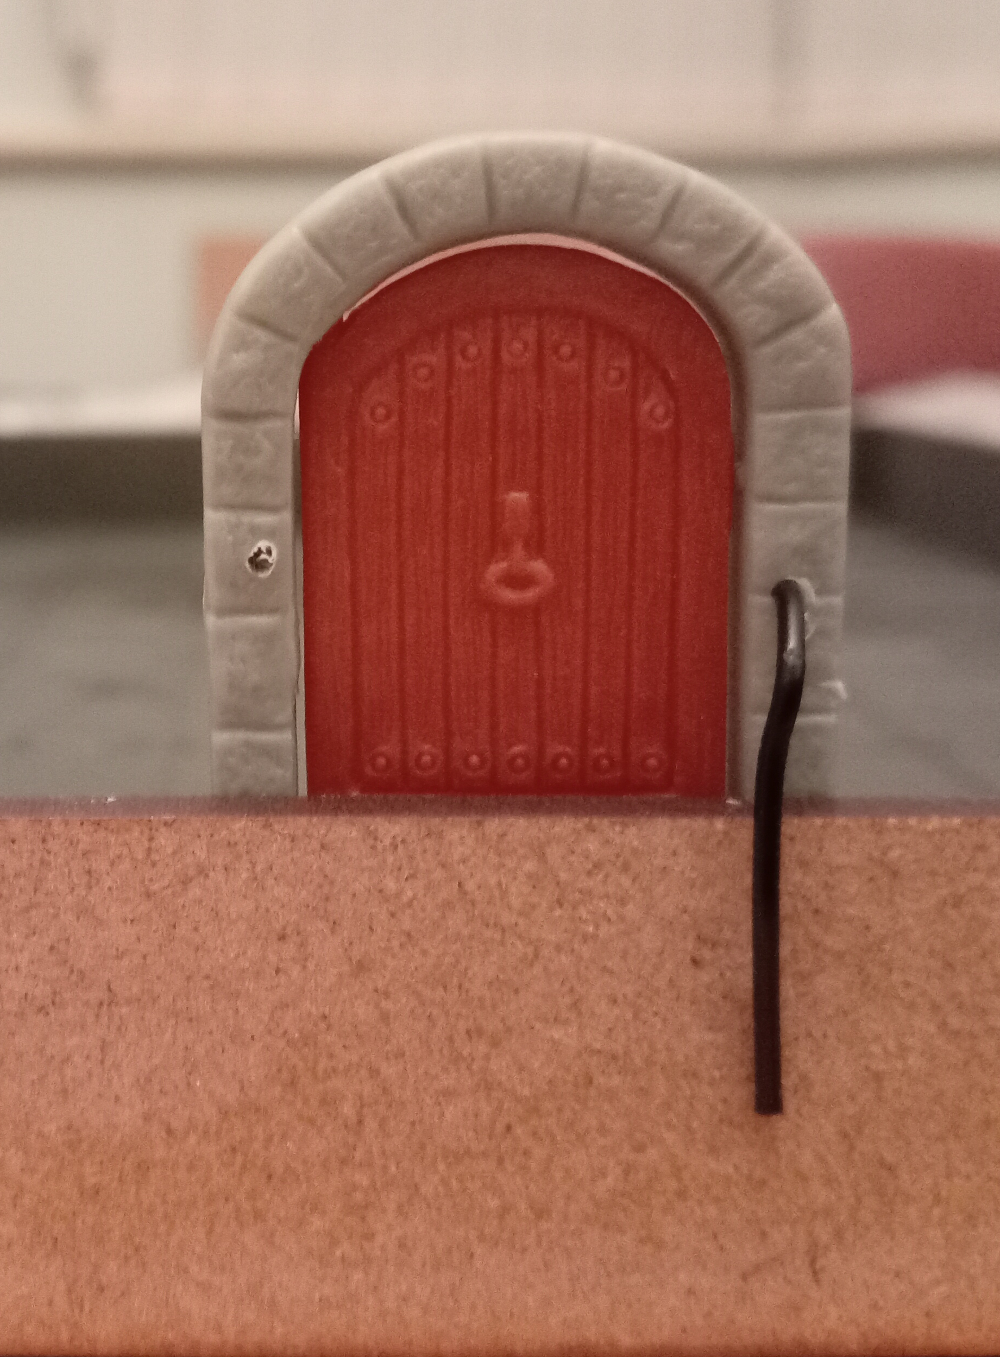
A Door Problem
I was wondering how to fix the connecting door problem on the tiles when it suddently dawned on me… paperclips.
The doors from zombicide black plague are not being used but I didn’t want to just plop them down on the tile… I wanted to attach them.
So I decided to do a test involving a pin drill and a paperclip… and it works.
Drill small hole in door frame. Blob of superglue. Insert paperclip. When the glue is set I can bend the clip to shape and trim to size. And as a bonus, the door will still open.
So now I have a lot of door frames to drill (I have over 20) and blobs of superglue to apply.
The following images are from the prototype…
The End Is Nigh
My week off is ending and so my time to work on this project diminishes.
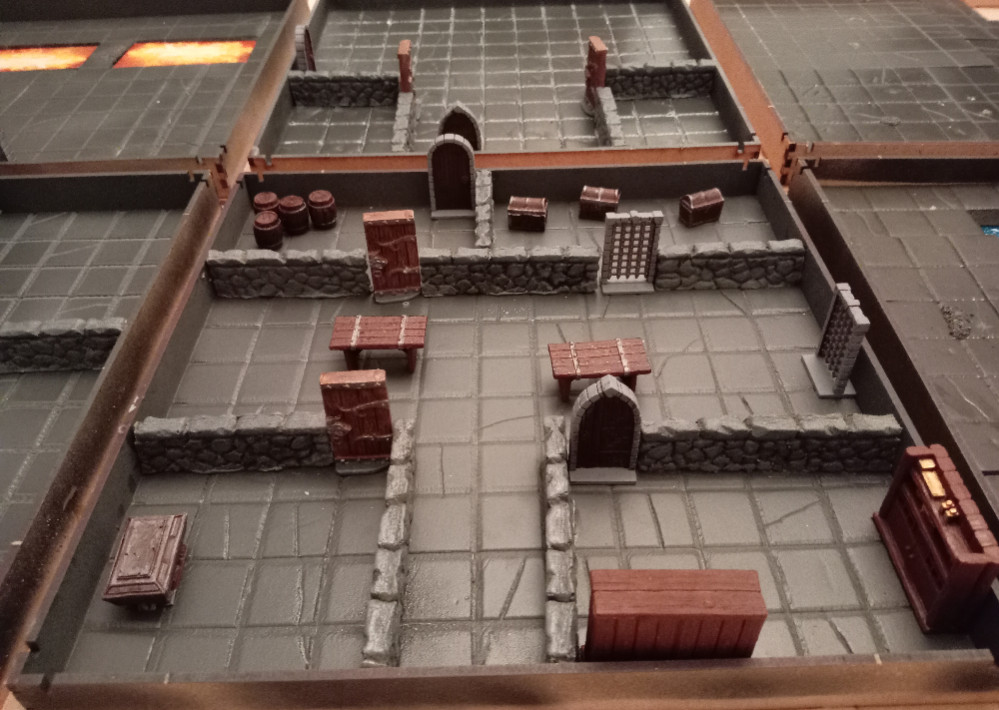
I’ve created 15 tiles. The others can’t be flipped as they have surface details, or a cutout.
The walls are glued in place, but everything else can be moved.
If I get time I’ll make some connecting doors to link the tiles.
However… the tiles can be used now… so I count that as a win.
 Here be dungeon...
More Doors... (Not Mordor)...
I was looking for more doors for the dungeon… and remembered Dungeon Saga.
There is no longer a shortage of doors for this project. And as a bonus I have treasure chests, tables and numerous other things.
I also picked up one of the random terrain boxes that mantic sold last year… along with Barroom Brawl…
Fortunately most of the ‘dungeony’ items are already painted.
 Every dungeon needs a bar...
Busy Day...
I had a productive day working on tiles…
These are the first ten and although they need detailing… they look ok.
The walls are some resins I bought online and cut down to fit better.
Resin doors are in short supply, but most adventuring parties don’t move on until they kicked down all the doors in one area. I’ll see if I can find more on ebay.
 Ten down... few more to go.
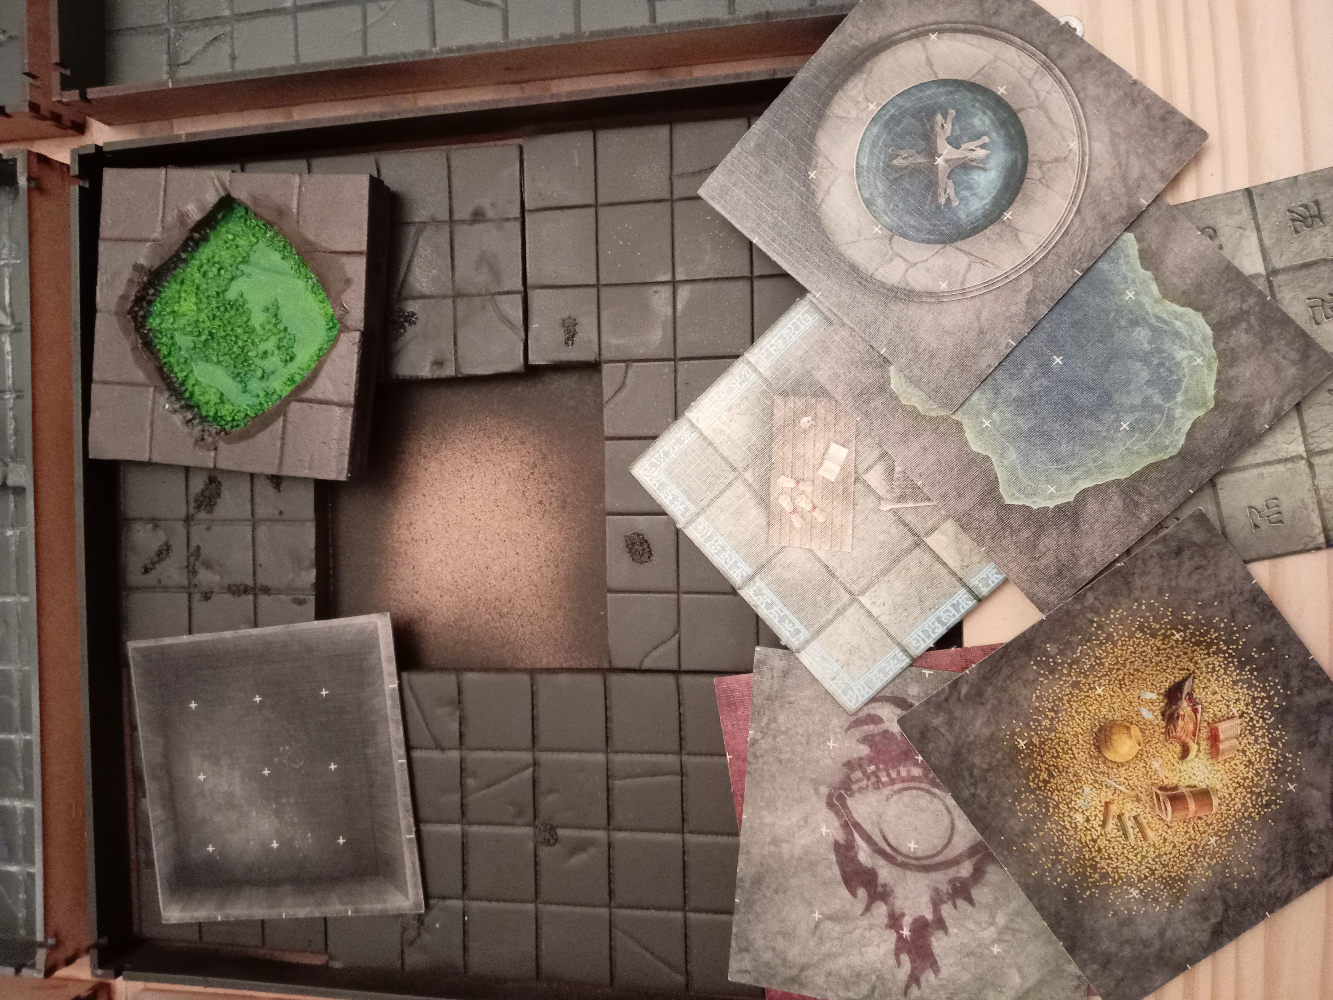 The centre space is removable so I can swap out for some d&d tiles I have...
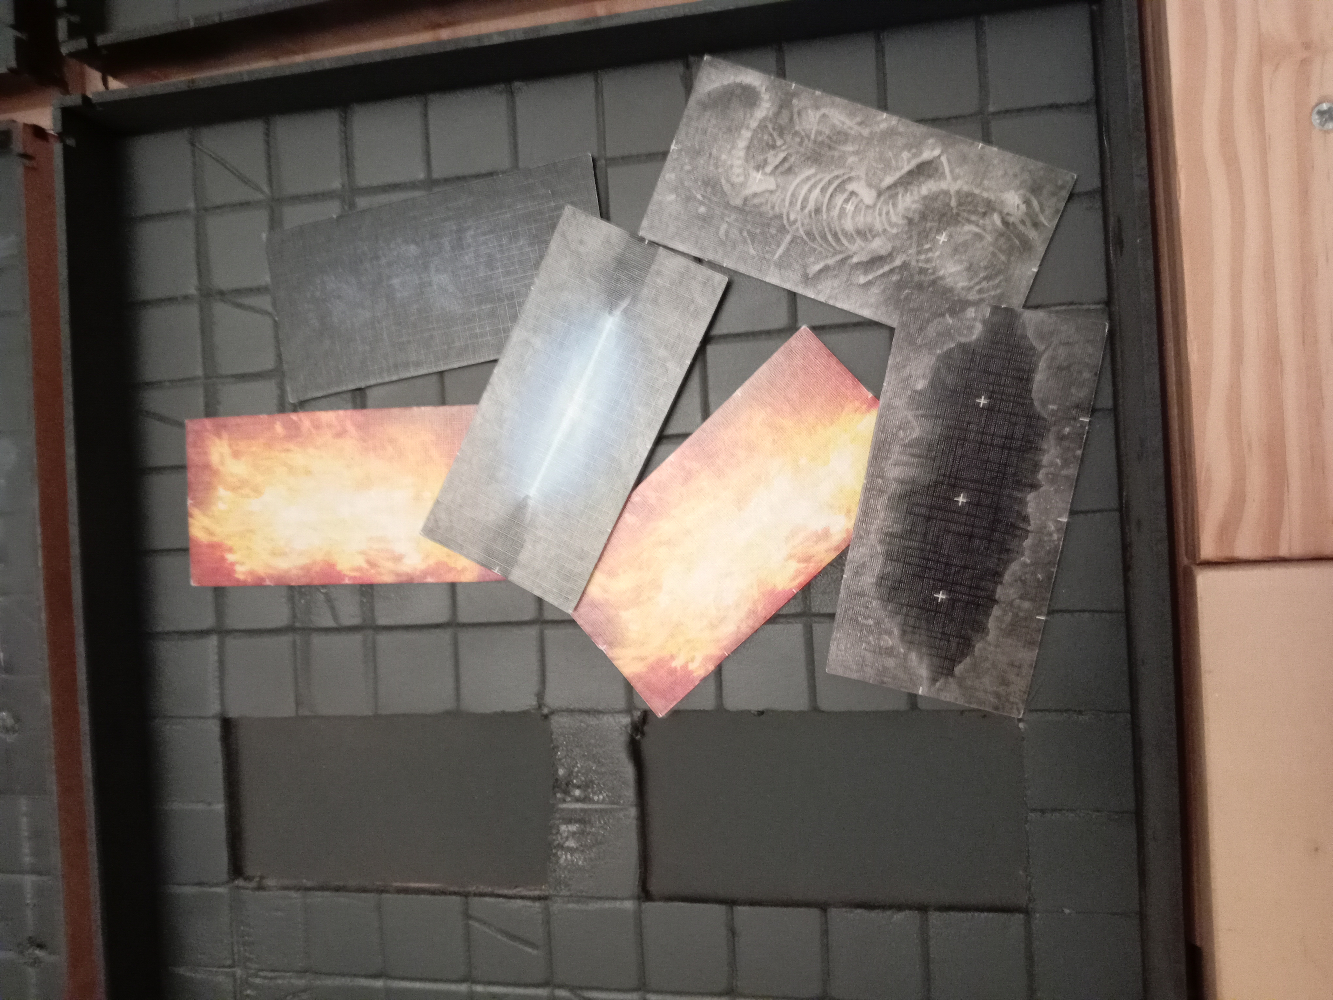 Same here, but smaller tiles.
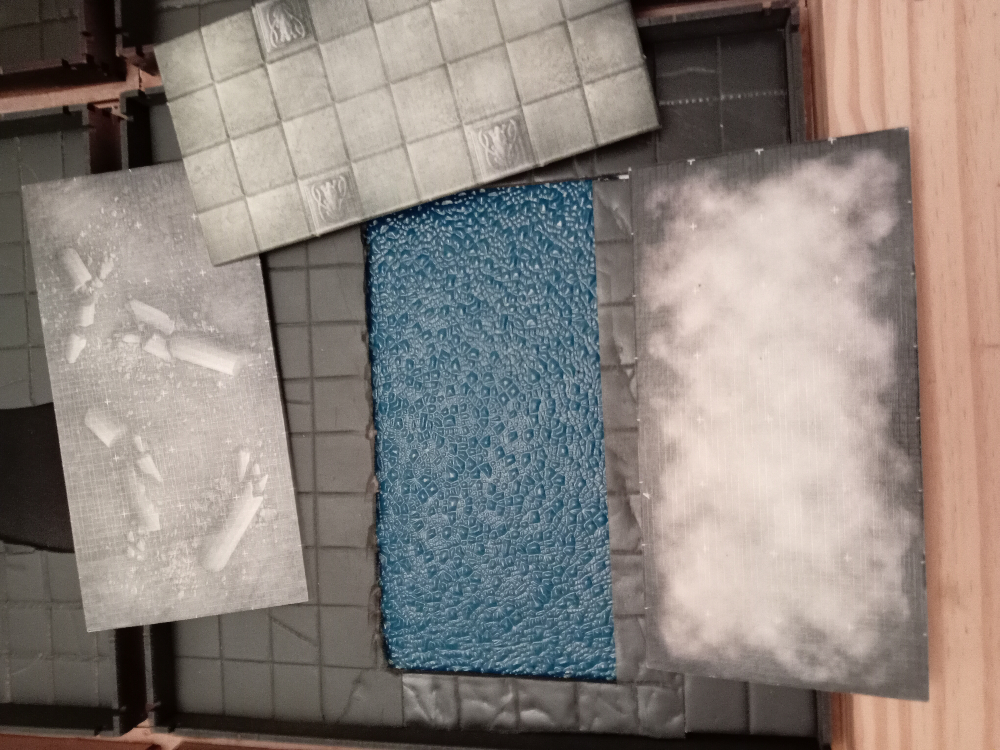 And these are the biggest of that set... designed to cover the indoor dungeon pool.
In Production
Started work on the flipside tiles. Four of them so far, including one that will be used as a crevasse with a bridge that will not be permanently attached.
No walls, texture, or terrain features added yet.
When I get around to using the tiles I will place ziplock bags underneath which will contain a mixture of props and adversaries, plus the doors.
Props will be treasure chests, furniture and such.
And the adversaries will be the monsters and villains lurking in the darkness.
 Four tiles started... lots more to go.
Preparation
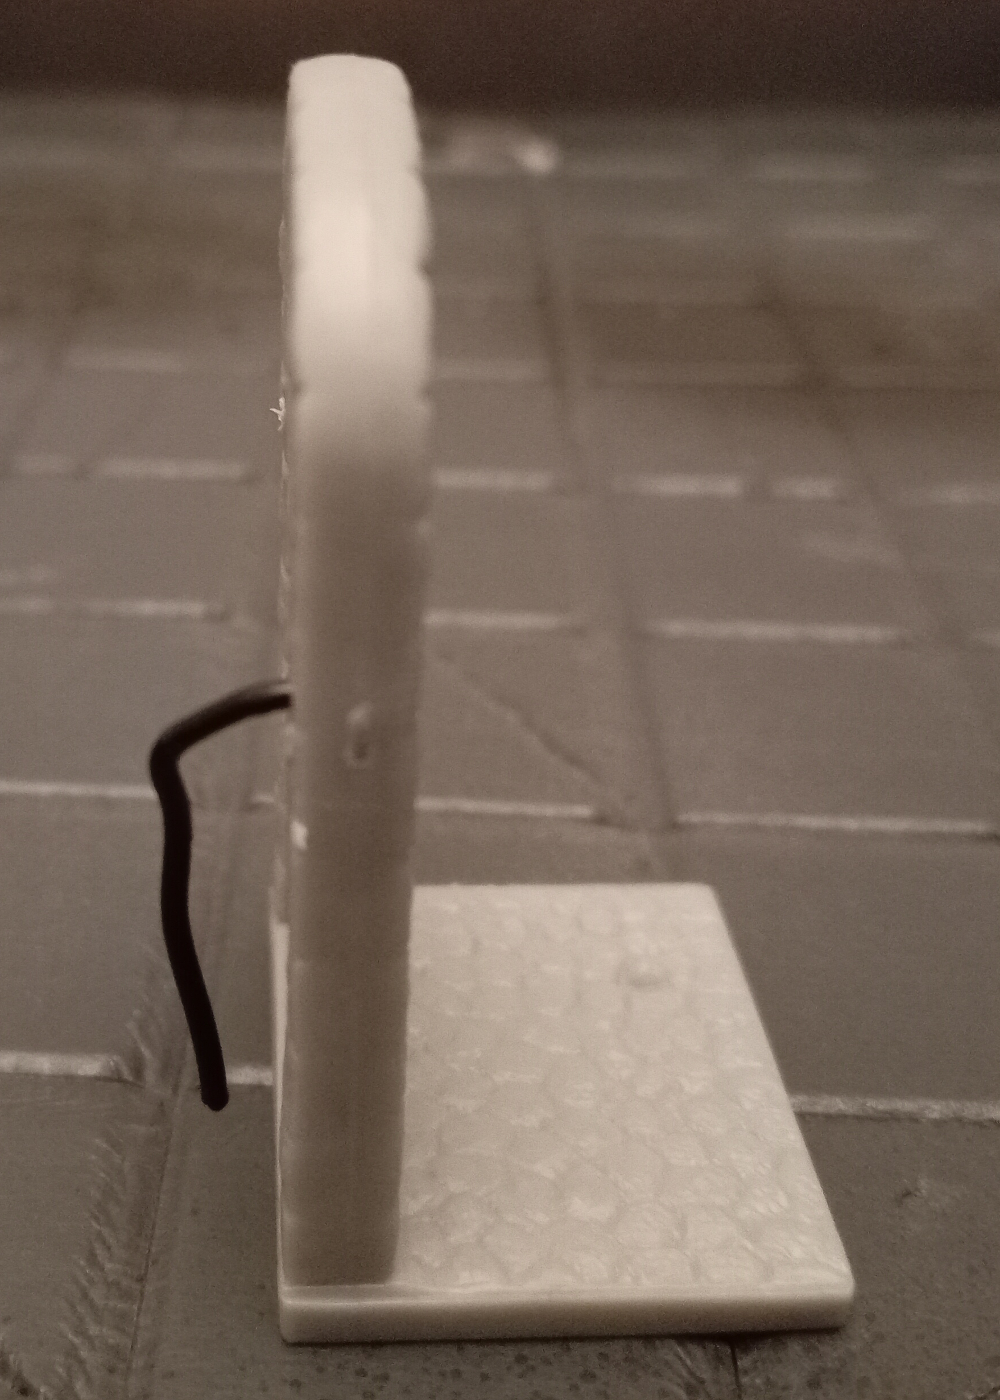
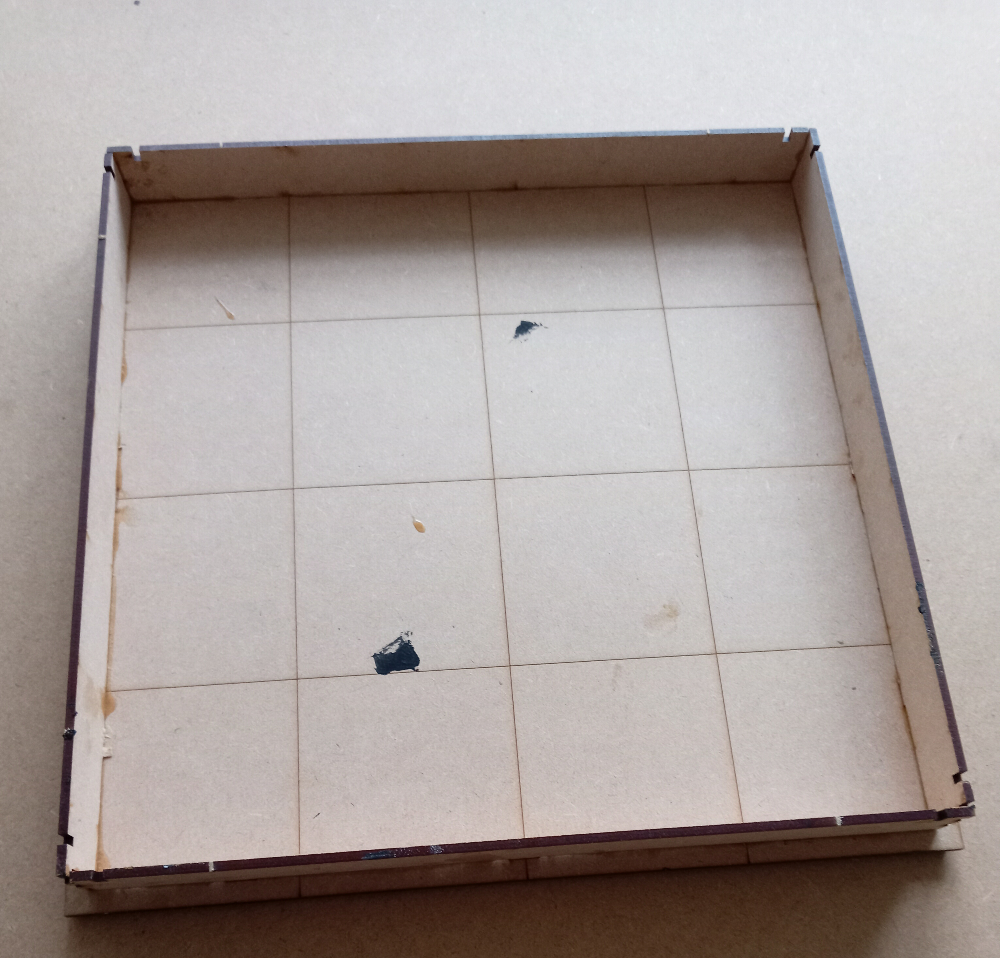
Cut a piece of 5mm foam board to use as a base and made sure that the wall I want to use will fit inside the tile.
Obviously the door is too tall, but I’ll insert that as required during play.
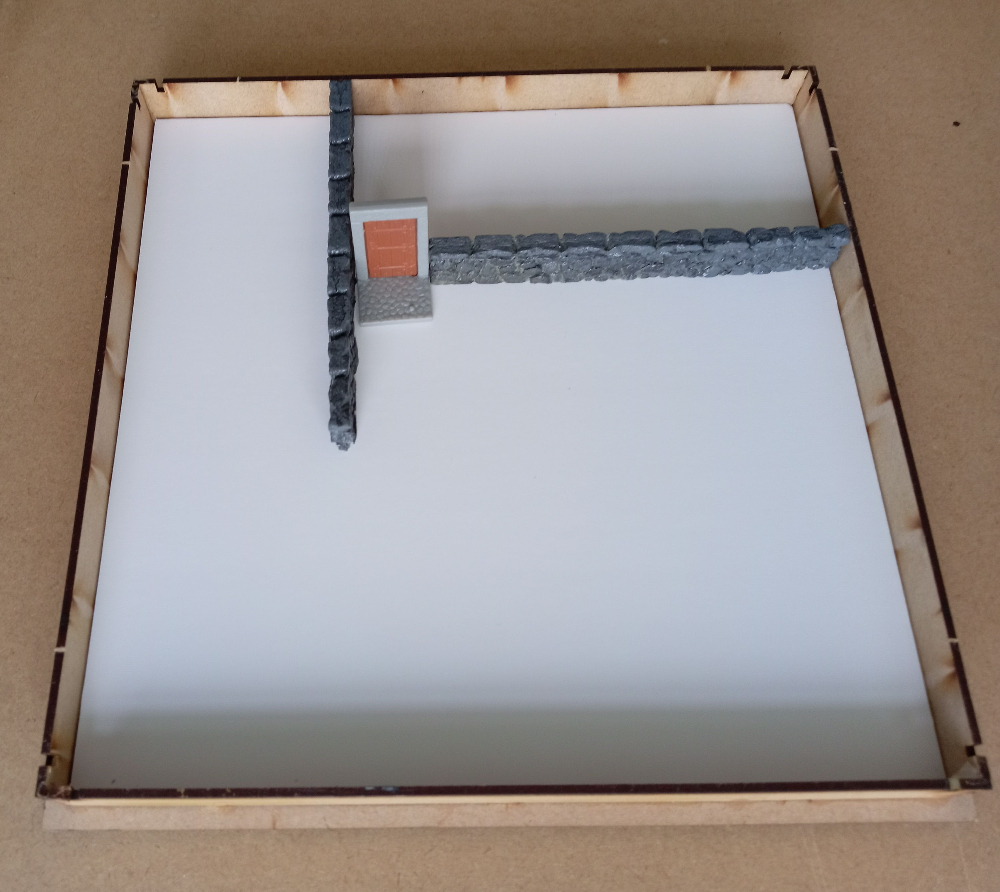
This tutorial by Army Painter for their Gamemaster range is how I’ll prep the tile.
The Dungeon On The Flipside...
This never really felt dungeony enough for Dungeonalia… until I thought about flipping the tiles…
 Flipside of the TT Combat Tiles
The underside of the tile is around 11 inches square inside and deep enough for 1 inch high walls and terrain features.
Plan is spray paint grey and make the rest up as I go along.
There will be a gap between the tile walls that I’ll fill with foamboard at some point to make it look more… solid.
Got some doors lying around from the zombicide black plague game that I never use that I can use to ‘connect’ the tiles.
And the bonus ‘feature’ is that I can lay the tiles out with the dungeon side concealed and reveal each one as the party explore the dungeon.
This might be a disaster waiting to happen… but I’ll have a go in the next week.
Getting There...
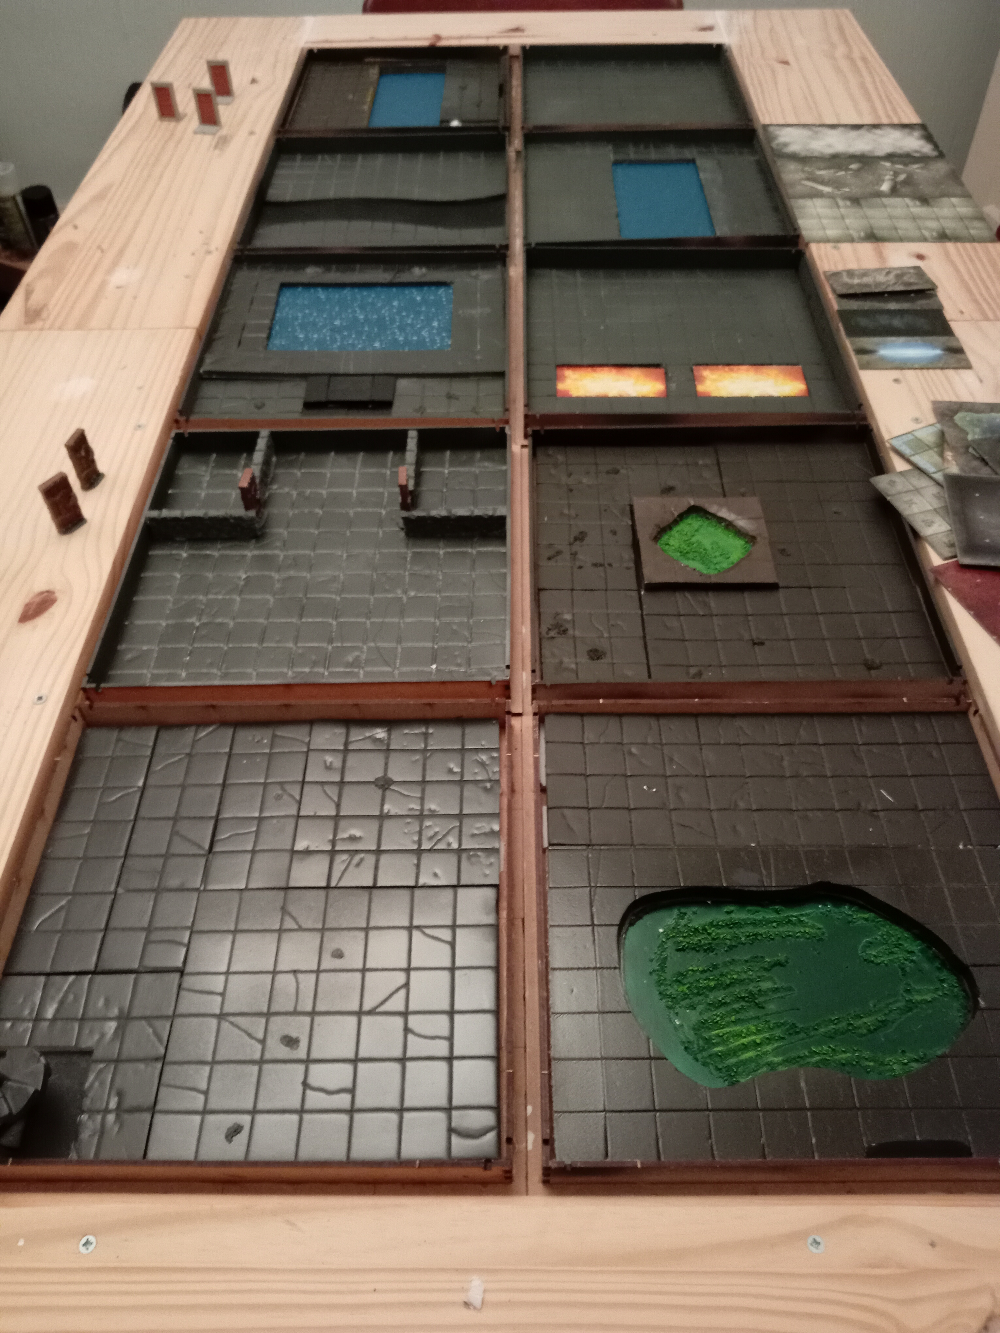
Done the basics on ten tiles to give a variety of terrain.
Obviously the outer edges of the board are just plain wood, but large painting, or possibly woodstain, projects are problematic with the cold weather and I need the table for gaming… so that remains untreated for now.
The layout is 72 by 40 inches. The add on boards take it to 48 inches wide, but that will mean one side has a wider flank than the other. I have additional scatter terrain I can use to make that more interesting.
Put a few scatters of sand, some tufts and touched up the ruins with a lighter shade of paint… work still needed.
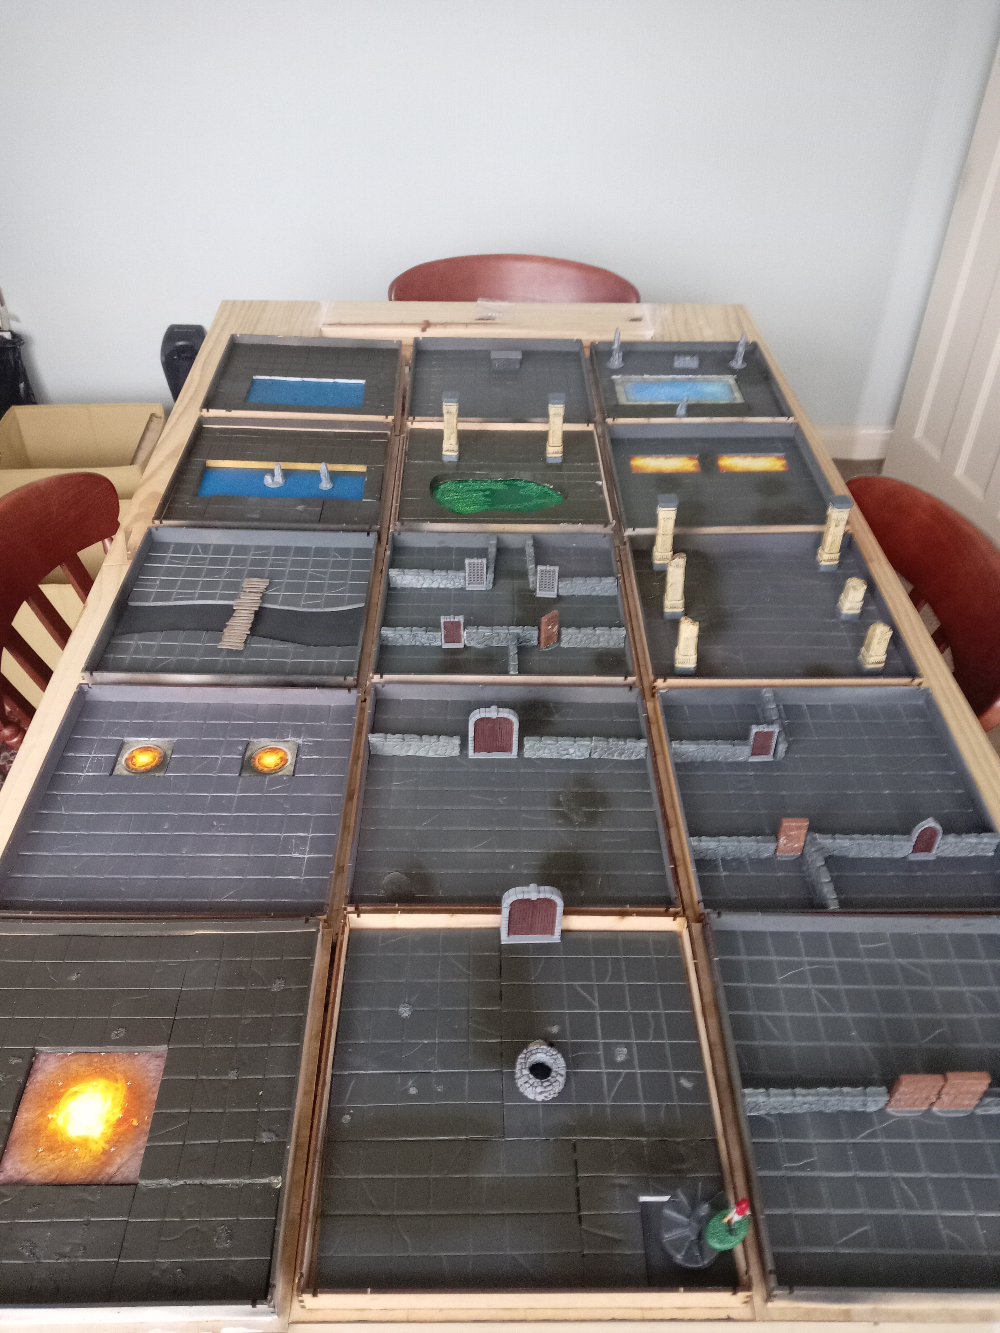
 Sample layout. All boards can be moved and rotated for variety... mid game even.
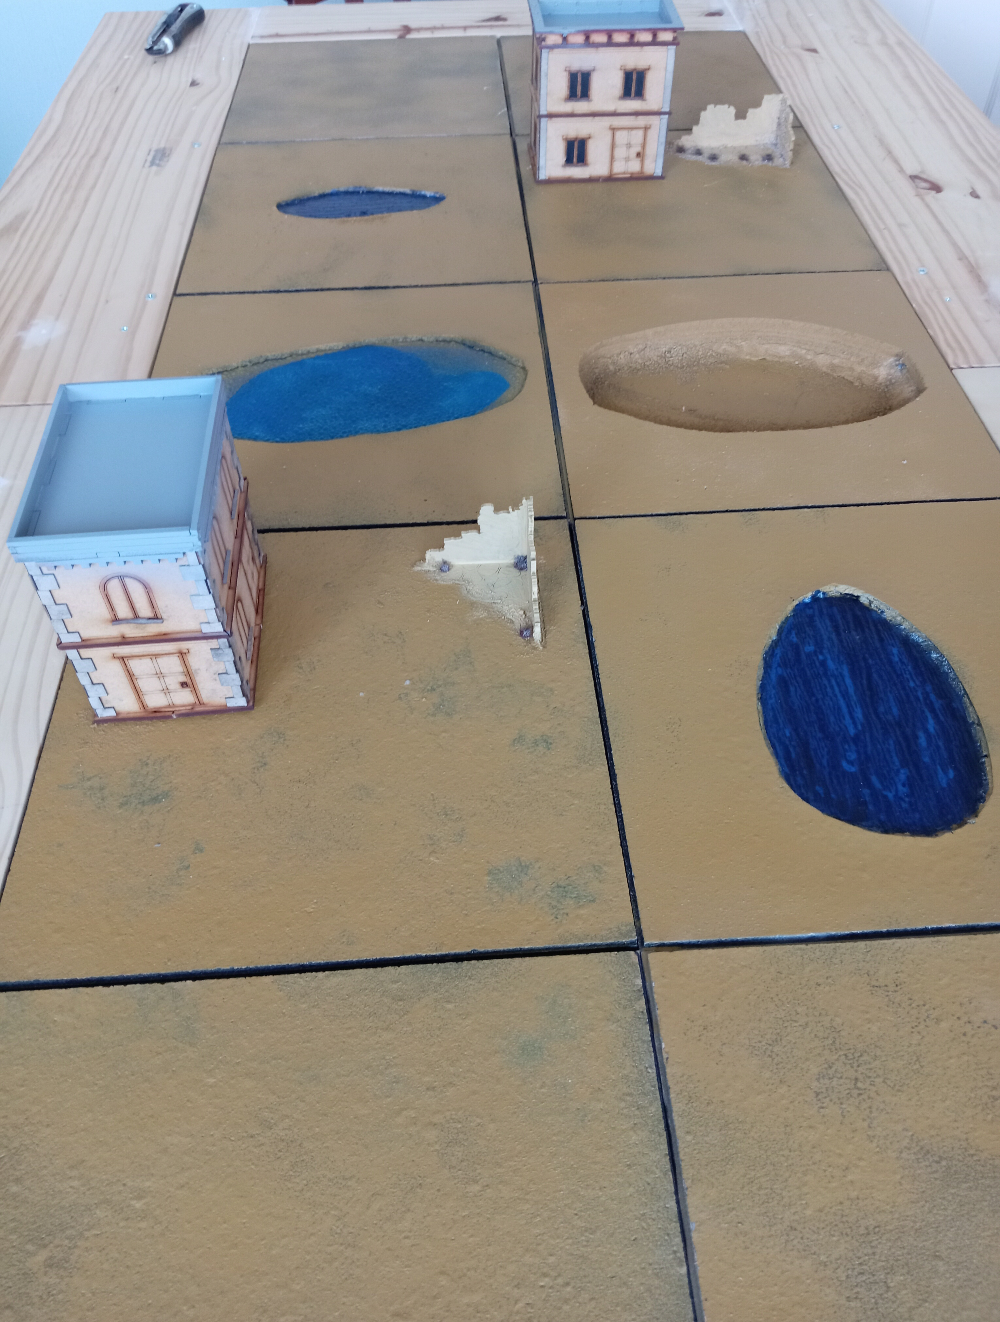 And the same layout with the 'bottomless' buildings covering the ruins as was my plan.
The Story So Far
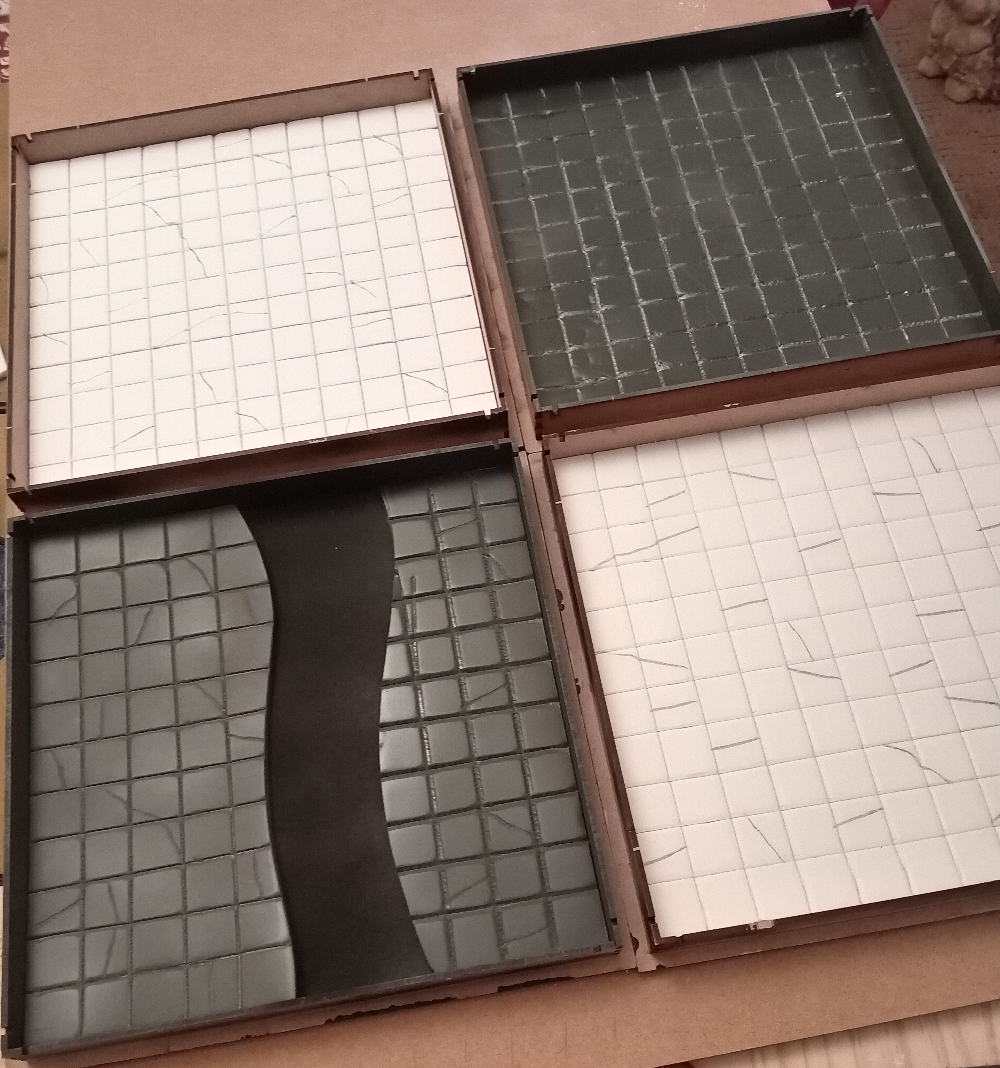
Here are the first six tiles.
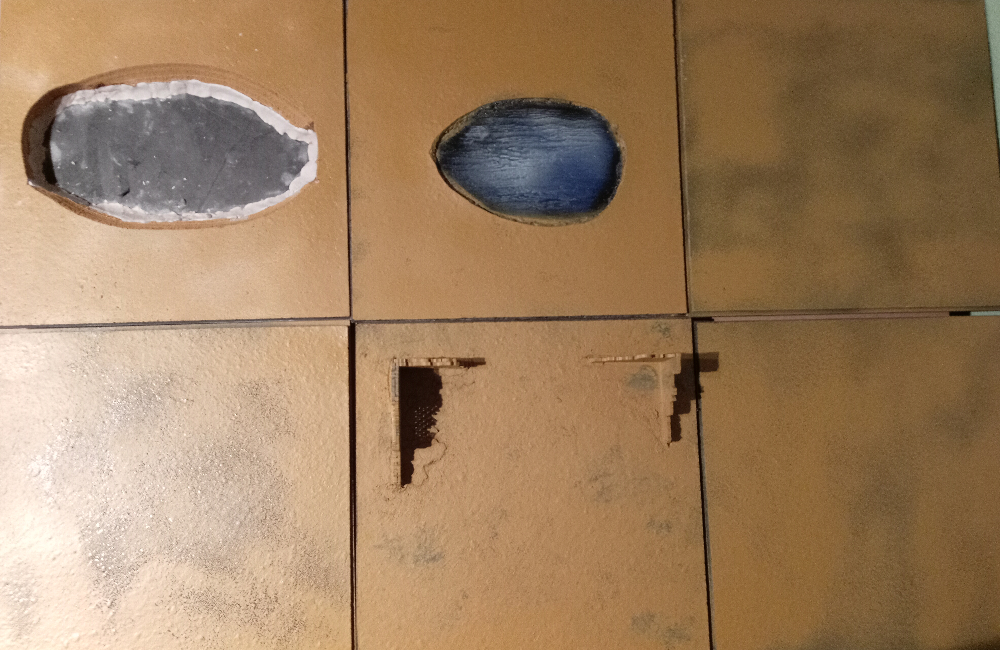
Some of the tiles are flat and that’s necessary as they are part of my gaming table for RPG’s and board games which has an outer frame of wood with ten of the tiles as filler in the middle… over which I throw a 6×4 mat on games night… so I need a flat surface… flat-ish anyway…
However, some of the water feature tiles are flat enough to fill that role.
The water effect was created with a sheet of plastic ‘water’ that I bought for a railway project. Don’t recall the specifics, but I found it on ebay. Discovered that the best way to is to paint the bottom surface of the water, not the top. That water is a mess… it was an experiment… I hope to fix it with contrast paints.
That means 8 tiles can have raised… or lowered… surfaces and they are the ones I’ll do most of the work on for this project. Trying to avoid buying more tiles at this point, but I will if necessary.
Today I was supergluing magnets to stalagmites and pillars, but I found that the magnets are not very strong when passing through the mdf and cork tiles, so I’m going to have to work on that.
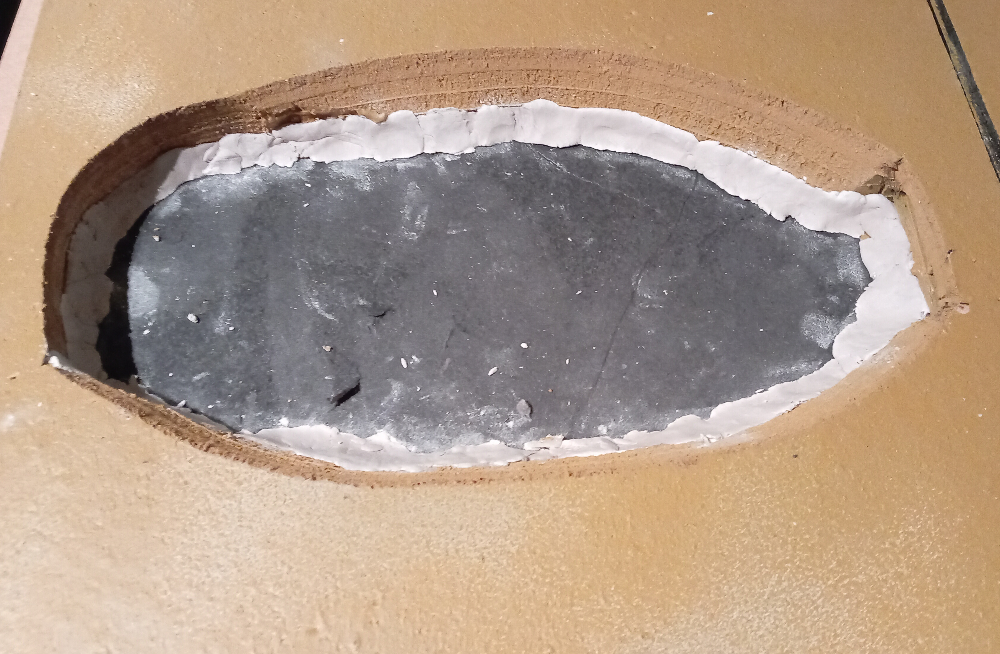
The Pit
I wanted there to be depth to tiles, not just height… so took a jigsaw to one of the tiles and put layers of foamboard underneath. Then used the jigsaw again with the blade at an angle of roughly 45 degrees to create a slope.
Another piece of black foamboard to added as a bottom and then used some Das to smooth over the edges. When it dries I’ll use some of the Diorama FX to add a bit of texture… then more paint.
Into The Desert
Decided to go with the desert as it’s a more flexible option. Used the Army Painter Desert and Arid Wastes spray.
The first coat was a bit uneven… too much paint in some areas and I dabbed it off… which left some of the black leaking through… but I like it… gives it some variation in colour.
Still needs work of course… but now that I know I like the colour I can start working on some of the other tiles.
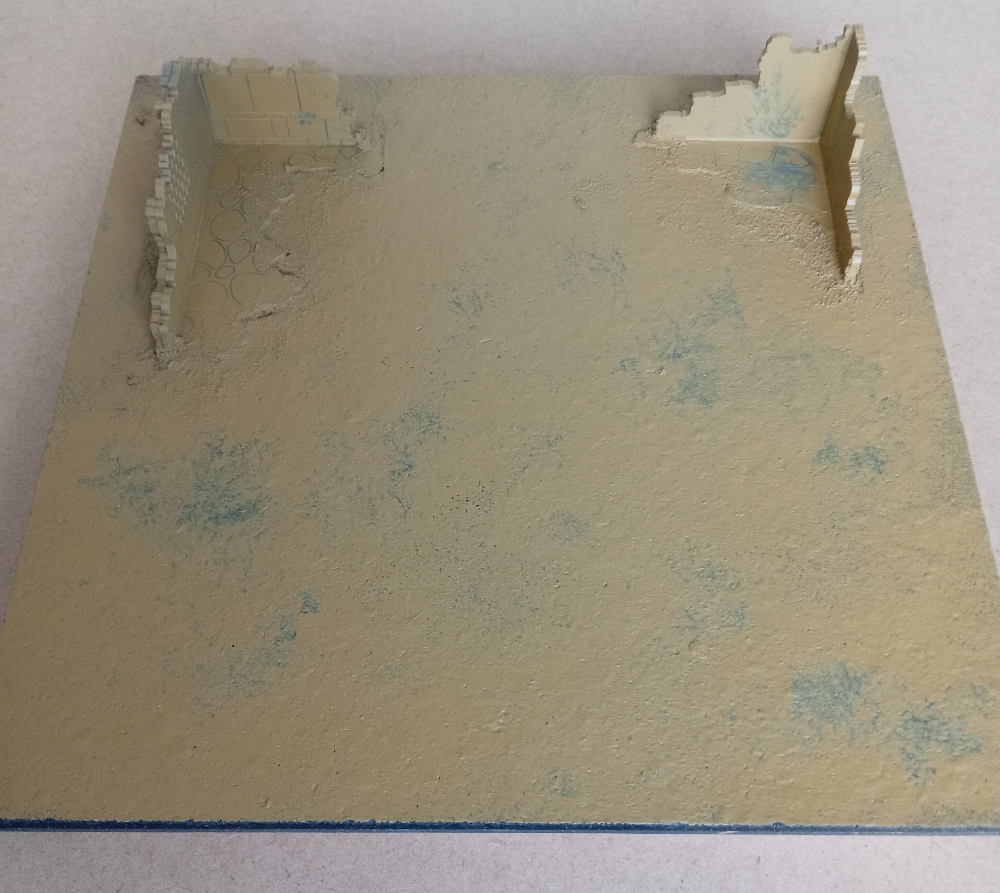 It looks rough... but it's the prototype and hopefully things will get better.
Filling In
Left the glue to dry over night and as it seemed solid enough I added a second ruin to the tile… followed by filler using some Diorama FX I picked up last year.
The Diorama FX is a mixture of resin and pumice and needs at least 90 minutes to dry… and given the cold weather… may take longer so I’ll leave it for the rest of the day.
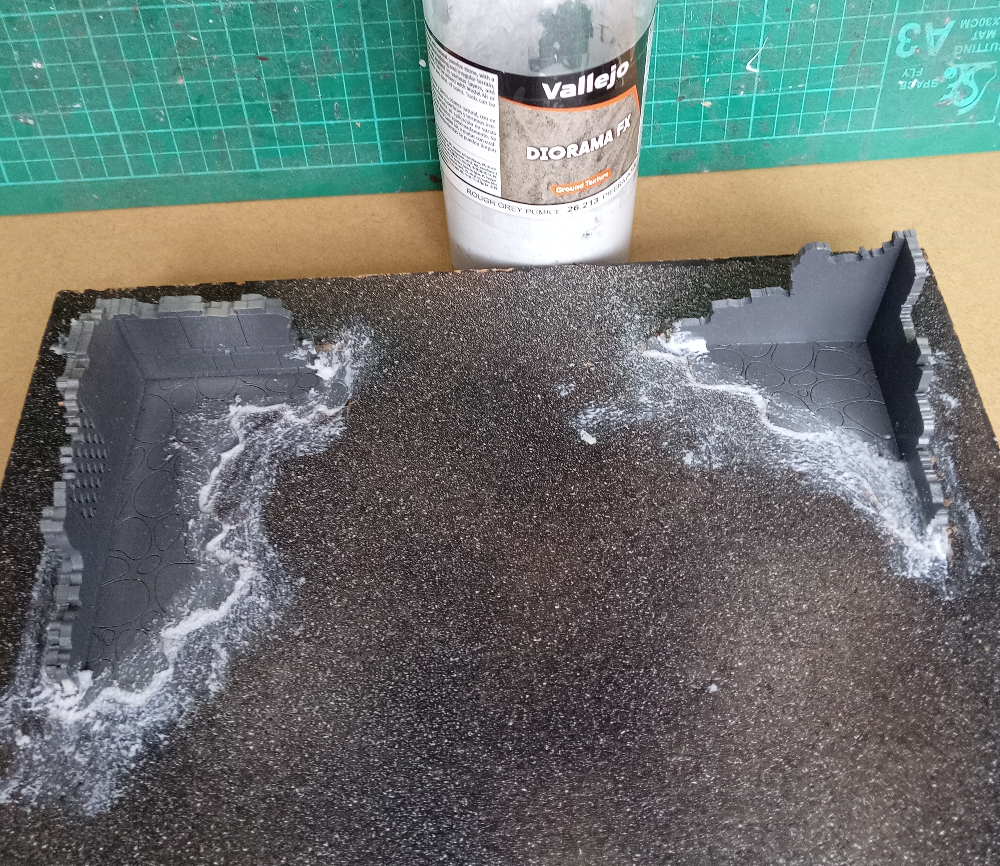
Obviously it needs a respray and I’m not sure whether to go for desert, or snow.
Desert is a flexible option and I have a can of Army Painter Desert & Arid Wastes that is water based for use on the XPS foam (which I may use for some hills).
Snow is ideal for Frostgrave.
I may also try attaching magnets to some cacti, stalagmites and pillars that I have lying around so that they can be store more conveninetly, but won’t fall over if the table is knocked.
The project seems to be expanding…
The Test
Finally got around to the first test.
Selected a ruined building that would fit ‘almost perfectly’ inside one of the chosen buildings and place it on the tile so that I could cut into the cork which is conveniently the same thickness as the base of the ruin.
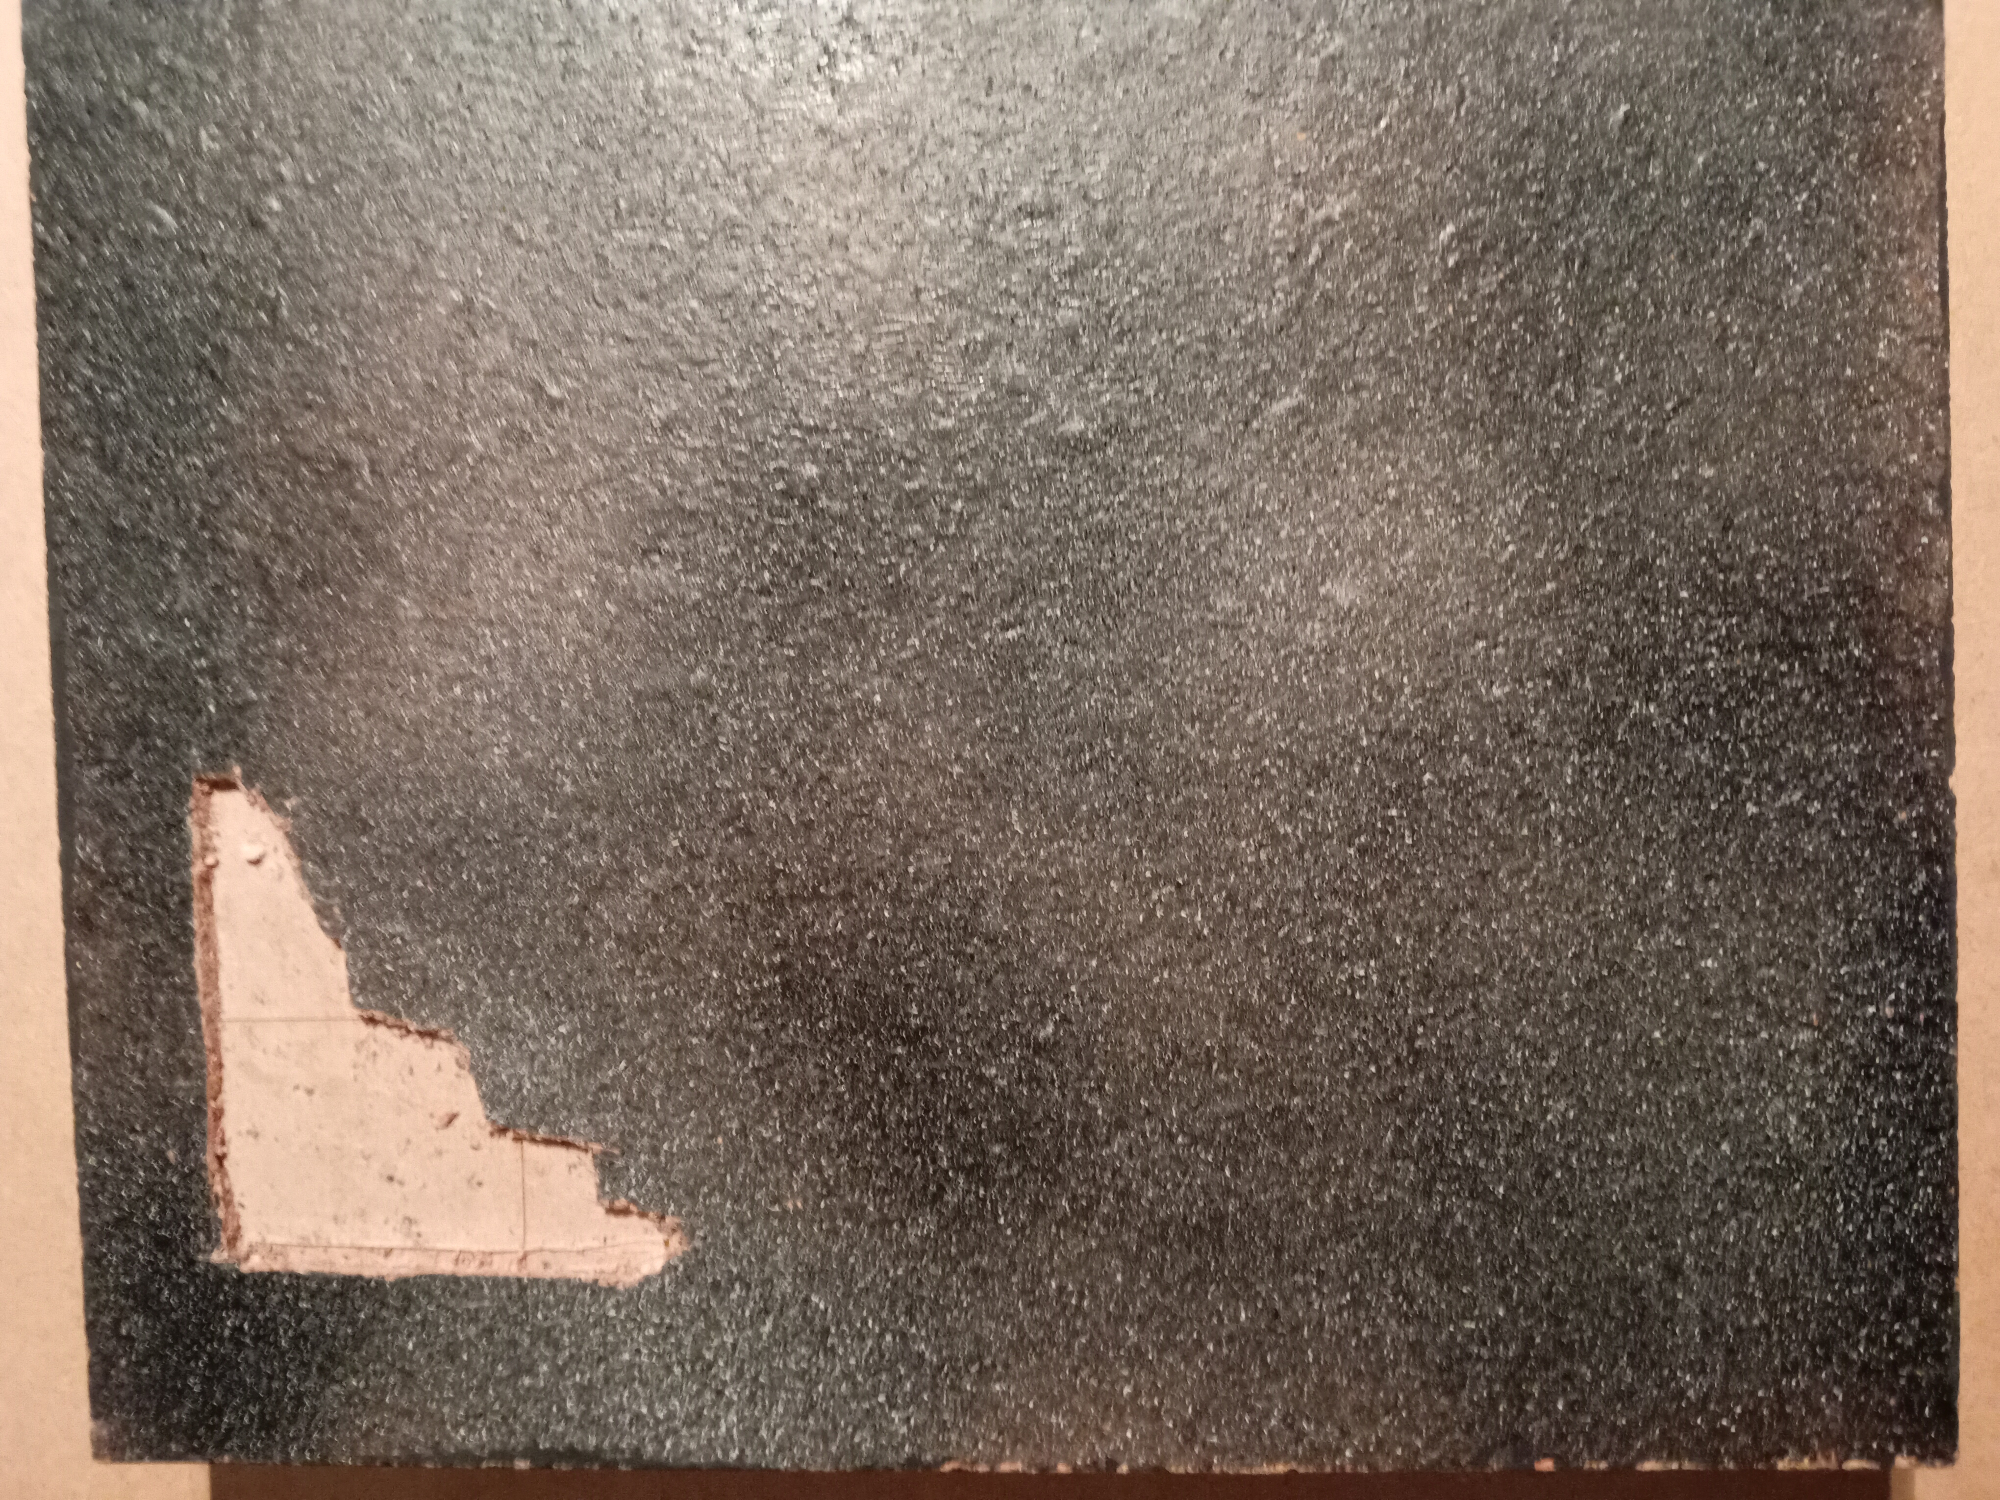 Made the cutout...
After cutting the recess I had made an imperfect job of it and it will need filler, but that was expected. When satified with the fit I applied some PVA glue and forced the ruin in place.
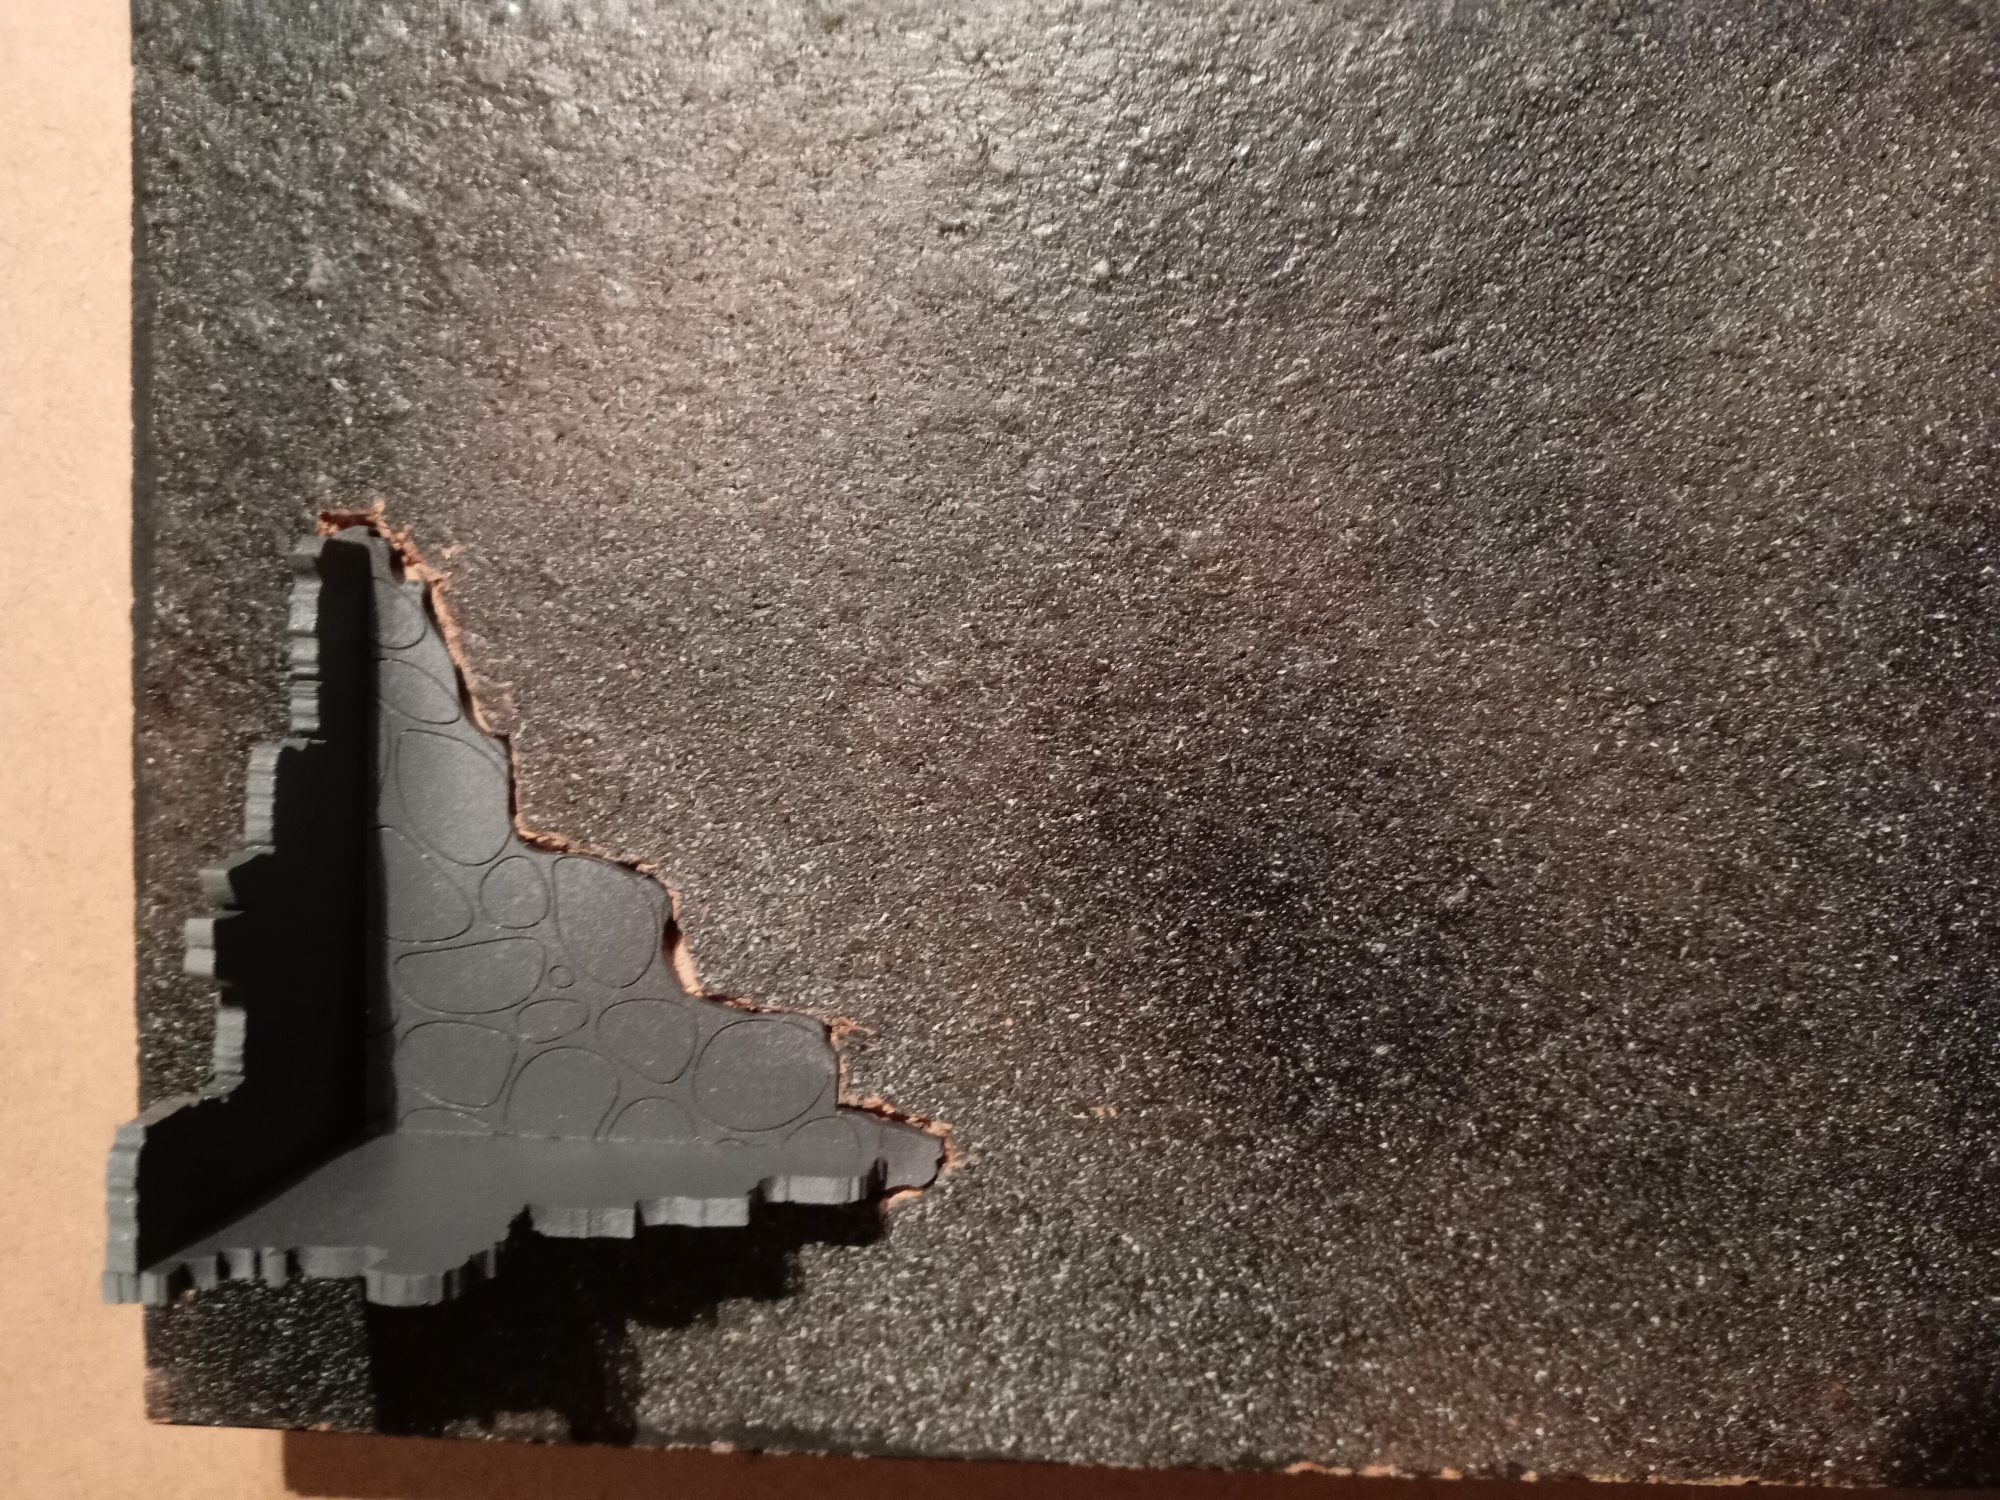 Glued the ruin in place... now I wait for the glue to dry...
Prologue
I have a pile of 18 TTCombat tiles that I plan to combine with some ruined buildings to create a modular skirmish battle field and I want to design it so that I can put some MDF buildings from Carnevale over the ruins so that it can be used for that… and I want to use it for RPG’s.
The idea is that when playing the game and moving miniatures the buildings won’t get nudged around the table. And it will hopefully be easily stored as I have limited storage.
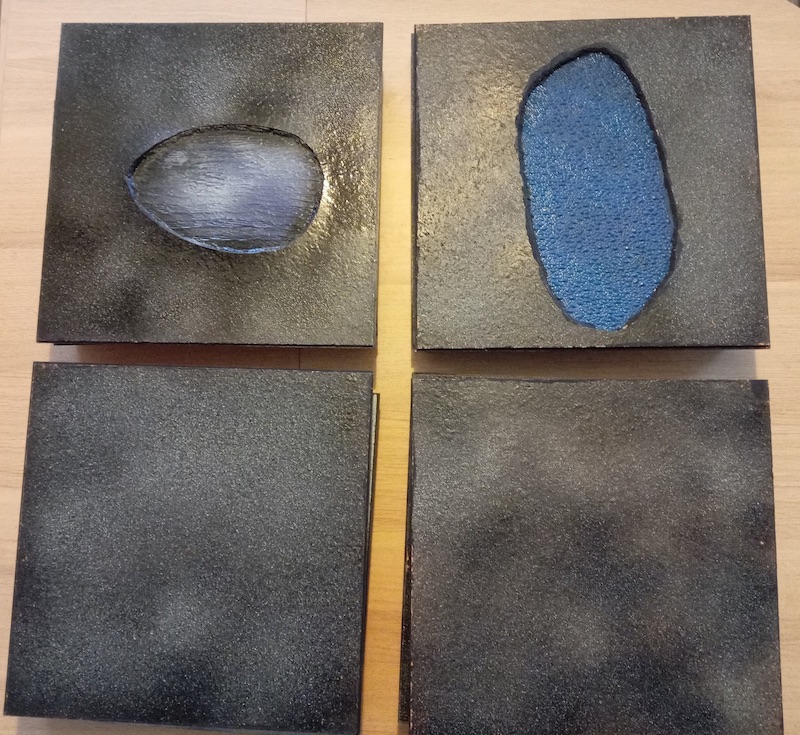
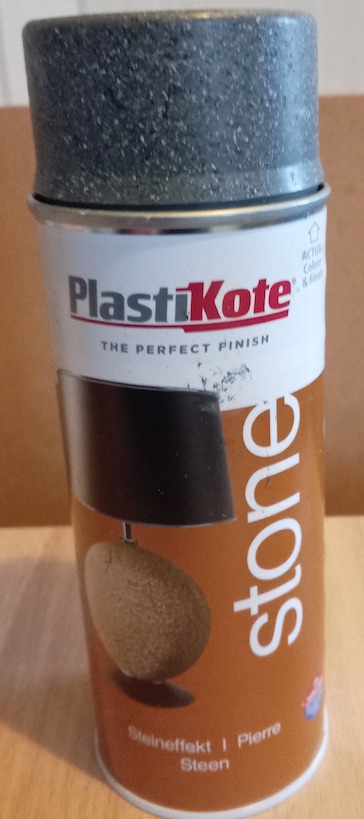
When I bought the TTCombat tiles I thought the surface was too smooth so I added a cork tile to each, primed it and used some Plastikote paint to give it texture. They are my base material. A couple have been modified to include water effect plastic. The tiles will need repriming and I’ll try to do a better paint job. Not all tiles will have ruins on them as you always need some open space on the battlefield.
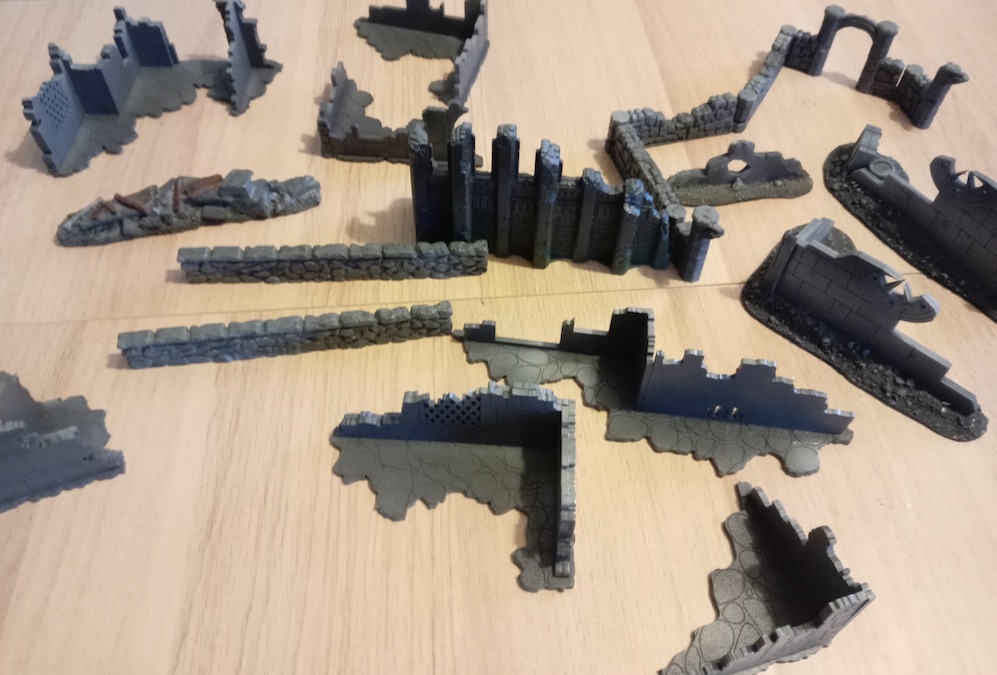
The ruins and walls are are from number of sources and some will need cutting down to fit inside the buildings. They also need painting properly.
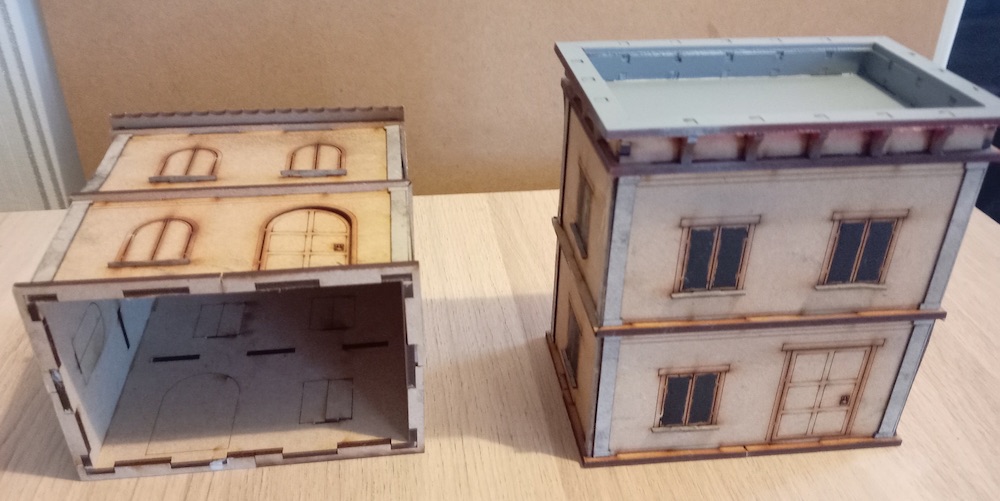
Because Carnevale takes place outdoors with buildings used to block line of sight and provide elevation, a number of the TTCombat Venice building have no floor… which makes them perfect to place over the ruins when the battle boards are used for urban settings. I don’t have a huge amount of floorless buildings, but the Carnevale kickstarter included some printed card buildings that I may use instead.
Below are images of some of the tiles, a selection of walls & ruins, sample buildings and the paint I used to texture the cork tiles.
Whether this project will ever complete is in doubt… as I’m not always good at completing things and not a great painter… but I’m setting this as goal for 2024.
Whether it qualifies as Dungeonalia, or not is up to the folk at Beasts. To me the important thing is trying.