Objective Markers
Recommendations: 101
About the Project
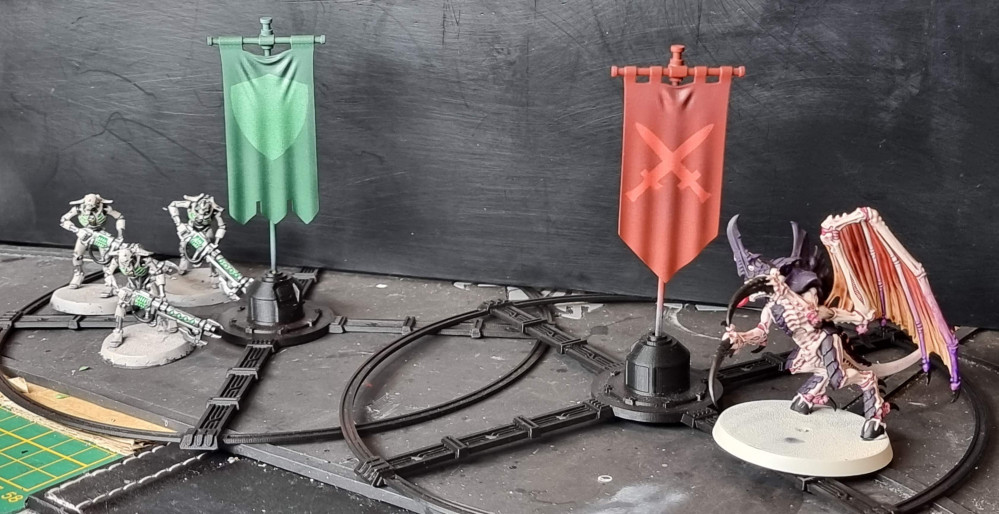
Objective Markers, specifically for 40k, that has banners for each person to claim the objectives.
Related Game: Warhammer 40,000
Related Genre: Science Fiction
Related Contest: TerrainFest 2023
This Project is Active
Step 7: Play!
I’m pretty happy with the results!
Aside from the primer not sticking to the brass and the touch-ups being visible, they are exactly what I was after.
That brings me to 23:45 on the 31st of October (in Australia).
However the project won’t end here!
In the next few days, I’ll;
- Fix up the primer.
- Paint the non-banner bits, the pole and cross-arm.
- Seal them with varnish.
- Prime and paint the objective bases.
- Get a game on!
I will come back and post the final results when they’re complete to official close out this project.
My lessons learnt from the project;
- Mylar stencil material is too thick and springy to work on complex surfaces like these banners.
- Removable vinyl is great as a stencil material, but make sure to seal the object with a good varnish before applying them.
- Touching up errors with a brush may not match the airbrushed surface.
- The overall method works well to achieve the effect I was after.
- Need to think through primer on brass, maybe I’ll need to use a spray primer made for metal. hopefully once sealed under a varnish it’ll hold out… I might need to make it a thick coat! Otherwise I’ll have to mask off everything and use an spray primer for metal on just the pole.
Step 6: Paint!
The time has finally come to paint these bad boys.
First, my inspiration.
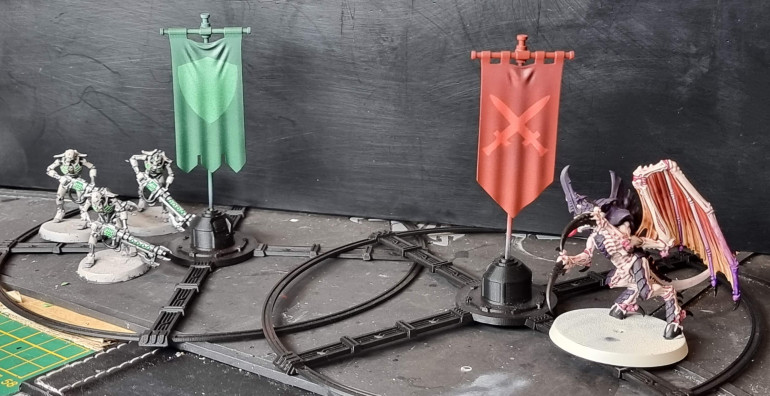
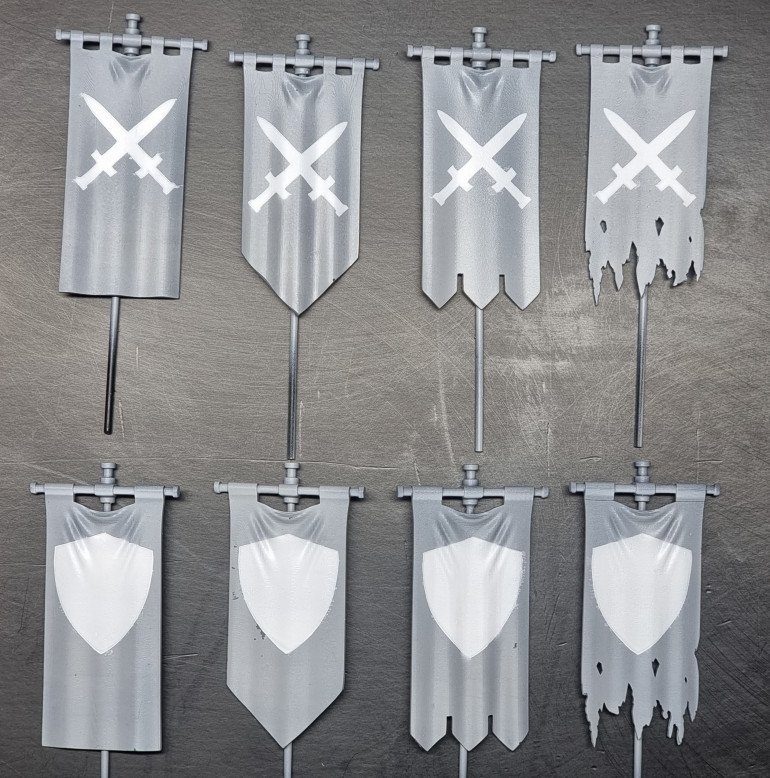
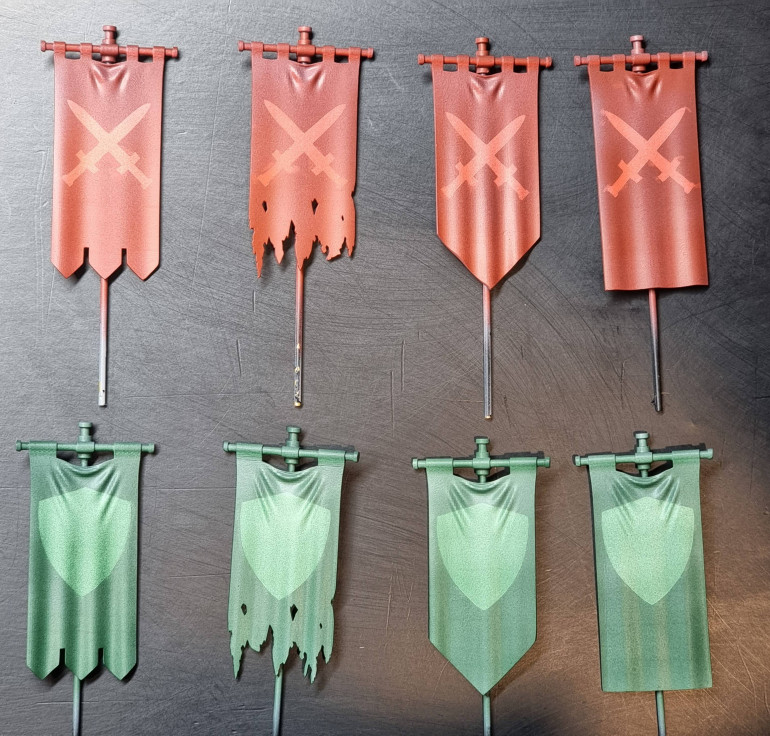
In Warhammer 40k, you play for objective control, so there are numerous maps like the one shown below, which tells you how to deploy and where to put the objective markers. One player is the ‘Attacker’ (swords) and the other is the ‘Defender’ (shield).
So my banners will be painted to match these symbols. In future, I’ll create a set for each of my armies, with the faction symbol and army colour as well.
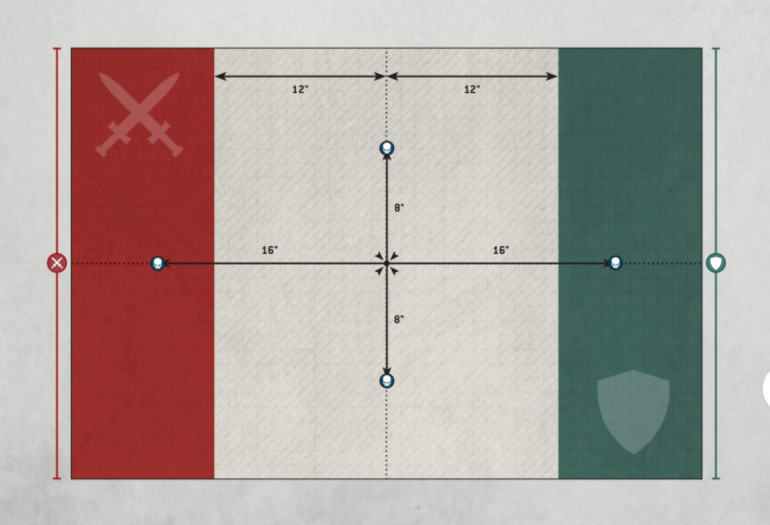 A typical 40k setup showing the Attacker and Defender deployment zones and objective marker positions.
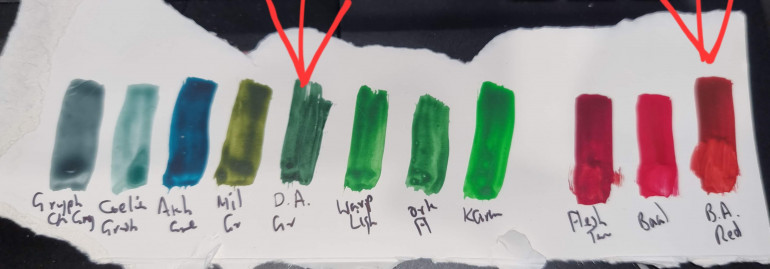
With the method I had in mind, I needed transparent paints, so I selected what blue/green and red Contrast paints I had and did a swatch.
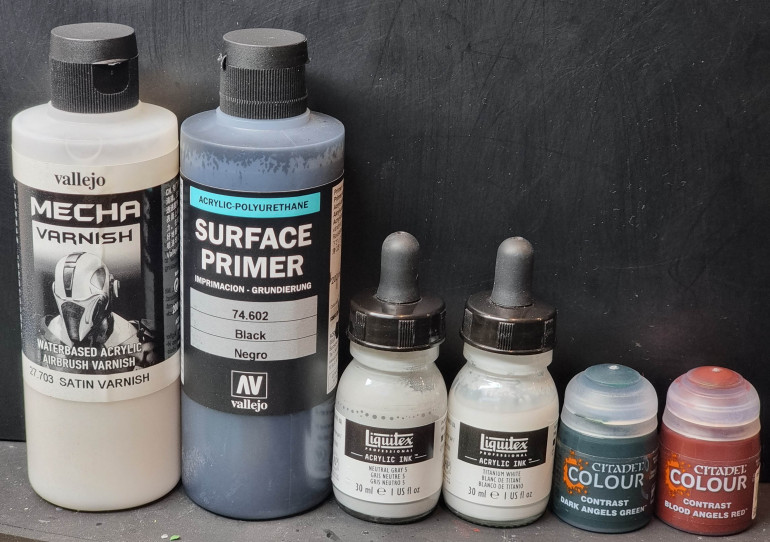
I picked Dark Angels Green and Blood Angels Red.
Now to get painting!
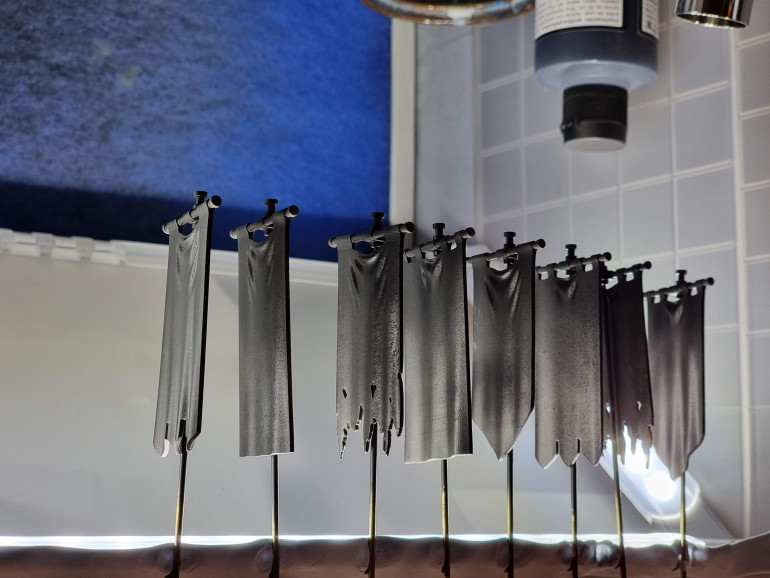
I started with basing the banners in a medium grey ink, with a few coats. Then I sealed them with a satin varnish to hopefully stop the sticky vinyl from lifting the paint off the banners.
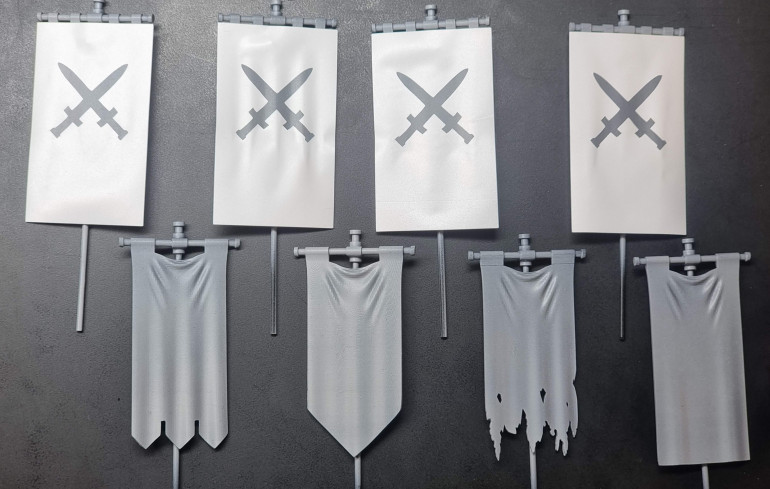
The next day I applied the vinyl stencils.
Once applied, I used a white ink and airbrushed on a few coats.
I let it dry a little, then removed the stencils to reveal… a few imperfections where white ink had spilled onto the grey, so I touched it up with a paint brush.
Unfortunately this didn’t do a great job, as the thicker painted on grey yielded a lighter tone to the airbrushed grey. So the touch-ups ended up being visible in the end.
It will take all of my courage to get over it.
However overall, I was satisfied with the stencils job.
Time to colour them in!
I airbrushed on the green and red, a few thin coats, making sure to catch all the sides and angles.
et voilà!
Step 5: Prime
Now to prime.
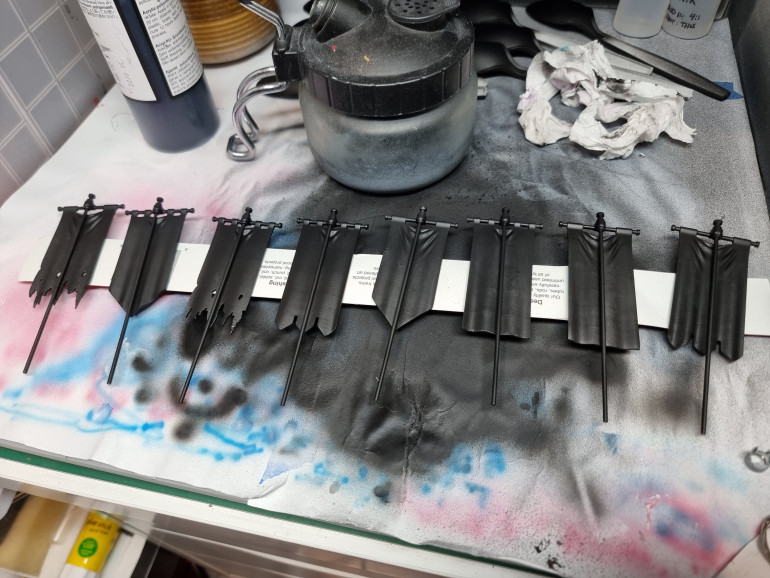
I used Vallejo Surface Primer as I couldn’t afford to wait for the perfect spray can weather.
This was pretty simple, however even after leaving to cure for 24hrs, the primer struggled to adhere well to the brass pole. I just gave up trying to repair it and will return to the pole at the end, where I’ll re-prime, paint with a dark metallic silver and then seal with a varnish to hopefully lock it all in.
Step 4: Assemble banners.
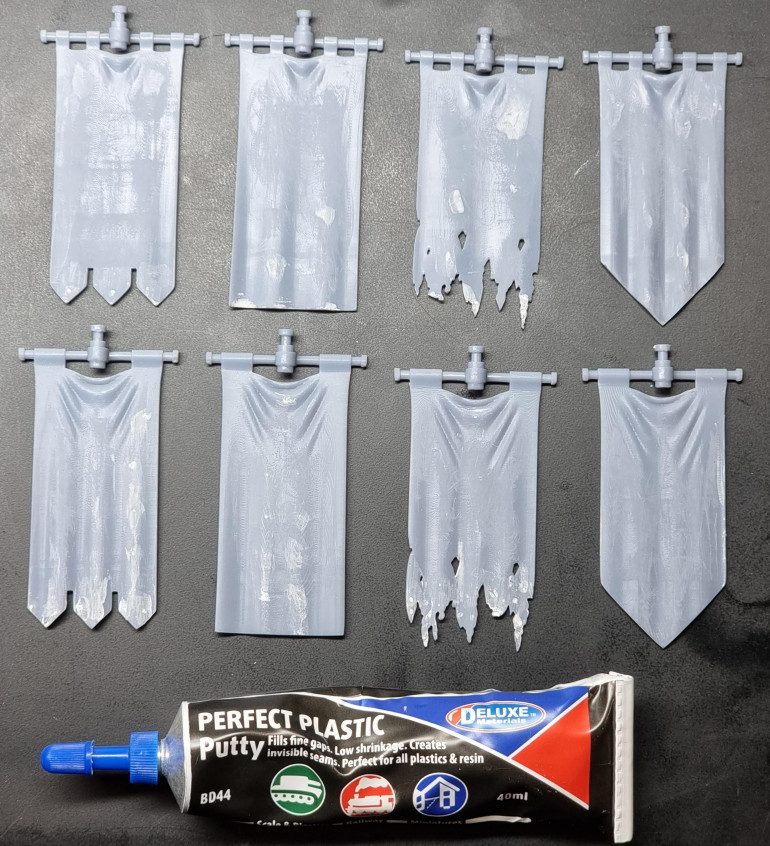
Some supports left divots rather than nubs. So I used Deluxe Materials Perfect Plastic Putty to fill in the holes.
It’s a really soft putty and great for gap filling! Unfortunately I hadn’t noticed that not all holes were completely filled. Anyway, moving forward!
I then cut up some brass rod.
The rod I got was from here: https://www.hobbytools.com.au/brass-solid-rod-1-83mm-072-x-300mm-12-3pc/
I had made the hole in the banners 2mm, so was thinking just under 2mm will give me some wiggle room and allow some space for glue.
So I ended up getting 1.83mm brass rod. Thick enough that it won’t bend without force and fits inside the banner holes perfectly!
I cut the poles up with some pliers and used my Dremel to clean up the cut edges.
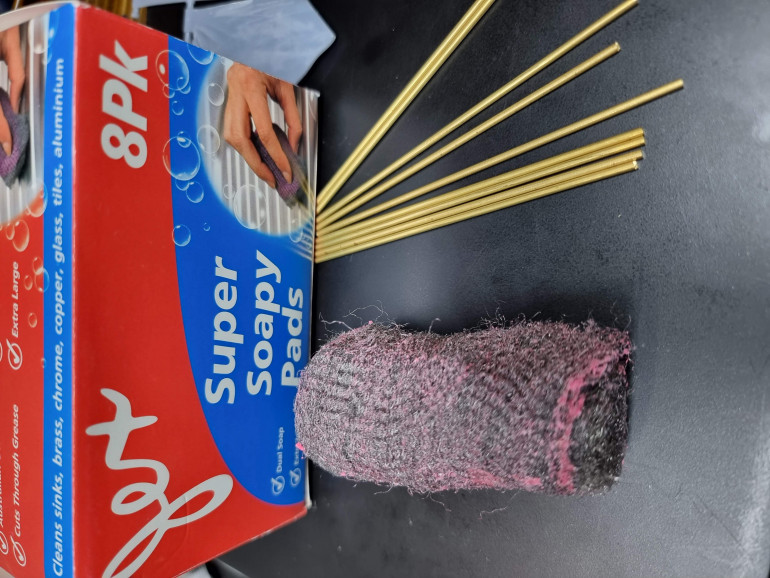
Considering that primer may have a hard time sticking to metal, I used some steel wool to scuff up the surface.
In hindsight, this didn’t really work.
Although I blame my primer: Vallejo Surface Primer. Great for plastic, but it just doesn’t adhere well to metal. In hindsight, maybe I should’ve used a spray primer made for metal. Hopefully varnish will help keep everything together!
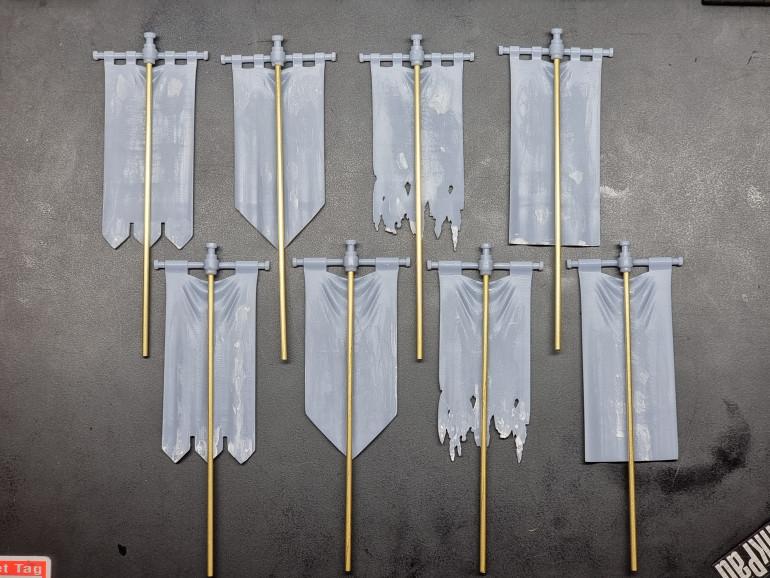
Anyway, next I glued the rods into the banners.
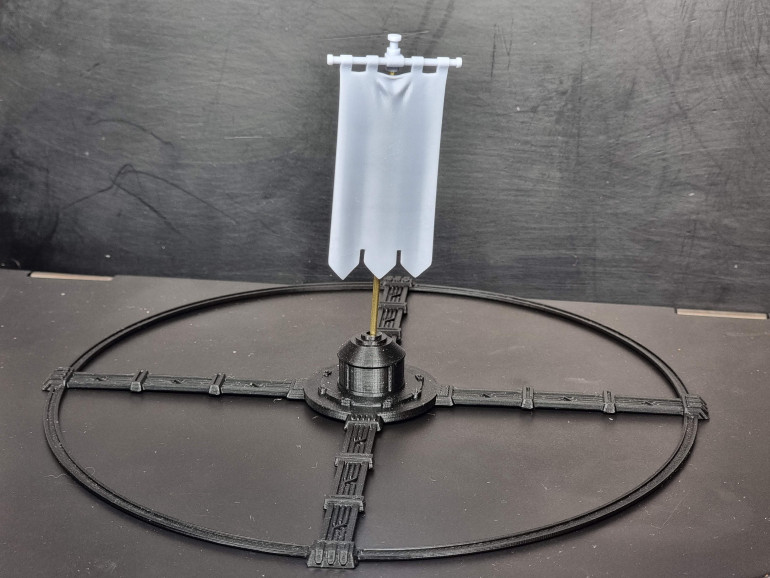
The following photo shows the intended result.
The bases are designed for 40k, with the middle being 40mm and then a surrounding 3″ radius.
These bases were printed on my FDM printer, no modifications required.
Next up, painting!
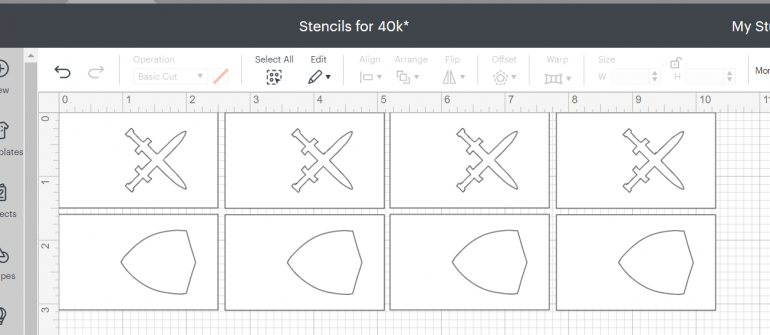
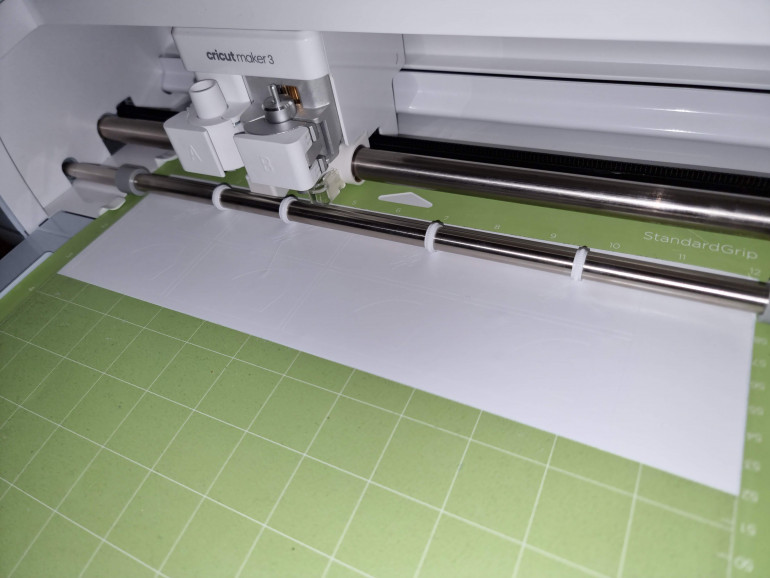
Step 3: Create stencils using the Cricut.
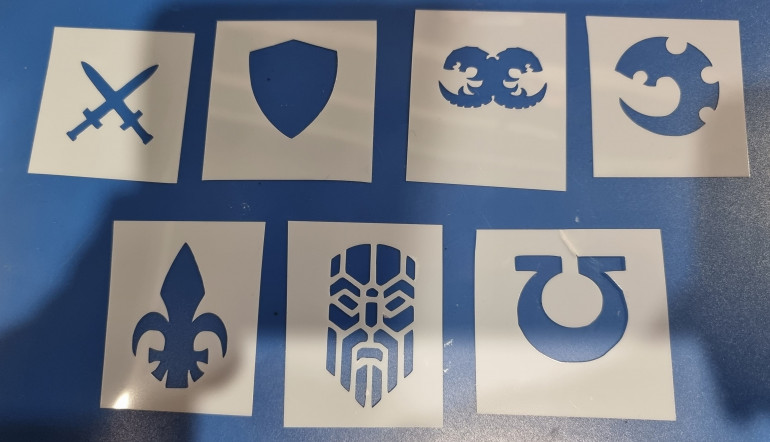
So, initially I thought using mylar would be the go.
Mylar is a thin plastic that’s flexible and often used for stencils.
After cutting out the stencils (below), I found the mylar was too stiff to fold with the banner surface.
I bought some thinner mylar, but was still concerned with how I could keep it contoured to the banner surface while airbrushing.
So where did the symbols come from? I simply ‘snipped’ images from GW PDFs (hosted on the Warhammer Community site) and then used the Cricut software to clean up the image and create the basic shape.
So I instead printed some stencils using removable vinyl. The vinyl is sticky on one side, allowing me to adhere it to the surface, spray, then hopefully remove it without harm!
Step 2: Prepare and print the pole-less banners.
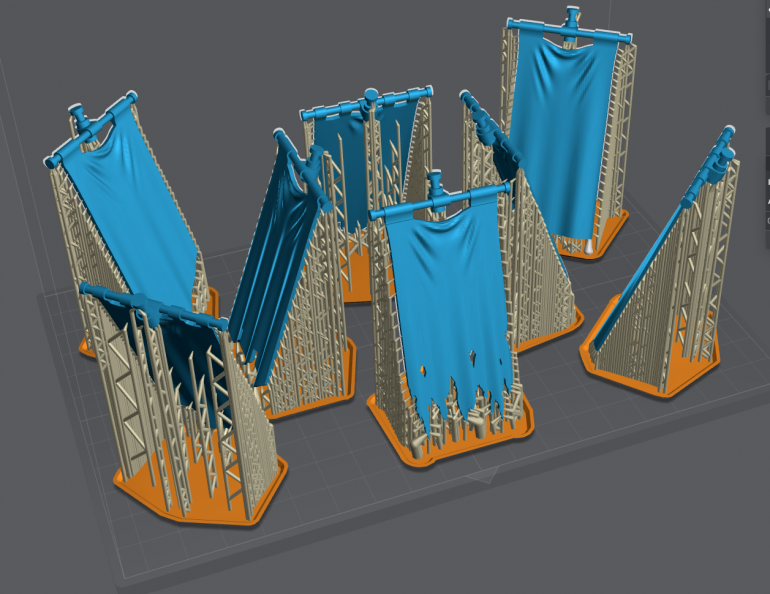
After editing the eight banners, I then imported them into Lychee and prepared them for printing.
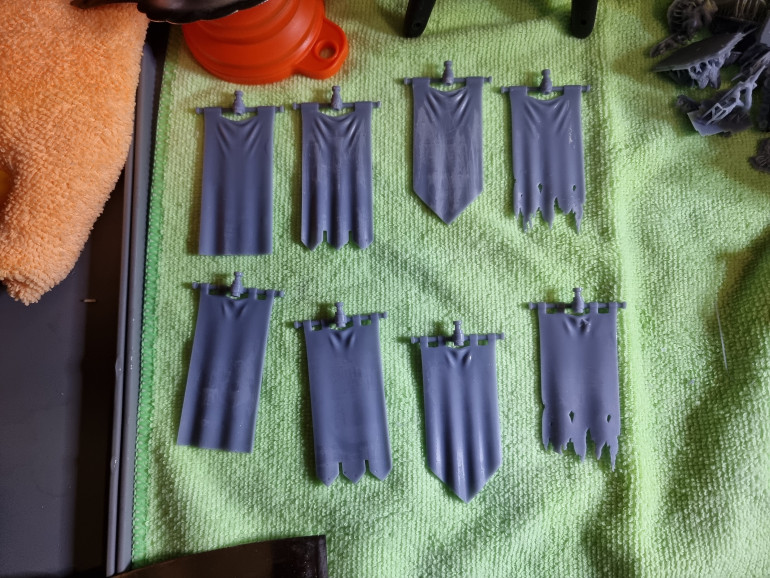
If you haven’t printed with a resin printer before, it essentially requires finding an optimum position/angle to print at and then adding supports to the model.
The end result can be seen below.
Then the file is sliced, exported and put on a USB stick for the printer.
Success!
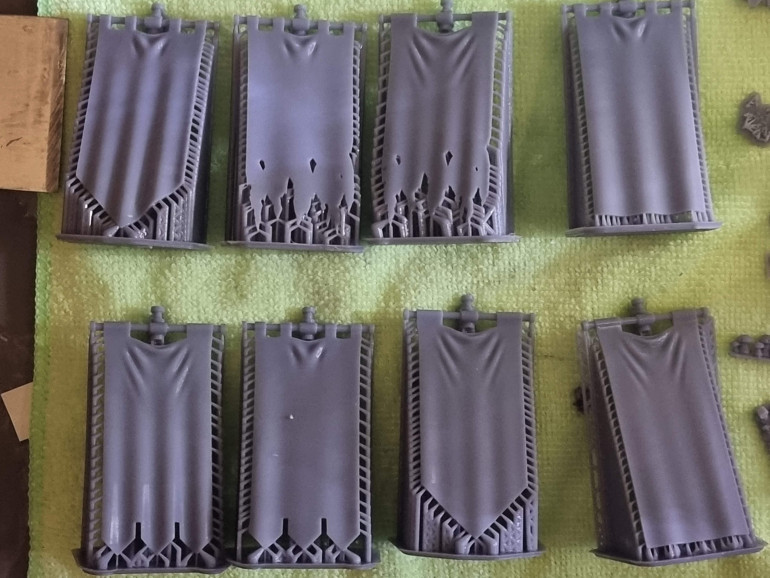
After ~4hrs, the print was complete!
I then washed them in 100% IPA and left them to dry.
After an intermission that lasted a couple of weeks (life!)… I returned to the prints.
Now to remove the supports.
I used some nippers (that I’ve dedicated to a life of resin-only work), I carefully removed all the supports. The two tattered banners had some pieces broken off in different spots, but that didn’t worry me since it’ll go by unnoticed.
To clean off the nubs from the supports, I used some sandpaper (320, then 600 grit) to wet-sand them off.
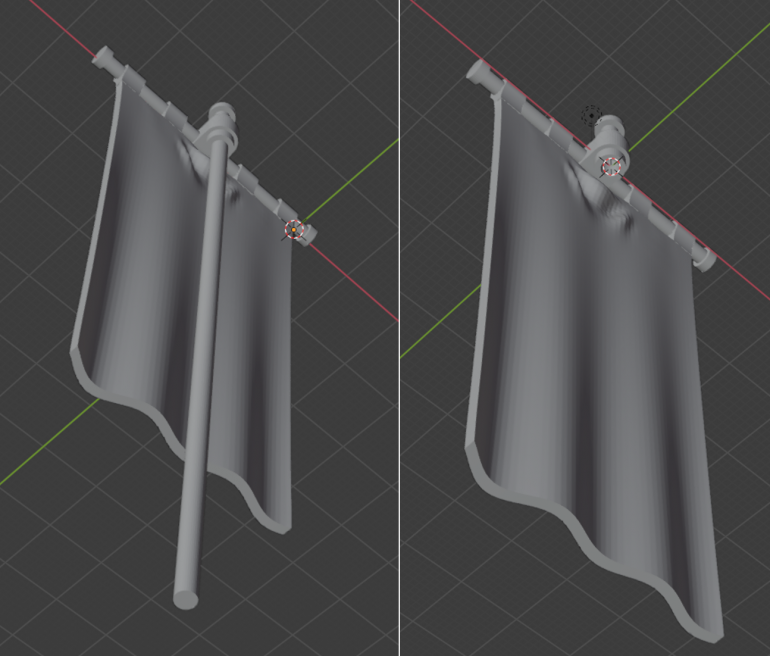
Step 1: Modify the banners to remove the pole.
As I mentioned before, I wasn’t comfortable with the lack of strength from the resin poles, so my first step was to try and remove the pole.
Not being particularly strong in any 3D software, I played around in the few I had installed and found blender allowed me to modify each individual face/vertex.
So I stumbled my way through and managed to work out how to delete the pole, then add a hole for it to sit in. There was a bit of trial and error here and finding out that faces have a direction (and if they face inside instead of outside, things break!).
Anyway, the result was a success; Manifold STLs that could be printed!
IT HAS BEGUN!
Welcome to my project, weary traveller!
In 40k 10th edition, the game is mostly played with missions using objective control.
Each objective;
- is 40mm diameter
- models cannot stand on them
- has a 3″ radius of control
More specifically, I’m enjoying small Combat Patrol games with my son and friends. These are games that use just the contents of a Combat Patrol box and include an ability casually called ‘sticky objectives’. When the main troops (with ‘Battleline’ keyword) take hold of an objective, they retain control even if they wander off… until the enemy captures it.
So, I thought… what’s a good way to track sticky objectives and objectives overall?
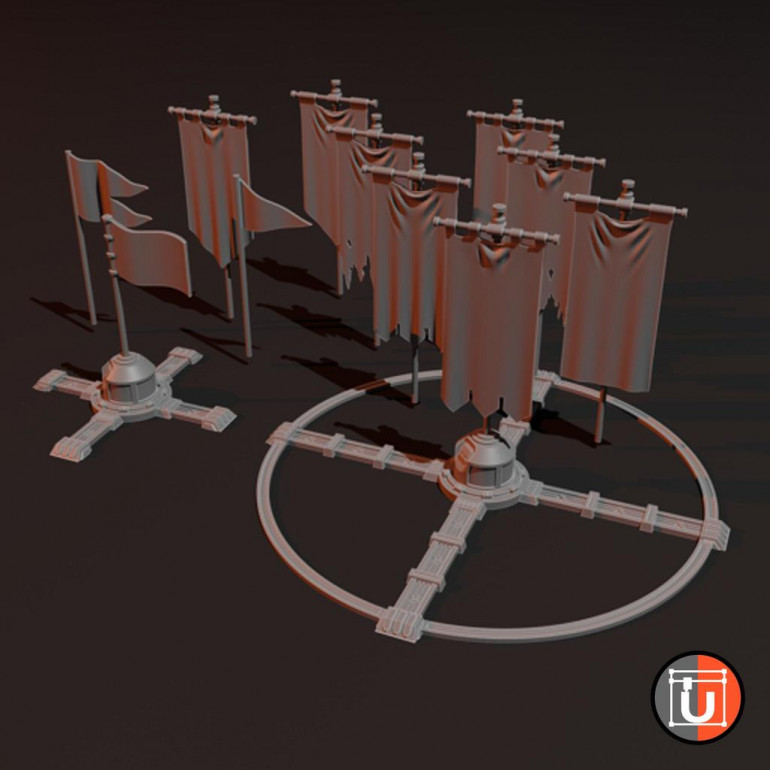
This project will see me take the following beautiful banner objective markers shown below from Udos3DWorld, make an adjustment (replace the pole with a brass one) and paint them using a DIY stencil.
The initial plan is to create a set of 6-8 for the Attacker and Defender. Beyond that, faction specific sets for my armies.
The tools I’m using;
- blender (modelling software) – I used blender to modify the banners. Note: I have no idea how to use blender!
- onshape (modelling software) – I used onshape to make my own objective marker pucks (a precursor project I’ll share). Note: I’m a beginner user of onshape.
- FDM printer (Prusa i3 Mk3S+) – I used my FDM printer to print the bases. I use PrusaSlicer as slicing software.
- Resin printer (Elegoo Saturn) – I used my resin printer to print the banners. I use Lychee as slicing software.
- Cutting Plotter (Cricut Maker 3) – I’m using my cutting plotter to cut out stencils for banner logos.
- Airbrush for painting.
The Plan
- Modify the banners to remove the pole. As I’m printing these in resin, I’m not comfortable with the strength of the skinny pole. So I want to remove the pole, create a hole in the top and add brass rod for the pole instead.
- Prepare and print the pole-less banners.
- Create stencils using the Cricut and Mylar sheets.
- Assemble banners.
- Prime banners and bases.
- Paint.
- Play.
One concern I currently have, is that the mylar is fairly stiff; bendy, but stiff. Being able to bend it around the contours of the banners for airbrushing the pattern, will be a challenge. I foresee it being an issue with keeping the stencil tight against the banner a challenge. One thought is to use some sort of temporary glue. Maybe a liquid mask might work as glue that can be removed easily later. The mylar is fairly smooth, so adherence might be an issue, although I can sand it a little. The mylar I have is 7.5mil, I’ve just ordered 4mil, which might be better (arrives 19th Oct).


