


Aircraft Crash Board


Recommendations: 422
About the Project
I’m building a small gaming board featuring an aircraft crashed to jungle.
Related Genre: General
Related Contest: TerrainFest 2023
This Project is Completed
Idea and the plan
The idea is to build a small terrain board (roughly 2’ x 2’) featuring an aircraft that has crashed into jungle.
Constraints and choices:
- It must have fairly small surface area, I don’t have a big storage space.
- Playable for 28mm – 25mm warband type skirmish games. I’m thinking Drowned Earth, 7TV, maybe Judge Dredd. So handful of models.
- Historical plausibility. No weird alien plants etc.
- No need for modularity. I want to be able to model cool stuff, and this is more intended as a showcase piece.
- Playability in the sense that figure bases fit, and there aren’t too many sloped surfaces.
What I have so far:
- Crashed Aircraft STL files from Printable Scenery: https://www.printablescenery.com/product/crashed-aircraft/
- Above partly already, the printer is hot as a write.
- Ikea Lack table as a the base board. I’ve few spares and have used them successfully before to build terrain. Cheap, light and durable.
- Cheap jungle plants from eBay.
- General modelling materials.
Below is a super rough pencil drawing. The plane is enough in scale to fit to the Ikea board, leaving enough space to fit models in between.
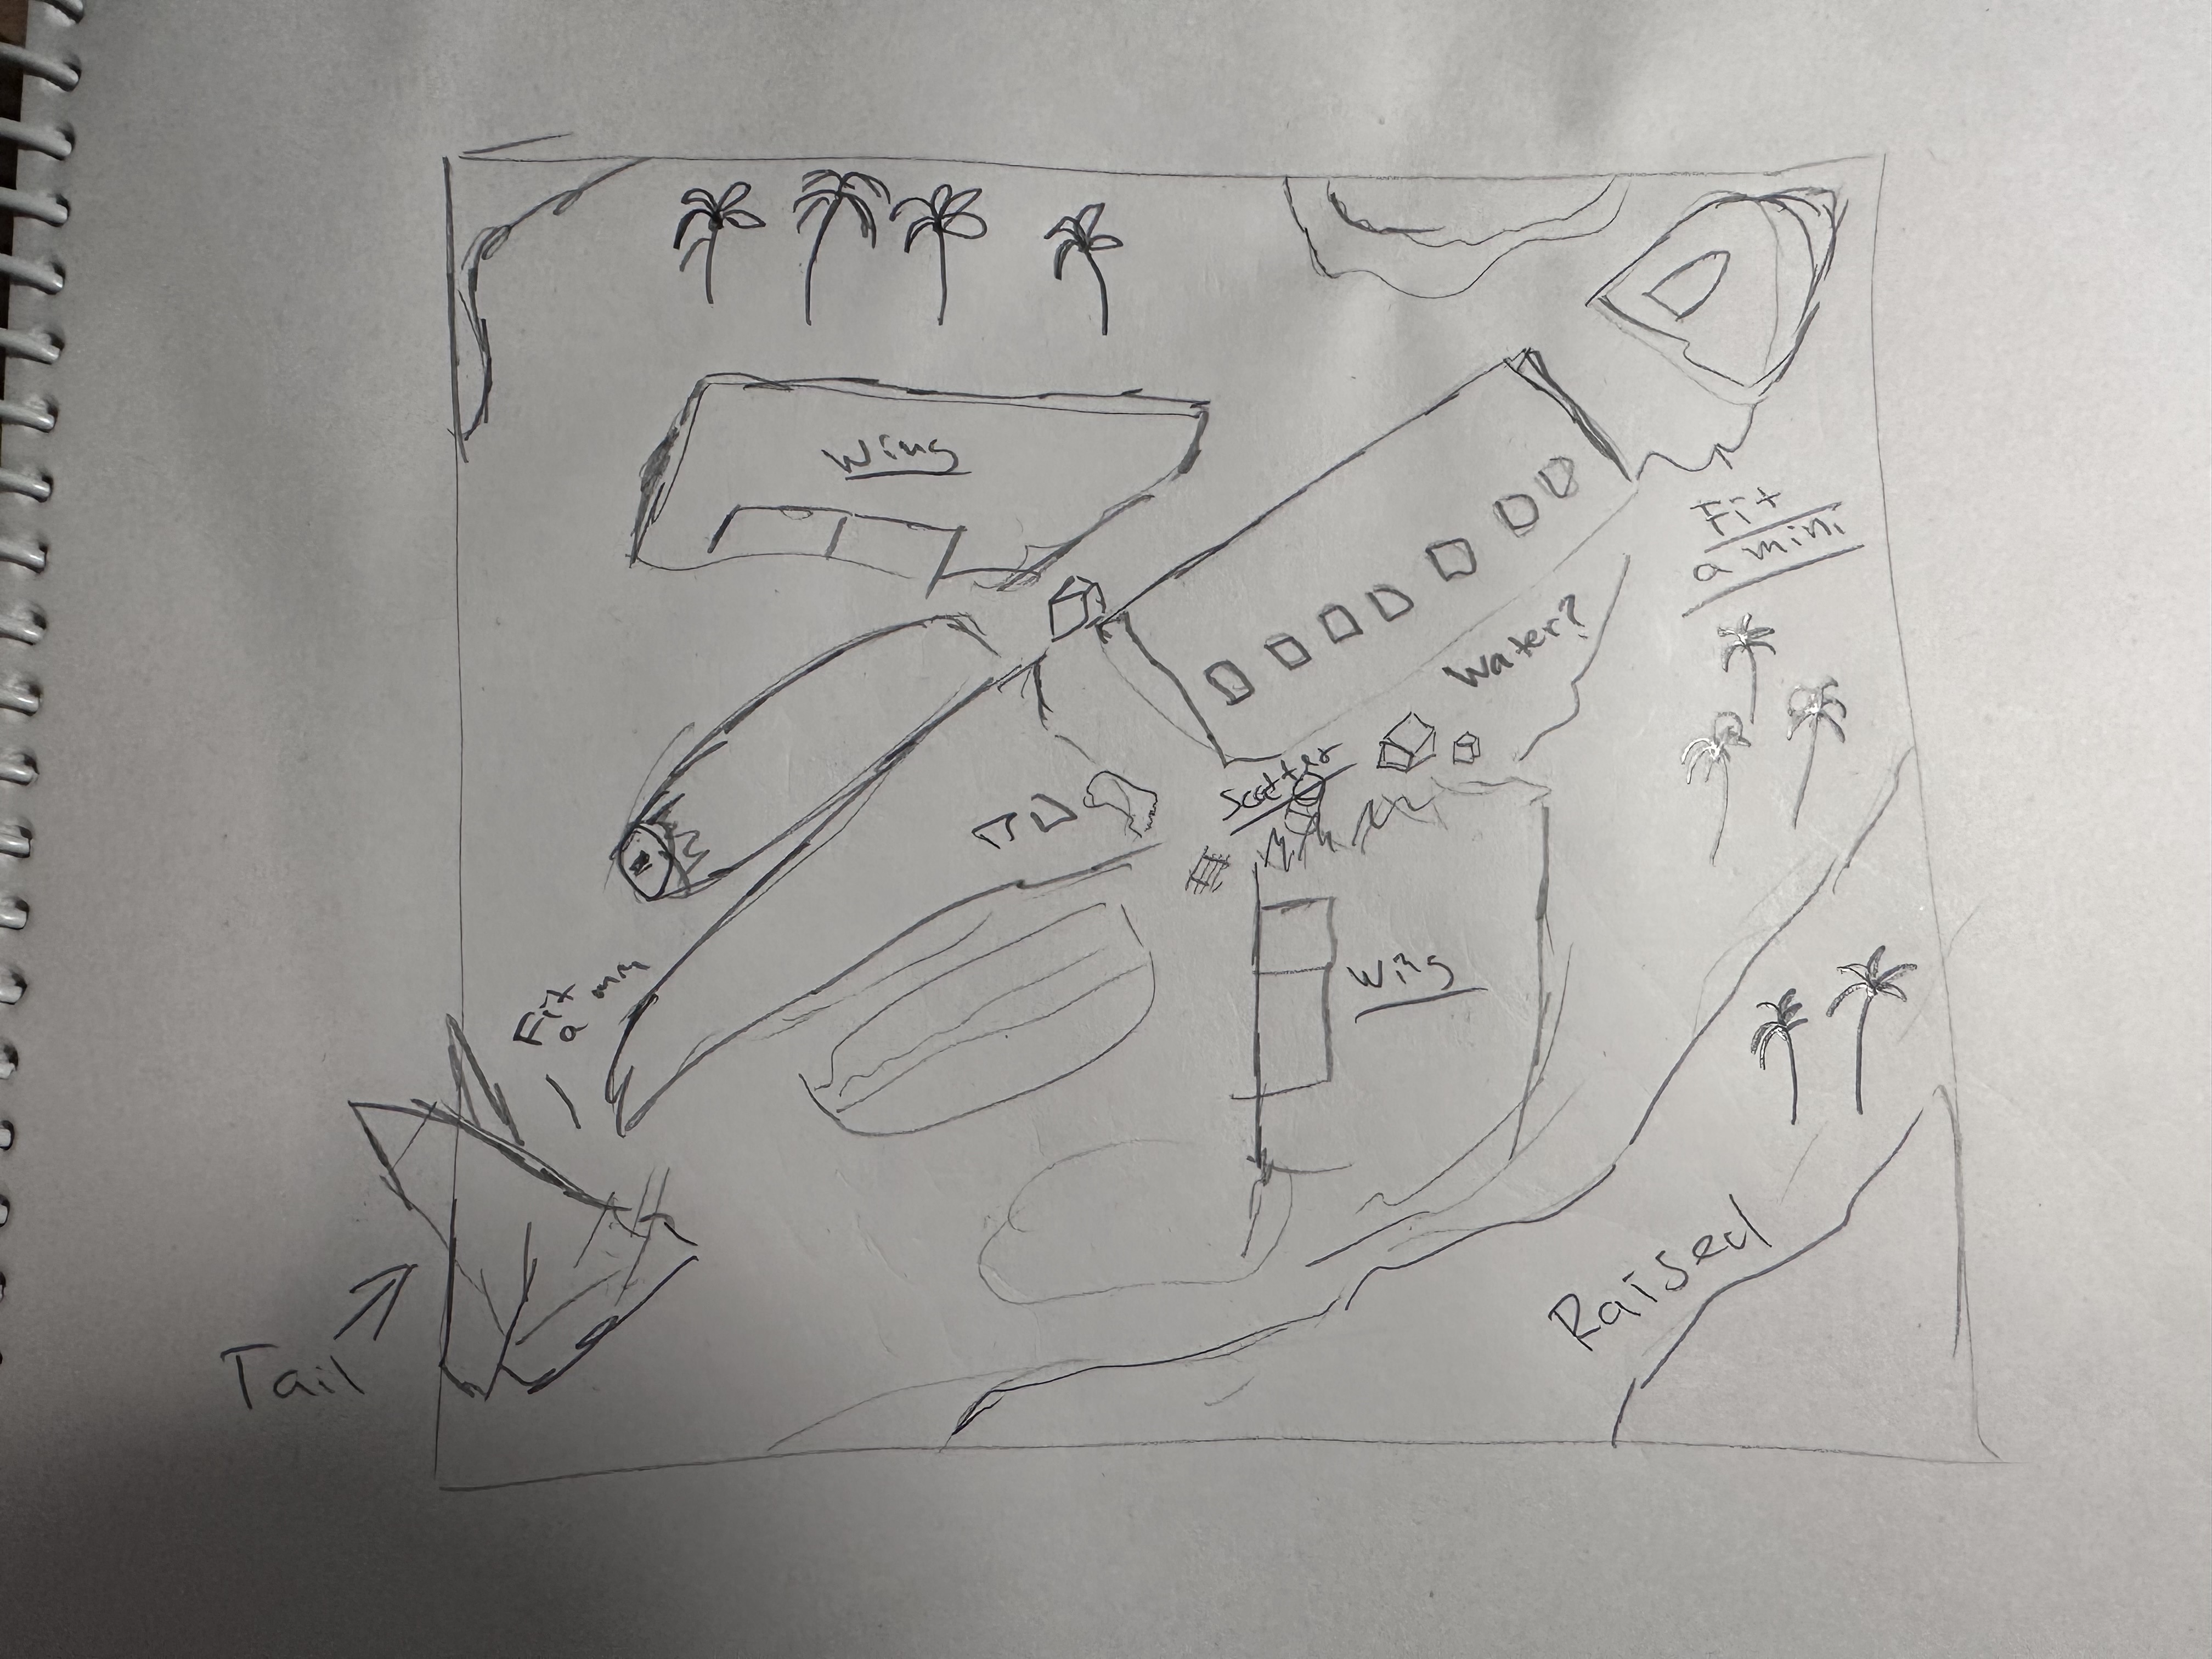 Quick sketch
 Cleaning up the prints
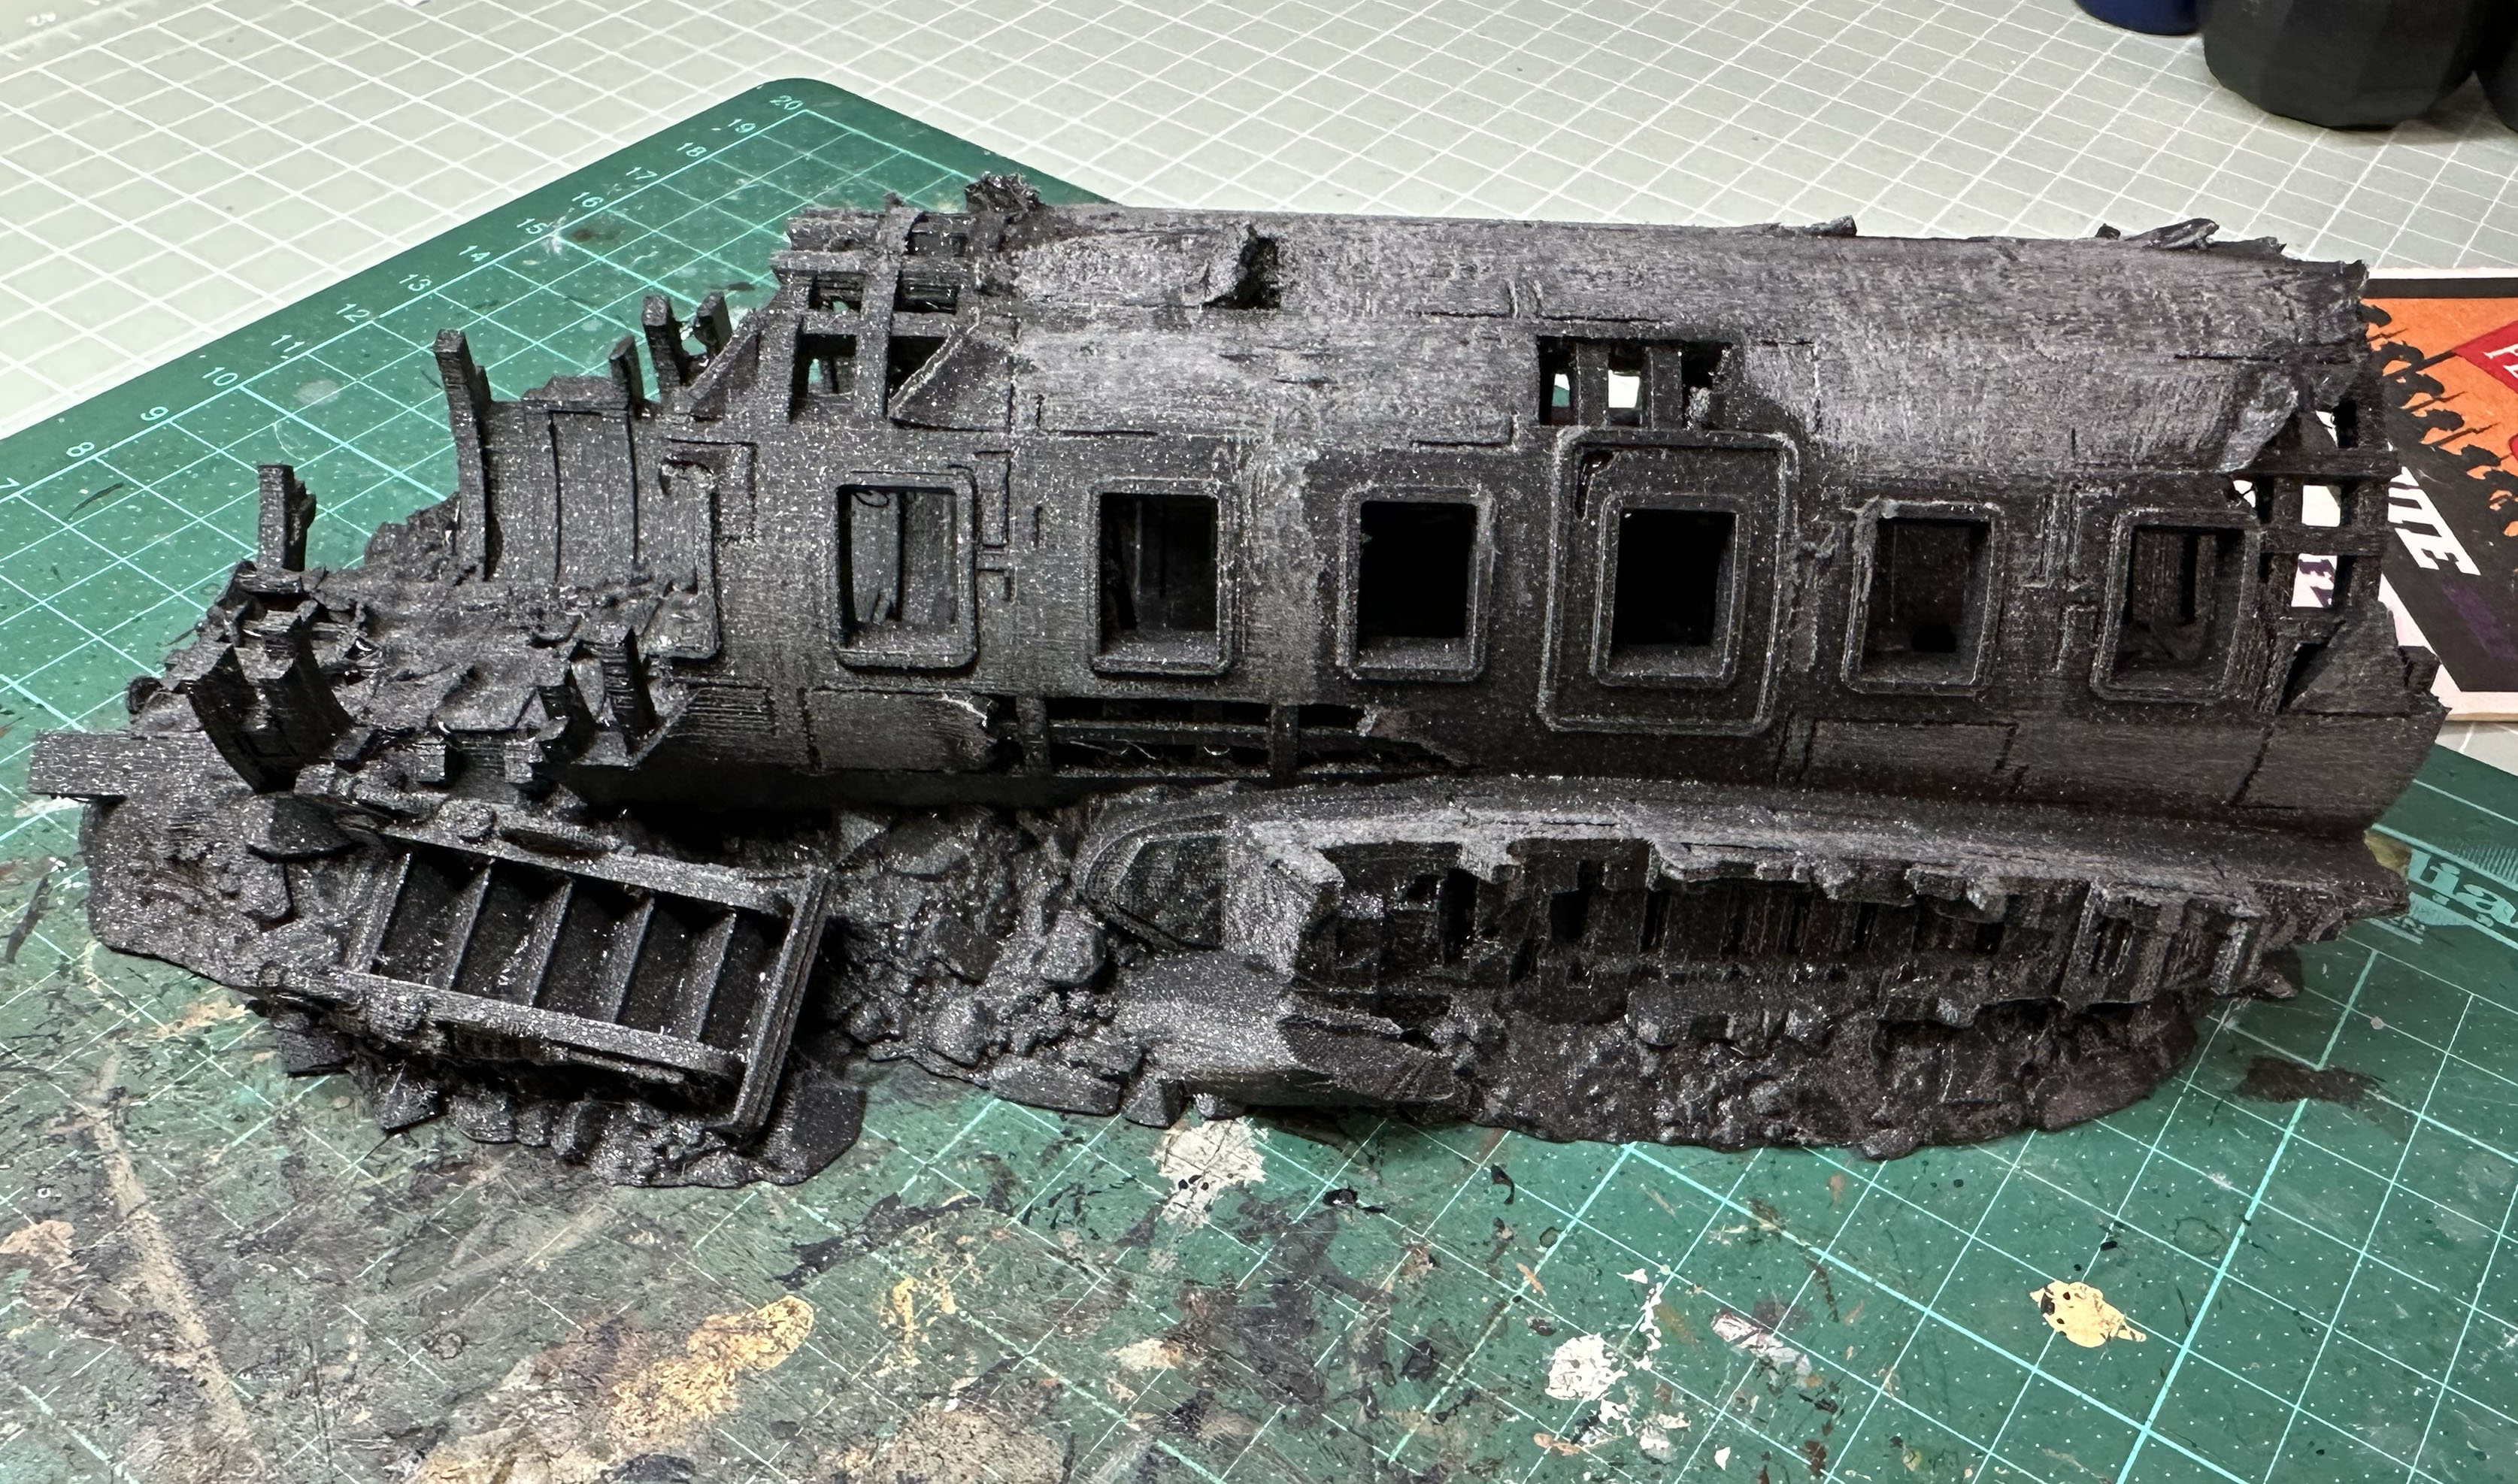
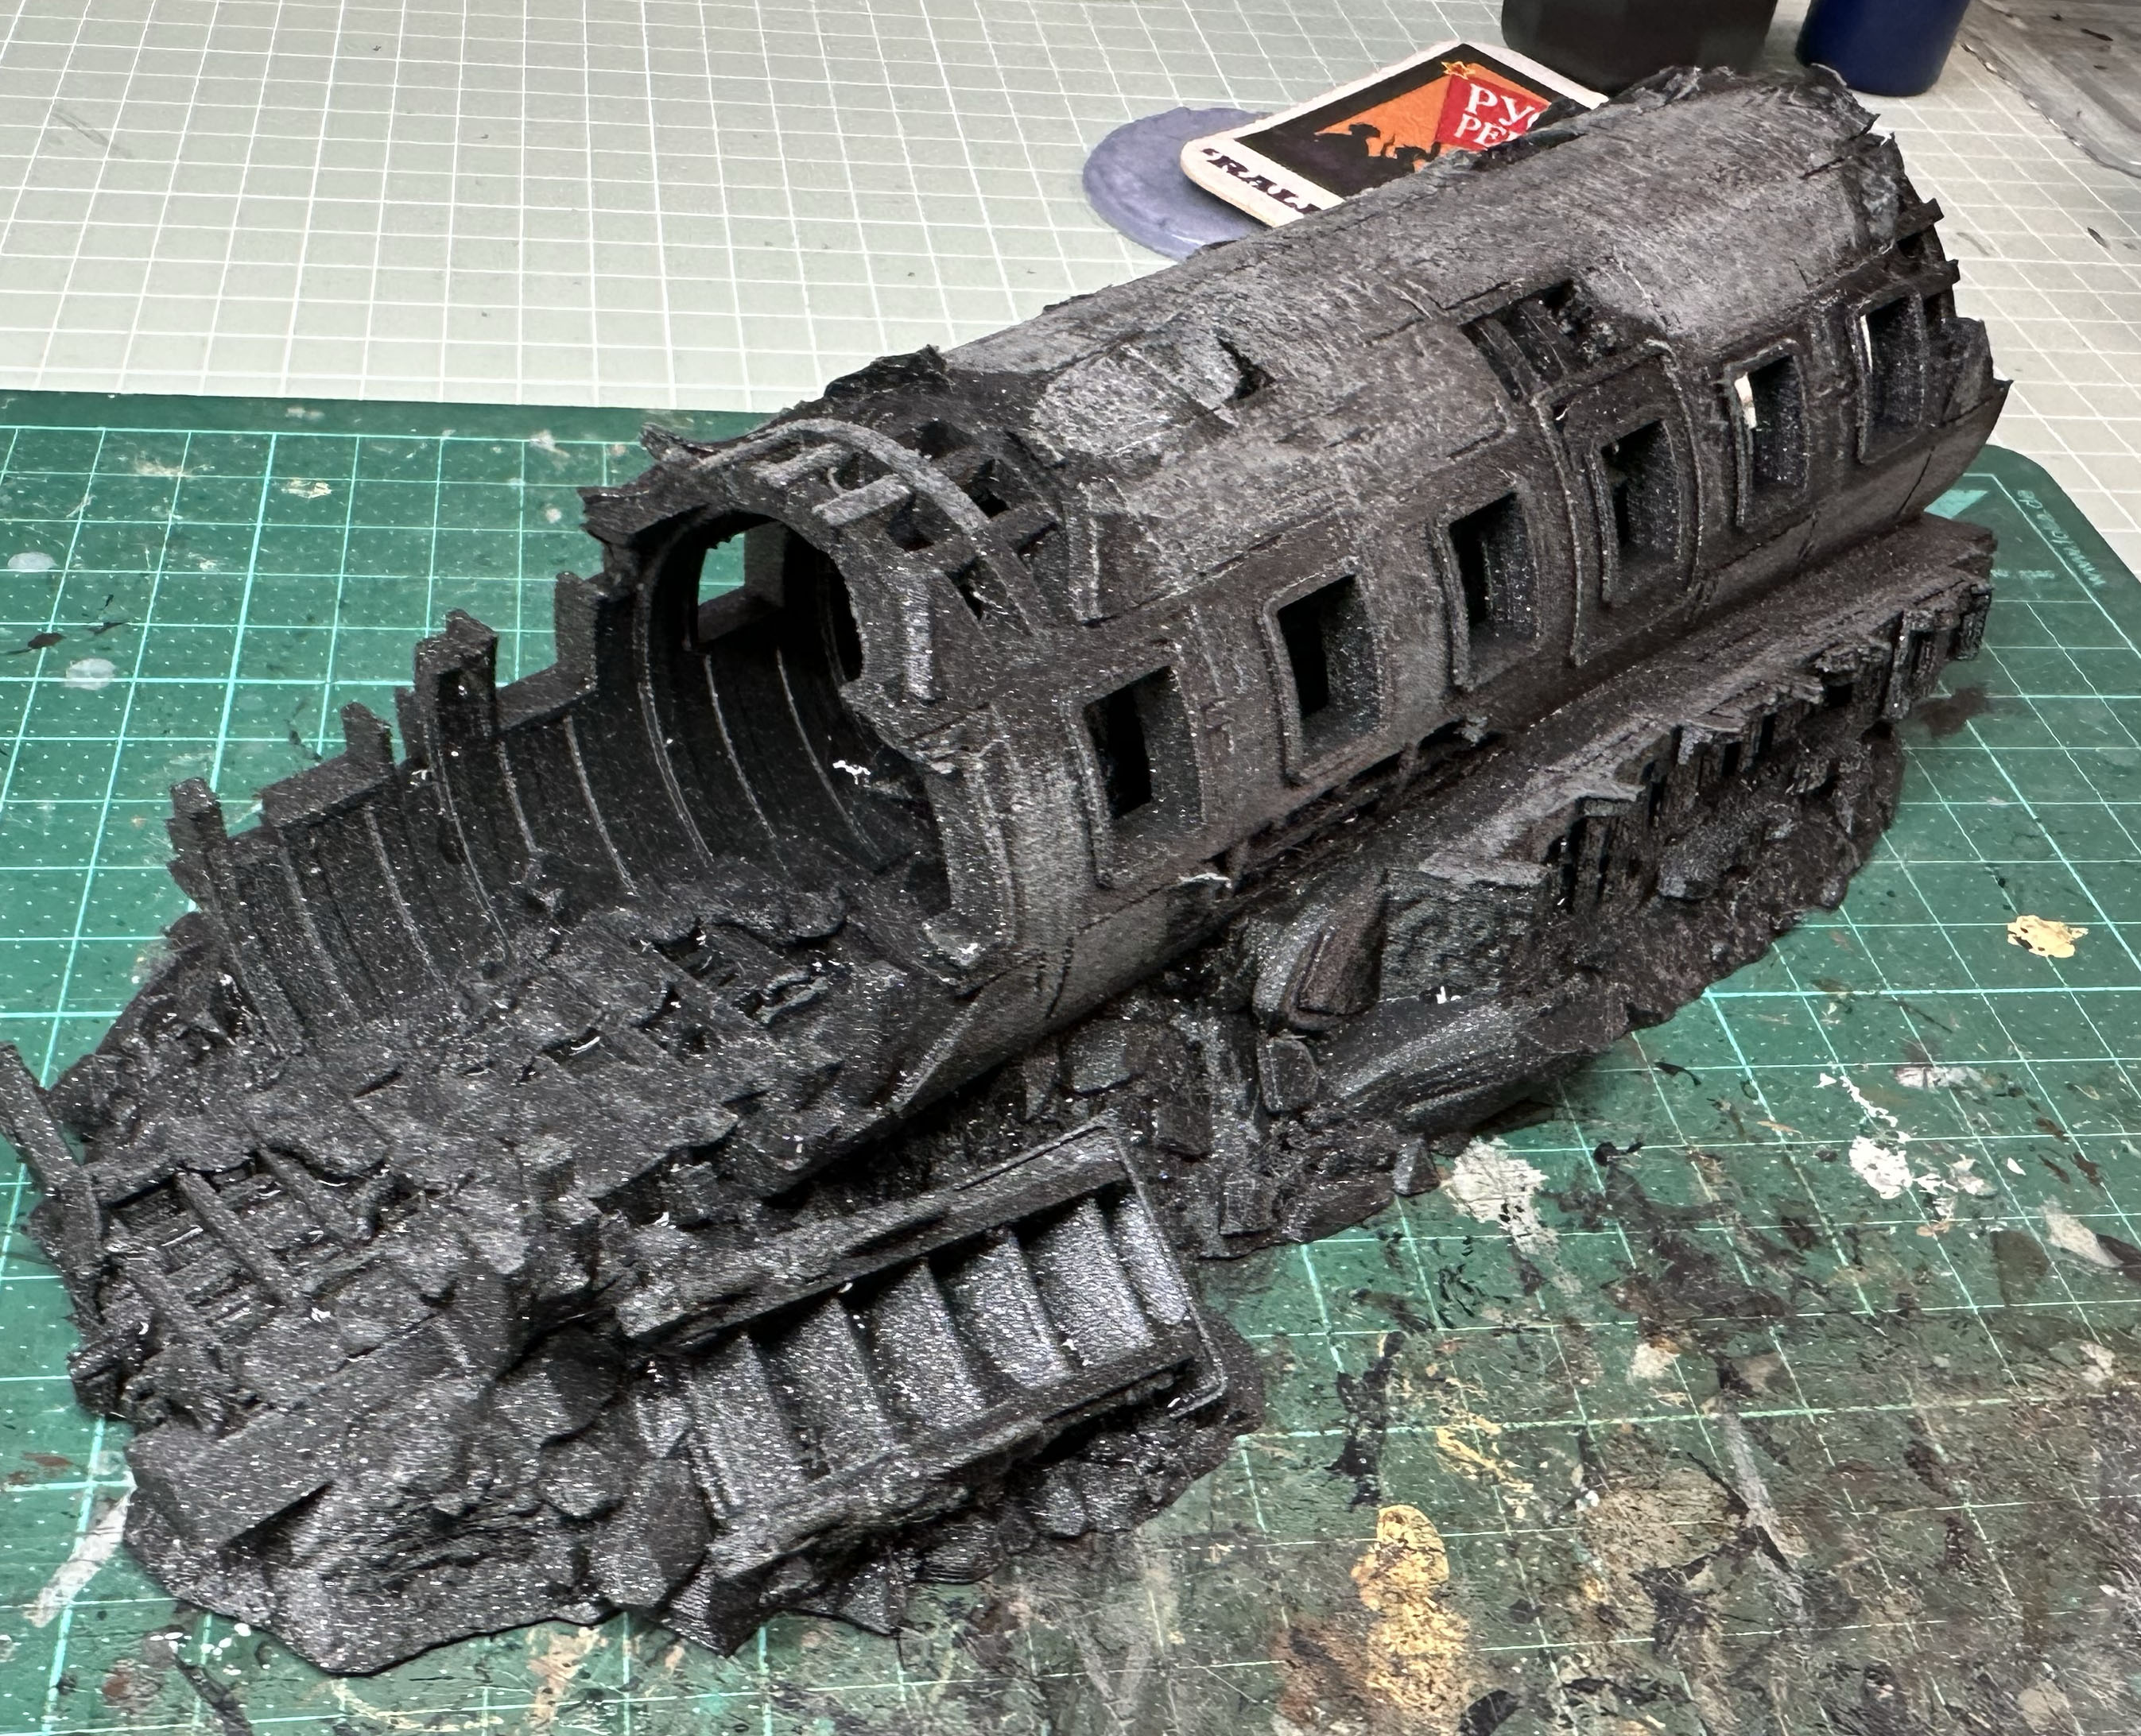
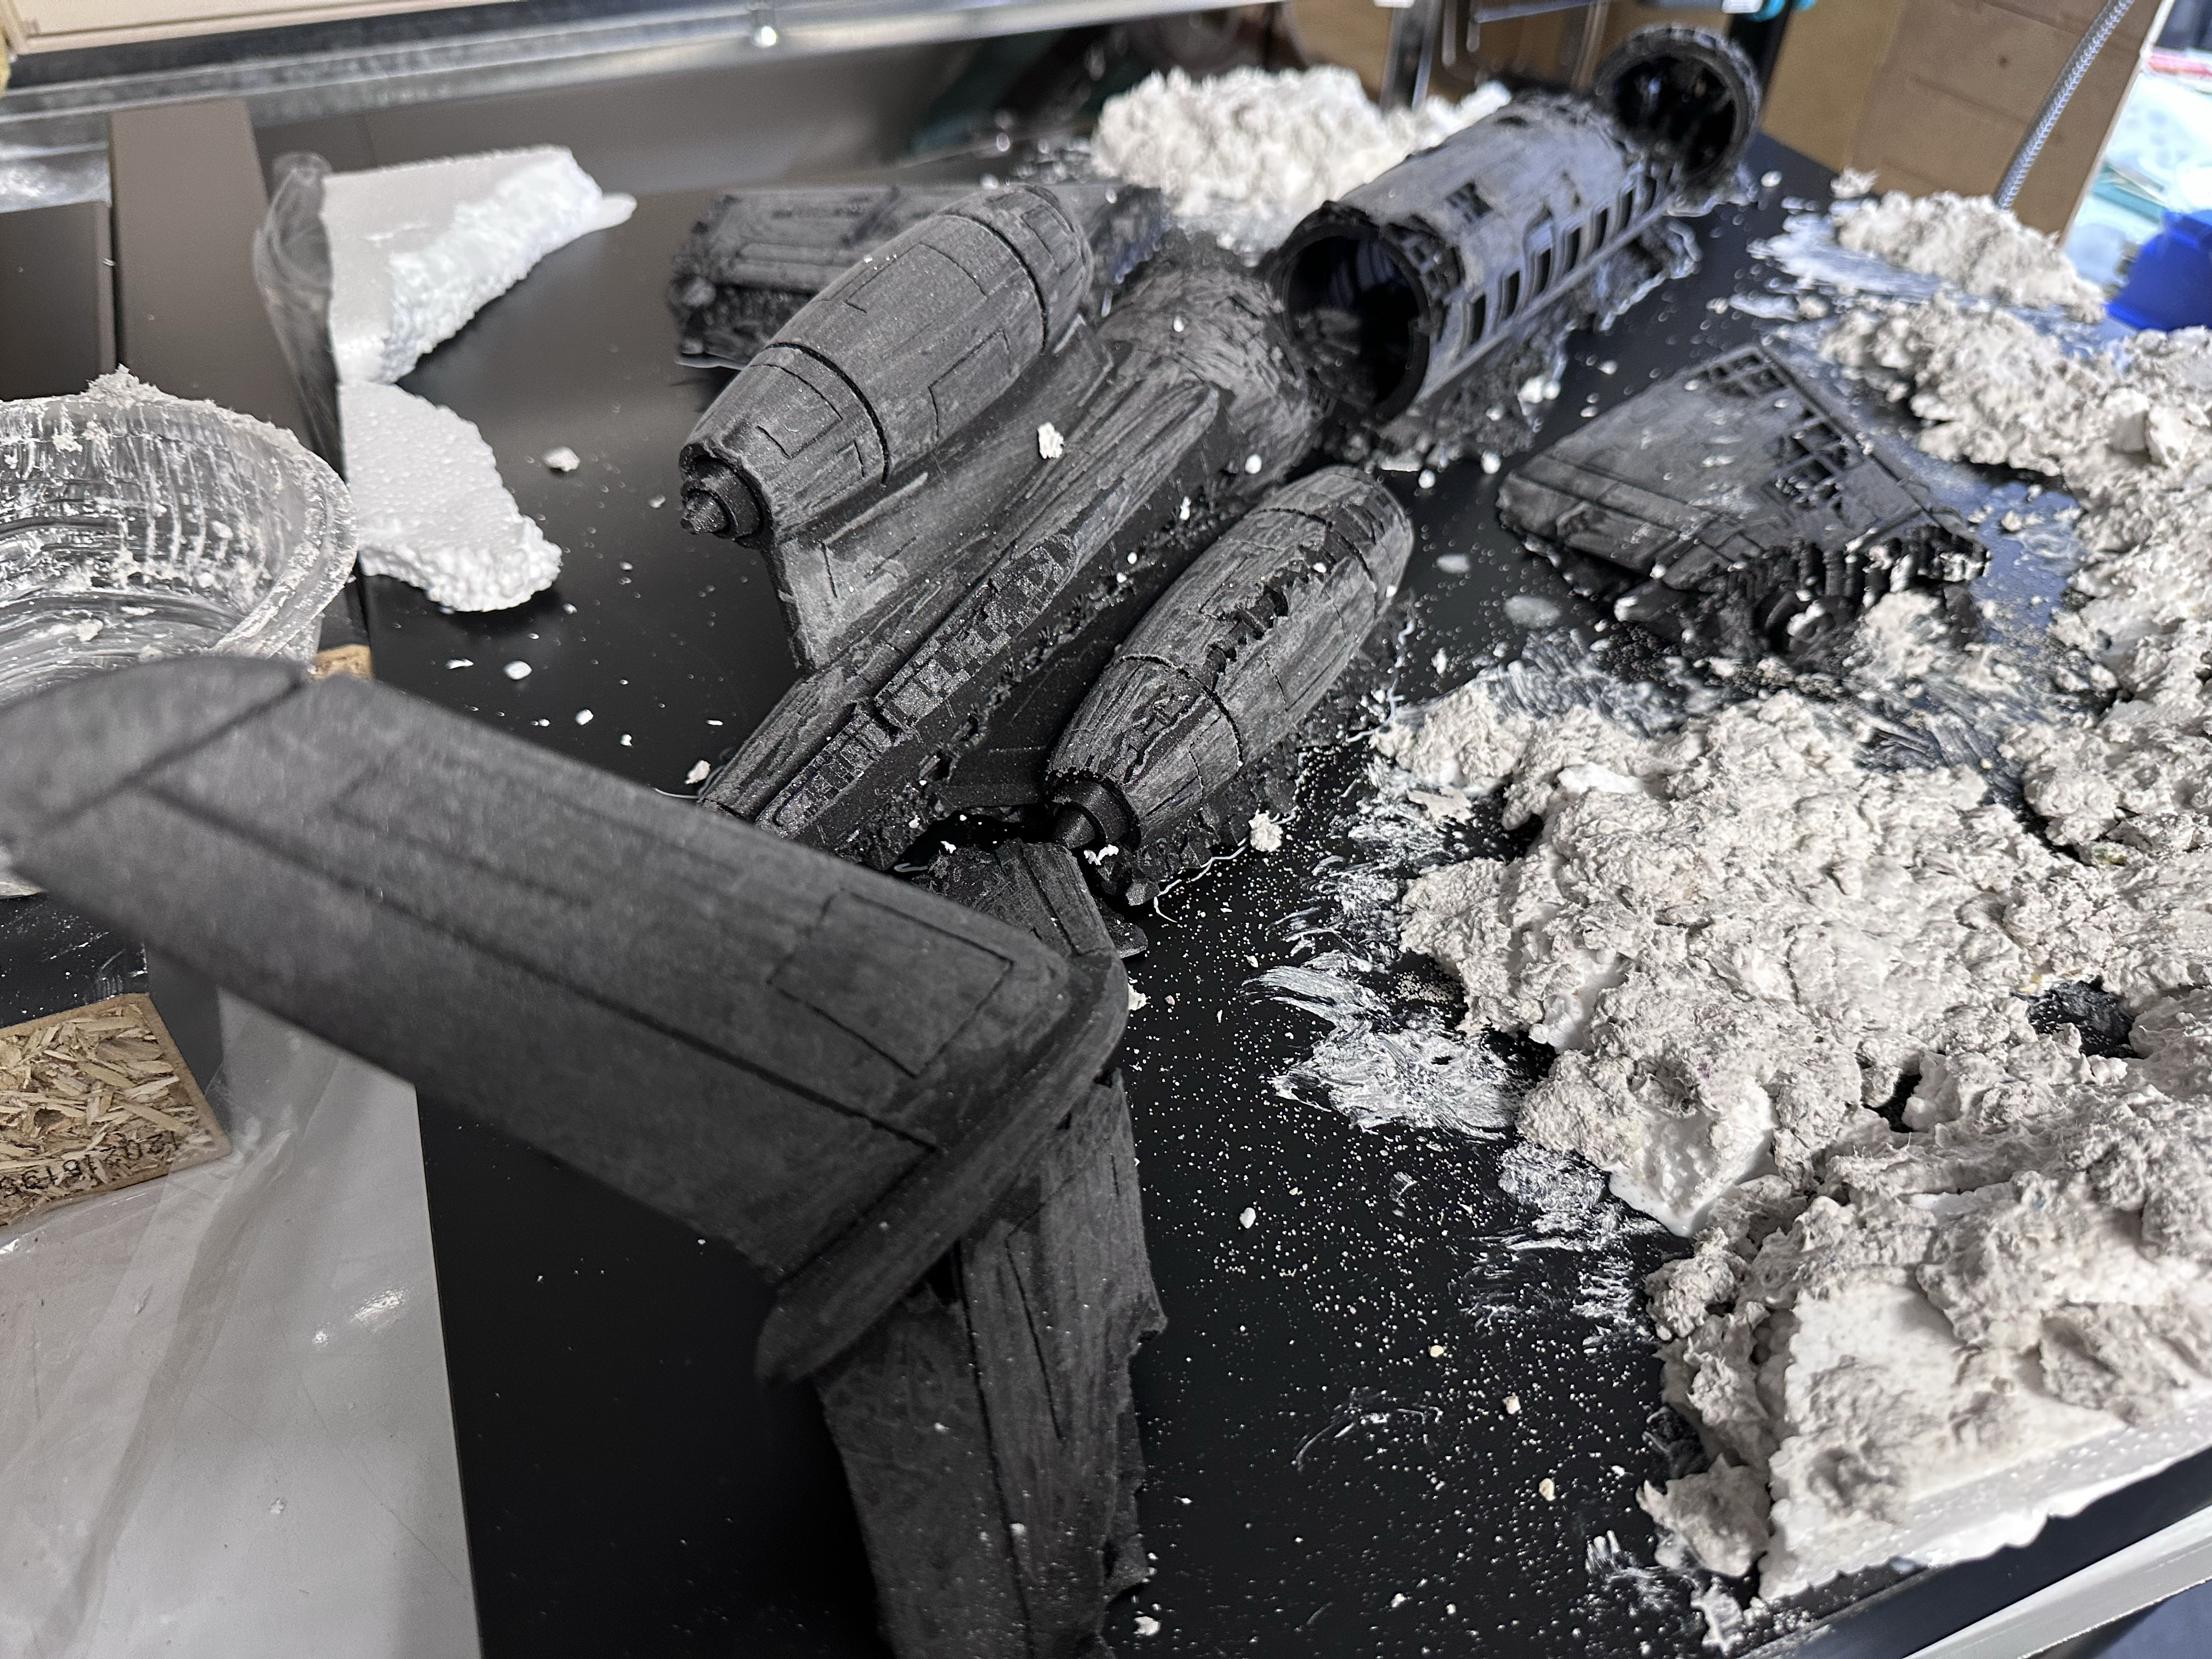
I started off with cleaning up with prints. The parts are printed with FDM printer, and I want to smooth down the layer lines.
Going down with various grits of sandpaper and a Dremel.
I don’t mind a slightly rough surfaces at places, it’s a crashed air plane after all.
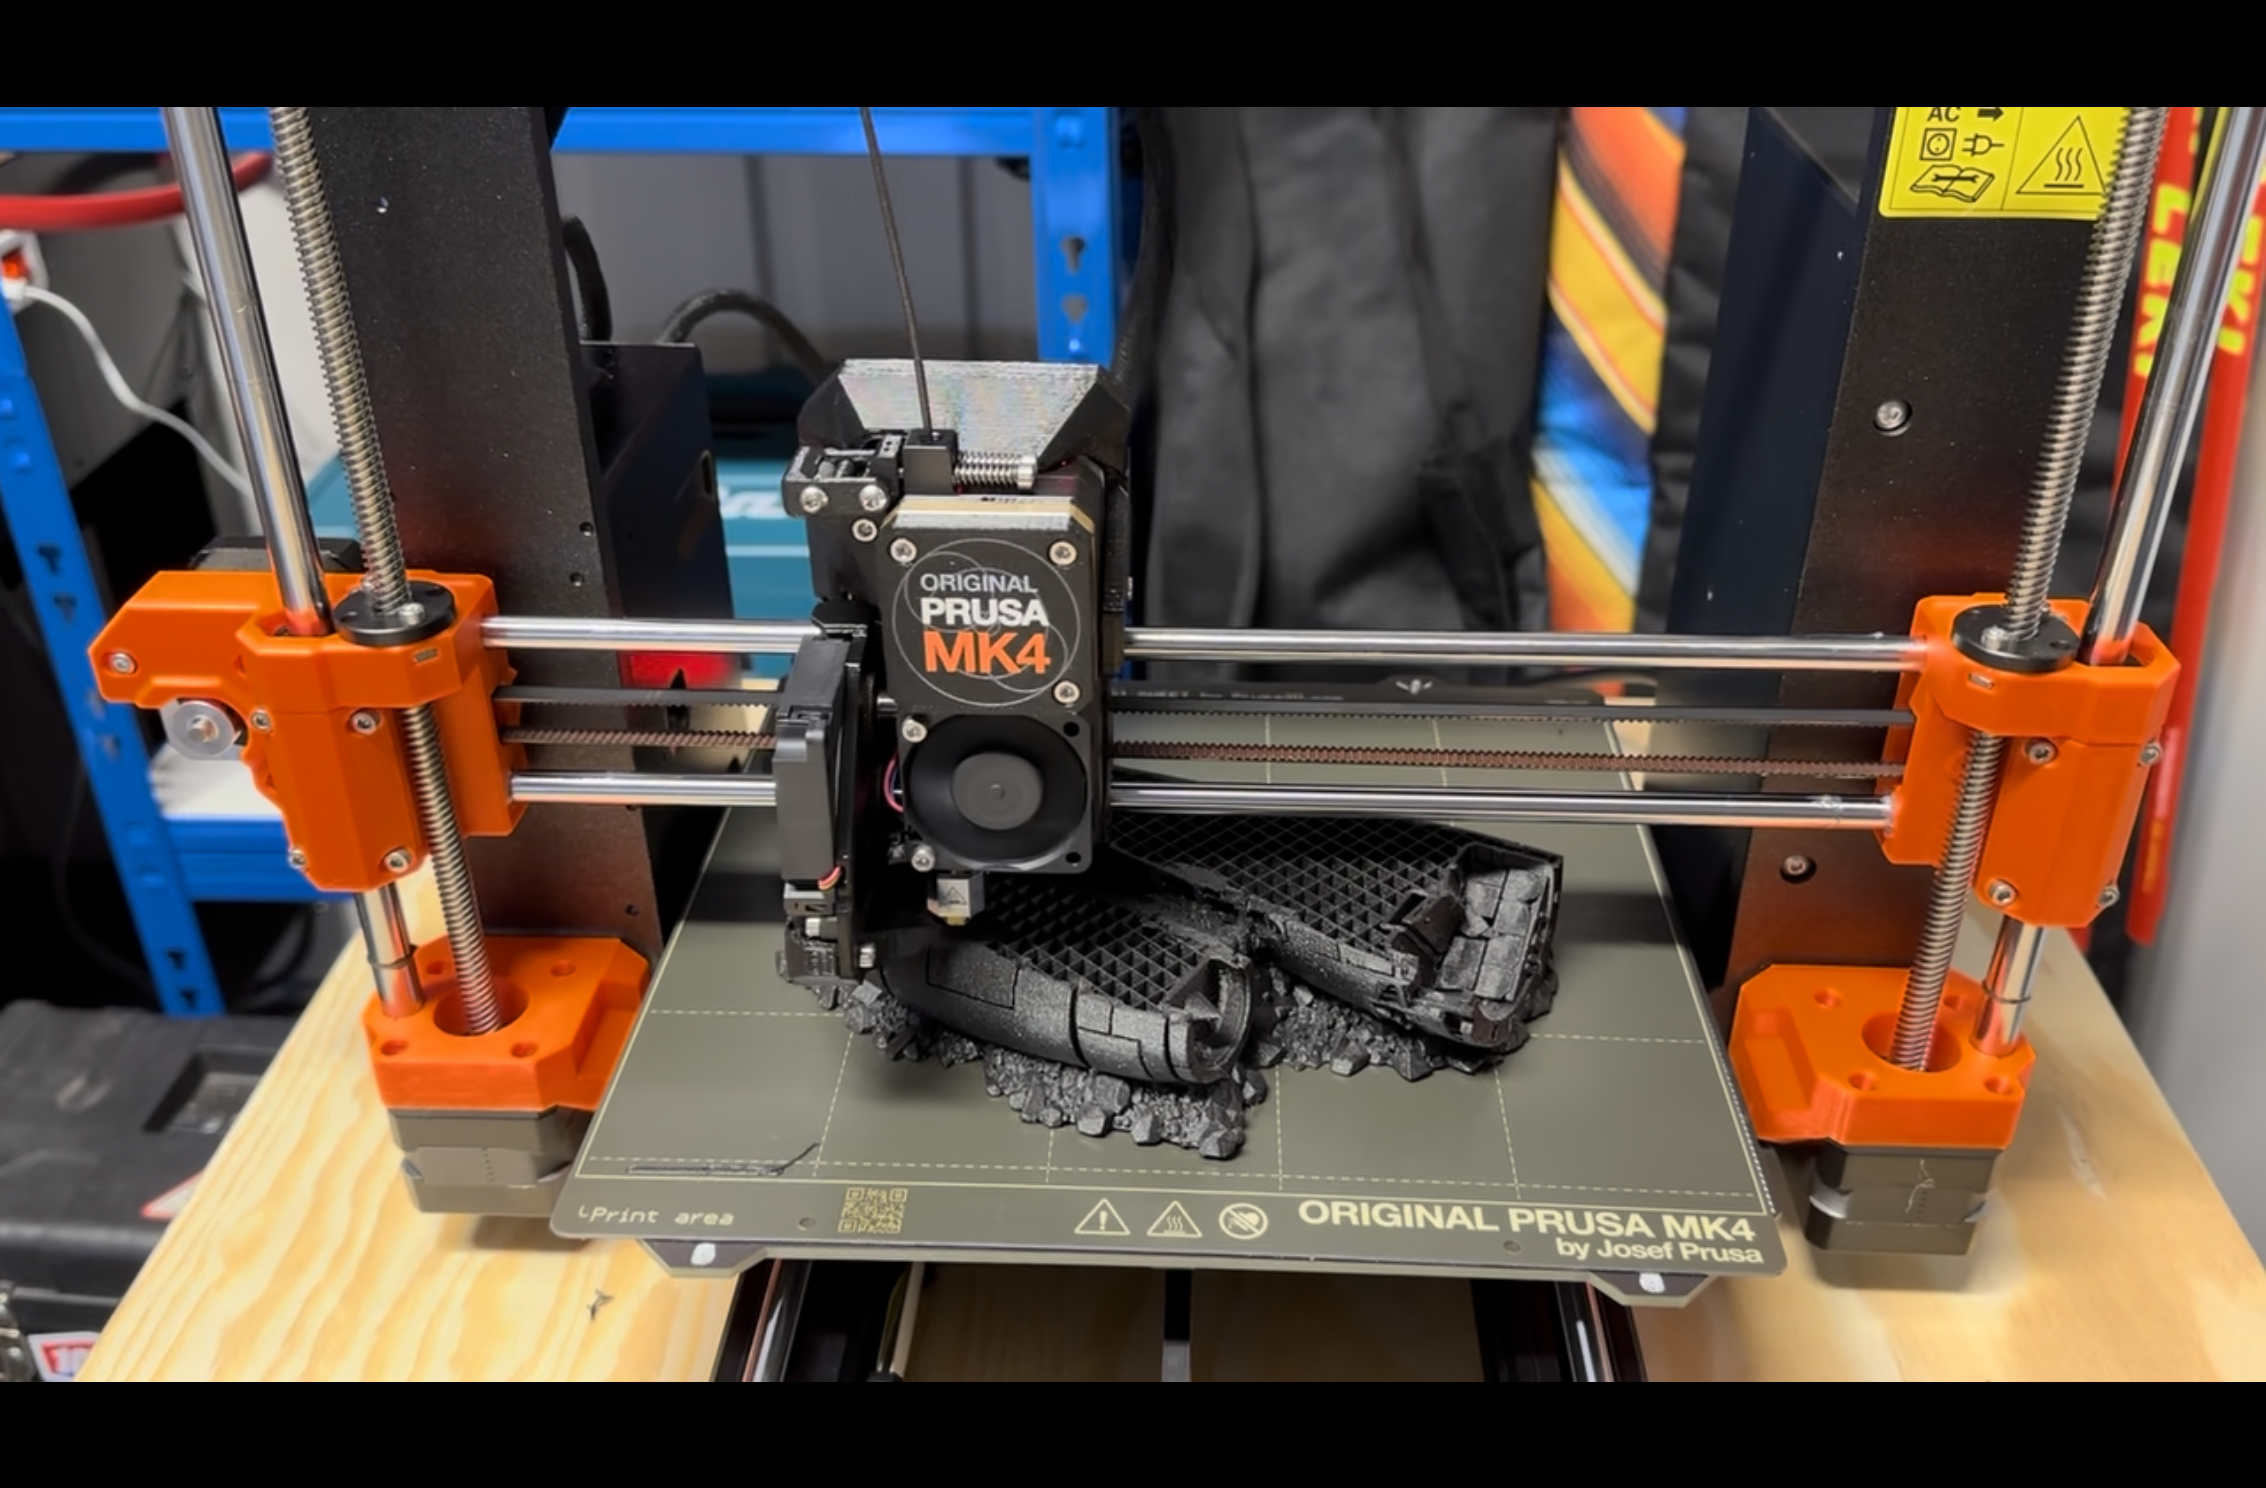
3d Printer goes brrrr…
Quick update. Printing is progressing well, I just put the last bits to print overnight. The forecast says rain for the weekend — perfect time to TerrainFest! The plan is to get the primer on the printed parts and start building up the layout.
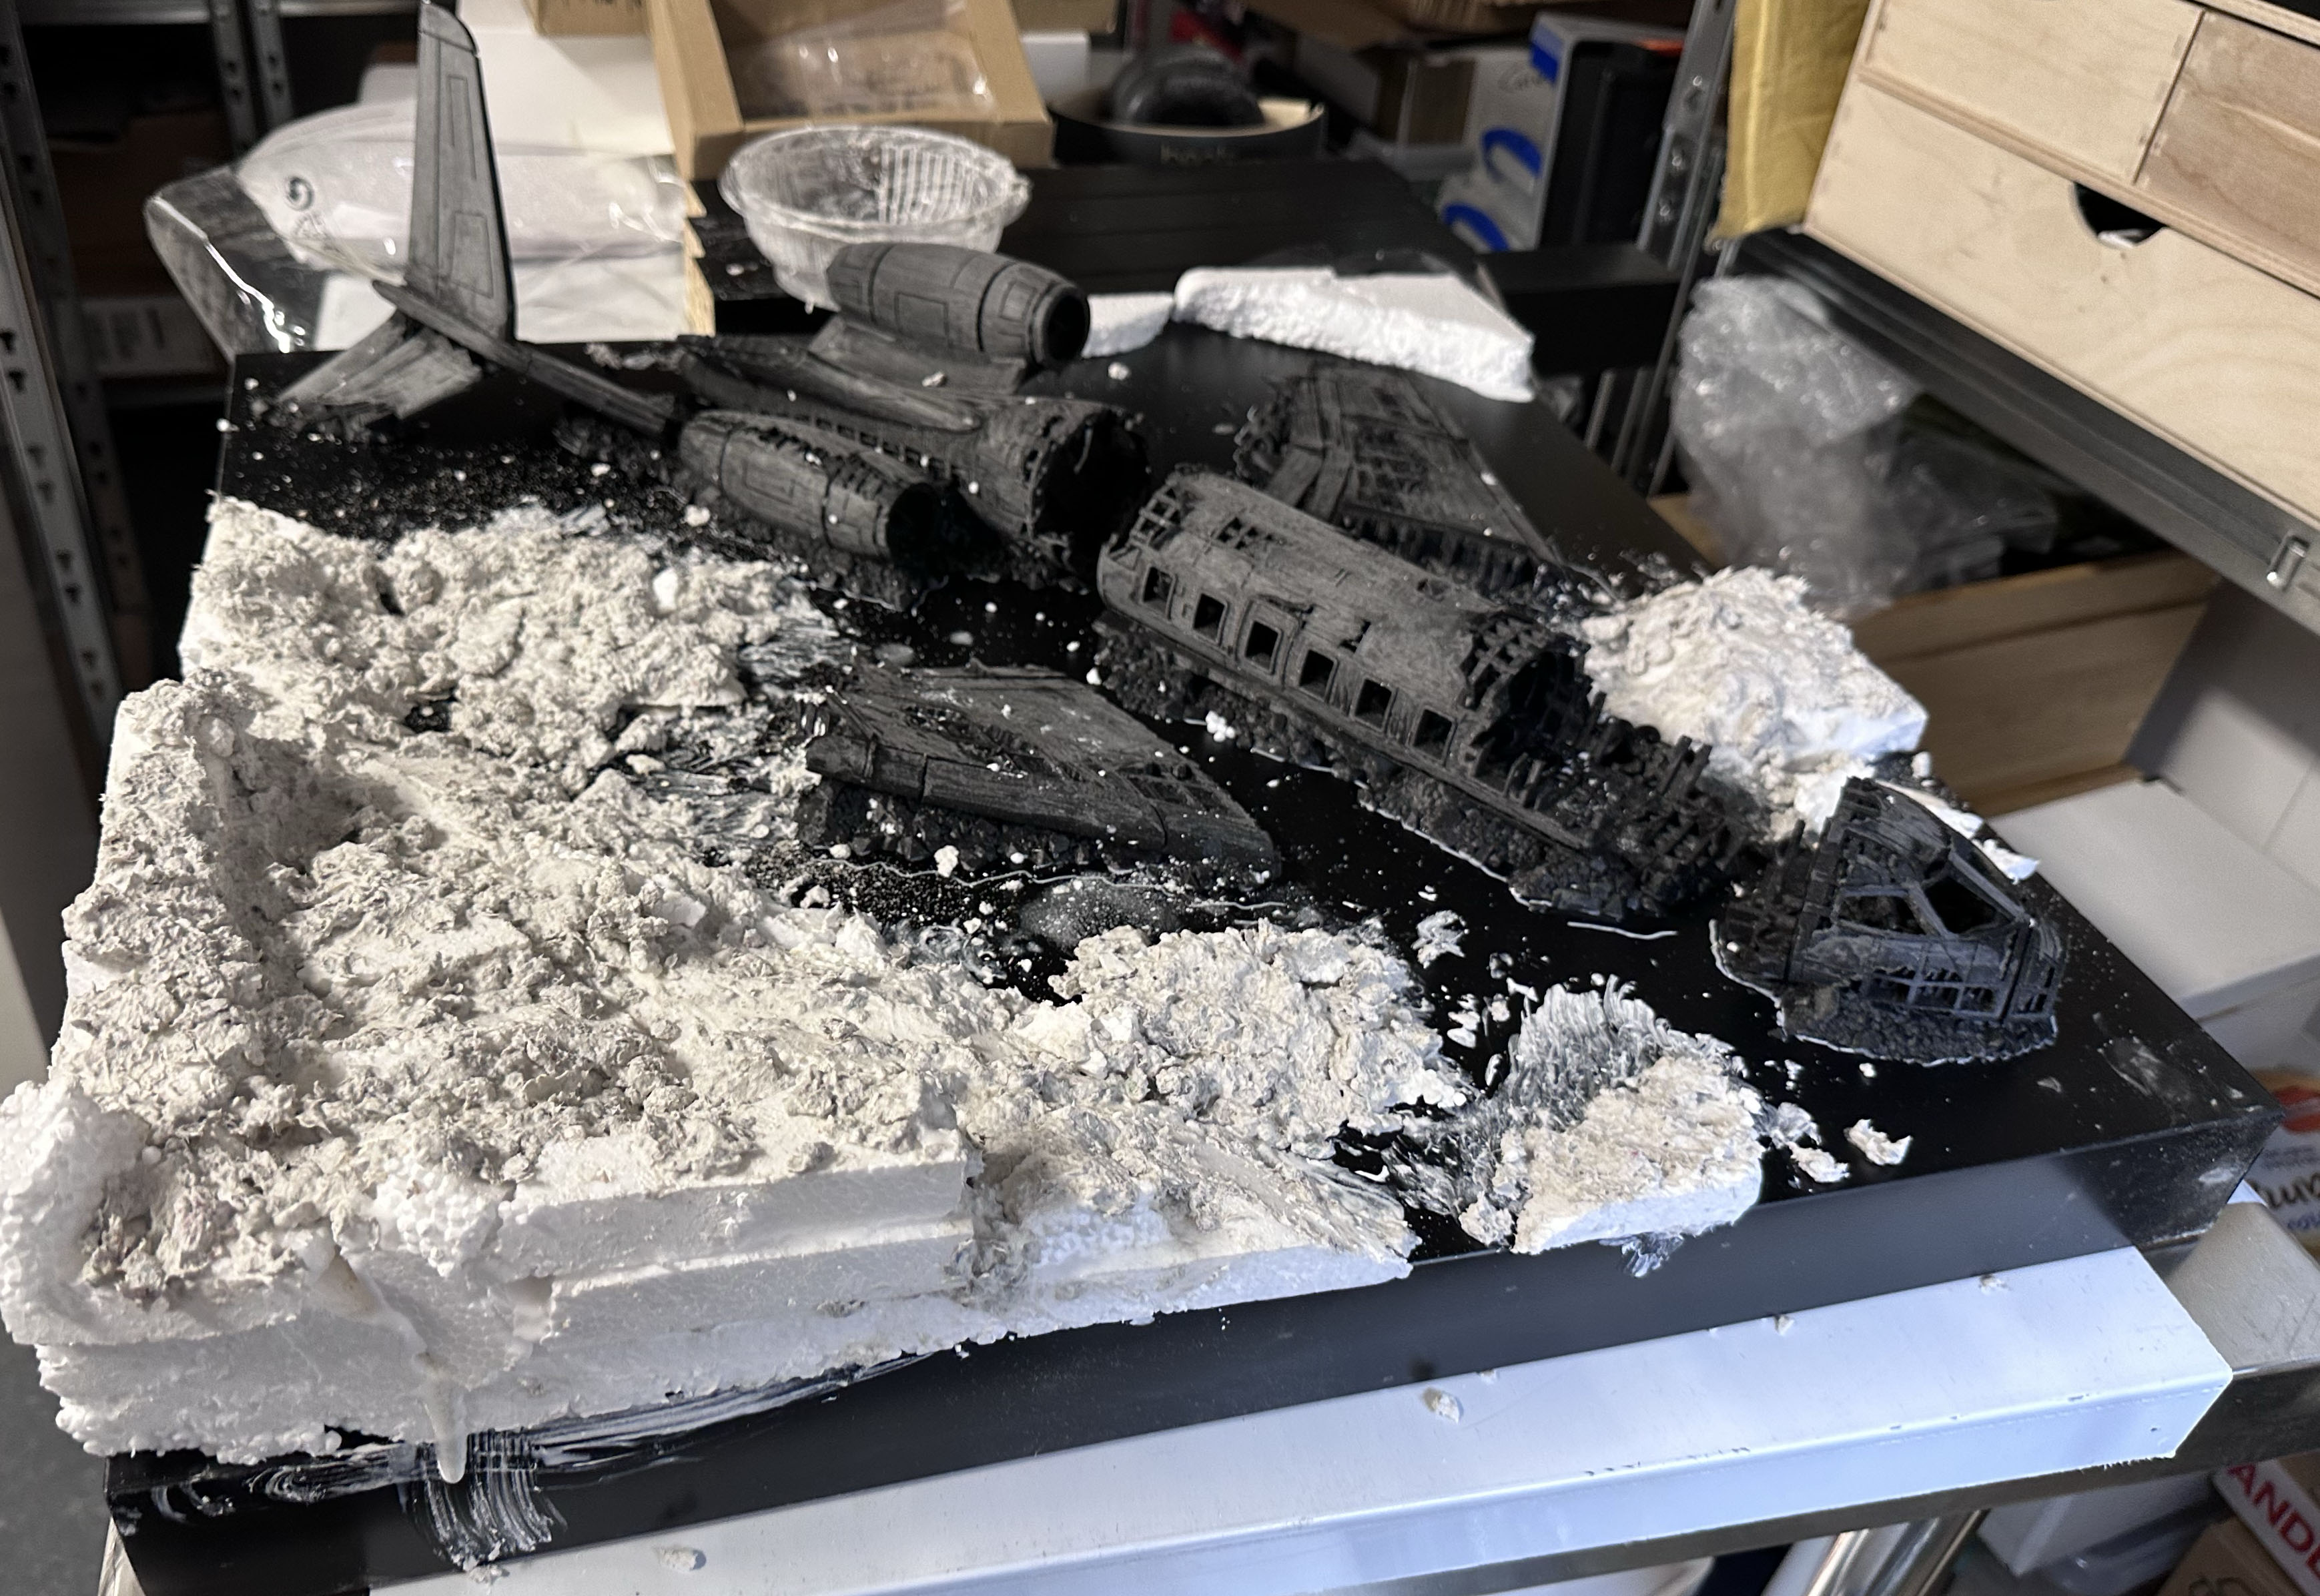
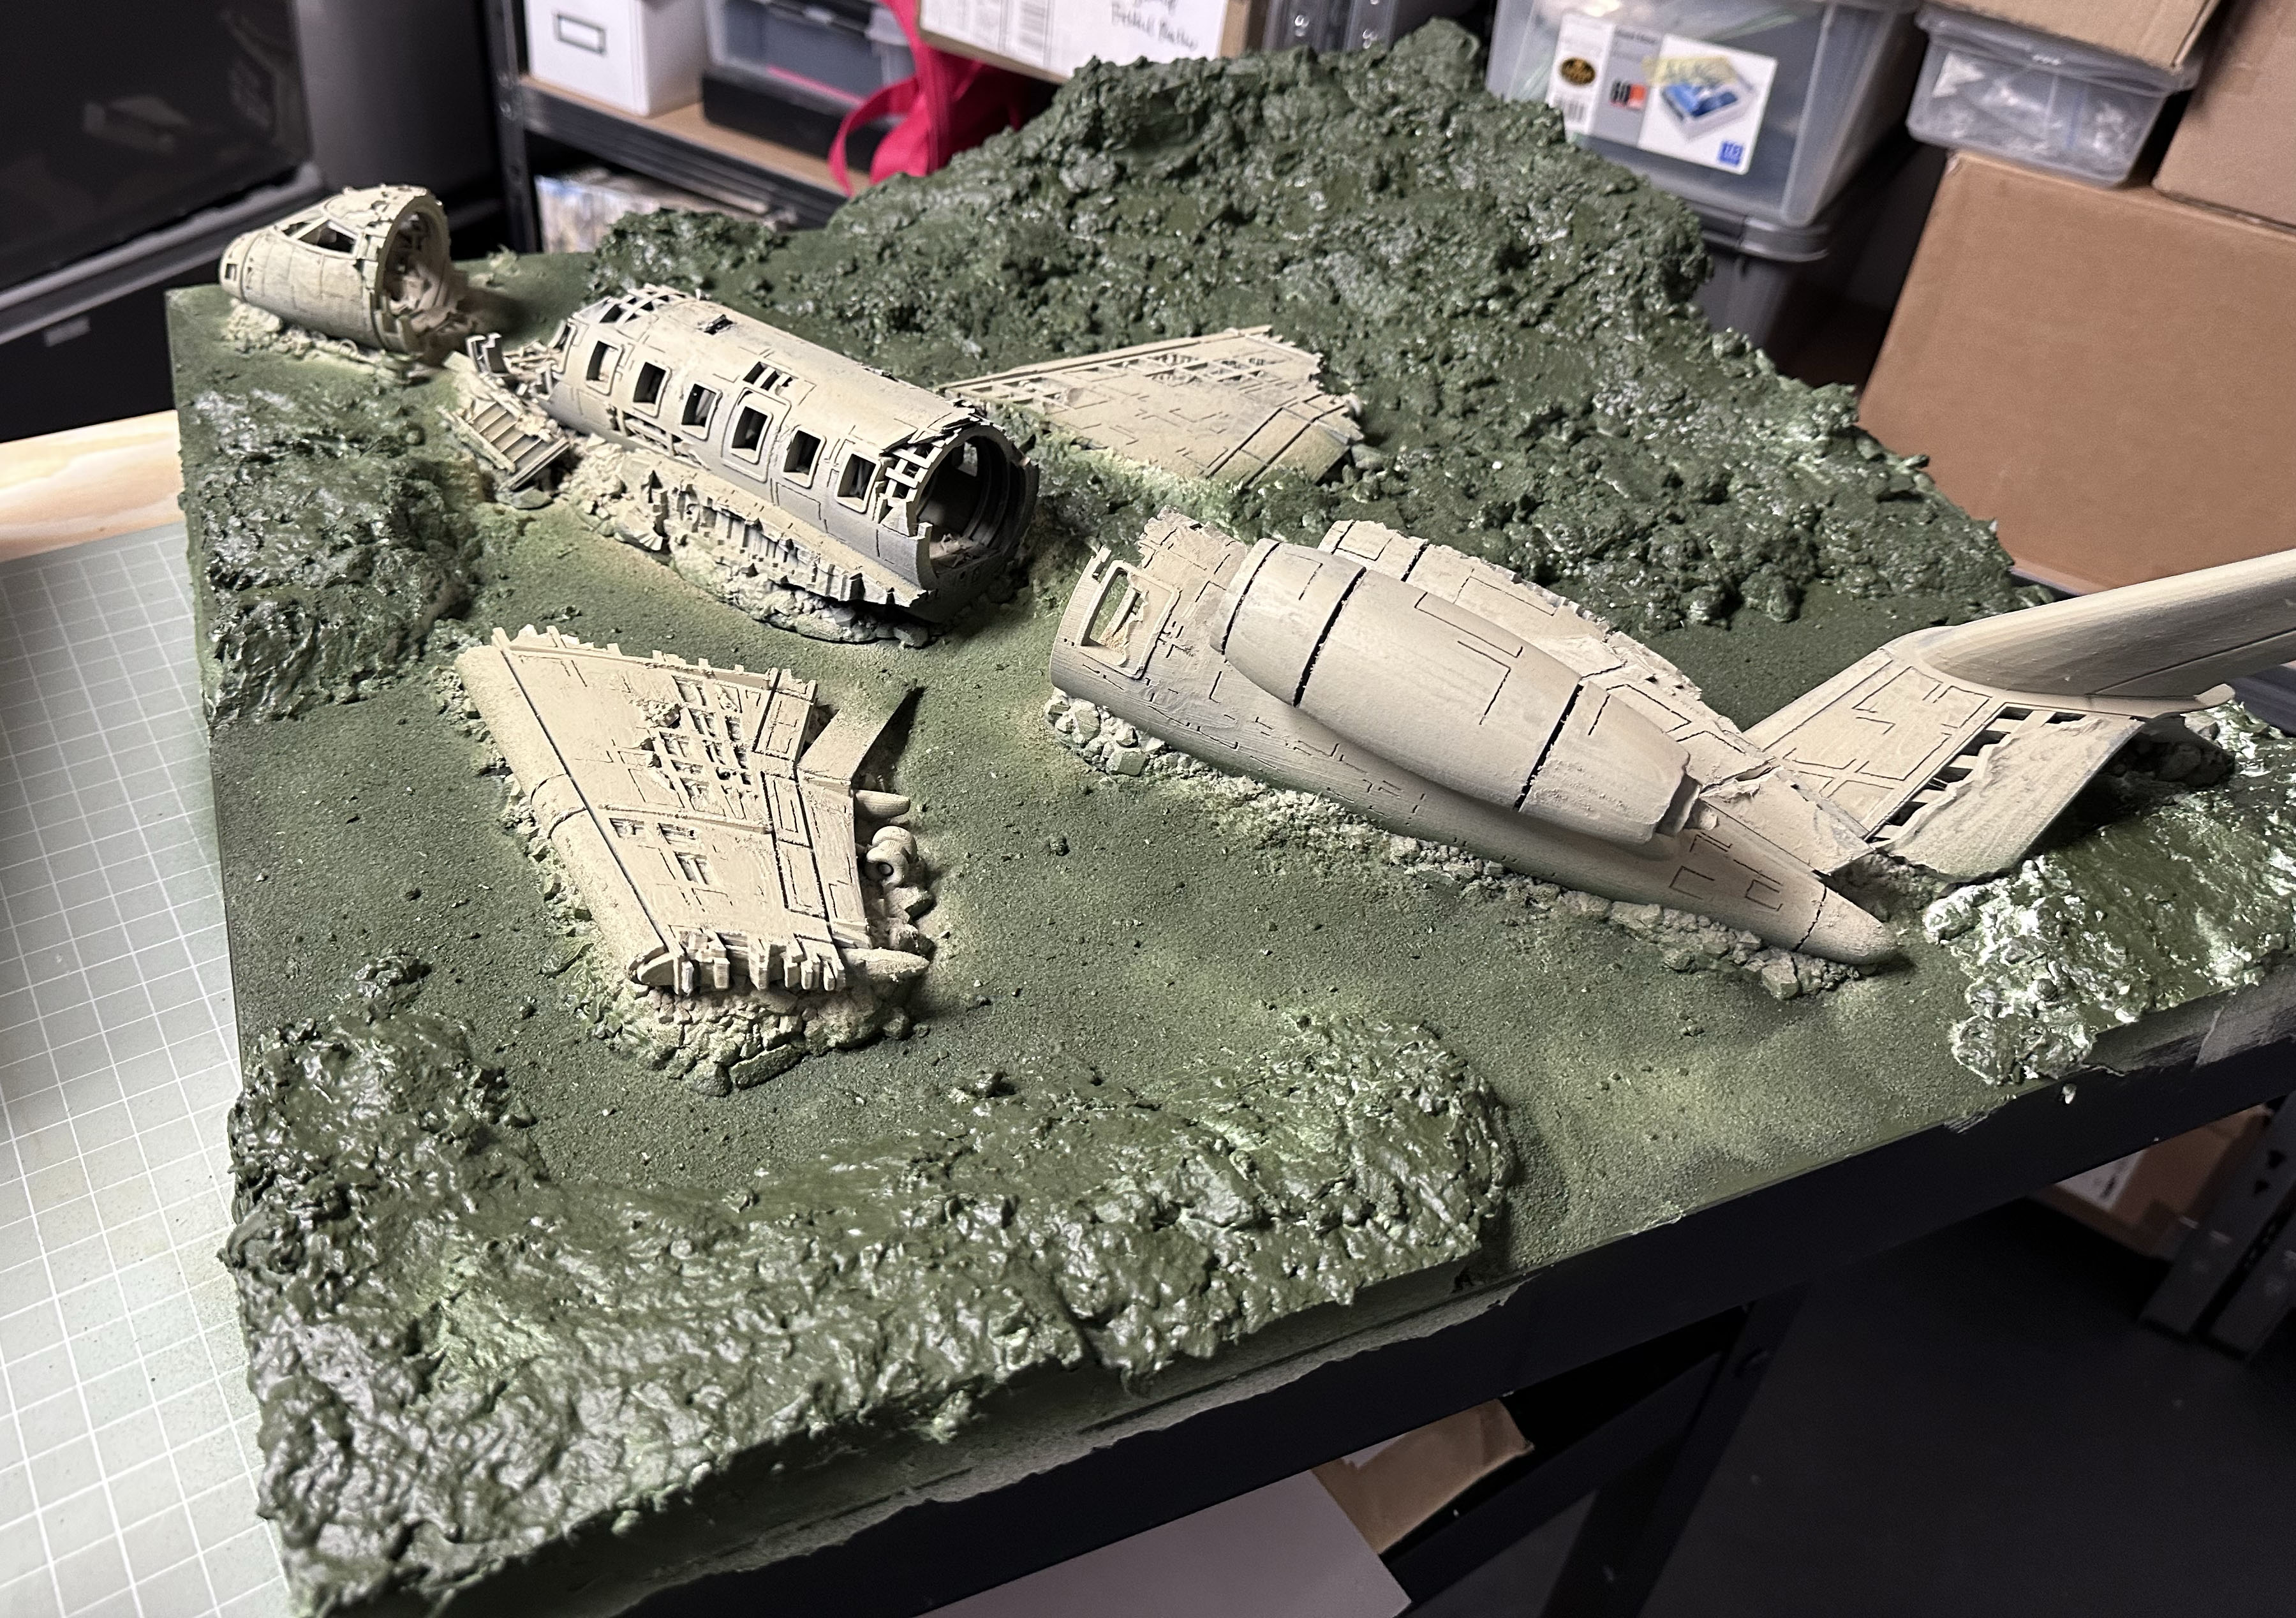
Building the layout
Parts are printed and mostly sanded. I started laying out the board.
As originally intended, I’m using an Ikea Lack table as the base board. It’s 55cm square, so just under 2’ but I’m fine with it. Cheap, light and fairly durable.
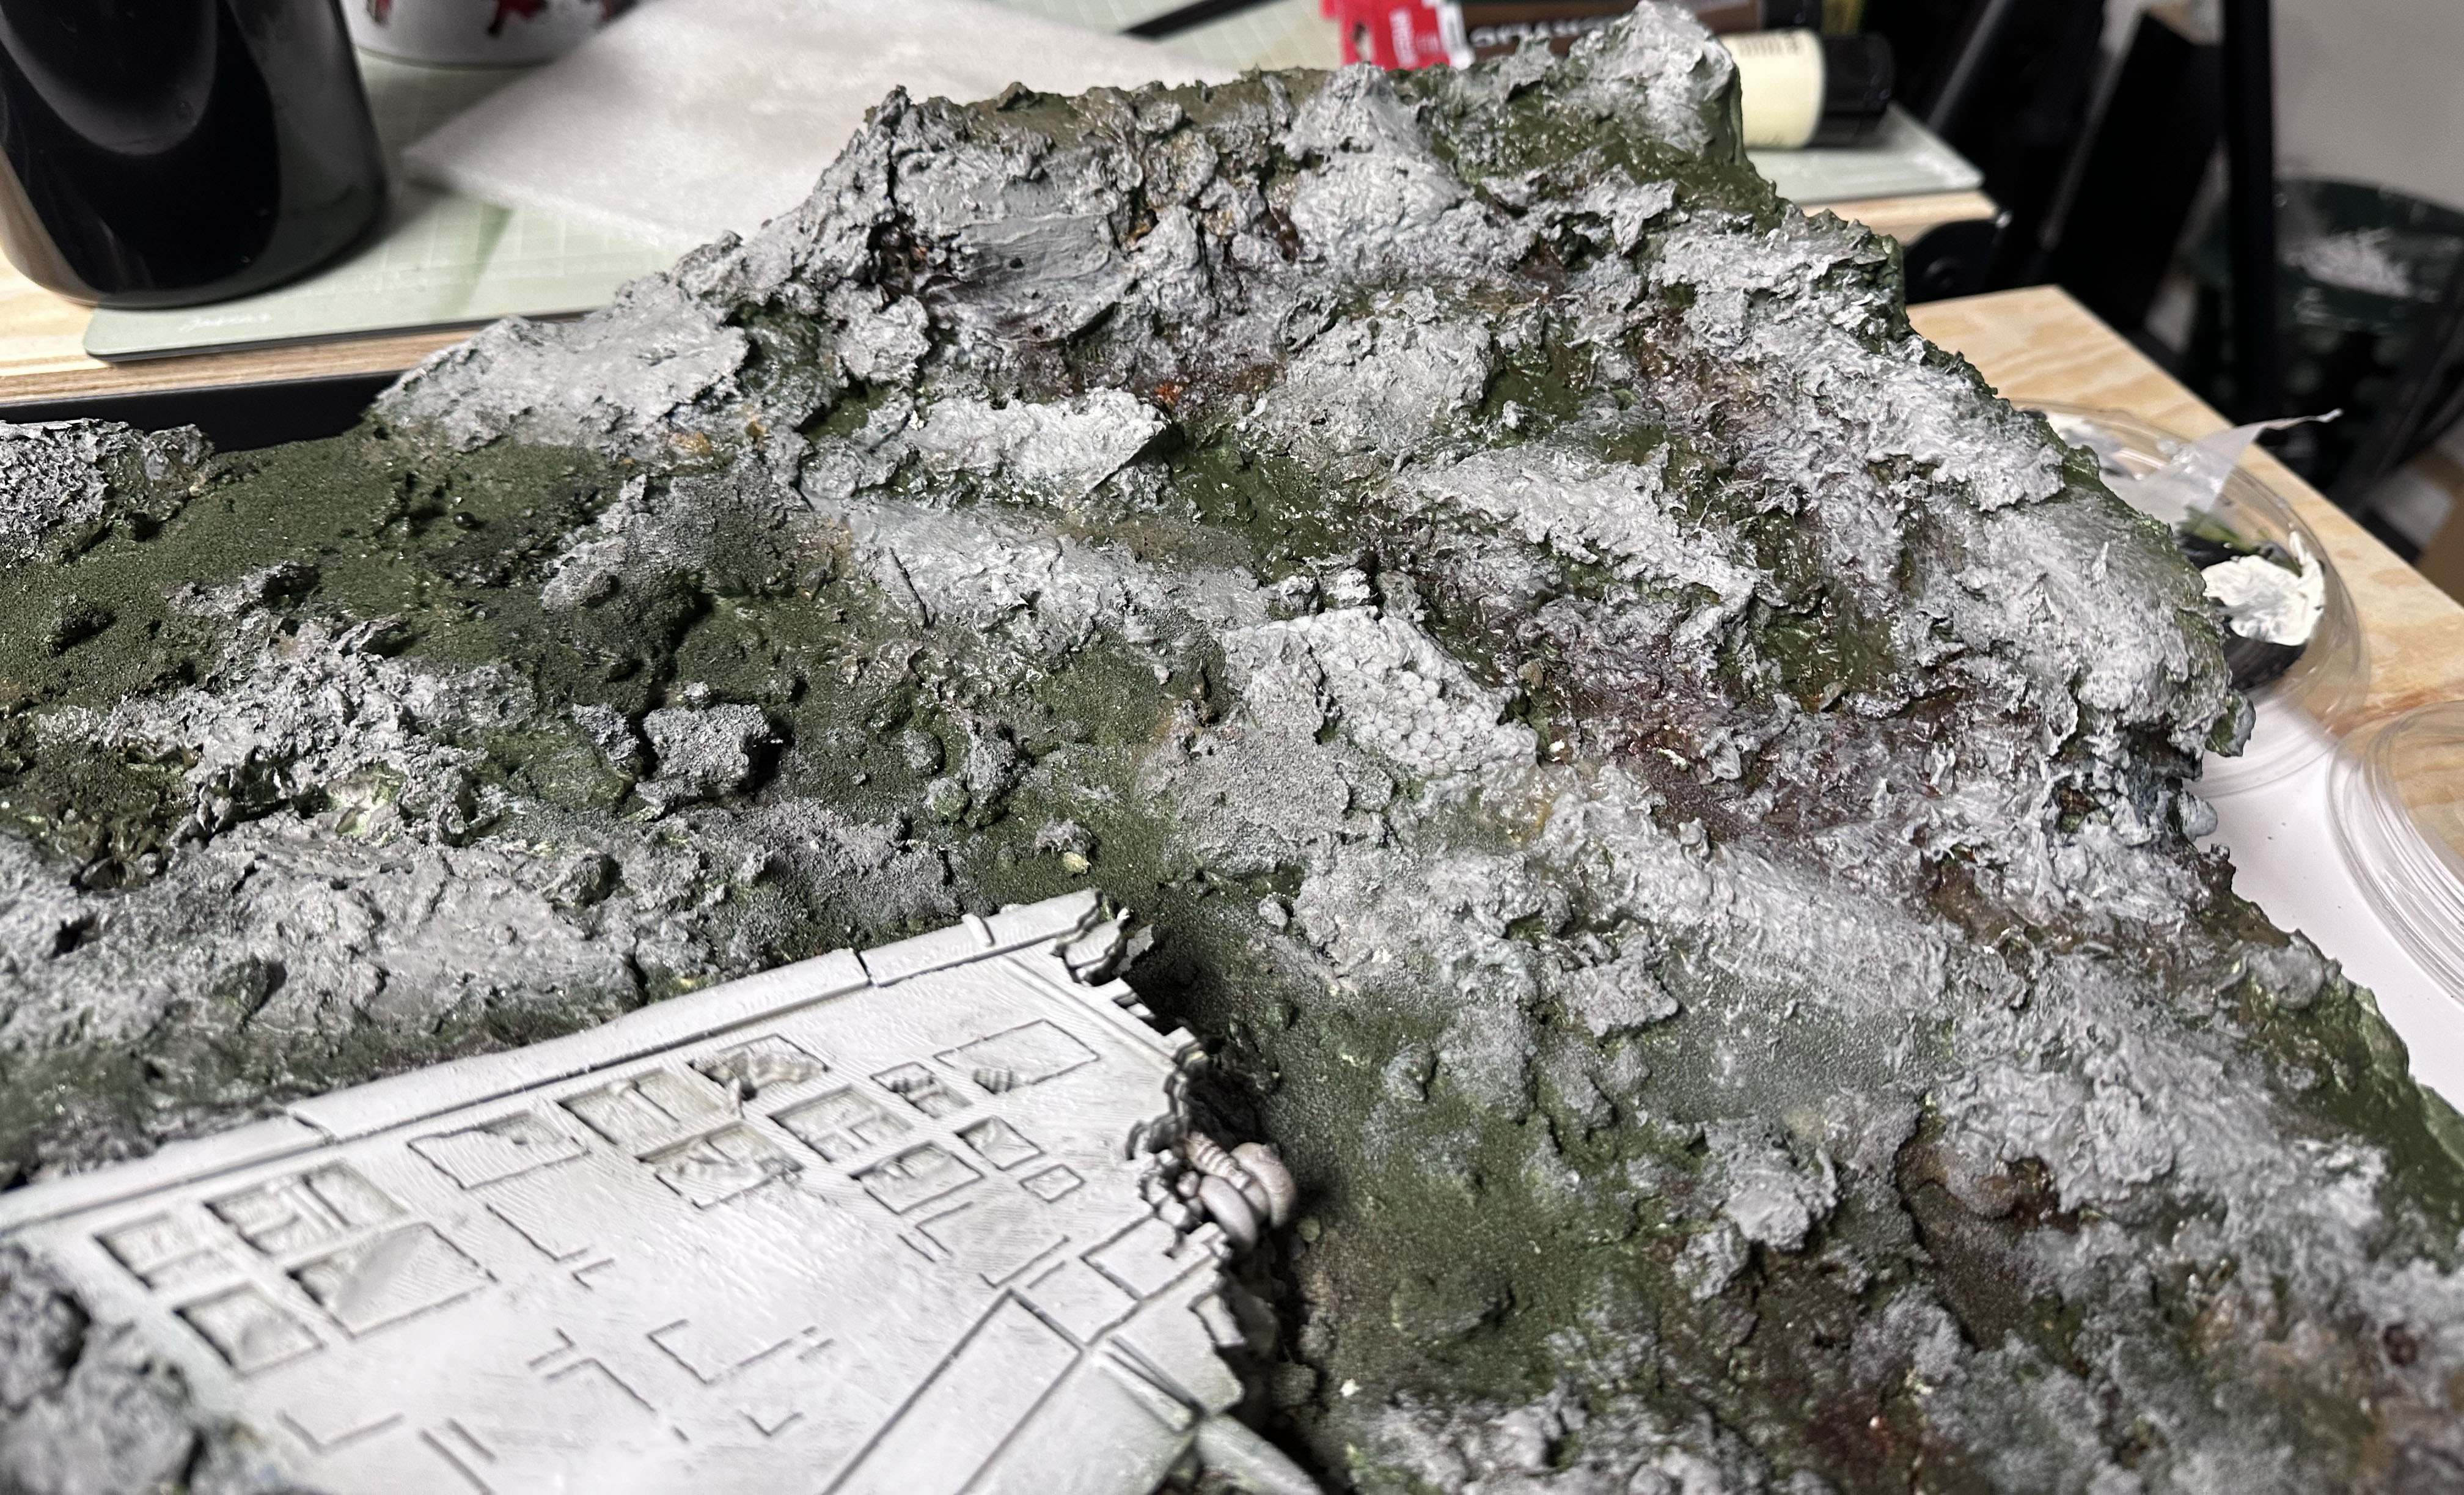
The raised areas are built with basic styrofoam to save weight. Glued with PVA and some cocktail sticks to hold them in place. I’ve shaped them very roughly with a knife, creating an absolute mess of polystyrene balls.
I started covering and smoothing the polostyrene with Geek Gaming modelling compound. New material for me, but seems to be working rather nicely.
The aircraft pieces aren’t glued on yet, I will be priming them separately before I start blending them into the board.
Today I’m still going to get the primer on the plane and finish bulking up rest of the raised areas, to have everything dying for tomorrow so that I can start slapping some paint on.
Getting paint on
Cracking on with the project!
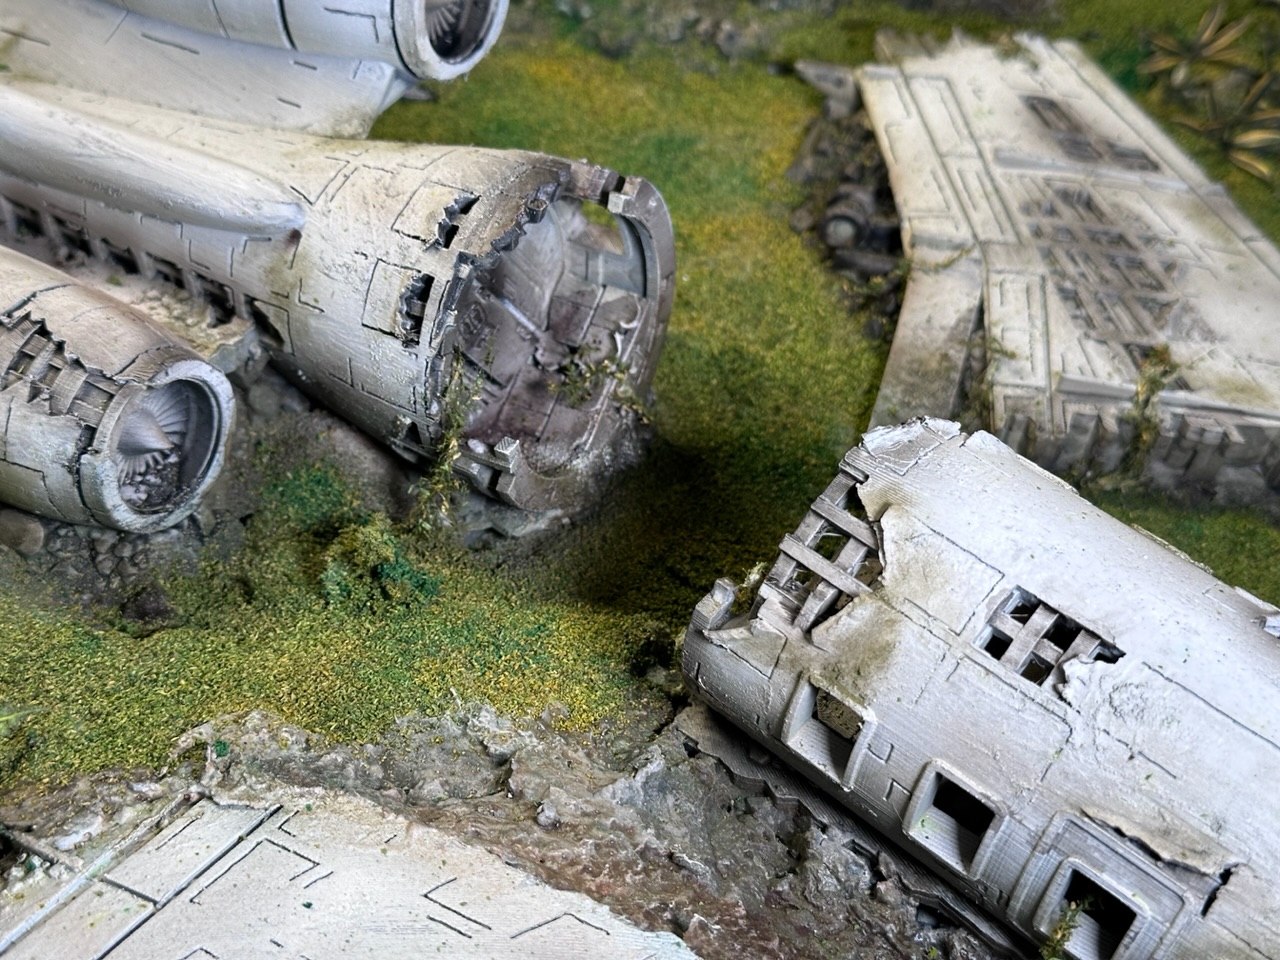
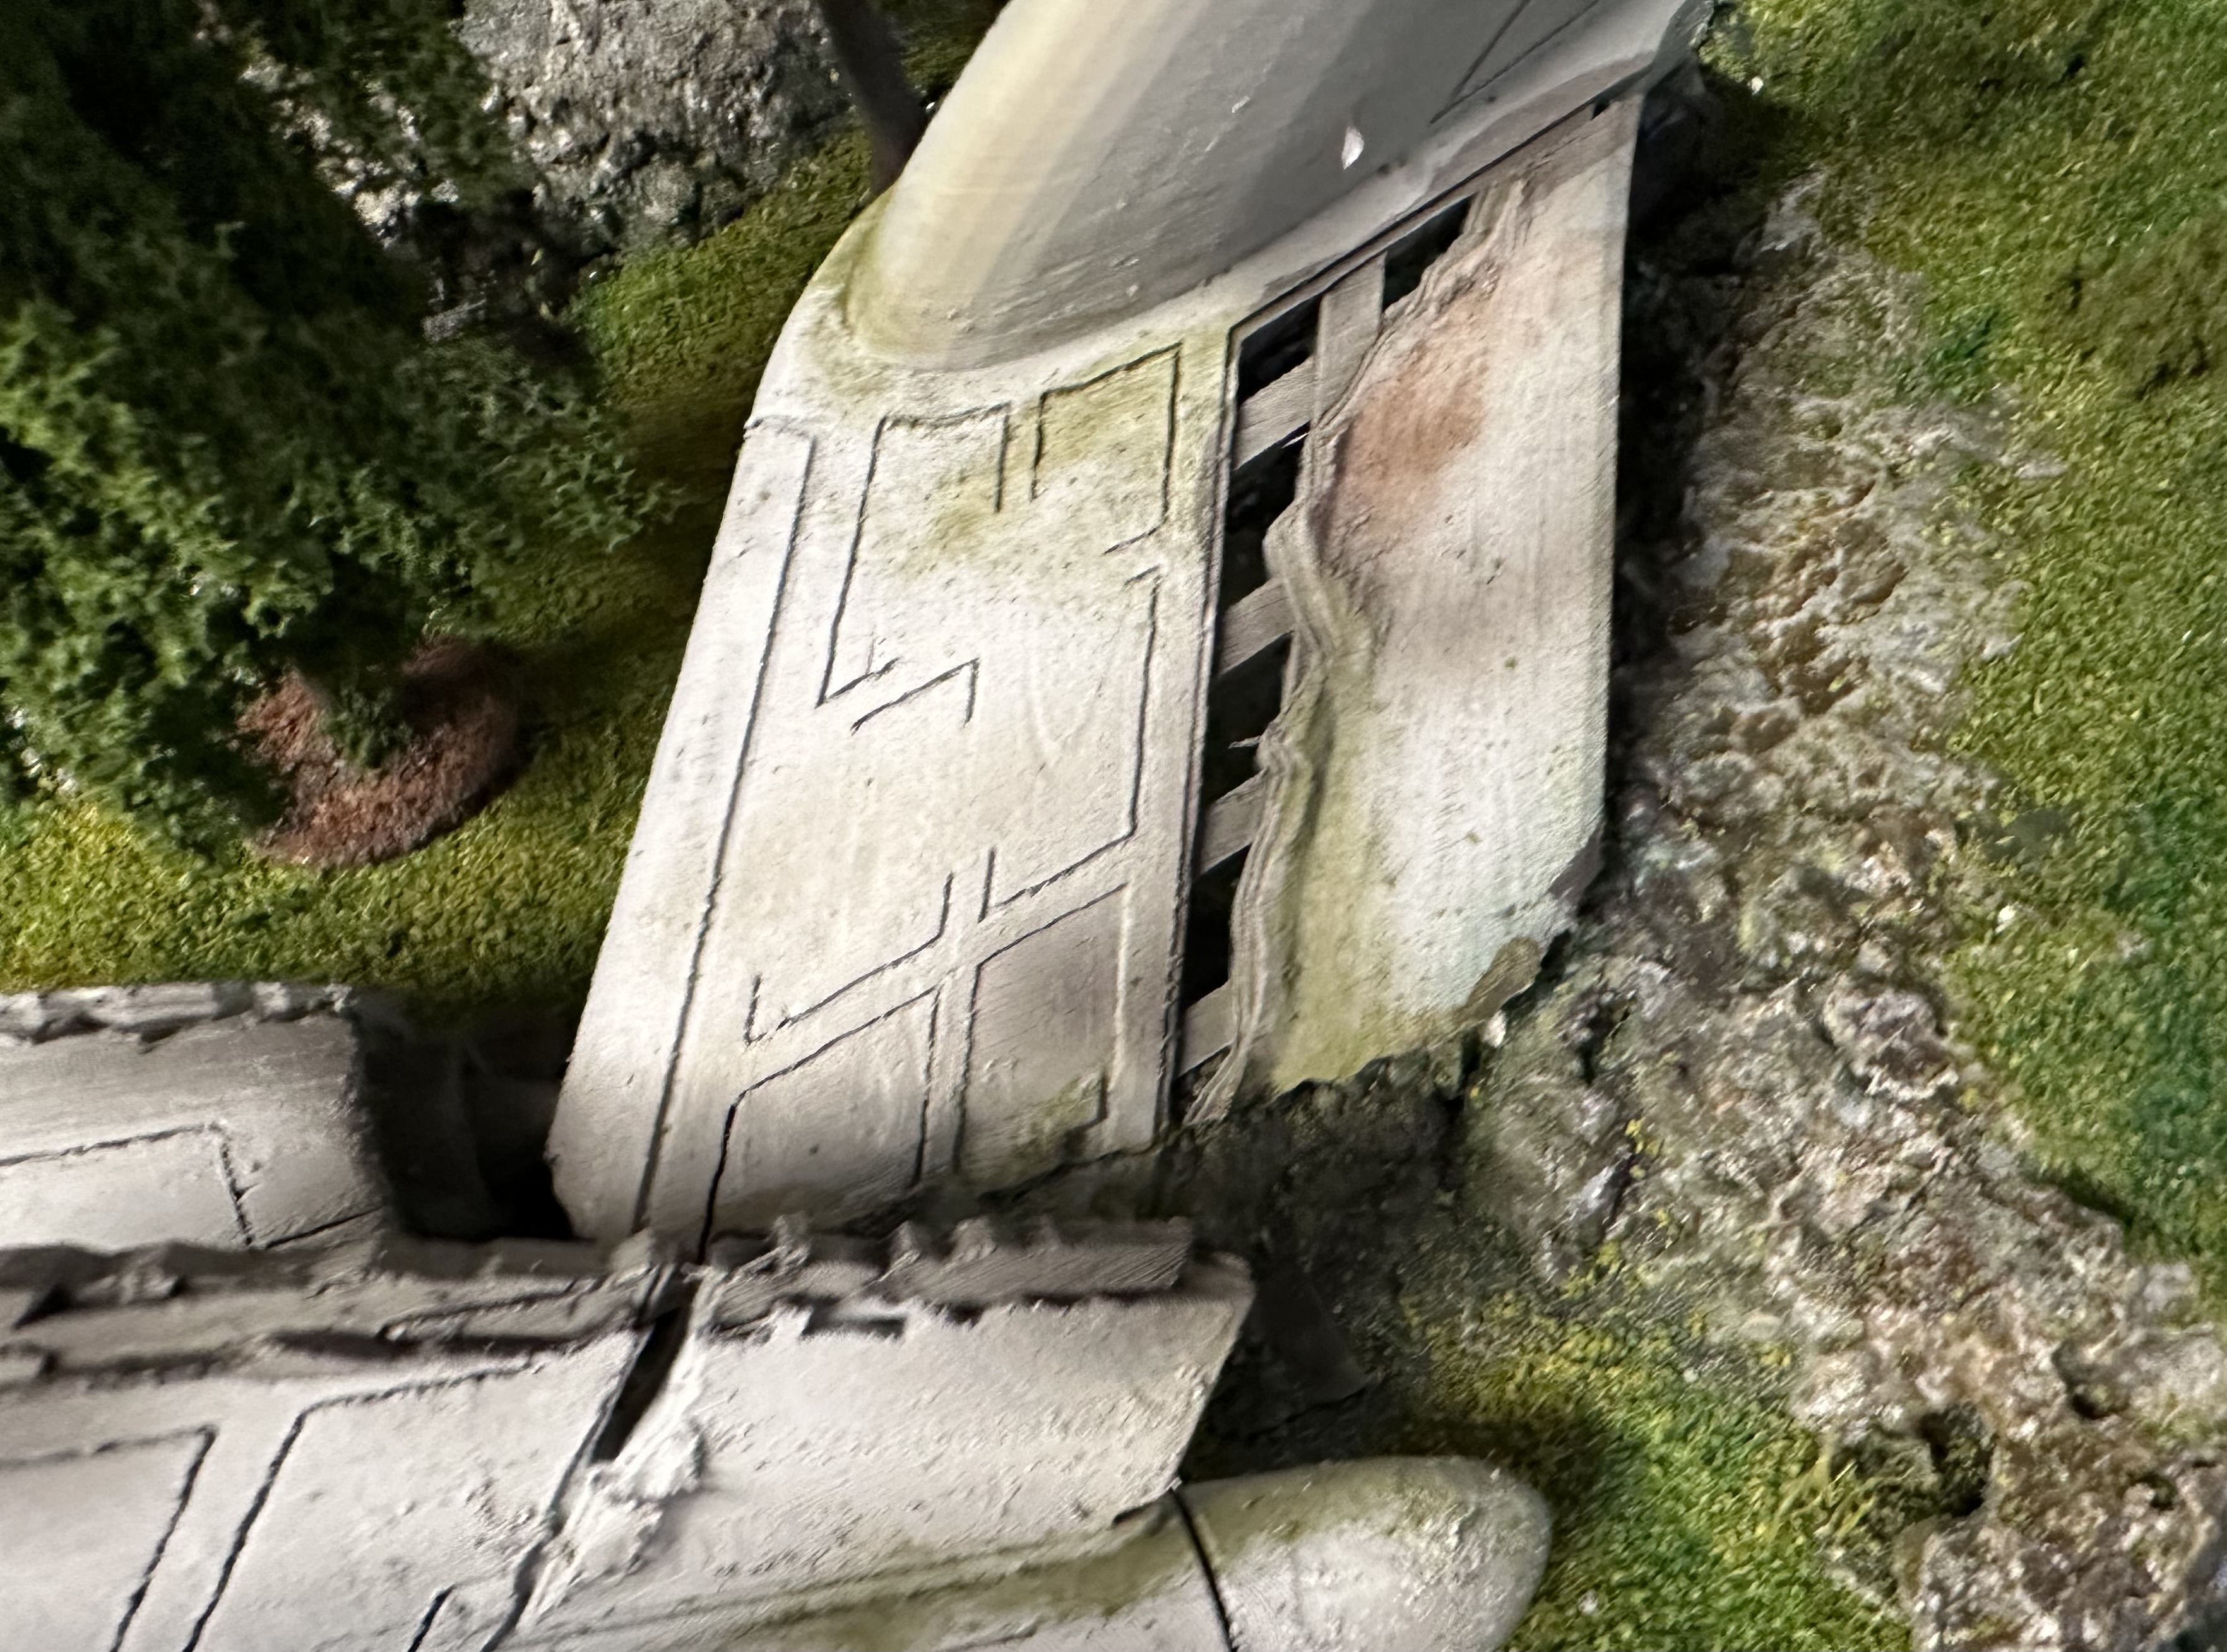
The plane was primed Skeleton Bone last night. I will be painting it white with an airbrush, the theory is that skelly bone gives a good weathered base.
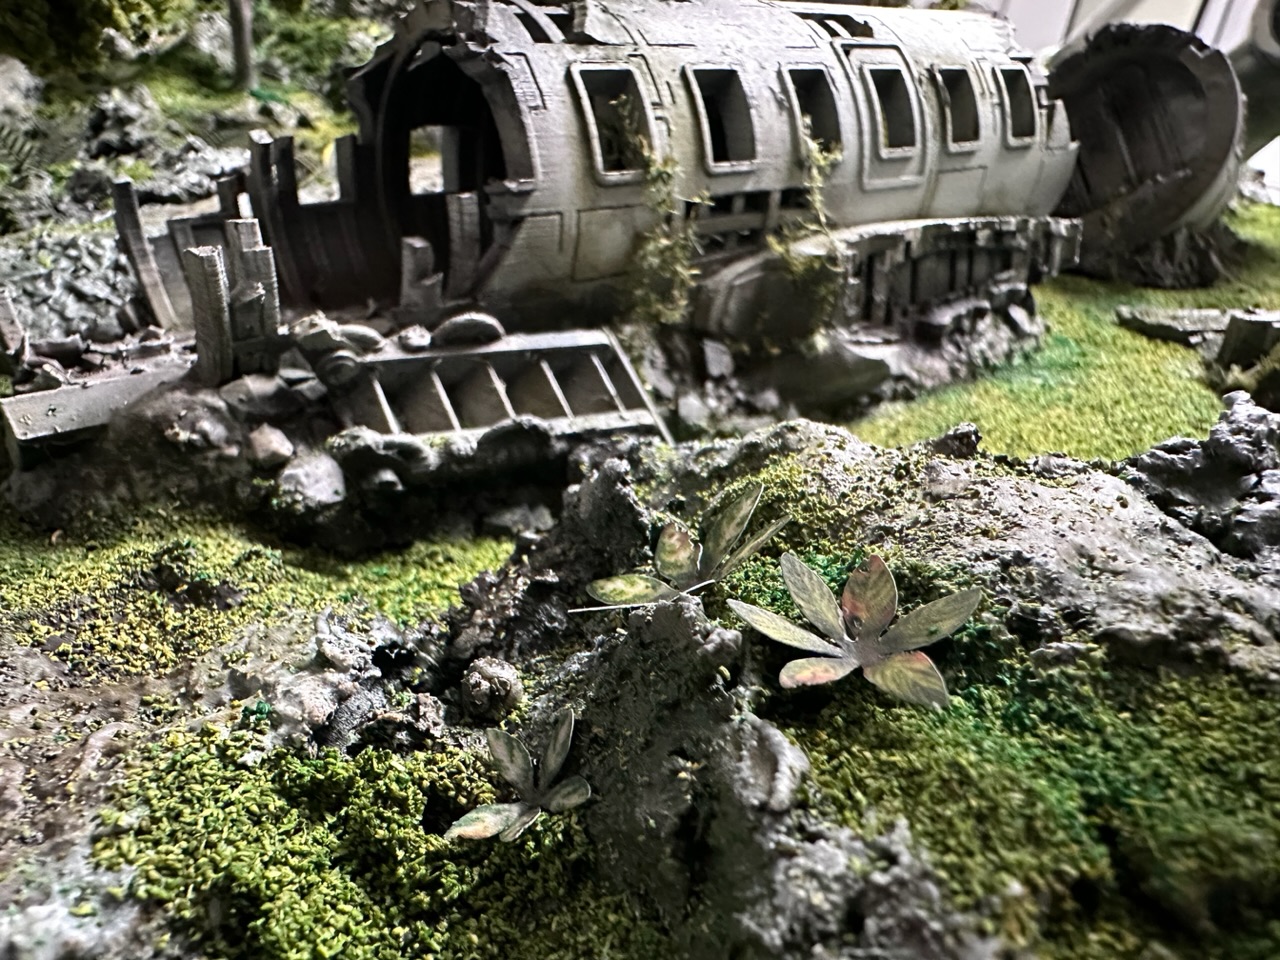
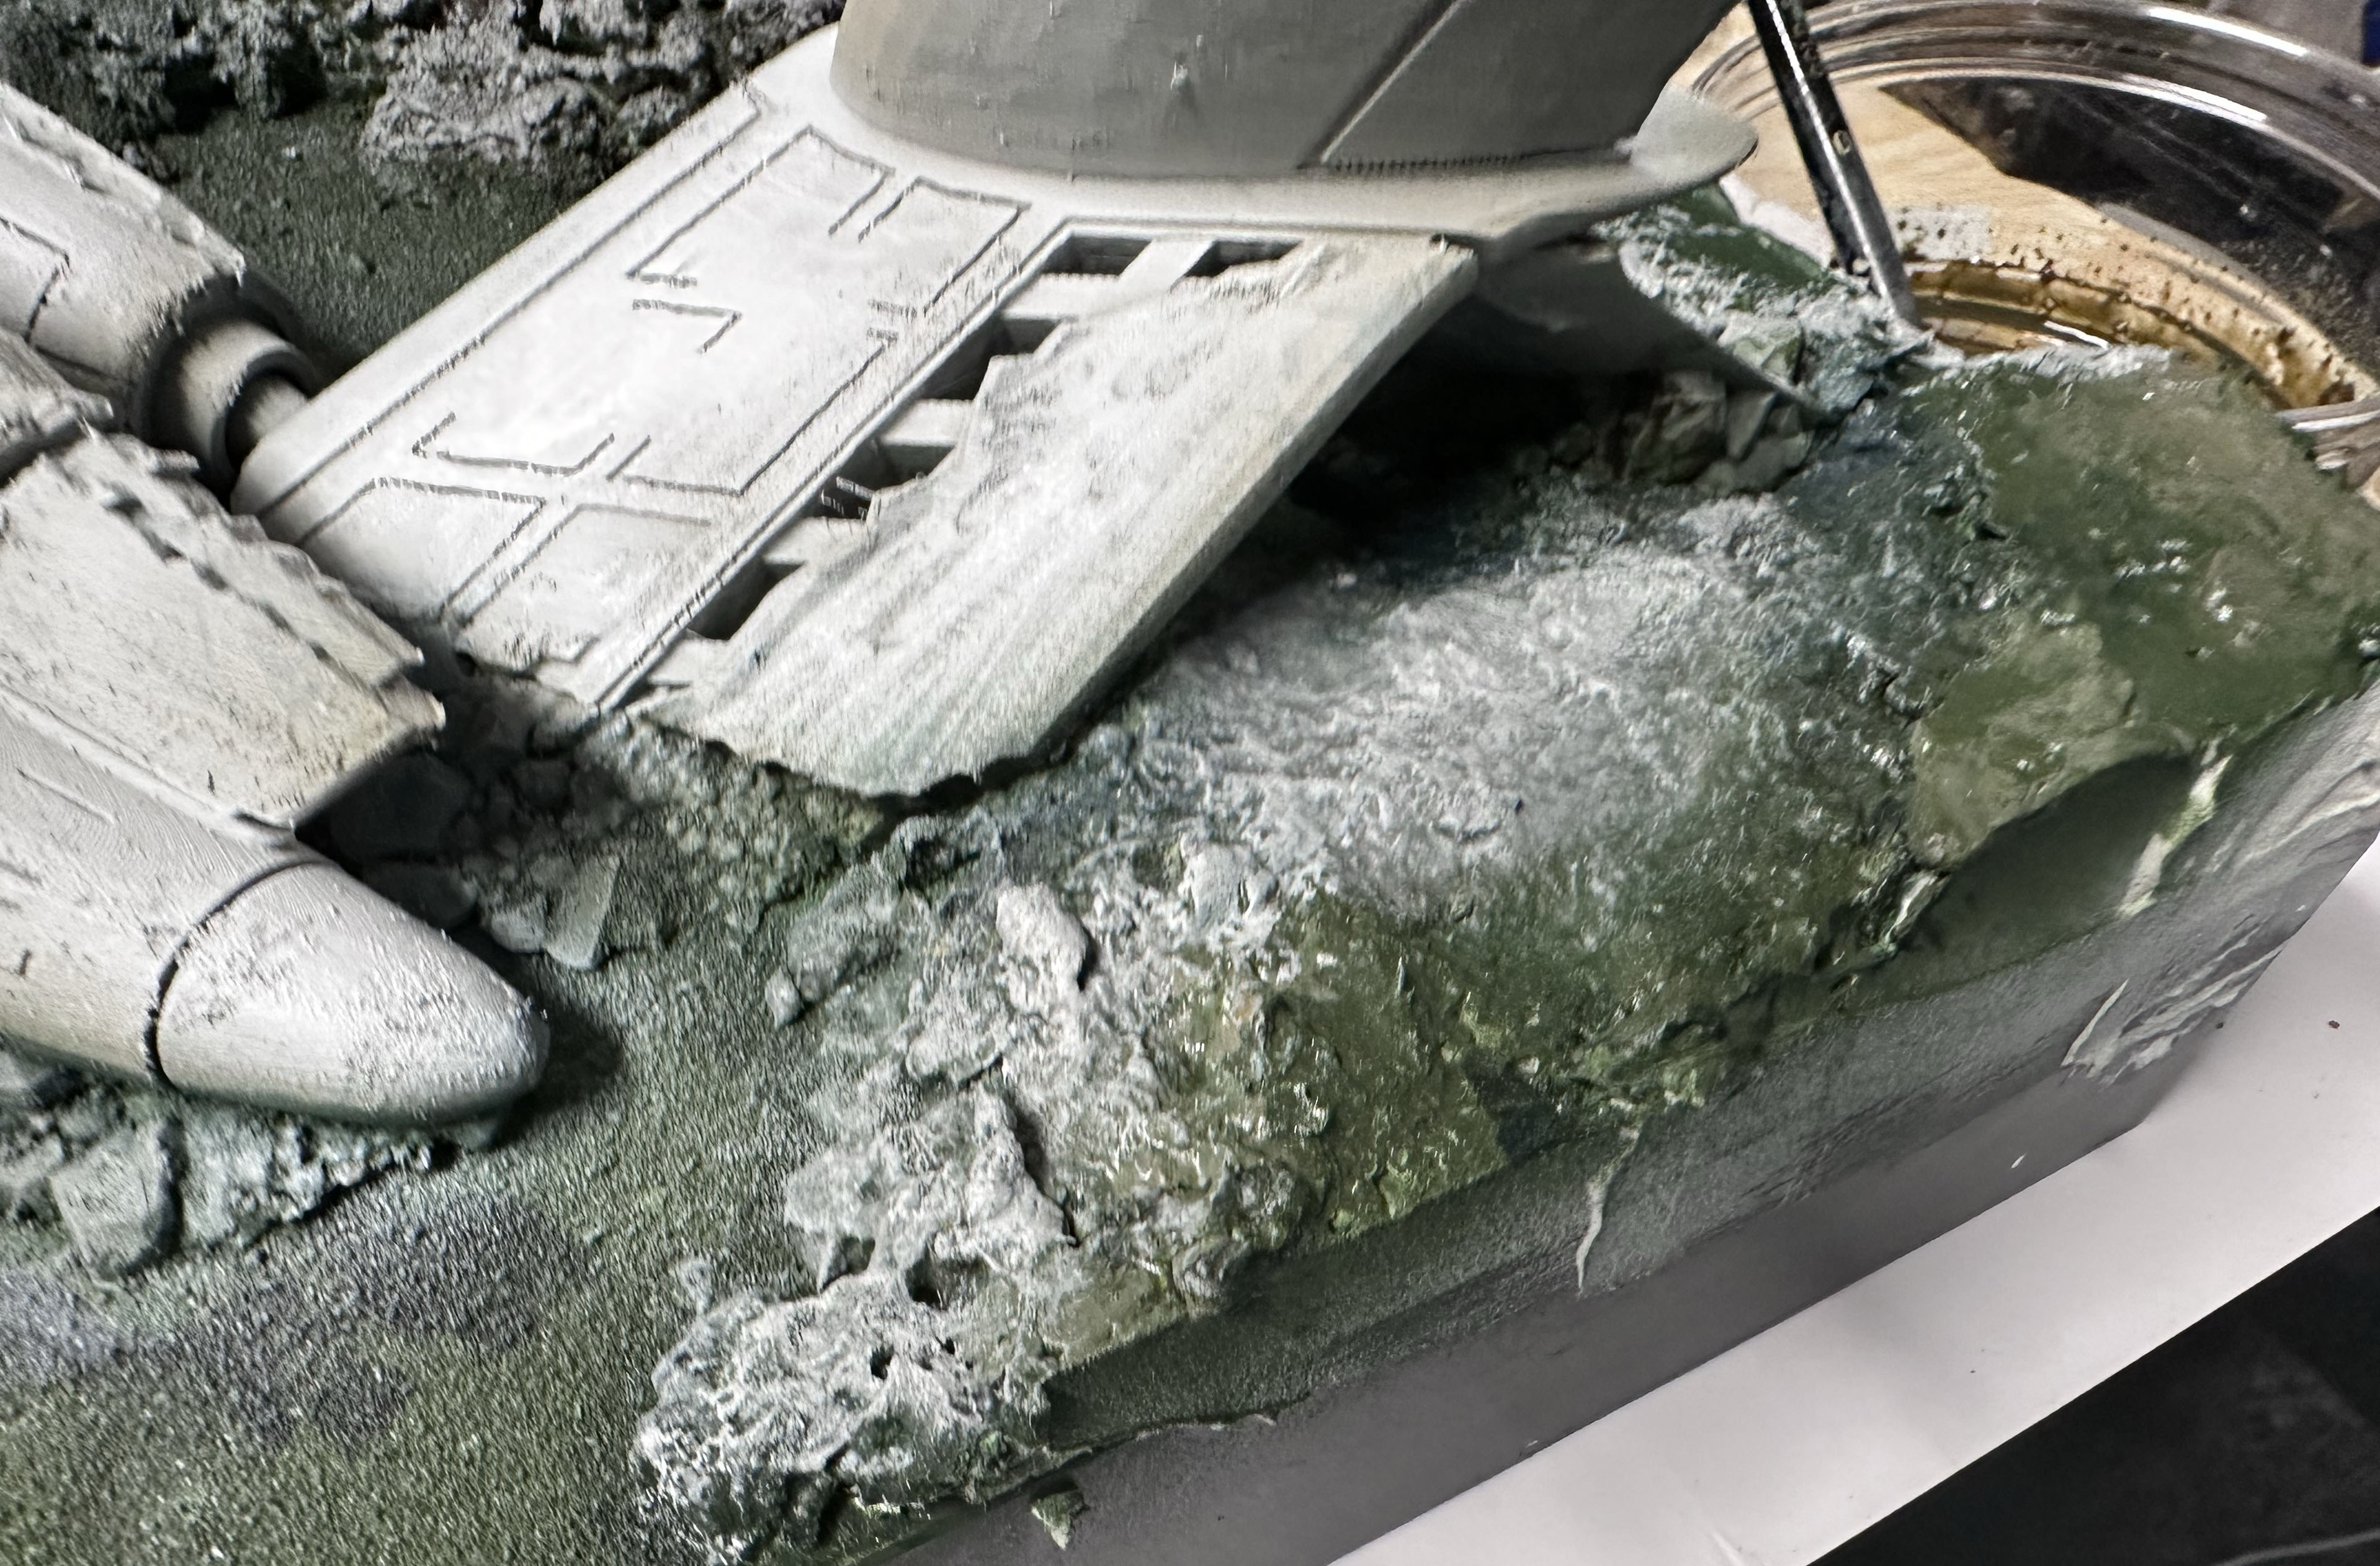
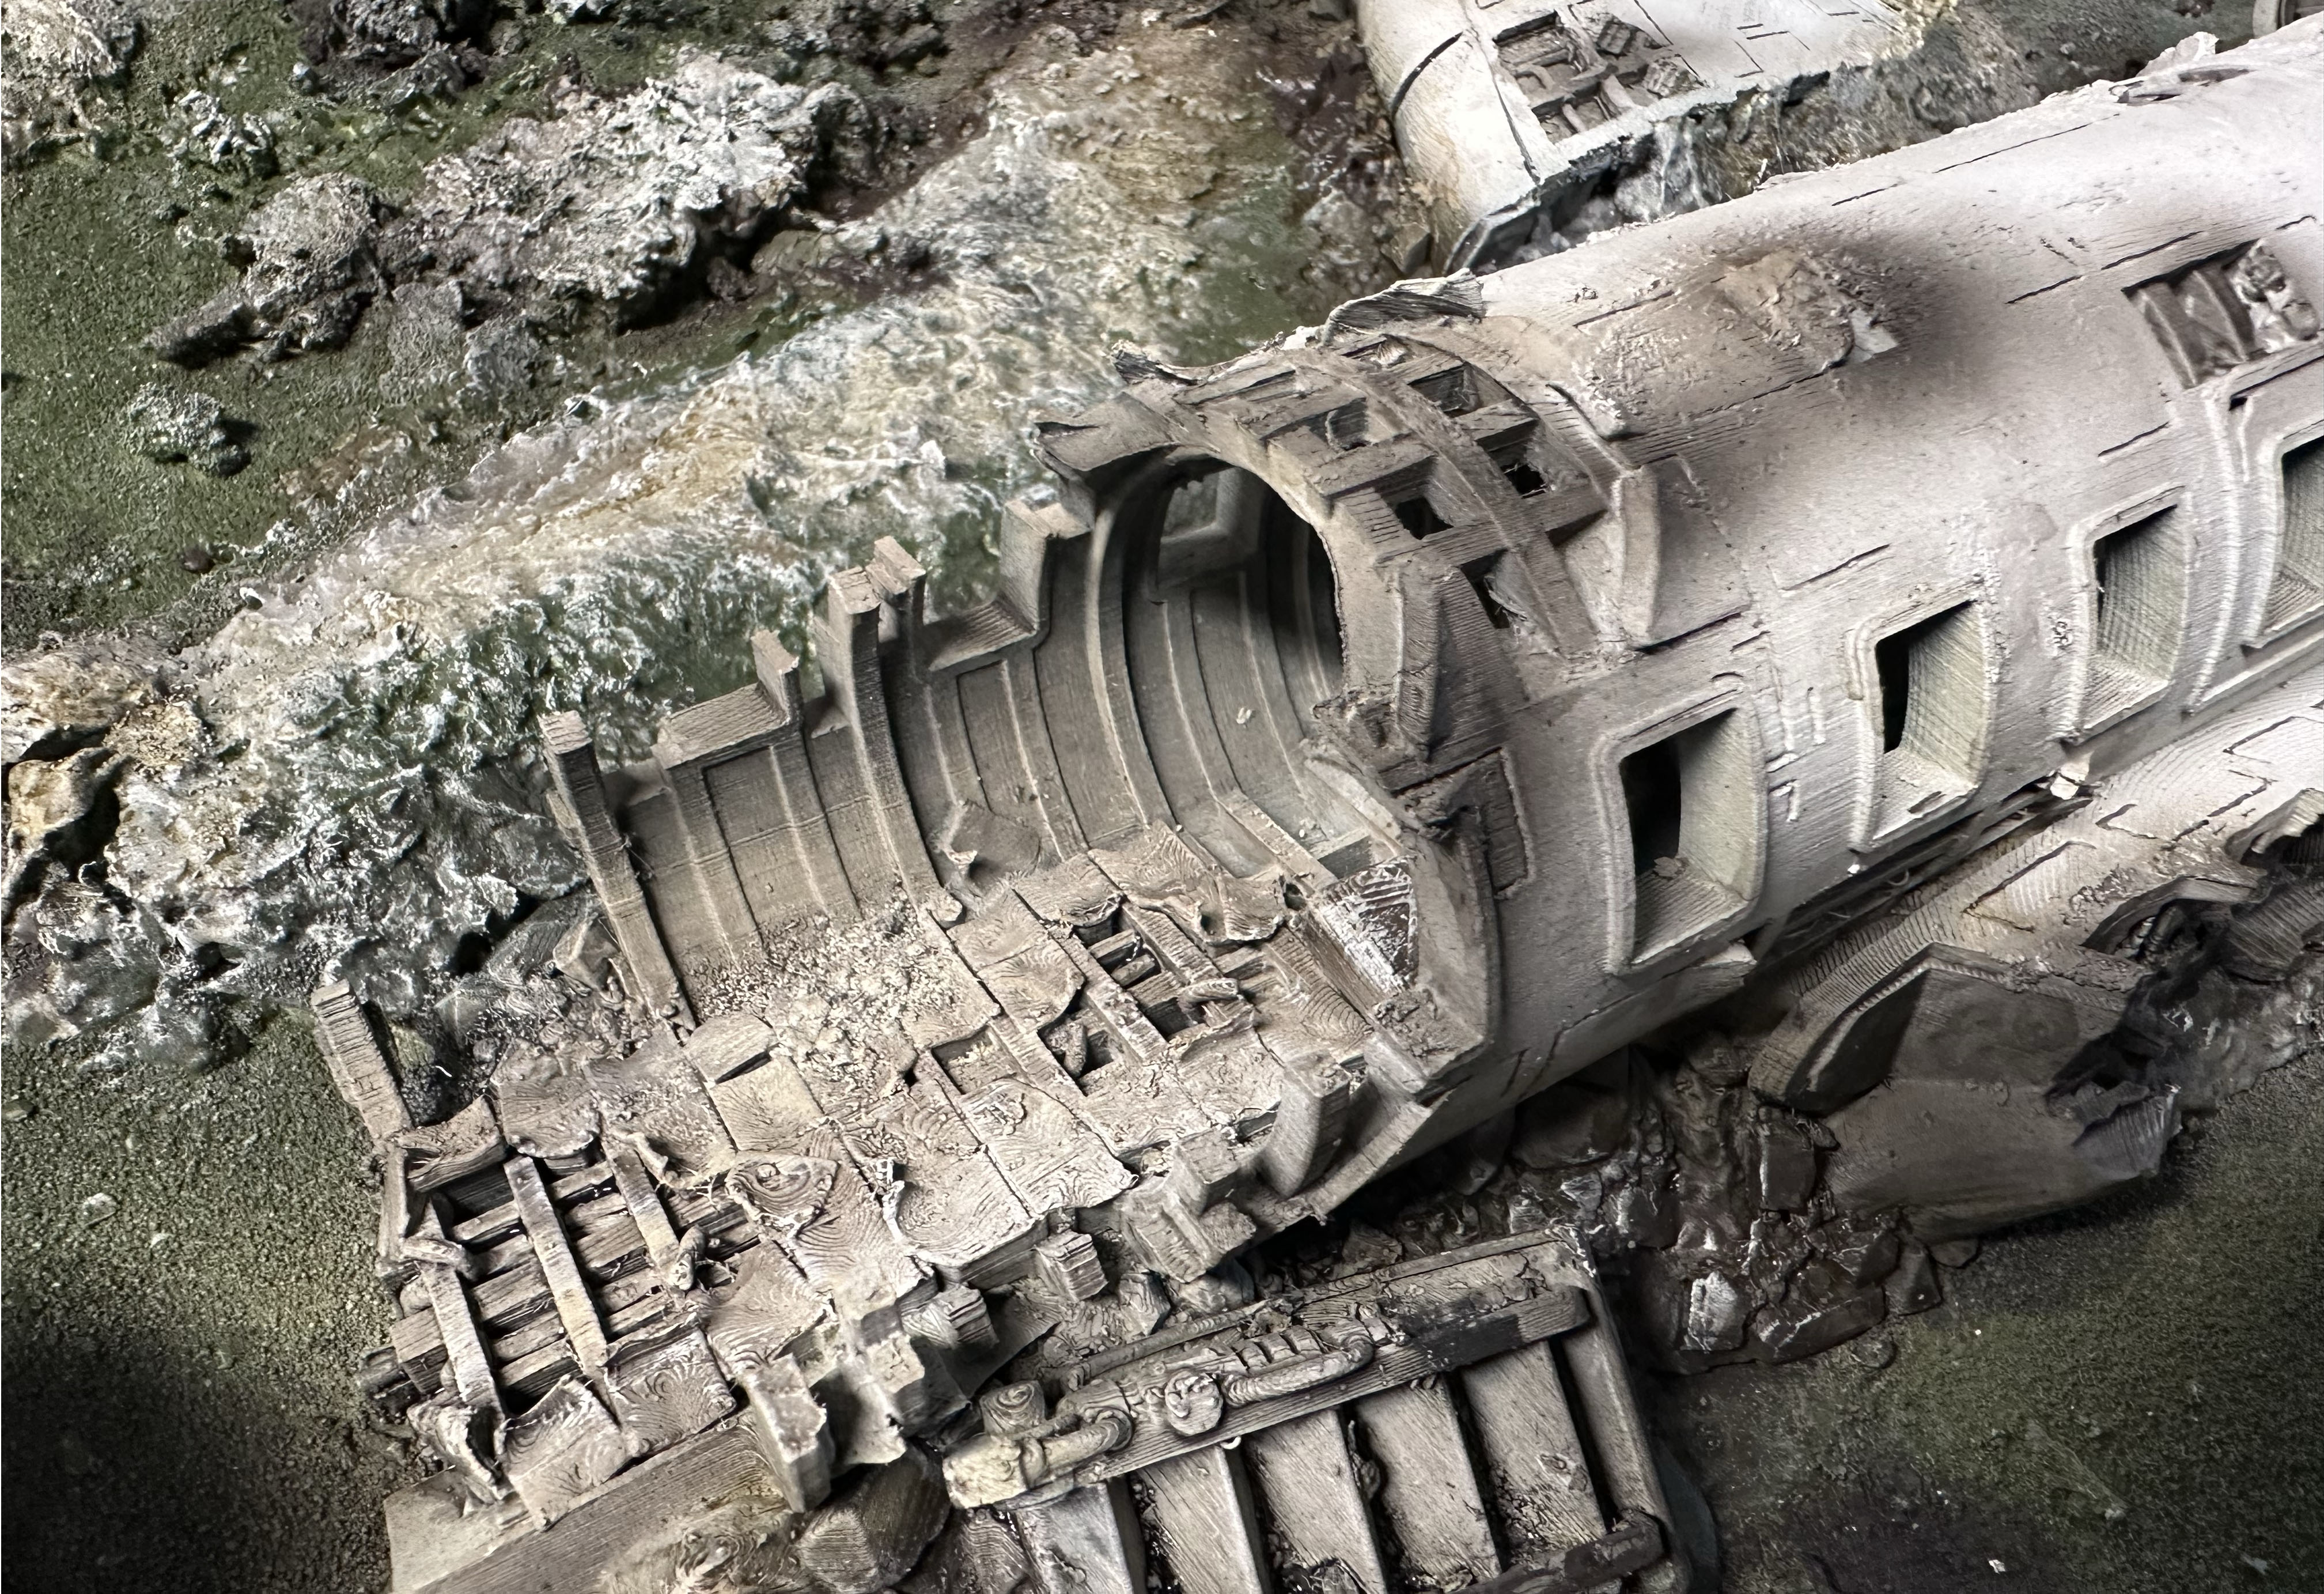
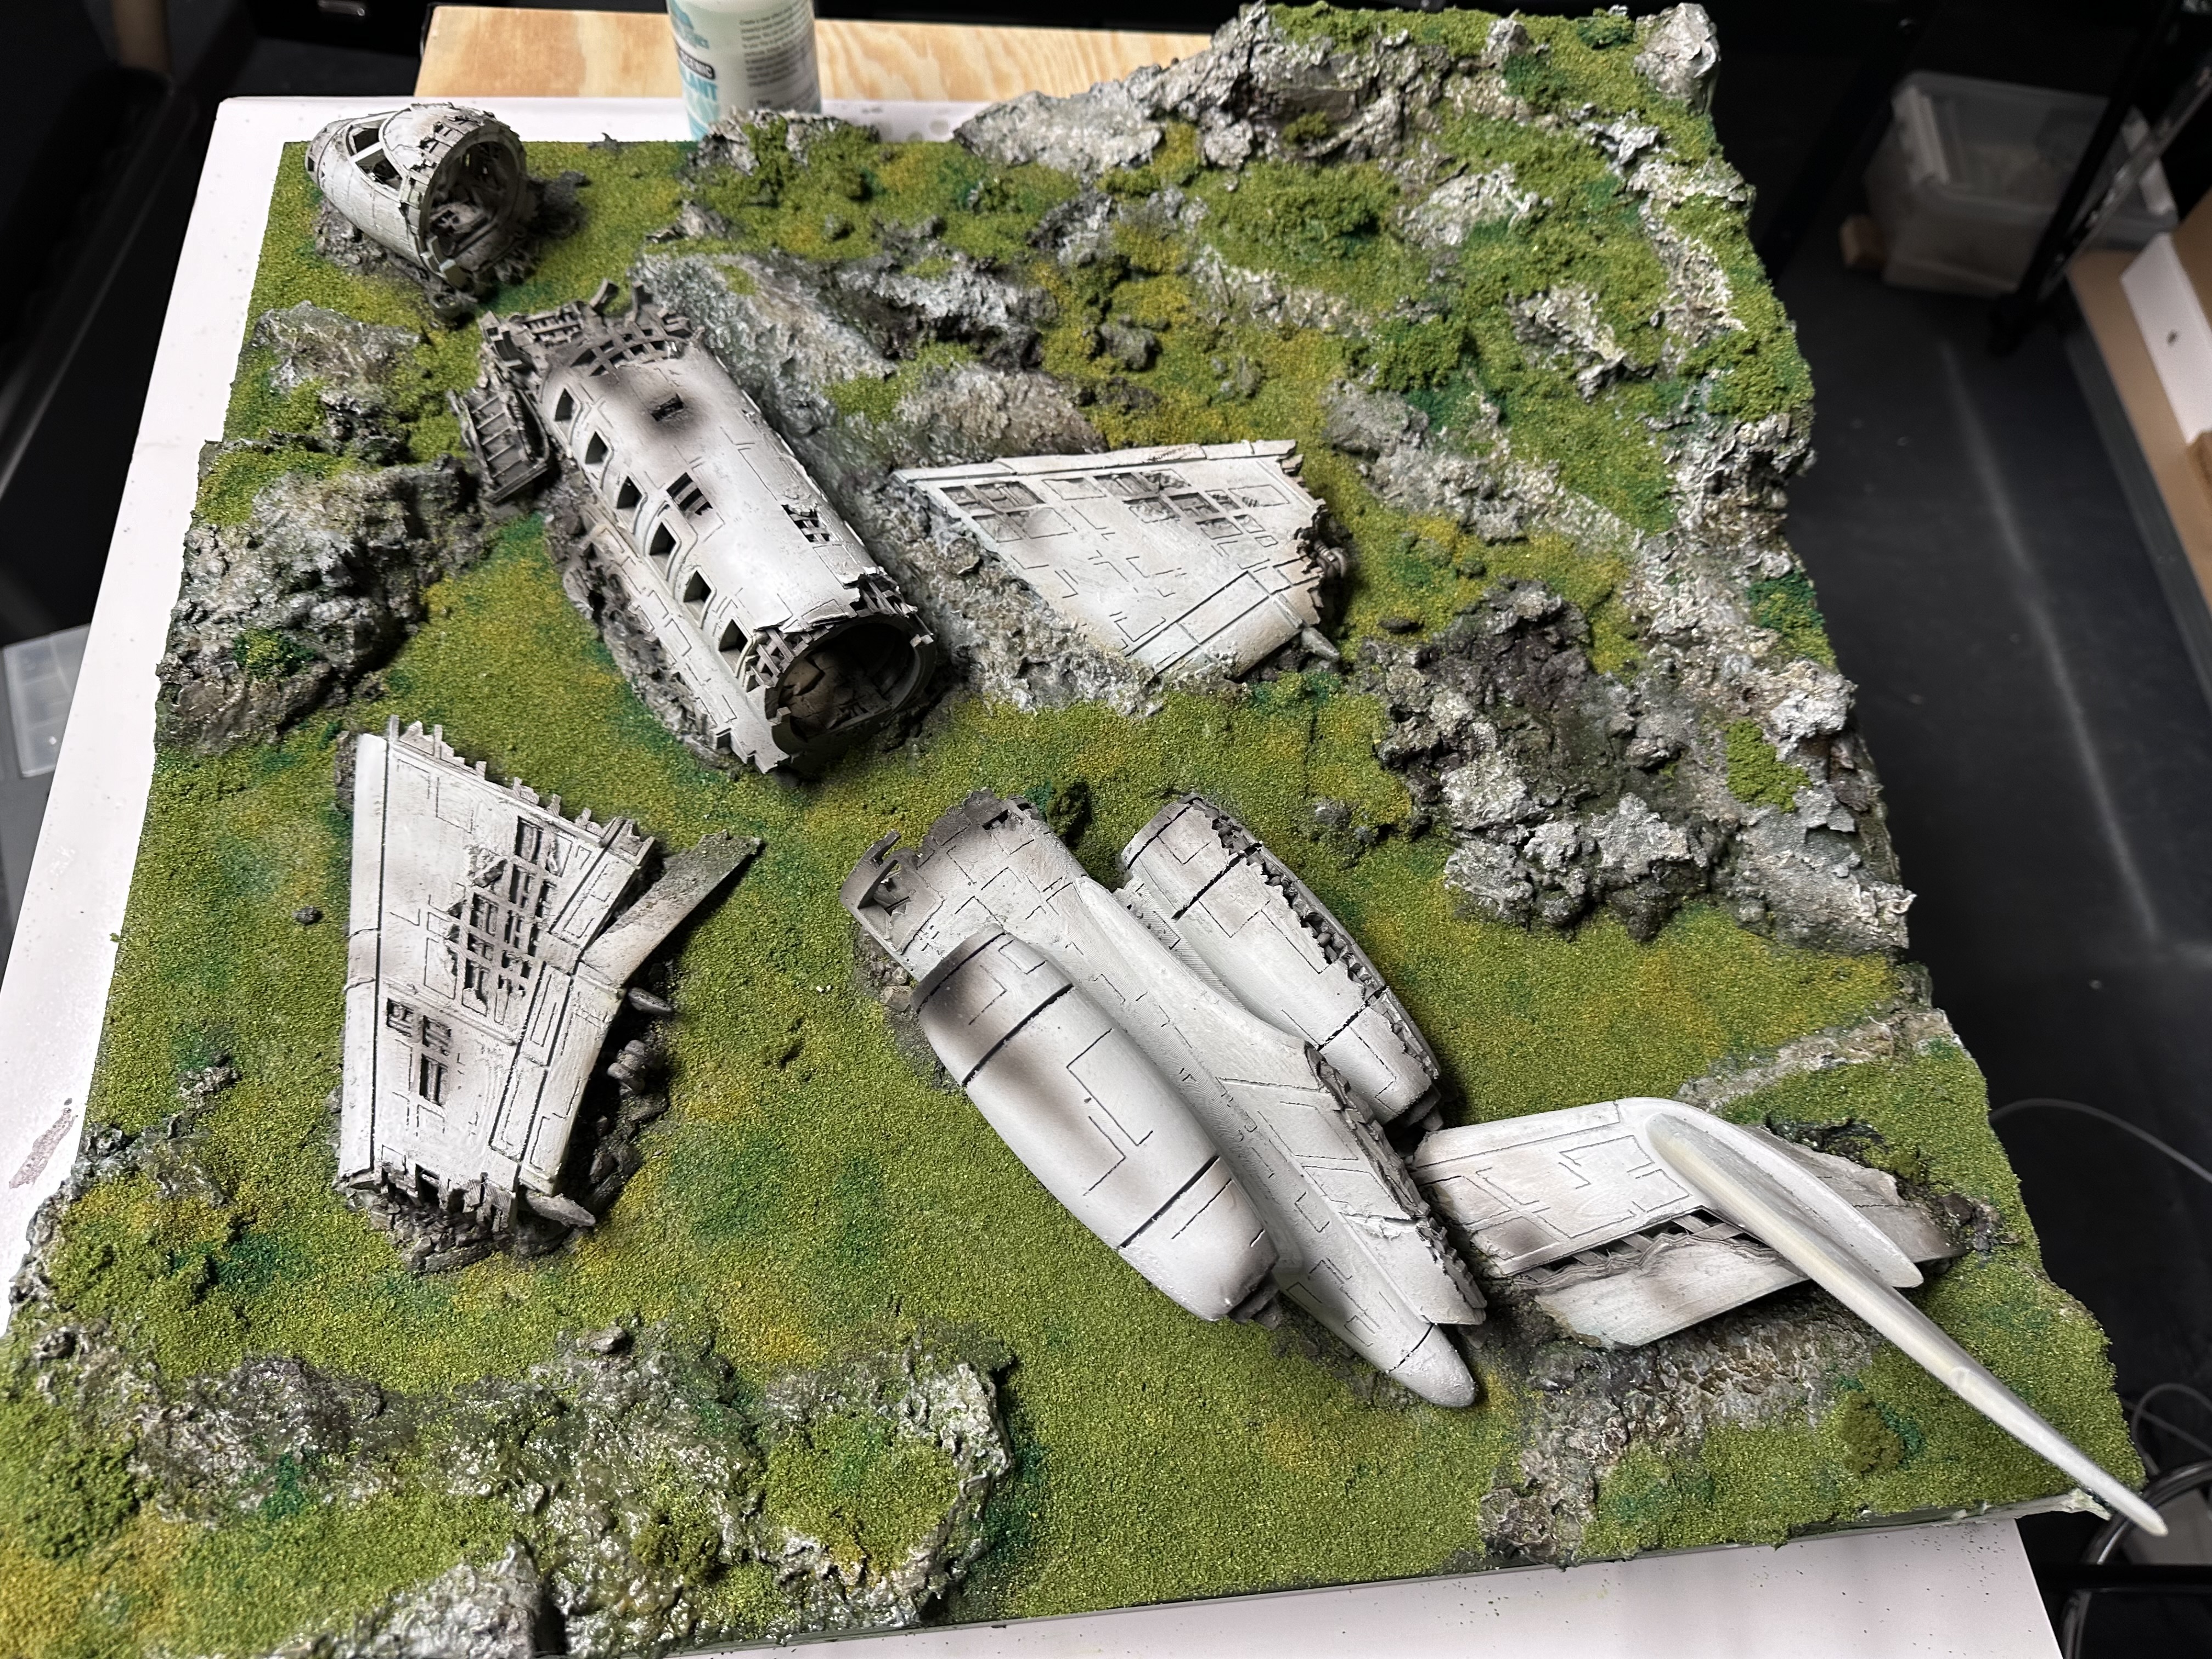
I glued the parts of the plane to the board and blended them in with some PVA, sand and modelling compound.
The with the modelling compound PVA’d sand dry, I got a coat of primer on. I used Army Painter terrain primer ”wilderness and woodland”.
After the terrain primer was dry, it was time to start slapping on some colour to the raised areas.
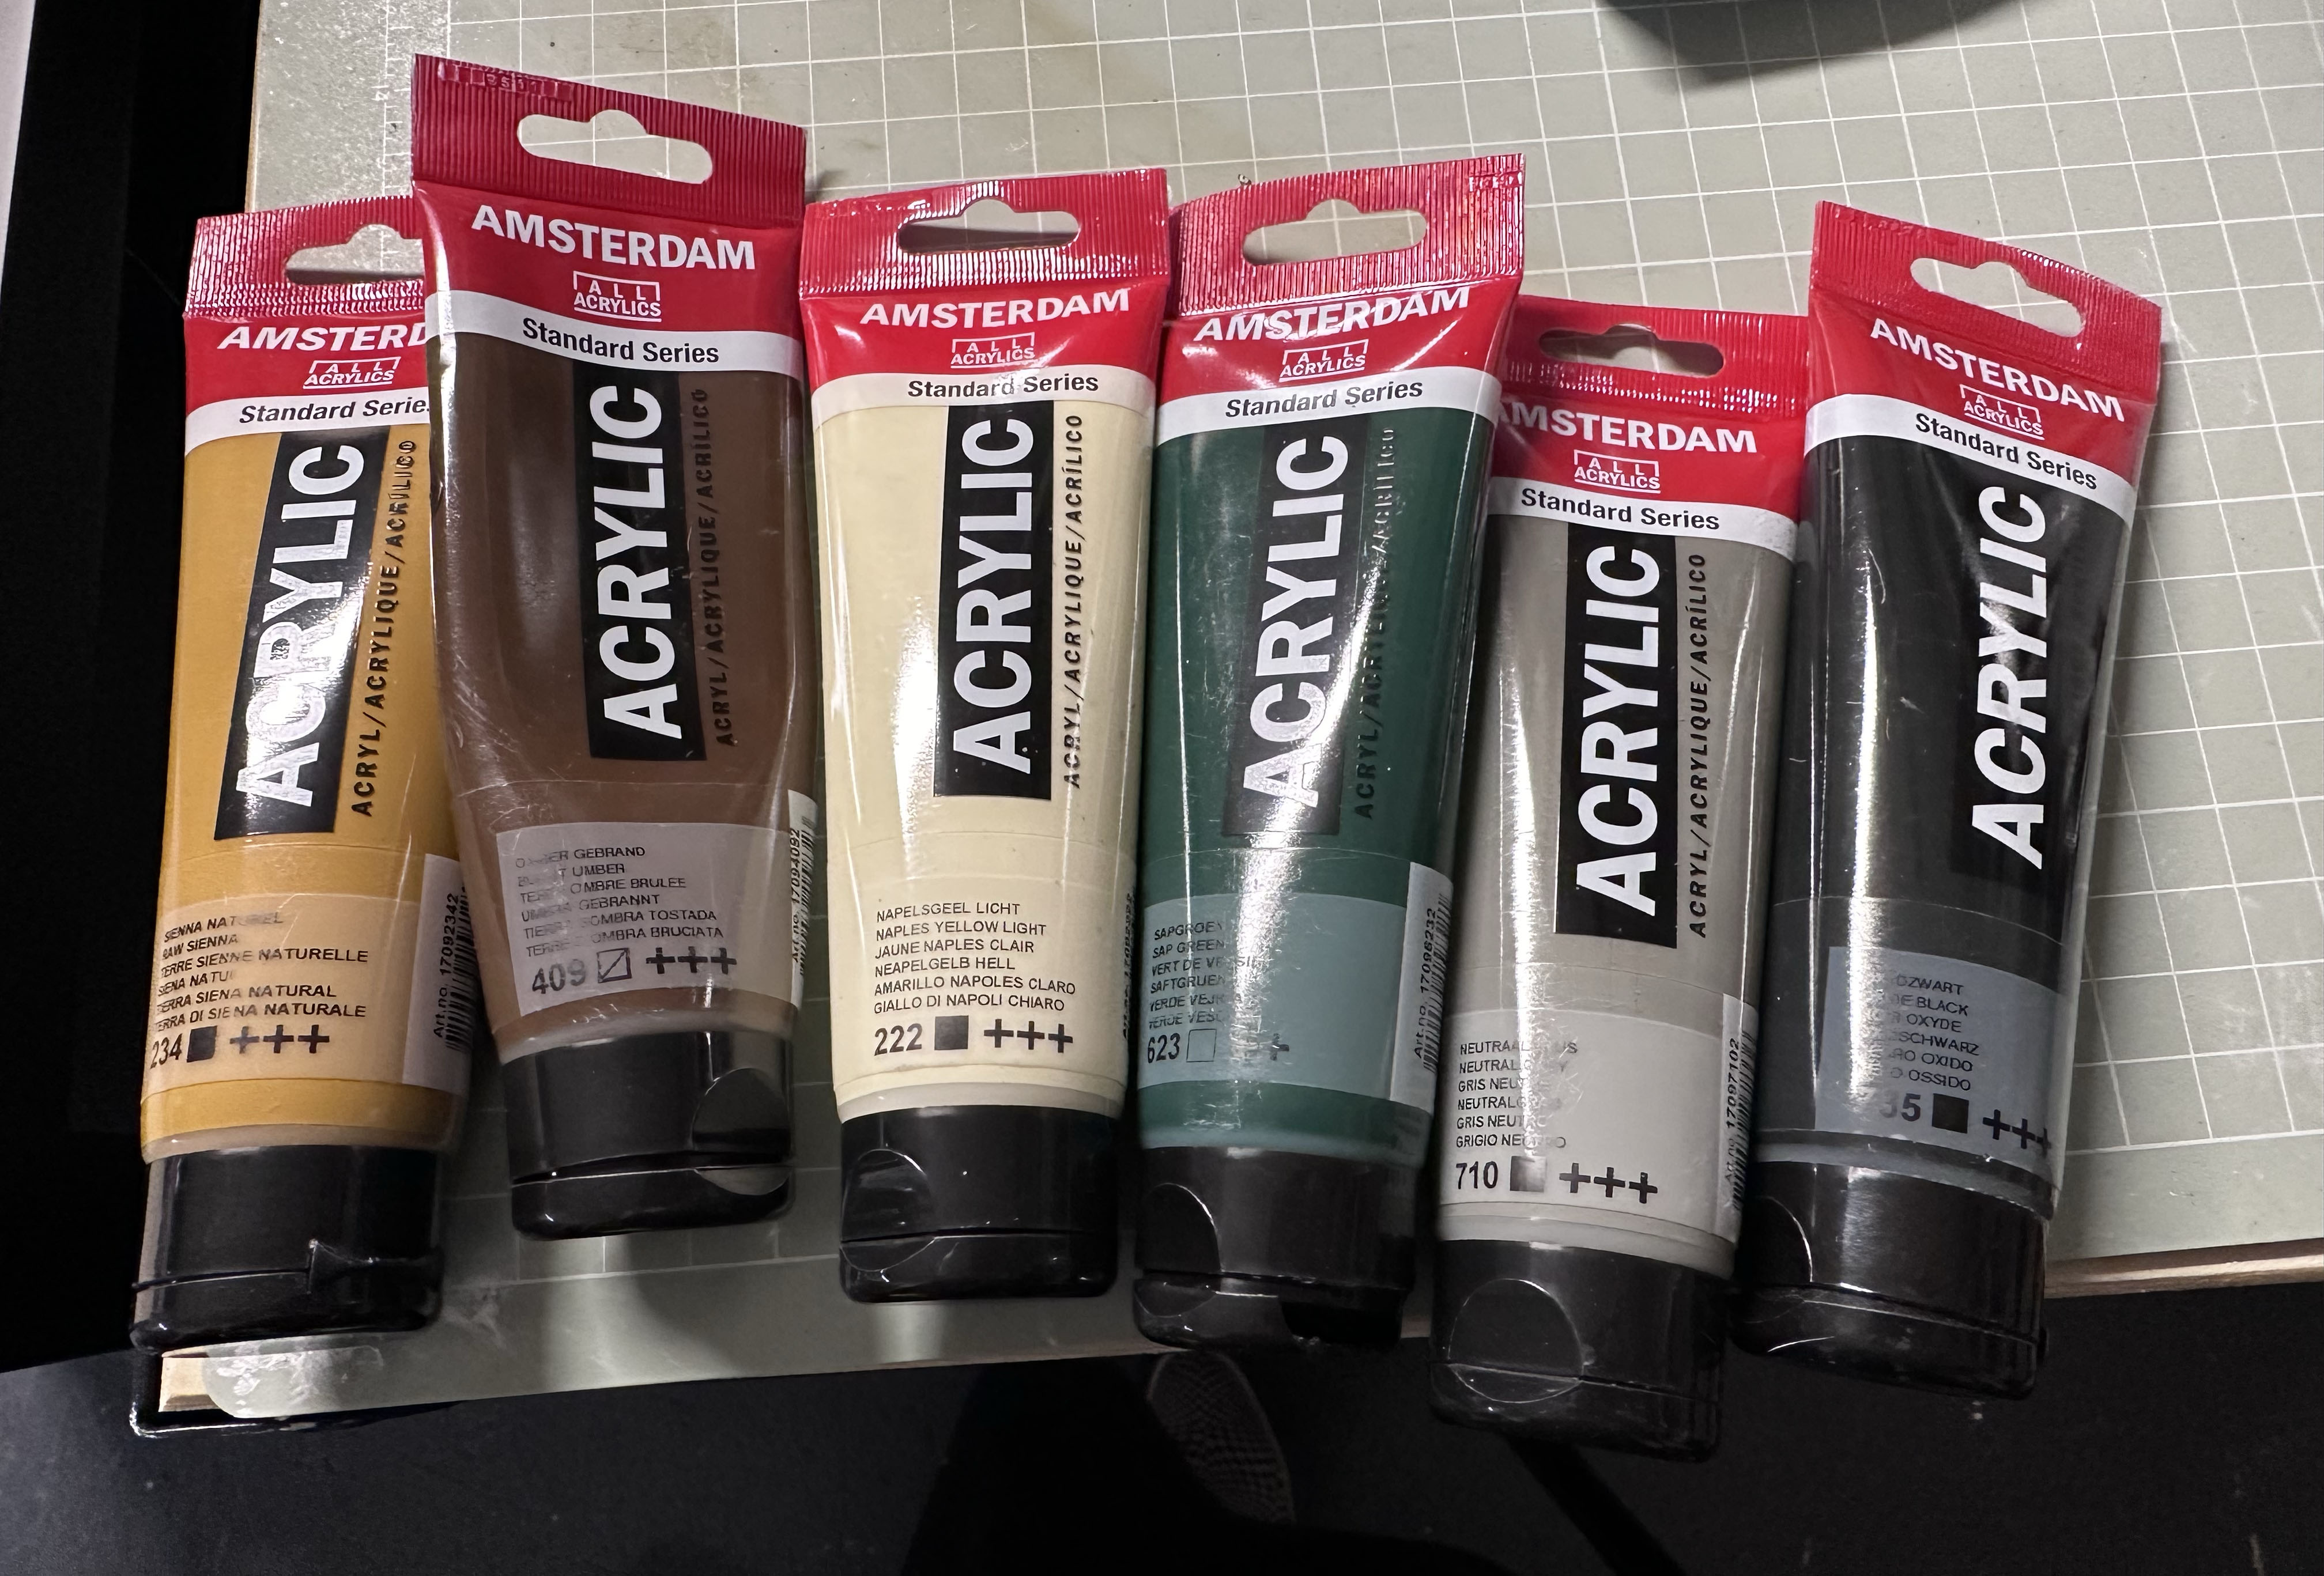
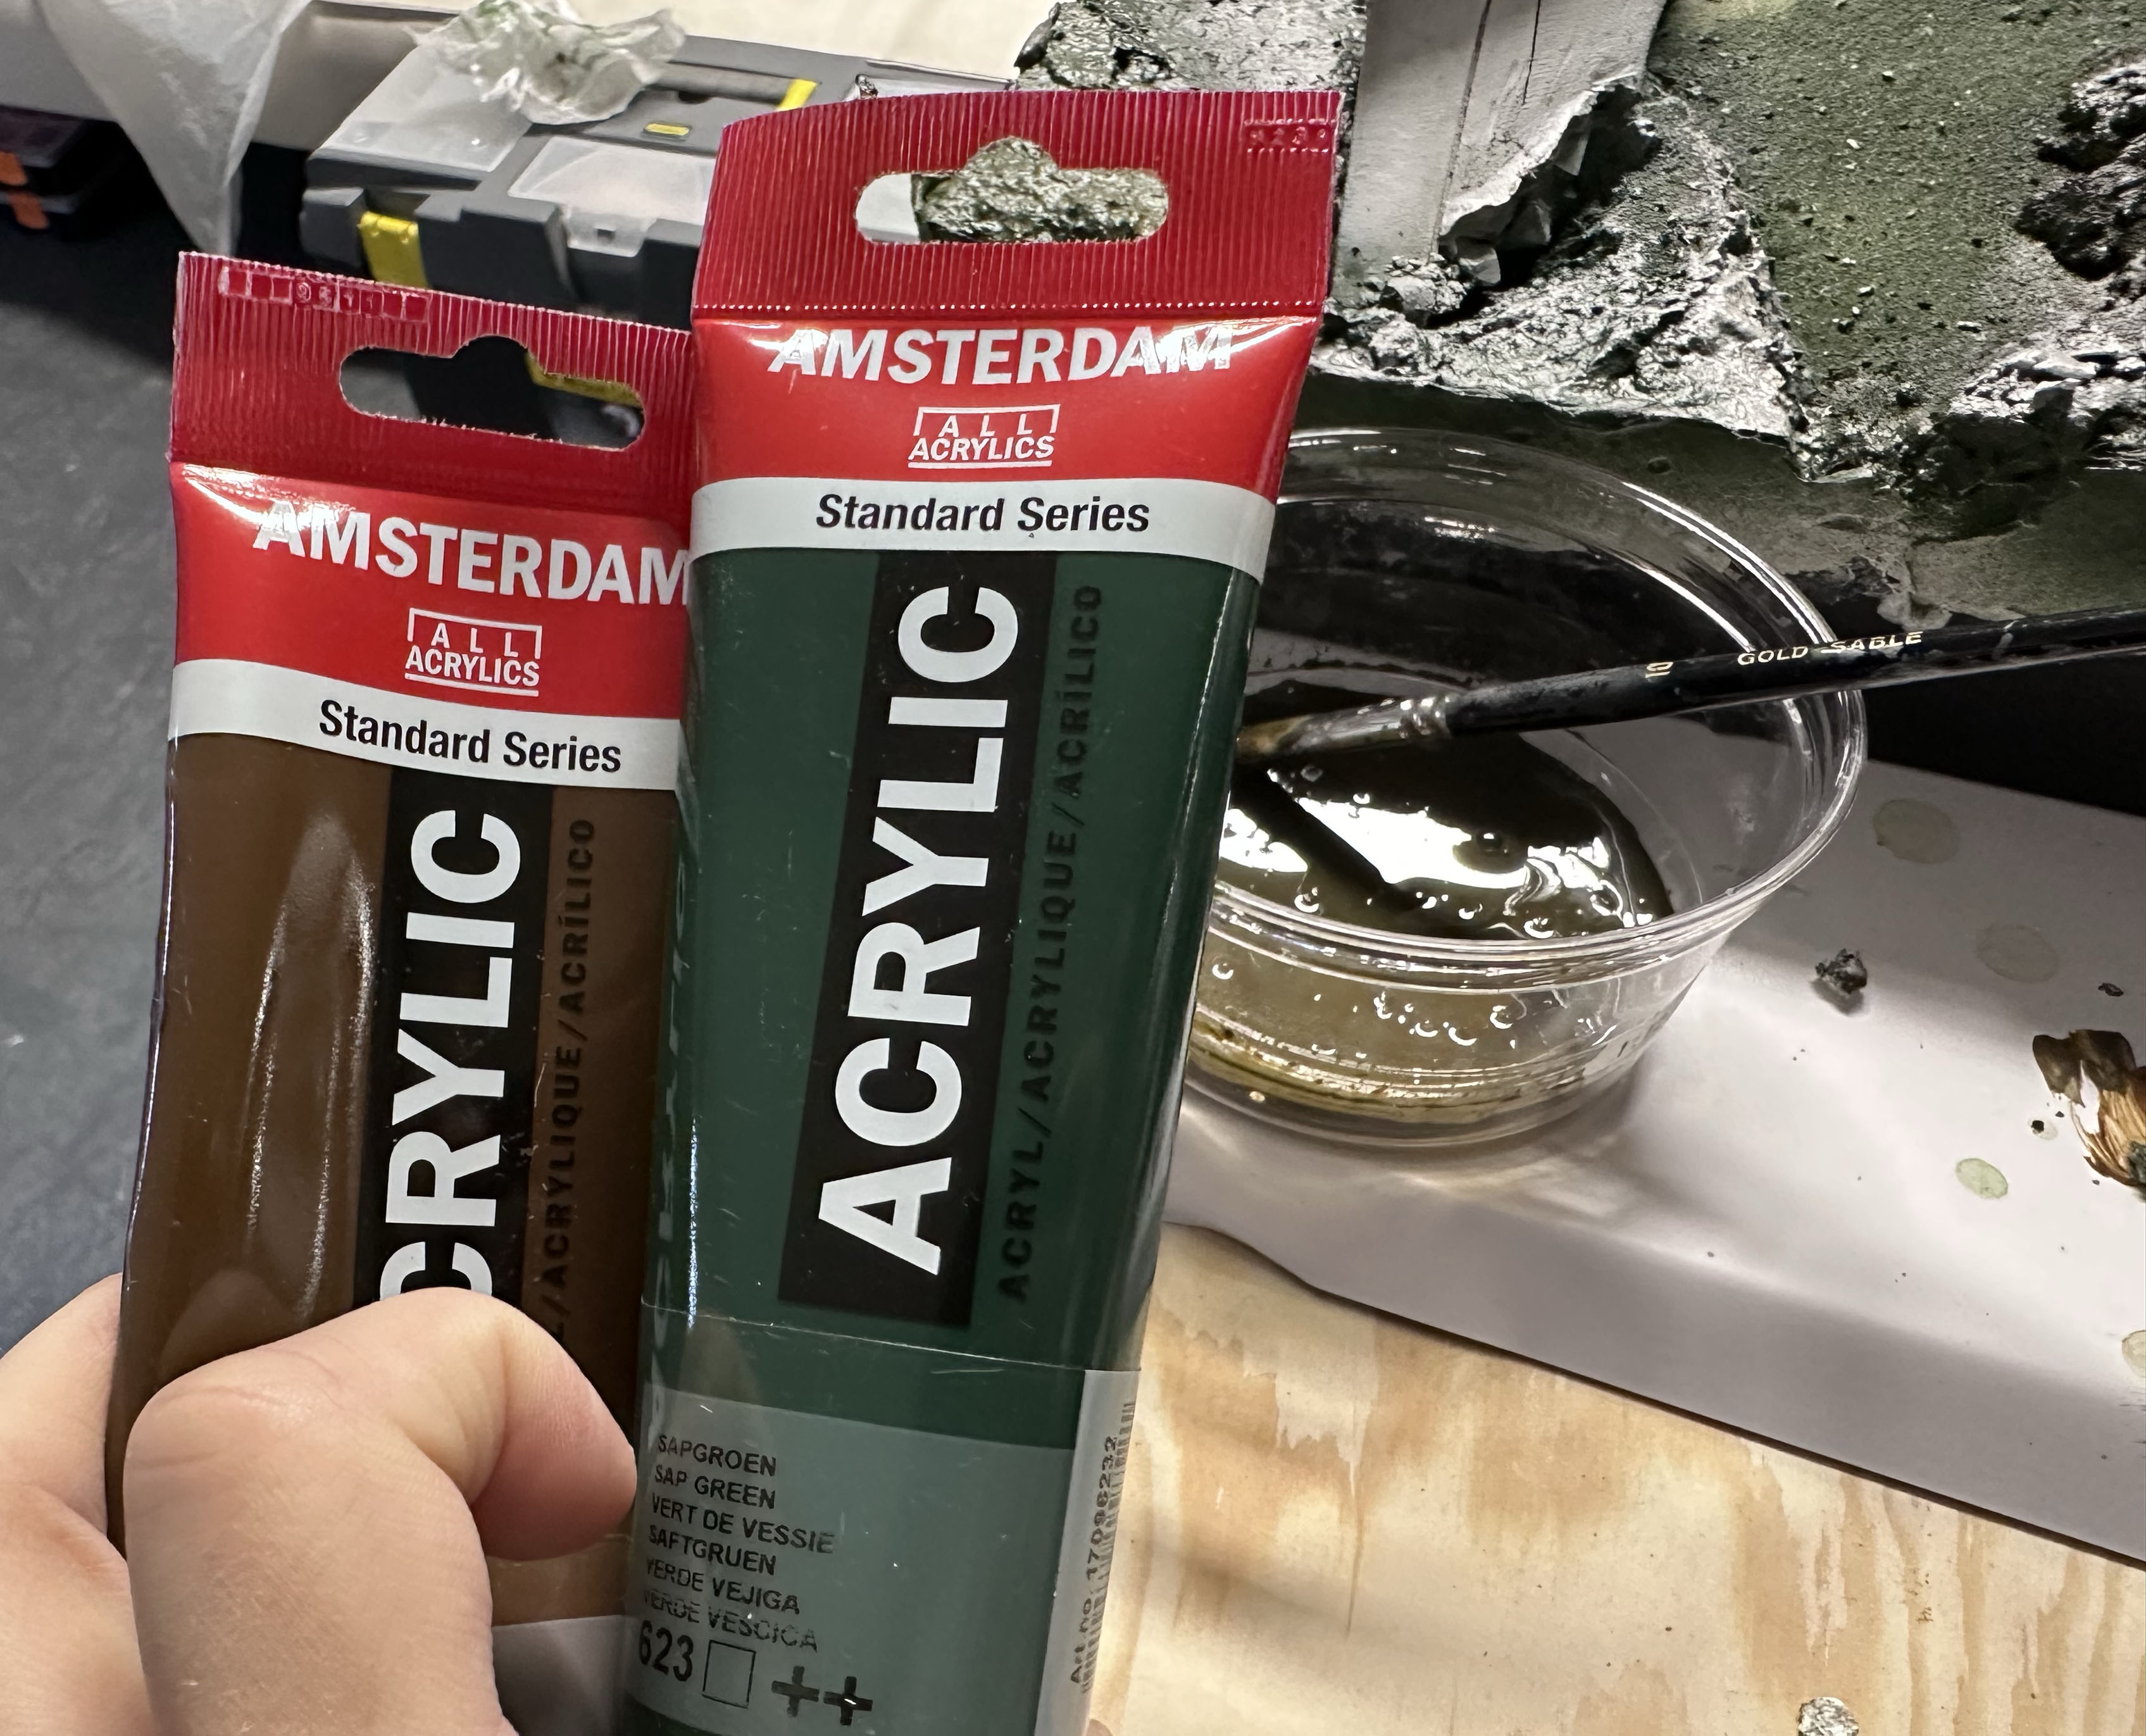
I used my trusty artists acrylics from big tubes. Applied in very slapdash manner, all will be blended in with washes and drybrushing later.

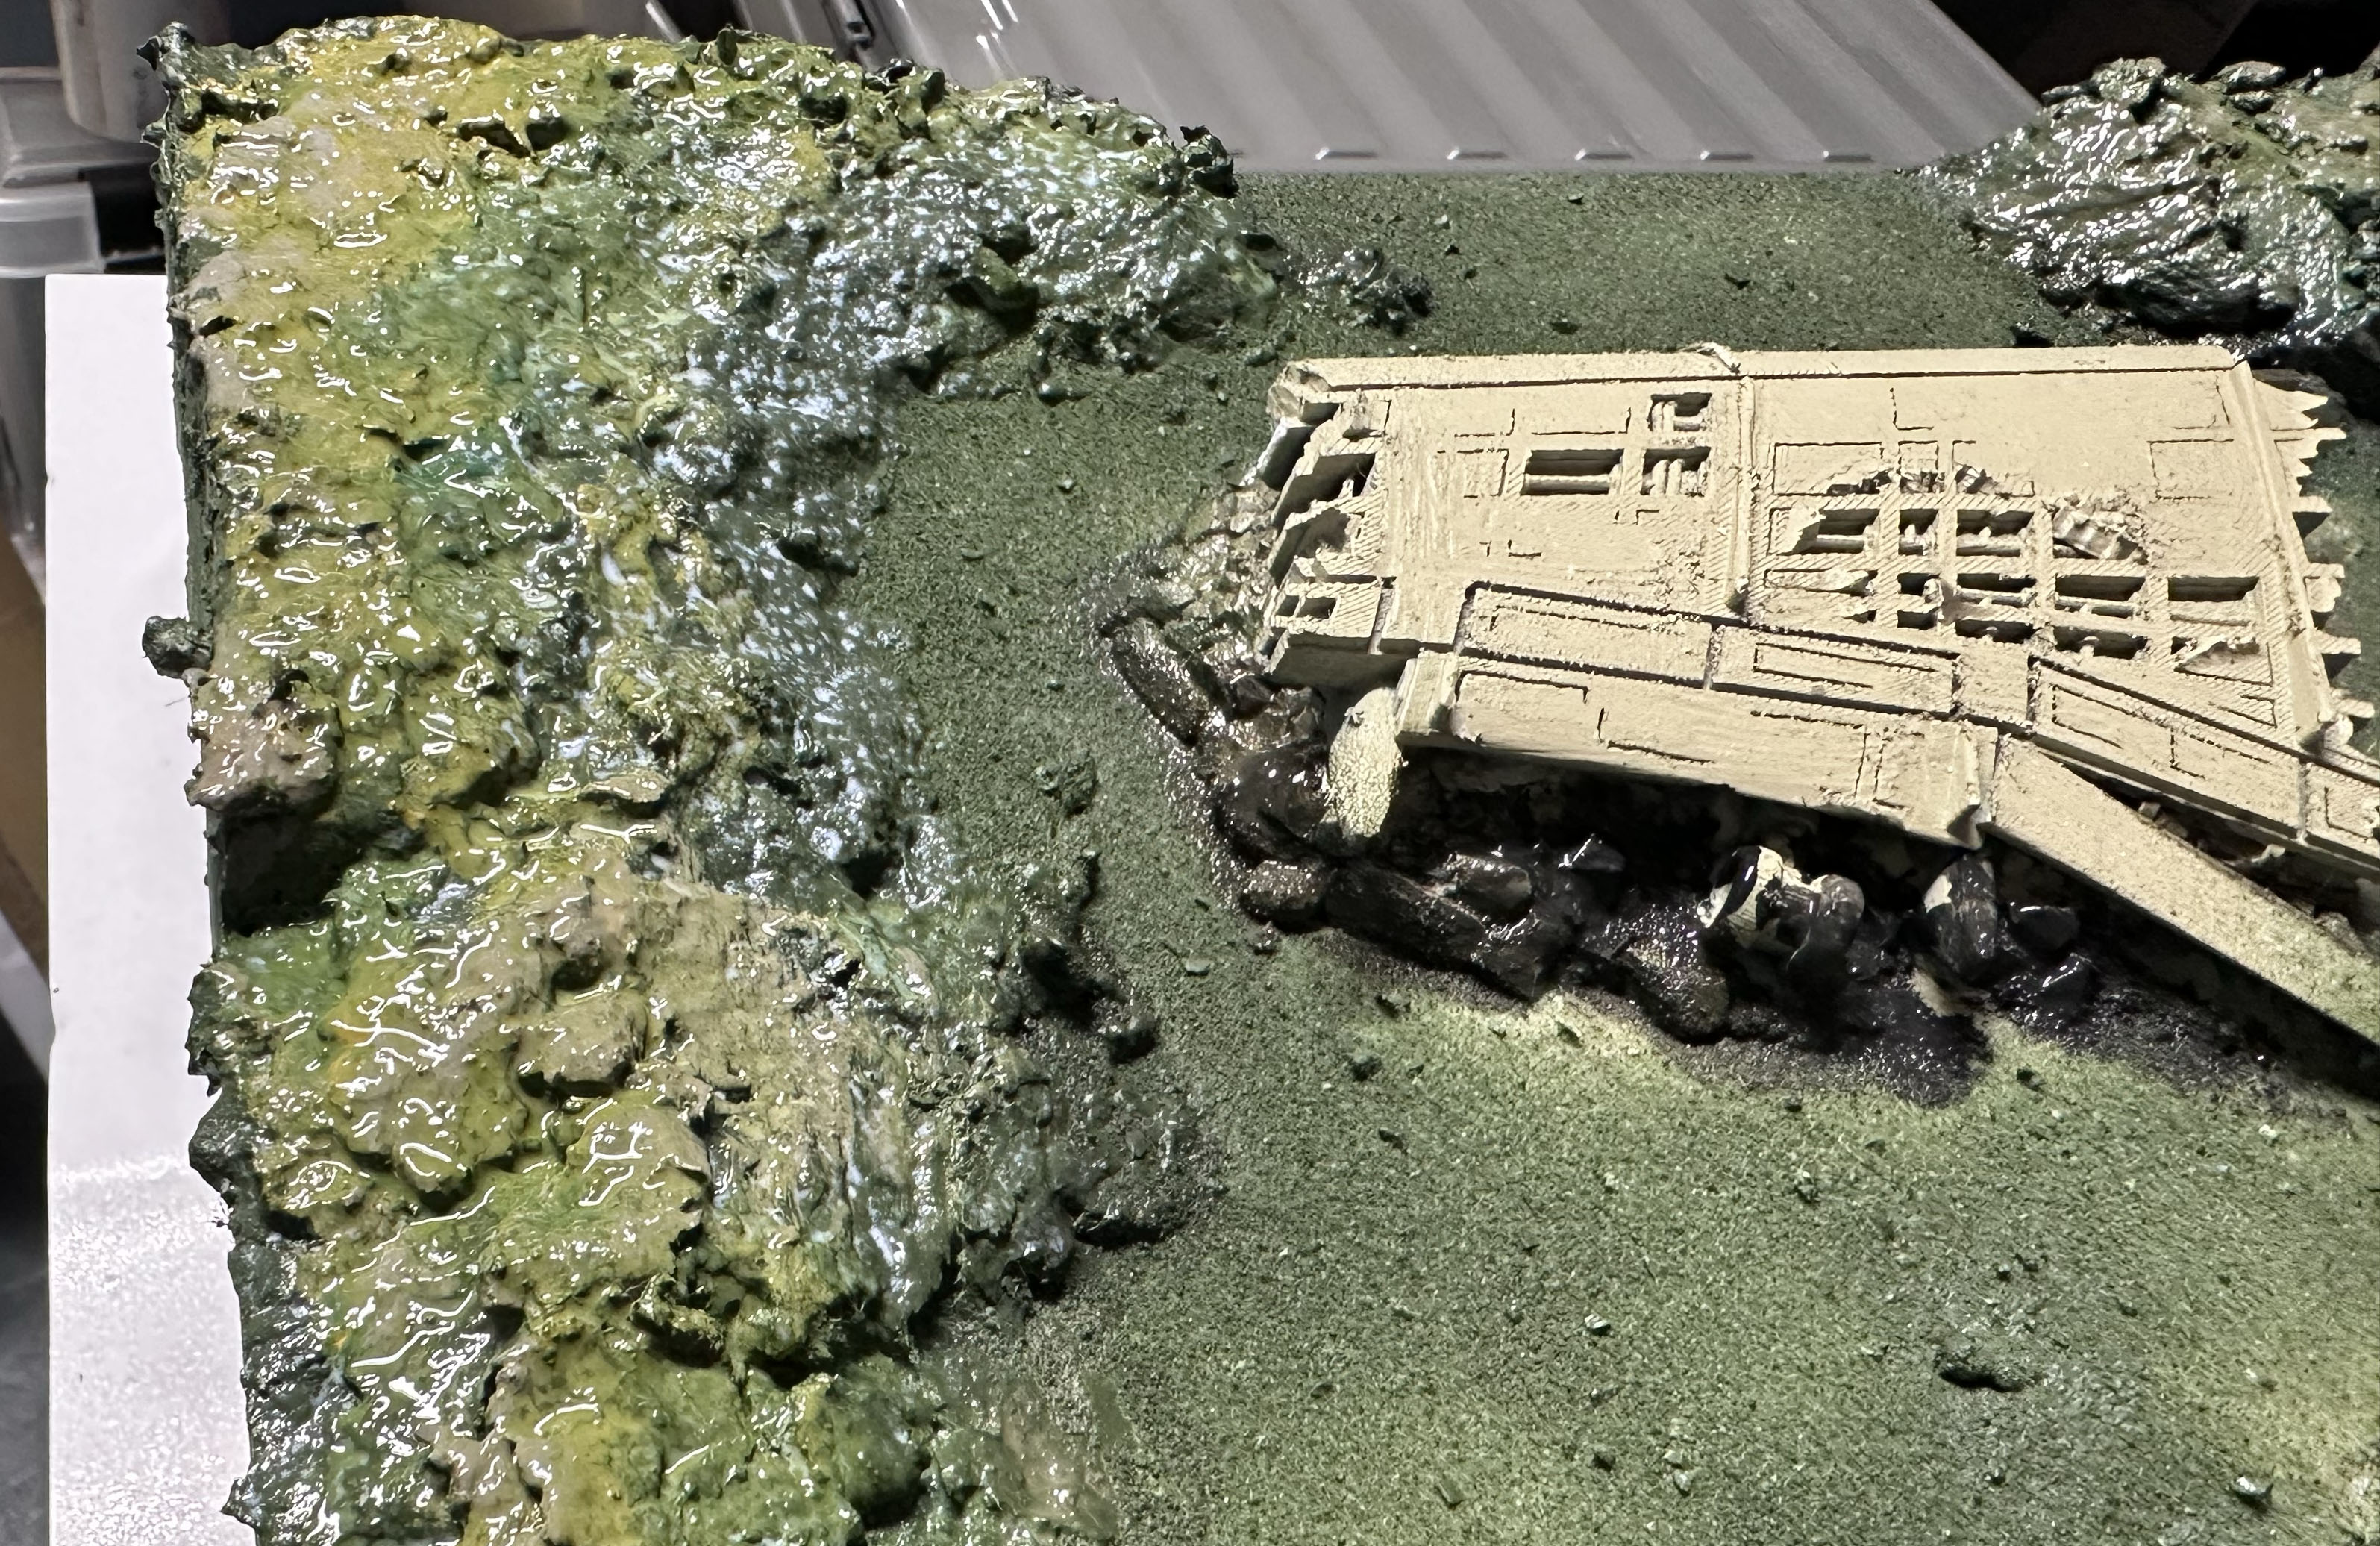
One observation on the modelling compound: it dries a bit brittle. So parts were chipping off when I was brushing on the paint, which was alright as I was able to cover any patched with paint. If I wanted to avoid that, it would have been a good idea the give the whole piece a coat of PVA before painting.
While the acrylics were drying, I went with the airbrush to add white colour to the plane itself.
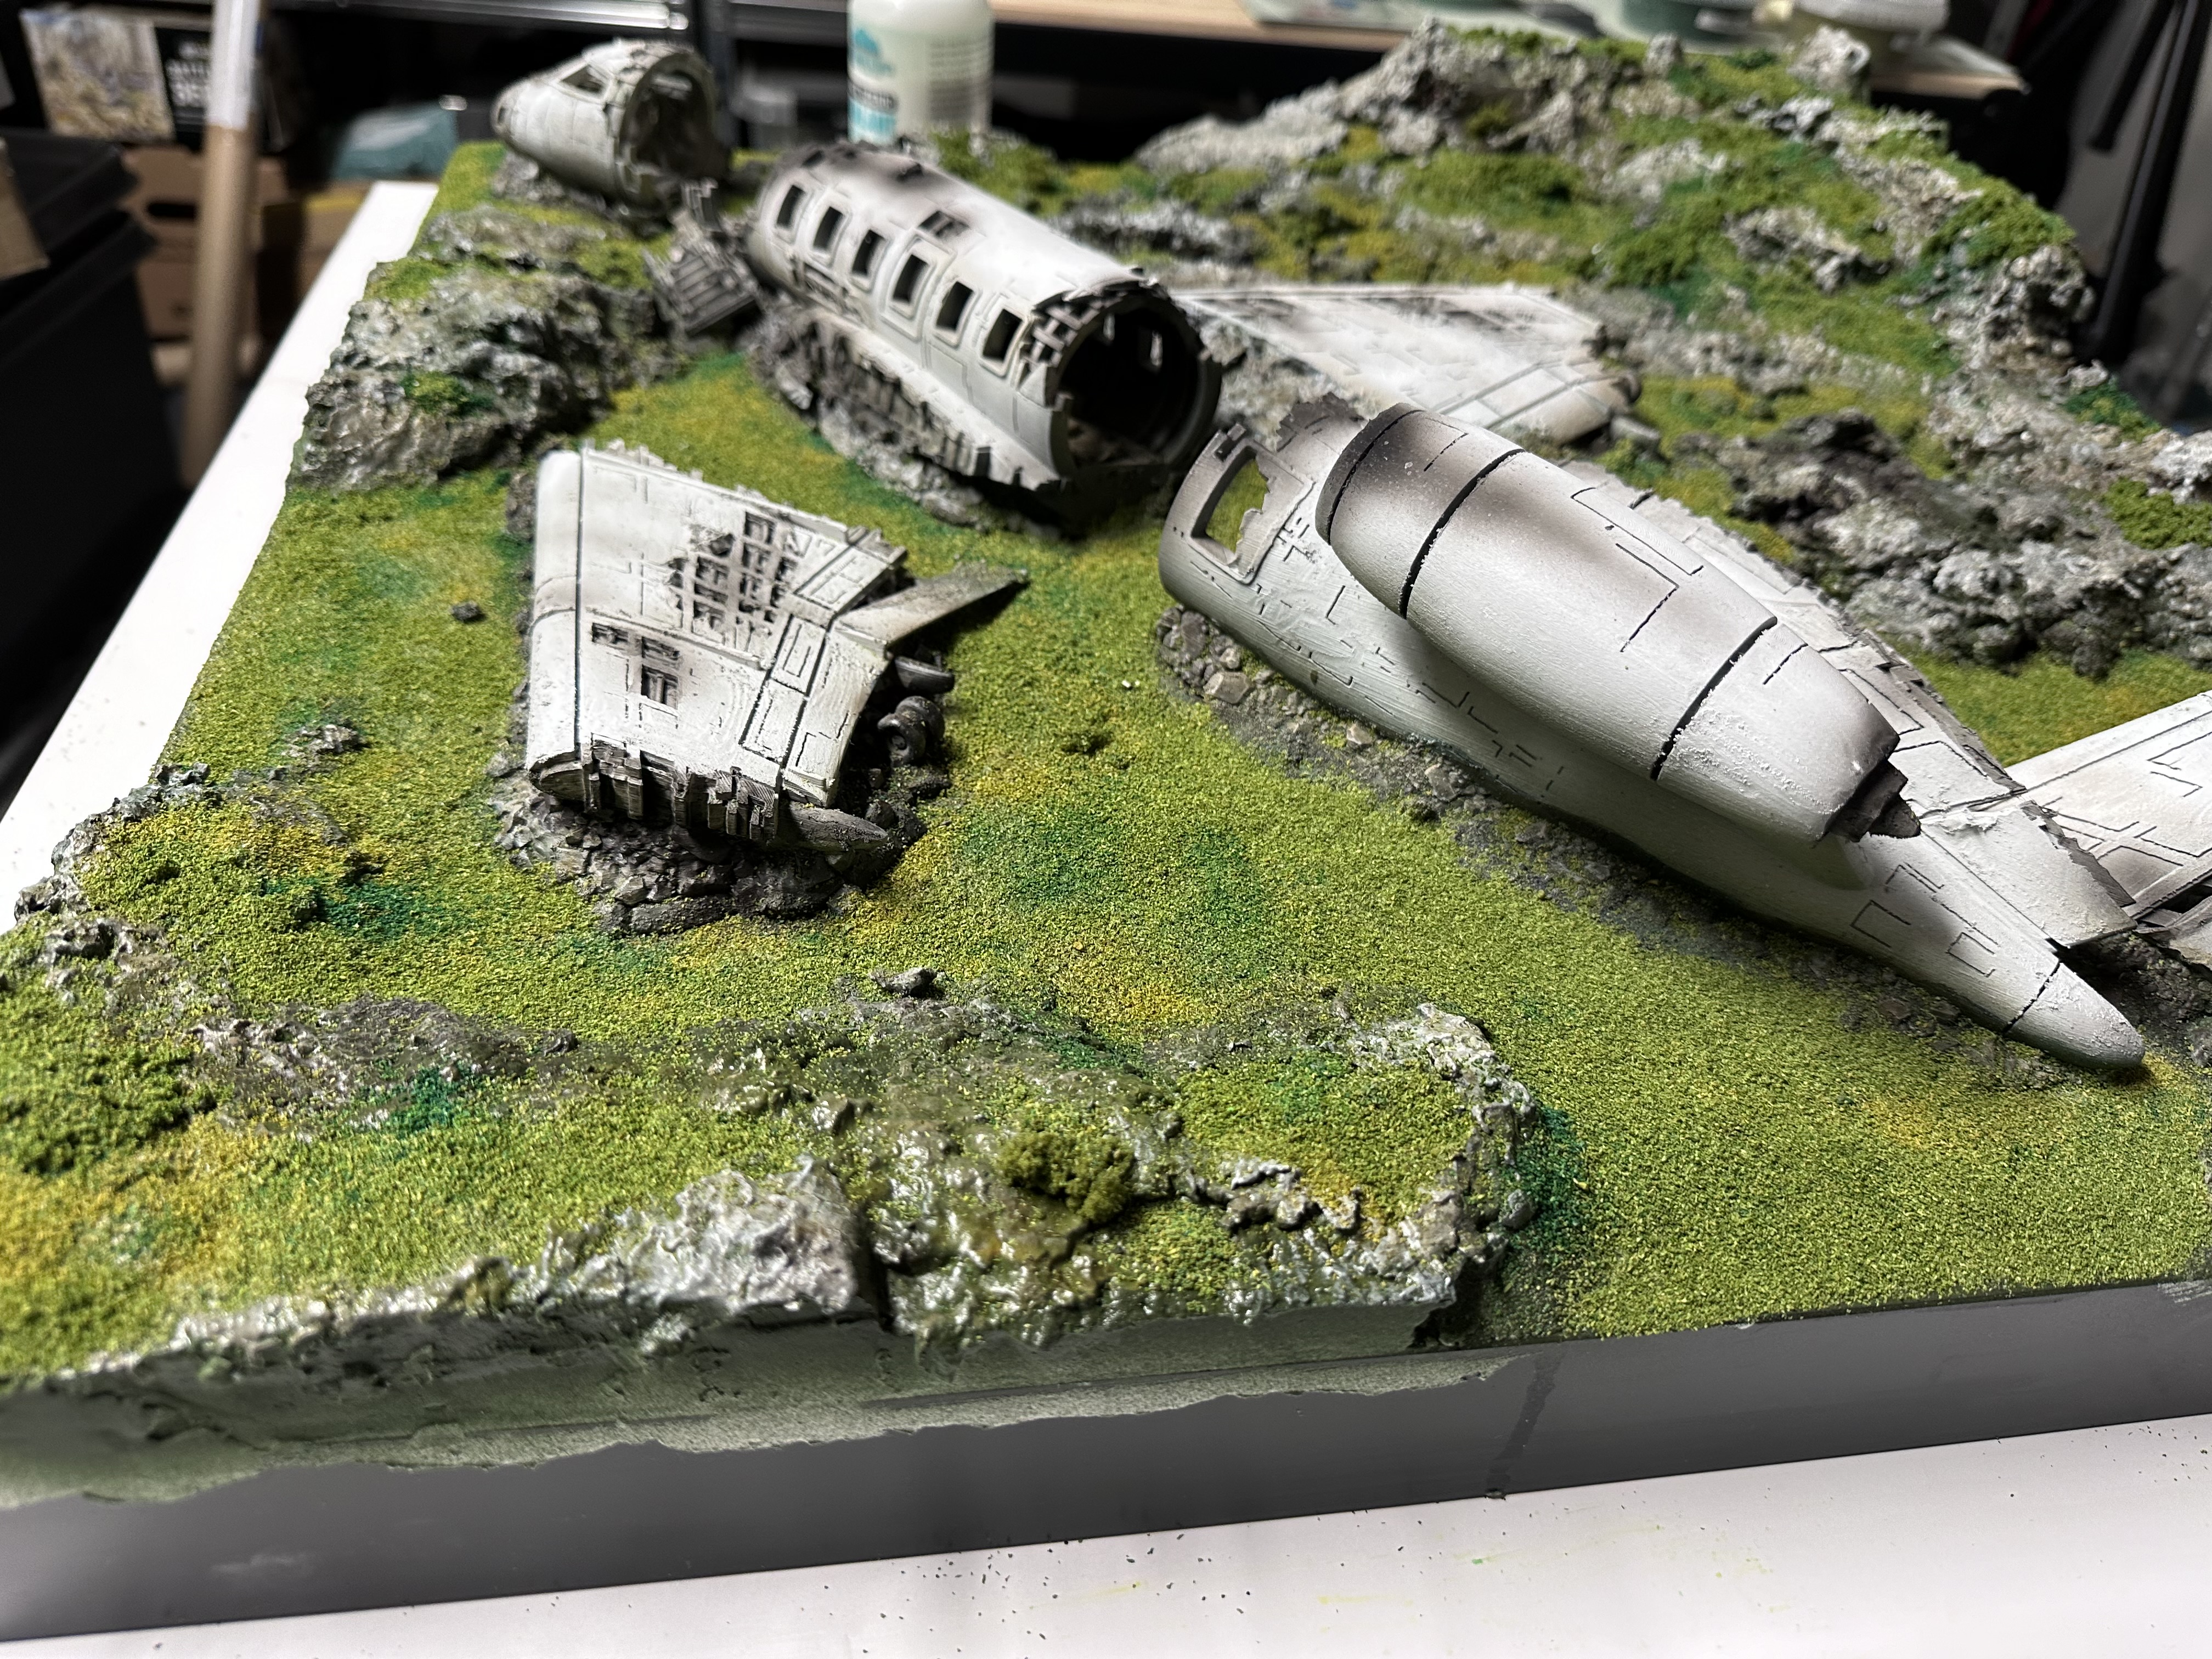
Drybrushing and washing
Next step: bringing up rocky details with a drybrush.
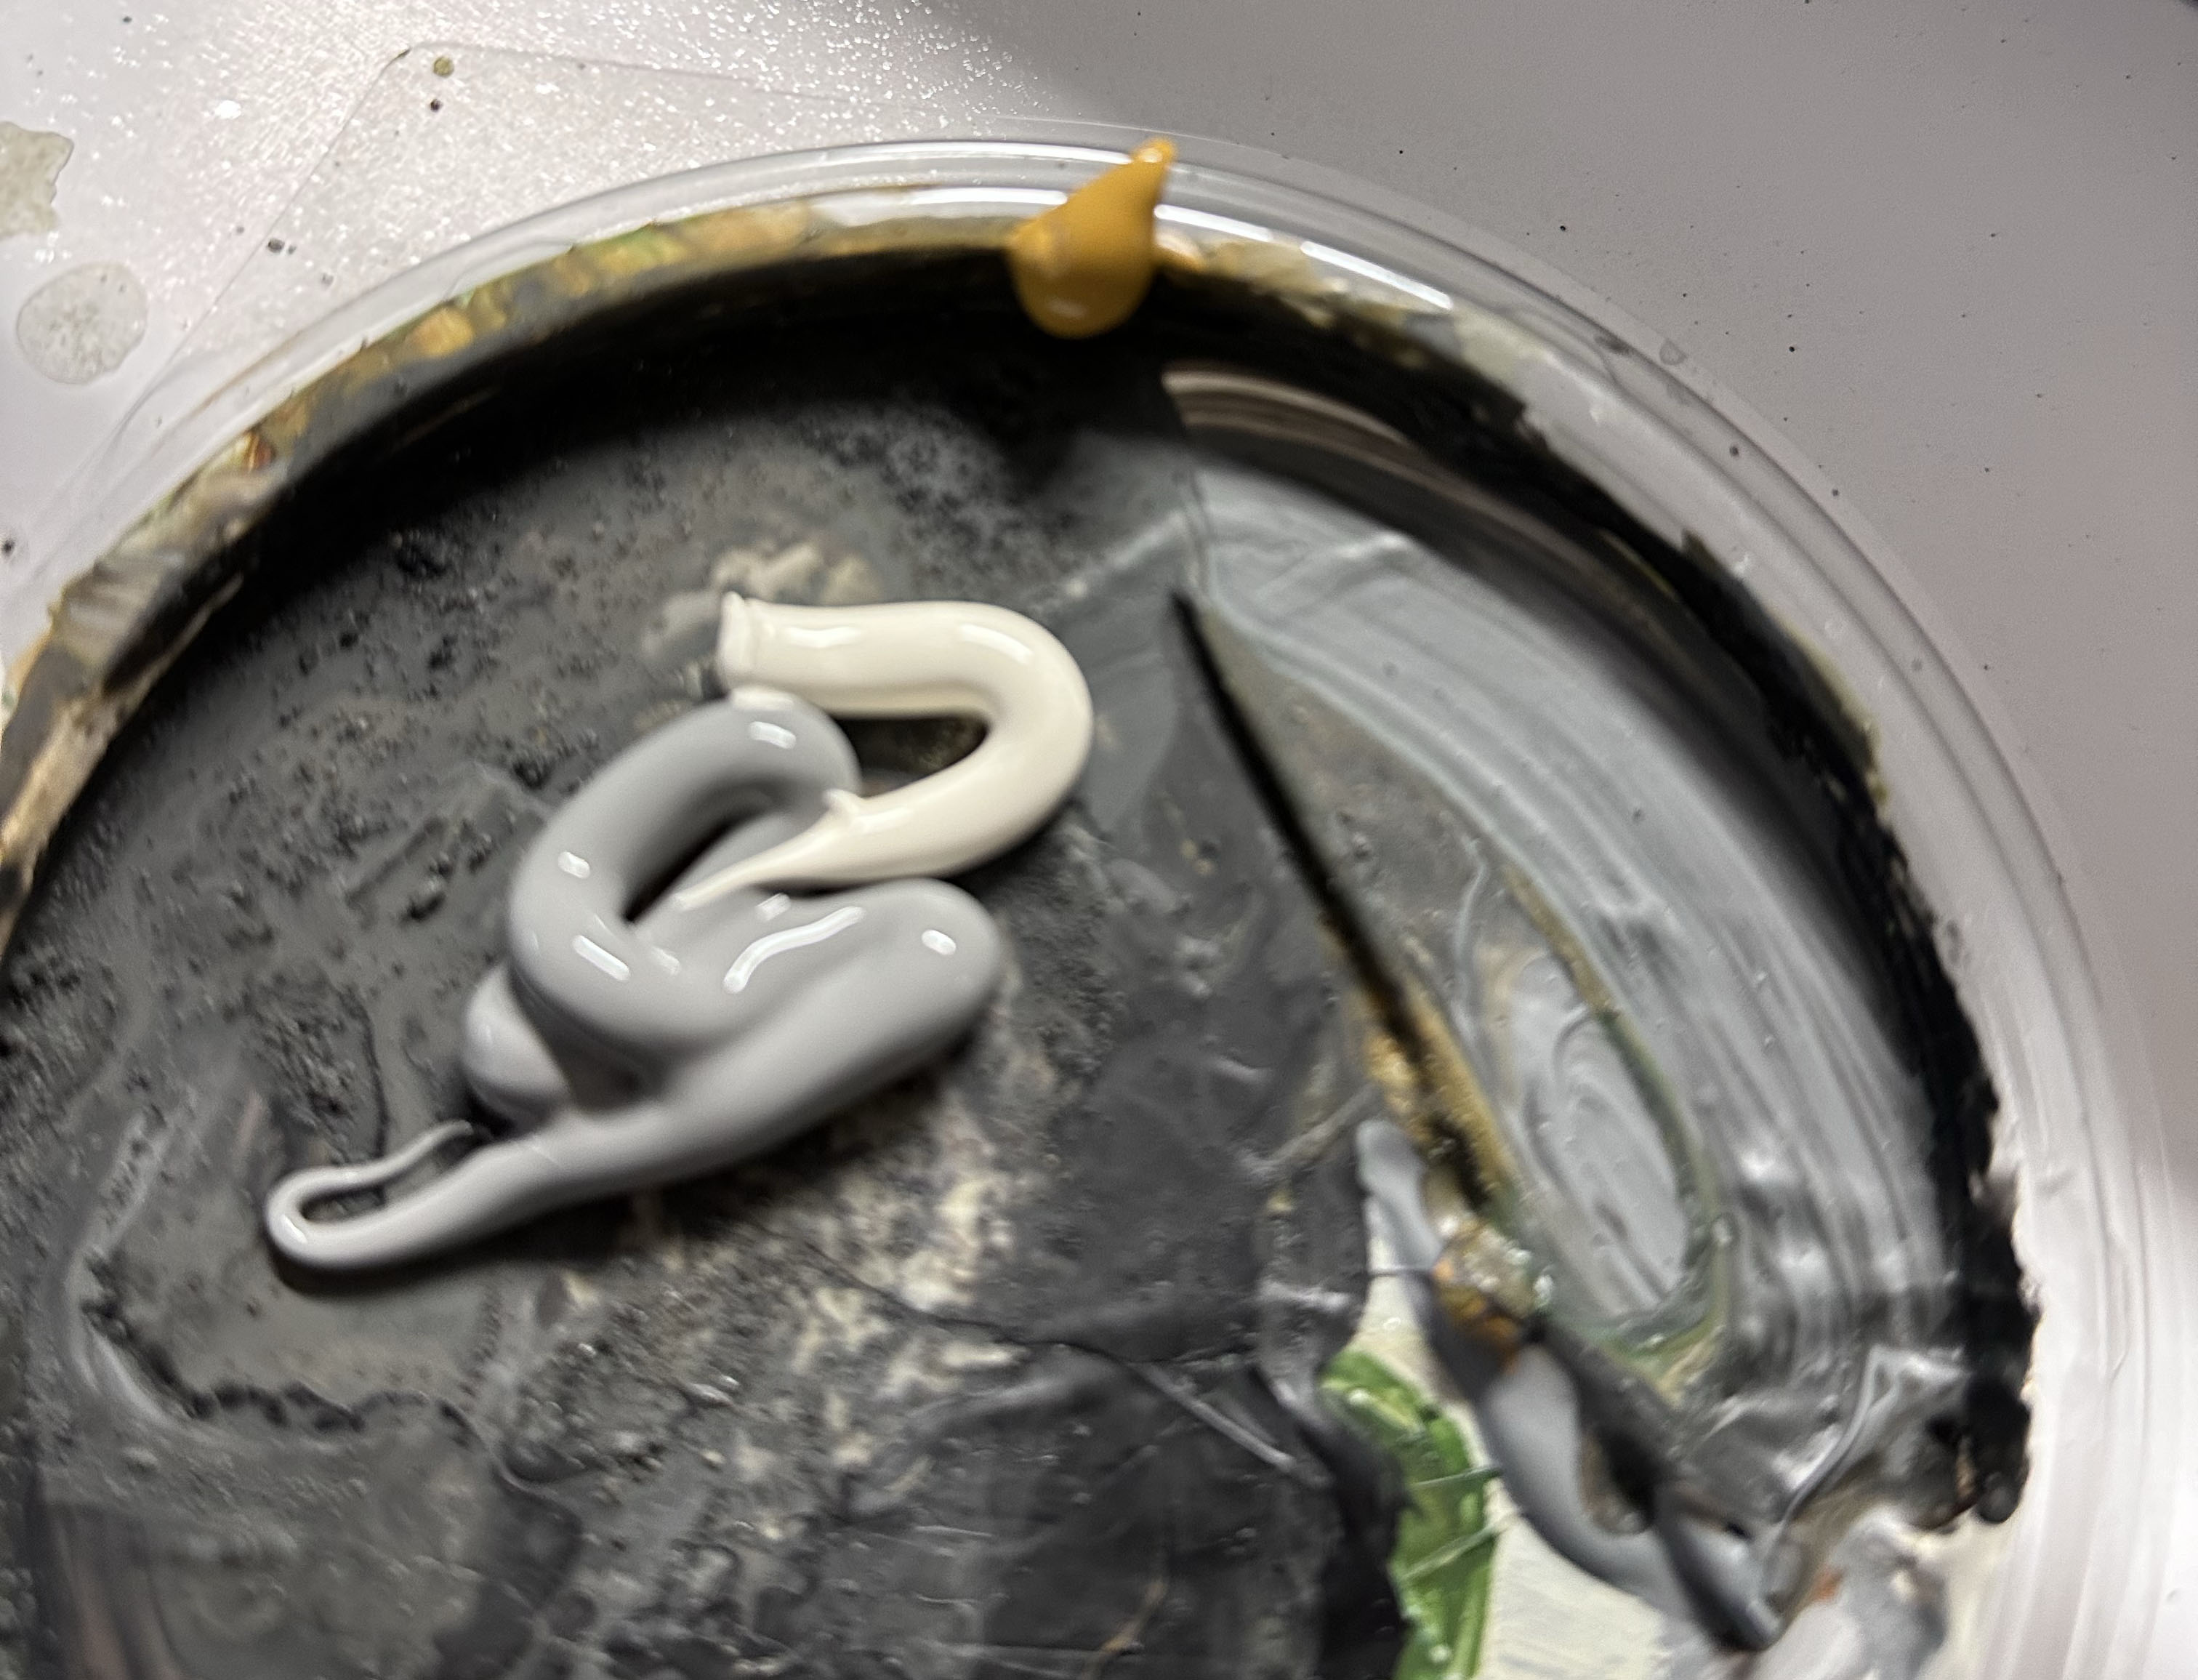
I made a mix of neutral grey, light yellow and a bit or raw sienna.
Then drybrushed the parts I wanted to end up rocky with big brush.
Then to blend it back in and bring in some natural tones, I made wash with green, brown acrylics and water. Nasty looking stuff.
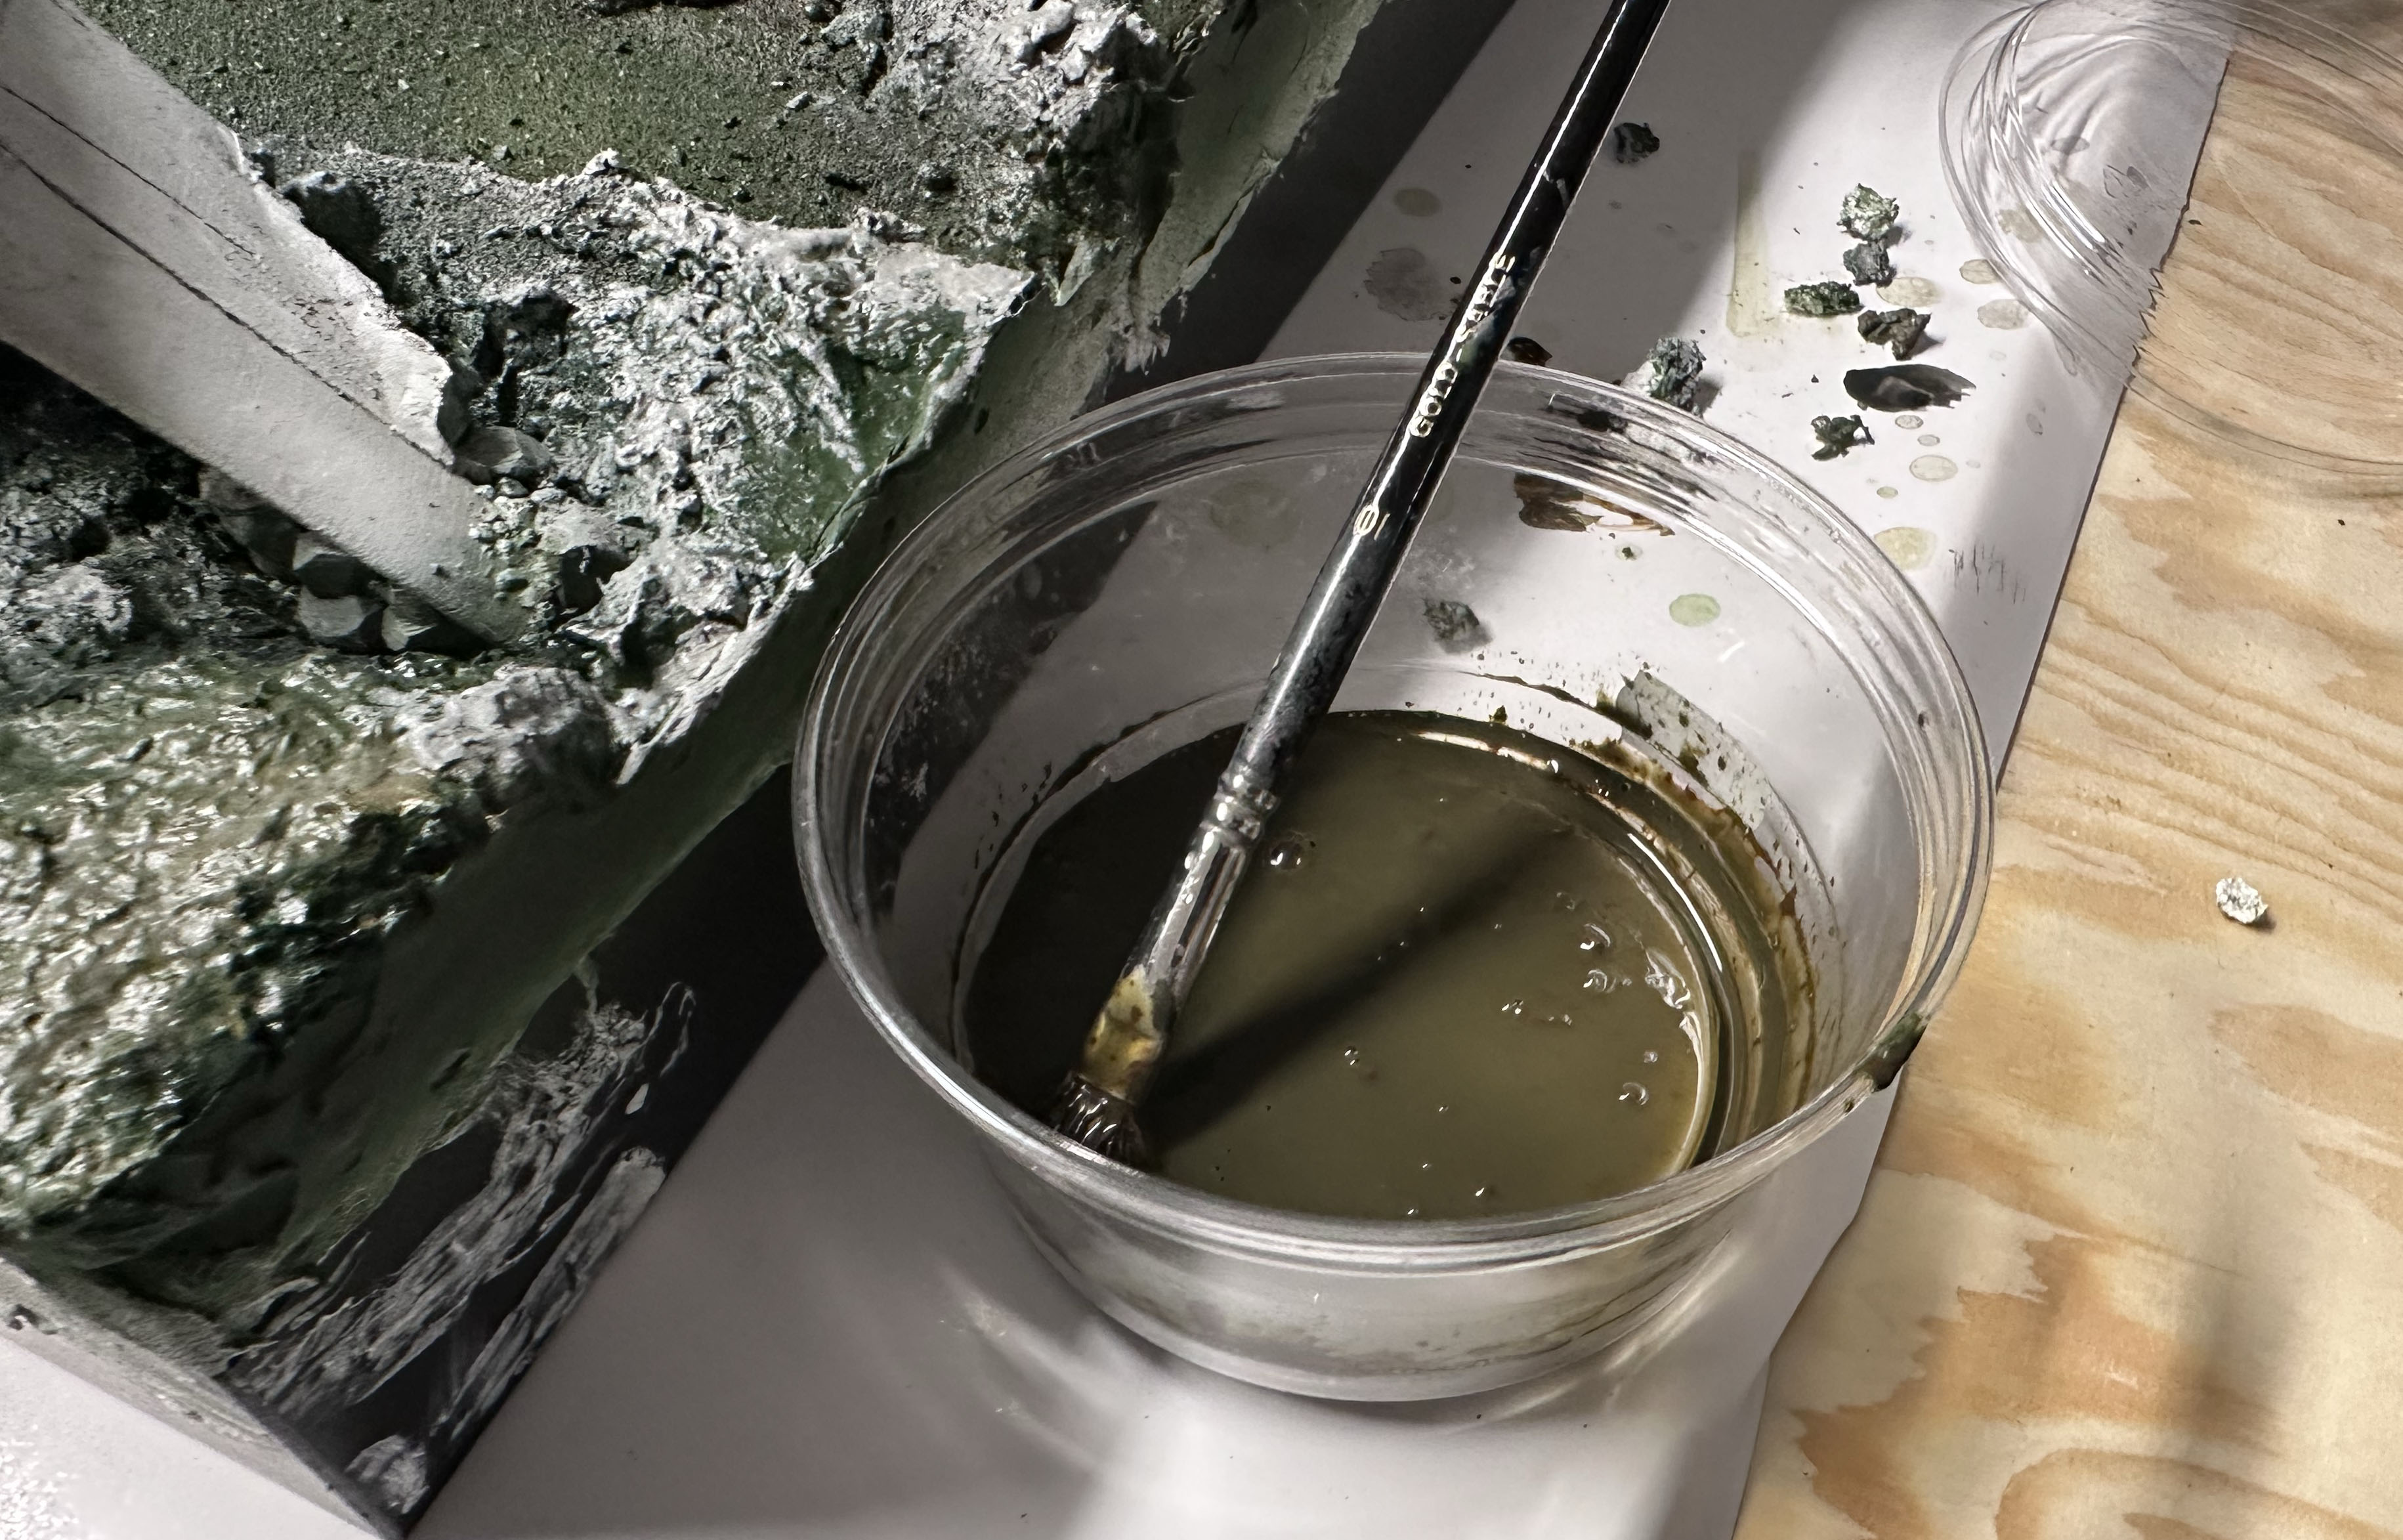
Getting carried away with painting, I forgot to take a photo of the end result with the was. You can kind of here see it in the background.
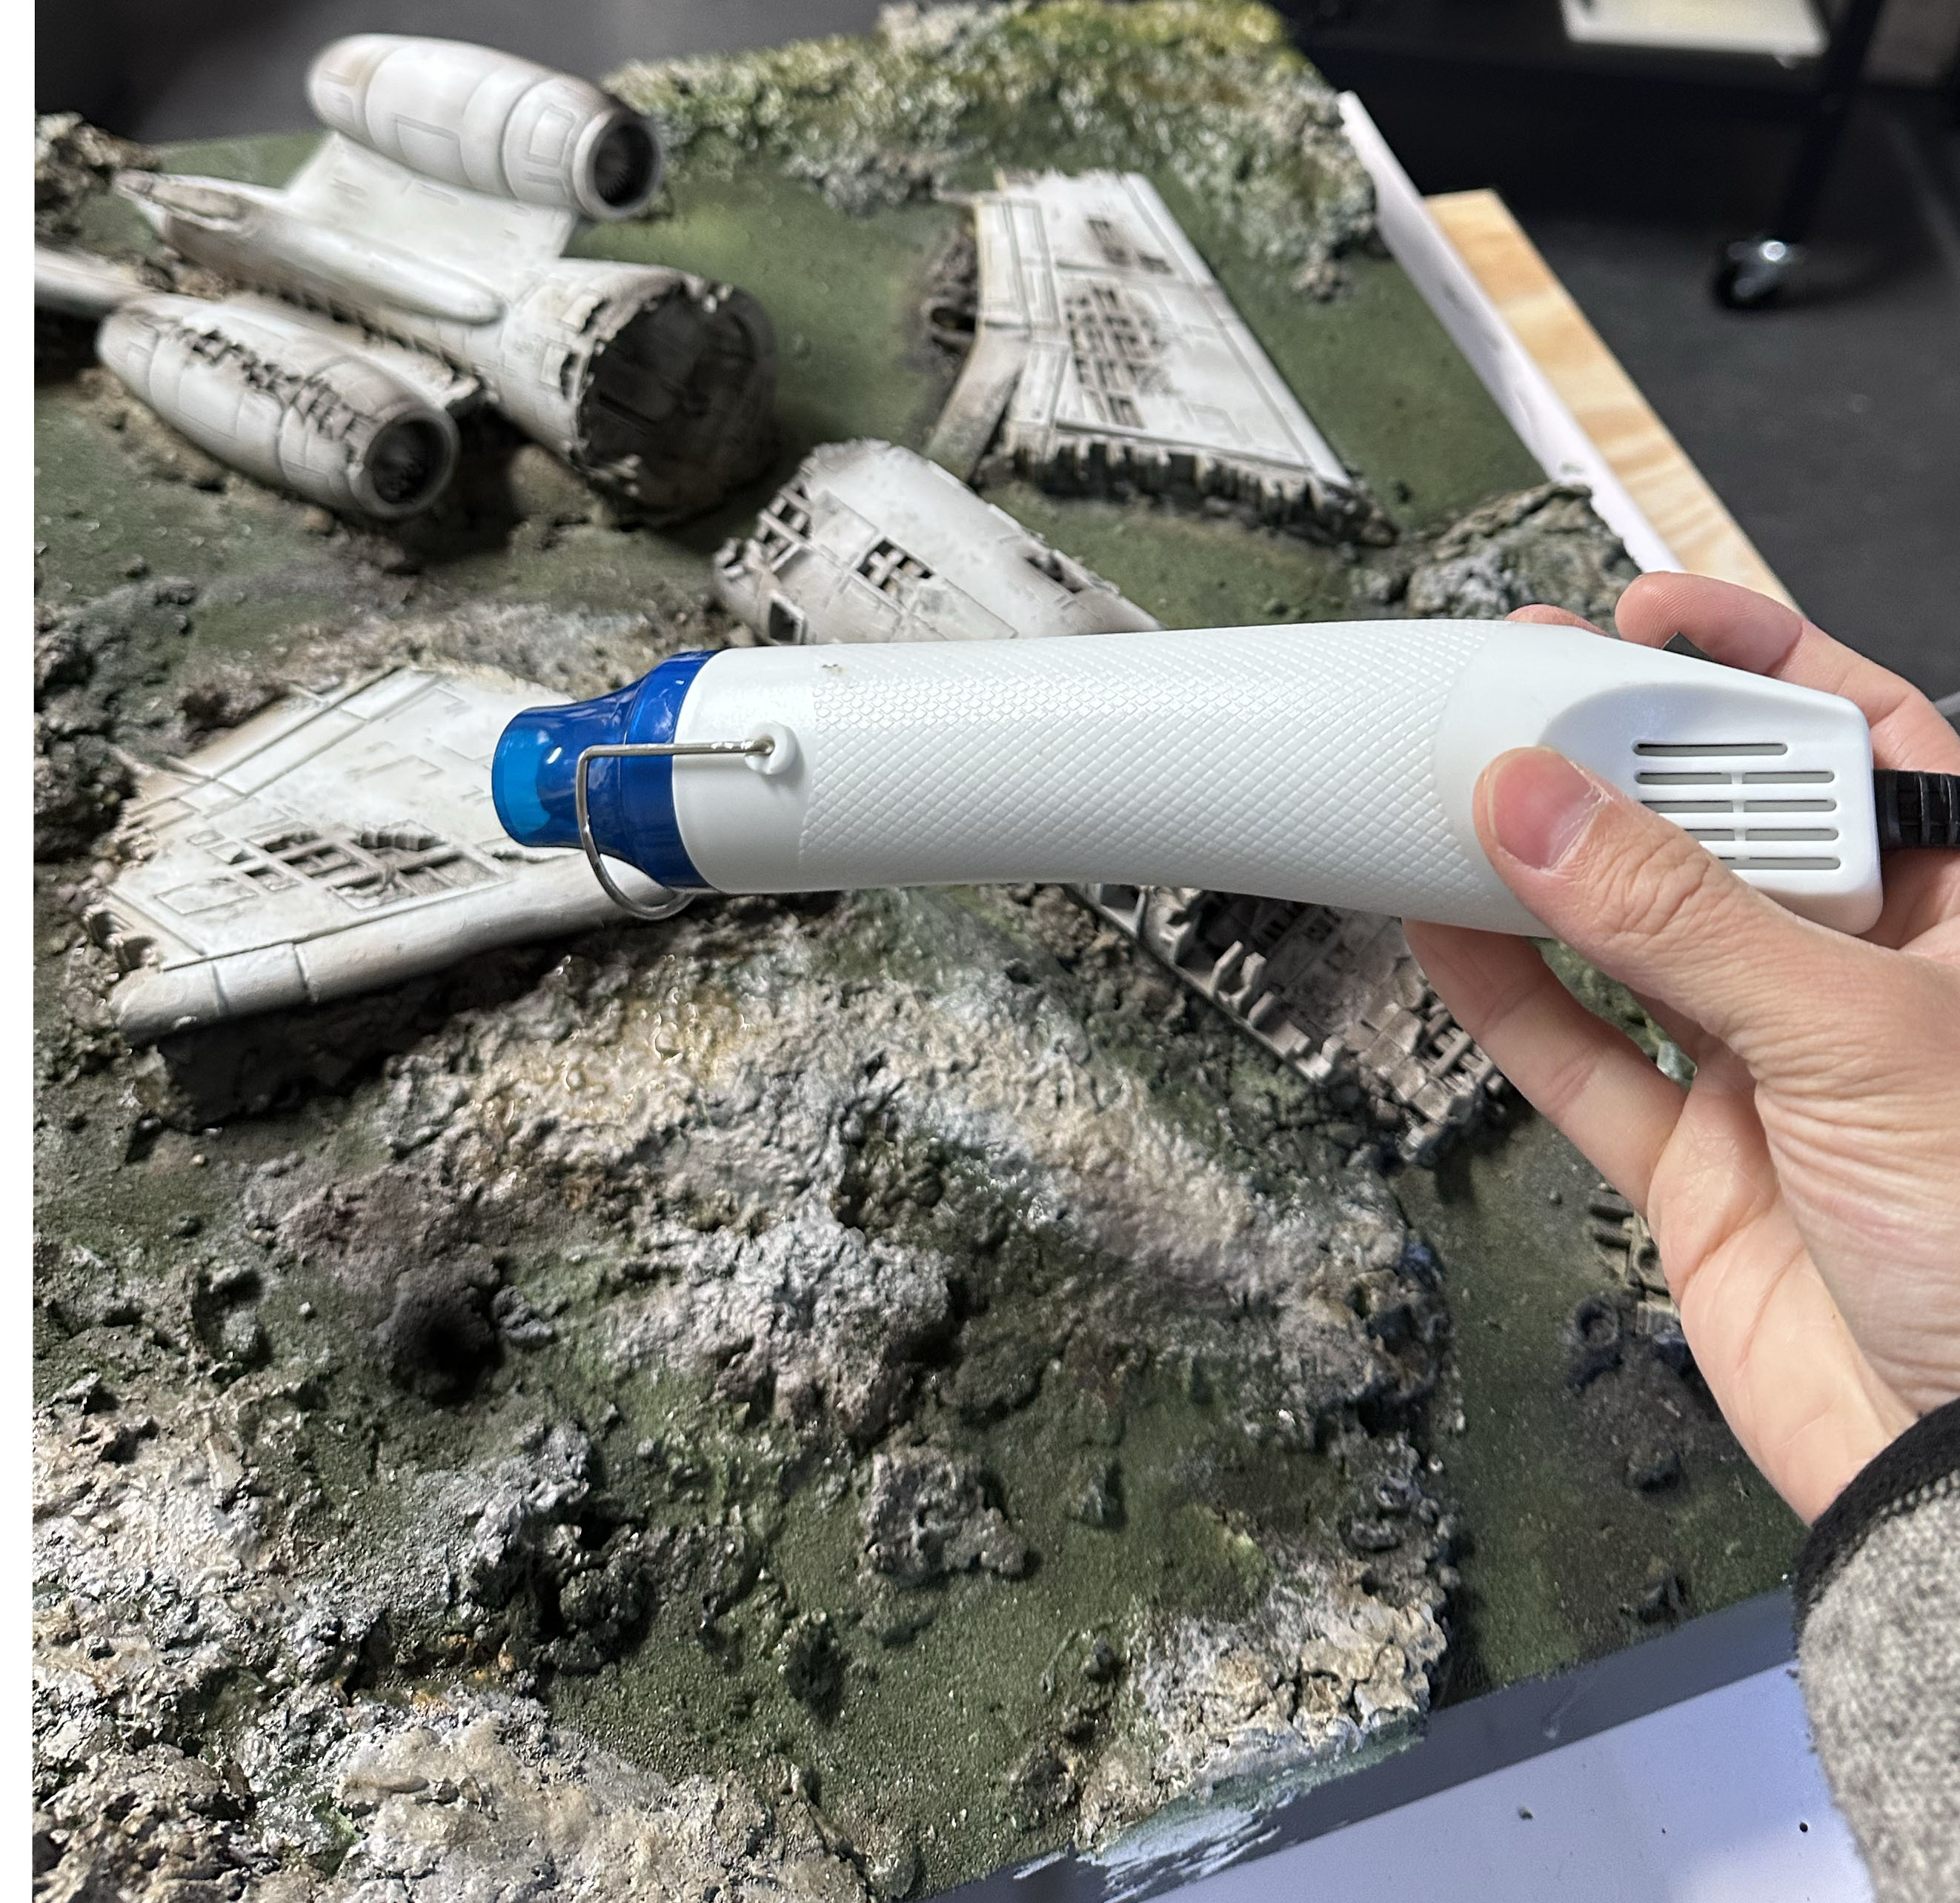
Below is the cheat code for dying time: cheapo hot air gun from Amazon.
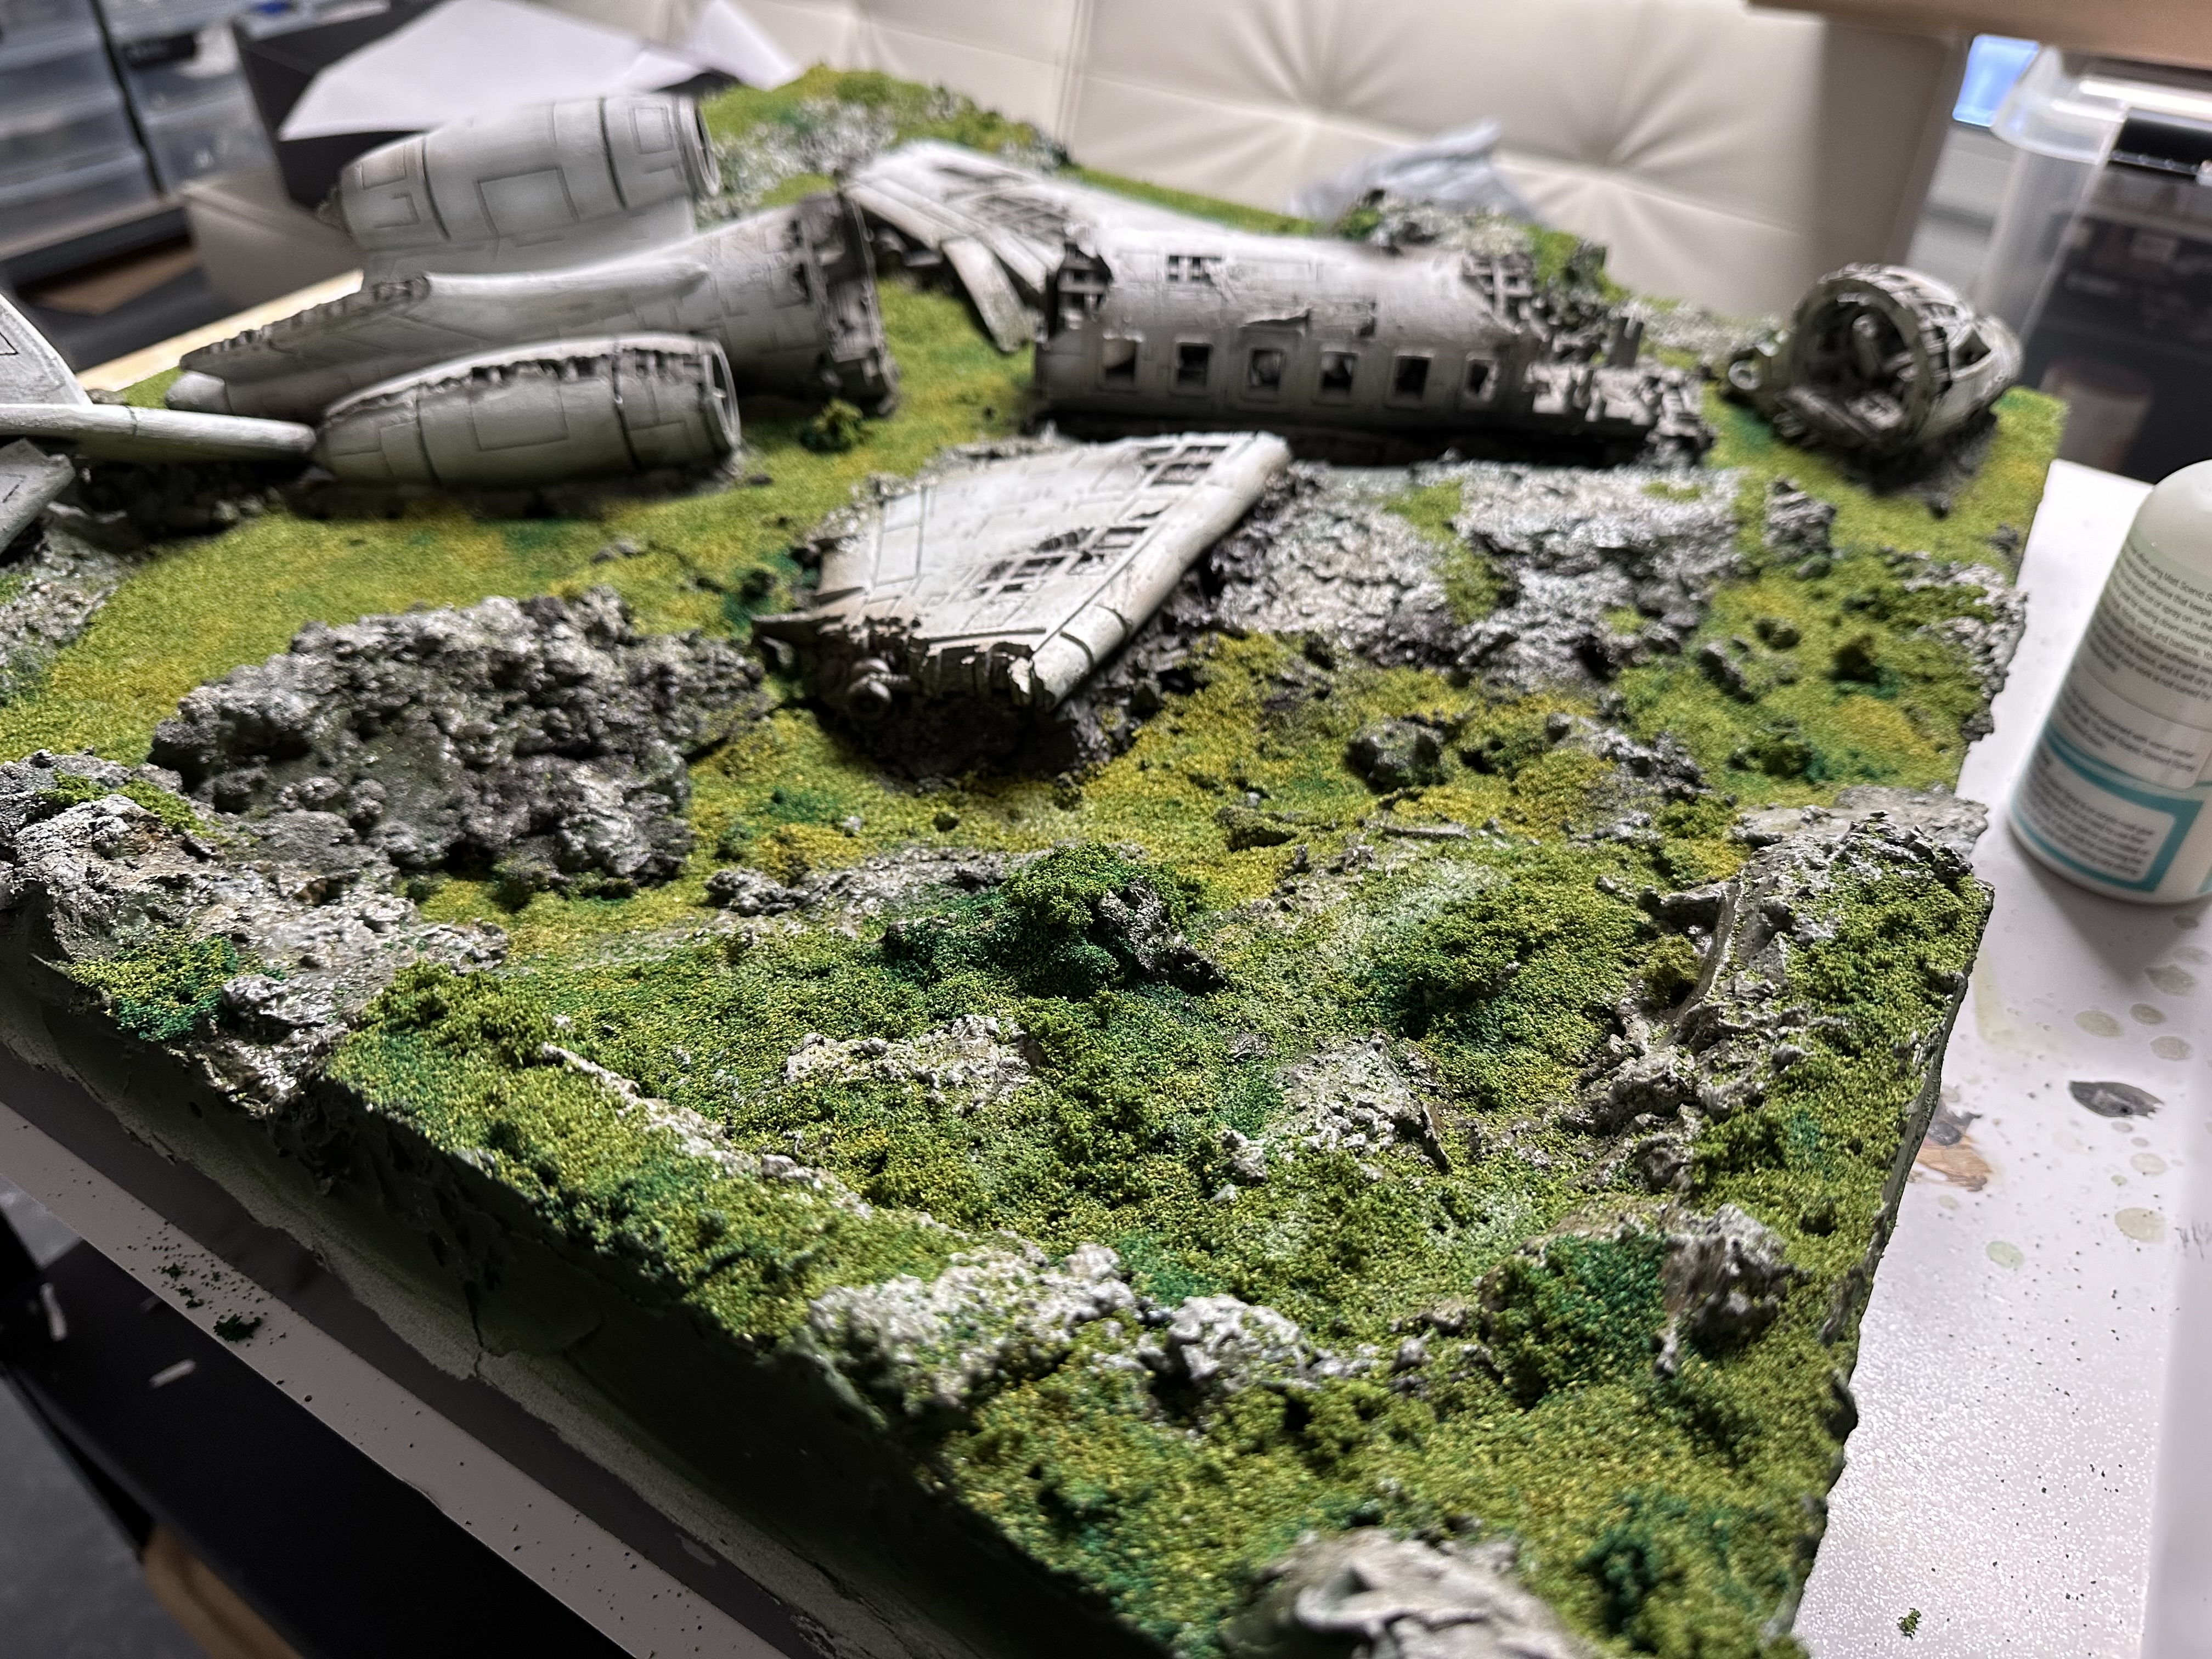
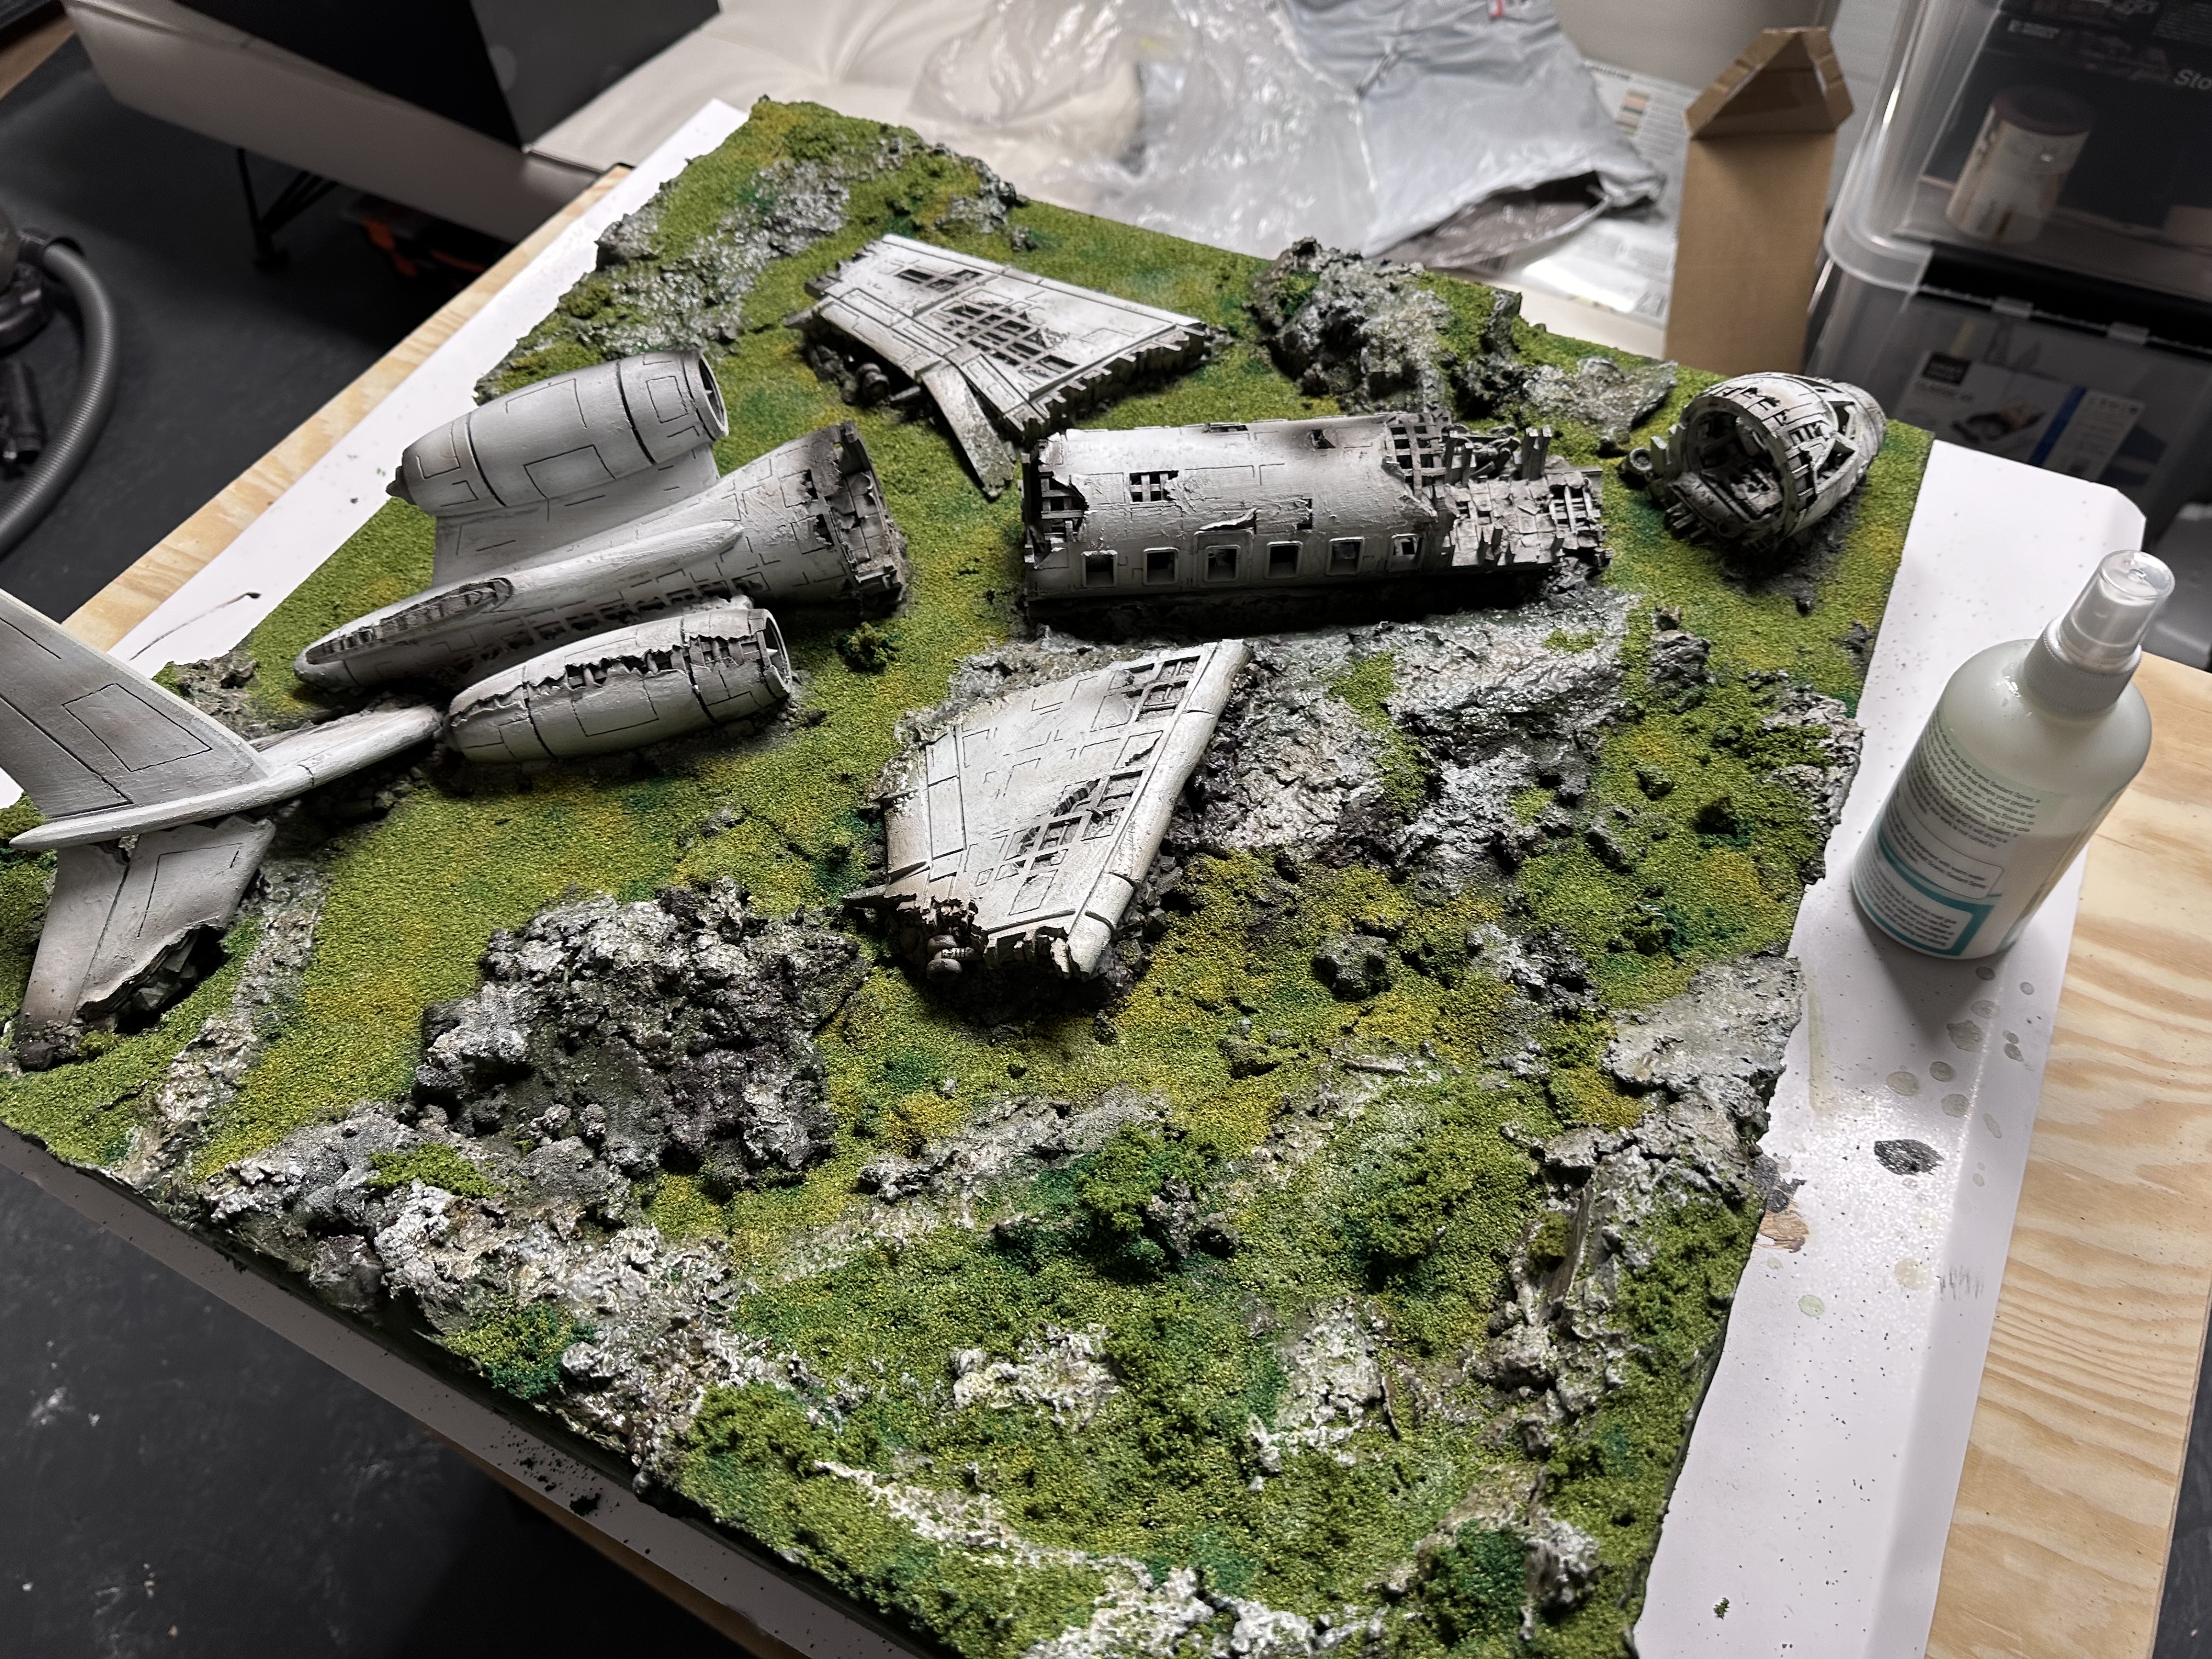
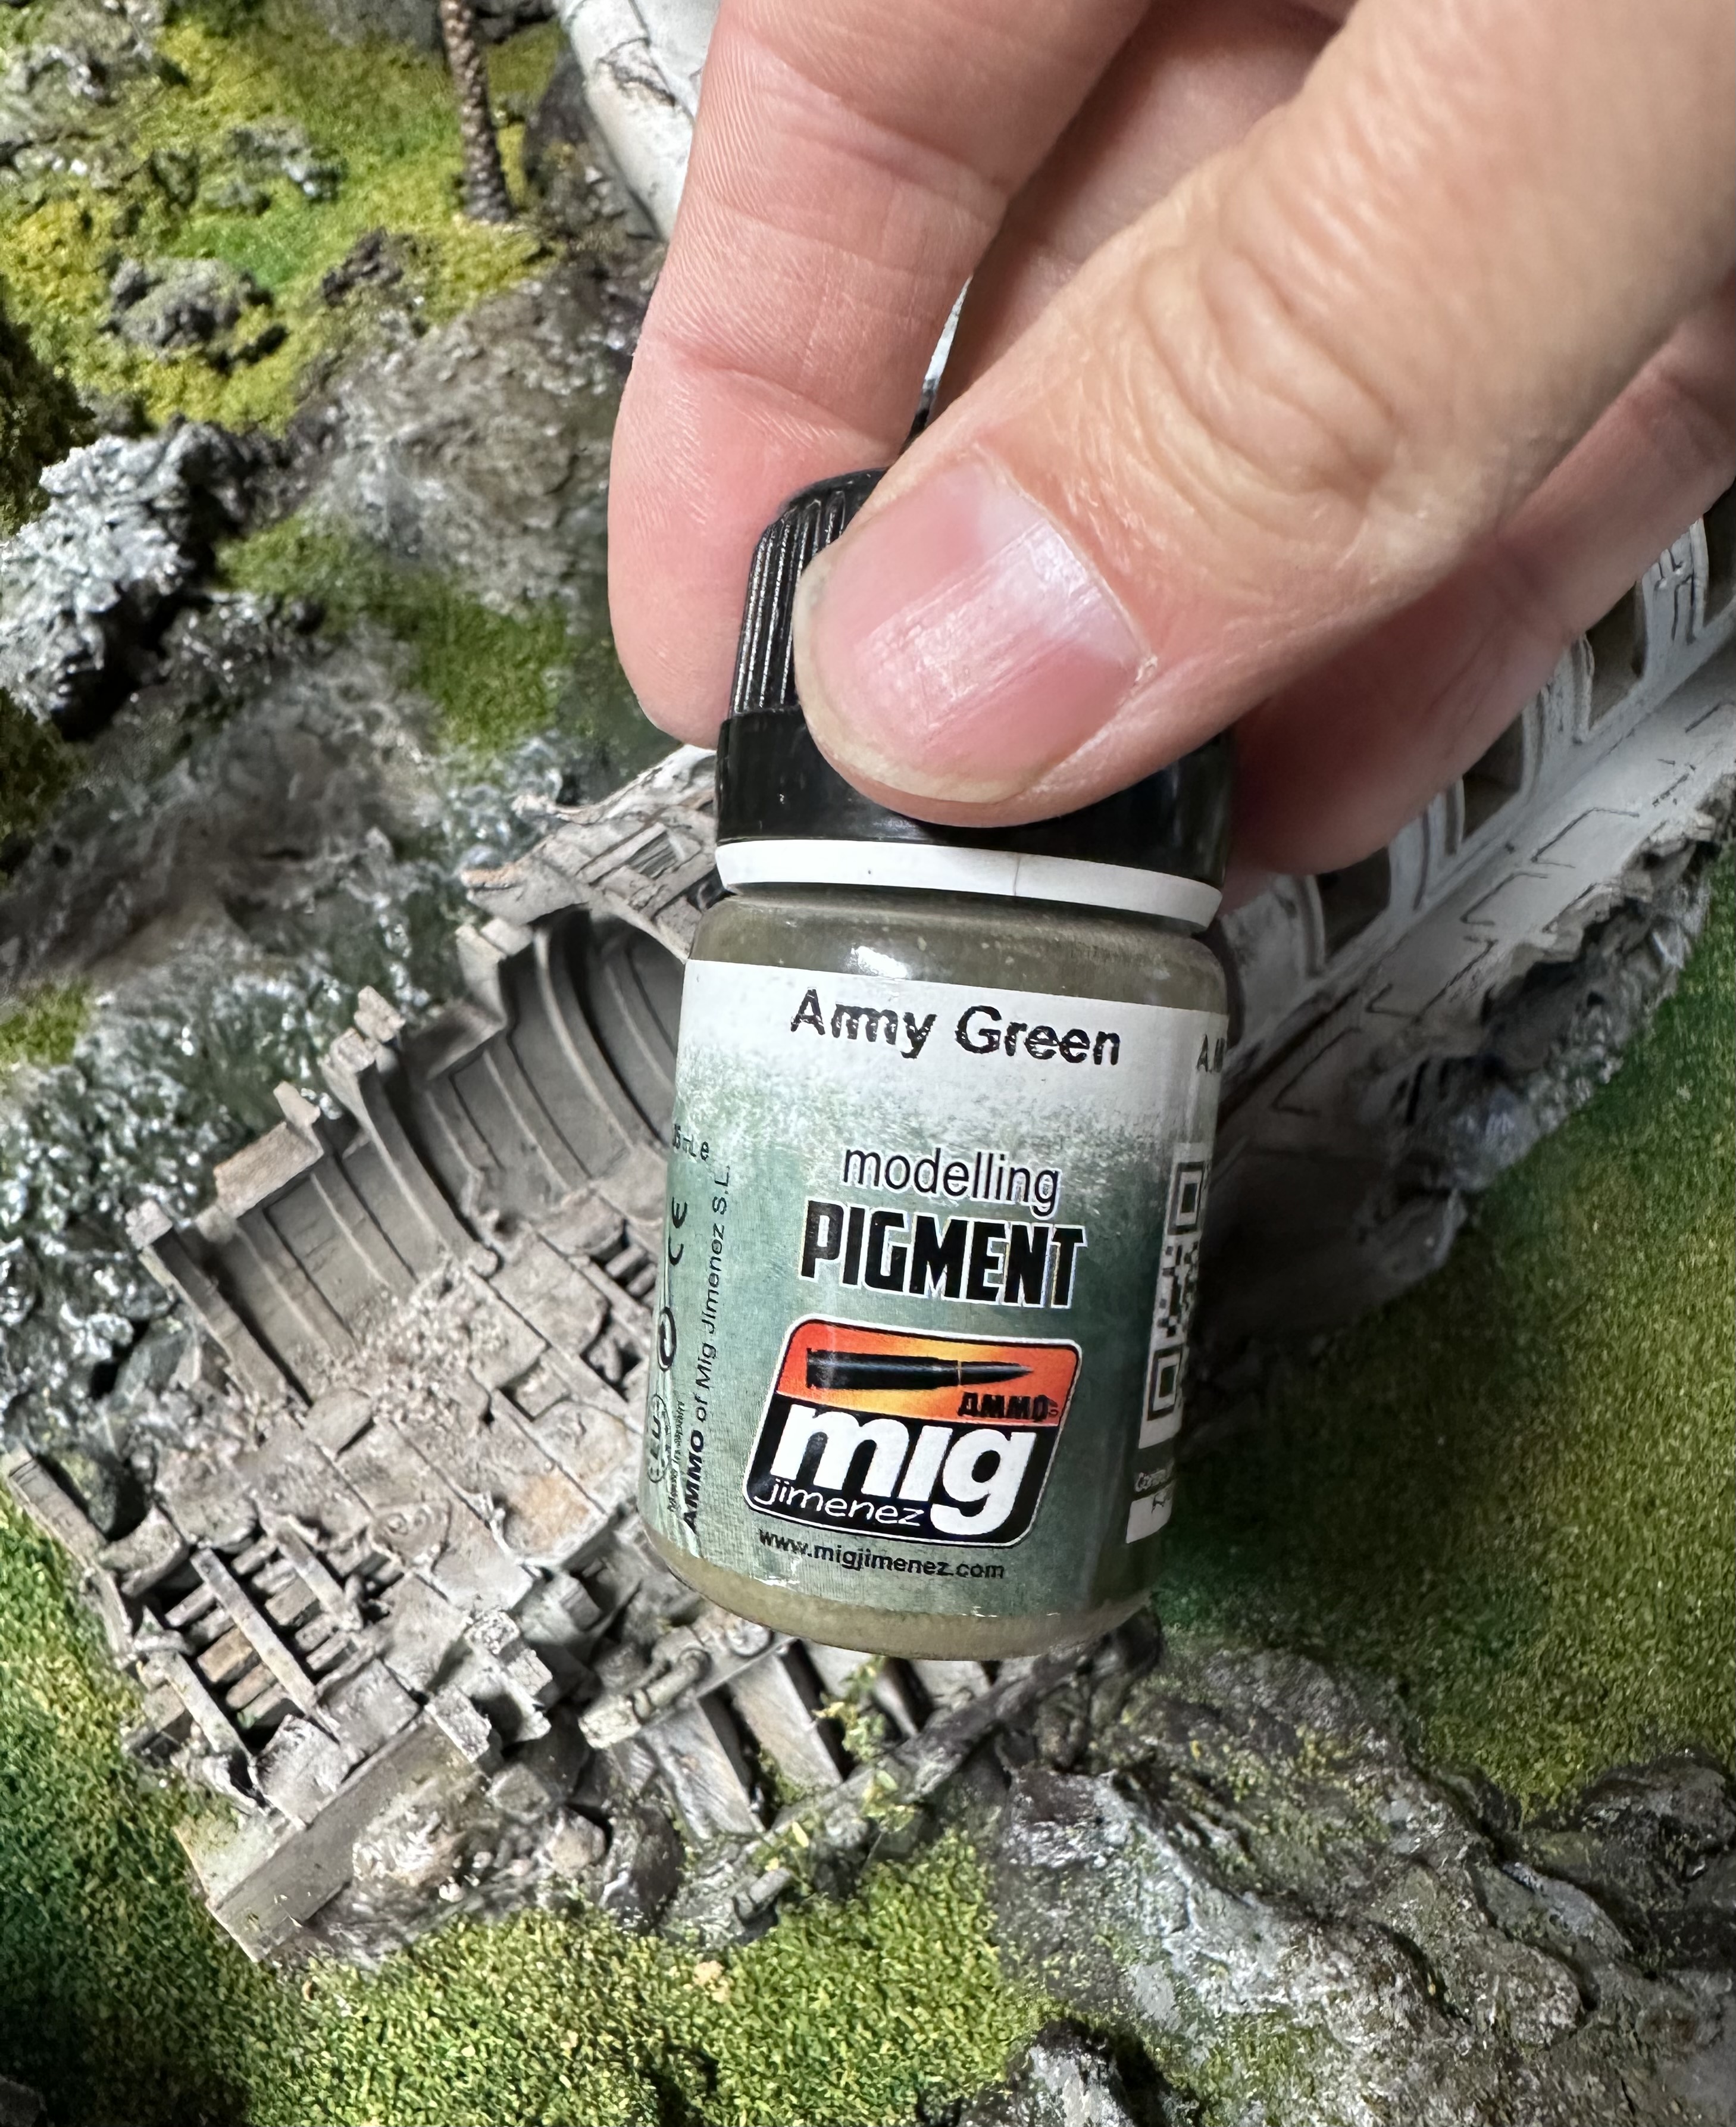
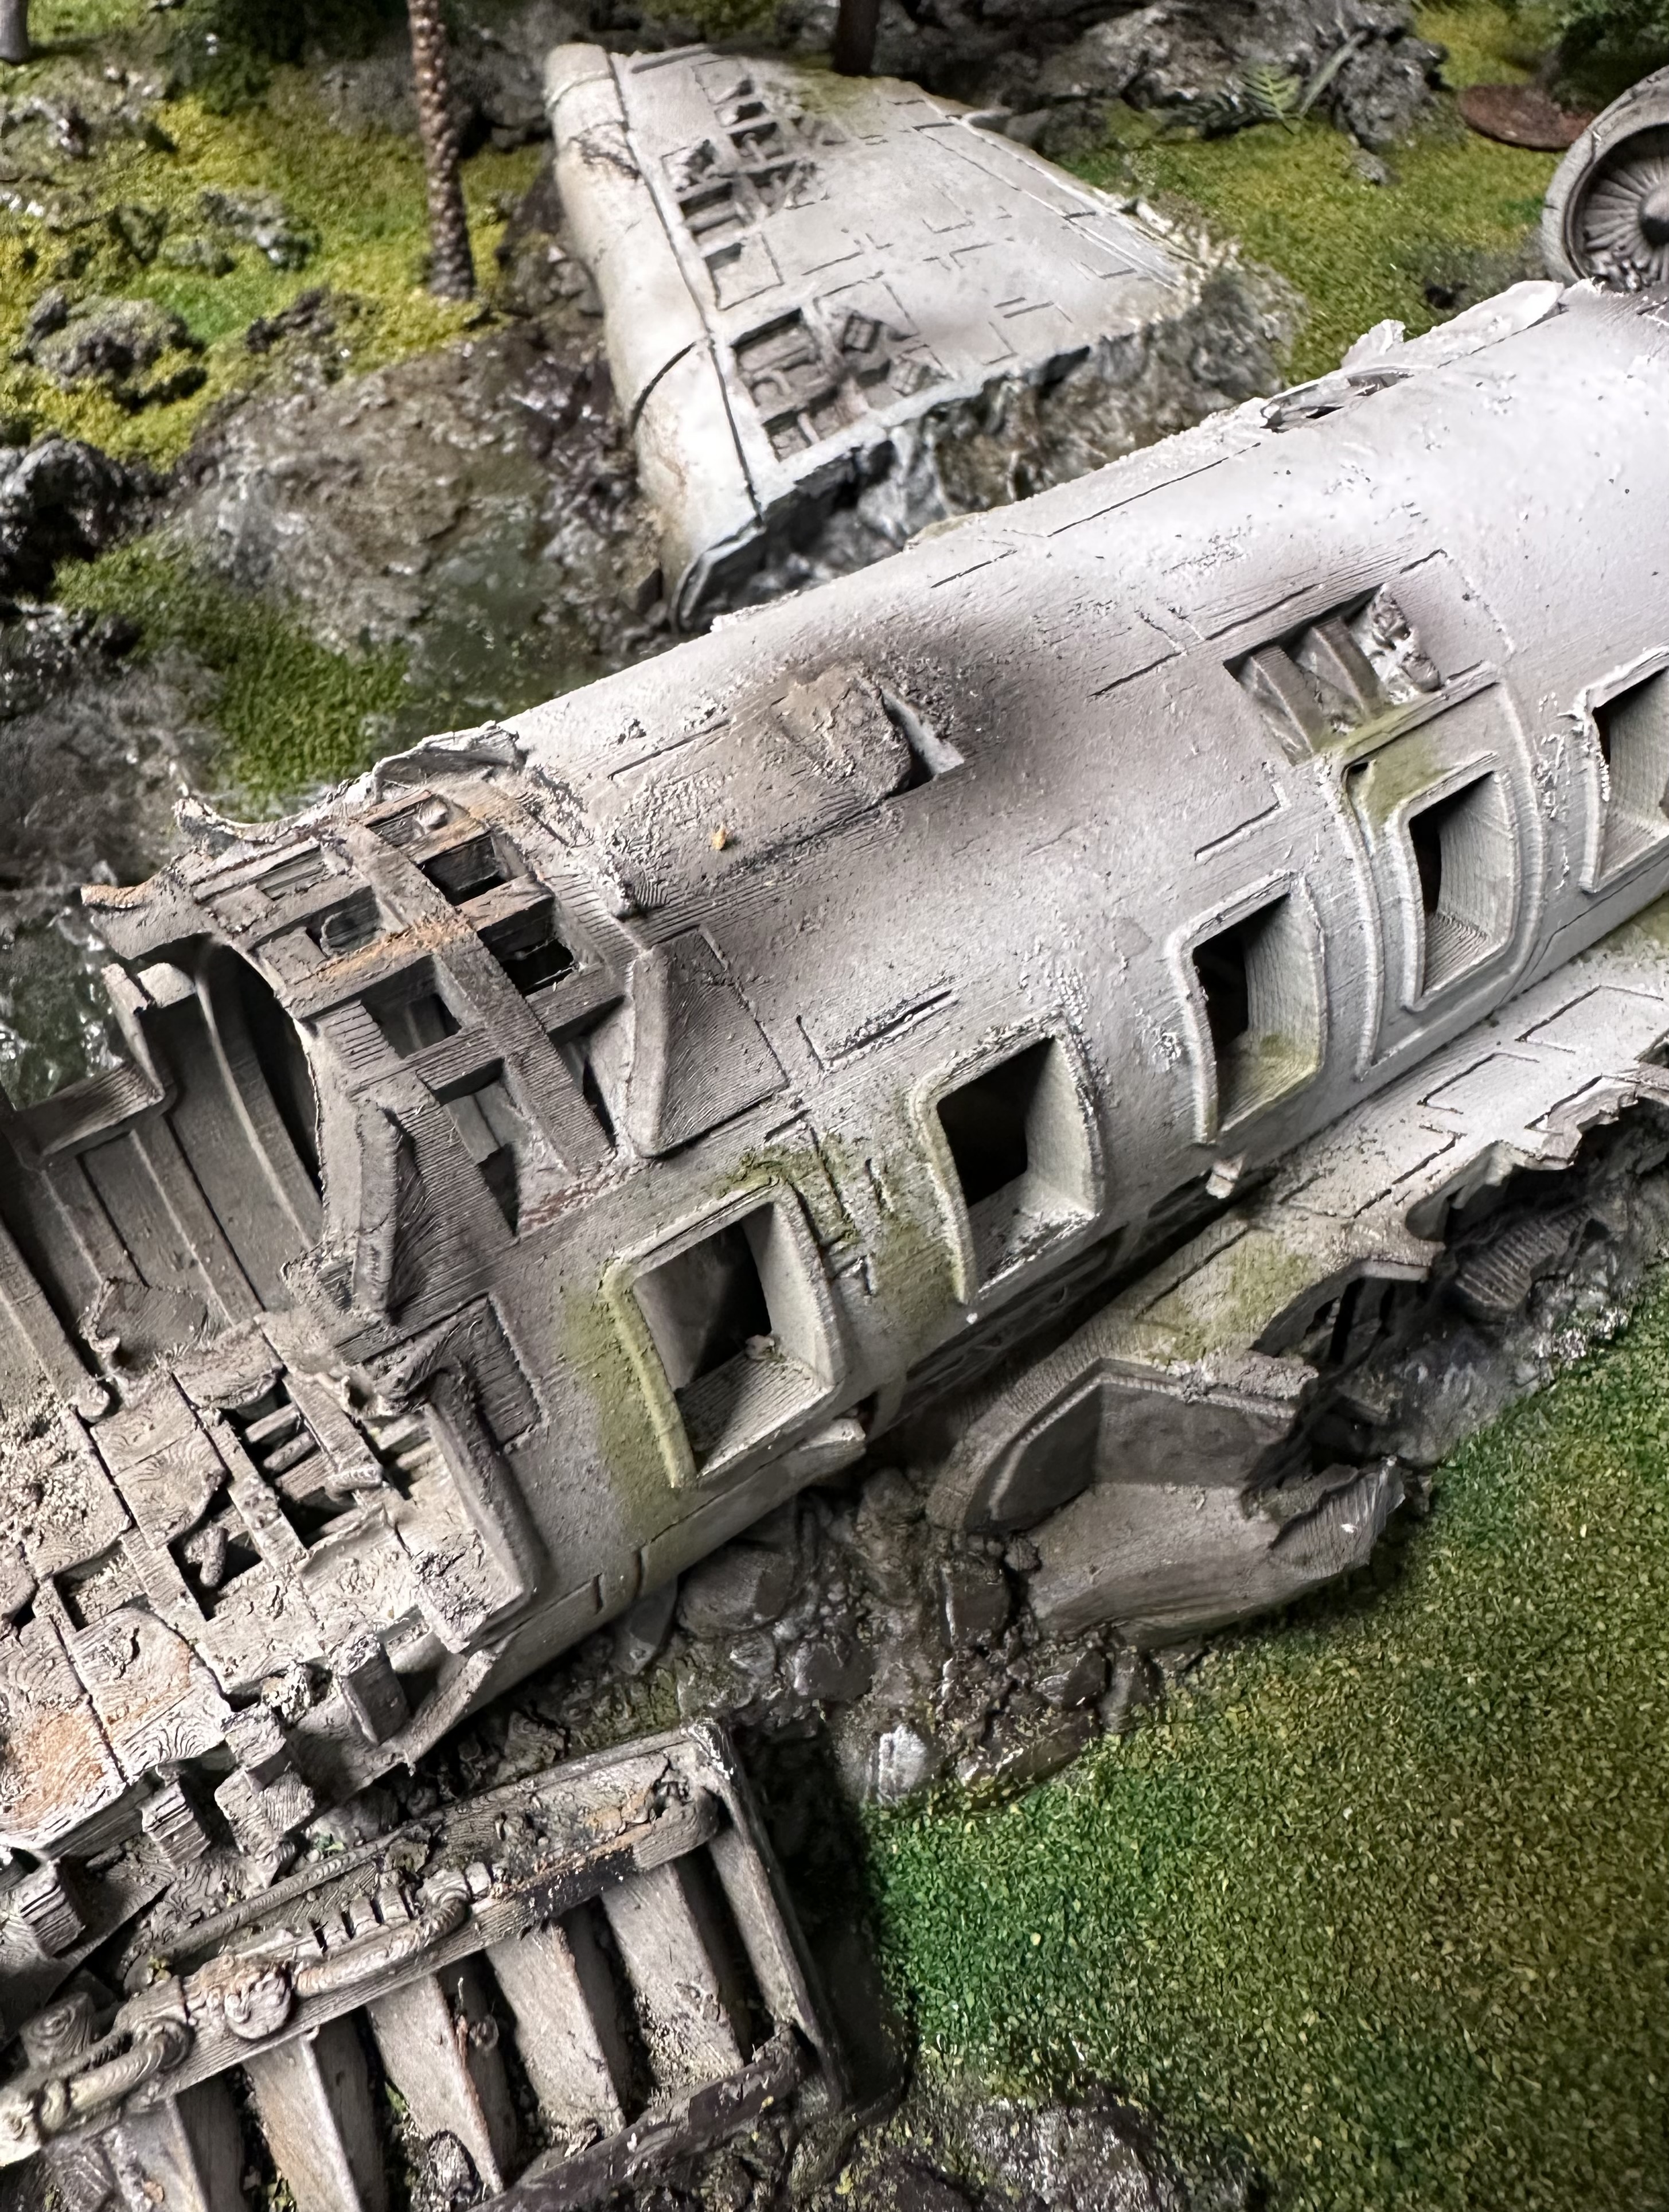
Weathering the plane
First pass on weathering the plane. I intend to go back as final steps to add some pigment powders and perhaps some overgrown grass. But first, some colour tones on with an airbrush.
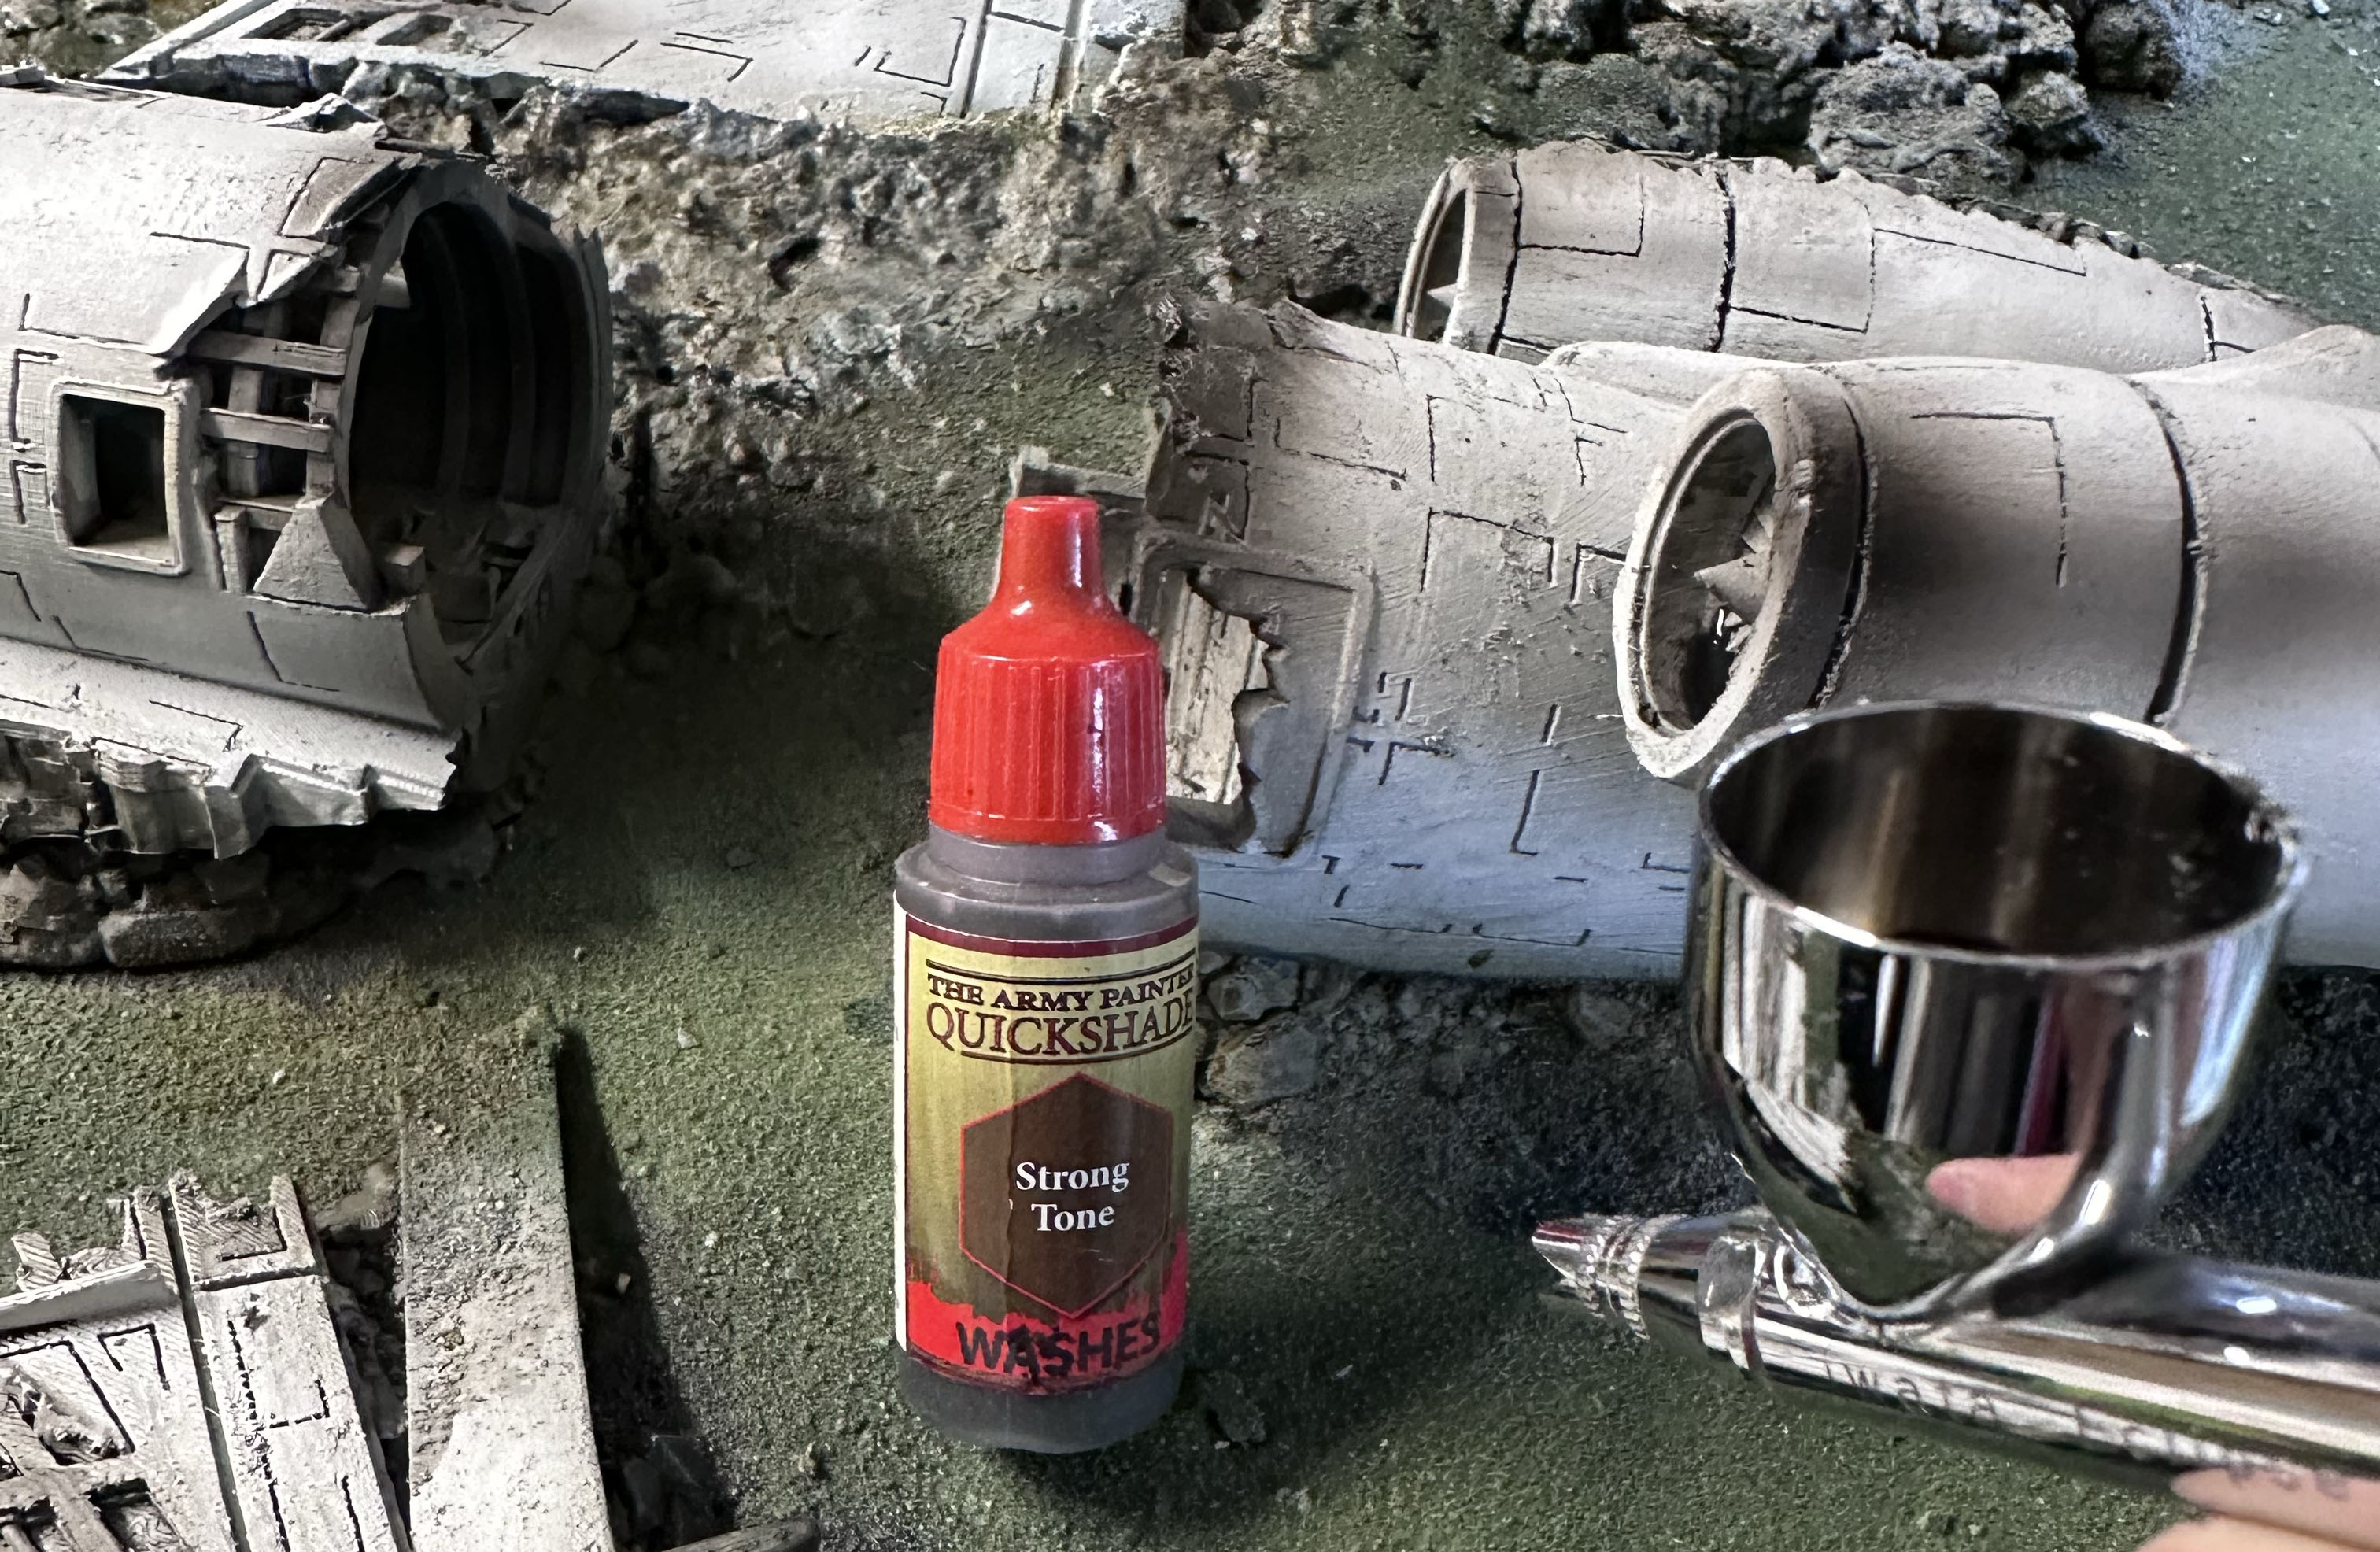
To give the resemblance of the engine have been on fire, I airbrushed on some Vallejo black shade wash.
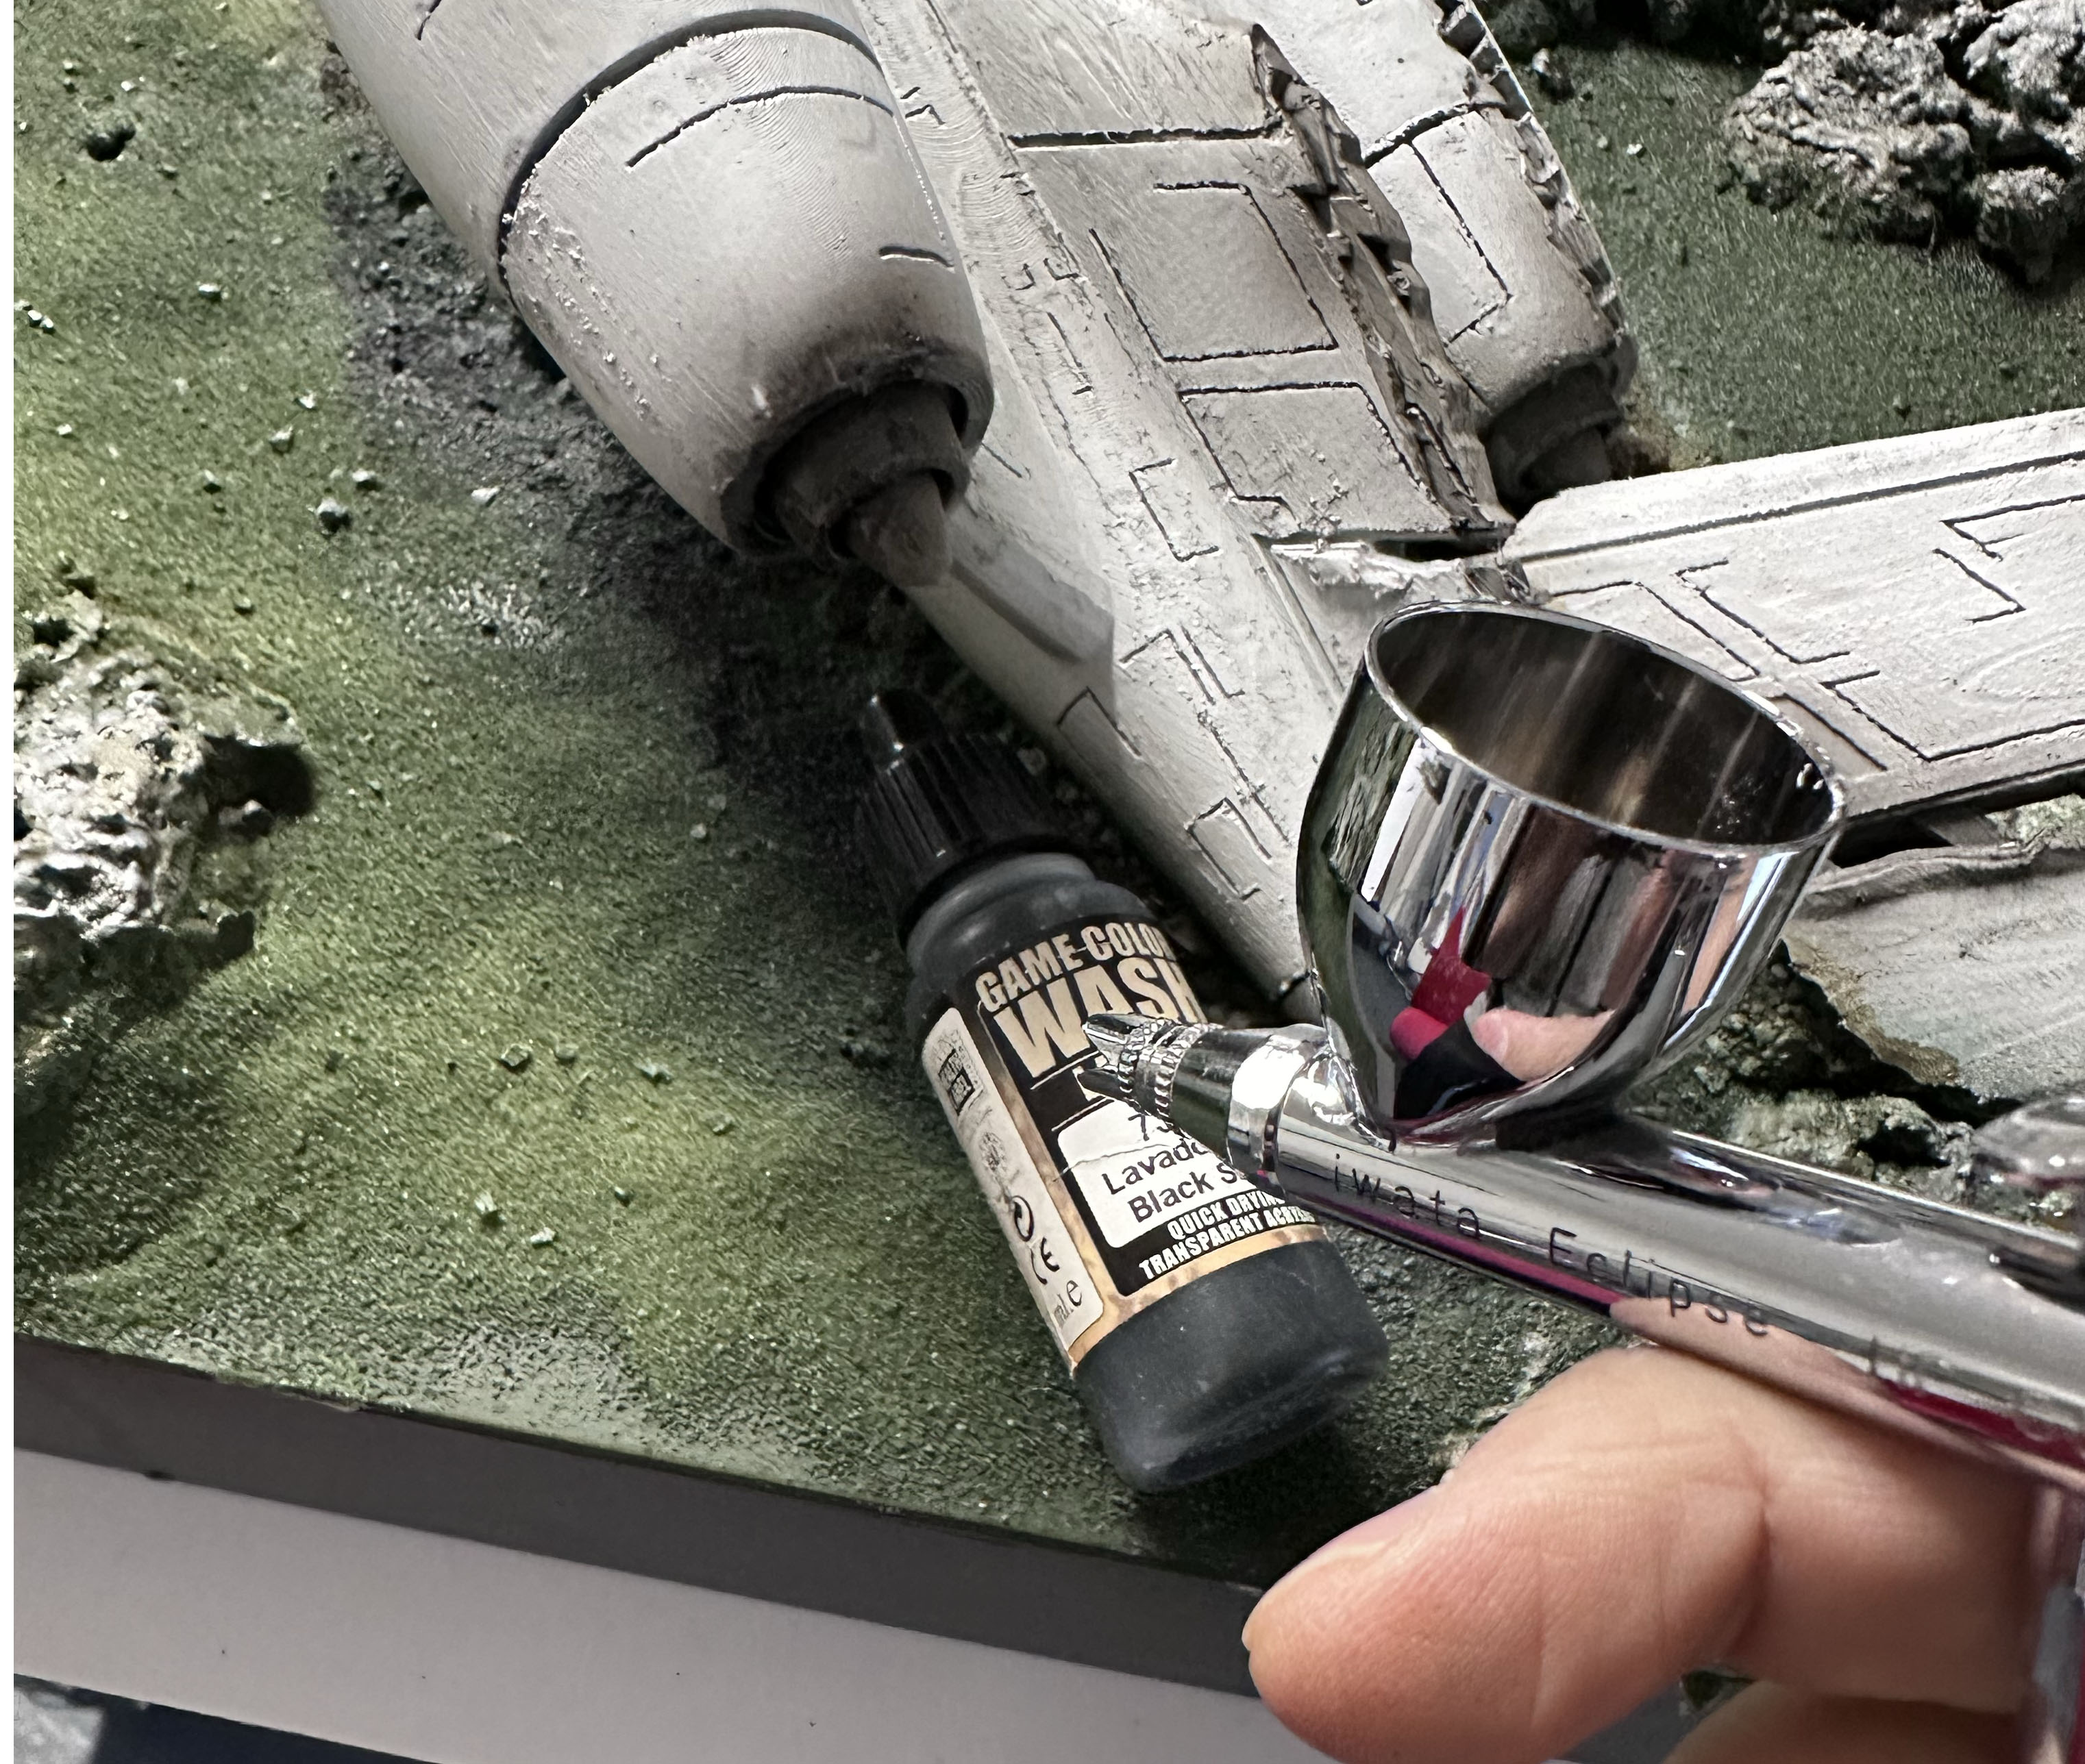 Black shade wash through an airbrush
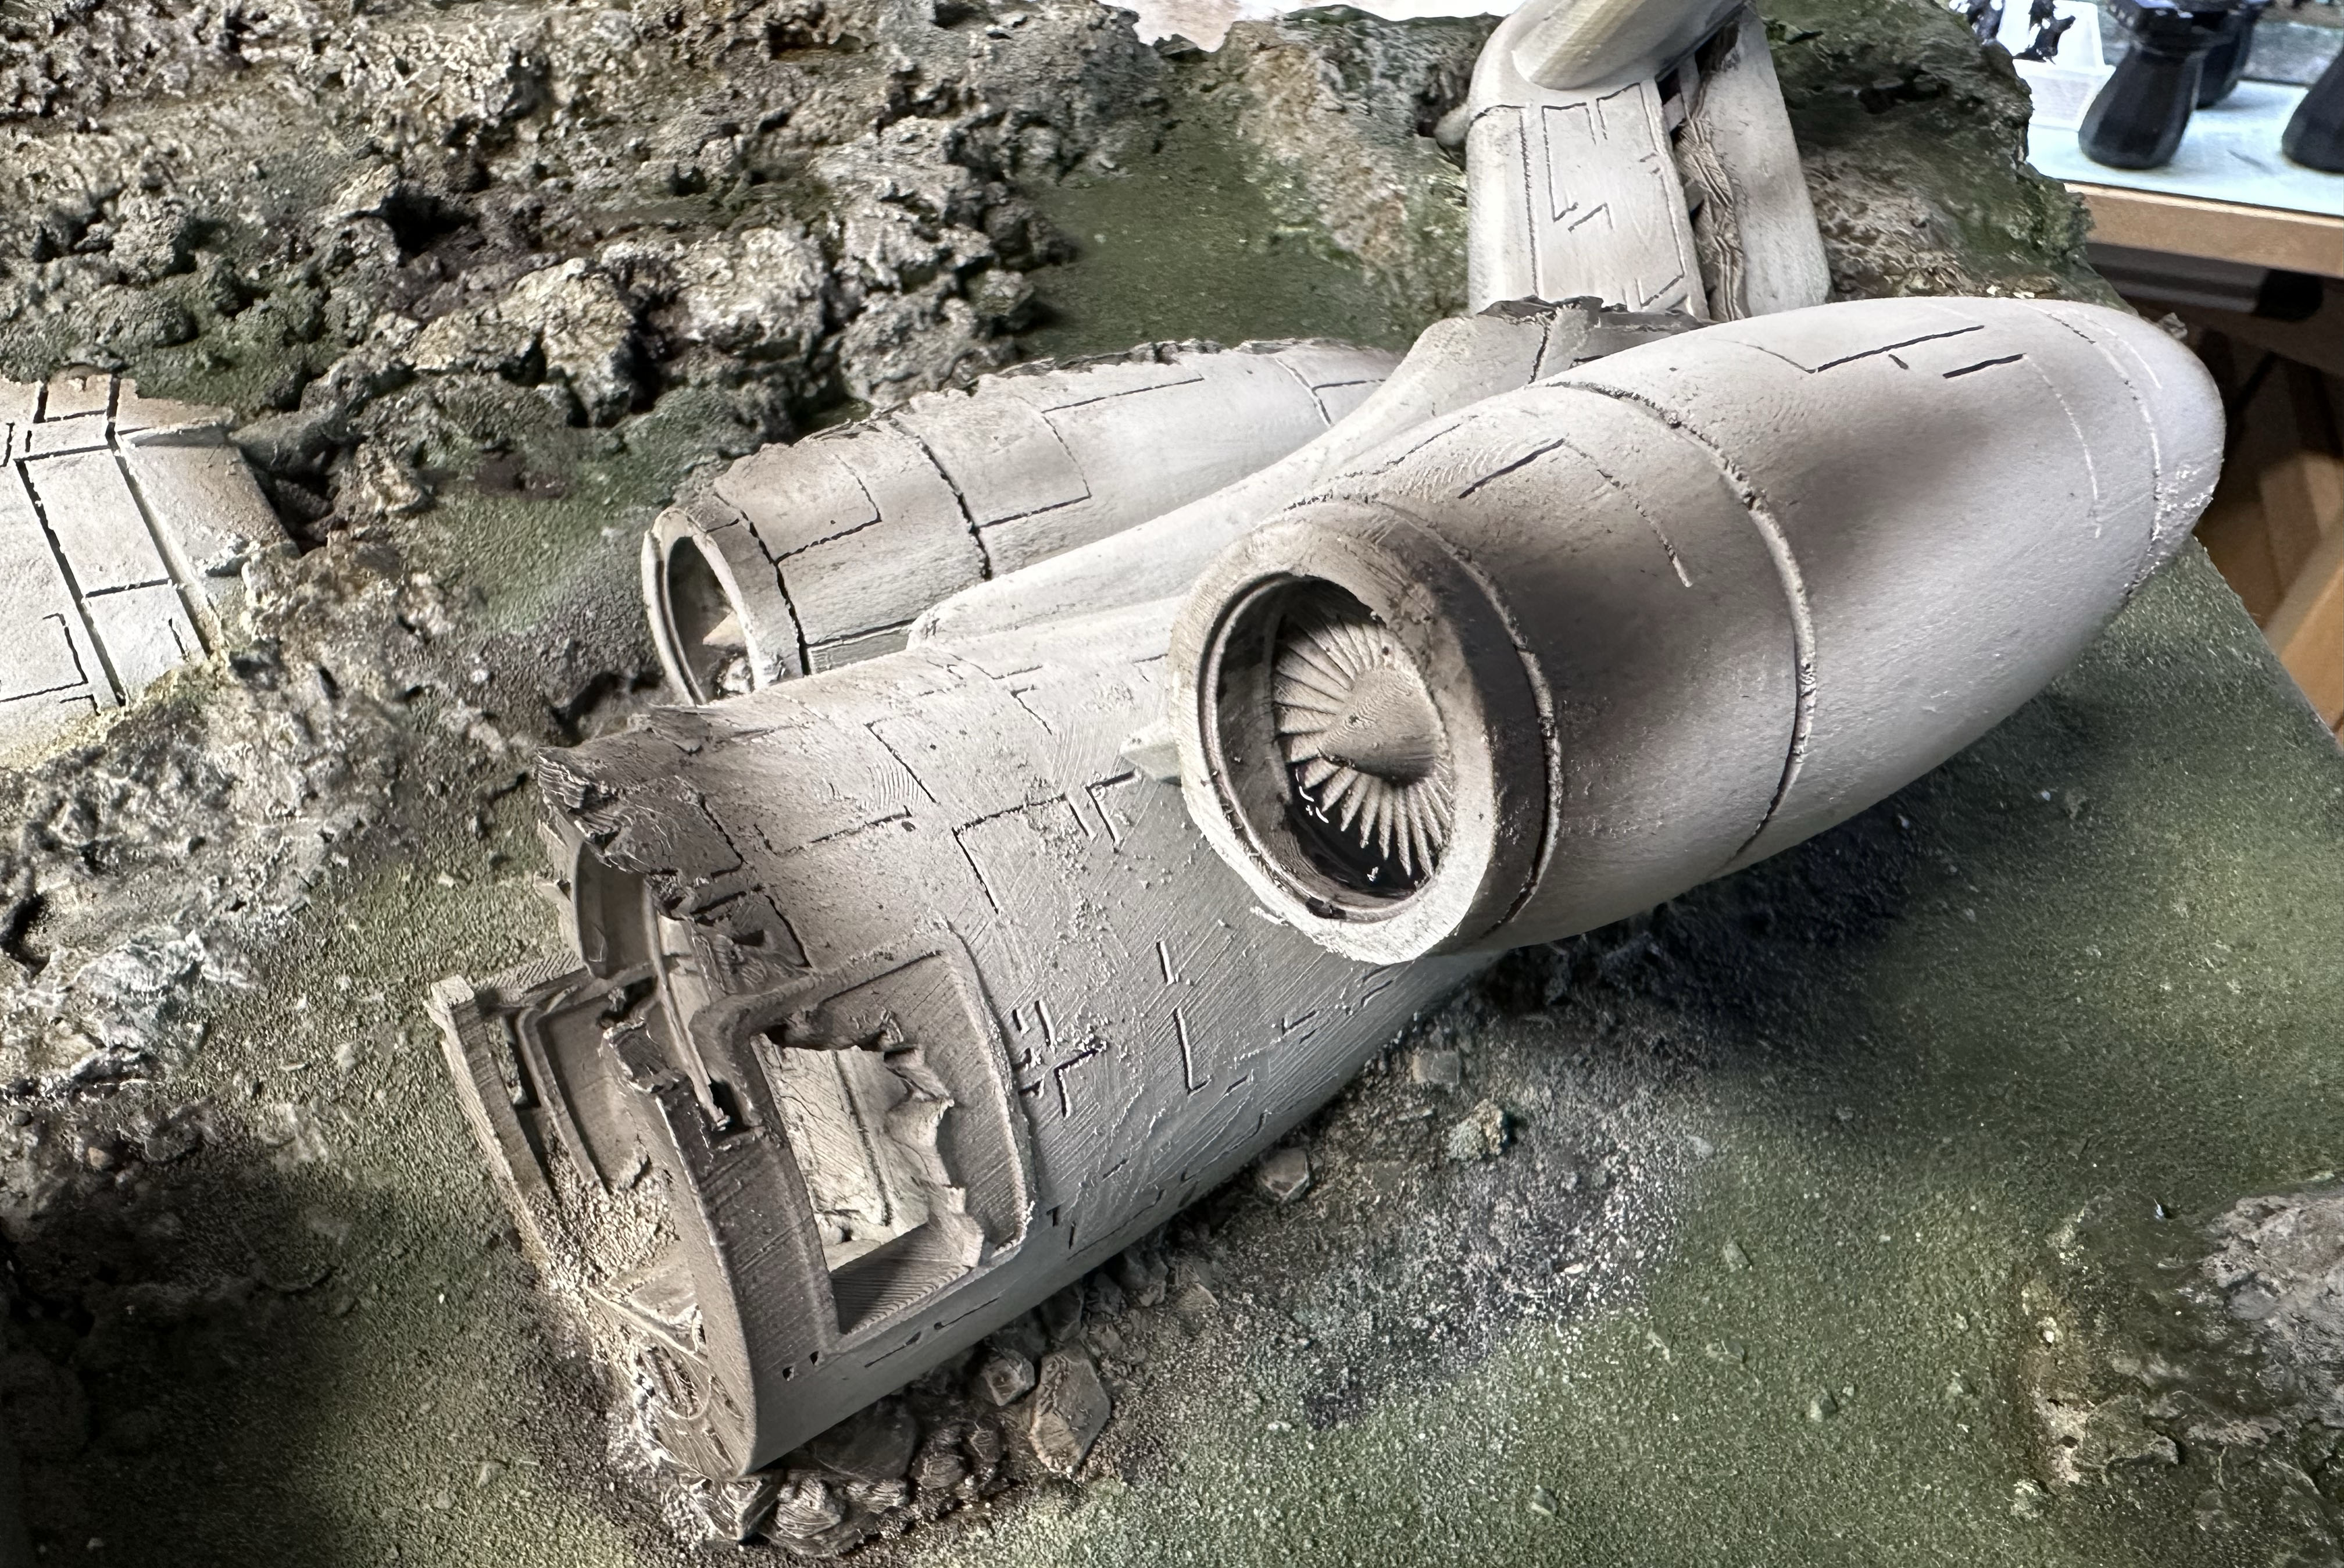
And Army Painter strong tone to weather the interiors and adding some colorisation here and there.
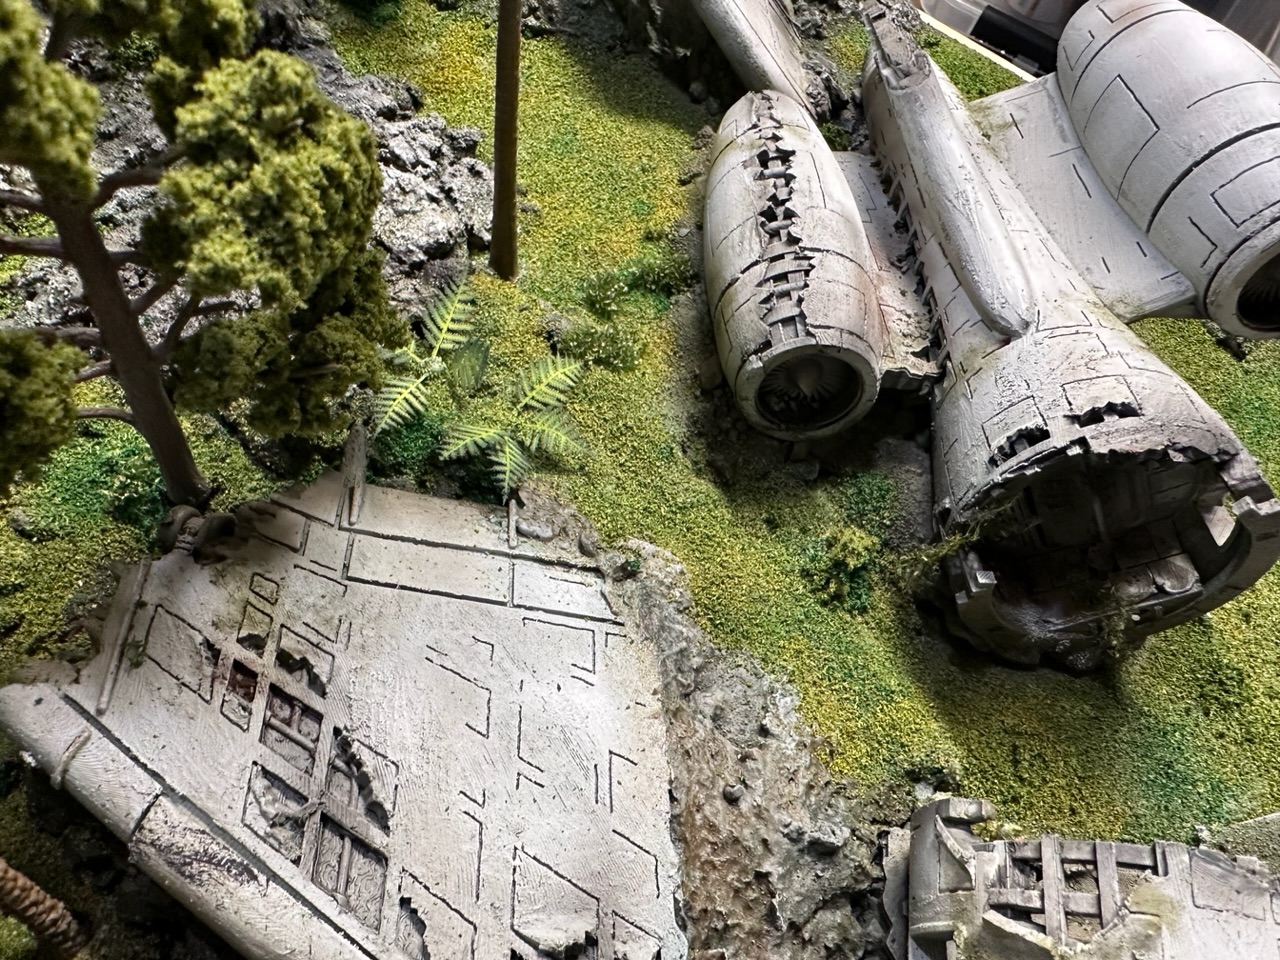
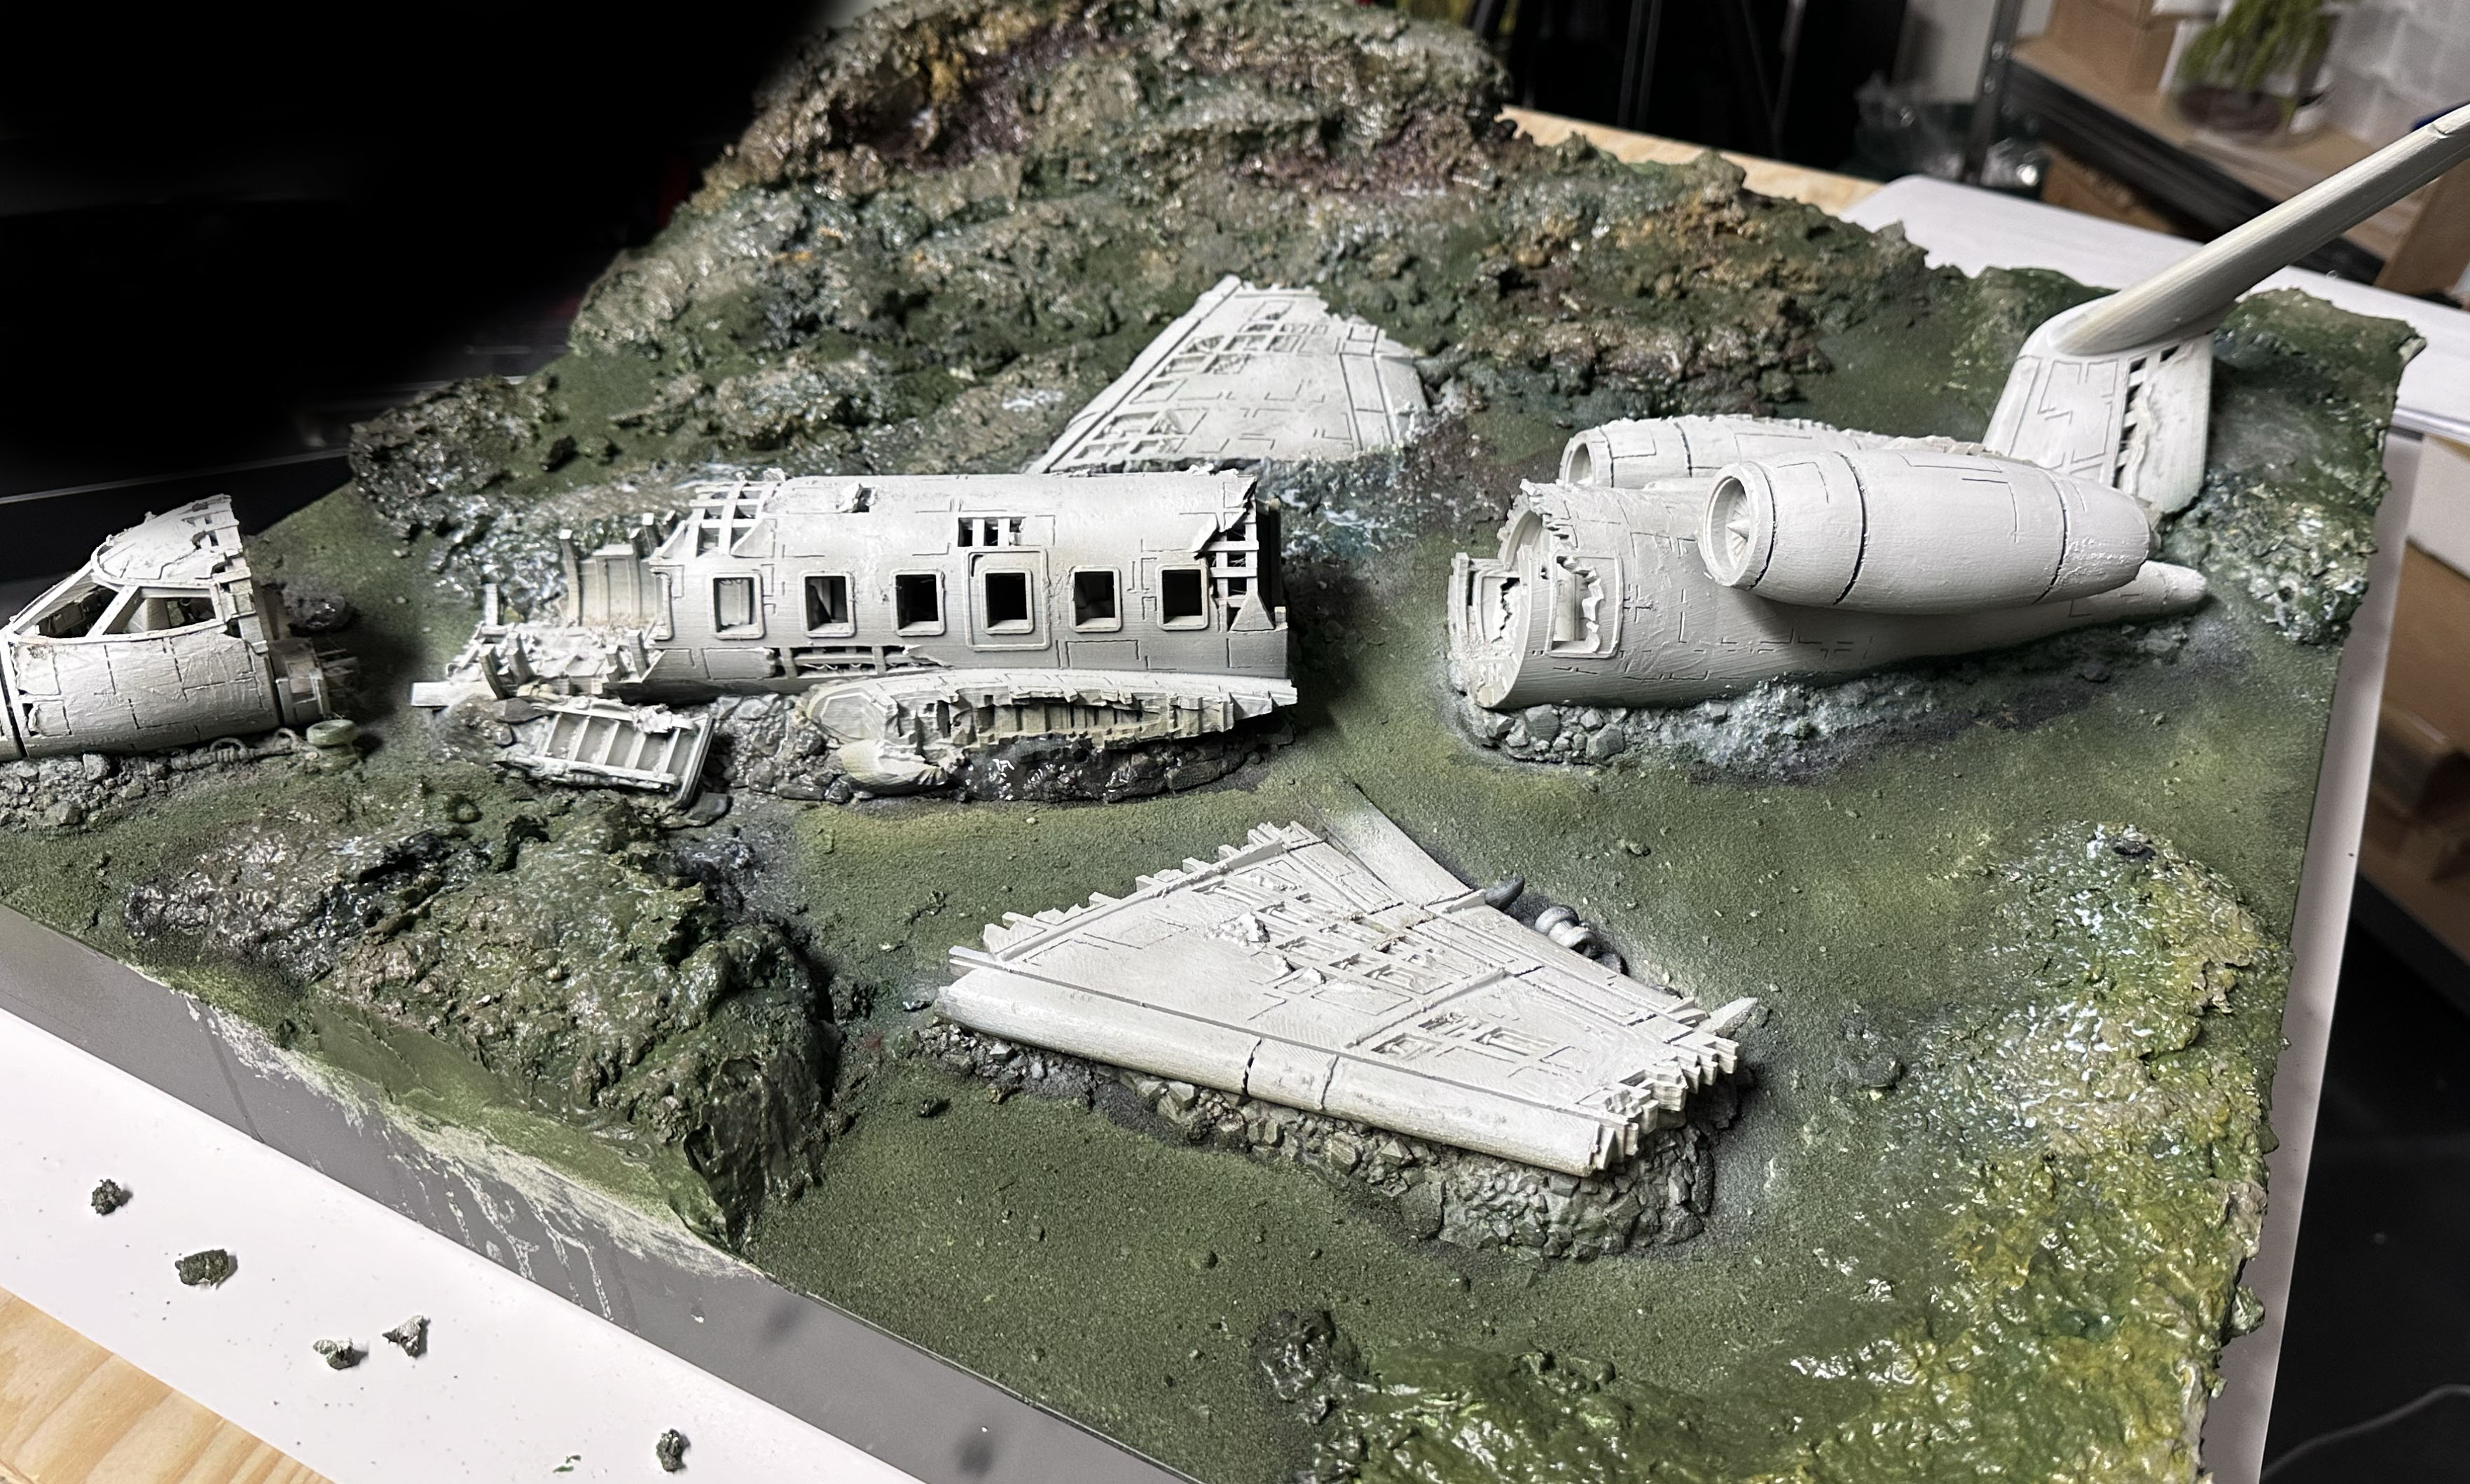
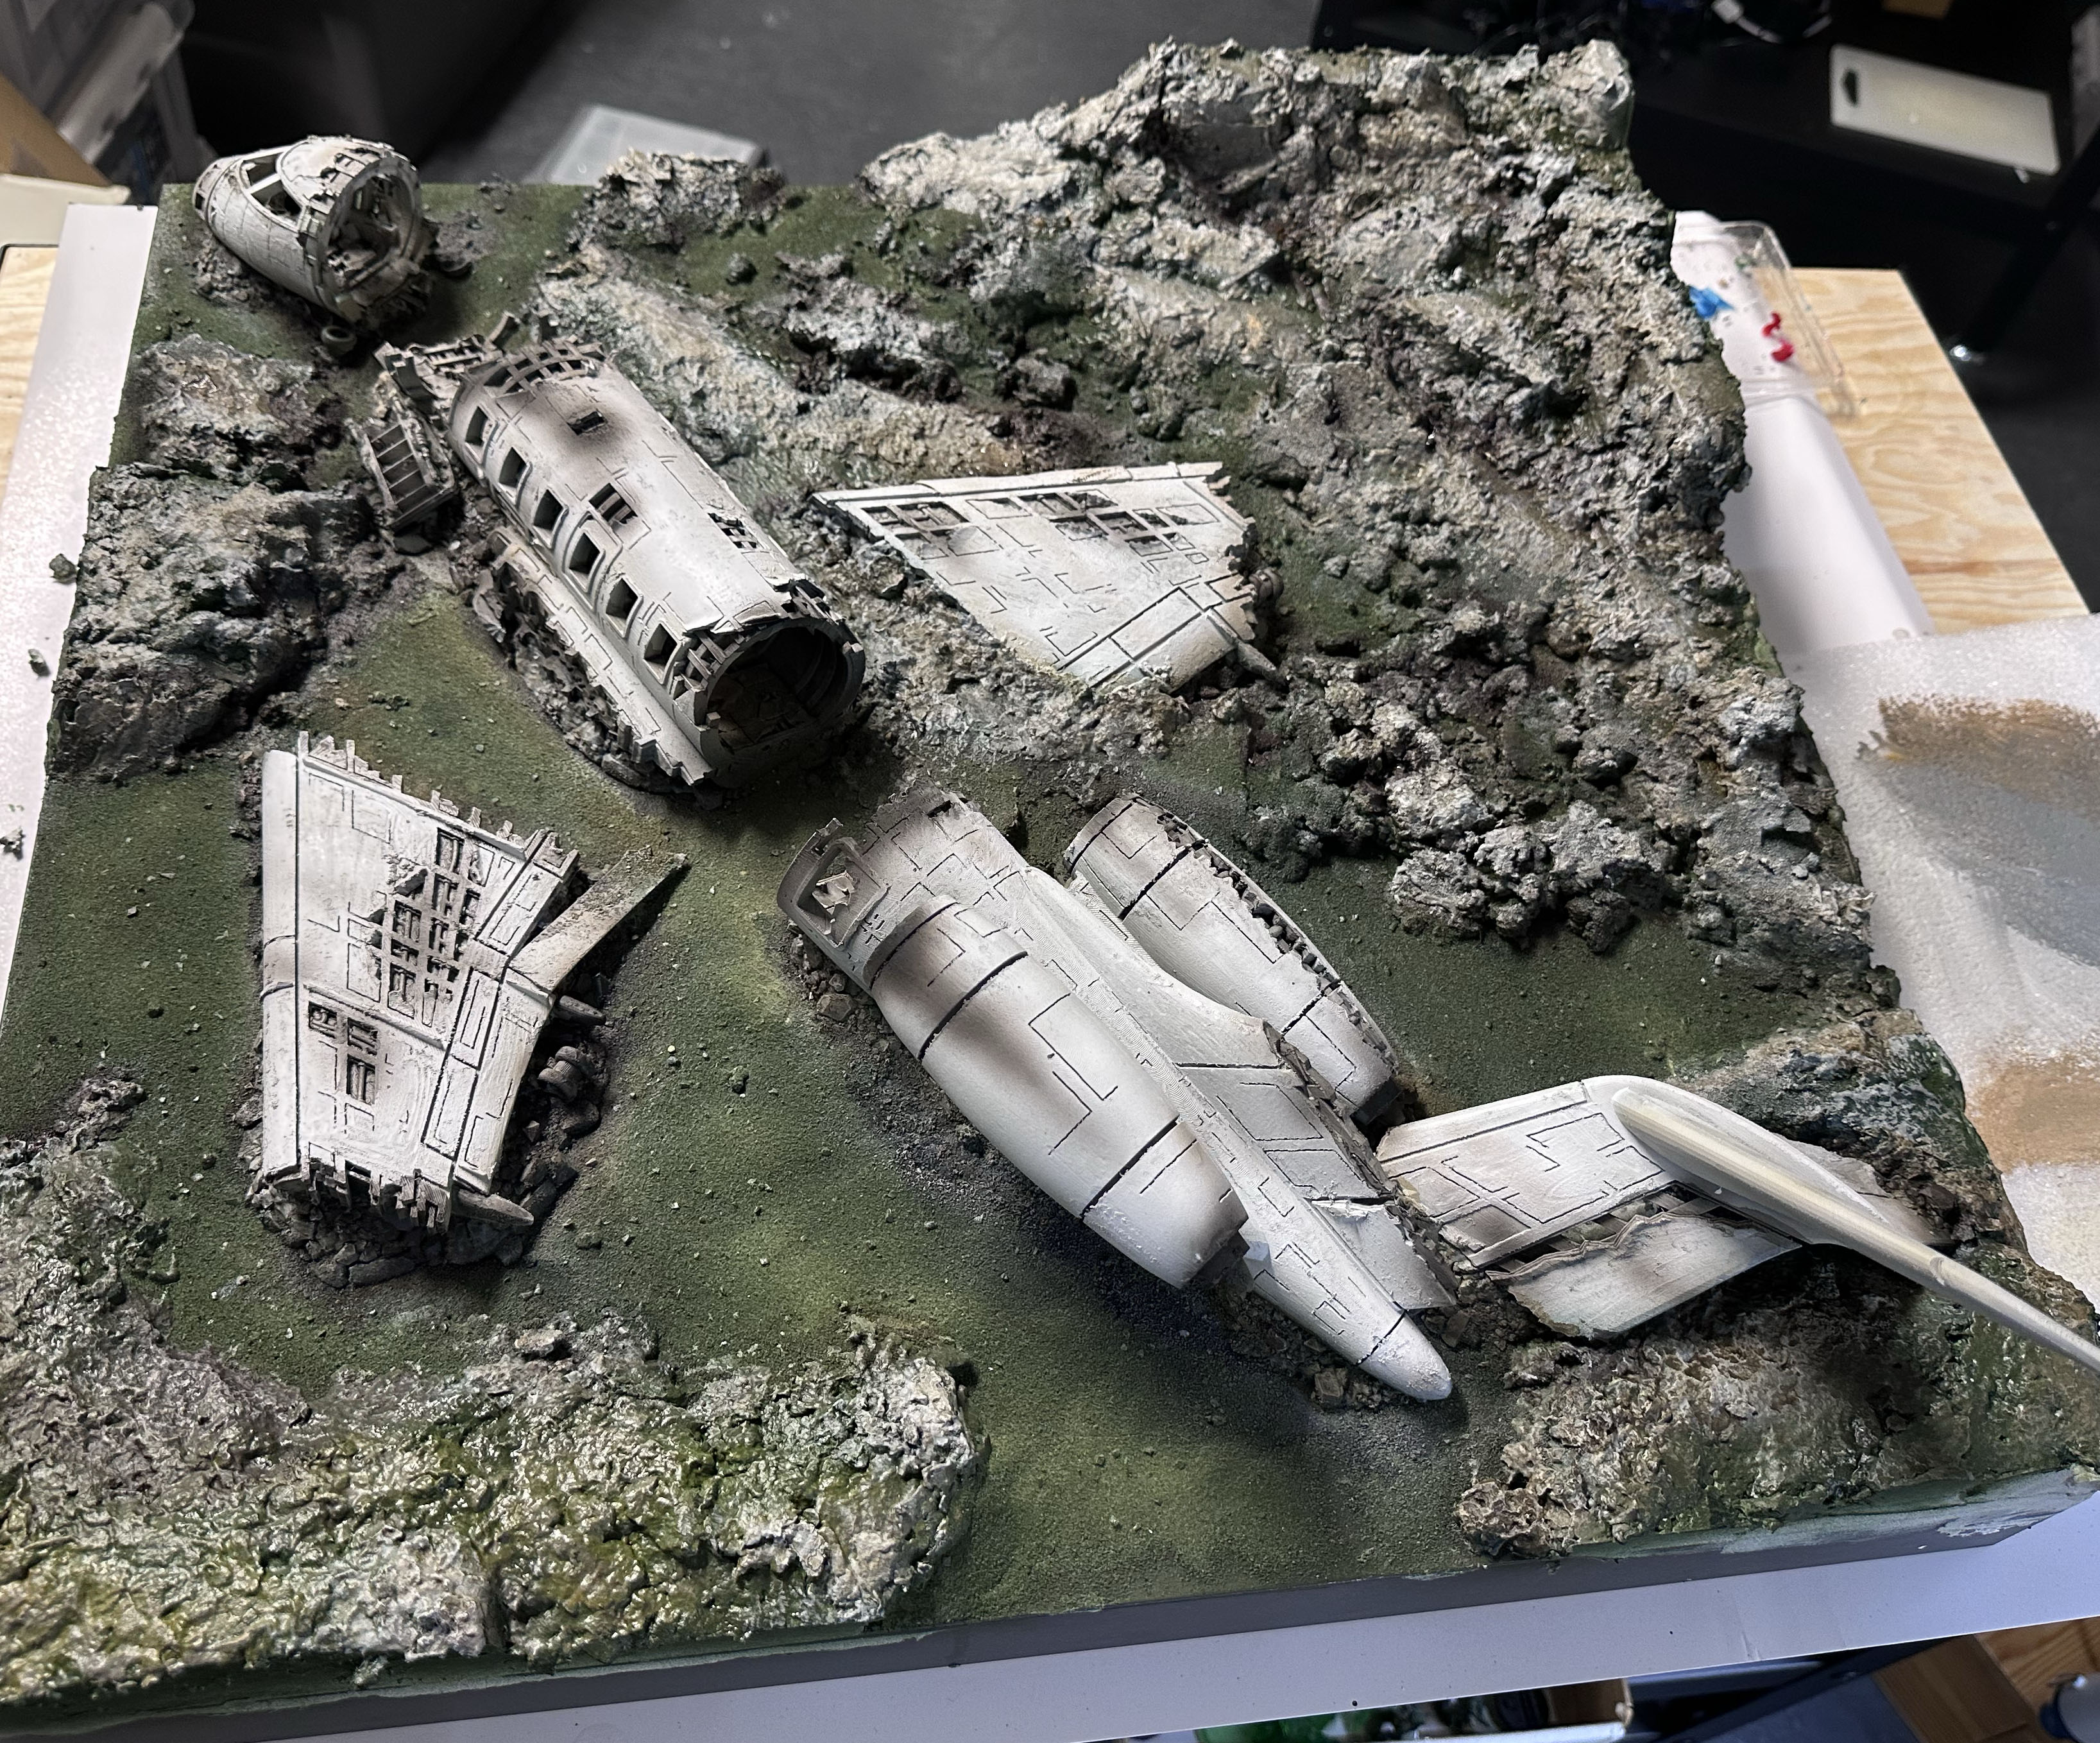
Here’s the whole build after the drybrush, washes and weathering stages. Next up is the ground cover.
Ground cover
For the ground cover I used the classic three Javis colour tones and some heavier clumps. I sealed everything twice.
Quite happy how it looks!
Next I’m going to do a quick rattle can varnish for added protection and start planning the trees and other bits that will go on top.
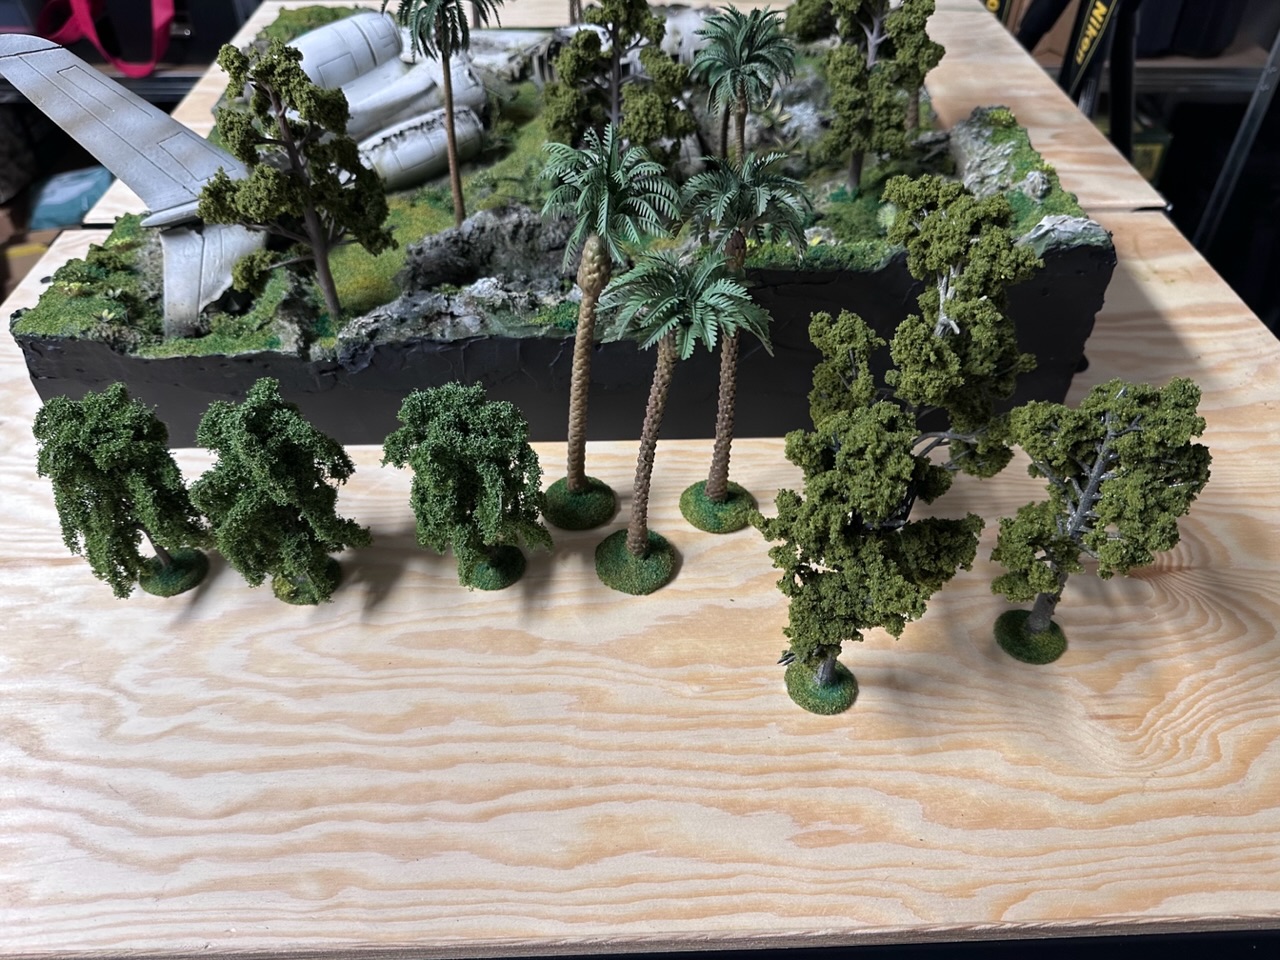
Which trees to use?
I would really appreciate the community’s opinion on which combination of trees I should use for the board. The goal is to create a feel of somewhat dense jungle, but keeping it playable.
The plan is to repurpose some of my existing trees, and I did order more palm trees.
Below are some photos I took earlier, also places some aquarium plants in situ, I do intend to use them as well.
Which ones I should use? Mix all or just one or two types? Get something else altogether?
Tree 1: palm trees. Many available and ordered more.
Tree 2: Willows. These are old 4Ground trees, no longer available. I have 3 or 4.
Tree 3: Woodland Scenics trees. I’ve plenty of armatures in different sizes and foliage couple of different green tones.
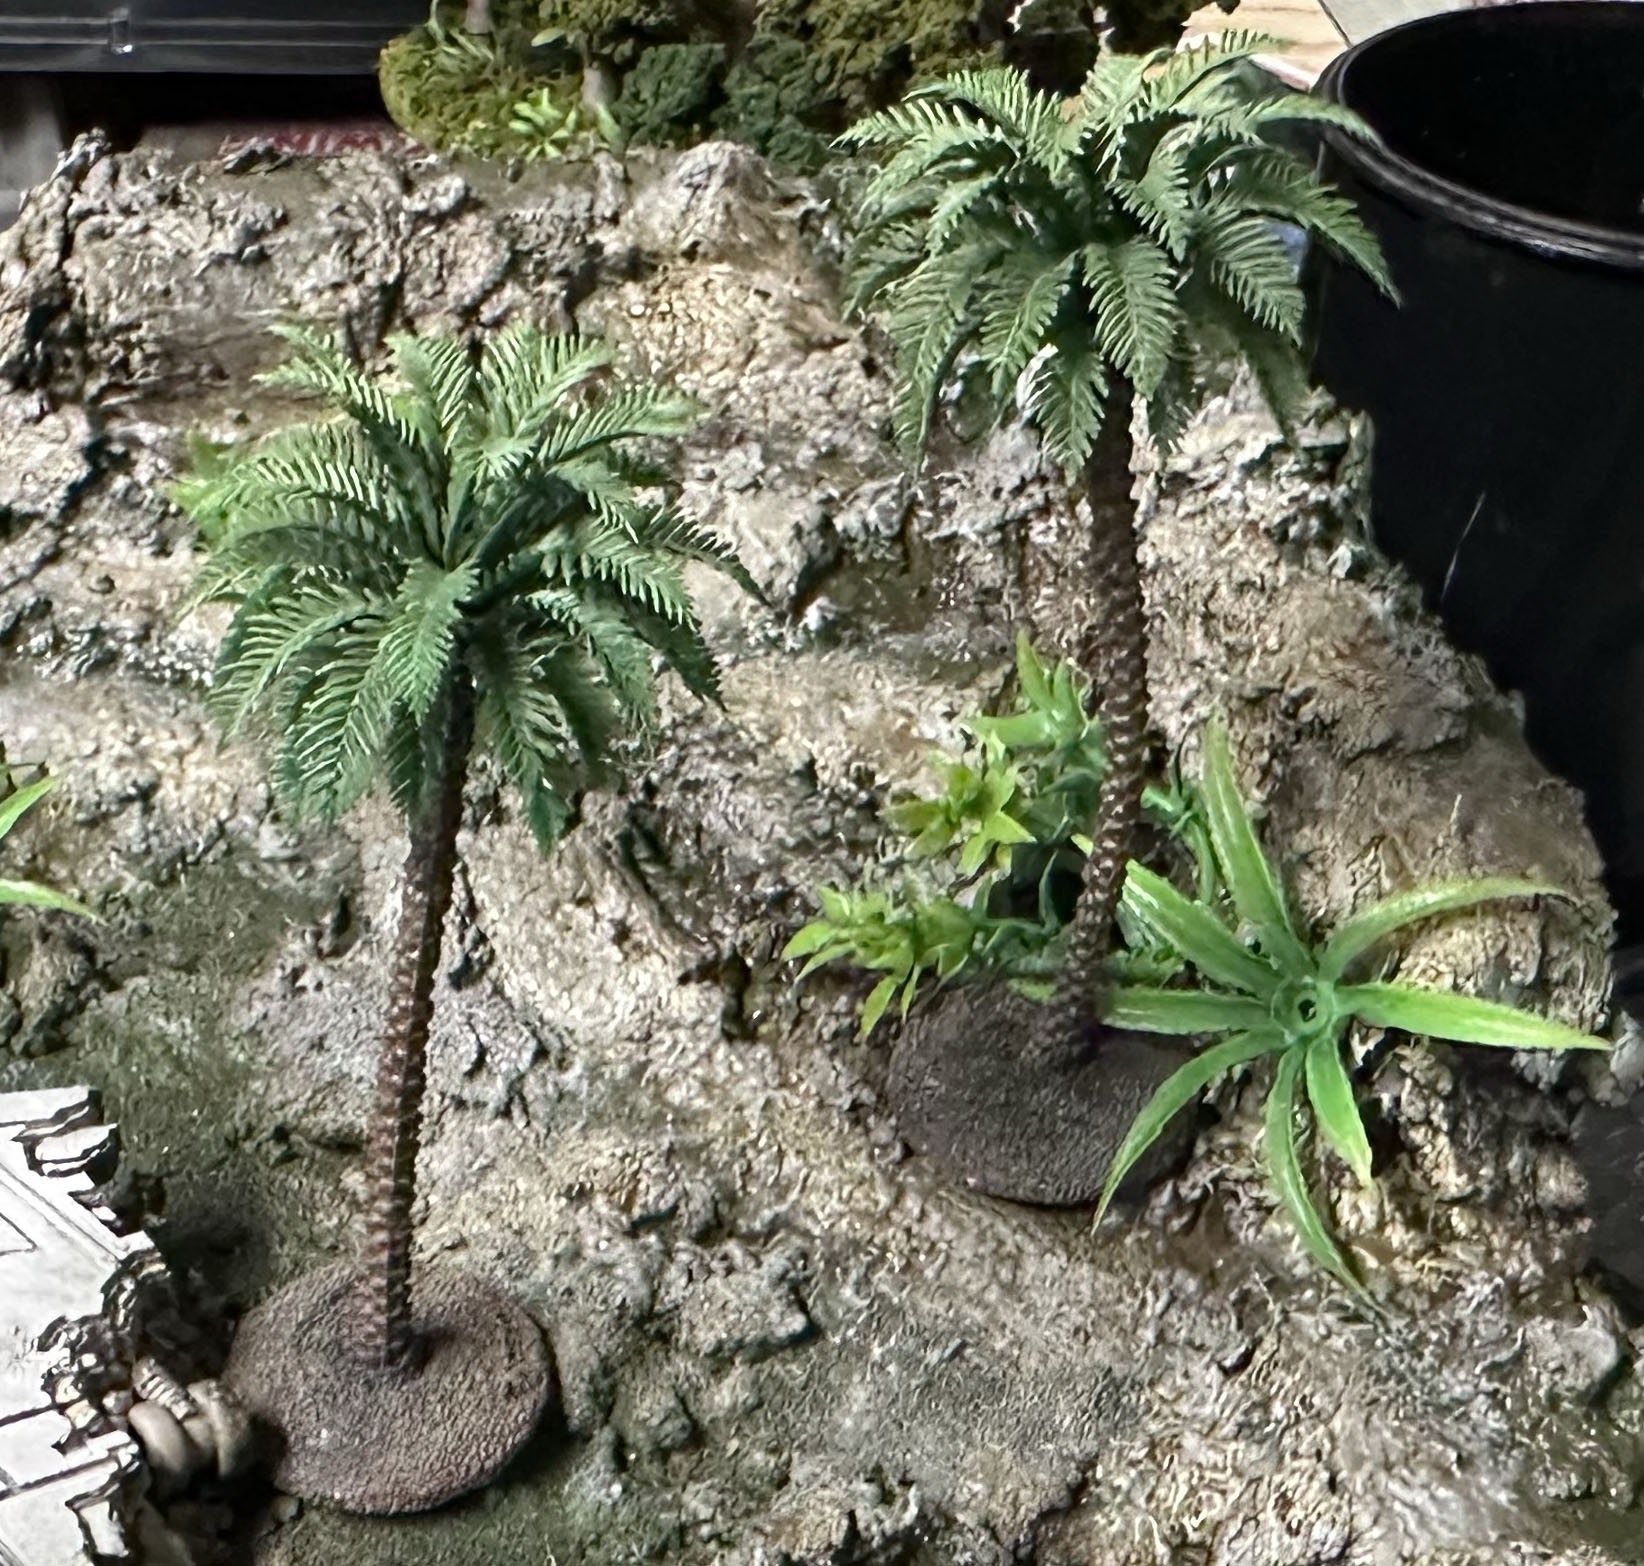 Tree 1 - Palm trees
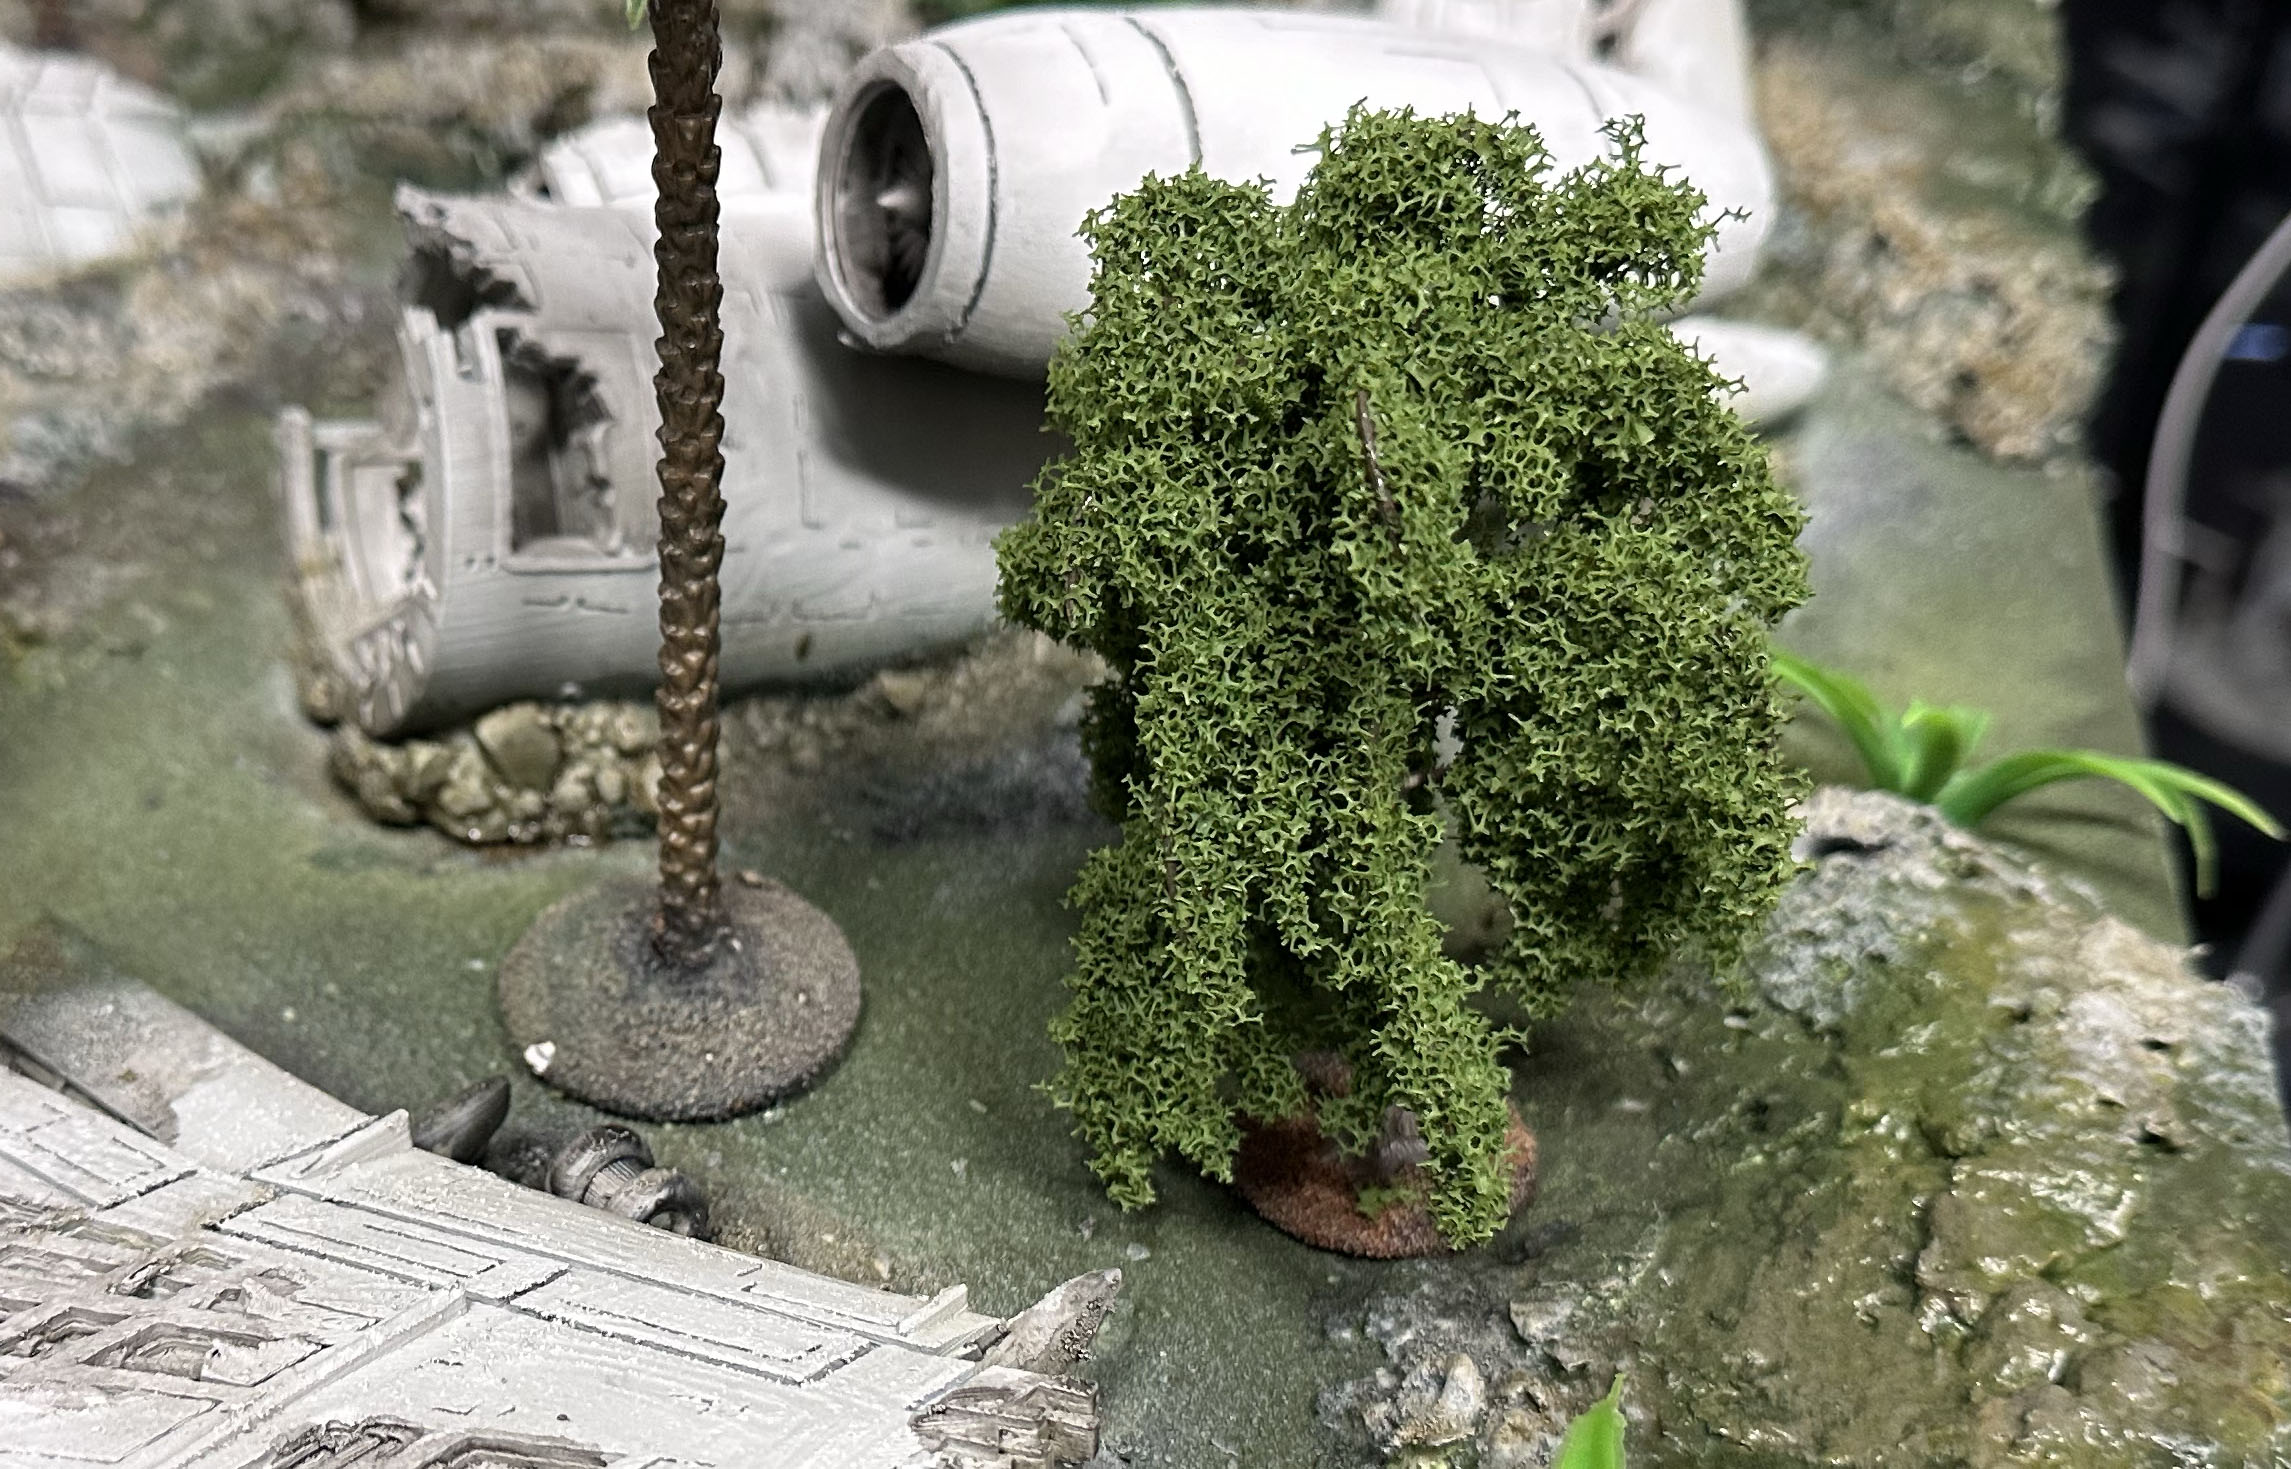 Tree 2 - Willows
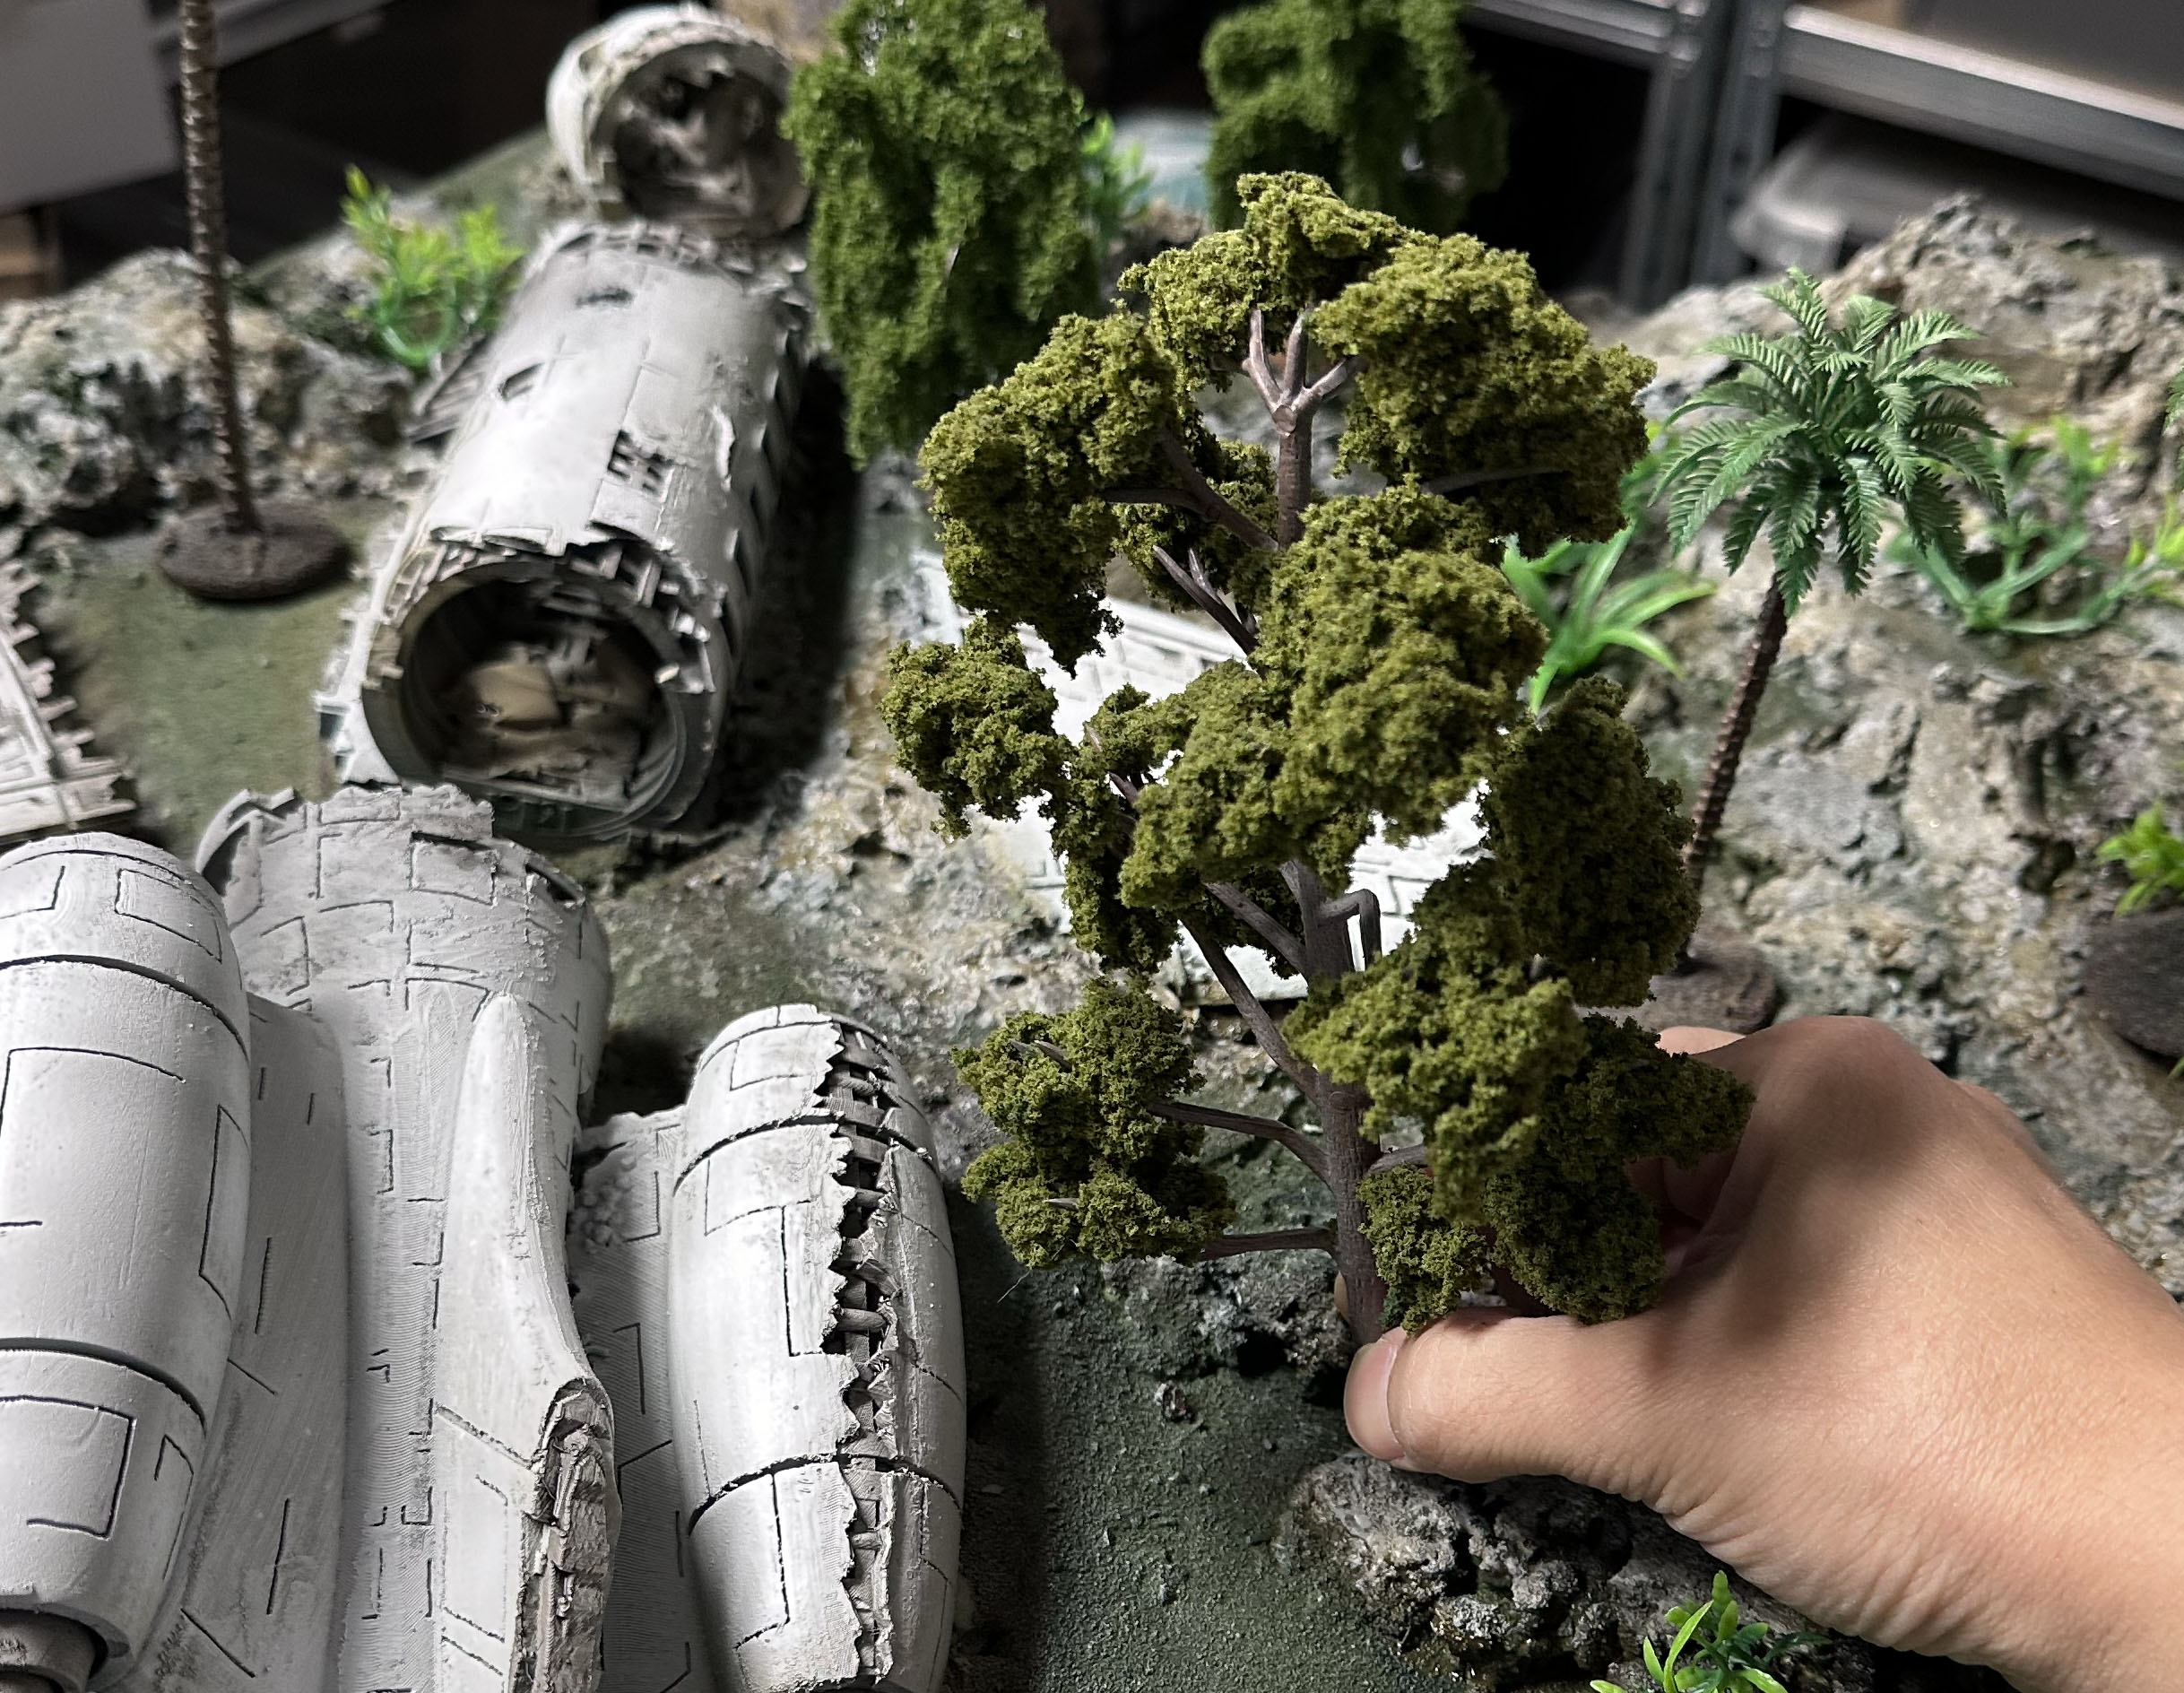 Tree 3 - Woodland scenics


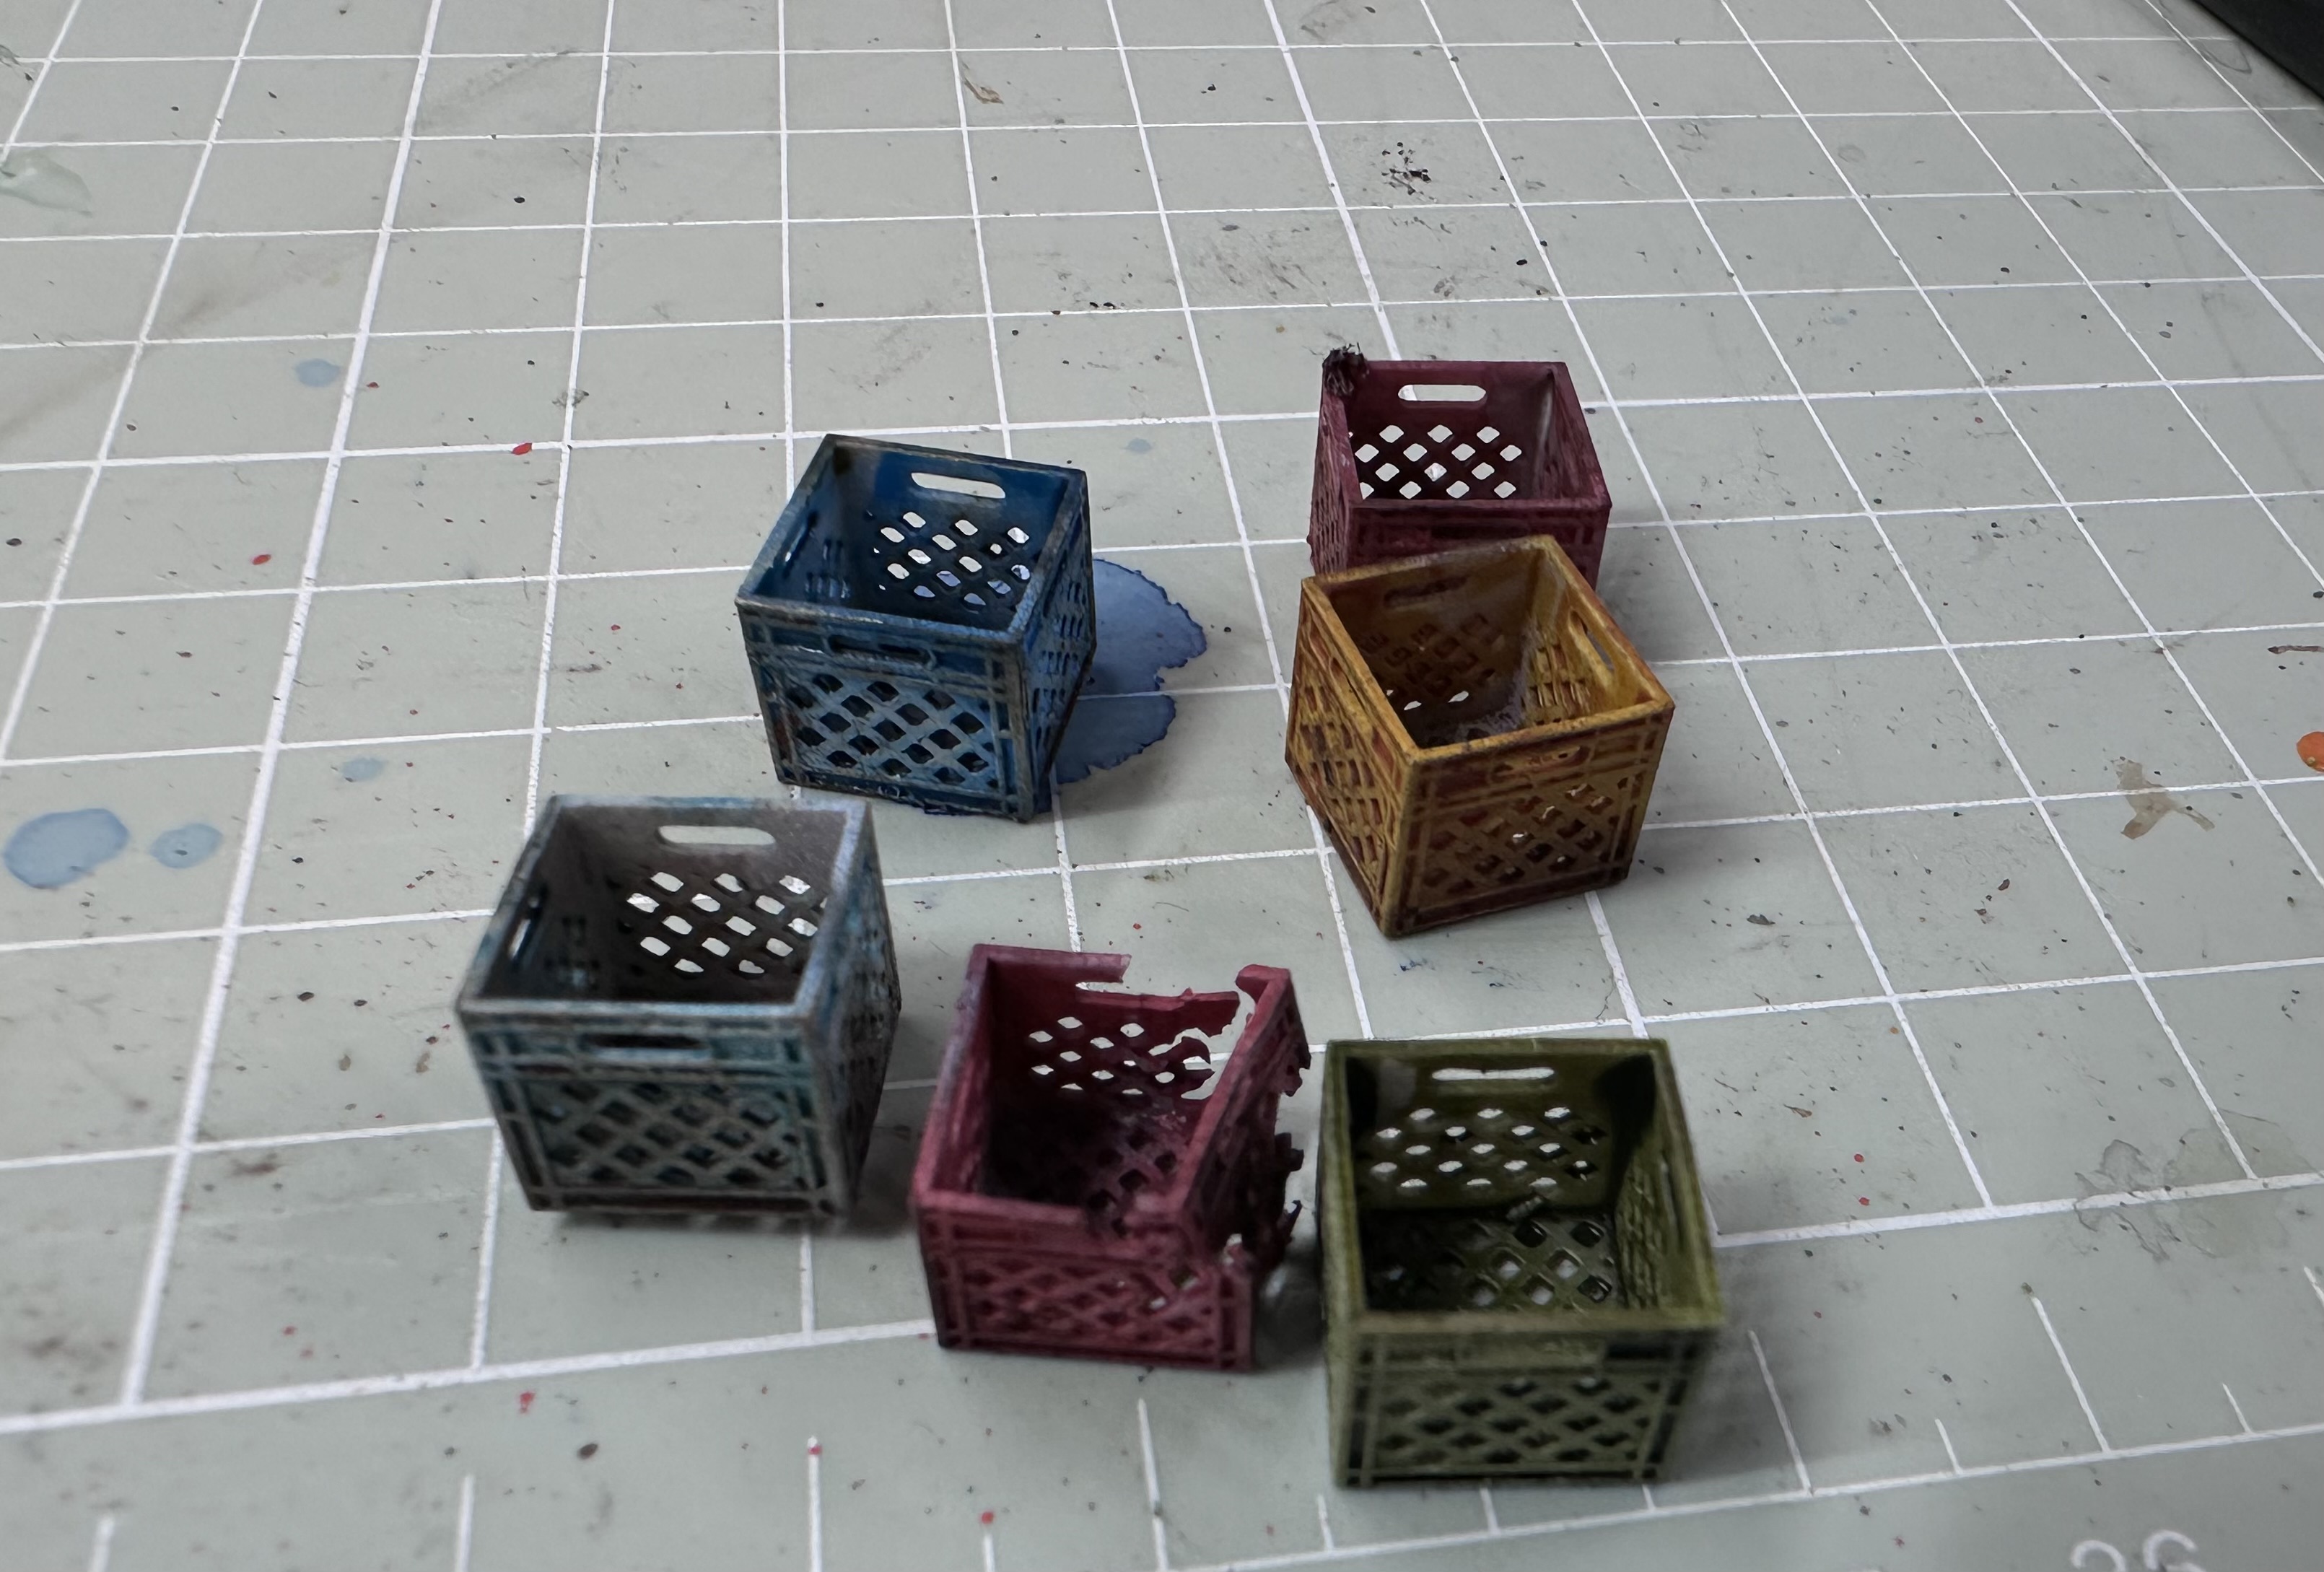
Printing some boxes and crates
@hutch shared an idea in the comments to add some incidental pieces, crates and such. I found some interesting pieces in MyMiniFactory:
https://www.myminifactory.com/object/3d-print-milk-crate-for-dioramas-214623
https://www.myminifactory.com/object/3d-print-oil-drums-and-ammo-boxes-253246
I printed bunch, because why not, can always use them in other builds or bases too. Despite small size they came out nice from the resin printer.
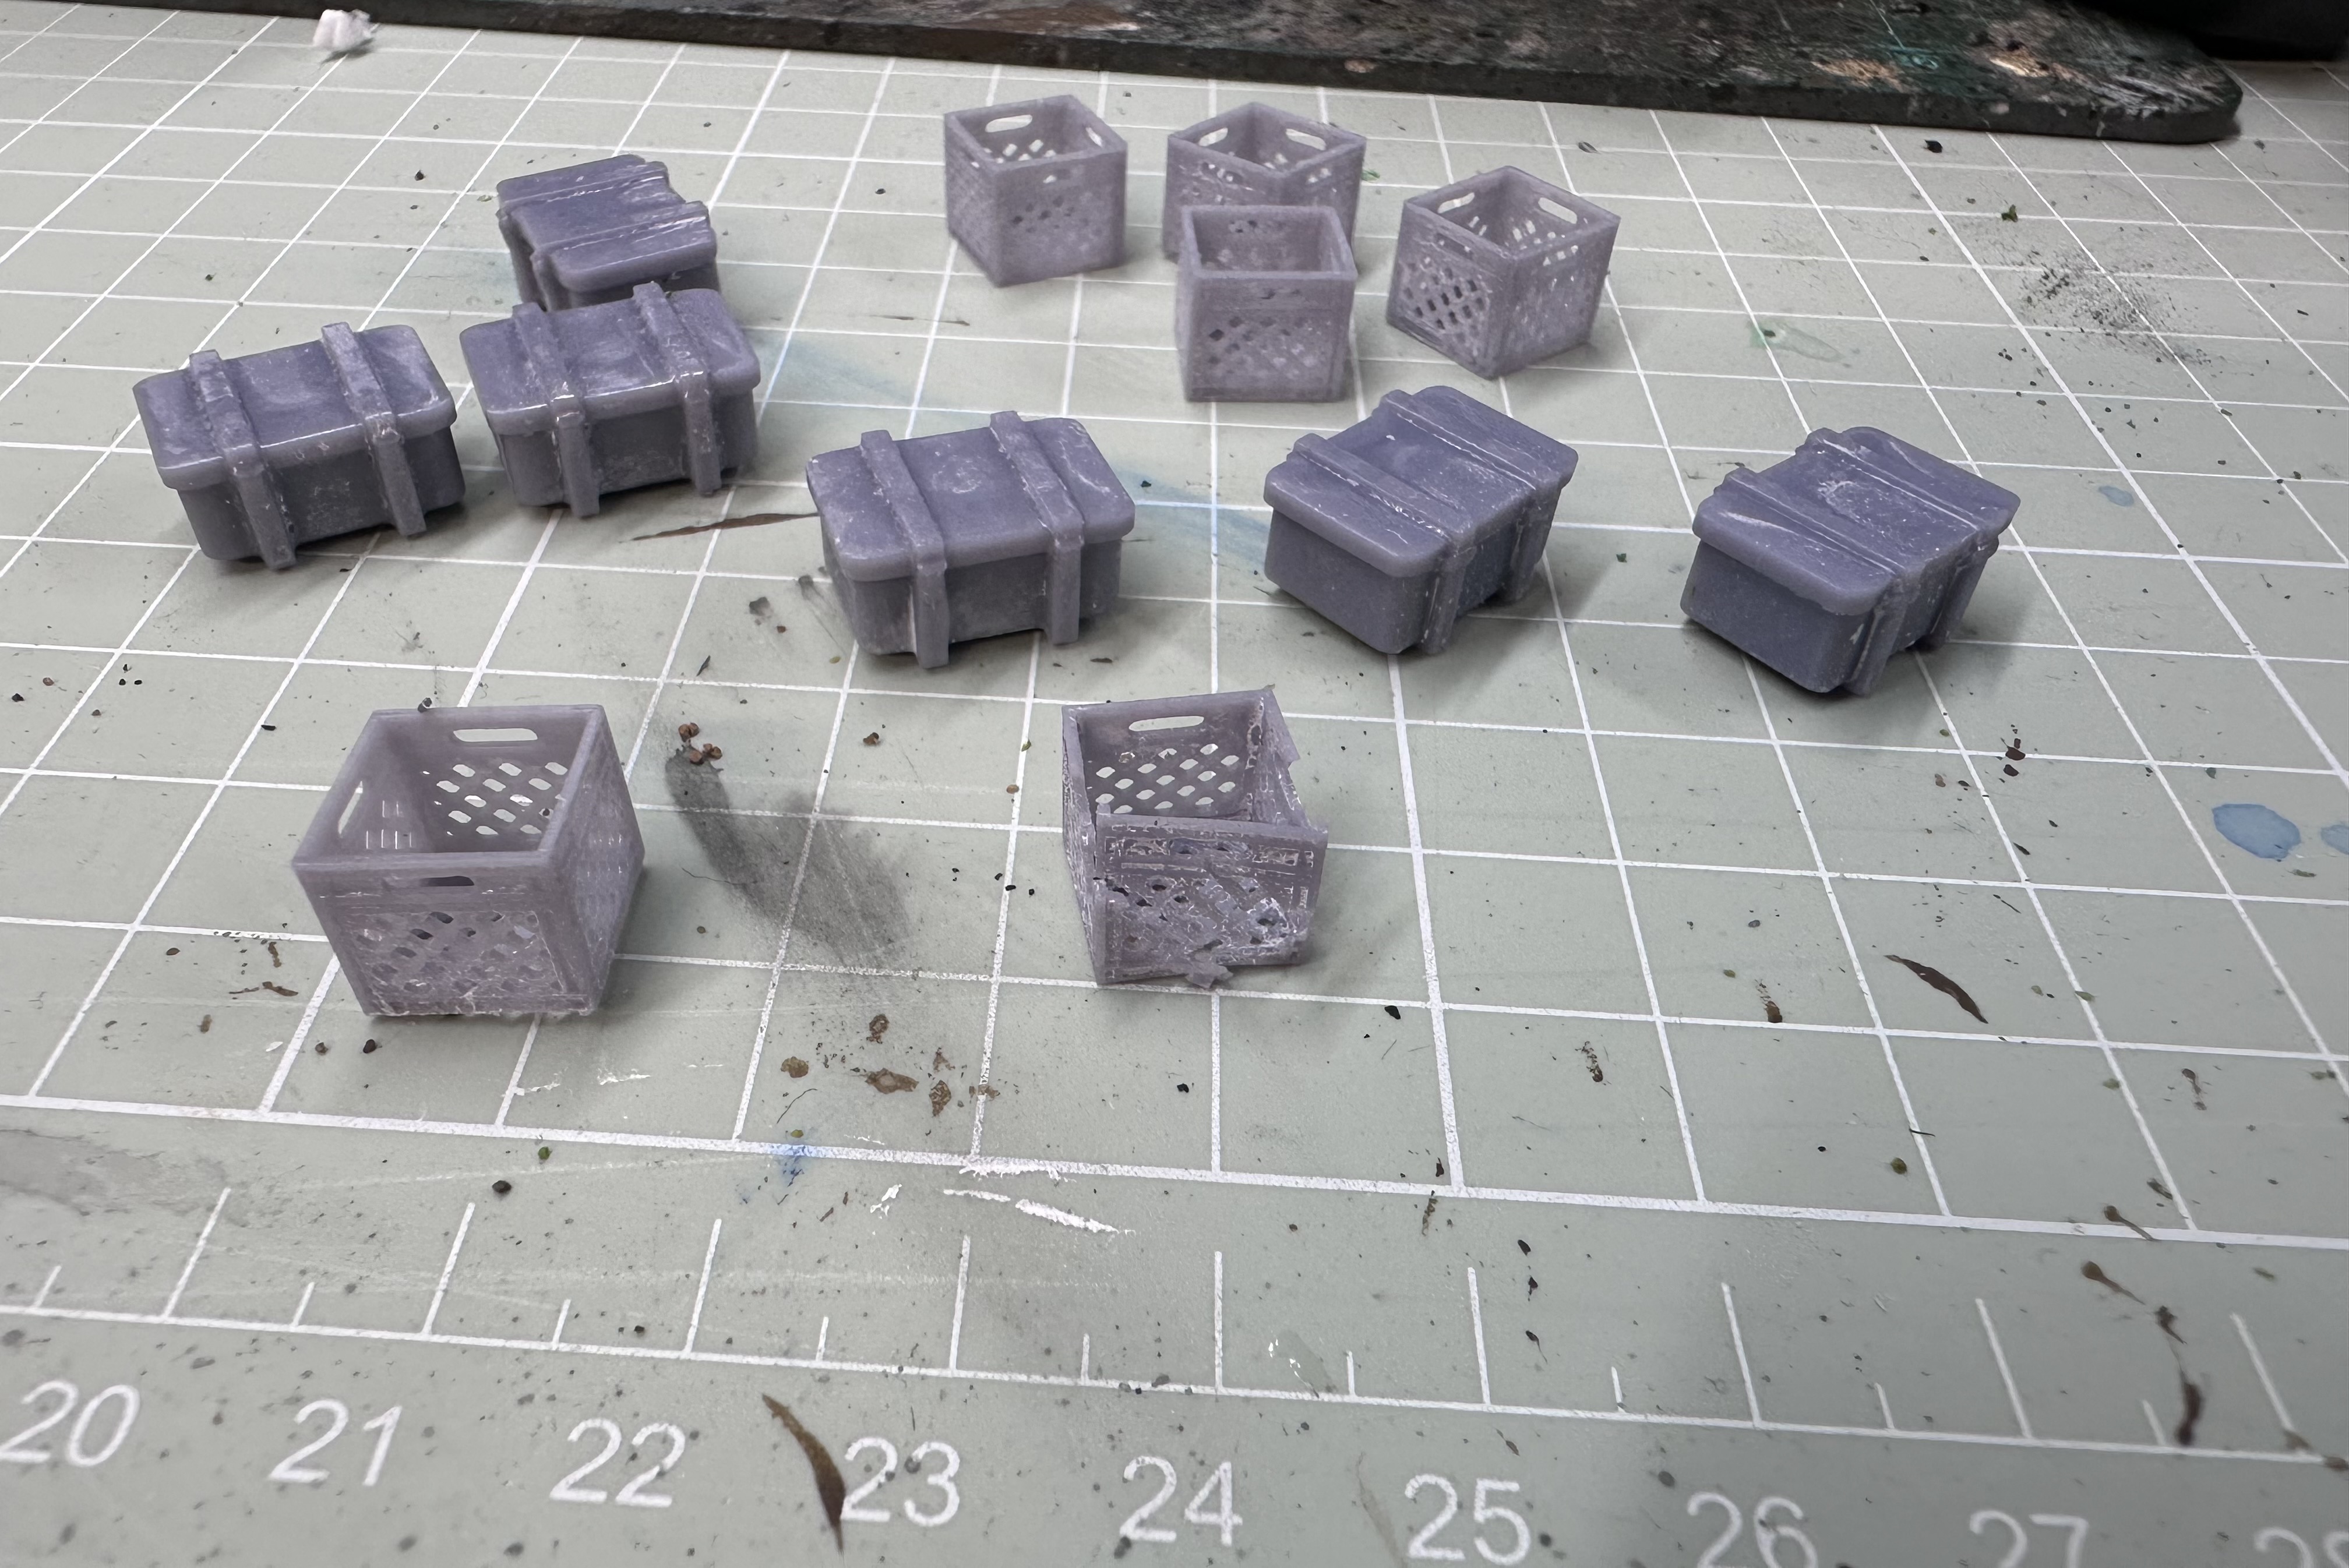 (the grid is 1cm)
Trees, plants, and a bit of clean up
Nearing the final stages of the project!
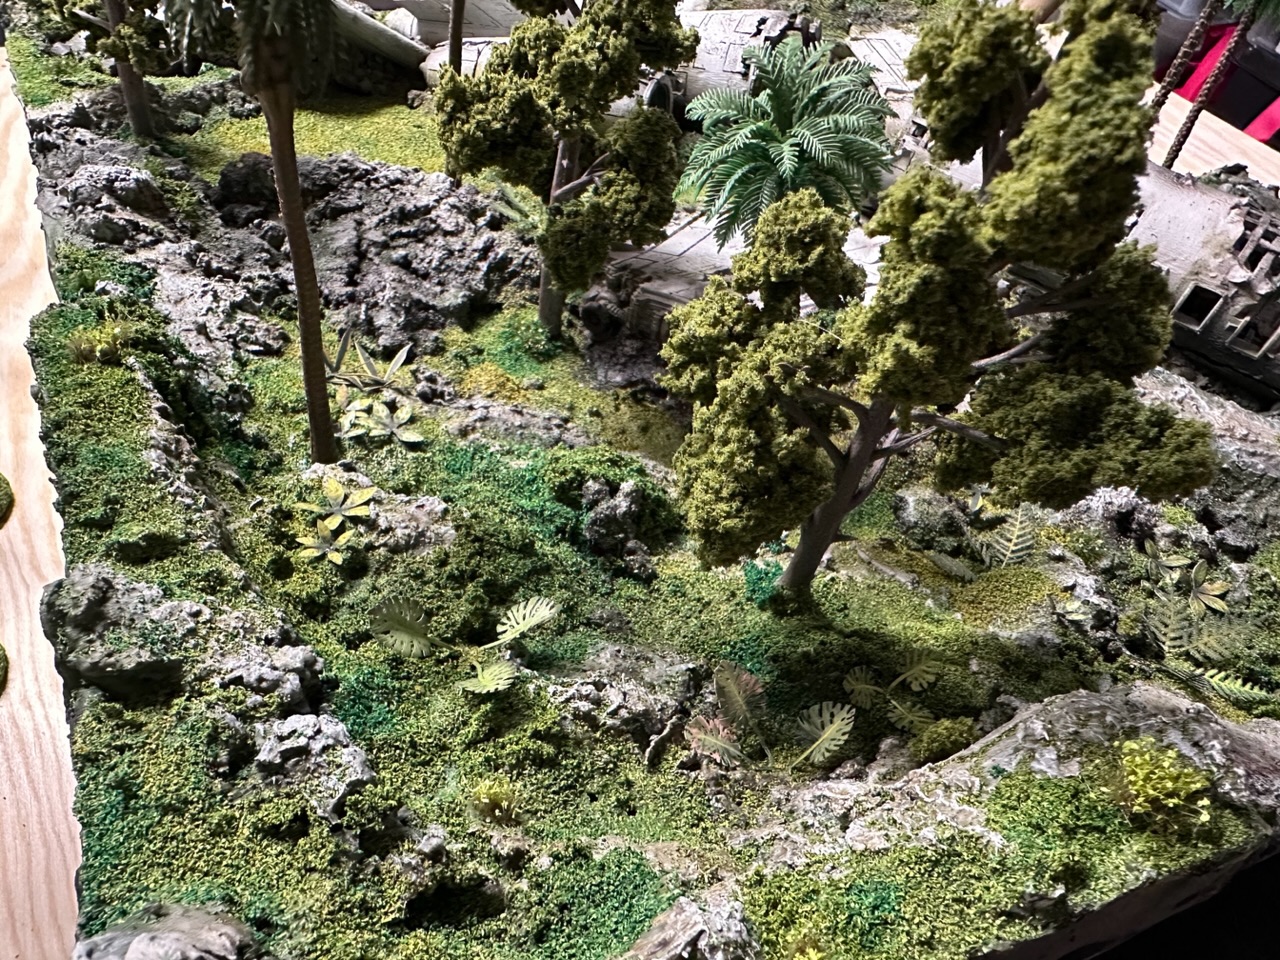
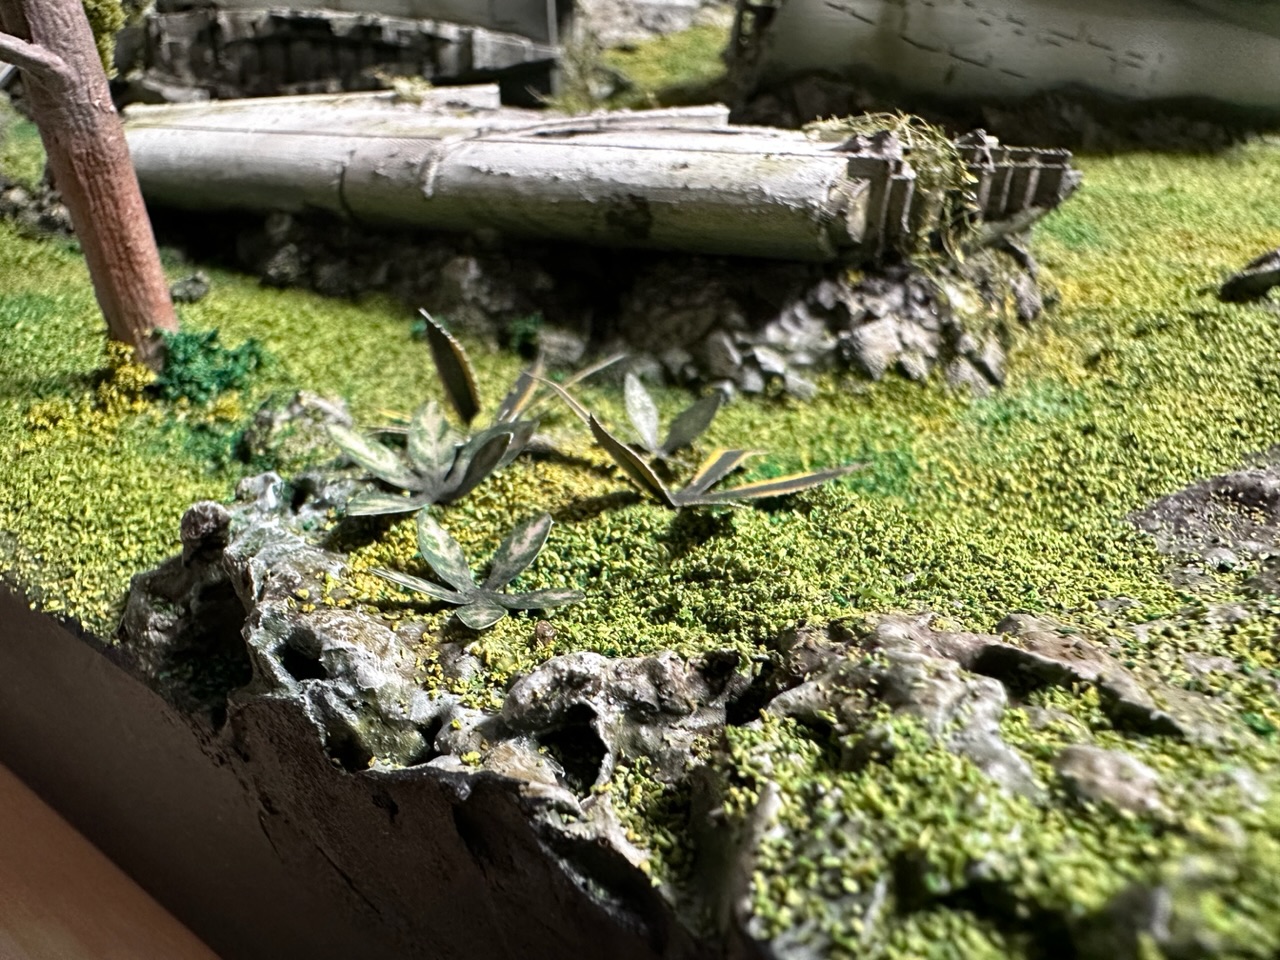
I glued in some of the trees and added jungle plants here and there. As was recommended in the comments, instead of the plastic aquarium plants I used laser cut ones from Gamers Grass. They look fantastic, especially after a matt varnish coat.
Few flat areas were left open for set on pieces and I based few loose trees to match. So there’s some modularity, the board can be made feel more dense or I can build alternate additional pieces for different games or scenarios.
As a tidy up, I sanded the outside edges flat and painted them black. Small thing but makes so much cleaner look.
There’s still one weekend of Terrain Fest left, and I plan to finalise the project with:
- few more palm trees and separately based trees
- add more moss/green and vines to the plane — I want to make it look it’s been there for a while
- final sealing and varnishing coats
- proper photos
- plan and get started on a storage box.

Making plastic palm trees look decent
I wanted to add few more palm trees to the project. Couple of glue to the board and few based as set on pieces.
Using the typical cheap plastic trees you can buy online, these are the steps I used to make them look decent.
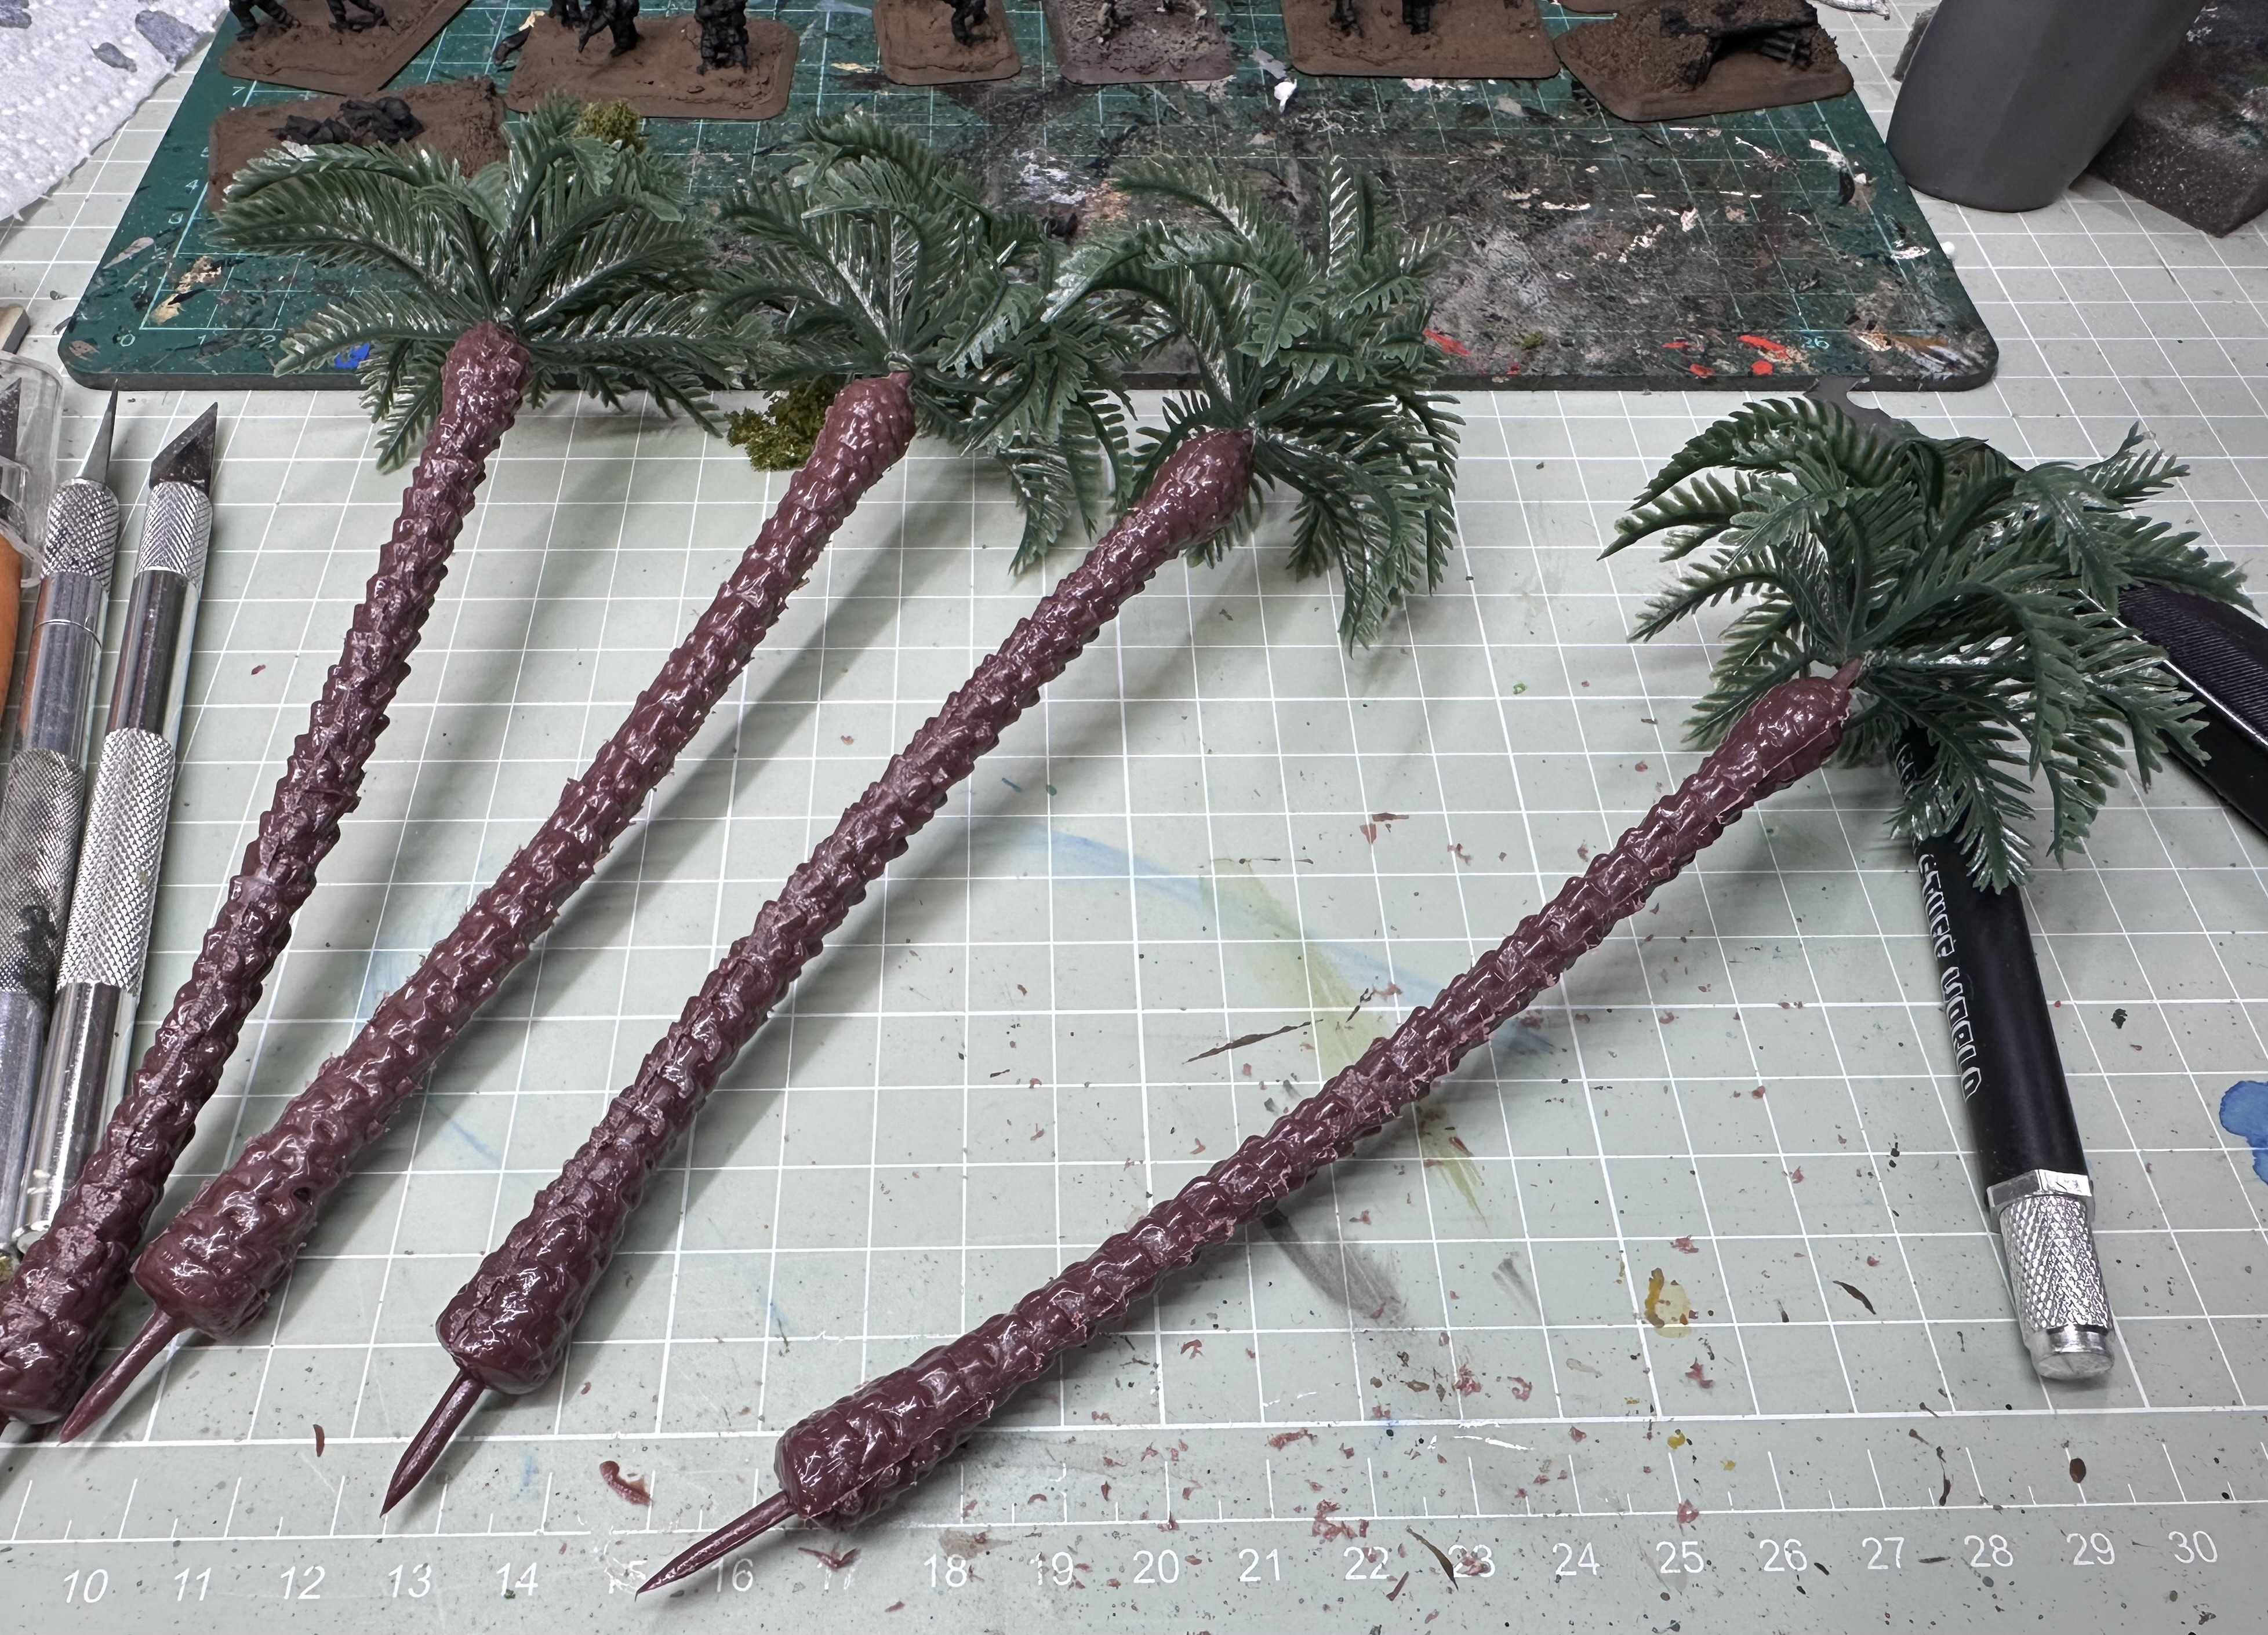 Clean up the terrible mould lines
 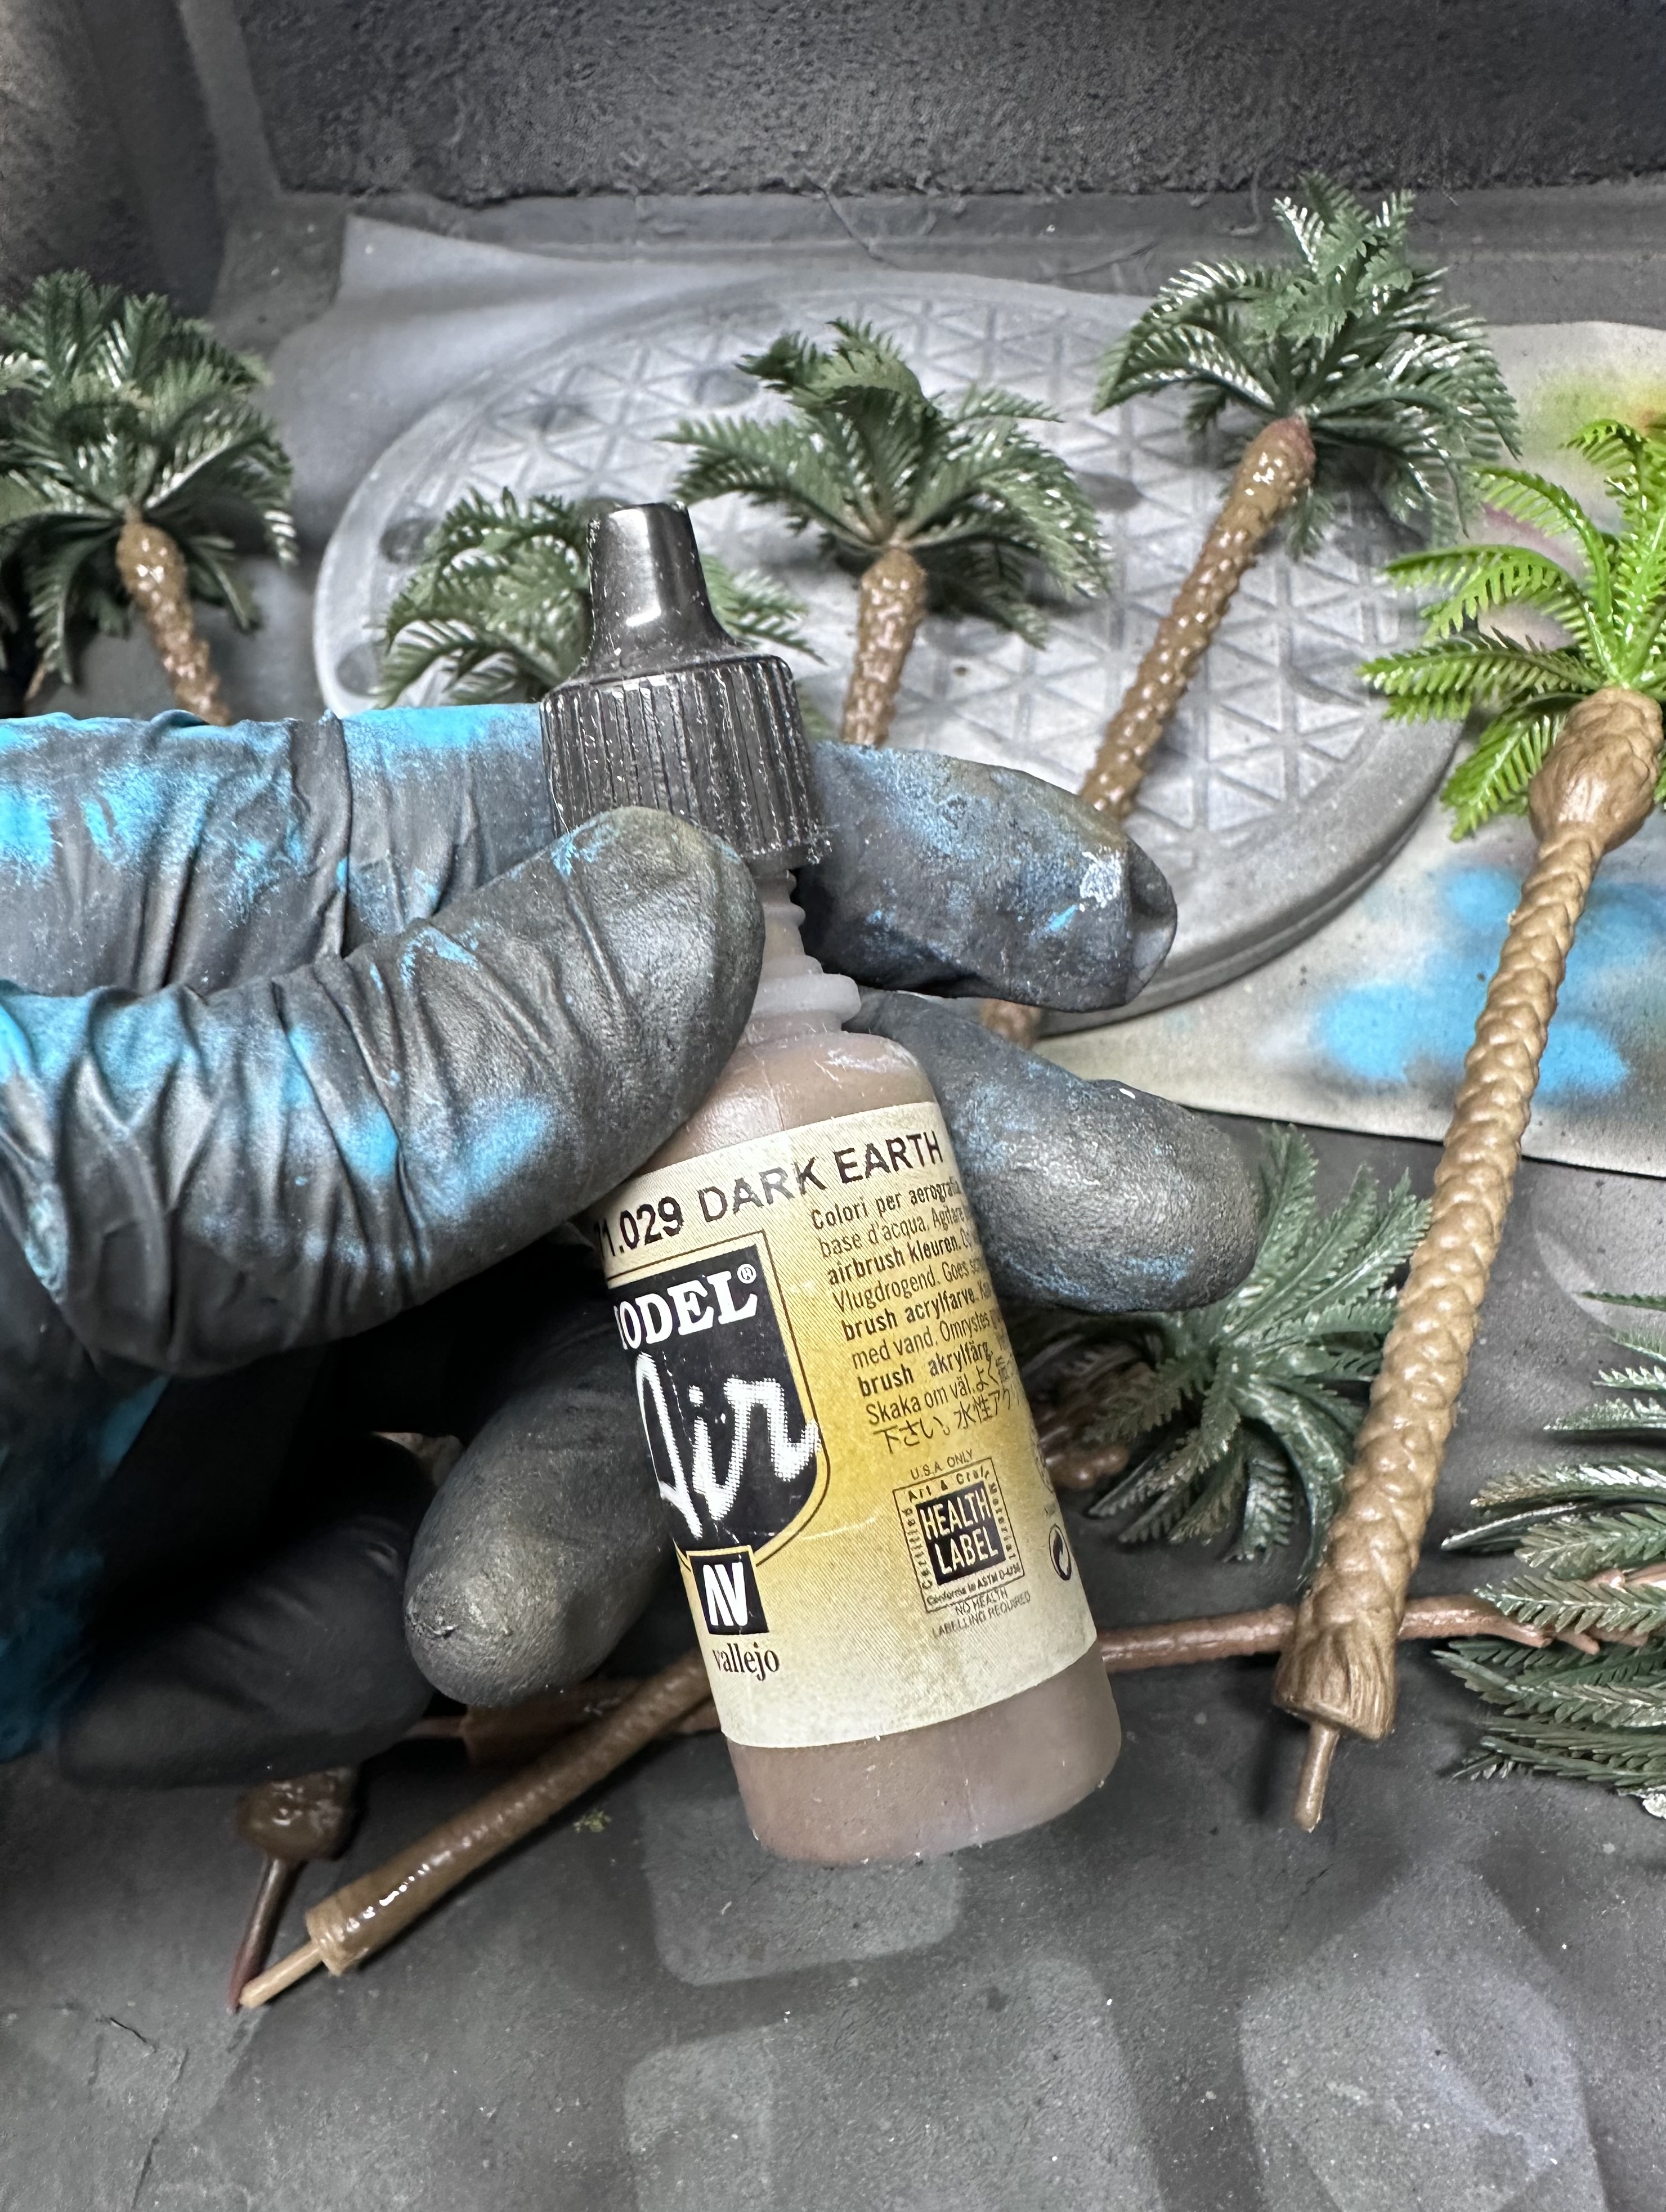 Airbrush the trunks with Vallejo Dark Earth
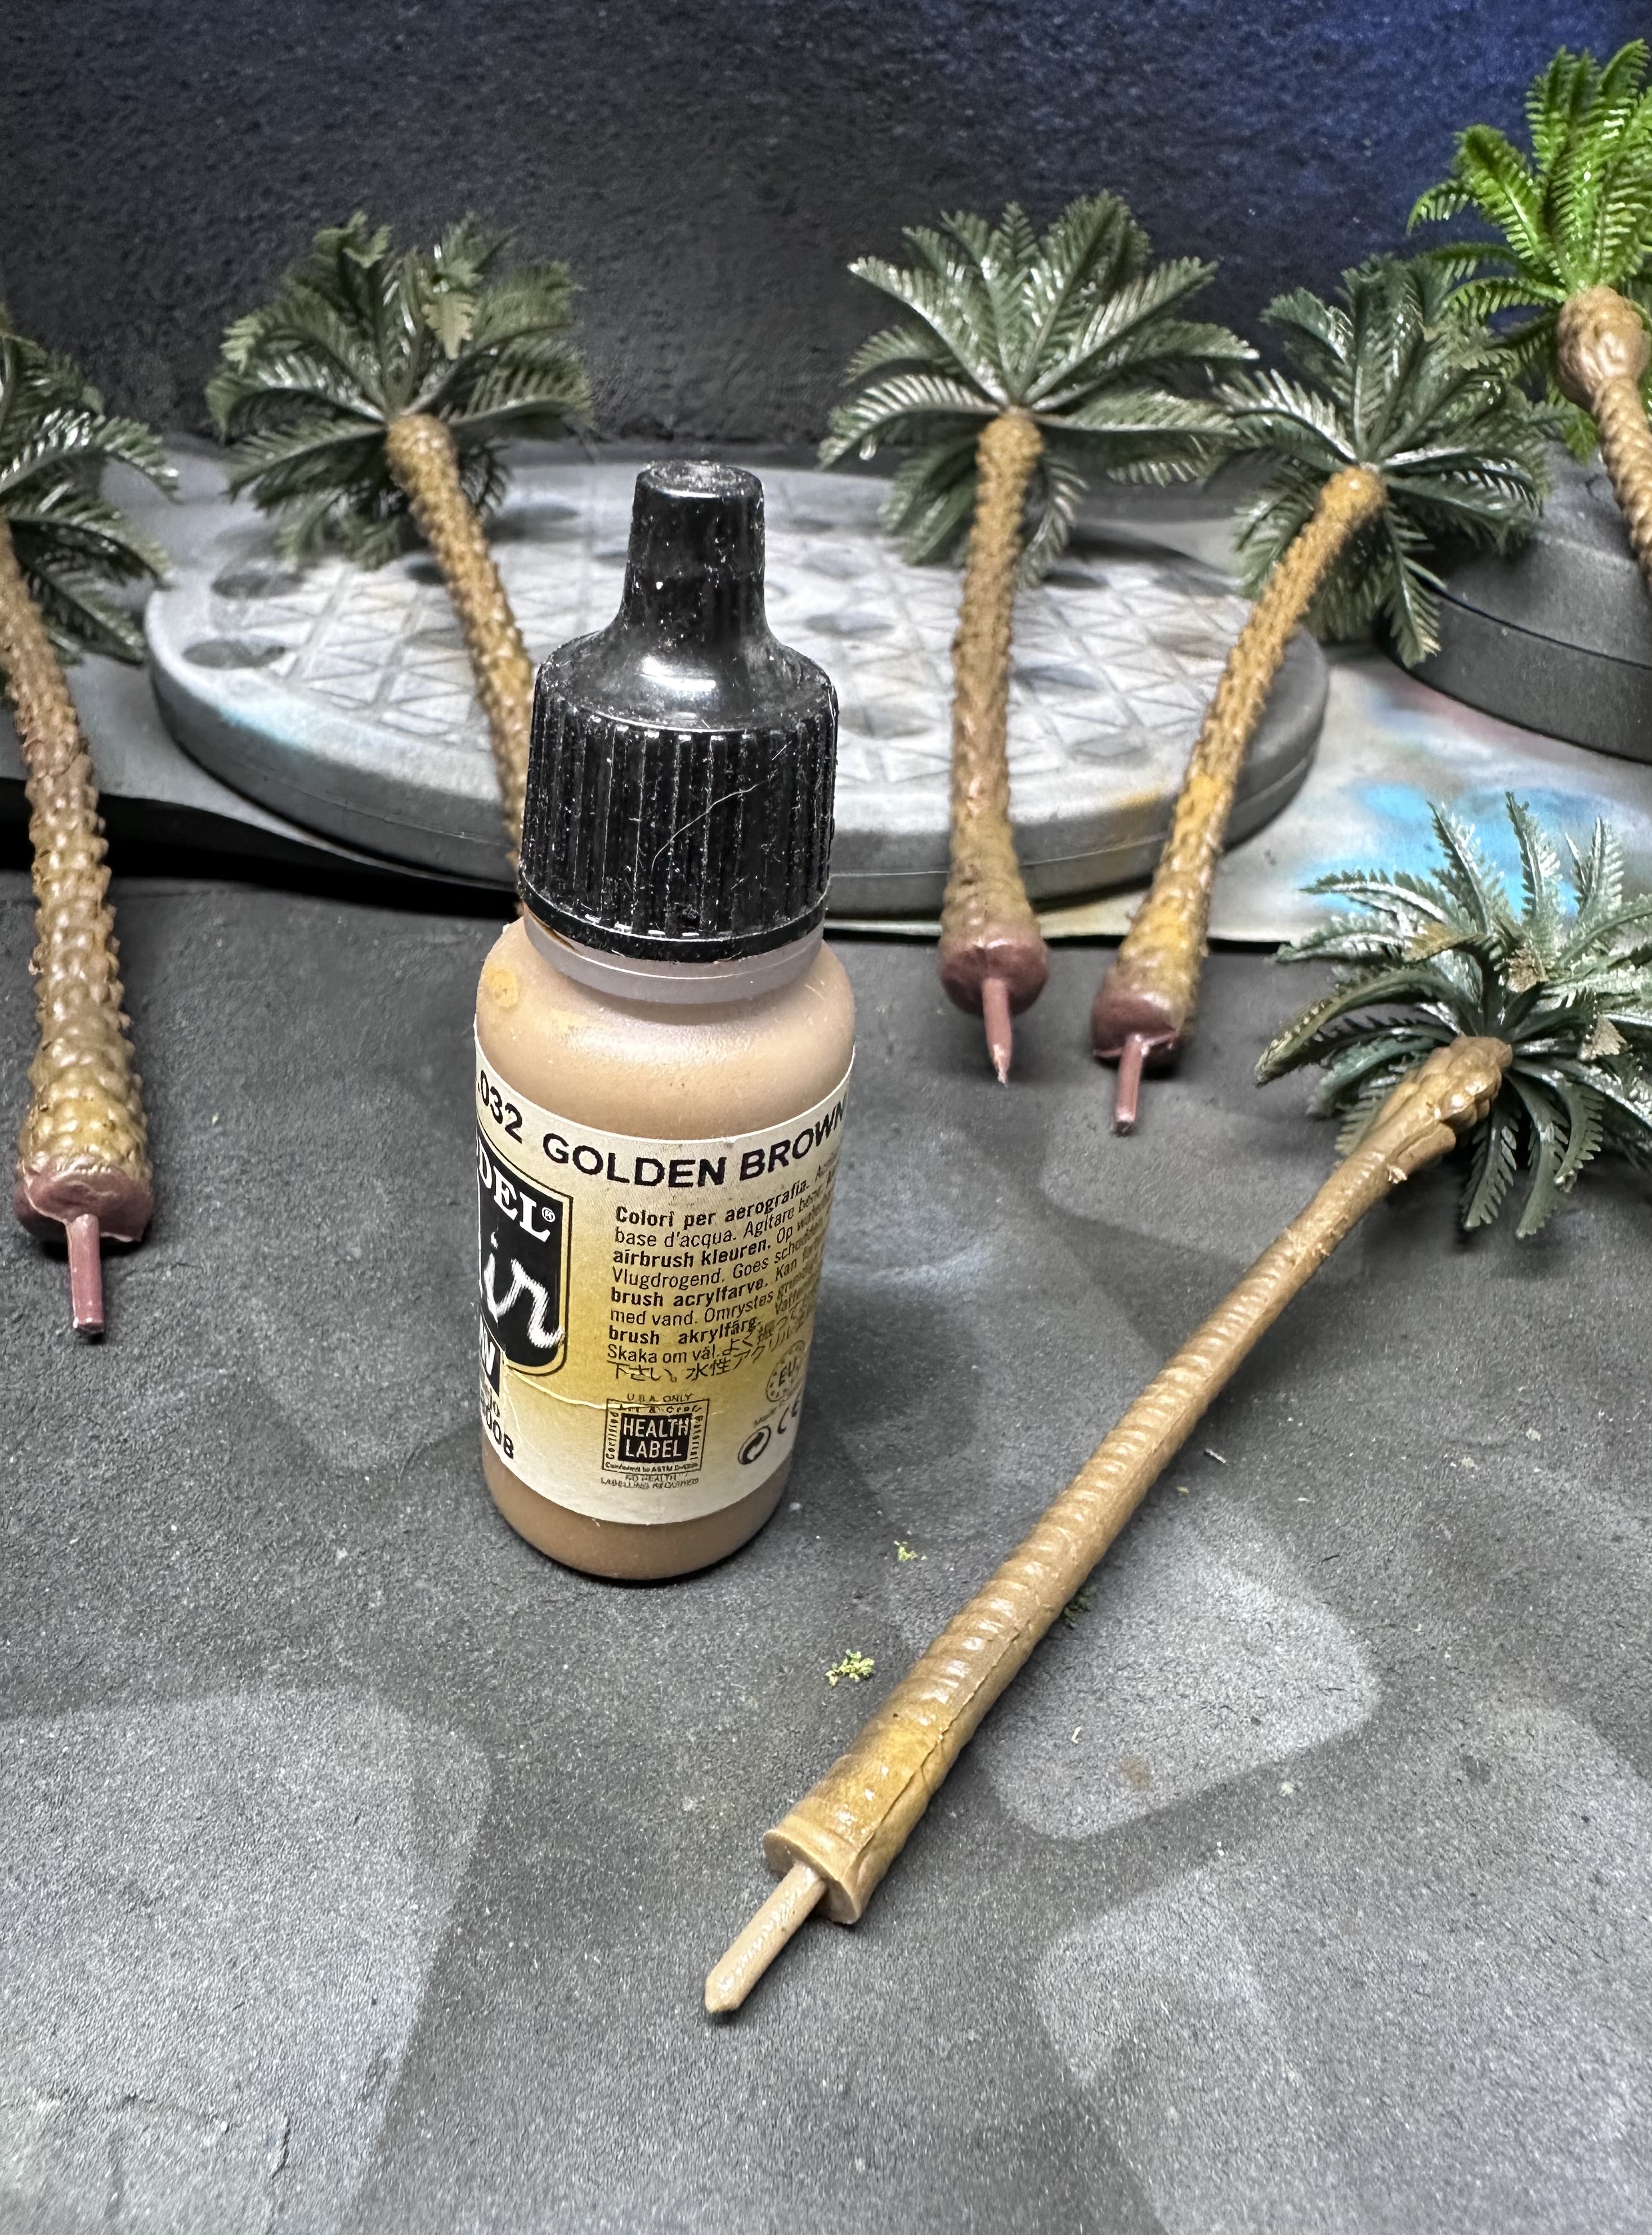 Follow with Gold Brown
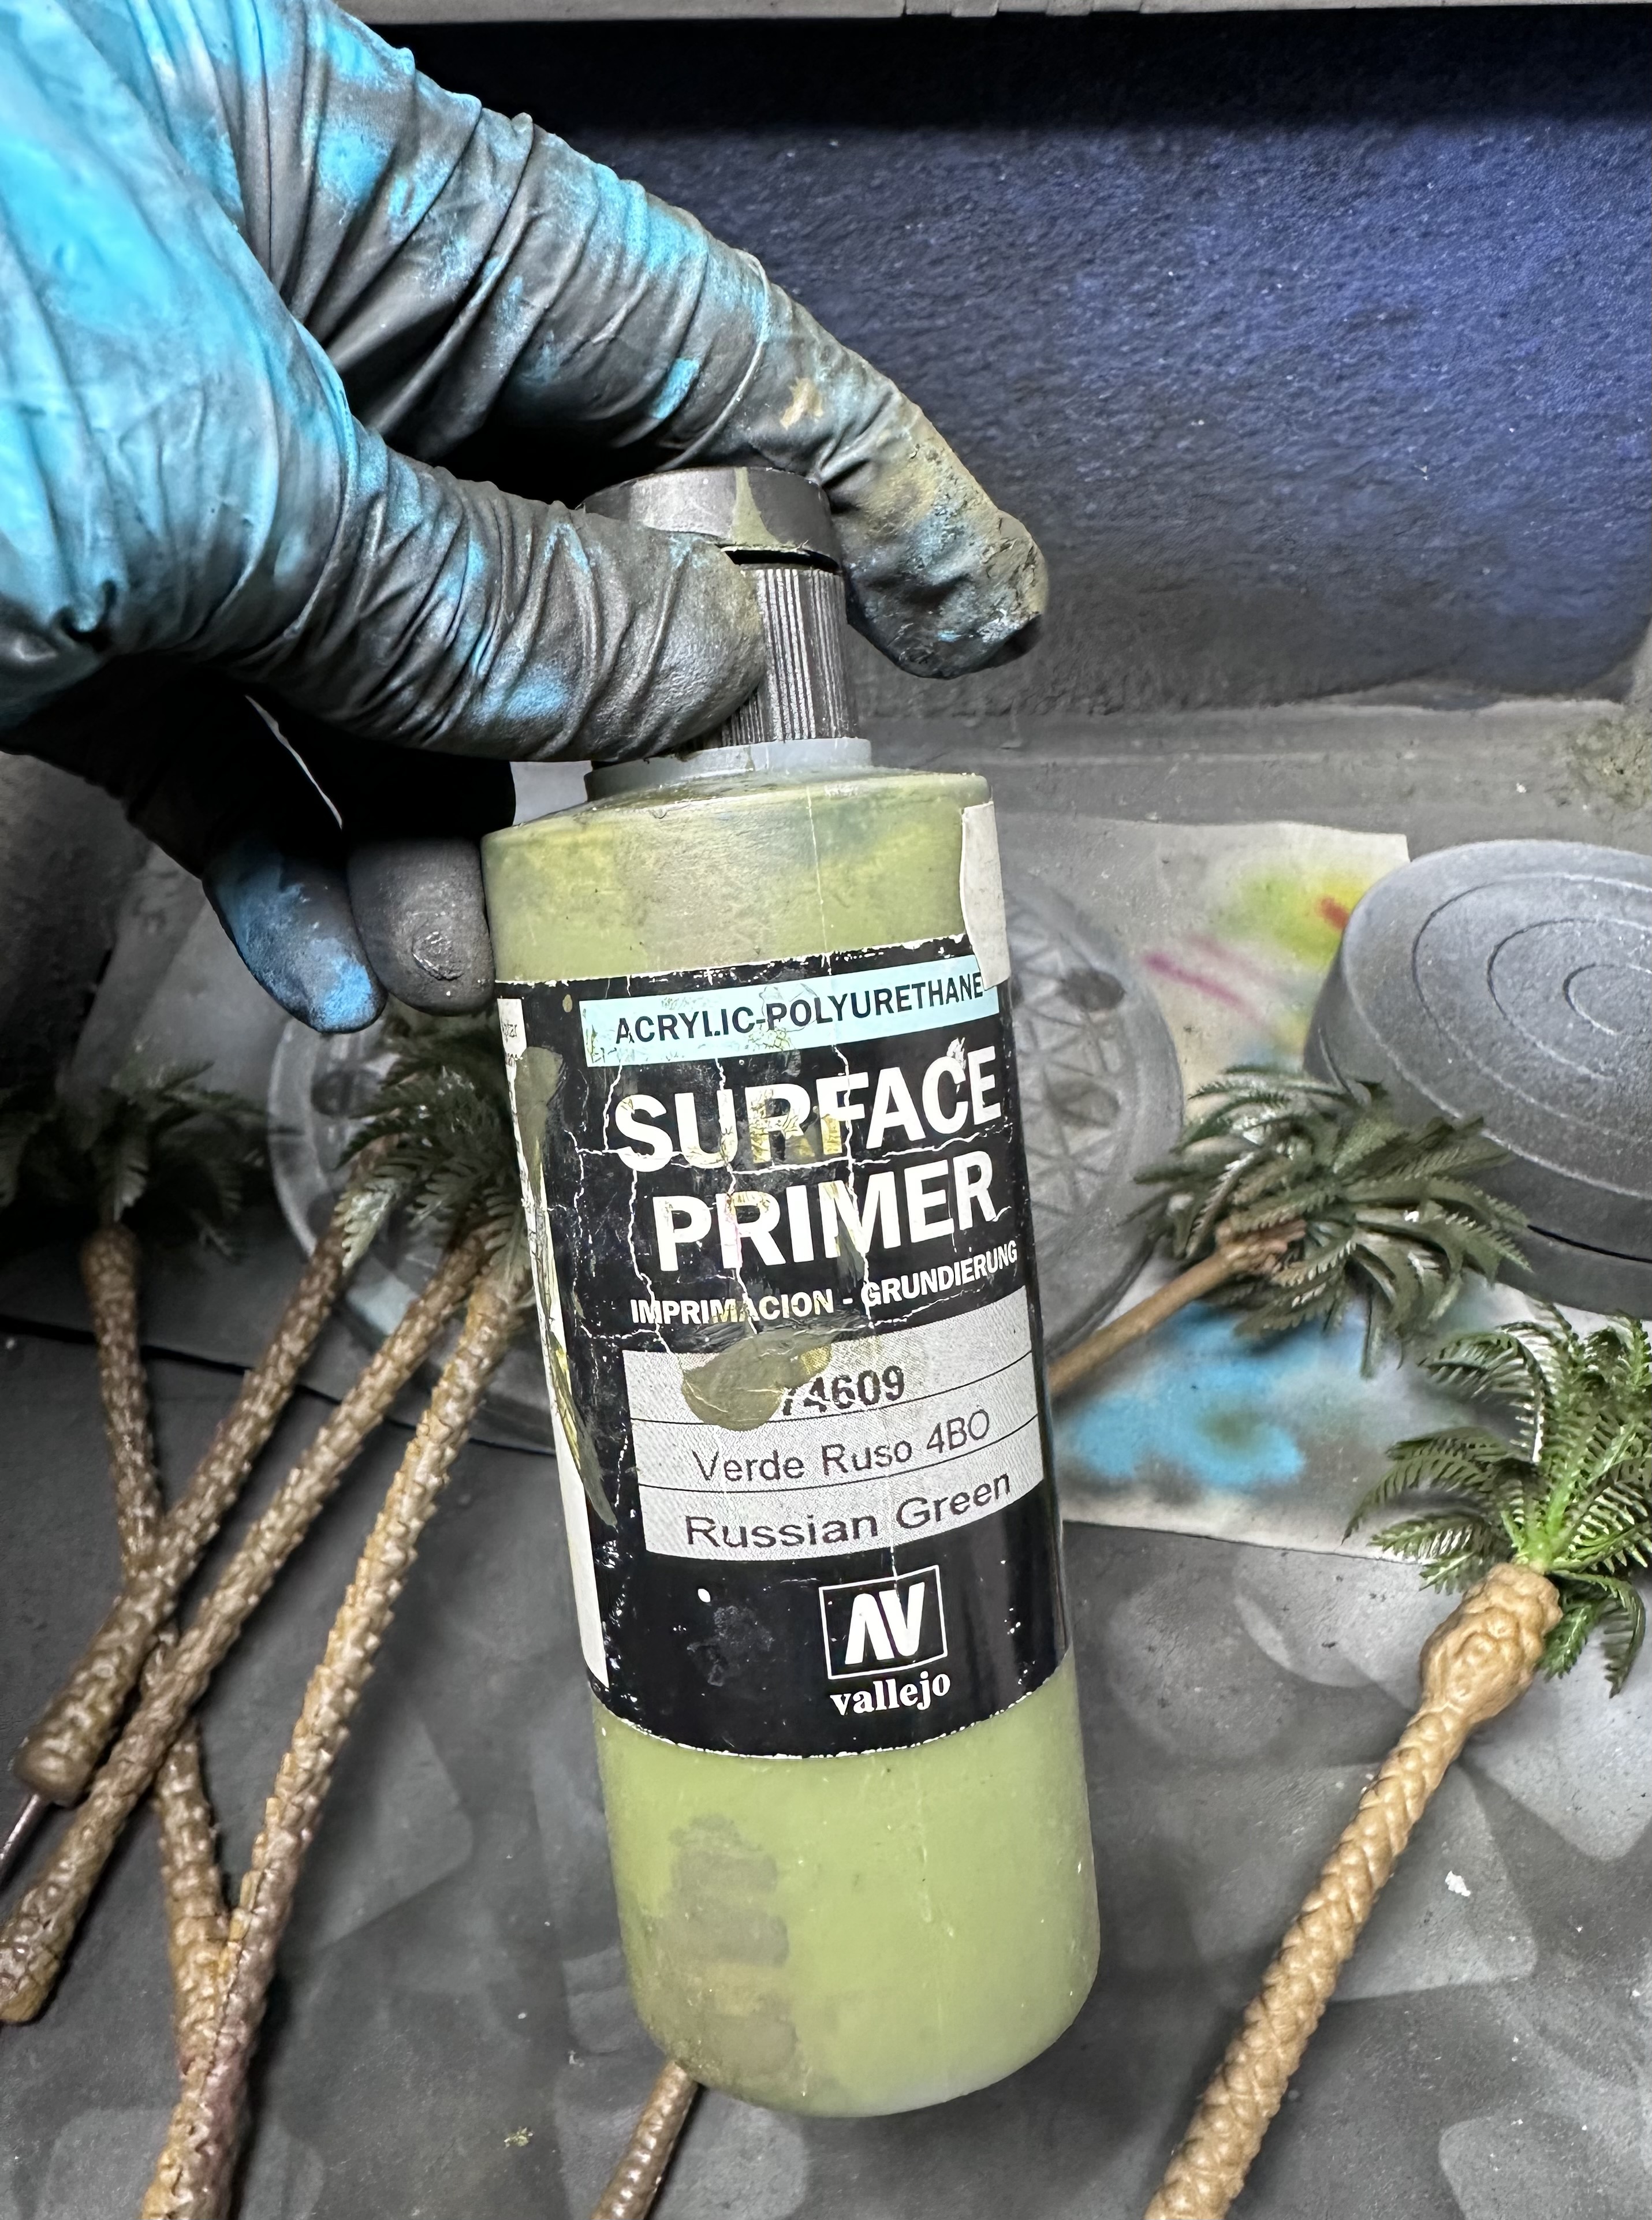 Russian Green as the darkest green for the leaves
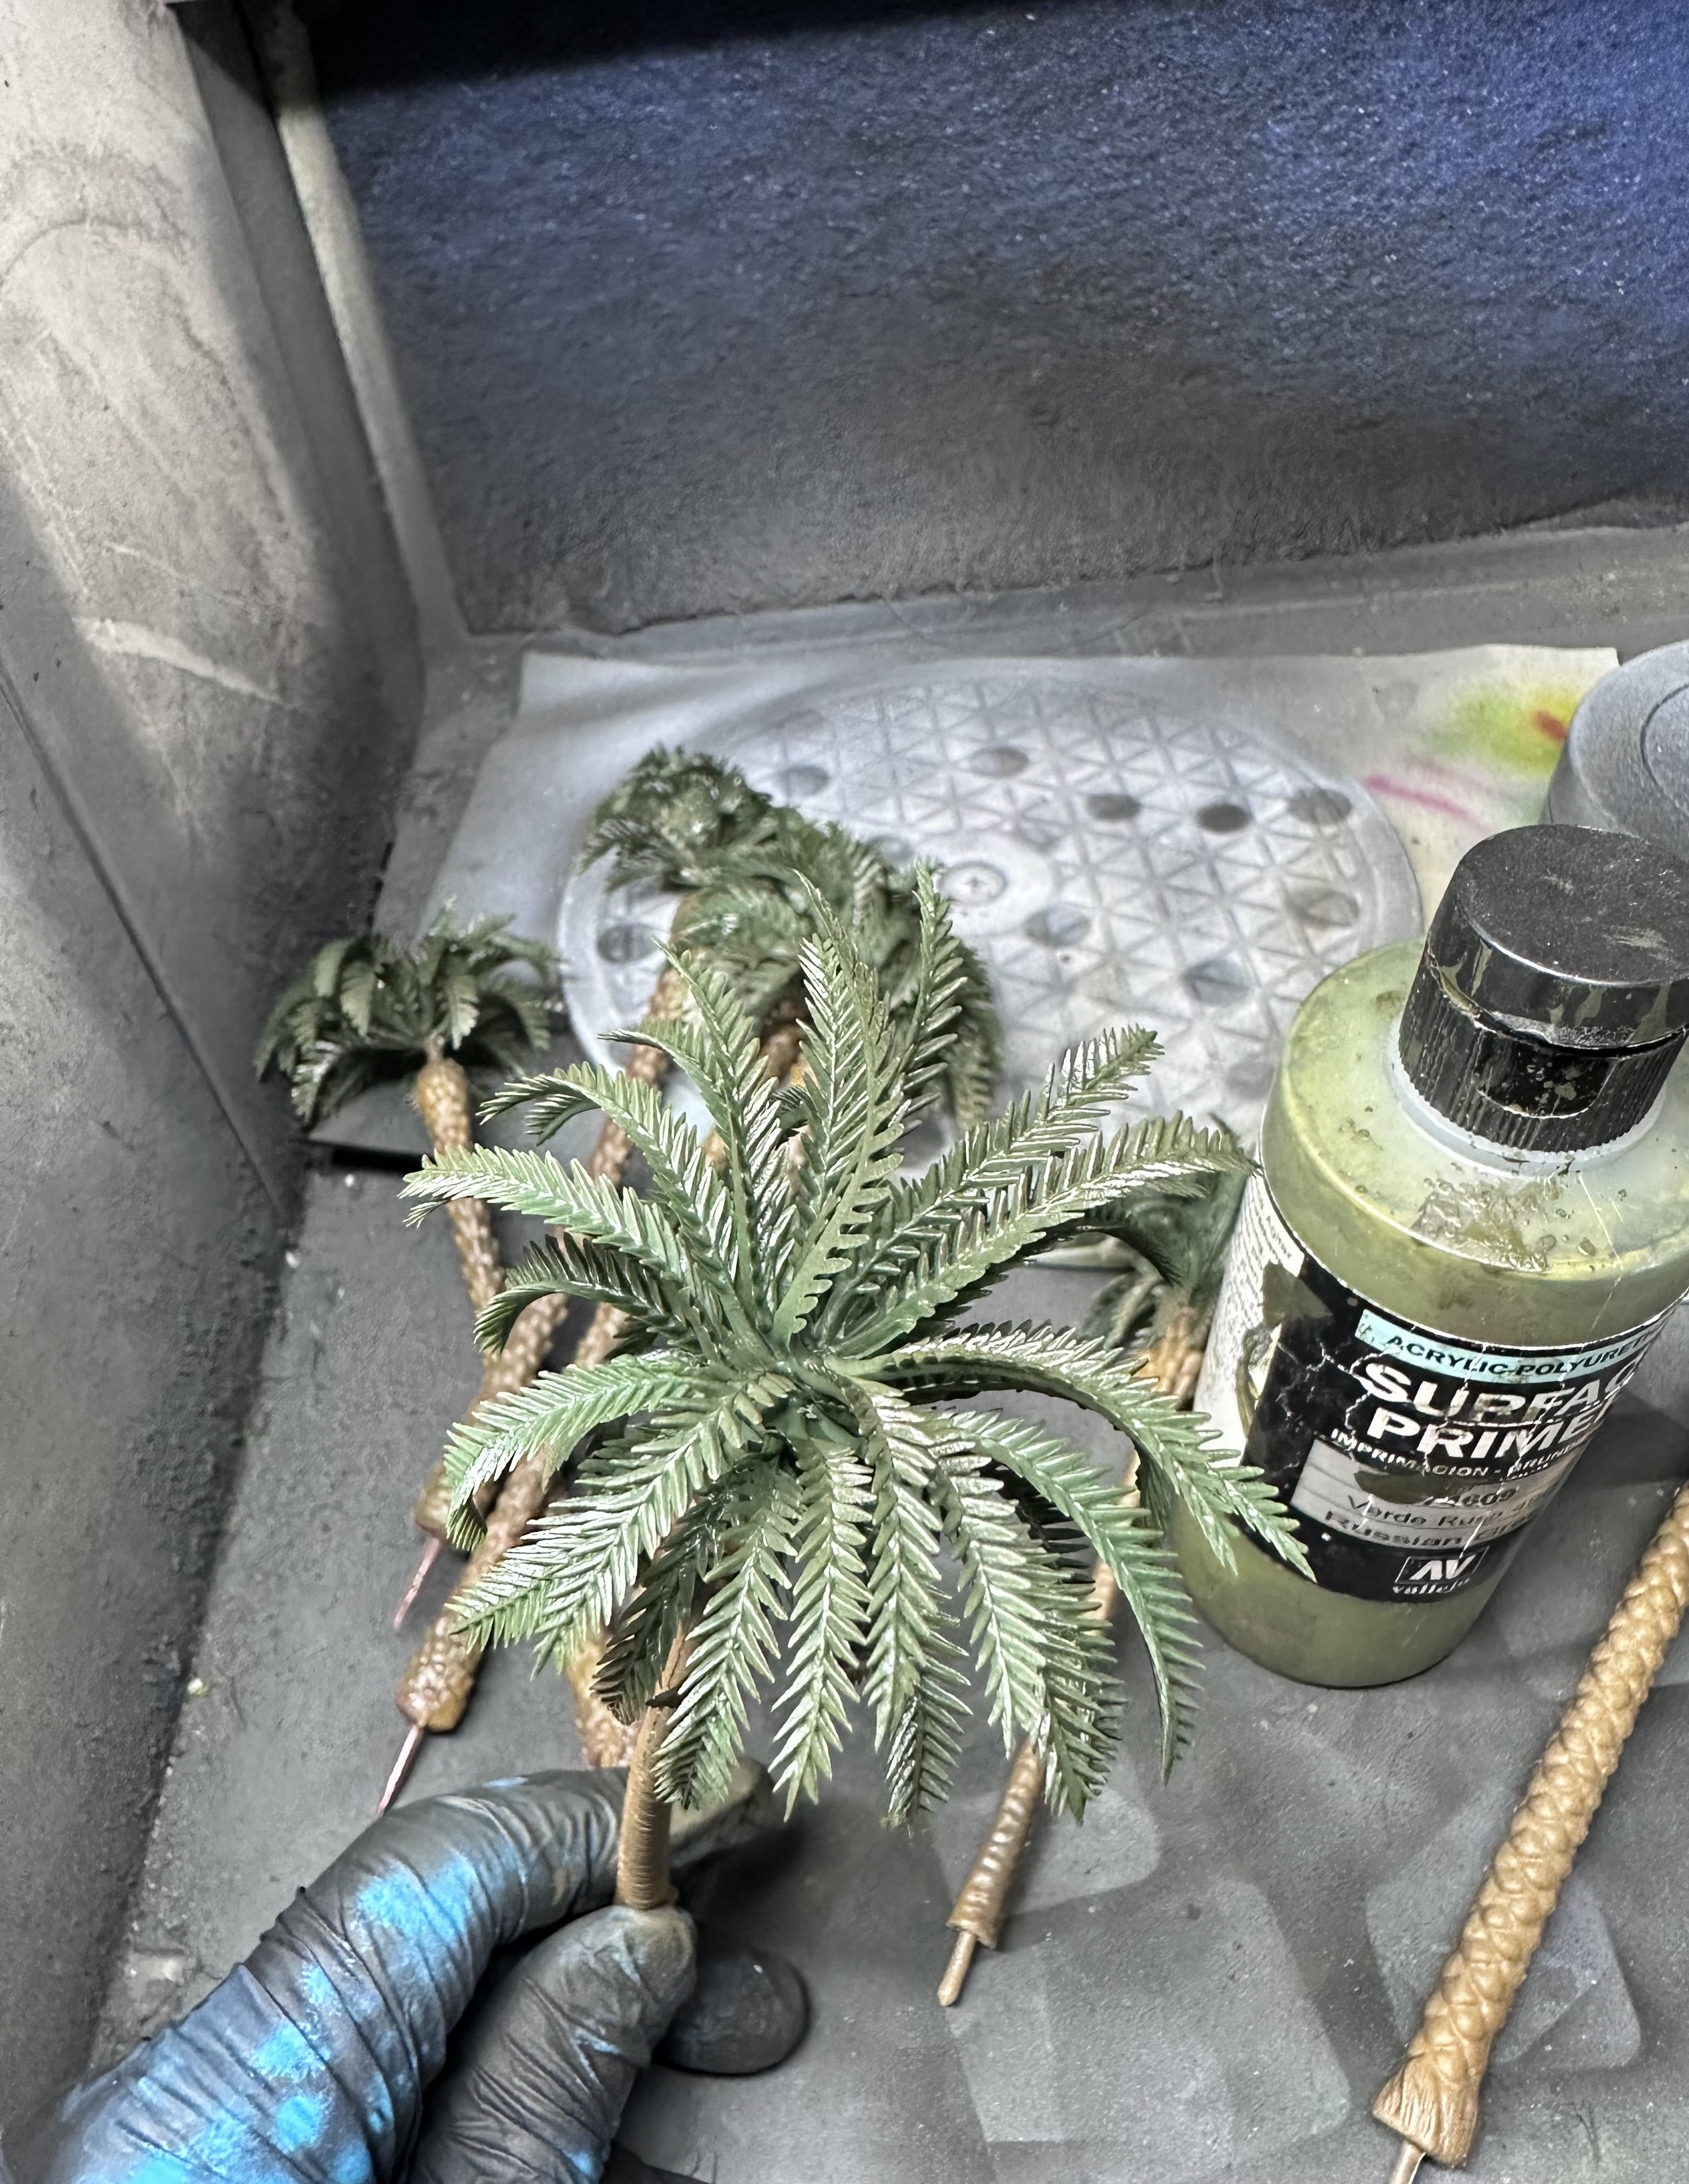
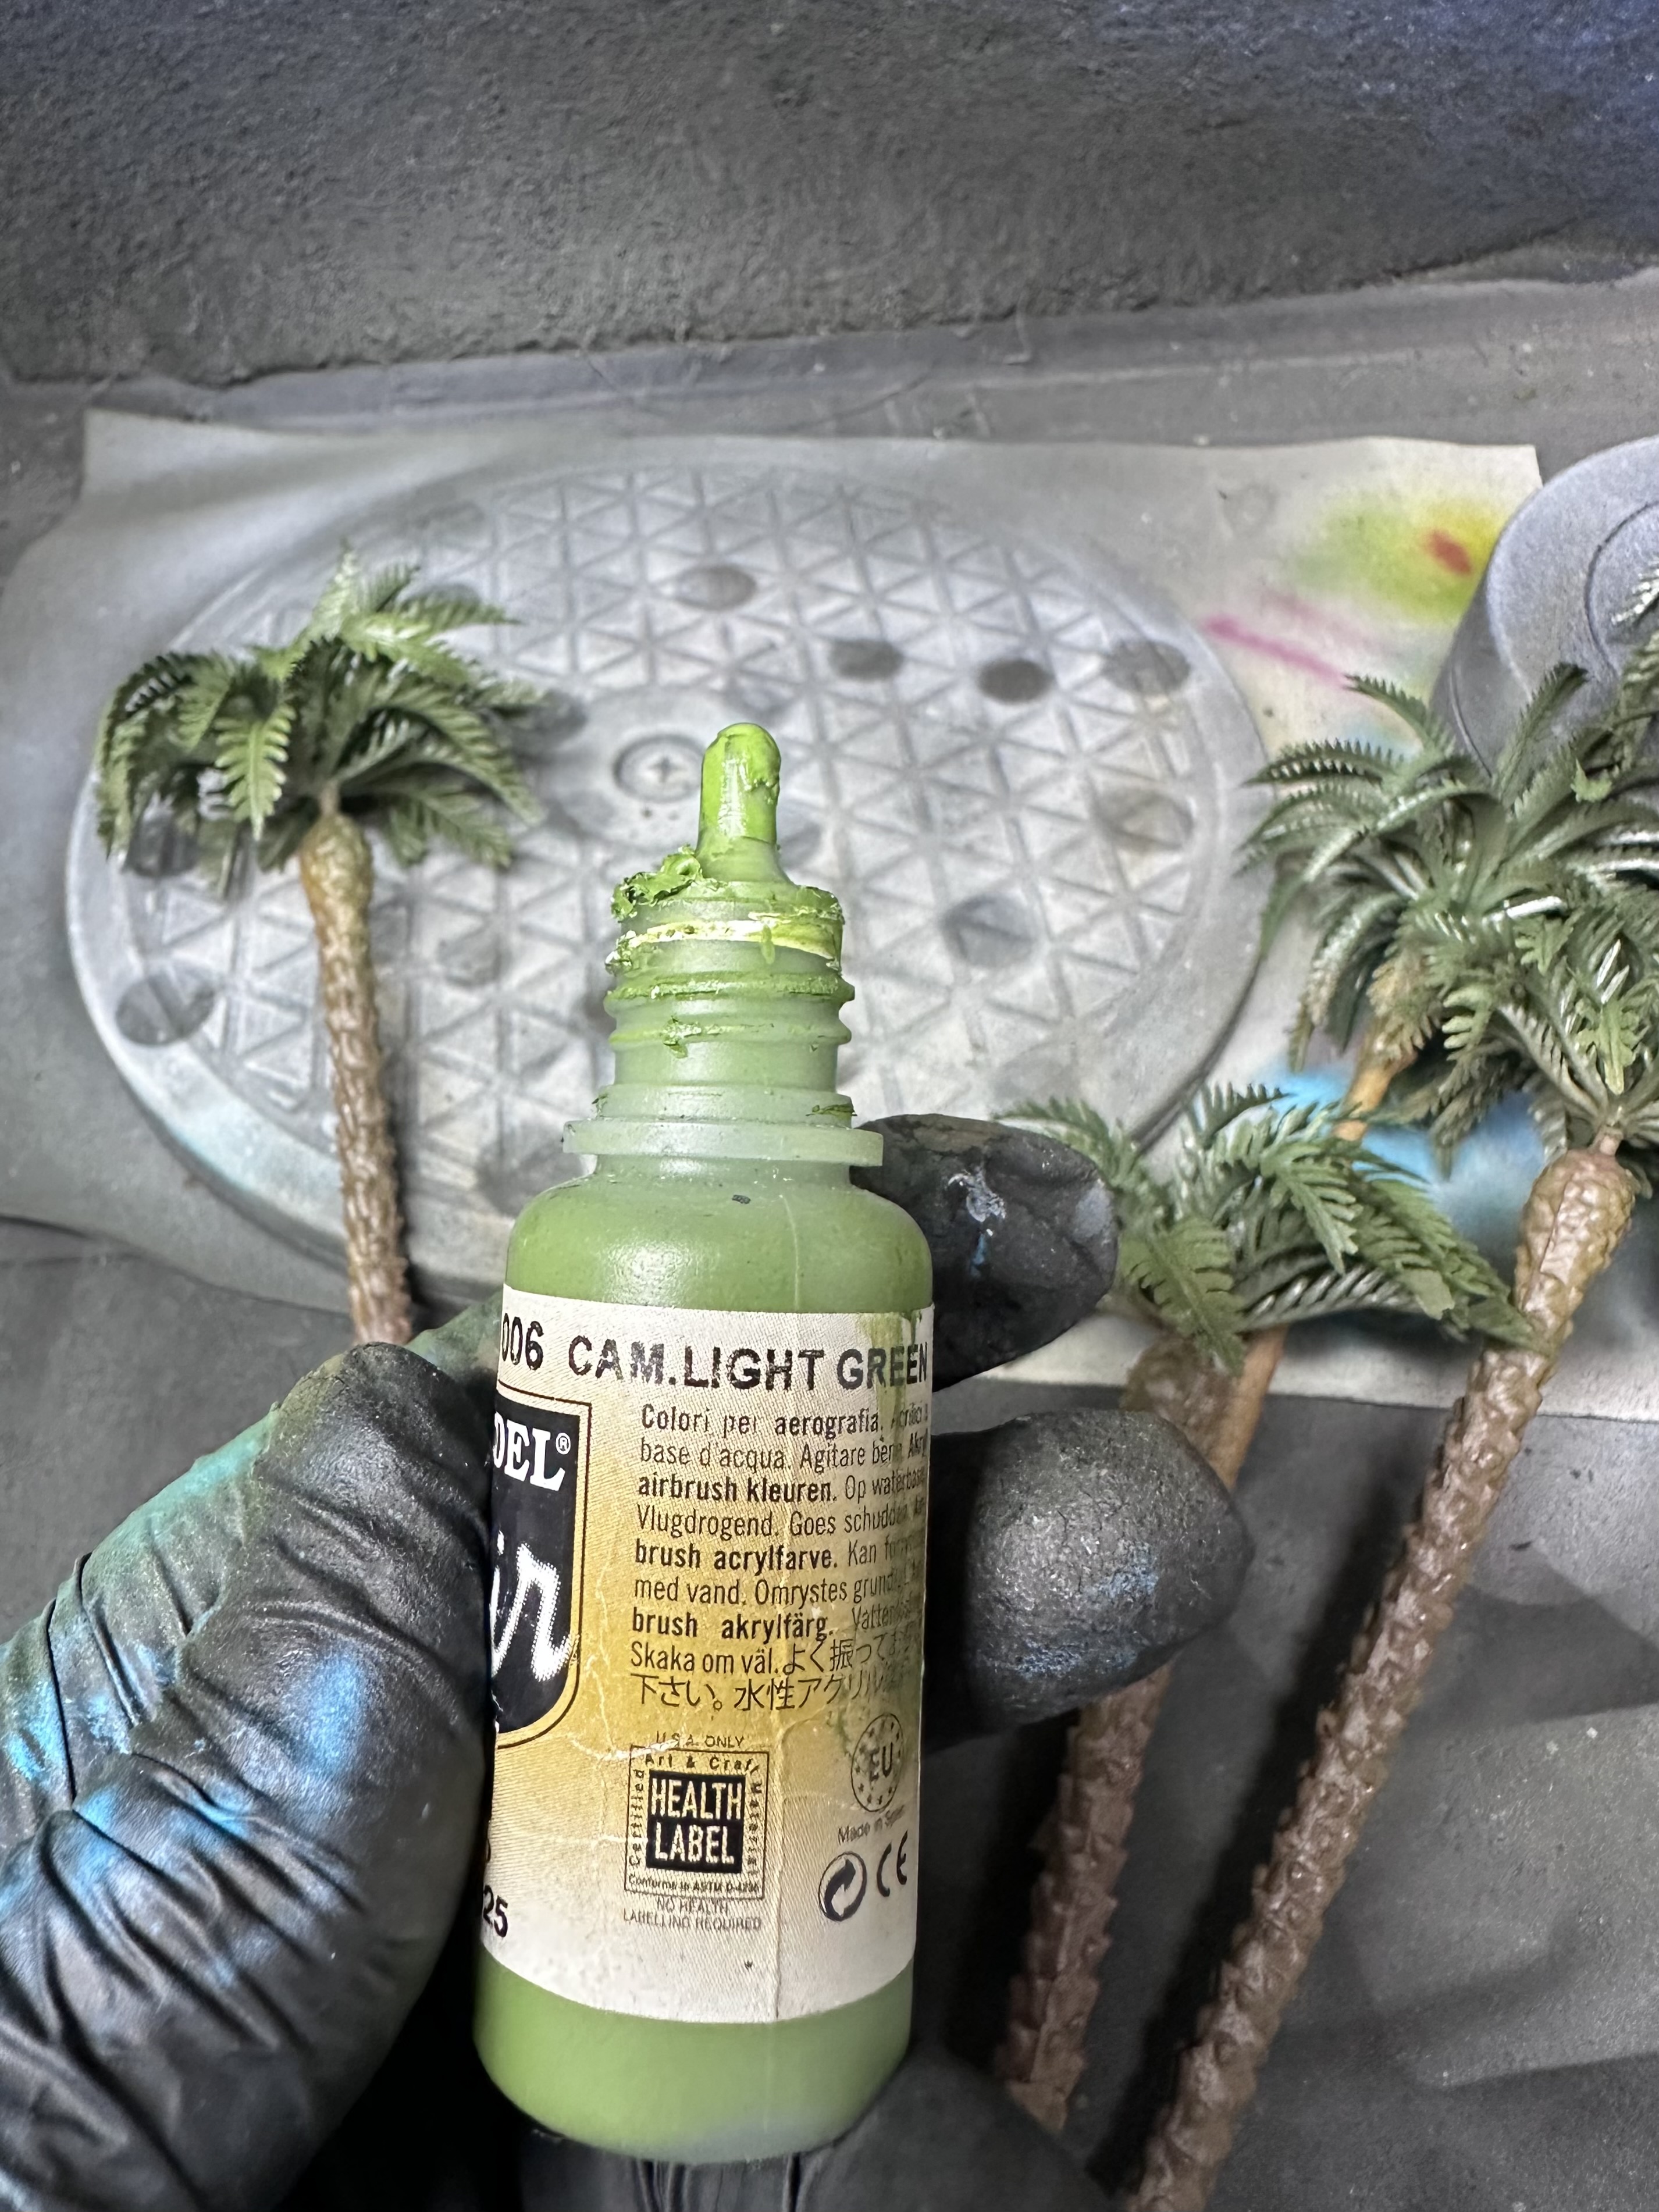 Camo Light Green for some highlighting
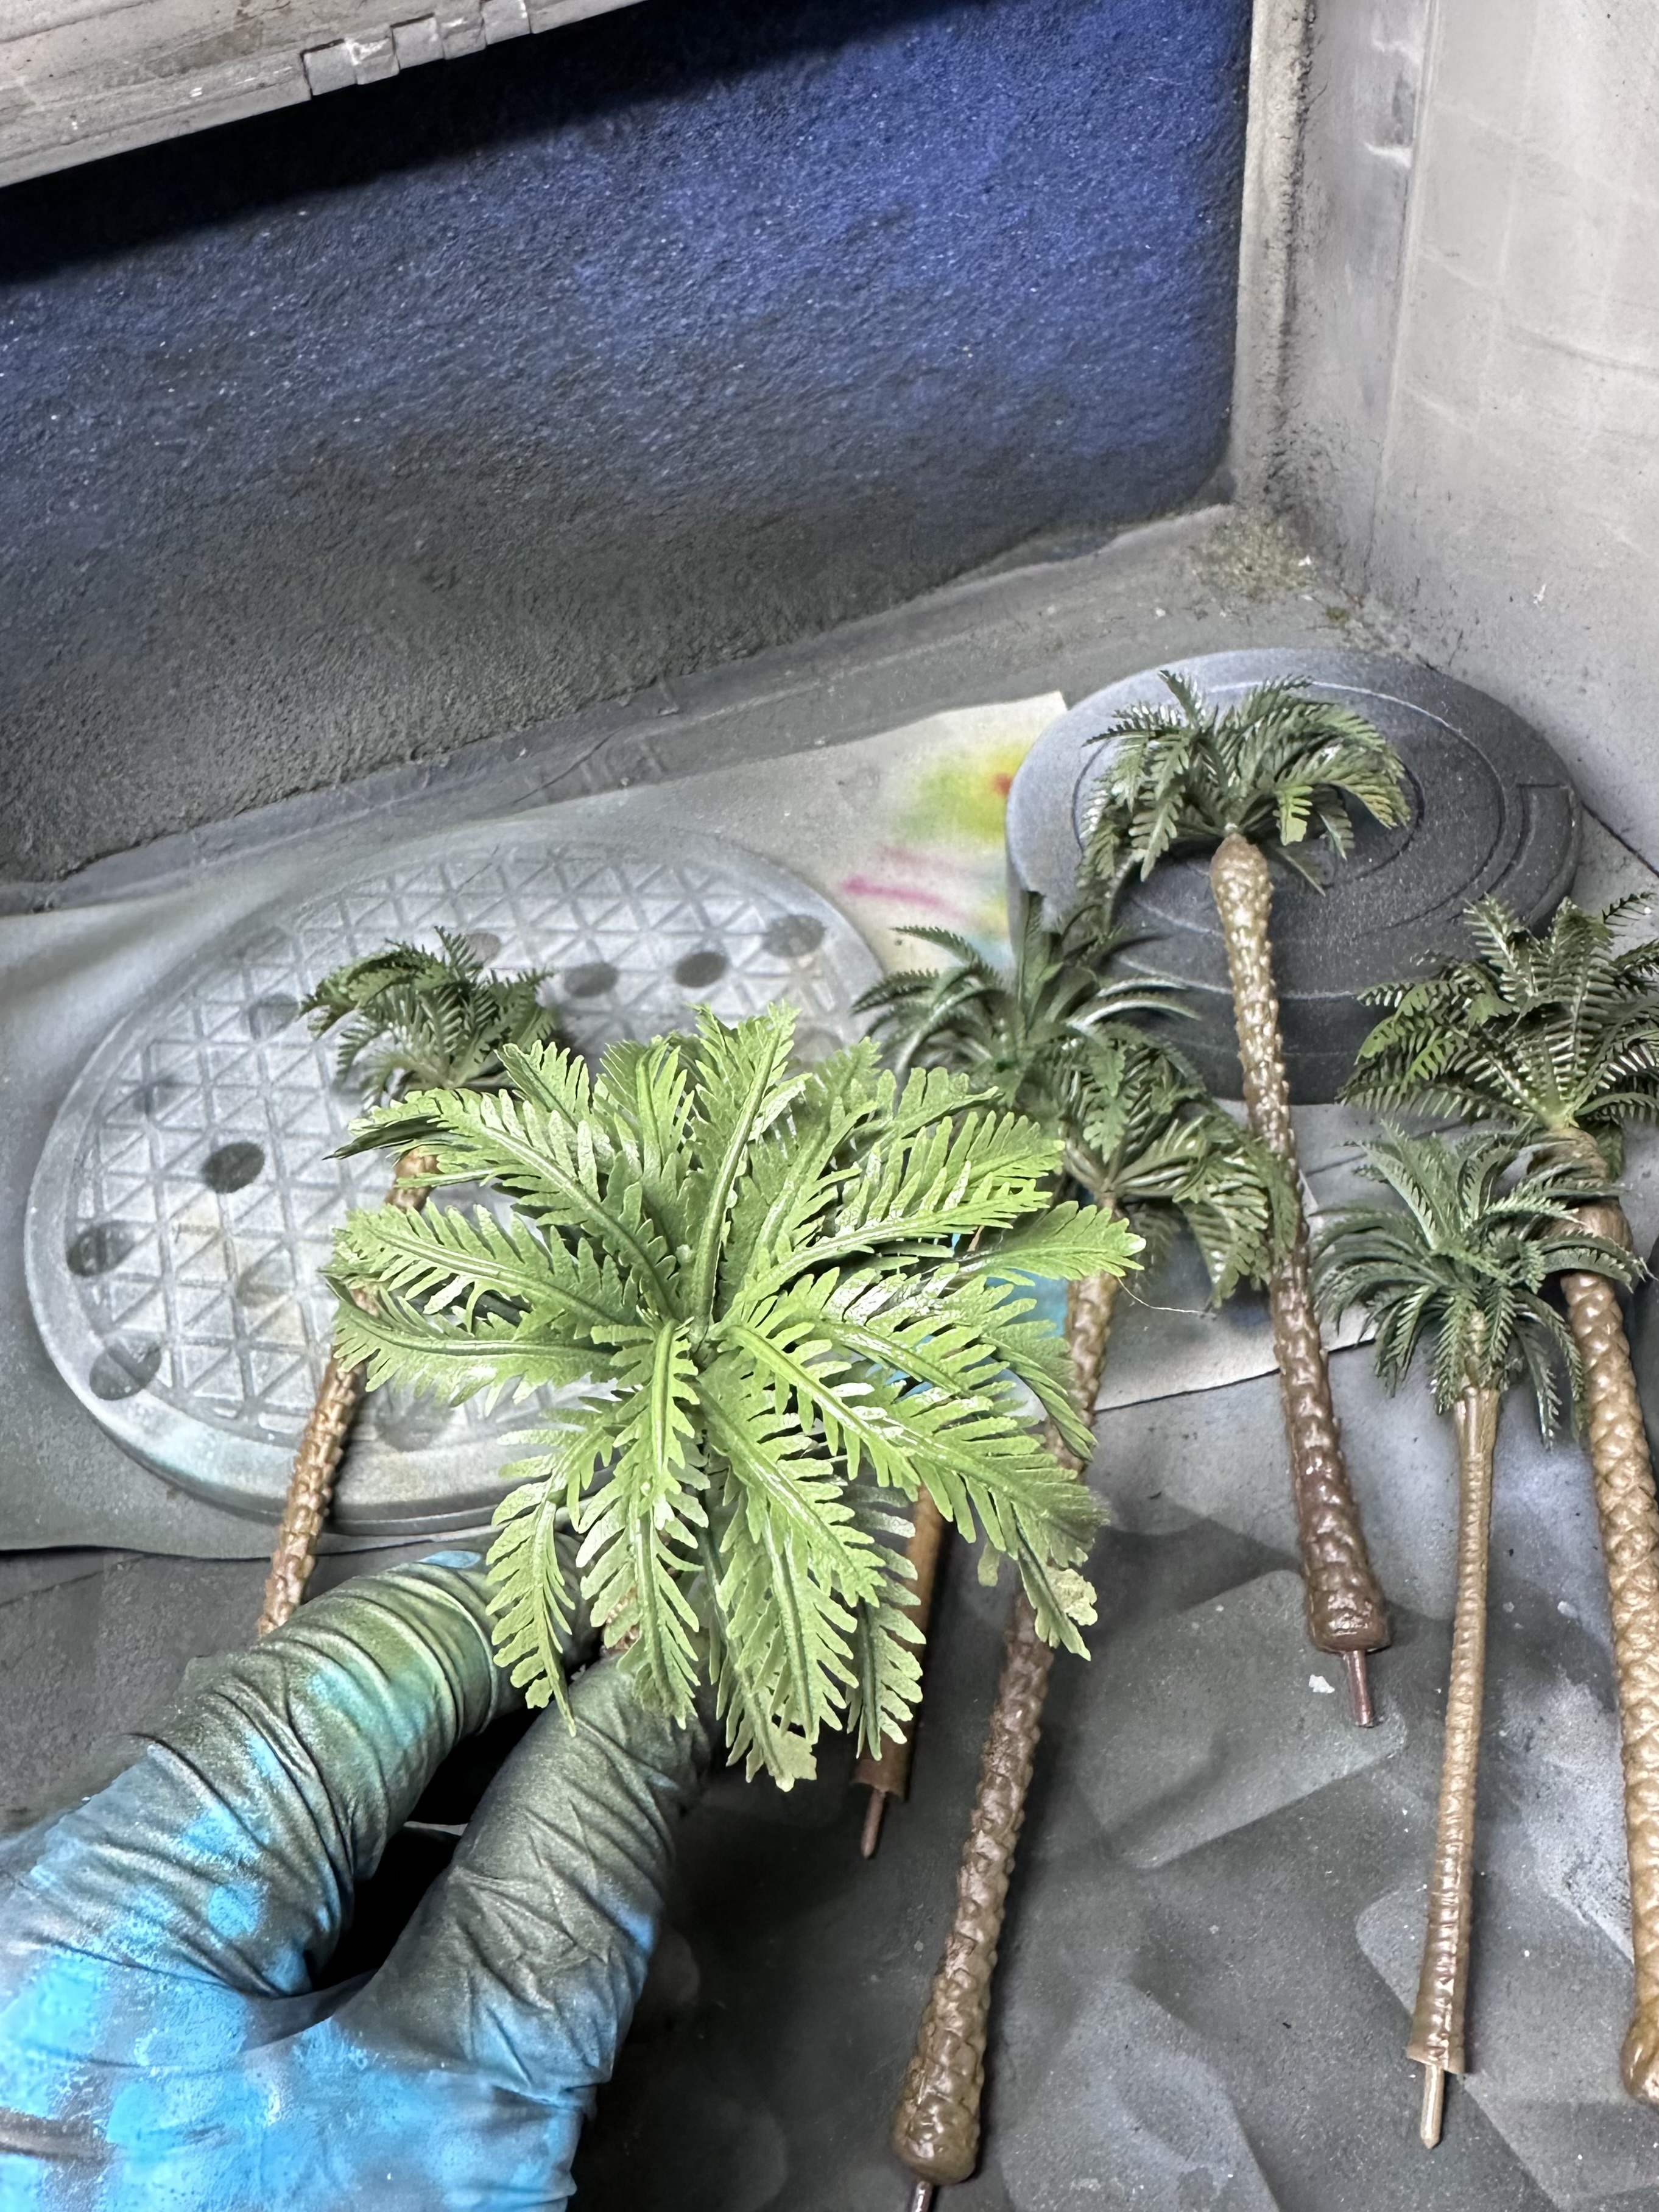 Pale Green as a final highlight. This is the end result
Weathering boxes and crates
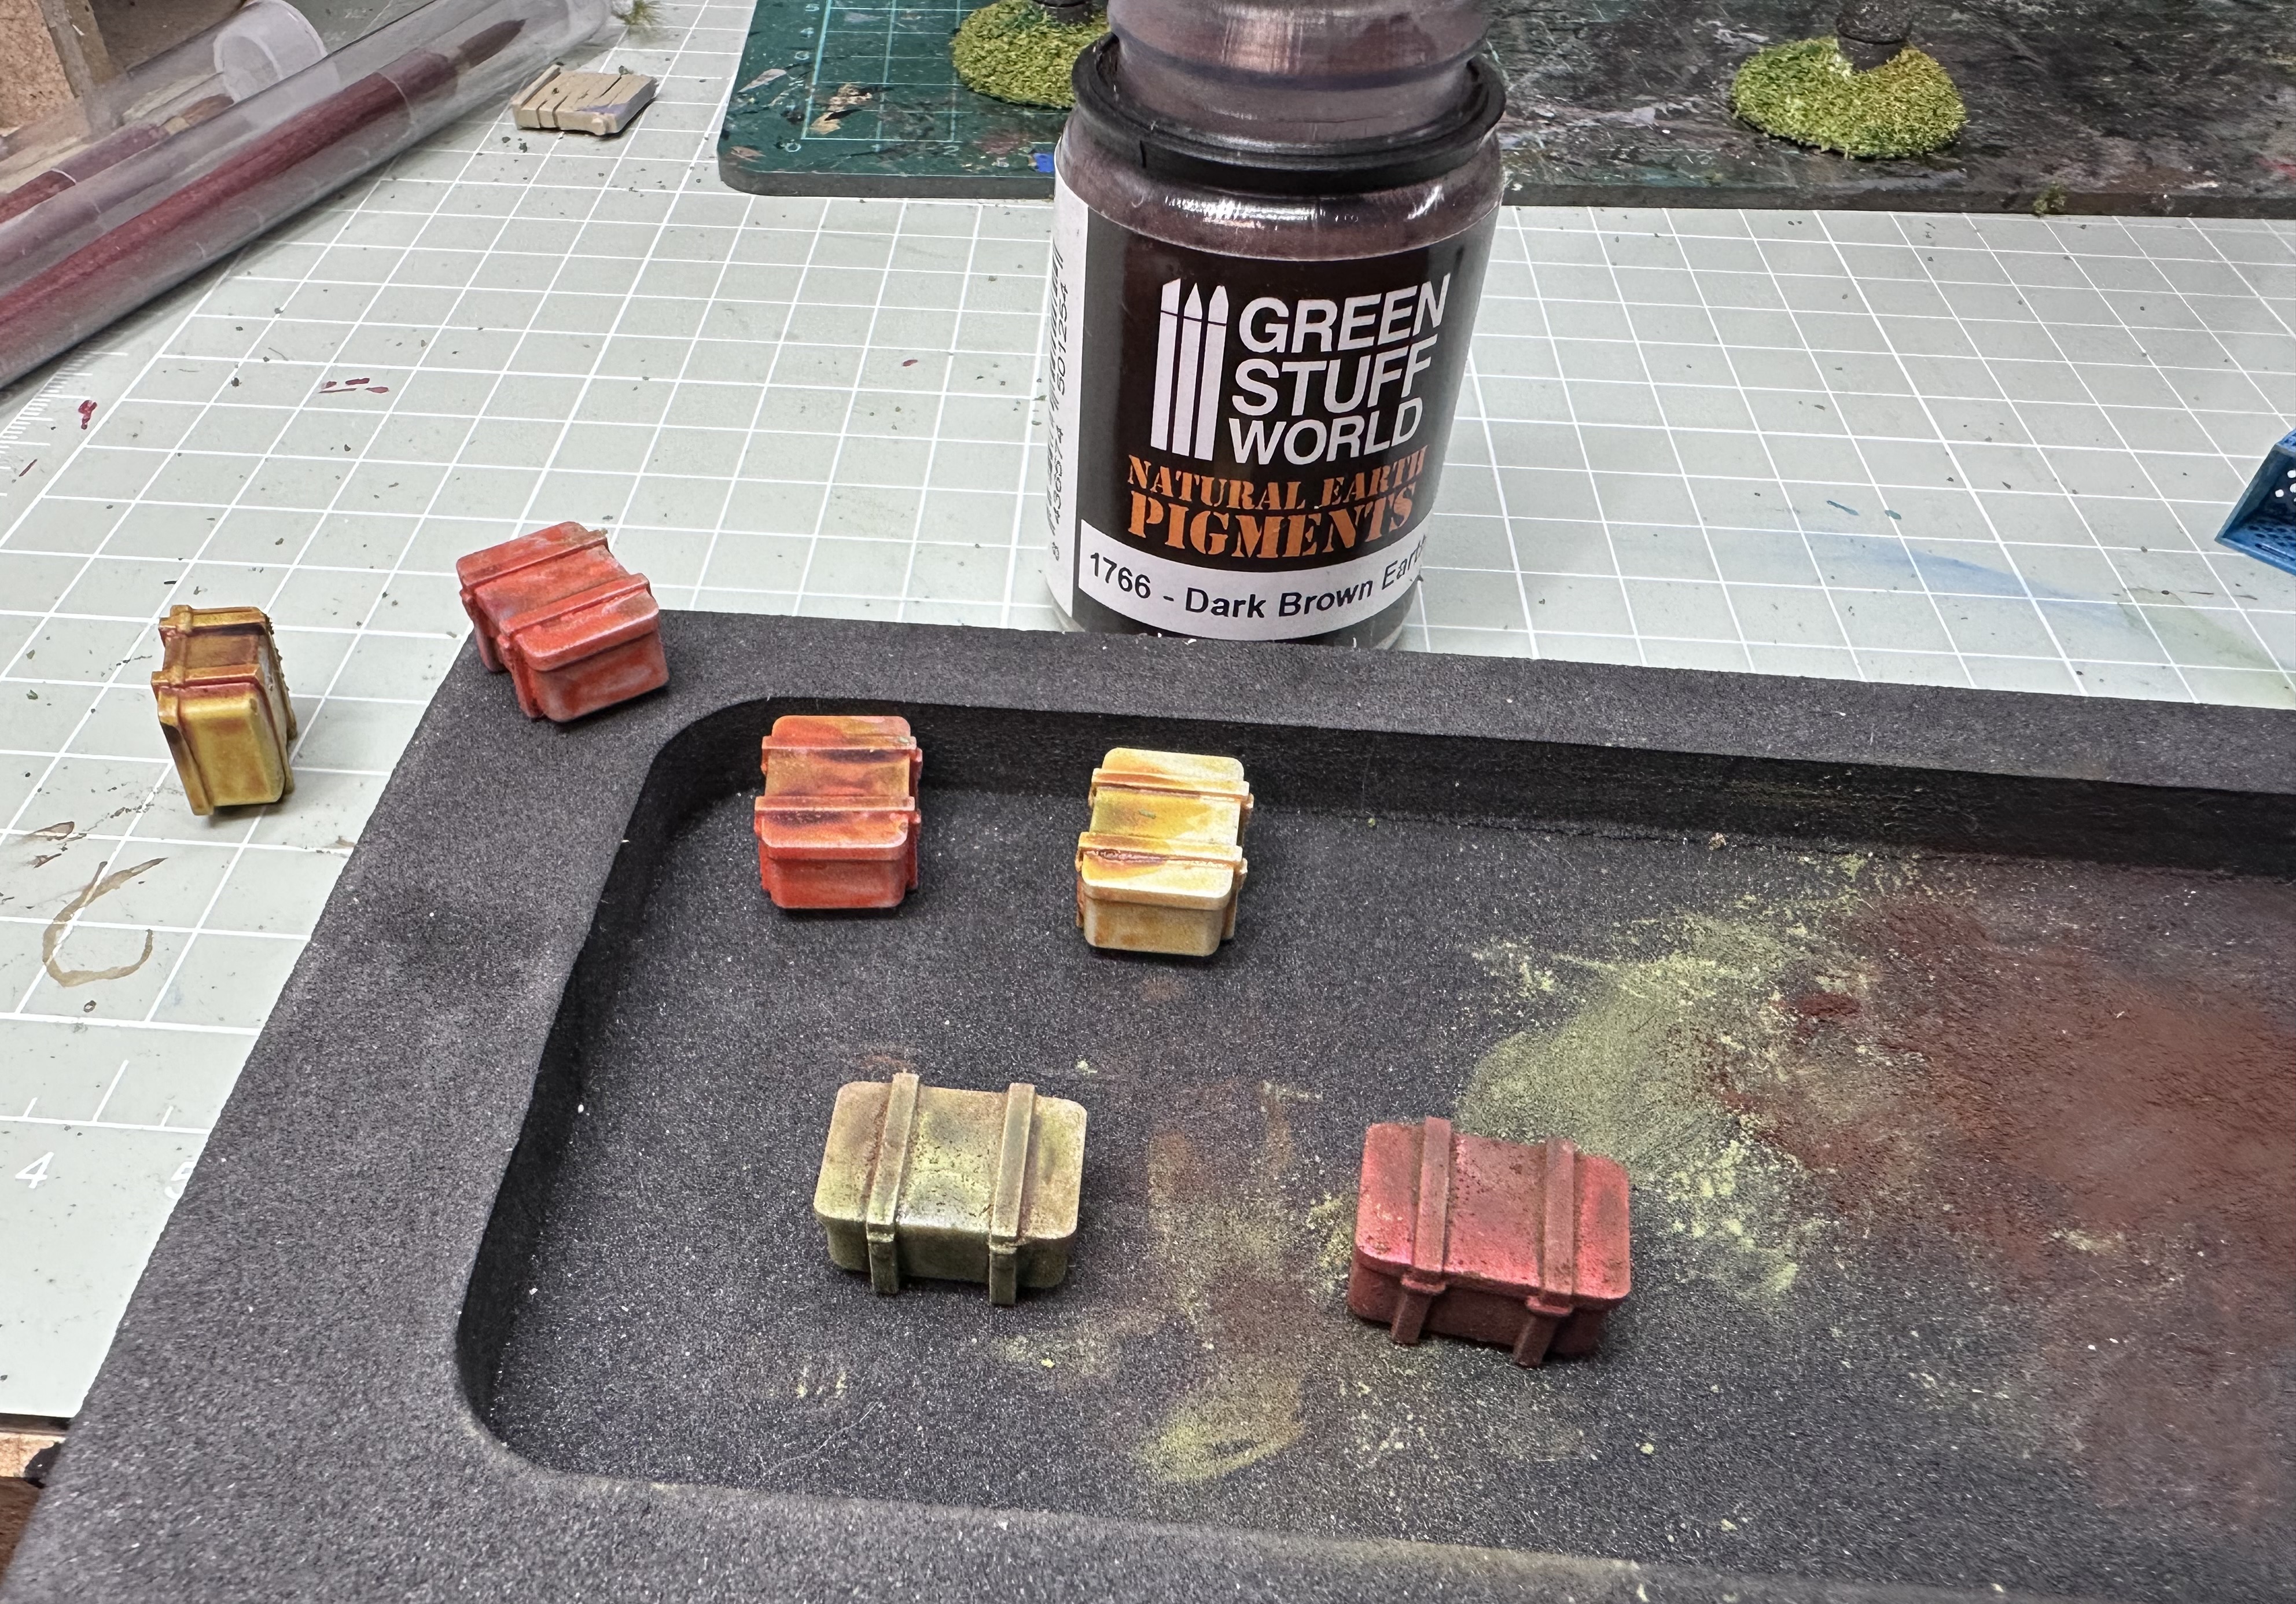
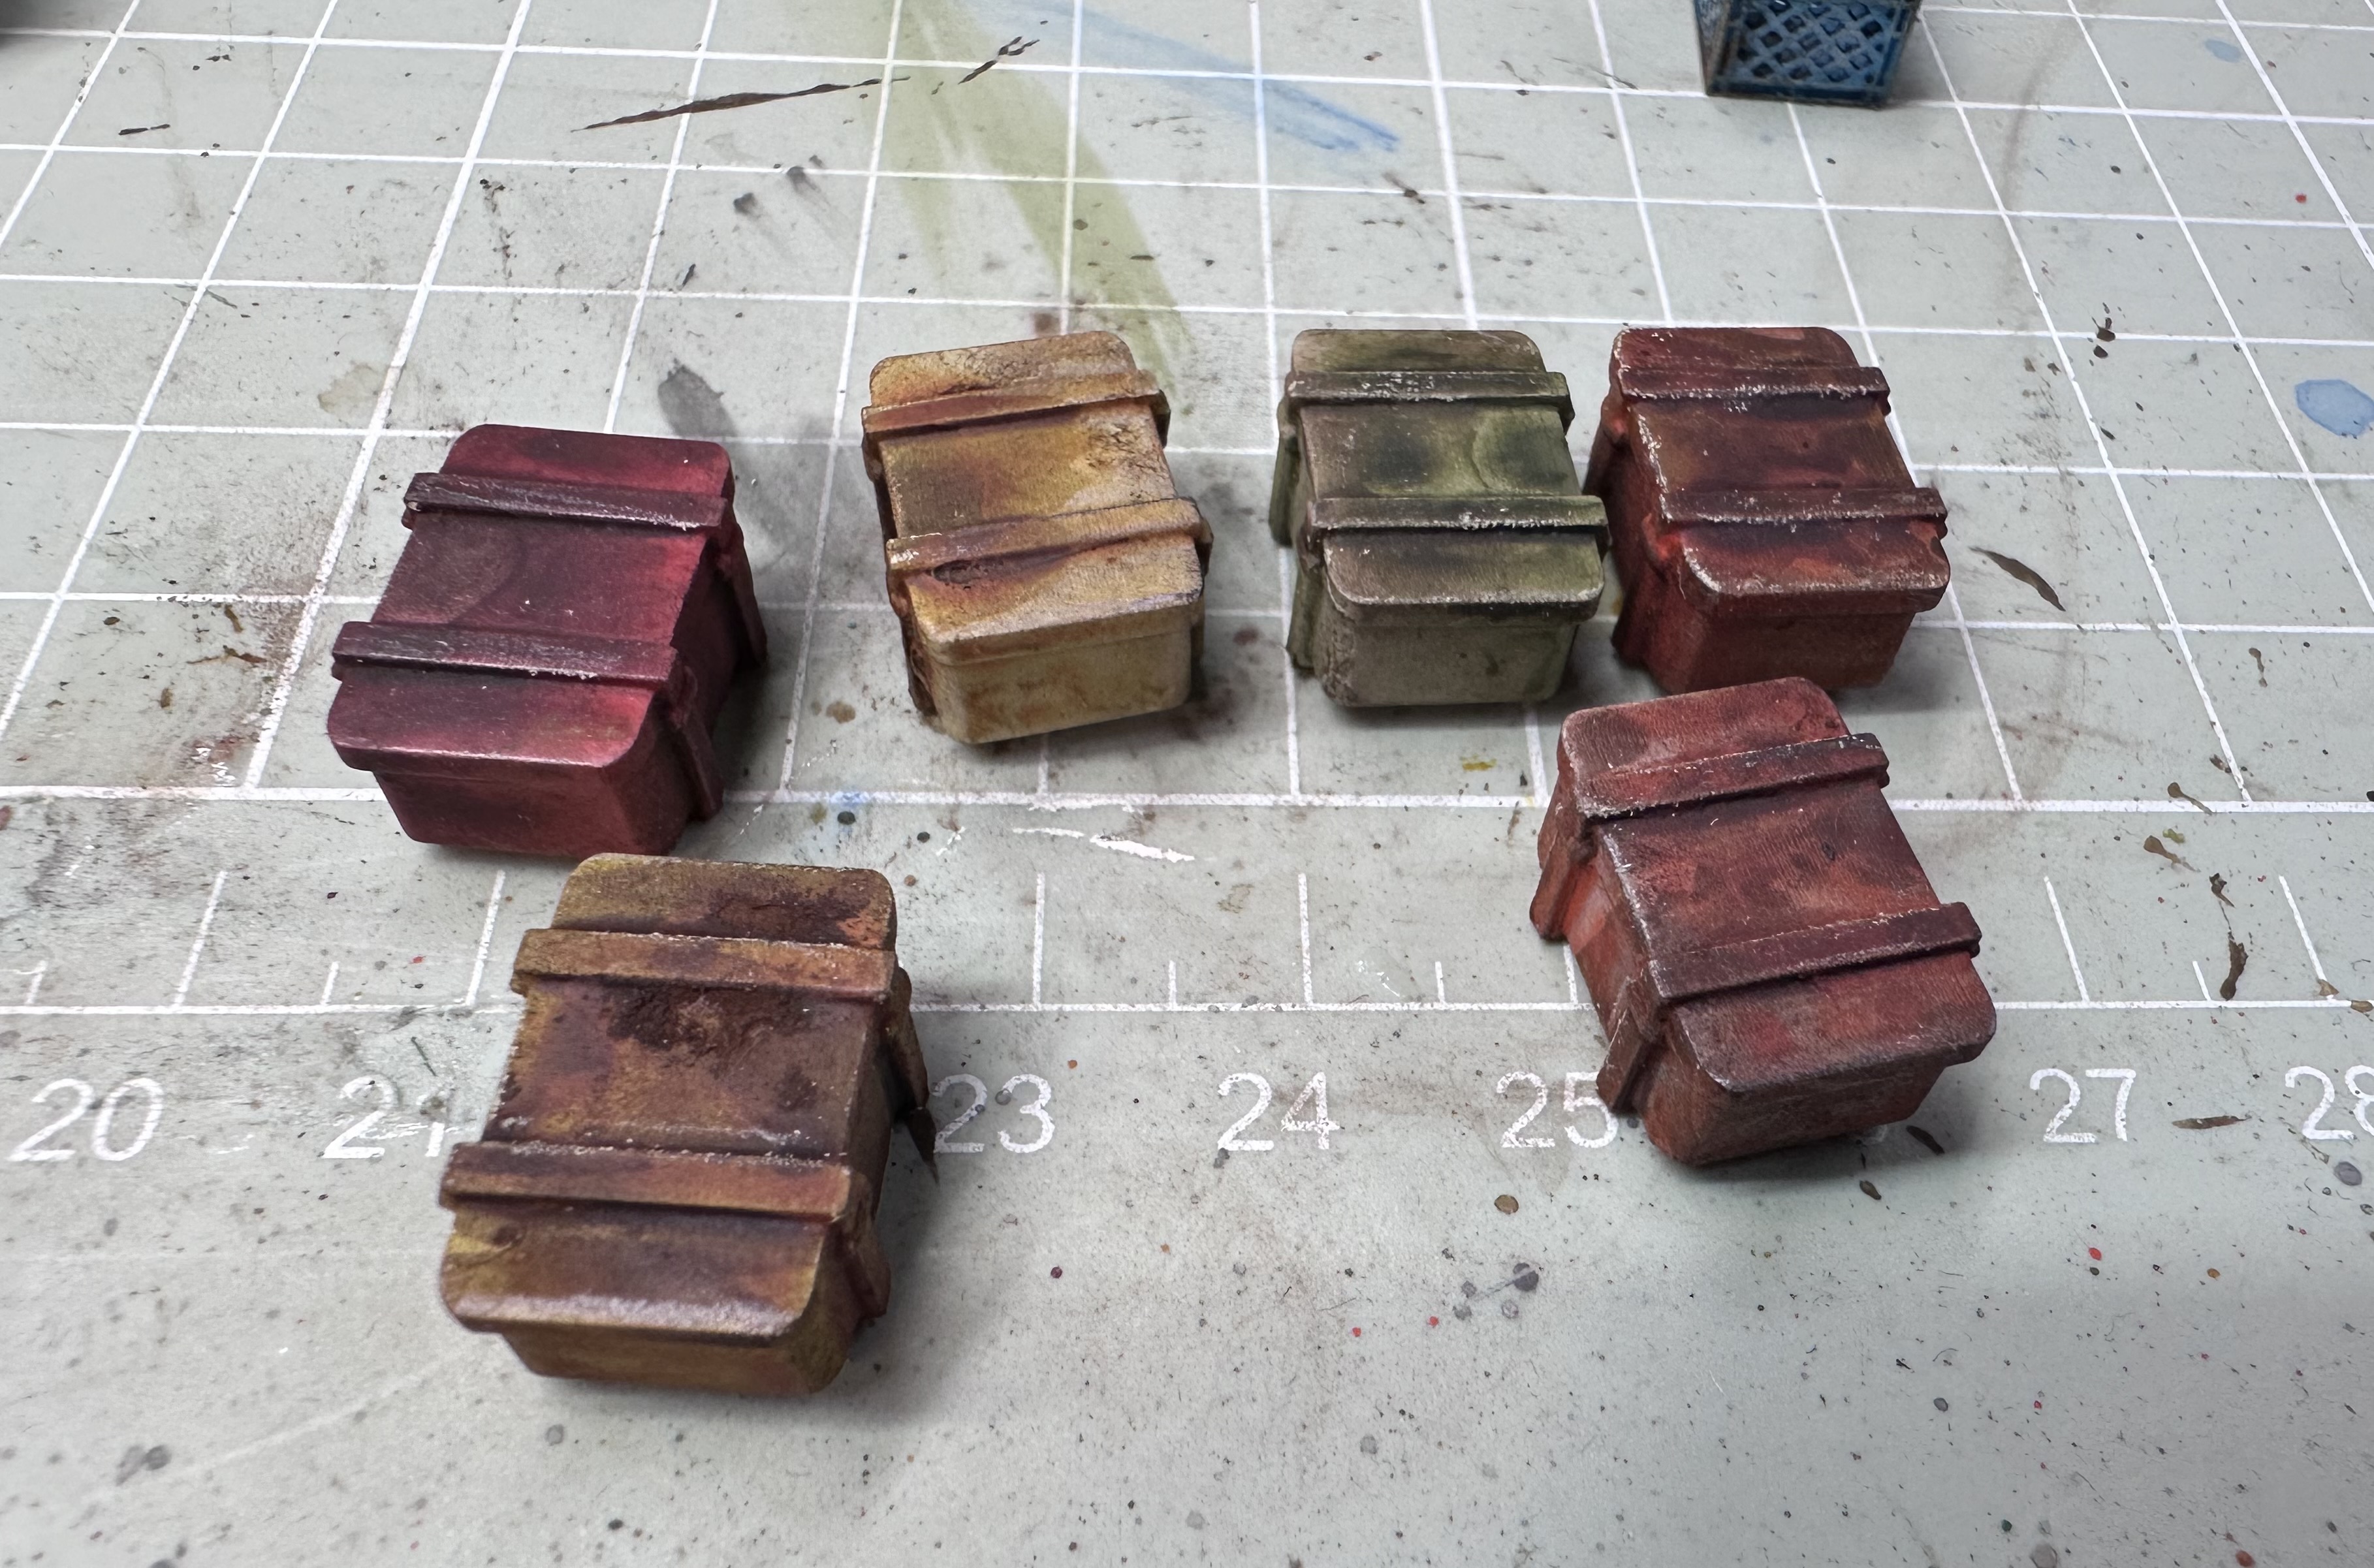
Weathering the boxes and crates.
They were first painted in quick manner with Contrast paints.
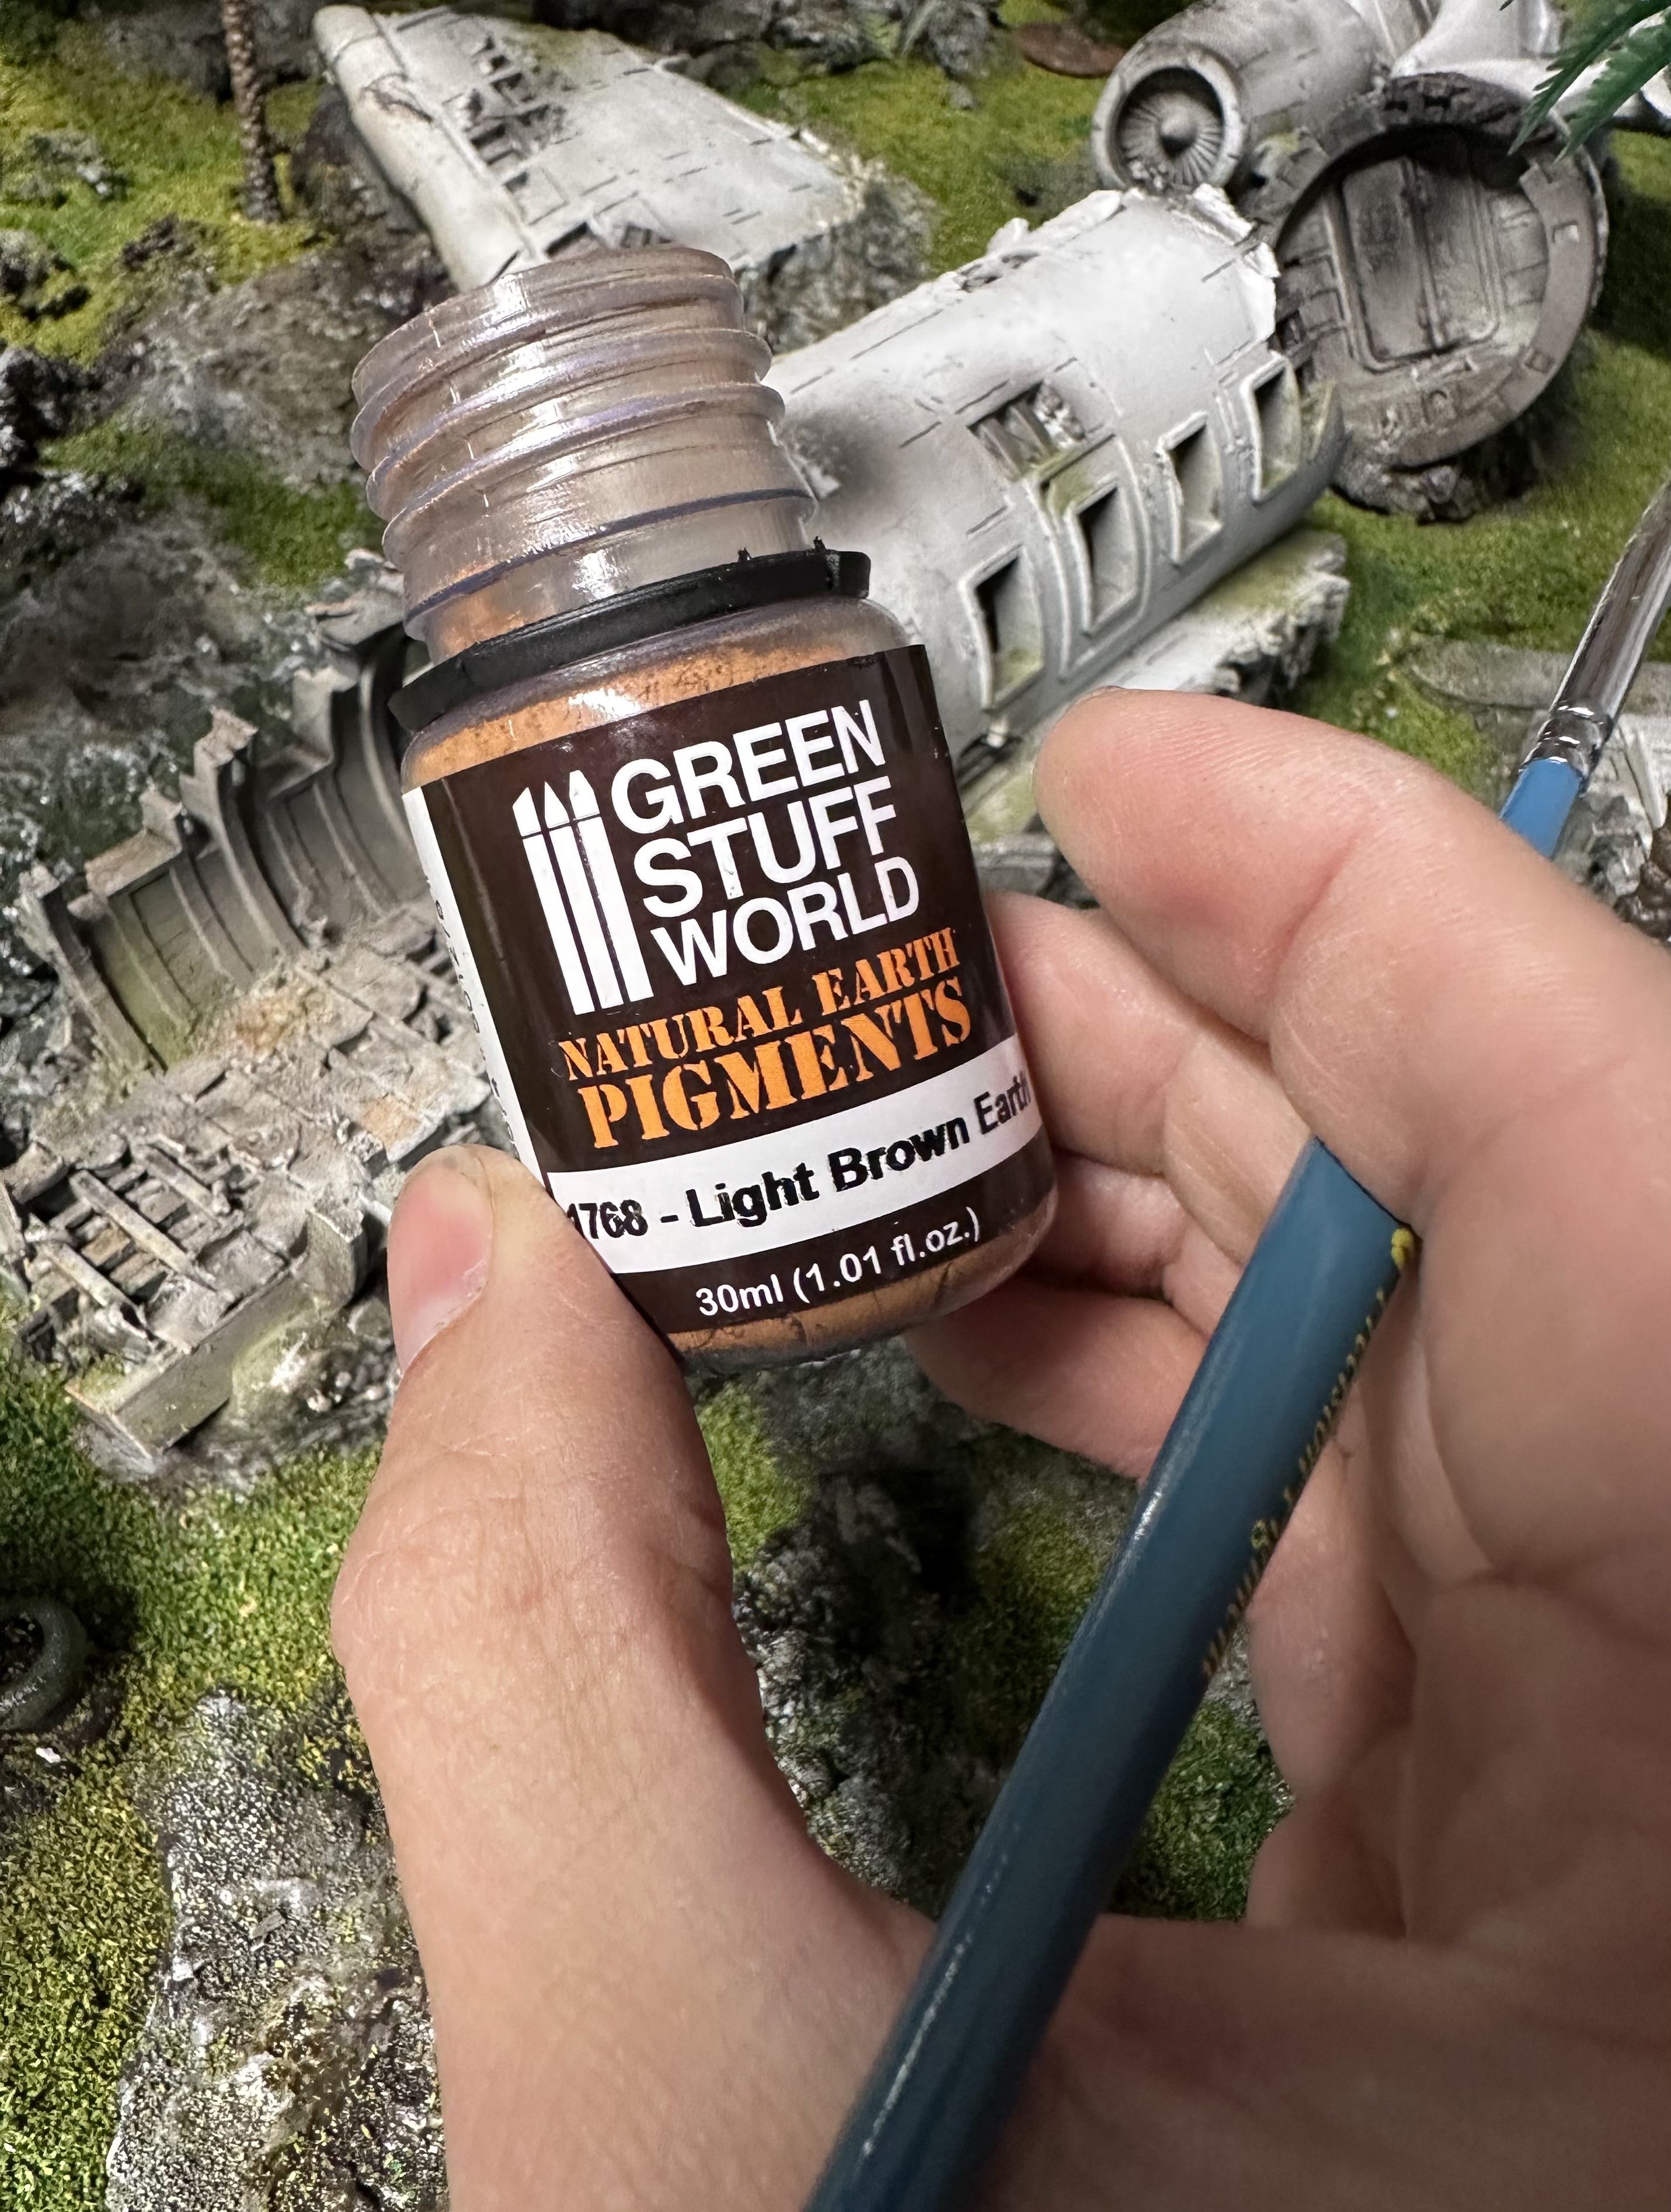
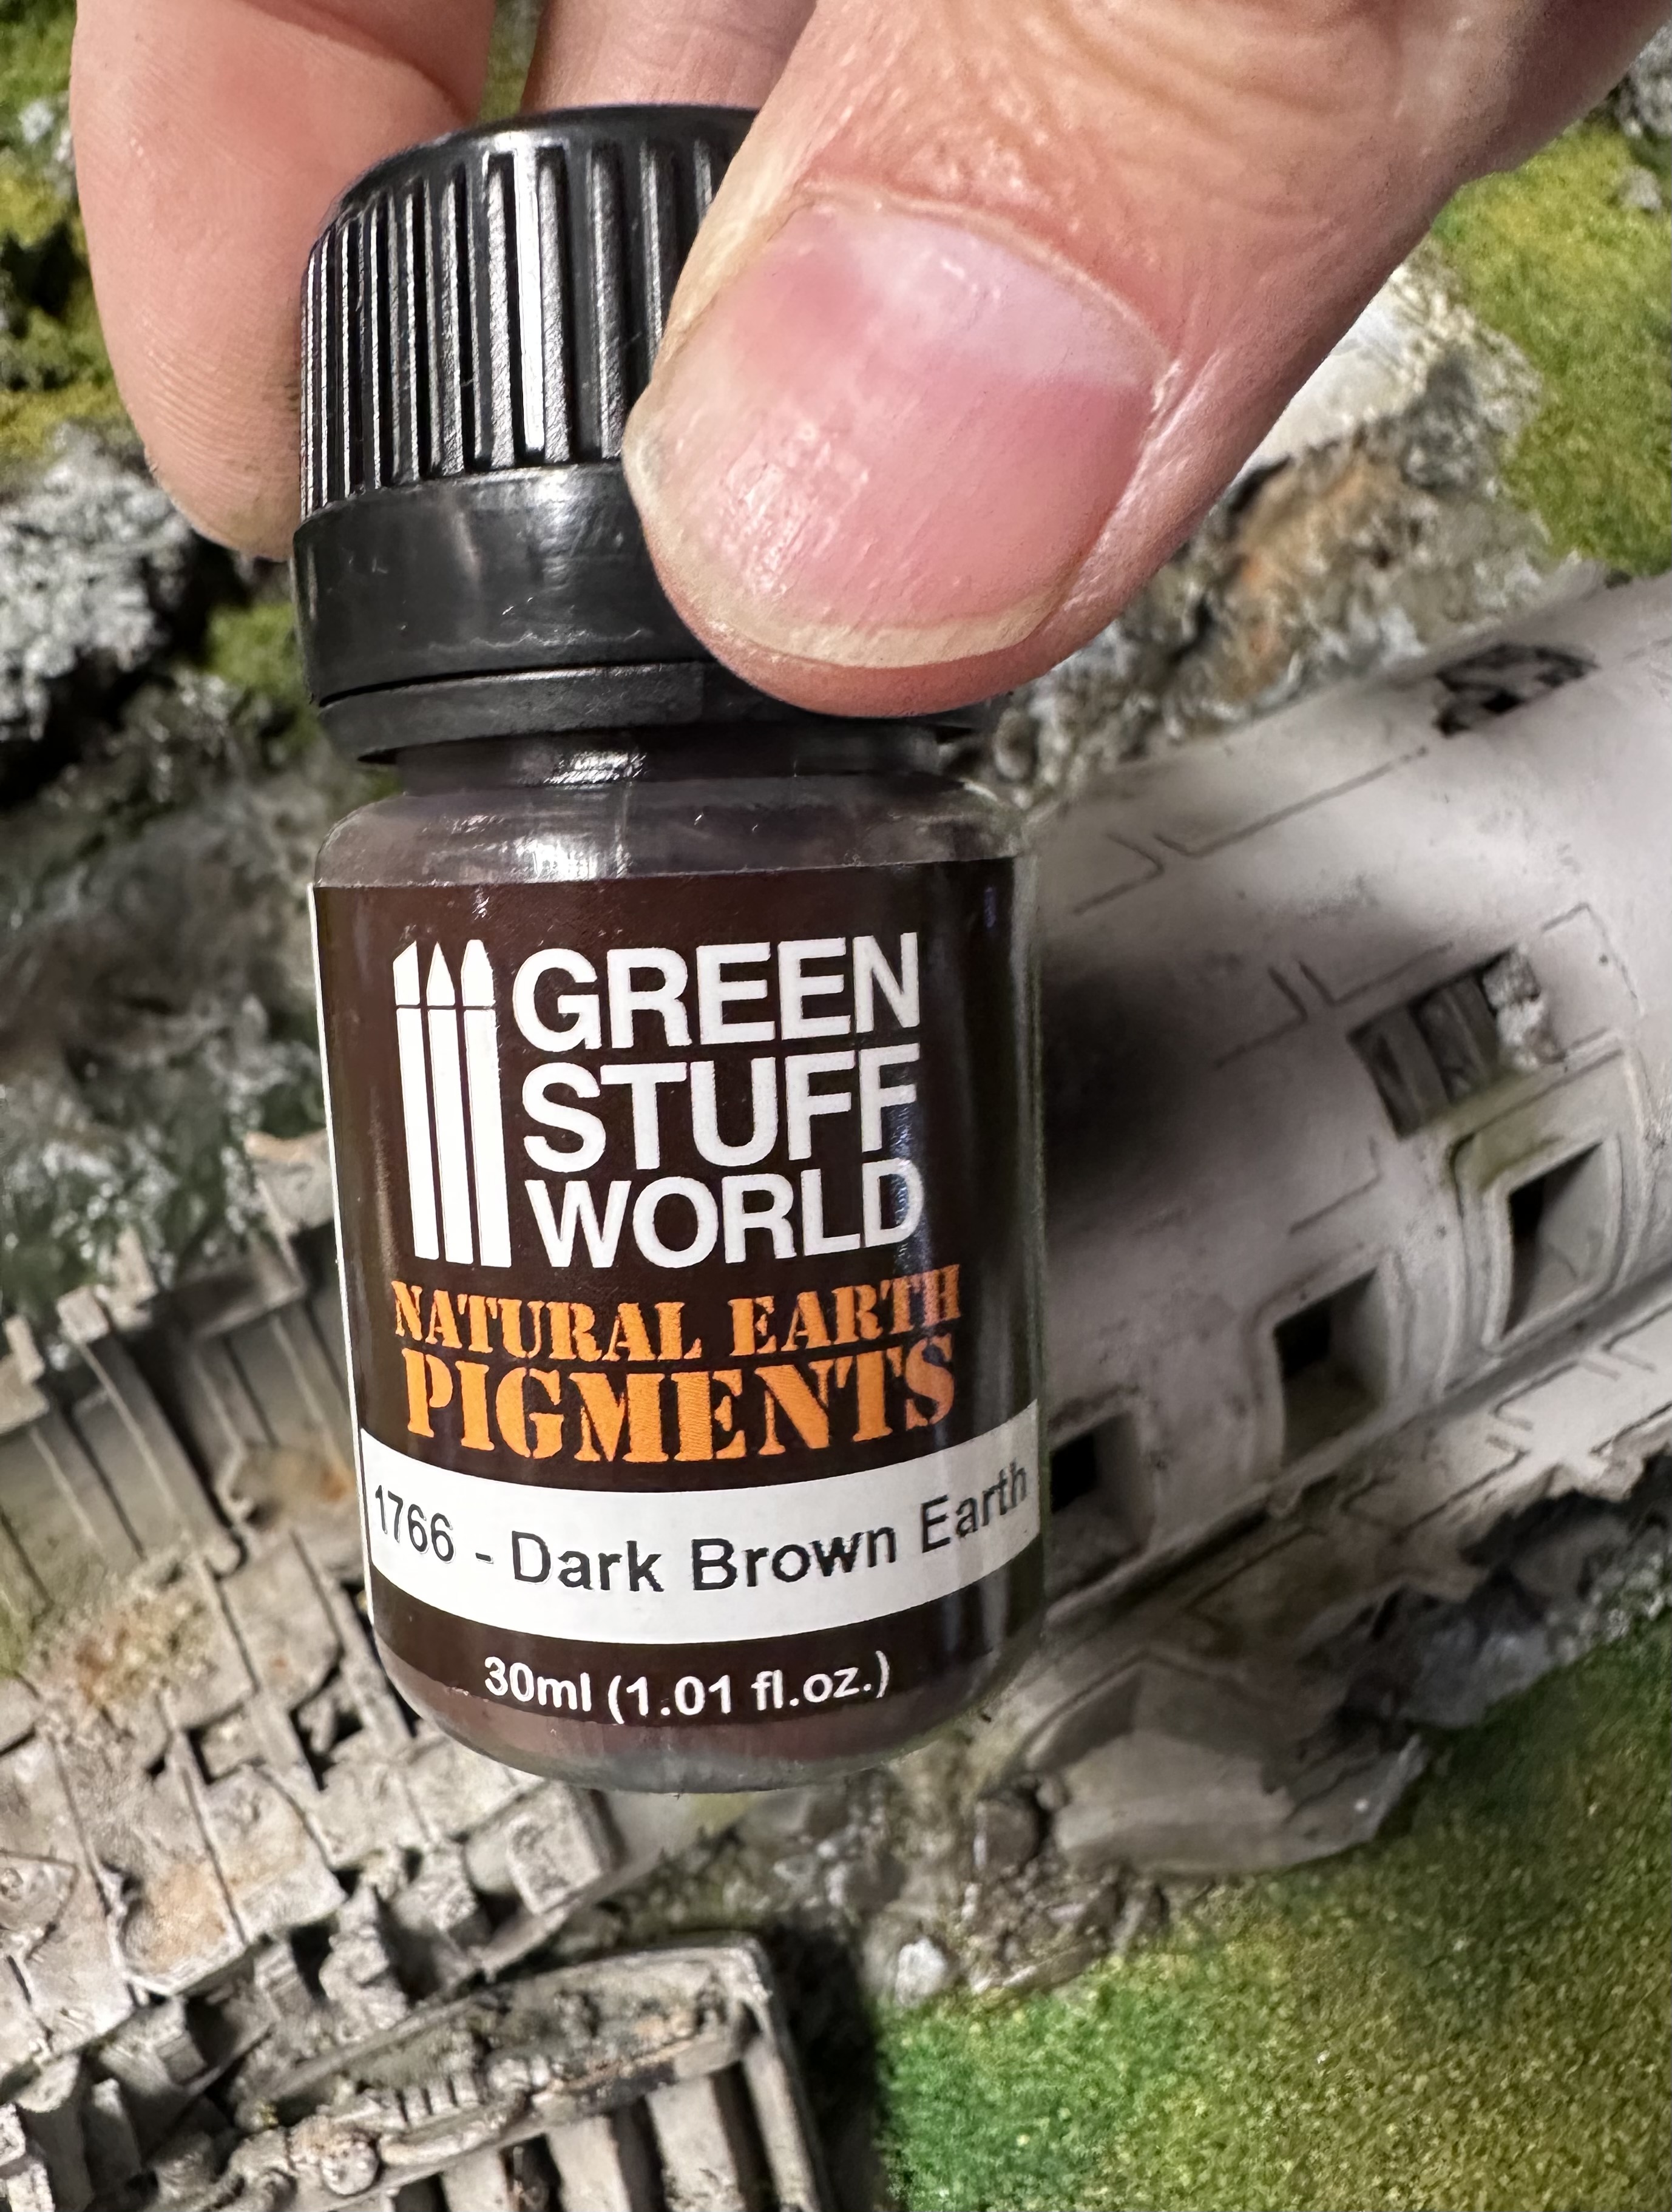
For weathering I went in heavy with a dark brown pigment powder, really rubbing it on the surfaces with a short bristled brush. I used the weathering pencils to bring out some edges.
Finally sealed them with matt varnish to lock in the pigments and get rid of the Contrast shine.
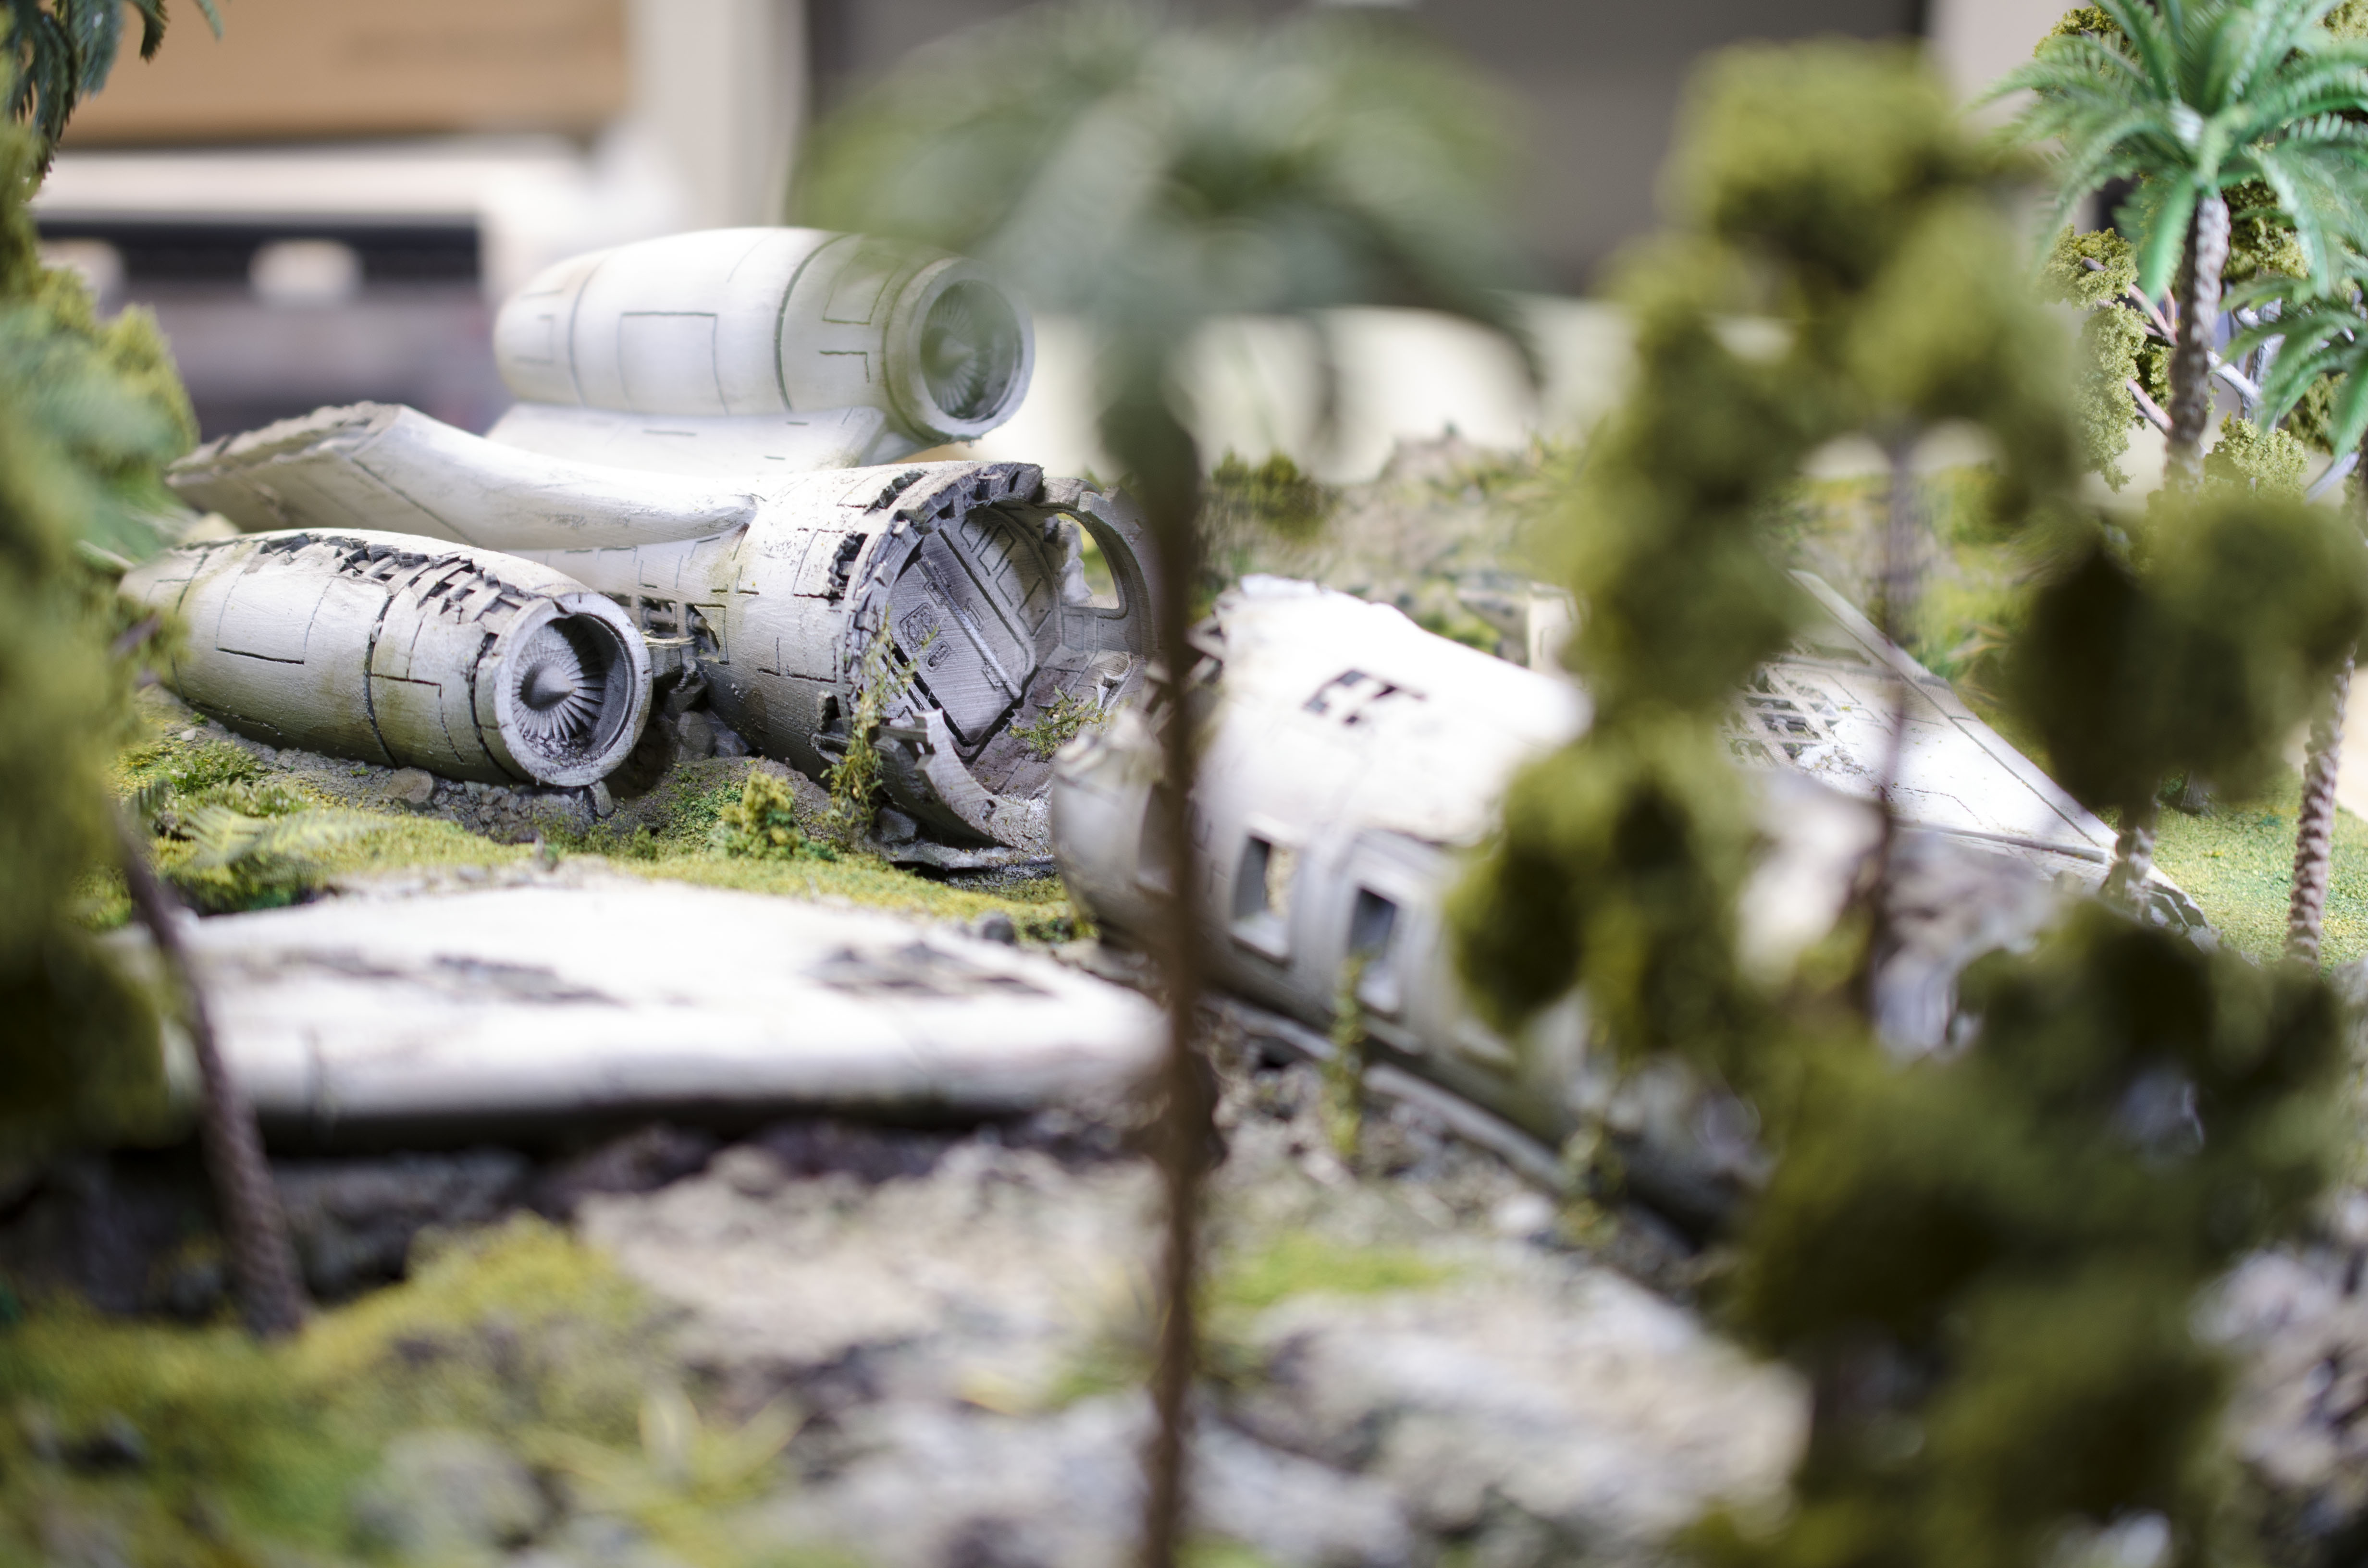
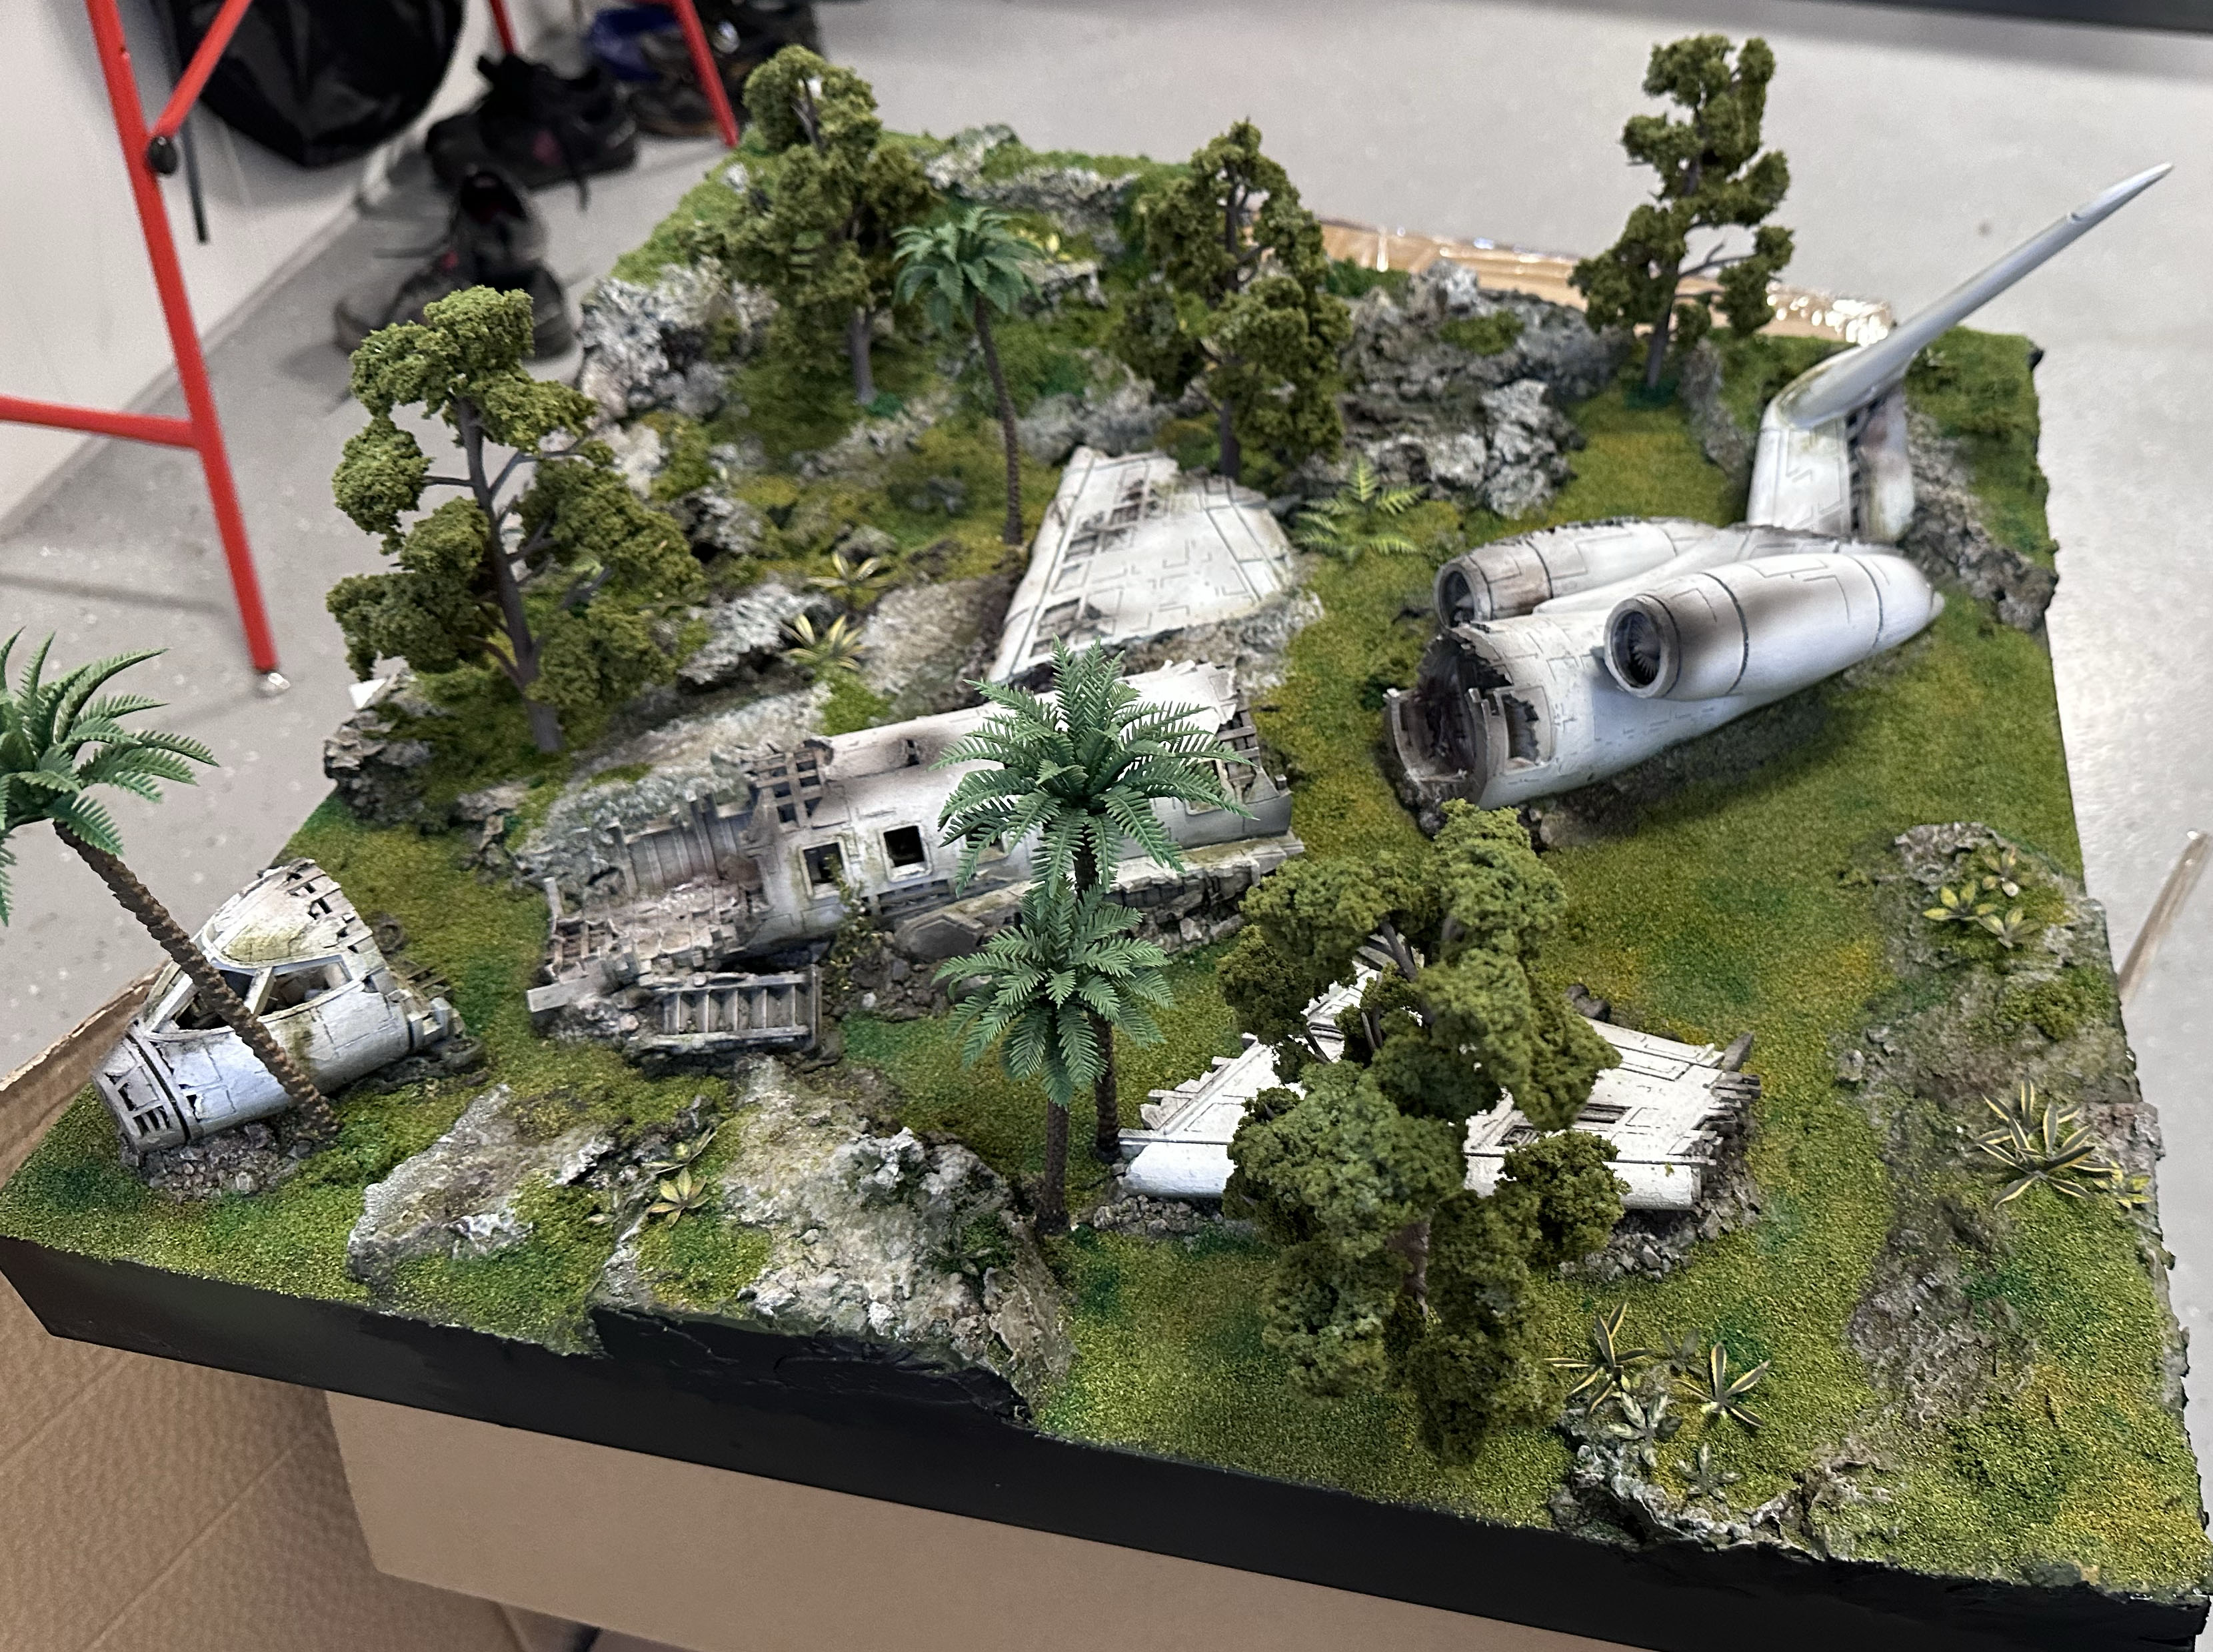
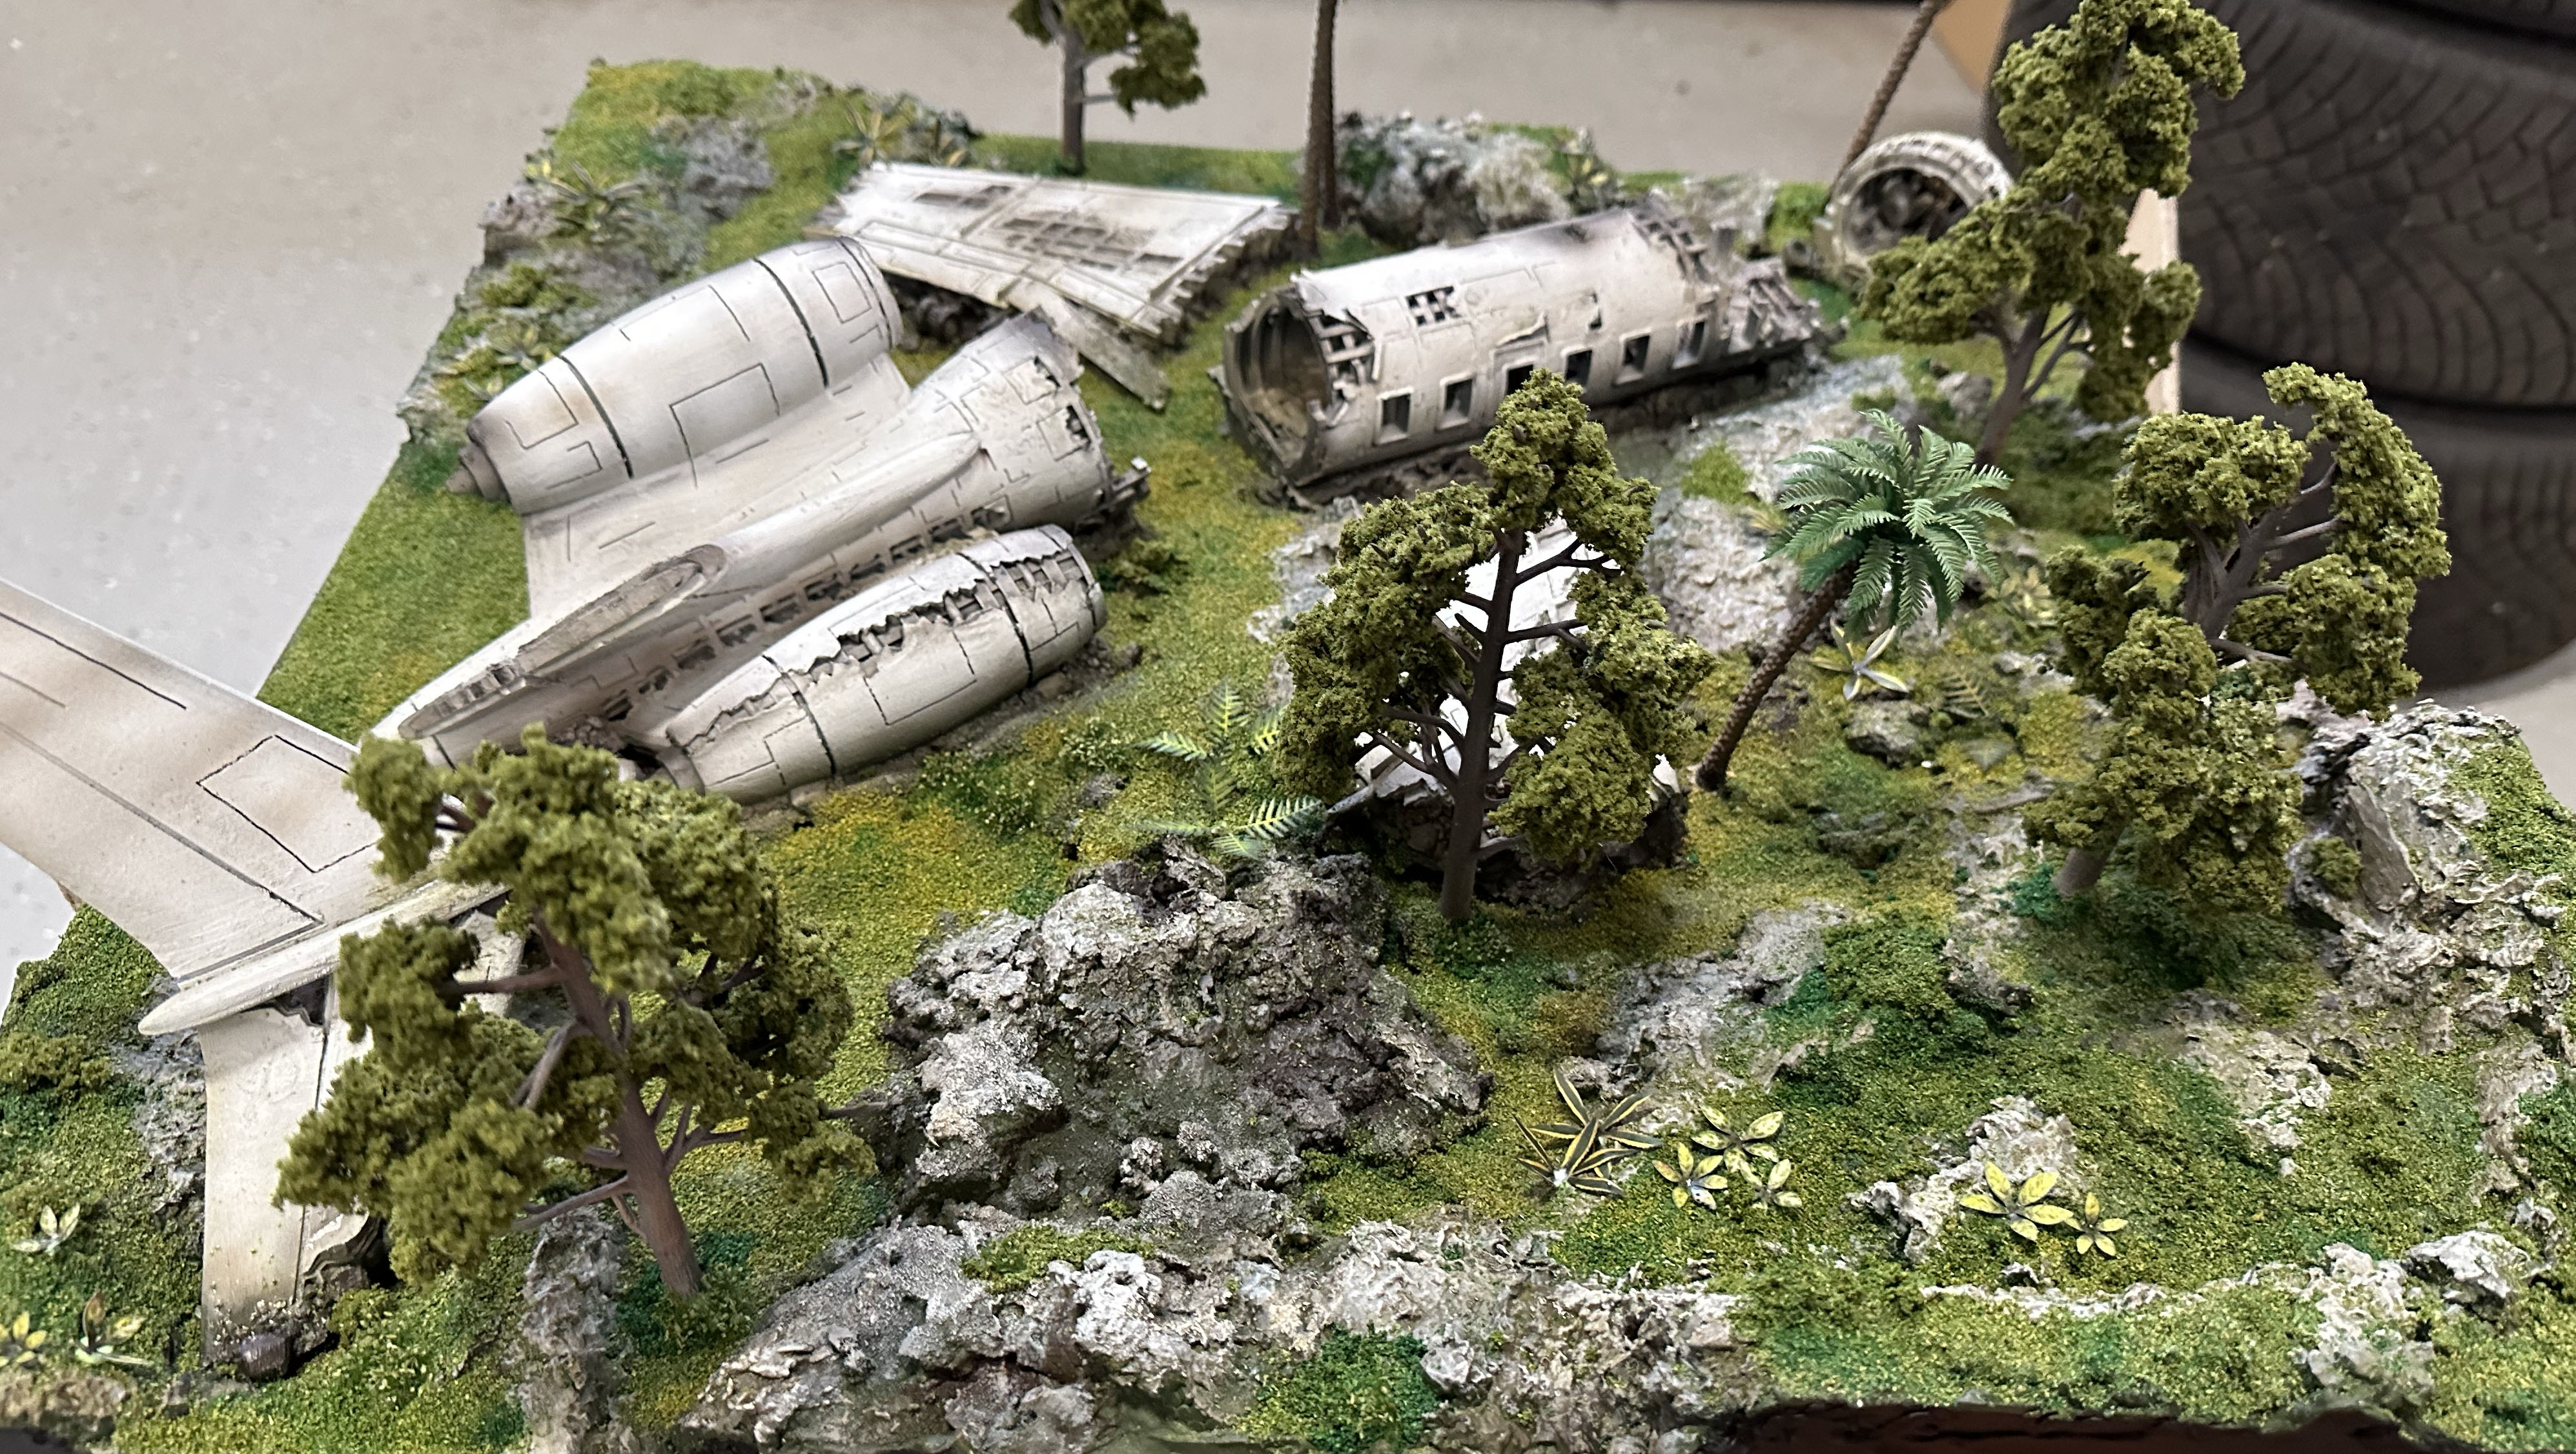
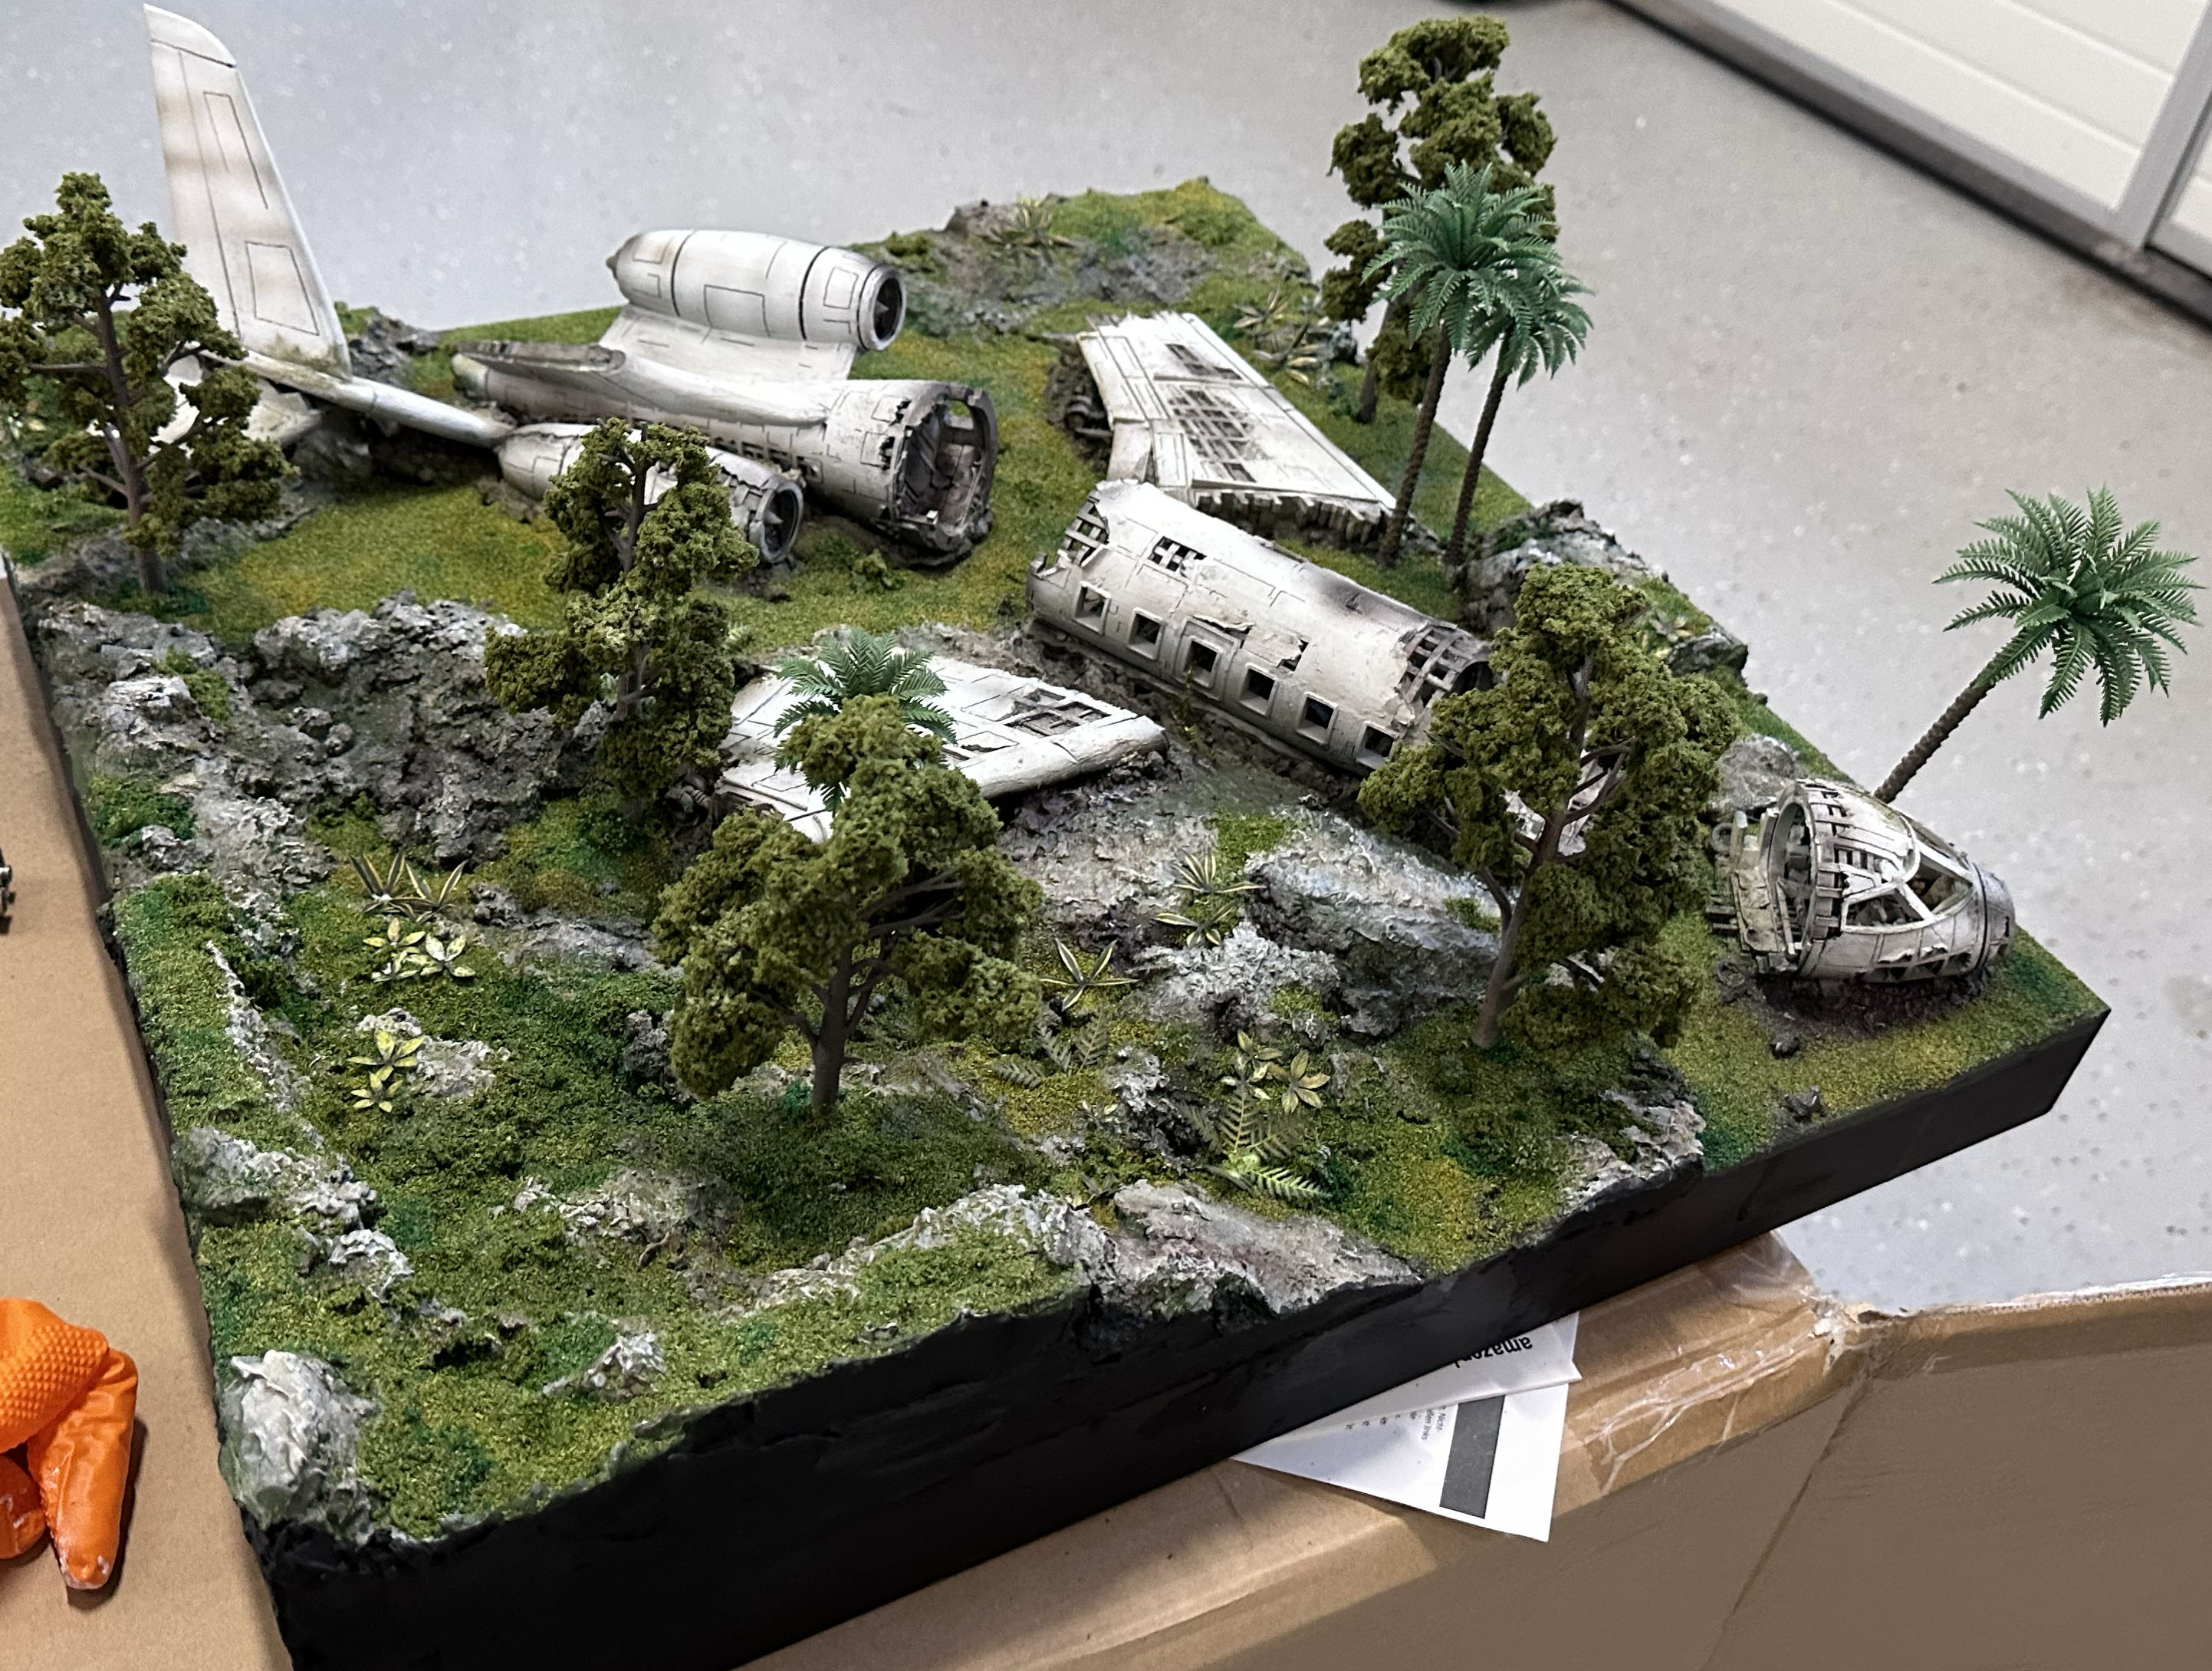
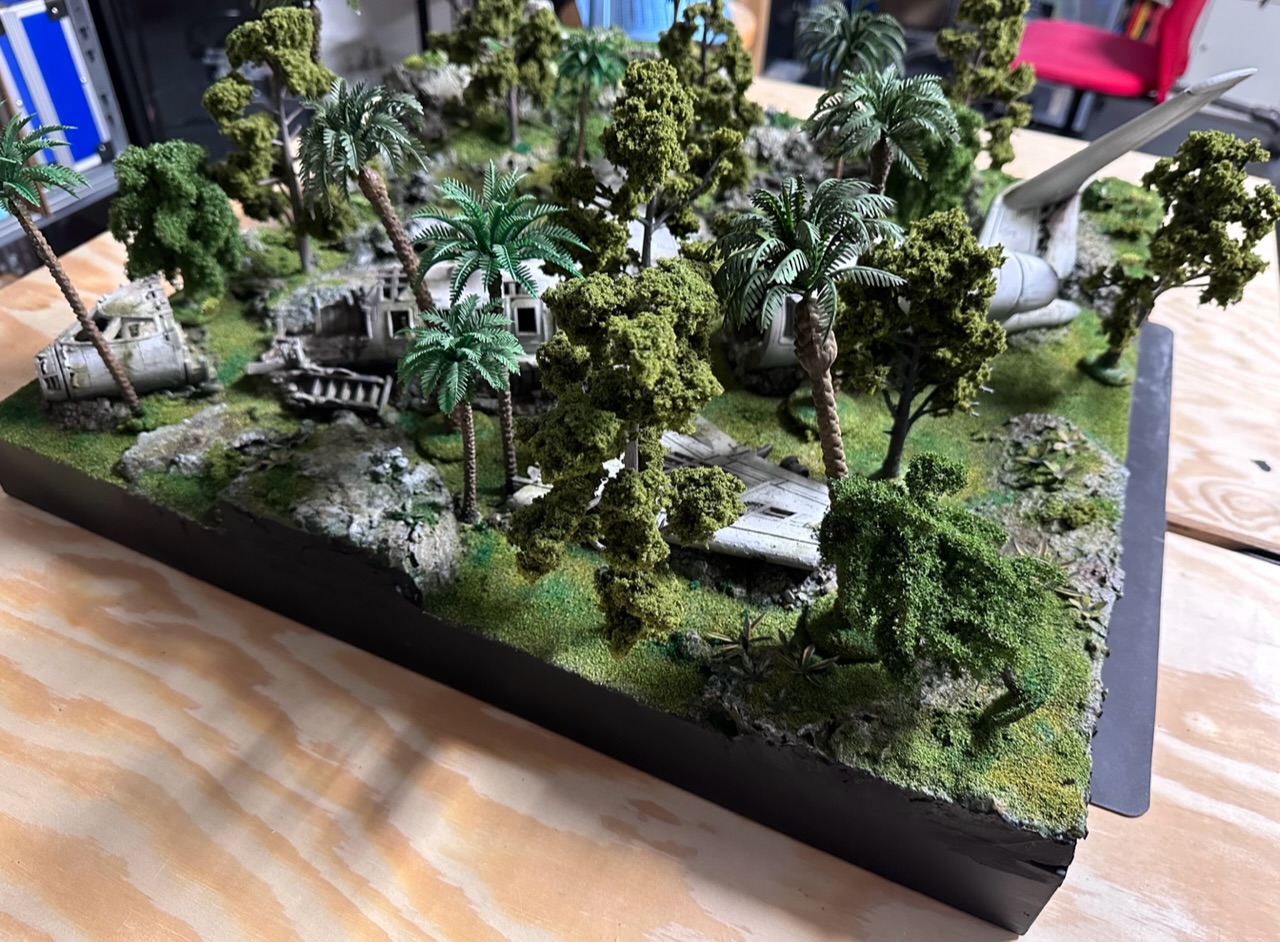
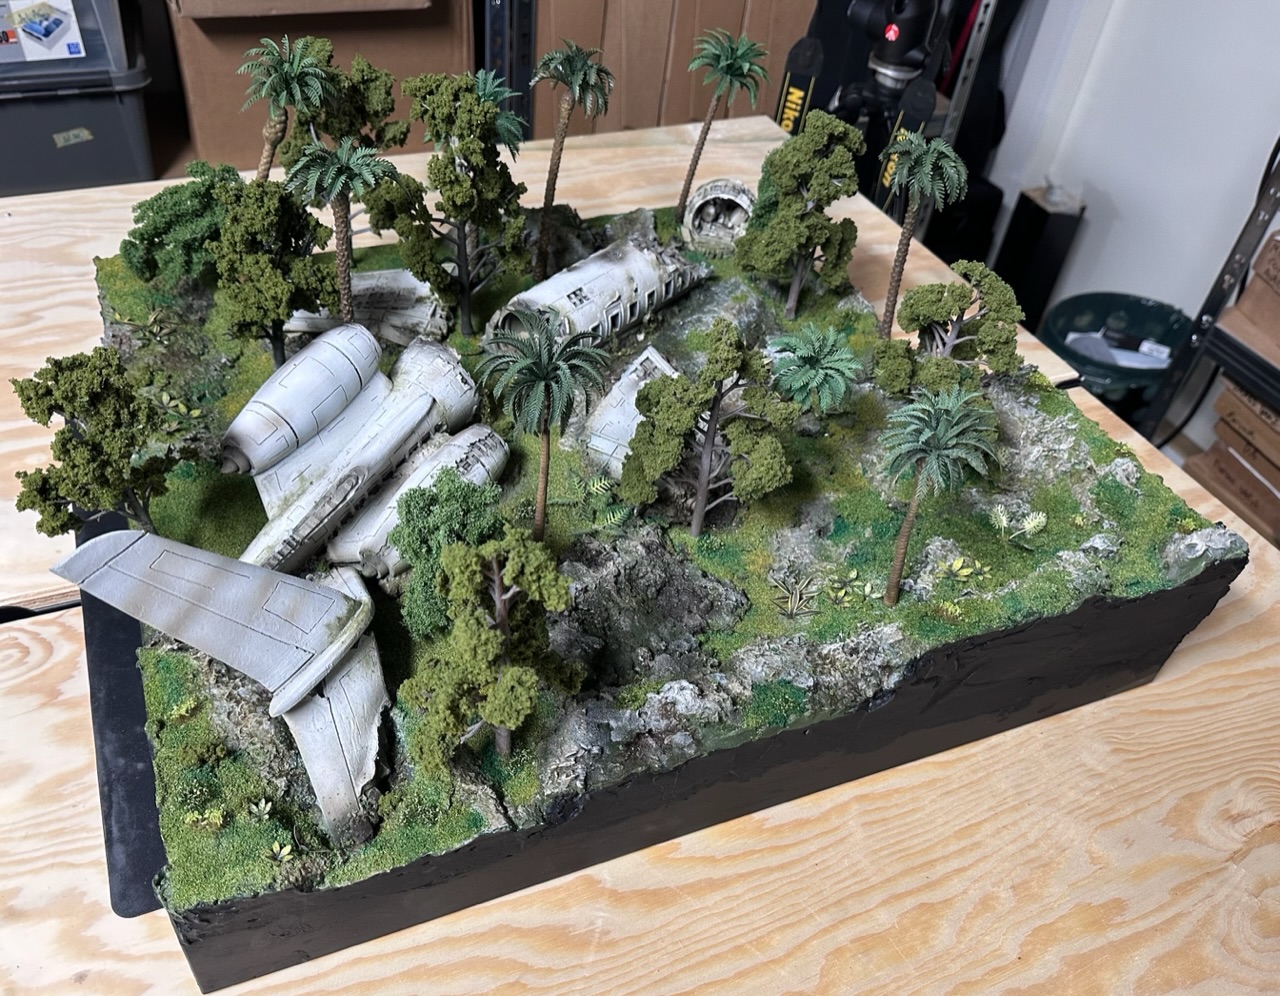
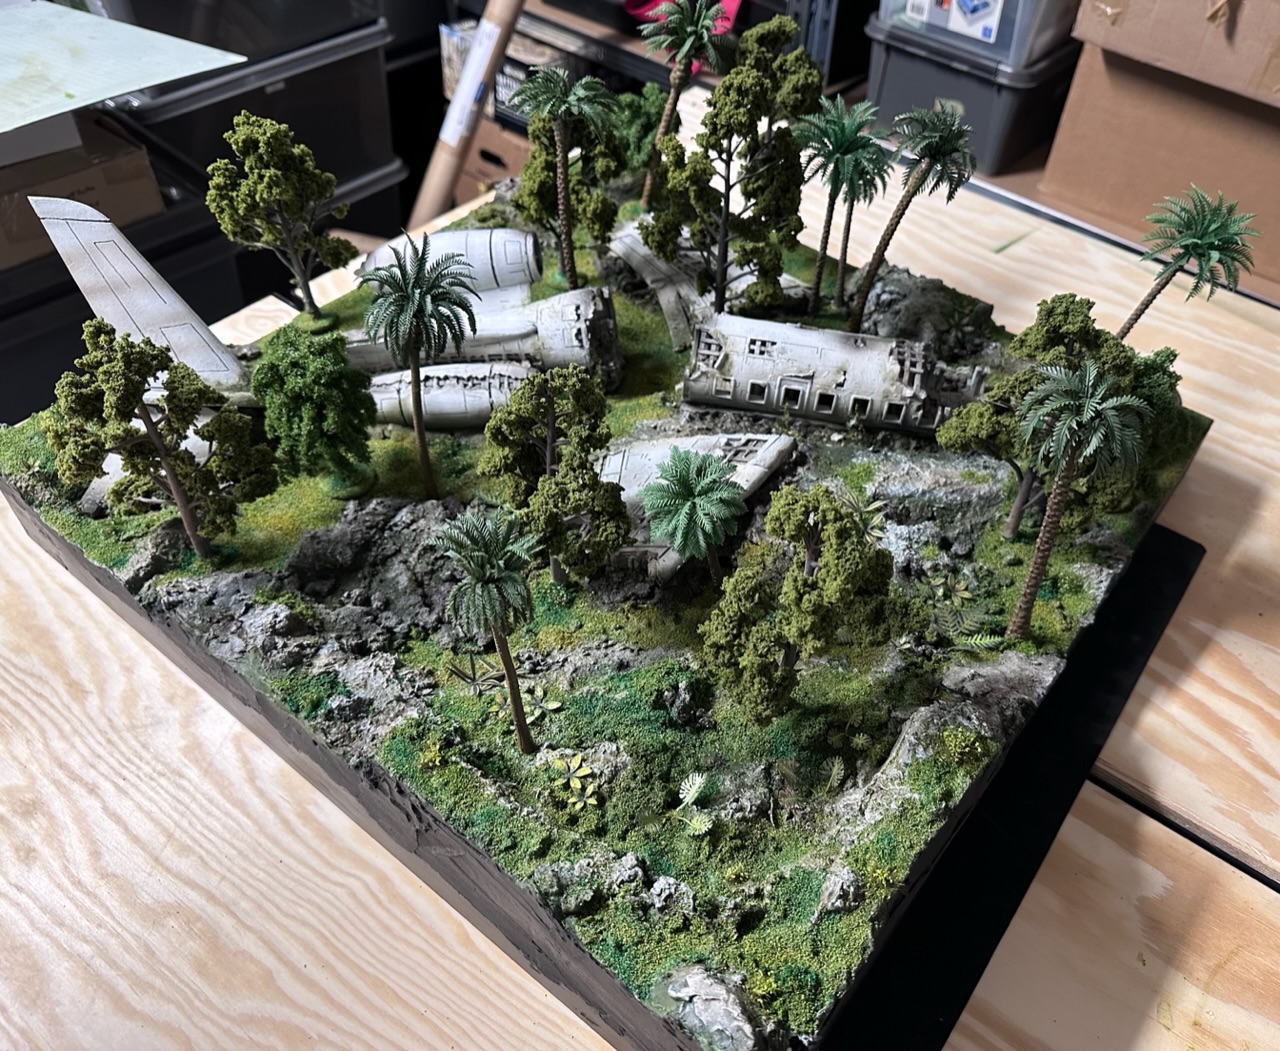
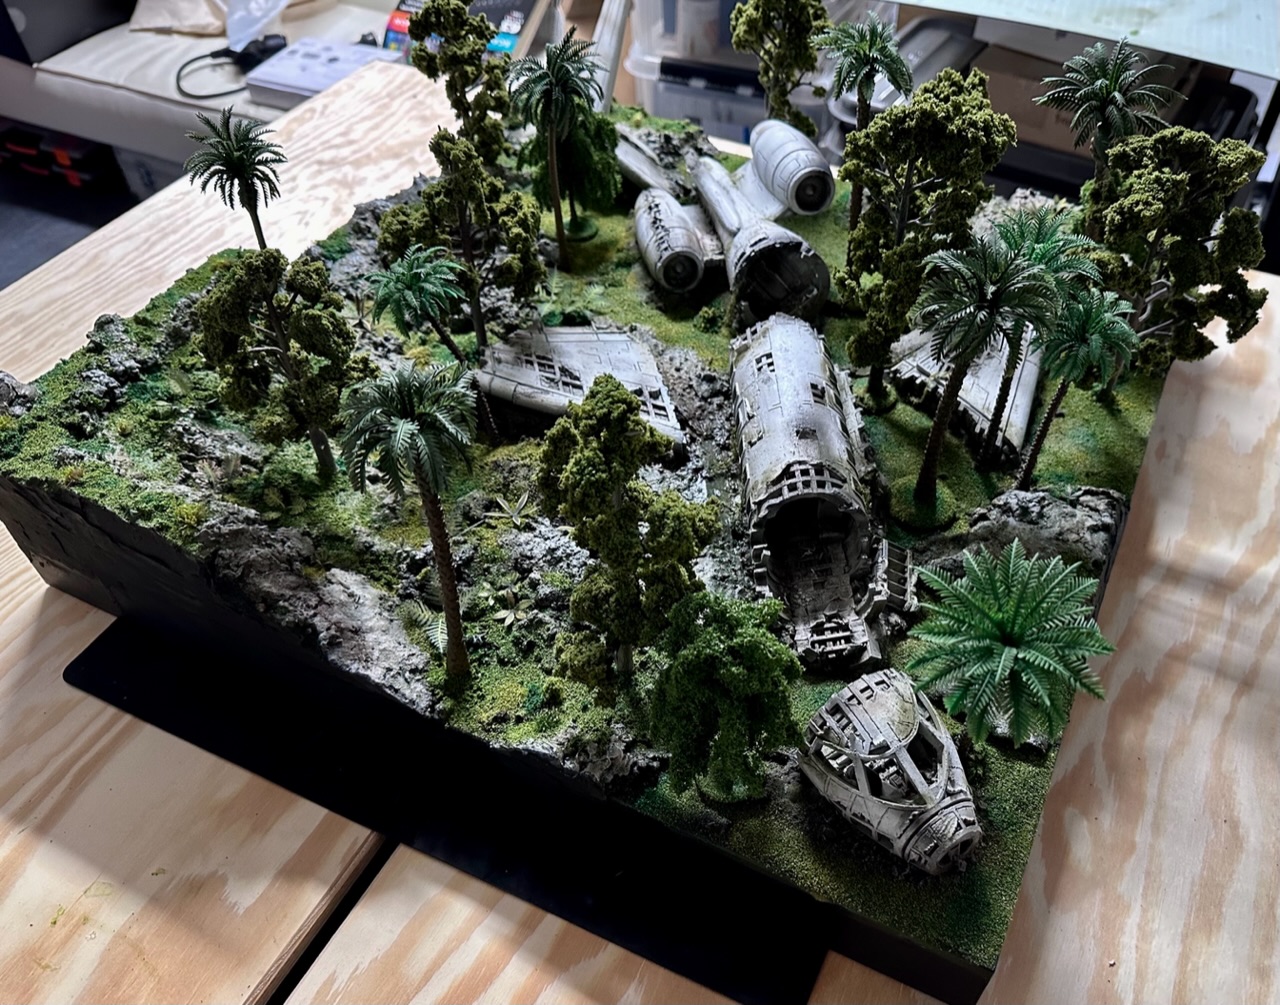
Photos of the completed board
Aaand done!
Everything sealed and varnished, a kilo of flock hoovered from my floor all the supplied packed away.
Here’s some photos.
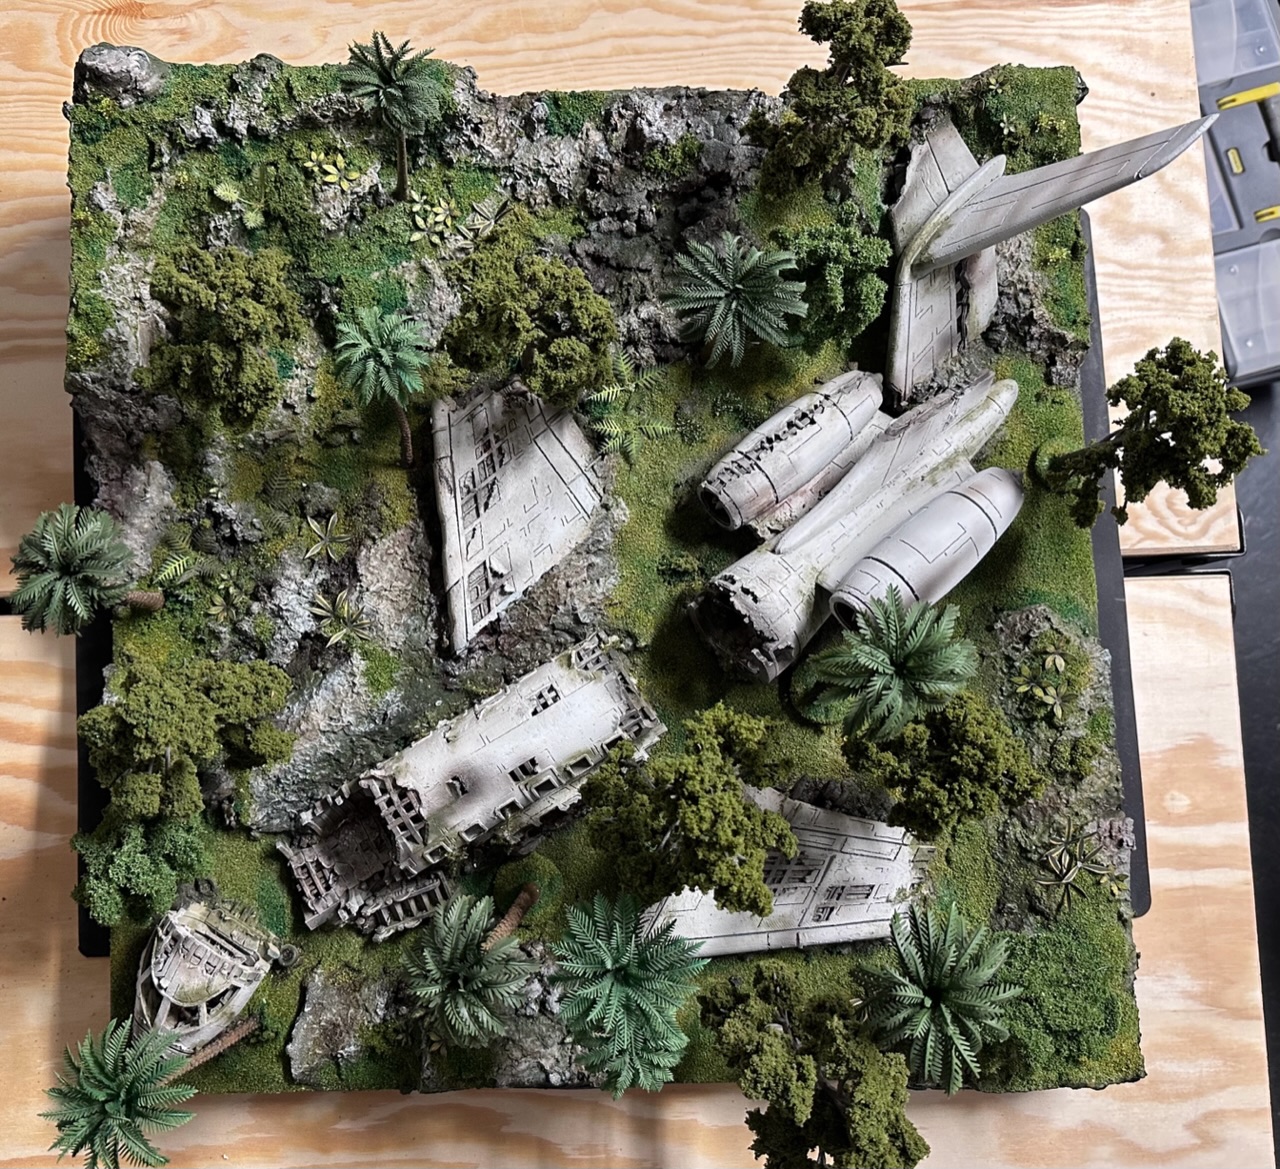
Below are the set-on trees I made
And here’s the board without the removable trees. Plenty of options to add scenario objectives or other pieces to customise the layout.
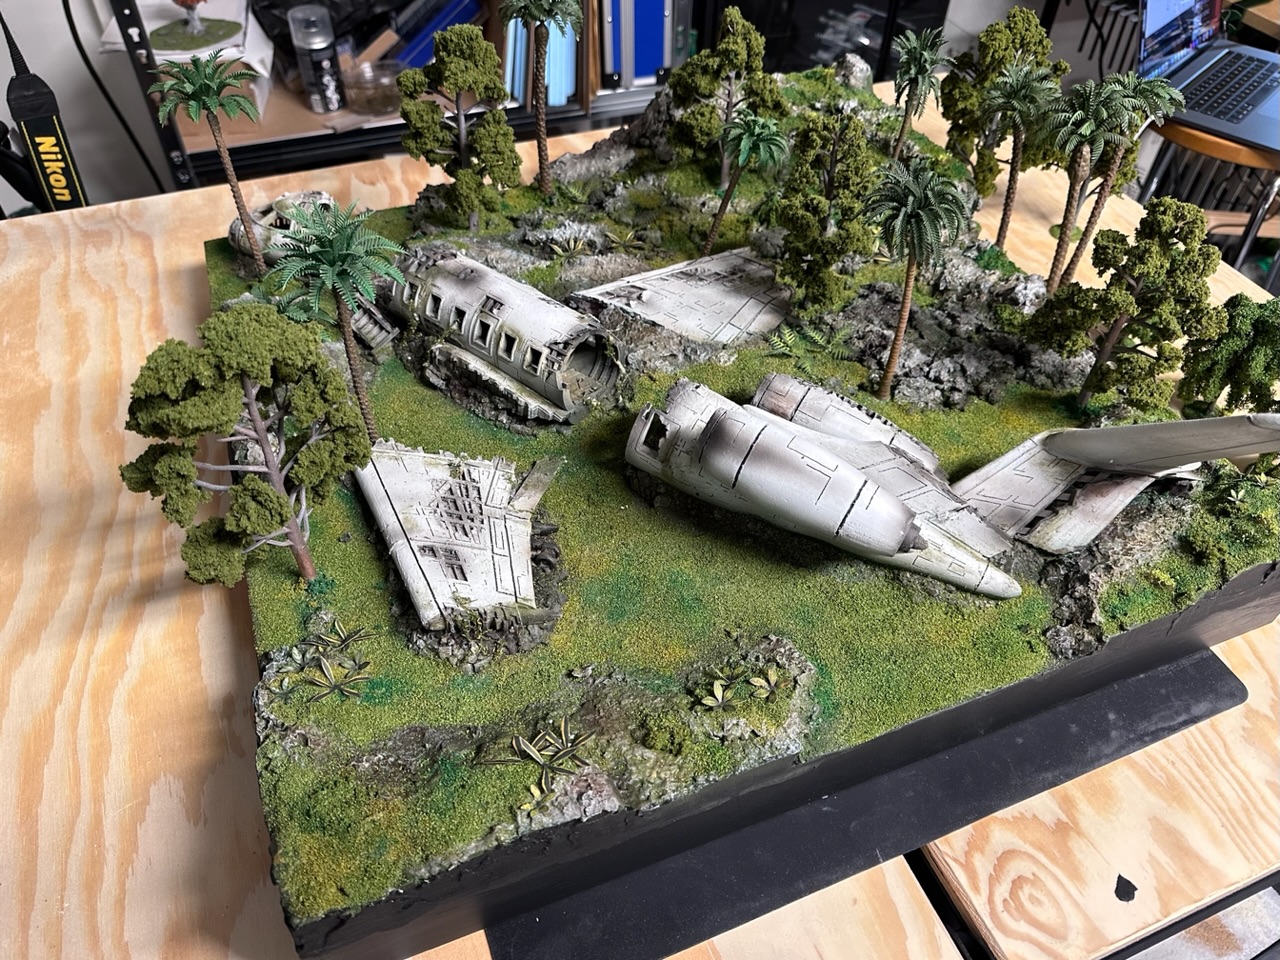
Some more photos as a gallery.