Carnevale – Strigoi
Recommendations: 12
About the Project
This project covers my efforts to paint my first Carnevale faction collection, the vampiric Strigoi.
Related Game: Carnevale
Related Company: TTCombat
Related Genre: Pulp
This Project is Active
A failed(?) experiment
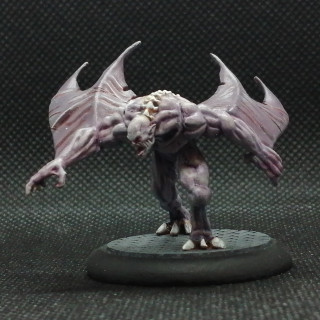
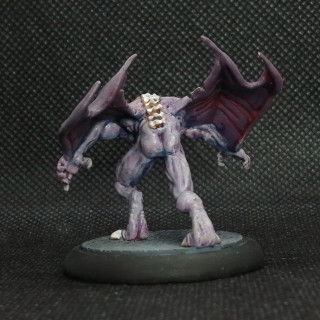
For my next model I chose to paint the Strzyga, a large naked monster which is essentially all skin. I wasn’t entirely happy with the skin tones on Vlad and Miriam, and I wanted to capture the ‘inhuman’ look of the vampire skin more successfully on a model that was basically just skin.
I watched a ton of videos on YouTube for ideas on painting vampiric skin and I saw one which showed a range of skin tones achieved by layering paint almost like glazes over a really dark muscle tissue. This mimics the colouration we see in real Caucasian skin which has a translucency that allows the underlying tissue to affect the skin colour.
The skin process
Step 1: To establish a clotted blood tone to the flesh I painted the whole model with Vallejo Model Color (VMC) Burnt Red. I then washed everything with Citadel Colour Agrax Earthshade to establish some initial shading.
Step 2: I defined all raised muscles and wings with a thin coat of VMC Intermediate Blue, which is a dark blue grey colour. Please note the model looks like complete crap after this step with huge contrast jumps and bizarre clashing colour placements but…
Step 3: This was the first payoff step and frankly is incredibly involved and time consuming. Basically I used my two establishing colours (Burnt Red and Intermediate Blue) and a ton of Vallejo Thinner Medium on my wet pallet to perform a series of blended glazes over the whole model to create blends between the two starting colours. Most of the model had a minimum of three steps with more for some tricky areas. For those who may want more detail: create a colour blend of red and blue that lies between your starting colours then add thinner (roughly twice as much thinner to paint) to get a very thin paint, then glaze this over the area you want to colour. Repeat this step using different blue /red mixes to remove stark colour changes from the model.
Step 4: Next I painted smaller highlight areas onto each of the major muscles of the model, BUT NOT THE WINGS, using VMC Stone Grey. To blend these highlights and create a smoother look I glazed the raised muscles with a thing glaze of 2 parts Stone Grey/1 part Royal Purple/3 parts Thinner Medium trying to keep this mix out of the deepest recesses and thinning it out with water where it bled into them.
Step 5: Lastly I dry brushed the whole model, wings included, with VMC Silver Grey.
Final details
Anyway we are into the last details so I painted the claws and spine with VMC Cork Brown, a wash of Argrax and then VMC Ivory.
The teeth were picked out in VMC Off-white and the inside of the mouth with Burnt Red.
Lastly I used to the Game Color Wash(GCW) Red on raised surfaces like backs of hands, face and scalp and GCW Blue on the hidden surfaces like crotch, underside of thighs and arms to create a visual shading effect using colour.
Basing was the usual method (see previous entries in this blog) and we have another model done (thank the lord).
Conclusions
Was I happy with the result? Yes. Would I do it again? Feck no. It was fun to experiment with paint in this new way for me but, ye gods, it took way too much time. I was going to need an alternative methodology for the other models in the warband, that’s for sure.
The big take away for me is the way that the incredible variation in the colouration of the skin removes all ‘flatness’ from the models skin and adds great visual texture. I think this can be seen in the stark difference between the claws and bone and the skin. They look like different materials which is great, and I can see why these laborious painting methods are used by top tier painters.
However I am not a display painter and the time investment for me is not worth it for the added visuals.
My first warband
Having finished painting my Escape from San Canciano Starter set, and having played a few games, it was time to dig deep and start building a model collection to make proper lists.
Having looked at all of my options I decided upon the vampiric Strigoi faction as my starting choice. Being an old man raised on the Hammer horror movies of the 1970s, I have always been a fan of the many ways vampirism has been explored in modern literature and cinema.
Obviously my first purchase was going to be the legendary Vlad Dracul and his retinue of brides and serfs. Who could pass up the opportunity to play Dracula on the tabletop.
I aklso purchased the newest box set for the Strigoi faction, the fantastically named Airborne Cannibals. These models are a complete contrast to the very human models in the Dracula box, being generally naked bestial and animalistic representations of vampires from various mythologies around Europe.
With my initial purchases secured I began to build the models. Being resin the models needed washing in a mild detergent before assembling the parts with super glue. Unfortunately the Airborne Cannibals box in particular has some particularly poor quality model casts in it. There were pits, bubbles and serious mould slip on two or three of the models and I had to break out the Vallejo plastic putty to get the models to the point I was happy with them.
Although the models come with perfectly serviceable bases I wanted to try some of TTCombat’s cast resin bases so I purchased a pack of each of the 30mm and 40mm bases.
With all of the models assembled and based I primed everything with Vallejo airbrush primer. Initially Black, then a zenithal of Ghost Grey to enhance model readability.
Dracula
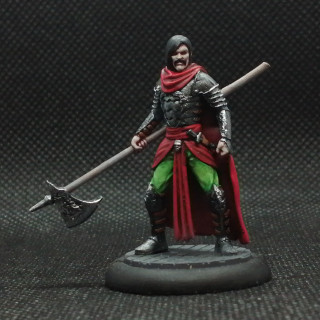
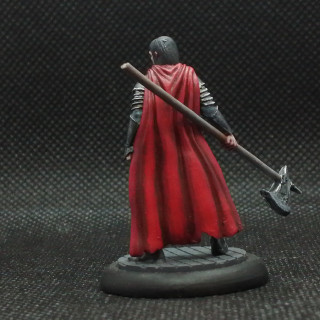
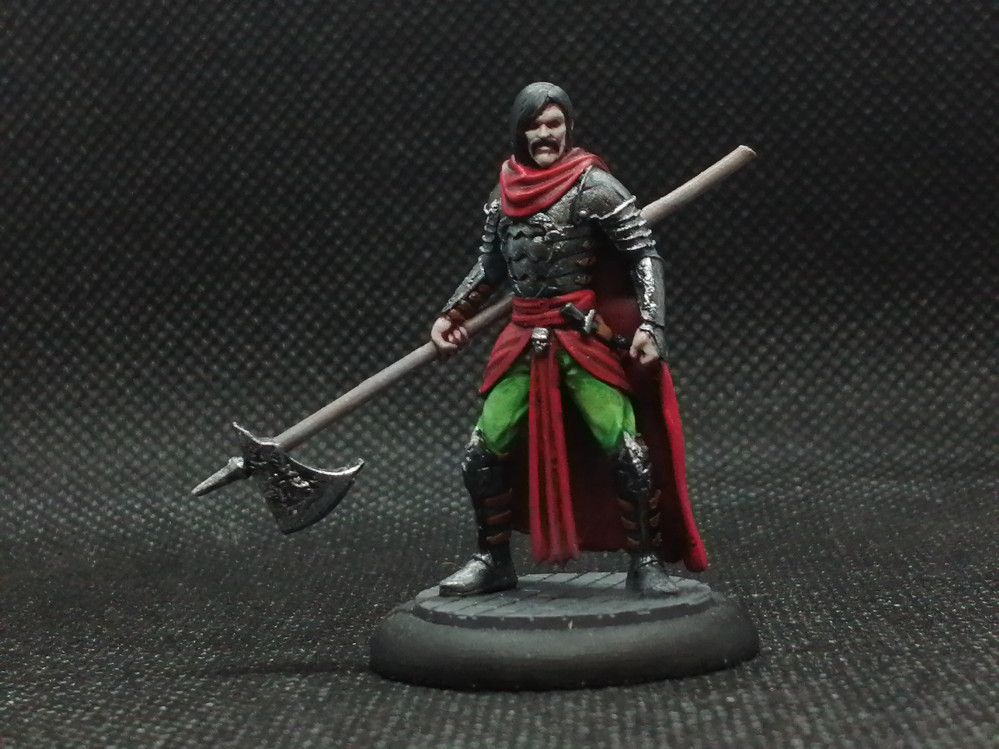
The first model I tackled was Dracula himself. This was a fairly ‘by the numbers’ paint job. No fancy techniques just base coats, shades and some highlights.
Those of you who are familiar with my projects know that Vallejo Model Color (VMC) are generally my weapon of choice and unless noted in the guide below all paint names come from this range.
Base colours
Knife, skull buckle, poleaxe head, hair, armour, moustache – Black
Skin, cloak, belt/sash – Burnt Red
Straps – Orange Brown
Shirt sleeves – Field Blue
Trousers – Green Sky (This colour was a completely left field choice that I thought worked really well)
Poleaxe handle – Beige Brown
Washes
Skin, cloak, belt/sash, straps – Citadel Colour Agrax Earthshade
Trousers – Vallejo Game Wash Green
Armour, poleaxe head – Citadel Colour Nuln Oil
Highlights
As the centrepiece of the force (and an entry for my local club’s monthly painting competition) I used several highlights on most of this models colours.
Cloak, belt/sash – Burnt Red/Flat Red – Flat Red – Flat Red/Vermillion – Vermillion
Skin – Brown Rose/Deck Tan 50:50 – Brown Rose/Deck Tan 20:80 – Deck Tan
Trousers – Green Sky/German Yellow – Citadel Colour Green Glaze
Skull buckle, polexe head, armour – Oily Steel – Silver
Poleaxe handle – Neutral Grey – Silver Grey (Note: these paints were applied by stippling to give some texture to the wood colour)
Hair – drybrush Neutral Grey
Armour, poleaxe head, skull buckle, knife blade – drybrush then edge highlights with Silver
Knife handle – Basalt grey – Neutral grey
Eyes – Vermillion
To keep consistency across my Carnevale collection I used the same basing colours as my previous San Canciano project, i.e. Basalt Grey base colour, London Grey dry brushing to pick out the details of the cobblestone texture and a nice clean Black base edge.
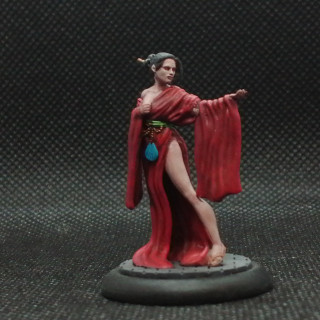
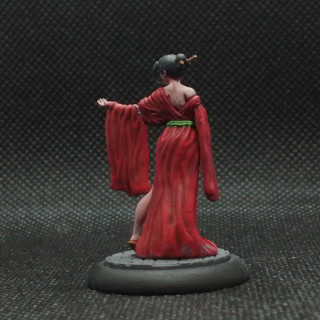
Miriam
I painted my second miniature, Miriam, at the same time as Vlad as I knew I wanted the robes to be painted in a similar way. For detail on painting the skin and robes see Vlad’s painting guide above.
There are only a few details on this model to paint (take note please GW!) so the painting information is brief.
Belt – Base coat: Golden Olive – Wash: Citadel Green Glaze – Highlight: Green Sky
Purse – Base coat: Light Turquoise – Wash: Vallejo Game Wash Blue Wash – Highlight: Blue Green
Sandals – Base coat: Orange Brown – Wash: Vallejo Game Wash Flesh Wash


![TerrainFest 2024 Begins! Build Terrain With OnTableTop & Win A £300 Prize! [Extended!]](https://images.beastsofwar.com/2024/10/TerrainFEST-2024-Social-Media-Post-Square-225-127.jpg)


