Skip to toolbar
Manda’s (Amachan) ‘Oiling Up’ Project

Manda’s (Amachan) ‘Oiling Up’ Project

Supported by (Turn Off)

Project Blog by amachan Cult of Games Member

Recommendations: 589

About the Project

In this project I will go through some experimentation with painting in the Grimdark style and using those lessons learned to develop my own, more gritty paint style. I will be using oil paints for the first time in combination with acrylics, enamels and some wax paints, hence the title...

This Project is Active

Greenstuff World Spider Serum

Tutoring 3
Skill 3
Idea 3
No Comments

Does Greenstuff World’s Spider Serum work? Well I have to say, yes it creates quite a good spider web effect. Be sure to use your airbrush pressure between 1.5 and 2 bars and keep 30cm distance from the model as advertised. This is really important here. And you can get these results with it.

However…… Be prepared for your workplace to look like it hasn’t been used or cleaned in years…..

Greenstuff World Spider Serum

But it does work, although I think it might work better for Halloween decorations around the house. I just need to find a good model to do some tests on further, but for now I’ve made enough of a mess…..

Hanna of Vil

Tutoring 2
Skill 5
Idea 4
1 Comment

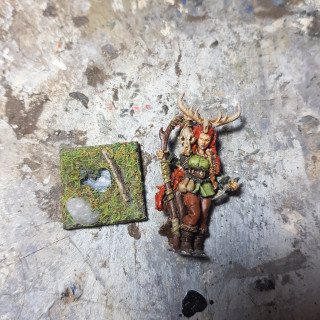
That is Hanna of Vil from Hasslefree Miniatures finished, now she can live in a display case so that the axe may never break again….. I give it a week.

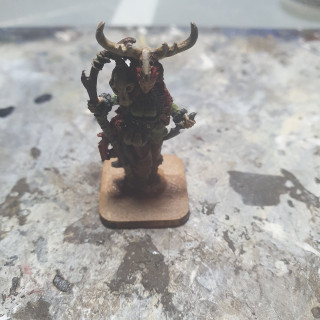
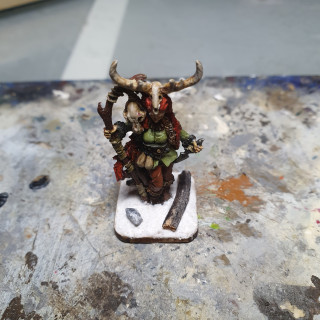
And since this is a repaint of a model I painted before, here are the old pictures.

Knocked off the axe again!

Tutoring 4
Skill 5
Idea 4
No Comments

I started with my mud mix (AK Interactive Diorama Puddles (AK8028) with a little bit of Vallejo Pigments Natural Sienna (73.105)) on the base and I decided to also put some over the boots to see what that will do.

Knocked off the axe again!

Then I went to the axe with some AK Interactive Blood Effect (AK11260). Initially brushing it on and then with a little cocktail stick I moved it around a little to create this effect.

Knocked off the axe again!

And then I dropped the model again….. And the axe broke off again…… But I added some splatter of AK Interactive Blood Effect (AK11260) over the model and put a bit on the shield as well where it got damaged so it looks like she punched someone in the face with it.

Knocked off the axe again!

And at this point my chronic illnesses really started flaring up so, I had to stop. But this is pretty much the miniature done, between now and the finished pictures I will most likely just paint the rim of the base with Scale 75 Scalecolor Black (SC-00) and that’s it.

My chronic illnesses have been very bad over the last couple of days so progress will be slow.

But on the positive side, this project got a Butt-Butt-Ding!!! 🎉

Why are some axes so troublesome?

Tutoring 5
Skill 5
Idea 5
No Comments

I re-attached the axe and when that was dry I started with adding a bit of AK Interactive Streaking Grime (AK012) over the join. I then added a coat of AK Interactive Wash for Wood (AK263) over the shaft of the axe and the inside of the shield. And then a coat of AK Interactive Moss Deposits (AK676) over the rock and dabbled some into the tuft as well. With a couple of cotton buds I removed the majority of it.

And then disaster happened. I did up the gold medallion on her arm and around her neck with AK Interactive True Metal Gold (AK450). I accidentality got a splotch on her forehead, don’t ask me how, but I did. I then tried to remove it using mineral spirits and a cotton bud, but that spread the gold particles all over….. So I added a bit more mineral spirits and tried to soak most of it up with a fresh wool dauber and while doing that I managed to drop the model and the axe broke off again…. I just tried to remove as much of the gold dust as possible and then decided to take a break. In the mean time I re-attached the axe again, but you can still see some of the gold dust around the model. The camera picks it up way more that you can see in real life luckily.

Why are some axes so troublesome?

When I got back to it I highlighted the bronze armour bits with AK Interactive True Metal Brass (AK460), the axe head with AK Interactive True Metal Steel (AK457) and then the belt buckle, the inner bit of the shield and the boss on the outside with AK Interactive True Metal Iron (AK459).

And that is the second weathering/shading stage done.

Why are some axes so troublesome?

Axe -1

Tutoring 5
Skill 6
Idea 5
No Comments

The first layer of weathering/shading went on Hanna of Vil from Hasslefree Miniatures.

I started with an airbrush coat of AK Interactive Streaking Grime (AK012) over the model and then a coat of AK Interactive Earth Effects (AK017) over the base and the legs.

I then got the wool dauber out for some action and broke off the axe….. The axe was a weak point as it has broken off before I even started painting this model.

Axe -1

After some more rubbing with the wool dauber, a large pile of cotton buds and some tweezers to pick out the fluff this is the result.

Axe -1
Axe -1

I used Streaking Grime rather than the Neutral Wash I used before and rubbed it all off without using mineral spirits and I do like the effect more. Now I was going to do something with the skin tones, but I like them where they are right now. I’ll see later if still want to add more to that or not when it has all dried.

I will obviously glue the axe back on when everything has dried.

METALLIC!!! 🤘

Tutoring 3
Skill 5
Idea 6
No Comments

After the varnishes have gone on I went over the metallics again on Hanna of Vil from Hasslefree Miniatures so that they are metallic again.

METALLIC!!! 🤘
METALLIC!!! 🤘

Little by Little.

Tutoring 3
Skill 5
Idea 6
No Comments

Little by little, I got the acrylic base layers done on Hanna of Vil from Hasslefree Miniatures.

Little by Little.
Little by Little.

Slow progress...

Tutoring 3
Skill 3
Idea 3
No Comments

I made a a little bit of progress Hanna of Vil from Hasslefree Miniatures. I am really struggling with my health and can’t paint a lot at the moment.

Slow progress...
Slow progress...

NEXT!!!

Tutoring 3
Skill 3
Idea 3
No Comments

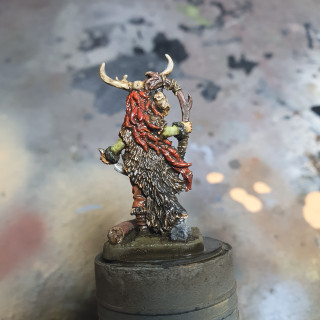
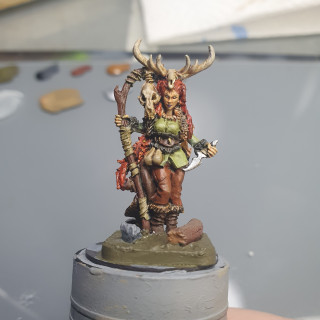
On to the next practice model, this is Hanna of Vil from Hasslefree Miniatures. My focus will be on blending in the tufts with the base and skin tones.

NEXT!!!
NEXT!!!

This is how much my body allowed me to paint today….

Skálmöld, Valkyrie

Tutoring 5
Skill 7
Idea 8
No Comments

That is Skálmöld, Valkyrie by Bad Squiddo Games finished. Not happy about the dirt speckles everywhere, lesson learned I guess.

This is a repaint of a model I did some time ago in 2019, so here are the old photo’s for comparison.

It's a Bloody Mess!!!

Tutoring 6
Skill 6
Idea 7
No Comments

Here’s a gory update on Skálmöld, Valkyrie by Bad Squiddo Games. I wanted to play around the AK Interactive Viscera and Blood effects as this model would be perfect for it, so I did and added some more to most likely finish the model.

I started by blobbing on the AK Interactive Viscera Effect (AK11261) as it is quite viscous and shrinks somewhat when it dries. I went in with AK Interactive Blood Effect (AK11260) to add some splatches of blood in the Viscera Effect, around the edges and over the sword.

I followed that up with some general splatter from the direction of the head using more AK Interactive Blood Effect (AK11260).

It's a Bloody Mess!!!

And then I wanted to try a new mud texture I mixed up. This is AK Interactive Diorama Puddles (AK8028) mixed with a little bit of Vallejo Pigments Natural Sienna (73.105). I splattered some of it on, but was not too happy with that effect and removed some of it. But then I applied it with a brush to the base and I think that will look good.

And then I just finished the rim with some Scale 75 Scalecolor Black (SC-00). When this is dry we’ll see the results and that is most likely going to be this model done.

It's a Bloody Mess!!!

Valkyric Progress.

Tutoring 6
Skill 6
Idea 6
No Comments

I got a bit more done on Skálmöld, Valkyrie by Bad Squiddo Games today.

I started by adding a bit of a highlight to the fleshtone with Abteilung 502 Modelling Oil Color Light Flesh Tone (ABT135) on a silicone sculpting brush and then shaded it down with a wash made of mineral spirits and Abteilung 502 Modelling Oil Color Flesh Shadow (ABT215). I then did the same on the hair but used Abteilung 502 Modelling Oil Buff (ABT035) as the highlight instead, but used the same wash. And then again on the head, but with Abteilung 502 Modelling Oil Dead Flesh (ABT520) as the highlight and the same wash again.

Then I directed myself to the base and added a coat of AK Interactive Wash for Wood (AK263) over the log and wiped off the excess. Then I added some AK Interactive Moss Deposits (AK676) around the rock and the log.

And then to highlight the metallics I used the silicone sculpting brush again with some AK Interactive True Metal Brass (AK460) on the bronze, AK Interactive True Metal Steel (AK457) on the sword, AK Interactive True Metal Silver (AK458) on the silver bits on the wings on the helmet and finally some AK Interactive True Metal Iron (AK459) on the iron bits of the helmet. Sadly this doesn’t show up well on the camera.

And that’s today’s progress done. Getting close to finished.

Valkyric Progress.
Valkyric Progress.

FINALLY!!!

Tutoring 6
Skill 6
Idea 6
No Comments

After spending more than a week trying to figure out how I am going to solve the issue I had with the base, I think I finally found one and made a little more progress on Skálmöld, Valkyrie by Bad Squiddo Games. While some might think I spend way too much time perfecting this on one model, these are practice models for a paint scheme for multiple SAGA warbands. So any problem I find, I want to take the time to iron out.

First I used the AK Interactive Fresh Mud (AK016) to make the base muddier and that worked well on the older style bases that the Imperial Roman Legionary was based on, but it is kind of too dark for what I actually want. So after fiddling around with paints for a week I found that 1 part AK Interactive Fresh Mud (AK016) and 2 parts AK Interactive Earth Effects (AK017) gave me a the colour and finish that I was looking for. I applied it using the same technique I used to apply the Fresh Mud before. Now let’s see if it also translates to a model.

FINALLY!!!
FINALLY!!!

I can only judge it when it is cured obviously, so we’ll see.

Weather in the Shade.

Tutoring 5
Skill 5
Idea 5
No Comments

Today I wanted to apply the first layer of weathering/shading. To start off with I tried to put an oil through my airbrush and that made a mess of my airbrush, I might have done something wrong so I thought I’d see what difference is between doing an oil wash with a brush or an enamel wash with my airbrush. I am working on developing a paint scheme to paint warbands and armies with, so nothing too complicated.

First I applied a coat of MIG Neutral Wash (P222) with my airbrush over the model.

Weather in the Shade.

Then a coat of AK Interactive Fresh Mud (AK016) over the base.

Weather in the Shade.

First I went over the mode with a wool dauber and a bit of mineral spirits to remove the majority of the enamel coats and then followed that up with a cotton bud in the finer details and this is the result so far.

Weather in the Shade.

This is obviously going to have to dry for a bit of time. But I do think I should have picked a different base colour for the base of the model. I’ll see how it turns out.

A bit more Valkyrie

Tutoring 5
Skill 6
Idea 5
No Comments

A bit of an update on Skálmöld, Valkyrie by Bad Squiddo Games. After the varnishes I just went over the metallics again to make them metallic again.

A bit more Valkyrie
A bit more Valkyrie

Late Imperial Roman Legionary.

Tutoring 4
Skill 6
Idea 6
No Comments

That is the late Imperial Roman legionary from Wargames Atlantic finished. I added a little bit of a tuft and flock to the base, but honestly I need to work on blending that in better with the aesthetic I am going for. But that is the point of practice models.

Late Imperial Roman Legionary.

Don’t worry about the bits of flock and fluff on the model, I just wiped that off with my finger but couldn’t be arsed to redo the pictures.

NEXT!!!

Tutoring 4
Skill 5
Idea 5
No Comments

While I am waiting for the oils and such to dry on the late Imperial Roman legionary, I did the acrylic base layers on my next practice model. This is Skálmöld, Valkyrie by Bad Squiddo Games.

NEXT!!!
NEXT!!!

Spearpointing with the Late Imperial Roman Legion.

Tutoring 4
Skill 4
Idea 4
No Comments

An update on the late Imperial Roman legionary from Wargames Atlantic.

I re-attached the plume and shaded that with a wash made from Abteilung 502 Modelling Oil Color Sepia (ABT002) and methylated spirits. I then followed that up by adding a bit of a wash made with Abteilung 502 Modelling Oil Color Flesh Shadow (ABT215) to the fleshy bits.

I then added a bit of Abteilung 502 Modelling Oil Color Light Flesh Tone (ABT135) with a silicone sculpting brush to the hand on the spear and his nose. It was a bit harsh so in order to tone it down I added a bit more of the Abteilung 502 Modelling Oil Color Flesh Shadow (ABT215) wash. Next time I should do that highlight first and then the wash.

Spearpointing with the Late Imperial Roman Legion.

I then used that same silicone sculpting brush to brush up and highlight the metallics. All of the steel/iron colours I did with AK Interactive True Metal Steel (AK457) and the bronze with AK Interactive True Metal Brass (AK460).

And then I finished the rim of the base with Scale 75 Scalecolor Black (SC-00). But lessons were learned today. So I’ll let this dry and then see where I am at.

Spearpointing with the Late Imperial Roman Legion.

Oh, Bloody Mud!

Tutoring 3
Skill 4
Idea 3
No Comments

I started the weathering and shading on the late Imperial Roman legionary from Wargames Atlantic.

I started with a wash made from Abteilung 502 Modelling Oil Color Sepia (ABT002) and methylated spirits.

I then painted the base with AK Interactive Fresh Mud (AK016) and removed the excess with a cotton bud. Then I stippled on some AK Interactive Fresh Mud (AK016) over the bottom of the shield, legs and such.

And followed it up by stippling on some Abteilung 502 Modelling Oil Color Coagulated Blood (ABT505) through the mud on the shield and base. And a little bit on the spear as well.

I then applied some AK Interactive Moss Deposits (AK 676) on the rock. And then to finish off I applied a bit of the AK Interactive Wash for Wood (AK263) on the inside of the shield which is really hard to see on the picture.

And this is the finished result for today. Overall I am happy with how it looks so far, I am just going to wait until it dries to see where I’m at. There are a couple of things I wish I did in a different order, but I know that now for next time.

And his plume from his helmet fell off right at the start, so I am going to have to glue that back on as well.

Oh, Bloody Mud!
Oh, Bloody Mud!

Spearpointing for Rome!!!

Tutoring 5
Skill 5
Idea 5
No Comments

Progress on the late Imperial Roman legionary from Wargames Atlantic. I attached the shield that I painted some time ago and then sealed it all in with a matte varnish. Once that cured, I went over the metallics again to make them more metallic again and that’s all my health allowed me to do today sadly.

Spearpointing for Rome!!!

Supported by (Turn Off)