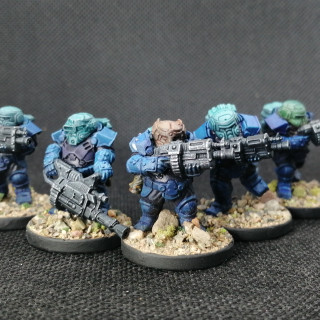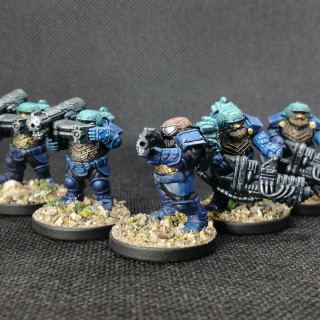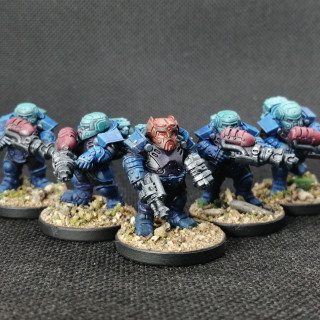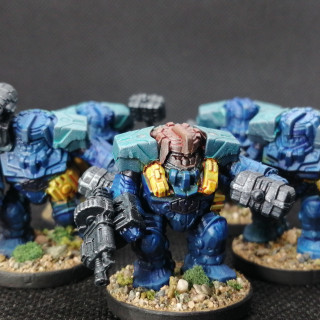
Forge Fathers – Firefight
Recommendations: 72
About the Project
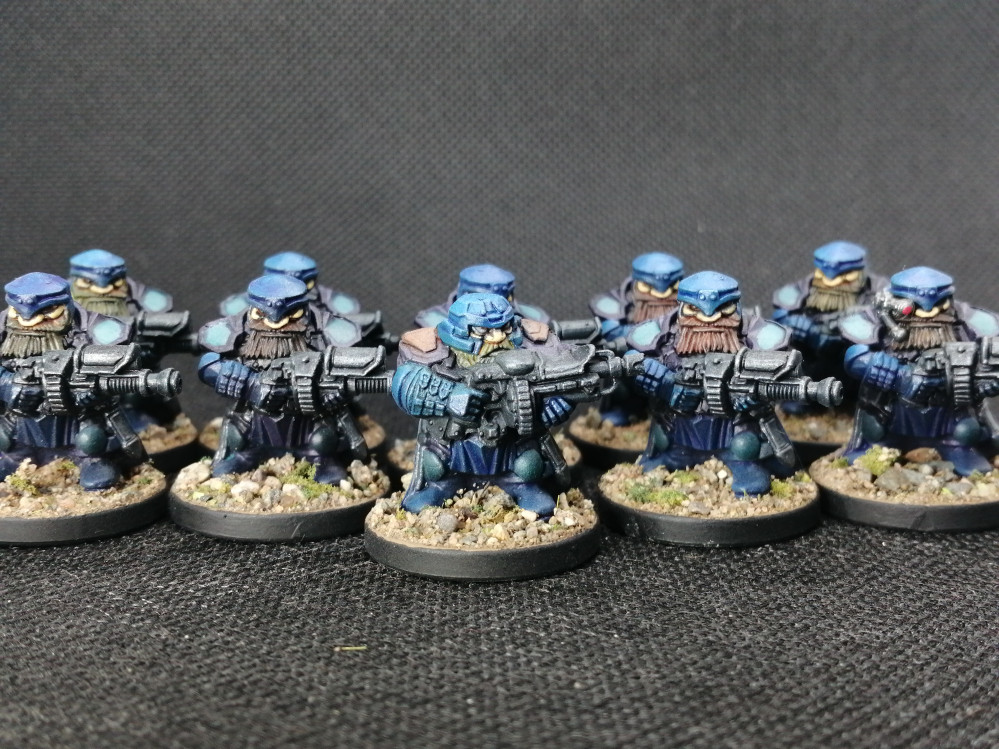
This project covers my first army for Mantic's Firefight system. Dwarves in space.
Related Game: Firefight
Related Company: Mantic Games
Related Genre: Science Fiction
This Project is Active
Finishing things off
All the models bases were painted in VMC US Field Drab and when this was dry I applied PVA before dipping in Geek Gaming Scenics Mediterranean basing mix.
All models were then sealed in Citadel’s Munitorum spray varnish.
The Beauty Shots
Final Thoughts
I am really pleased with the project as a whole. Getting a 1000 point army painted and ready to play in around 100 hours or so is very satisfying.
I wish I had been more aggressive with the zenithal initially, pushing the highest level up to white, because the whole force is a little too dark in my opinion.
Having played a game with the army I do need to modify the list, but considering I got to the table without spending any ‘new’ money I don’t feel I can complain too much.
I only have a single command element and he has no bodyguard models so when he is removed I lose the option to activate command abilities in my army, so adding a second command element is a must.
In addition I also need more armour penetration in my attack profiles, as highly armoured targets like walkers and vehicles are hard to deal with if I lose my Veteran squad.
Finishing things off
All the models bases were painted in VMC US Field Drab and when this was dry I applied PVA before dipping in Geek Gaming Scenics Mediterranean basing mix.
All models were then sealed in Citadel’s Munitorum spray varnish.
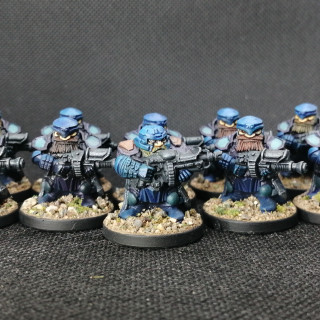
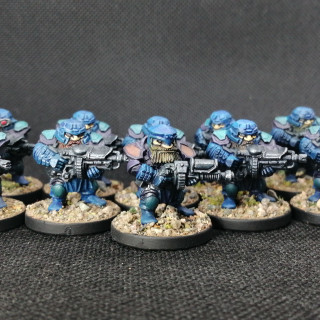
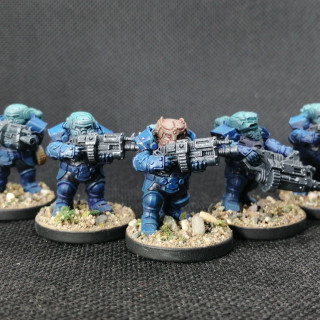
The beauty shots
Final Thoughts
I am really pleased with the project as a whole. Getting a 1000 point army painted and ready to play in around 100 hours or so is very satisfying.
I wish I had been more aggressive with the zenithal initially, pushing the highest level up to white, because the whole force is a little too dark in my opinion.
Having played a game with the army I do need to modify the list, but considering I got to the table without spending any ‘new’ money I don’t feel I can complain too much.
I only have a single command element and he has no bodyguard models so when he is removed I lose the option to activate command abilities in my army, so adding a second command element is a must.
In addition I also need more armour penetration in my attack profiles, as highly armoured targets like walkers and vehicles are hard to deal with if I lose my Veteran squad.
Painting the army
With the models assembled I had to think about a colour scheme.
I knew I wanted this project to be painted with Army Painter Speed Paints (APSP) as they would allow me to get the project done in the shortest amount of time.
I also wanted a unified look for the army using a common colour palette for all the various types of troops while still being able to differentiate models on the tabletop.
I tend to pick a classic triad of colour for my speed painting projects, choosing three colours fairly equally spaced around the colour wheel and this has become a bit of a habit. During a live stream I discussed options with my co-host and chat, and decided to use a complementary scheme around APSP Mystic Blue, APSP Hive Dweller Purple and APSP Plasmatic Bolt.
I used the airbrush to put a zenithal prime on the models using Vallejo primers (Black and Grey). Note: I should have taken the zenithal higher at this point using either a white ink or white primer as the finished models were a little too dark for me.
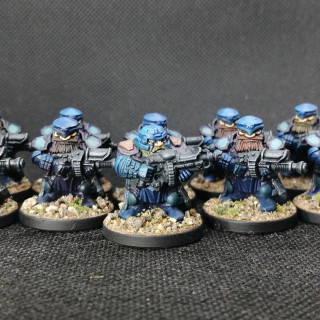
Miltia
The first models I painted were the miltia models as they were one piece plastics with very few ancillary details.
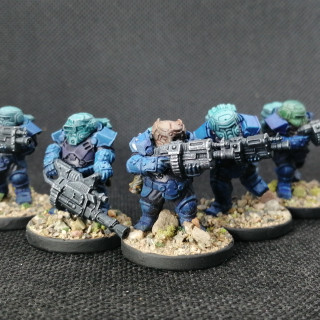
Helmet, gloves, tabbard, boots, cloak – APSP Magic Blue
Shoulder armour, sleeves, breastplate – APSP Hive Dweller Purple
Shoulder pads – Troopers: APSP Plasmatic Bolt. Unit leader: APSP Fire Giant Orange
Knife handles, gun – APSP Grim Black
Skin – APSP Crusader skin
Knife blades, headset, chainmail leggings – Vallejo Model Color (VMC) Oily Steel
With the base coats done I dry-brushed all the guns with VMC Oily Steel. In addition the models without cloaks had a knife on their waistband which I painted in APSP Plasmatic Bolt to give a coloured metallic effect.
I painted any exposed faces with VMC Dark Flesh as the zenithal was too dark under the Crusader Skin for it to work well.
The beards were painted with an assortment of APSP colours for variety (Zealot yellow, Fire Giant Orange, Sand Golem, Hardened leather, Runic Grey)
One model had an unusual pair of goggles and another had a headset communicator. The lenses of these were painted in VMC Vermillion to pick out these details.
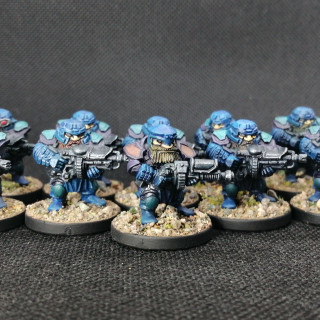
Steel Warriors, Rekkhyr and Stormrage Veterans
Steel Warriors
Boots, belts, gloves, shoulder pads – APSP Mystic Blue
Trousers, sleeves, breastplate – APSP Hive Dweller Purple
Backpack, helmet – APSP Plasmatic Bolt
Guns – APSP Grim Black
Accessories on belts – APSP Zealot Yellow
Note: To identify unit leaders I painted their helmets in APSP Fire Giant Orange.
Leaders shoulder pad details – VMC Oily Steel
Rekkhyr
These were painted exactly the same with one exception. I painted the tanks on the flamers with APSP Blood Red to make the models stand out as a unit.
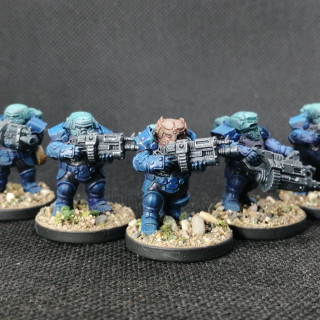
Stormrage Veterans
These were painted in the same colours as the Steel Warriors with some small changes listed below.
Torsos were painted in APSP Dark Wood with an overbrush of VMC Old Gold.
Faces and beards were painted in the same way as for the Miltia units.
The lenses on the Mjolnir missile launchers were painted with VMC Vermillion to keep with the theme from the Militia units also.
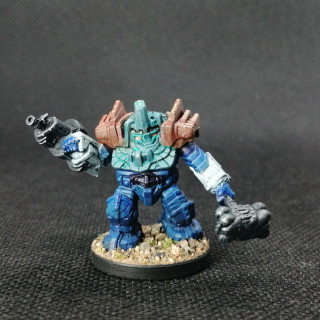
Forge Guard
These models are a very different design to the other infantry and the accessories from the Steel Warrior sprue were modelled directly onto the miniatures in several places and I had to be quite careful when applying the Mystic Blue to not cover these features as painting the yellow over blue would not have worked at all well.
Legs, torso, heads, armoured gauntlets – APSP Mystic Blue
Note: The unit leaders head was painted APSP Fire Giant Orange in line with the rest of the army
Upper sleeves, hexagonal waist detail – APSP Hive Dweller Purple
Shoulder pads – APSP Plasmatic Bolt
Note: The leader model had a few recessed details picked out in VMC Oily Steel to mirror the shoulder pad details of the other unit leaders
Accessories – APSP Zealot Yellow
Weapons – APSP Grim Black with a drybrush of VMC Oily Steel
Forge Guard Huscarl
With the finish line in sight I only had the leader model to paint and It was really important this model stand out from the other Forge Guard models. Luckily the shoulder pads and helmet on the sculpt were far more ornate than the other Forge Guard models and this helped.
Legs, lower torso, hands, sleeve armour above the elbow – APSP Mystic Blue
Upper sleeves, hexagonal waist detail – APSP Hive Dweller Purple
Helmet, upper torso – APSP Plasmatic Bolt
Shoulder pads – APSP Fire Giant Orange
Forearm armour – APSP Holy White
Weapons – APSP Grim Black with a drybrush of VMC Oily Steel
As a final touch I painted the Huscarl’s eyes in VMC White and then VMC Bright Orange and painted some rivet details on his helmet and shoulders in VMC Old Gold.
Starting the project
Mantic are without doubt one of my favourite miniature wargame companies and I have played Deadzone since first edition. When they announced a second edition of their Firefight ruleset earlier this year I knew I wanted to give it a try.
Luckily for me a friend at my gaming club (Ricky) bought the starter set and we had a few games using the models inside. After only two games I was hooked and knew I had to make myself an army.
Having moved house this year and cut my work hours, I didn’t really have the spare cash to buy a new army so I dove into my pile of plastic ‘potential’ to search out some unloved models to perhaps repurpose for a Firefight army.
My search unearthed a couple of gems. I had the second edition Deadzone starter models unassembled, a Forge Father faction starter from around the same time and a very old box of the original ‘steel warrior’ models, which are now called Forge Father militia in the current range. This was a lot of Forge Father infantry and I just needed to form it into a list.
The army list
Using Ricky’s army list book and my available models this was the list I came up with.
Forge Father Huscarl 70 points
Two 5 man Steel Warrior units
Leader upgraded with hailstorm rifle
One trooper upgraded with a hailstorm cannon 115 points each
Two 10 man Militia units 110 points each
A 5 man Forge Guard unit
One trooper upgraded with Mjolnir missile launcher 180 points
A 5 man Stormrage Veteran unit
Leader upgraded with hailstorm rifle
Two troopers upgraded with Magma Cannons
Two troopers upgraded with Mjolnir Missile Launchers 190 points
Total cost 970 points
Model assembly
It is really important in Firefight to be able to differentiate unit leader models as all movement and range are measured from these models.
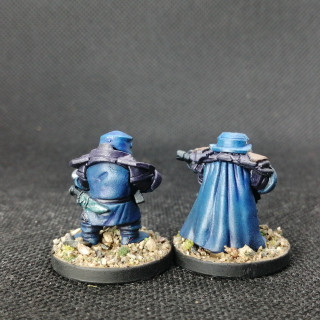
The Militia models are one piece plastics with limited accessories so I was going to have to differentiate the leaders with paint.
The two units however could be divided into a unit with cloaks and unit without cloaks (see picture) which would help on the tabletop.
The Steel Warriors, Rekkhyr and Stormrage Veterans were all built from the same sprues so I could look at differentiating the units and leaders during assembly.
The Forge Father sprue has two main helmet types, full visor closed helmets and open helmets showing faces and beards.
I decided to use open helmets on the Veterans and enclosed helmets for the other units.
With the full helmets there were some enclosed variations with ridges on top so I used these for the unit leader models in the Rekkhyr and Steel Warrior units.
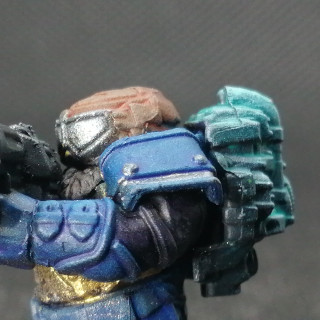
The sprue also has two types of shoulder pads and I used the more decorative variation with studs and a groove (see picture) for the leader models and plain shoulder pads for the regular troopers.
The torsos on the sprue have a ‘standard’ variation and some more unusual ones so I used these alternative breastplates on the Veteran unit. The differences are really subtle though so I was sure that I would need to use paint for differentiation as well.
Lastly the backpacks on the sprue had a few different configurations but there was one example that had a distinctive ridge running over the top so I used these for the Veteran unit as well.





![Very Cool! Make Your Own Star Wars: Legion Imperial Agent & Officer | Review [7 Days Early Access]](https://images.beastsofwar.com/2025/12/Star-Wars-Imperial-Agent-_-Officer-coverimage-V3-225-127.jpg)
