Assassin’s Creed Brotherhood of Venice
Recommendations: 169
About the Project
This project will detail my painting and possibly playing of the Assassin's Creed board game by Triton Noir.
Related Game: Assassin's Creed: Brotherhood Of Venice
Related Company: Triton Noir
Related Genre: Fantasy
This Project is Active
Painting Ezio and some terrain pieces
Hiding Spots
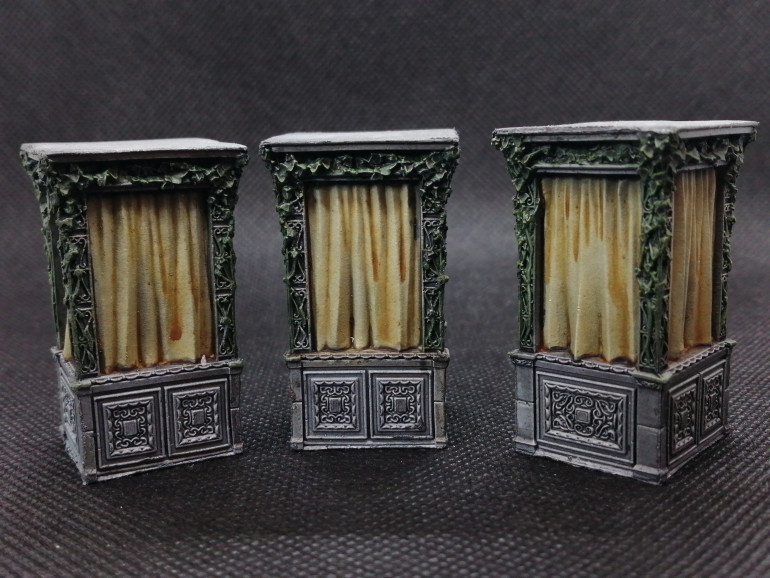
For my next mission (0.4) of the Assassin’s Creed board game, I only needed to paint a single set of models, those being the hiding spots.
These are a terrain feature that allows assassins to hide from enemy models in the game.
Due to their basic design the paint job on these was very simple.
The first step as usual was to apply a basic black/grey/white zenithal with an airbrush using the Vallejo Primer range and Liquitex Titanium White ink for the last step.
For the curtains I applied a coat of Army Painter Speed Paint (APSP) Pallid Bone.
The stone structure of the hiding spots was painted with APSP Gravelord Grey.
The ivy that runs around the upper parts of the hiding spots was painted with APSP Camo Cloak and then drybrushed with Vallejo Model Color (VMC) Olive Green.
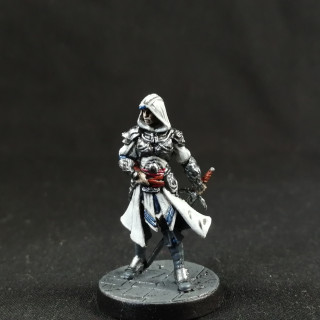
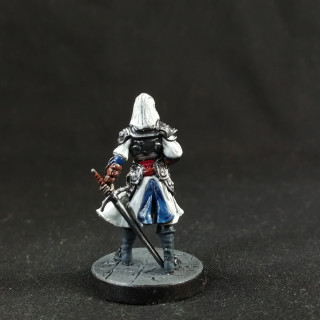
Ezio Auditore da Firenze
That’s not all for this update though, as I also painted the alternate sculpt for Ezio Auditore that was gifted to me by my good friend cookiesk8r that backed the kickstarter.
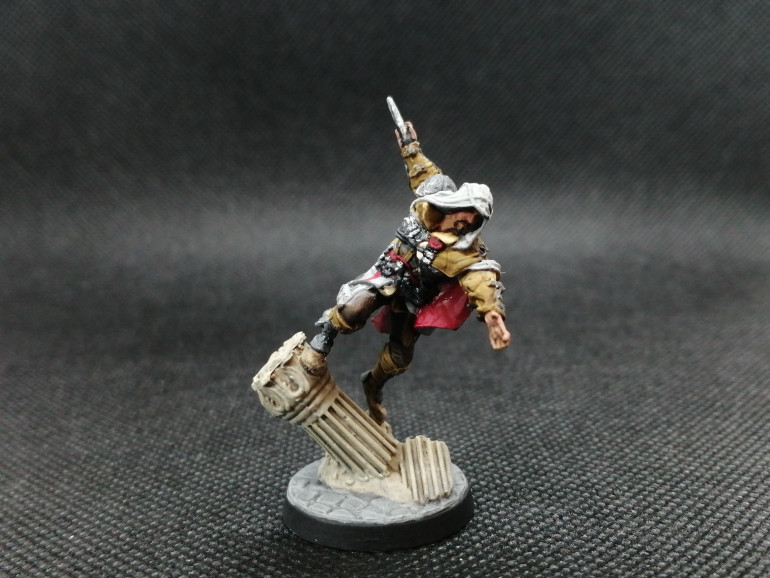
This model was painted for a painting competition at my local gaming club so received a bit more than the speed paint treatment.
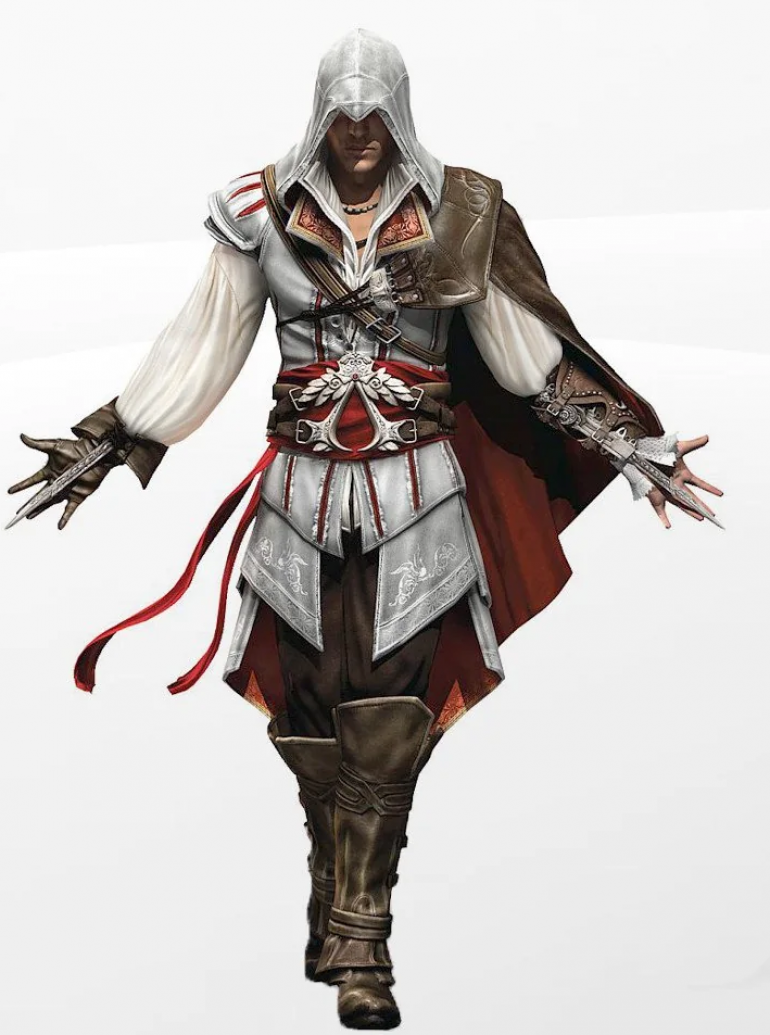
This miniature is a PVC board game piece and as a result the details are quite soft. As I was finding the model quite difficult to read I trawled the internet and discovered the image below which I’m sure is the inspiration for the sculpt. This image helped hugely in painting the model.
Step one as usual, was to zenithal prime with an airbrush. For this model though, I knew I would be painting the outer coat and white, so I wanted this ‘priming’ stage to also do the heavy lifting in regards to painting for these parts of the finished model. This meant I worked up from black to a pale grey by gradually adding more and more ghost grey primer to the Vallejo black and doing more steps than I normally would do in a simple zenithal prime. The final stage was the white ink mentioned previously.
With this done I then applied base coats to the other parts of the model as indicated below using my usual VMC paints.
Lining of cape, lining of outer coat, collar of inner coat and cumberband – Carmine Red
Shirt sleeves and collar – Buff
Skin – Cork Brown
Beard, greaves, right bracer, assassin blade, heel caps, throwing knife handles, armour on right shoulder and chest and the rope tie running from front to back under the right armpit – Black
Pouches, inner bracer on right arm and bracer on left arm, boots, straps and the wrap over the left shoulder – Khaki Grey
Pillar and rubble on base – Stone Grey
Trousers – Burnt Umber
With everything base coated, I moved on to washes.
The red parts were washed with Vallejo Game Color (VGC) Red Wash.
The skin (face and hands) was covered with VGC Flesh Wash.
The shirt, pillar and rubble, pouches, straps, boots and bracers were washed with Citadel’s Agrax Earthshade.
When applying the zenithal through the airbrush the white ink had speckled in some places and to smooth the blends out I applied APSP Holy White, almost like a glaze which I think worked quite well.
With this done I applied a few highlights, but not too many as it is after all a board game piece.
I applied some ivory to the clasps securing the leather wrap over the left shoulder.
All the metal pieces e.g. heel caps, armour etc. I painted with VMC Gunmetal Grey then VMC Silver highlights.
The intricate stitched patterns on Ezio’s outer jacket I painted in VMC Gunmetal Grey.
I picked out a couple of folds on the lining of the cape in a 50:50 mix of VMC Carmine Red and VMC Buff.
I highlighted the face and hands with a 50:50 mix of VMC Cork Brown and VMC Brown Rose.
Lastly I reinforced some of the definition from the zenithal with highlights of VMC Light Grey, Sky Grey and Silver Grey as the white parts of the model were where I wanted the main focus.
To keep consistency with the other board game models I finally applied VMC Basalt grey to the cobbled areas of the base. Then I applied Citadel Nuln Oil wash, a drybrush of VMC Neutral Grey and a VMC Black base edge to finish things off.
I was pleased to place second in the competition with it and given the paint job was 4 hours or so I was pleased with the end result.
Mission 0.3 Poor Little Templars
Oh my god this was a beast for me to get done.
I am pretty pleased with the end result which I achieved using the free OpenShot editing software.
Animating the card slides was not as hard as I was expecting, once I had scanned all the assets.
The audio is terrible on the gaming parts, as I filmed it on my mobile and had a mains lead connected, which I suspect is why I have a continuous background drone in these sections.
I looked at splitting the audio and video, cleaning the audio in Audacity and then resyncing both audio and video again in OpenShot but it was frankly a bit too much work.
For mission 0.4, I only need to paint the hiding place terrain pieces to play the mission so I hope to get to it soon.
Mission 2
I filmed my playthrough of the second mission for YouTube some time ago but never posted a project entry.
I’ve included a link here for completion.
Mission 3 is giving me some issues, in that, my camera setup is struggling to get the whole board in shot and I am not happy with showing card assets to the camera during play.
Still while I work on solving these problems I hope some of you enjoy the mission below.
Happy Gerry? ;~]
Preparing for mission 3
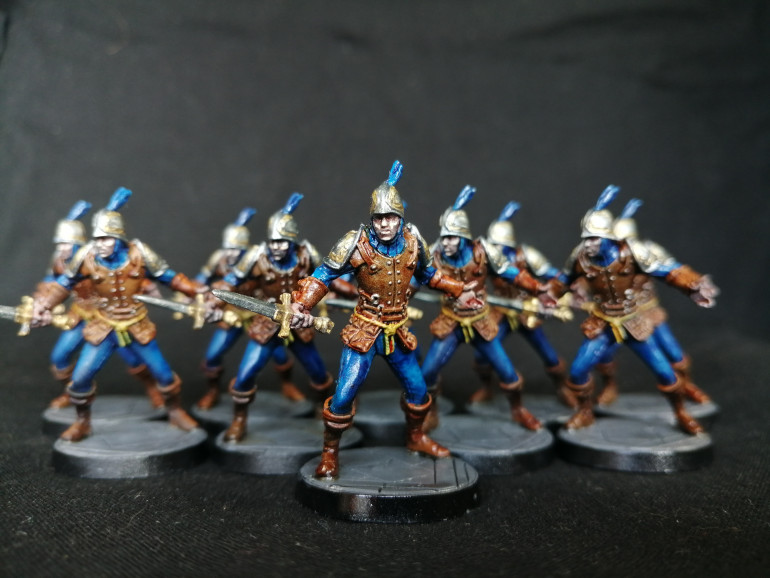
The next stage of the Assassin’s Creed: Brotherhood of Venice project is preparing the miniatures for mission 3. The game is adding a new type of enemy model called an agile who can scale buildings without ladders, similar to the assassin models.
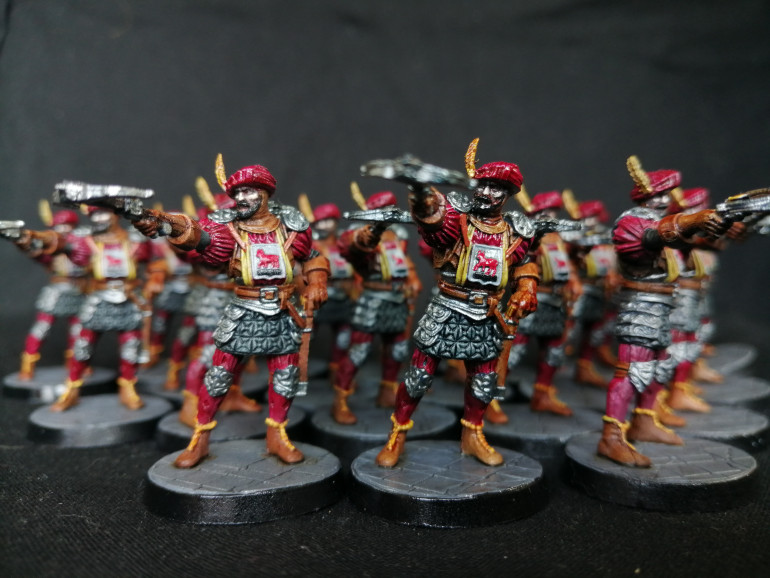
Also as one of the conditions for game failure is being unable to place reinforcements when asked to by the game, I wanted to get all of the available crossbowmen painted.
These models added to the chests I need for objective markers gives me 34 models which I’m painting in one massive batch paint.
The remaining crossbowmen
This collection of 20 models were painted in exactly the same way as those covered earlier in the project so I won’t go into too much detail here.
Although they have a different pose from those already covered he models are essentially identical.
Agiles
As with the crossbowmen I referenced images from the computer game to get the paint scheme as close as possible to the game.
The first step as always is a zenithal prime consisting of Vallejo primers black and then grey, applied with an airbrush.
All colours used were either Army Painter Speed Paint (APSP) or Vallejo Model Color (VMC), as noted.
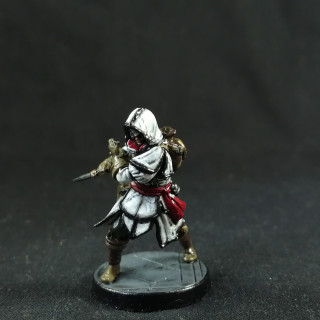
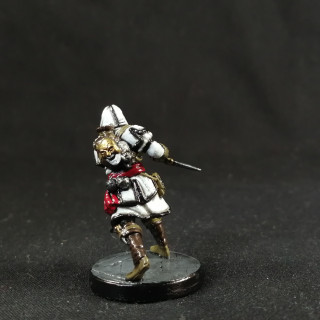
Trousers, helmet plume – APSP Highlord Blue.
Jerkin, boots, bracers – APSP Hardened Leather.
Skin – APSP Crusader skin then a highlight on cheekbones and nose with VMC Basic Skintone.
Helmet, shoulder pads, dagger blade – Initially painted with VMC Dark Grey then VMC Oily Steel over the top.
Buckles and studs on the jerkins were picked out with VMC Oily Steel.
Cord Belt – APSP Zealot Yellow.
Dagger hilt and armour details on the helm and shoulders were painted with VMC Old Gold.
Bases were finished in the same way as the other models. First VMC Neatral Grey then Citadel Colour Nuln Oil wash over the top. Bases were then edged in VMC Black.
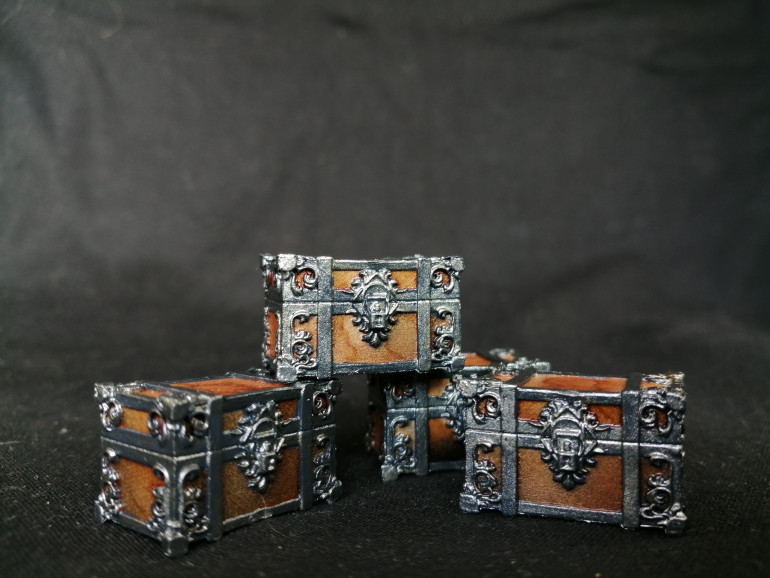
Chest tokens
These were incredibly simple and I think effective in their final look.
Step 1 was a zenithal prime in black then grey, trying to establish a fade to black effect on the chest sides from top to bottom.
Then all wooden areas were painted with APSP Hardened Leather.
Finally all metalwork was painted with VMC Dark Grey then VMC Oily Steel.
I used no washes or other finishes making them a very quick paint.
All models received a generous coat of cheap satin spray varnish as they are board game pieces and will get some wear.
Assassins proper and more terrain items
With the distraction of UKGE I’ve fallen a bit behind with this project but this week I finally managed to get the assets prepared for my next two games.
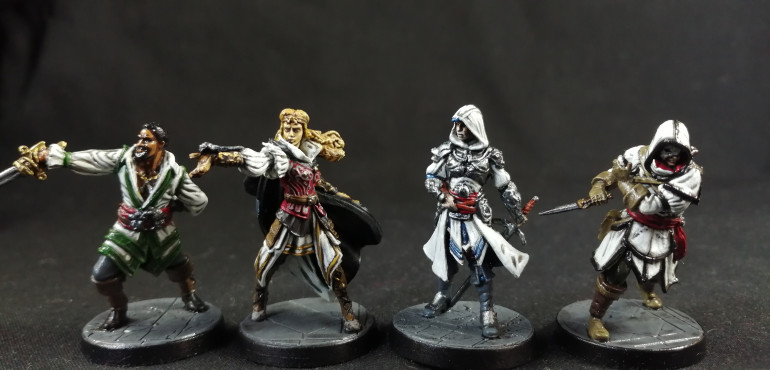
This included the ladder markers and the 4 named assassin models Alessandra, Bastiano, Claudio and Daria.
Each of the main assassin characters has a colour associated with them that appears on their character card and a coloured ring that attaches to their base during the game.
I decided to incorporate these colours into the paint schemes for each model as accent colours.
As the assassins were ‘feature’ models in the game I decided to stock to a more conventional approach to painting rather than use Speed paints or anything more unusual.
Before painting all models were prepared with a zenithal prime using Vallejo primers (Black then Grey) through my airbrush.
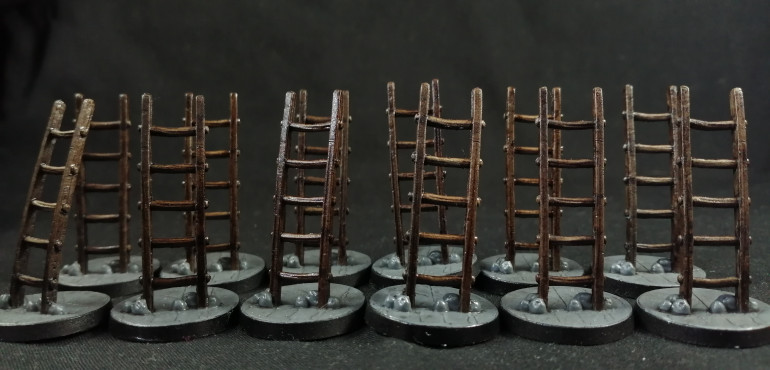
Ladder tokens
The game has 12 ladder tokens that are used to allow the games enemy models enter roof tile areas. I painted all 12 as a batch paint using a really simple scheme.
With the shading from the zenithal I painted the ladders themselves with the Dark Wood from Army Painter Speed paint range.
I then painted the bases and rocks in Vallejo Model Color Neutral Grey.
I then applied Citadel Nuln Oil wash over the bases and rocks.
Finally I edged the bases in Vallejo Model Color black and applied a generous coat of satin varnish from a spray can.
All colours are from the Vallejo Model Color range unless otherwise stated.
Alessandra – Blue
Base colours:
Robes – Deck Tan
Armour – Dark Grey then Oily Steel over
Cumberband – Flat Red
Skin – Chocolate Brown
Sword Hilt, Trousers, Straps – Red Leather
Boots – Intermediate Blue
Coat lining, Boot tops, Robe stripes – Dark Prussian Blue
Base – Neutral Grey
After finishing base coats I applied Citadel Nuln Oil wash to the whole models EXCEPT the skin areas which were shaded with Citadel Agrax Earthshade.
Highlights:
Robes – Ivory then White over
Coat lining, Robe stripes – Prussian Blue
Skin – Cork Brown then Light Flesh/Cork Brown mix.
The final step as always is edging the base in Black then varnishing.
Bastiano – Black
Base colours:
Robes – Deck Tan
Backpack, Gaiters – Burnt Umber
Shoes, Gloves, Straps, Pouch – Khaki
Trousers – Refractive Green
Cumberband – Flat Red
Robe edging – Black
Skin – Chocolate Brown
Knife handles – Old Gold
Knife blades – Dark Grey then Oily Steel over
Smoke bombs, Face mask – Silver
Smiling mask – Old Gold (top), Deck Tan (bottom)
Sad mask – Silver (top), Dark Grey (bottom)
After finishing base coats I applied Citadel Nuln Oil wash to the whole models EXCEPT the skin areas which were shaded with Citadel Agrax Earthshade.
Highlights:
Robes – Ivory then White over
Skin – Cork Brown then Light Flesh/Cork Brown mix.
Smiling mask bottom – White
Sad mask bottom – German Grey
The final step as always is edging the base in Black then varnishing.
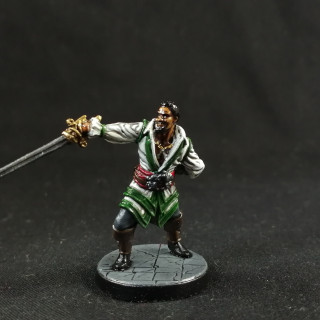
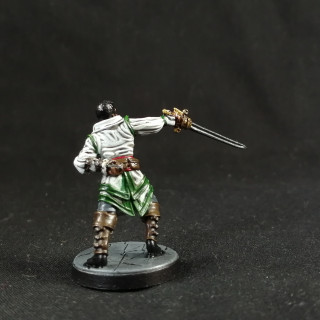
Claudio – Green
Base colours:
Robes – Deck Tan
Sword blade, Hidden blade, Belt buckle, Necklace – Dark Grey
Cumberband – Flat Red
Robe decoration – Flat Green
Trousers – Intermediate Blue
Gaiters, Belt pouches – German Camo Medium Brown
Hair, Shoes – Black
Belt, Sword hilt, Arm straps, Neck chain – Chocolate Brown
Skin – Flat Brown
After finishing base coats I applied Citadel Nuln Oil wash to the whole models EXCEPT the skin areas which were shaded with Citadel Agrax Earthshade.
Highlights:
Robes – Ivory then White over
Belt buckle, Necklace – Silver
Neck chain, Sword hilt – Gold
Sword blade, Hidden blade – Oily Steel
Skin – Orange Brown then Basic Skintone
The final step as always is edging the base in Black then varnishing.
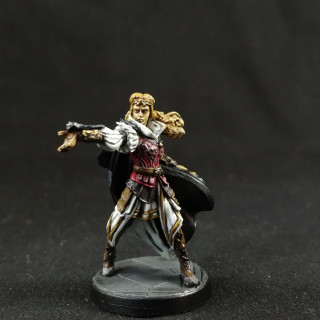
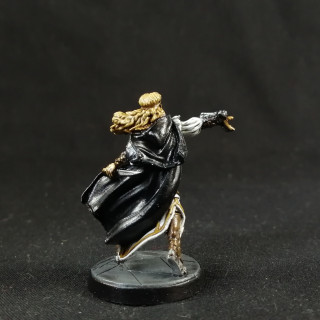
Daria – Gold
Base colours:
Robes – Deck Tan
Leather jerkin panels, belt, boot tops – English Uniform
Leather jerkin – German Camo Black Brown
Jerkin – Flat Red
Shoes, Stitching on jerkin – Sky Grey
Skin, Stitches on boots, bracers – Chocolate Brown
Hair, Edging on robes – Gold Brown
Cloak – Black
Handbow, Knife blade, Belt buckle – Black then Oily Steel over
Head badge, Knife handle, Detail on bracers – Chocolate Brown then Gold over
After finishing base coats I applied Citadel Nuln Oil wash to the whole models EXCEPT the skin areas which were shaded with Citadel Agrax Earthshade.
Highlights:
Robes – Ivory then White over
Cloak – Black Grey
Hair – Drybrush Flat Yellow then Flat Yellow/Ivory mix
Skin – Medium Fleshtone then Dark Sand
The final step as always is edging the base in Black then varnishing.
The first mission
With my initial models painted, I decided to jump into a solo playthrough using two assassins.
In the first mission the apprentice assassins need to rescue their senior guild members who have been captured while on a mission.
I will be filming my playthrough and here is the first mission.
Fast Travel Stations
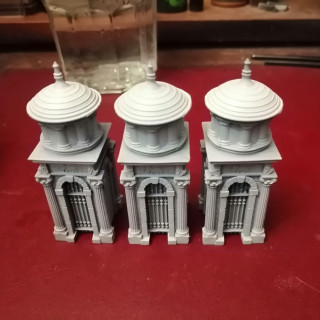
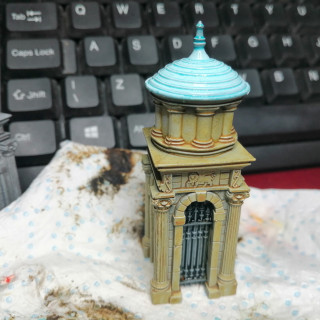
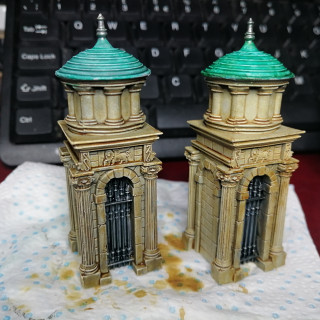
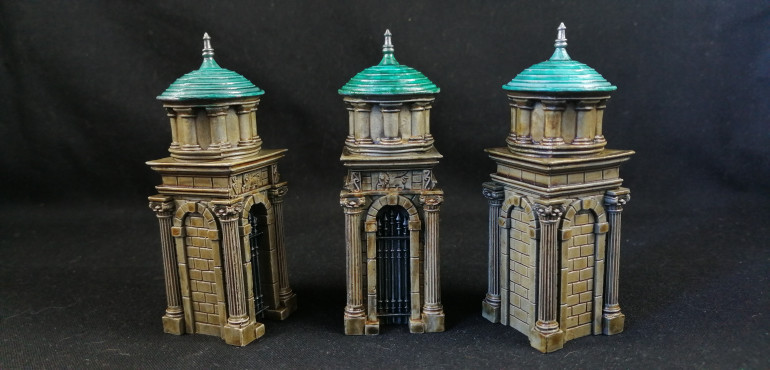
Continuing to explore the Army Painter Speed Paints (APSP), I decided to paint the fast travel stations next.
After a discussion with a friend I decided to do an experiment to see what effects could be achieved with different techniques.
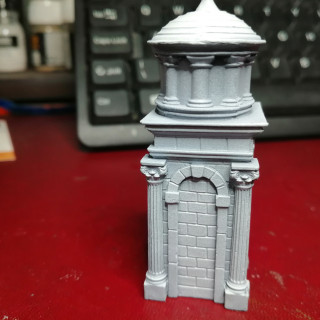
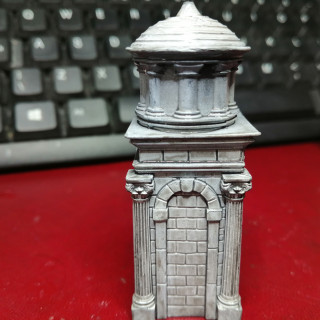
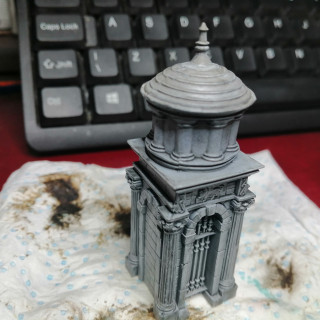
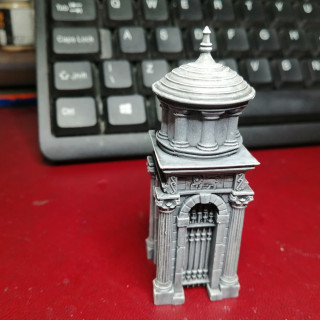
I began by doing a black white zenithal highlight to the the fast travel stations.
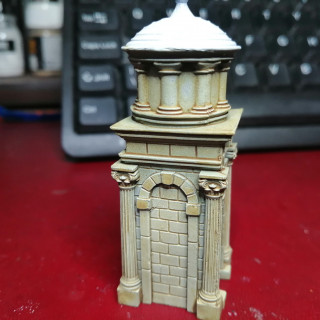
The first one I painted with APSP as follows
Stonework – Pallid Bone
Roof – Plasmatic Bolt
Archway and gate – Grim Black
I was unhappy with the verdigris colour on the roof as I felt it was too washed out so I applied a second coat of Plasmatic bolt with just a hint of Camo Cloak. This colour I felt was too green. There is no pleasing me, I guess. :~]
My friend had suggested undershading before applying contrast as he had found the brickwork was poorly defined when he painted his set with standard acrylic paints and washes. So from the zenithal I applied Citadel Nuln Oil over the whole model and when this was dry applied a drybrush of Vallejo Model Color (VMC) White to bring back up the highlights.
This second model was then painted as the first except I applied a second coat of Plasmatic Bolt to the roof with no green. This, coupled with the darker tone of the Nuln Oil, intensified the verdigris colour to a colour I was happy with.
I think the second approach produced a better result. The colour tones were better and the contrast was better. The uneven and mottled look the the wash gave also made the stonework look more ‘weathered’ I feel. The Speed Paint alone looked too even and ‘clean’.
With this in mind I painted the third station like the second.
In an attempt to ‘rescue’ the first miniature and unify the set I decided to retrspectively add Nuln Oil over the Speed Paints. As I expected this did lead to reactivation and I had to work quickly and carefully to not pass over areas too frequently. Applying a varnish step first would have been a smart move although this could, potentially, have changed the behaviour of the wash leading to this model looking out of place against it’s companions.
I did have to go back in with Pallid Bone and Plasmatic Bolt to clean up areas where the Speed Paint had rubbed off leaving almost white areas on the miniature, but I think this rescue step worked to a degree and the three models looked much more unified.
As a final touch I applied VMC Oily Steel to the gate and the finial atop each roof before varnishing.
Apprentice Assassins
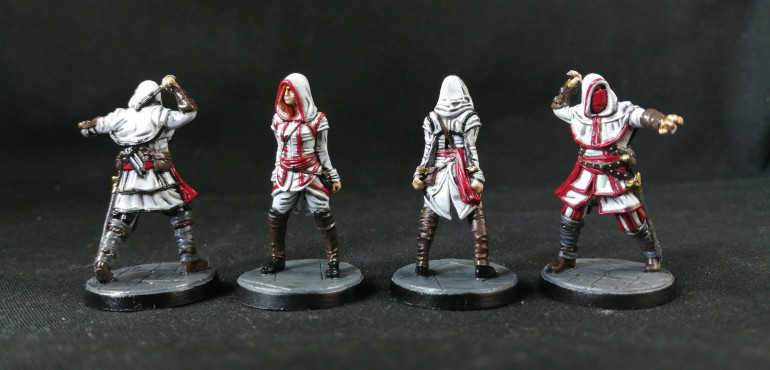
As these are the hero models that will be used in many scenarios I decided to use my conventional painting style rather than use the Army Painter Speed Paints for these models. Having said that, they are still board game pieces so highlighting will be minimal.
There are 4 models in two variants (2 male and 2 female). I saw a cool colour scheme online where someone used red and black to accent the white robes. I decided to use red on one or each sex and black on one of each sex giving me unique combinations so that each model could be differentiated during play.
Male Assassins
All base colours are from the Vallejo Model Color range.
Robes – Deck Tan
Bracers, shoes, pouches and straps – Leather Brown
Scabbard, leg wraps – Neutral Grey
Sash – Flat red
Piping on robe and face mask – either Flat Red or Black
Metals e.g. knife blades – Oily Steel
Skin – Dark Flesh
Female Assassins
All base colours are from the Vallejo Model Color range.
Robes – Deck Tan
Boots, pouches and straps – Leather Brown
Sash – Flat red
Piping on robe – either Flat Red or Black
Metals e.g. knife blades – Oily Steel
Skin – Dark Flesh
Shoes – Black
Hair – Gold Brown on one and Red Leather one the second
With all the base colours down, I applied Citadel Nuln Oil wash to all of the models except any areas of skin (e.g. face and hands).
To the face and hands I applied Citadel Agrax Earthshade to keep some warmth in the base tones.
With this done I highlighted the robes with VMC White to bring out all the folds and details.
To make the faces and hands catch the eye more I also highlighted them with VMC Basic Skintone.
I did not apply highlights to any other part of the models at this stage but I could always go back and do this at a later stage.
The first models
Project planning
Assassin’s Creed Brotherhood of Venice is a colossal board game with well over a hundred miniatures in the core game alone.
These sort of projects are always intimidating and frankly a little soul destroying to the unprepared so before doing anything I had a quick look at the mission guide.
To play the first mission I need Apprentice Assassin’s (at least 2), Fast Travel Stations and Crossbowmen, so this is what I will attack first.
As many of the models are repeated sculpts, I wanted to do batch painting as much as possible. So, even though I only need 4 or so Crossbowmen at first, I will paint all of the similar sculpts in one go regardless.
I set aside all 4 apprentice Assassin’s (2 male, 2 female), all 3 fast travel stations and 10 of the crossbowmen (all the same sculpt) to paint first.
I have been looking at the new Army Painter speed paints with interest and have liked some of the images I have seen from online reviewers and so I bought myself the Mega Paint set to do this project with.
These translucent paints (a la Citadel Contrast) are a new thing for me and so I figured a board game project was a good way to ‘test’ them out. If I wasn’t 100% happy with the results I would be more content living with the results than if it were a wargaming army project.
The models are nice enough but the quality is certainly not up to Games Workshop standards. Made from PVC, the details are a little ‘soft’ and the mould lines in places are terrible.
Still after a bit of work I got all my first wave of models ready for priming.
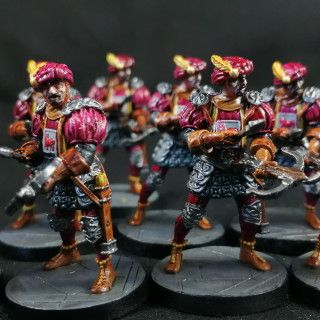
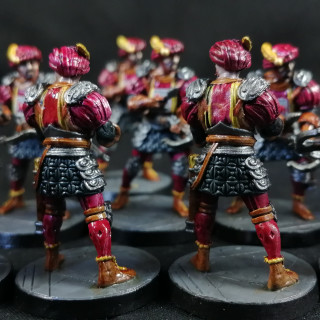
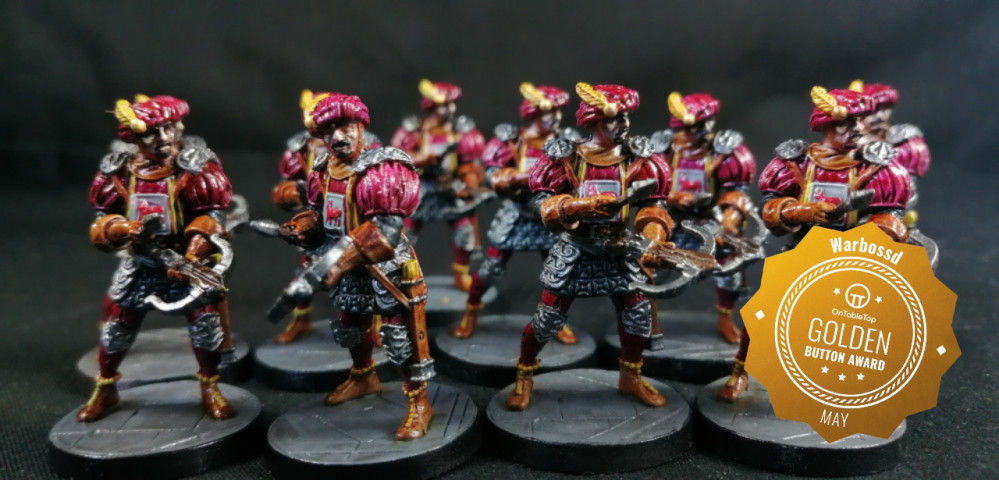
The Crossbowmen
As I was going to be using Army Painter Speed Paints (APSP) on these models I wanted to do a zenithal prime underneath to enhance the shading effect of the paints.
Using my airbrush I painted all 10 models with Vallejo Back Primer then did a zenithal with Liquitex Titanium White Ink.
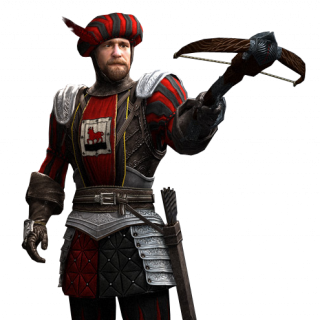
I searched online for some images of the in game assets from the Assassin’s Creed Brotherhood of Venice Computer game and decided to use these as a basic template for painting my models.
First of all I began applying the Speed Paint colours to the models.
Face – APSP Crusader Skin.
Note: I did not like the colour of this paint at all. It may have been an issue with the zenithal highlight as the overhanging hat brims on the models had left the face details very dark. The faces would need attention later for sure.
Hat, leggings, shoulder ruffs, rear panel of tabard – APSP Slaughter Red
Gloves, Collar, Belt, Kneepad straps, Quiver and straps, Leather jerkin, Shoes – APSP Hardened Leather
Note: This paint seemed very thin and didn’t produce a consistent colour when applied. It may have been my inexperience with the paints, but only time will tell.
Tabard front panel – APSP Holy White
Note: The speed paints behave a bit like oil washes and they exhibit a strong capillary action drawing themselves away from the brush into grooves, edges and details on the model. This makes it almost impossible to use them for painting very small details like the animal and bar design on the crossbowmen’s tabards. It was clear that I would have to paint some of the finer details like straps and such with standard acrylic paints unless I wanted to paint large areas of the model a single colour.
Crossbow Stock, quarrel shaft – APSP Dark Wood
Padded skirt, lower sleeves – APSP Grim Black
Feather on hat, quarrel fletching in quiver, boot details – APSP Zealot Yellow
This completed all of the work I felt I was able to do with speed paints. I have seen many on the internet use Speed Paint greys for metals but I’m sure this is for product demonstration purposes only as I think it looks pretty awful. I will be using Vallejo Model Color (VMC) metallic paints on my models.
Button on hat – VMC Gold
Armour plates, Quarrel head, Crossbow metalwork, Quiver fittings – VMC Gunmetal Grey
Shoulder armour Straps – VMC Red Leather
Piping edges of tabards – VMC Flat Yellow
Tabard insignia horse(?) – VMC Flat Red
Tabard insignia bar, beards – VMC Black
Face highlights – VMC Basic Skintone
With the painting complete I applied VMC Neutral grey over the paved texture on the bases and then applied a Citadel Nuln Oil wash over the whole base.
The bases were edged in VMC Black before a generous coat of spray varnish was applied to protect these board game pieces.
Some thoughts on Army Painter Speed Paints
The Army Painter Speed Paints are a fine product and I feel I can get better results with practice as I will learn more about how they behave on models.
They obviously have their limitations and are difficult to control when painting fine details.
I am not convinced they suit beginner painters well as they require a very precise placement to produce clean results. On a couple of occasions I got Grim Black on the gloves where I was later applying Hardened Leather and the darker patches are very visible under the Hardened Leather. I attempted to cover the Grim Black with Vallejo Model Color White and the black did reactivate, even 24 hours later, tinting the white paint a grey colour. This wasn’t a massive problem as the Hardened Leather was able to obscure this slight greyness easily, where it could not cover the Grim Black. If a painter lacks good brush control they are likely to spend considerable time on ‘clean up’ or have messy looking models, which may prove disheartening.
One other concern I have, is the ‘speed’ part of the products name. I am a very experienced painter and I am sure I can lay down down crisp clean base coats on a model using standard acrylic paints and then slap Citadel’s Agrax Earthshade (or a similar wash) over the whole mini in the same time, or quicker, than using ‘speed’ paints. Omitting any highlight step would be how I would have previously tackled a speed paint project.
The main difference here is that my ‘old school’ speed painting method produces good base colours and shadows but poor highlights and less vibrant colours overall. The Army Painter Speed Paints will produce more contrast on highlight areas and brighter colours overall. So depending on your preference for the final look of your models I could not recommend these paints on the basis of the ‘speed’ argument alone.


