Little Alice
Recommendations: 193
About the Project
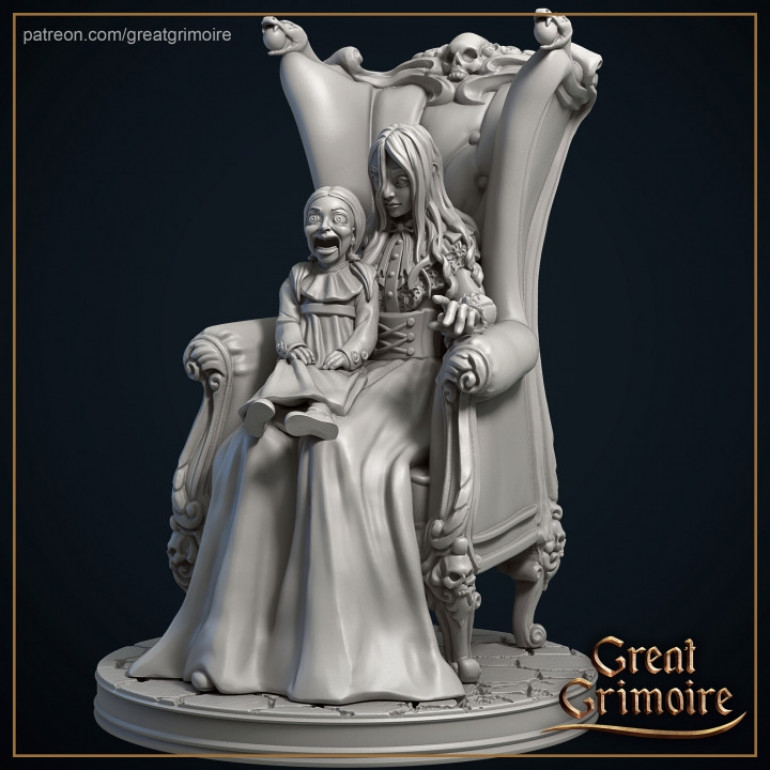
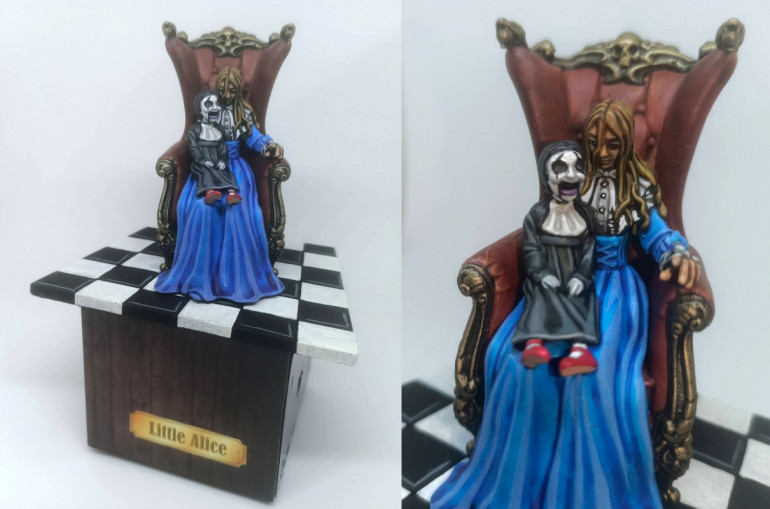
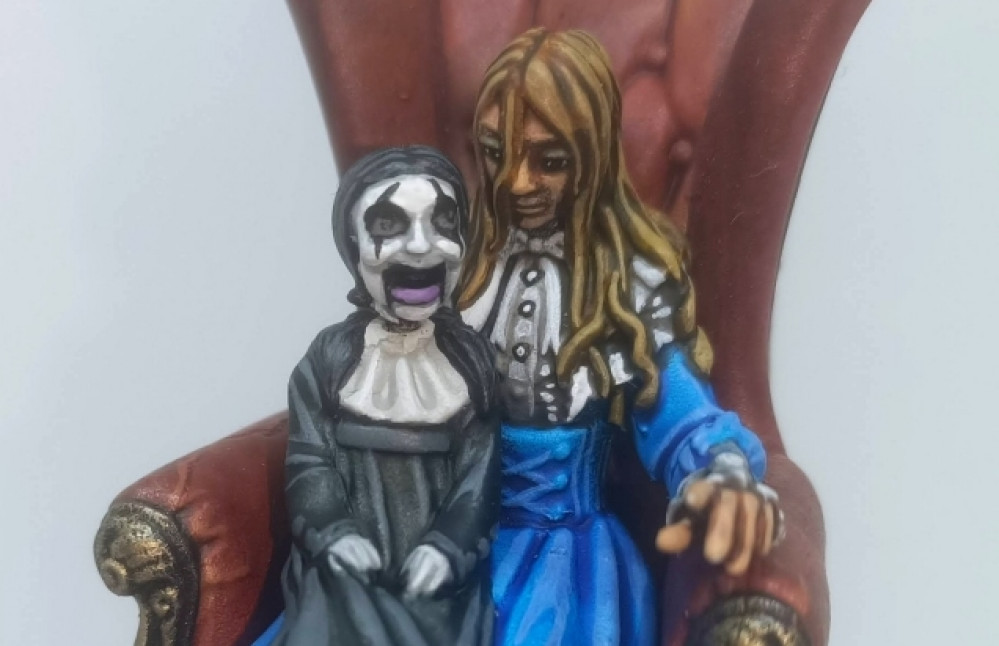
A little while ago, Great Grimoire ran a painting competition for their "Hills Asylum" release. As soon as I saw the Alice and doll miniature, I knew exactly what I wanted to do!
Related Genre: Horror
This Project is Completed
Great Grimoire Patreon
I’ve been a supporter of the Great Grimoire Patreon for quite some time now. Every month, I think “I can’t use the minis in any game and they take up a lot of time when I do get around to printing them” but I can’t bring myself to give up supporting Anna Zem for one simple reason – her sculpts are just so darned grotesque!
I’m not sure if I’d like to spend an hour discussing the inspiration for her, frankly, disturbing range of miniatures – or spend the hour hiding from her in case she tried to speak to me; they’re weird.
But weird in a spectacular way.
So I buy supporting the patreon and keep getting all these horrible, disturbing minis – most of which will probably never make it onto my print plate. But there was one month – that also happened to be when she ran a painting competition – that I saw a miniature and knew exactly what I wanted to do with it.
That miniature was Alice.
Now not only does the mini have that creepy child-with-a-toy horror movie feel about it, but I figured it would be a perfect contender for a spot of animatronics.
A few months ago @avernos Gerry said “no more golden buttons ’til it makes a noise”. Well, I decided to go one better. Because this thing is going to move…..
Hacking in Blender
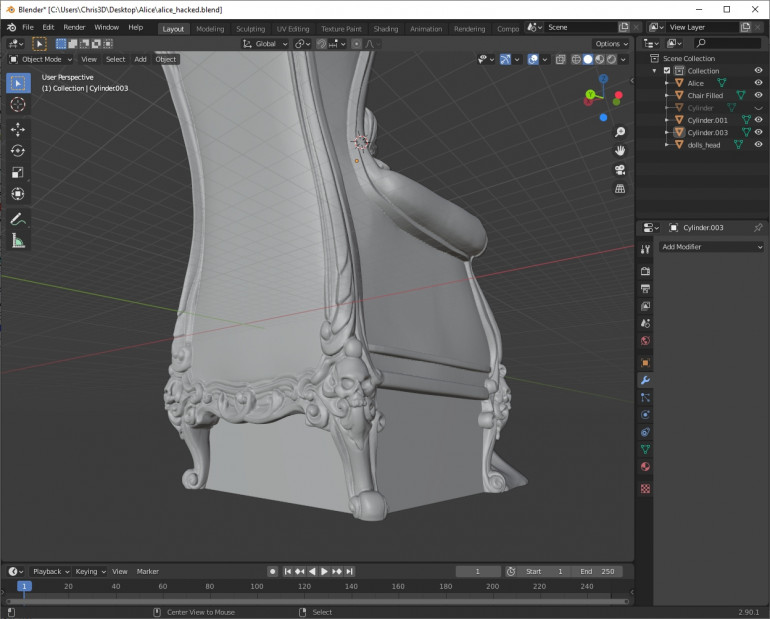
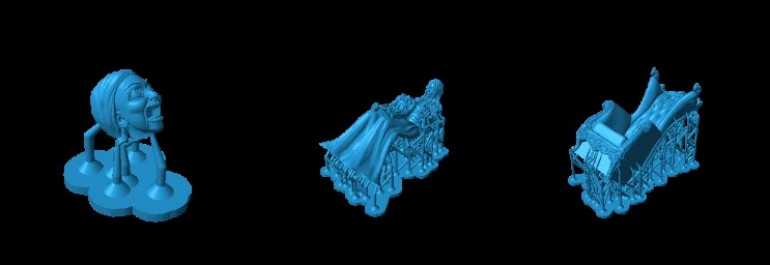
Like many of my modified 3d printed miniatures, the first job is to modify the .stl file in Blender – creating cutouts and channels to accept the electronics and other mechanical wizardry.
Already I had an idea of what the finished model would look like – it was going to have electronics, a motor, a speaker, some LEDs, would need space for a battery or power supply….. all stuff that needed to be hidden in a base, somehow.
So I needed to stop the mechanics of how it all worked from being visible to the viewer. Which meant “filling in” between the legs of the armchair
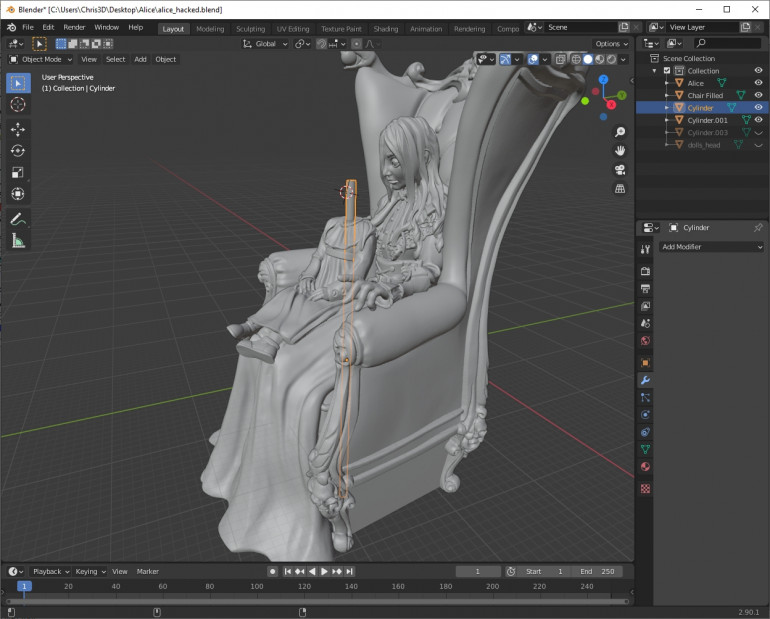
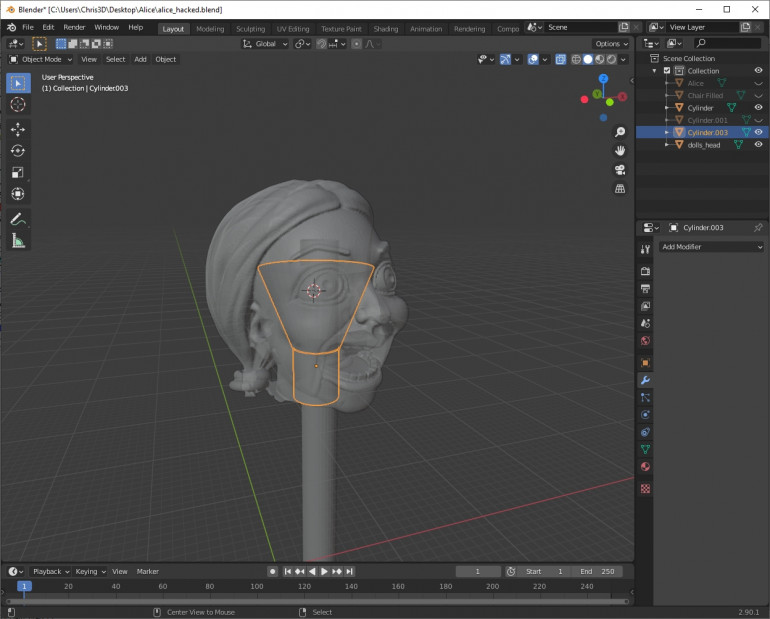
I then took an unusual delight in chopping off the head of the evil doll (I’d already decided that the doll was evil, so felt vaguely relieved in decapitating it!) and placed a thin cylinder through the body of the doll and the armchair.
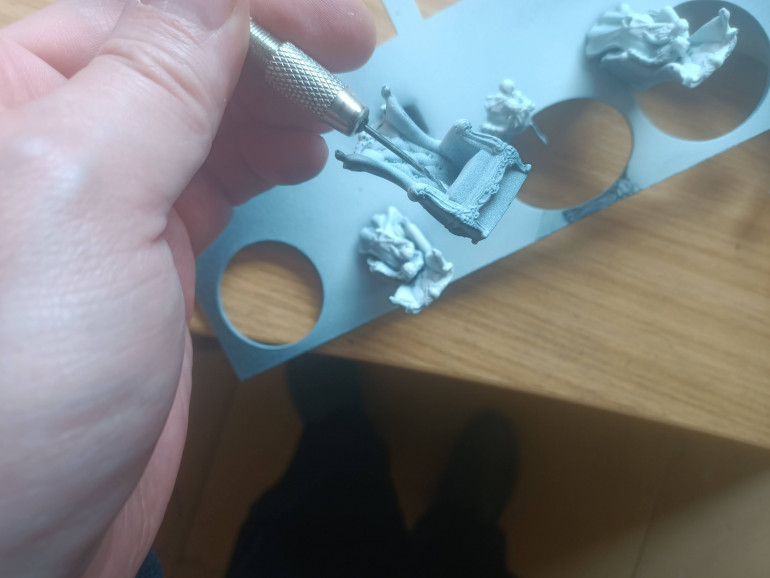
A quick boolean operation, and I had a channel for a axle to fit
Rather than simply glue the doll’s head onto the end of a rod, to enable it to rotate, I thought we’d really try to push the boat out on this one – and created a void inside the head to take a tiny LED, in order to make the eyes light up.
I figured that if it didn’t work out, I could always just fill the head with glue and stick it onto a small rod anyway and wouldn’t be any worse off for it. But if it worked…. light up laser eyes!
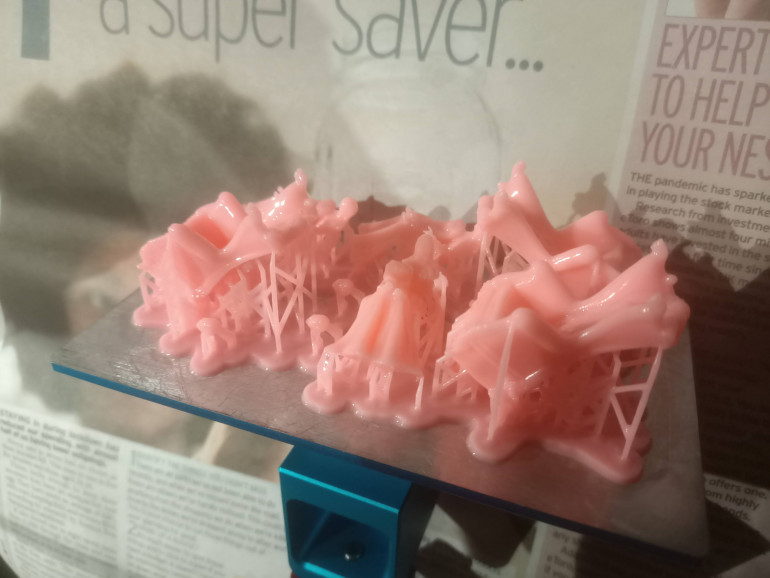
I created “supported” versions of the .stl files and dropped then onto my AnyCubic Photon printer. Now it was just a matter of waiting the four hours or so for the pieces to print, and I’d be able to tell if this idea was going to work or not!
Printing and assembly
Amazingly, all of the parts printed, first time, without any problems. I printed double of everything, just in case, but it turned out an unnecessary precaution.
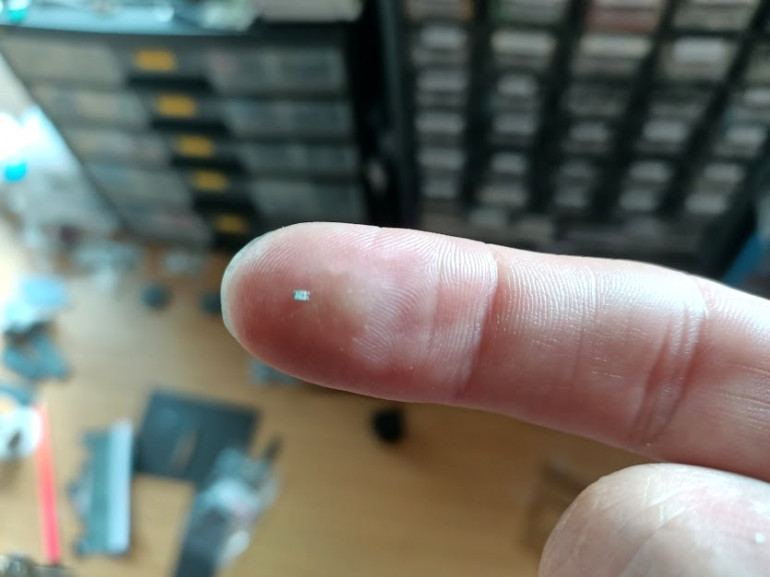
To make the evil doll’s eyes light up, I needed a tiny RED led. The void inside the head was insanely small. Less than one millimetre!
Luckily I had some LEDs that were up to the job!
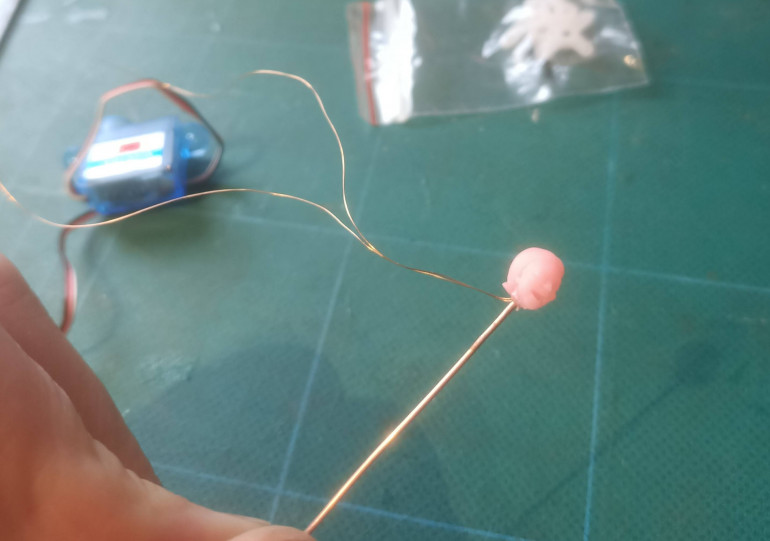
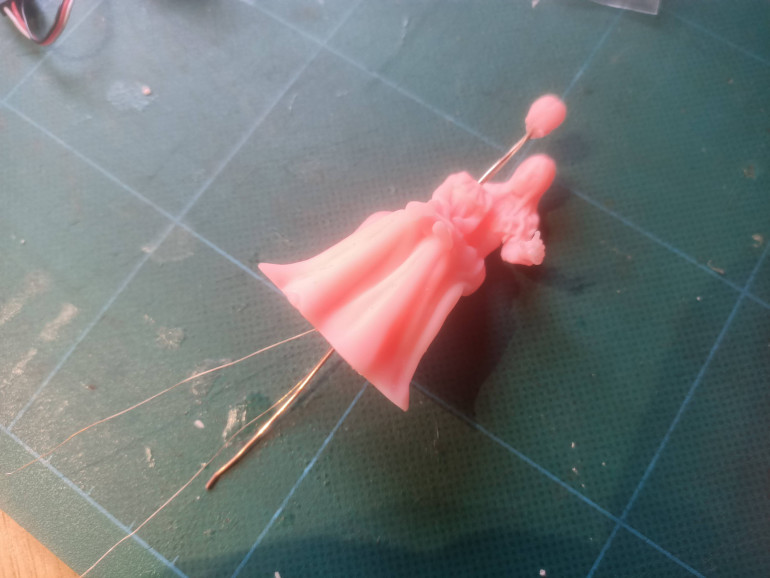
After soldering in two lengths of magnet wire (super-fine wire that, instead of a plastic/pvc covering is painted in very thin enamel paint) I used a single length of solid core wire (approx 0.4mm across) as the rod to mount the head onto
A quick dry fit ensured not only that everything still fitted together, but that the head could rotate, even with the wires for the LED eyes in place.
Everything seemed ok, but after priming (first black, then a basic zenith highlight in white) the rod felt reluctant to turn, so I re-drilled the hole using a pin vice and 0.8mm drill bit
Slap on some paint
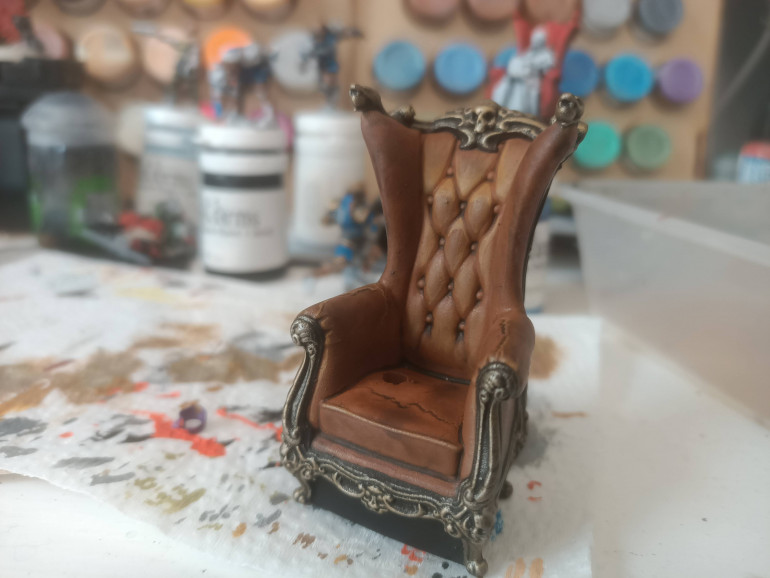
Painting the armchair was great fun. It was also pretty simple too; the legs and arm embellishments were painted black, then heavily drybrushed with (retributor) gold. The leather was just flooded with snakebite leather contrast paint, then each of the edges where the leather pushed in towards the buttons was edge highlighted with a pale brown.
Where I’d rushed and whacked on the white zenith a little too heavily along one arm (and the seat) then failed to let it fully dry before flooding with contrast paint, the underlying white primer cracked. I decided I liked the effect and – in Bob Ross style – set about celebrating, instead of trying to hide one of those happy little accidents. The edges of the cracks were highlighted, the same as the folds around the bottons, to give an aged, worn, leather look.
I repeated the highlight effect anywhere on the model where the leather appeared to crease or fold (around the fronts of the arms, for example).
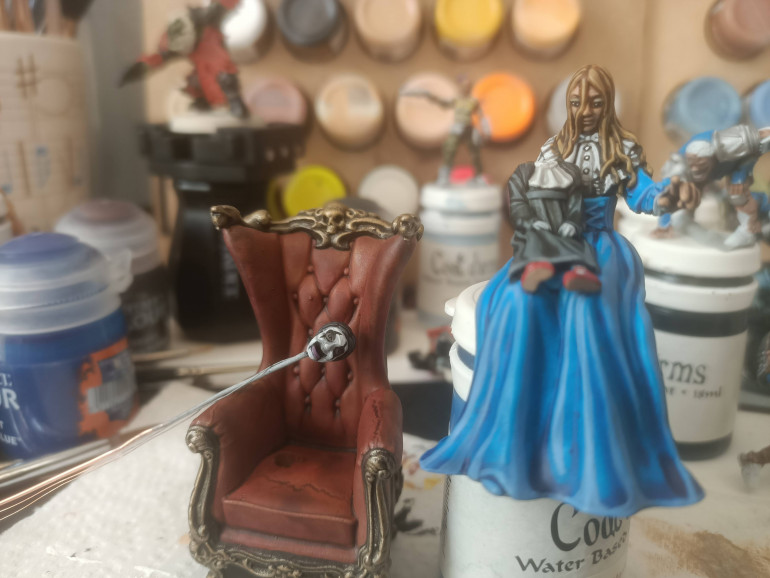 (at this point, I felt that the brown leather and muted tones of the doll were just a bit "boring" so slapped on a wash of red ink, to make the chair look more like an old Chesterfield and increase the contrast between the chair and the blue dress, thanks to a maroon-tint to the "leather")
Contrast paints are like a revelation for me. They speed up my painting (marginally) but more importantly than that, they make painting fun again. As you layer the stuff on, good and thick, you can see all the shadows and details on the miniature being picked out.
I help this effect by priming my models black, then applying a white zenith highlight (using Halfords car paint primer if you’re interested). It makes the darkest recesses of the shadows all the darker, while helping to push the raised edges to a brighter colour.
Even though the effect is quite eye catching, I always prefer to add some layering on the highest points, of a colour “two shades up” from the base contrast colour (one shade up and the effect is too subtle).
This creates a very stylised “cartoony” look. It’s one I spent a long time fighting, but have since learned to embrace my painting style – no creamy smooth blends here; stark contrast changes and a cell-shaded cartoon-look will do me just fine!
I like to move it, move it....
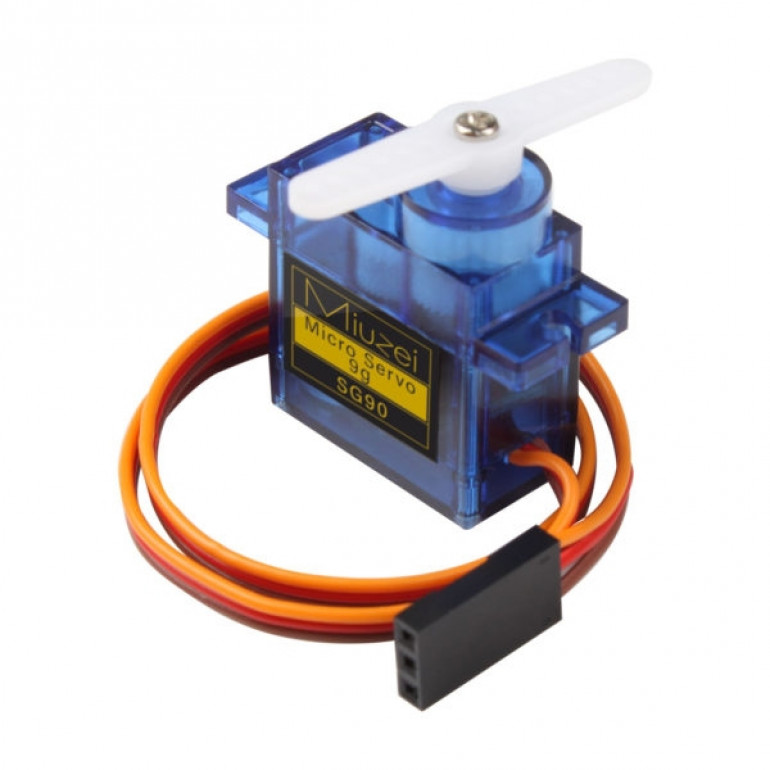
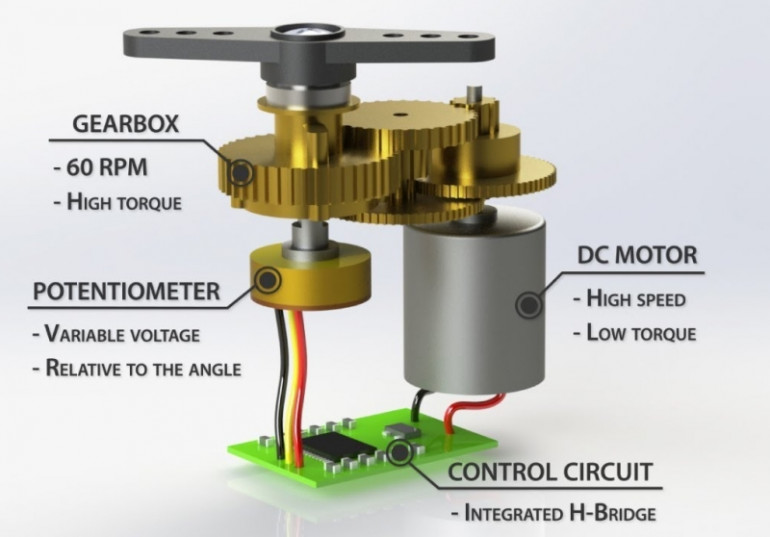
This is a servo. It goes bzzzzzt. And moves. It’s a tiny motor that can be turned to a specific angle by giving it a specific signal. It’s both technically crude and impressively sophisticated:
It’s basically a little more and a load of gears, but with a very important addition – the potentiometer inside is turned at the same time as the final cog in the gear chain. This potentiometer sends a feedback signal back to the control board, so that it knows when the motor has reached the desired position (or not).
Even though the motor turns (relatively) quickly, and has very low torque (relatively) because of the gearbox, the “horn” on the top rotates relatively slowly (and has much higher torque).
It’s the movement of all these gears against each other than makes the familiar bzzzzt sound, when a servo moves.
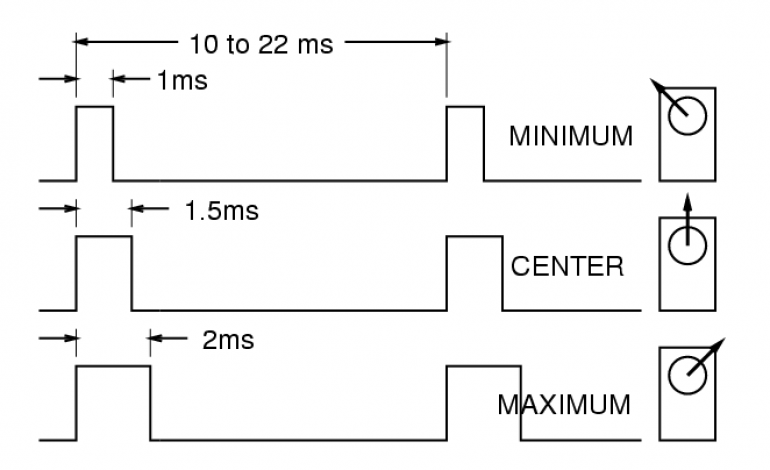
All servos work in pretty much the same way – they have a guaranteed range of about 90 degrees (some servos can move in a wider arc than this).
To make a servo move, we send it a “pulse” of a specific width, every 20 milliseconds or so. A pulse that is 1.5ms long tells the servo to move to the “centre” point (many call this “90 degrees”).
A pulse every 20ms or so that is only 1ms long would cause the servo to move to about 45 degrees. A pulse every 20ms or so that is 2ms long would cause the servo to move to about 135 degrees. Some servos accept pulses of less than 1ms (and can therefore move to an angle of less than 45) and pulses of more than 2ms (pushing them beyong the 135 degree angle) but this is never guaranteed.
Some servos “chatter” if you try to make them move beyond a 90 degree range.
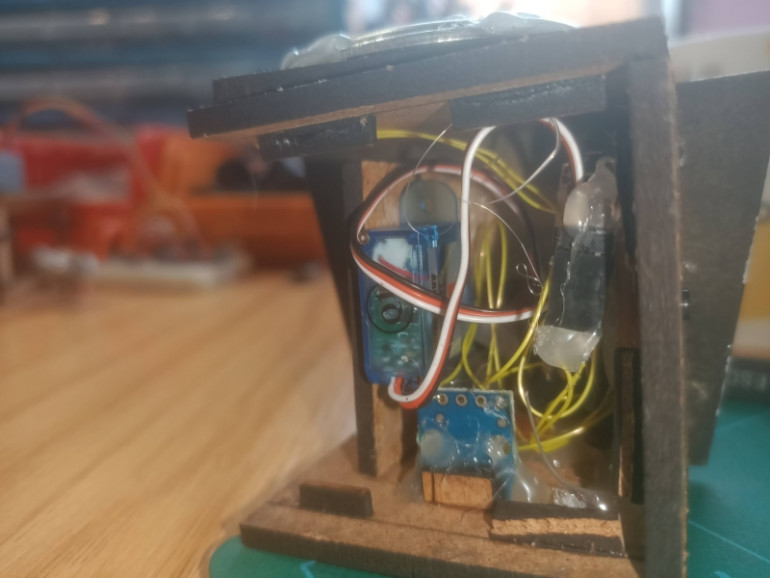
I mounted the tiny 9g servo inside the base of my diorama and hot-glued the end of the rod (on which the dolls head had been glued) to the centre of the servo “horn”. I ensured that the servo was at it’s maximum rotation (135 degrees) and glued the doll’s head at it’s extreme rotation (facing the Alice character on which the doll sits).
Now, when I set the servo position to 45 degrees, the doll appeared to be face outwards, towards the viewer.
By now, I had an assembled diorama with a seated Alice, a spooky doll (with light-up LED eyes) and the ability to make its head turn to either face Alice, or towards the viewer.
It was really creepy.
I wanted more. It needed to make a sound…..
Everybody make some noise!
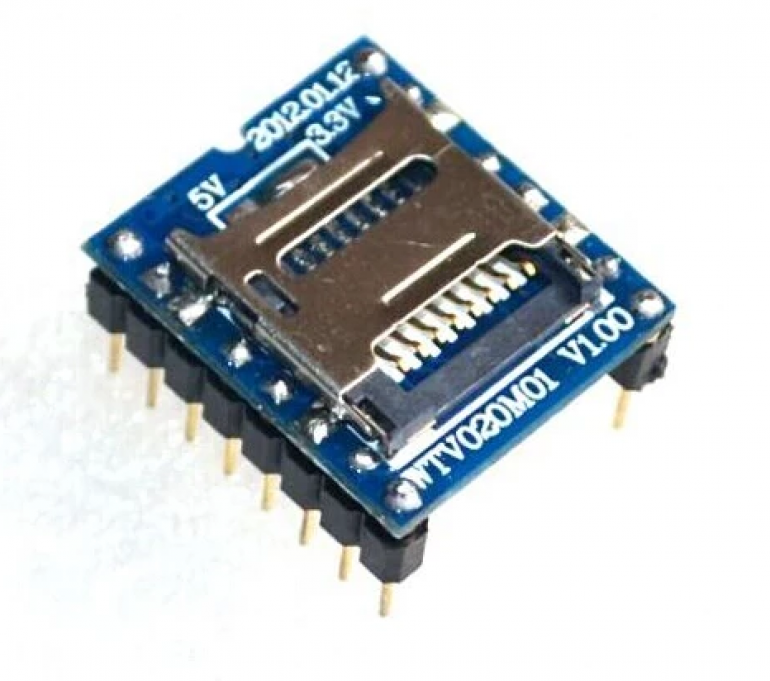
This unassuming little module is he WTV020M01. It provides a cheap and reliable way of playing audio using nothing more than an 8-bit microcontroller. (yes, it is possible to – and I have in the past – create an audio player from a microcontroller yourself, but playing 8-bit audio at 22khz requires a lot of processing cycles which wouldn’t leave much time to do all the other cool stuff, like lighting up the eyes and controlling the servo etc.)
Simply put, you create your audio in a special format (.ad4 which is little more than a “headerless” WAV audio file) copy it onto a freshly formatted sd card, then send a command to the module to tell it the number of the file you wish to play (the files are named 0000.ad4, 0001.ad4, 0002.ad4 etc)
Alice Cooper’s “Wind Up Toy” just felt like the perfect soundtrack for this little vignette. Not only is it a great song (featuring no less than Joe Satriani on guitar) but the lyrics fit beautifully with this scene.
There’s also a great little spoken line towards the end of the song, which I thought would make a great finish for the “laser lights” pay-off.
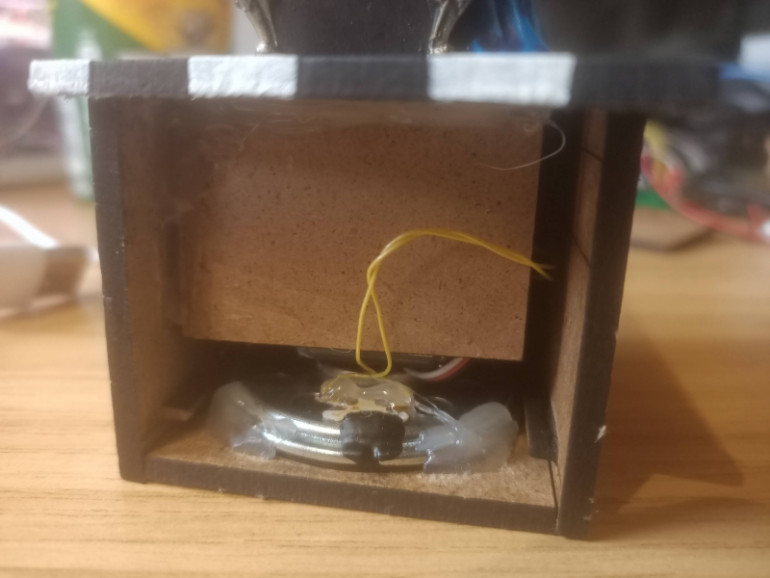
I hot-glued a 2″ speaker (a full speaker with a magnet and paper cone, not just a crappy piezo buzzer) onto a piece of mdf with a large hole laser-cut into it (so the sound could escape from the bottom of the diorama base) and connected it up to the WTV020M01 module.
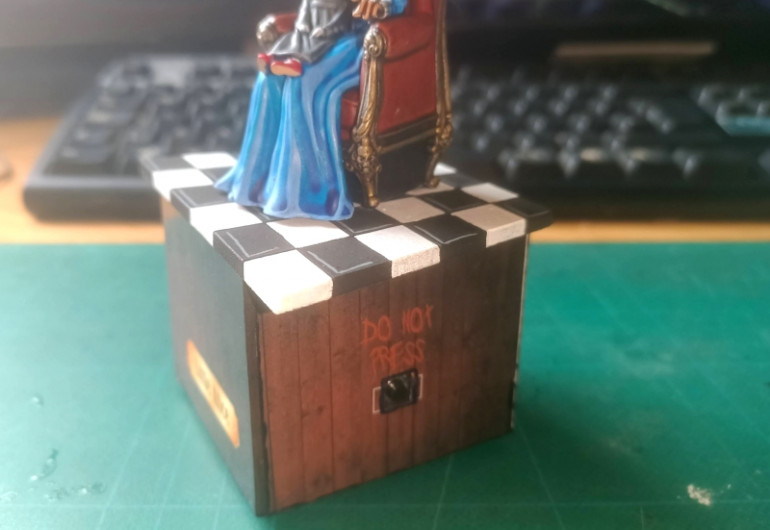
I glued the side onto the base, with a small 6mm tactile push button (hot)glued onto a hole in the side.
As space inside the base was a little cramped (and I didn’t want to inadvertently press anything up against either the servo or the rod that it turn, causing it to stop working) I decided against adding a battery and charge circuit inside the base.
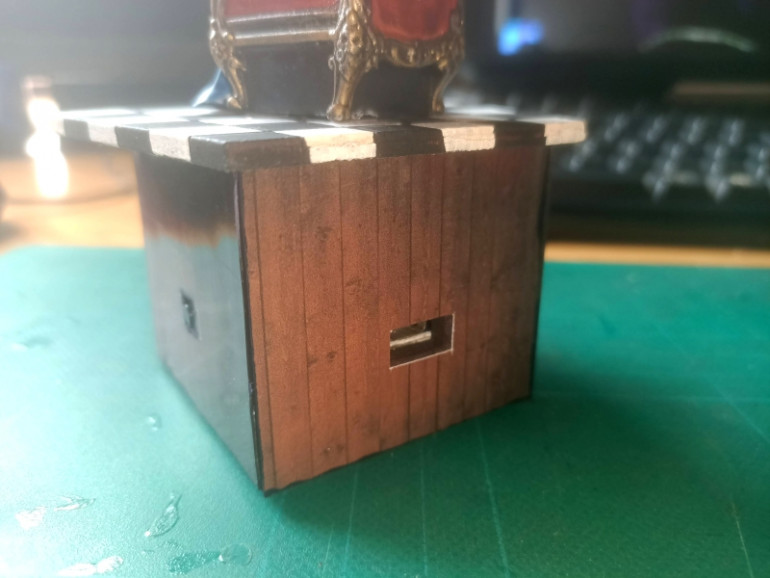
The entire thing is powered directly from a usb-micro socket on the rear of the base. Any standard micro-usb phone charger can be used to provide power.
....my fingers don't shake and my head isn't jerking
Originally I went with the full song. But, tbh, waiting for the full animation to play out got a bit tiresome. And, as much as a love the song, I was sick to death of hearing it after having to let it play for it’s entirety just to check that head movement (and eyes lighting up) happened at the right time (it didn’t for the first twenty or so attempts!)
So I made this shortened version. Press the button and the doll slowly comes to life.
I created a method of recording “cue points” in the song by pressing the button – so when it is initially released, a timer starts running in the microcontroller. Each time the button is pressed (while in “record mode”) it stores the current time (in milliseconds since the song was started) in eeprom memory so that on future presses, it knows when to move the doll’s head.
A similar method was used to determine when the eyes should light up, at the end of the “performance”.
I kept the “long version” programmed into the microcontroller – there was something really creepy about watching the doll turn and look towards Alice, seemingly in response to the lyrics in the song.
So I changed the firmware so that a “short press” on the do not press button makes it play the “short version” and a “long press” plays the full-length version.
I didn’t have time to really do to town on the base (I was aiming to complete the entire diorama as part of the Great Grimoire painting contest) so printed out some wood panel effects using photo paper on an inkjet printer and glued them onto the sides. A bit of touching up on some of the extreme highlights and it was time to call her done!
Give the song I’d chosen and original character being Alice from Alice in Wonderland, my wife came up with the name “little Alice” for the doll – and it only seemed appropriate that I painted the famous eye make-up on the doll.
[updated June 2021]
I entered the Great Grimoire painting competition….. and won!
The prize was originally for Patreon goods and Amazon gift cards, but after a few days, the organiser asked me if I’d be happy with a PayPal donation instead.
It seemed rude to say no. And given I already had about £80 in PayPal credit, it only took a few pounds more to be able to spend my winnings on yet more hobby stuff!


