Burn’n Through the Reichbuster’s Pledge
Recommendations: 222
About the Project
In this middle of this social-isolation craziness, a day before my 39th Birthday, my 2018 Reichbusters Kickstarter Pledge Landed on my doorstep. I've had tons of fun playing through several scenarios, and have decided to make it one of my spring/summer hobby goals to burn through this minis before they become a "backlog".
Related Company: Mythic Games
Related Genre: Weird
This Project is Active
This is not a drill
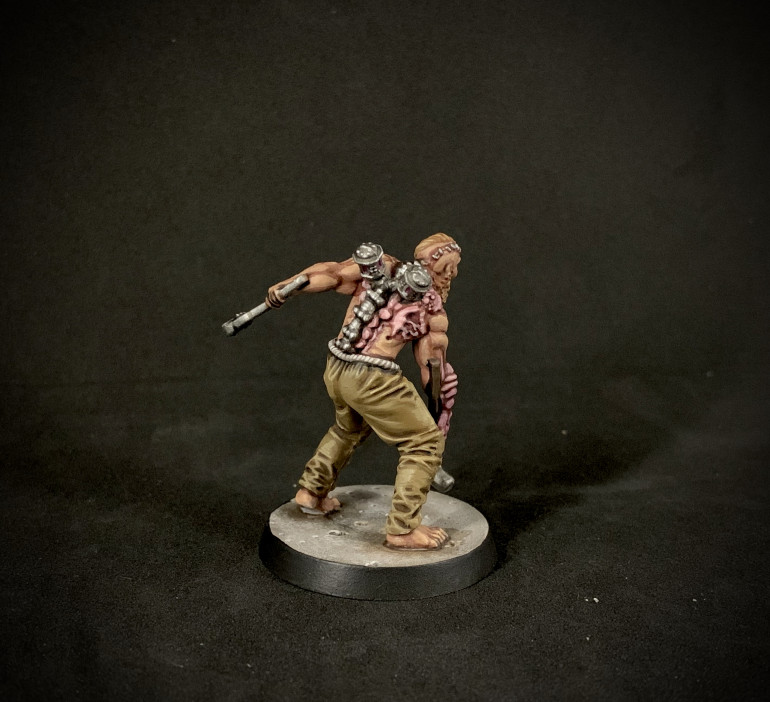
Took a bit of a break, painted some Konflikt 47 models, but finally circled back to my Reichbusters figs. Another hero, this time the Vrill-enhanced O’Reilly. This one was particularly challenging, as it was primarily just two colors: flesh and the khaki pants. Thus a lot of time had to be spent on the little details: the rope belt, the beard, the hammer and the wrench.
I tried a strong pink shade for the mutated flesh, and I’m not sold on the results, but I think it does add some variety to the model. Would be interested in any comments on how to improve his mutated look.
The midnight hour is close at hand
‘Cause this is thriller,
Thriller night
And no one’s gonna save you
From the beast about to strikE
You know it’s thriller,
Thriller night
You’re fighting for your life inside a
Killer
Thriller
Tonight
Hardest part about painting these zombies was deciding what to do with the flesh tone. I didn’t want a cartoony green skin. In the end I decided on the following
1) GW rakarth flesh
2) GW druchii violet wash
3) GW rakarth flesh highlights
4) highlight 50/50 rakarth flesh and palid wych flesh
5) final highlight palid wych flesh
6) watered down light wash of Carabourg Crimson
This gave a very deathly pale flesh, with the red and purple washes ensuring there was some warmth. Without that pale skins can look plastic, lacking life.
An officer and a not-so Gentleman
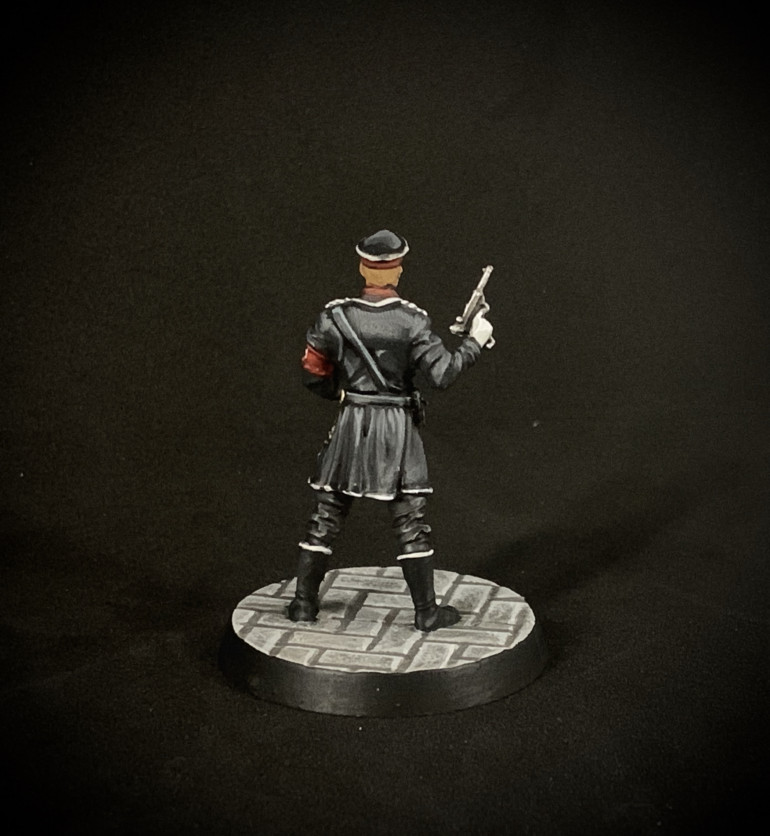
Latest addition is a German officer. This miniature was actually extremely difficult because such a large amount of black, which can be a hard color to paint to begin with. Boots, coat, paints, belts, hat.. all black.
there are three ways of dealing with this:
1) focus on the not-black: part of making a black miniature pop is to spend a lot of time on the other colors on the mini. The white of the gloves and lapels. The skin. The arm band. Spend a lot of time on these details and the black becomes a subtle background color.
2) start with not-black: none of this model was actually basecoated black. All the lack areas were painted in different dark greys, then washed with black washes to create the shadows and darken them. This allows you the differentiate between different blacks with the different dark greys. Some are more blue, others are browner.
3) don’t just highlight by adding white: try highlighting by adding colors other than white to the basecoat color. For some add light blues. Others add bones or beiges. This results in slightly different shades of highlights, that make the blacks appear different.
Just missing the doves...
Next up is another hero, Irena, Polish Assasin and part-time John Wu film stunt double. I find that sometimes, with miniatures like this one, particularly historic military figures, you need to go out of your way to add some details to make it “pop”. Particularly if the miniature is for a player character/hero. Otherwise they can just look like a blob of Olive Drab/Kahki.
For this miniature I used her flowing cloak. For starters I painted the inside and outside different colors. Also I added the pin-stripe border on the inside lining. Both give the cloak a more “regal” feel, thus ensuring no one confuses her with a common grunt.
Prepare for frontal assault
Decided to change things up and go for one of the heroes. This is Brad, the USMC assault specialist. Nothing game changing here. I have a USMC army for Bolt Action and Konflikt 47, so this paint job was very familiar to me. My only complaint on the Reichbusters figs is I think they went a little overboard in clothing folds around joints.
one tip here is for basic iPhone photography. Most of my pictures use a light box, but I’ve learned lowering the black point removed the background, and the “vignette” setting is cool for adding that cool “fade” around the perimeter.
My...precious
This is a test run fig that took surprisingly long to complete, deep tire the simplicity of the model. First, the gloves and mask, painted to look like that heavy duty chemical grade PPE, allowed me to use a jade green paint that has been sitting on my shelf for years, but had never been opened. I wasn’t sure of it at first, but in the end I really like how it added a strong color to what would have otherwise been a very monochrome model.
Next, what is always a challenge. Large flat areas of white are especially tricky. Some tips:
1) never actually paint with white. Only the most extreme edge highlights on this model are actually pure “white” paint. I always paint with an off white. They often cover significantly smoother, and allow you options with highlighting. P3 trollblood highlight and GW rakarth flesh are some of my favorites
2) Vallejo makes a pale grey wash that is subtle and great for use on white.
3) really thin The paint for your highlights and build them slowly. This can avoid the patchy/chalky finish white paints can get.
4) emphasize the other colors. I’ve found one way to make predominantly white and Black models look good is to spend lots of time on the other colors. Get a “good” white/black basecoat, then really pay attention to details like SM shoulder pads, iconography, etc. these are often less challenging to paint, and become the focus of the mini, while the difficult basecoat becomes a nice “background”.
C&C welcome.
Stop...Hammer-Time
Next completion is one of the German science experiments, the Ubersoldaten. This guy is an Ogre-sized figure, wielding a giant hammer. The spike on the hammer pommel isn’t original. At some point the pommel broke off during my painting, so I replaced it with a spear point from an old GW spear tip.
I’ve gotten questions on how to paint the metal. It was GW leadbelcher, washed with nuln oil and agrax earthshade to give it a dark, oiled look. Then edge highlighted with a bright silver, if you want it to look more weathered and old, you can add successive layers of washes and bight highlights/dings/scrapes. This makes some edges/scrapes seem newer and others older.
Creeping Death
First entry is a group of the tracking bombers. These were interesting as painting the bases actually took more work than the minis themselves. With the metal plating on the bases, it was a challenge to come up with colors/shading that didn’t make the models appear monochrome.
The bombers themselves are mostly GW leadbelcher, washed with nuln oil and agrax earthshade to give a dark/oiled appearance, then dry brushed with a light silver. Small details were the painted like hoses, eyes, etc. with models like these, I find a lot of their appearance can come from the time spent painting the details, rather than the bulk of the model.


