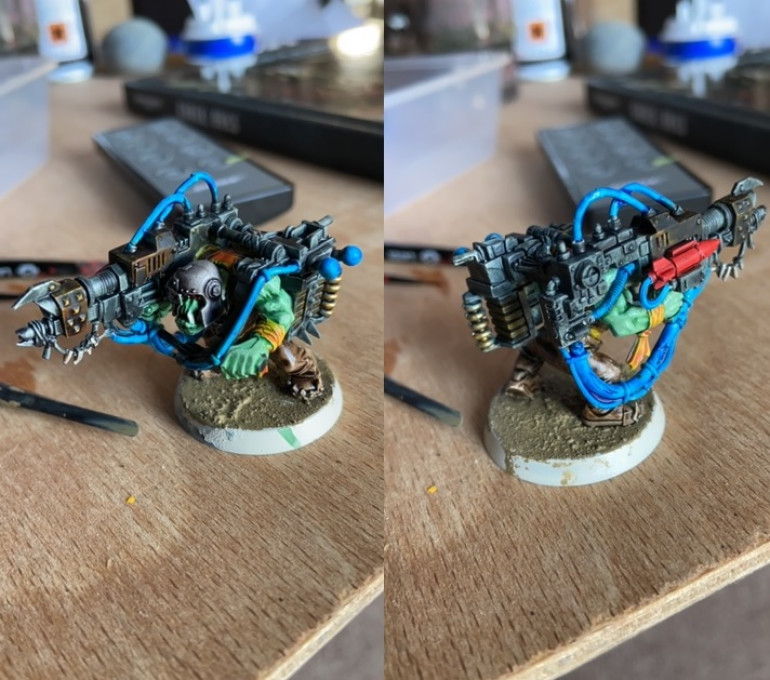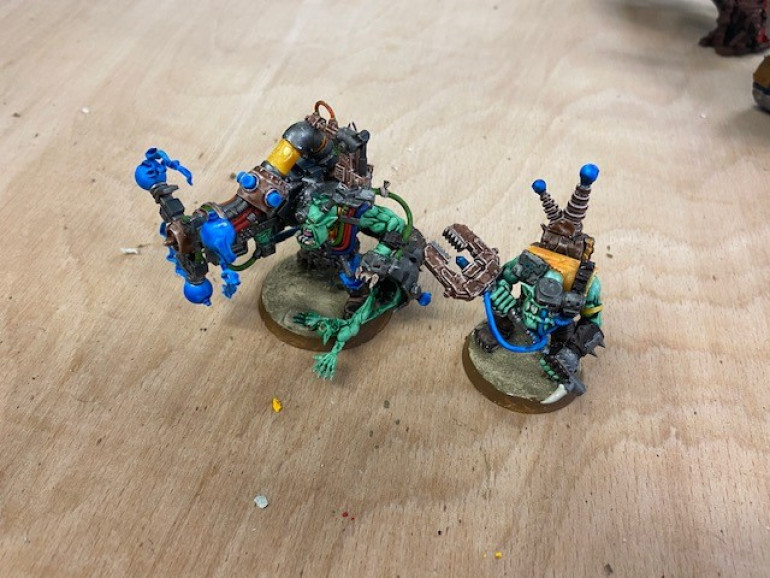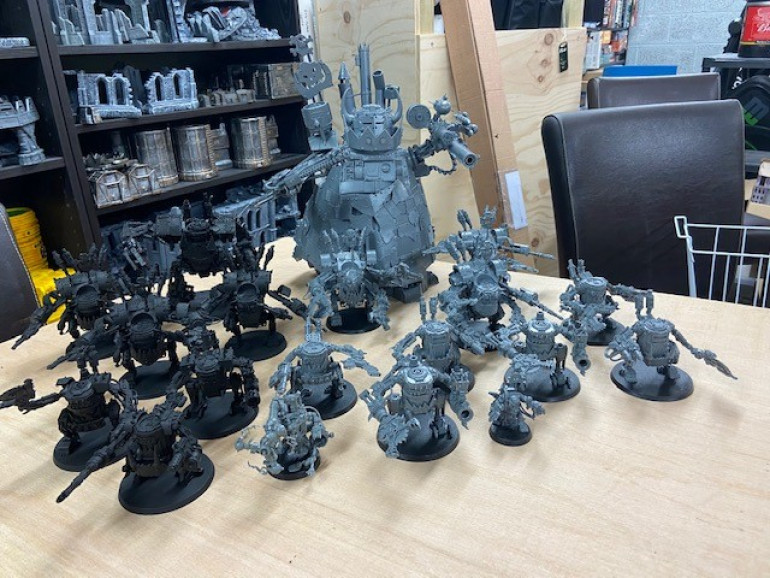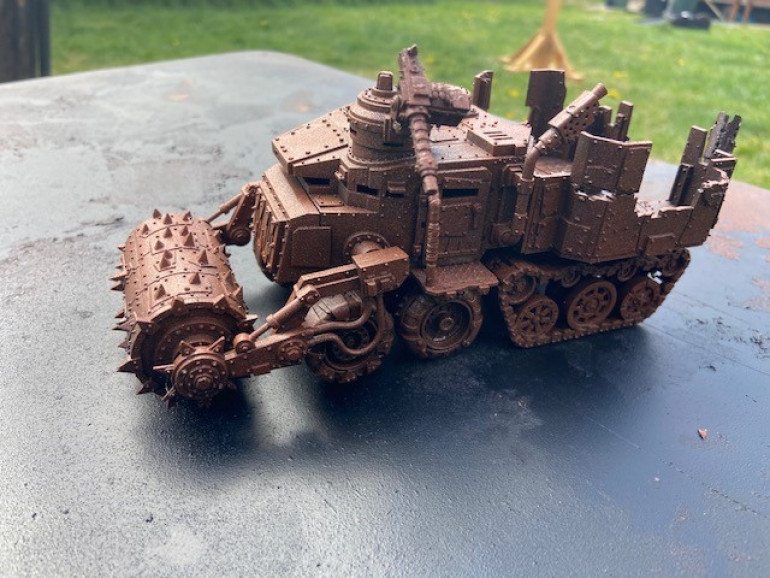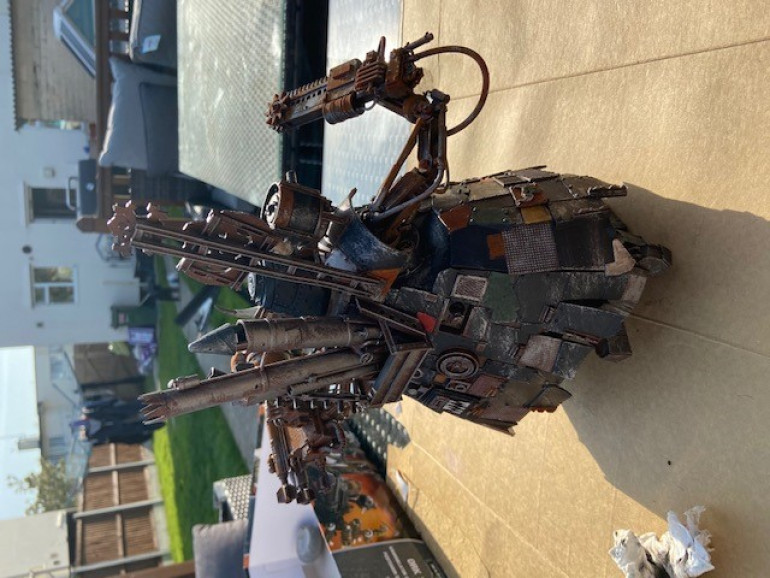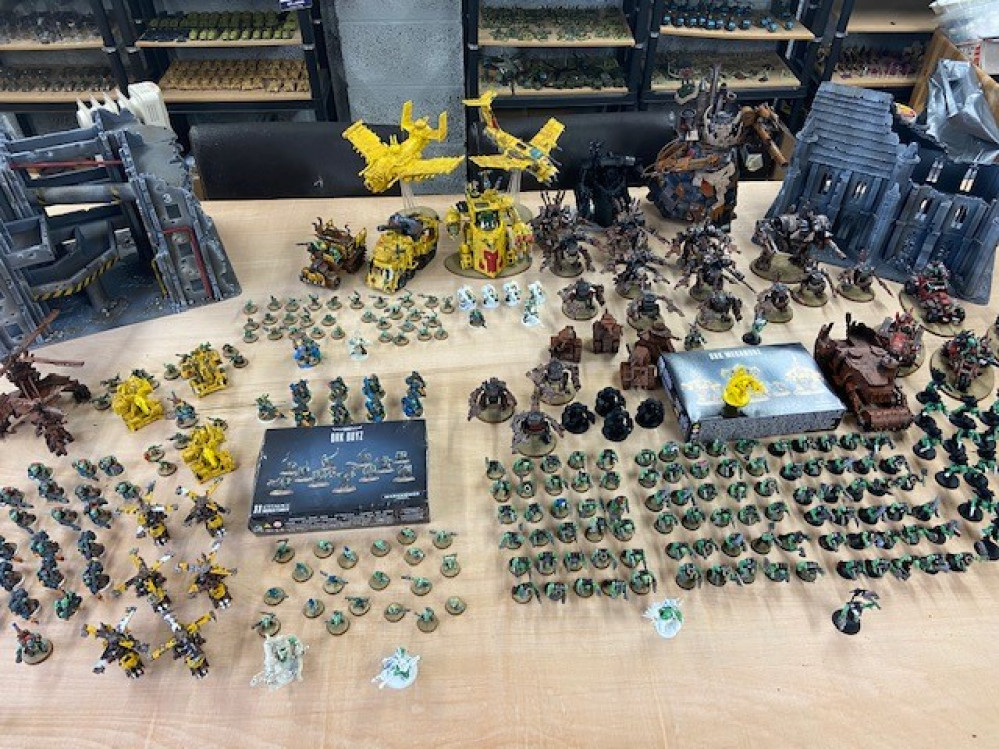
40K Ork Apocalypse army / Spring clean challenge / how i’m beating the boredom of the Covid 19 lock down…
Recommendations: 210
About the Project
A big push to get my 40K Orks army over the finish line and how i got myself to stay on track mentally...
Related Game: Warhammer 40,000: Apocalypse
Related Company: Games Workshop
Related Genre: Science Fiction
Related Contest: Spring Clean Hobby Challenge (Old)
This Project is Active
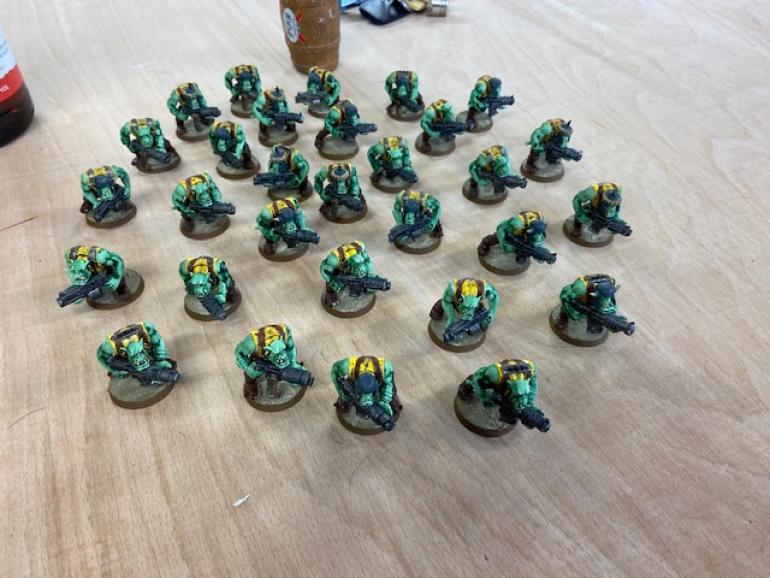
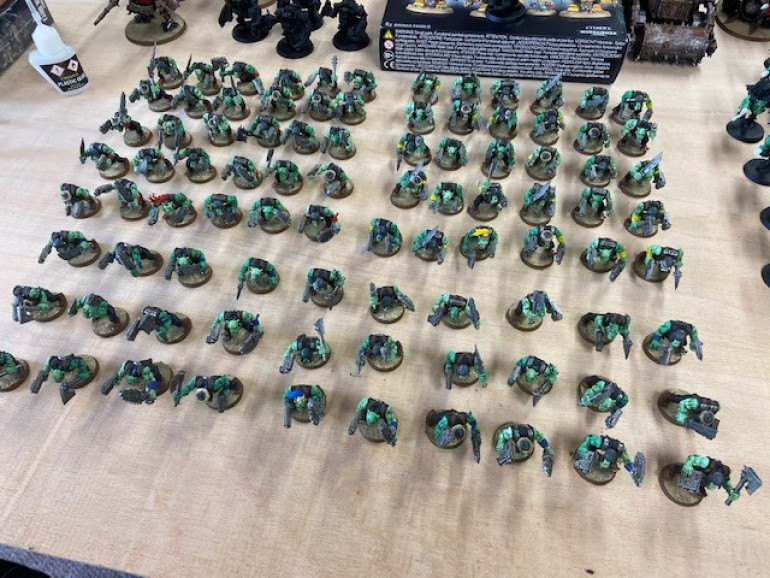
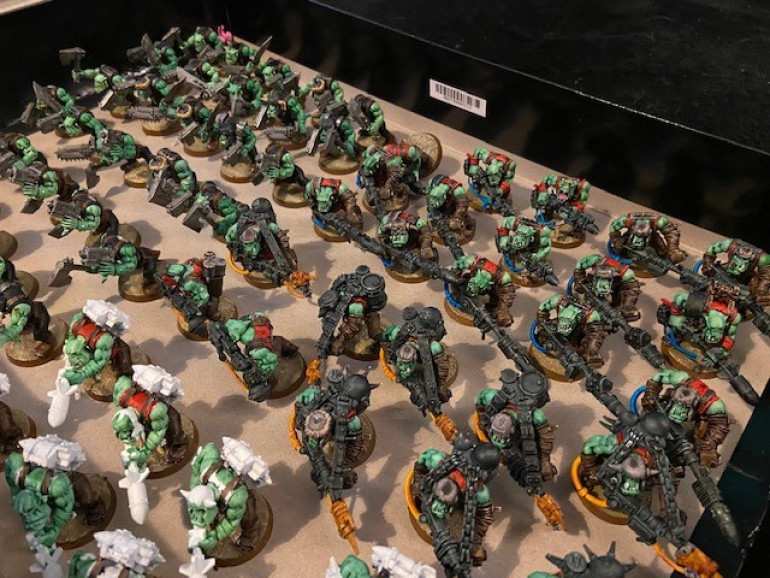
30 Boys in 3 hours? And get table top results? You be the judge...
One of the final units for my Ork army is a big mob of 30 Shoota boys. Having previously speed painted 90 boys and 50 grots already, I was keen to try and get as many models painted as quickly as possible. 30 Boys in 3 hours would mean just 5 minutes per boy in total…. This was going to take some doing*
*In my all honesty, I do not include drying time for paint or glue, nor is it 3 hours in one sitting, this was achieved over 4-5 days when I had free time here and there. Also remember im going for table top ready models, not awards.
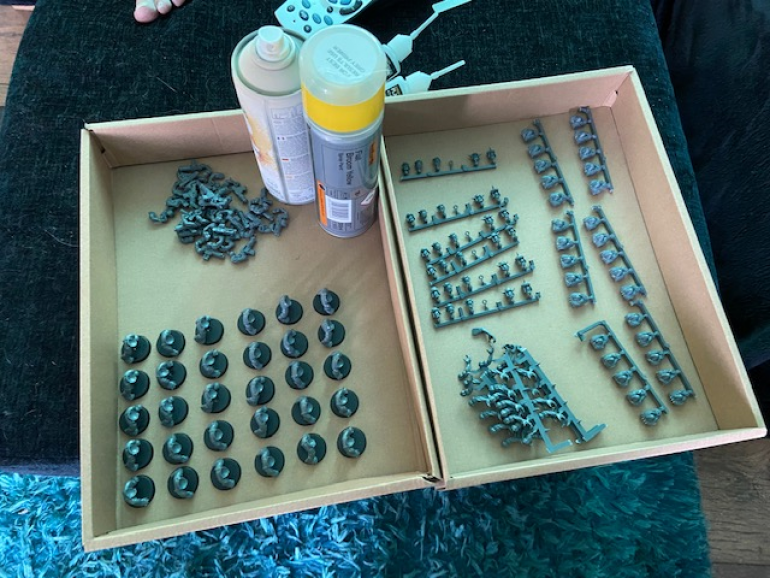
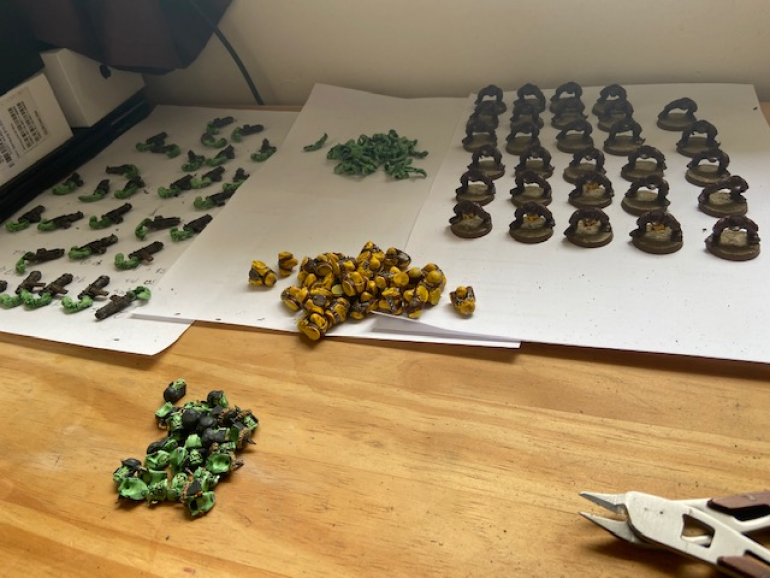
First step was to remove all the parts I would need from the sprues. I had decided to use aerosol paints to speed up the process and that would mean painting things separately, I also glued all the legs to the bases so I could base coat those at the same time.
Time taken: 35 Minutes so far
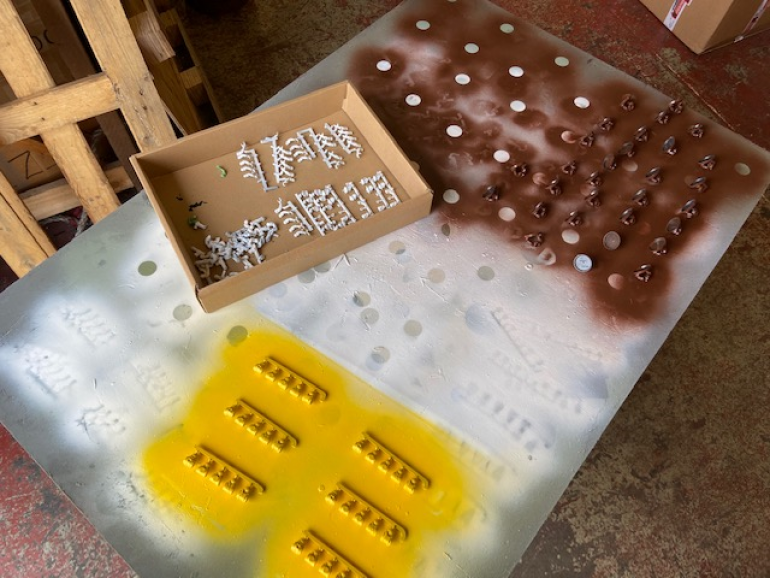
Second step was to lay all the individual pieces out for spraying. I used Halfords white primer for everything, then Rover brown on the legs and Fiat Broom Yellow (same as the planes, Morkanaut etc) on the torsos.
Time taken: 10 Minutes, 45 so far
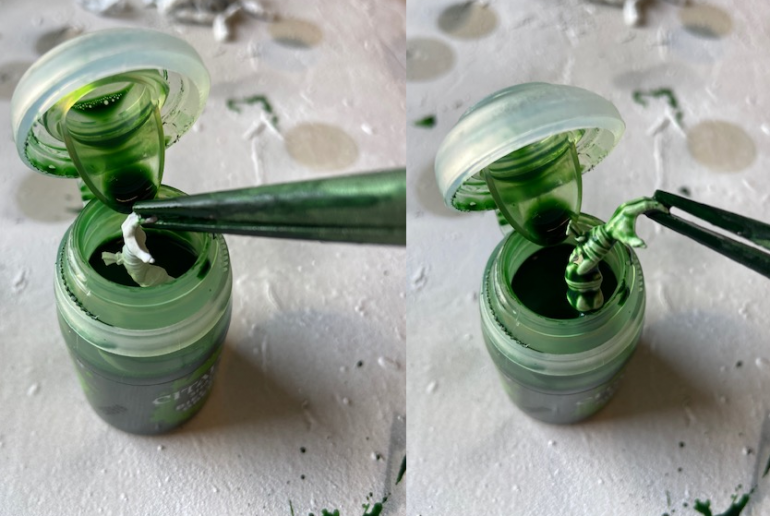
Third step was to “dip” the flesh colored parts of the models. I used a tub of GW Biel tan green and literally, dipped the arms and heads into it. When it drys, it gives a perfect quick and easy Ork flesh tone. This took quite a while but I had used this technique on over a hundred models previously so I’ve got the hang of it.
Time taken: 30 Minutes, 1 Hour 15 so far.
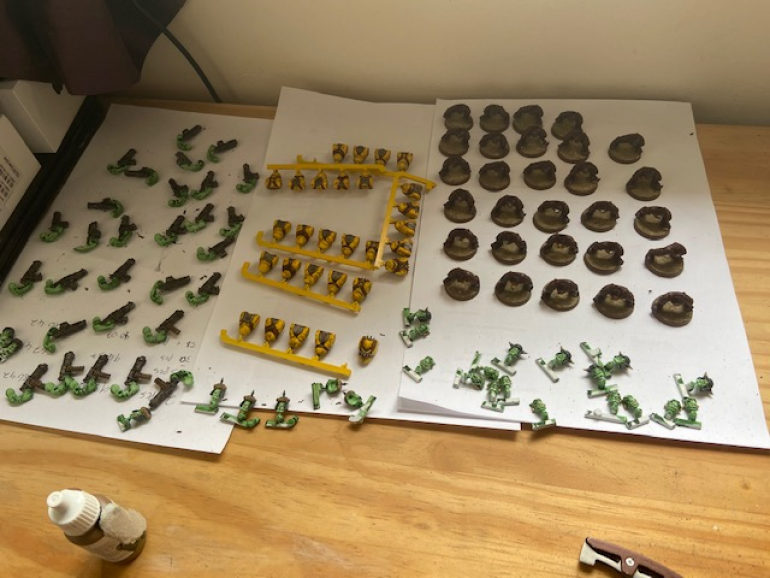
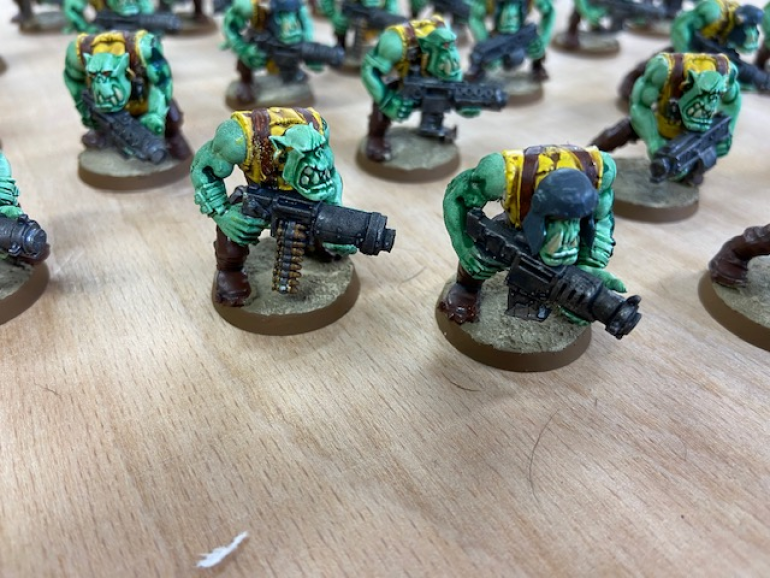
Fourth step was what I call the top layers. This involves painting the guns silver (lead belcher), the torsos with silver (more LB) and brown (Mournfang brown) & detail on the faces (Usabti bone for the teeth, Evil Sunz red on the eyes & retributer armour gold on the ear rings). This took quite a while but it was the single biggest part of the whole process.
It took a little longer then expected because the Rover brown I had used on the legs came up very glossy. It took me two coats of yellow to do the loin cloths on some of the models, and then the legs all needed a coat of Agrax Earthshade to dull them down and add definition.
Time taken: 1 hHour, 2 Hour 15 so far.
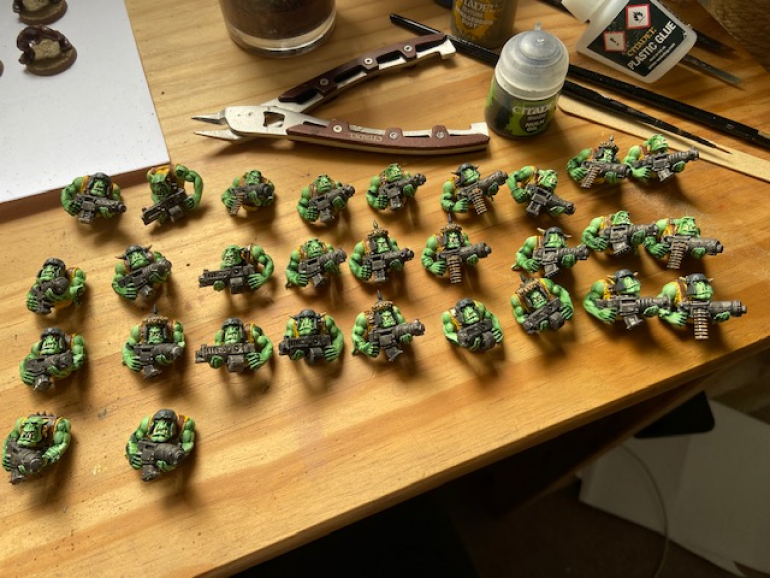
We’re in the end game now! The torsos were dulled down with a liveral coating of Agrax Earthshade, and the guns were coated with Nuln oil. After that, it was just a case of removing the final parts from the sprues.
Time taken: 20 Minutes, 2 Hour 35 so far.
After that, it was just a case of gluing the bits together. This took a bit longer as I did not want to repeat the mistakes I had made with my previous models.
On the previous 90, I had glued the arms, heads etc straight onto the torsos and then the legs. This had proven to be a bad idea as what I had effectively done is glue paint to paint. This meant that the models broke at absolutely nothing as the glue had nothing to key or bond to. This time around, I sanded down some of the paint in the areas that the glue would need (and be hidden from the eye) so as to reveal some of the plastic underneath, and to give me a rough surface for the glue to bond too.
This took a long time and put me over my 3 hour budget but I believe it will pay off in the end.
Time taken: 40 Minutes, 3 Hour 15 so far.
Lastly it was just time to glue the completed torsos to the legs, the bases having already been done back in stage 4.
Total time taken, 3 Hours and 35 Minutes.
So, are they worthy of an award? No. Do they pass the 4ft test on the battlefield, I think so. And remember these are just basic boys. They deploy, they move (if I go first) and then they get killed. No point spending an hour per model when 5 minutes will do.
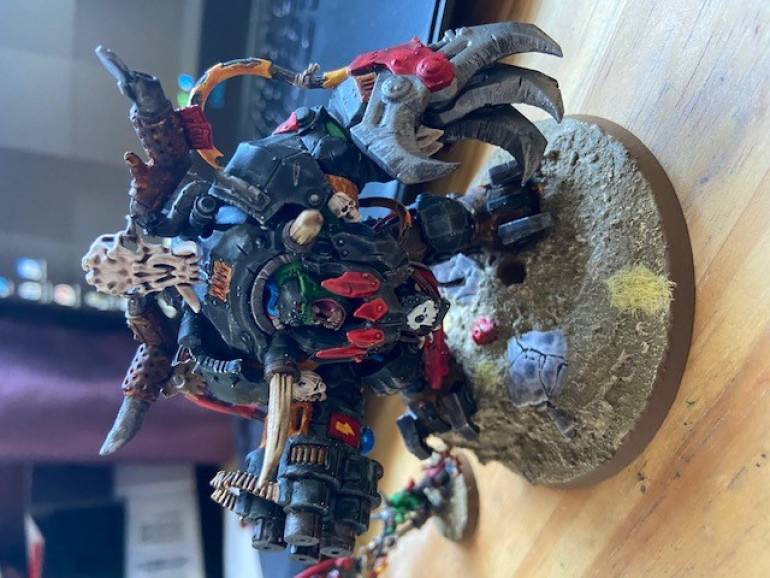
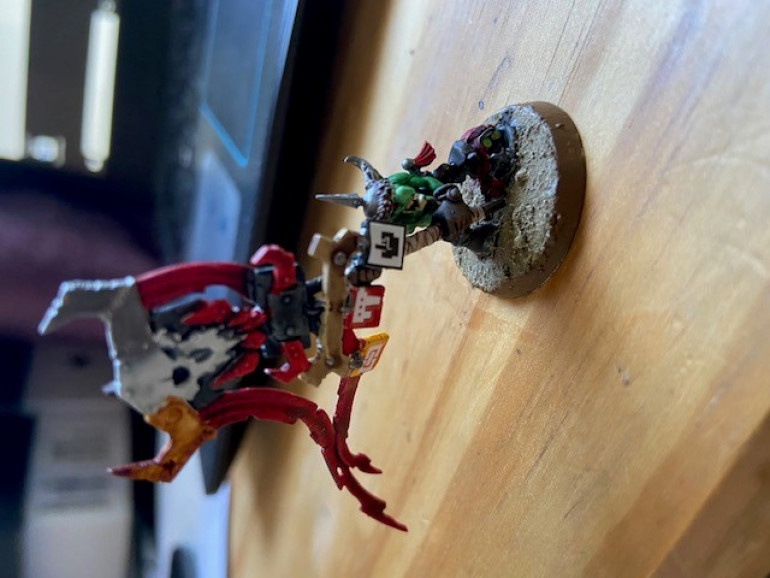
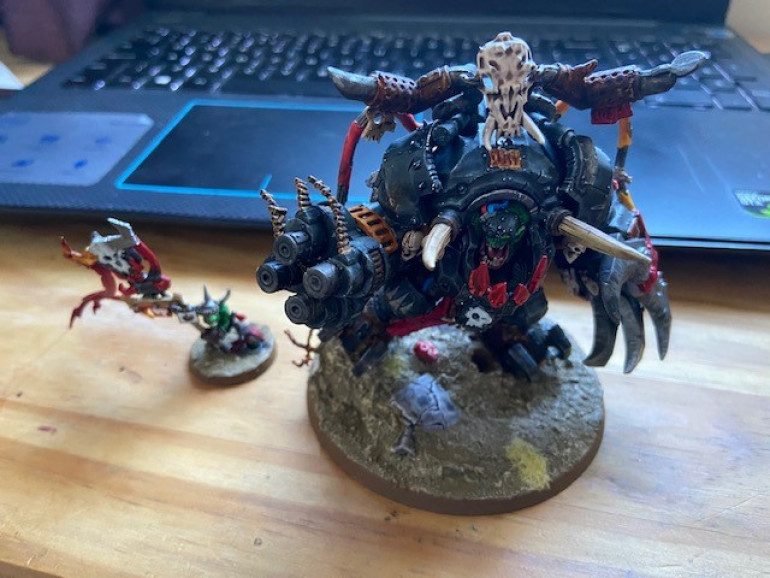
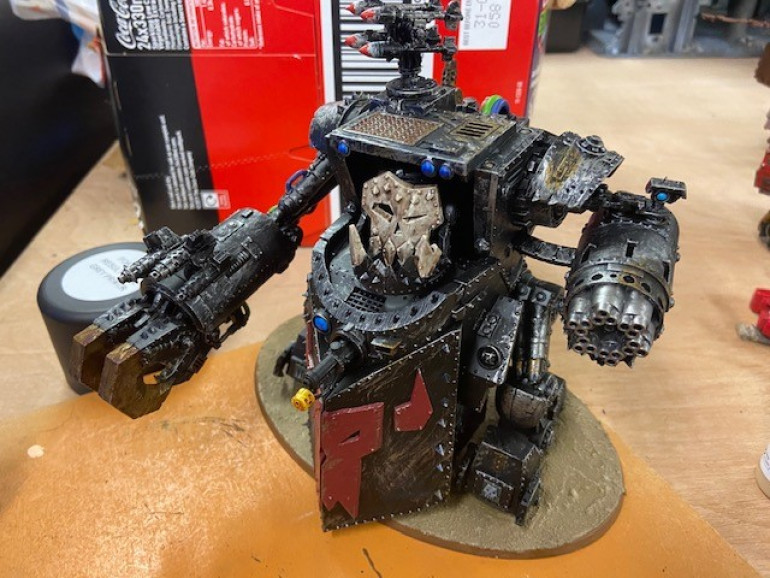
Ghaz finally finished
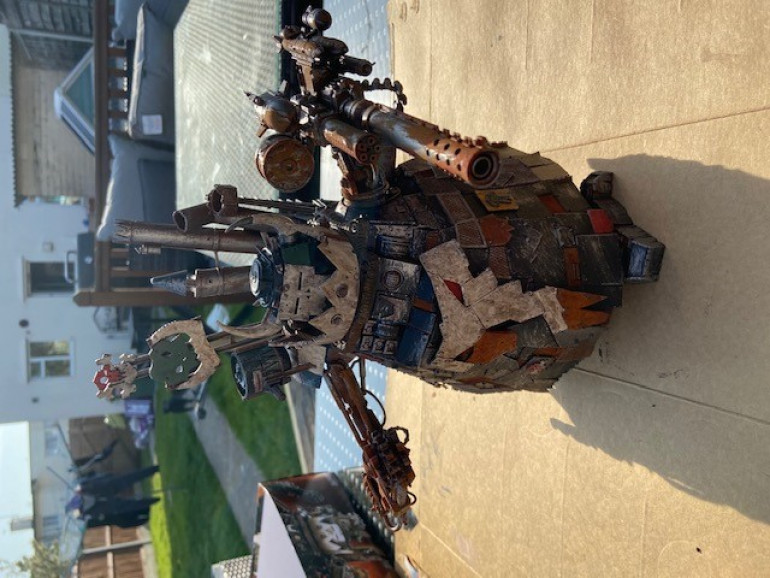
Took ages. Honestly ages. I don’t think Ive ever spent so long painting a single model, and that includes the Stompa from earlier in this project.
Painting the component parts before assembly saved some time and made it easier to paint the small details and all the little inaccessible spots, but it did (at least seem like) add considerable time to the painting. I also discovered that GW plastic glue doesn’t like holding together contrast paint. It much prefers bare plastic or at a push, undercoat.
The model required a bit more time of holding it in place to allow the glue to dry. Annoying because if it wasn’t quite right after 15 mins, you’d let go and whoops there goes that small but you needed!
Anyway, I did enjoy painting this model for the most part. Working on such a center piece for me was a daunting prospect as I don’t have a huge amount of confidence in my painting capabilities.
As I have said else where in this blog, I try to look for the most straight forward way to get table top results and the techniques I used on this model were not straight forward (to me) or what I would call efficient.
Anyway, after an initial base coat of GW Wraithbone spray I used:
Ghaz
- Black Templar contrast (pretty much all the armour)
- Blood angels red contrast (the jaw and a few of the external pipes)
- Flesh tearer red contrast (the claw and banner cloth)
- Ork flesh contrast (on the exposed flesh parts)
- Wyldwood contrast (various exposed bits of clothing)
- Bascilia grey contrast (the claws and muzzles on the arms)
- Ushabti bone with an Agrax wash on the horns and skulls
- Rust paint and Leadbelcher with a Nuln oil wash on the back pack exhausts
Base
- Main paint is Armeggedon dust technical
- Highlighted with Iraqi desert sand (Vallejo)
- The rim is Flat earth (Vallejo again) and a bit inside some of the craters
- The beams are Bascilia grey contrast (2 coats)
- The rusty plates are rust paint (shock) and leadbelcher with a nuln oil wash.
Finished….
Anyway, I was hoping to take a break from painting, but the OTT guys (big thanks to @dignity) have sent me some bits to be getting on with. The final unit to build and paint is 30 Ork boys. 30 Boys in 30 Mins? Have to see in the next update.
Right where’s that beer…..
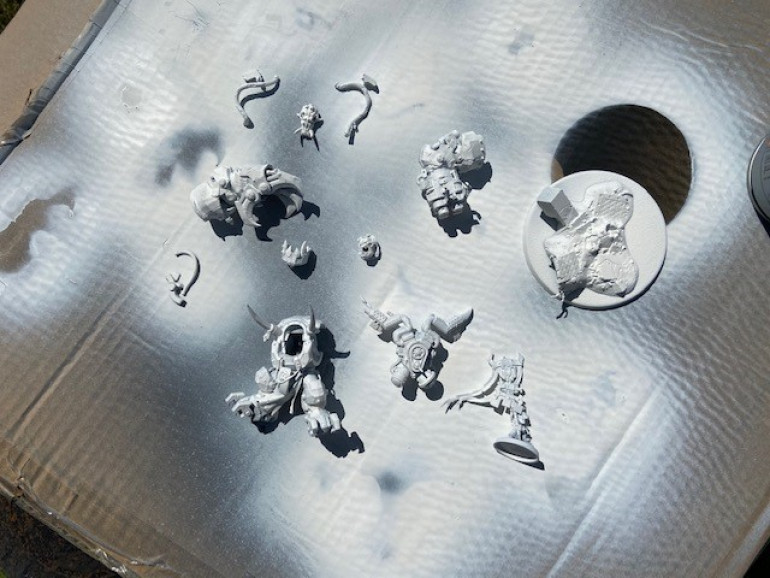 First step was to build and divide up the core components to make them easier to paint. I elected to build the arms and body separately, as well as keeping the face and a few other small parts to one side.
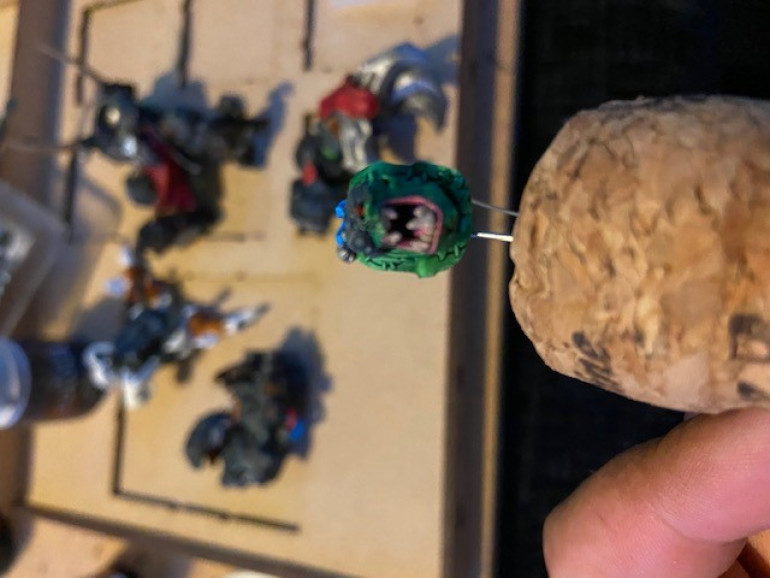
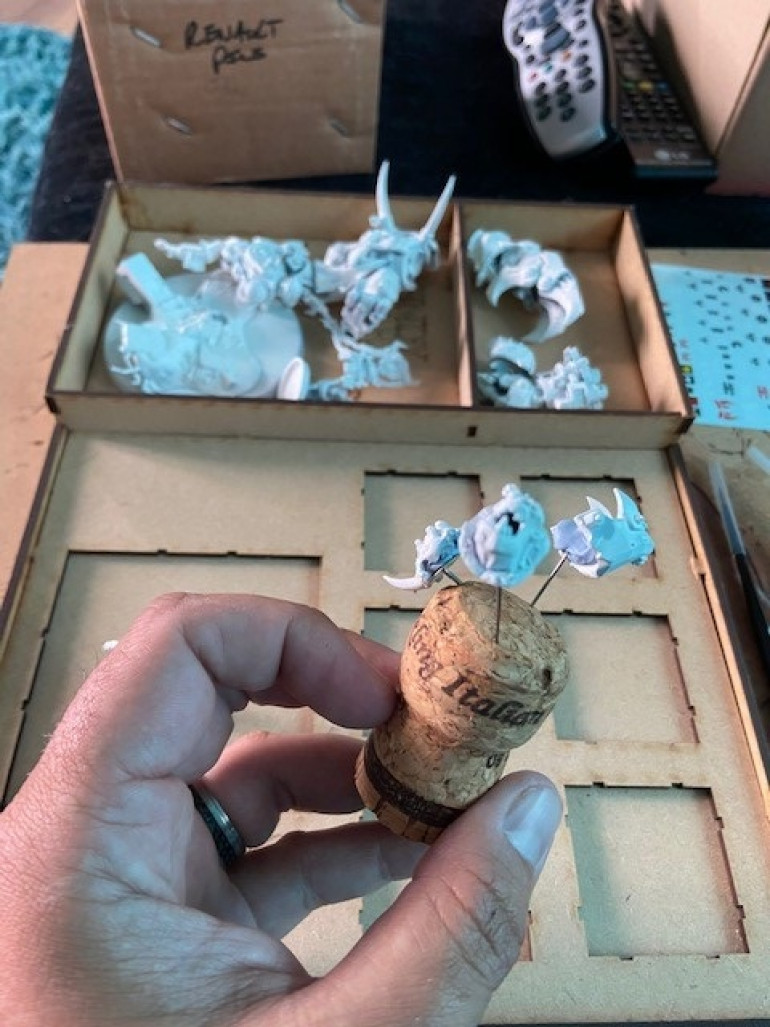 I also experimented with a cork and pins to hold the small parts for me to paint. THIS I highly reccomend as it made them sooooooo much easier to paint.
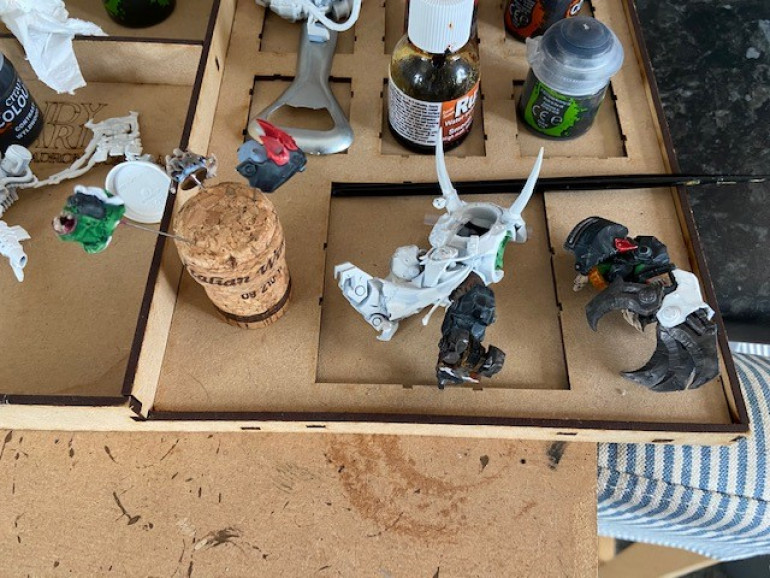 The model consists mostly of Templar black contrast paint, I used half a pot on this model! Contrast paint does not seem to go as far as regular paint.
 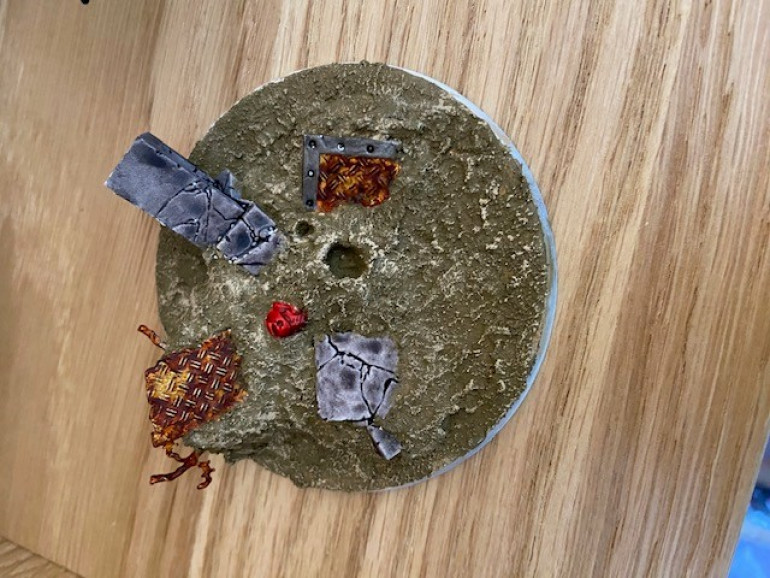 I took a break about 2/3 through to do the base. Its not 100% finished at this stage but its almost there. It was actually quite refreshing to switch it up a bit from the predominantly dark colored figure to the much brighter base.
 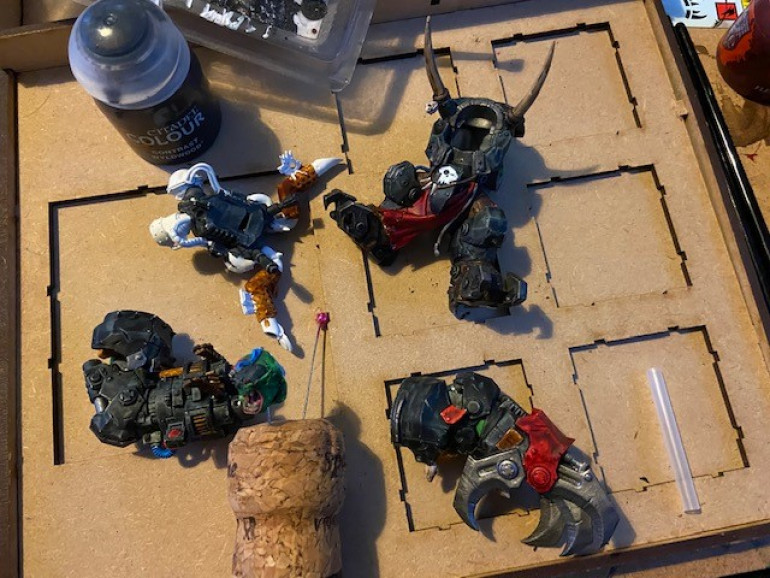 Nearly there. At this stage I pretty much stopped taking pics as I was just painting a panel, taking a pic, paint another panel... etc and I really wanted to get it finished.
A slight side track
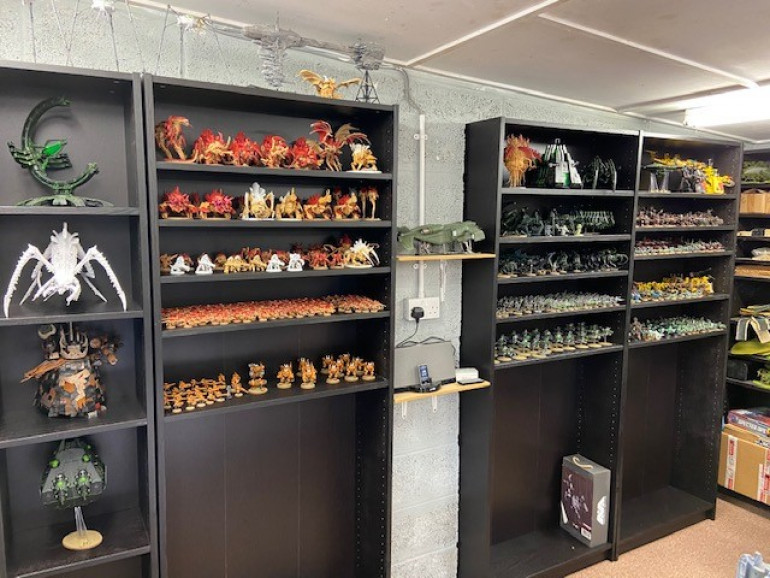
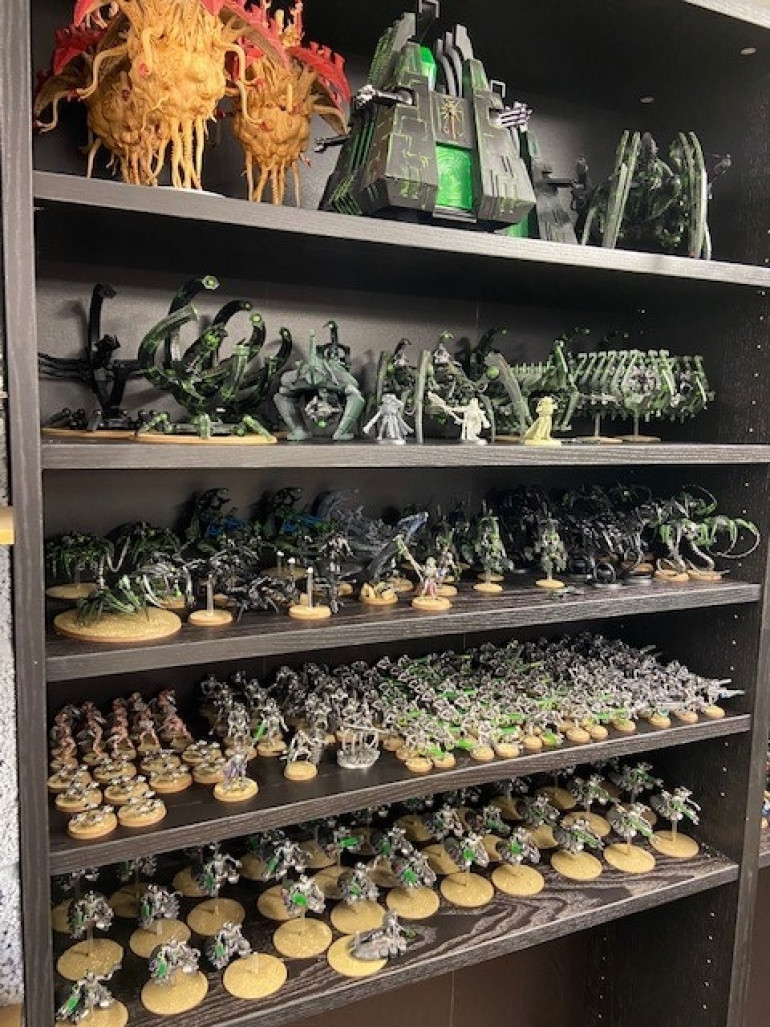
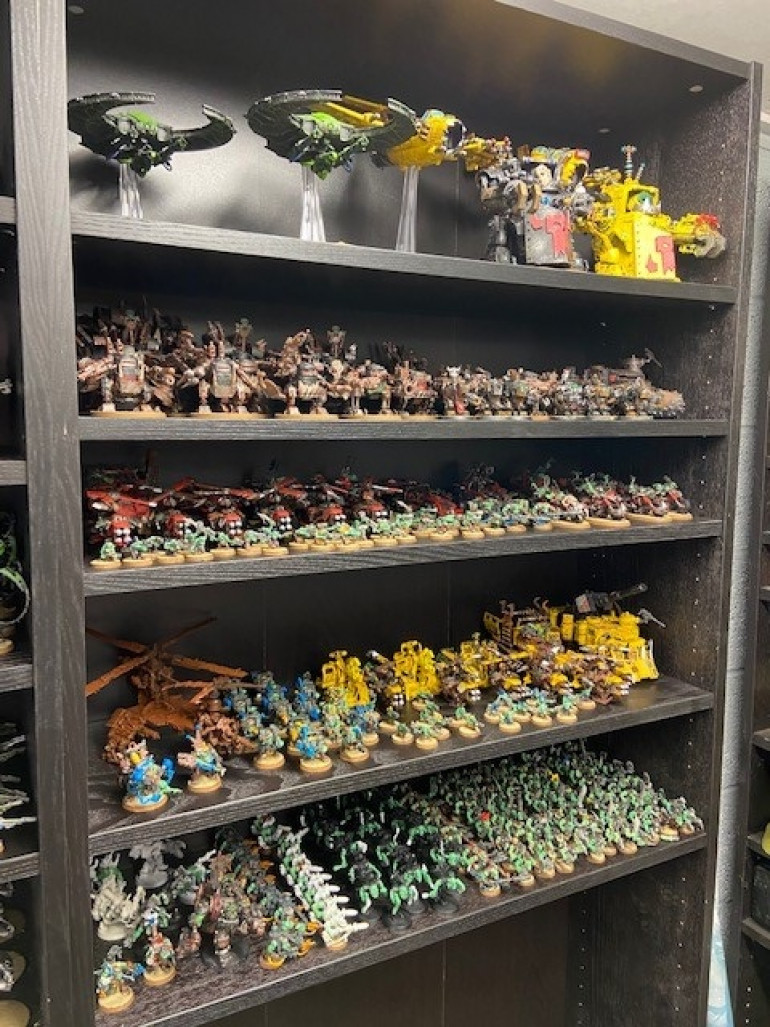
Been a while again since my last update. Ive been quietly working away on my Ghazagkull model that arrived, more on him when he is finished. I was also able to my new shelving system installed for my models. Has given me tons more space, is a lot more sturdier and looks a lot better as well. Plus I now get to show off the whole collection to any unwary visitors to my games room lol.
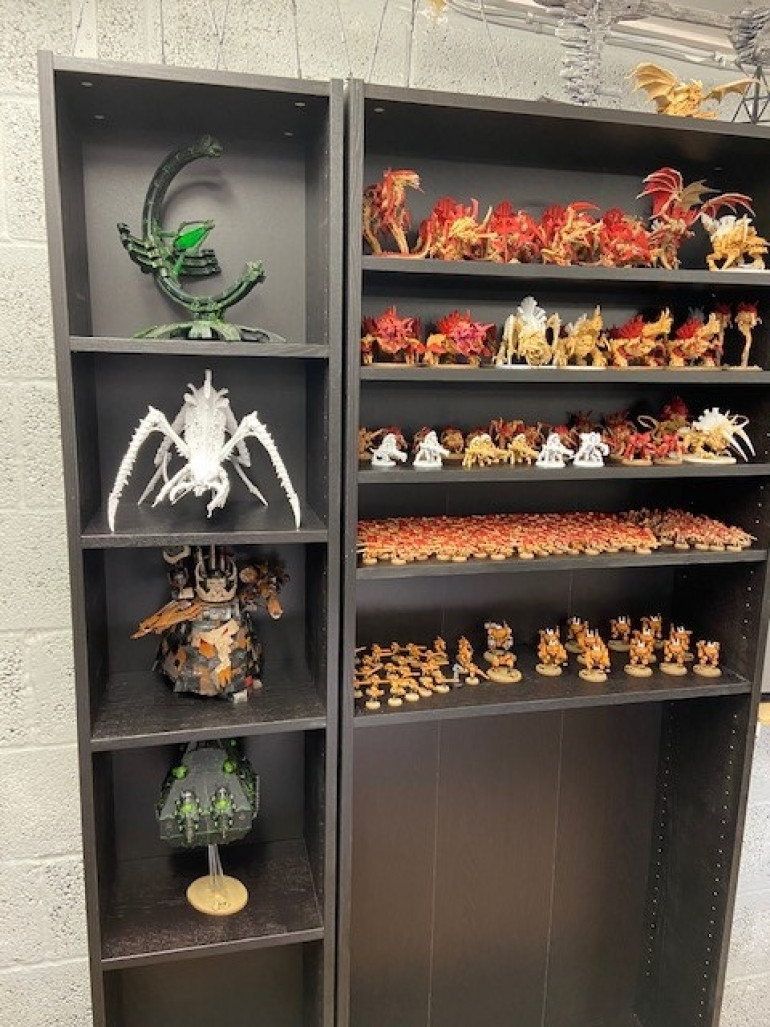 Tyranids, like the Orks, about 90% complete. They will be the focus of my next project blog. Yes, there is a sneaky little Tau section in there, watch this space..
Killing time doing odd units
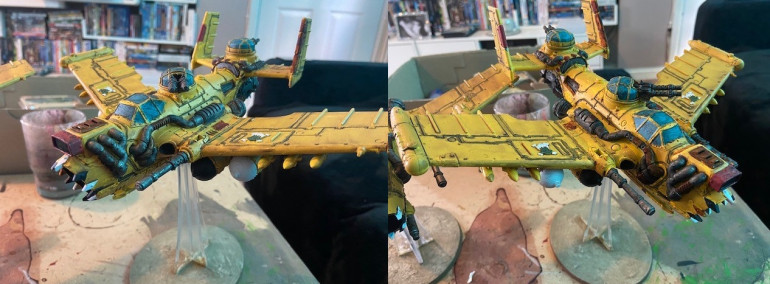
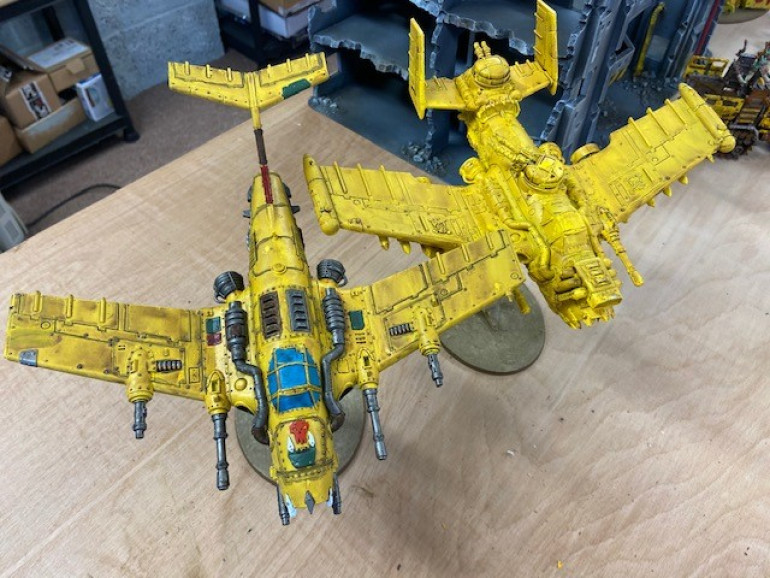
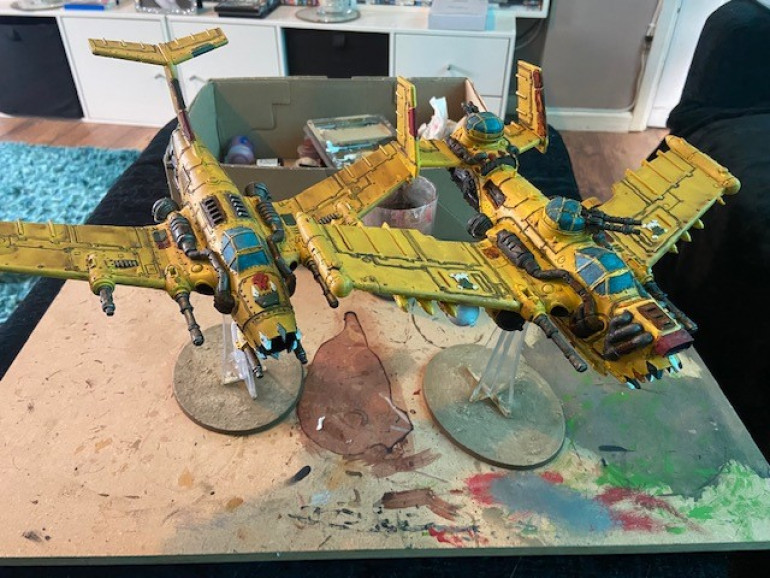 Bomma and Dakka Jet comparison. Painted 12 months apart, I think I got the colour scheme replicated pretty well.
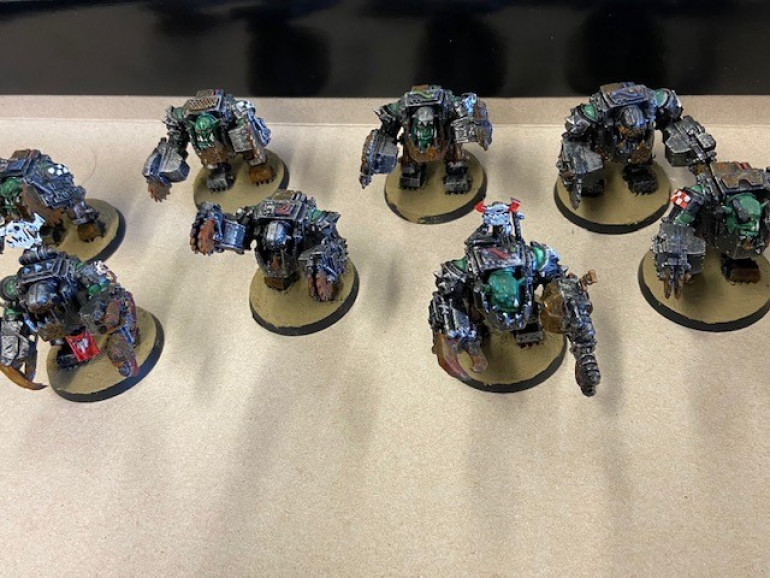 Mega Nobz, the Terminators of the Ork Army. Plan was to drop this inside the Bone Breaker but I might have to rework that plan...
Haven’t been able to update for a couple of weeks due to a stomach flu. I seem to be getting everything but the dreaded Covid 19 at the moment… go figure?
Anyway, I’m now at a stage with the army, where its getting harder and harder to bulk process units. This is because i’m left with odd units that didn’t fit in with anything else I have been doing previously.
First big unit to get done was my Burna Bomma. Great fun these. These tings chuck out mortal wounds (un-save-able damage) to high powered units, and when they get shot down you can play a card which makes them kamikaze into enemy units automatically, causing even more death and destruction. Not amazingly competitive in a tournament but very Orky none the less.
I started with the traditional Fiat Broom yellow base coat and then detailed accordingly, using the Dakka Jet (painted over a year ago) as a base to copy. The rust effect paint worked wonders in places and the black and white really stands out against the dirty yellow.
Second odd unit were the Mega Nobz (Nob stands for “Nobility” in Ork society, not well endowed). These were part of a rescue unit. Models that had previously been glued together and painted before I got hold of them. I went with two units, each has 3 double kill saw Nobz and one Big Nob (snigger) with power klaw and custom shoota. The Kill saws are a little expensive points wise but the damage out put is very high. Team them up with a few character buffs and they can really wreck face.
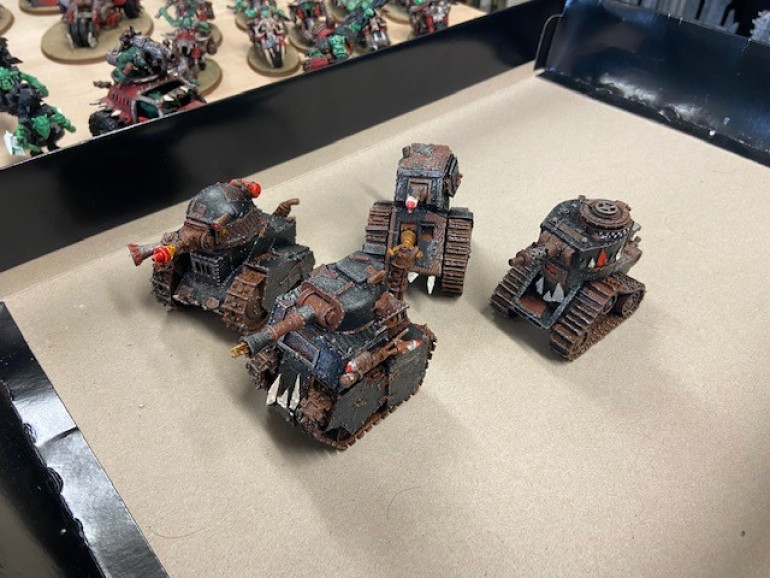
Last unit to be done were the grot tanks. Similar paint finish to the Mega Nobz so saved a bit of time there I suppose. Grot tanks are not in the least bit competitive, but they are very funky. A few friends have suggested that I should build the Grot uprising army, no chance. I’m not painting another 360+ Grots who take longer to deploy on the board then they do to remove casualties. I’m sure someone will do it somewhere and I look forward to seeing it and applauding their efforts…. but not for me.
For the Grot tanks and the Nobz I copied the format I used on the Gorkanaut. Base coat black, silver flick to highlight edges etc, then detail accordingly. On the Nobz, I went back over the skin areas with white, and used Biel tan Green ink for the skin shades. A good dose of rust paint on the saws and other areas and we’re in business… just need to finish the bases when the next batch of bases are ready to do and et voila!
So what does this leave me? Well I’ve got 20 Storm Boyz to do, and 2 Mek guns…. plus about 4-5 characters. Unfortunately because of low stocks the other units I need to buy to finish the army will have to wait a week or two… but luckily a surprise delivery has given me something to work on. Ordered before the lockdown, my Ghazagkull warboss has finally arrived. Expect updates on him soon.
A good ticking off!
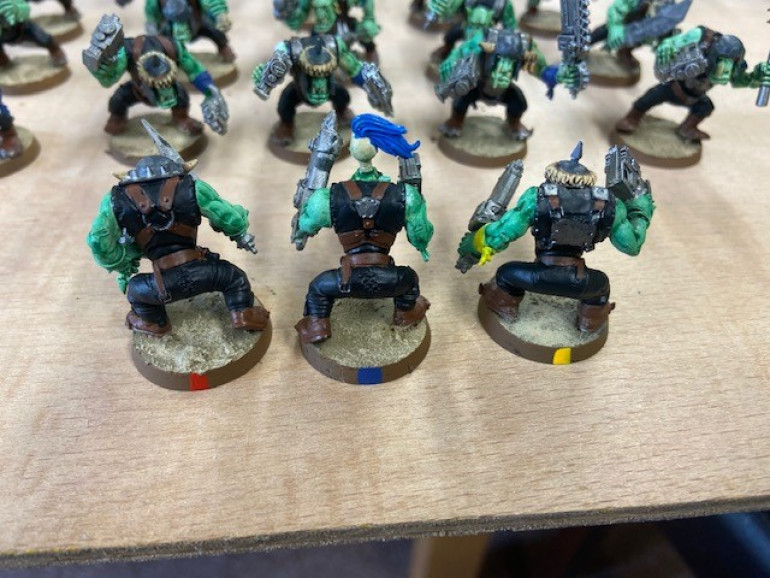
Managed to get a few more units ticked off. Iv’e been working on 90 basic Ork boys for ages since the very start of this project over a year ago, and this morning I made a big push to get them finished. The models were pretty much done and based, but I needed a way to distinguish between the squads on the battle field. In my last post I showed how my Necron squads are divided up with a coloured blob on the rear (ass) of the base. For the boys, I decided to step it up a bit and give each of them a coloured bandanna or hair do.
For the army I also needed a Gorkanaut but with the lock down but any I could find online that were actually in stock were actually more then GW’s RRP. I never thought profiteering from panic buying would stretch to the hobby industry but there we go.
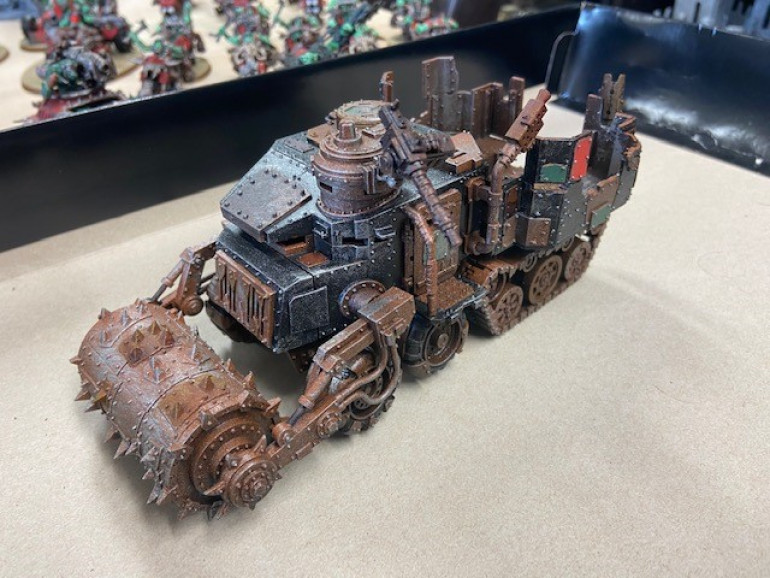
Anyway, 4TK games in Colchester had one at a normal price so I snatched it up and within 3 days of taking the sprues out of the box, it was painted. And when I was done with the Gorkanaut, I got the Bone Breaker done as well.
Another 5 more ticks on my sheet… starting to run out of models to paint!
You know I'm all about that Base.... a slight change of plan...
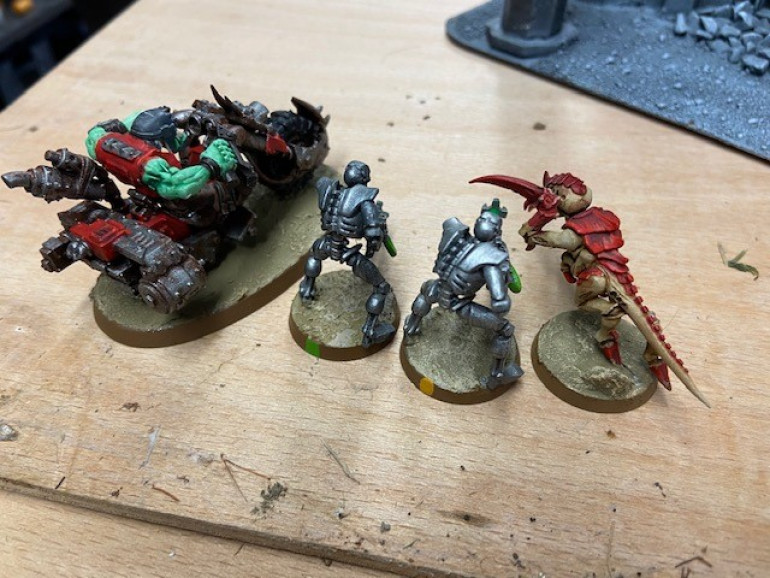 The finished bases, contrasted against my Necrons, Nids and Orks. The Necron bases have a colour blob on the back to seperate the squads, the 3 x 30 man units of Goff boys will be getting this soon, 100% finishing off those units.
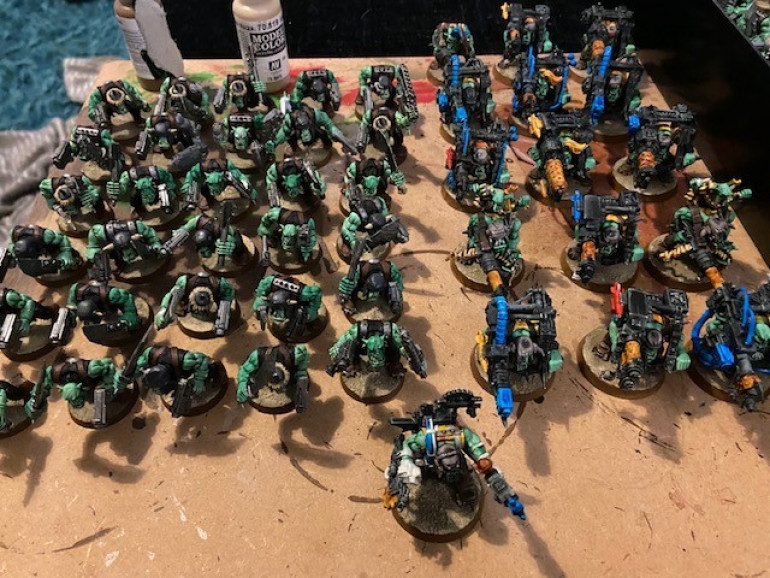
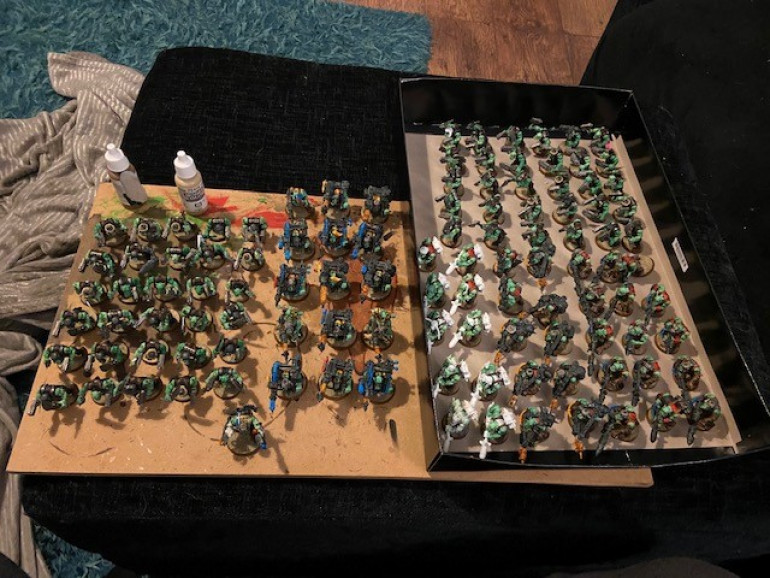
So recently I have been working on what I have termed my specialist boys. Lootas (heavy Weapons), Tank Bustas (ant tank rockets) and Skorchas (flame throwers. However, after plodding my way through 45 of them and still having 10 more to go (plus 10 more to even buy and build yet!) I was getting very bored.
Remember how I said it was important to finish a detachment at a time? Well it is, but I decided to take a break. I had 2 hours free last night while the Mrs caught up with her TV watching so I decided to tackle one big job that would fill the 2 hour gap and give me some achievements.
Basing.
My basing routine is pretty simple…
- Slap a load of GW Armageddon dust texture paint on the base except the rim.
- Highlight / dry brush with Vallejo Iraqi sand
- Use Vallejo Flat brown on the rim to create a nice contrast.
I have found this scheme adds a really nice contrast to the regular Ork colours (green, red etc) and even use it on all my Necrons and Tyranids.
I use the basing process as a mental “closure” when finishing a unit. When it’s based, its done and I can tick it off my list. So that exactly what I did.
Tuesday night’s basing session let me tick off 4 units on my to print sheet and bring the Goff boys one step closer. The Goffs will require one final step, they get a small coloured square on the back of the base to separate their squads (see the example Necron Warriors above) so they will get ticked off soon but the bulk of the work in basing them is done.
This is a deviation from my earlier comments about sticking to units etc but I really felt bogged down for some reason with the specialist units, the switch really has brightened up my out look and inspired me to crack on.
"I see a bad moon a-rising".... And also painting Yellow....
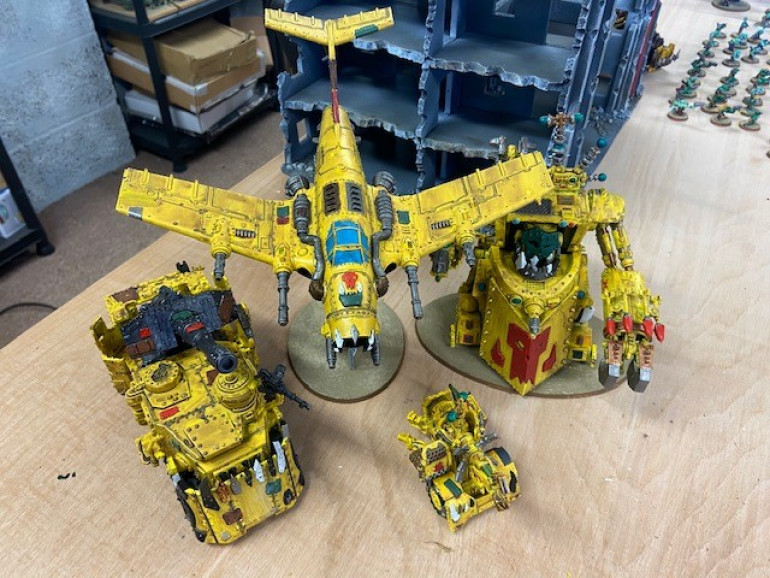 Dakka jet, Morkanaut and Battle wagon all finished using Fiat Broom Yellow as a base coat. Mek Gun is still in progress...
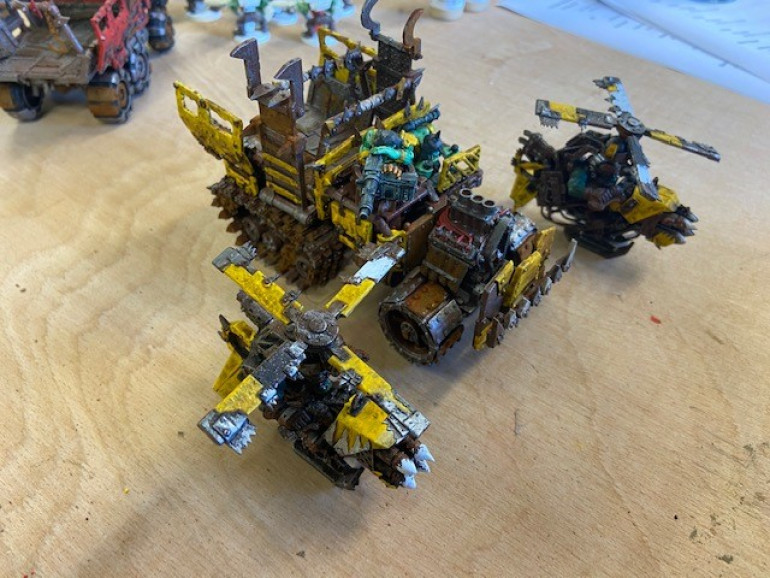 Trukk And Deffkoptas have more worky bits on show then the others so got a rust brown base instead of yellow.
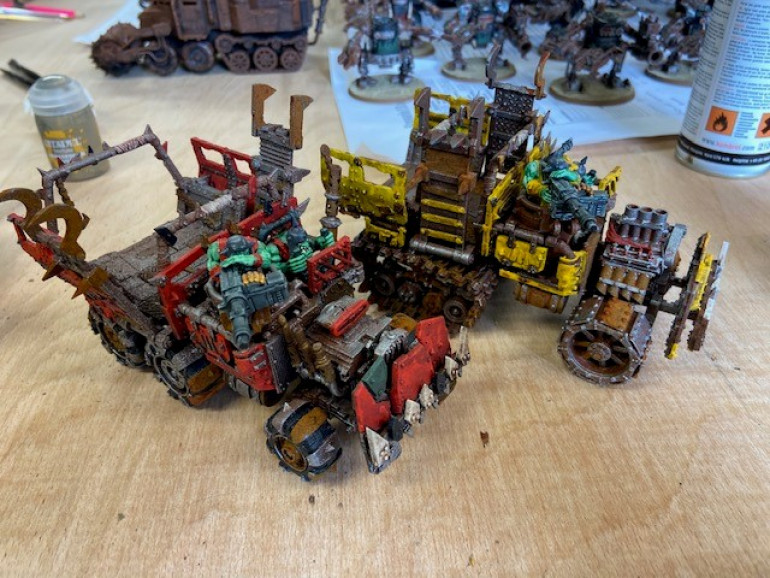 Bad Moons Trukk along side an Evil Sunz Trukk. If I had base coated the Bad Moons Trukk yellow, it would have looked very different and in my mind, not blended in with the rest of the army.
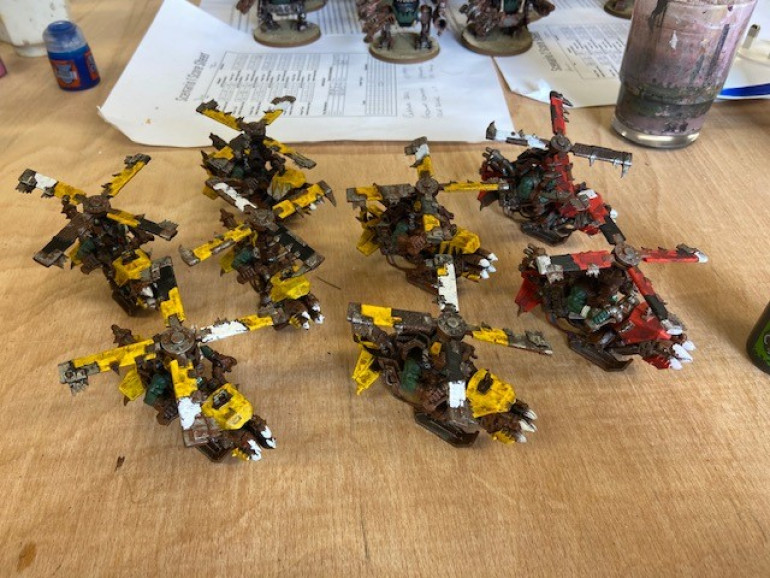 Bad Moons Koptas along side a couple of Evil Sunz ones. It was massively easier painting red over base brown then it was to do Yellow, which took around 3 coats!
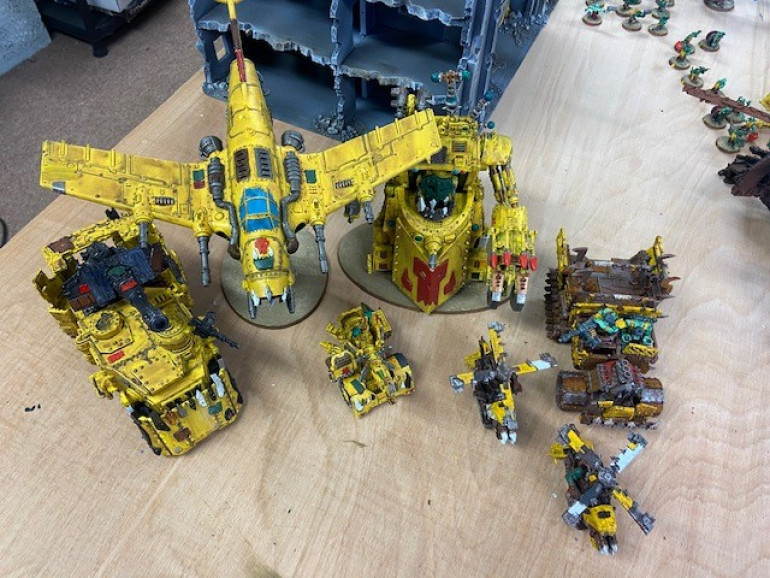 You can see the difference in painting styles here. Base yellow on the left and base rust brown on the right. Like this they stand out a bit but on the battlefield you hardly notice.
For those of you who don’t know a lot about Orks, they are essentially split into 6 clans or factions if you will, each with it’s own distinctive colour and behaviour.
- Goffs like black and white and prefer melee combat
- Evil Sunz like red and like going fast on bikes or other vehicles
- DeffSkulls like blue because it brings them luck
- Snakebites prefer old ways and shun away from technology
- Blood axes are (for Orks) intelligent and use tactics and what not…
- And lastly there’s the subject of this post. Bad Moons, they like big guns and expensive weapons…. but they also like yellow…. and I hate yellow…..
Why do I hate yellow? Because no matter what I do, I have never been able to get it to a finished shade I’m happy with, it’s so thin it takes about 90-million coats before it looks like it should do, and both of these work directly against my philosophy of speed painting to a table enough standard. Poo.
*Sigh*
But Bad Moons like yellow and they fire the big guns, and I want big guns so i’m going to have to “Suck it up Buttercup” and learn to paint some damn yellow.
As far as the rules for Bad Moons go, they are pretty strong. Orks can’t generally shoot worth a s**t and the Bad Moons are no exception needing 5+ to score a hit at any kind of range. But, they have a few stratagems that can really boost their damage output and if the dice gods smile on you, the damage output can be insane.
The biggest explosion came against an Imperial force with a Shokk attack gun (more on him in a later post). As a Bad Moon he fired at and blew up in one volley, an Imperial Guard Storm Sword (a very big tank) and then I fired him again and blew up a Leman Russ Executioner… He did 36 wounds and removed 570 points from my opponents army while him self only having 4 wounds and costs 80 points….
So yellow it is.
I had decided that to save time, I would use an aerosol on the vehicles as much as possible, while switching to contrast paints for the infantry. The infantry doesn’t have a massive amount of area devoted to the colour yellow, but it was still a pain…
Vehicles
A quick trip to Halfords and I returned with a can of Fiat Broom Yellow. Its about as close as I could get to any of the GW yellows but as soon as I’d sprayed the first few models, i knew it was going to have to be darkened down a lot. Que up some Agrax Earth shade wash and suddenly, painting yellow didn’t seem so bad after all.
Now this was all done before I discovered the PlastiKote rust in a can so as a result, these vehicles don’t appear to be anywhere near as run down or dirty as their more recently painted counterparts. The Dakka Jet, Battle Wagon and Morkanaut were all completed to a good standard and I wasn’t going to start again.
But with the next batch of Yellow vehicles I did use the rust base first.
The Trukk and Deff Koptas have a lot more “Worky bits” on show so I decided to use the rust brown on them. Besides I had already painted an Evil Sunz Trukk and Deff Koptas with rust brown base and I was very happy with the way they came out.
It did mean 3 coats of yellow by hand on the Trukk and Koptas but i’m more then happy with the finished results. I did have to spend more time per model then I would have preferred… but they are done now… and i’m never doing any more.
Infantry
As mentioned earlier, the Bad Moons infantry doesn’t have a massive area of the model given over to yellow. And the army list for bad moons consist predominantly of Grots. Grots don’t get any of the rules bonuses that Orks do, they are just cannon fodder. I won’t go into too much detail about the Grots as they have their own post coming up.
Most of the Bad Moons infantry models consist of characters and heavy weapons troops and none of them have a lot of yellow to paint (ok the Mek has a bit but that’s it) so I decided to pop my cherry, and try some contrast paints.
I learned very quickly that contrast paints don’t like going over other paints, unless it’s a white base coat, and this is especially true of yellow. It did slow me down in the painting of these models but I still achieved a decent time vs results ratio.
Over all i’m quite happy with the results of my Bad Moons detachment, and as soon as GW re-opens there will be a big mob of yellow shoota boys to paint!
First big step, The Tin Eads Detachment...
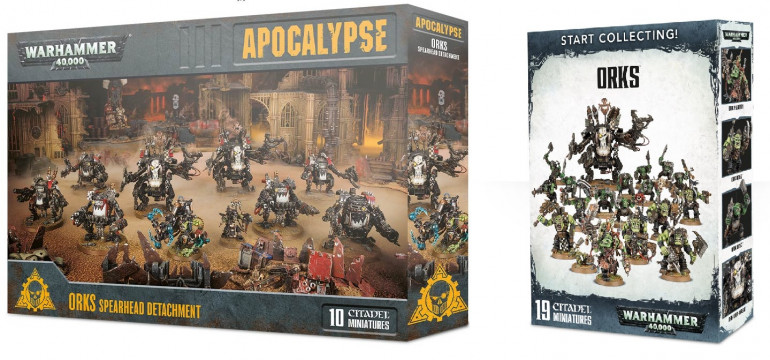 GW's occasional generosity is often well worth the wait. Bundle boxes like these will often give you 10-20% more models for your buck then buying separately, and are often reduced again by specialist retailers.
 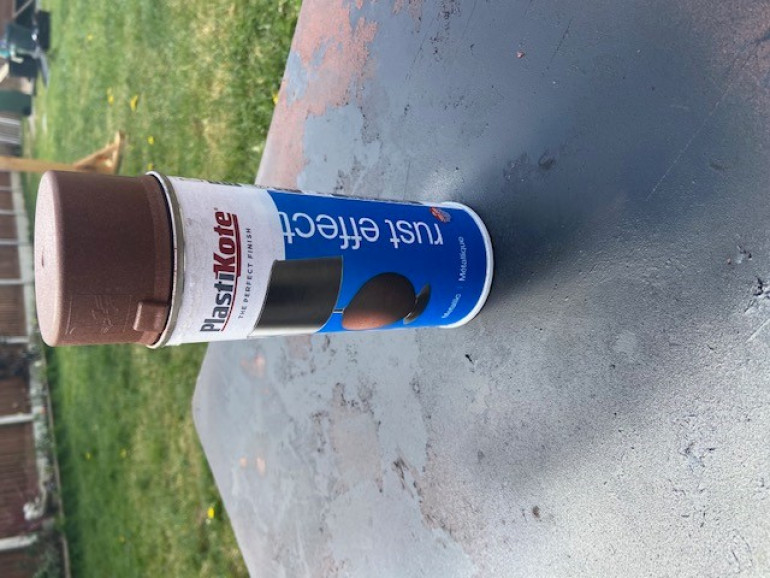 Not cheap, around £14 if I remember correctly. But I got a lot of models painted very quickly and the finish is excellent.
 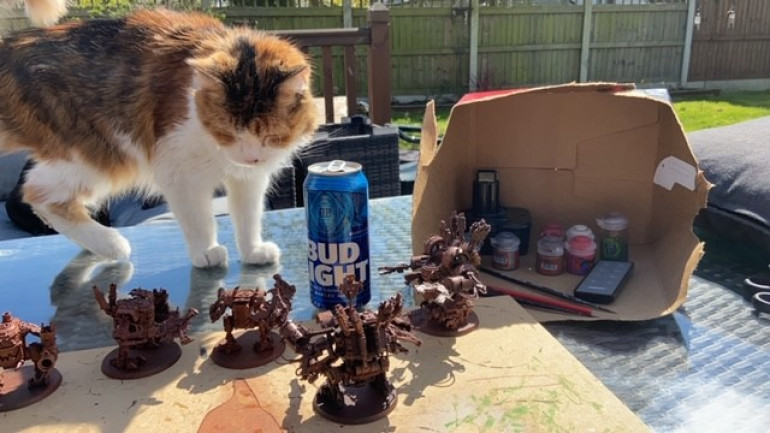 Another essential item to any project apart from cold beer is a helper Cat. Here Bay can be seen scrutinising the base coated models checking for missed areas.
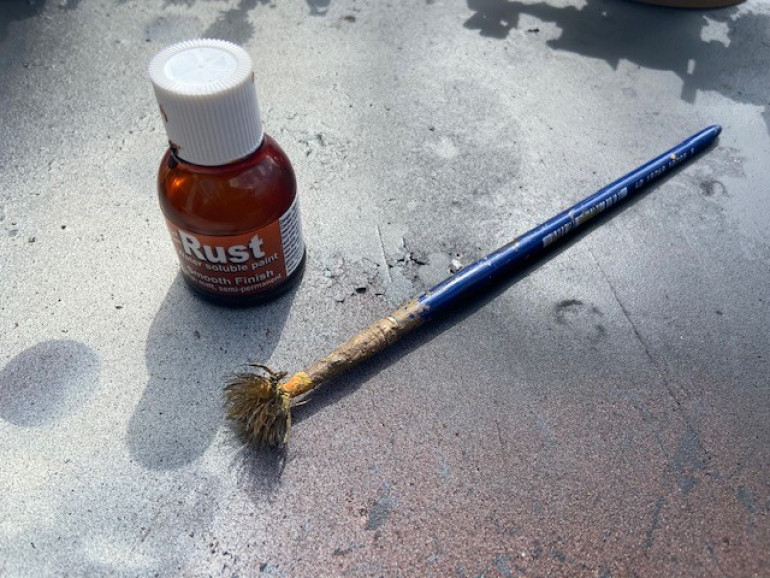 This rust effect paint is also amazing, the old crappy brush is what I use for "flicking" / dry brushing silver all over the vehicles
So before I begin a small editorial note. Firstly this project has been on the go (officially) since October 2018 and has been an on and off again project ever since (mostly off if im honest). I did paint a few models at the 40K hobby weekender in 2019 at the BOW HQ but even then it was only a few Grots. It is fair to say that the real guts of the project have been done during the Covid lock down although I have finished about 5 weeks of painting before even thinking about starting this project blog and I didn’t take many pictures as I went. So if the time line of painted images sometimes seems off, that’s why…
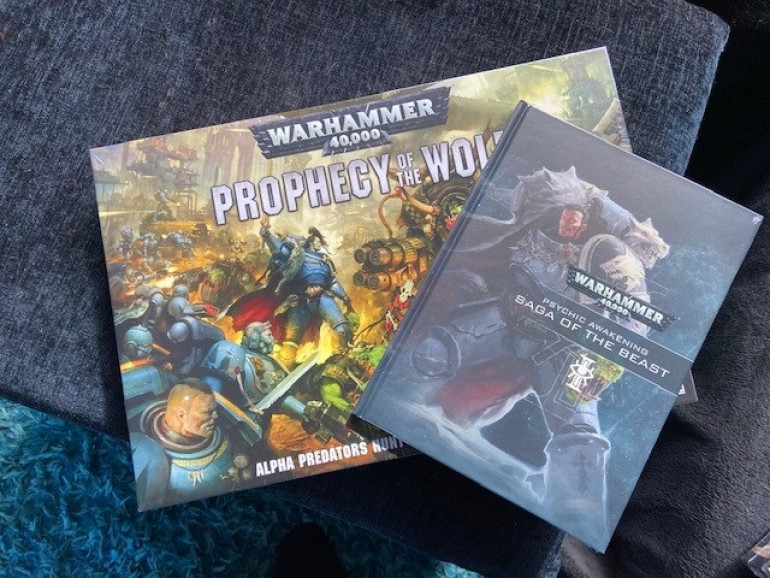
So my first big detachment done was my Tin Eads detachment. The new Saga of the Beast book from GW added a whole load of stuff for the Orks and one of the cool new detachments was the Tin Eads one which gives Dreads, Kans etc all +1 to hit in melee. Not bad.
Prior to the book, most of the Ork walkers were needing 3’s or 5’s to hit but now they are boosted to 2’s and 4’s they are much more viable. Before the update they were quite a few points and didn’t have many attacks, hopefully this small boost will rectify that.
Now, I know that with an unlimited free hand like I have now, they would be better as Goffs and have them near to Ghazagkull. This way a Deff Dread would go from the normal 3+ to hit, to a 2+ to hit… re rolling 1’s… and any roll of a 6 adds an extra attack.
This is waaaay better then being Tin Eads alone which just gives them a 2+ to hit and none of the other stuff. The catch being that in order to get these benefits, the models have to be within 6″ of Ghaz and there is no way they are all going to fit.
Besides, this part of the army is mostly just for fun and an entire detachment of Tin Eads sounds cool.
So, now that we have covered my decision behind which “faction” to make the detachment, lets look at the colour scheme. I decided that the main colour was going to be black. A it suits the look very nicely and B I can always put individual models back into Goff clans (the Goff’s favorite colour is black).
I had a load of Deff Dreads still on sprues from all the start collecting boxes I bought in Orktober 2018 (more on this in another post) and also from the Ork Apocalypse box GW released at Christmas 2019, I had more Dreads and some Killa kans. All I needed to back them up was a Gorkanaut* and a Stompa.
*The Gorkanaut would actually come after this detachment was painted, i had trouble sourcing one before the Covid lock down.
So, time to break out the snippers and glue, open a fresh case of cold beer and get cracking. Some 8 hours later I emerged from my hobby room, blinking in the sunlight and scraping the dried glue from off my fingers. The build phase was complete.
My next step was to work out a way of painting the models to a good standard but wasn’t going to take weeks. So I turned to my old friend, the Aerosol.
I’m sure the more dedicated modelers reading this just spat their Earl grey over the computer screens… Aerosol! not an Airbrush! Well no. While I do have an Airbush setup and I do use it from time to time on certain jobs, I find it a slow process of set up, cleaning etc, and when you have a large area to cover like this, it will take a long time.
The first coat was with trusty Halfords Matt Black. For those of you over seas or are perhaps afraid of motor factors, Halfords is a big auto parts accessory store. Whenever my wife finds an excuse to drag me to the shops to look for cushions or other such things that don’t interest me, I make my excuses and head to Halfords. Power tools and wrenches beats soft furnishings!
Anyway, Halford Matt Black I have found to be an excellent base coat. Its quite cheap, comes in a large can drys very well without streaks or pools. Once dry I decided to try something new. Whilst rummaging around a craft store I came across PlastiKote rust effect in a can. I was a little dubious at first but I test sprayed an old model of no consequence and BOOM! Totally spot on.
It drys a perfect dark brown rust colour with a slight texture to it that doesn’t detract from the natural features of the model your working on. I would recommend this paint to any one working on a similar project.
Not including drying time I had all the models more or less 50% painted in around 1 hour. Not bad going… But the next steps took a lot longer.
First thing to do was build a master. I take my time on the master and generally don’t count it towards the total time taken per detachment, mostly because i’m rummaging through my paint box looking for an illusive colour, or scrolling through Google images for inspiration.
Once I have settled on a process for each model, I line the paints up and batch them one at a time. I did break up the detachment a bit more so as to break up the tedium of painting the same models over and over.
So I painted 2 Deff Dreads, then 3 Kans, 2 more Dreads, the Mega Dread, then 3 Kans, the final 2 Dreads, then the final 3 Kans.
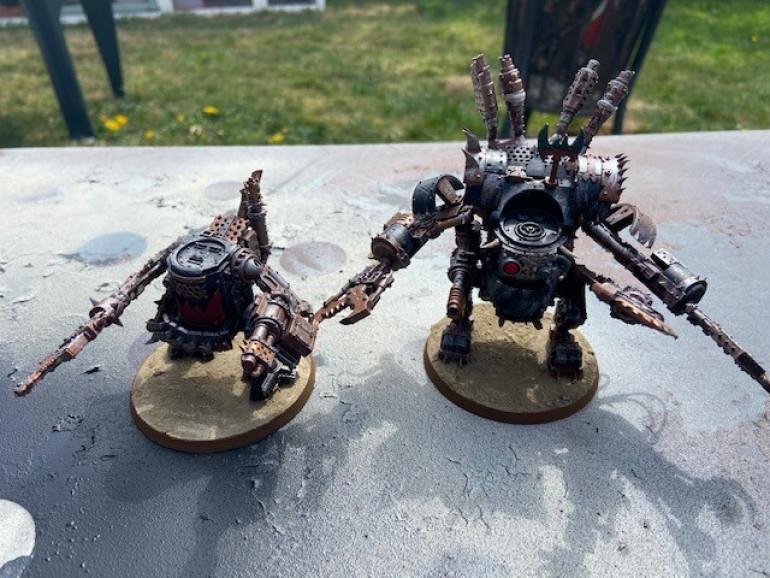
In the end It was taking me about an hour to do 2 Dreads / 3 Kans, plus a bit for the Mega dread and the spray painting for a rough total of 8 hours. So two working days to build and paint 6 Dreads, 9 Kans, a Mega Dread and a Stompa*, Pretty chuffed with that.
*The Stompa was actually painted separately and took an additional 4 hours to paint. As a large center piece model, It deserved a little more attention.
The paint process after spray was:
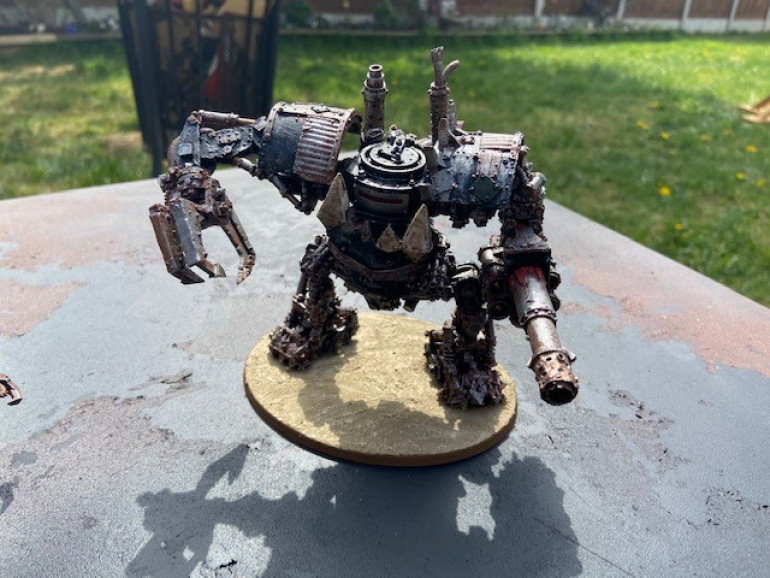
- Abaddon black the hulls and armour plating
- Dry brush the whole model with LeadBelcher concentrating more on the arms and weapons.
- Detail with Khorne Red, WraithBone, LeadBelcher and Rust paint.
Job done and first big detachment out the way
First steps... Planning to beat the boredom
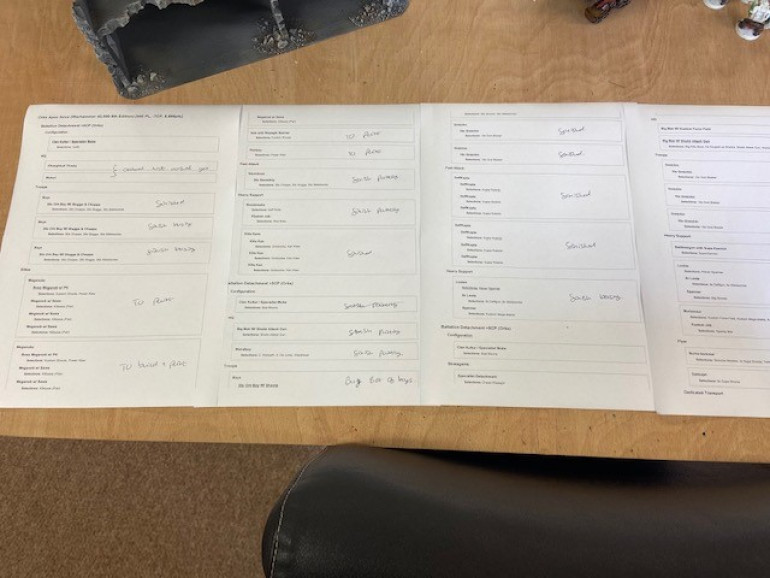 These cut down Battle scribe army builds are great for ticking off units as they are done, and seeing at a glance what is coming up next.
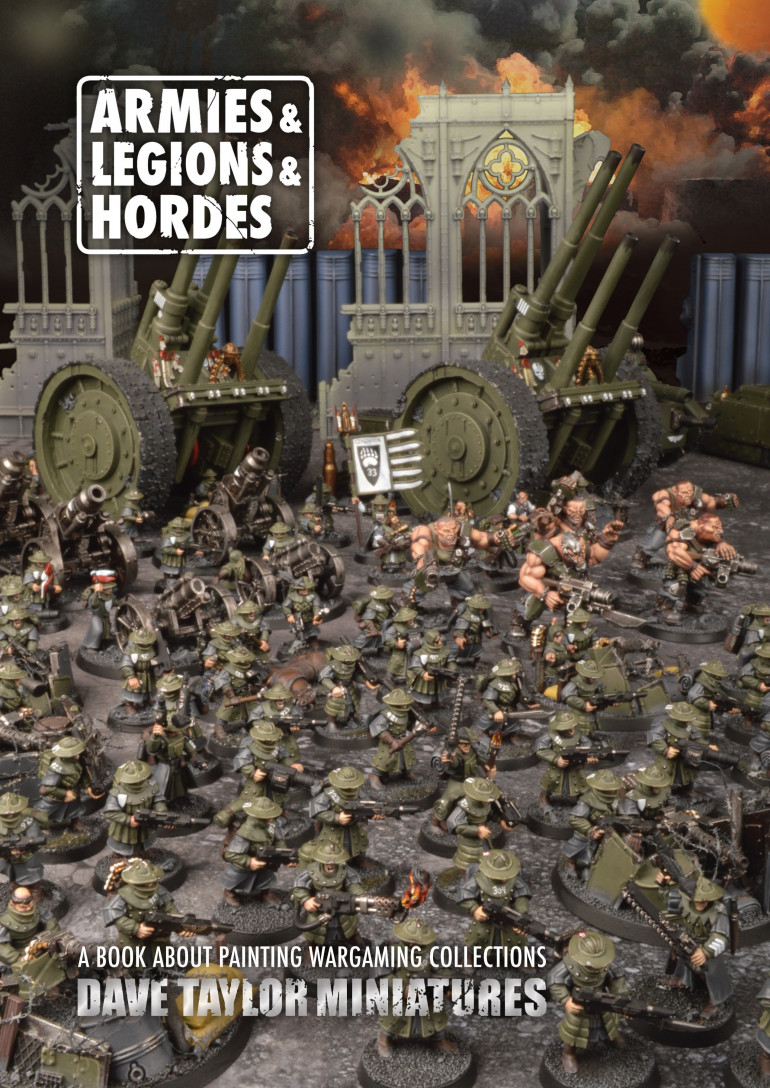 Dave Taylor's Armies, Legions & Hordes books is a must have for any body planning out a large army...
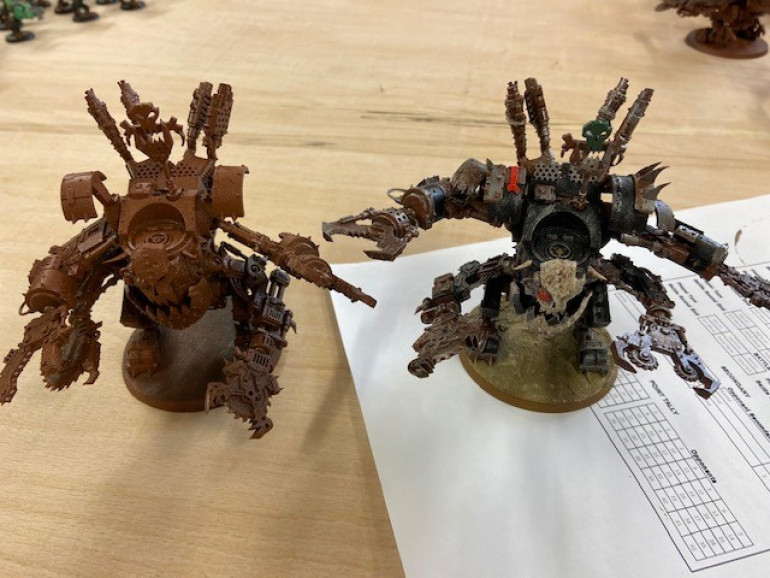
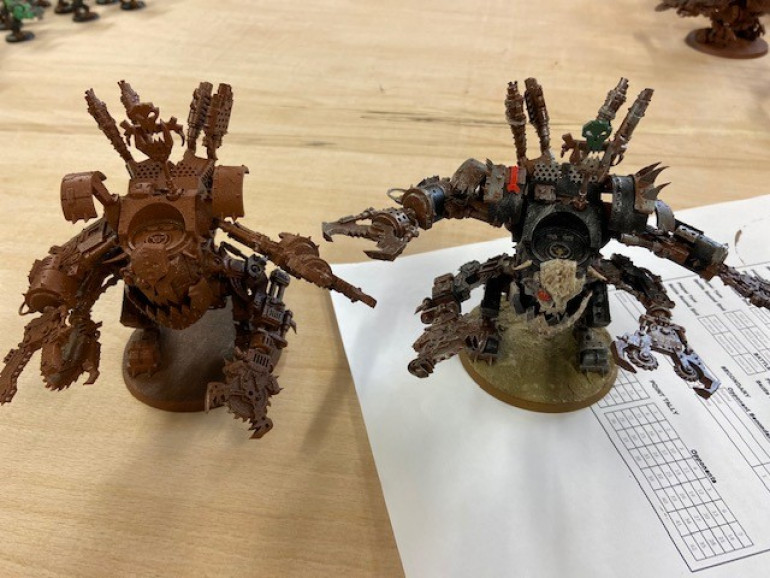 Base coat on the left, finished master on the right. In the end, it would take me around 25-35mins per Dread to achieve this finished standard, but more on that in another post.
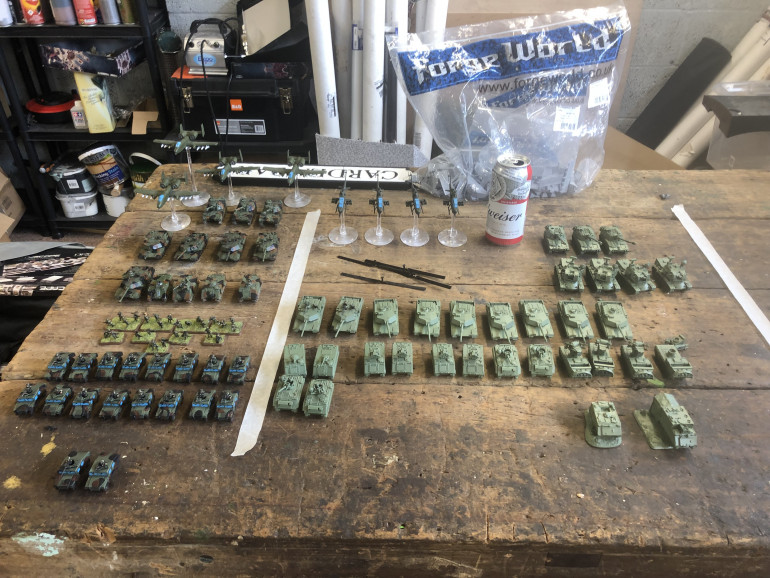 On my previous TY project, I used masking tape to create "goal lines" to move finished units over which generated encouragement and inspiration to keep going.
Back in October 2018 when Games Workshop ran their “Orktober” promotion, I decided that huge Tyranid and Necron armies needed some company, and that my wallet hadn’t been punished enough.
So I took the plunge and ended up with around 3,000 points of Orks. I played quite a few games and added the odd unit here and there which was fine for a while… but like every project Iv’e ever started, it soon grew a mind of it’s own and I lost control.
Pretty soon I had an army which was about 10% fully finished, 30% started and about 60% un-built… Something had to change.
The Covid lockdown has given me a lot of free time to unbox, build and paint the vast pile of models that make up my Ork Army… But where to start? First stop, Battlescribe.
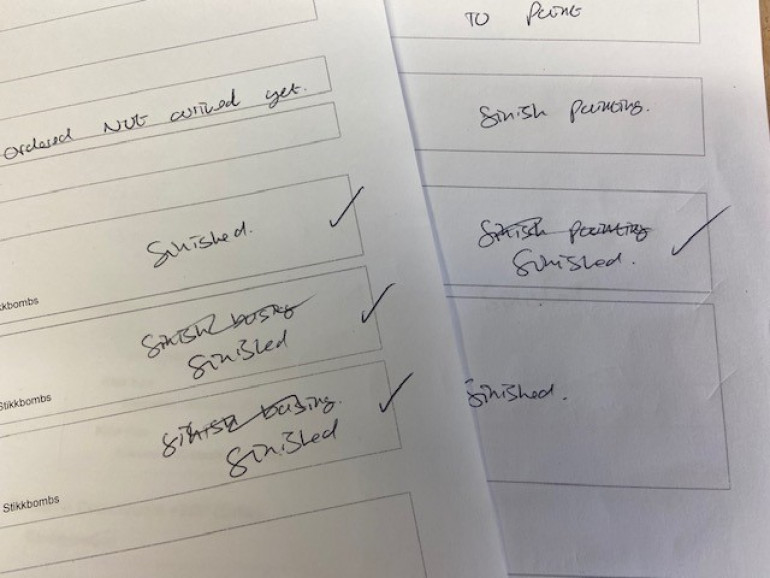
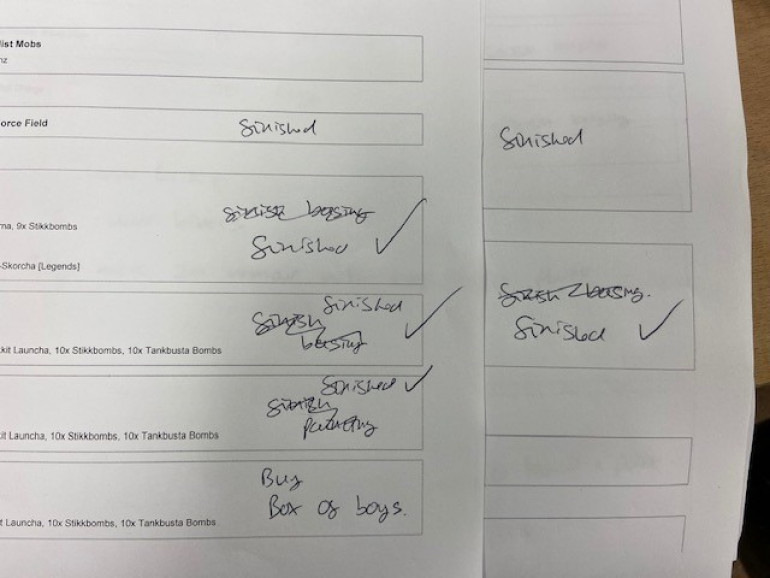
This useful army builder is incredibly useful not just for composing army lists, but also in creating what I refer to as paint schedules. When printing the army list, if you turn off all the details, you are left with a simple list of units separated into squads in neat little boxes.
The boxes don’t really dictate the order in which I paint any of the army, but the satisfaction that comes from writing in “Finished” next to a unit is immense and helps beat the boredom that come from painting such a large army.
At this point im going to mention Dave Taylor’s excellent book, Armies, Legions and Hordes. It’s a great guide on how to stay focused on the task when it comes to painting up an army. There are lots of suggestions about how to stay on track by setting yourself goals etc, and I have taken inspiration from the book and use my own techniques to getting an army finished.
The first step as mentioned above is to sit down with Battle Scribe and write out the Army list in full and allocating the models into their chosen units.
The next step is to break the Army down into paintable sections You can make these as small or as large as you want and can even mix units up, but the important thing is to finish the section before you move on.
Once I choose a section to start with, I work out a format for painting the models. I choose my paint schemes and how they are applied on several criteria but essentially, they all boil down to a trade off between time taken vs finished result. If I was to say, spend an extra 5 minutes per model I might increase the quality of the paint job by say 5%…. but am I going to notice that extra 5% or would the time have been better spent on finishing more units?
To help me decide, I produce a master. I finish one or two models in a section and learn the most efficient process of applying the colours in the right order to achieve the desired effect.
A good example of this are the “Tin Eadz” detachment. A detachment comprised totally of Deff Dreads, Killa Kans, a Mega Dread and a Gorkanaut. I’ll cover how I painted them up in another post but the picture will give you an idea what i’m talking about.
The most important thing when your done painting a section is making a physical show that it is finished, something that inspires you to continue.
On my last project, I sorted my Team Yankee models into three basic categories, Unbuilt, base coated and finished. And divided each category up with masking tape. This gave me a physical goal line that units could cross as they moved from category to category. This small thing actually gave me huge inspiration to keep progressing and getting units over the finish line.
Because my Ork army is so large, it’s not very practical to use a set up like the one I used for TY. Instead, I write finished in the boxes my Battle Scribe list and tick them off as I go. Its this small achievement that gives me the encouragement I need to keep going.
Thanks for reading, next post I will talk about my Tin Eadz detachment in more detail, and show how using simple techniques, they were busted out pretty quickly.


