![Very Cool! Make Your Own Star Wars: Legion Imperial Agent & Officer | Review [7 Days Early Access]](https://images.beastsofwar.com/2025/12/Star-Wars-Imperial-Agent-_-Officer-coverimage-V3-225-127.jpg)


3rd Armoured Division Savlar Chem-Dogs


Recommendations: 93
About the Project
3rd Armoured Division Savlar Chem-Dogs I’ve always been a fan of tanks and can count around 20 various Leman Russ variants in my collection. Over the Easter vacation and somewhat inspired by the ‘Spring Clean’ initiative on Beasts of War, I decided to finish off my command tank that had been sitting on a shelf collecting dust having been built and undercoated black. Now, I'm adding more tanks that having been hanging around to be built, some of which have been on my shelves for years... This is my 2019 Spring Clean project... but as an army it will never end being added to...
Related Game: Warhammer 40,000
Related Company: Games Workshop
Related Genre: Science Fiction
Related Contest: Spring Clean Hobby Challenge (Old)
This Project is Completed
Introduction
3rd Armoured Division Savlar Chem-Dogs
I’ve always been a fan of tanks and can count around 20 various Leman Russ variants in my collection. Over the Easter vacation and somewhat inspired by the ‘Spring Clean’ initiative on Beasts of War, I decided to finish off my command tank that had been sitting on a shelf collecting dust having been built and undercoated black, but then put aside as I built a Flaming Eagles Kill Team.
Then, having read and been further inspired by the many projects being created under the banner of ‘Spring Clean’, I thought why not record my effort to build and reinforce the Astra Militarum tank division that was slowly coming together. In my Spring Clean, I happened to have a three Solar Auxilia tanks from Forge World, bought at Salute 2017 with the intention of building a Solar Auxilia force… that never happened. However, the aesthetic of these models lends itself to the Savlar Chem-Dogs and with my chosen paint scheme of brown and blue, and my rough and ready painting style, I’m hoping to create something a little different.
Ever since reading about the Savlar Chem-Dogs in Codex Imperial Guard (2003), I was intrigued by this bunch of scavengers that are allowed to keep any equipment and resources they win in battle. They seem like a load of cut-throats and mercenaries, that are just about kept on the side of the Emperor’s Law by Commissars ‘sensitive’ to their troops needs and the needs to complete the mission.
I don’t regard myself as an expert or even a professional painter. I managed to win Gold and Silver Medals at the International Model Engineering Exhibition in the late 1980s when fantasy miniature painting was just taking off, and I look back at those models with fondness, although the standard then I suspect would certainly be no match with today’s expertise. Still, I’d hope that these tanks will be good enough for the table top, and with that in mind I’ve set about this project trying to keep to using only Games Workshop components to ensure that they are ‘tournament’ acceptable.
So, first up will be a Solar Auxilia Dracosan Armoured Transport, and this will be followed by a couple of Solar Auxilia Basilisks. I will try to detail my work-in-progress for the Dracosan, but so as not to bore everyone and to repeat myself, I will probably just record before and after shots of the Basilisks and anything else I find in my Spring Clean to add to this project.
Hope you enjoy my project…
The Commander's Tank - An Example Paint Scheme to Follow
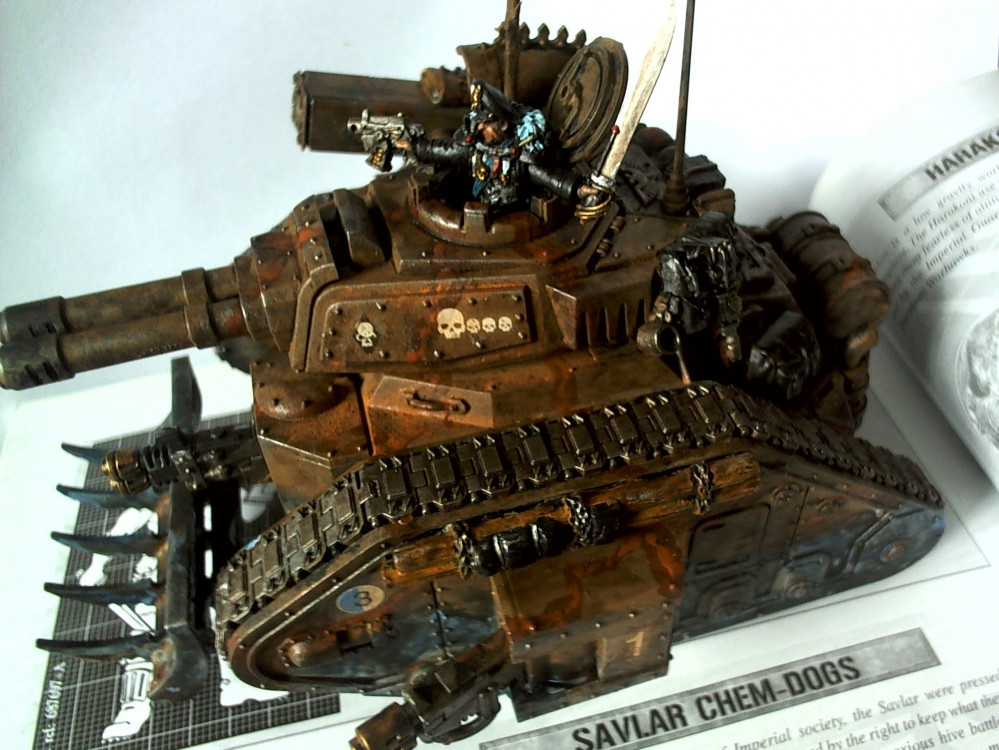
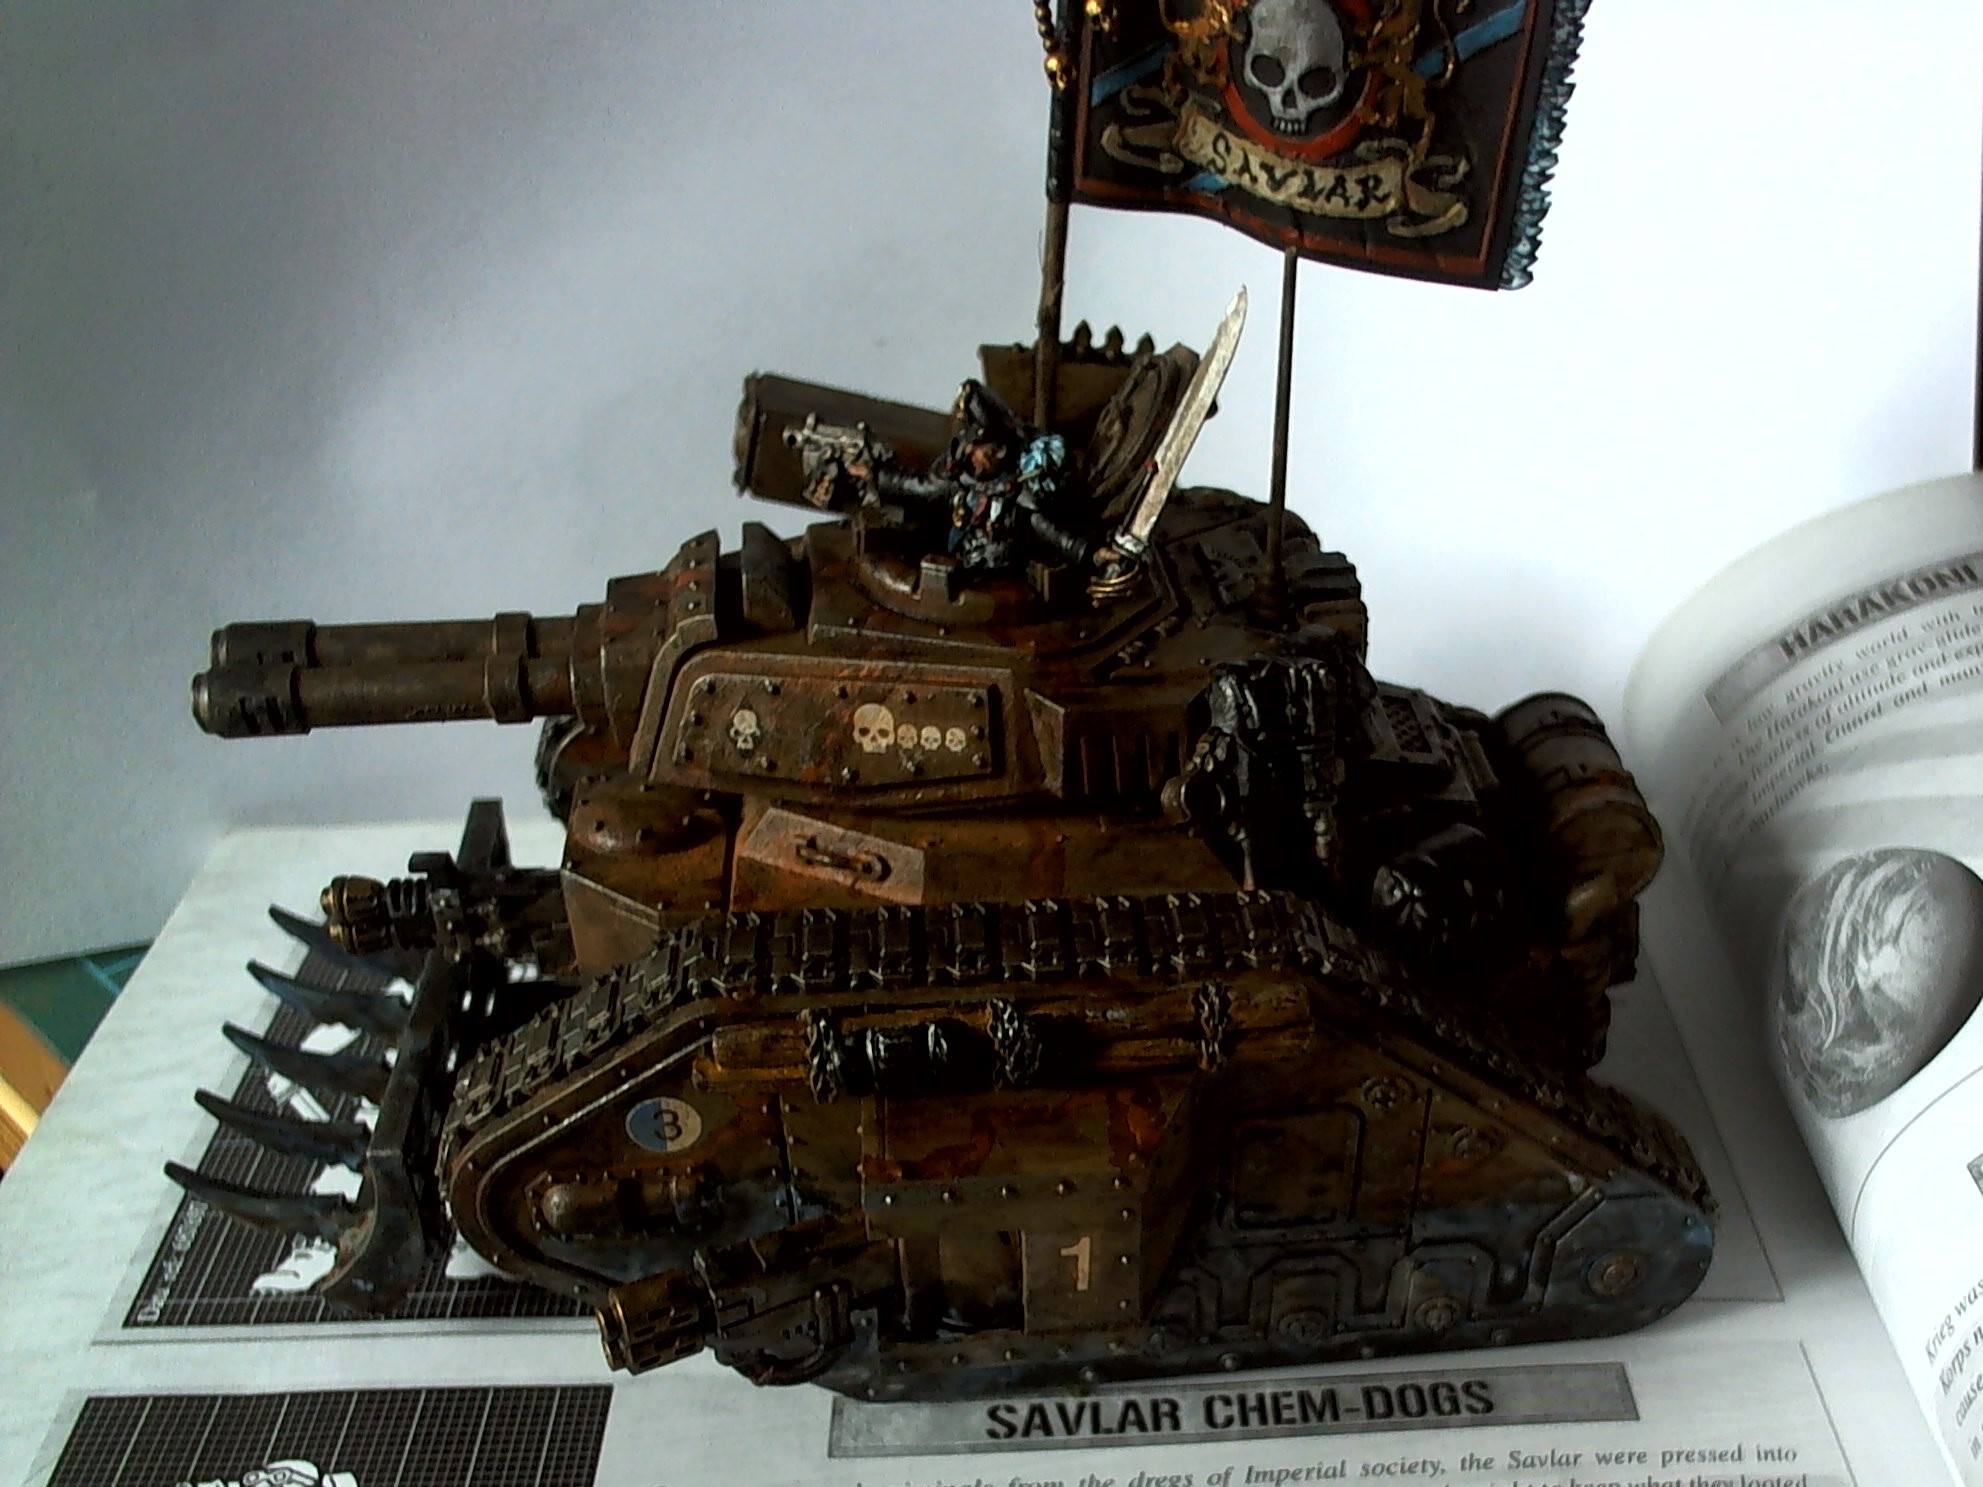
3rd Armoured Division Savlar Chem-Dogs
So, having painted up the Commander’s Tank over Easter – A Leman Russ Exterminator with a GW Commissar Lord Mini cut down to fit into the turret (yes it also had been hanging around for some time and he looked stern enough to make the change from being a Commissar to being a Tank Commander), I’ve now got an example paint scheme I want to follow for the rest of the division and to act as a bit of self-motivation towards the end goals…


3rd Armoured Division Savlar Chem-Dogs - Tank A- Solar Auxilia Dracosan Armoured Transport - Preparation
3rd Armoured Division Savlar Chem-Dogs – Tank A- Solar Auxilia Dracosan Armoured Transport – Preparation
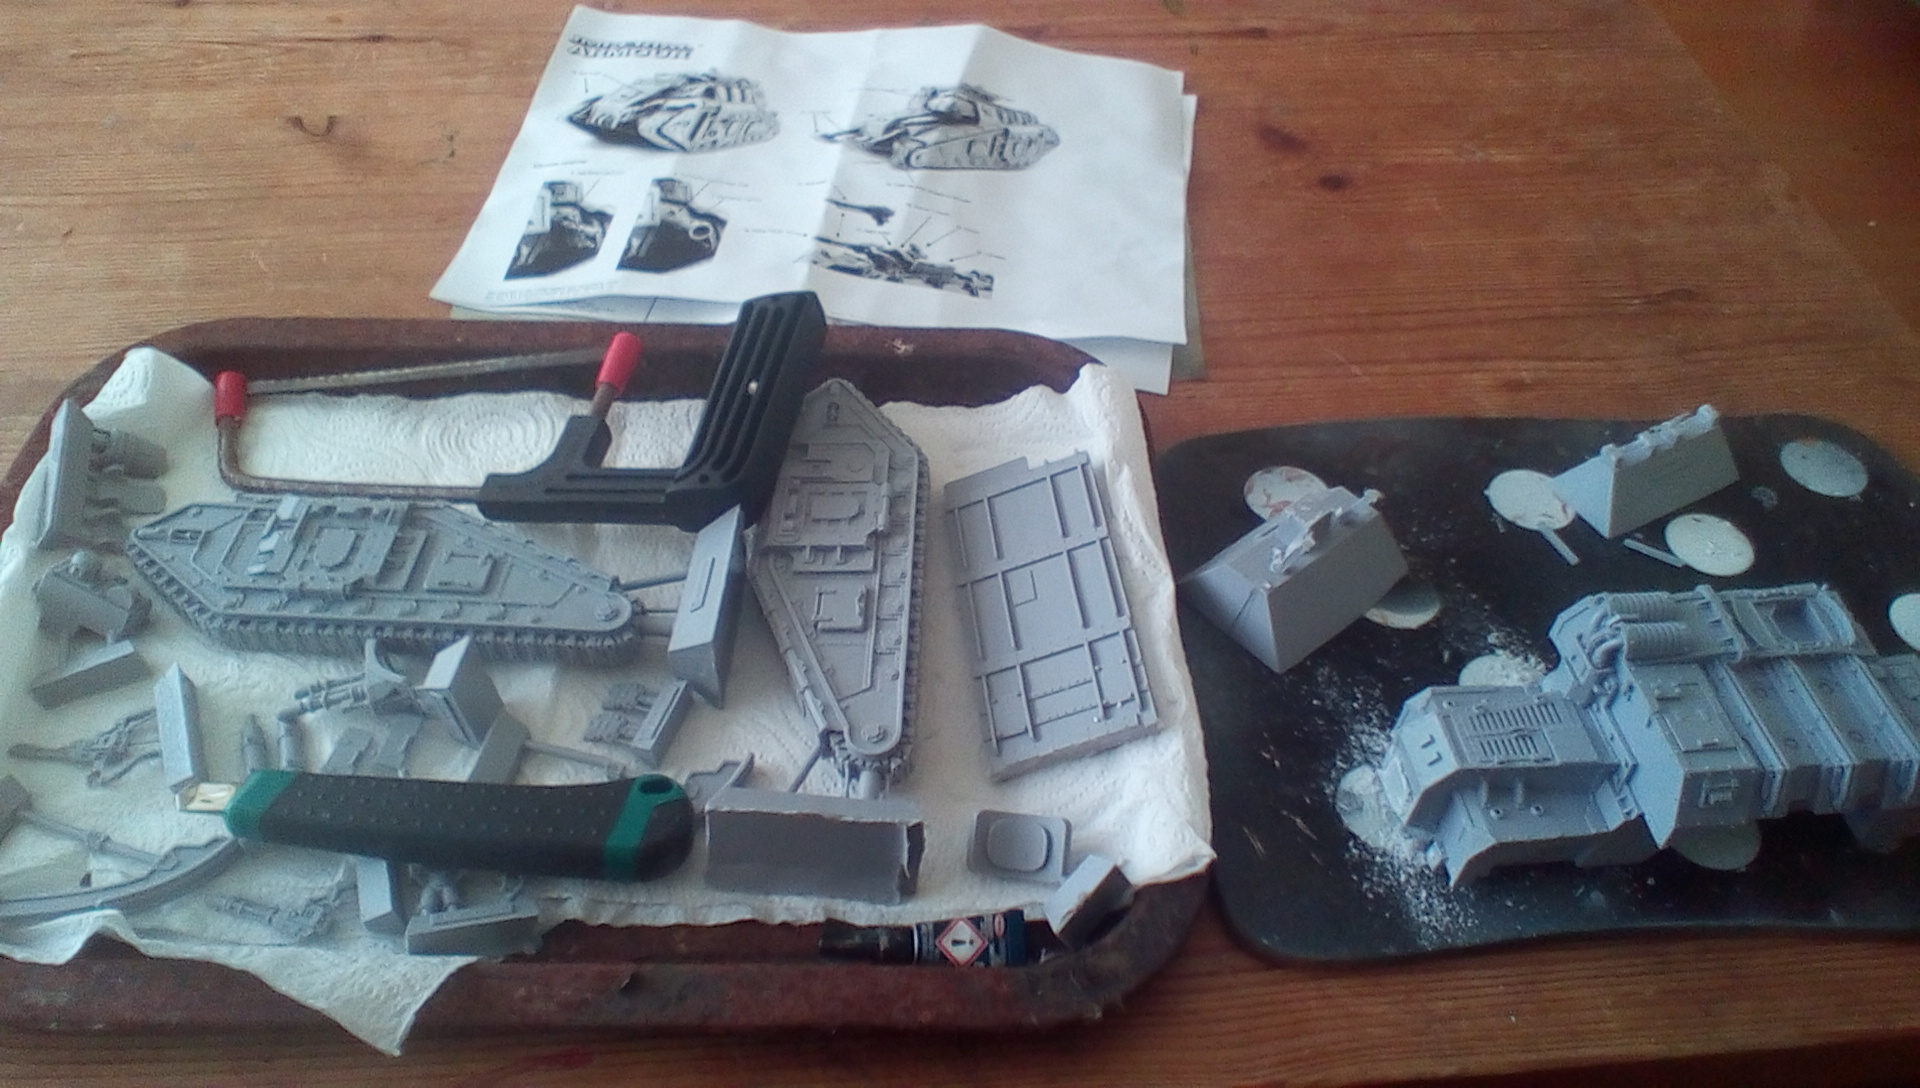
So, as with all projects the preparation of the parts and reading the instructions is critical.
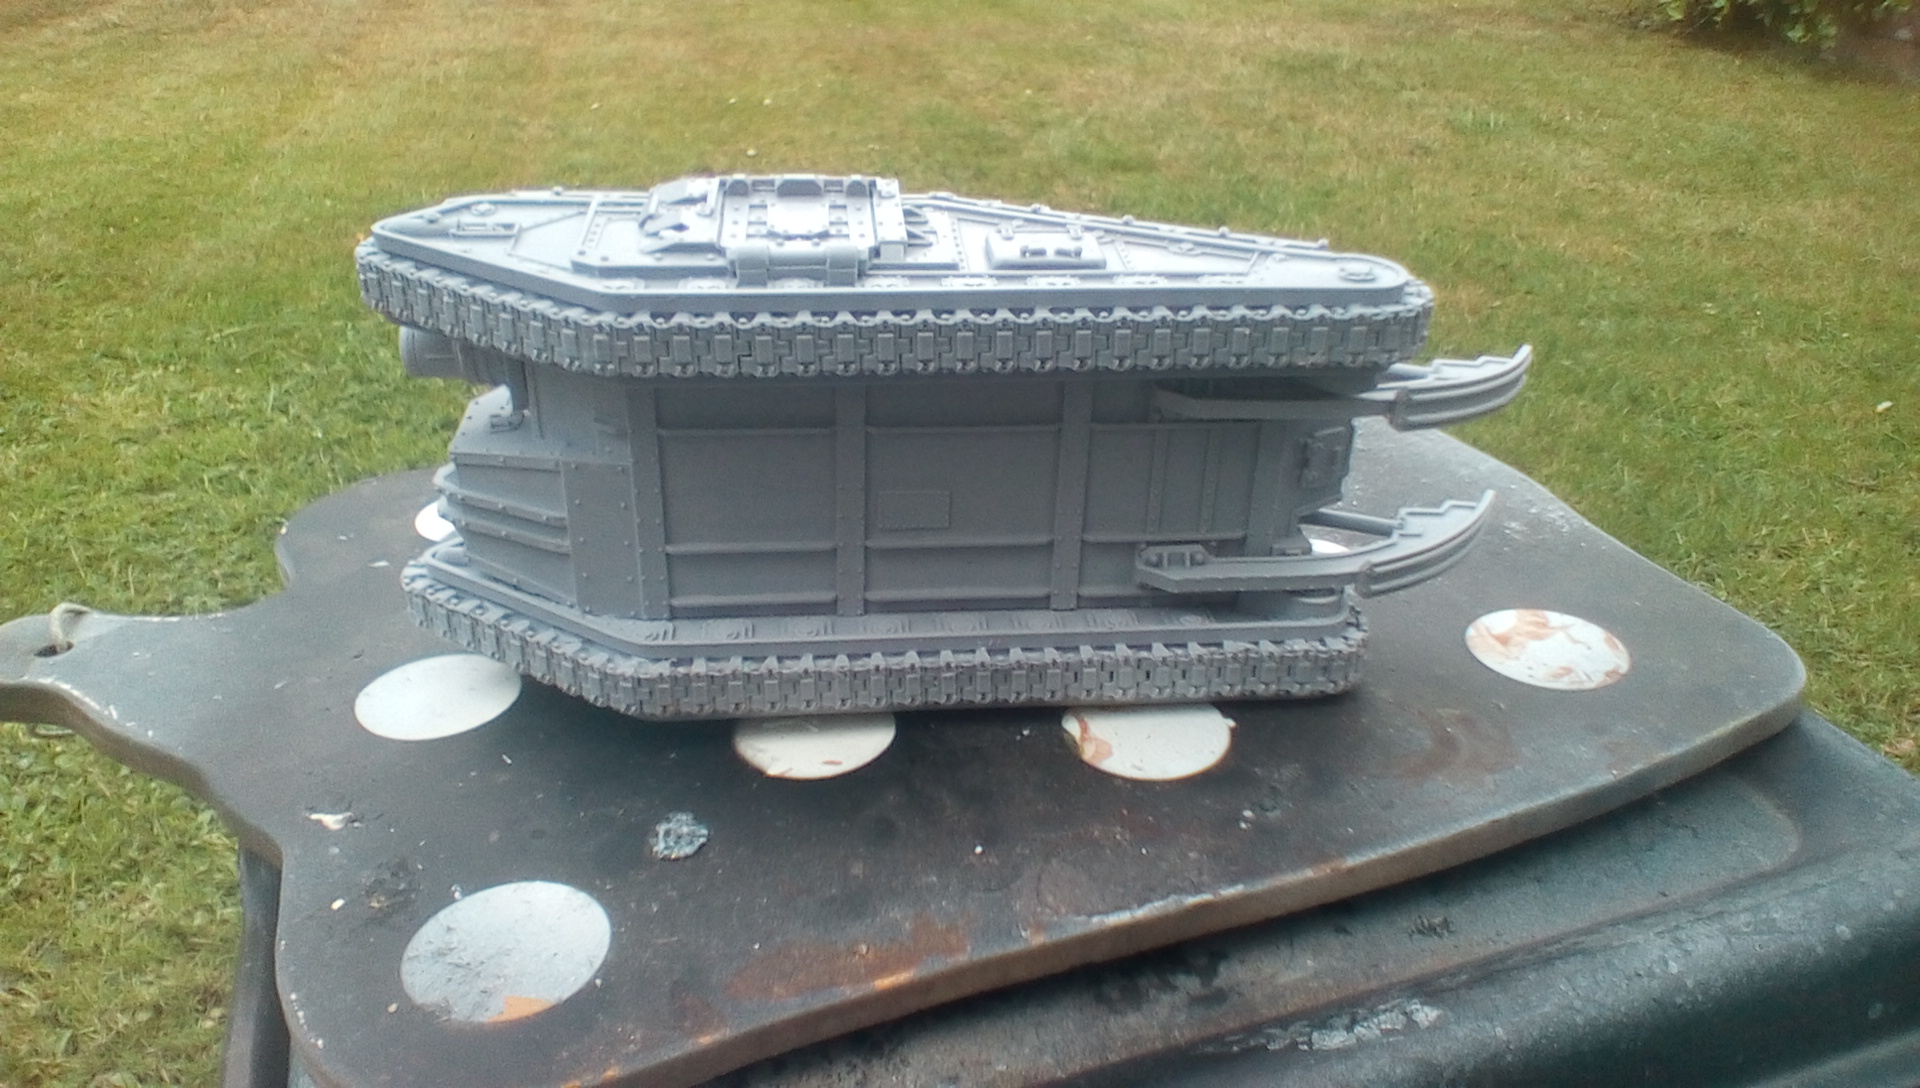
I was actually quite surprised when I opened up the contents of the Forge World Solar Auxilia Dracosan Armoured Transport to see that there was less construction than I had anticipated. Huge chunks of resin pieces to make up the top, hull and sides would mean that this was a simple job?
Problem 1) Resin Mould Excess Grease – The resin pieces were really very slimy! So I washed them in a bowl of luke-warm water with washing up liquid and left that overnight for the water to cool and for the detergent to work. Actually, I’m pretty pleased with the need to wait. Originally, I had planned to sit down and model-make whilst Liverpool took on Tottenham on the TV, but the model-making had to wait until the parts were clean.
Problem 2) The main parts still had huge chunks of excess resin from the casting process and required sawing rather than clipping. This produces a fair degree of dust, so just be careful not to inhale. The main excess chunk at the rear of the body left a small square of resin that, rather than try to file out or scrape away, I’ve decided to incorporate into the hull. I may cover it with stowage if it looks silly at the end.
Time Elapsed:
30 minutes cleaning components;
12 hours leaving components in soapy water to cool;
90 minutes carefully removing excess resin mould chunks with hacksaw and scalpel.


3rd Armoured Division Savlar Chem-Dogs – Tank A- Solar Auxilia Dracosan Armoured Transport - Construction
3rd Armoured Division Savlar Chem-Dogs – Tank A- Solar Auxilia Dracosan Armoured Transport – Construction
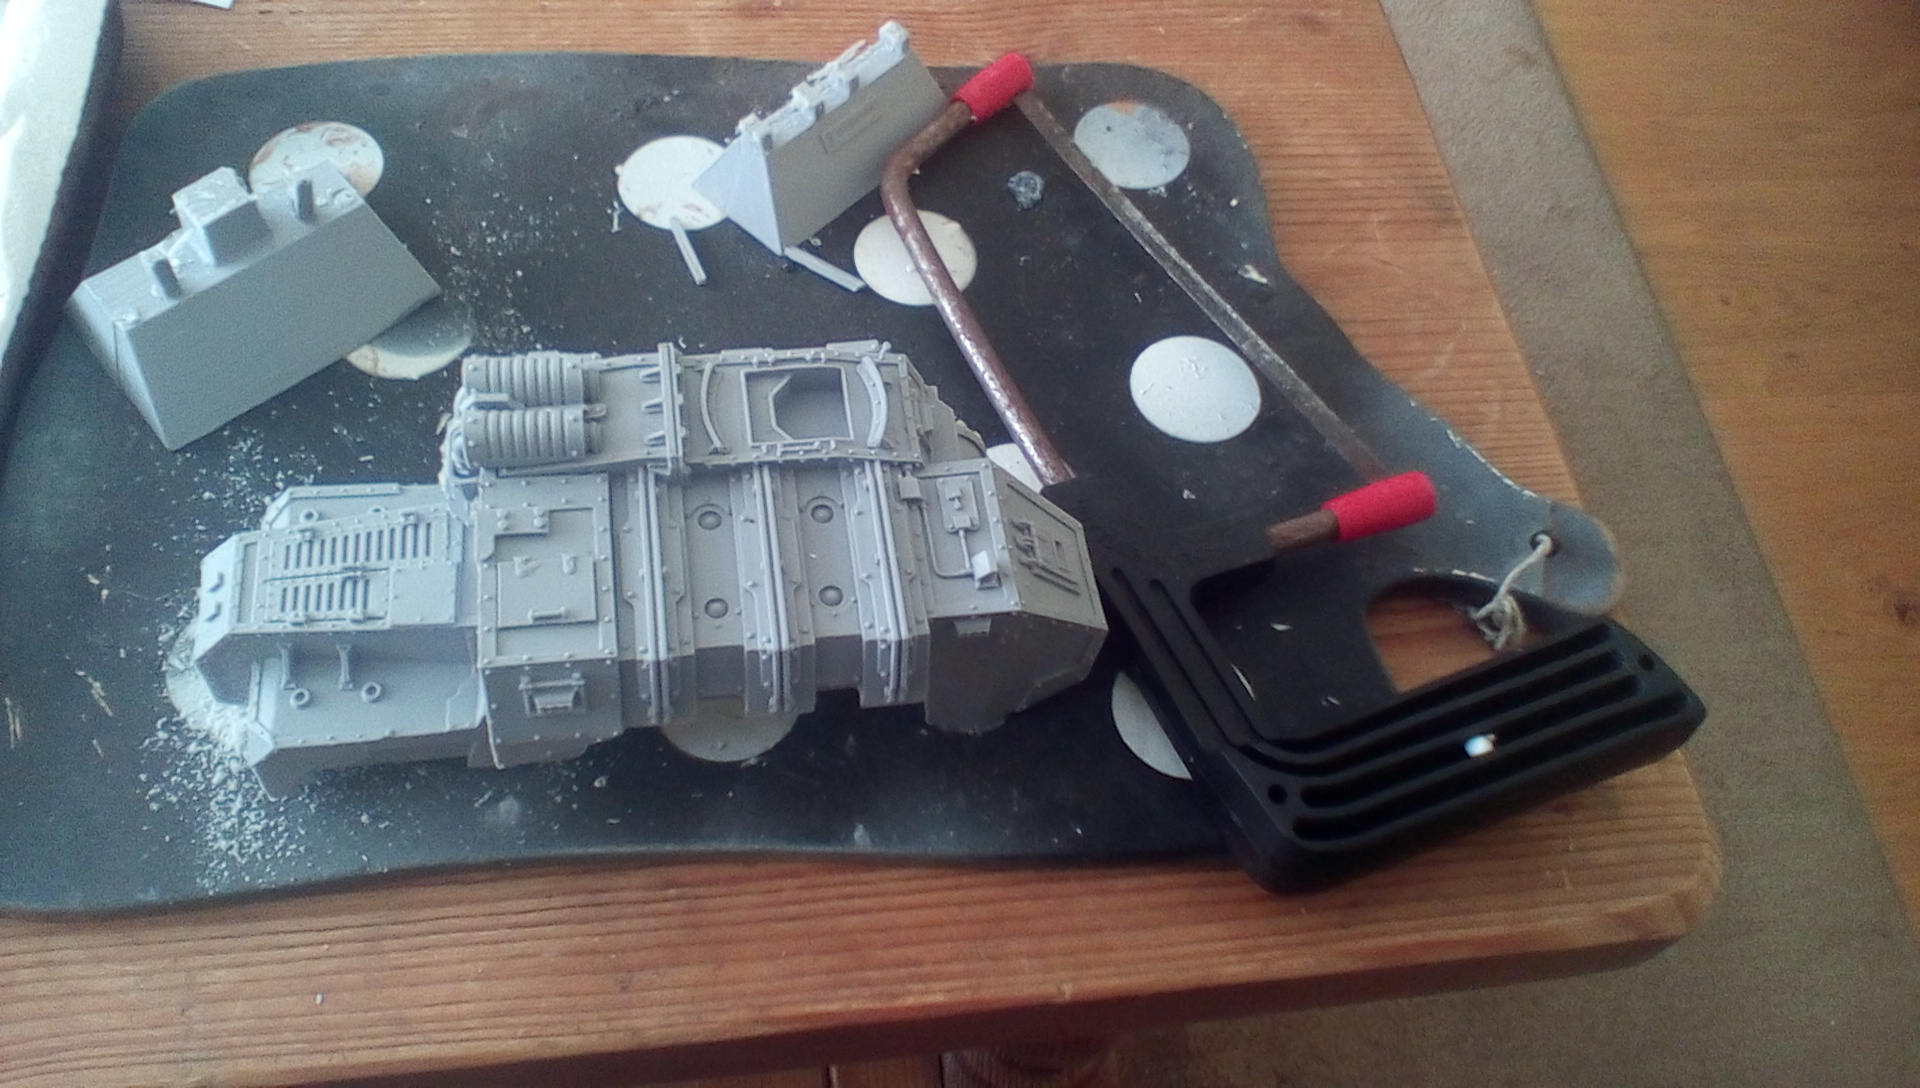
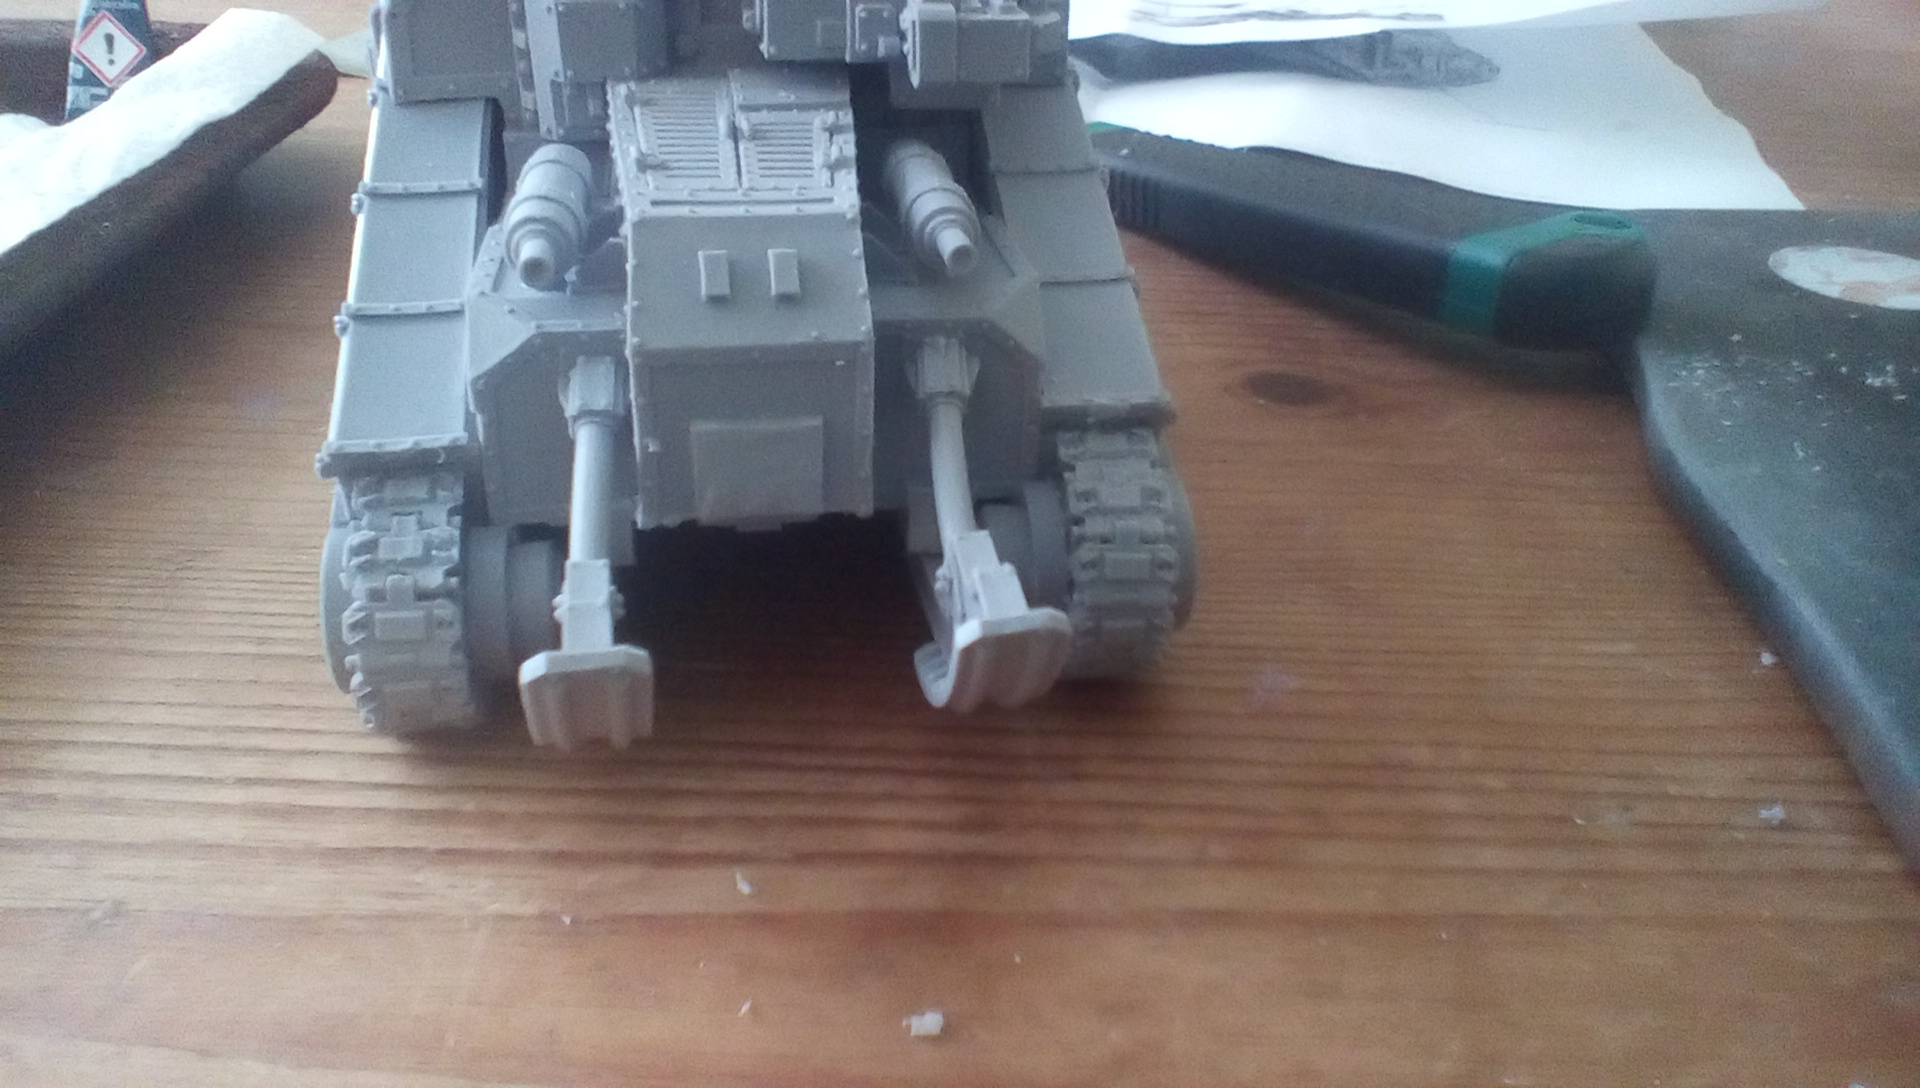
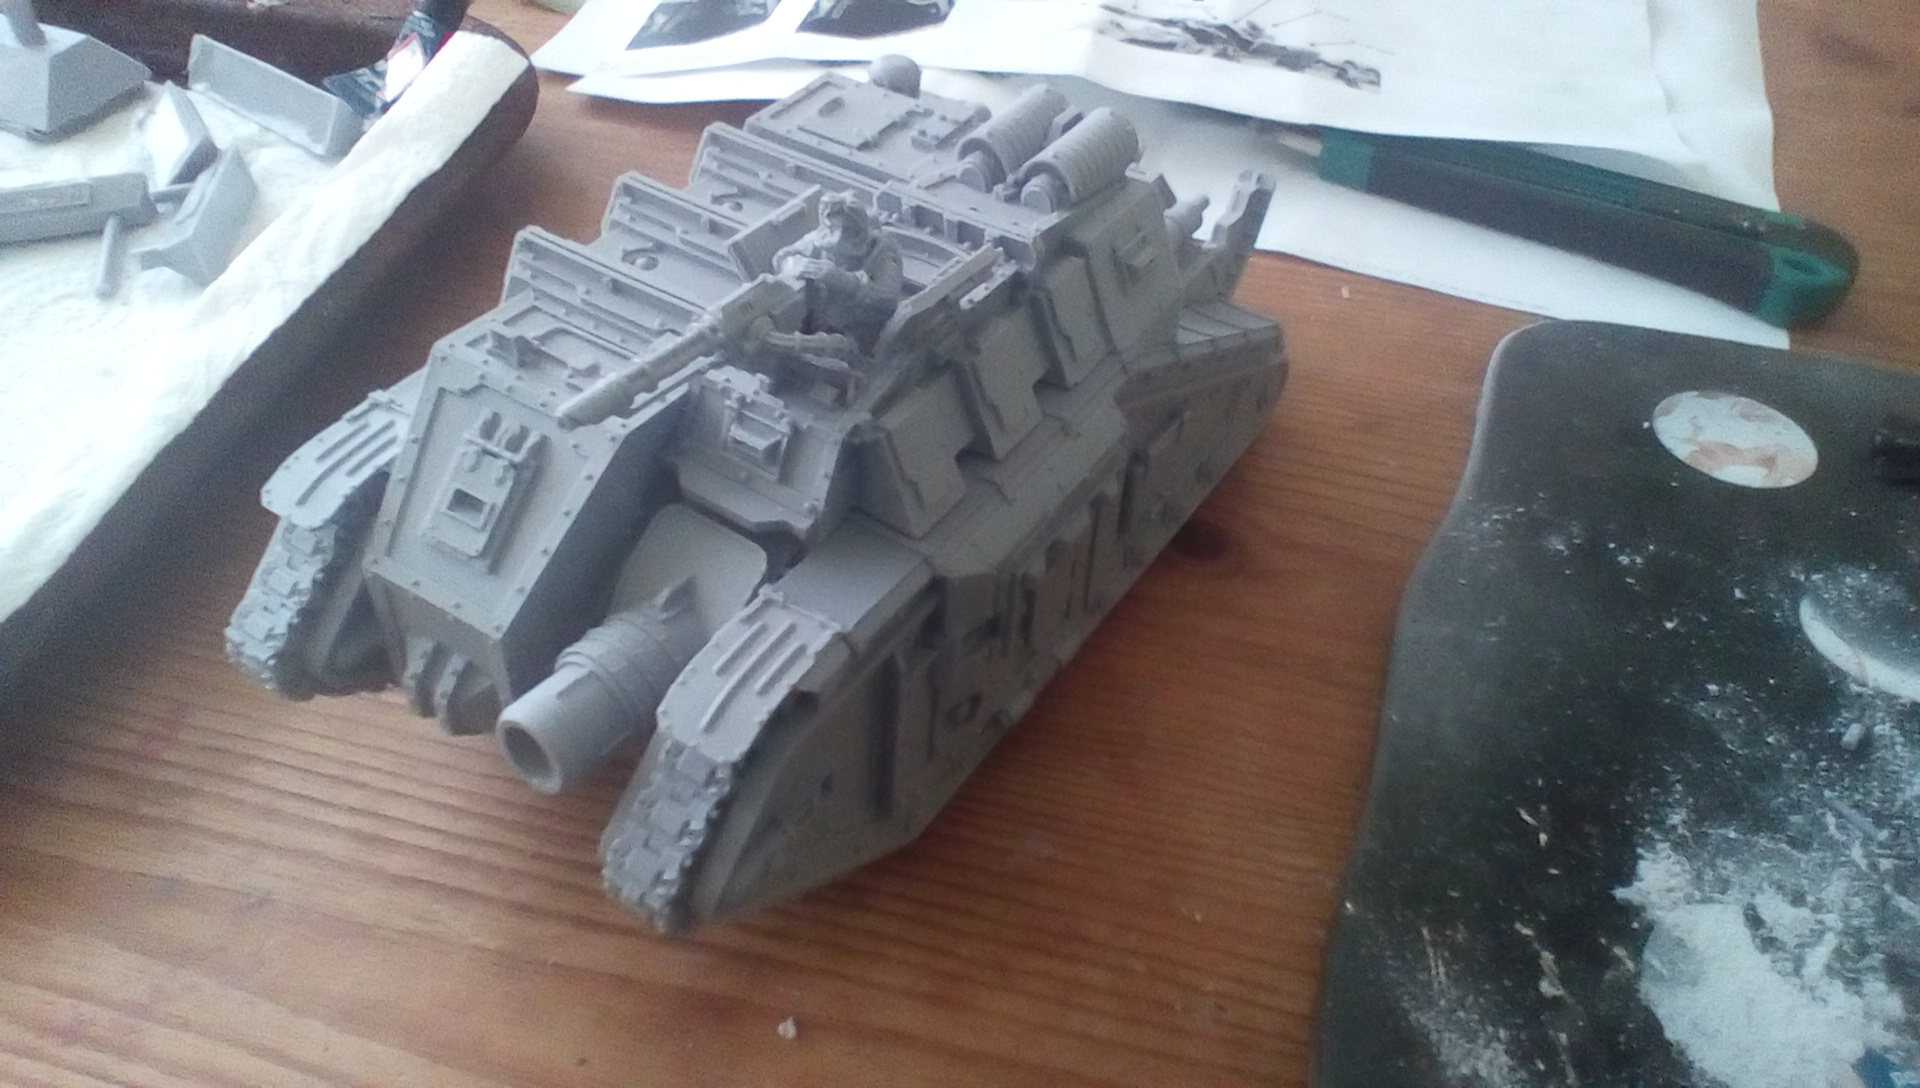
This was pretty straight-forward. There are only four main pieces with a couple of track pieces to add at the rear, two trench rails and a life support filtration unit positioned behind the cab.
The base slotted nicely with the top of the tank and was pretty much a perfect fit. I like to dry fix first before using the glue. The instructions suggested using a two-part epoxy resin glue, but I don’t have any of that to hand, and in fact I’ve always just use Loctite Superglue, whether it be plastic, metal or resin. I tend to use small 1g tubes of superglue, because larger tubes dry-out quickly if not used up on one project. The larger pieces did require a fair degree of glue and so in the end I have used two of these small tubes of glue up, but wasted none.
Once the top and bottom were glued the sides slotted in nicely as well. The trench rails look okay, although one appears a little bent and frankly I couldn’t be bothered to put back in warm water to re-bend. It looks okay, and after all, I’m not going for a Golden Demon award!
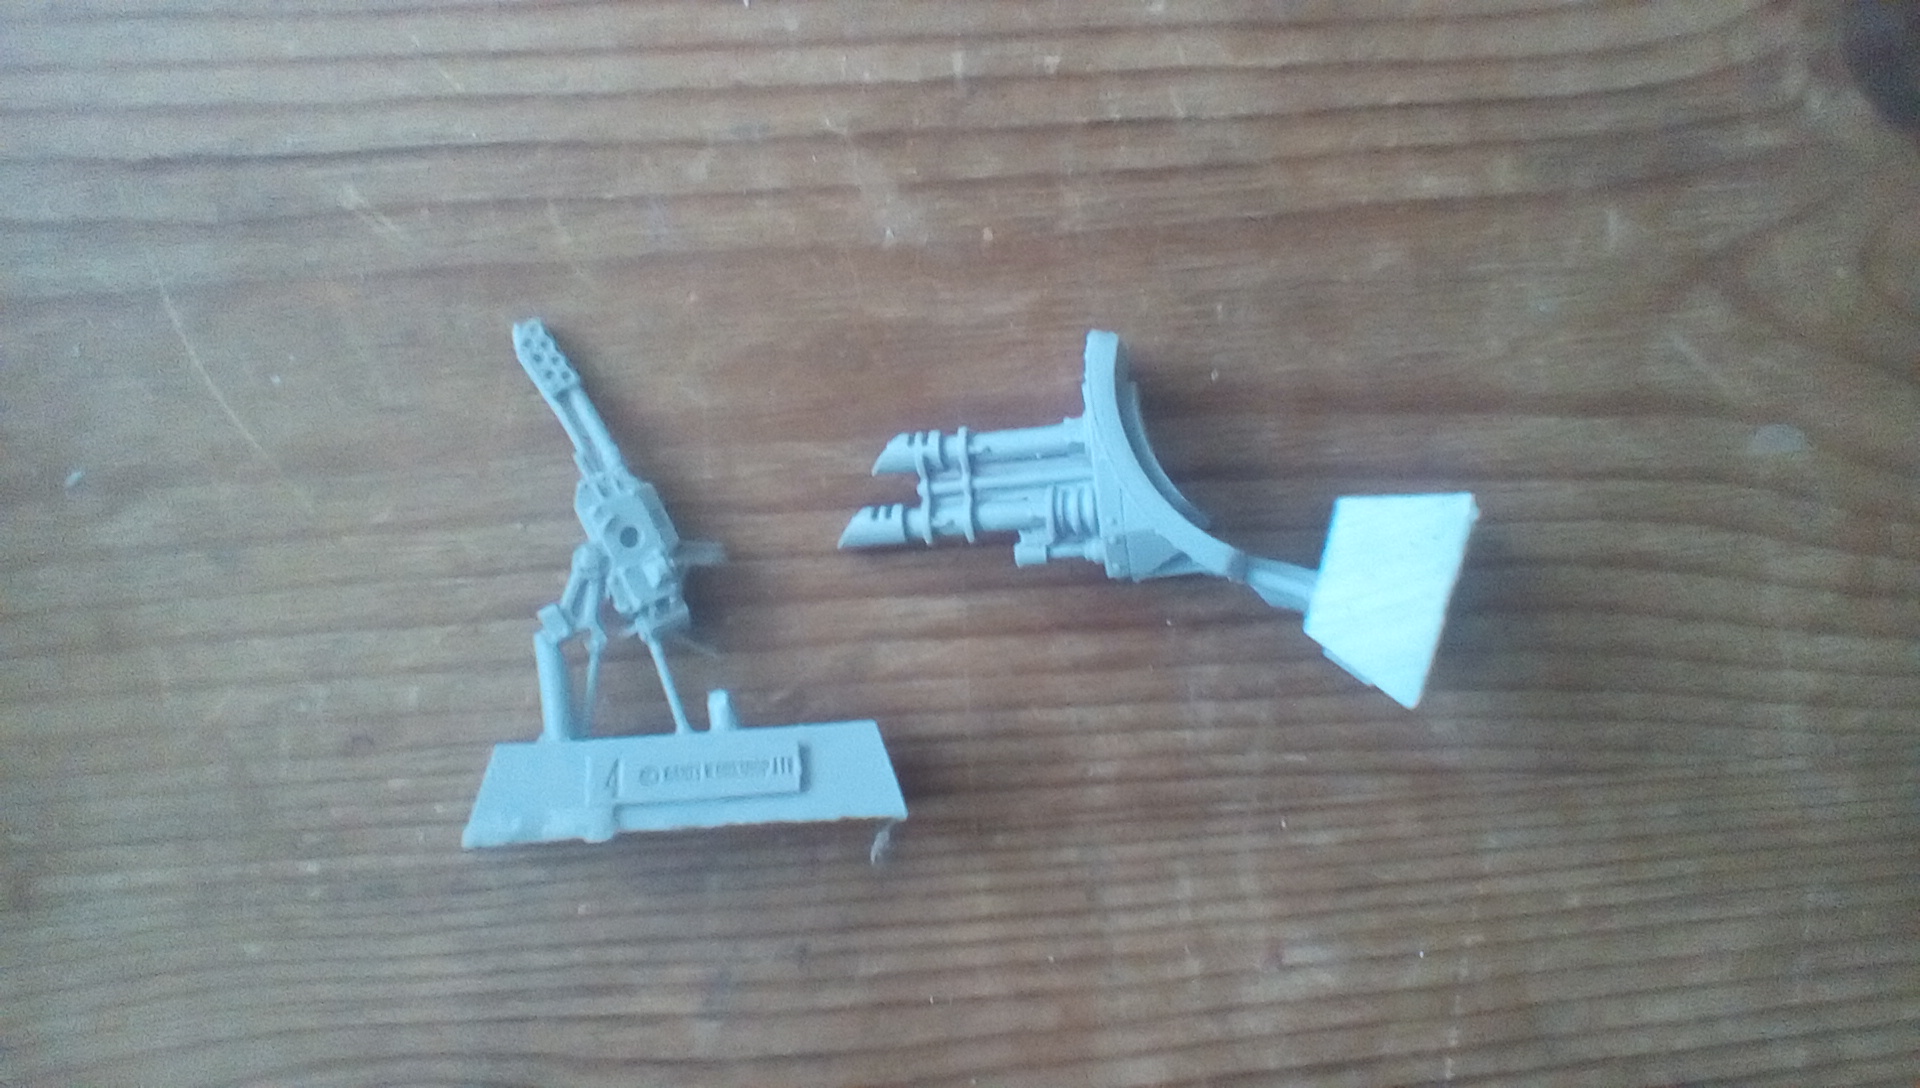
The construction requires me to choose either a demolisher cannon or a twin-linked laser-cannon for the main hull weapon. I chose the former, mainly because I haven’t got the rules for the Solar Auxilia Dracosan Armoured Transport and so I could always just use it as proxy Leman Russ Demolisher if required. The las-cannons can go in the bits box, as can the turret mounted flamer. I chose a multi-laser for the gunner, because again it could be a proxy las-cannon, but also because the alternative flamer was bent.
For the gunner, I toyed with idea of using a Forge World Chaos Militia Enforcer body and to attach the gunner’s arms, but as I’ve found a dozen or more of these torsos hidden away in a box, I think they may be better suited for a rough rider unit? So, even through the construction process, you can inspire yourself…
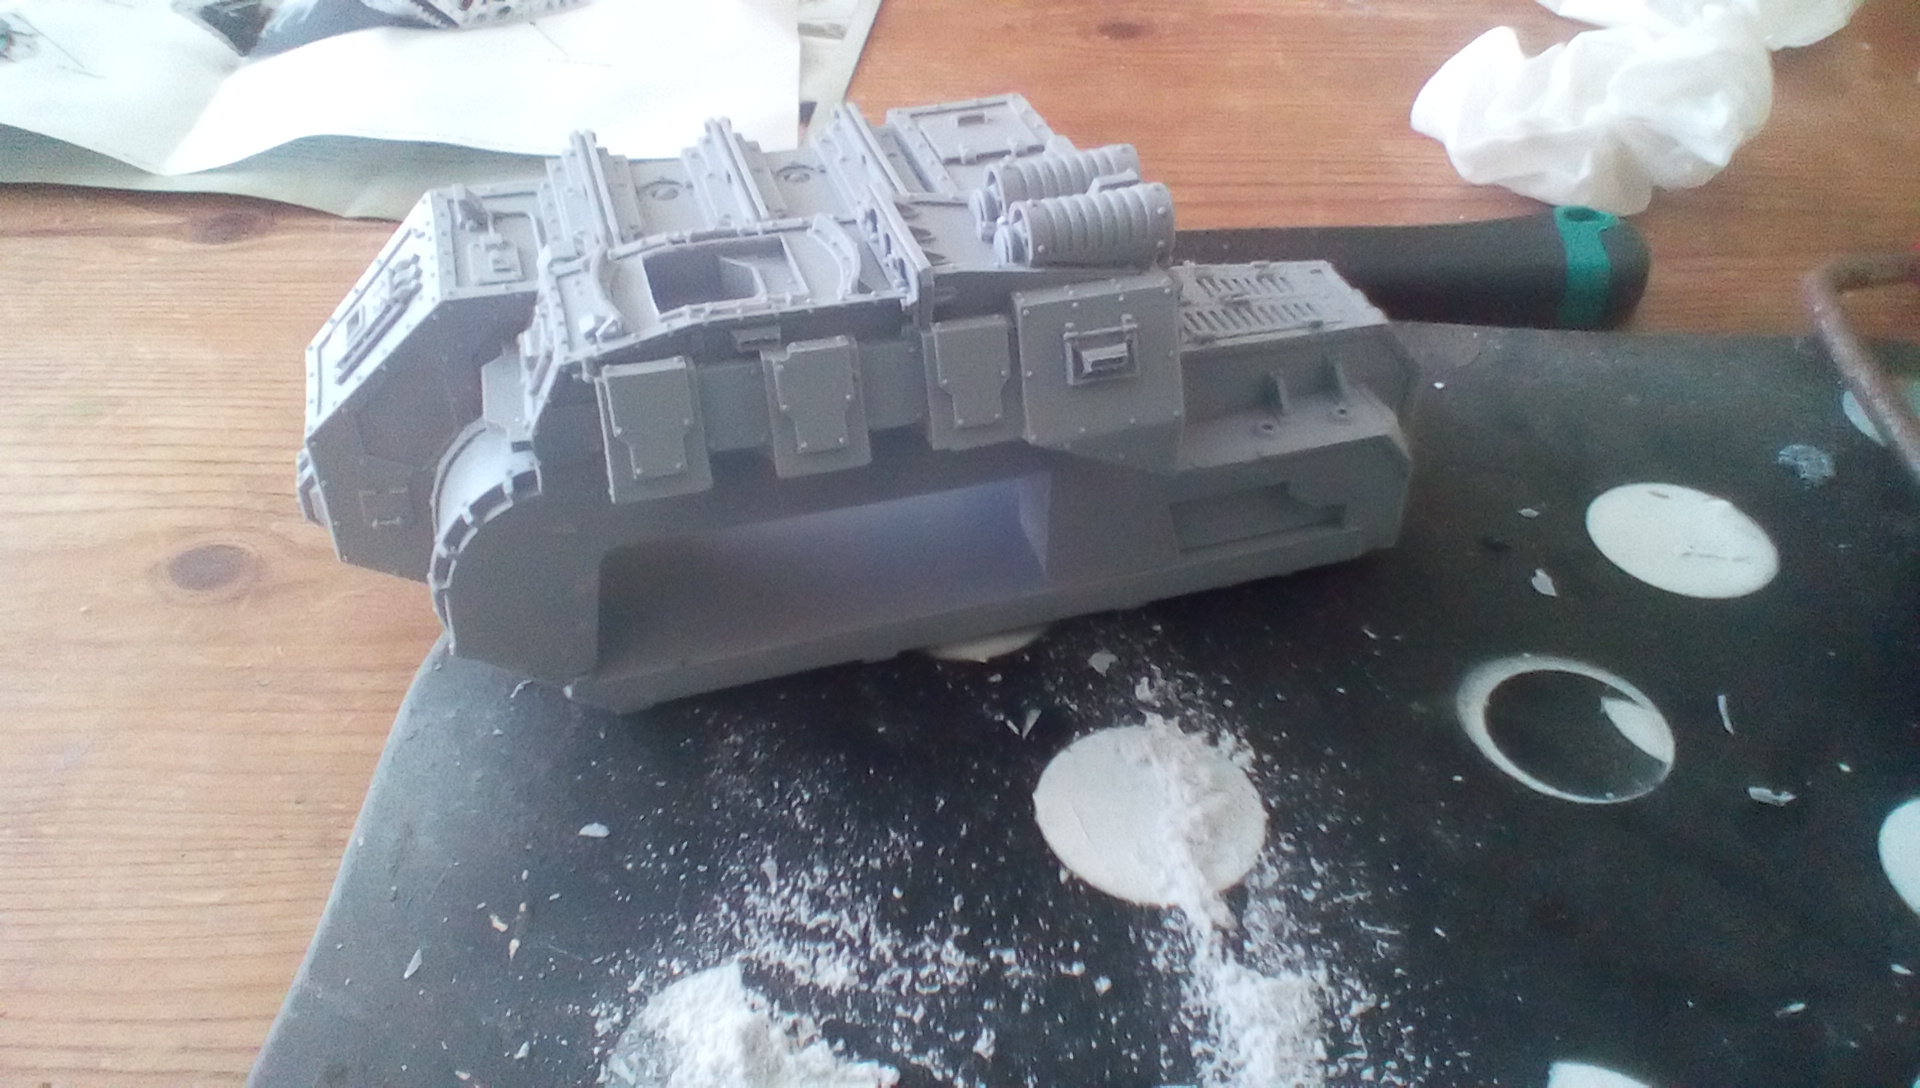
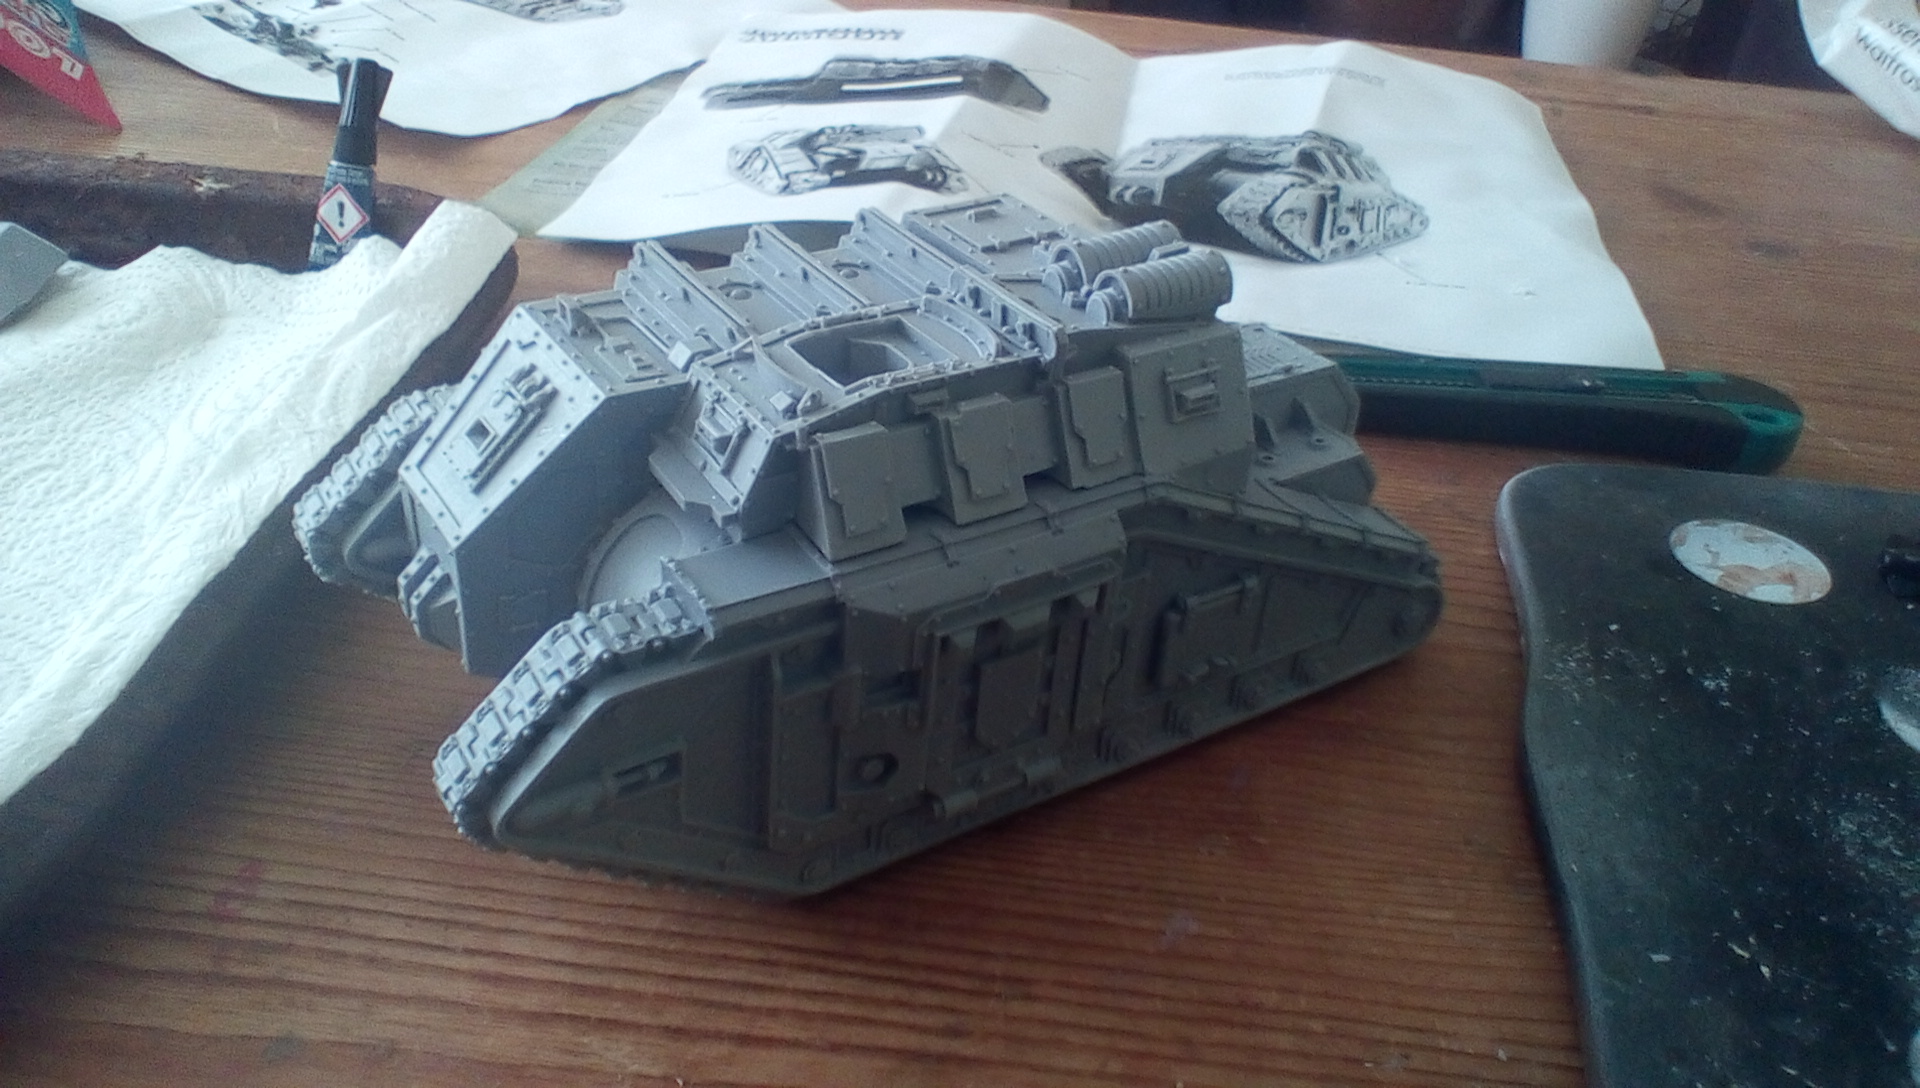
The gunner fitted together nicely with the multi-laser and the hatch doors sat in their hinges well. Check they are facing the right direction – according to the instructions, because if you get it wrong I think you may damage the hinges rectifying the mistake.
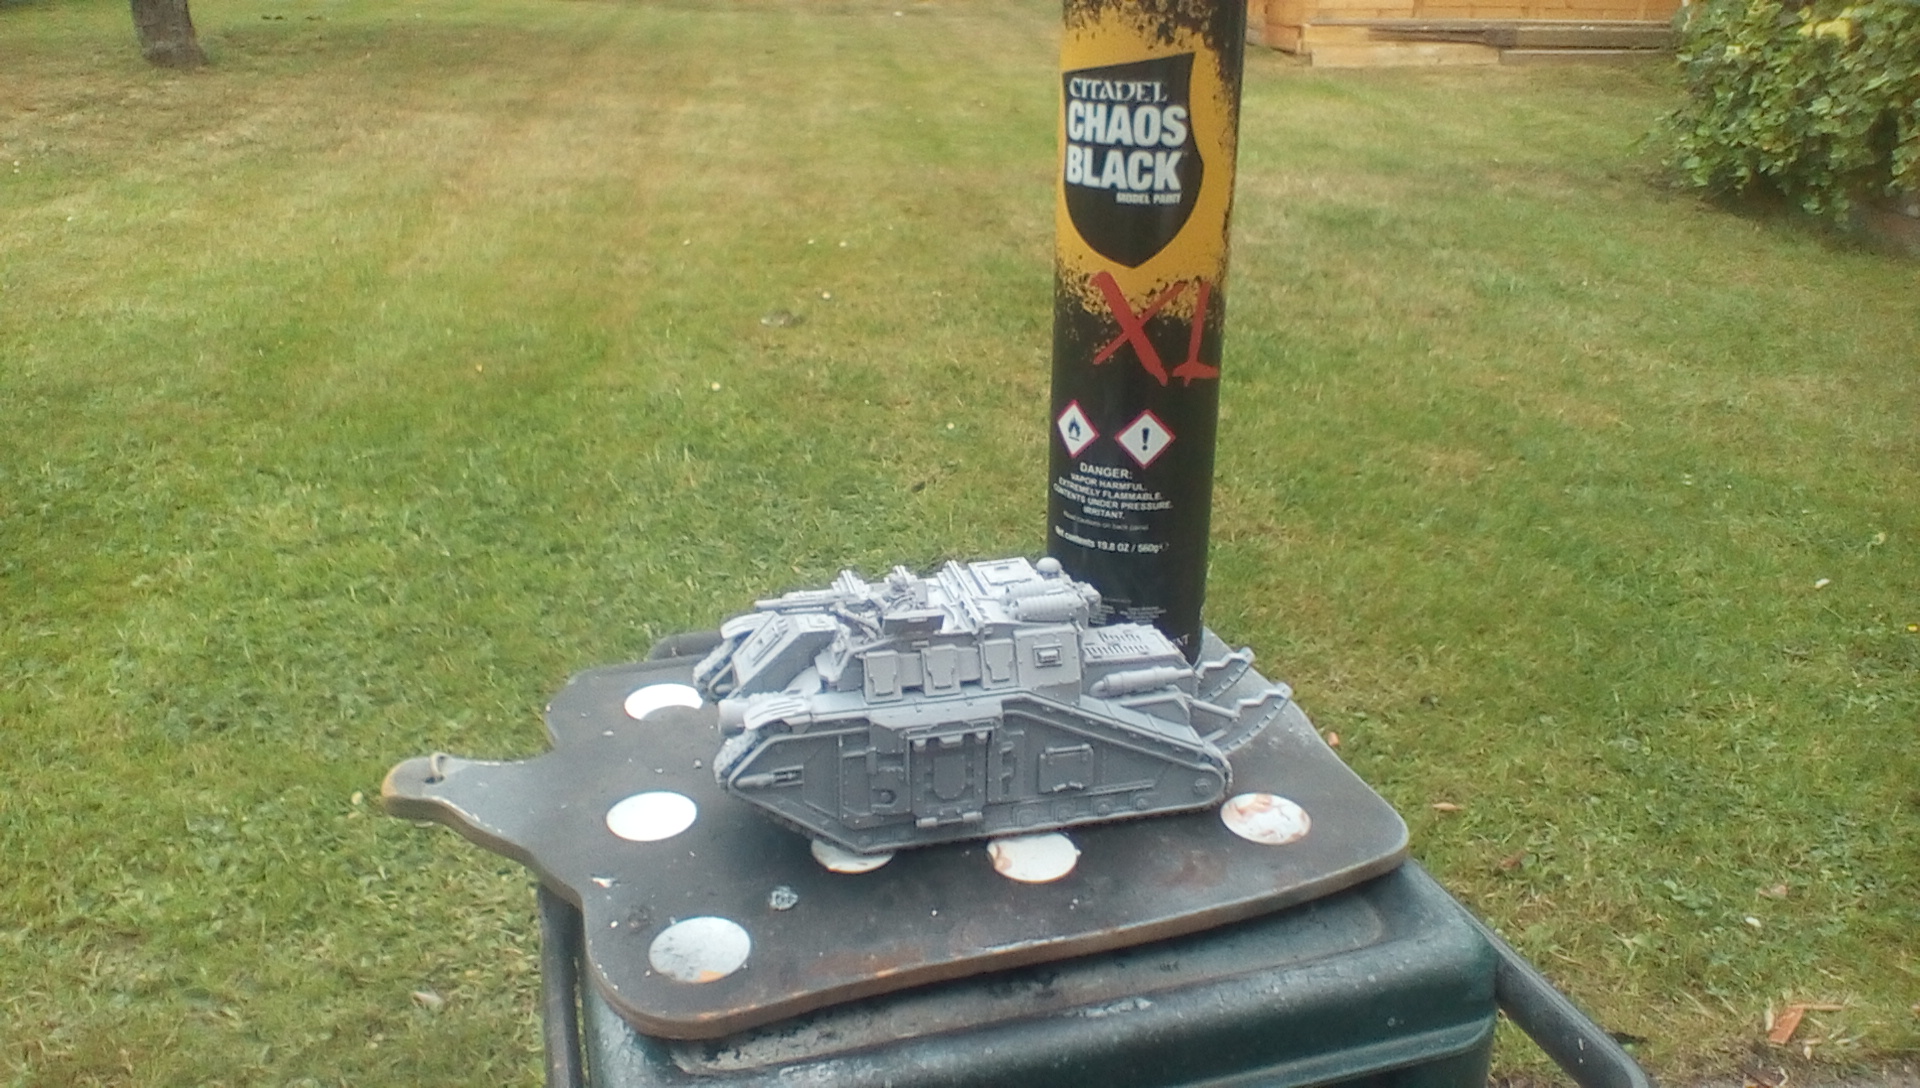
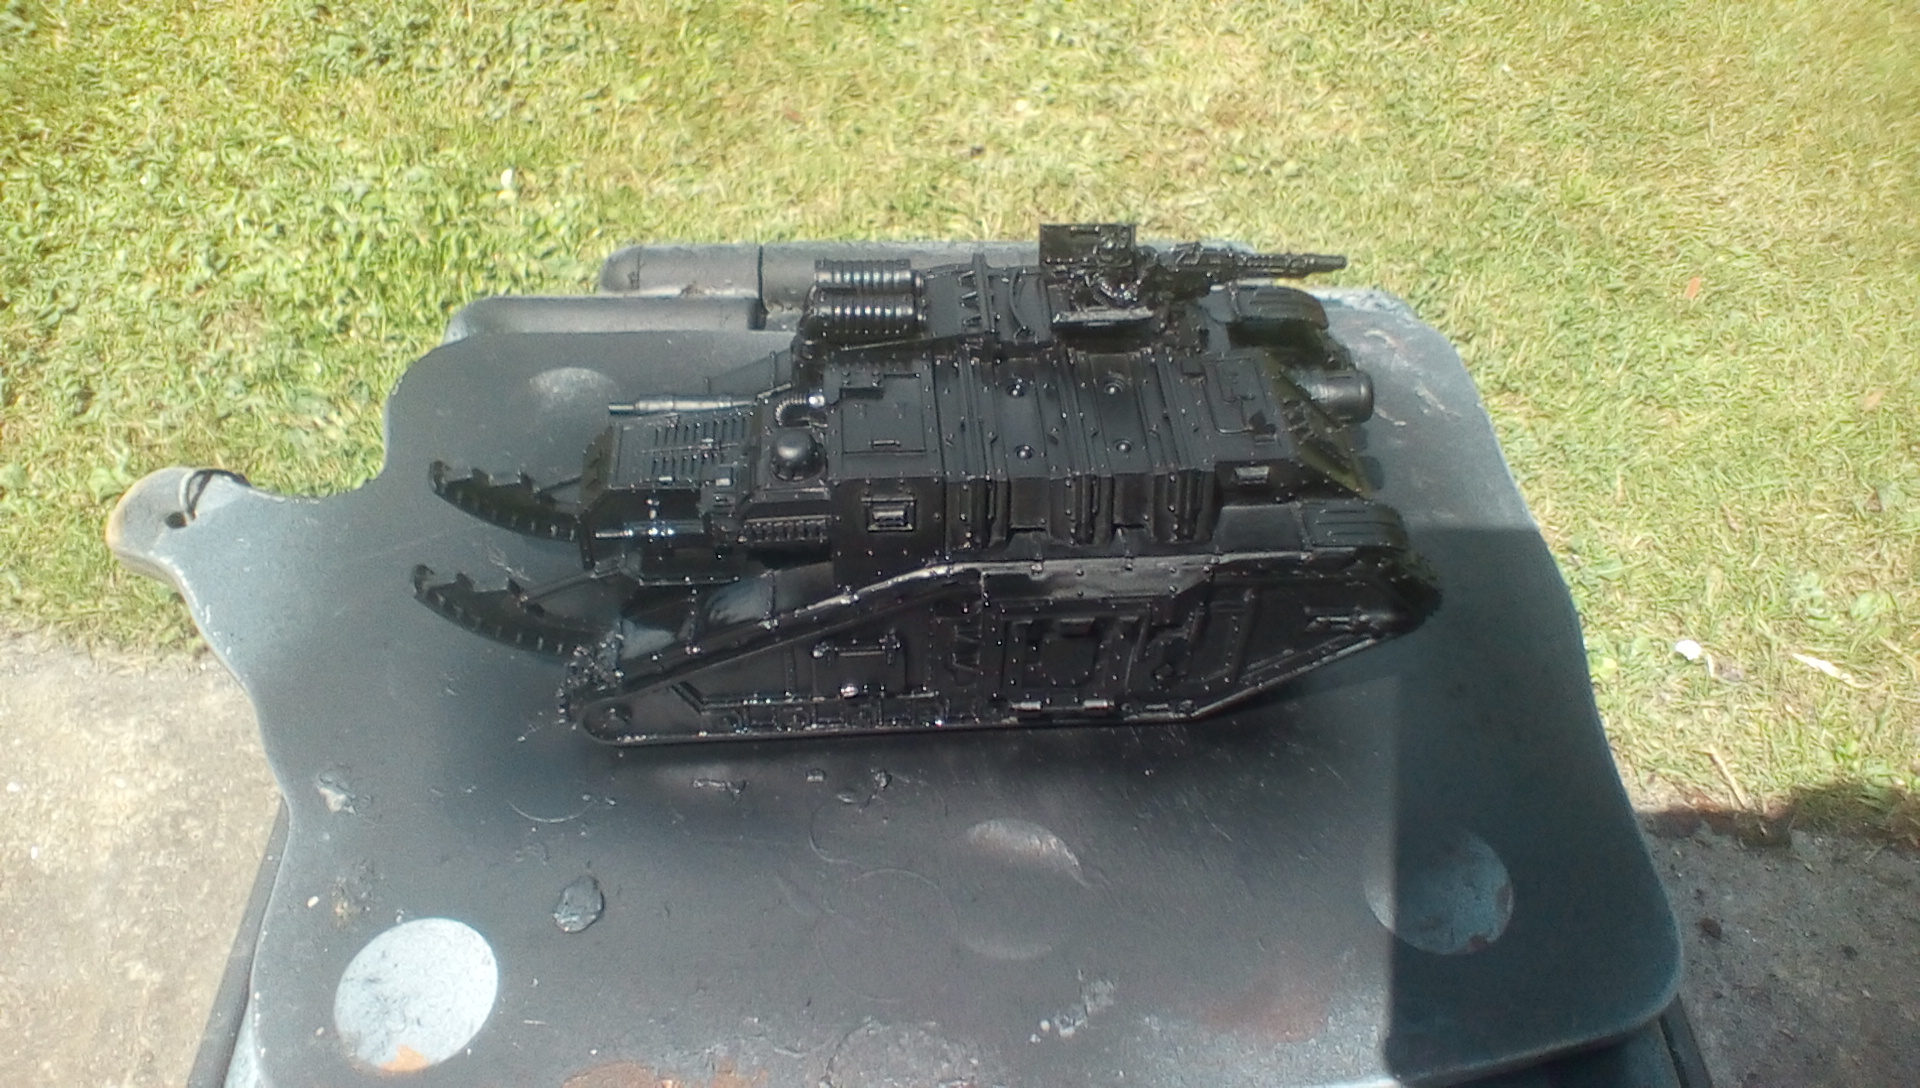
Once glued and I was happy with the overall construction, it was time for the undercoating. This was done outside for ventilation, as I tend to use a spray can of black or white to undercoat my miniatures. I use white if the subsequent layer coats of paint are to be bright e,g. when using yellow, but in this case I wanted to reinforce grime and darkness of the Savlar Chem-Dogs and so black was used. This will give a darker feel to the final paint job that I hope to achieve. I sprayed the underside first, and although this would not be seen on the table top, I feel it’s necessary.
Then leave the tank to fully dry. Having painted the Commander’s Tank earlier I have collected together the paints that I will need for this new tank. Although every tank will look slightly different, I want to keep a continuity through the base colours of blue and brown, even if I experiment a bit later with different shades, or if I run out of paint!
Time Elapsed:
60 minutes construction
10 minutes black undercoating (spray)
2 hours drying time

Colour Palette for Savlar Chem-Dogs
Colour Palette for Savlar Chem-Dogs
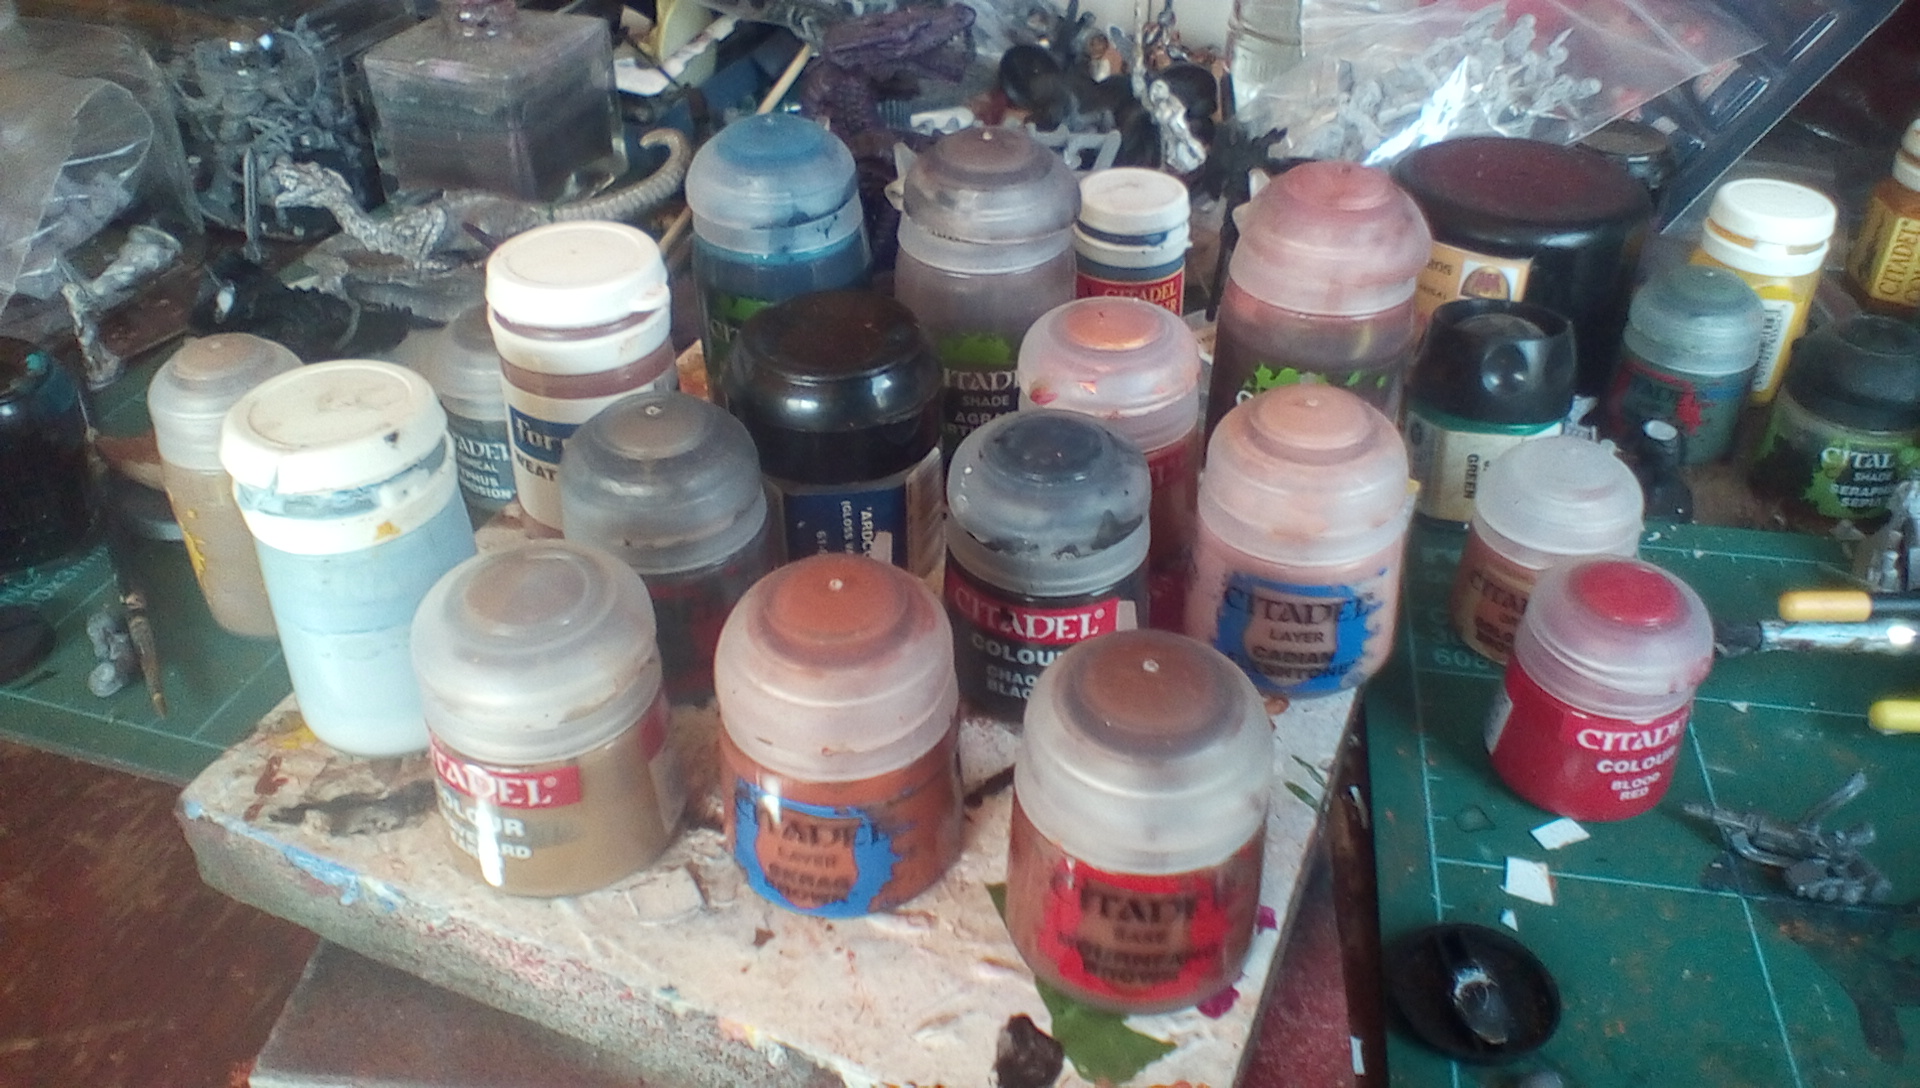
I’m using Citadel Paints (Acrylic).
Brown Base – Graveyard Earth equivalent will be Steel Legion Drab
Camouflage Stripes – Mounfang Brown and Skragg Brown
Blue Base – Light Blue-Grey from 1990s! Equivalent will be Space Wolves Grey
Washes – Agrax Earthshade (Brown); Drachenhof Nightshade (Blue)
Tracks – Leadbelcher
Other Paints: Chaos Black; Troll Slayer Orange; Blood Red; Cadian Fleshtone; Reikland Fleshshade
Weathering Powder: Light Rust
 Colour Palette for Savlar Chem-Dogs
3rd Armoured Division Savlar Chem-Dogs – Tank A- Solar Auxilia Dracosan Armoured Transport – Painting Part 1
3rd Armoured Division Savlar Chem-Dogs – Tank A- Solar Auxilia Dracosan Armoured Transport – Painting
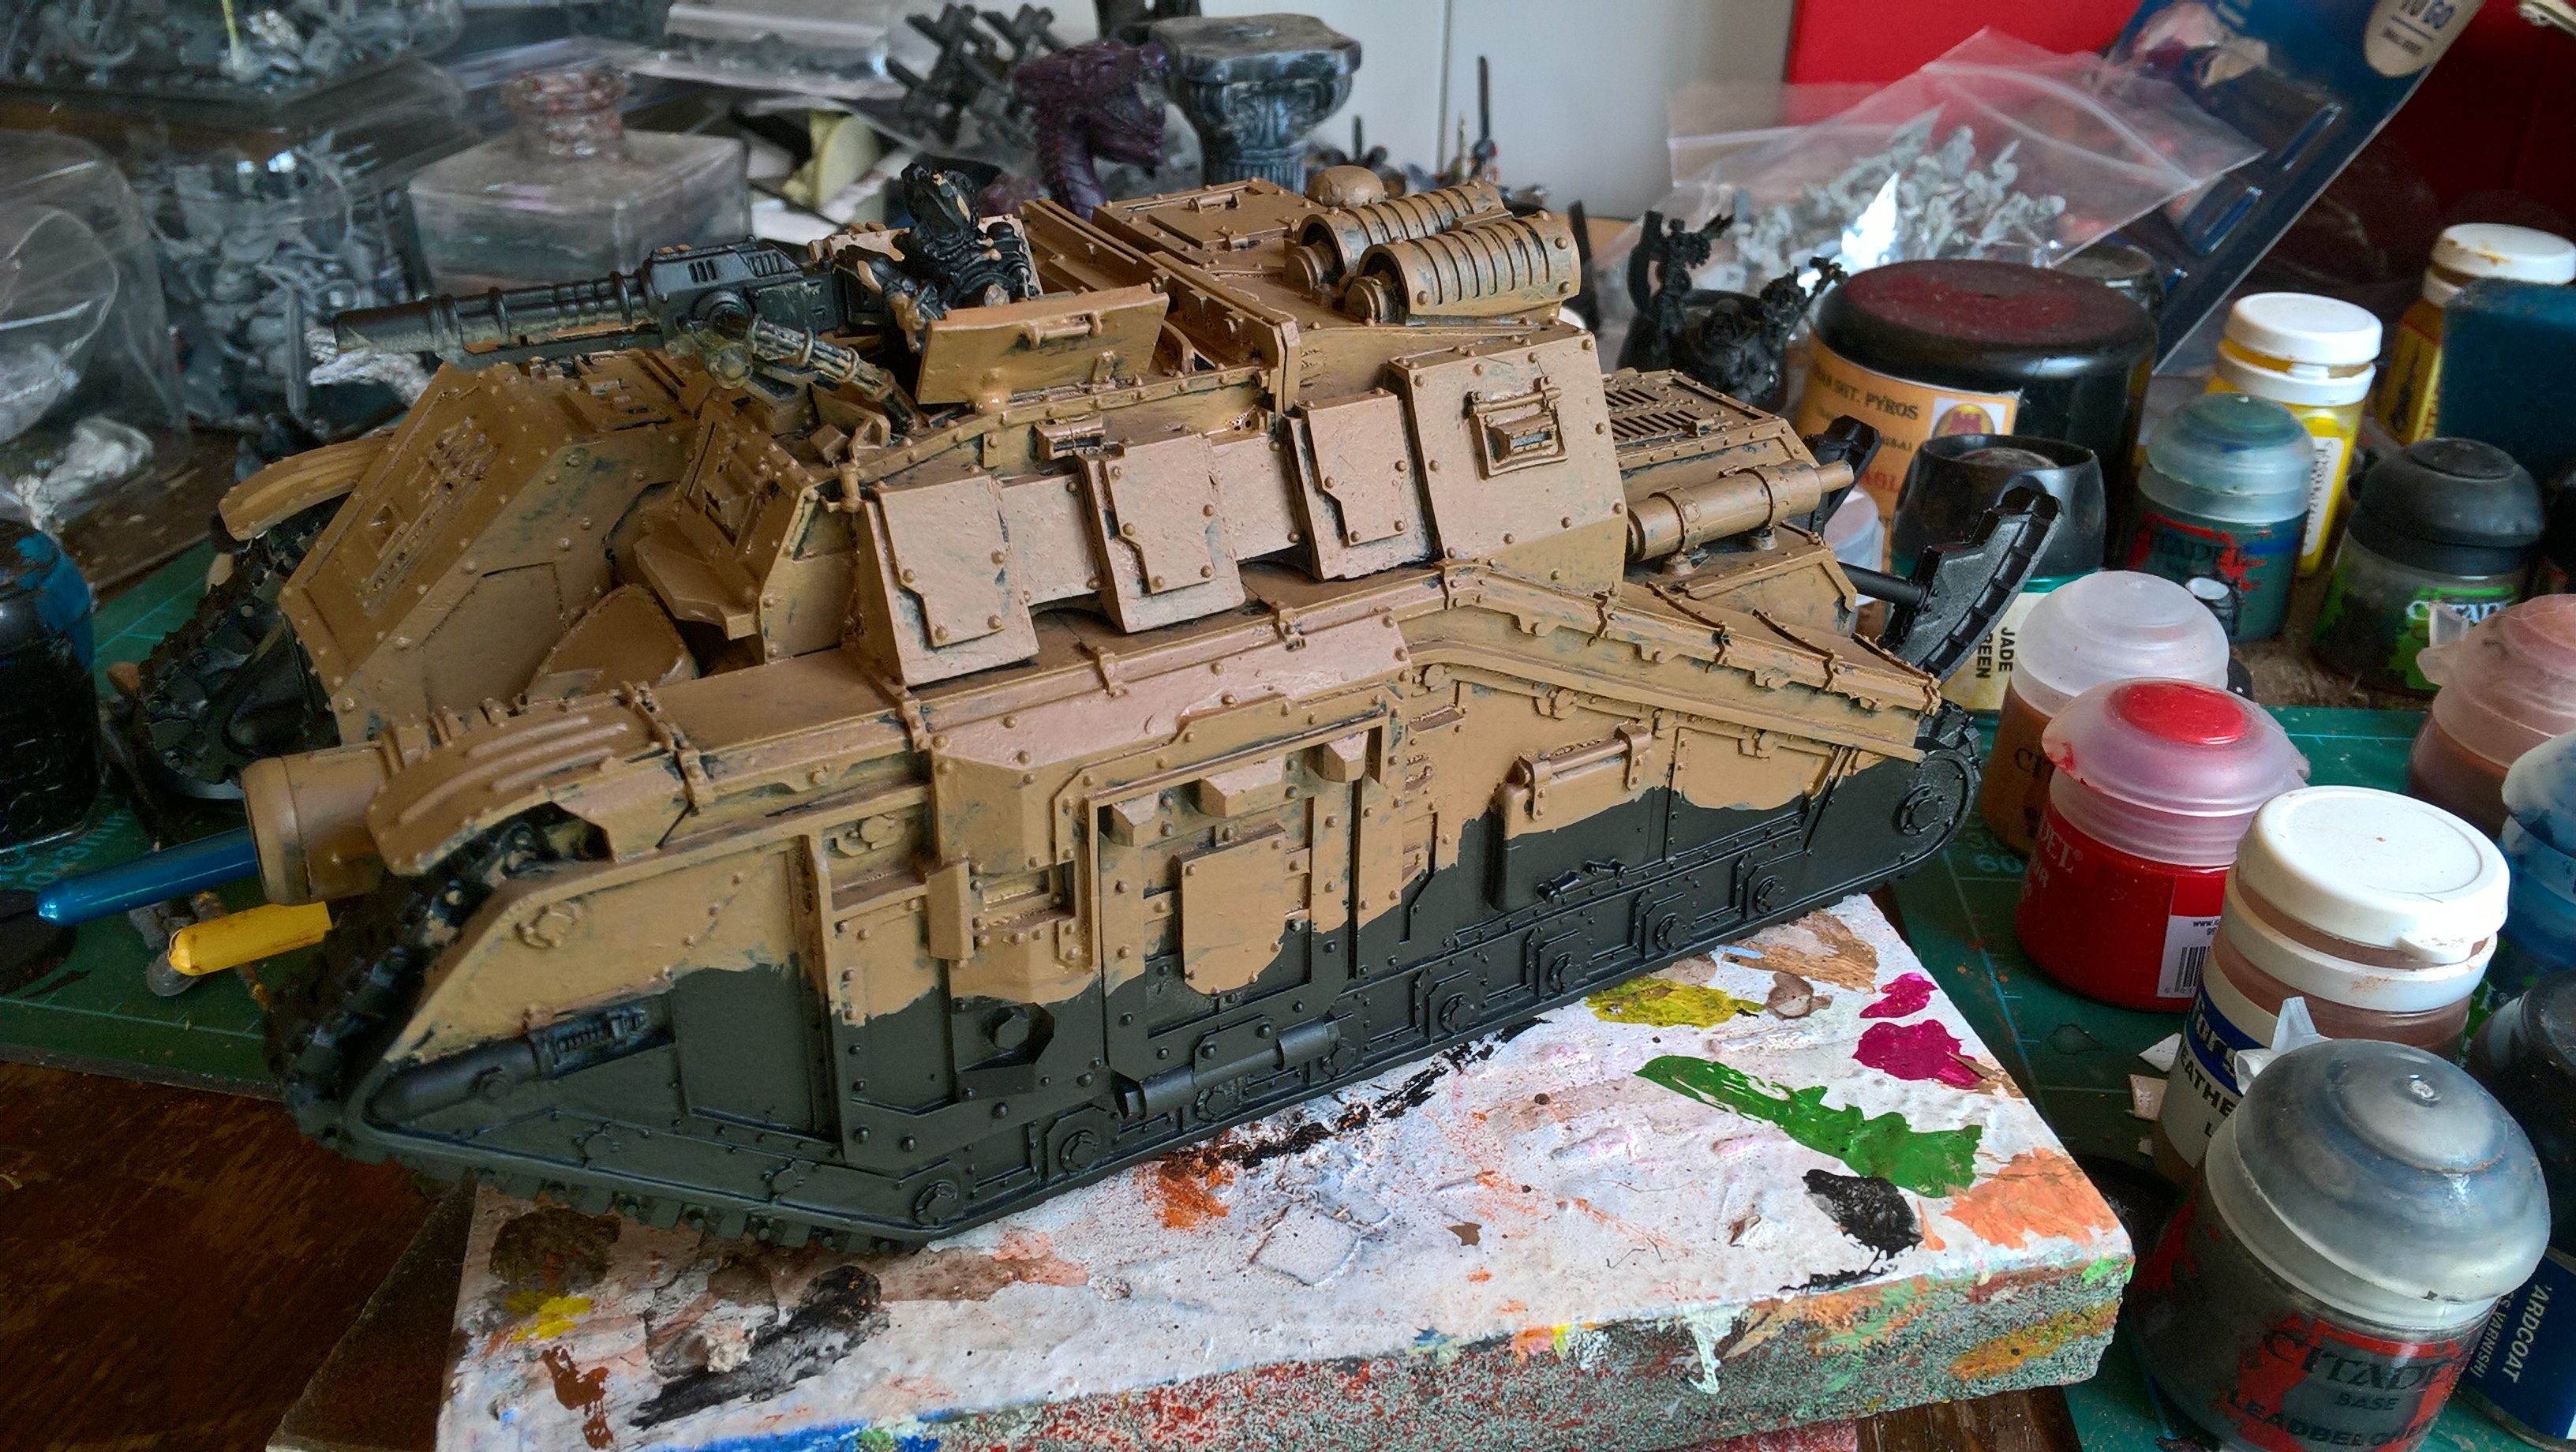
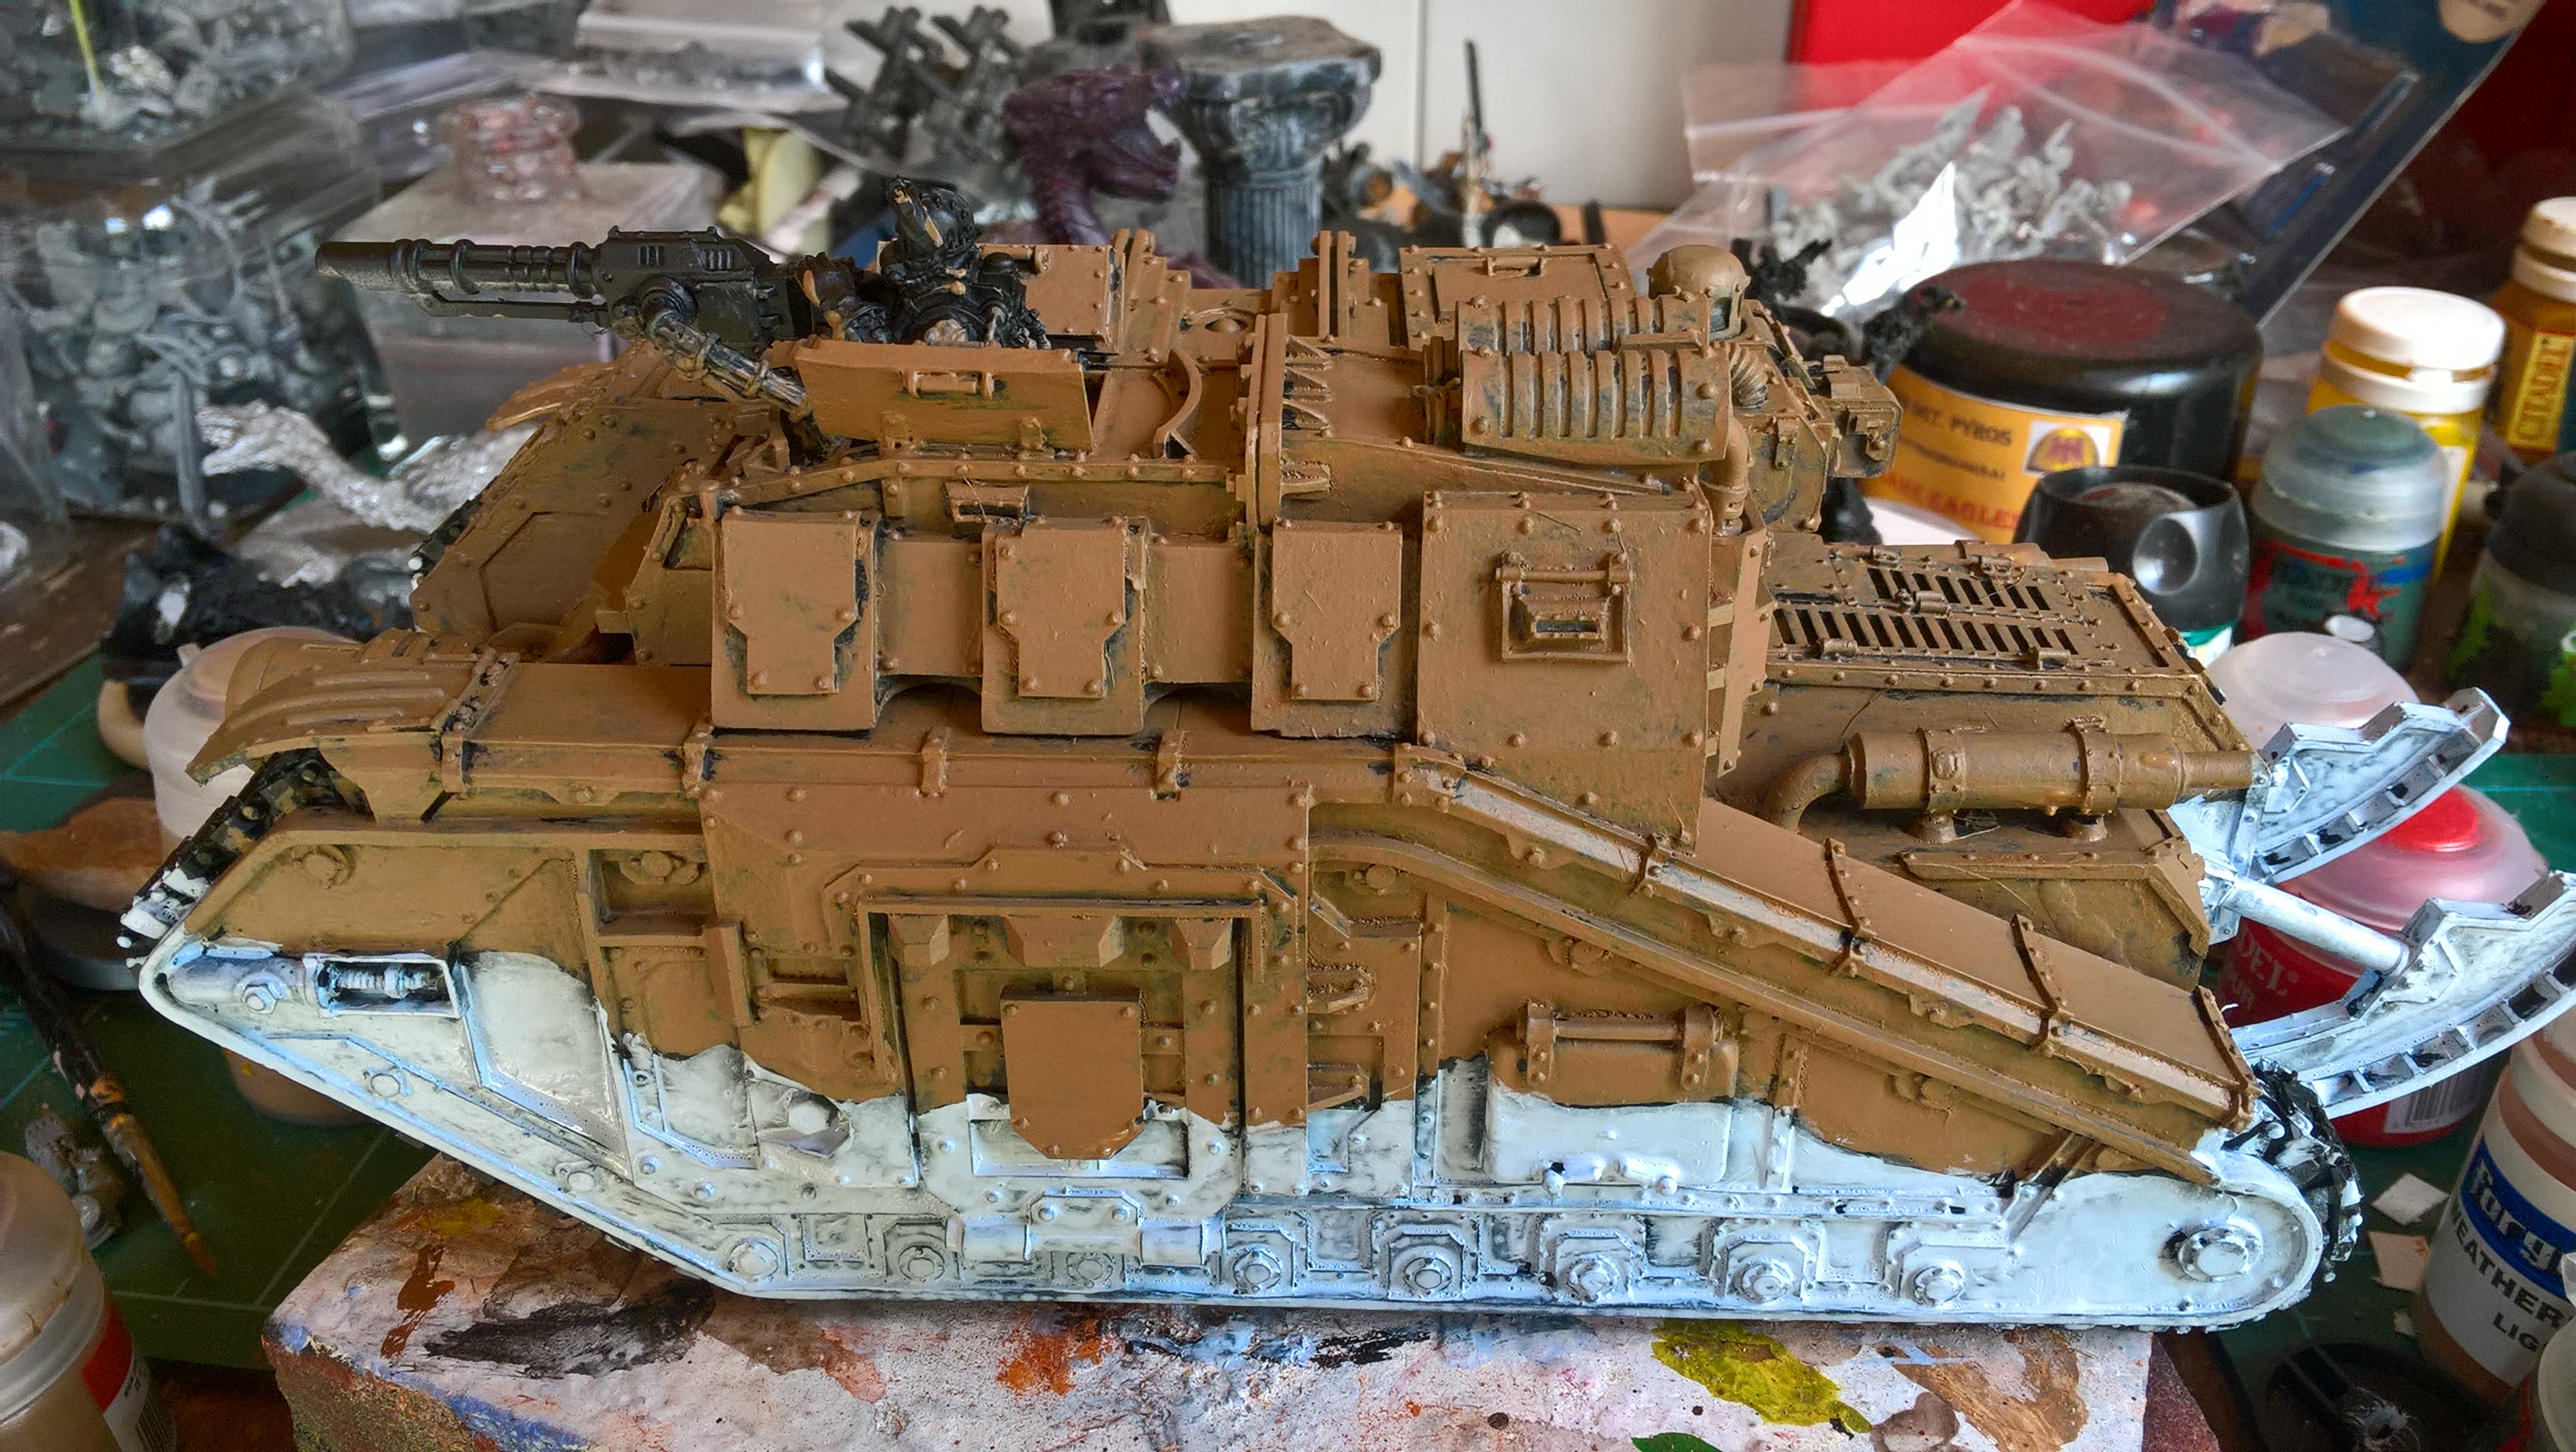
Stage 1: Base Colours
I used a size 8 brush to paint Graveyard Earth brown on the top half of the tank and, once dried, Space Wolf Grey on the bottom half. I used a size 0 brush to get a defined edge between the two main block colours.
Time Elapsed:
40 minutes painting Brown
30 minutes drying time
40 minutes painting Grey
30 minutes drying time
3rd Armoured Division Savlar Chem-Dogs – Tank A- Solar Auxilia Dracosan Armoured Transport – Painting Part 2
3rd Armoured Division Savlar Chem-Dogs – Tank A- Solar Auxilia Dracosan Armoured Transport – Painting
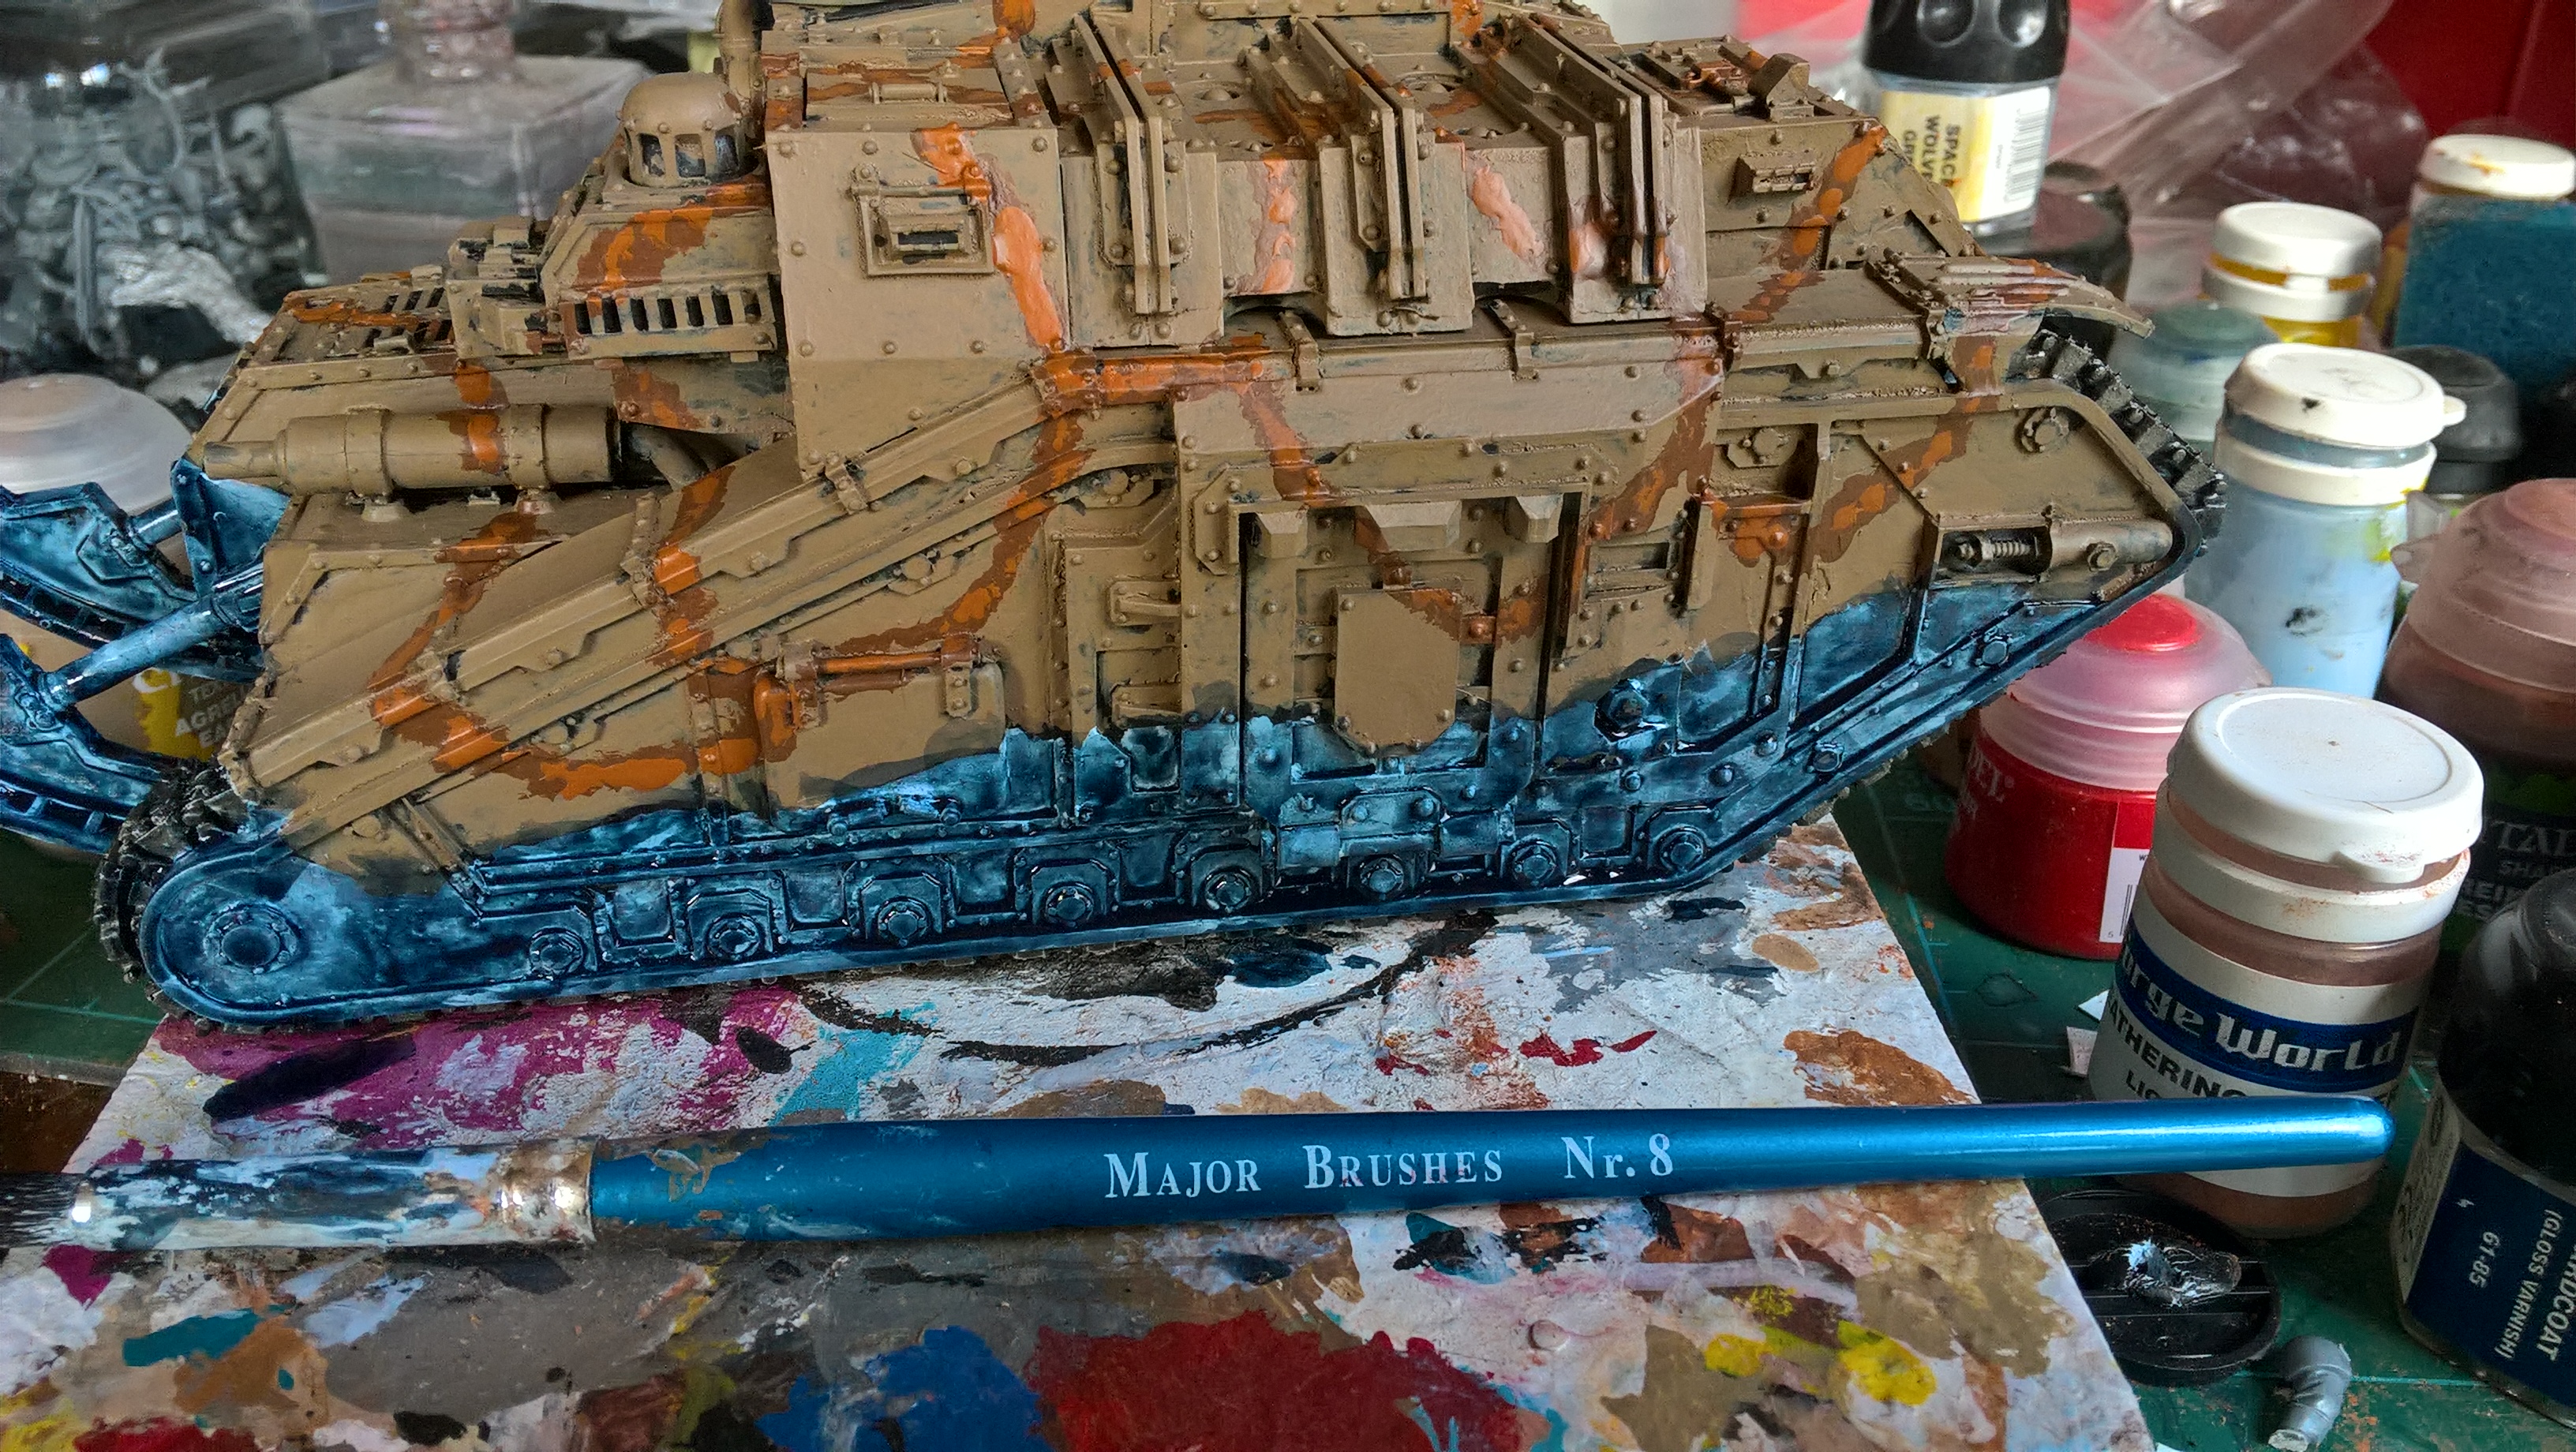
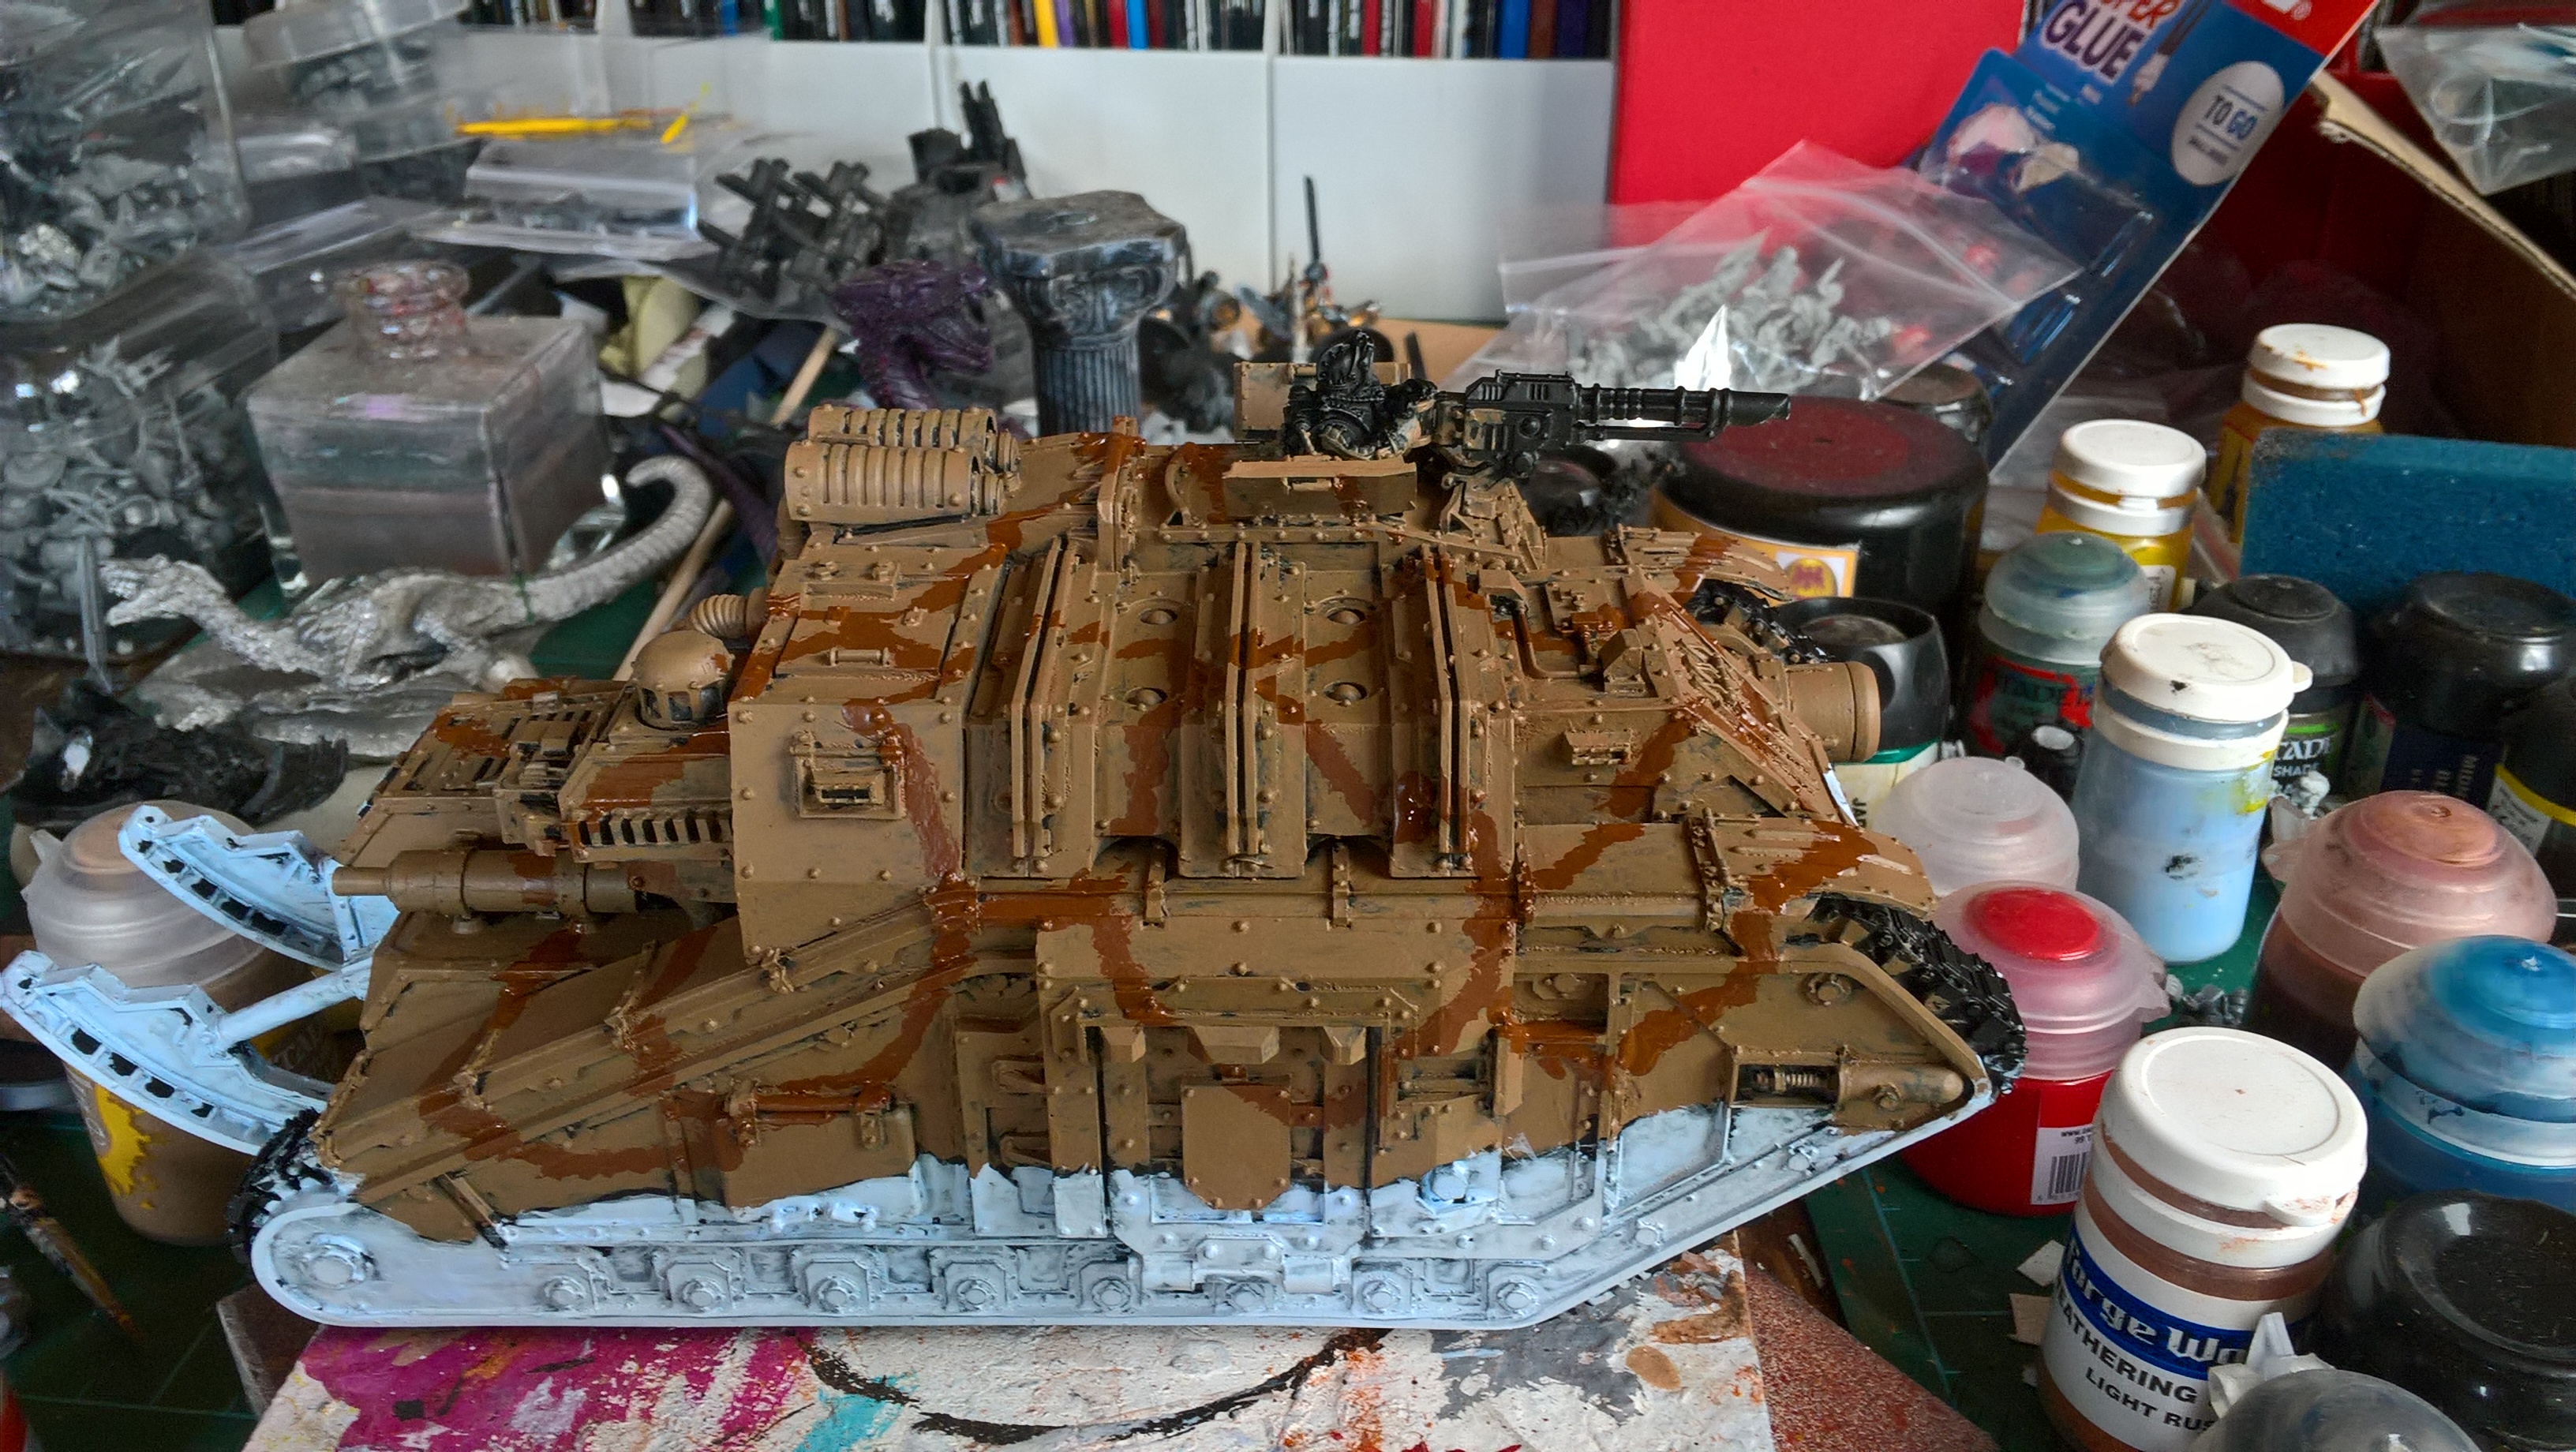
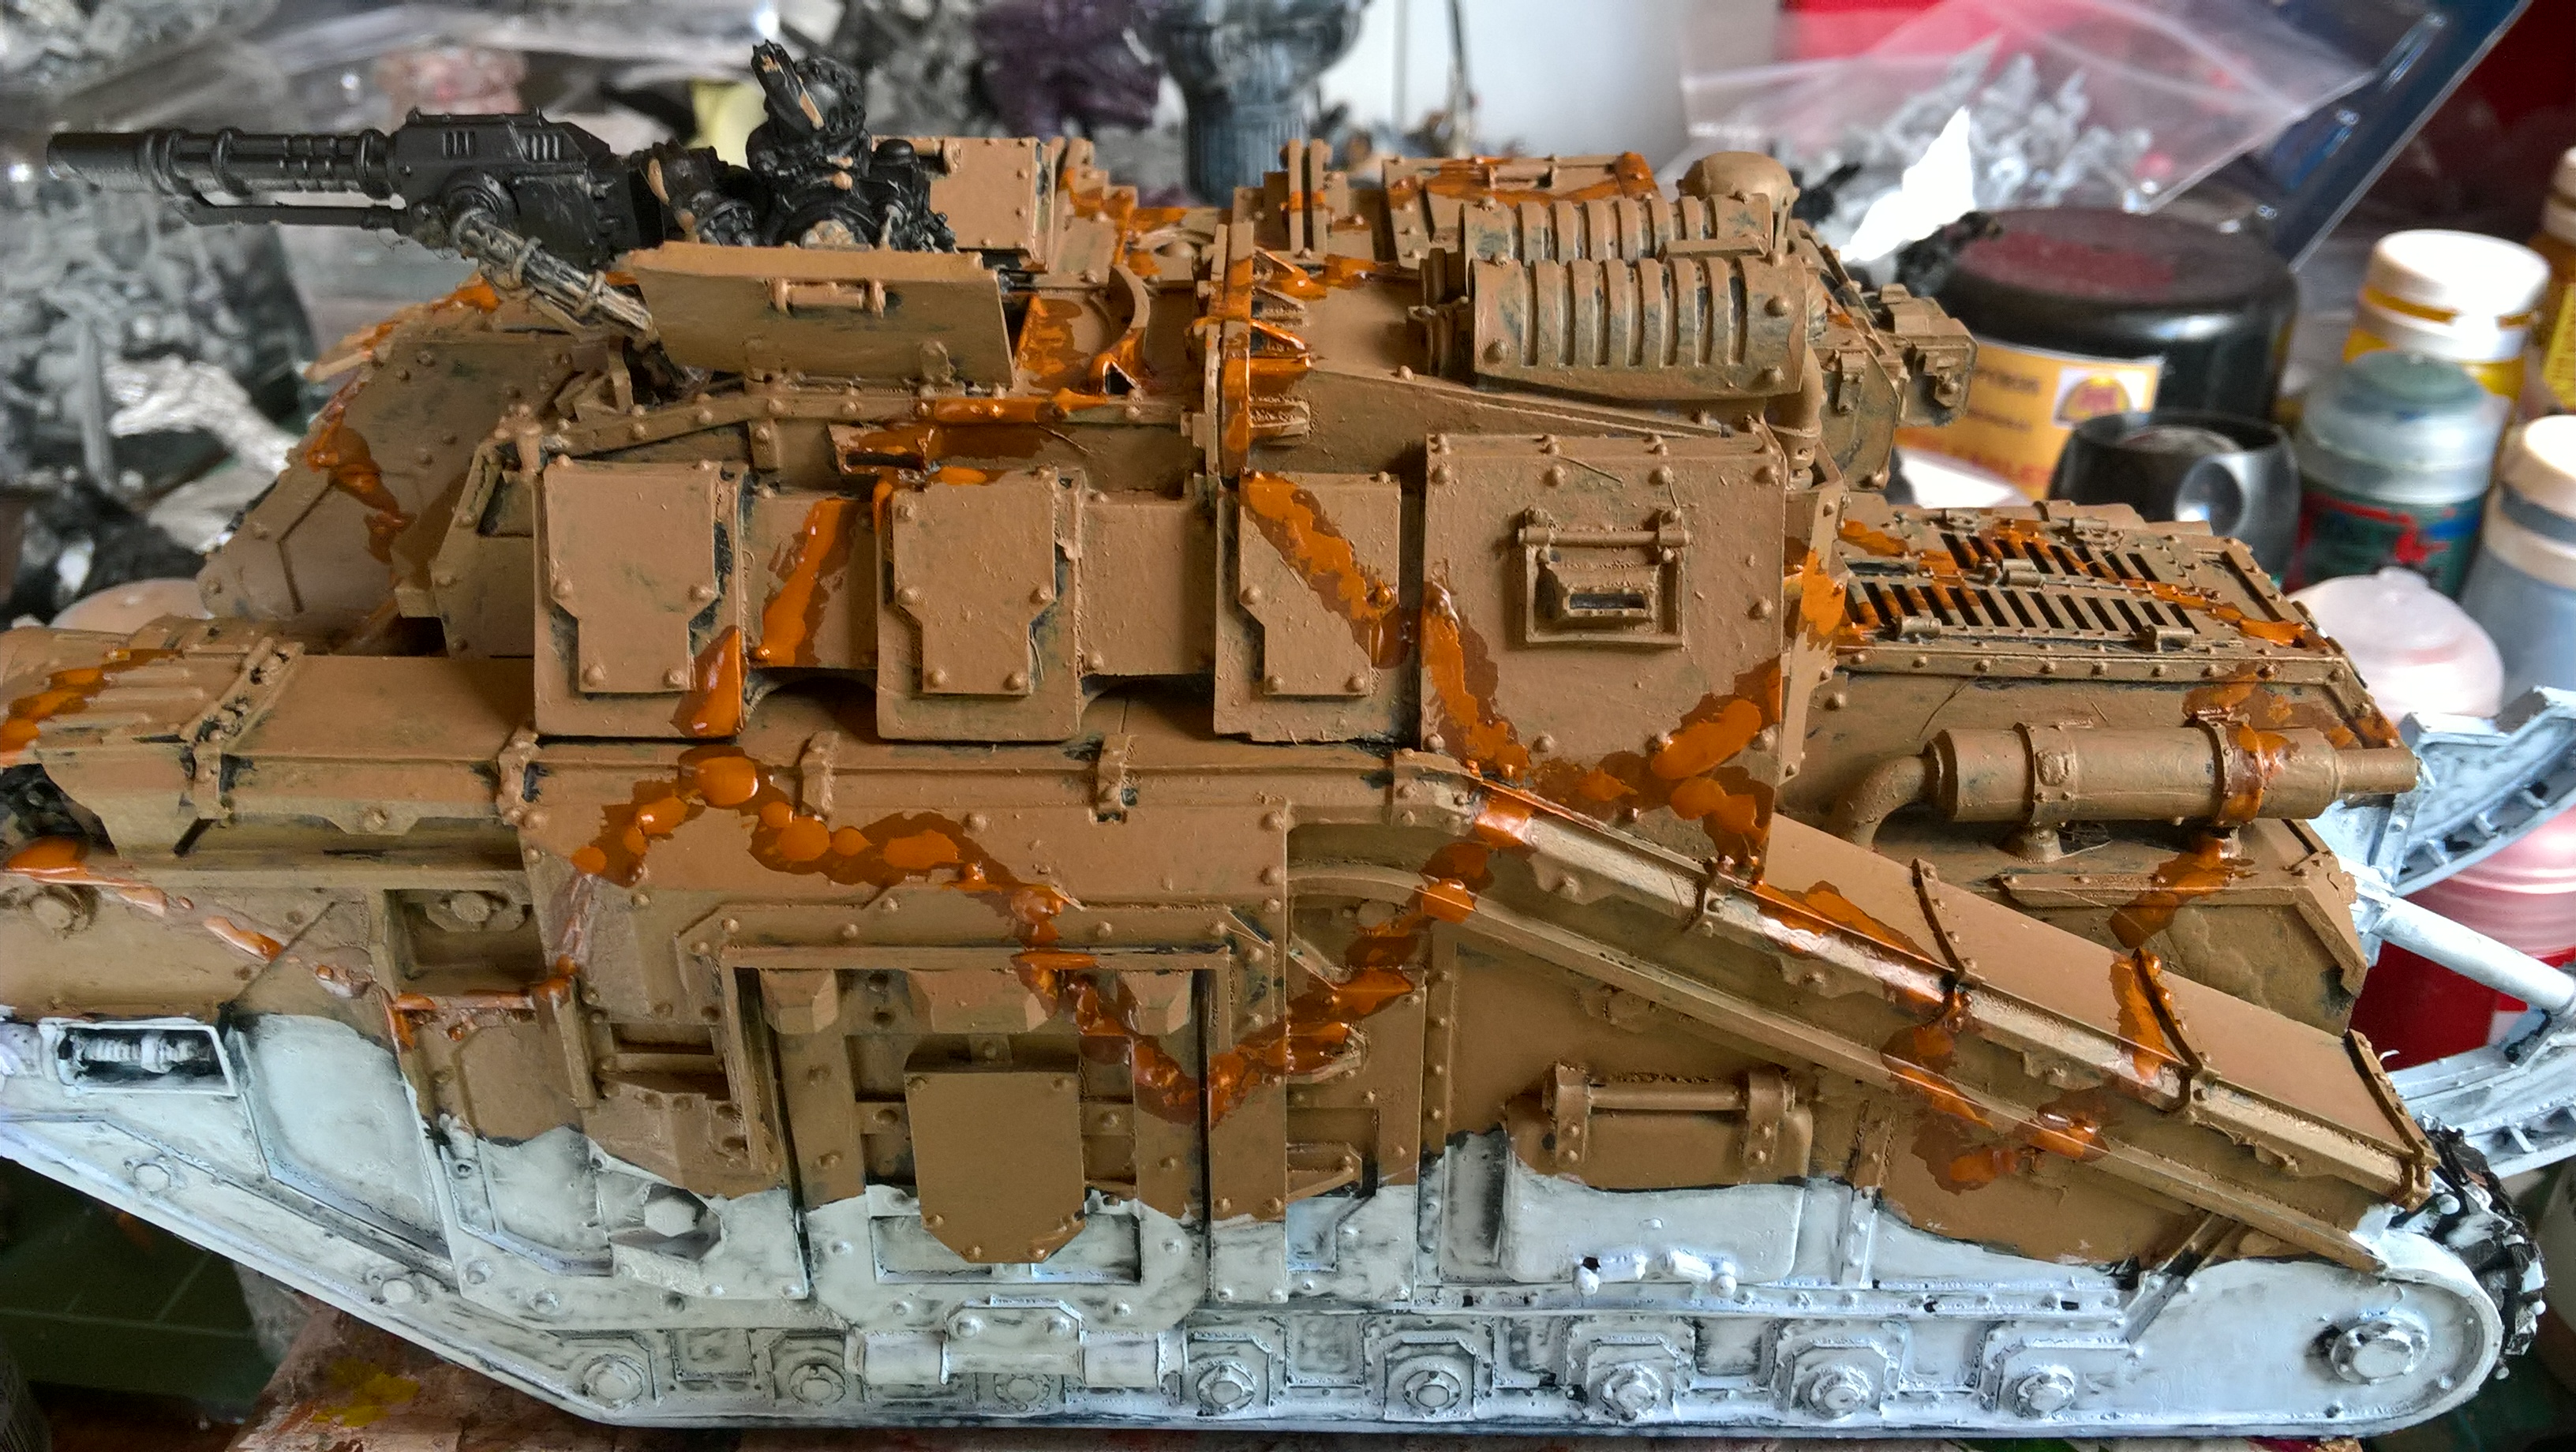
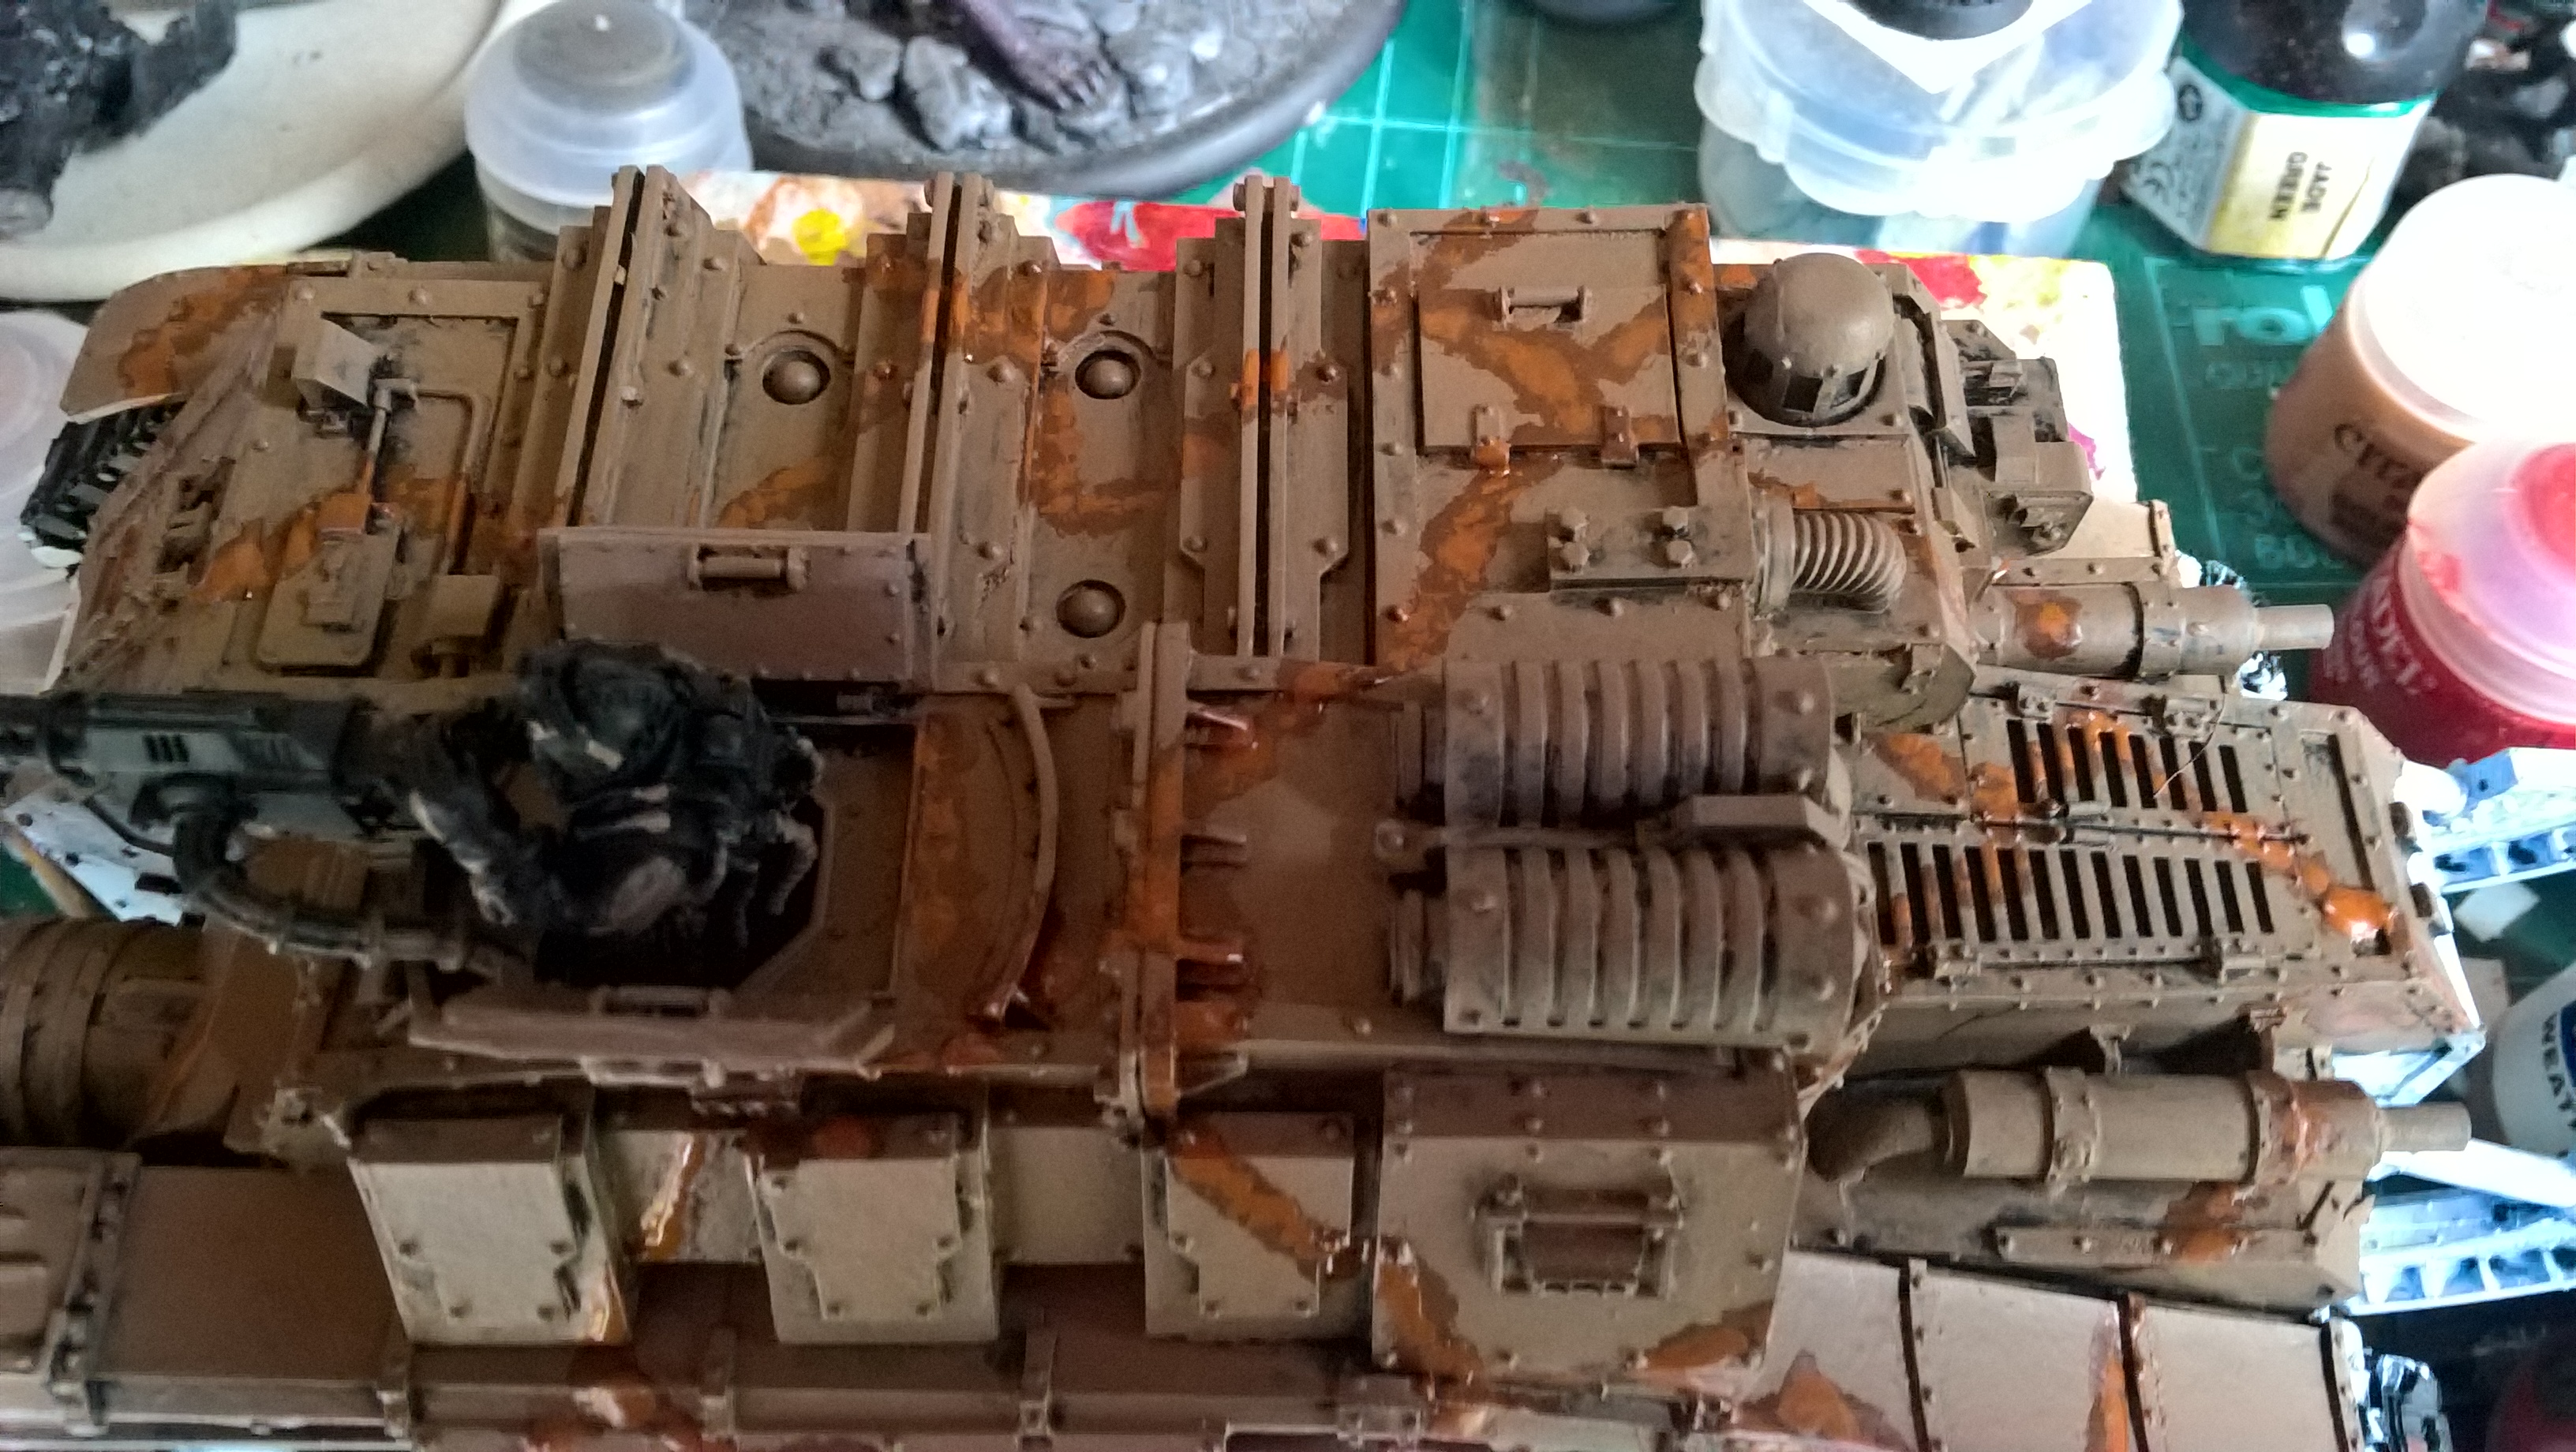
Stage 2 – Camo Stripes
Using a size 1 customised brush, that I had cut the point off, I liberally and freely painted Mournfang Brown dark stripes across the top half of the tank and before the paint dried, dabbed Skragg Brown in the centre of the stripes to blend the two shades of brown together.
Time Elapsed:
30 Minutes Painting Stripes
60 Minutes drying time
3rd Armoured Division Savlar Chem-Dogs – Tank A- Solar Auxilia Dracosan Armoured Transport – Painting Part 3
3rd Armoured Division Savlar Chem-Dogs – Tank A- Solar Auxilia Dracosan Armoured Transport – Painting
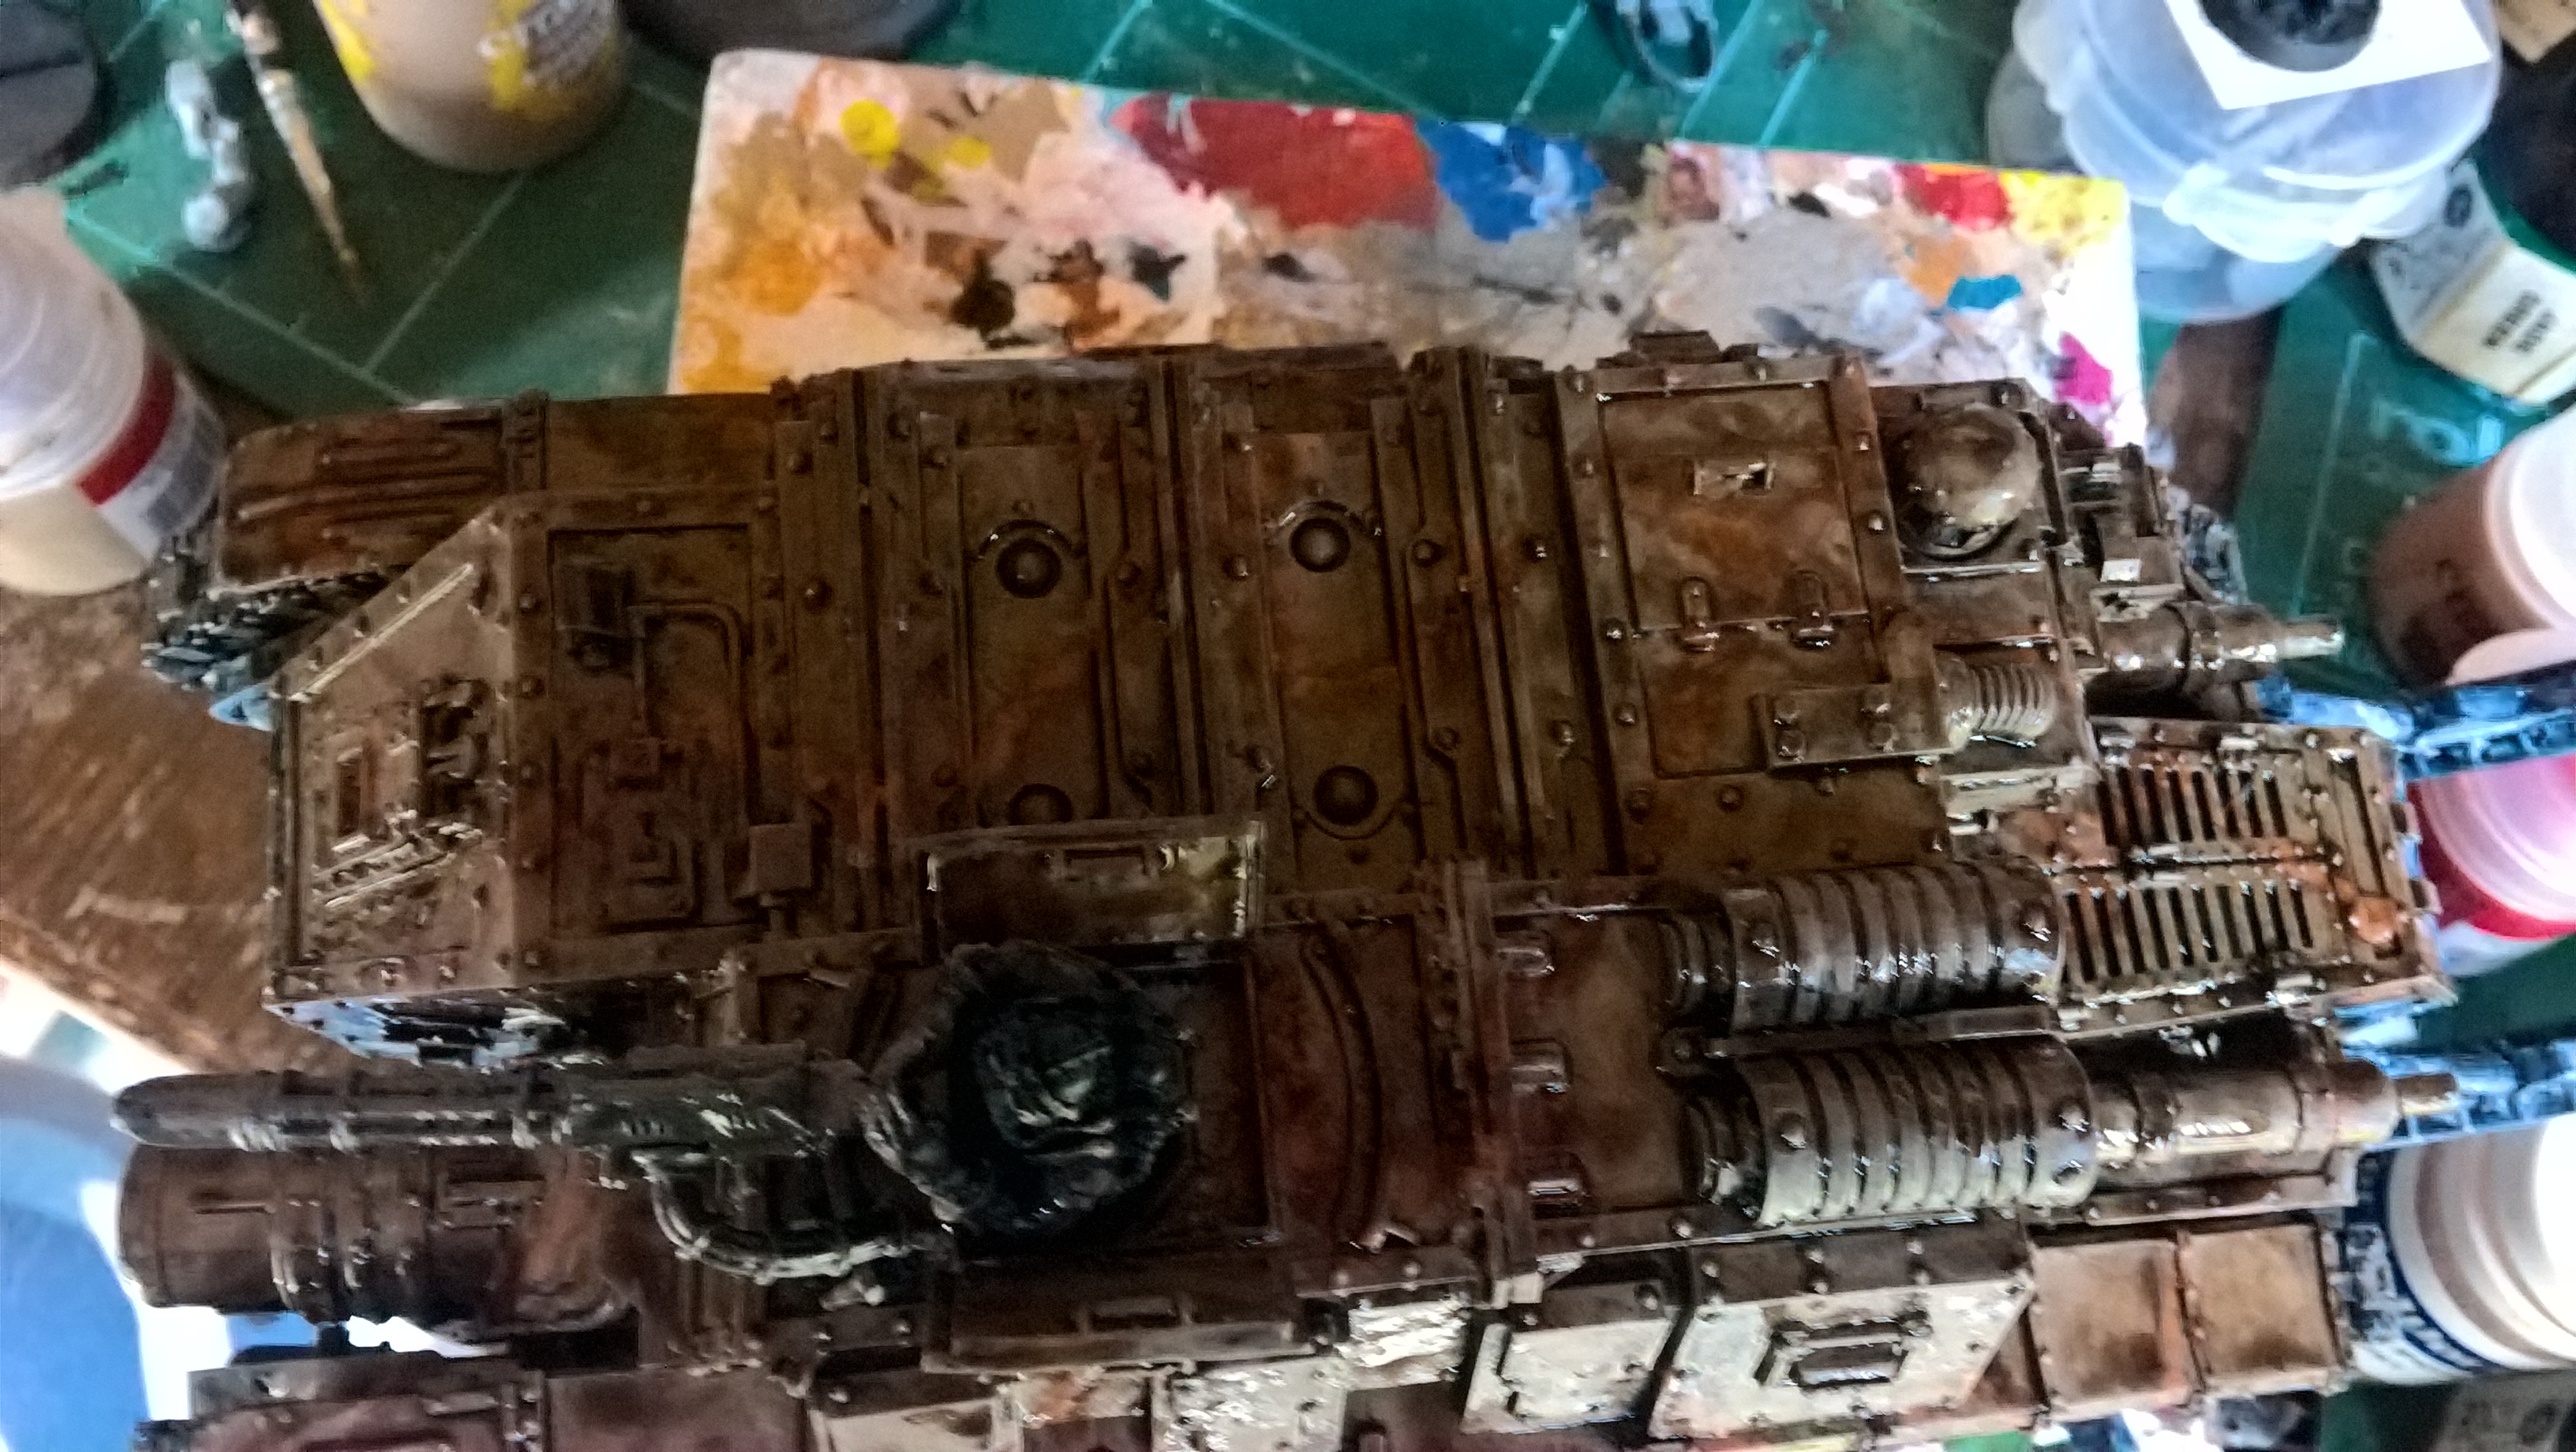
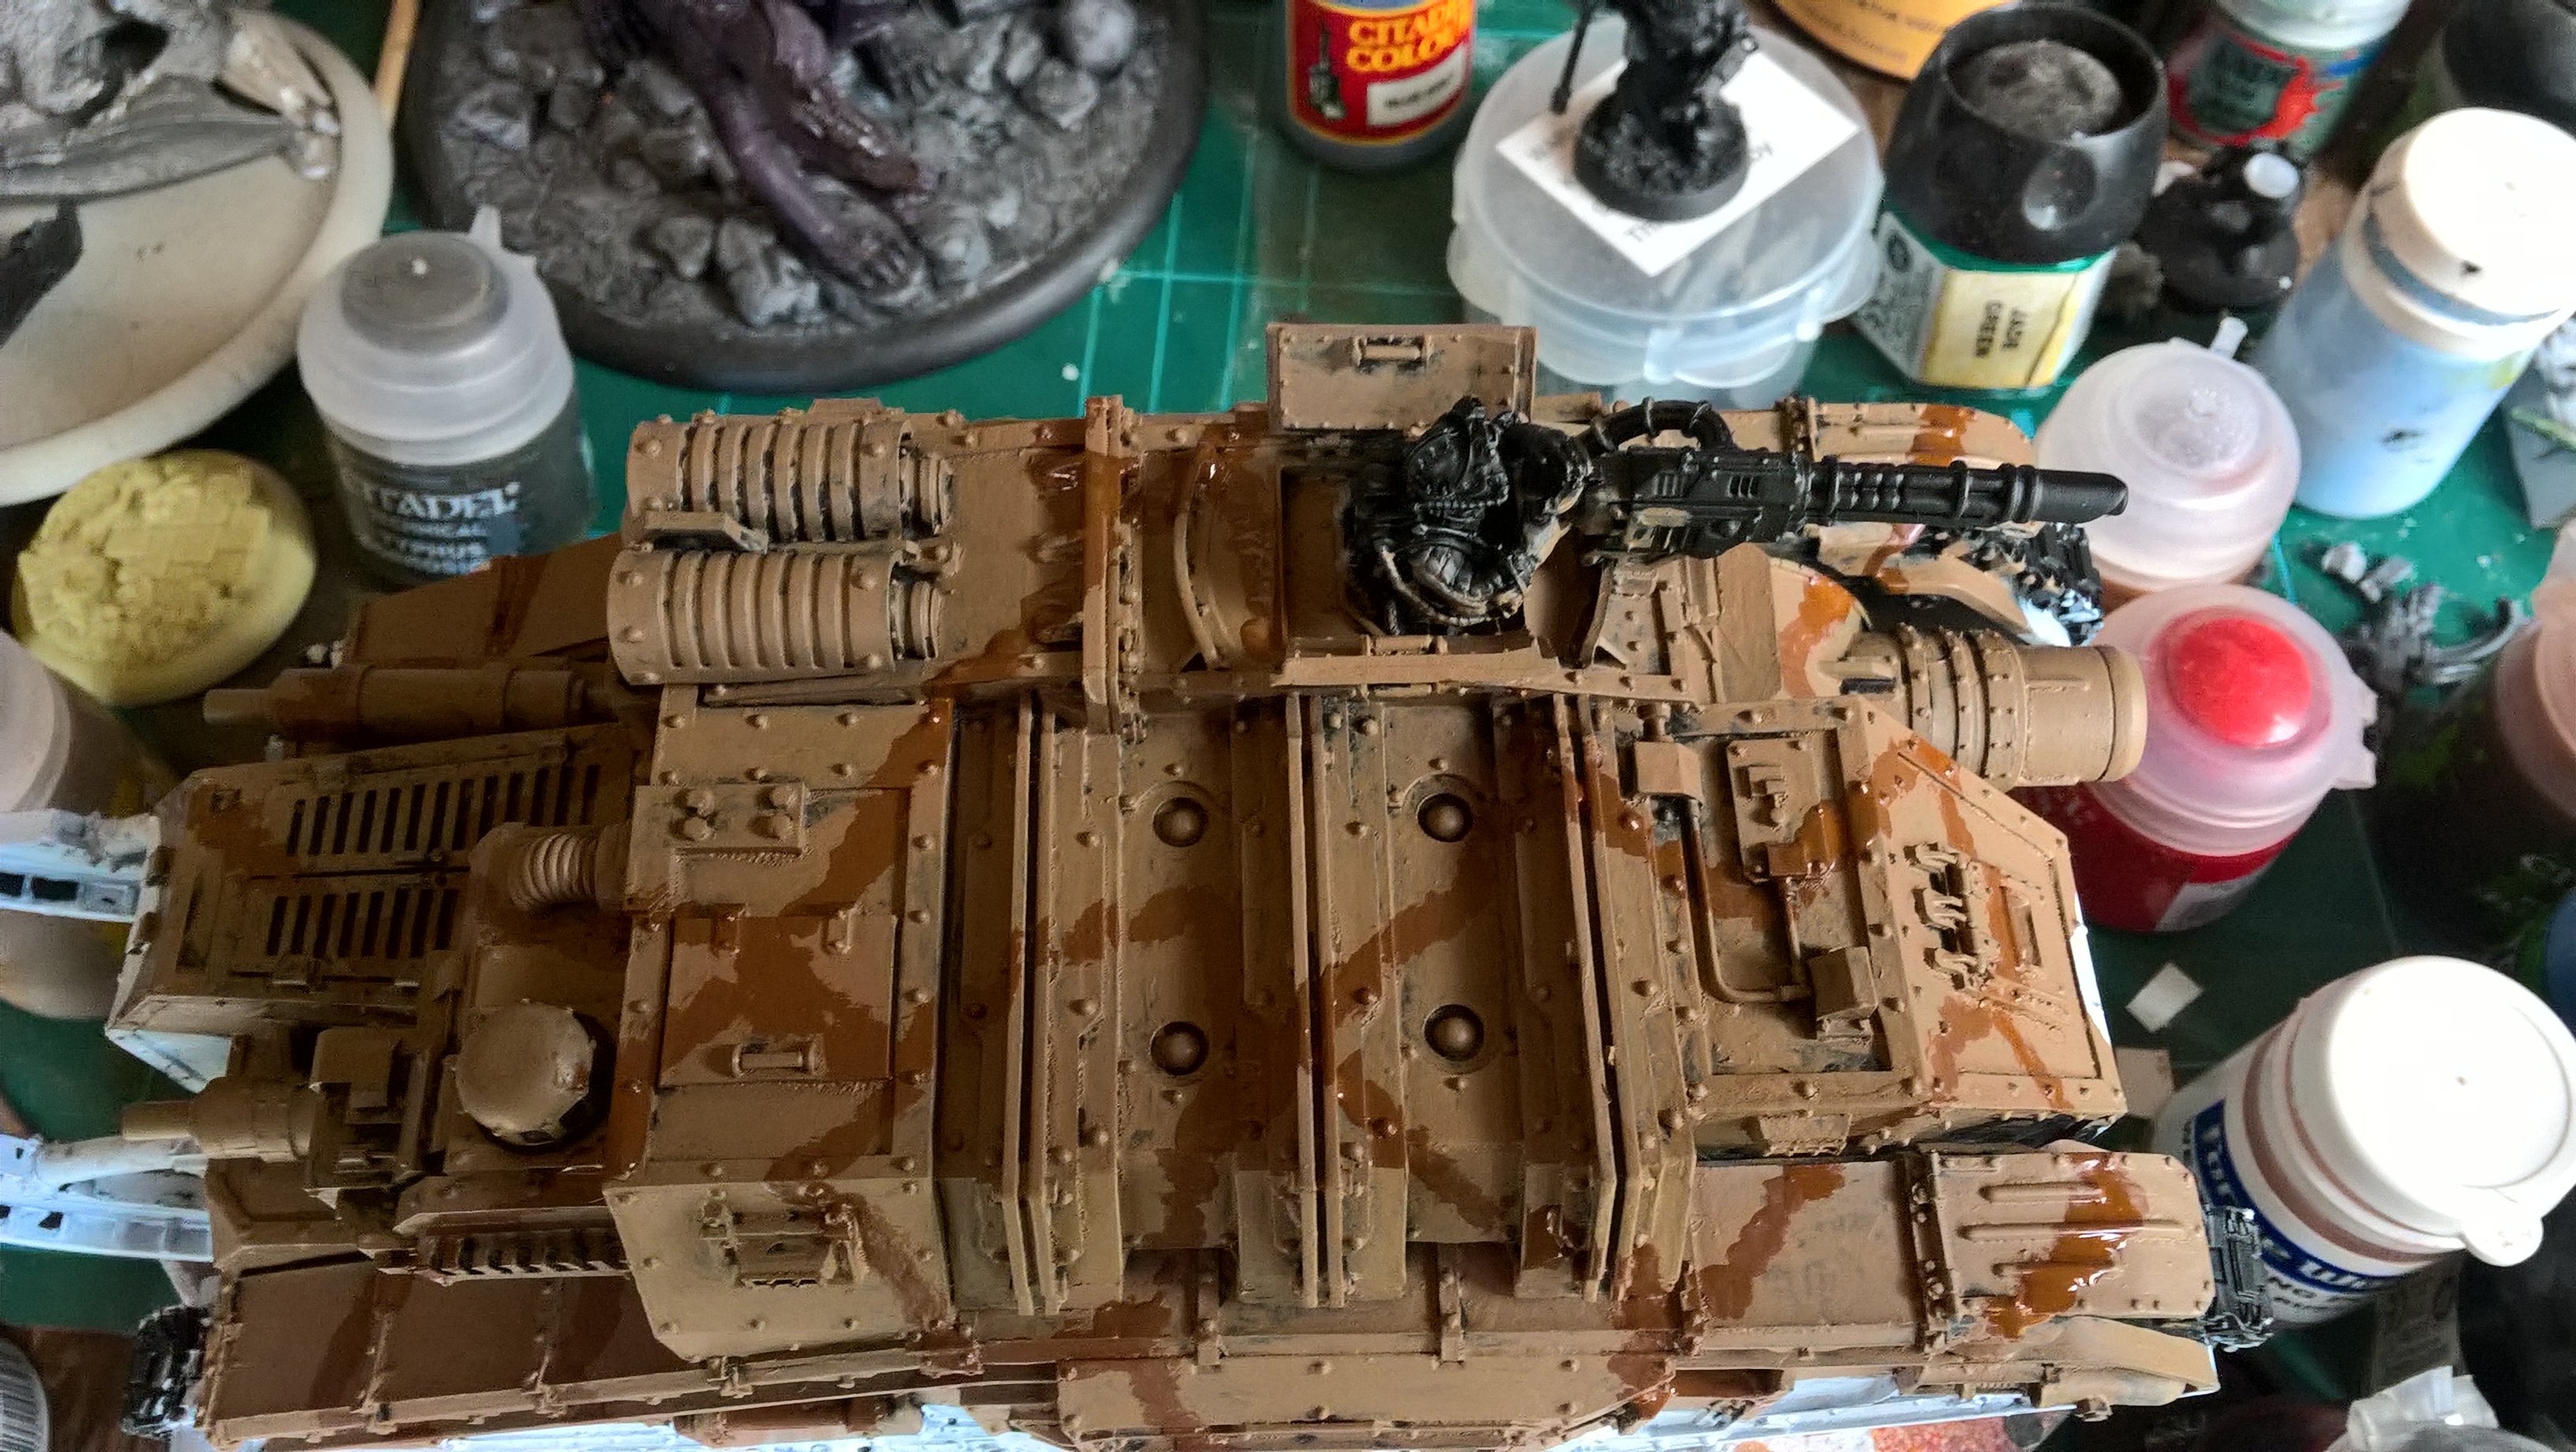
Stage 3 – Washes
Fairly straight-forward, but starting with the lower half of the tank, I liberally painted Drakenhof Nightshade all over the light blue area. You end up pushing the paint into the recesses, but ensure that an even single coat covers the area. It’s important to leave to dry, before tackling the brown wash with Agrax Earthshade. then I left the tank to dry overnight again.
Time Elapsed:
20 Minutes Blue Wash
30 Minutes drying time
20 Minutes Brown Wash
60 Minutes drying time (Overnight)