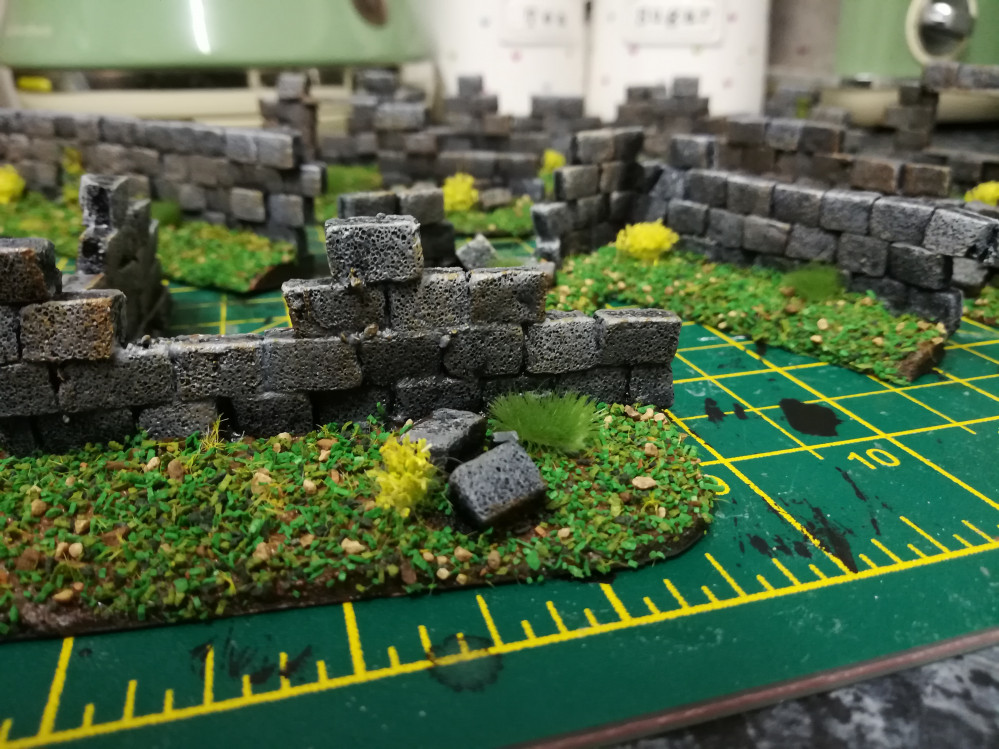
From zero to hero, a terrain journey
Recommendations: 44
About the Project
I got back into the hobby after a 15-odd year absence and wanted to rope my wife into playing. What's a great way to capture someone's imagination? A table full of terrain! I've made way more than I need but it's just as fun as the miniatures, so I thought it was about time to write about it.
Related Game: Burrows & Badgers
Related Genre: Fantasy
This Project is Active
Frostgrave Mausoleum
I’m half-heartedly interested in Frostgrave, mostly I like that it specifies some interesting terrain features to build.
To start with I’m attempting the Mausoleum, which is represented as a four-sided building with one doorway in each face. The terrain piece should be in a 6″ square area.
My actual mausoleum building is smaller than that, but I’m basing it to the 6″.
Overall the terrain piece will have a ‘reclaimed by the forest’ theme and include a set of overgrown gravestones and some sickly-looking trees to go with it!
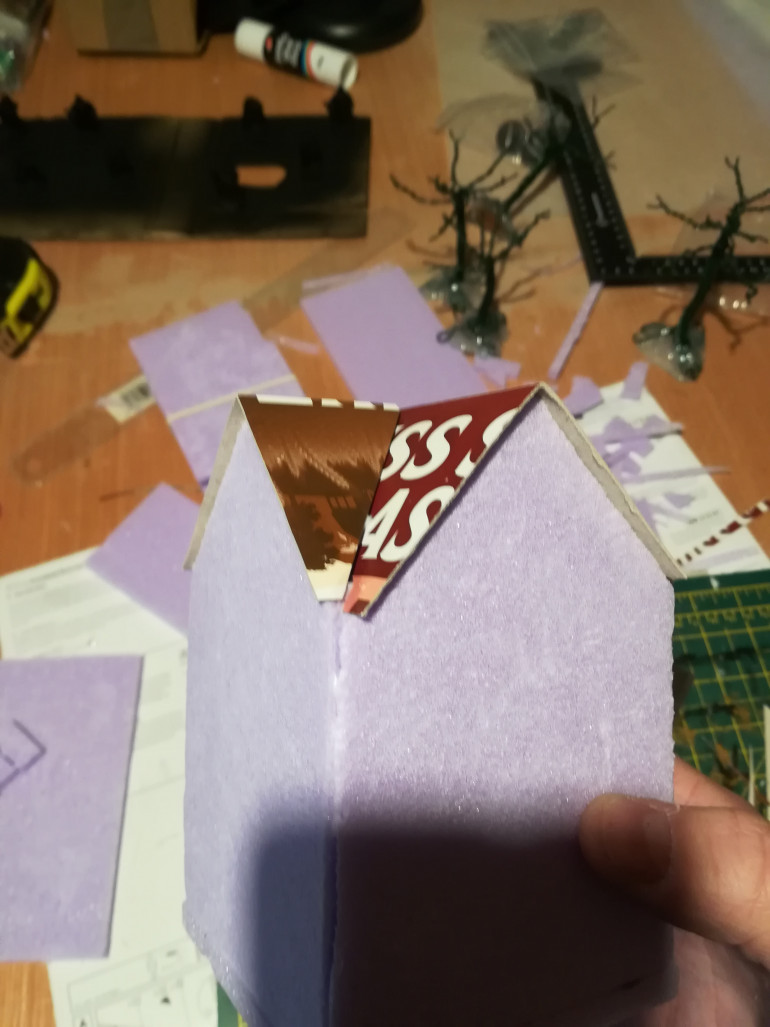
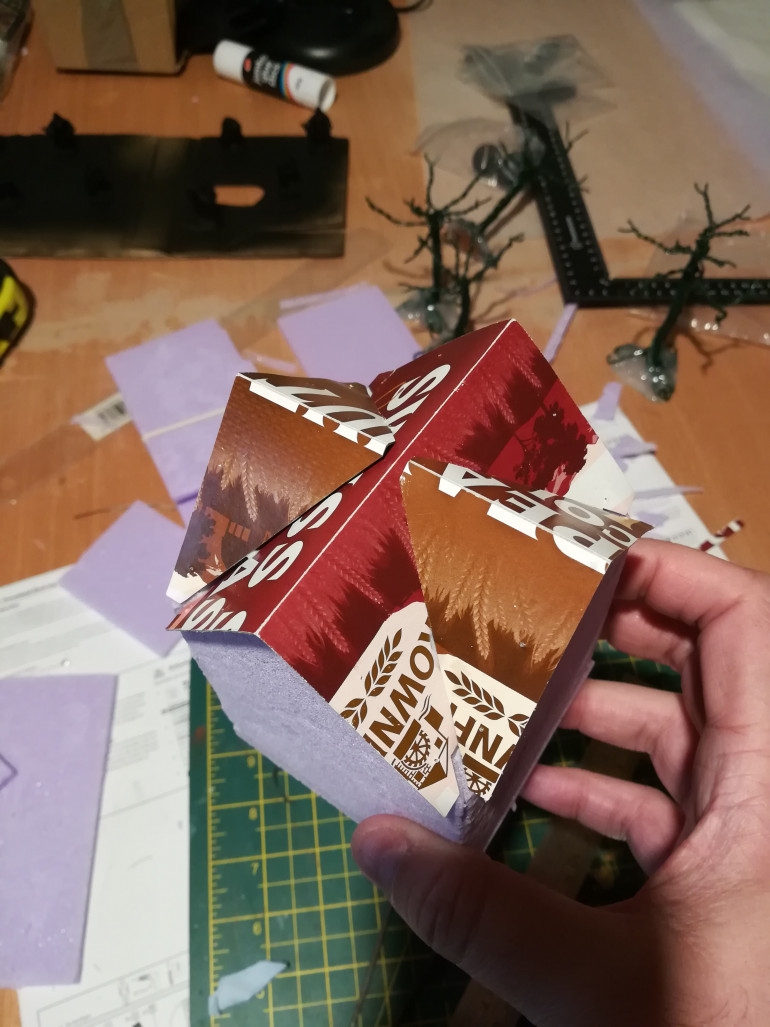
The actual shape of the building was pretty simple, I wanted a square with a four-way gabled roof so I just needed four of the same shape to build upon.
I mitred the inside edges then glued, pinned and held together with elastic bands to get my square shape, it’s come out pretty nicely.
After that I did the substructure for the roof. Bit of cereal box cardboard and a lot of measuring and swearing later, I think it’s going to look pretty good!
Cobblestone roads
An homage to the "hell of the north"
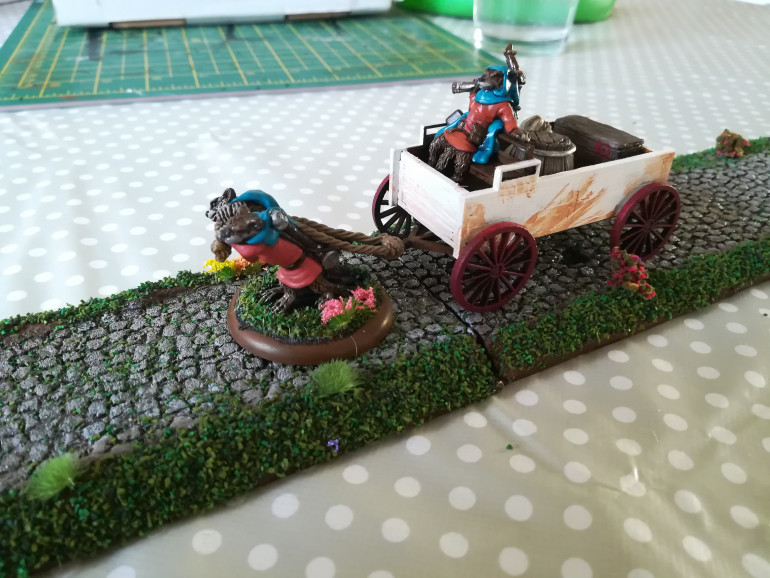 Maybe a bit narrow but I did make it to measure for my Stoatbart cart and I wanted to squeeze three sections out of my A5 piece of plasticard
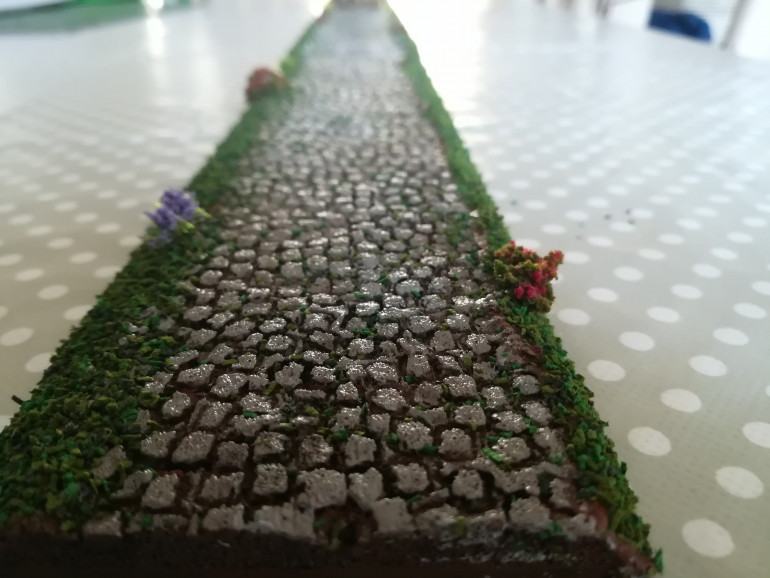
I made some cobbled roads to use with the Stoatbart Haulage scenario for Burrows and Badgers. I went down the hard route for making my cobblestones because I wanted to recreate the inconsistent nature of the modern pave as ridden by professional cyclists in the spring, culminating in the infamous Paris-Roubaix.
I rode the route myself a couple of years ago and it’s hard to describe just how rough the cobbles really are, so they were a natural inspiration for my little model roads!
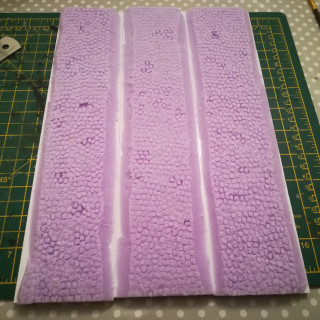
The pieces are based from a single piece of A5(ish!) plasticard, which worked out to be three ~300mm x 70mm sections. I cut a slightly oversized bit of foam and stuck the three pieces of plasticard to it next to each other with room to cut them away. I put a bunch of weight on them to get a solid bond (last thing I need is the road surface coming away from the base!)
Once dry (actually about a week later) I got around to trimming them to the size of the base and after a bit of measuring I knew I needed my road surface to be 50mm minimum. Armed with this I bevelled the edges of hte foam down to the base and used filler to give a bit of shape to the verges and hide any crimes from cutting.
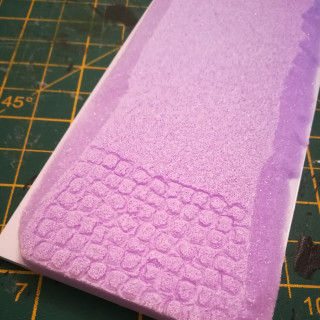
To create the cobbles themselves I used Mel the Terrain Tutor’s method of using a ferrule from a broken paintbrush bent into a rough square shape to engrave each cobblestone by pressing into the foam surface.
It took ages and I got cramp but I did insist on doing three feet of it in one sitting.
One of the benefits of this method was being able to do deeper impressions on some sections to represent loose or damaged cobbles, I dug some of them out completely to leave gaps in the road surface.
Once the engraving was done and all the filler was cured I added sand and grit to the verges and eventually primed the pieces with mod podge and black.
I accidentally didn’t take any intermediate photos of the priming and painting steps, but it follows a very similar approach to my ruins although this time since the cobbles are set into the ground any mortar is long covered by grasses and mud so after a base of mod podge and black I coated it in a generous layer of brown, then drybrushed the actual cobbles back to grey.
The grey had a very glossy finish to it which I was pretty disappointed with, but now I’ve gone back out to measure them for this entry it turns out I just didn’t leave the paint to dry fully!
I think to really finish the piece I’m going to give the cobbles another very light tan drybrush and possibly apply a bit of wash to break up the colour a little bit. The aim here being to evoke newer repaired sections of road.
Modular (ish) foam brick ruins
Step 0: Tiny foam bricks
n.b. I realise I’m adding these updates back to front a bit; this is my most recent project and I’ll sort of work backwards!
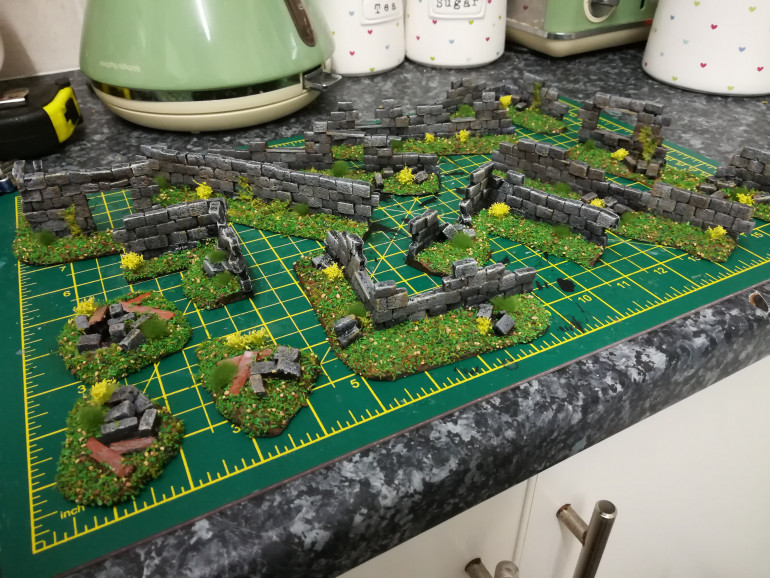
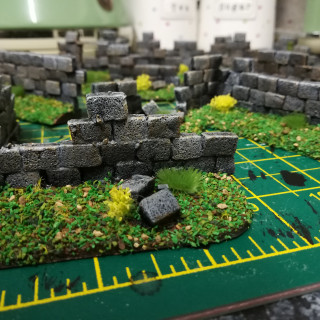
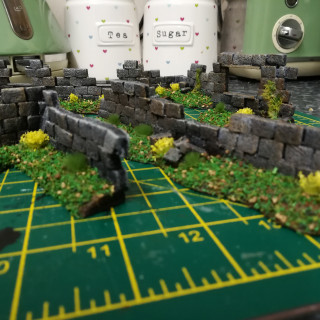
I fancied some ruins to use for the base attack scenario in Burrows and Badgers and also for some general scatter. I loosely followed the Black Magic Craft approach for his modular dungeon walls.
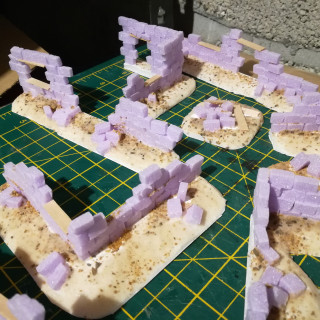
Teeny tiny foam bricks. I painfully cut these out of a sheet of 5mm xps foam that I got for a few quid on ebay (I should put in another order from them actually)
I don’t have a foam cutter or even a try square so I had to do a lot of measuring and checking before cutting anything. My steel ruler and craft knife did the job though- Mostly helped by how thin the foam is really.
My bricks are an irregular 5x5x10mm, irregular because cutting by hand isn’t going to produce perfect results anyway, but they were close enough. A bit of variety in the bricks actually helps give a bit of interest to the piece when finished.
I chucked my bricks in a tub with some stones and rolled it around a bit to take the sharp edges off and leave a bit of texture in the bricks. This worked a treat and didn’t take long at all.
I made a couple of tubs of these one evening without any real plan for them other than finally making a dent in the 8ft sheet of foam in the way in the garage
Step 1: the tiny bricklayer
I used my best tiny bricklaying powers to start building up my walls.
Bases for the pieces were made from 5mm foamcore and cut to 6″ x 2cm (mixed units I know… something that is completely Games Workshop’s fault as when I was growing up I used imperial for all my wargaming and metric for all my school work. To this day I tend to think in mixed units.)
Corner bases were measured to be 3″x3″ along the edge the wall was to be placed, so inner corners and outer corners can be used together and the ‘inside’ of the building has no extra basing protruding.
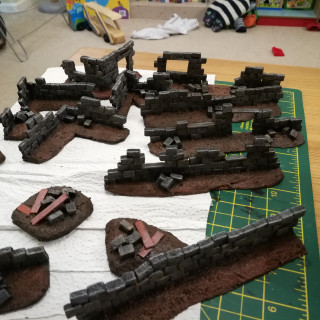
This means that all walls are multiples of 3″ when arranged so we can build up arbitrary structures of different sizes to represent anything from a large single building to a ruined village or similar.
I included some doorways and windows using coffee stirrers as lintels and windowsills. In retrospect I should have frames the doors and windows more realistically but not to worry.
Bases were textured with PVA, play sand and basing grit.
Step 2: Seal and paint
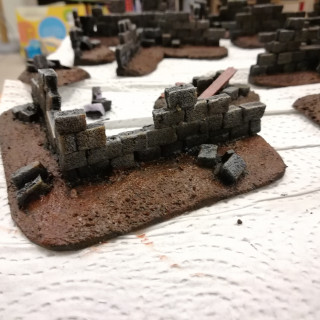
I’m fuming. I forgot to take any photos of the mod podge and black stage. It makes a brilliant basecoat and the pieces are so much more hardy. Do as Black Magic Craft says on this one; it’s excellent. It also allowed me to repair any bits that hadn’t glued down properly by just sticking them down with the primer. Can’t go wrong.
I painted the pieces up from the primarily with drybrushing. I did four or so brushes of dark grey through to white. For the first couple of layers it was a bit more like an overbrushing but not quite; I still wanted to see some of that black here and there. The white seemed extreme when I did it and I wondered about taking it back down again but I’m glad I didnt.
Next I painted the bases a mix of raw umber and burnt sienna I didn’t go mad here I just kind of slapped it on. The plan was to flock over it anyway so as long as I got a good coverage I was happy. The walls also received a very light drybrush of the raw umber and then burnt sienna. This brought them round from a very cold-looking finish (perfect for frostgrave) to a warmer tone (perfect for my woodland ruins!) – this knocked back a bit of the white and made for a really nice effect.
Step 3: Flocking tufts!
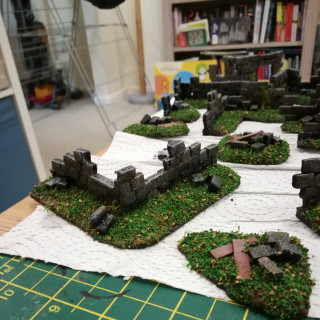
I bought some Army Painter Battlefield XP tufts and meadow flowers the other day so I thought I’d try them out here. The meadow flowers look really nice with proper shaped leaves on the grass tufts but the standalone grass tufts I’m not crazy about. I think in comparison to the static grass I already own they’re a bit flat in colour and plasticy in finish.
For flock I had a big tub made from grit, static grass and different coloured flocks that fell off my MSF game board in a big sheet (!!!) because I made a mess of the gluing stage. I didn’t really want this flock to go to waste – that one tub is probably more expensive than the whole rest of this build.
Since these ruins are designed to be a set it worked out well to use this perculiar mix of colours and textures for their bases so they were nice and uniform. They also pass for a ruins-in-the-wood sort of look which is good.
This part was pretty routine; I slapped on some PVA, shoved the flock all over the place and stuck my flowers and tufts on here and there. In future I may add some white flower tufts to some of them to add a bit of variety to the colours on the ground cover but overall I’m really happy with the aesthetic.












![The fearesome cobbles of Trouee d'Arenberg, credit: bram_souffreau [CC BY-SA 2.0 (https://creativecommons.org/licenses/by-sa/2.0)]](https://images.beastsofwar.com/2019/05/23186435-Paris-Roubaix_Trouee_dArenberg-770.jpg)
