


Necromunda: The Halls of Hive Primus


Recommendations: 607
About the Project
Way back in the mists of time games workshop released a small little game called Necromunda, maybe you've heard of it? The idea of gang wars in these massive hive cities immediately caught my attention and the vast diversity of gangs, bounty hunters, mutants and general lowlife scum opened the world up to all kinds of crazy and innovative ideas. After 2 decades of waiting GW finally release Necromunda again, but unlike its original release the initial box set was missing the cardboard and plastic 3D terrain and instead focused on a 2D warzone. Necromunda to me should be played in a 3D space so I started this project to try and create a modular terrain system to offer the choice of making maps from the underhive and to also allow customisation to build upwards and outwards to create something unique.
Related Game: Necromunda
Related Genre: Science Fiction
This Project is Active
Things got dark.... Grimdark!
Although I was pleased with the first run of the kits the initial paint scheme seemed off to me, far to bright and shiny for the 41st millennium, this is the Grim Darkness of the far future after all.
With that in mind I went back and started fresh with a new paint scheme in mind.
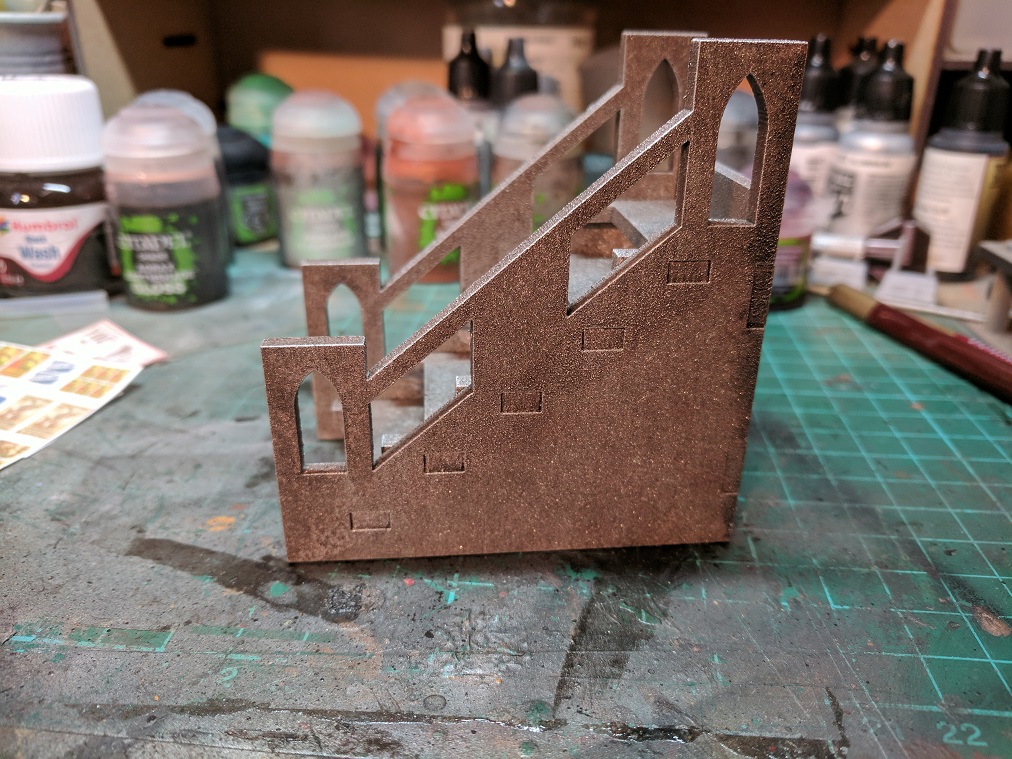
 Rustoleum do a style of paint known as Autumn, its a texture spray paint with flecks of brown, orange and black. perfect for doing dark aged rusty effects for metal.
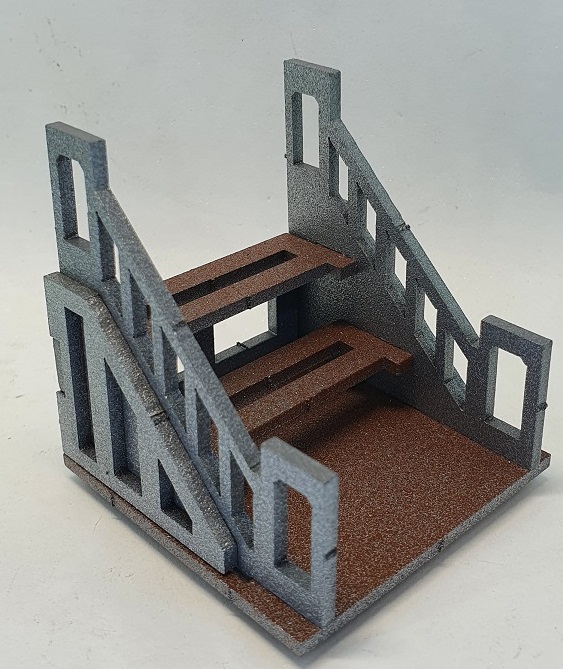 These were the original stairs using bright silver and rust effect spray paints.
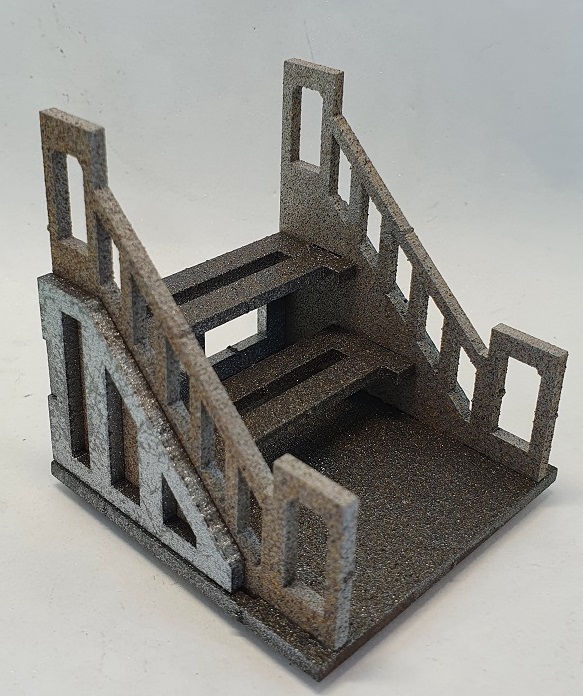 The same stairs this time using Bright silver, Gun Metal and Autumn texture paint.
A few before and after shots to show off the difference in the overall finish, I think the new approach gives a much more dirtier industrial feel which is ideal for a hive.
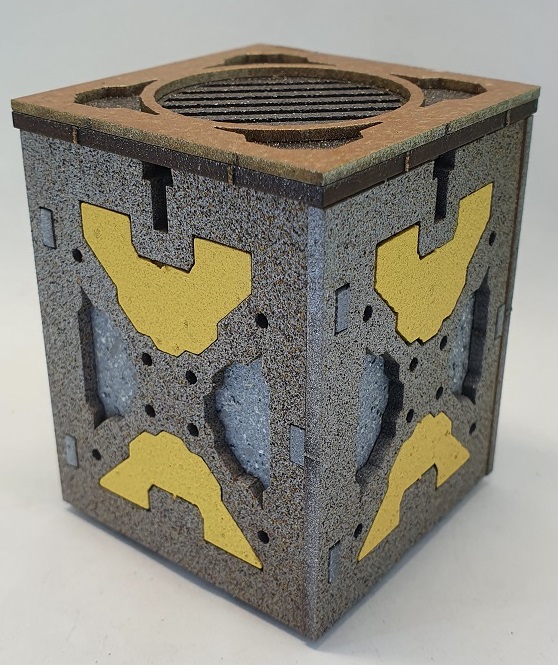 to add a little more variation and visual interest I took some of the old cut out sections and gave them a heavy spray of yellow paint before installing them back into the column, not only does this give a bit of variation it also helps fill the gaps when a wall section is added between columns'.
 Re-modelling from the ground up.
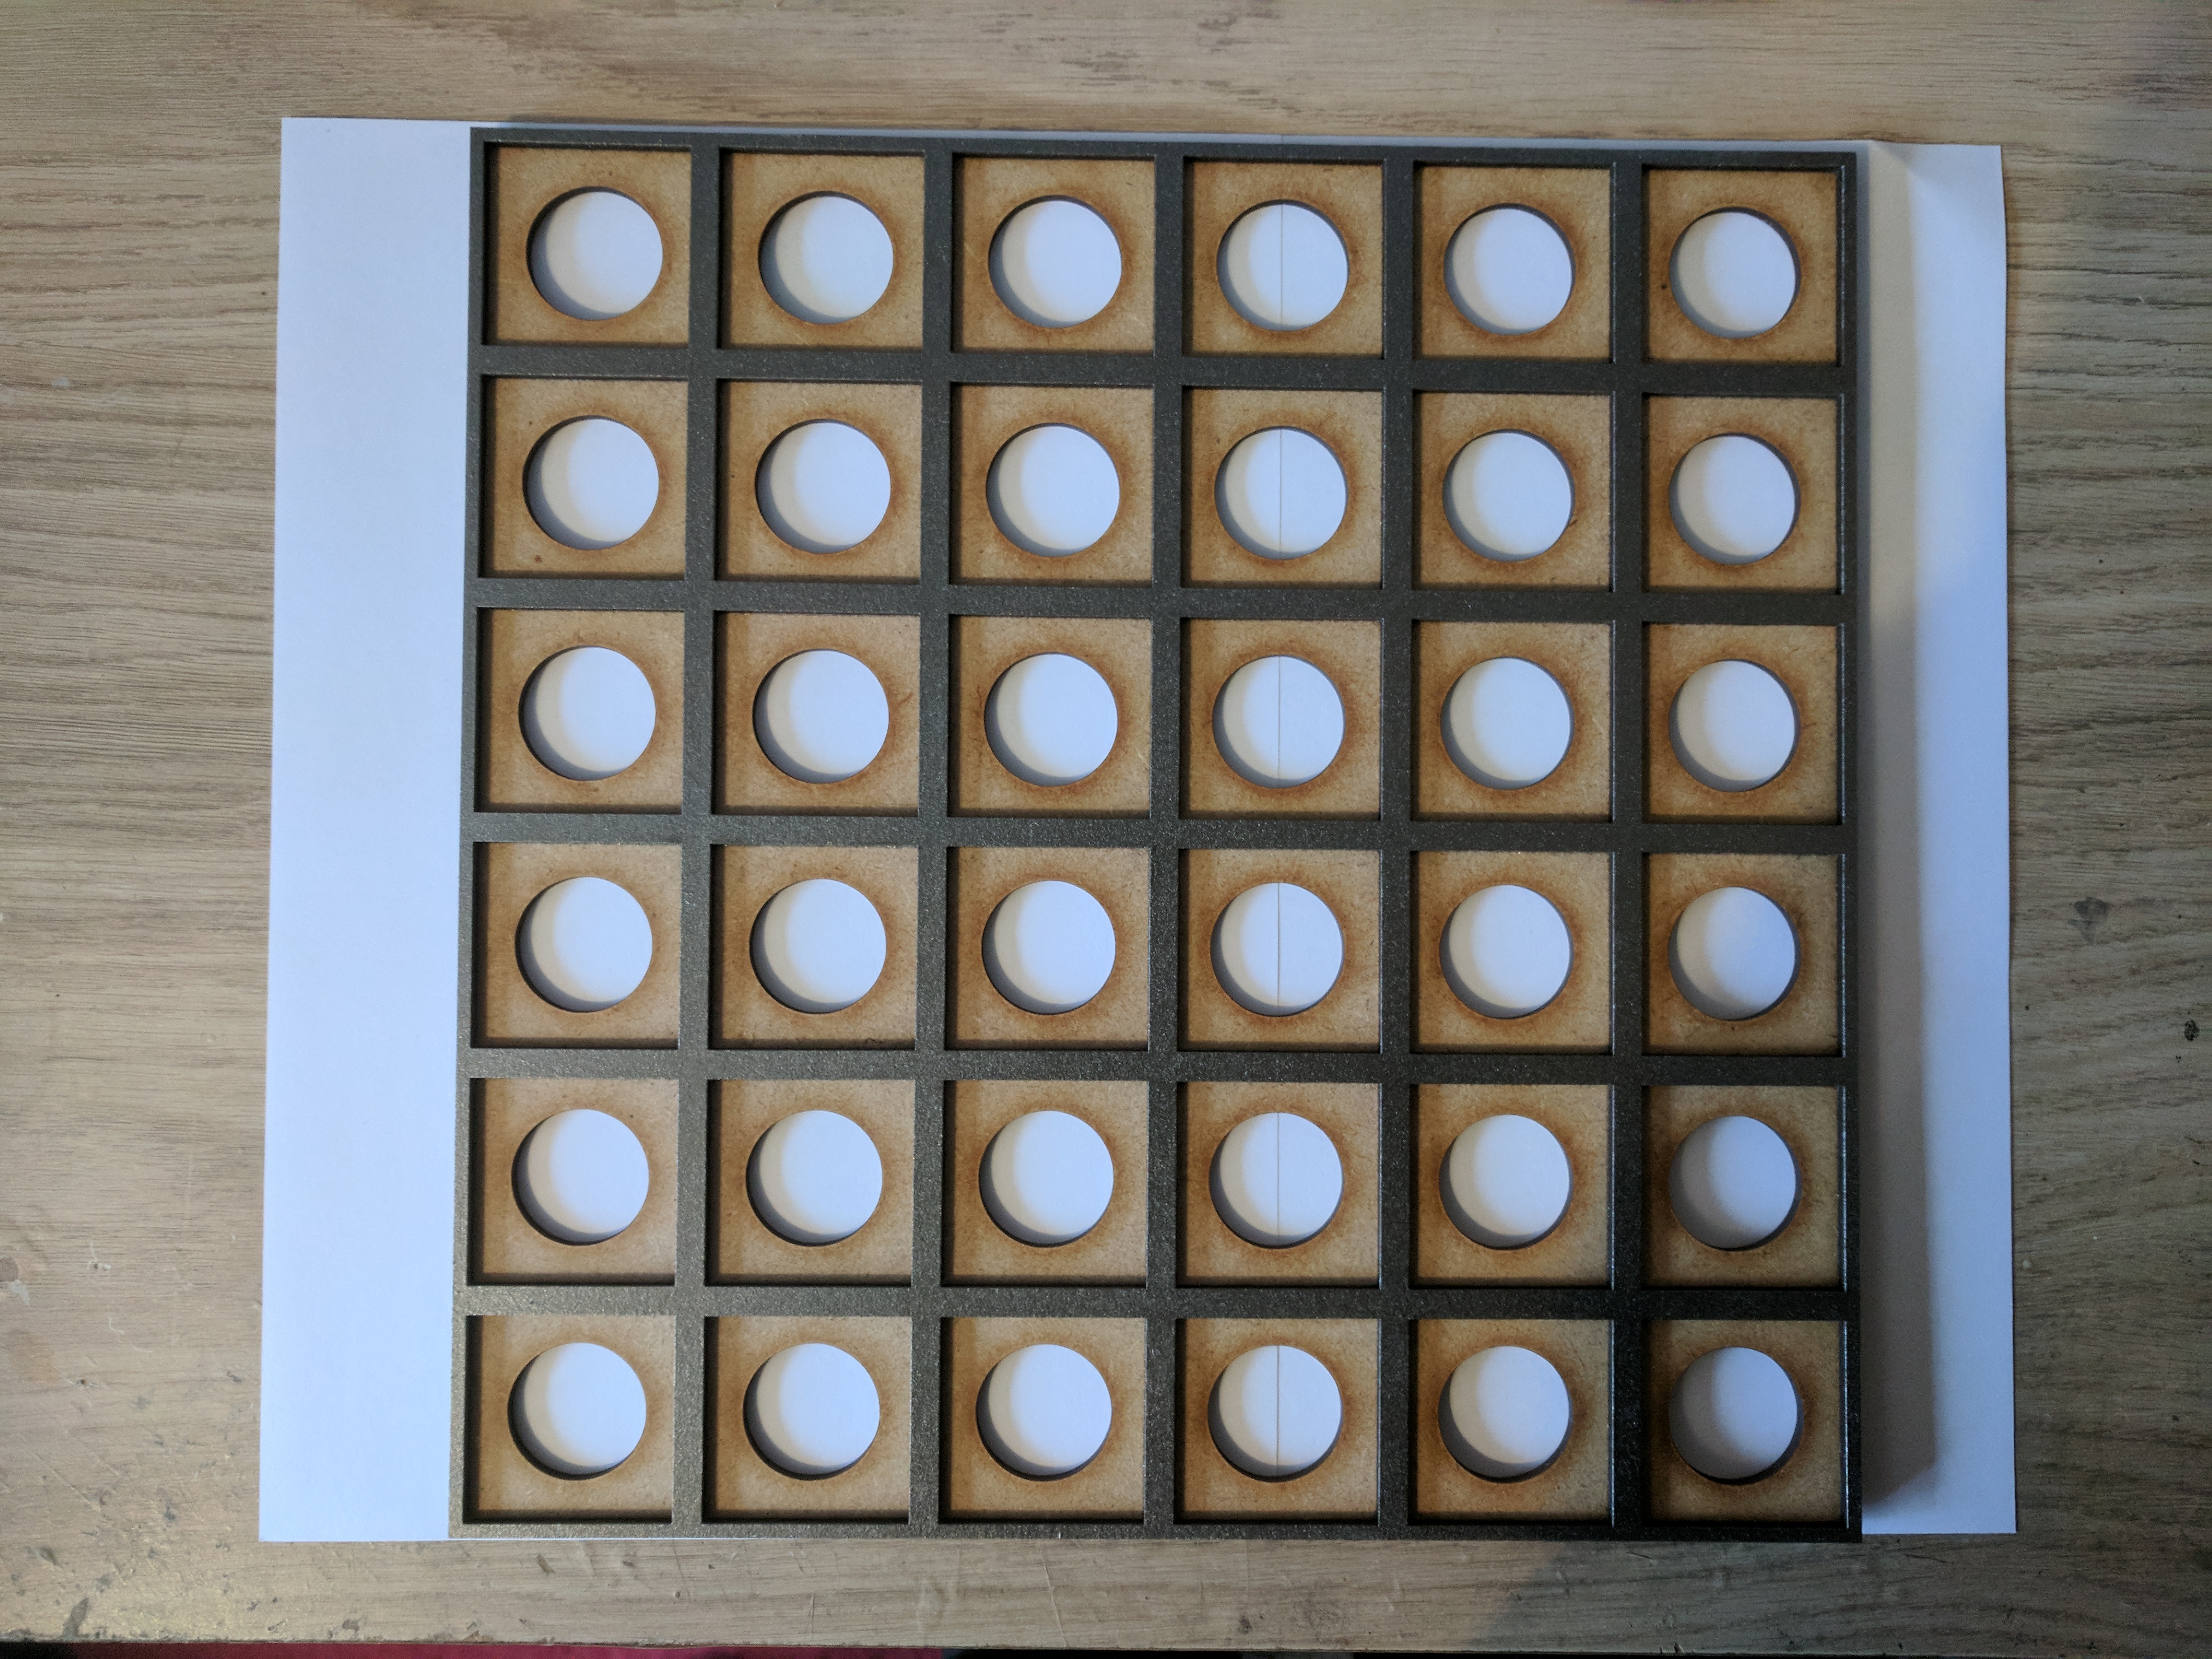
When I first started this project I initially went for a square tile into a square hole base. Although the finished item was pretty decent, the amount of time needed to etch details and paint them was pretty excessive.
When other materials became an available option it made me rethink the pieces and how everything would eventually come together…
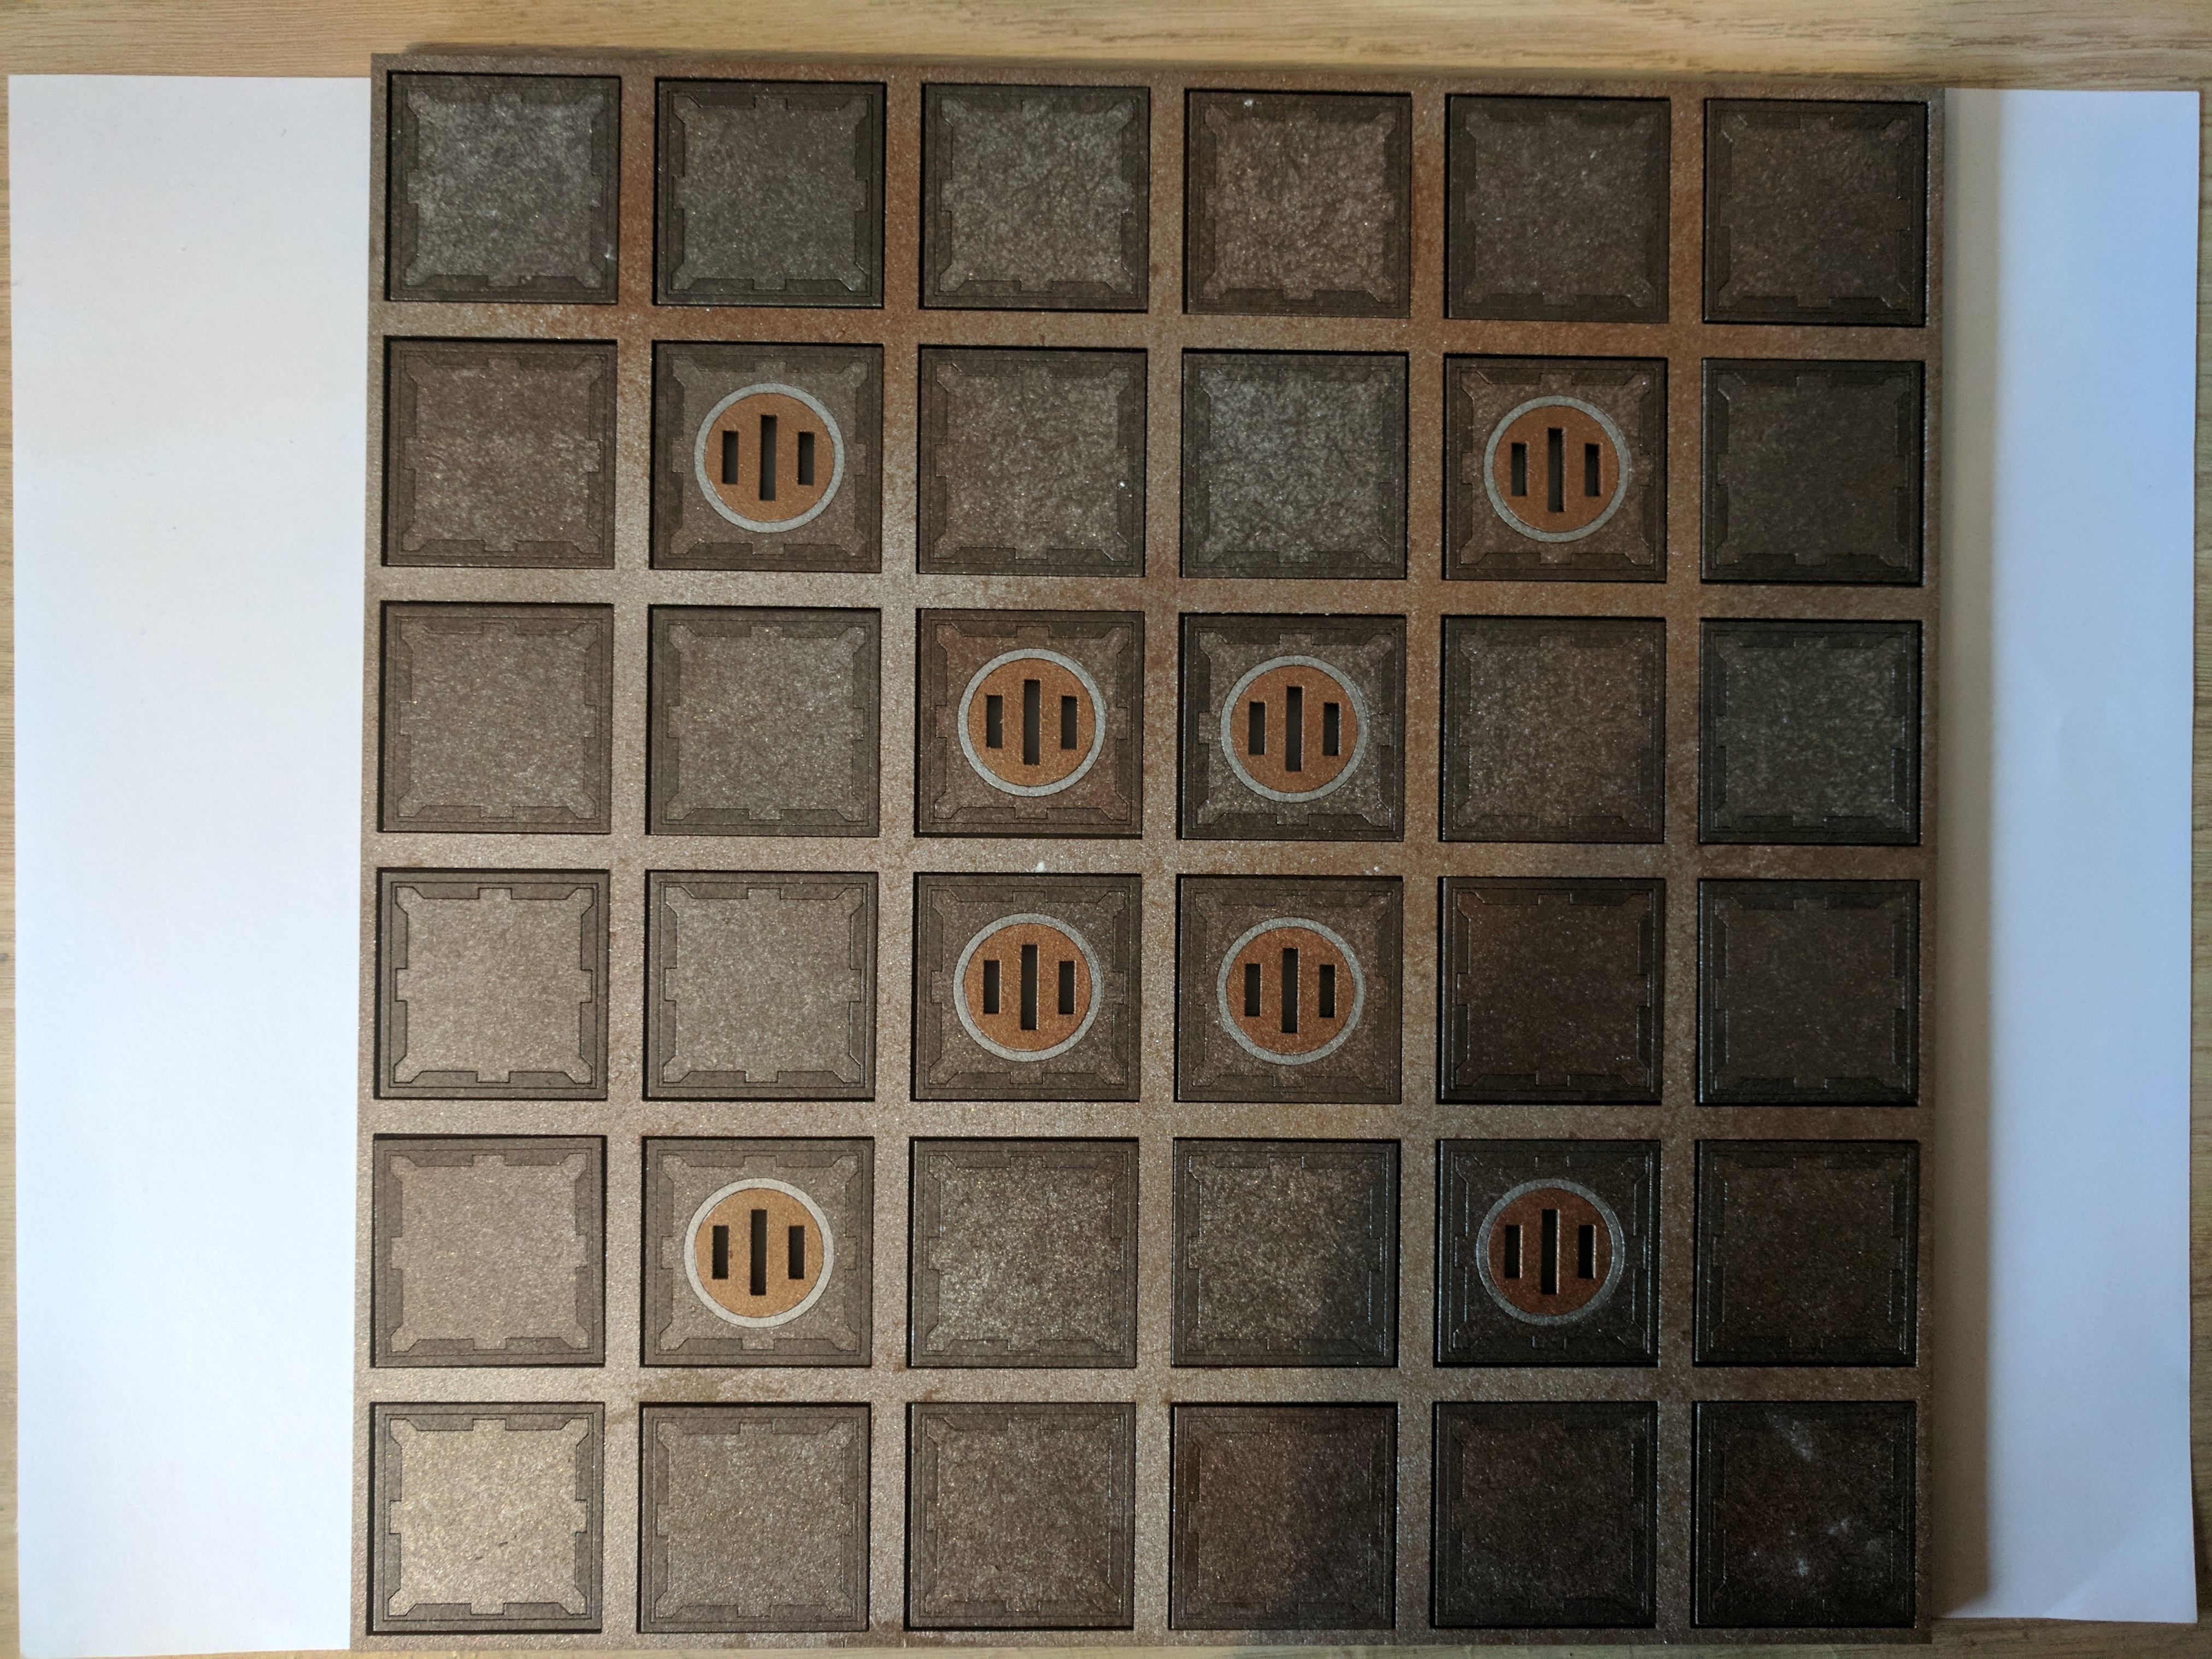
 Instead of a single tile I decided to make a small range of tiles with varying sizes from 1-9. Each tile is double layered and painting them went from a time consuming arduous task to a simple spraying in two different colours. Assembly still took a while but I can honestly say between gluing pieces together or painting the edges of 150+ tiles and additional details, I know which one I prefer!
 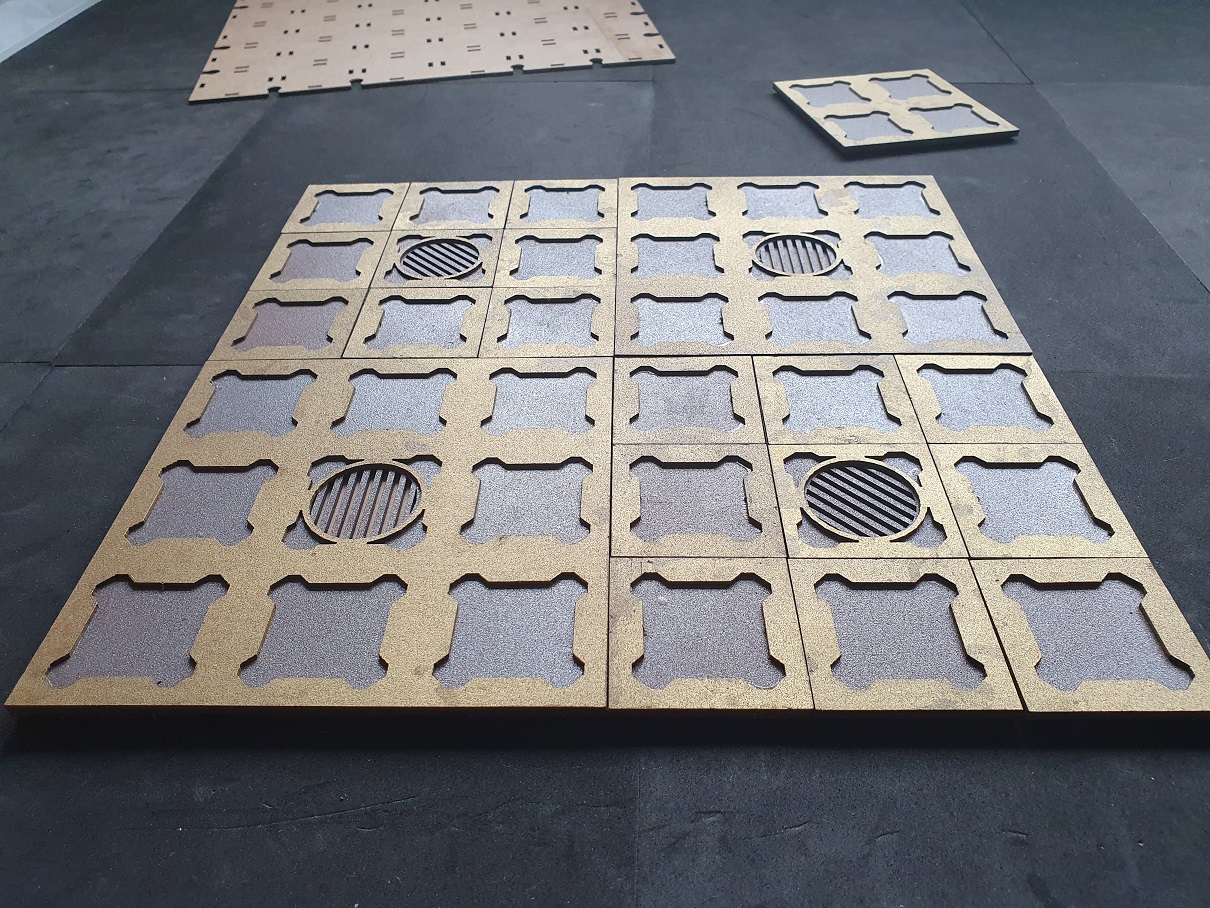 All the tiles fit together onto a base board....
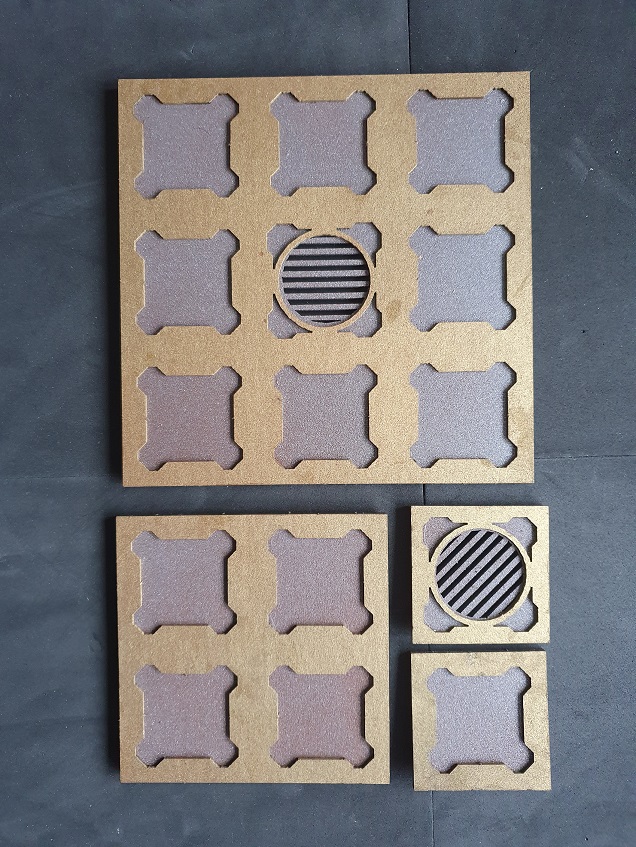
 Then the base boards can be put together just like the regular game boards.
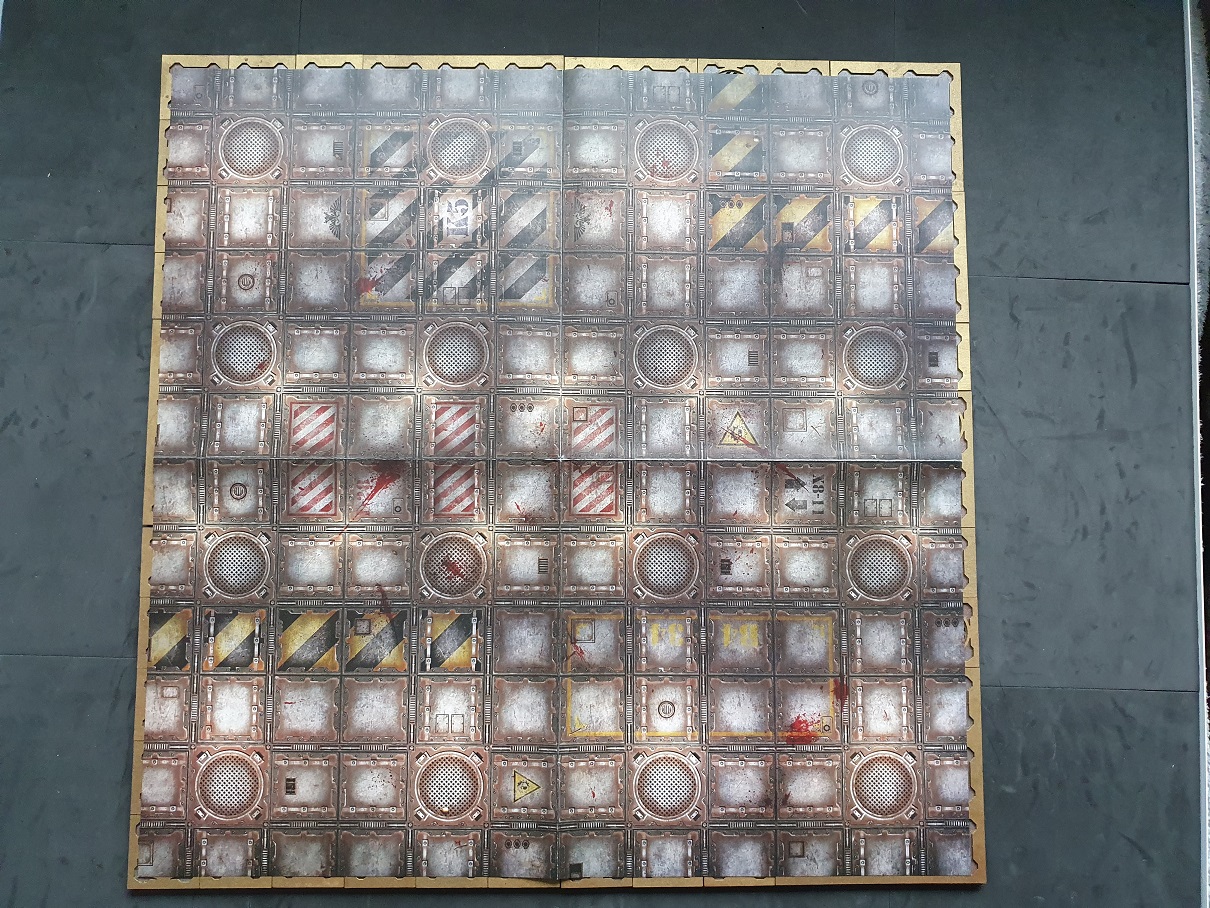 The final product just being marginally bigger than the game mat from the Dark Uprising box set.
There is a stirring in the deep...
My Necromunda project has been quiet for quite some time, but this activity has not been in vain, over the last year or so I have been working towards a final design which can eventually be replicated and produced as a kit for anybody that is interested in their own modular underhive.
After the abysmal year we’ve been having I’m happy to say that at least something good has come from it.
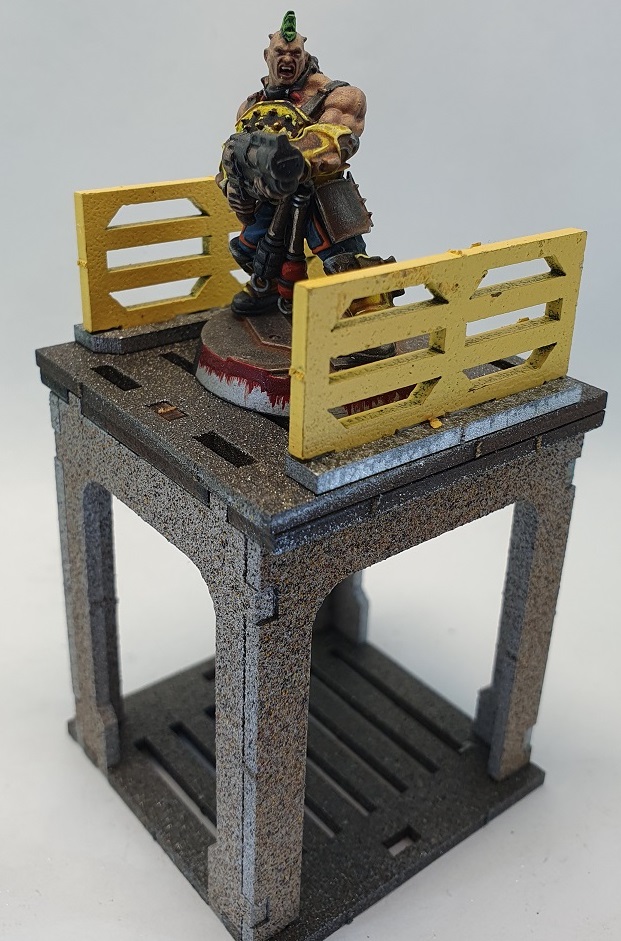
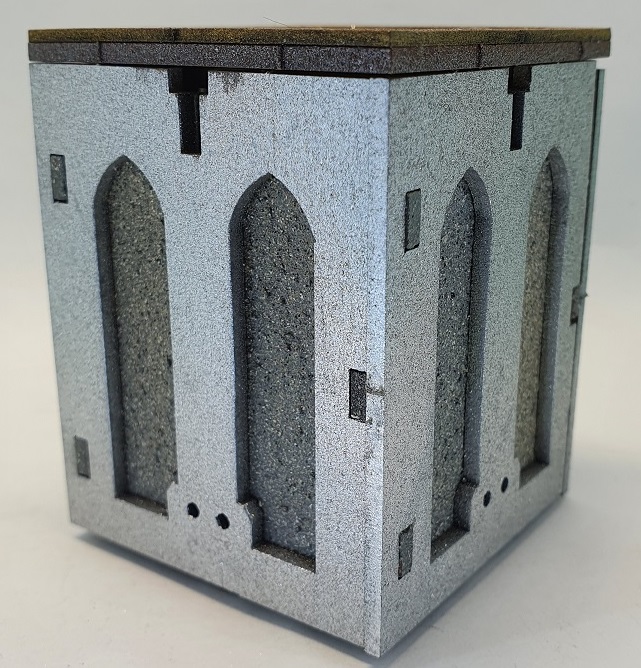
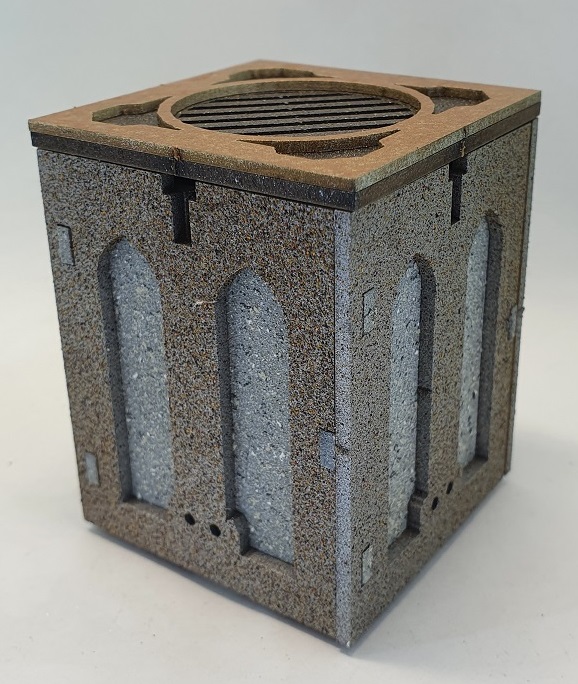
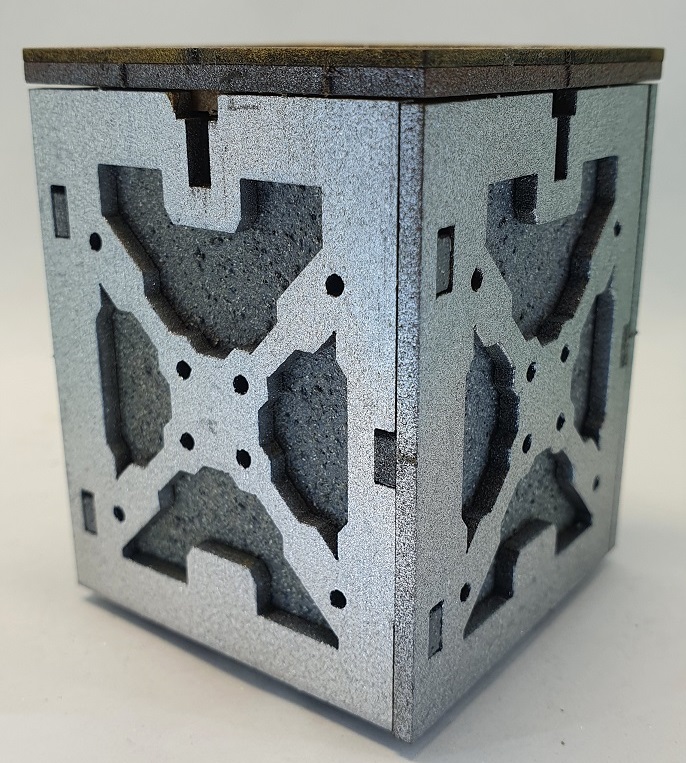
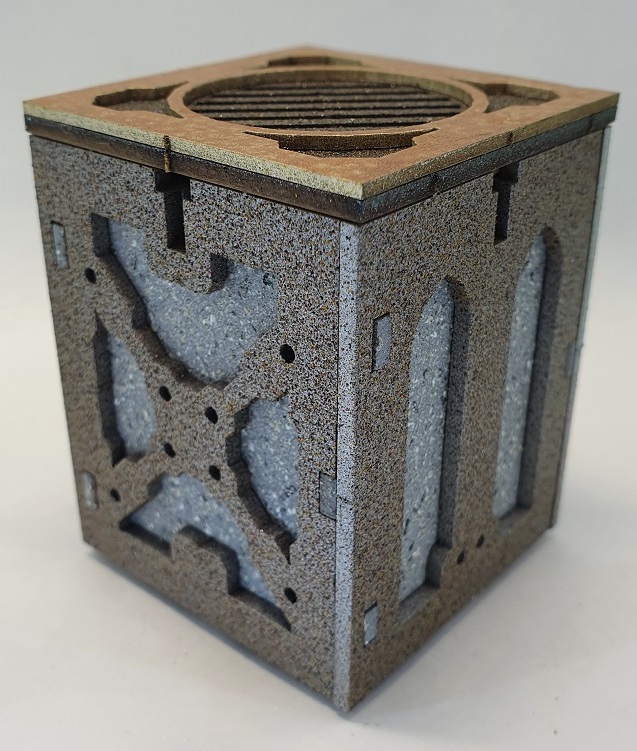
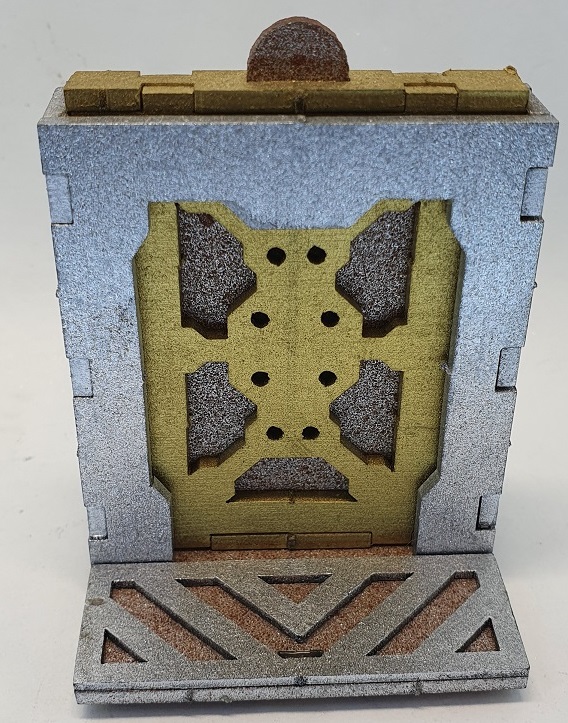
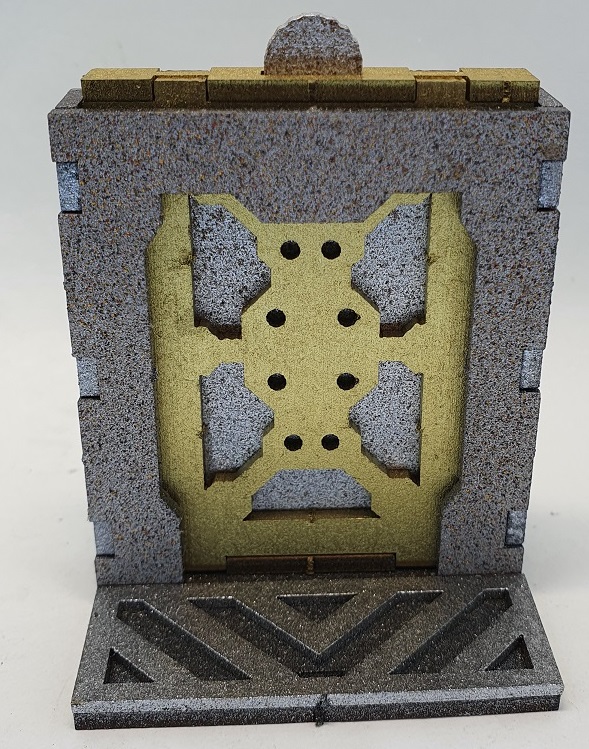
Finally my first set of modular walls are done, these are the first pieces which will hopefully be a much larger line of MDF kits intended to make bespoke shifting battle zones for Necromunda and 40K.
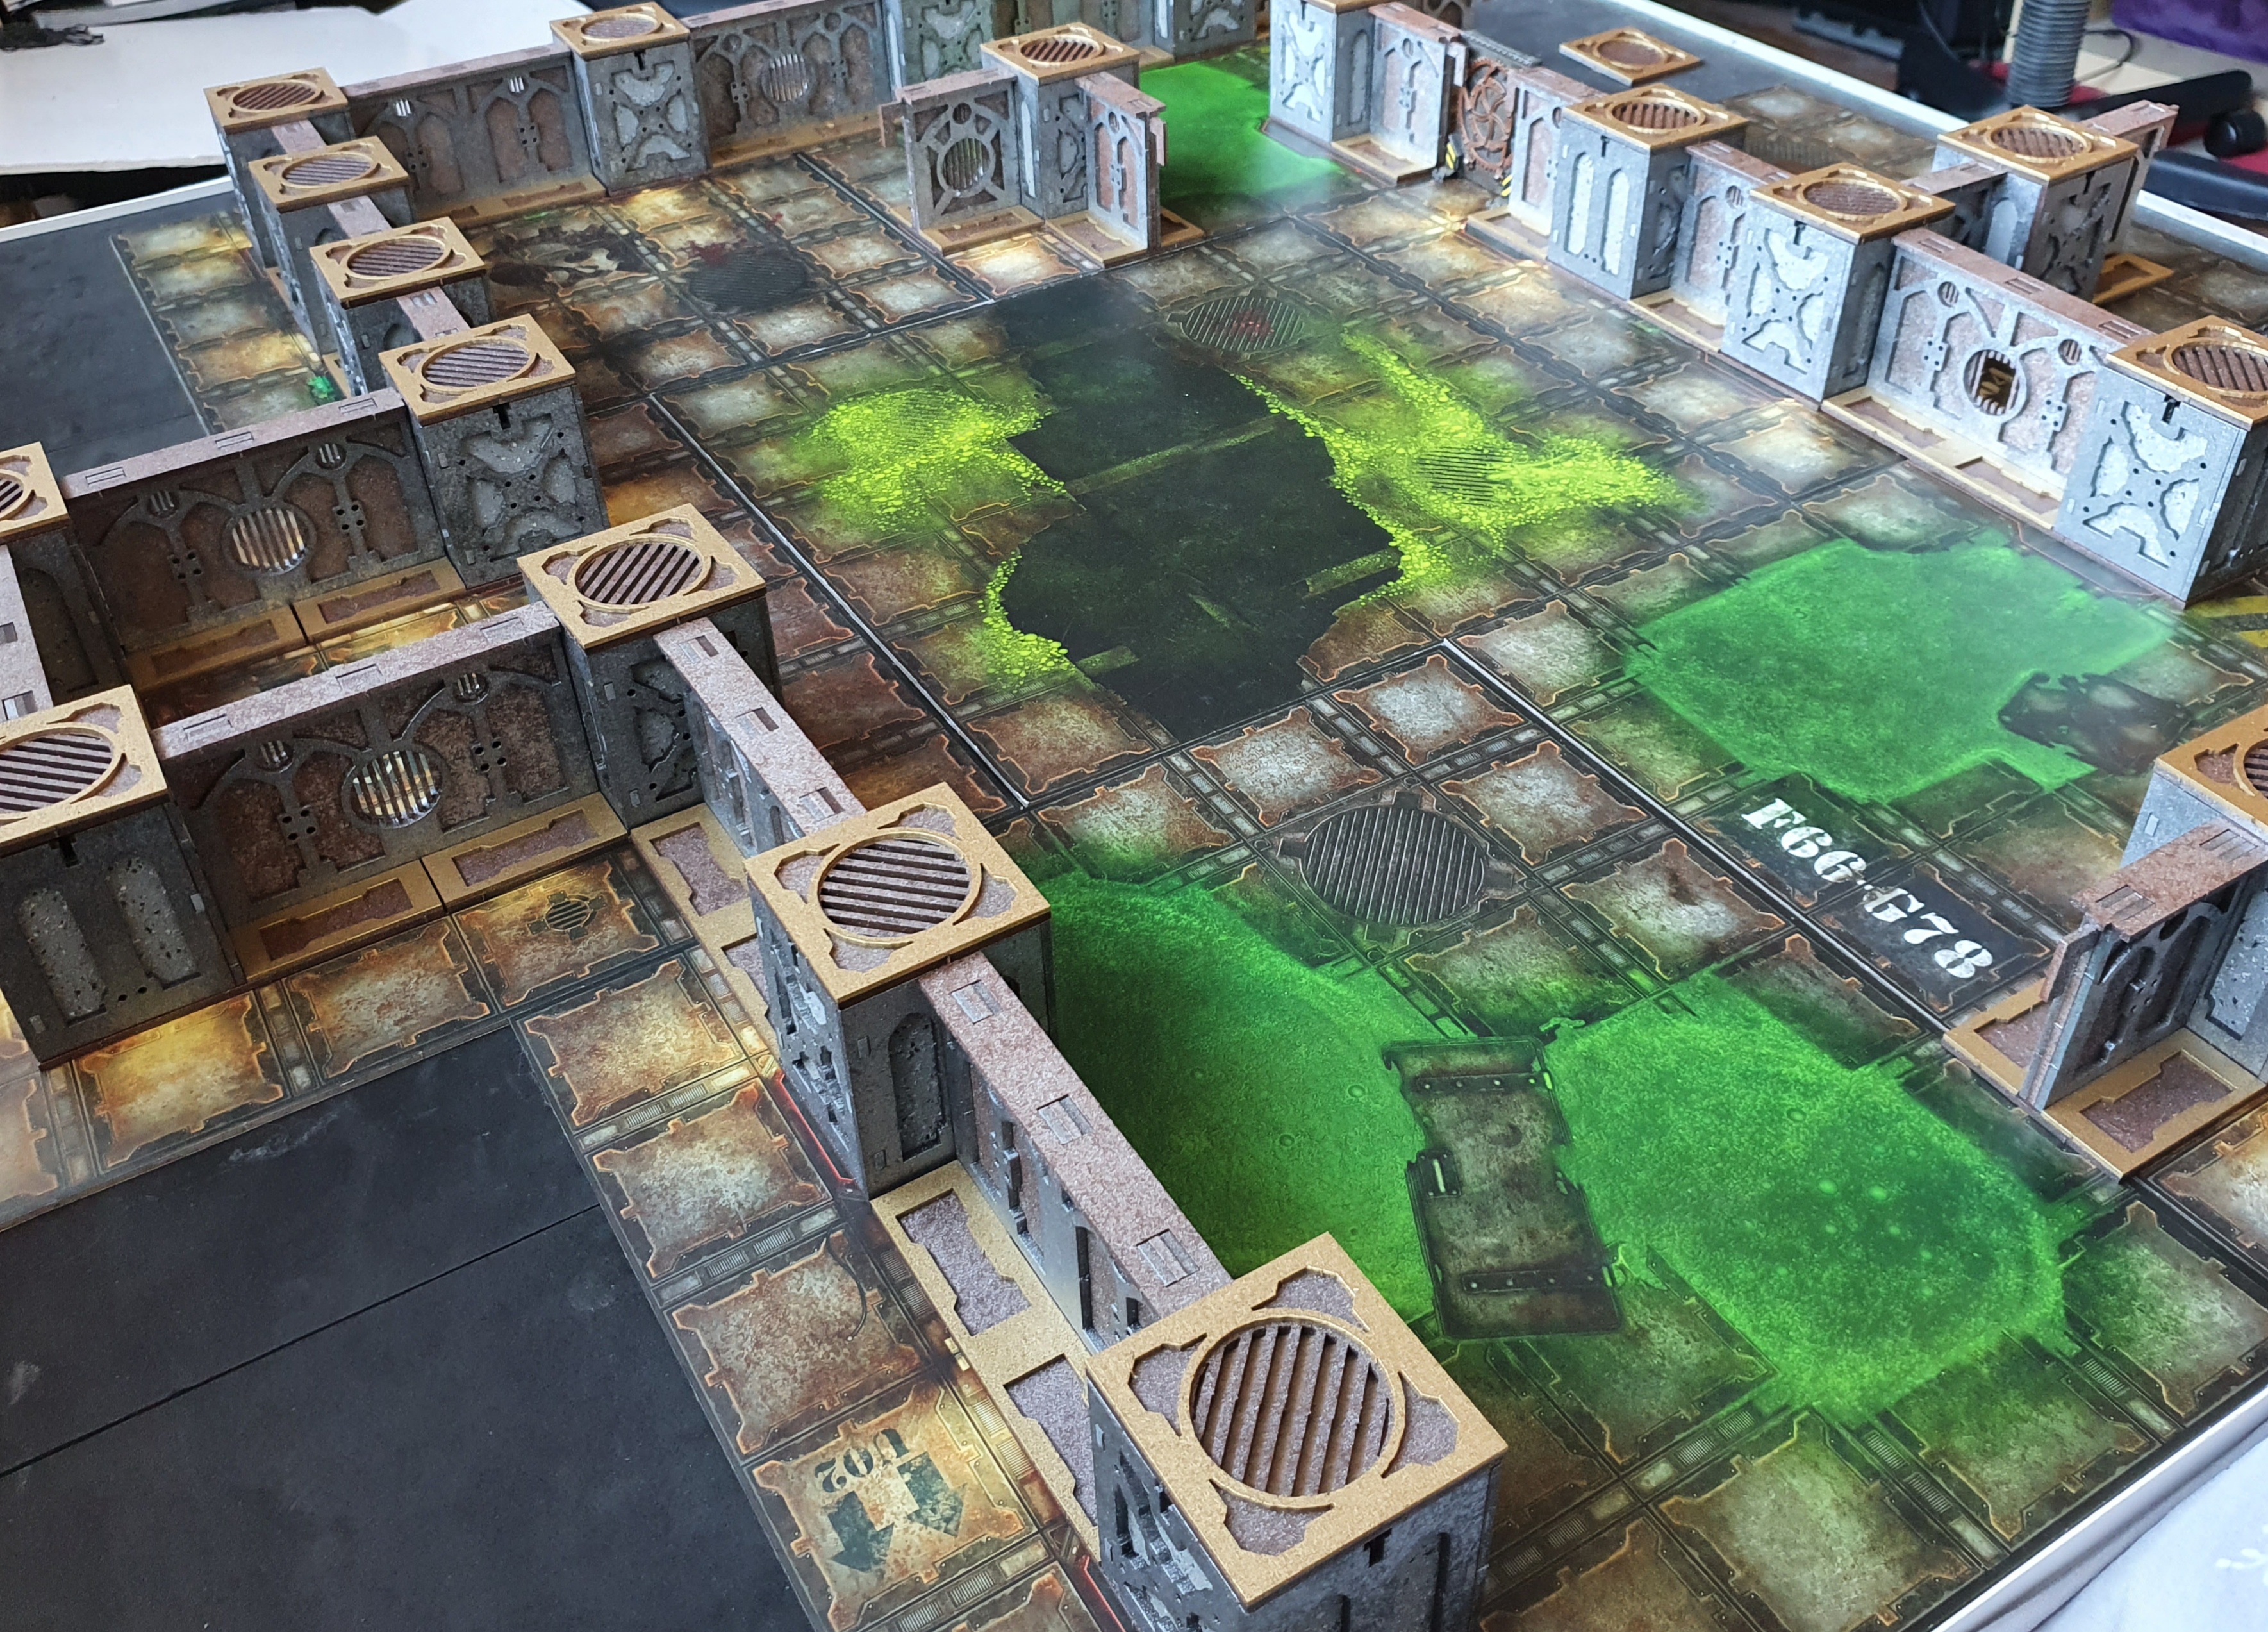 The first set have been designed to work around the original Necromunda game boards.
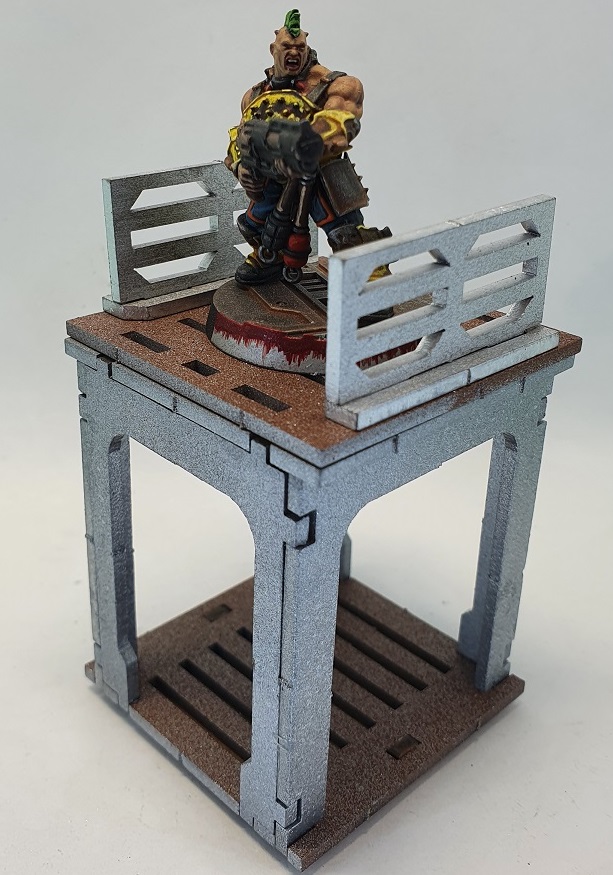
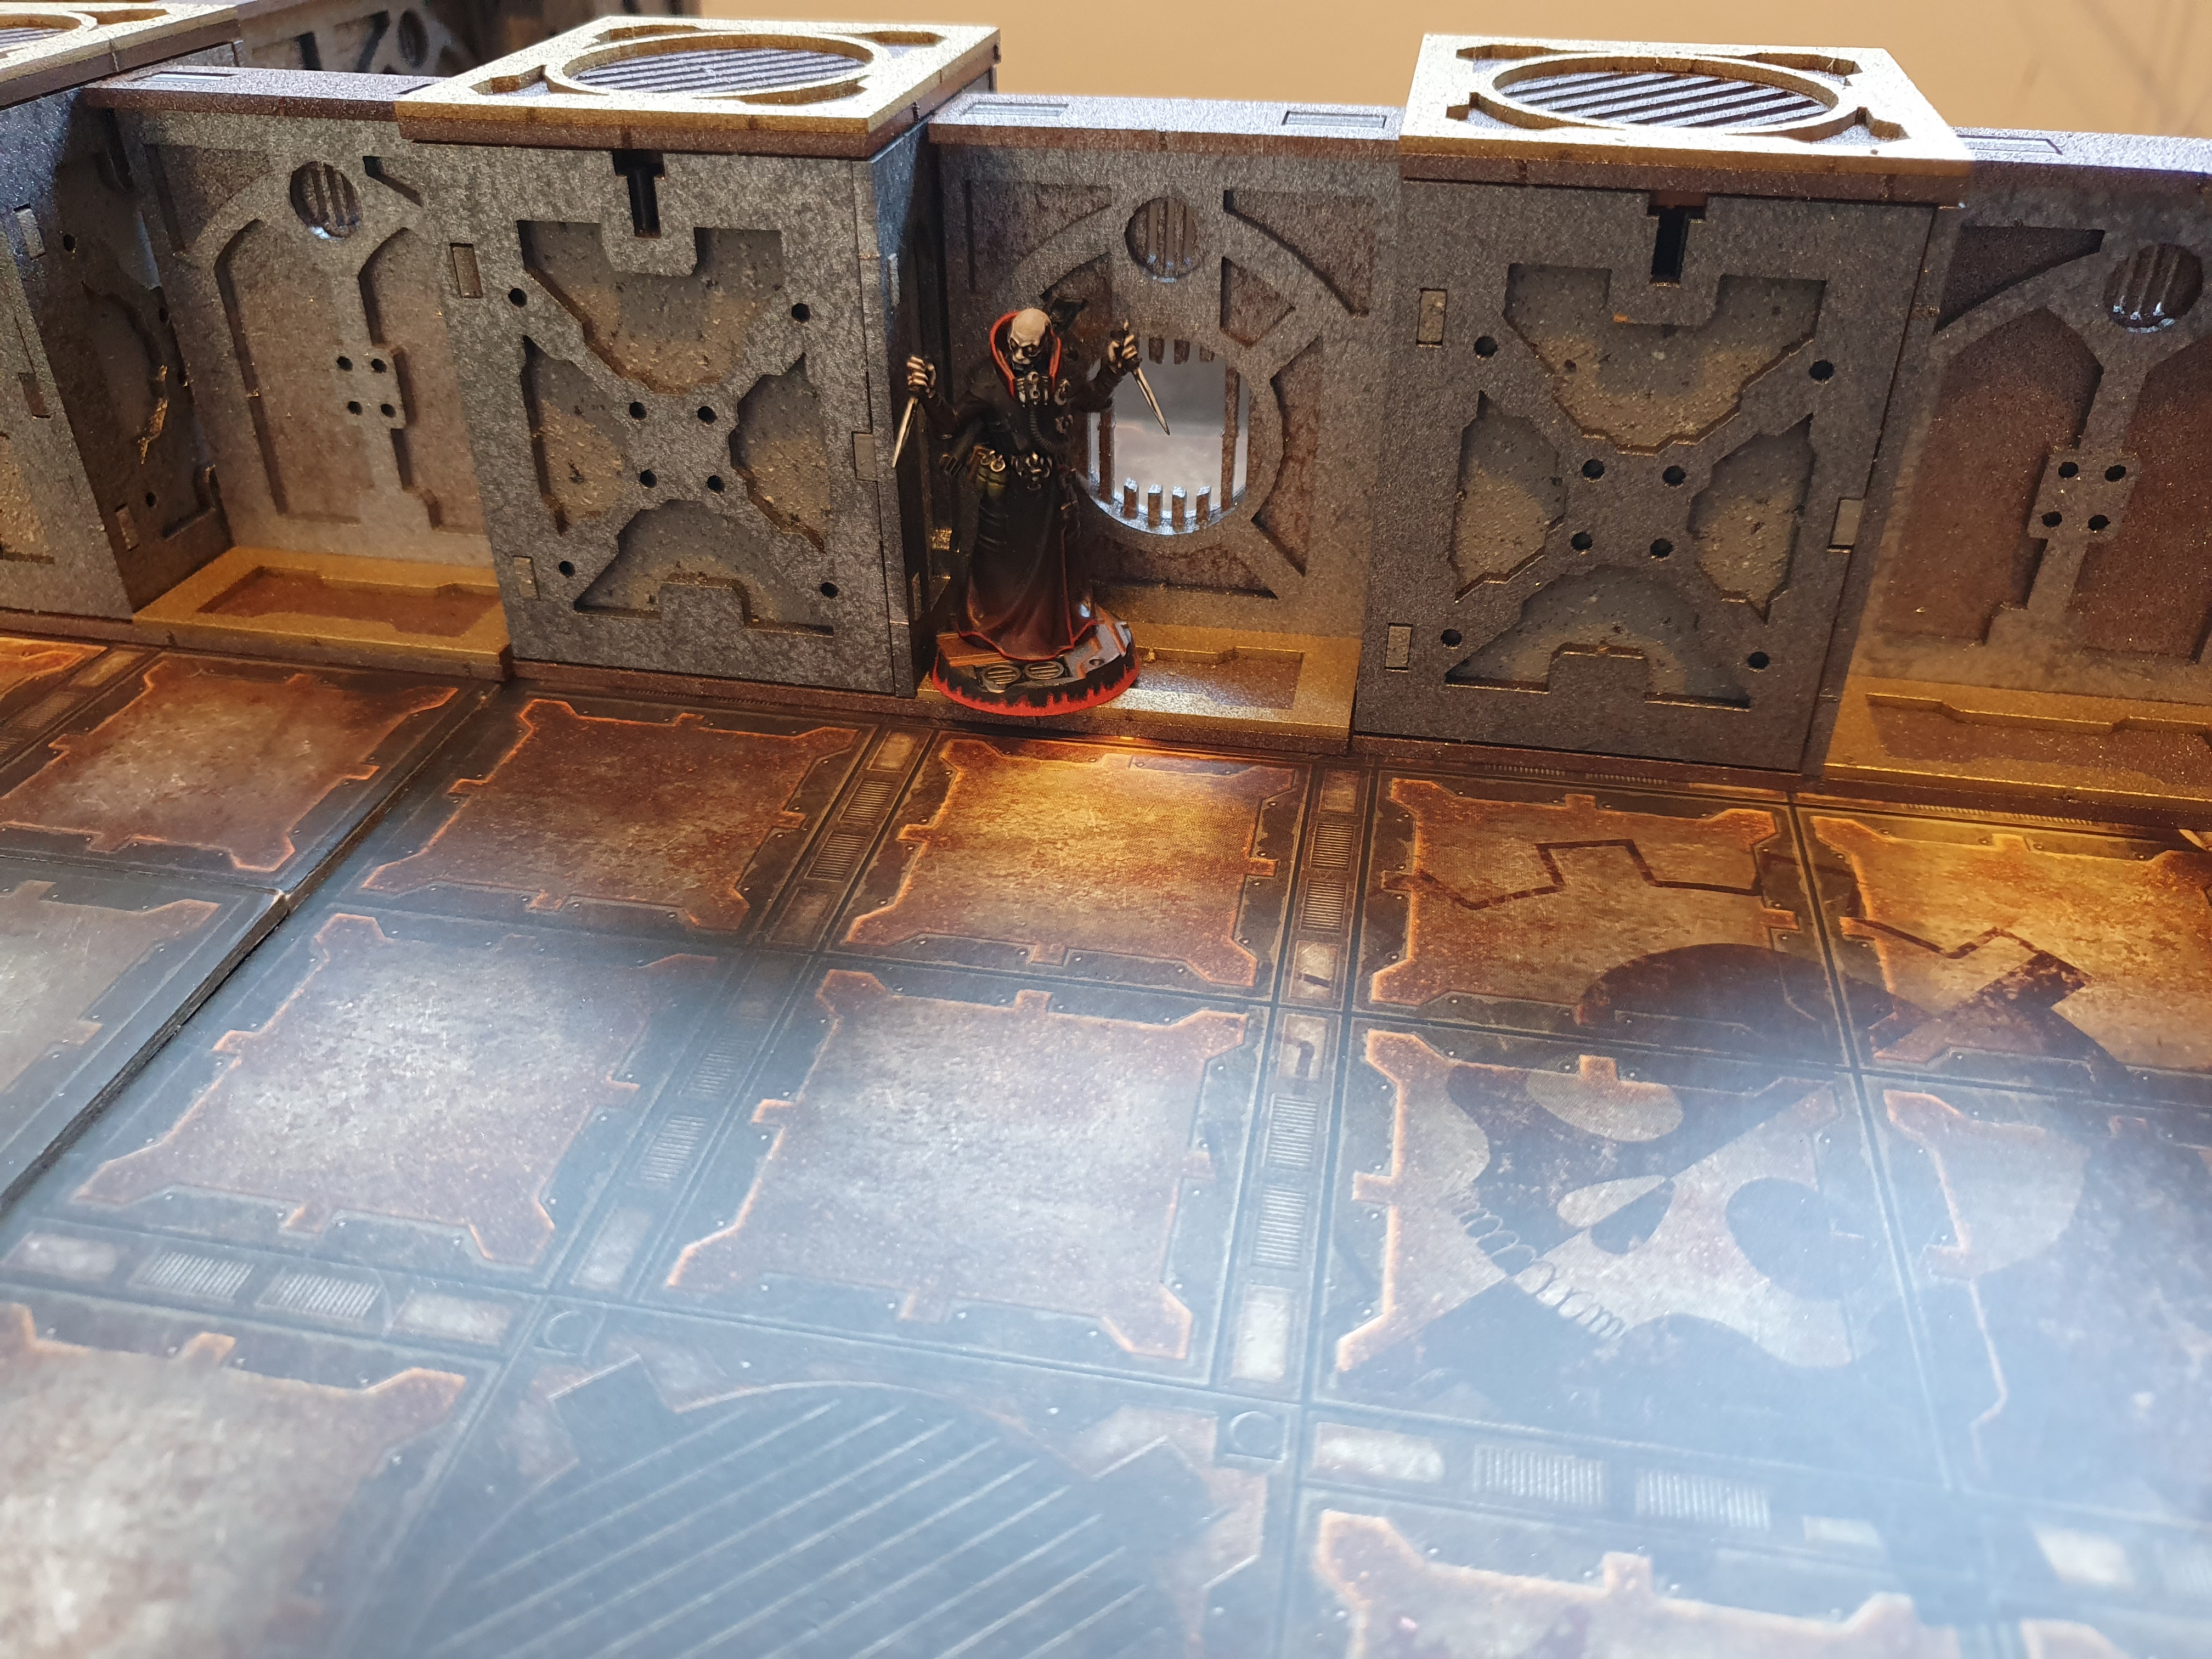 Added a sneaky Delaque ganger to give a general idea of the size.
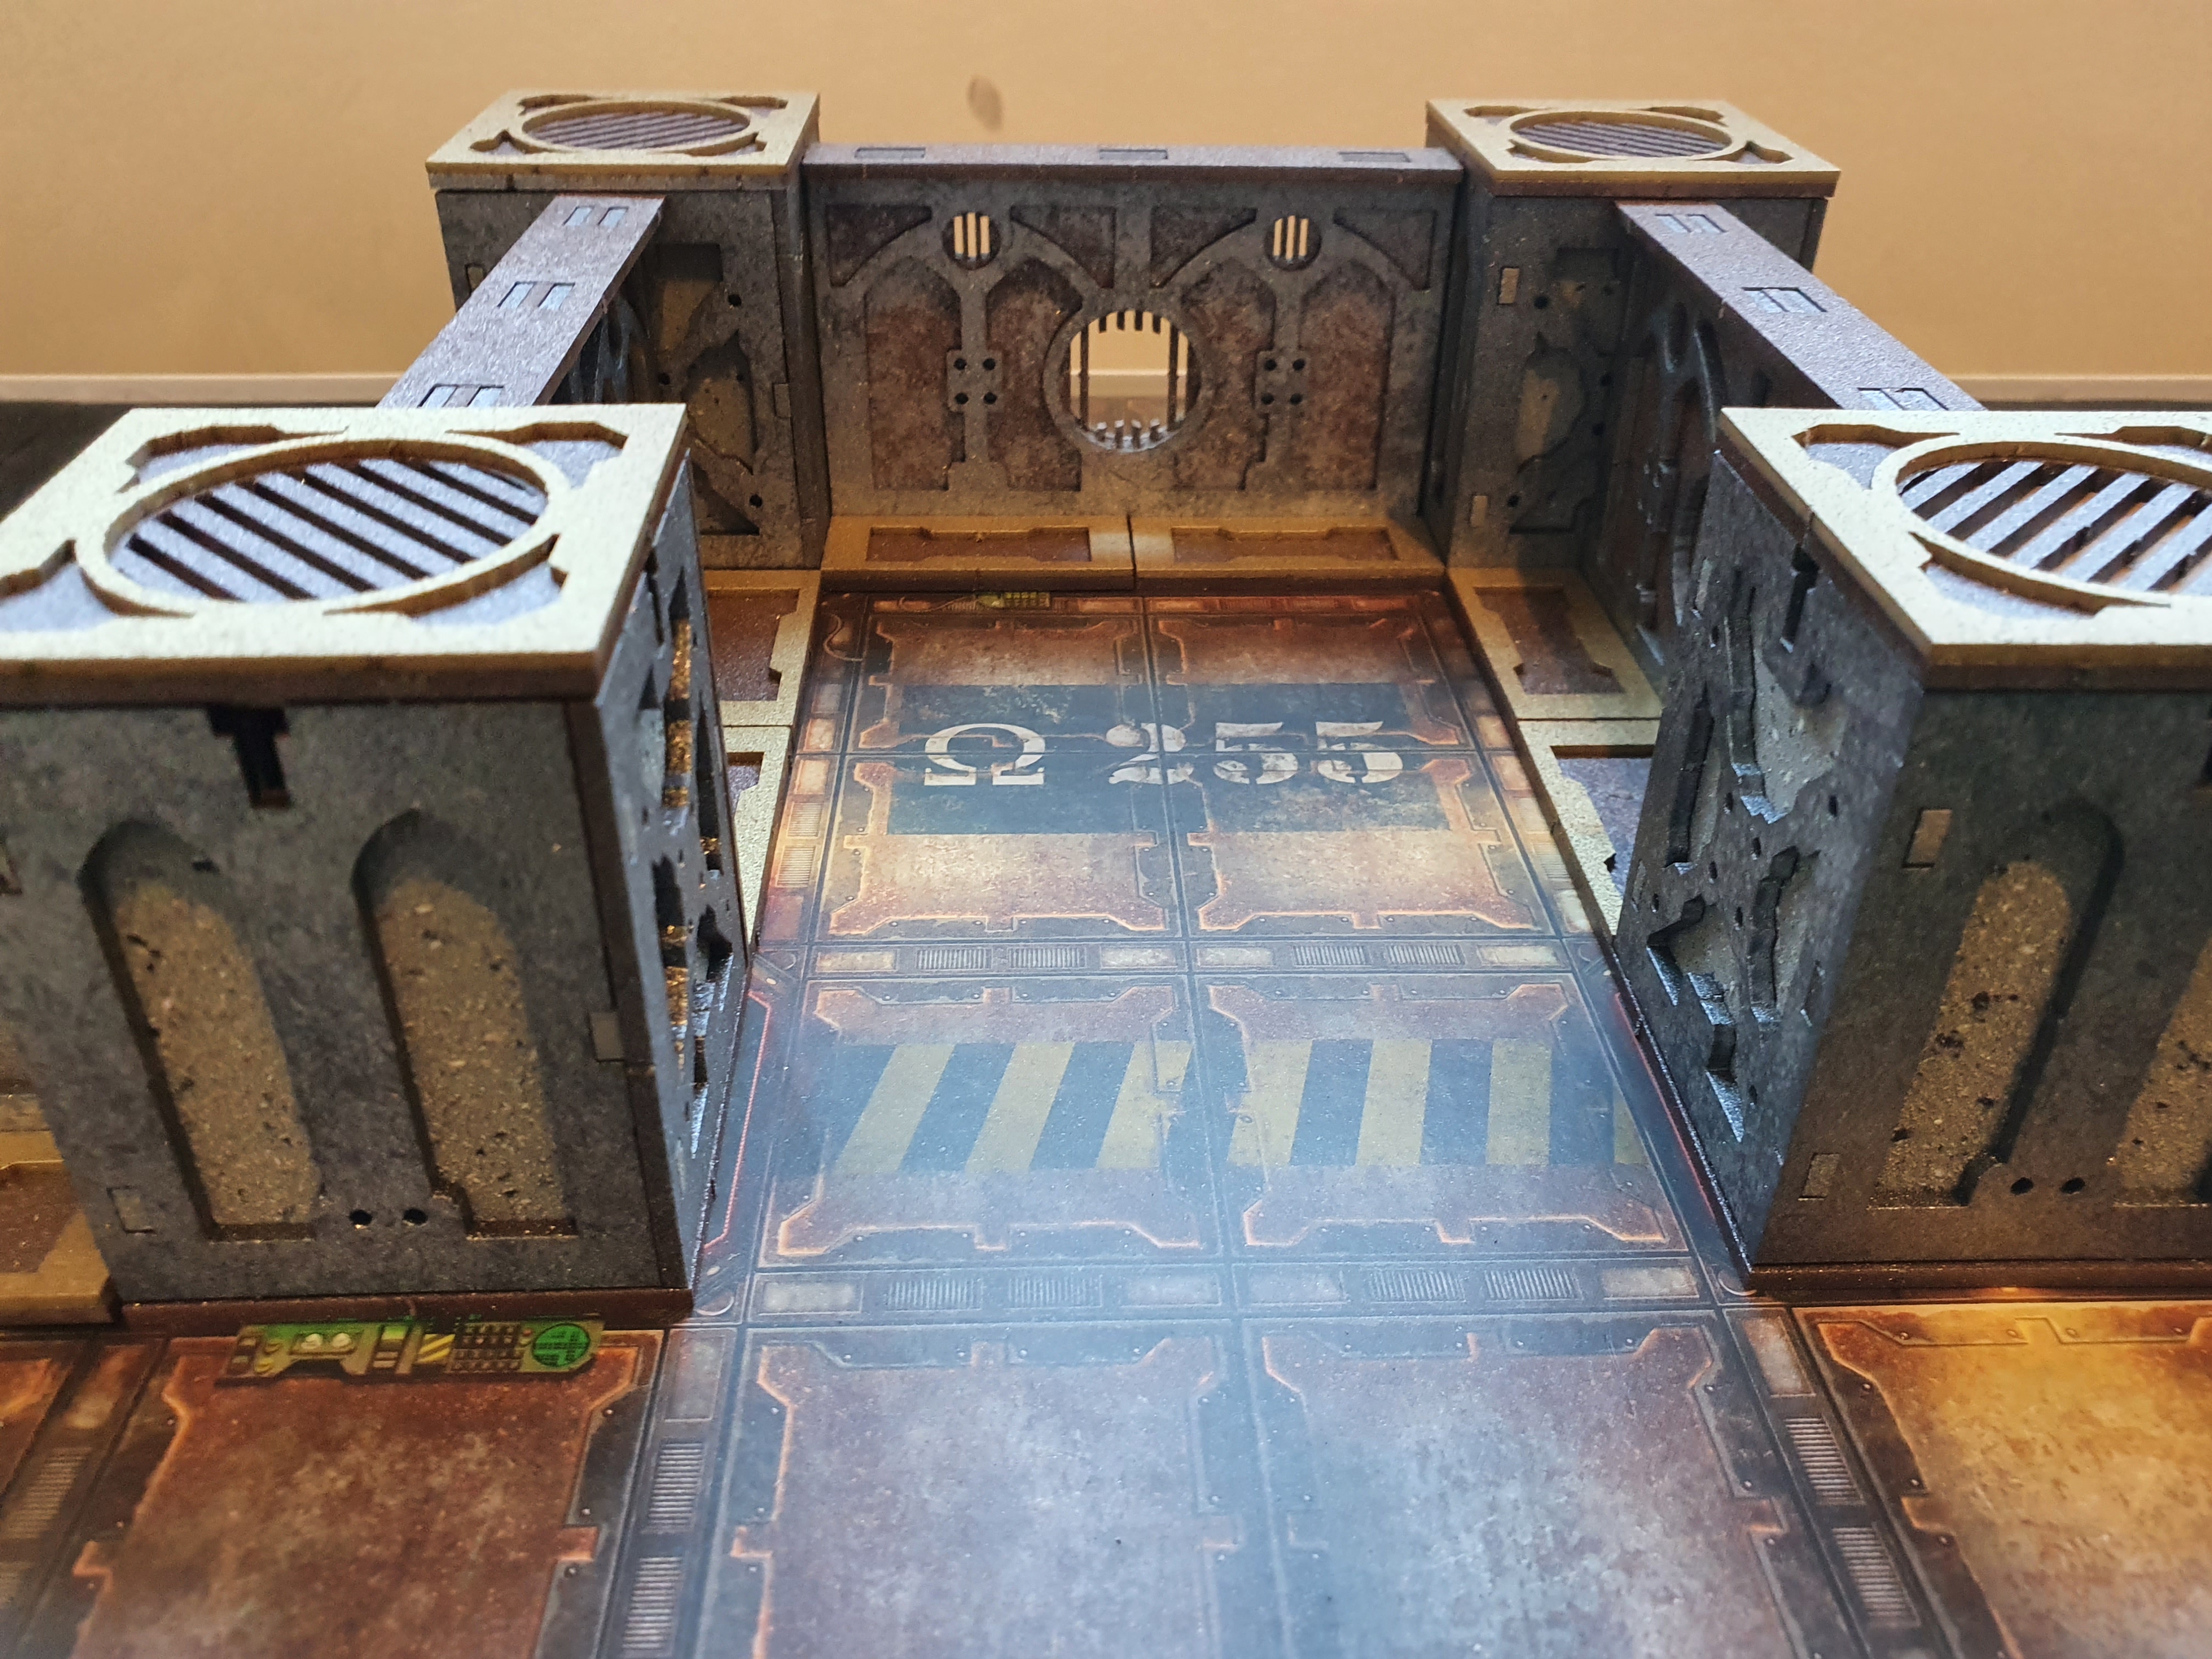 Designed with minimal pieces, they can be assembled in a variety of different configurations to make side rooms and alcoves.
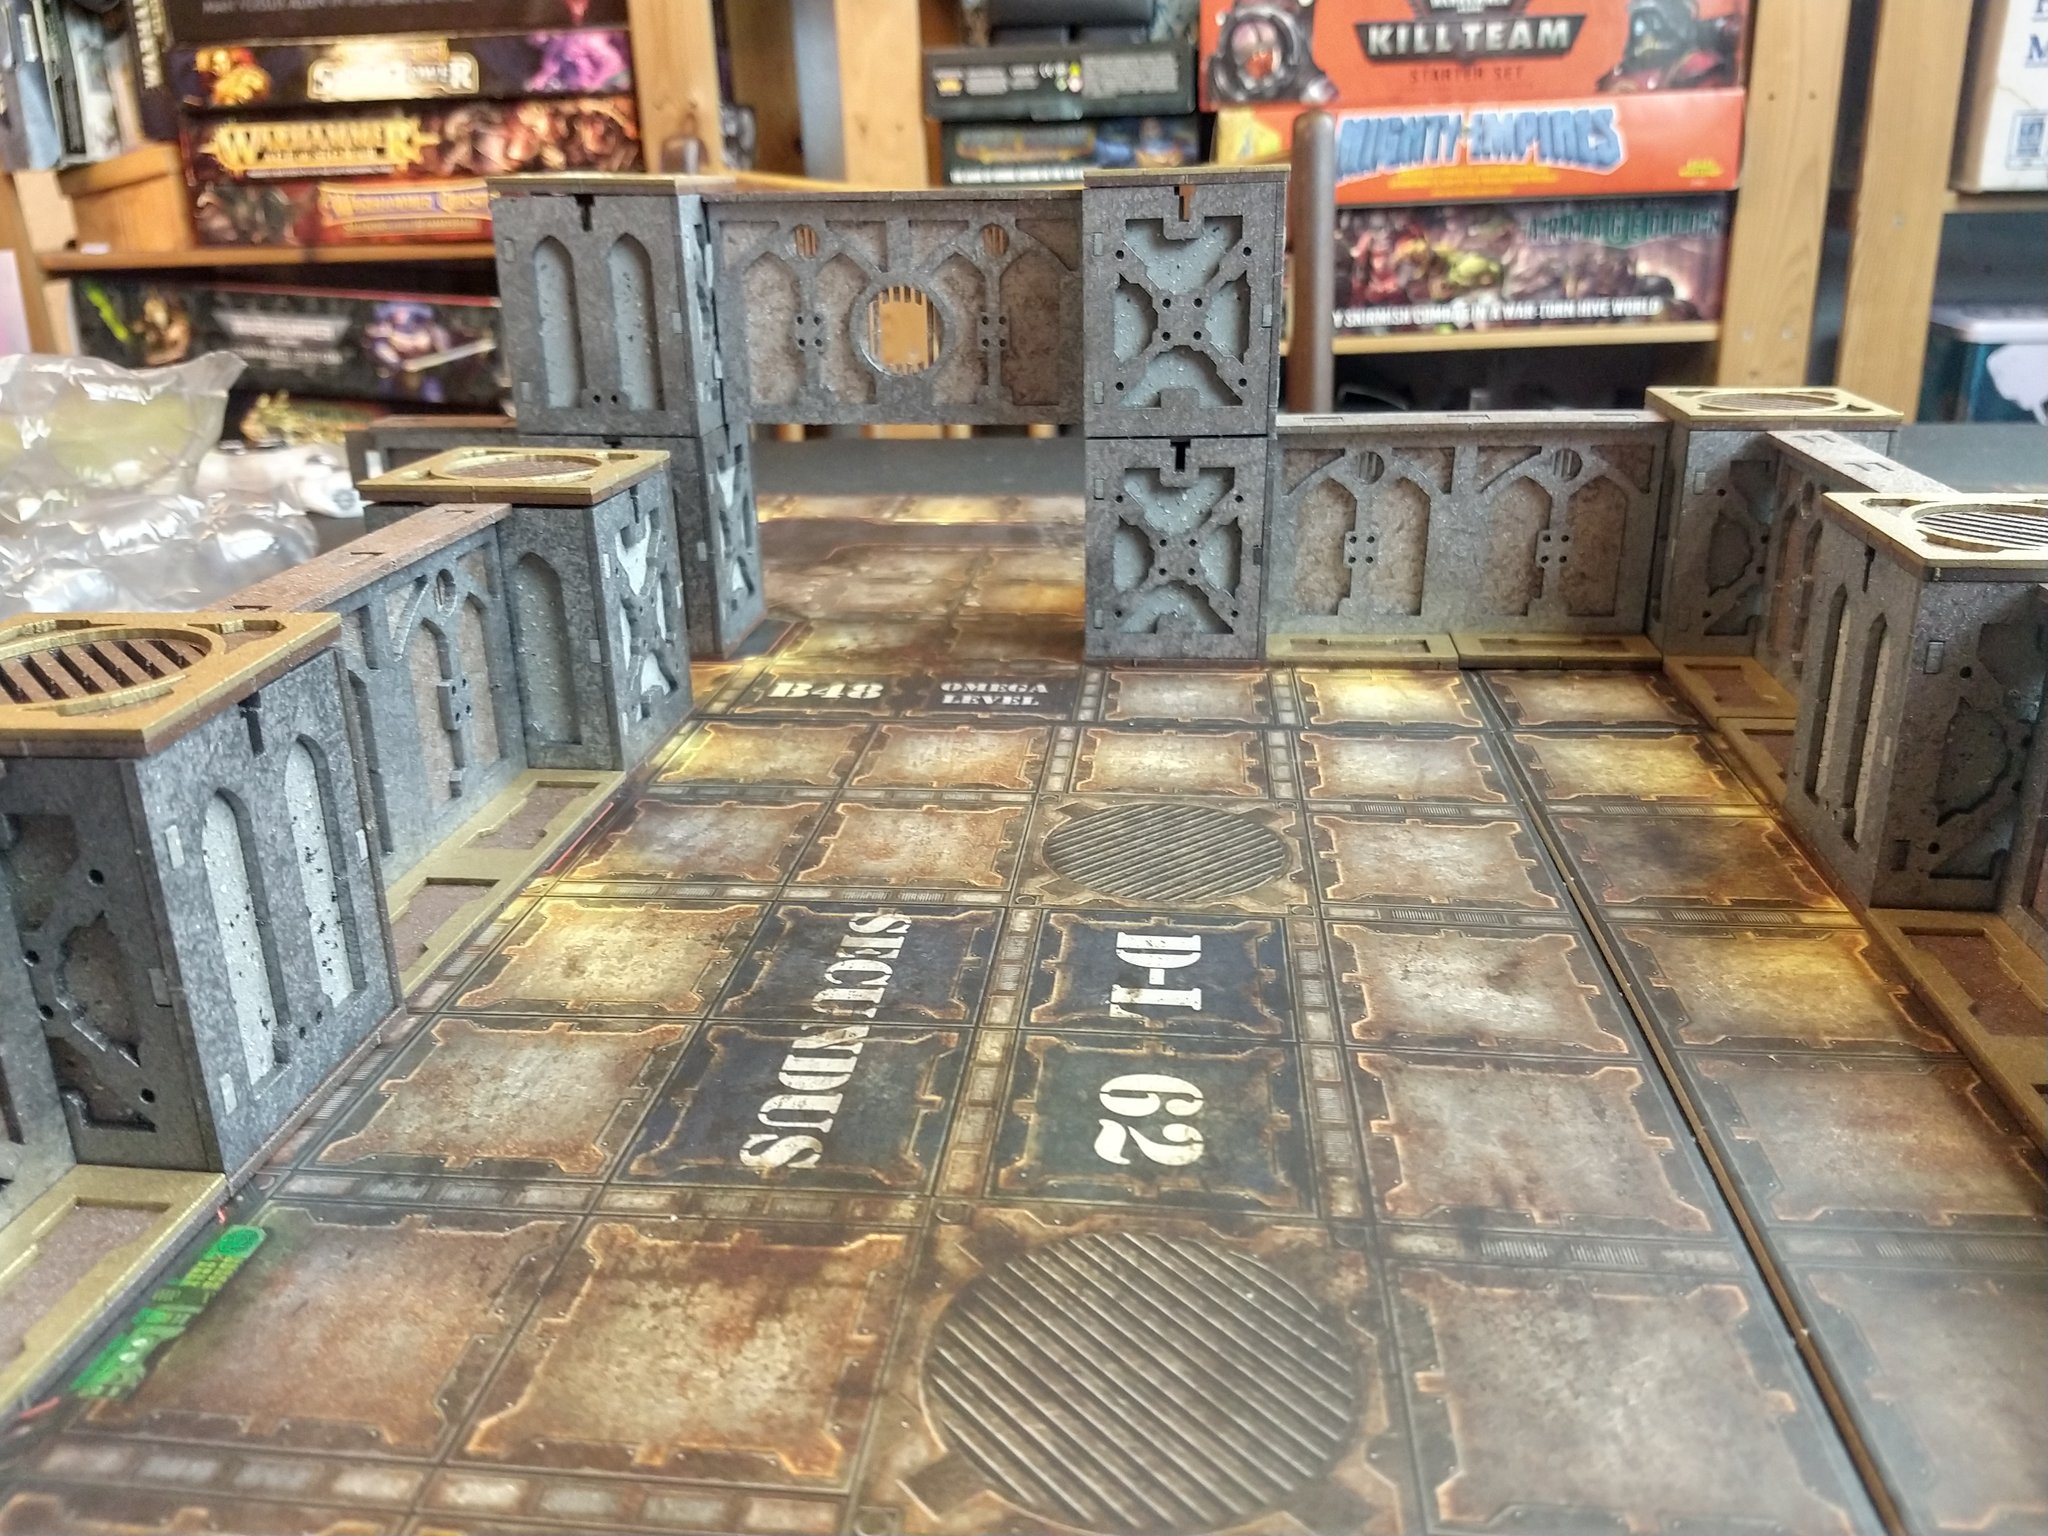 the pieces have also been designed to be stackable to give the option of making buildings and raised platforms in the future.
These are still early days and I’m looking forward to gauging interest before moving on. I have sent a kit to the wonderful Agents of Sigmar who run a gaming channel over on youtube, if you are interesting in checking them out please head over and take a gander here https://www.youtube.com/channel/UCgHUrefFPIx5_ppXbwqT4Pw
Hopefully they will be playing a few games of Necromunda with these in the future.
If anybody is interested in knowing more or maybe want to grab a set for themselves, please drop me a mail at [email protected]
Aim for the Red ones!
If video games have taught me anything, barrels and crates should be EVERYWHERE! and this should be even more true in a hive city. I wanted a good handful of oil drums to group together and place next to barricades to add in an extra level of detail and realism.
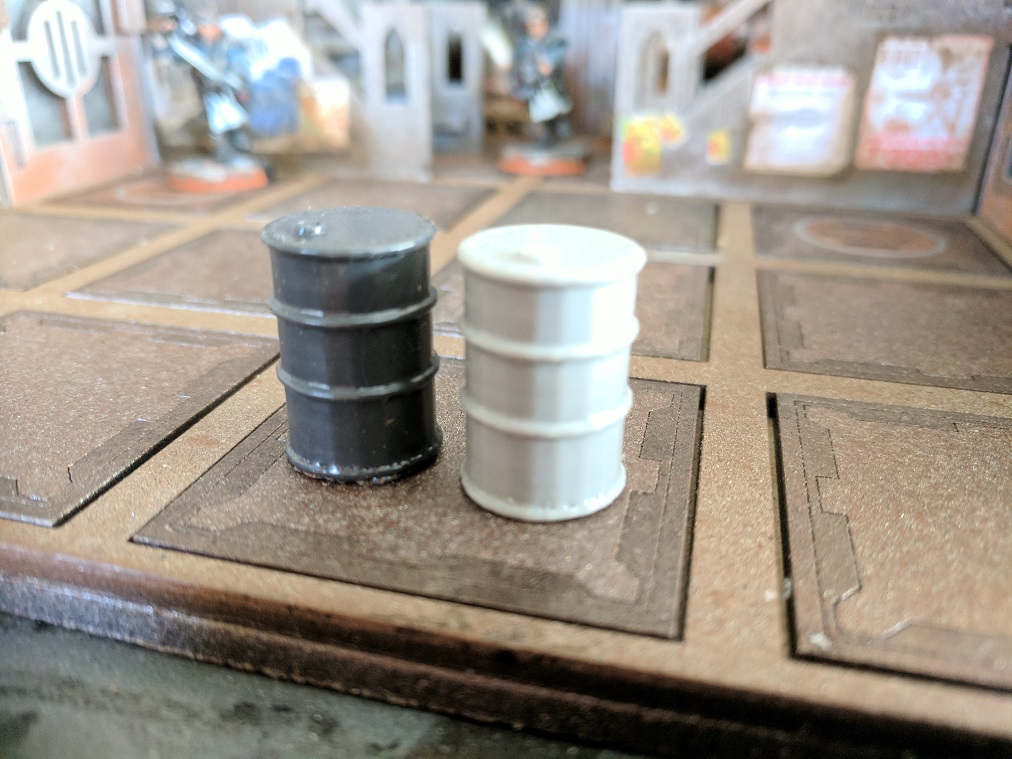 I put together a simple oil drum shape in Blender and printed it off on my 3D printer, once i was happy with the size i made a rubber mould so i could run off as many copies as i like.
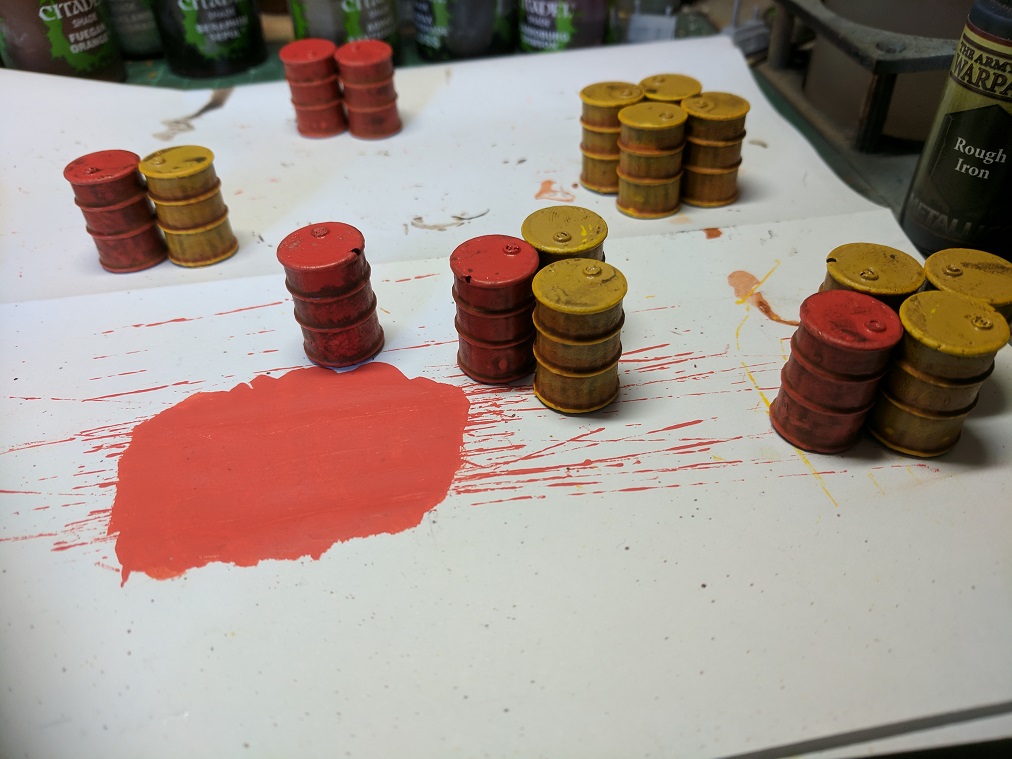 I wanted a bit of variation so I did 20 barrels and painted 10 yellow and 10 red, the base coat for the yellow was more of a brown ochre spray paint while the red was just a standard hot red, The base coat was followed by a wash of agrax earthshade and/or strong tone from army painter and then finally drybrushed.
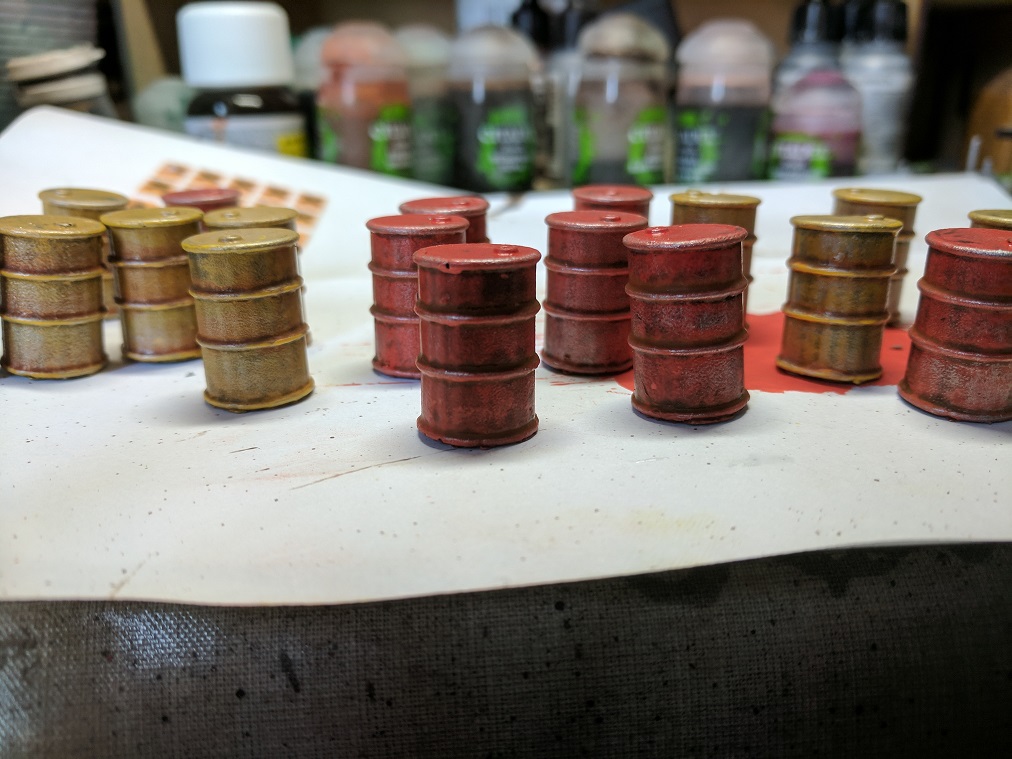 To weather them a little more i did a light drybrush of light silver just to give the impression of paint fading/chipping in places.
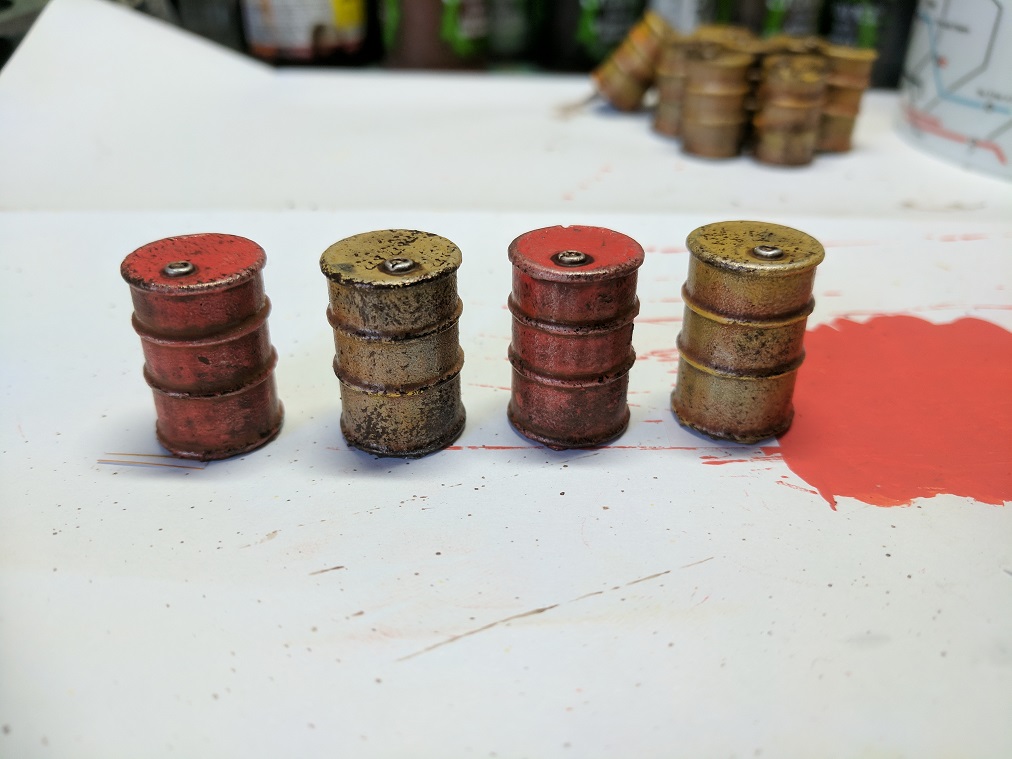 Next step was to paint the cap in the same silver then using a sponge i dabbed on some rough iron paint around the barrels to act as more aged darker chips and scratches.
 As an extra touch i printed off some hazard labels on standard printer paper and applied them to the barrels using PVA (don't add water to the mix. it ruins the prints) i used two standard hazard warnings, Irritant for the yellow and naturally the red barrels were flammable/explosive.
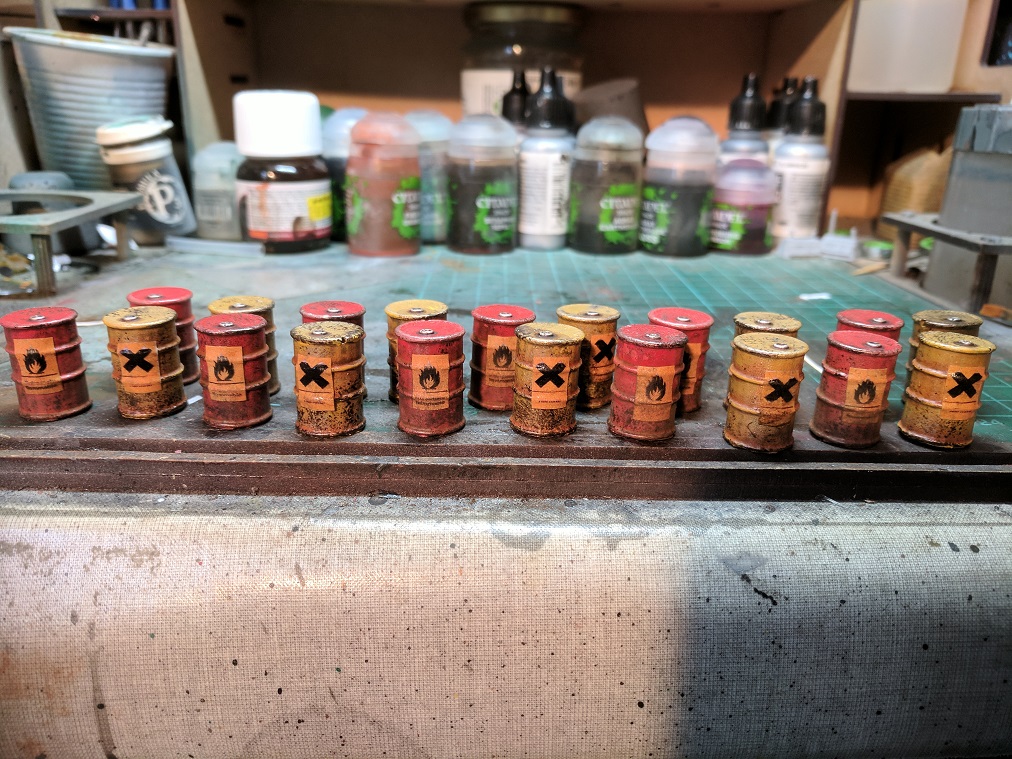 The completed barrels ready for the next step....
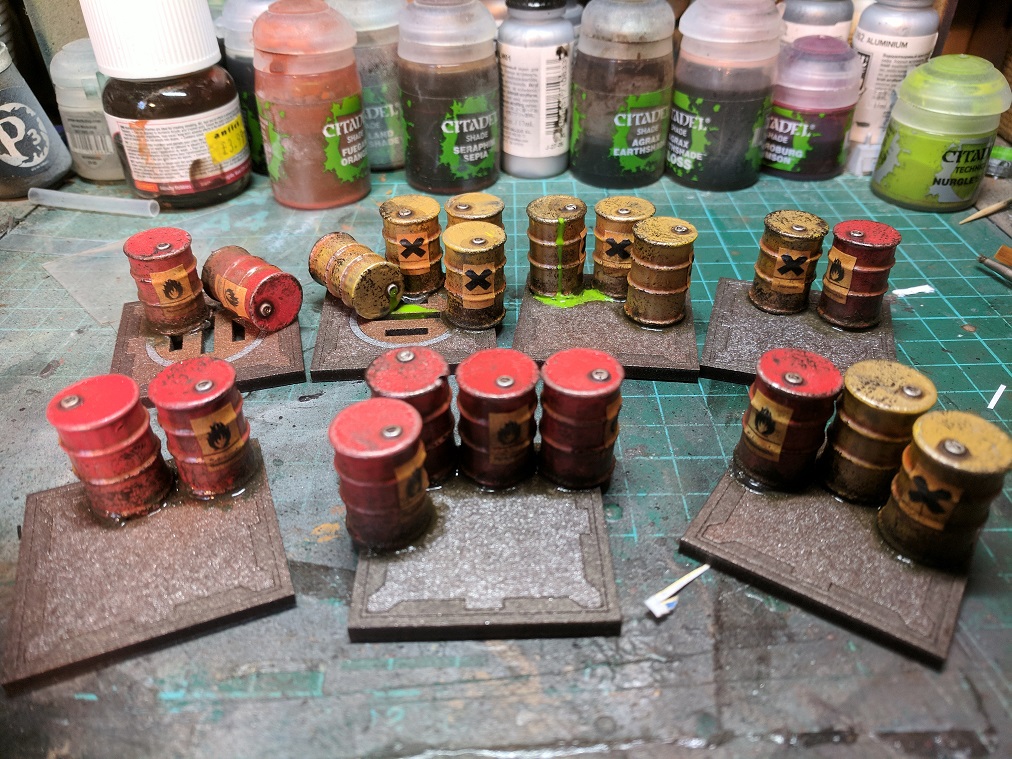 Since barrels are small and light it would be a pain to position them loosely on the board since they would probably keep on getting knocked over and rolling about everywhere so i decided to group them together and glue them to some of the board tiles, there were a couple which had a casting defect here and there so i added on a little bit of extra detail and had them leaking goo here and there, it is 40K after all.
 The completed barrels ready to provide...questionable cover to the gangs of the underhive, I'm playing around with the idea that these might be part of a mission where you have to save as many as you can, any stray shots could strike the barrels causing either an explosion, a poison gas cloud... or an exploding poison cloud!
Propaganda for the People!
 After spray painting the stairs i wanted to add in a couple of extra details to give that lived in look to the underhive.
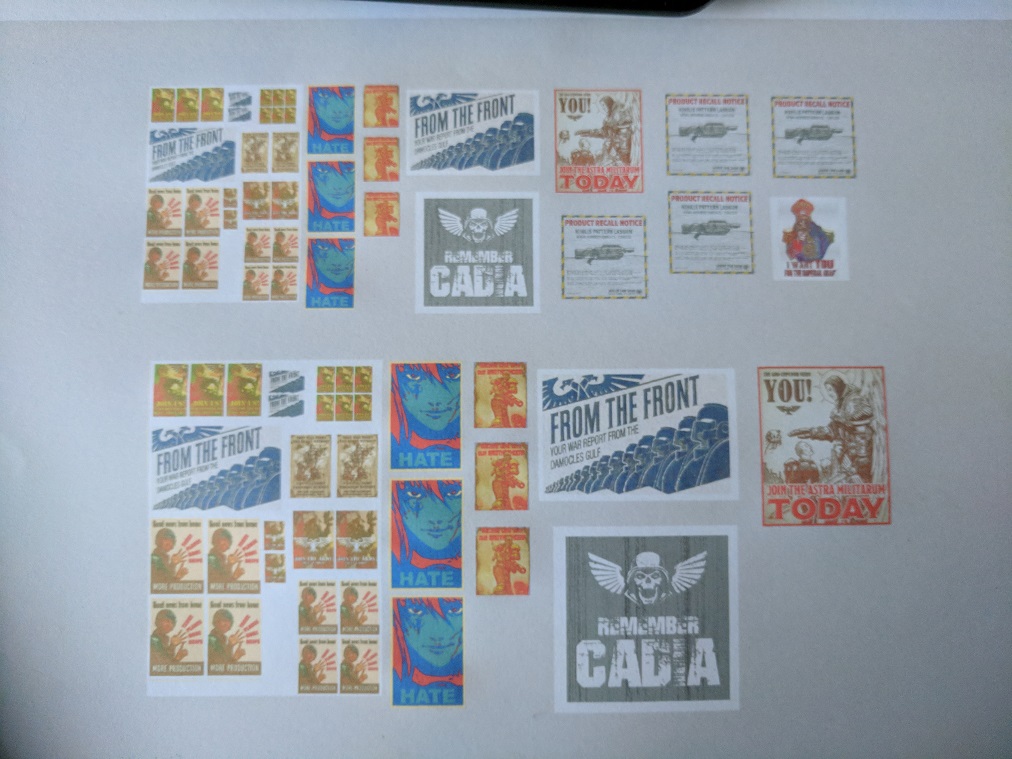 I remembered seeing a project from a while ago where somebody added some extra some extra life to their scenery by putting up posters, the video can be found here: https://www.youtube.com/watch?v=d1gpJruQiZk or the same idea again done by the games workshop team: https://www.youtube.com/watch?v=SgKlrzOJvRs I looked around online and found some nice poster ideas that i liked, resized them and printed them.
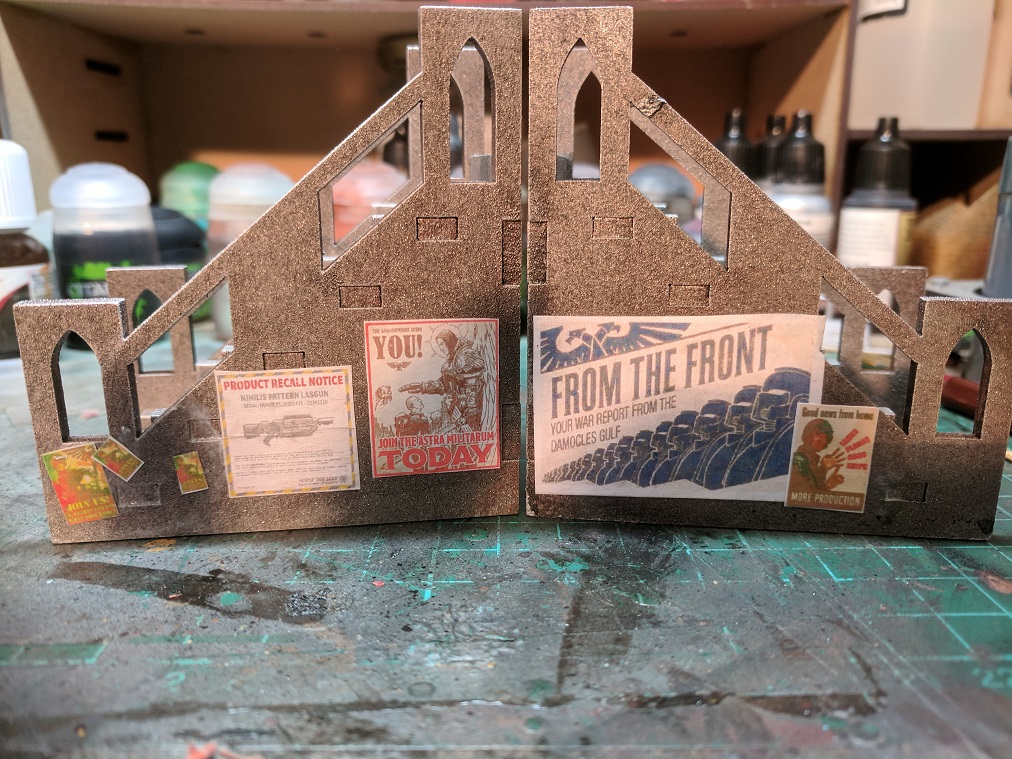 Glued the posters on with some basic PVA/Wood Glue.
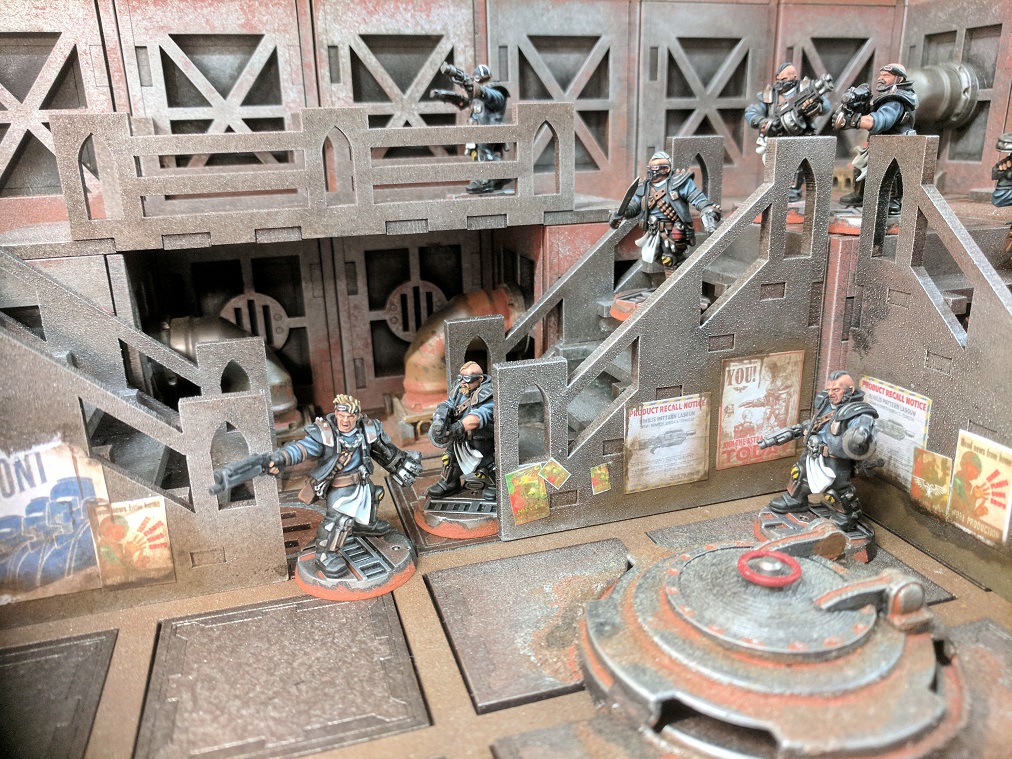 Finally added a bit of weathering, a couple of splashed of brown wash and/or some pigment powder should be enough to add a realistic worn dirty look to the posters.
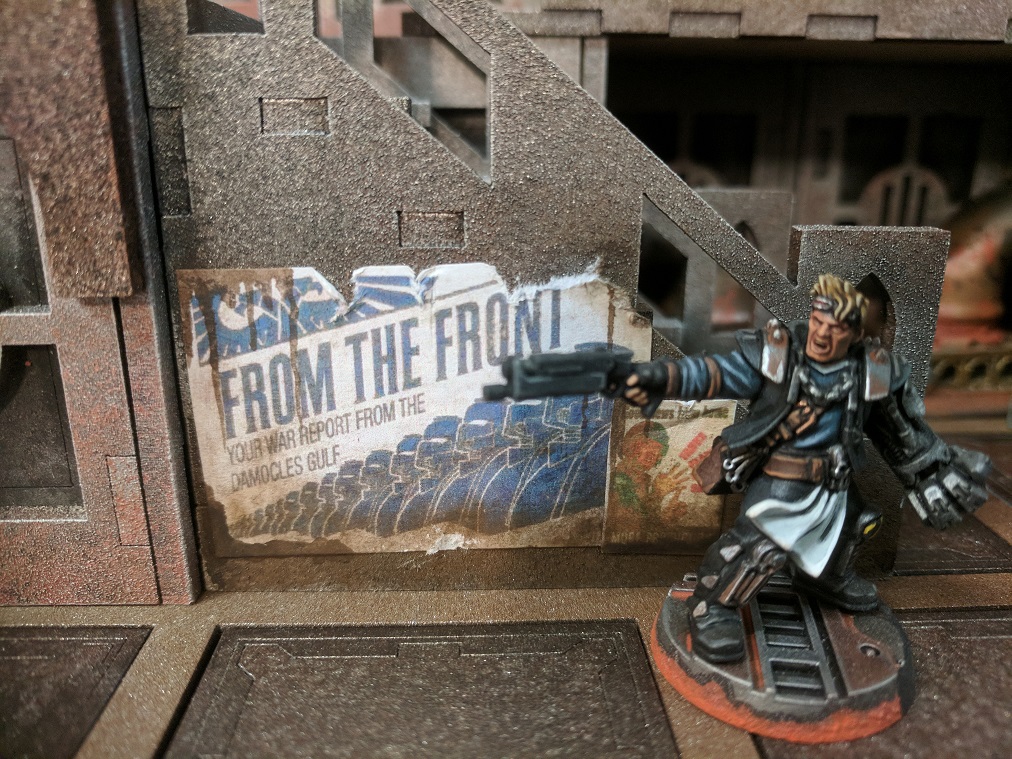 News from the front indeed, but this ganger has his own war to fight!
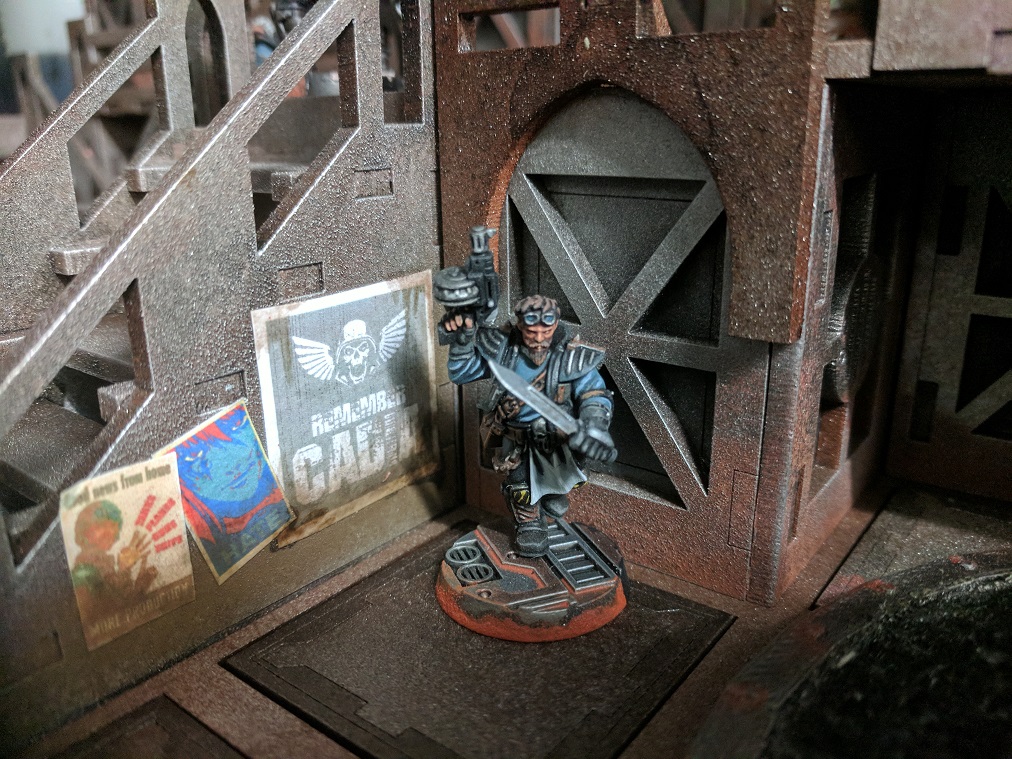 Remember Cadia? I dunno, do you?
 Who needs a stinkin Van Saar lasgun when you've got a good trusty Orlock autopistol...or two
Step on up, Don't fall off the edge and cross those bridges when you come to them.
As stated before at the beginning of the project I wanted to make the modular board suitable for both 2D and 3D play areas so the addition of stairs to reach upper levels was a must as was bridge sections to cross between raised areas, I also felt that any upper areas should also have a line of rails around the outside edge to act as both cover and add a bit of realism.
I drafted up some new designs and got them cut in the usual 3mm MDF…
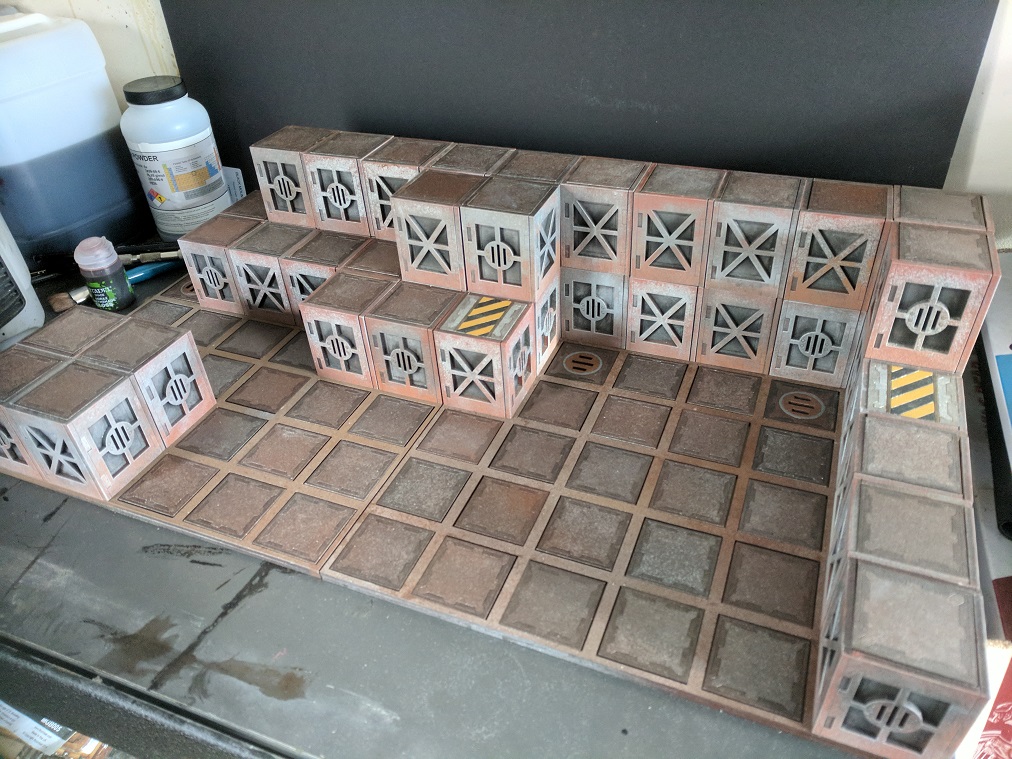 As you can see, the board when built up looks a little barren, lacking any real scenery or areas to move up/down or across.
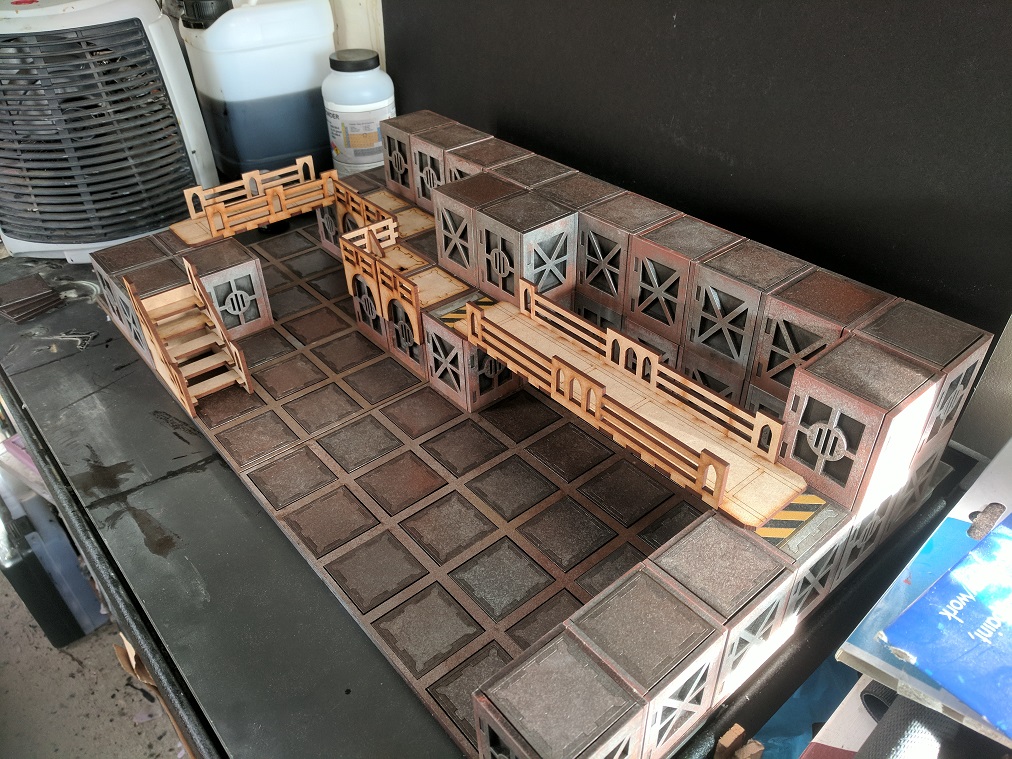 The same board layout, now with the added stairs, bridges and rails, much better!
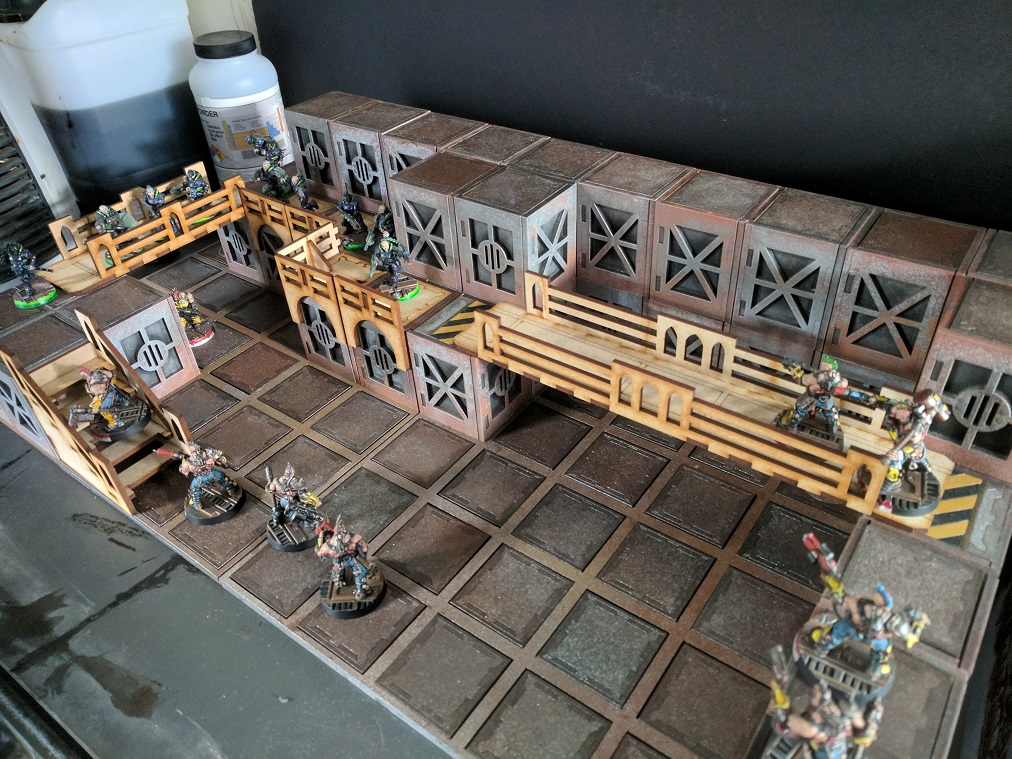 Added on some miniatures to give an idea of scale.
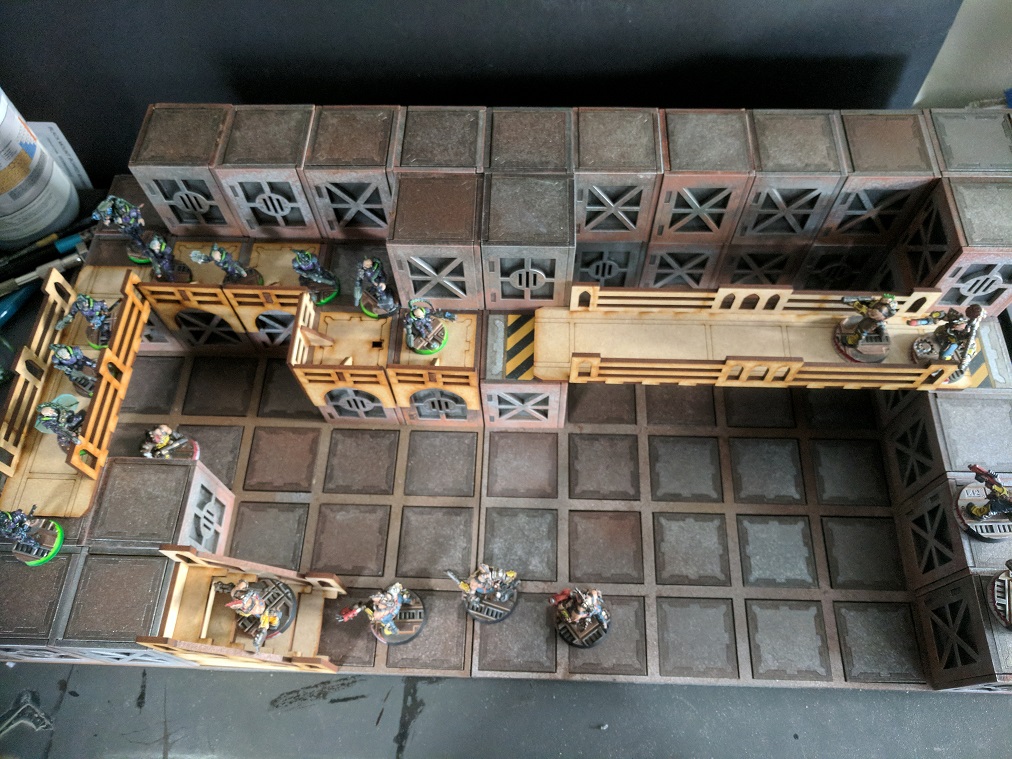 Once again from above.
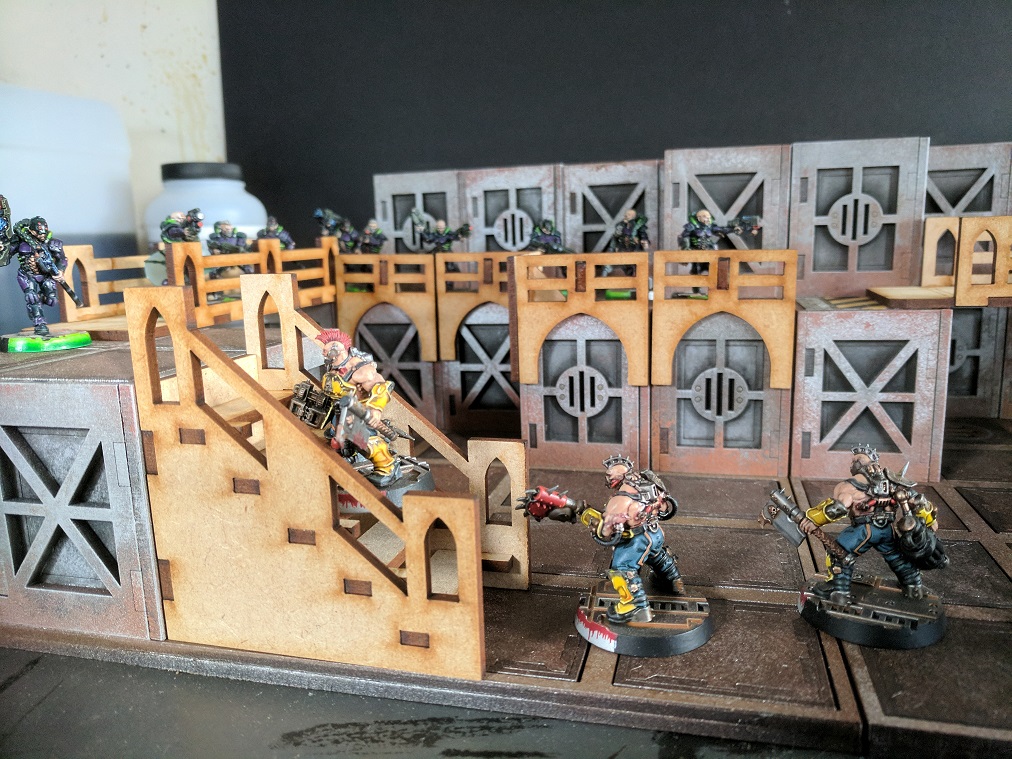 Another nice feature is the stairs are pretty much functional with enough of a flat area and gap to sit miniatures on both size bases.
Gears of the manufactorum
 Just before Christmas i was given the suggestion to make some kind of assembly line track with a more Grimdark feel, I really liked the idea of some kind of manufactorm track so i set to work....
 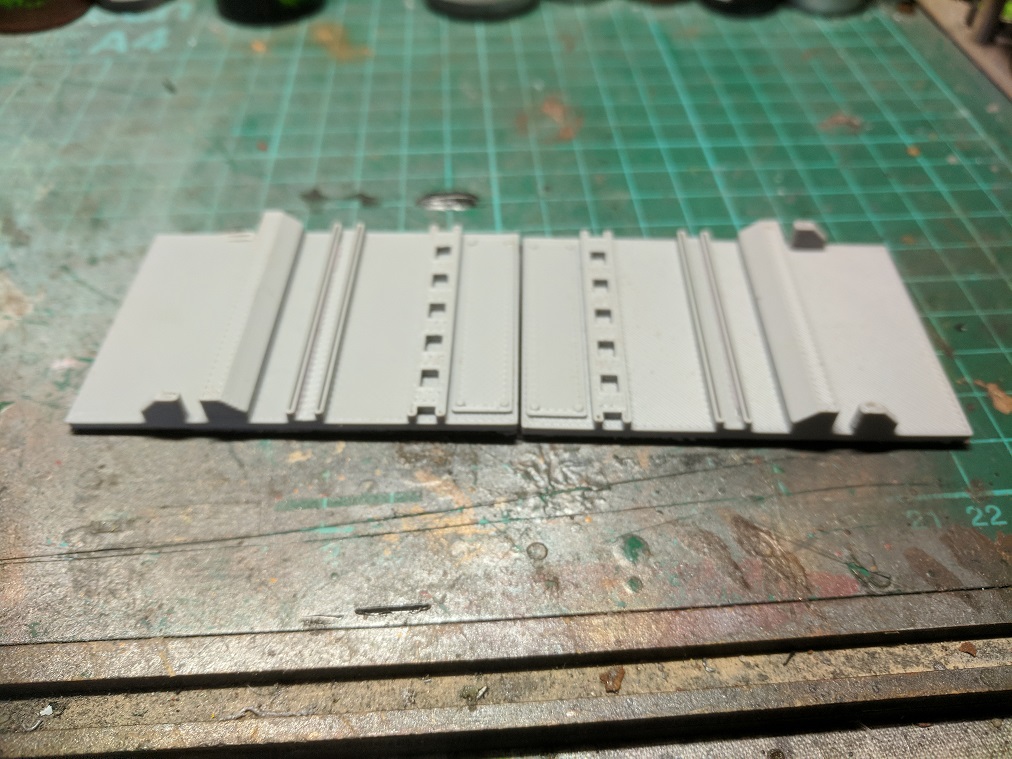 I Started with the base, nothing fancy but i wanted a couple of tracks in the middle then some spaces along the edge for fixtures and fittings.
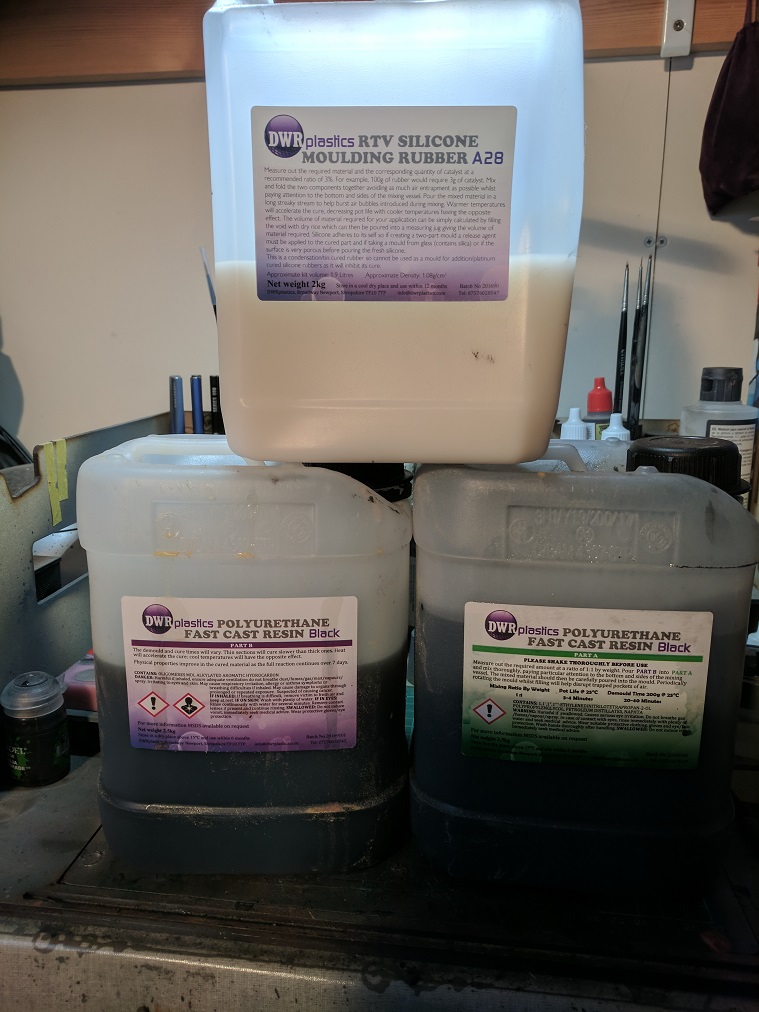 I had a feeling that i would need quite a few track pieces so i opted to make resin casts rather than reprint them over and over again, if anybody is interested in making rubber moulds and re casting in resin i can recommend DWR plastics in the UK, great products and relatively cheap.
 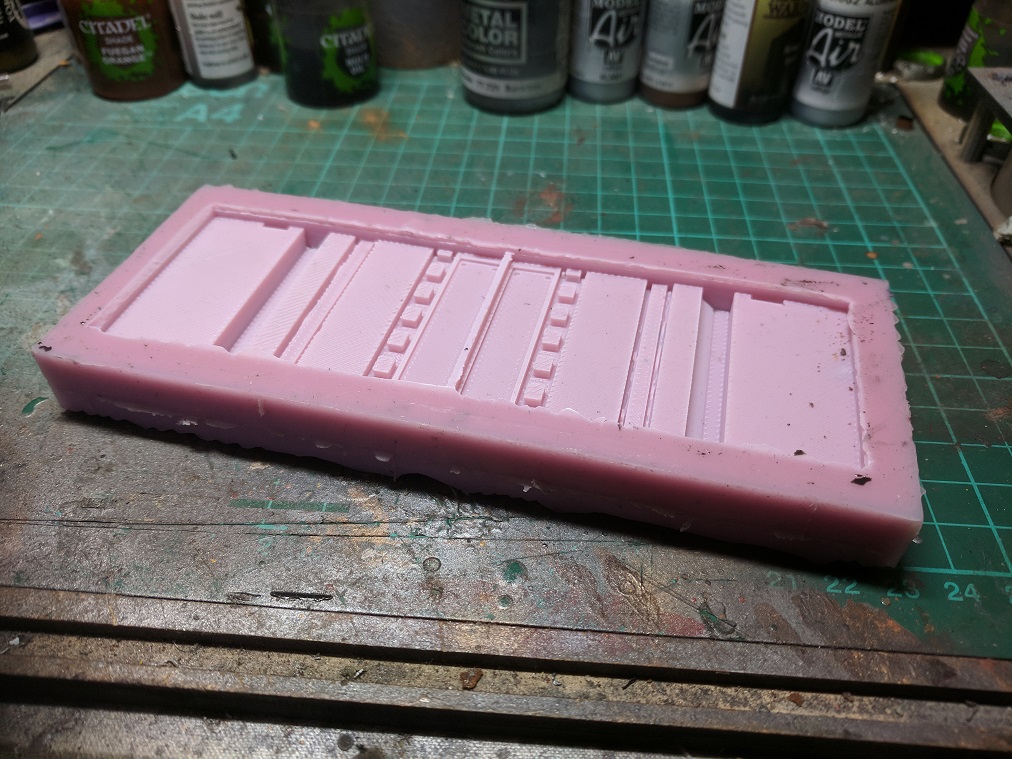 I made up the mould that i would need....
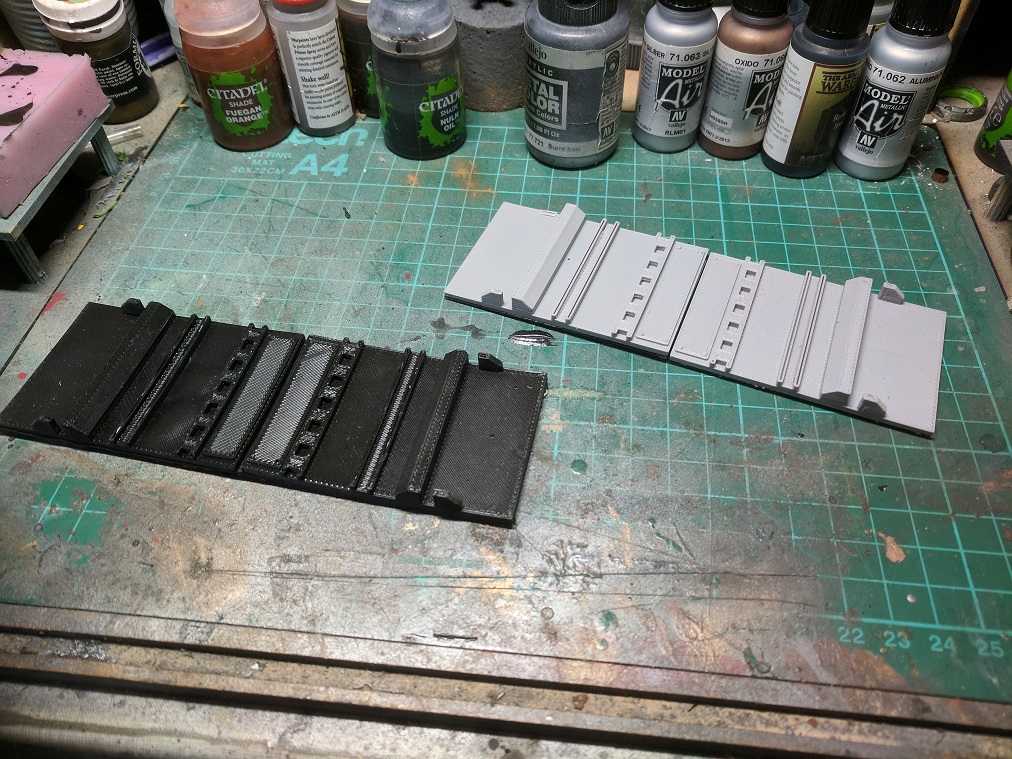 and then started casting copies of the original.
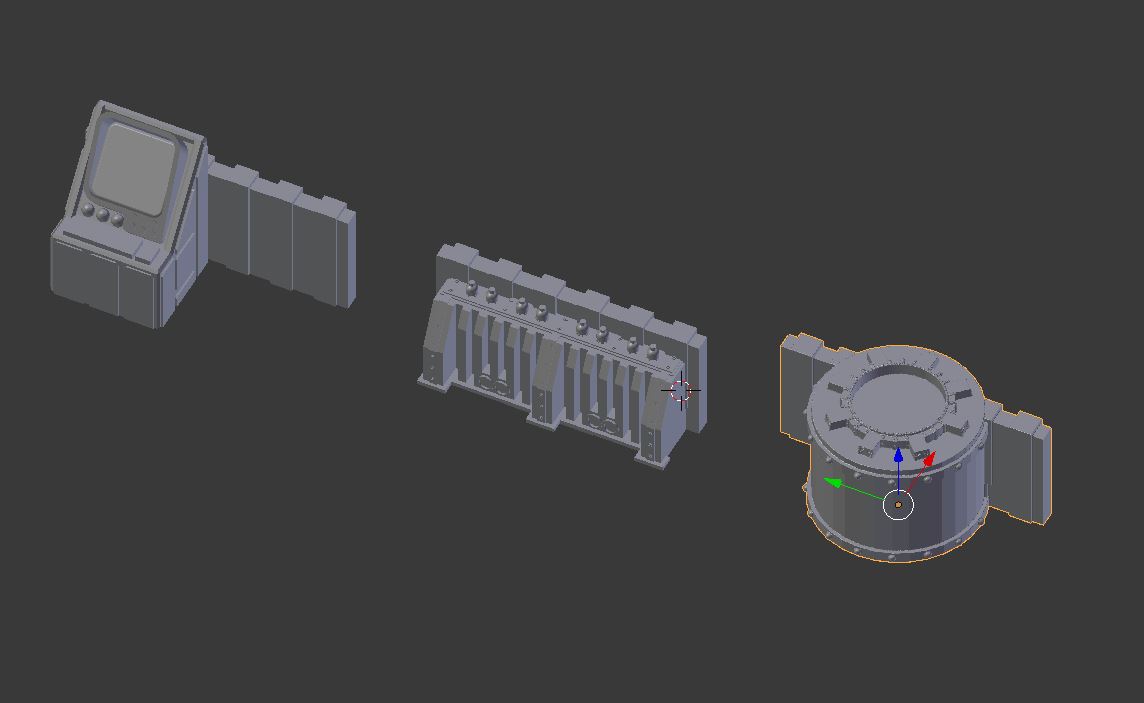 For the edges i wanted some variation, control consoles, power banks and housing for the assembly arms.
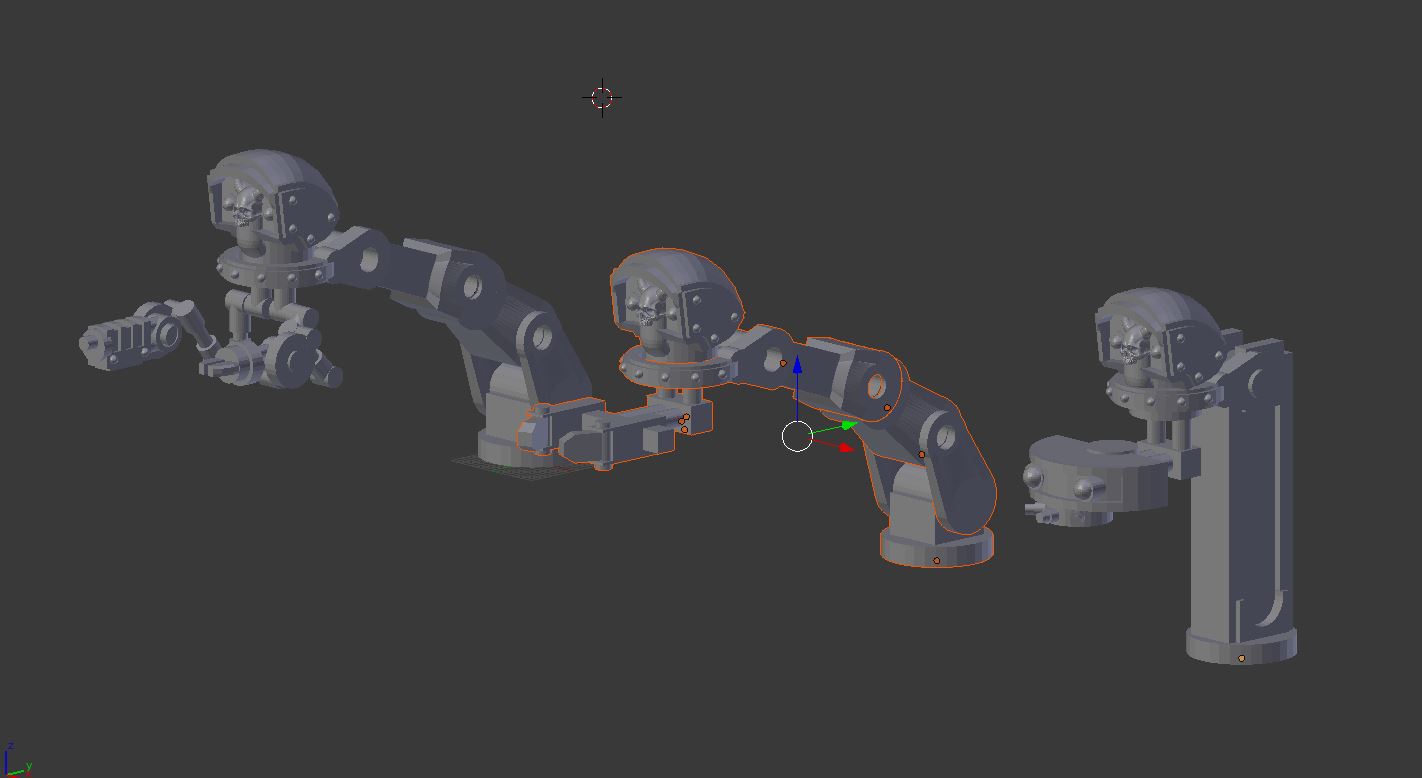 and for the assembly arms i went for 3 variations, heavy tool arm, claw and scanner.
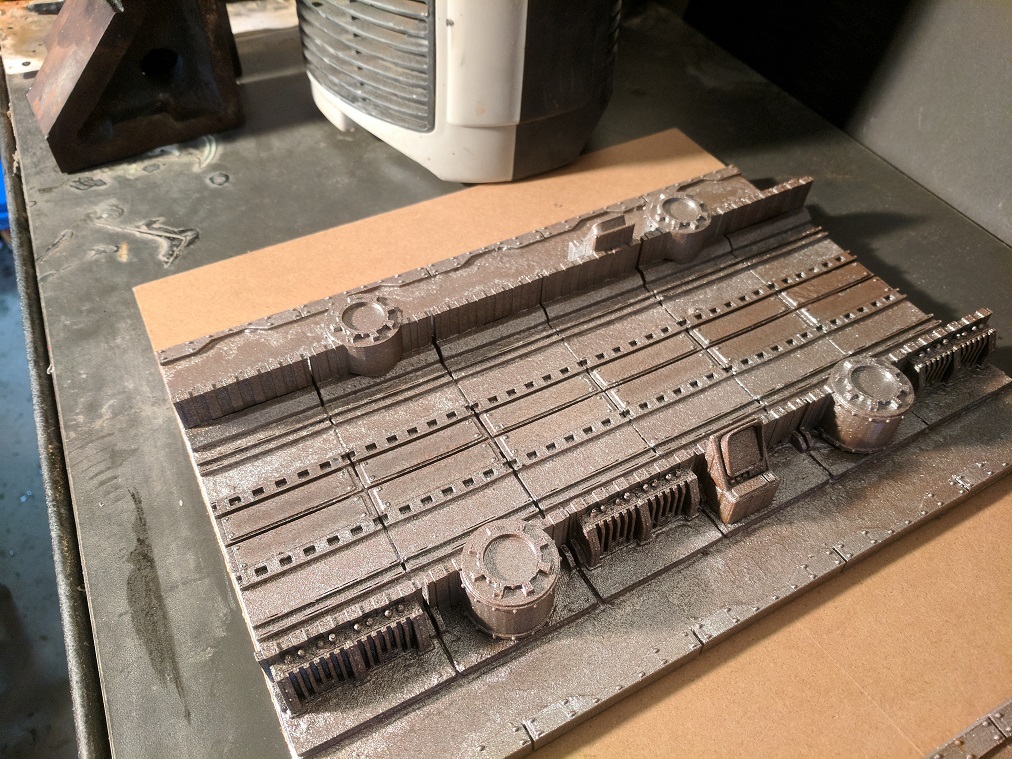 I took the casts and mounted them on some foam board, than added some printed edging, once everything was assembled i gave it a heavy spray of light and dark silver then a light mist of rust paint.
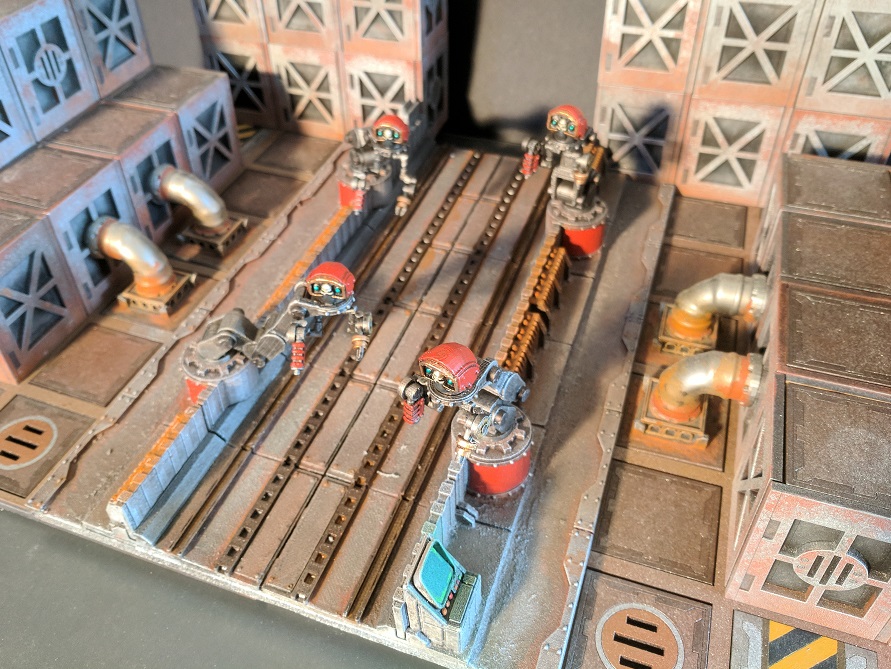 with the addition of some weathering effects and the finished assembly arms things were starting to look good.
 I repeated the process again to make a second track which would spread across the board, i will probably do this one more to get a really long track... but for now here is some Orlocks ambushed by soime Van Saar.... industry stops for nothing... not even a firefight.
looks a bit run down, but the foundations look strong.
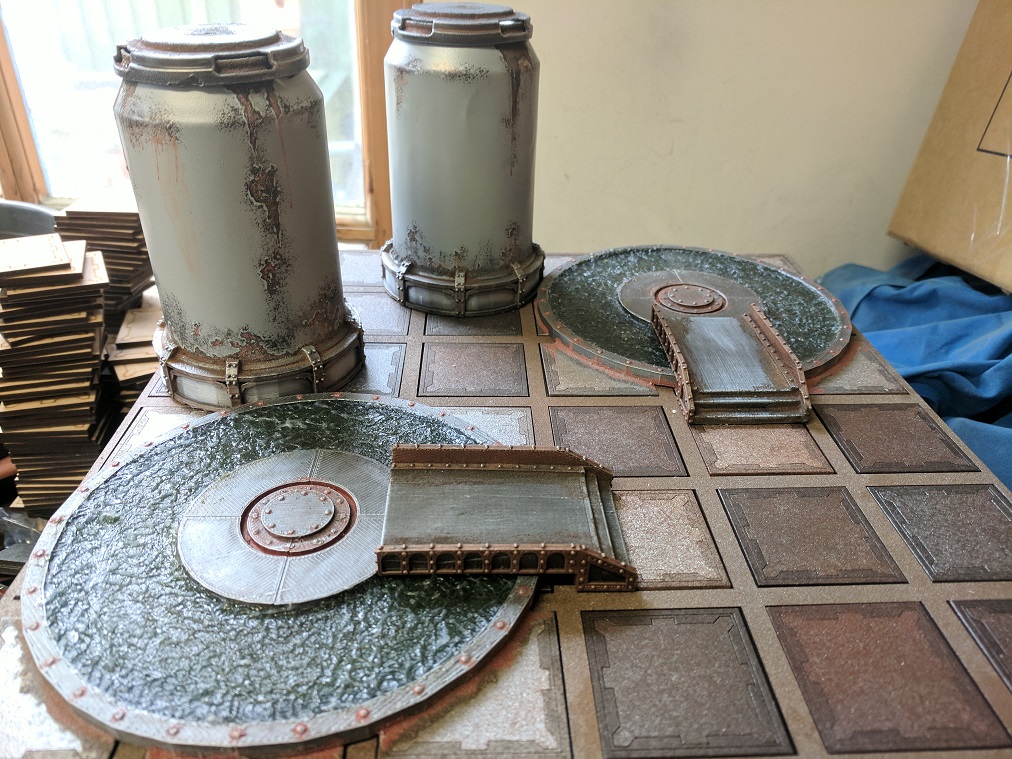 The tanks looked ok when i made them but when placed on the board seemed disjointed and out of place, the best way to get scenery to look natural is to add on a base which blends the transition between board/mat/playing area and the scenery itself, so its time to add on a base to one or both of these tanks.
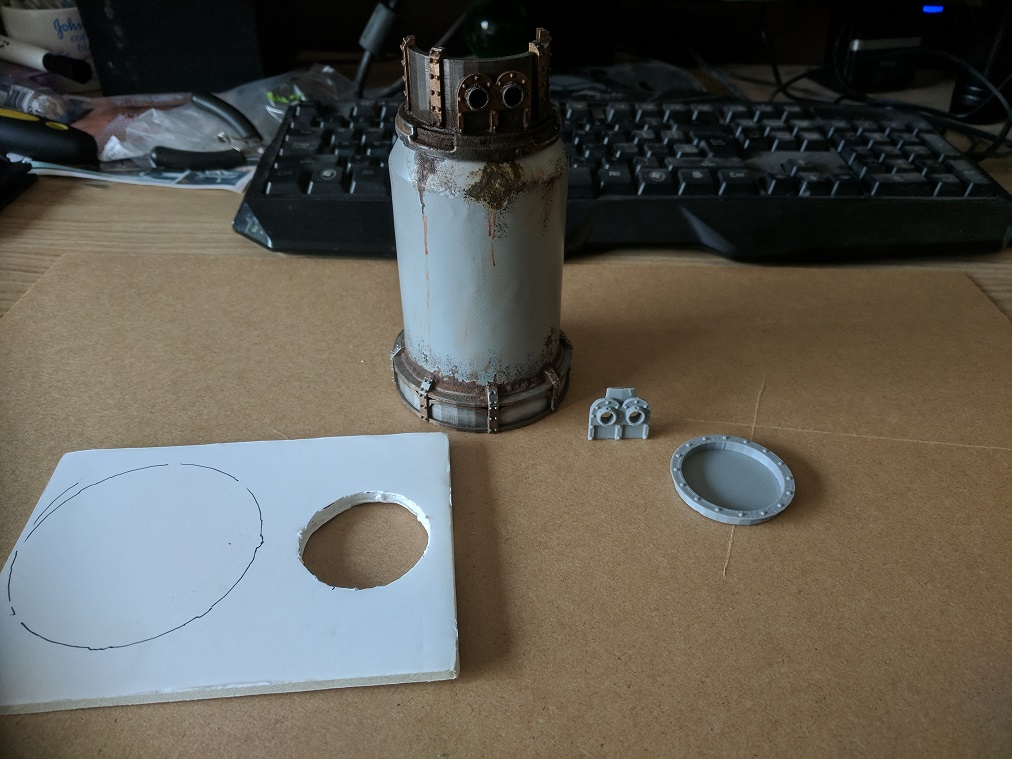 For the base i wanted just a simple raised area with a "filter pool" so i went for the model makers best friend "foam card" nice an easy to work with. for the pool i printed out a smaller cup and for the bottom of the tank i added in a little addition for extra pipes.
 I took some thin card and cut out some squares and glued it to the top of the foam card just to add a bit of texture then printed off some edge pieces to form a border around it all before spraying in all in a dark silver primer.
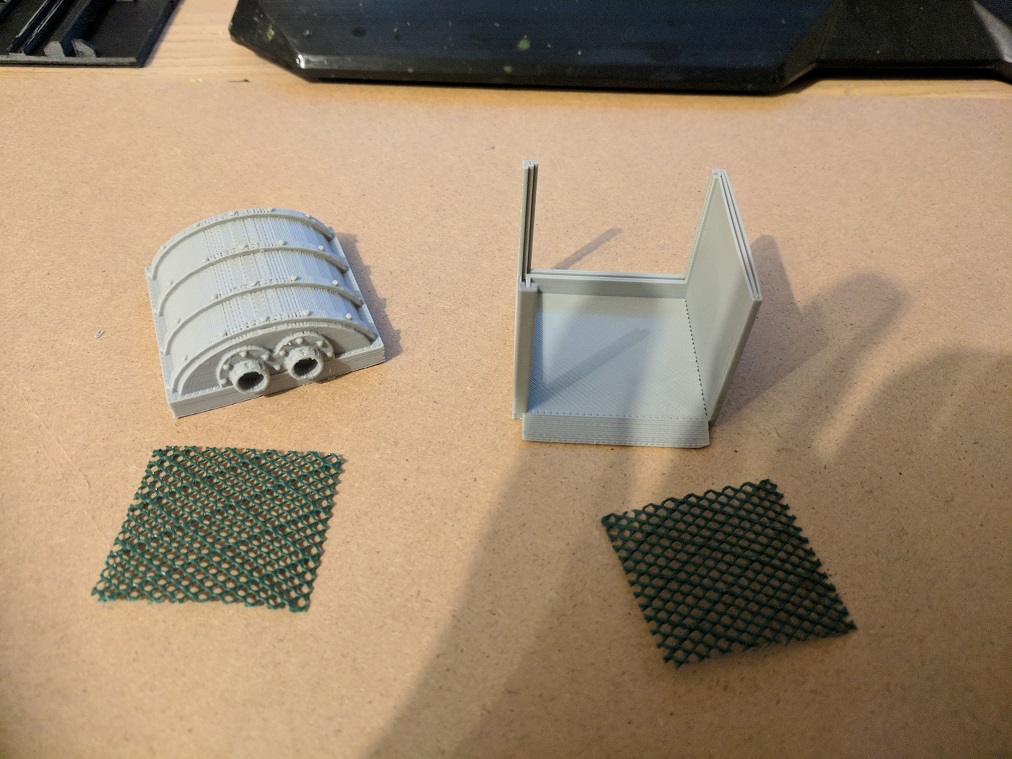 I also wanted something in which the sludge would be vented to, the hut was Printed but the green mesh was from a garden centre, relatively cheap for metres of the stuff and ideal for making fences.
 The filling station assembled complete with fences and ready to be added to the rest of the base.
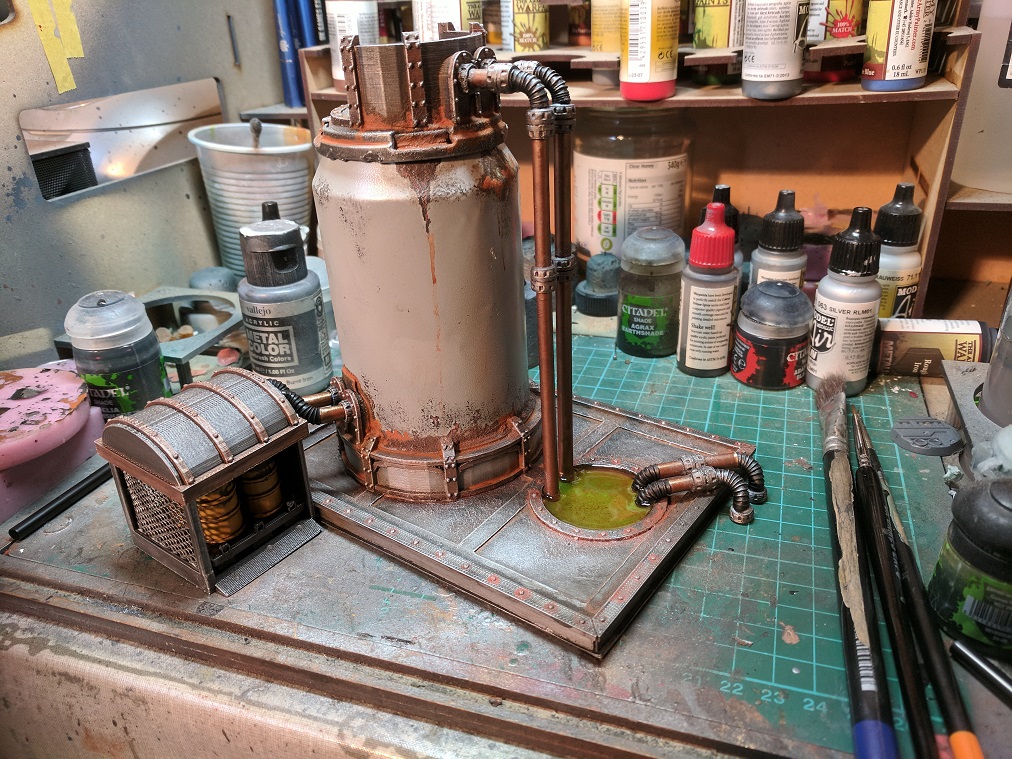 The finished base, i used straws from the previous entry to make the pipes and filled in the filter pool with some green paint and liquid resin, finally the filling station was glued to the side and connected to the tank with more straws, as a final touch i added in four barrels inside the hut waiting for protein rich Soylent Gre... err... Plant Sludge.. yeah plant...


