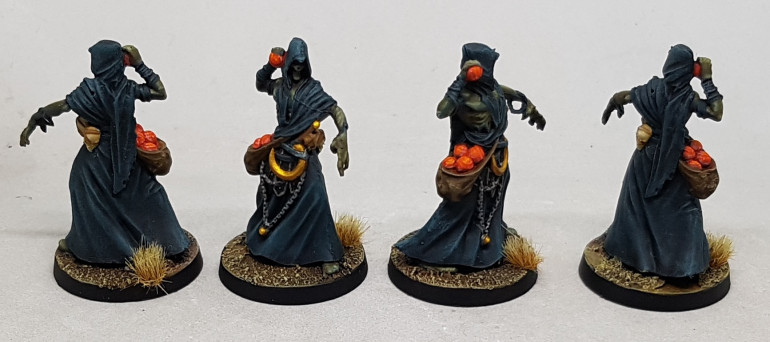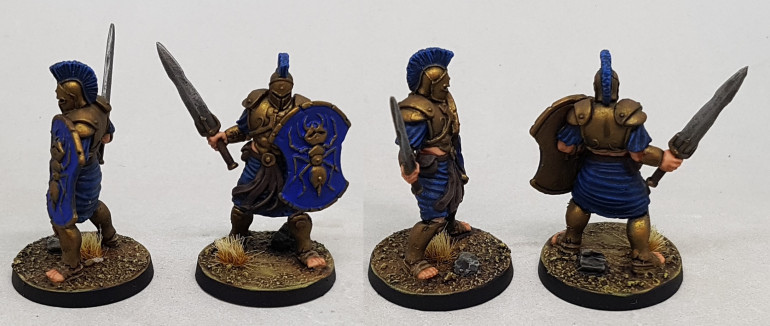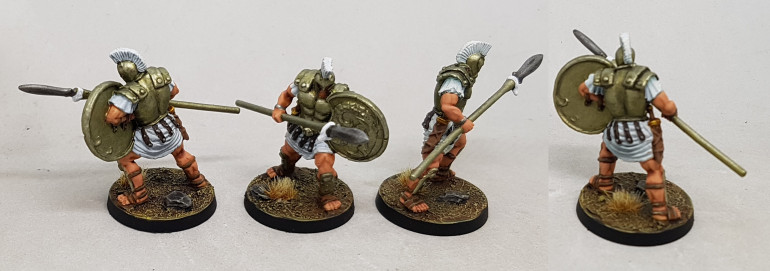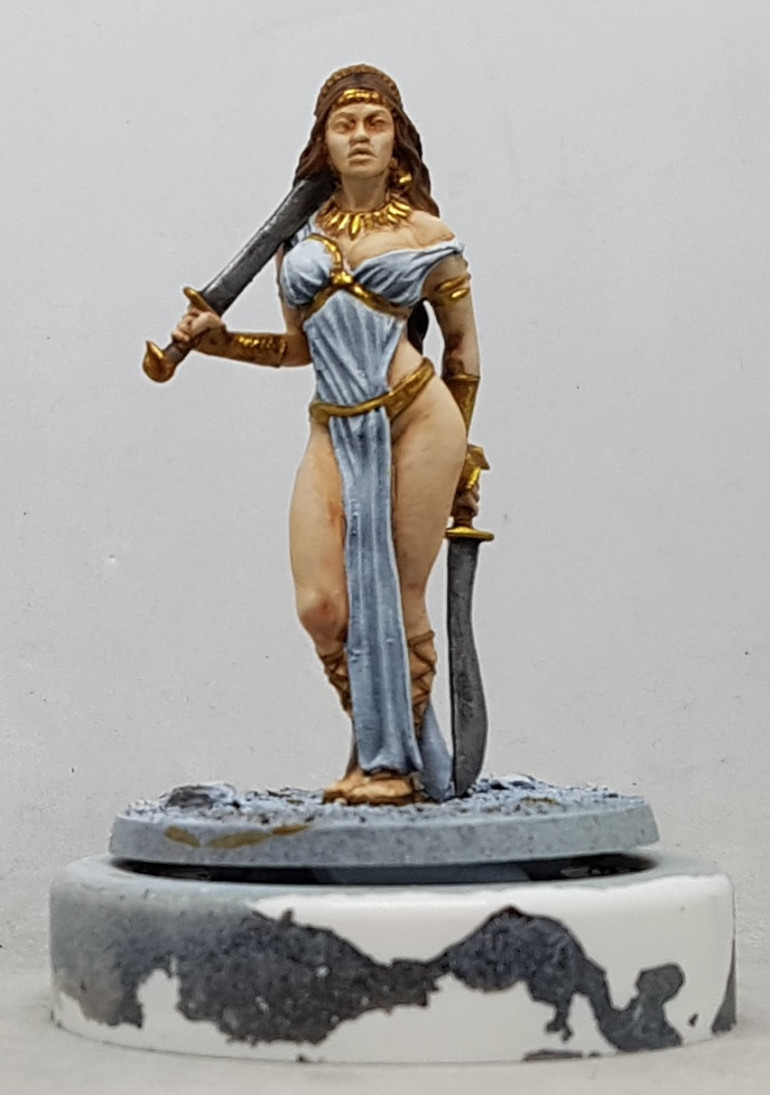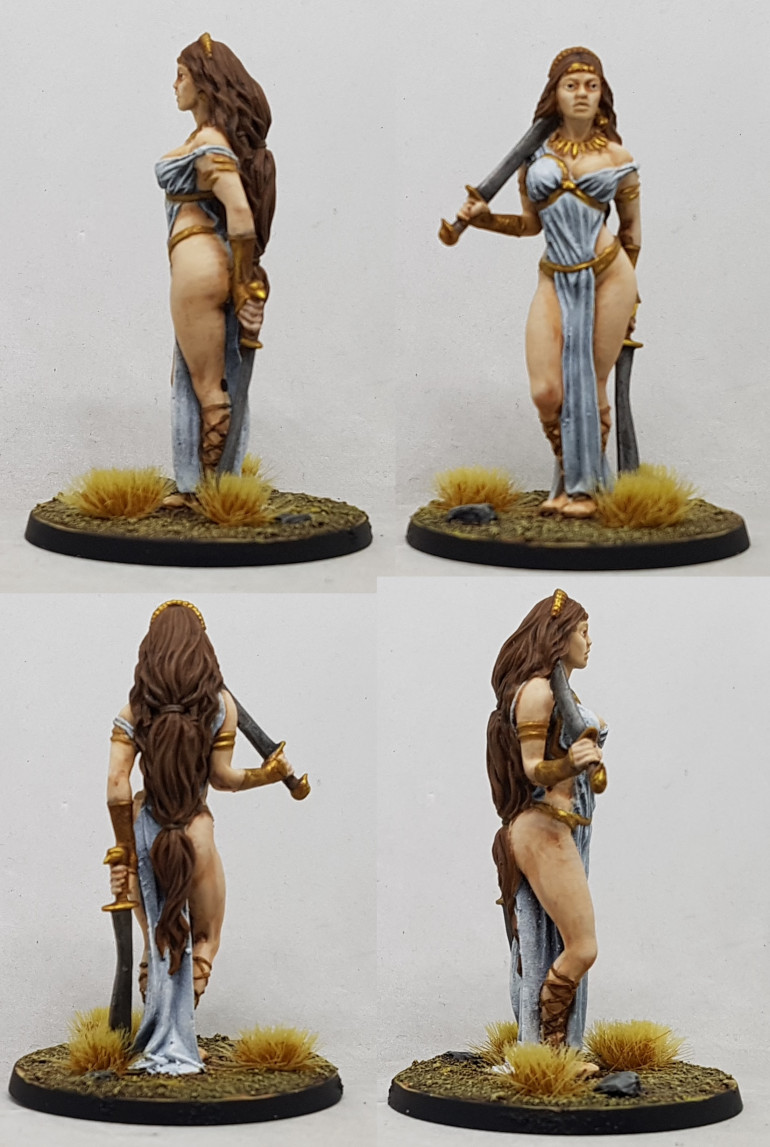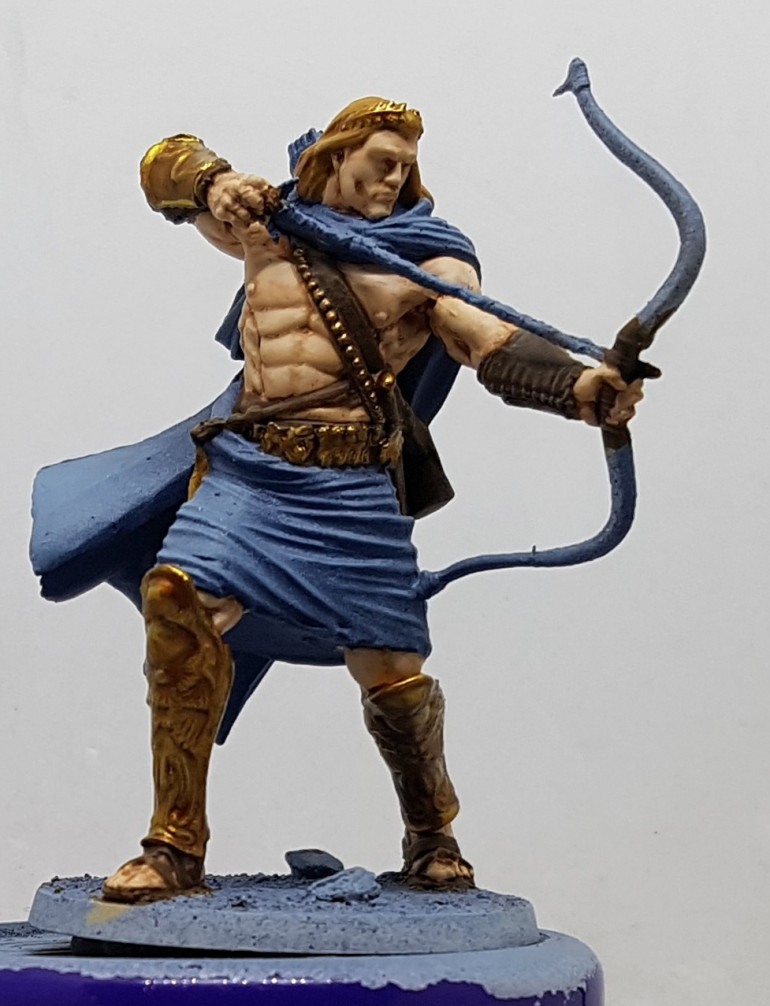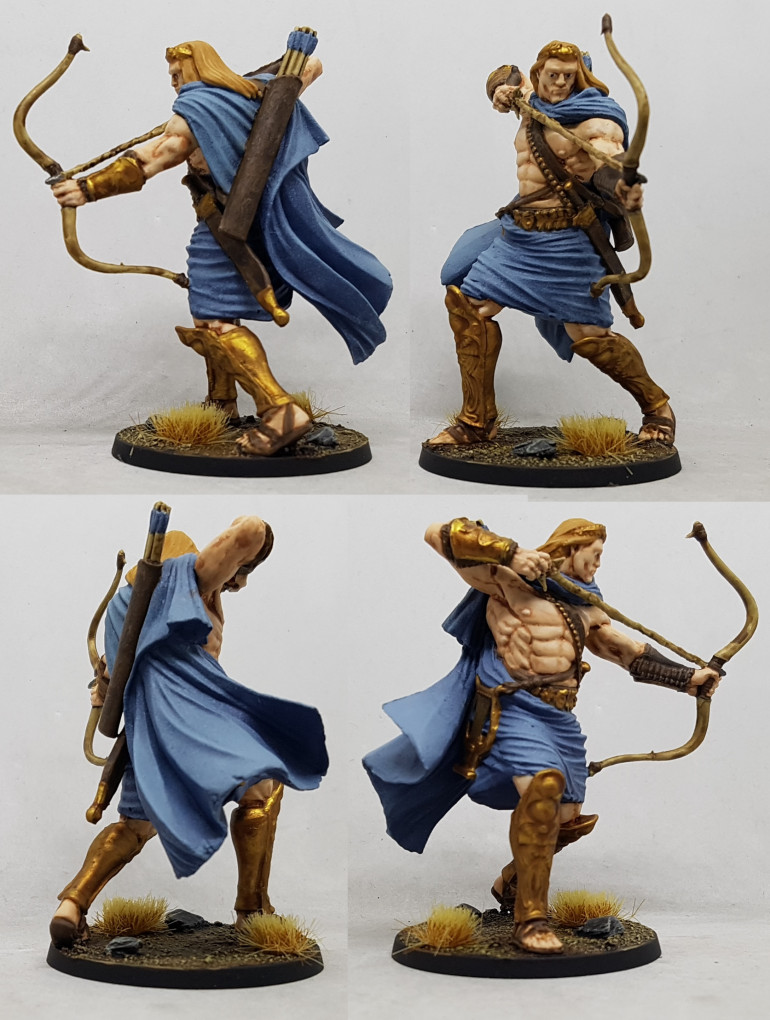
Mythic Battles: Pantheon by lawnor
Recommendations: 919
About the Project
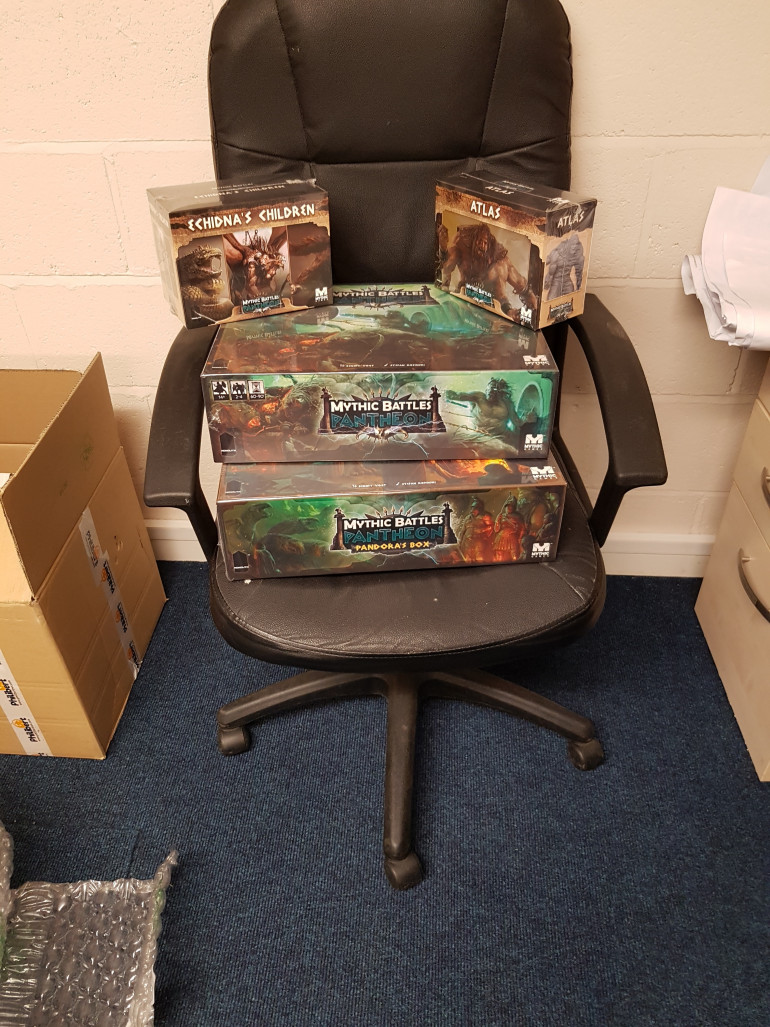
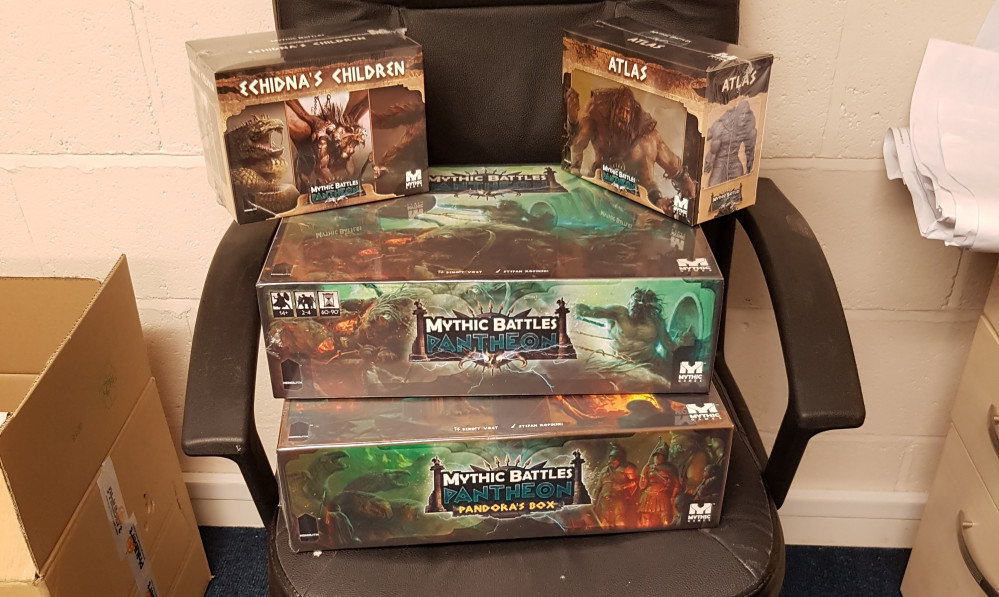
I have a core set, the Pandoras Box, and Echidna's Children expansion and I plan on slowly painting through it, working around or along side my other projects. I'm in no rush to get this done.
Related Game: Mythic Battles: Pantheon
Related Company: Monolith Edition
Related Genre: Fantasy
Related Contest: Spring Clean Hobby Challenge (Old)
This Project is Completed
Introduction & Mission Statement
I recently got my hands on what appears to be a God tier Kickstarter pledges worth of MB:P. I’ve only played the intro noob game so far, and only five times. Not 100% sold I’m going to play this game lots, but I get the impression it will greatly improve as we start adding more options to the different sides due to the deck limiting who we can activate. The more options you have, the less likely you are to draw the card you want and the more you have to use your whole army.
When I first opened the box and saw the infantry I thought they were good for board game minis but nothing fancy so I likely wouldn’t end up painting them, but over the course of my first game I fell in love with the Zeus and Ares sculpts. My brain had already picked out not just colours, but paints for some of the areas and now I really want to paint EVERYTHING, even if I end up not playing the game.
I have a few questions:
- MB:P seems to have gone a little quiet on OTT recently. Have people lost interest? Does it not hold up after a few playthroughs? Or are you all just busy playing it and I’m not looking in the right places?
- If anyone has already worked with these sculpt and has any advice that I might not already know from working with other ranges I’d love to hear it. I’ve not worked with BG minis or any Monolith plastics before.
- I see the bigger guys can be encouraged to pop off their bases which will allow better basing and better access to undersides, but the smaller models appear to be single piece, base and all. Can some of the shields etc be popped of too? How about riders from their mounts?
- What are peoples thoughts on storing painted minis back in those plastic trays? Assuming the box never really moves further than between the shelf and the table and the minis are varnished they should be fine, right?
I don’t currently expect to throw myself completely in to this project. I plan on focusing on games I play more and smaller projects I can actually complete. I hope to pick up a mini now and again, and incorporate these models in to compatible projects I have on the go elsewhere. For example, I plan on painting up some Griffons for Hordes as my next project. There’s at least 1 winged model in MB:P that runs off the same colours so I’ll paint him and any friends he has at the same time as the Griffons.
This could take a couple of years and may never get finished. I need to finish off my Orks first. Hopefully that’ll happen this weekend, but there may be more work left than I realise. I’m posting this now as I’m taking the cellophane off the second box tonight so I can start washing models so they are dry before I need them.
The Griffon
I’ve painted a few models like this before with great success. unfortunately all my steps were stored in a WAYPN thread on the old forums which are still down so its time to work from a foggy memory and try to figure it all out again. I’m also painting 7 griffons for Circle Orboros at the same time. This will mostly be airbrush work.
Any time I am adding paint to the airbrush I am going 50:50 for Thinner: Primer. I start with 6:30 for Paint:Thinner, and then test it out and add a little of whatever is needed to get the mix right. Everyone’s needs will vary.
I started by washing the model and cleaning up the sculpt. I added some dirt to the base. Given I want it to fit back in the plastic trays in the box I cannot afford to build up or decorate the base much. This may already turn out to be too much. We will see, and I will learn from this for future MB:P minis.
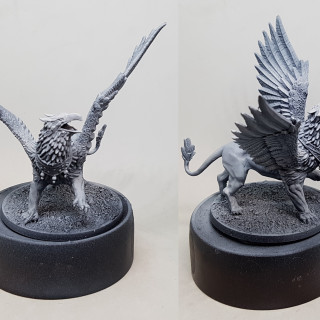
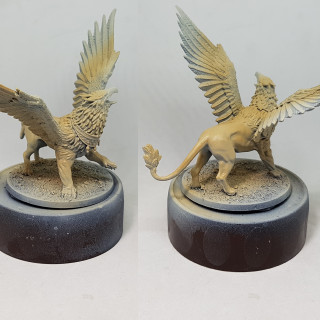
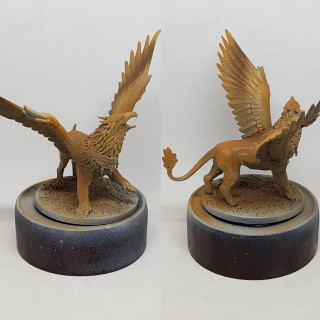
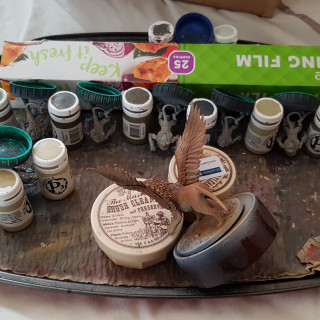
After clean up he got 2-3 coats of black primer and 1-2 zenithal coats of Vallejo 74.601 Grey primer and then left overnight to dry properly. See Pic 1 below
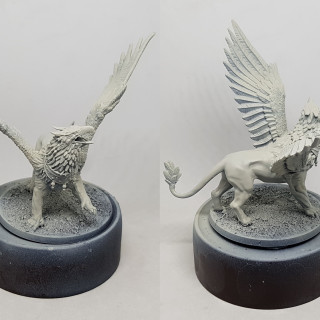
The base colour was VMC 70.986 Deck Tan. I love this colour. It is of white, but off by what its hard to tell. is it grey? Is it Brown? Who can tell? This means it is a great base for mixing with with any colour you want to fade in to white. I started with a very light dusting of the whole model in every direction. Then it got 3-4 coats from the sides and above, looking to preserve the darkness from the undersides. I occasionally dusted the darker bits again as I want them dark versions of the base colour, not black. See pic 2 below
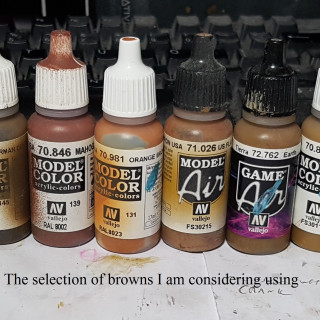
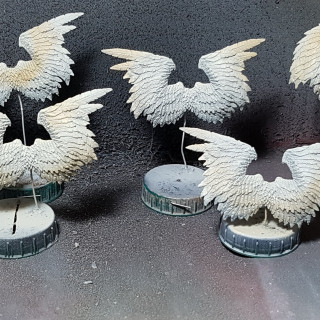
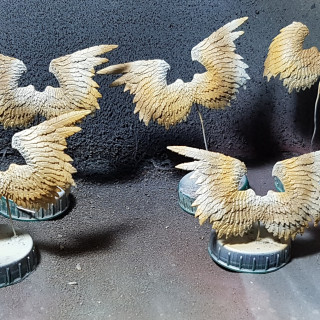
Next stage is to pick a series of random browns off my shelf and spray diffused lines across the wings. I’ve opted to start with VMC 70.843 Cork Brown. It’s a mild brown that will fade in to the base colour well and act as a solid base for darker browns as I build up the colour of his back. With all these colours, favour avoiding spraying from below whenever possible to preserve the shade. Let the sculpt work with you. Go gentle too. Avoid building up any strong colour boundaries. Avoid covering too much too as we will be adding more colours and patterns. I am also painting multiple similar models for a different game so I am trying to vary the pattern across them to make them all a little more individual. See pics 4 & 5 below.
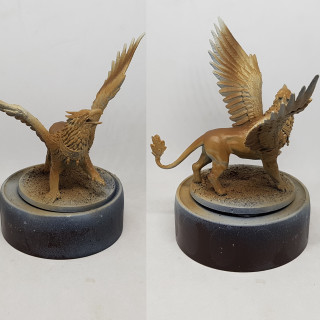
I opted for a much darker colour next as I was looking for contrast. I expect to get at least 1 more shade in after this so i can always tone it back down again if it’s too much. I went with VMC 70.872 Chocolate Brown following the same ideas as in the last stage. It came out lighter than it looks in the bottle as I am not building up the coats and allowing the spray to remain a little diffused. See pics 6 & 7 below.
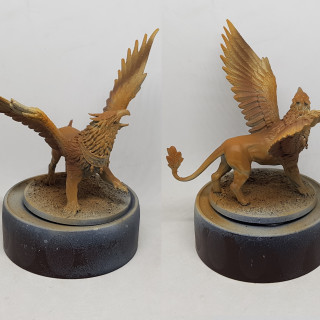
Next I added a touch of VMC 70.981 Orange Brown. Same method as above. I’m not just painting stripes by the way. Occasionally I’m holding the airbrush another foot away and just dusting all over a set of wings to mix it with the other colours lightly. I think this is the colour scheme I’ll be aiming for with the lions body at the least. See pics 8 & 9 below.
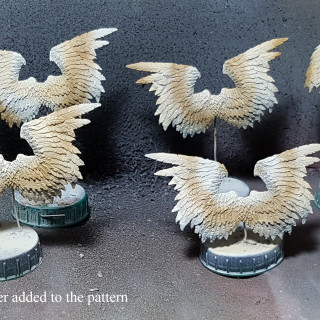
I should probably stop at this stage, but I’m very tempted to add just a touch of VMC 70.846 Mahogany Brown to some of these models. Lets see if that ruins everything?
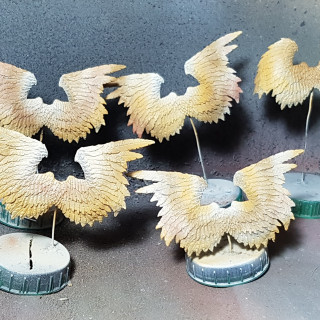
Its now 10 minutes later and the Mahogany Brown is done and I like it. See pics 10 & 11. Next stage is the big time sink of the project. The wings need a wash of diluted Agrax Earthshade and then balancing upside down to dry. Historically this wash takes ages to dry. Given I have no way to hang them upside down I can only wash one side at a time and then lean them the other way and wash the other side once the first has dried. This has taken all day before. We will see if I can find a better way this time.
For anyone curious about how fast an airbrush is, I primed last night, and sat down to paint around 9am this morning, and its not yet 2pm. I took a break for lunch and I’ve done 2 loads of washing and dithered. I was watching the weekender (2hrs long this week) whenever painting and it only just finished before I started that last colour. There was a fair amount of time spent waiting for paint to dry and I was writing this as I went. Doing this by hand would have taken many days and been nowhere near as smooth.
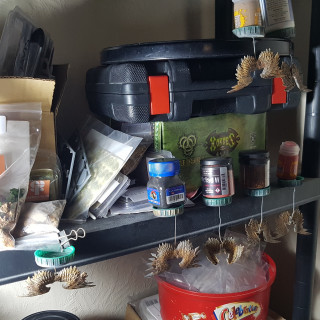
So I found a way to balance or hang my models so no washed part is touching anything so I’ve been able to get the wash done in one go. See pics 12 & 13 below. The paint may not have been as dry as it appeared as the Agrax Earthshade wash turned a little milky at times suggested it reactivated and mixed with the dried paint. We will see how this turns out. While it is drying I am off to do some gardening. No photos of that to follow unless I find something particularly interesting.
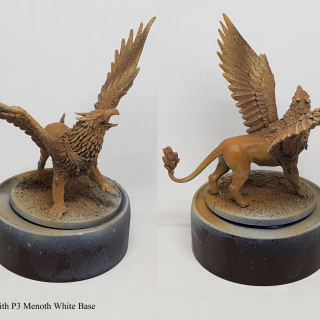
It is now the next day and the wash has dried. It was probably dry late yesterday but I had something else to work on so why not give it extra time to dry thoroughly? I have applied a drybrush of P3 Menoth White Base over all the feathers and nothing else. That’s all the feathers and fur finished, leaving just the gold, eyes, claws, beak, and base.
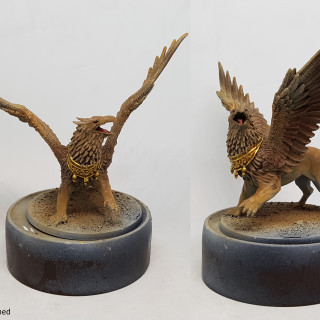
The gold has had 3 thin coats of Ammo Mig Jimenez 190 Old Brass. I’m told this wants 24 hours to dry completely so it’s time for a break. The tongue is getting 2 coats of P3 Midlund Flesh and then washed with GW Carroburg Crimson. The eyes were painted black and given a single dot of white. They will get a gloss varnish at the very end.
Once the Old Brass had dried it was given a targeted wash of Agrax Earthshade and after that had dried the detail was picked out in 2-3 coats of Ammo Mig Jimenez 197 Brass and now looks very shiny. I have some cloth to paint on my Hordes Griffons, and then I’ll paint all the beaks and claws together. If anyone has any schemes or ideas for this I’m interested.
At the weekend I finished this guy off. The beak was given a few even coats of P3 Mouldy Ochre. I mixed in some P3 Menoth White Highlight and drybrushed it up. This wasn’t as extreme as I was hoping for so I gave it another drybrush of pure Menoth White Highlight. I watered down some GW Seraphim Sepia and shaded the beak, keeping an eye out for anything running in to the feathers as it dried. Careful balancing and tilting was required once again.
the claws were base coated with P3 Thornwood Green (a dark greenish brown), drybrushed P3 Cryx Bane Highlight (grey with an edge of green) and then washed with GW Nuln Oil.
The base was then painted with P3 Bloodtracker Brown and drybrushed with P3 Mouldy Ochre. Some stones were picked out in P3 Bastion Grey, and then it was all washed with GW Agrax Earthshade. The ground was drybrushed with P3 Bog Moss, and then the ground and stones were drybrushed with P3 Menoth White Base. The edge was reclaimed with black. Once everything was dry it was varnished with gloss, and then matt varnish. The eyes and tongue were picked out with a final coat of gloss and a couple of tufts were added as a final touch.
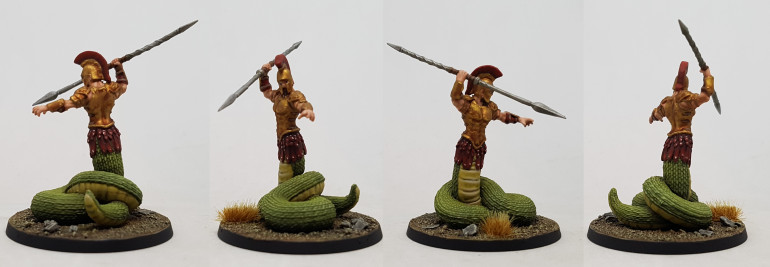
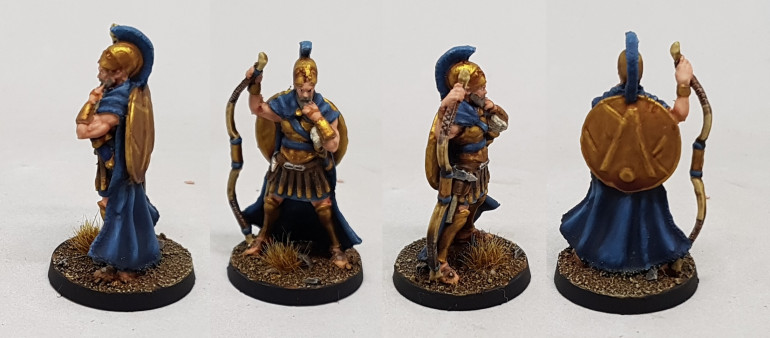
Zeus, Ares, Athena, Hercules, Atalanta, Leonidas, Spartans and Amazons
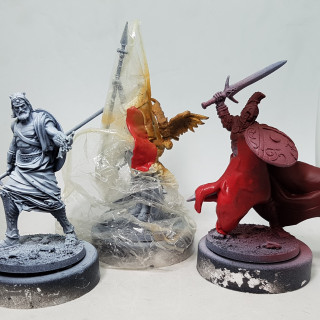
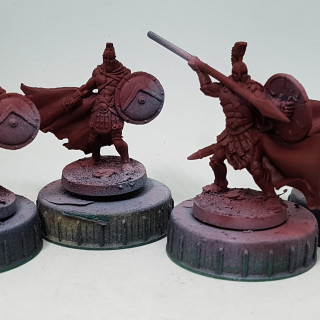
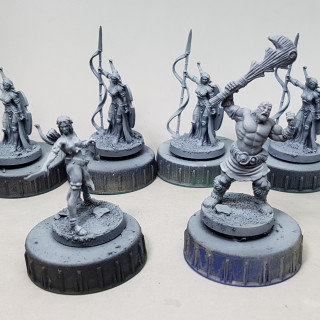
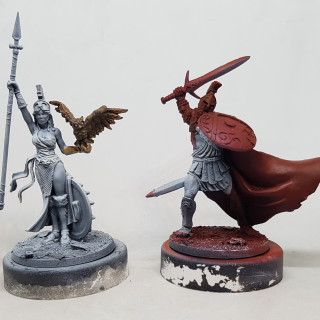
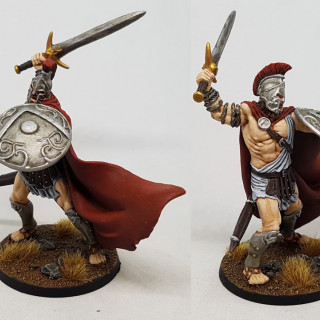
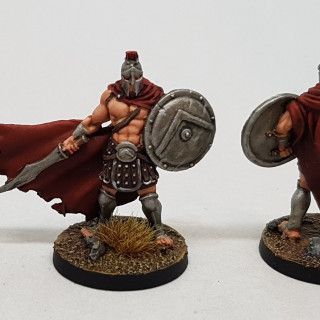
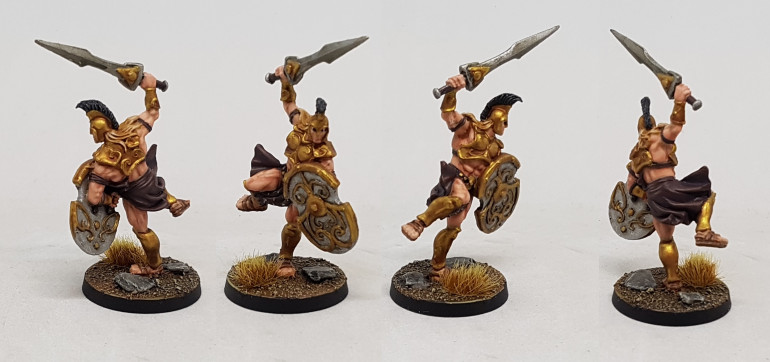
I’ve had some time off for Christmas so this seemed like a great time to embrace some heavy duty airbrush work and really sink my teeth in to this project. I had a good look through the starter set and realised that the two main colours in there that wanted airbrushing were the Olympian Whites and the Spartan Reds, and Ares wears both. I fished out all the models that use these colours and gave them a zenithal preshade.
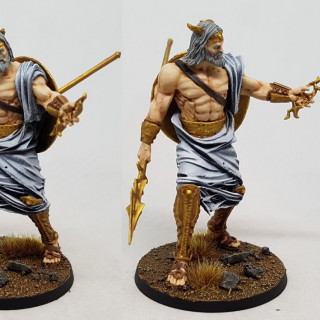
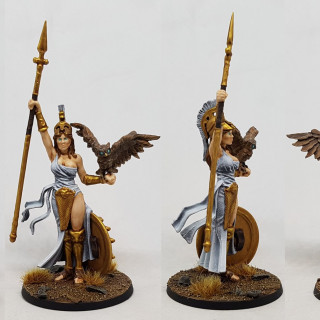
I started off with the white, following the steps from one of the Angel Giraldez books for a Pan-O white coat. Everything was airbrushed with VMC 70.994 German Grey. It was then given a few coats of VMC 70.906 Pale Blue, allowing the undersides and recesses to stay dark, while building up more layers on the higher and outer surfaces. I then gave the outermost and highermost surfaces a spray or two of VMC 70.951 White. I should perhaps have given more coats of this, but ultimately I am happy with the results.
Athena is holding an Owl who I wanted to paint up following the same steps as with the Griffon so I wrapped her in cling film and finished this off with Silly Putty. The owl was then airbrushed with the following paints in the Manner described with the Griffon: VMC 70.986 Deck tan, VMC 70.872 Chocolate Brown, VMC 70.981 Orange Brown, and VMA 71.026.
Ares was then wrapped in Silly Putty to cover the whites I had already painted and anywhere else I thought a red undercoat might work against me. The reds were then painted in the same manner as the whites work up from VMC 70.859 Black Red, to VGA 72.711 Gory Red, to Gory Red with an increasing mix of VGA 72.709 Hot Orange, to just a final light thin dusting of Hot orange.
The airbrushing was now finished and everyone was allowed to dry overnight before I continued on to the next stage. The masking was left on until I was ready to proceed just in case I smudged anything or decided I wanted to spray some more.
The whites were given a coat of thinned VMC 70.994 Dark Grey in the recesses to reclaim and enhance any shadows. The peaks and upper surfaces were reclaimed with white. I should have brushed this on but instead I went with the quick approach and drybrushed it on due to all those lovely folds in everything. This gave the clothes a chalkier effect that i would have preferred.
The reds were similarly darkened with GW Agrax Earthshade, and highlighted up with a mix of Gory Red and GW Evil Sunz Scarlett, and eventually just Evil Sunz Scarlet.
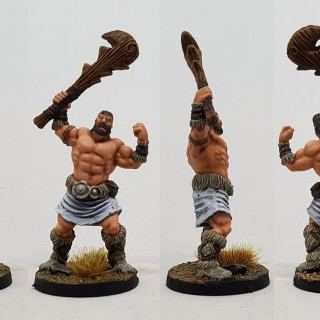
Bulk work done, I decided to focus on the Gods first, beginning with the flesh tones using Reaper paints and instructions from an Asset Drop box that I really like. They were all given a few coats of Caucasian Flesh and then a thinned wash of Flesh Wash. Once dry, the deeper recesses were targeted with some undiluted Flesh Wash. Non recessed areas were reclaimed with a thinned coat of the base colour. This was then mixed with some Maiden Flesh and thinned, and applied to the upper 50% of areas needing highlighting. Finally Thinned Maiden Flesh was used for the very highest of highlights. I really like this effect, but I decided it was too pale for Greek soldiers. They would have caught the sun after all. I’ll likely keep using this for the gods but I’ll use a richer tone for regular guys going forwards.
Flesh done, I then went for the hair.
Zeus:
Base: VMC 70.905 Blue Grey Pale, Drybrush highlight with P3 menoth White Highlight, and then wash down with VMC 70.892 Neutral Grey
Ares and Athena:
Base with P3 Bloodtracker Brown. She got a wash of GW Agrax Earthshade and he got a wash of GW Nuln Oil. They were both highlighted with P3 Gun Corps Brown.
Zeus, Athena and her owl had a dot of white applied in their eyes which was given a wash of P3 Arcane Blue. As the eyes didn’t quite have enough shape to them this did not work out as well as planned. Ares had the same treatment, but had a was of P3 Ember Orange instead.
The next dominant colour was the Gold. I really like the Ammo Mig Jimenez golds Asset Drop sent me. They are a really high and shiny gold and perfect for classical mythology treasures such as the weapons of the gods. Everything was given an even coat of Old Brass. This took a few coats. There were a few corner edges that just refused to hold on to the paint but I think I got there in the end. This paint can take up to 24 hours to dry I hear so I went off and painted other stuff for a day. I then diluted some Green Stuff World 1713 Pecatum Flesh ink wash and shaded everything. Once dry highlights of Ammo Mig Jimenez Brass were applied over a few layers to provide tonal differences and get the shine where I wanted it.
Iron was painted using Darkstar Old Silver. This was given a couple of washes made from P3 Cryx Bane Base. Models were positioned to encourage their whole surface to be tinted during the second wash, rather than to encourage it to obey gravity and run to the bottom of a surface. Once dry this was highlighted with p3 Cold Steel and extra gleam was added with a touch of P3 Quick Silver.
Ares’ skirt (He might be the god of war, but even he wants to look fabulous!) was based with VMC Panzer Aces 302 Dark Rust. I picked out the studs with P3 Cold Steel and then washed it all together with Nuln Oil. I drybrushed with P3 Bootstrap Leather and then reclaimed the studs
The shoes and remaining lather surfaces were painted with P3 Bootstrap Leather, washed with Agrax Earthshade, and highlighted with P3 Menoth White Base as this meant I could drybrush it on and not worry too much about getting it on nearby flesh.
The Bases were painted with P3 Bloodtracker Brown and then drybrushed with P3 Mouldy Ochre before being washed with Agrax Earthshade. Once dry they got a drybrush with P3 Bog Moss. The rocks were painted with P3 Bastion Grey and washed with Nuln Oil, then everything was drybrushed with GW Screaming Skull. The edges were tidied up with Black. and everything was ready for a varnish.
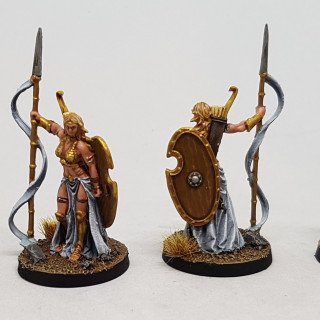
Then I focused on the heroes and then the units. They were painted the same as for the gods where applicable. The differences can be found below:
Flesh
Based with P3 Midlund Flesh, then received 3 washes: Midlund Flesh & P3 Skorne Red, Midlund Flesh and P3 Battledress Green, and then Skorne Red and Battledress Green. It was then highlighted in the same manner as above, firstly with Midlund Flesh, and then with a mix of Midlund Flesh and P3 Ryn Flesh
Fur
Based with P3 Cryx Bane Highlight, and then washed with P3 Beast Hide and P3 Thornwood Green. Drybrushed with P3 jack Bone and then P3 Menoth White Highlight
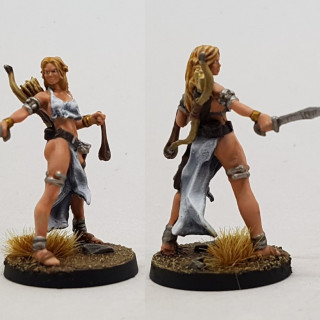
Blonde Hair
Recipe and paints from Asset Drop. I’ve never used this before so was good to experiment. Based with Reaper 09256 Blond Shadow and washed with diluted Coat d’arms Ink Wash Flesh. Undiluted flesh was was applied to the deepest regions of the hair. Blond Shadows was used for the first highlight, followed by Reaper 09257 Blonde Hair and eventually Reaper 09258 Blond Highlight.
Wood Branch
Scale 75 base followed by a Scale 75 Inktense Chestnut wash. Drybrushed up with Scale 75 Iroko, and finally a Coat d’arms Horse Tone Bay drybrush
Wood Shields
Base coated with P3 Gun Corps Brown with thin lines of P3 Menoth White base painted on for the wood grain. P3 Yellow Ink and P3 Bloodstone were turned in to a wash. A small amount of that was added to some P3 Brown ink. This was applied over the wood. A second coat was applied around the inside and outside edges. A little P3 Blue Ink was added to the mix and this was repeated.
Flights
Painted P3 Menoth White Base and given a wash of GW Seraphim Sepia.
Wood Core Bows and Spear haft
Painted P3 Menoth White Base, thin lines of Menoth White Highlight were added for wood grain, and it was all given a coat or two of Agrax Earthshade
Columns, and Prep for Green Lizards, Reptiles etc
I wanted to paint the Hydra next as I have an idea how and he is one of the models from the tutorial mission so it seems wise to start with those models. I have gone through all the models I own and identified 7 models that have green scales as a dominant feature. I’ve fished them out, washed them, and started basing them. I need to see if the models need cleaning up and then I can start priming. I have an Ork on the go right now and I should probably paint a few Space Marines before starting this work. I’ll be switching back and forth between MB:P and my Space Wolves to help break up any fatigue either project may cause.
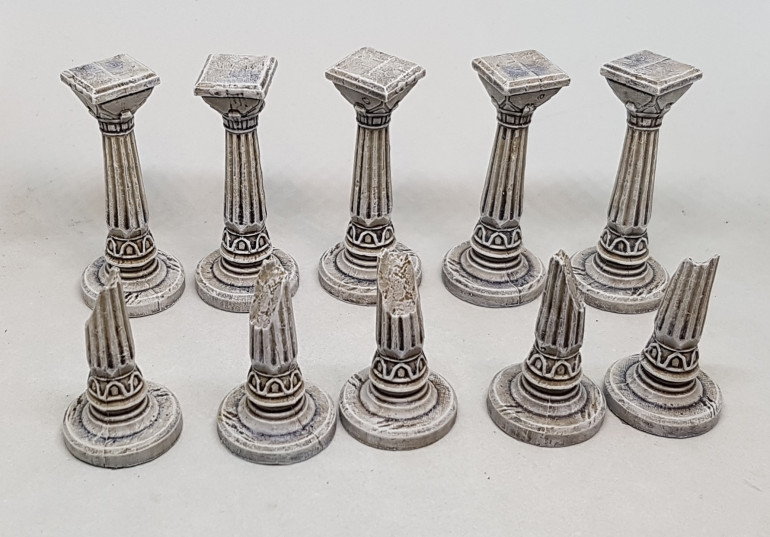
I’ve also fished out the columns because I’m pretty sure there is no effort involved in painting them. Prime. Airbrush base. Wash. Drybrush. Done. I should be able to do these as an aside to another project.
I had a chat with @Brushstroke about how he did his Columns in his project and I used his recipe, swapping out GW Rakkarth Flesh for P3 Hammerfall khaki as I was running very low on Rakkarth. I also drybrushed as I was prioritising speed over awesomeness for these pieces as they are nothing fancy. Painting them revealed lots of undesirable texture suggesting the manufacturers had the same idea. I wonder if perhaps these were intended to be much smaller once and got scaled up at the last minute without increasing the resolution of the file.
Anyway, I zenithal primed, base coated with Hammerfall Khaki, washed with GW Agrax Earthshade, drybrushed withGW Pallid Wych Flesh and then drybrushed with White.
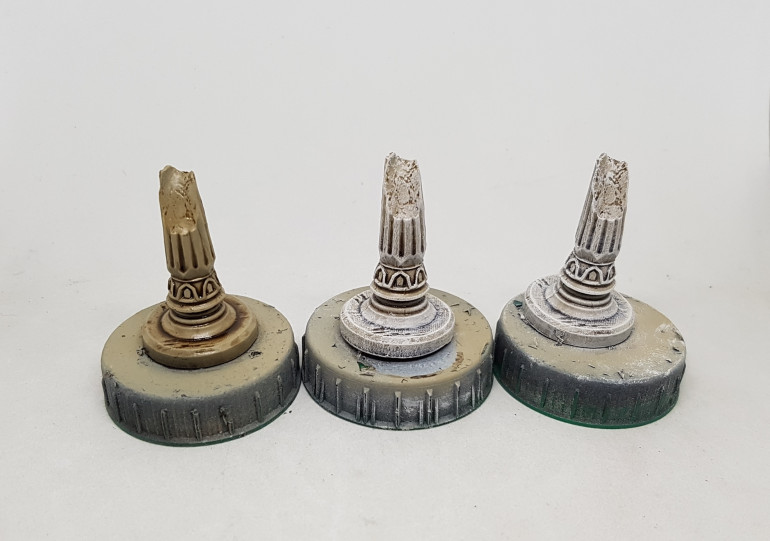 Here we see the stages goinf left to right we have after the wash, after the first and then second drybrush
Up close the end result is ugly, but at arms length they look fine. These are intended to be somewhere between terrain and tokens and they really are not the star of the show so I’m content to go with it. If I had to paint another as part of an actual model I would try painting rather than drybrushing.
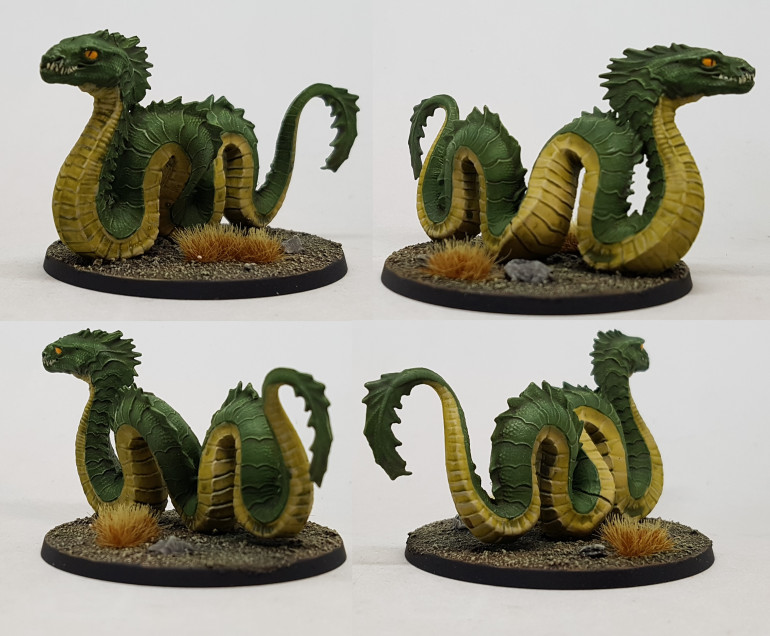
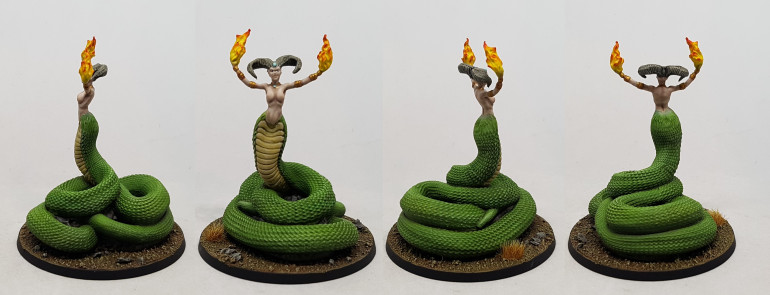
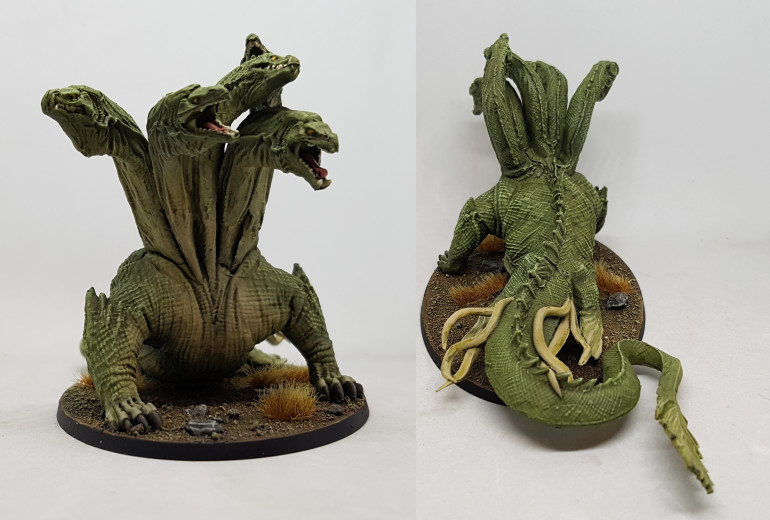
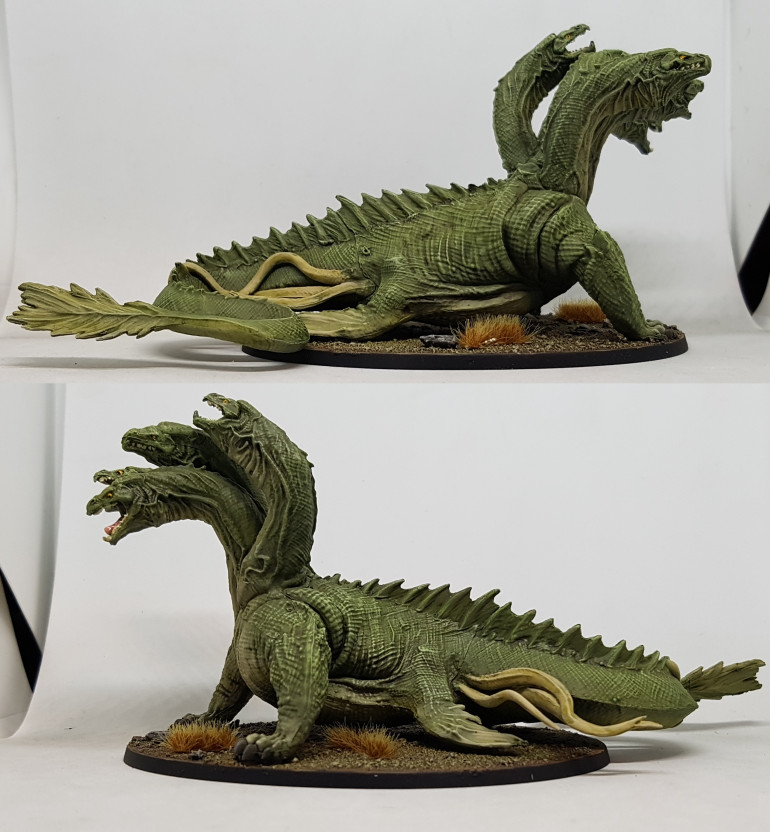
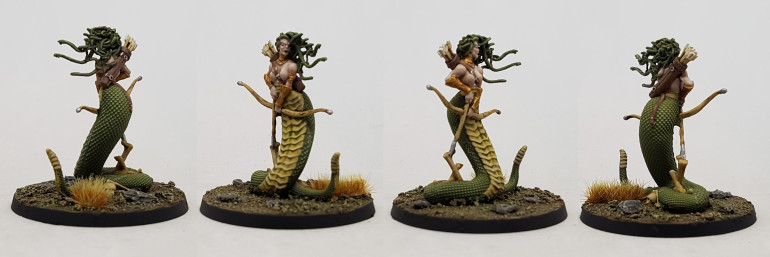
Green Scales - Python, Echidna, Basilisk, Cecrops, Medusa, Colchidian Dragon, and the Hydra
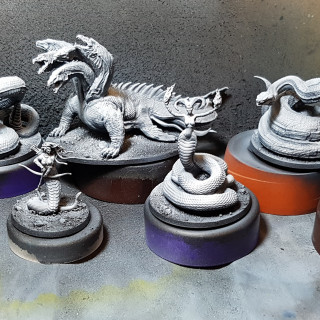
I went through all the artwork and pulled out every model that has a large area of green scales. I washed them, let them dry and based them with stones and mud. Once it was all sealed and dry I primed everything with black and gave it a zenithal of very light grey primer and left overnight to dry thoroughly. Anyone paying attention might notice I swap a model out after this stage. I grabbed a lizard who is supposed to be red by mistake and didn’t realise until after I had painted him green. I did some hurried catch up work after that!
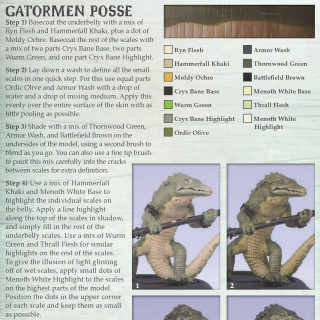
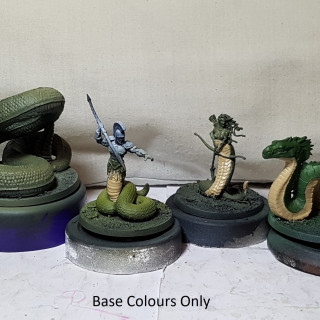
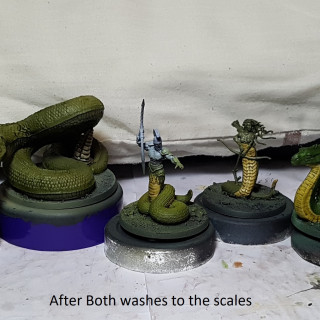
I have painted some Gatormen before using the PP guide from Forces of Hordes – Minions as seen below. I mostly liked the results, but the colour variation and contrast in the green scales wasn’t as great I’d have liked. I’ll be trying a few different base colours in the project so I can compare results and see if I can find something I like better. All the greens were applied through my airbrush. I thinned the mix down and lowered the pressure to 10-15psi to allow the preshading to influence the end results. here are the greens I have used on the models:
Python: VMC 70.922 Uniform Green
Echidna: VMC 70.922 Uniform Green
Basilisk: As from book, for comparison
Cecrops: VMC 70.890 Refractive Green
Medusa: Hakata B021 Medium Green (FS34102)
Colchidian Dragon: VMC 70.823 Luftwaffe Camo Green
Hydra: As from book
The underbelly colour was then painted as the the guide. I airbrushed most of this for the hydra, but mostly brushed it on elsewhere to allow for cleaner boundaries between sections. The first wash was applied all over the models and left to dry overnight. The second wash was applied to recesses and the undersides. Anywhere shadow might gather. This was then left overnight to dry too.
I followed the highlighting stages as described, favouring a drybrush over the scales due to all that lovely texture. I then went on to paint them with the same schemes as earlier models in this project with the following exceptions:
Fire: This recipe is from AssetDrops July 18 box. Firstly I undercoated white and then I painted the flames with Mr Paint’s Deep Yellow. I then mixed this with a little Mr Paint’s Fire orange and painted over the yellow, avoiding the deeper recesses. The next layer was just Fire Orange, again painting over the top but leaving a little of the previous layer showing. Working further outwards and upwards, the next layer was a mix of Fire orange and Deep Red, and then just Deep Red. All of the fire was then given a wash or two of Coat D’Arms Yellow Ink Wash, allowing it to pool a little in the recesses. once dry, the very deepest recesses were given a gentle glaze of white.
Eyes: Red eyes were based with P3 Sanguine Highlight, higlighted with P3 Khador Red Base and then given a glint of P3 Khador Red Highlight.
Yellow Eyes were just painted with P3 Heartfire and given a black pupil.
Human eyes were painted white and given a black pupil.
Mouths: Based with P3 Khador Red Base and washed with GW Carouburg Crimson. I highlighted with Midlund Flesh a little as best i could. Access to inside of mouths was very limited. There was an area at the back of the Basilisk’s mouth that would not take paint. Its right by a join so I’m assuming the paint was being sucked in to that join. There must be half a bottle of flesh pain in a void inside the basilisk somewhere. Thankfully it has not leaked out anywhere yet and has hopefully dried before it can!
Female Snakeperson Flesh: This is the Pallid Flesh recipe from the Warmachine: Forces of Cryx book. base with a mix of Ryn Flesh, Carnal pink and Trollblood Highlight. Then add Traitor Green and apply as a wash. The add Beaten Purple and wash once more. The final dep shade is a wash of Beaten purple, Traitor Green and Midlund Flesh. Highlight with a mix of Ryn Flesh, Carnal Pink and Menoth White Highlight.
Cecrops Flesh: This is the flesh recipe from the Warmachine: Forces of Khador book. Base with Khardic Flesh, wash with a mix of Khardic Flesh and Thornwood Green, and then with a wash of Skorne Red and Khadric Flesh. The Dep shade is a wash of Thornwood Green mixed with Skorne Red. Highlight with Midlund Flesh
Teeth: Teeth were painted P3 Menoth White Base and the tips were painted P3 Menoth White Highlight.
Blue Glowing Gem: I base coated with P3 Frostbite, then mixed some Frostbite with some P3 Arcane Blue and tried to put a little of this around the top of the gem. I ended up putting both paints on wet at the same time along with some Menoth White Highlight on the bottom and encouraged the three to run into each other. Once dry I made a glaze of frostbite and applied it over the whole mix.
Arrow Flights: Based with P3 Sickly Skin and washed with GW Seraphim Sepia. I painted the lines of the feathers back on the flights one dry.
The eyes, mouths and gems of everything were varnished with Gloss once everything had been sealed with its protective varnish coat (1 coat of Gloss, and then 1-2 coats of matt to remove the gloss effect, all from an airbrush)
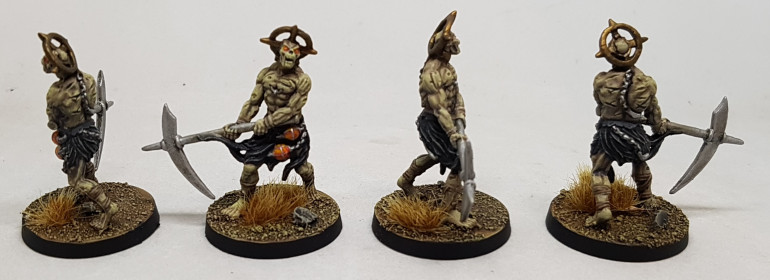
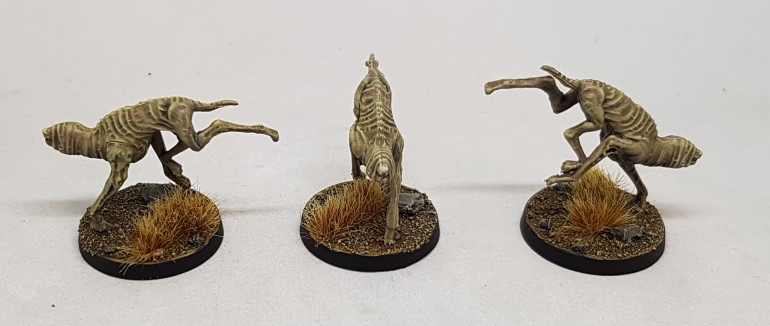
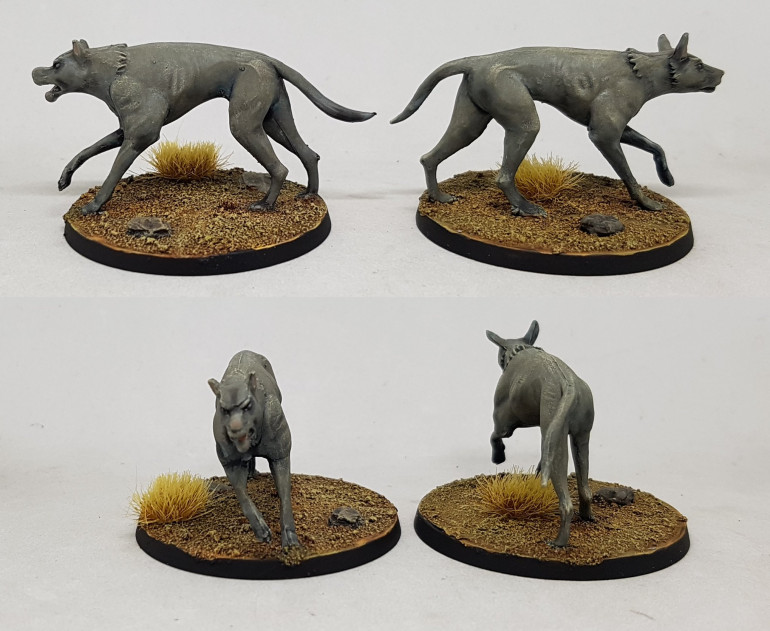
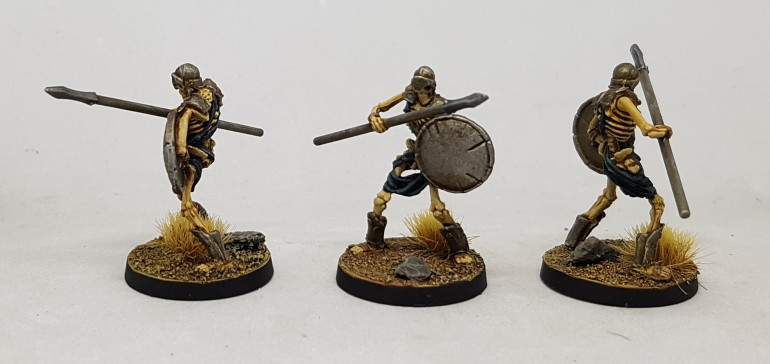
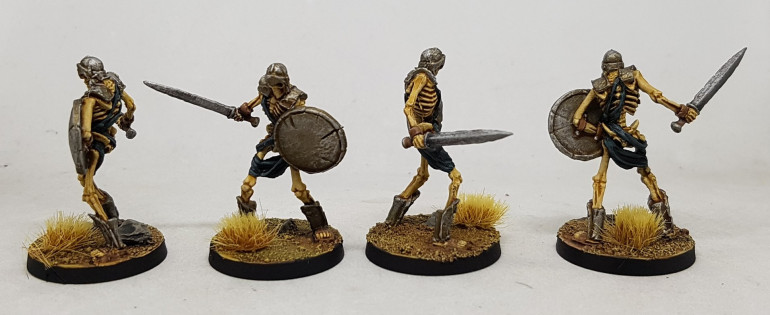
Hell Warriors and Hell Hounds
I already typed this up once, but it all vanished when I clicked Update and it doesn’t appear to be coming back. The system’s idea of an April Fools joke, I assume. Anyway, here’s the colour schemes used
Undead Flesh:
Base with P3 Thrall Flesh, then apply a wash of P3 Beaten Purple, followed by a wash of P3 Battledress Green. once dry make a wash from P3 Coal Black and P3 Beaten Purple and only apply this to the deepest and darkest areas. Drybrush highlight with P3 Thrall Flesh, and a final peak highlight with a mix of Menoth White base and Thrall Flesh.
I also put 3-4 coats of a P3 Ryn Flesh glaze on the noses of the hounds. Dunno if it is too strong or not.
Tatters/Bindings: base with P3 Trollblood Highlight, wash with GW Agrax Earthshade, and highlight with P3 Menoth White Base.
Black Cloth: Base with VMC 70.995 German Grey, drybrush with P3 Menoth White Base, and then wash with GW Nuln Oil.
The weapons were painted the same as earlier models. The chains got a coat of P3 Pig Iron, washed with GW Nuln Oil, and highlighted with P3 Cold Steel.
The Halos were base coated with Darkstar Blackened Bronze and drybrushed with Darkstar Bronze. They were given two washes of Secret Weapon Sewer Water, and then highlighted with bronze.
The glow areas were given two watery coats of white paint. I then painted their middles with P3 mouldy Ochre. Not because I want them that colour, but because it is a very rare yellow in that it has good coverage so make for a good undercoat. I painted over that yellow with a brighter one (Coat d’Arms 103 Sun Yellow) and then washed the areas with a vibrant red (Com Art 1.049 Permanent Red), hoping it would pool around the edges and mostly leave the middles alone. It didn’t quite work out. The pupils of the Warriors were picked out in Sun Yellow again.
Everything was varnished to protect it, and the lanterns (?) were given a final coat of gloss.
These models pretty much painted themselves. I started work on Friday after work, and had them done and varnished by 9pm Sunday and I went to the cinema and pretty much lost both morning to a toddler who likes to rearrange my paint pots while I paint and has started spinning the office chair I am sat in painting. He also rather helpfully reset my alarm clock and I almost didn’t notice!
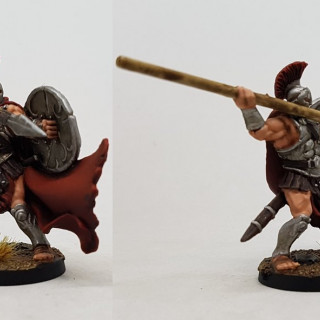
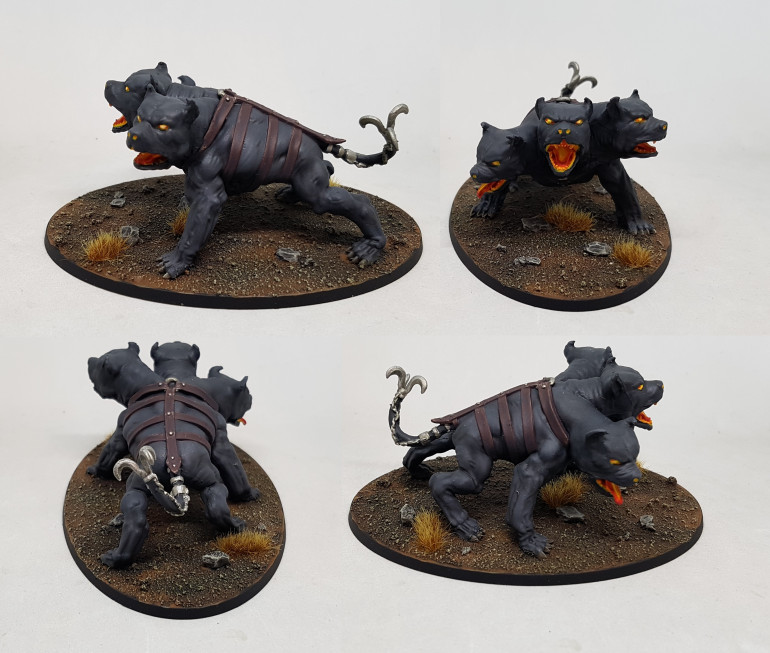
Hoplites, Hades, Achillies, Odysseus, Cerberus, Phoenix, and Giant Spiders
…Painted all together because all those common colours. It made sense at the time, and worked out fine.
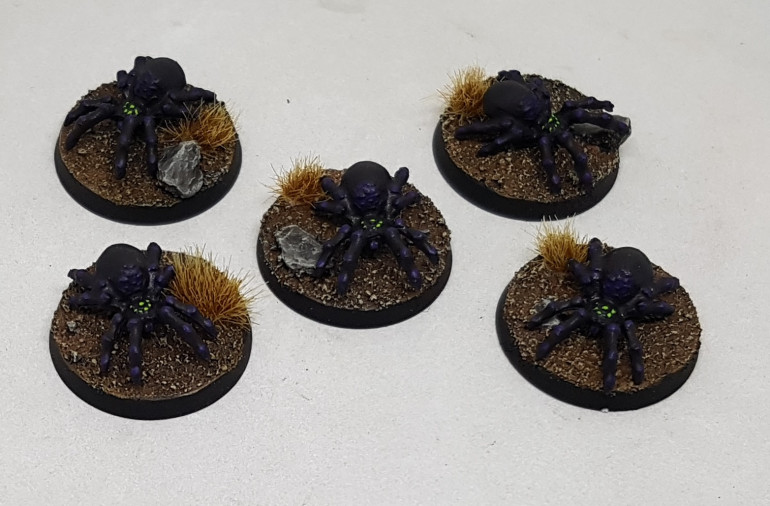
The spiders got primed black only, and everyone else got a zenithal preshade. Then the humans had their cloth colours airbrushed,the dog got his fur airbrushed and the bird had its yellow airbrushed. Then everything was painted normally with common colours being painted together. The spiders were a late addition to the mix as I was gluing mud to bases and they had to be cut off their or be buried. As they were lose and small I wanted to rush them through to prevent losing them. They took no real time or effort to paint too, which was nice.
New paint recipes etc
Spiders
Primed black and then given a few coats of VGC 72.087 Violet Ink. A dot of GW Xerus Purple was applied to each joint and the bumpy parts of the shell. Everything was then given another coat of the ink and the eyes were picked out in P3 Necrotite Green. Job done. Five minutes work, with a lot more lost to drying time.
Achilles Leather
Based with 1:1 mix of ScaleColour Black(Dark?) Leather and ScaleColour Red Leather. Then all but the deepest regions were painted with a 1:2 mix, and then less with just the Red Leather. Then a 2:1 mix of Red Leather and ScaleColour Orange Leather. Then a 1:2 mix of the two. Then a 2:1 mix of Orange Leather and VMC Ivory was used to add wear and highlight to the edges. A 1:1 mix was applied for the highest extreme highlights.
Cerberus Fur
Primed black and then given a zenithal coat of VMC German Grey. VMC German Grey and VMC London Grey were them mixed and a targeted highlight was applied to any shoulders, heads and raised areas. A little more London Grey was added and this was repeated. I was going to apply GW Nuln Oil to the recesses only but I made the whole thing a little too light so it was all given a coat. The fiery parts were then reclaimed with white primer and painted the same as the Phoenix, minus the soot.
Cerberus Toenails
Based with P3 Thornwood Green, washed with GW Agrax Earthshade and drybrushed with P3 Trollblood Highlight.
Hades Shield
Undercoated with any brown and then base coated with Darkstar Victorian Gold. Victorian Gold was mixed with Darkstar Silver Verde and overbrushed across the surface. Silver Verde was then applied to the glinty areas using a mix of drybrushing and regular brushing. Algenmoos Terrain wash and Dunkelschatten Terrain Wash from Handcraft Tabletop were then applied to add weathering. The darker of the two was applied in random patches and left to dry. Then a wash or two of the lighter was applied over the whole area.
Hades Skirt
Base coated with P3 Sanguine Base and then washed with a mix of Sanguine Base and p3 Exile Blue. It then got a wash to the deep regions of the previous wash with a little P3 Coal Black added. It was highlighted with P3 Sanguine highlight, and eventually Sanguine Highlight with a touch of P3 Menoth White Base.
Hades Hair
Base coated with VMC 70.869 Basalt Grey and then highlighted with P3 bastion Grey and then P3 Trollblood Highlighted
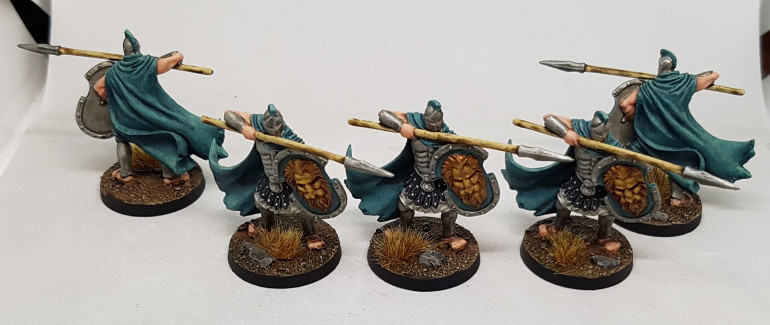
Hoplites Cloak
Based with a mix of 1:1 VMC 309 Periscopes and VGC 72.147 Heavy Black Green. Then using the airbrush this was zenithally highlighted with the base coat with a little VMC 70.845 Sunny Skin Tone. A futher zenithal highlight and brush edge highlight was applied by adding VMC 70.918 to the previous mix. Finally, a wash was made from the Periscopes and applied to the recesses as a shade.
Odysseus Blue
Based with Hataka Dark Sea Blue. This was them mixed 1:1 with Hataka Dark Blue and all but the deepest areas were painted. Then a 1:2 mix was applied over slightly less, then just Dark Blue. Then a 3:1 mix of Dark Blue and Hataka Gris Bleu Clar was applied over even less, then a 2:1 mix. Finally just Gris Bleu Clair was applied to just the peaks and edges.
Odysseus Beard
Painted with P3 Trollblood Highlighted and washed carefully with GW Nuln Oil.
Phoenix Fire
This recipe is from AssetDrops July 18 box. Firstly I undercoated white and then I painted the flames with Mr Paint’s Deep Yellow. I then mixed this with a little Mr Paint’s Fire orange and painted over the yellow, avoiding the deeper recesses. The next layer was just Fire Orange, again painting over the top but leaving a little of the previous layer showing. Working further outwards and upwards, the next layer was a mix of Fire orange and Deep Red, and then just Deep Red. The yellow recesses of fire were then given a wash of Coat D’Arms Yellow Ink Wash. Once dry, the very deepest recesses were given a gentle glaze of white. Finally, very little Kromlech Soot pigment was brushed dry on to the tips of the reddest areas
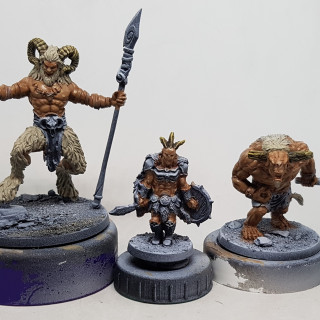
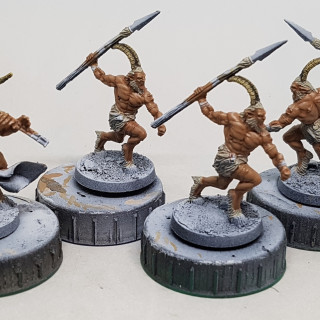
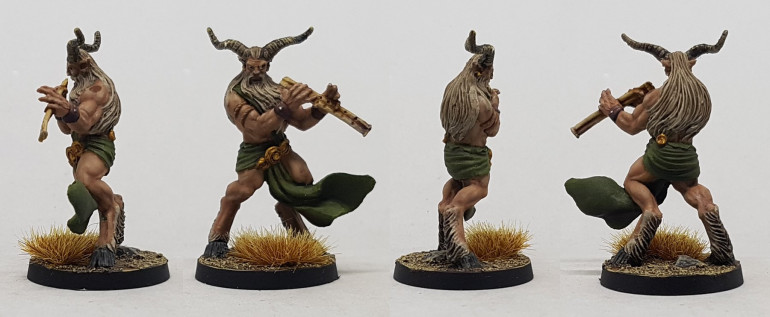
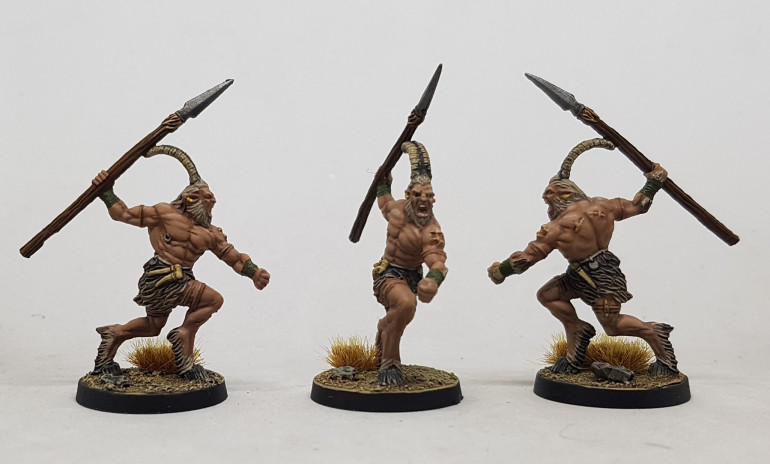
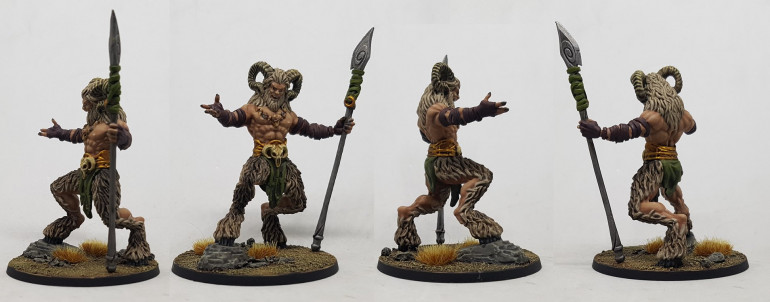
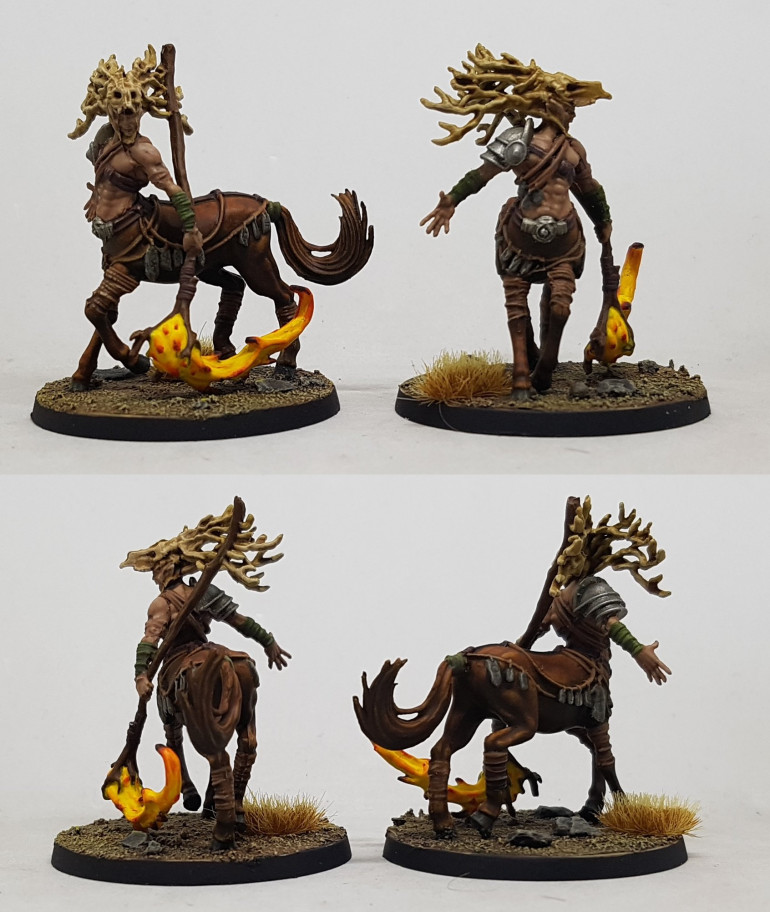
Beastmen: Minotaur, Centaurs, Satyrs, Eurytion, Marsyas, & Pan
To finish off the core box I need to paint the Minotaur and the two centaurs. I may as well paint the other beastmen at the same time as there are a lot of common colours. I’m throwing in the Brute from Gloomhaven too as he’s on my desk in need of attention and also has a lot of overlap. So far, I’ve done the flesh, the horns and started on the base coat for the fur.
Flesh
Base with a mix of P3 Midlund Flesh and P3 Gun Corps Brown. Add some P3 Skorne Red and make in to a wash and coat all over. Add some p3 Battledress Green and Thornwood Green and wash everything again. Reclaim raised surfaces with some of the base mix thinned down with water and mixing medium. Leave the recesses alone and try not to go all the way up to them. Make a similarly thinned mix of Gun Corps Brown and P3 Ryn Flesh and highlight further, only going over 50ish% of the raided surfaces. Final highlights were applied using thinned Ryn Flesh as a glint mostly.
This is a slightly modified version of the Tharn Flesh recipe from Forces of Hordes – Circle Orborus from Privateer press
Horns
This is based on Romain’s recipe found here at around 7 minutes in. I’ve swapped out the colours as such
Undercoat white then dilute some P3 Thornwood Green so its not a wash but runnier than you’d normally work with and coat the horns. Wash with GW Nuln Oil. Apply a second coat on the undersides if needed. I didn’t here. Drybrush with VMC 70.845 Sunny Skintone and then drybrush with P3 Mouldy Ochre. I think I didn’t quite get as much Ochre off my brush as I’d intended in places.
Fur
The fur base colour is a a mix of P3 Trollblood Highlight, P3 Menoth White Highlight, and P3 Hammerfall Khaki. It will need another coat or two before I can ad more colour to it.
Update Gallery
It appears I’ve gotten super lazy with updating this project so here’s some pictures of my progress since I last spoke up.
MBP: The Return - Spring Cleaning Challenge 2020 From This Point
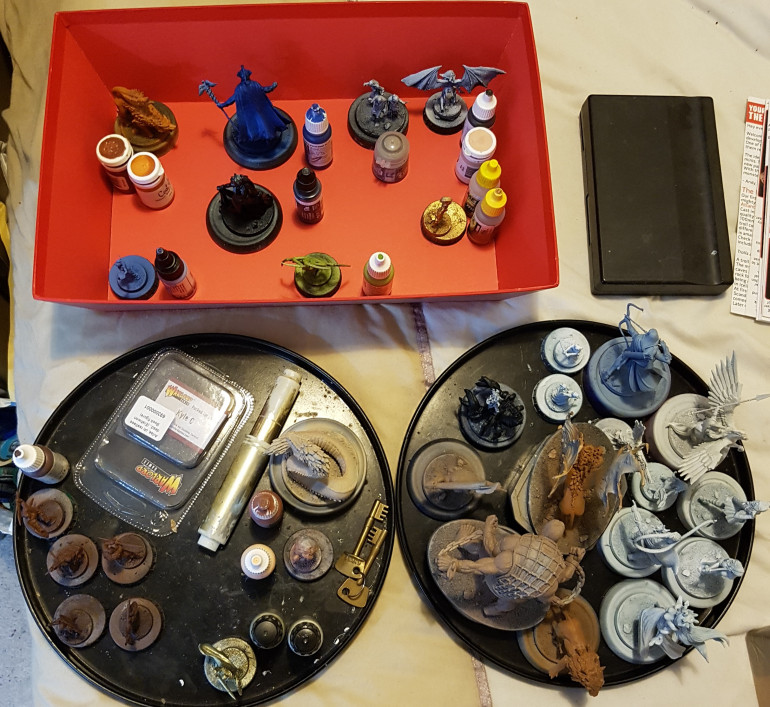
It’s been 6 months since I last touched this project (Making it the very definition of a spring cleaning project. I’m going back to something I abandoned a while ago). I have a gap in my painting queue and this is the largest single project I have left in the house so it’s time to paint the remaining 30 models. Everyone was based a year ago and I primed them up last week. Over the past few days I’ve split them in to groups based on what colour I want to airbrush on them and I’ve now mostly done that airbrushing.
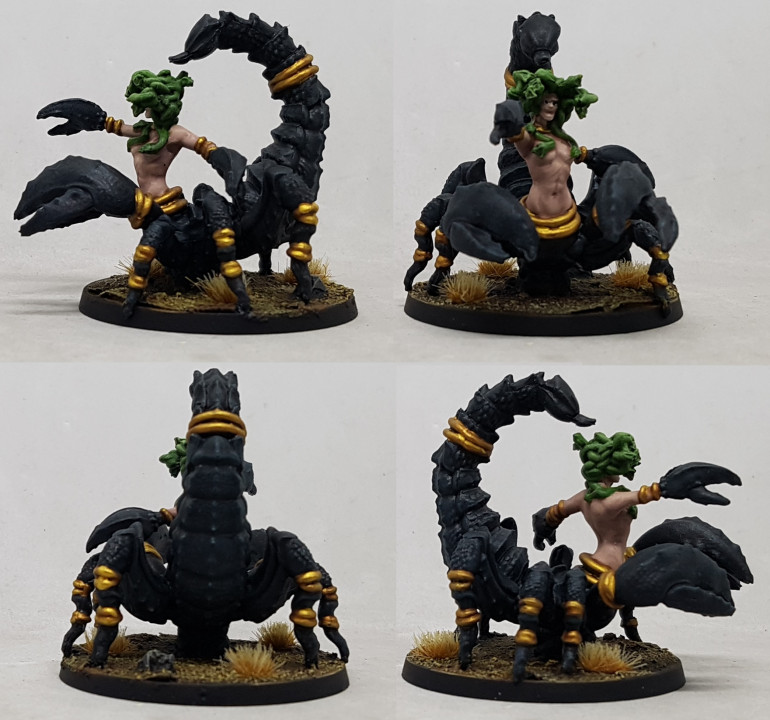
Some models just have a base colour on them, some have a few layers of shade and highlight. The Man scorpion (Campe?) had black contrast paint applied. I’ve never used the stuff before. It appears to be very dark green/turquoise and has worked well. I’ll give it a drybrush highlight of p3 coal black and call that colour finished. A few models need washes and then perhaps airbrushing highlights later. One of the perks of bulk painting is I don’t have to wait for a wash to dry. I can apply all the different washes and go paint something else and then do all the remaining airbrushing in the same afternoon.
From this point on each model will be given its own project entry and I’ll update that entry as progress is made, rather than create separate entries for each days work.
I am very tempted to pick up a 3D printer next month and having this finished would make me feel better about opening the door to more unpainted plastic turning up.
Aegystus
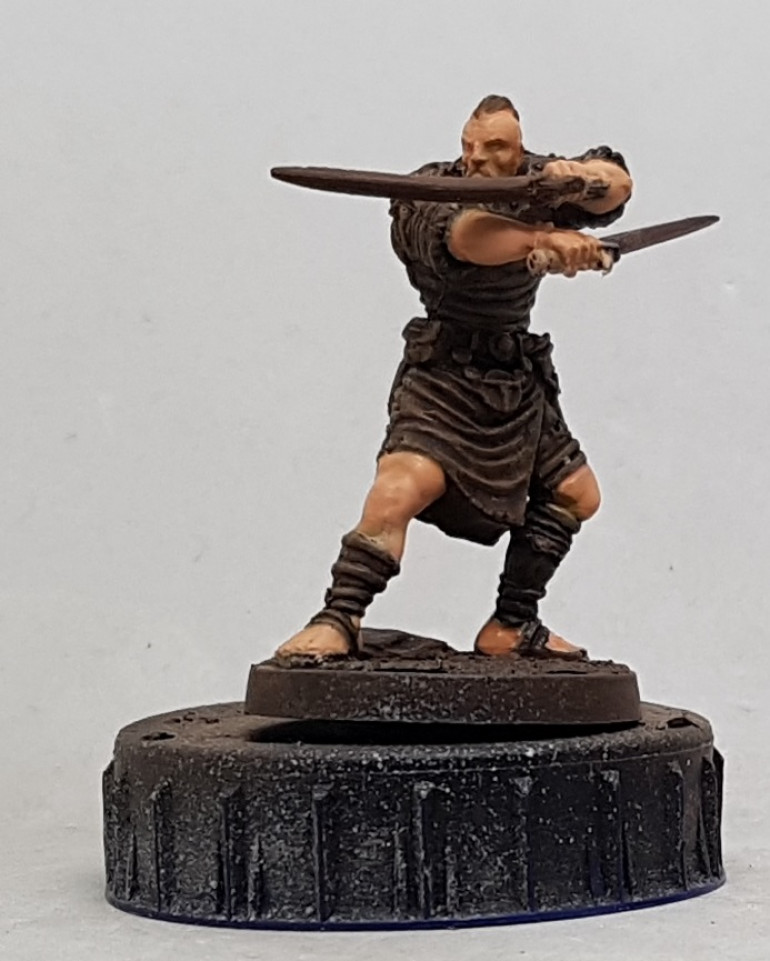 Male Skin: Base with P3 Midlund Flesh. Wash with Midlund Flesh and P3 Skorne Flesh. Wash with Midlund Flesh and P3 Battledress Green. Wash with Skorne Red and Battledress Green. Highlight with Midlund Flesh mixed with P3 Ryn Flesh. Brown Hair: Base with P3 Bloodtracker Brown, drybrush with P3 Beast hide and wash with GW Agrax Earthshade.
Aphrodyte
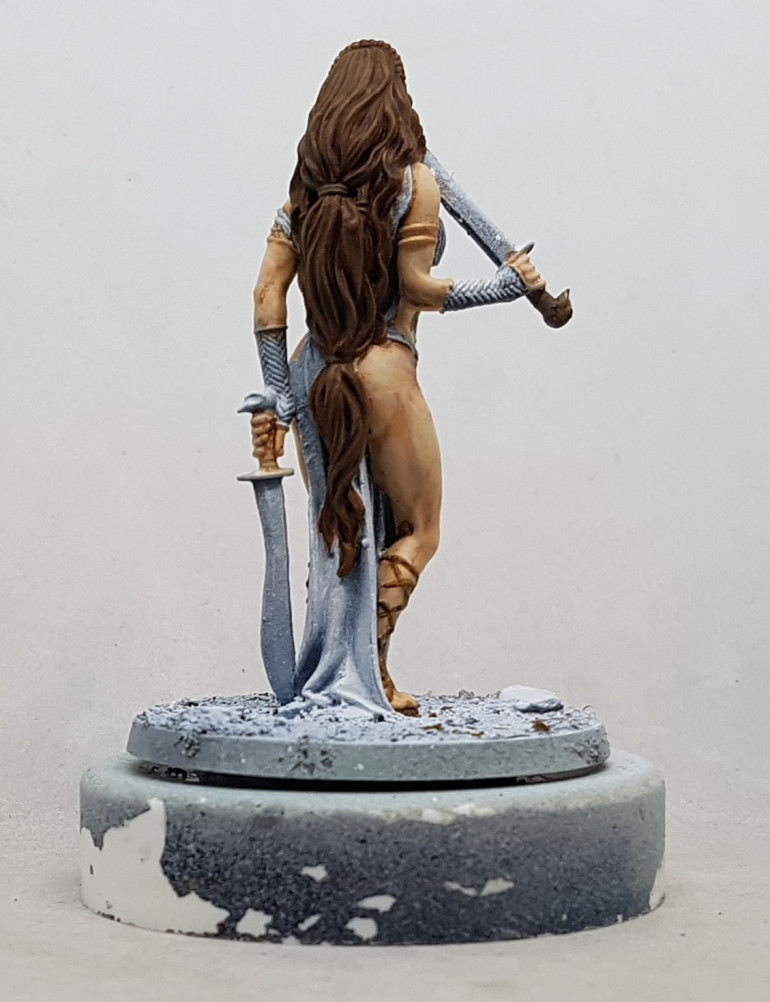
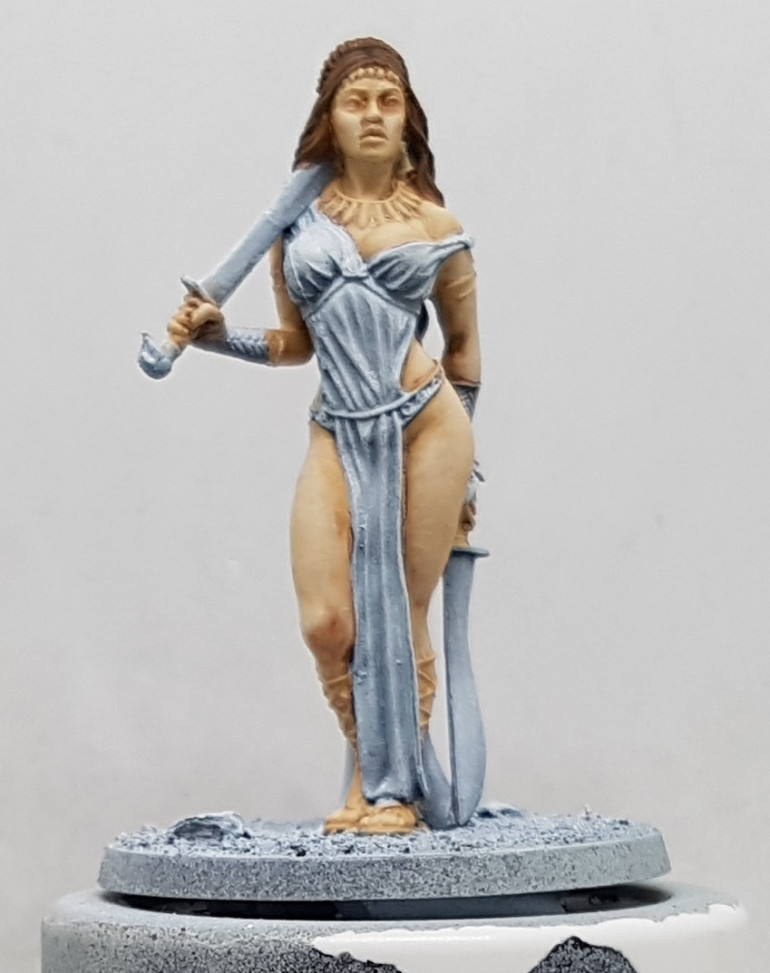 God Flesh: Base with Reaper Caucasian Flesh. Wash with Reaper Flesh Wash. Reclaim most with Caucassian flesh. First highlights with 50/50 Caucasian Flesh/Reaper Maiden Flesh, and then pure Maiden Flesh. Brown Hair: Base with P3 Bloodtracker Brown, drybrush with P3 Beast hide and wash with GW Agrax Earthshade.
 Mid tone leather: Base with Colour Party Paints MA41 Oakstaff, or any standard leather, wash with Agrax Earthshade, then highlight with P3 Beast Hide.
 Apollo
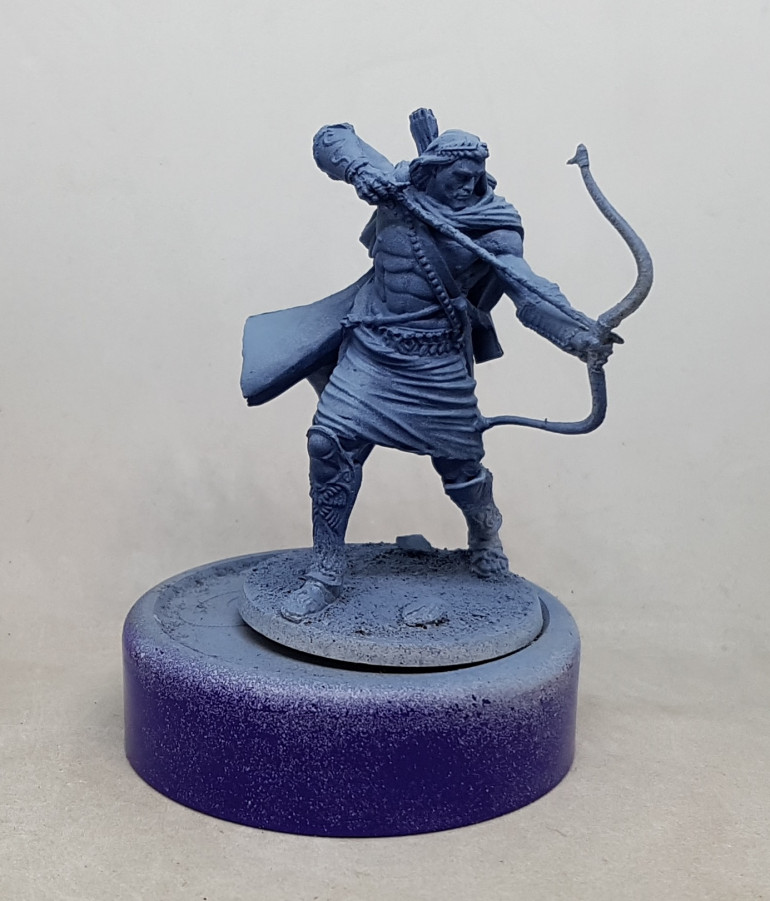 Even airbrush base coat GW The Fang, then 45 degree airbrush spray of GW Russ Grey, then Zenithal spray GW Fenrisian Grey, and finally a dryrbush on the edges with Fenrisian Grey
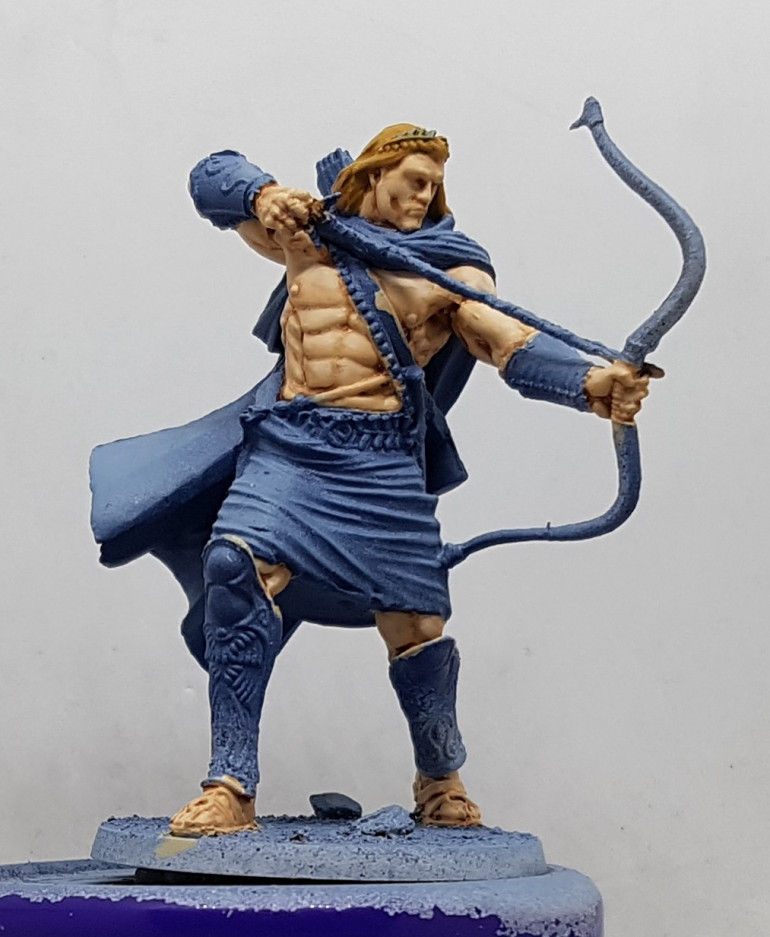 God Flesh: Base with Reaper Caucasian Flesh. Wash with Reaper Flesh Wash. Reclaim most with Caucassian flesh. First highlights with 50/50 Caucasian Flesh/Reaper Maiden Flesh, and then pure Maiden Flesh. Blonde Hair: Base with Reaper 09256 Blonde Shadow, drybrush with Reaper 09258 Blonde Highlight and wash with Coat d'arms 113 Flesh Ink Wash.
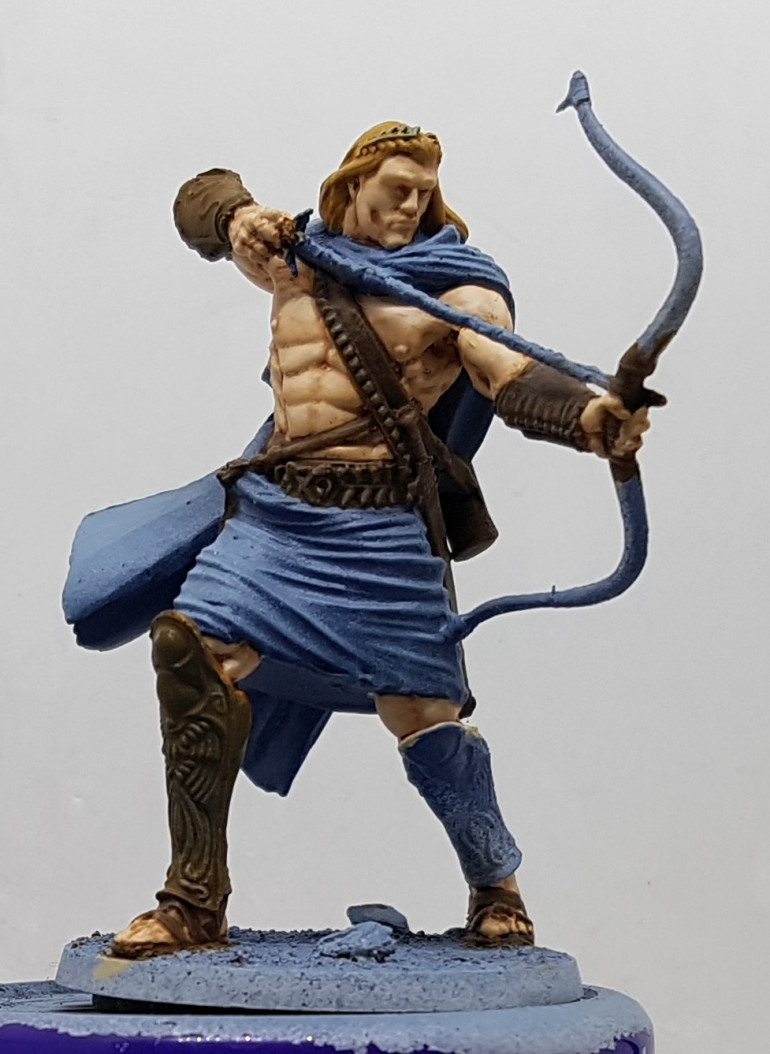 Mid tone leather: Base with Colour Party Paints MA41 Oakstaff, or any standard leather, wash with Agrax Earthshade, then highlight with P3 Beast Hide.
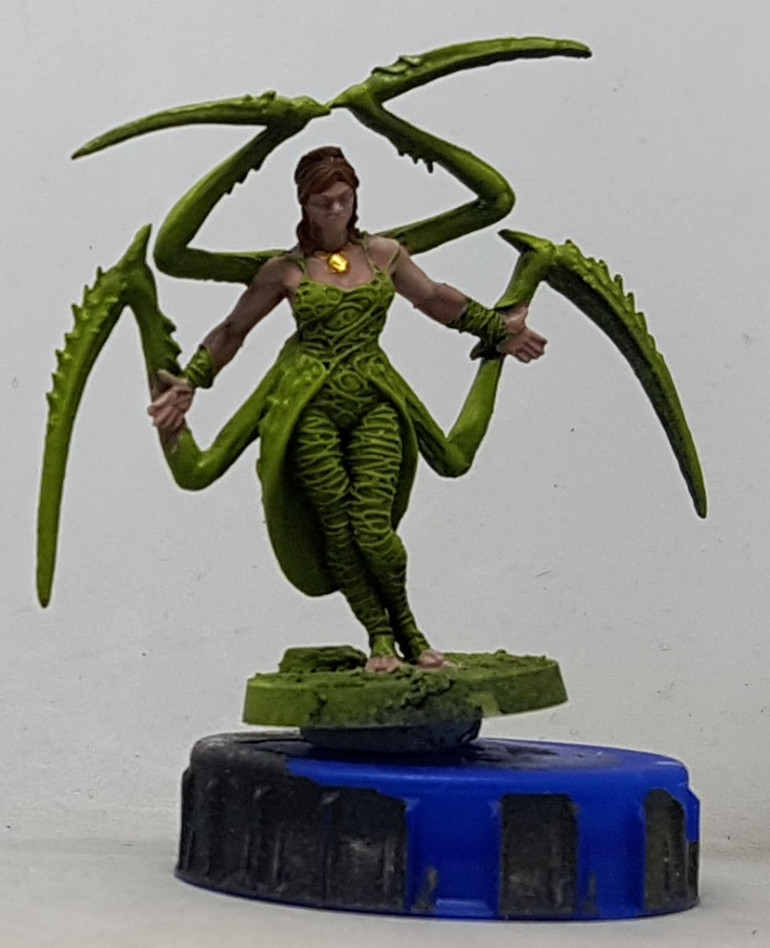
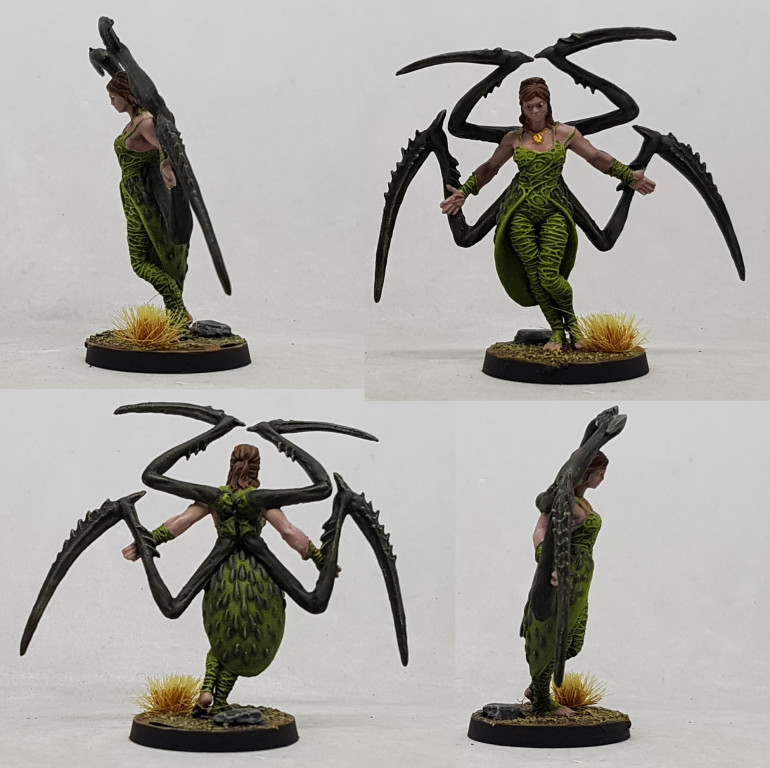
Arachne
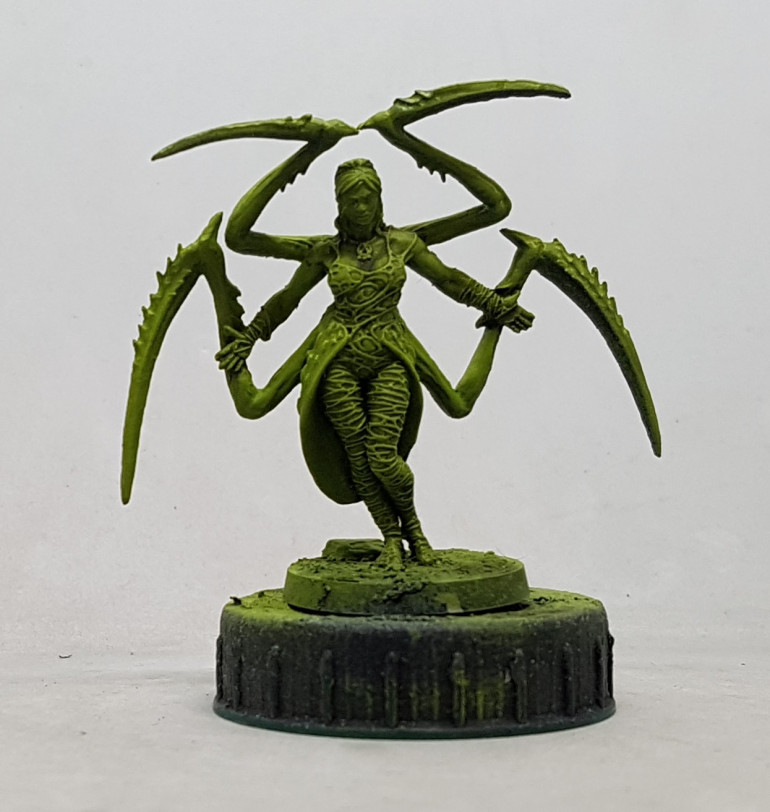 Based with VMC 70.857 Golden Olive, then washed with GW Athonian Camoshade. She was then given a drybrush of VMC70.827 Lime Green
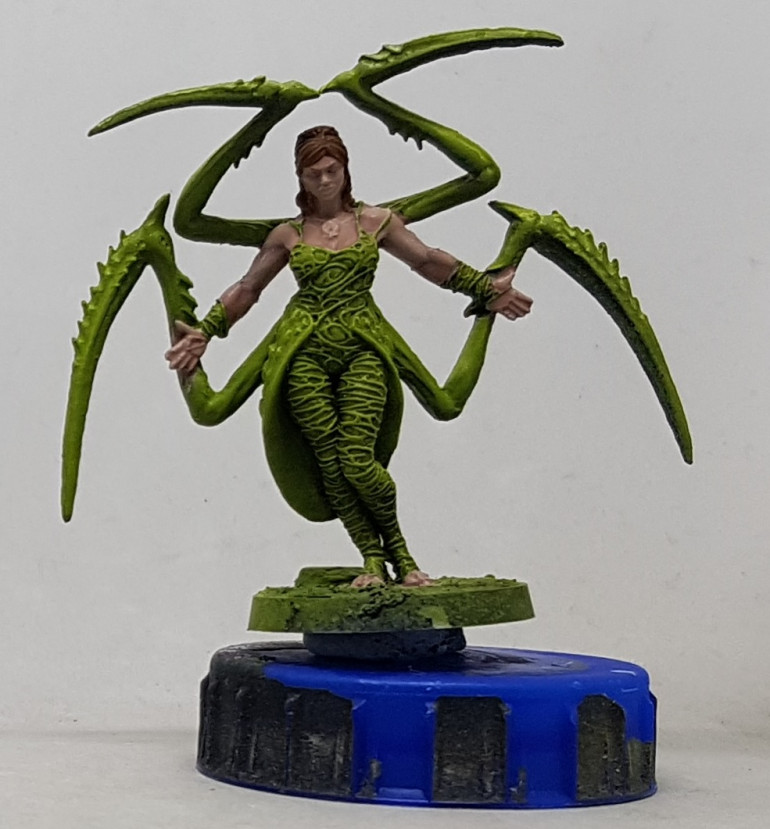 Creepy Skin: Base with P3 Ryn Flesh, P3 Carnal Pink and P3 Trollblood Highlight. Wash with the base mixed with P3 Traitor Green. Wash with previous mix with added P3 Beaten Purple. Wash with Beaten Purple, Traitor Green and Midlund Flesh mix. Highlight with Ryn Flesh, Carnal Pink and Menoth White Highlight mix.
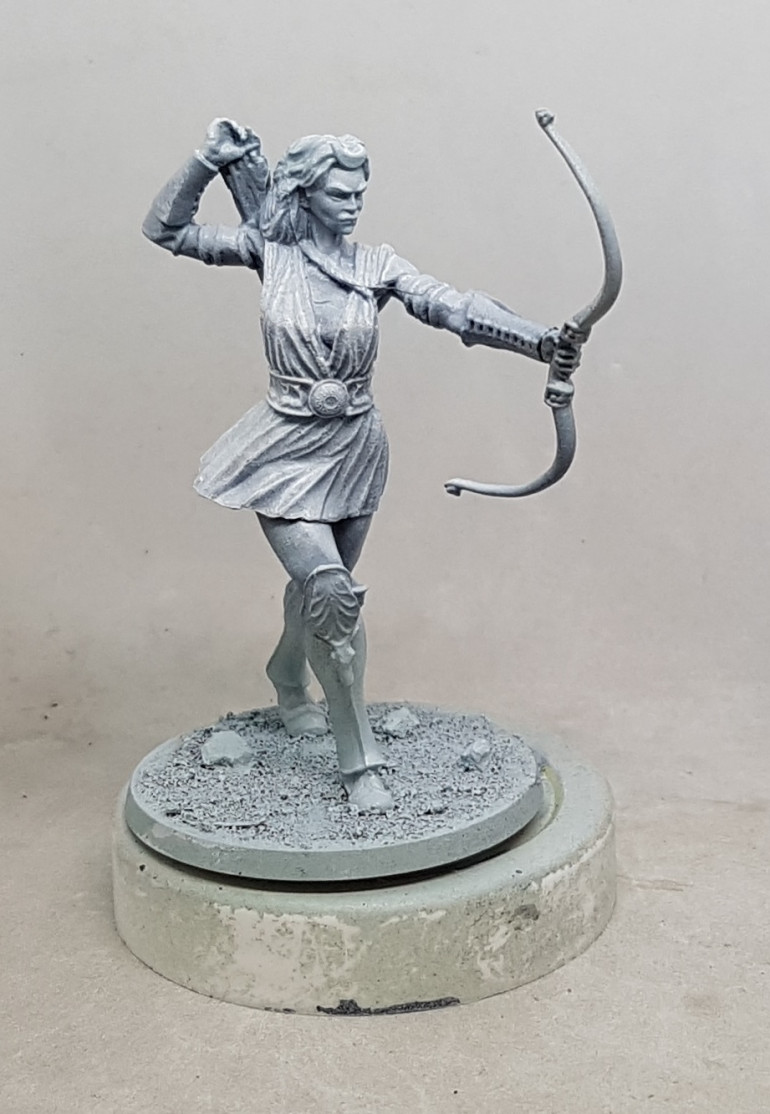
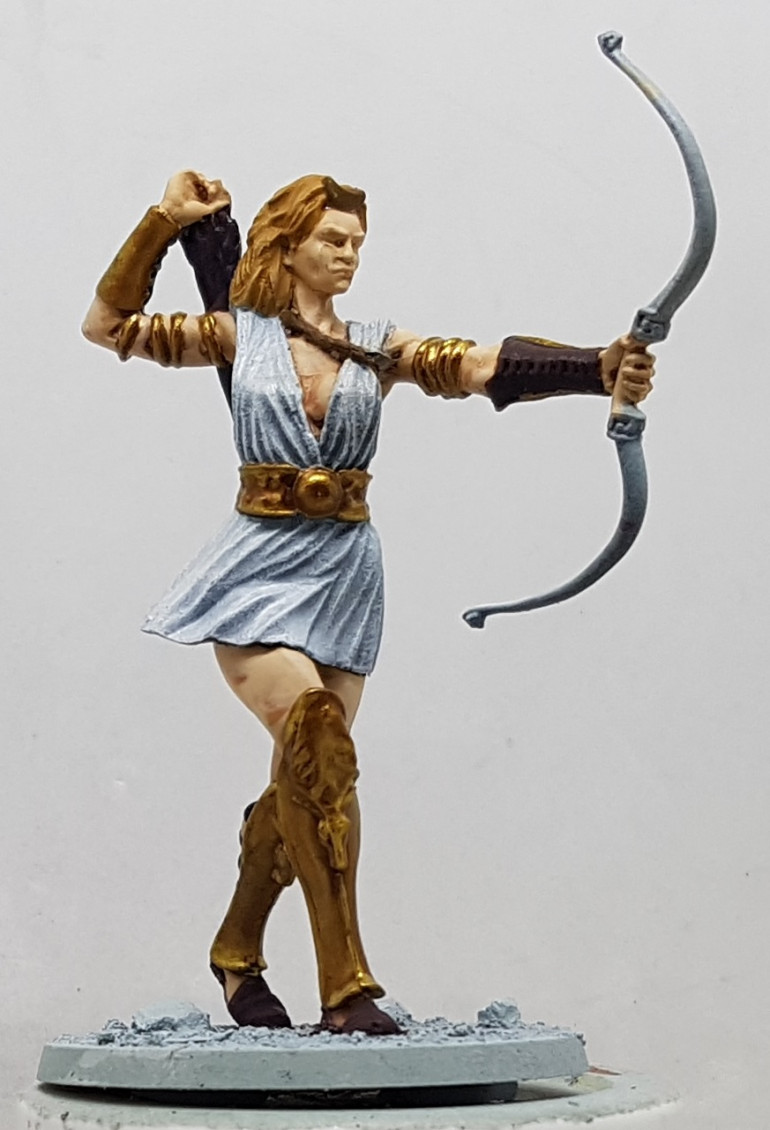
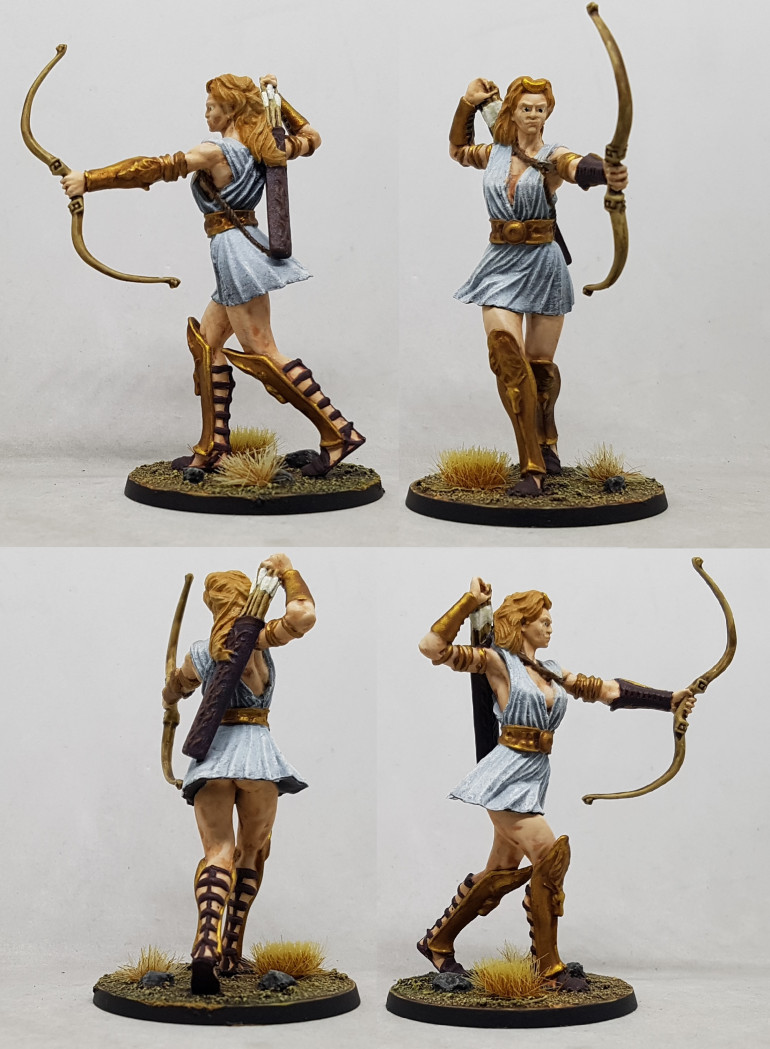
Artemis
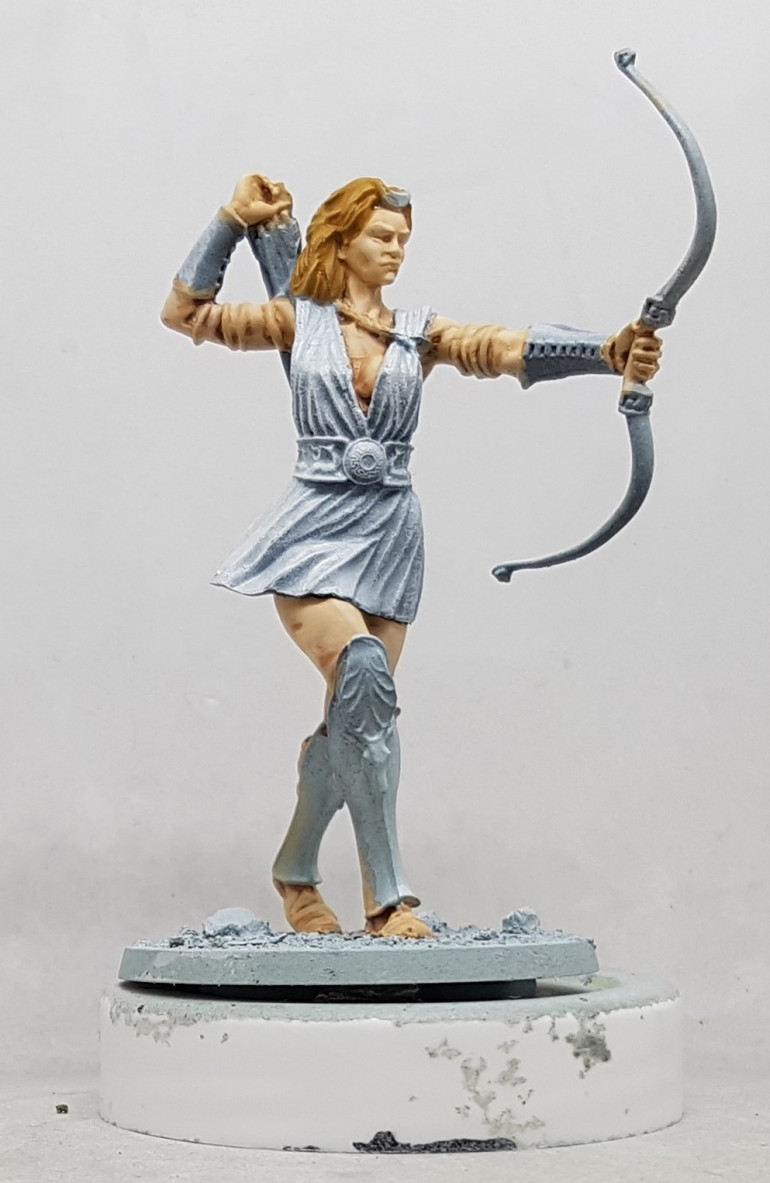 God Flesh: Base with Reaper Caucasian Flesh. Wash with Reaper Flesh Wash. Reclaim most with Caucassian flesh. First highlights with 50/50 Caucasian Flesh/Reaper Maiden Flesh, and then pure Maiden Flesh. Blonde Hair: Base with Reaper 09256 Blonde Shadow, drybrush with Reaper 09258 Blonde Highlight and wash with Coat d'arms 113 Flesh Ink Wash.
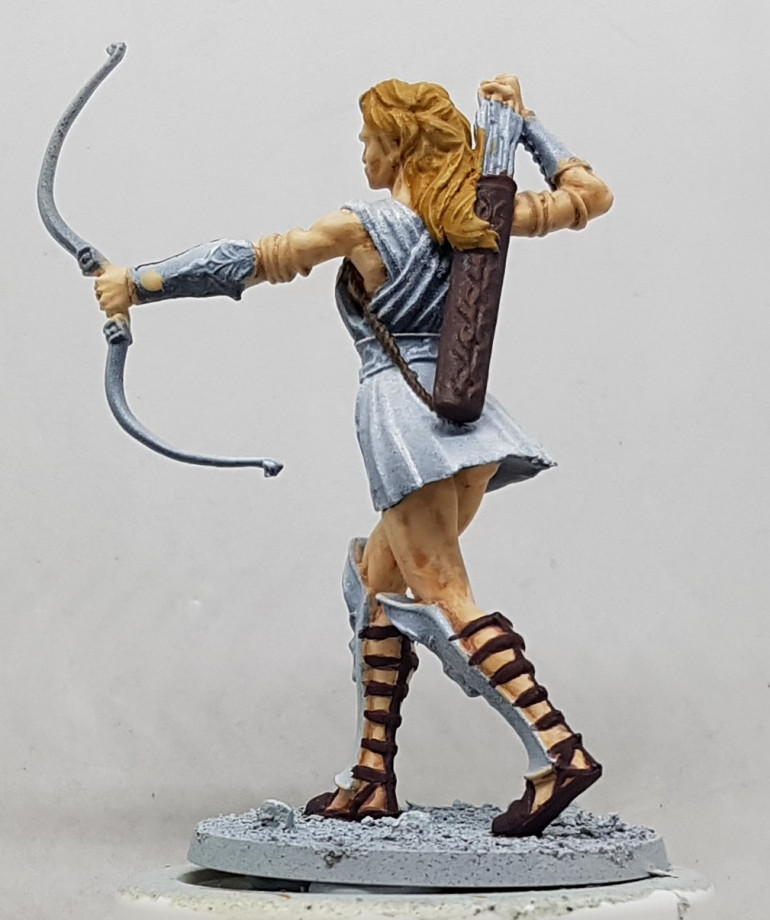 Mid tone leather: Base with Colour Party Paints MA41 Oakstaff, or any standard leather, wash with Agrax Earthshade, then highlight with P3 Beast Hide. Rich leather: Base with S75 Black Leather. All highlights had extra water and Lahmium Medium added. Highlight up with 1:1 Black Leather : S75 Red Leather, then Red Leather, then 1:1 Red leather : SC Orange Leather, and finally just Orange Leather.
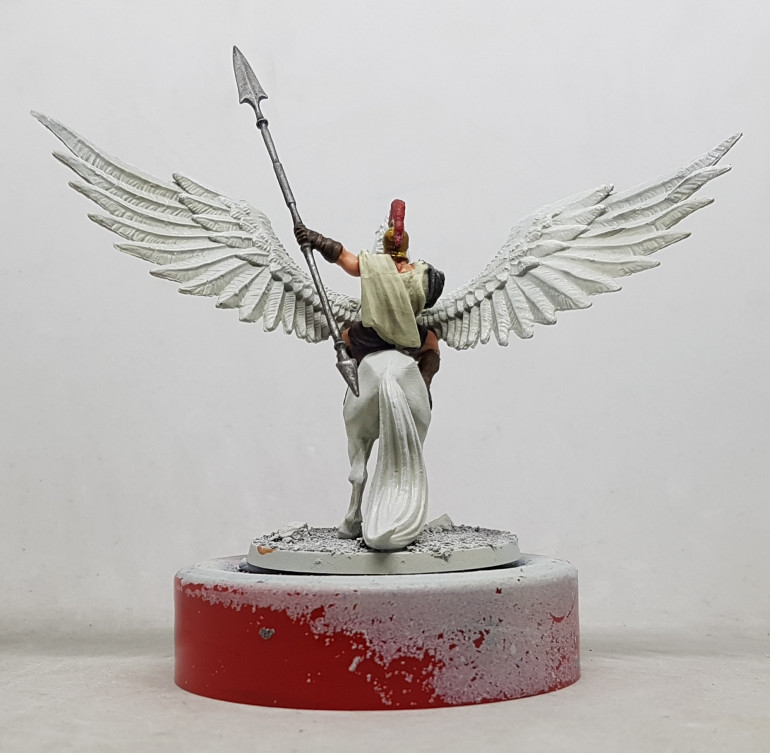
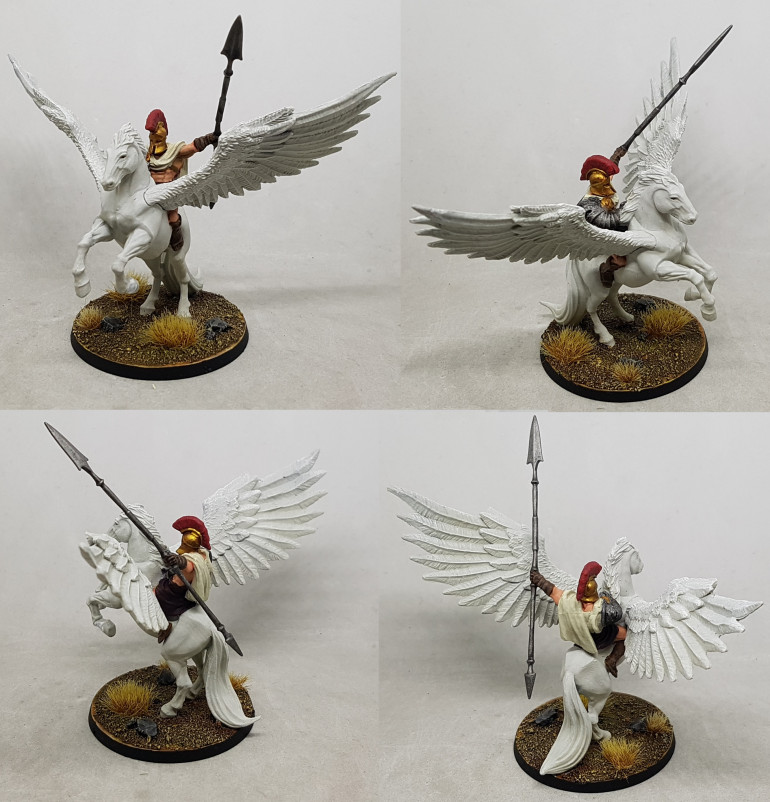
Bellerophon
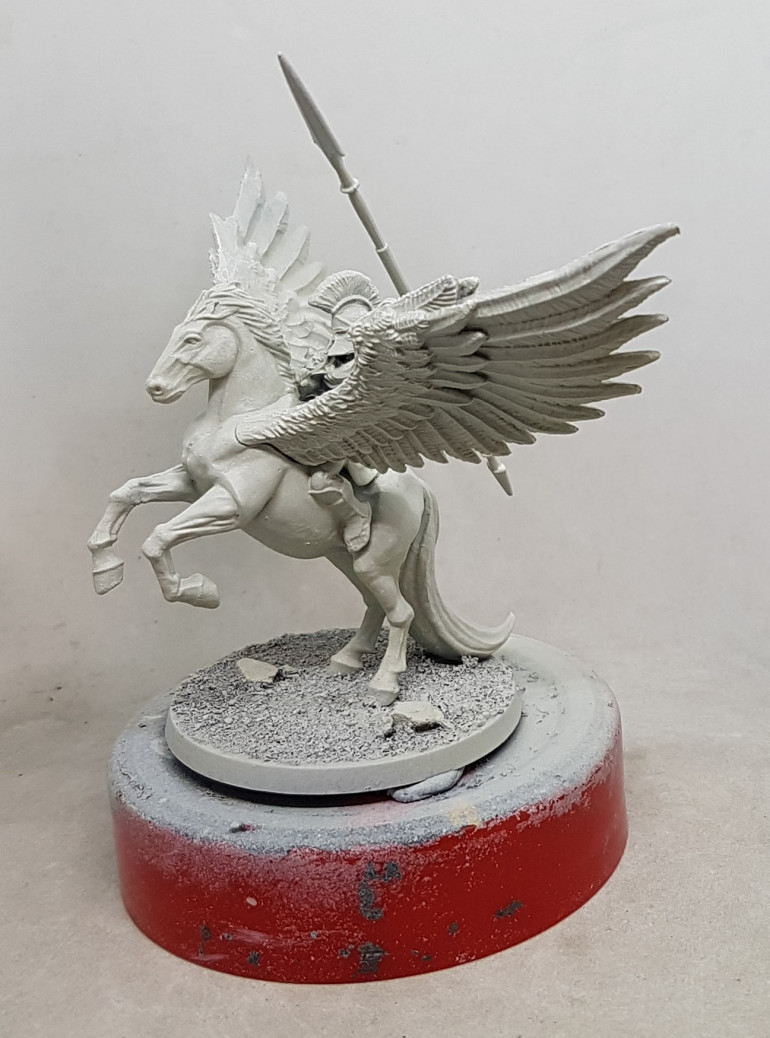 Based with VMC Deck Tan, then airbrush highlighted with 50/50 Deck Tan/White. Then drybrushed with white
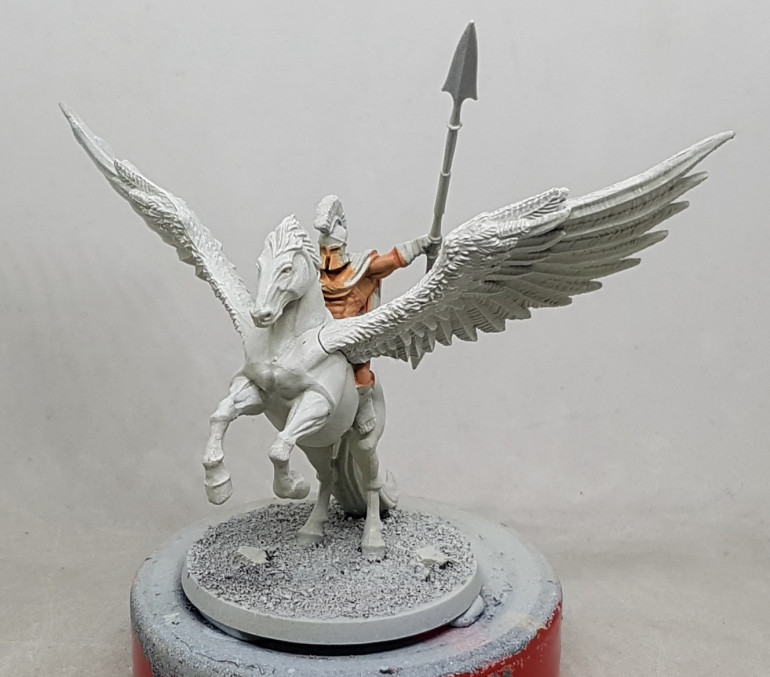 Male Skin: Base with P3 Midlund Flesh. Wash with Midlund Flesh and P3 Skorne Flesh. Wash with Midlund Flesh and P3 Battledress Green. Wash with Skorne Red and Battledress Green. Highlight with Midlund Flesh mixed with P3 Ryn Flesh.
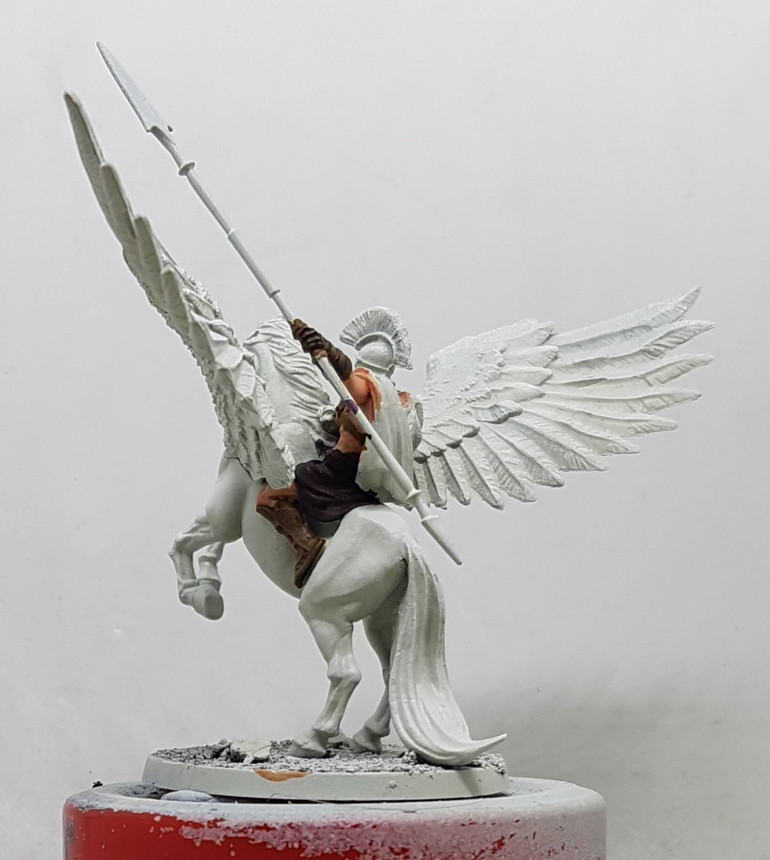 Mid tone leather: Base with Colour Party Paints MA41 Oakstaff, or any standard leather, wash with Agrax Earthshade, then highlight with P3 Beast Hide. Rich leather: Base with S75 Black Leather. All highlights had extra water and Lahmium Medium added. Highlight up with 1:1 Black Leather : S75 Red Leather, then Red Leather, then 1:1 Red leather : SC Orange Leather, and finally just Orange Leather.
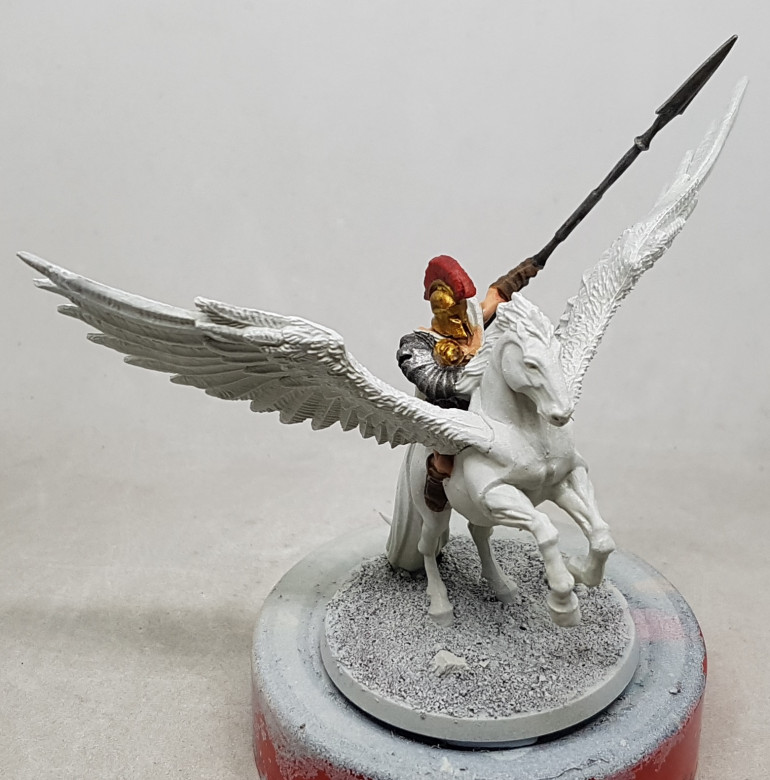 High Gold: Undercoat brown. Base with AK Old Brass, wash with GSW Pecaton Flesh and highlight with AK Brass. Iron: Base with P3 Pig Iron, wash with GW Nuln Oil and highlight with P3 Cold Steel.
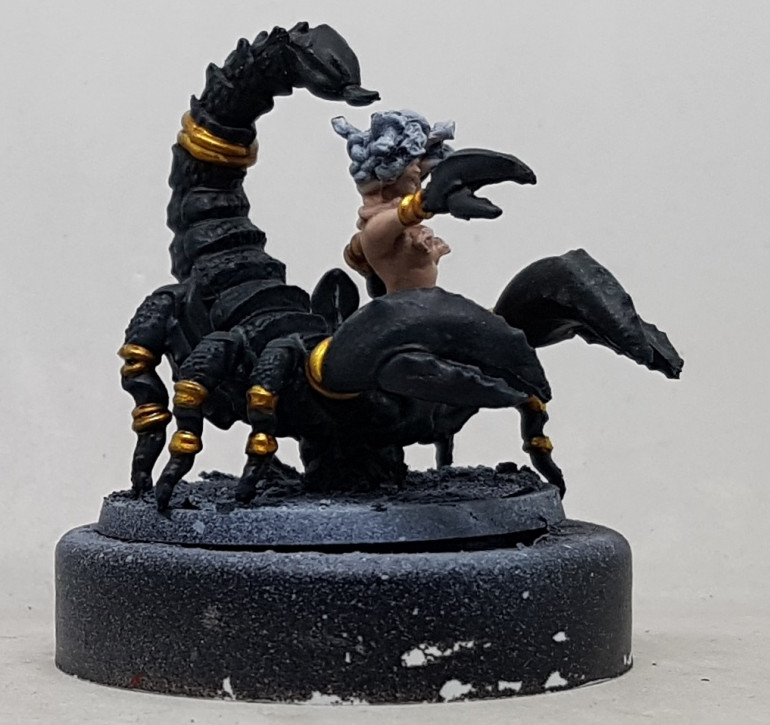
 Campe
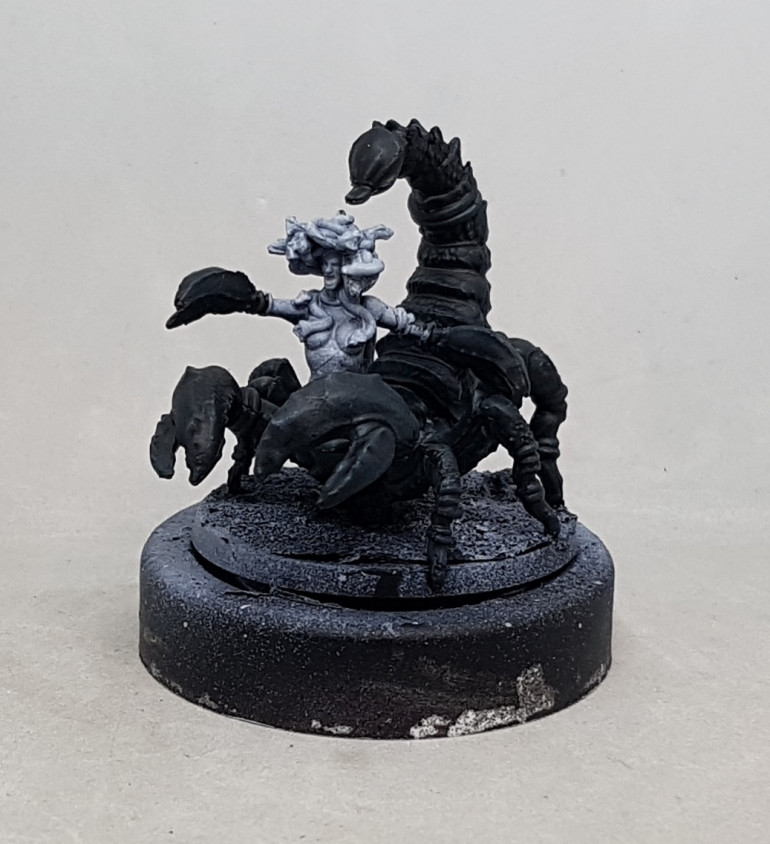 Zenithal preshaded, then painted with GW Contrast Black Templar and drybrushed with P3 Coal Black. My first time using contrast. Not too shabby, although the black is actually very dark green, so dark you can't tell on most of the surface
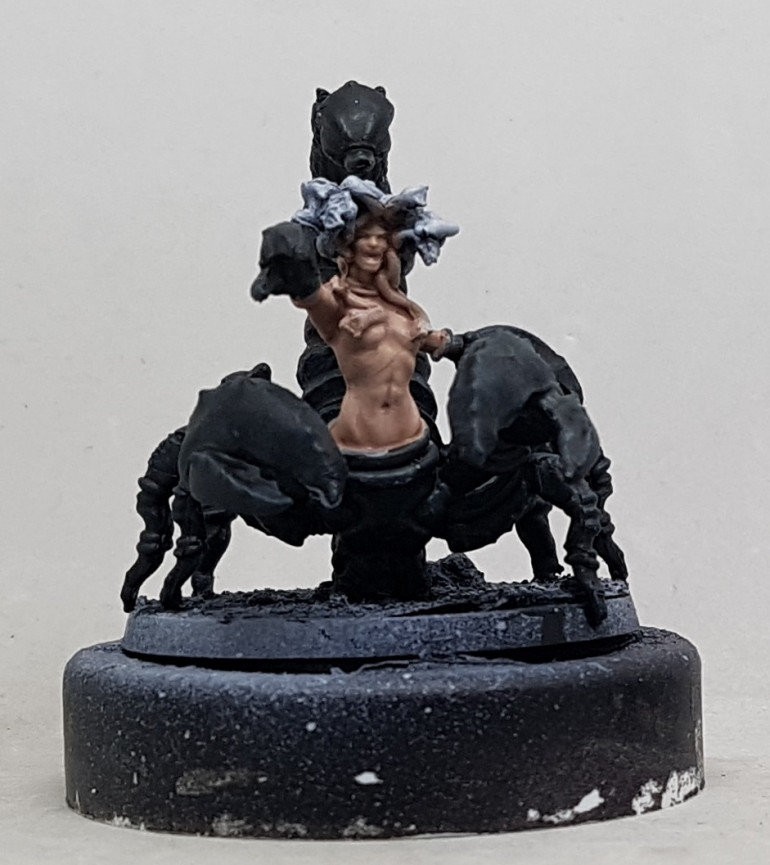 Creepy Skin: Base with P3 Ryn Flesh, P3 Carnal Pink and P3 Trollblood Highlight. Wash with the base mixed with P3 Traitor Green. Wash with previous mix with added P3 Beaten Purple. Wash with Beaten Purple, Traitor Green and Midlund Flesh mix. Highlight with Ryn Flesh, Carnal Pink and Menoth White Highlight mix.
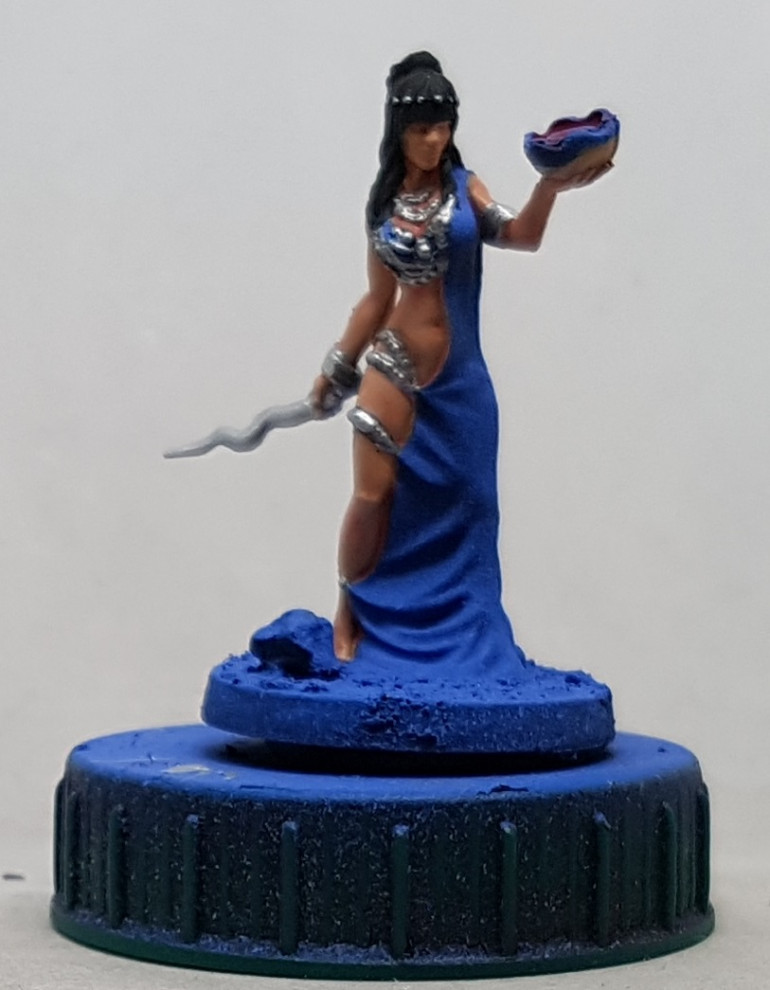
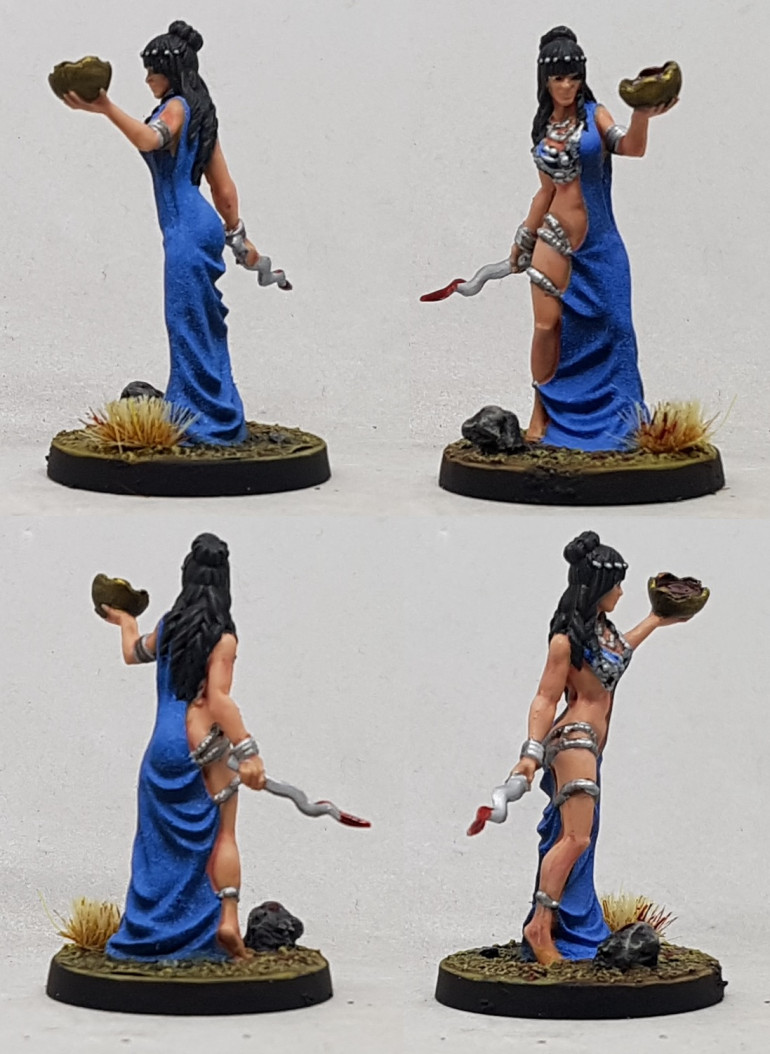
Circe
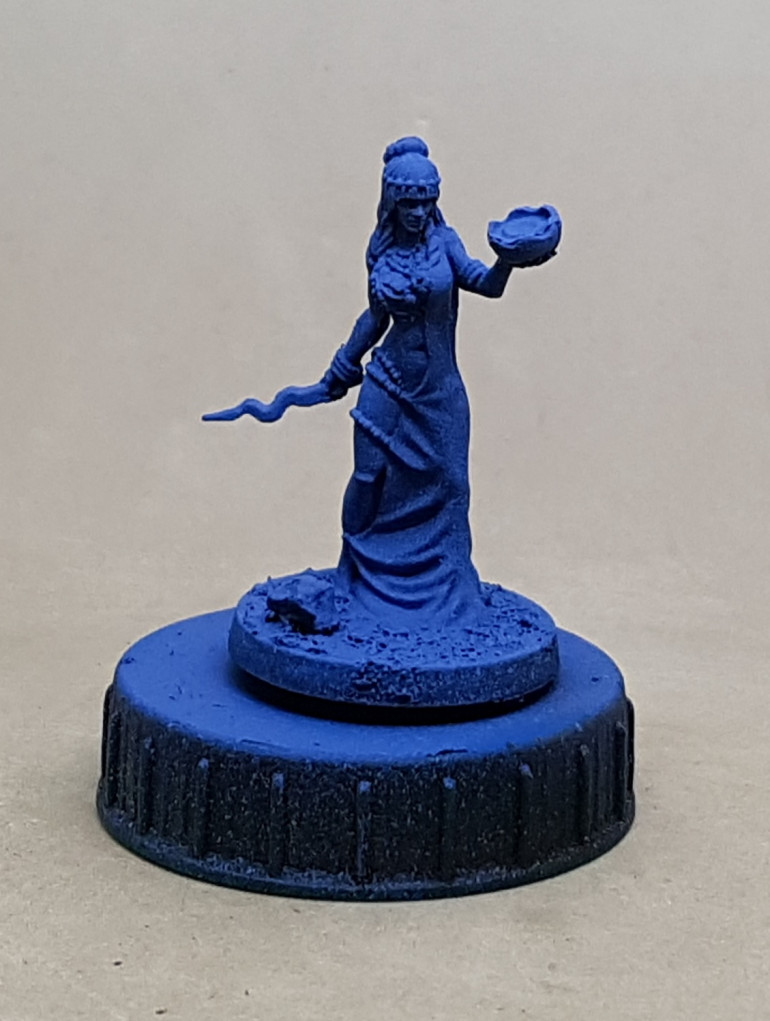 Painted using Creature Caster Pro-Acryl paints through an airbrush over a zenithal. Based with Dark Grey Blue, Highlighted with Blue, and zenithally highlighted with Faded Ultramarine
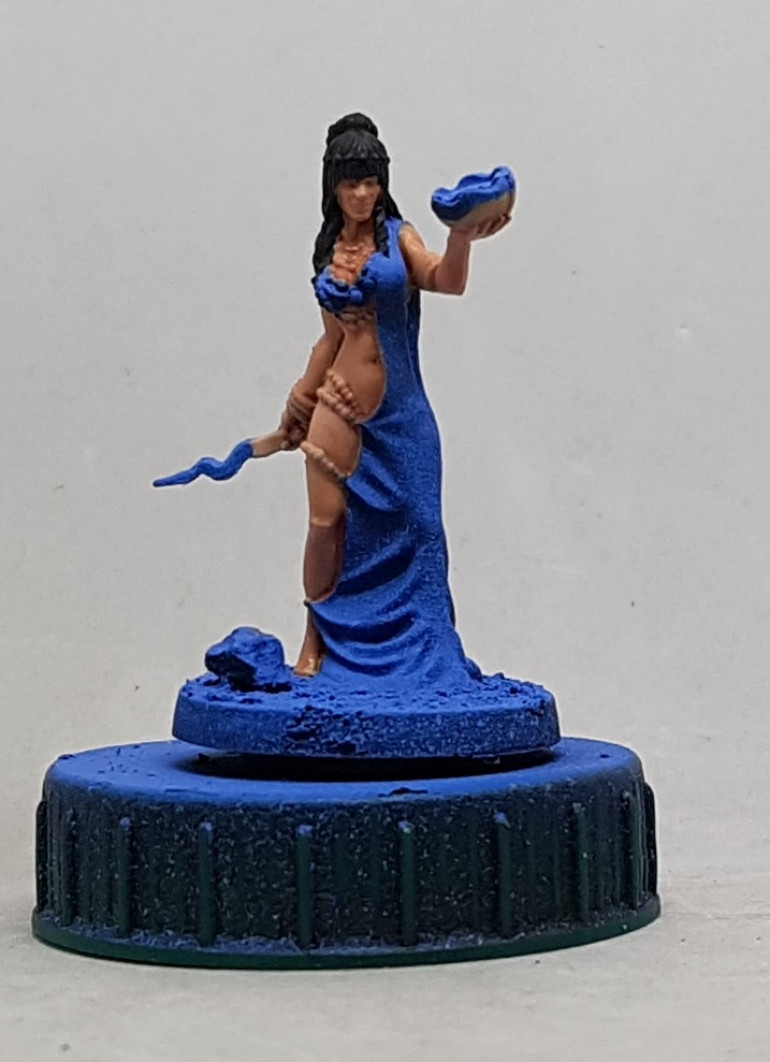 Female Skin: Base with P3 Midlund Flesh mixed with P3 Ryn Flesh. Wash with Midlund Flesh and P3 Battledress Green. Wash with Midlund Flesh and P3 Skorne Flesh. Highlight with P3 Ryn Flesh. Black Hair: Base with VMC 70.862 Black Grey, drybrush with P3 Bastion Grey and wash GW Nuln Oil.
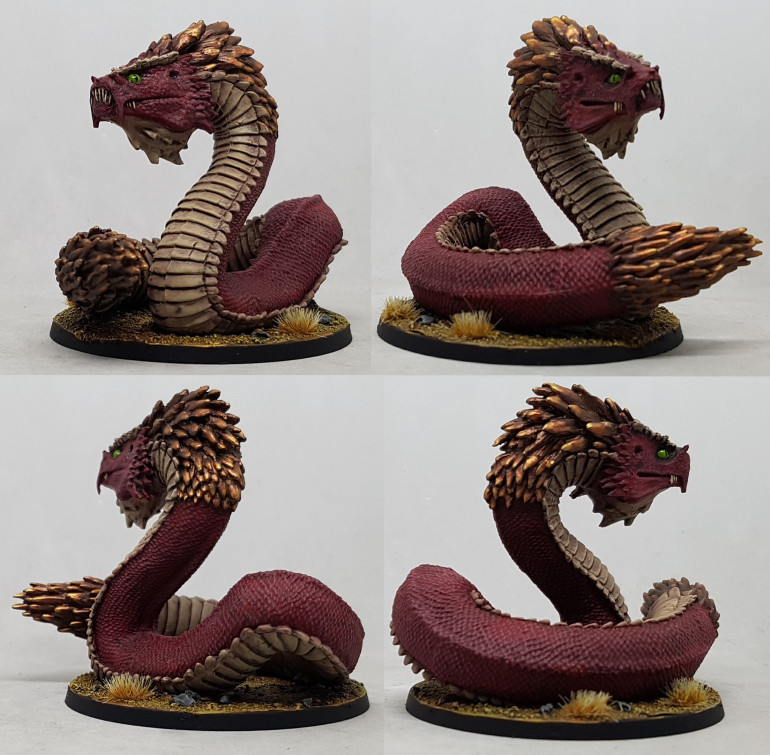
Dragon of Thebes
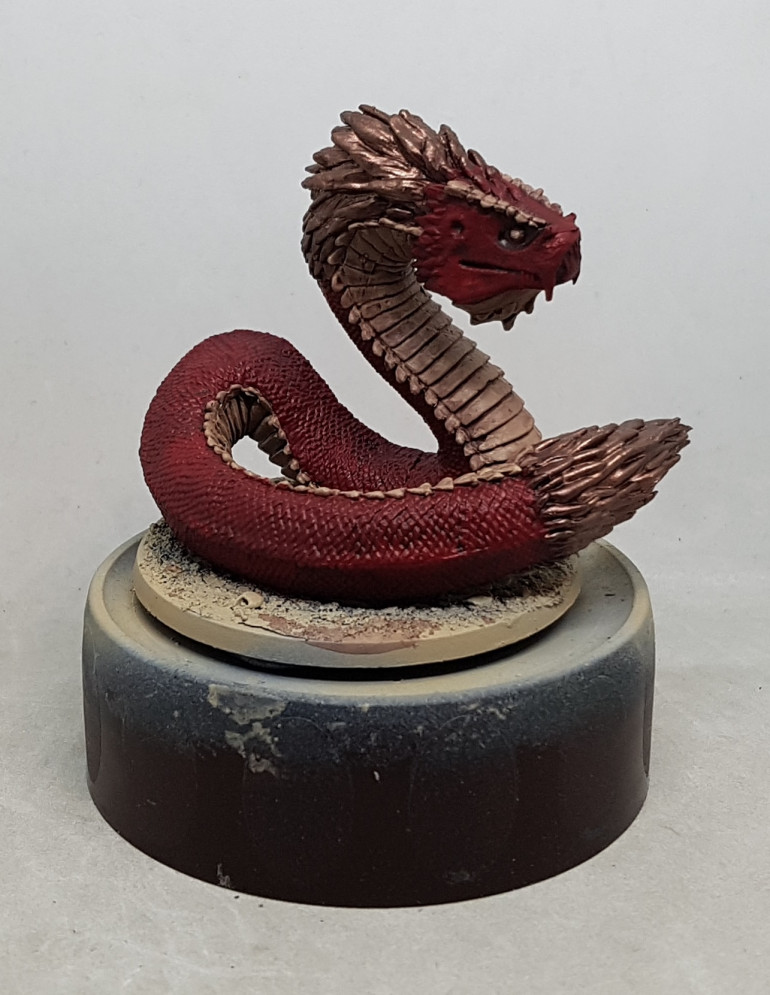 Underbelly base coated with 50/50 P3 Ryn Flesh/P3 Hammerfall Khaki. Red flesh wasVGC 72.012 Scarlett Red. Copper was Darkstar Aged Copper. All the flesh was washed with a mix of VMC 70.859 Black Red and P3 Armour Wash. I brought this up on to the copper near the flesh.
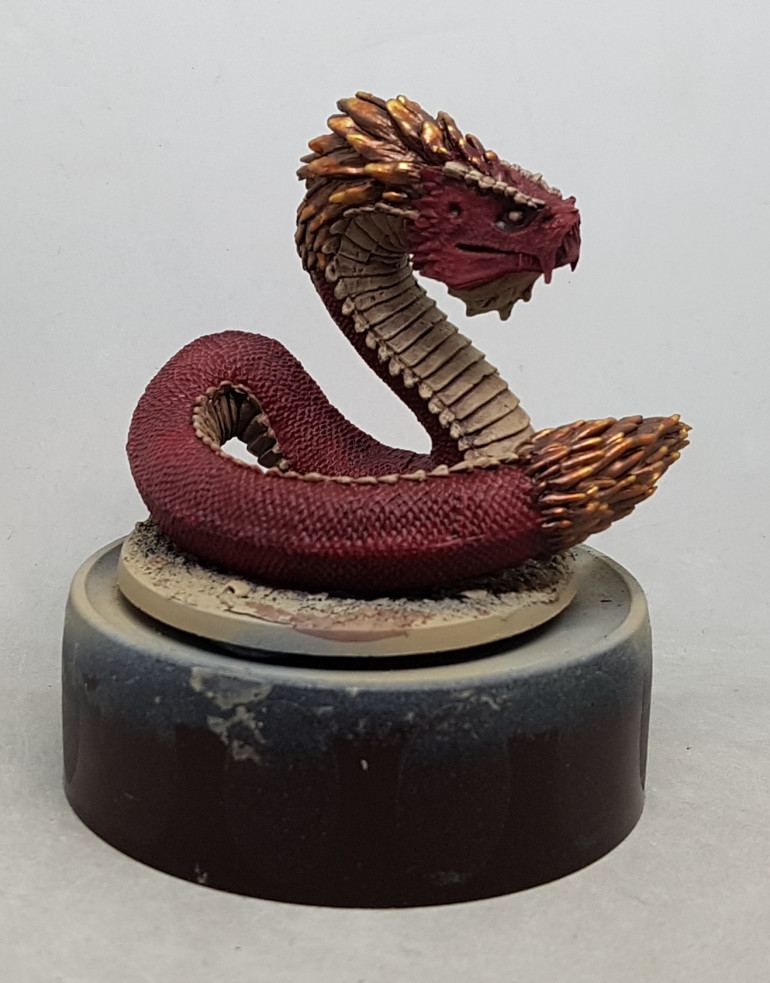 The belly was drybrushed up with 50/50 P3 Hammerfall Khaki / Menoth White Base. The scales were drybrushed with 60/40 mix of P3 Skorne Red / Menoth White base. The top half of the spines were enhanced with 50/50 Aged Copper/Darkstar Copper. The highlight was increased with Copper, then 50/50 Copper/Darkstar Polished Copper and eventually just a glint of Polished Copper. Finally, the spines and the scales fading in to them were washed with Instar Heavy Brown


![TerrainFest 2024 Begins! Build Terrain With OnTableTop & Win A £300 Prize! [Extended!]](https://images.beastsofwar.com/2024/10/TerrainFEST-2024-Social-Media-Post-Square-225-127.jpg)


