![Very Cool! Make Your Own Star Wars: Legion Imperial Agent & Officer | Review [7 Days Early Access]](https://images.beastsofwar.com/2025/12/Star-Wars-Imperial-Agent-_-Officer-coverimage-V3-225-127.jpg)


Painting dreadfleet


Recommendations: 518
About the Project
The goal of this project is to paint everything that came in the box: ships, terrain, tokens, sea monsters,...
Related Game: Dreadfleet
Related Company: Games Workshop
Related Genre: Fantasy
This Project is Completed
Base coating the ships
The sails
Base coating the sails and hulls was done by airbrush.
Sails of the pirate ships: after priming with white surface primer, I’ve base coated whit Model Air white. This is a brighter white than the primer. It makes the sails looks nicer and covers any remaining bare plastic.
Sails of the undead ships: their black primer serves as base coat.
The hulls
The pirate flagship and The Swordfish were base coated in Model Color Chocolate Brown from Vallejo. For the Flaming Scimitar I used Model Color Wood Grain from Vallejo. This is a more red brown, but on a black undercoat, there’s hardly any visible difference. I added airbrush flow improver for both.

 Skabrus received a base coat in Model Air Light Grey to make the body of the ship look like decaying or dead flesh.
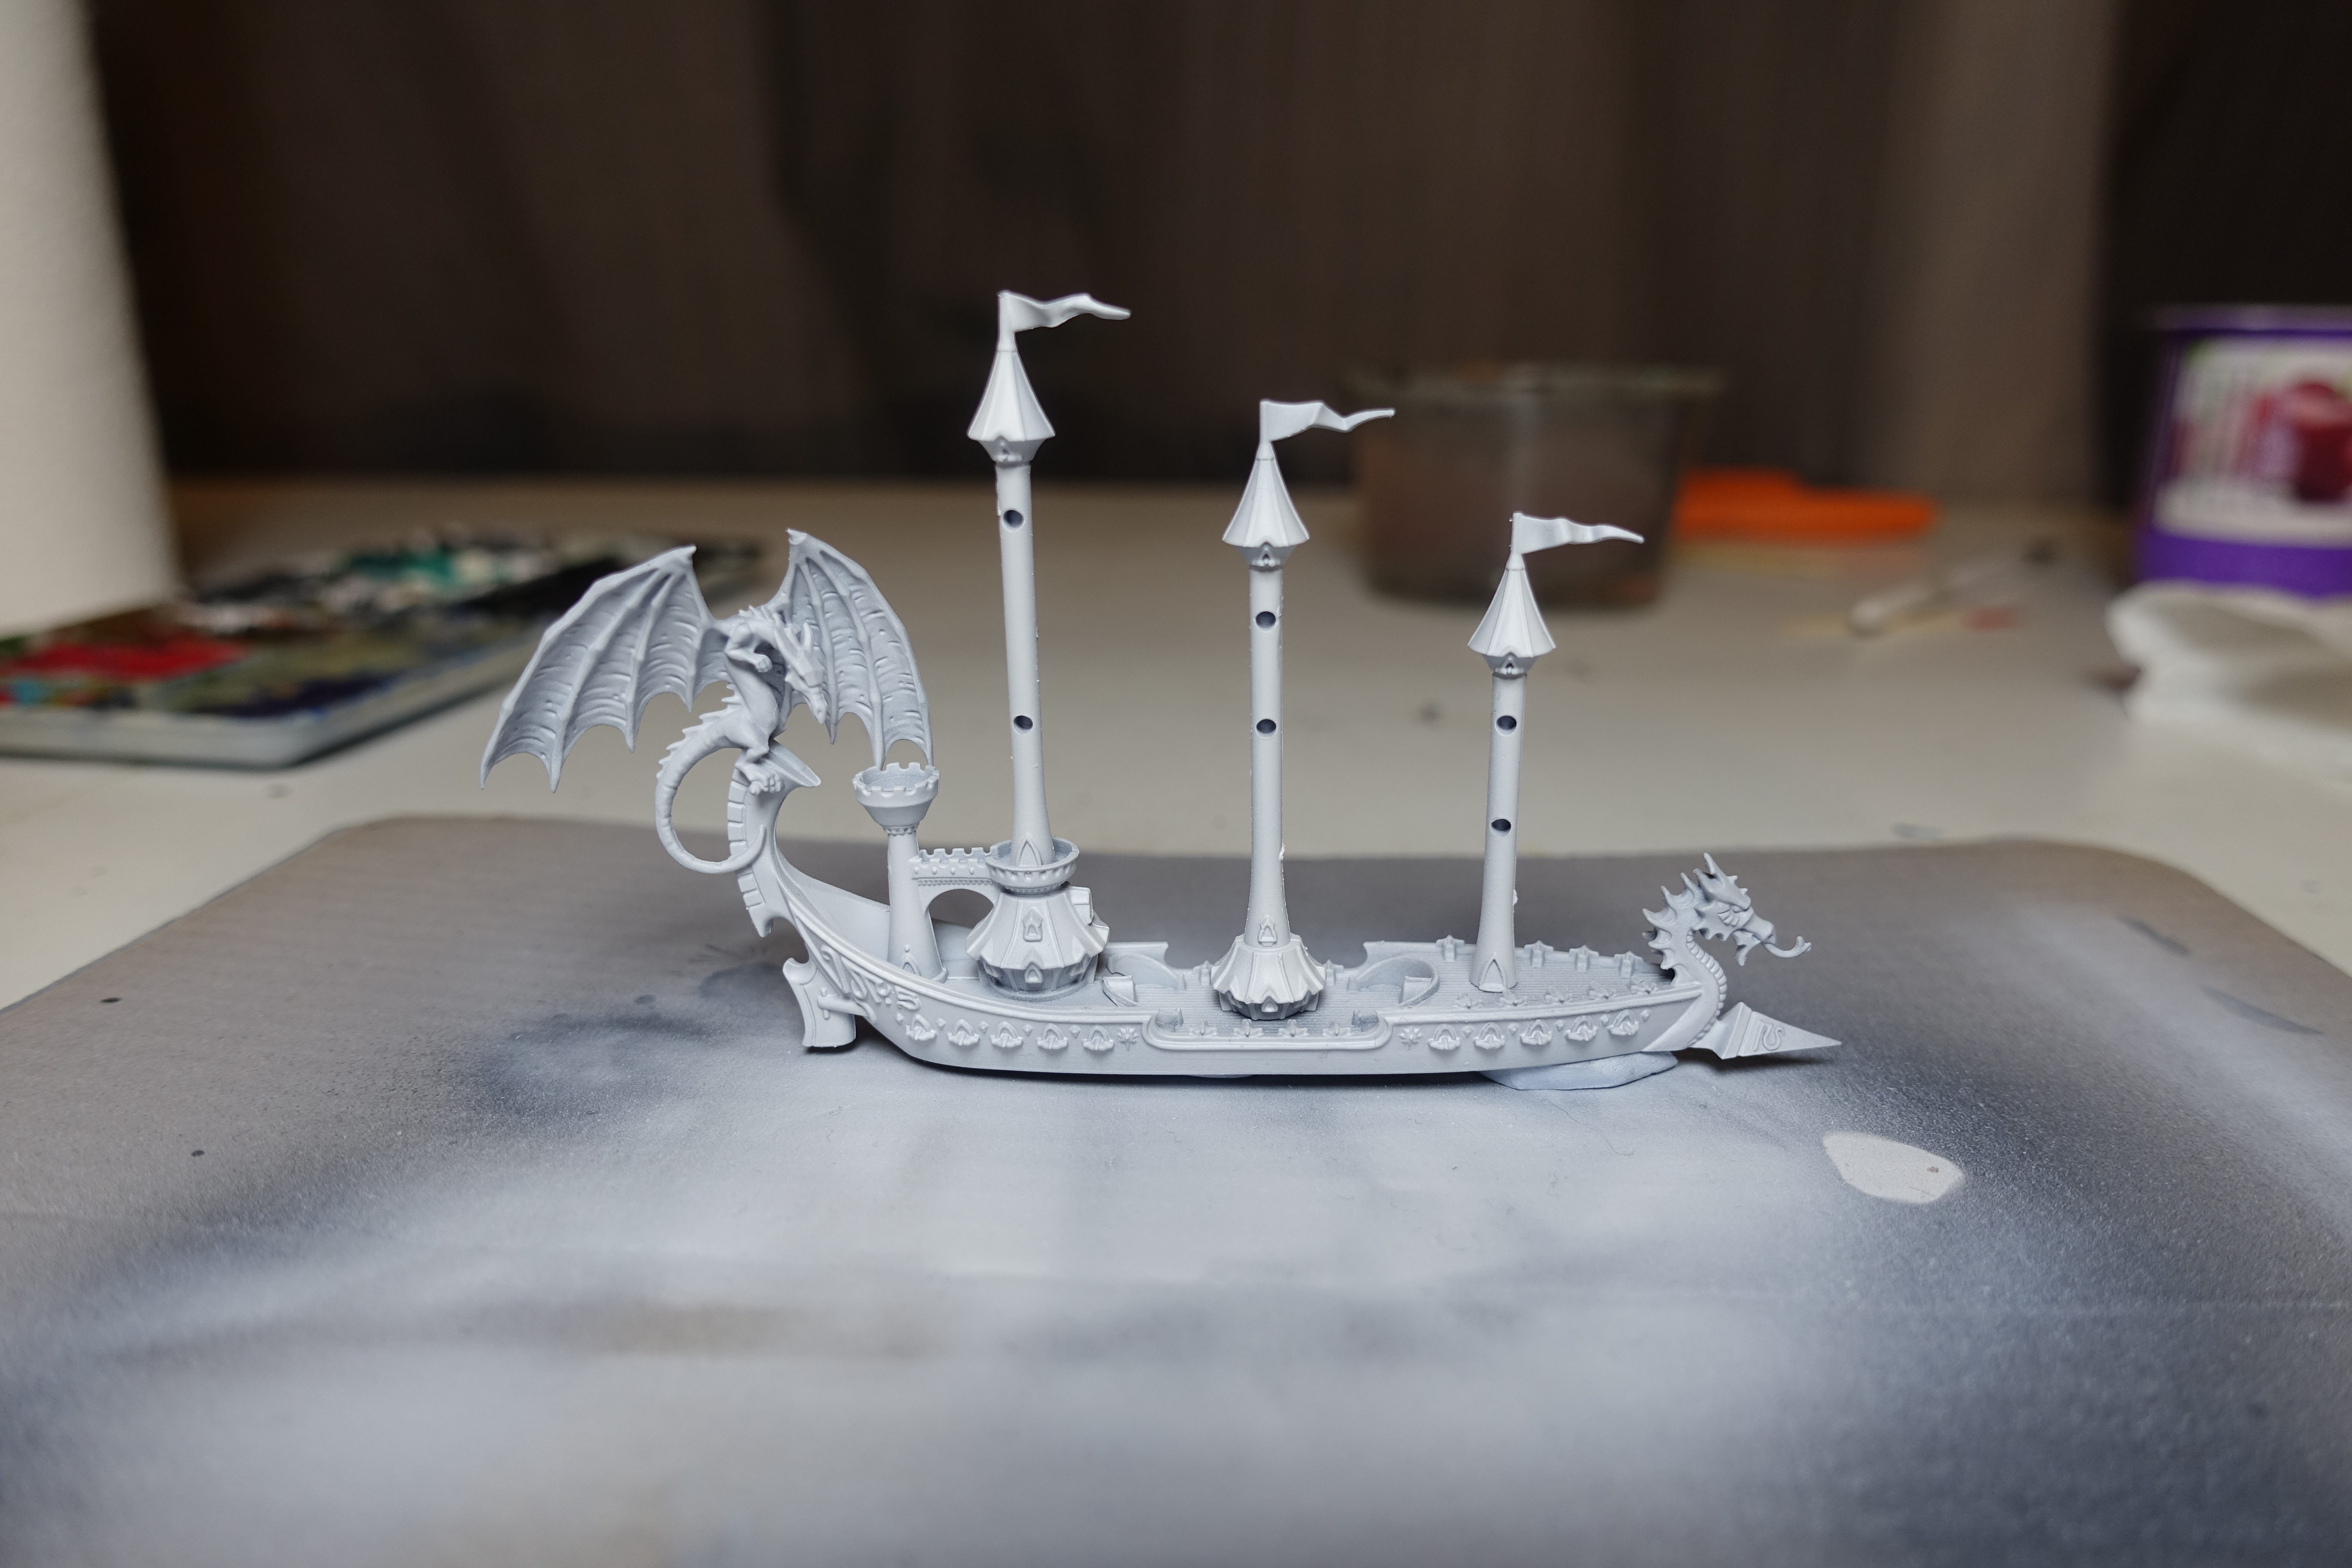 The elven ship received an extra coat or Model Air White for a very clean white hull.
The decks
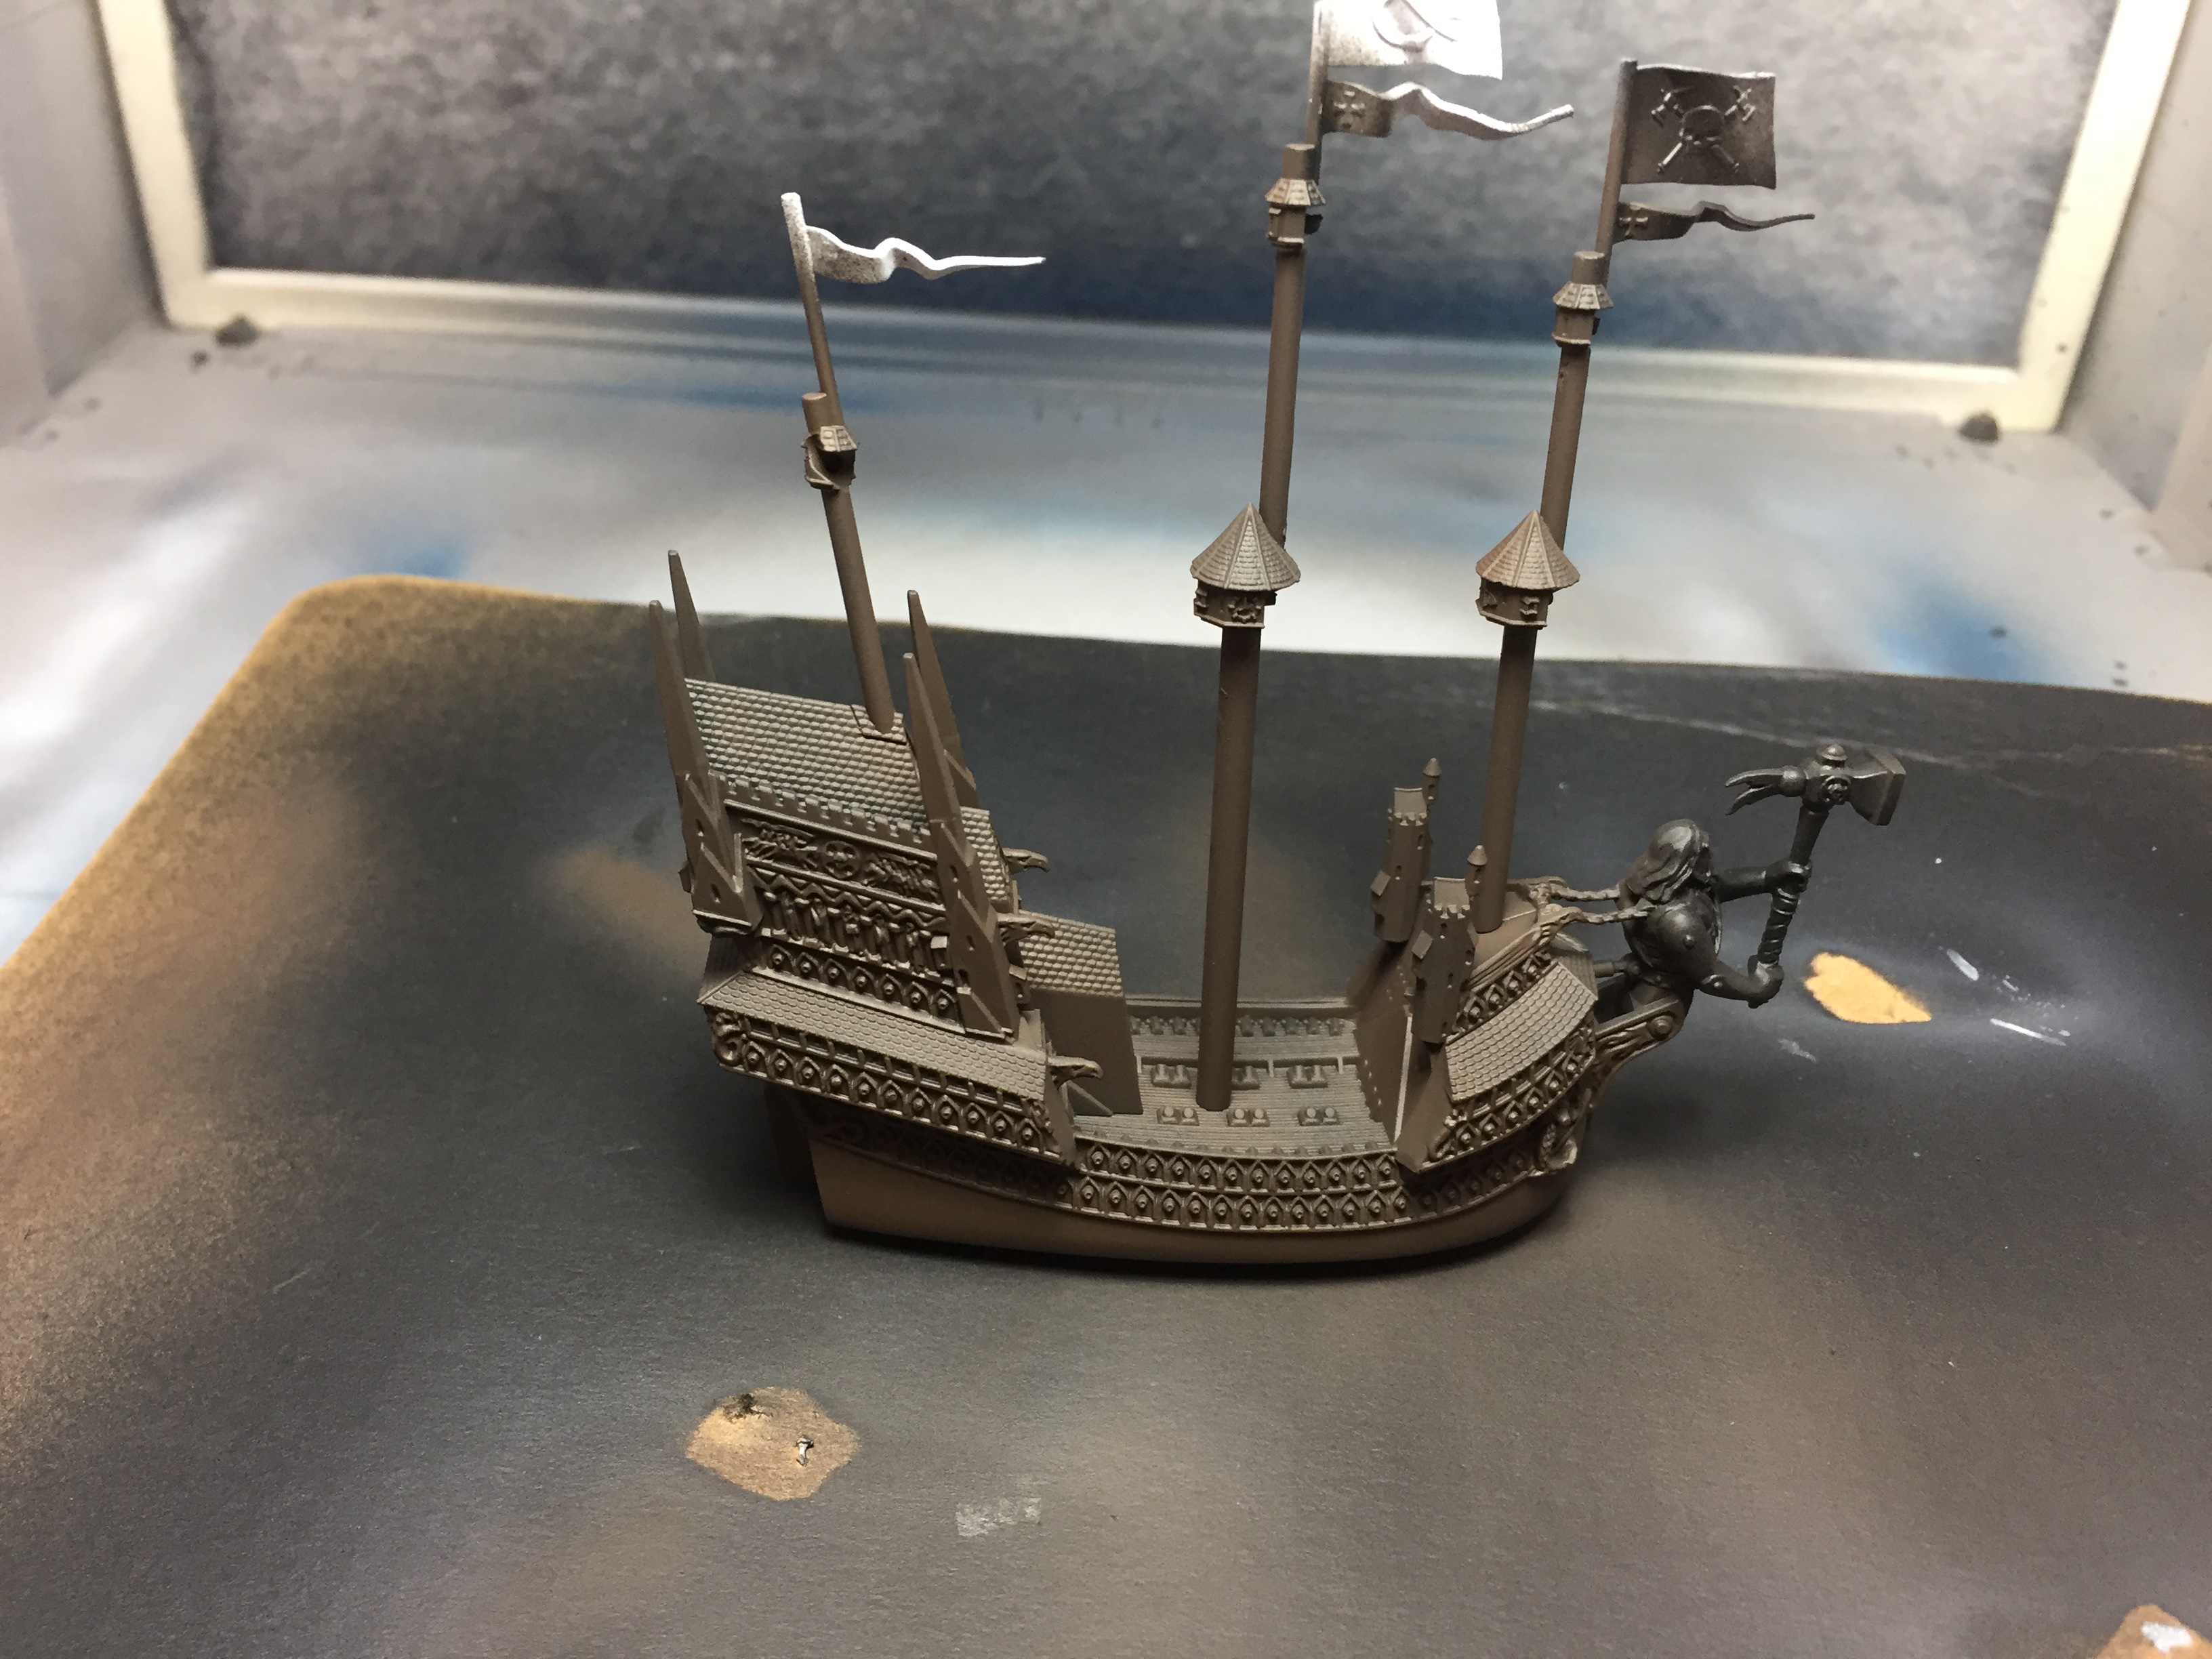
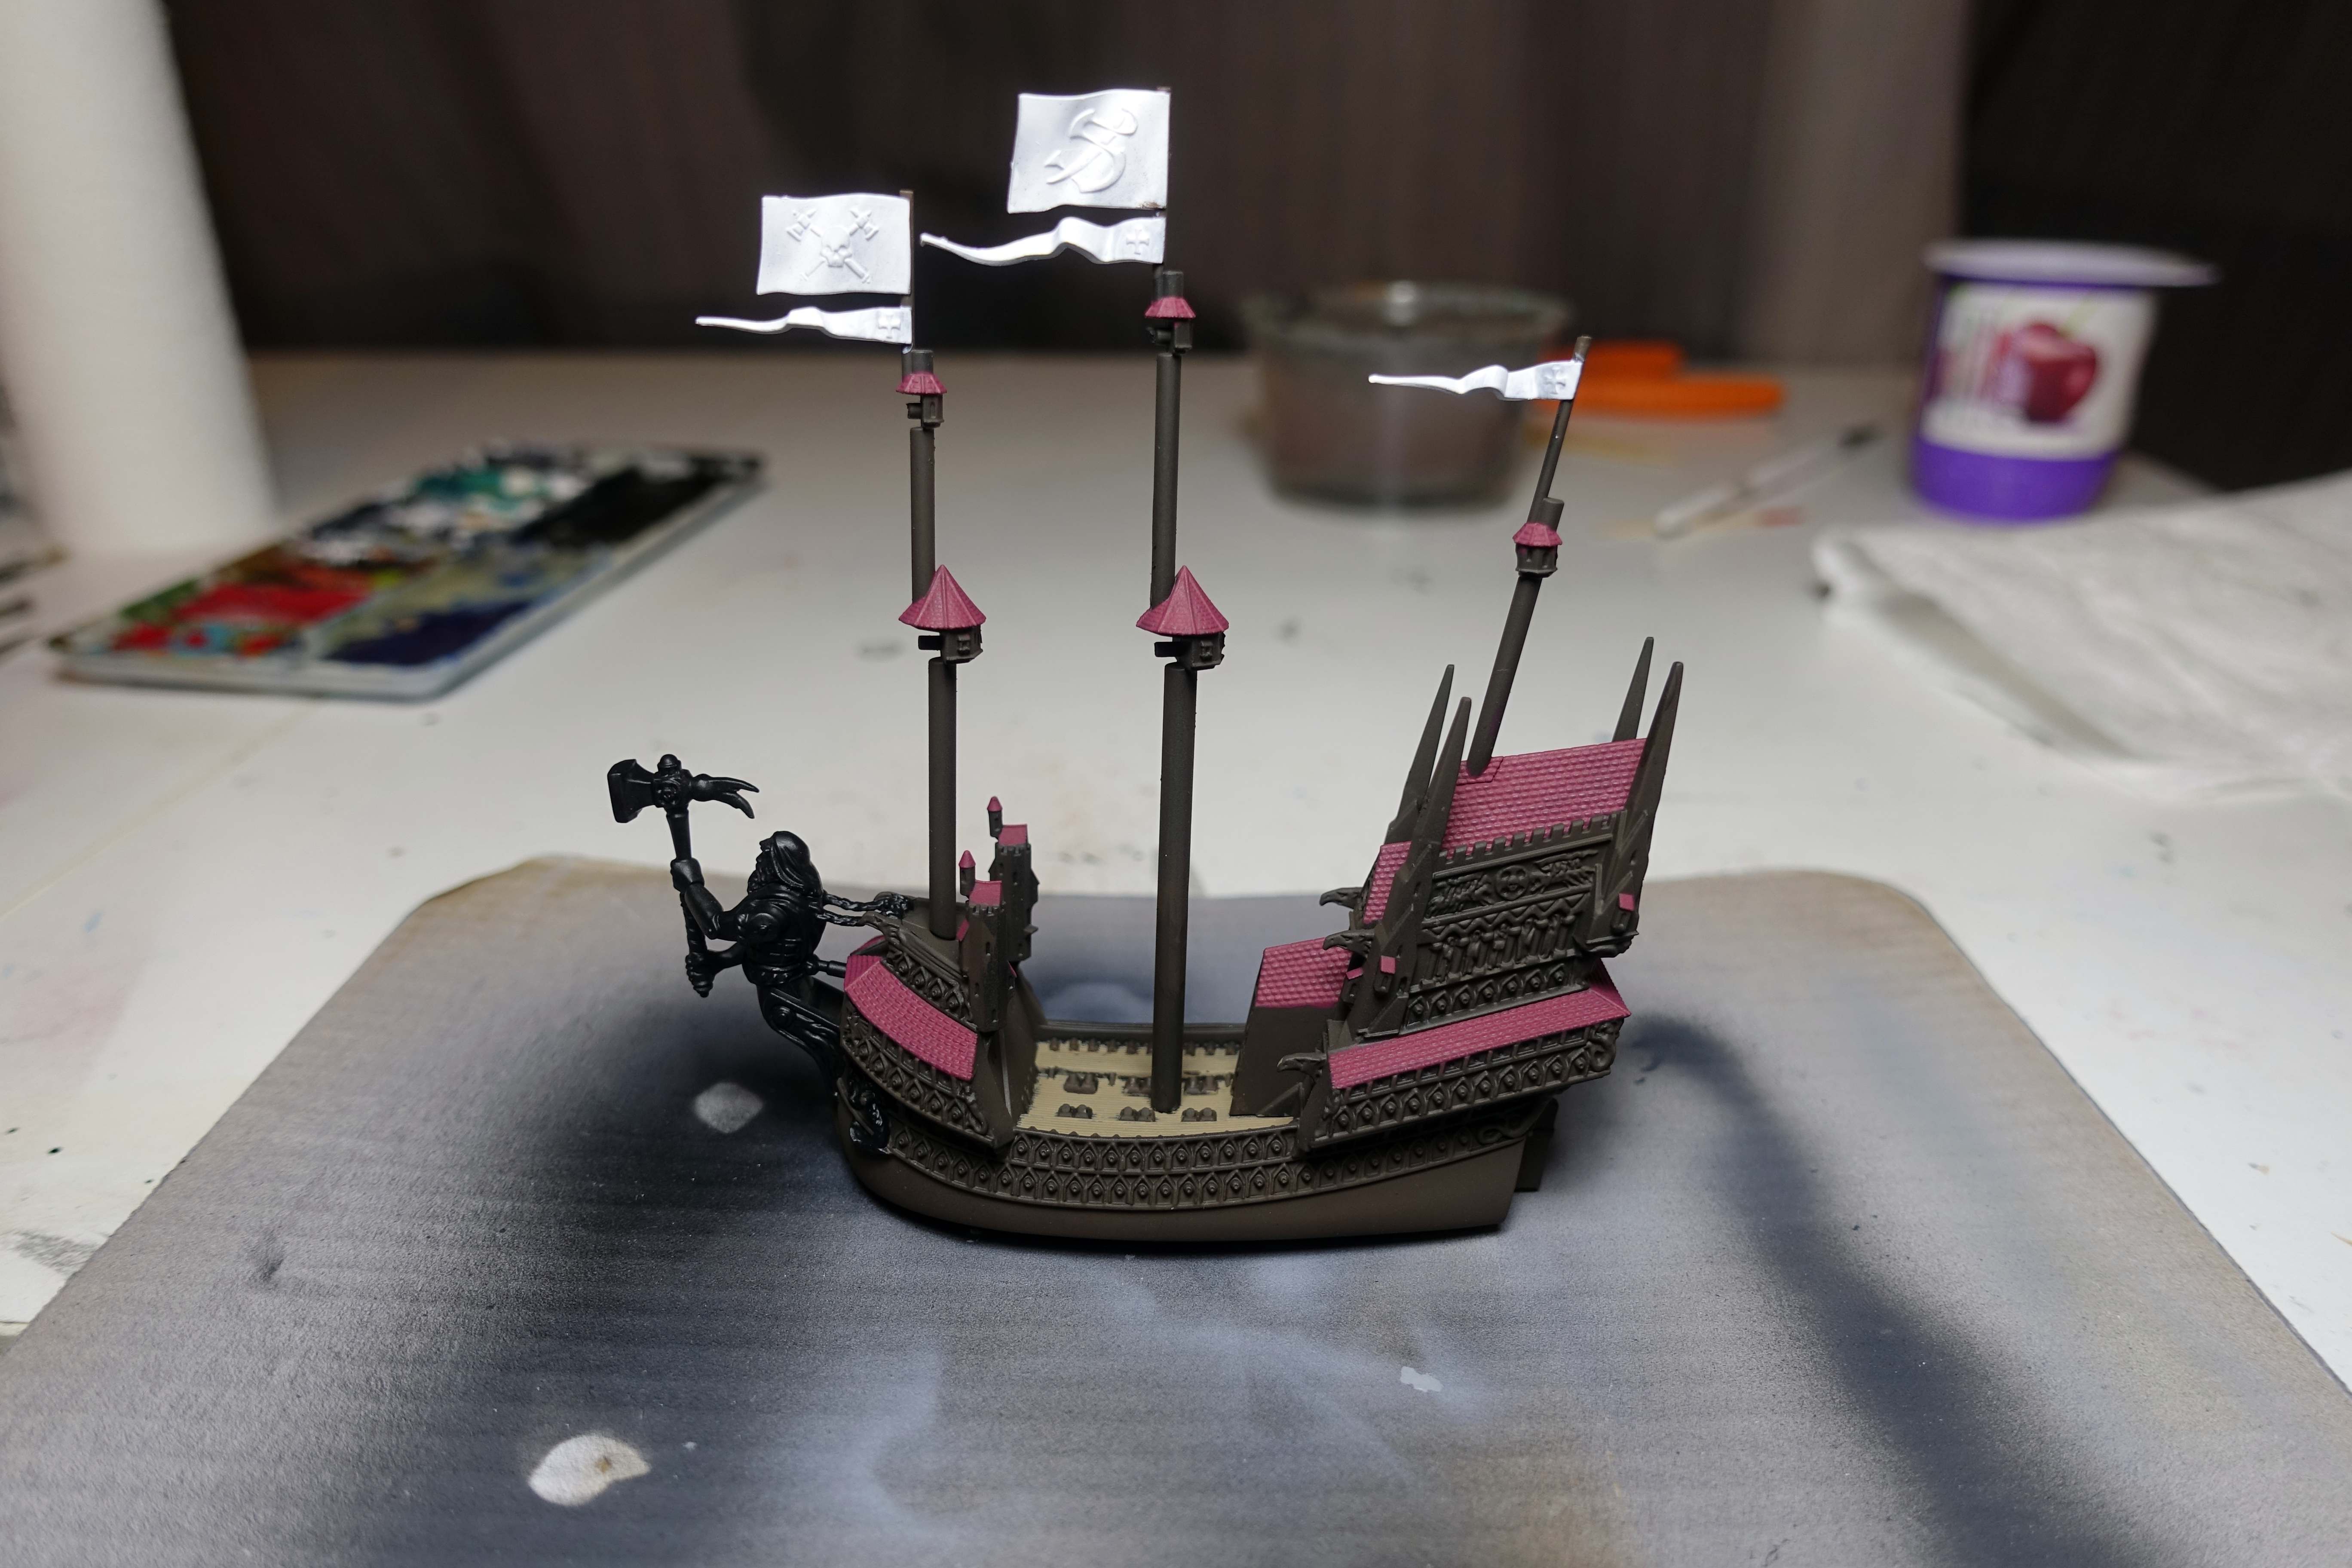
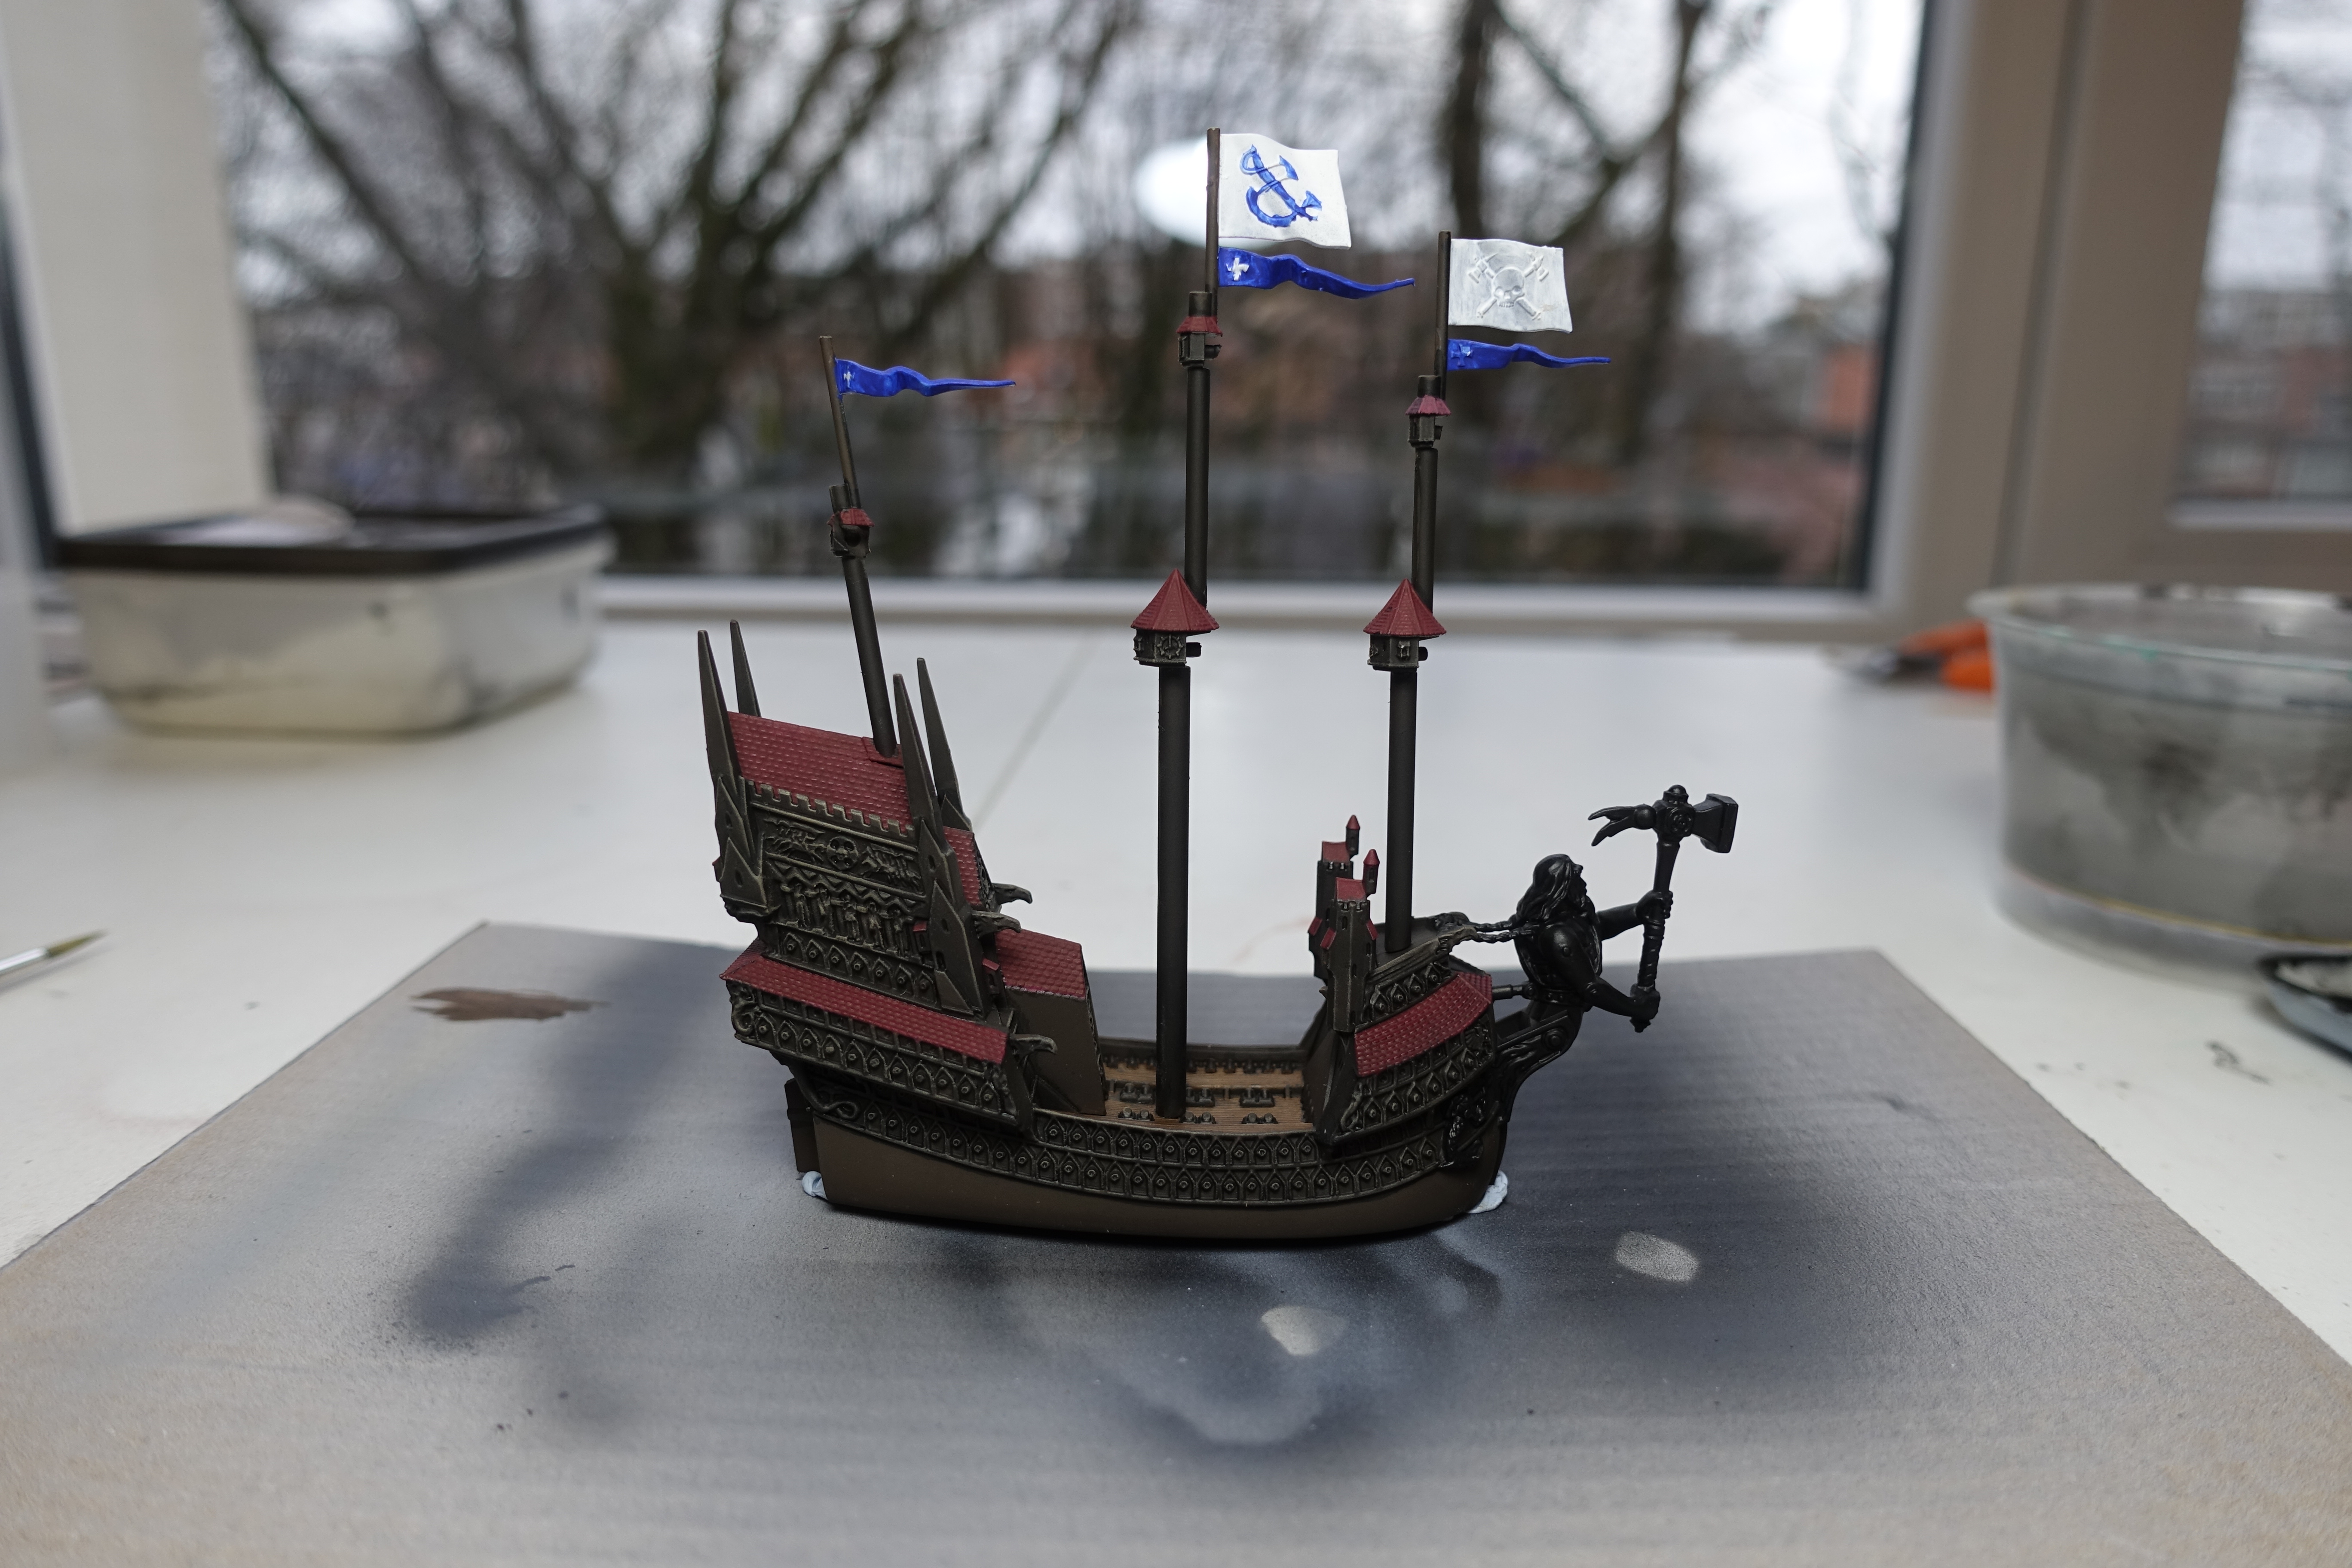
The decks of the ships will be base coated with a brush, as well as some other parts requiring a different colour base coat. For example: the roofs of the Heldenhammer on the photo bellow, painted in Model Color dark red. Vallejo’s Dark Red looks a bit, well, … I won’t say purple, but not so very red. I intend to alter the colour a bit through washes and dry brushing in a later stage.
The deck of Heldenhammer was base coated with Old Wood from the Panzer Aces Range. The figurehead was base coated black to use metallic paints on it in the future. At the moment I don’t intend to use much metallics or other colours on the ship to preserve the look of a wooden ship.
The flags are base coated white. In a later stages I want the colours I will paint the flags in, to look bright.
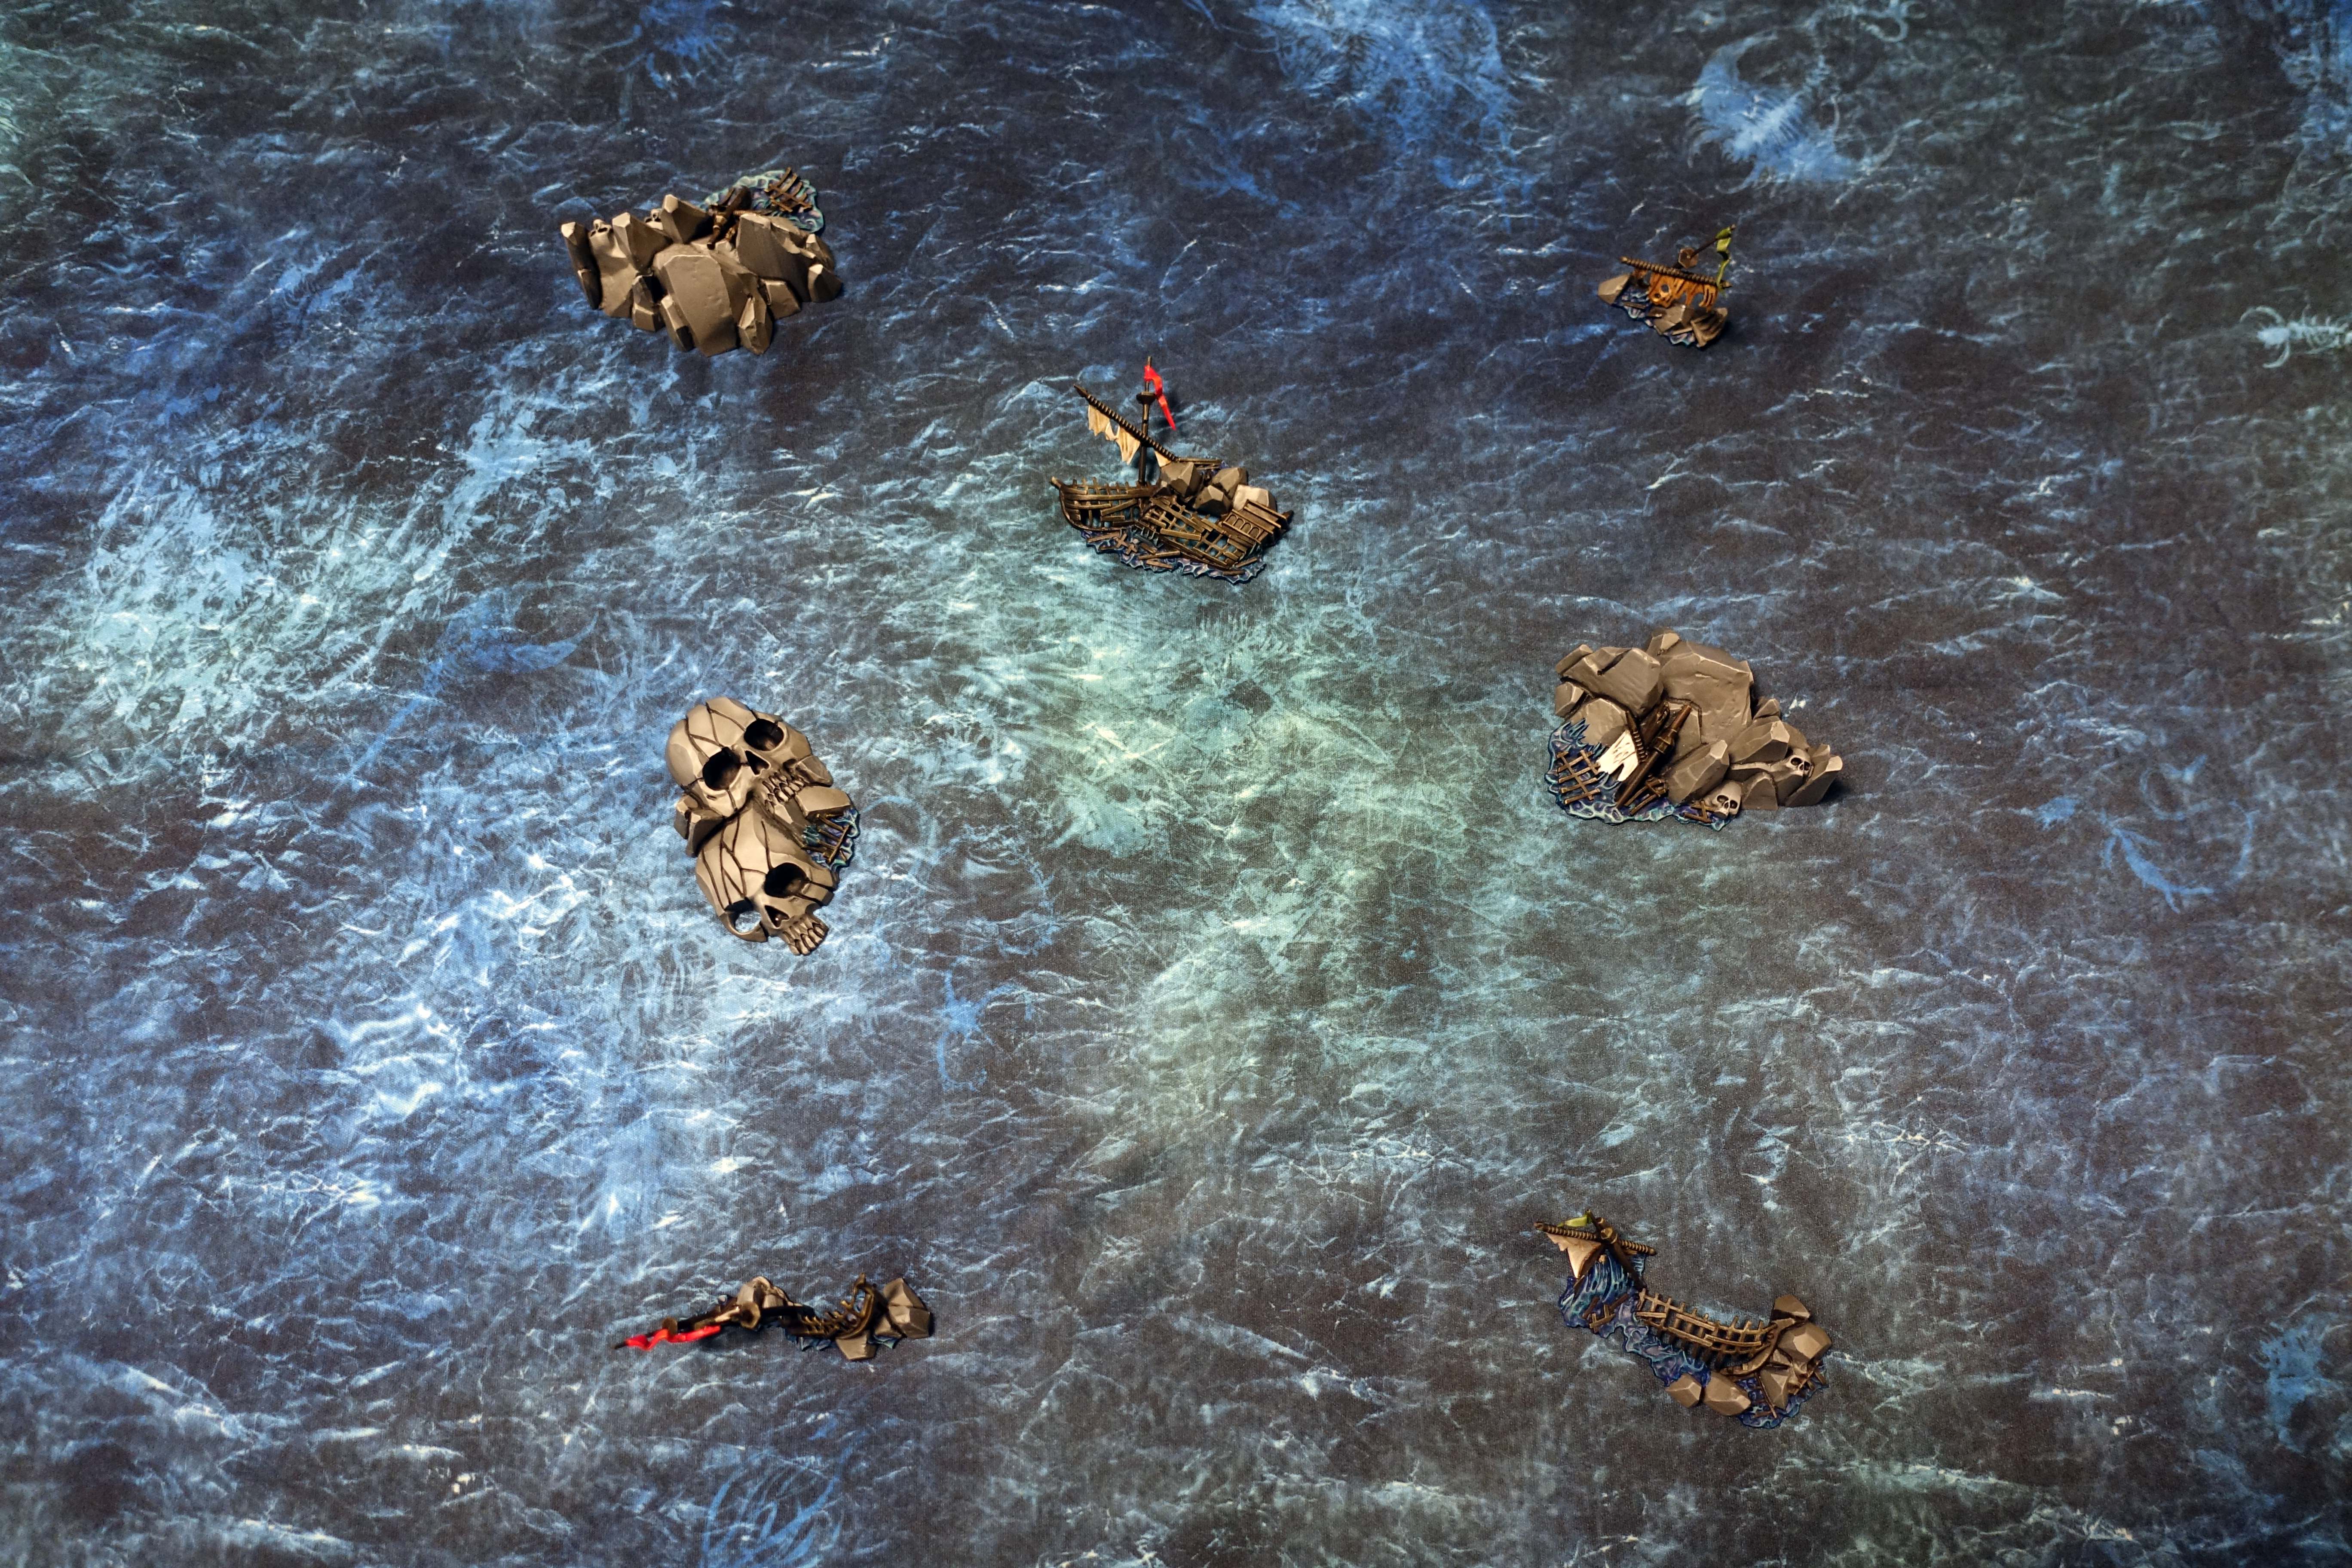
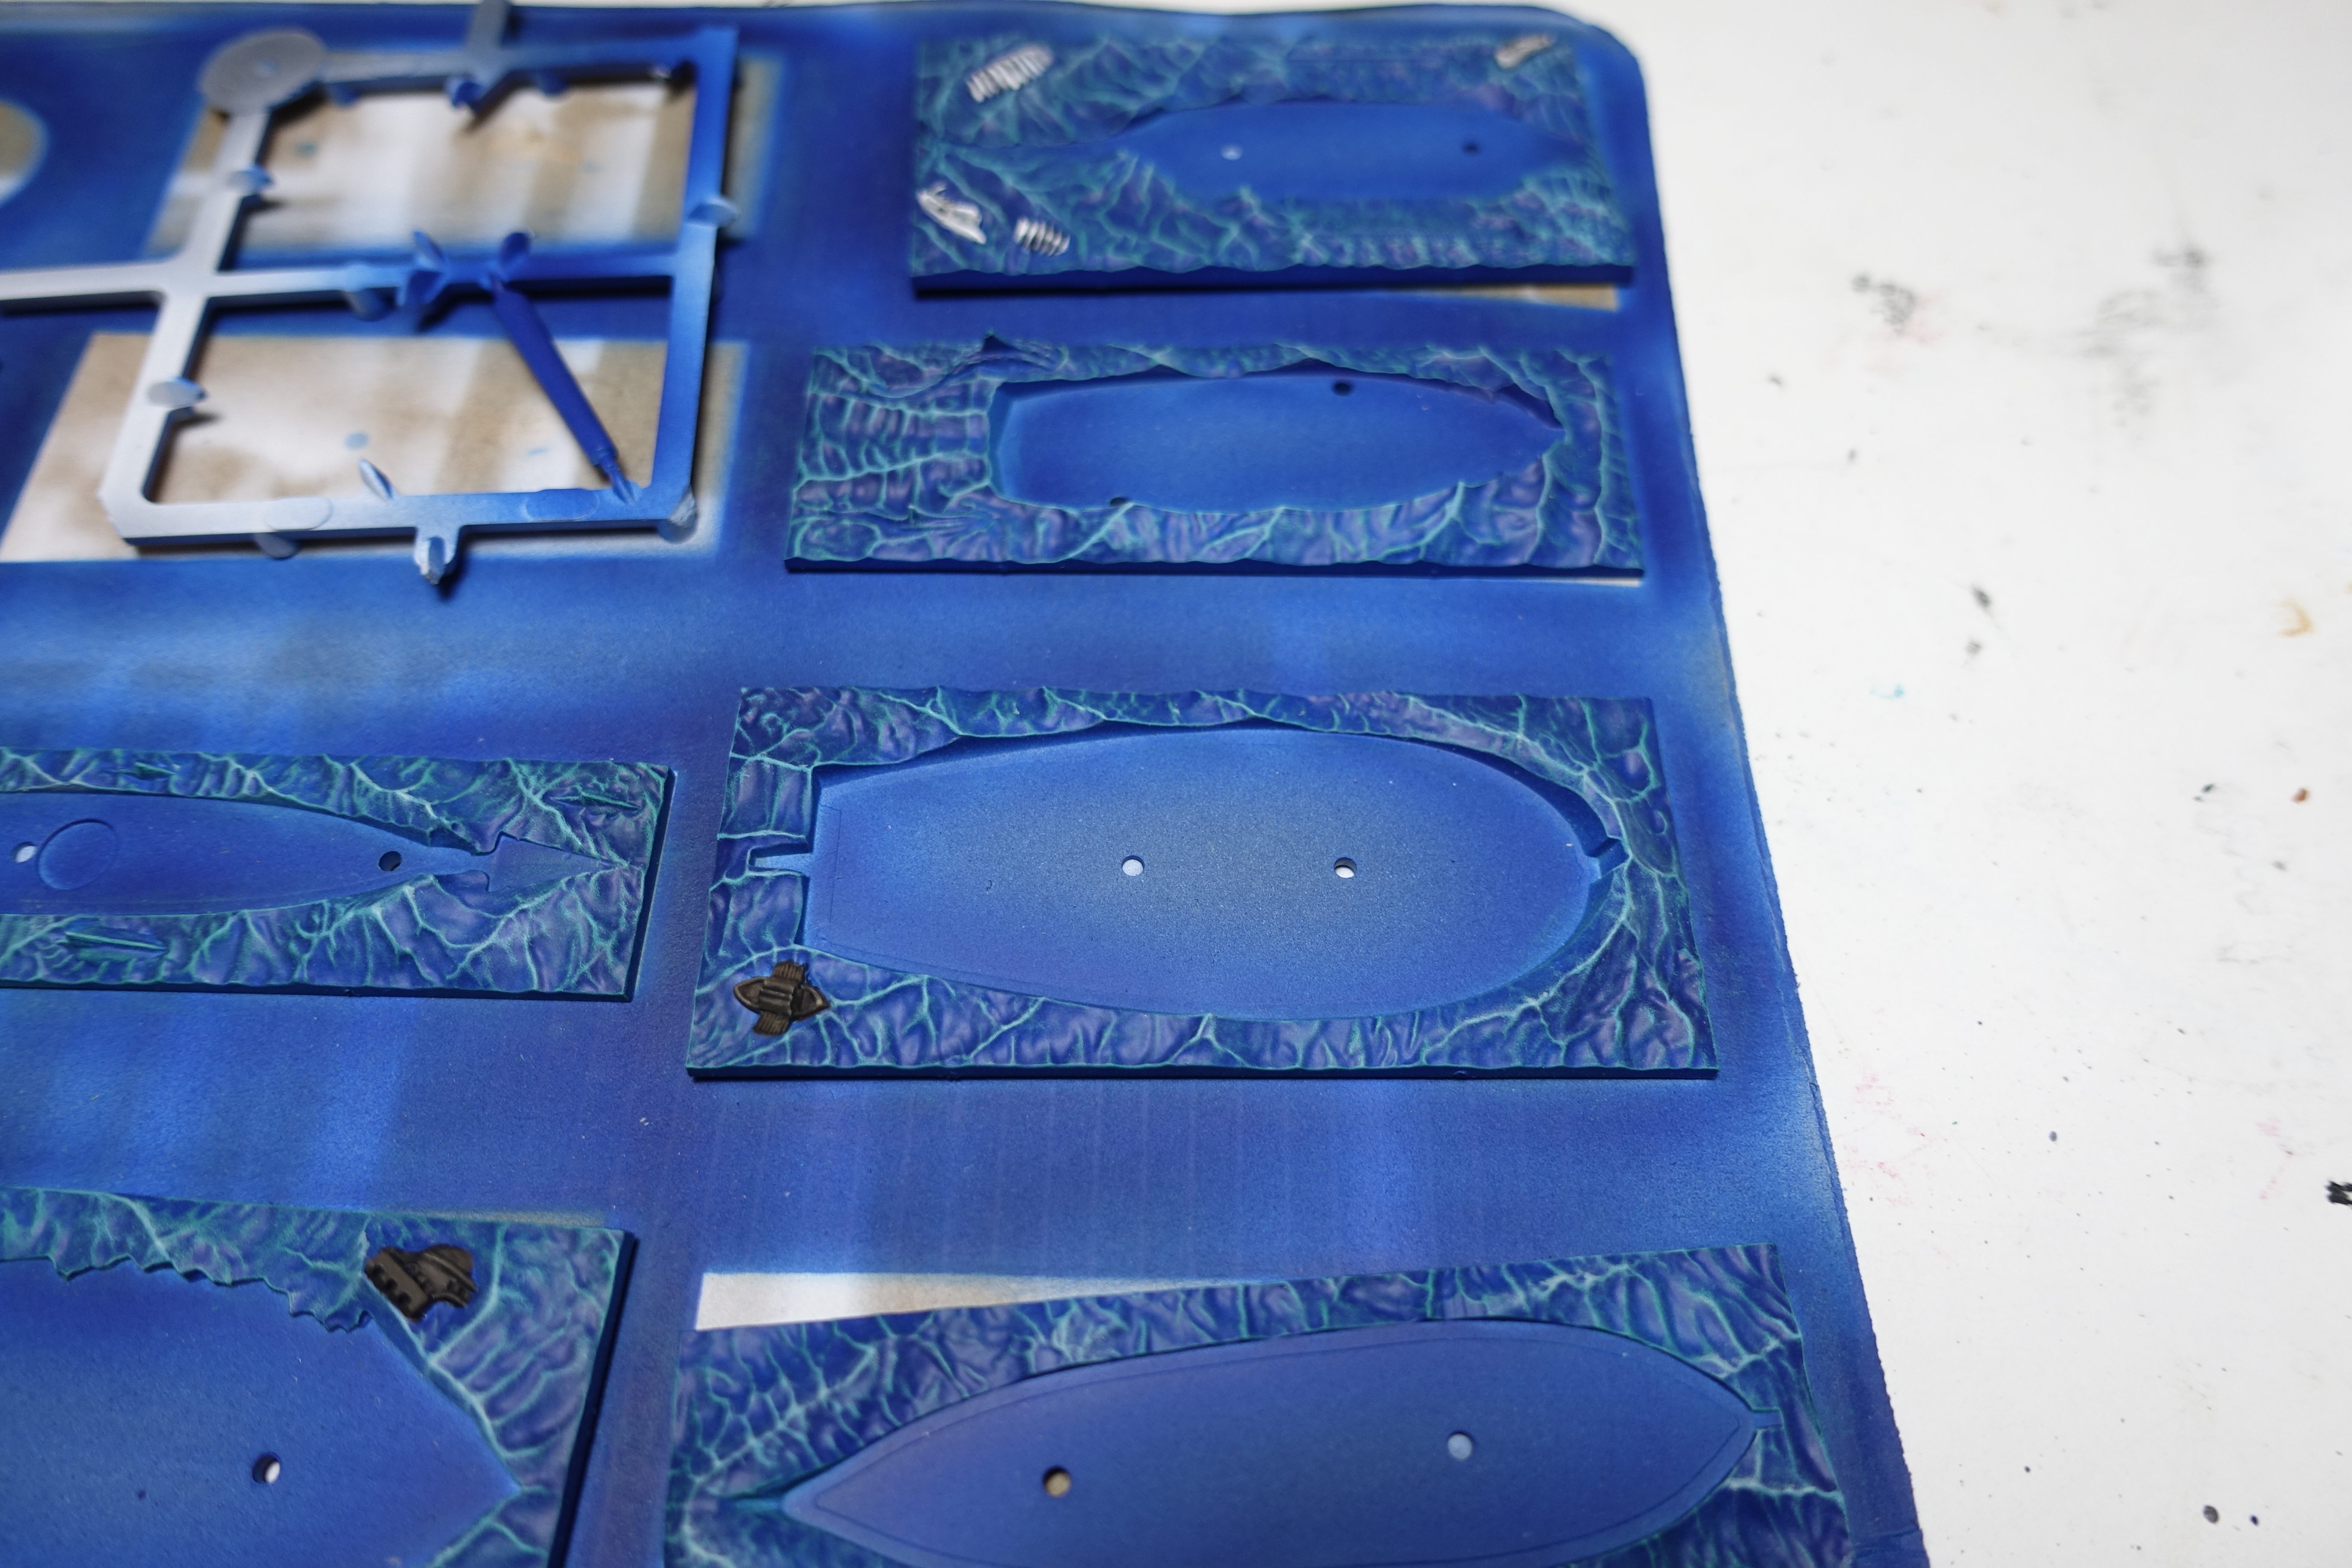
Wrecks and islands
Dreadfleet comes with several small terrain pieces. The rocks and sea have been painted following the same methods described in previous entries.
Wooden wrecks
To paint the wooden wrecks:
- Bade coat: Model Color chocolate brown
- Wash: Vallejo black wash
- Dry brushing:
- Model Color orange brown
- Model Color Japanese uniform WWII
- Model Color dark sand
This project was an opportunity to try out Vallejo’s wood & leather paint set. When I bought it, the colours surprised me a bit. After testing, I conclude the lighter colours in the set complement a chocolate brown base coat very well and the this combination of colours succeeds at creating a wooden look. I can recommend this paint set to create the look of wood. In a future project, I will try out painting leather with this set.
The smallest terrain pieces contain a mast with a flag on top. I painted these red and green.
Green flags
Base coat: Model Color Medium Olive
Wash in the fold of the flag: black wash
The round, outer parts of the flag: dry brushed heavily with Model Color Lime Green, followed by a final dry brush of pale blue. Pale blue was perhaps not the best colour for this, but it was what I had available.
This made the flags look lively.
Red flags
Base coat: Model Color Carmine Red
Wash in the fold of the flag: black wash
The round, outer parts of the flag: dry brushed with Model Color Lime Orange Red.
The carmine red was surprisingly glossy, but this will disappear after varnishing with math varnish.
The heavy dry brushing on the flags makes them look more lively. I must remember this when painting the flags of the ships.
The sails
Painting the sails was problematic. The terrain pieces were primed black, which was the suitable primer colour for the rocks, the sea and the wrecks. Not for white sails. I brushed several layers of white primer over the black primer. Eventually I switched from primer to Model Color White. Brush strokes remained visible and the overall appearance of the sails was to rough for sails. I tried to give some shading with:
- Black wash. Bad idea!
- Washes with watered down paint of light browns. Not great.
- Game Wash Sepia Shade. Hmm, still not great, but I wanted to try out this wash out because I just bought it.
After much experimenting and a final white highlight/reparation attempts I consider the sails “good enough”. I don’t think I can get them any better and I want to move on to painting ships.
Perhaps I should have painted coats of grey paint over the black primer, starting with dark grey and building up to light grey to end with white.
Well, they were supposed to look like sails from ships that wrecked long ago. The definitely look weathered!
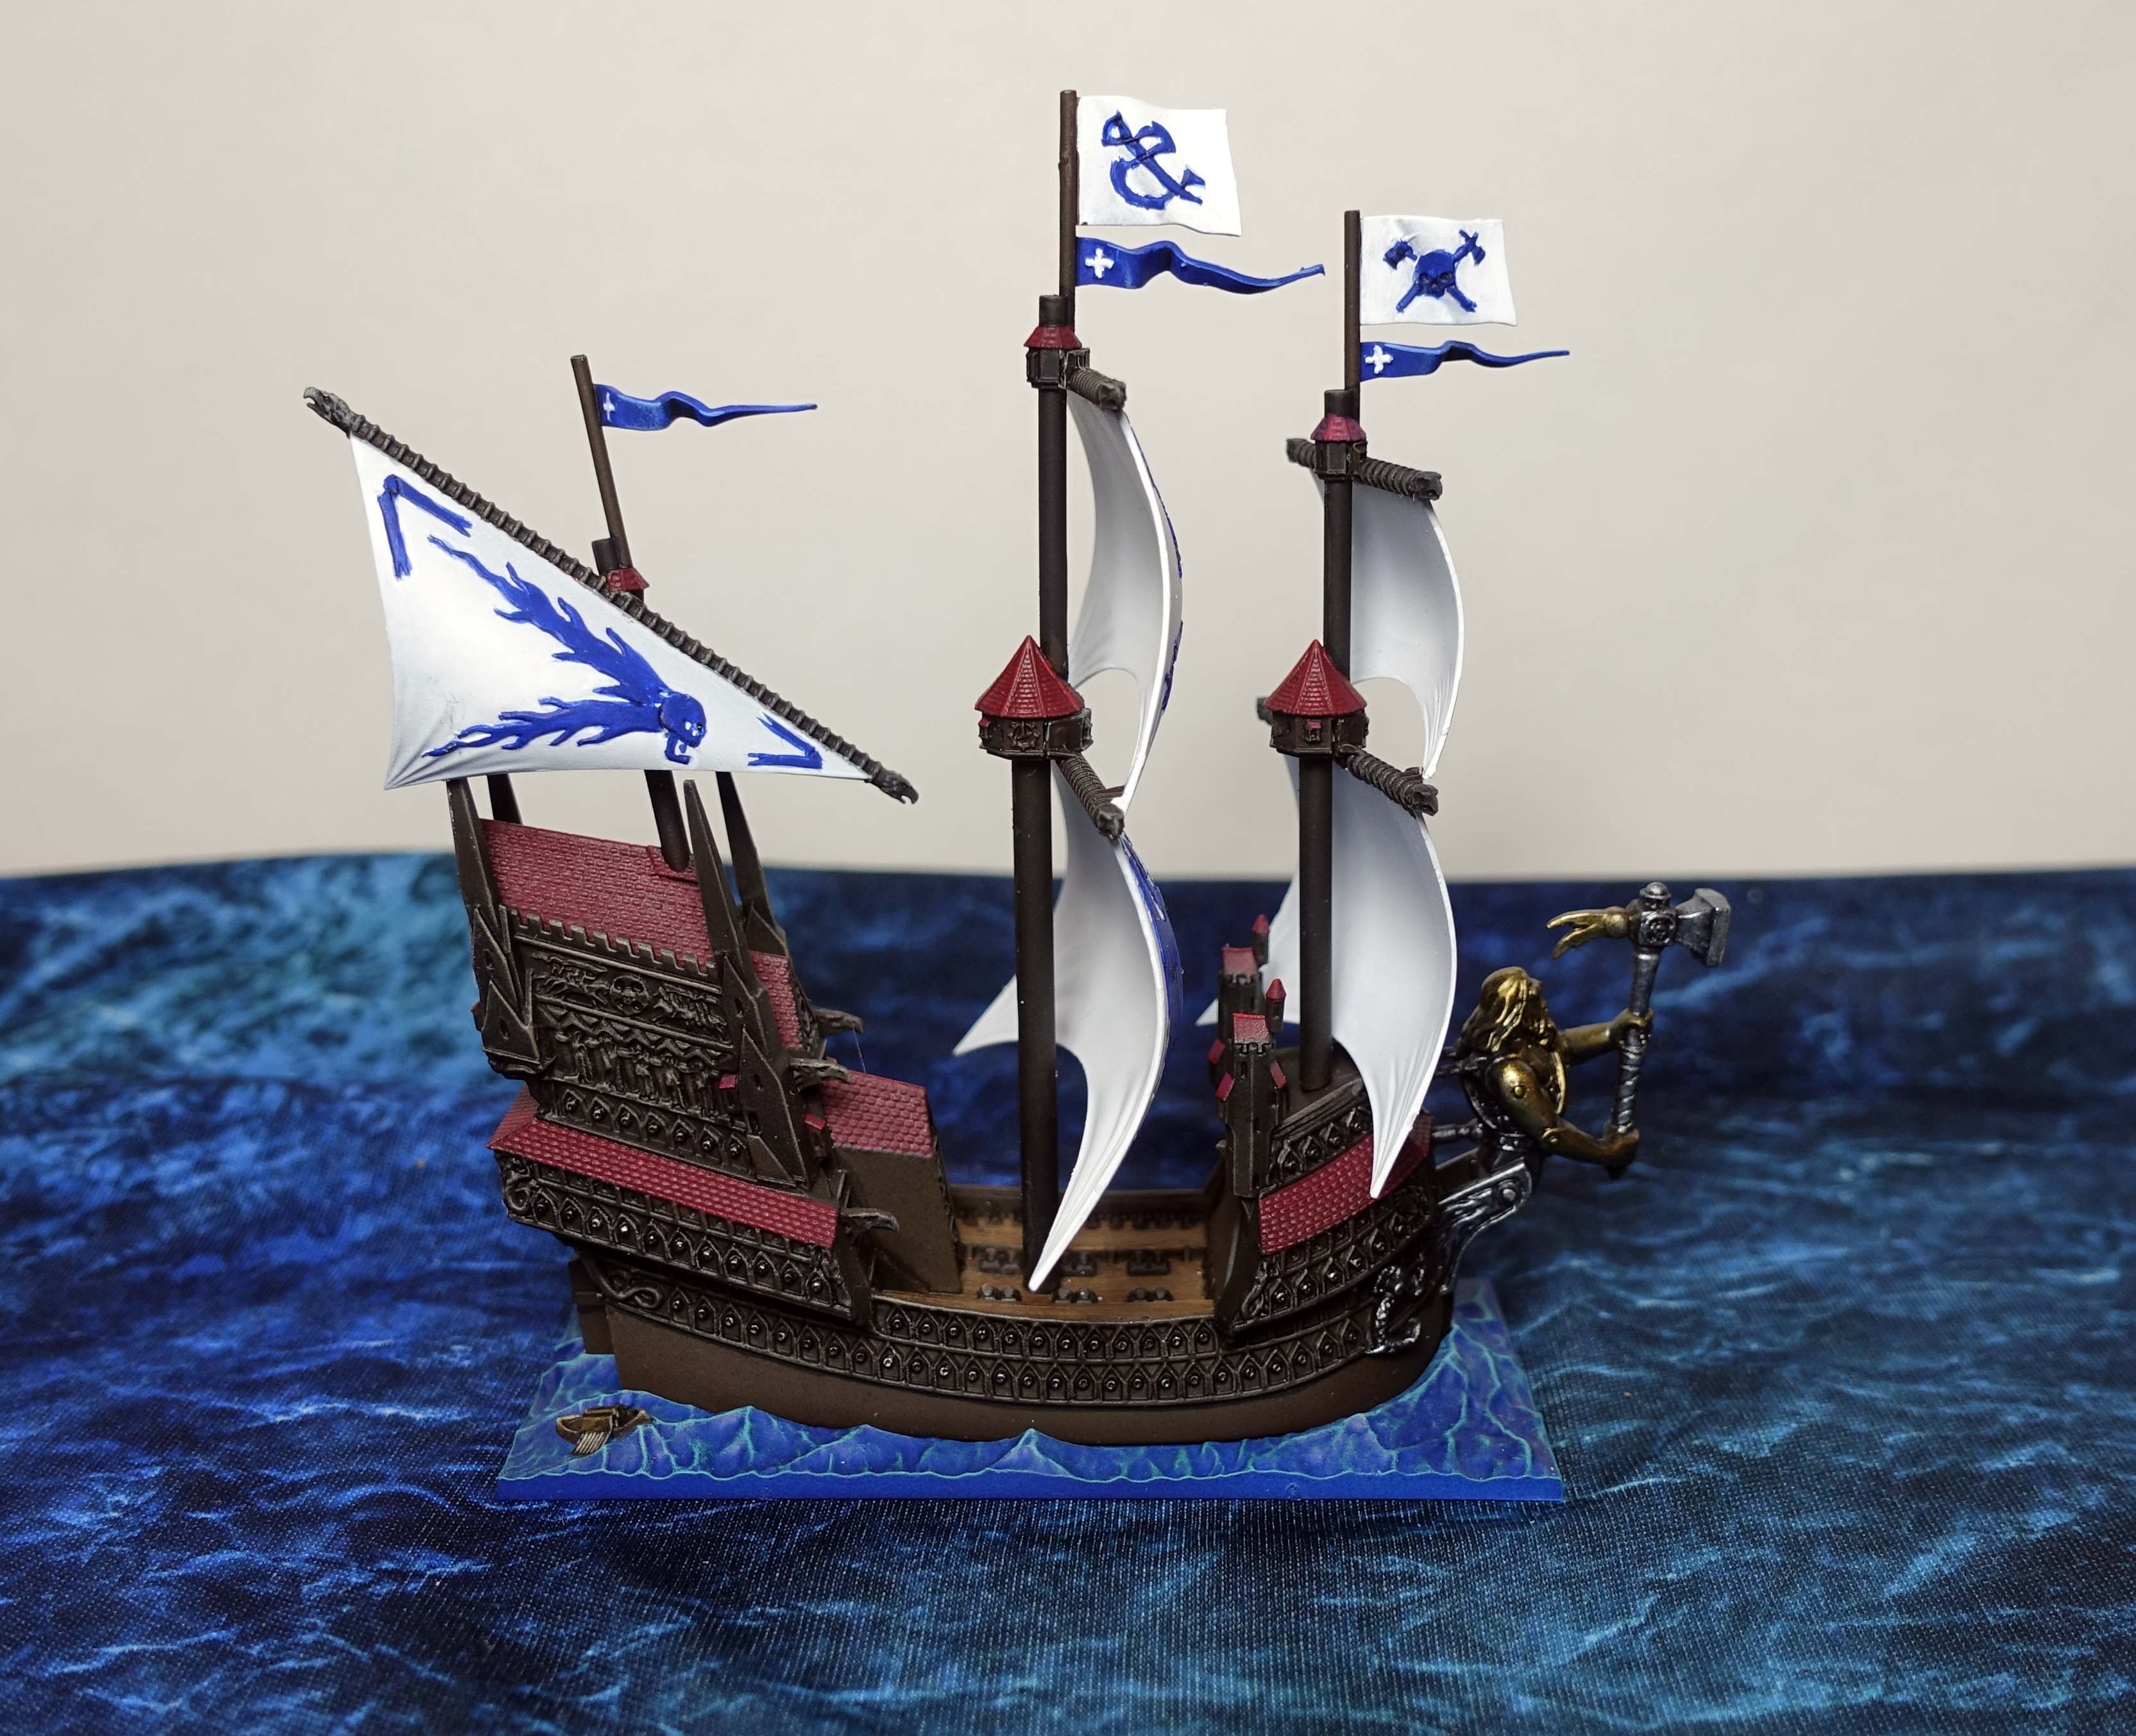
The Heldenhammer – Part 1 The hull, the superstructure and the roofs
The flagship of the pirate fleet!
(I’ve got more text and photos than the projectsystem can handle. My entry about the heldenhammer will come in several parts.)
 After base coating
Washes
Base coating was described in an earlier post, so we will move on to using washes. I used Vallejo’s black wash over the entire surface with an chocolate brown base coat.
On the deck I first used a wash of watered down Model Color Orange Brown. Once dry the wash was invisible. This paint isn’t dark enough for a wash on old wood, it seems. Next wash: watered down Model Color Chocolate Brown: this looks good.
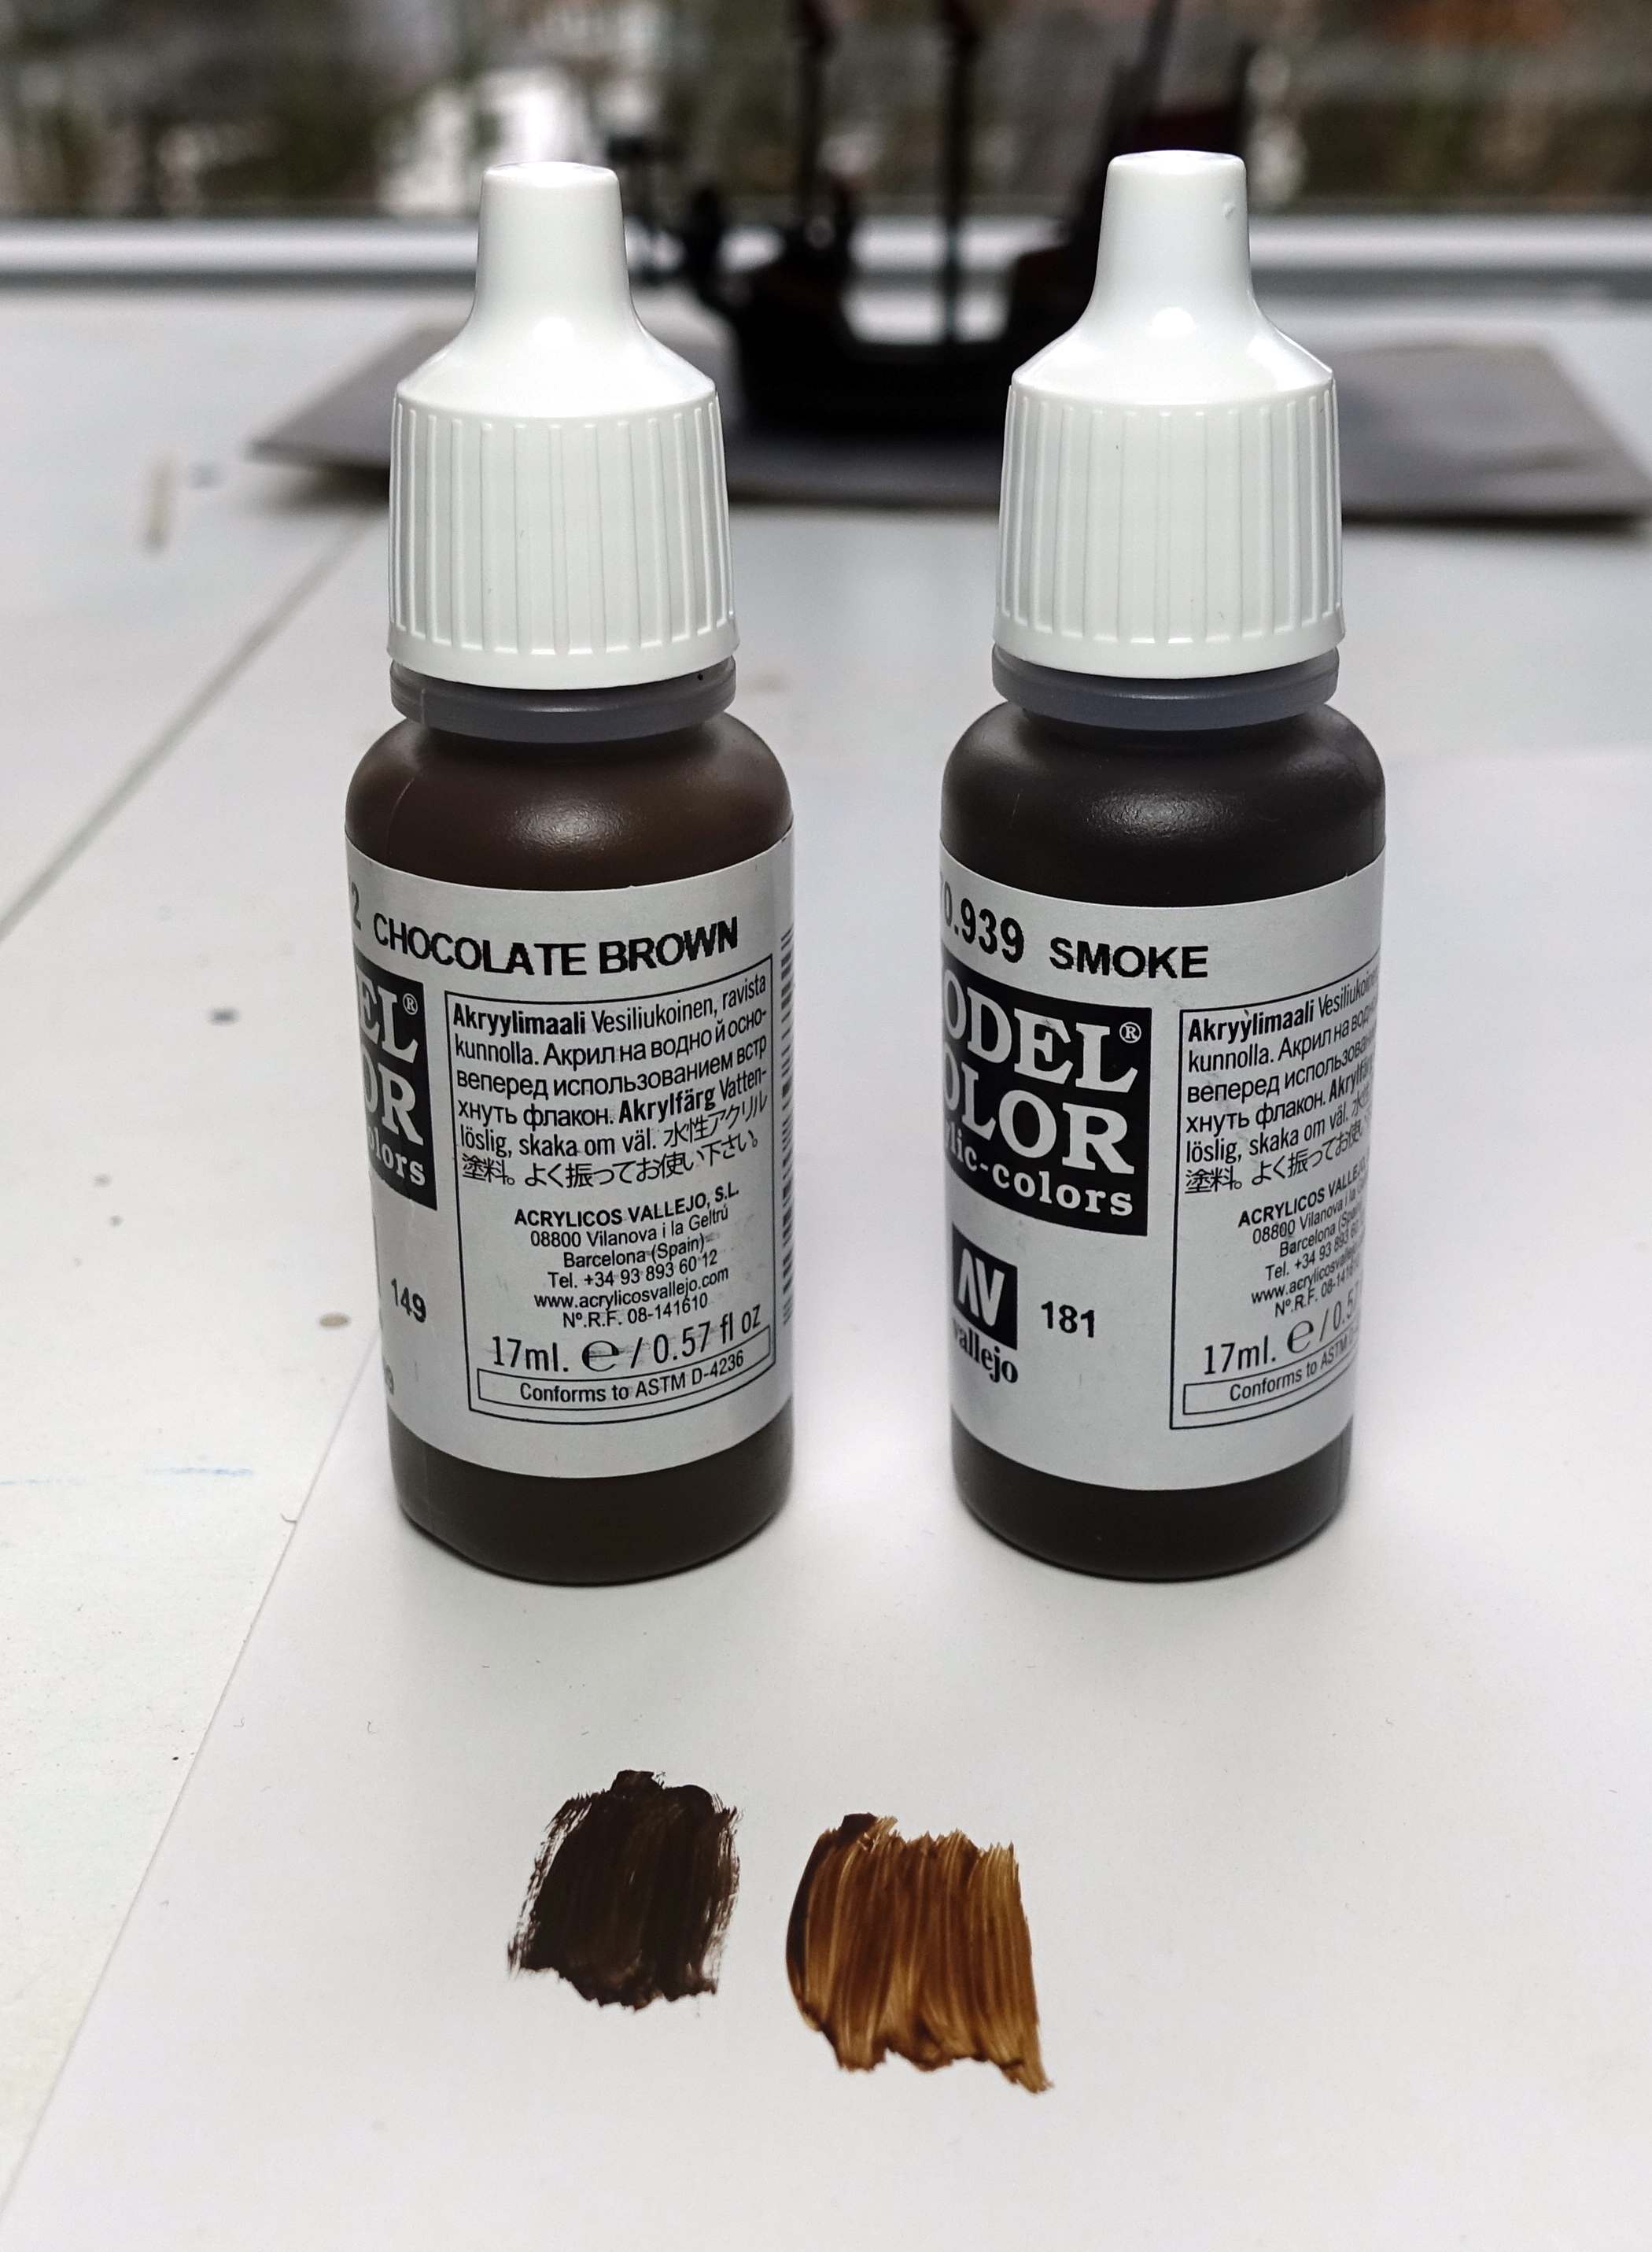
Lastly I’ve put a wash of Model Color Smoke on the deck. Smoke is a colour I haven’t used before. The last colour I hadn’t used from Vallejo’s Wood & Leather paint set. In the bottle the paint looks very dark. Almost black. I expected a transparent black paint, because a paint from another brand named “smoke” is a transparent, slightly brown, black paint. Smoke turns out to be brown paint. Compared to chocolate brown it is more transparent and perhaps a bit more red. On the photo below I compare the two.
I used watered down smoke for the final wash on the planks.
Black shadows
The black wash on the hull didn’t create dark enough shadows. I used a brush with a fine point to paint shadows with black paint. To do this for every detail on the ship would take for ever, so I only painted the shadows around the sculptures on the ship to make them stand out more. The doors and windows were also painted black (mostly in the superstructure at the back of the ship). To accentuate a few clearly visible lines, I used black as well. Such as the lines separating the lowest line of guns and the clean hull at the bottom of the ship. I also painted a very thin black line where the red of the roof touches the brown of the superstructure.
Returning to the base colour
Here and there painted chocolate brown again on parts of the ship I want to have a more clean look.
Dry brushing
I like the chocolate brown colour, so I didn’t dry brush too much.
 For the first dry brush, I used Panzer Aces old wood.
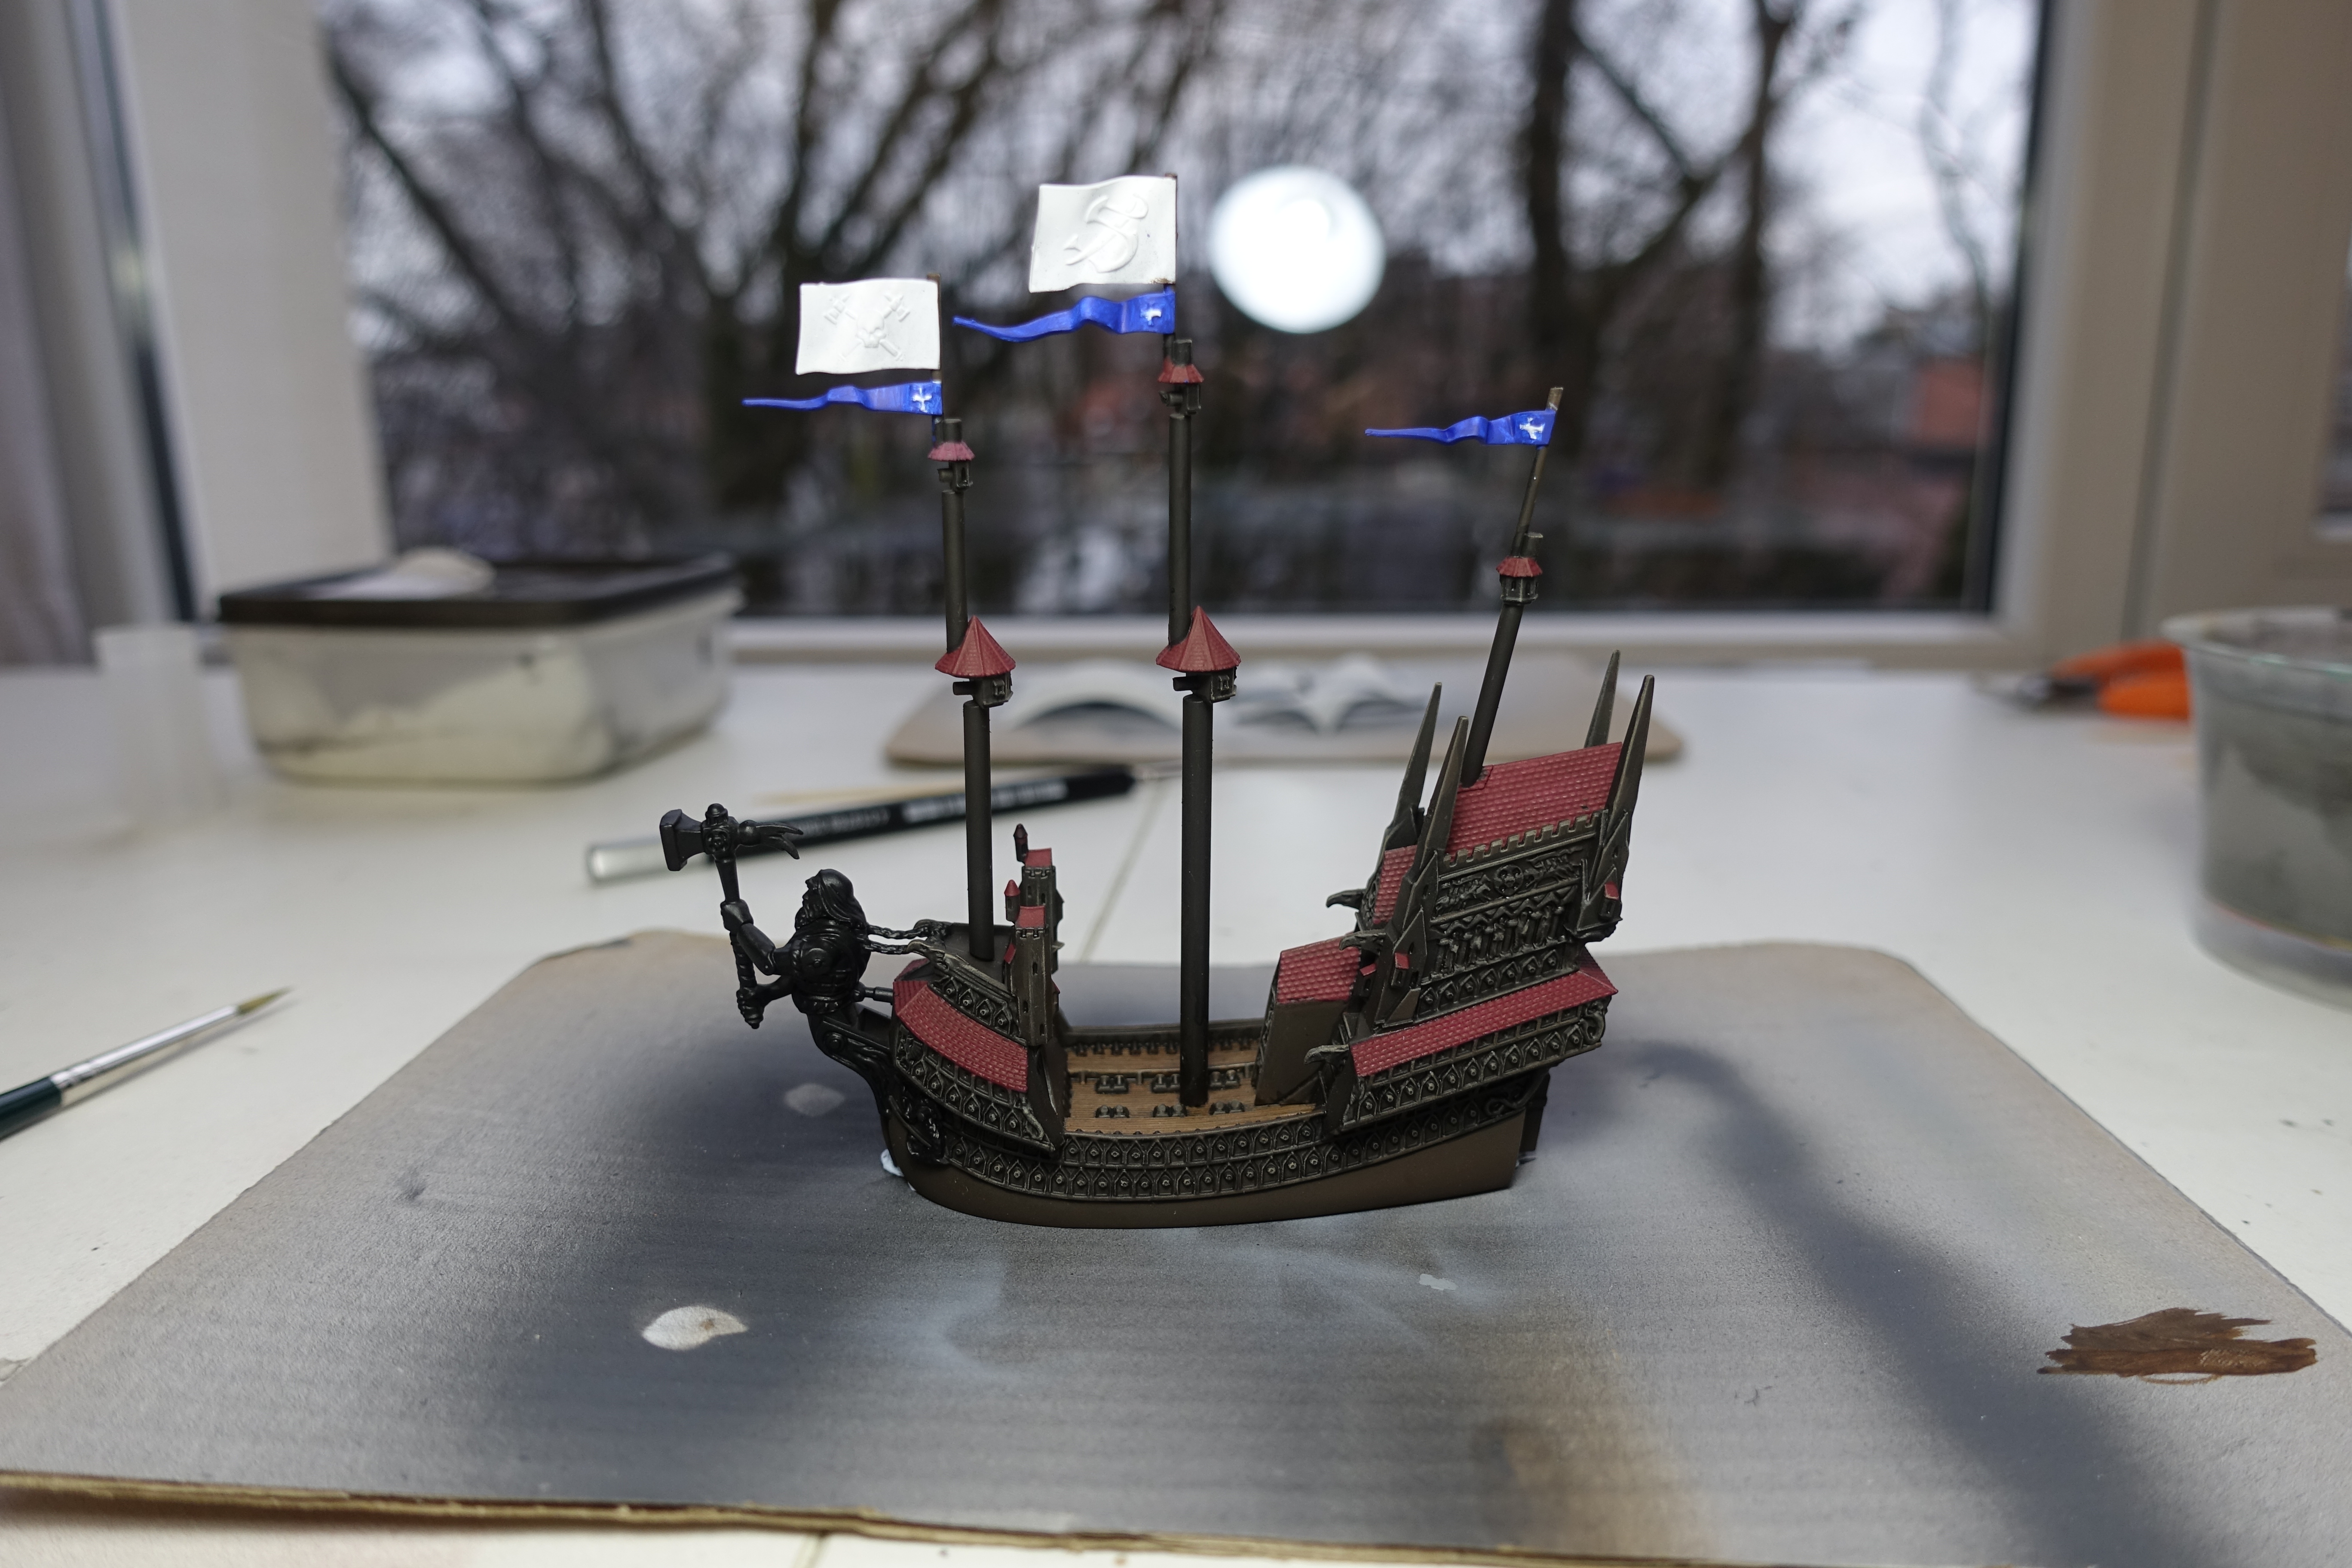 For the second one Model Color Dark Sand.
The red roofs received a dry brush with Model Color Carmine Red. The result wasn’t quite what I wanted yet, so another dry brush with Model Air Italian Red followed. The roof is a little bit more red now. A very little bit. For a more red roof, I should have used a different base coat.
The Heldenhammer – Part 2 The figurehead and the details
The figurehead
The figurehead is hard to miss on this ship. It’s a big statue of a man holding a huge hammer. In the game this hammer is used to hit enemy ships with. I will paint the figurehead to look like a bronze statue. Not to lose any details on this statue, I thinned my paints sufficiently on a wet pallet.
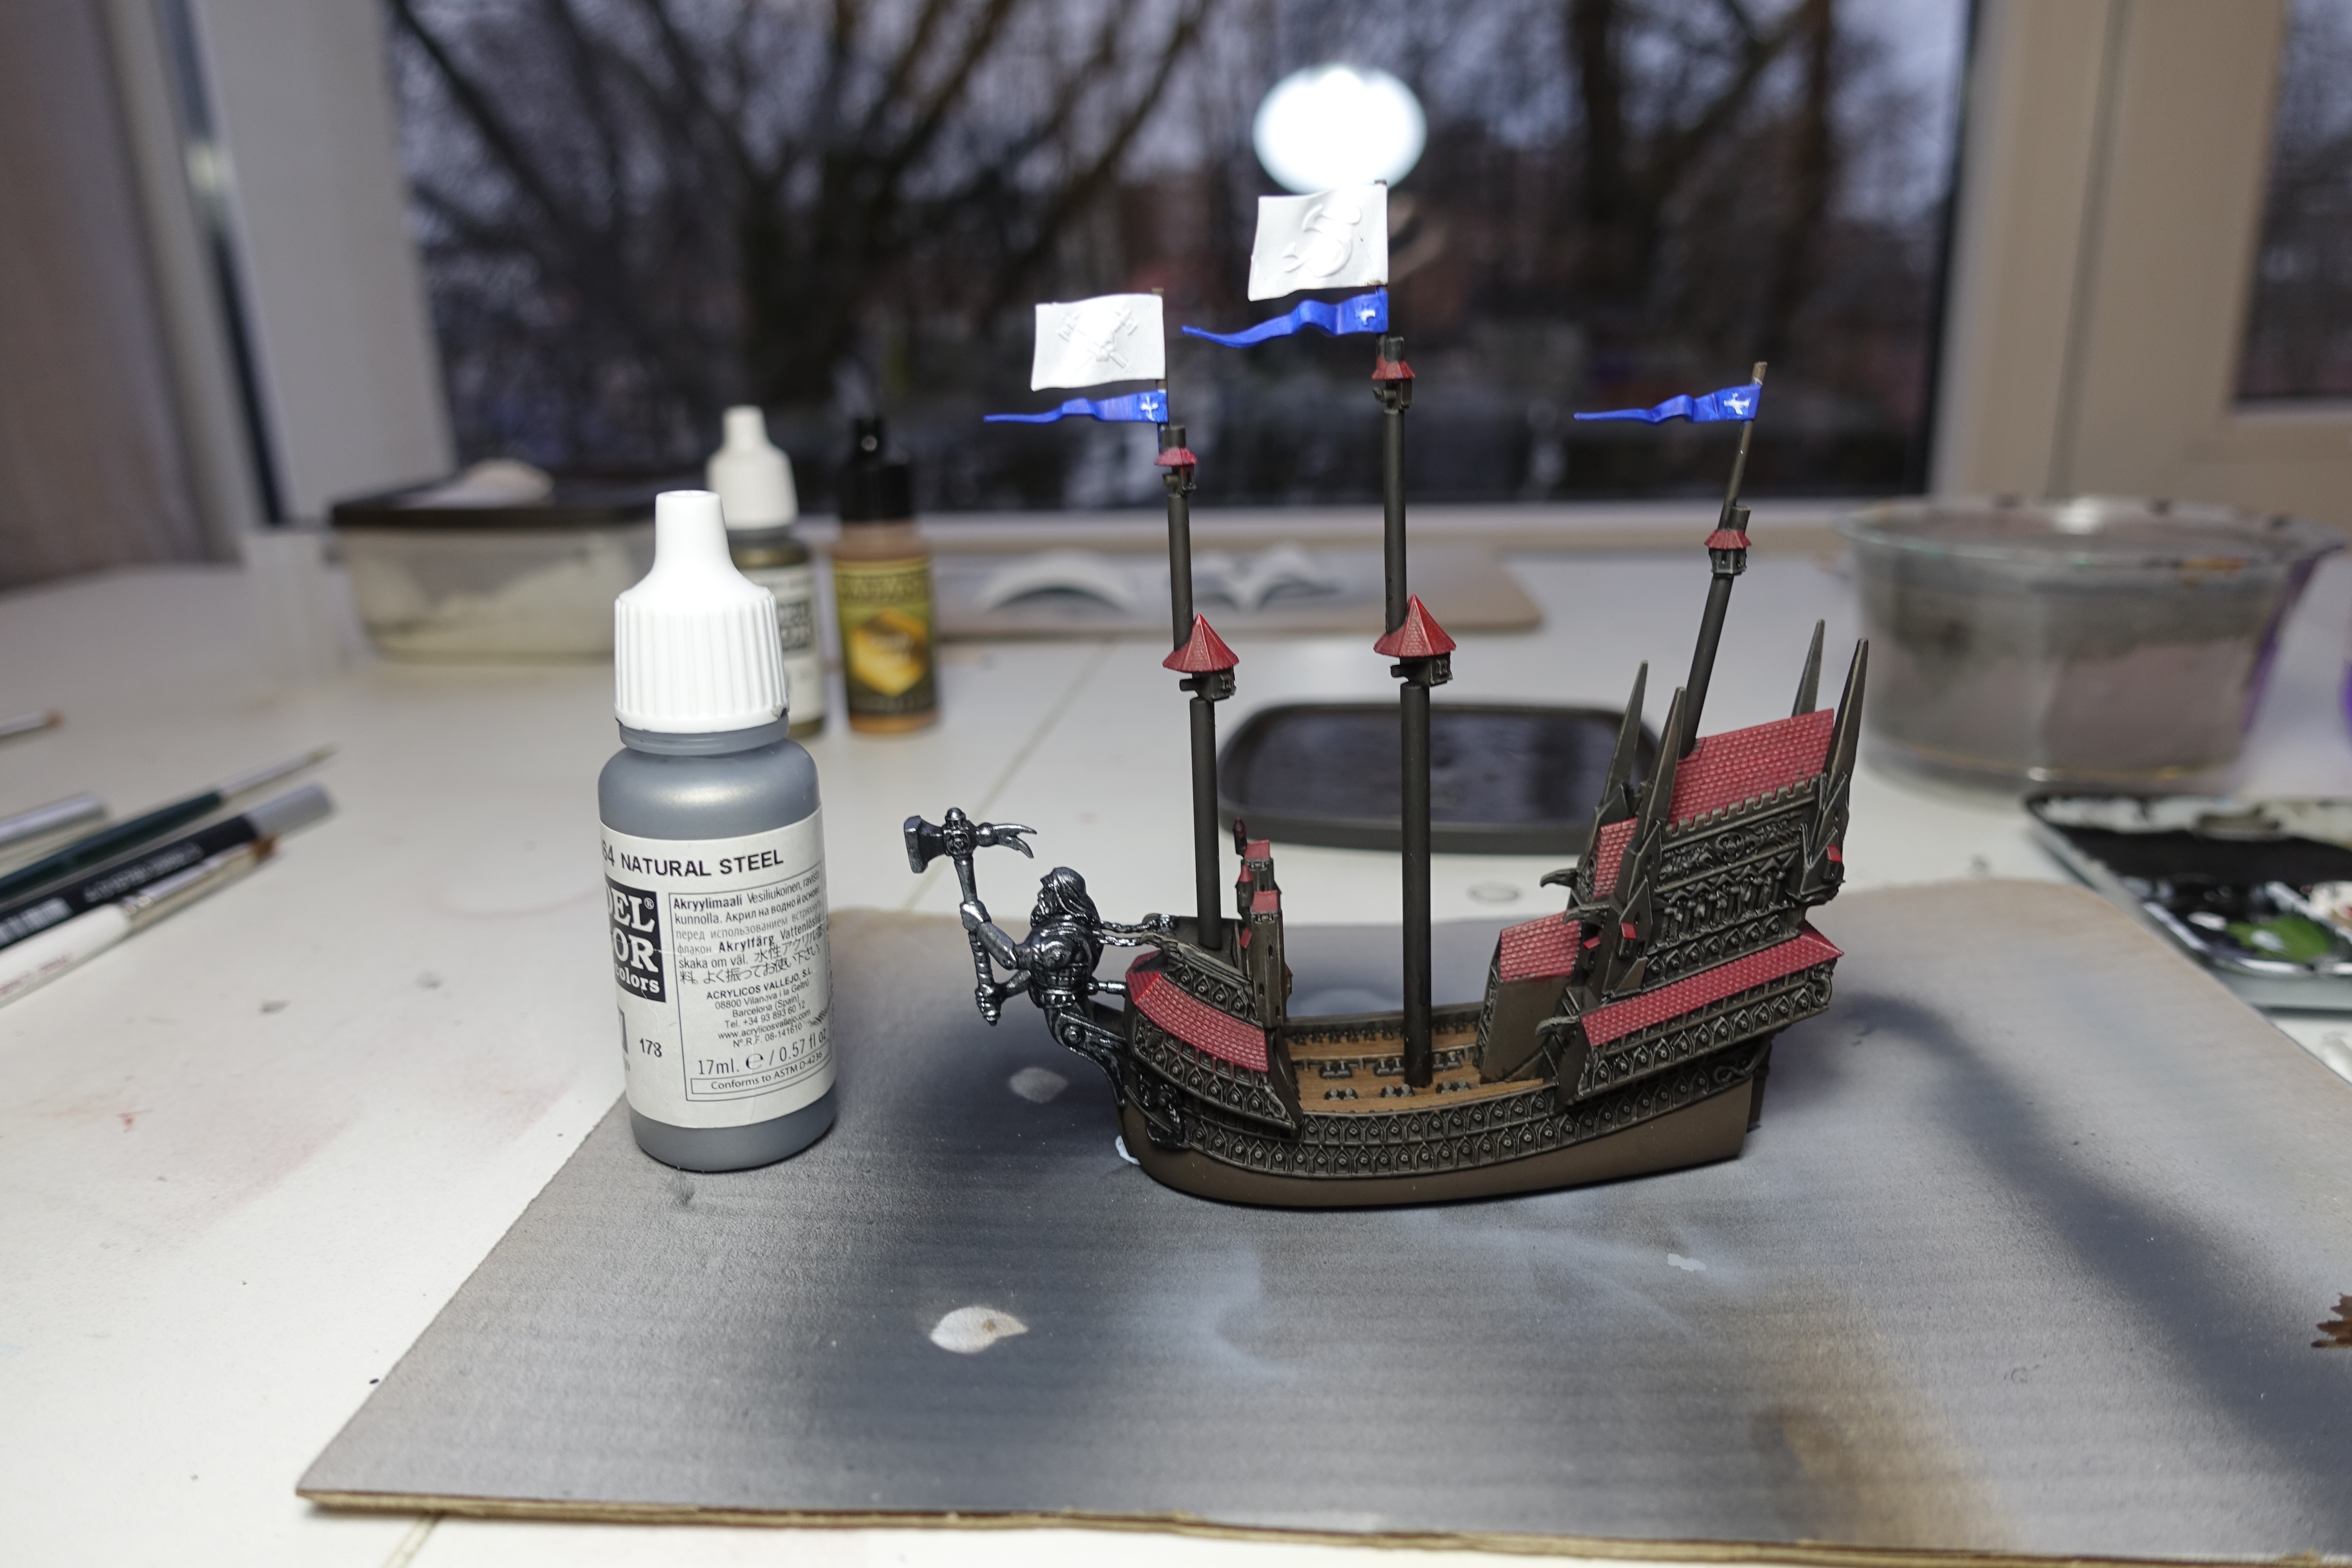 Step 1: Model Color Natural Steel
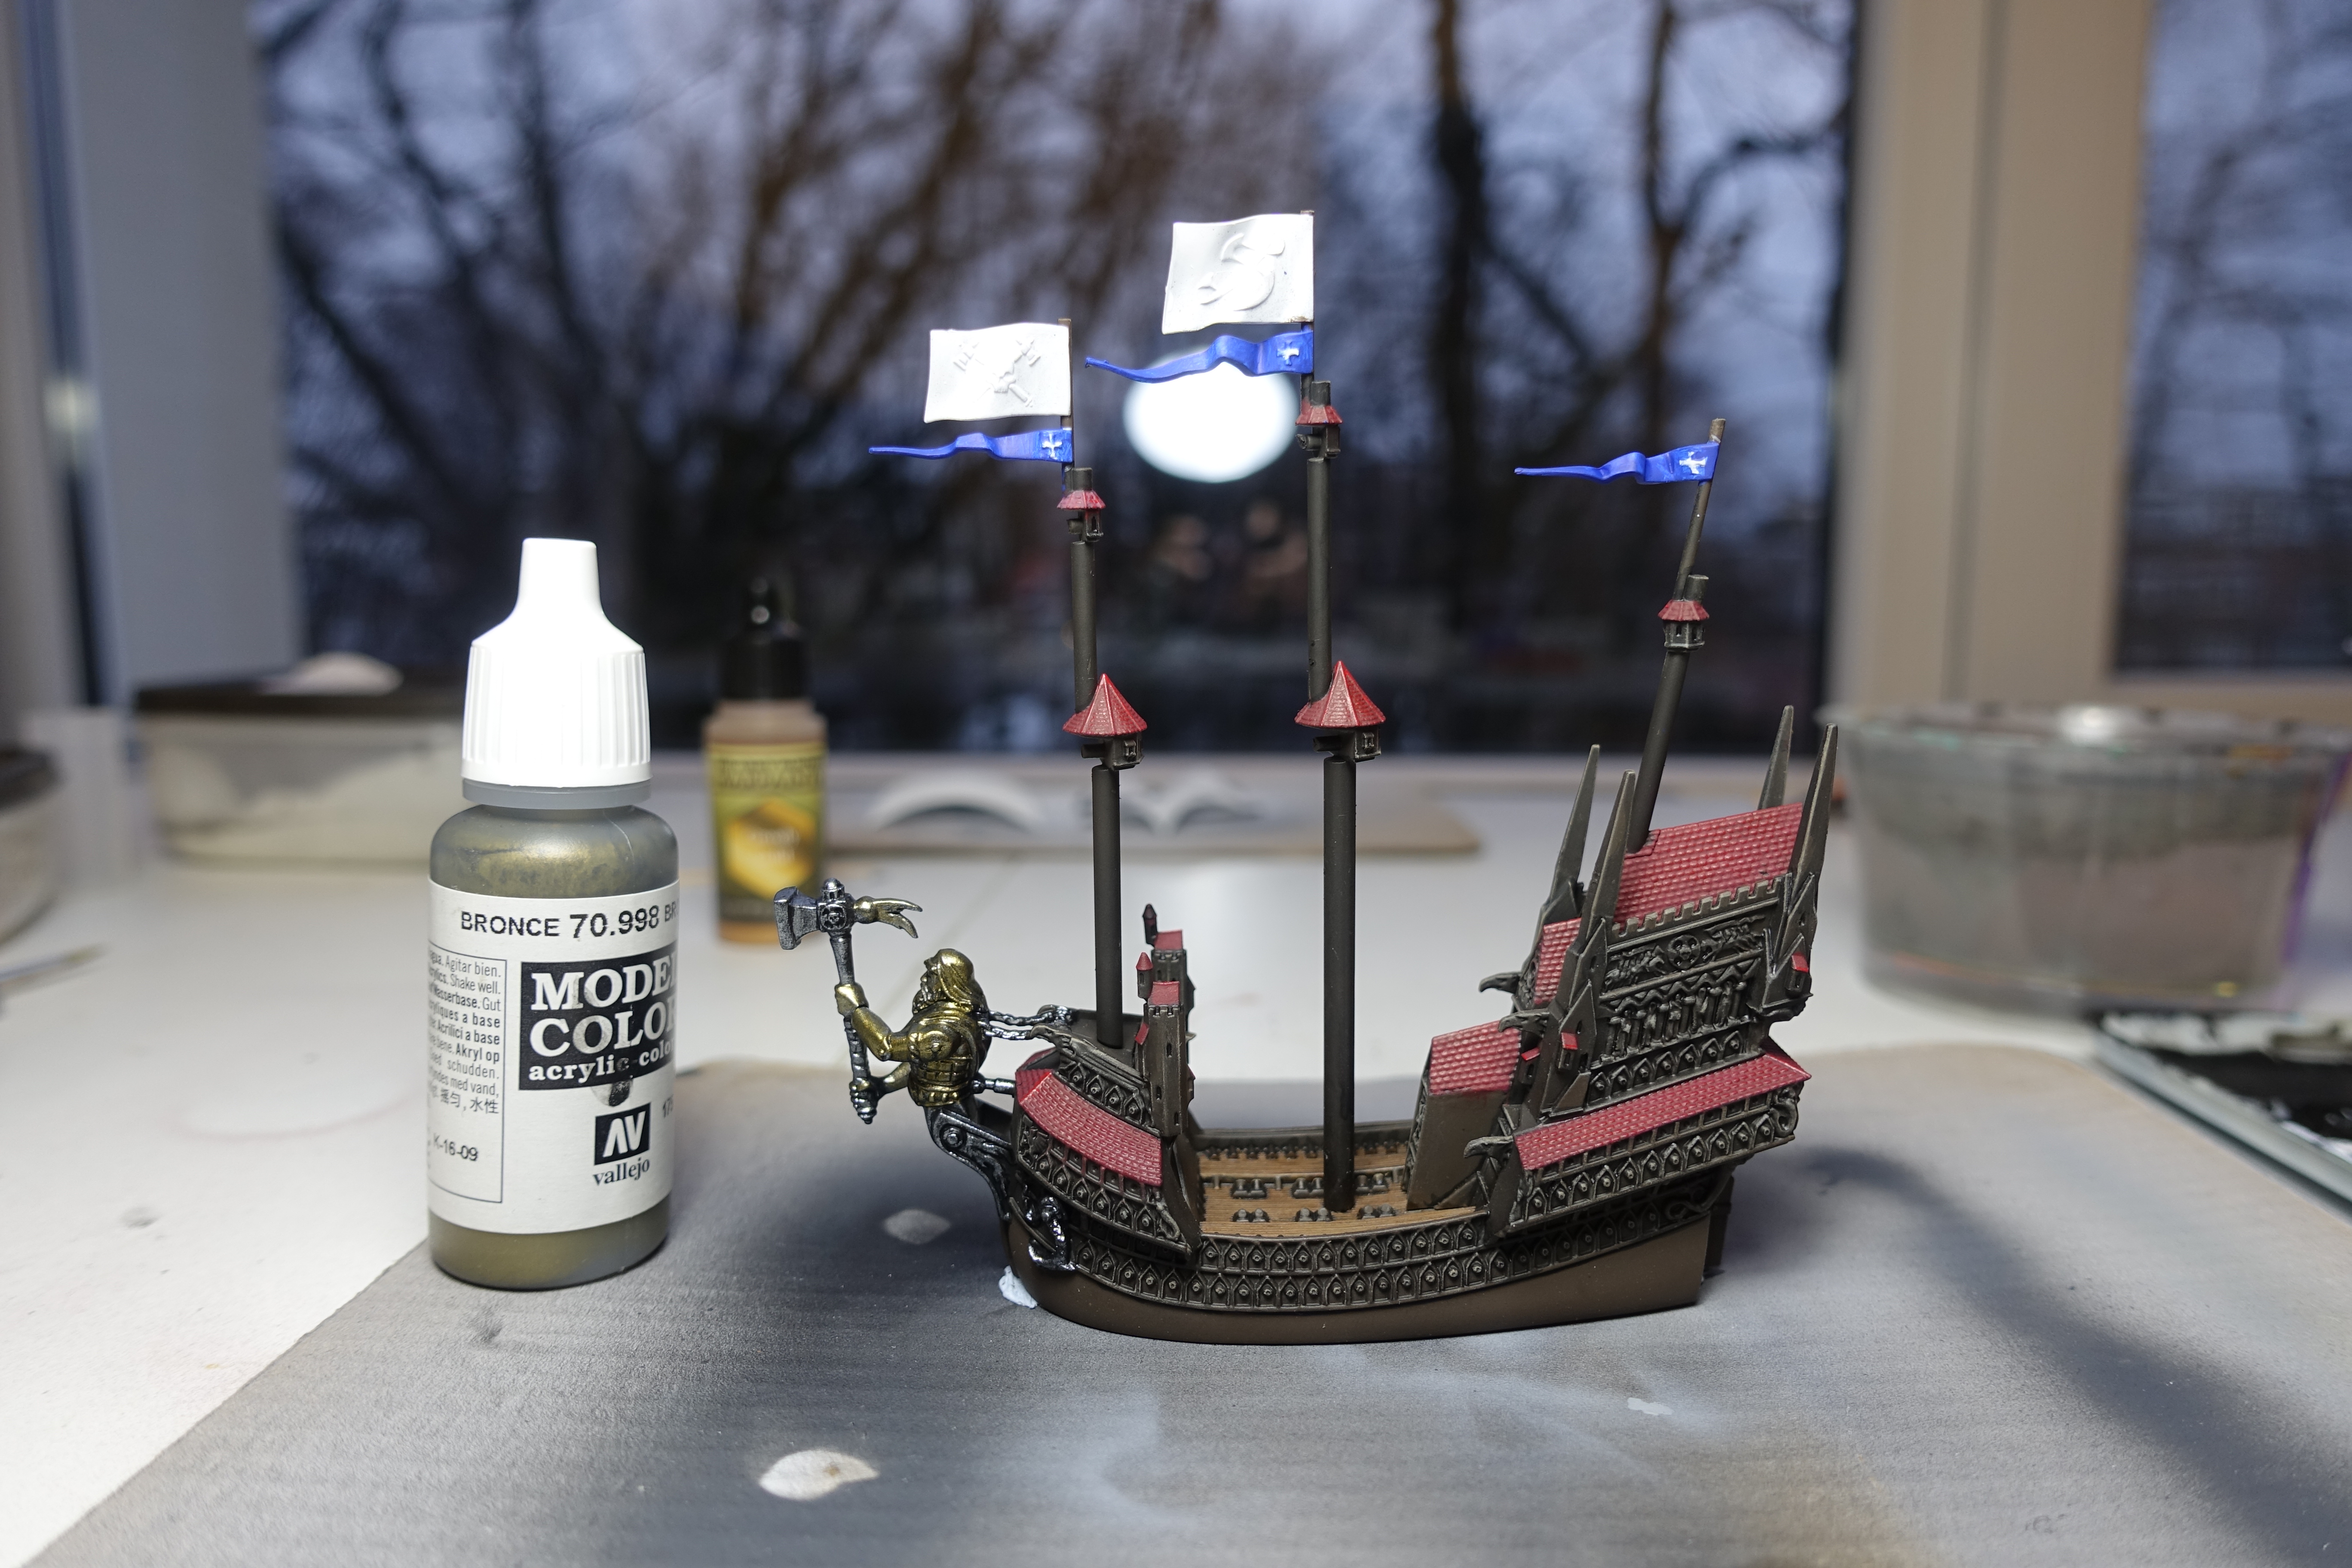 Step 2: Model Color Bronze (not on the hammer)
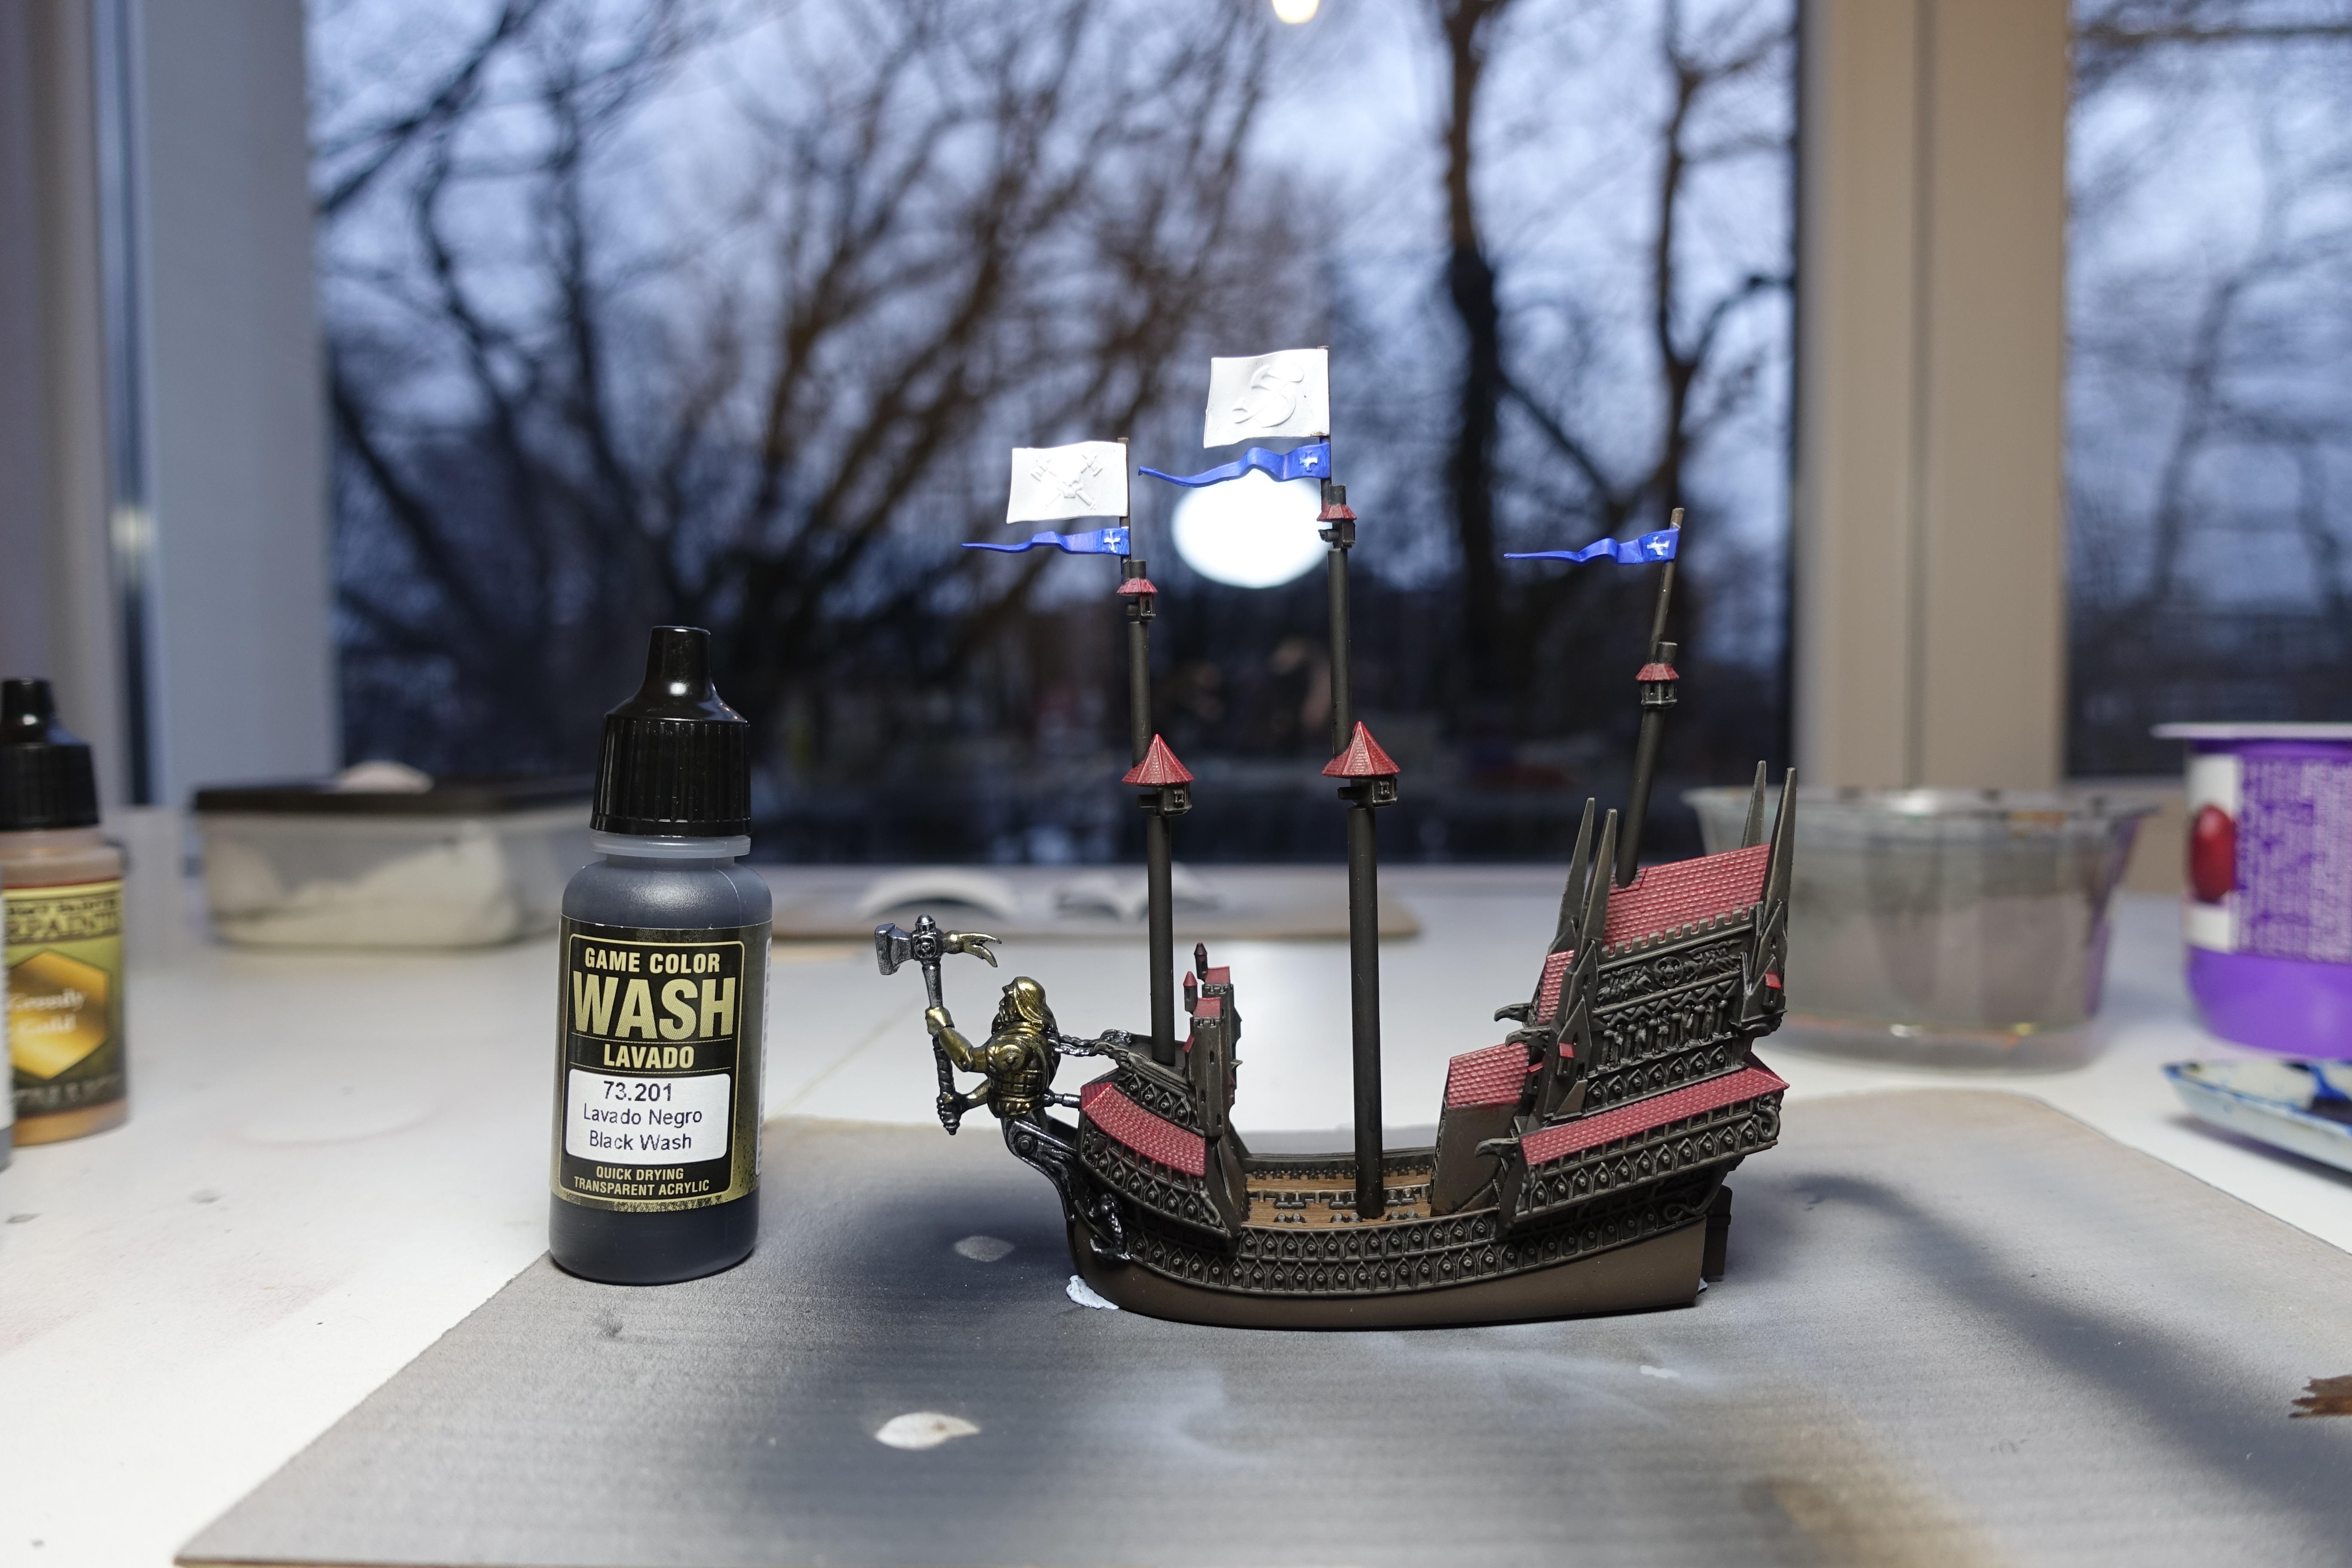 Step 3: Game Color Black Wash. First time I use this wash. The result looks good.
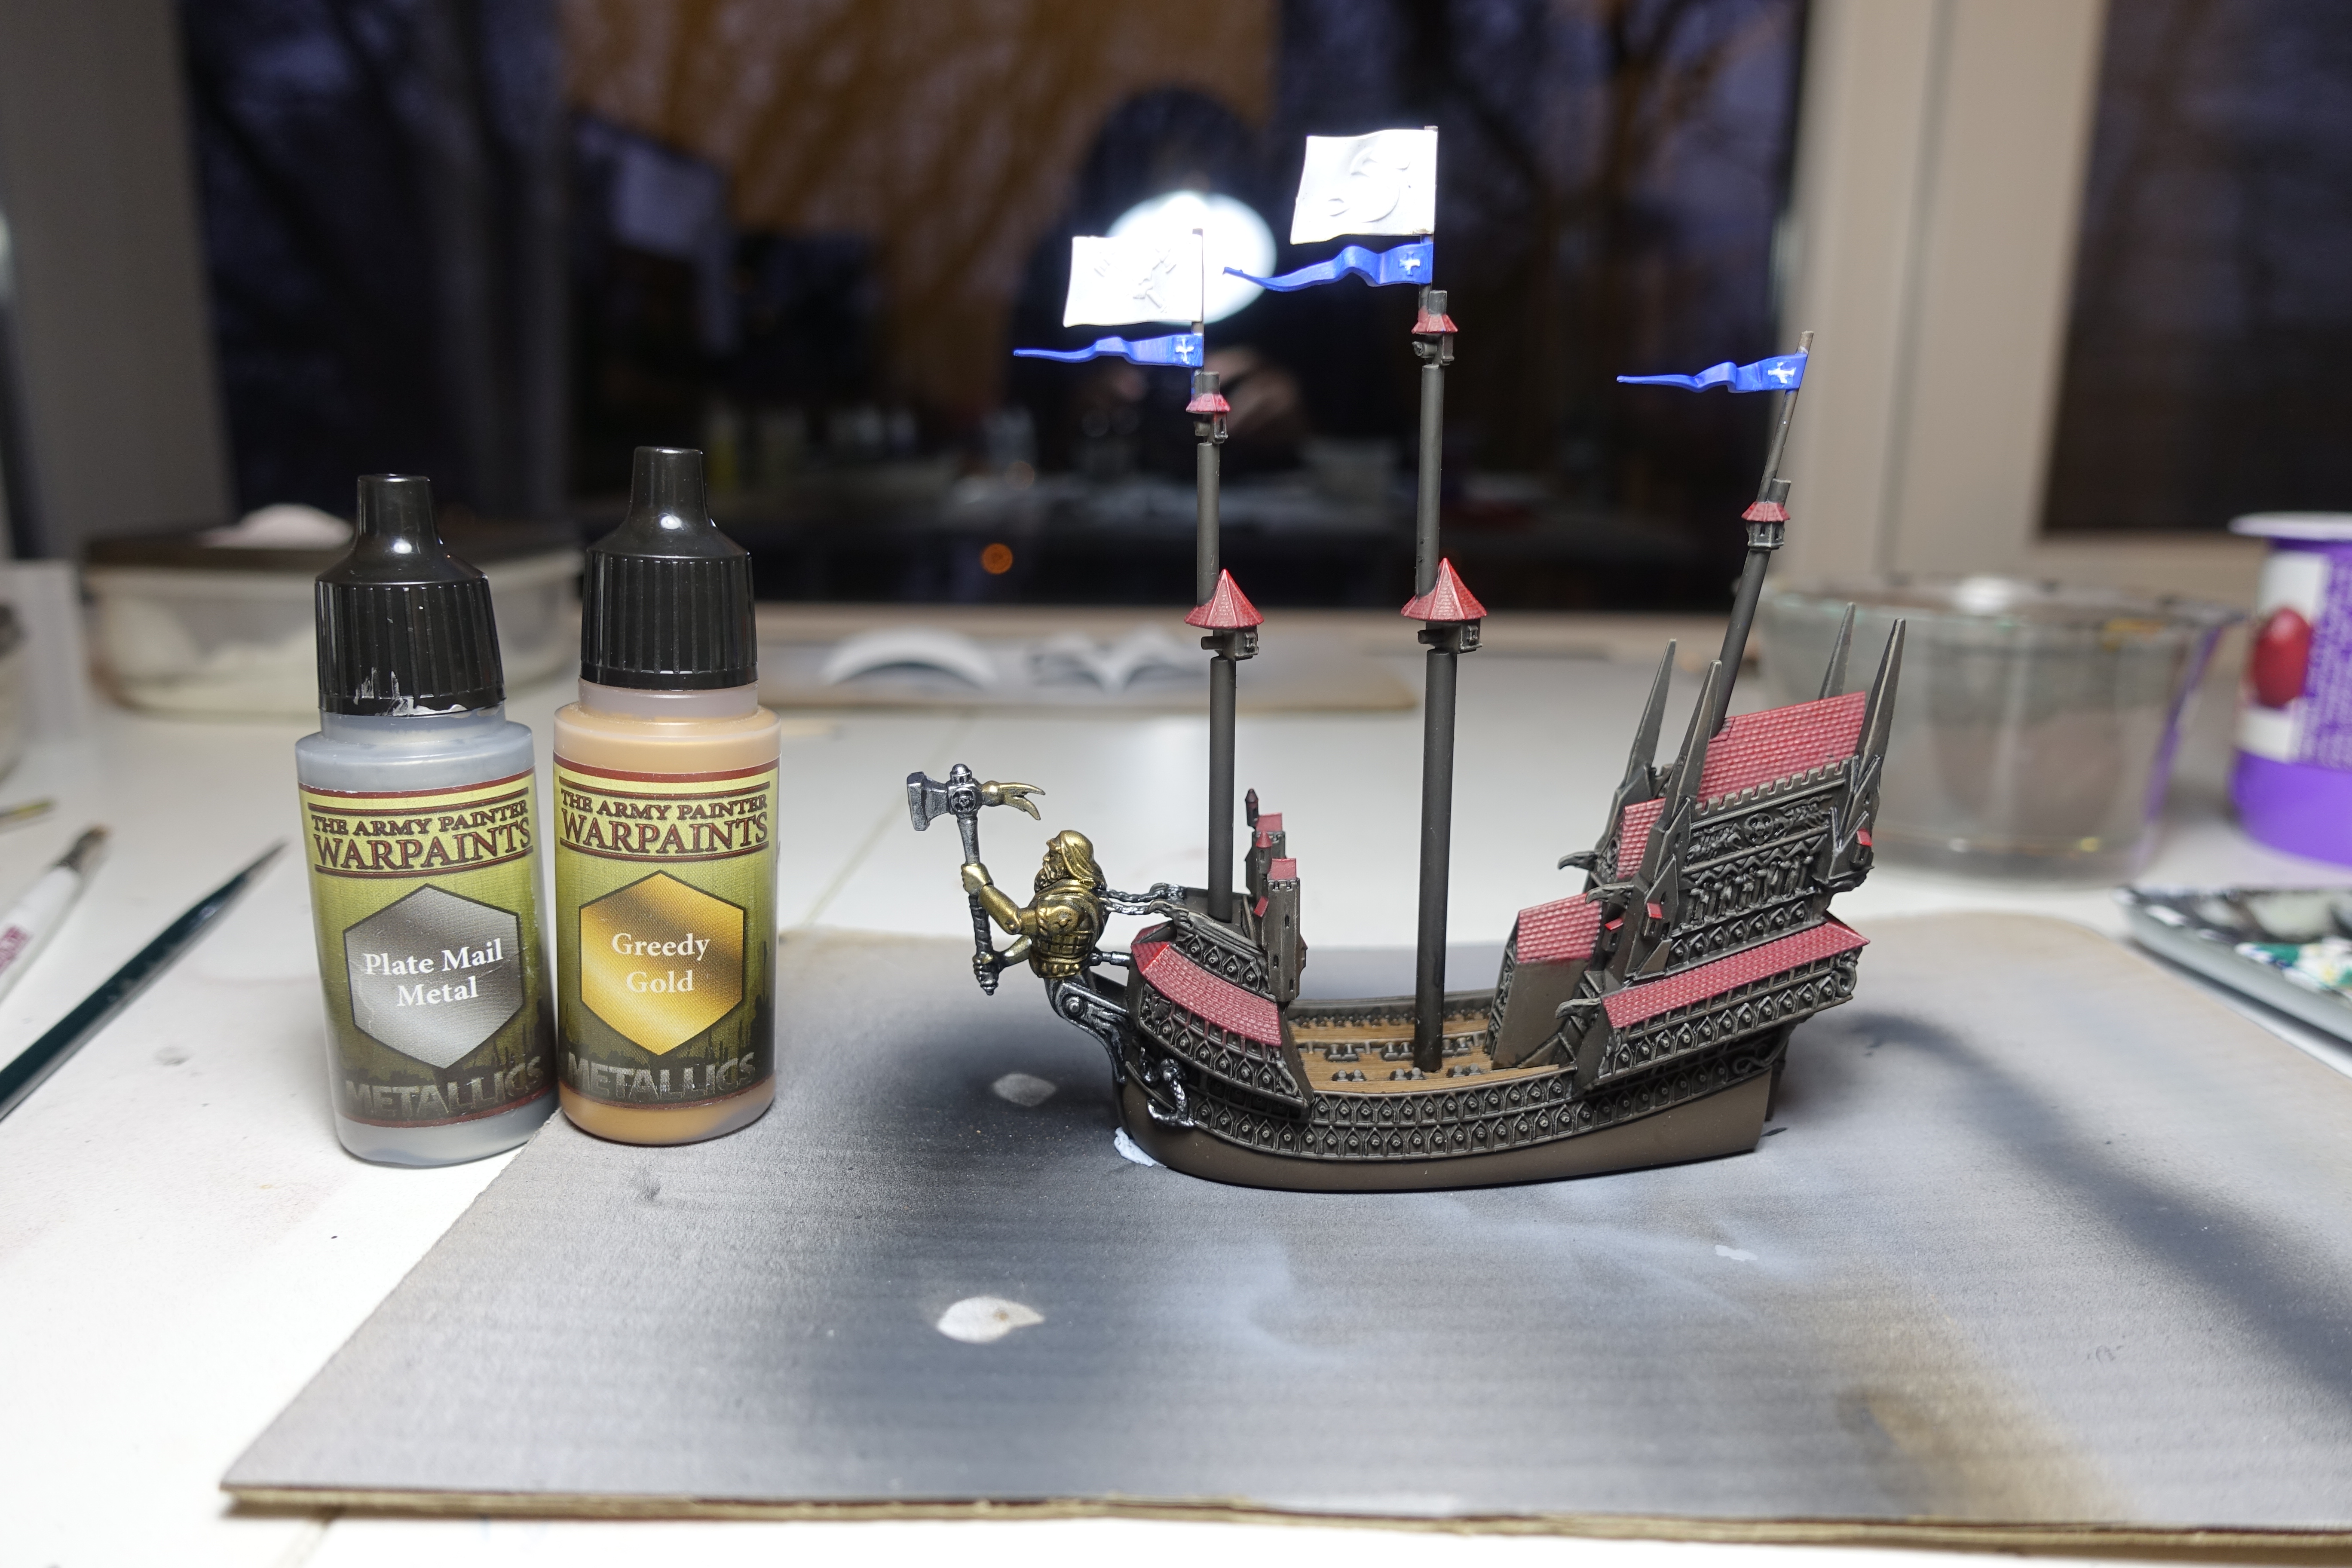 Step 4: Dry brush the statue with The Army Painter Greedy Gold. And step 5: Edge highlight the hammer with The Army Painter Plate Mail Metal. Finished!
The details
This ship contains so many details a perfectionist could spend a lifetime painting them. I won’t paint the sculptures on the ship. It takes too much time and I want to preserve the look of a wooden ship.
 I did paint all the cannons black. Those on the deck as well as those sticking out of the beam and stern.
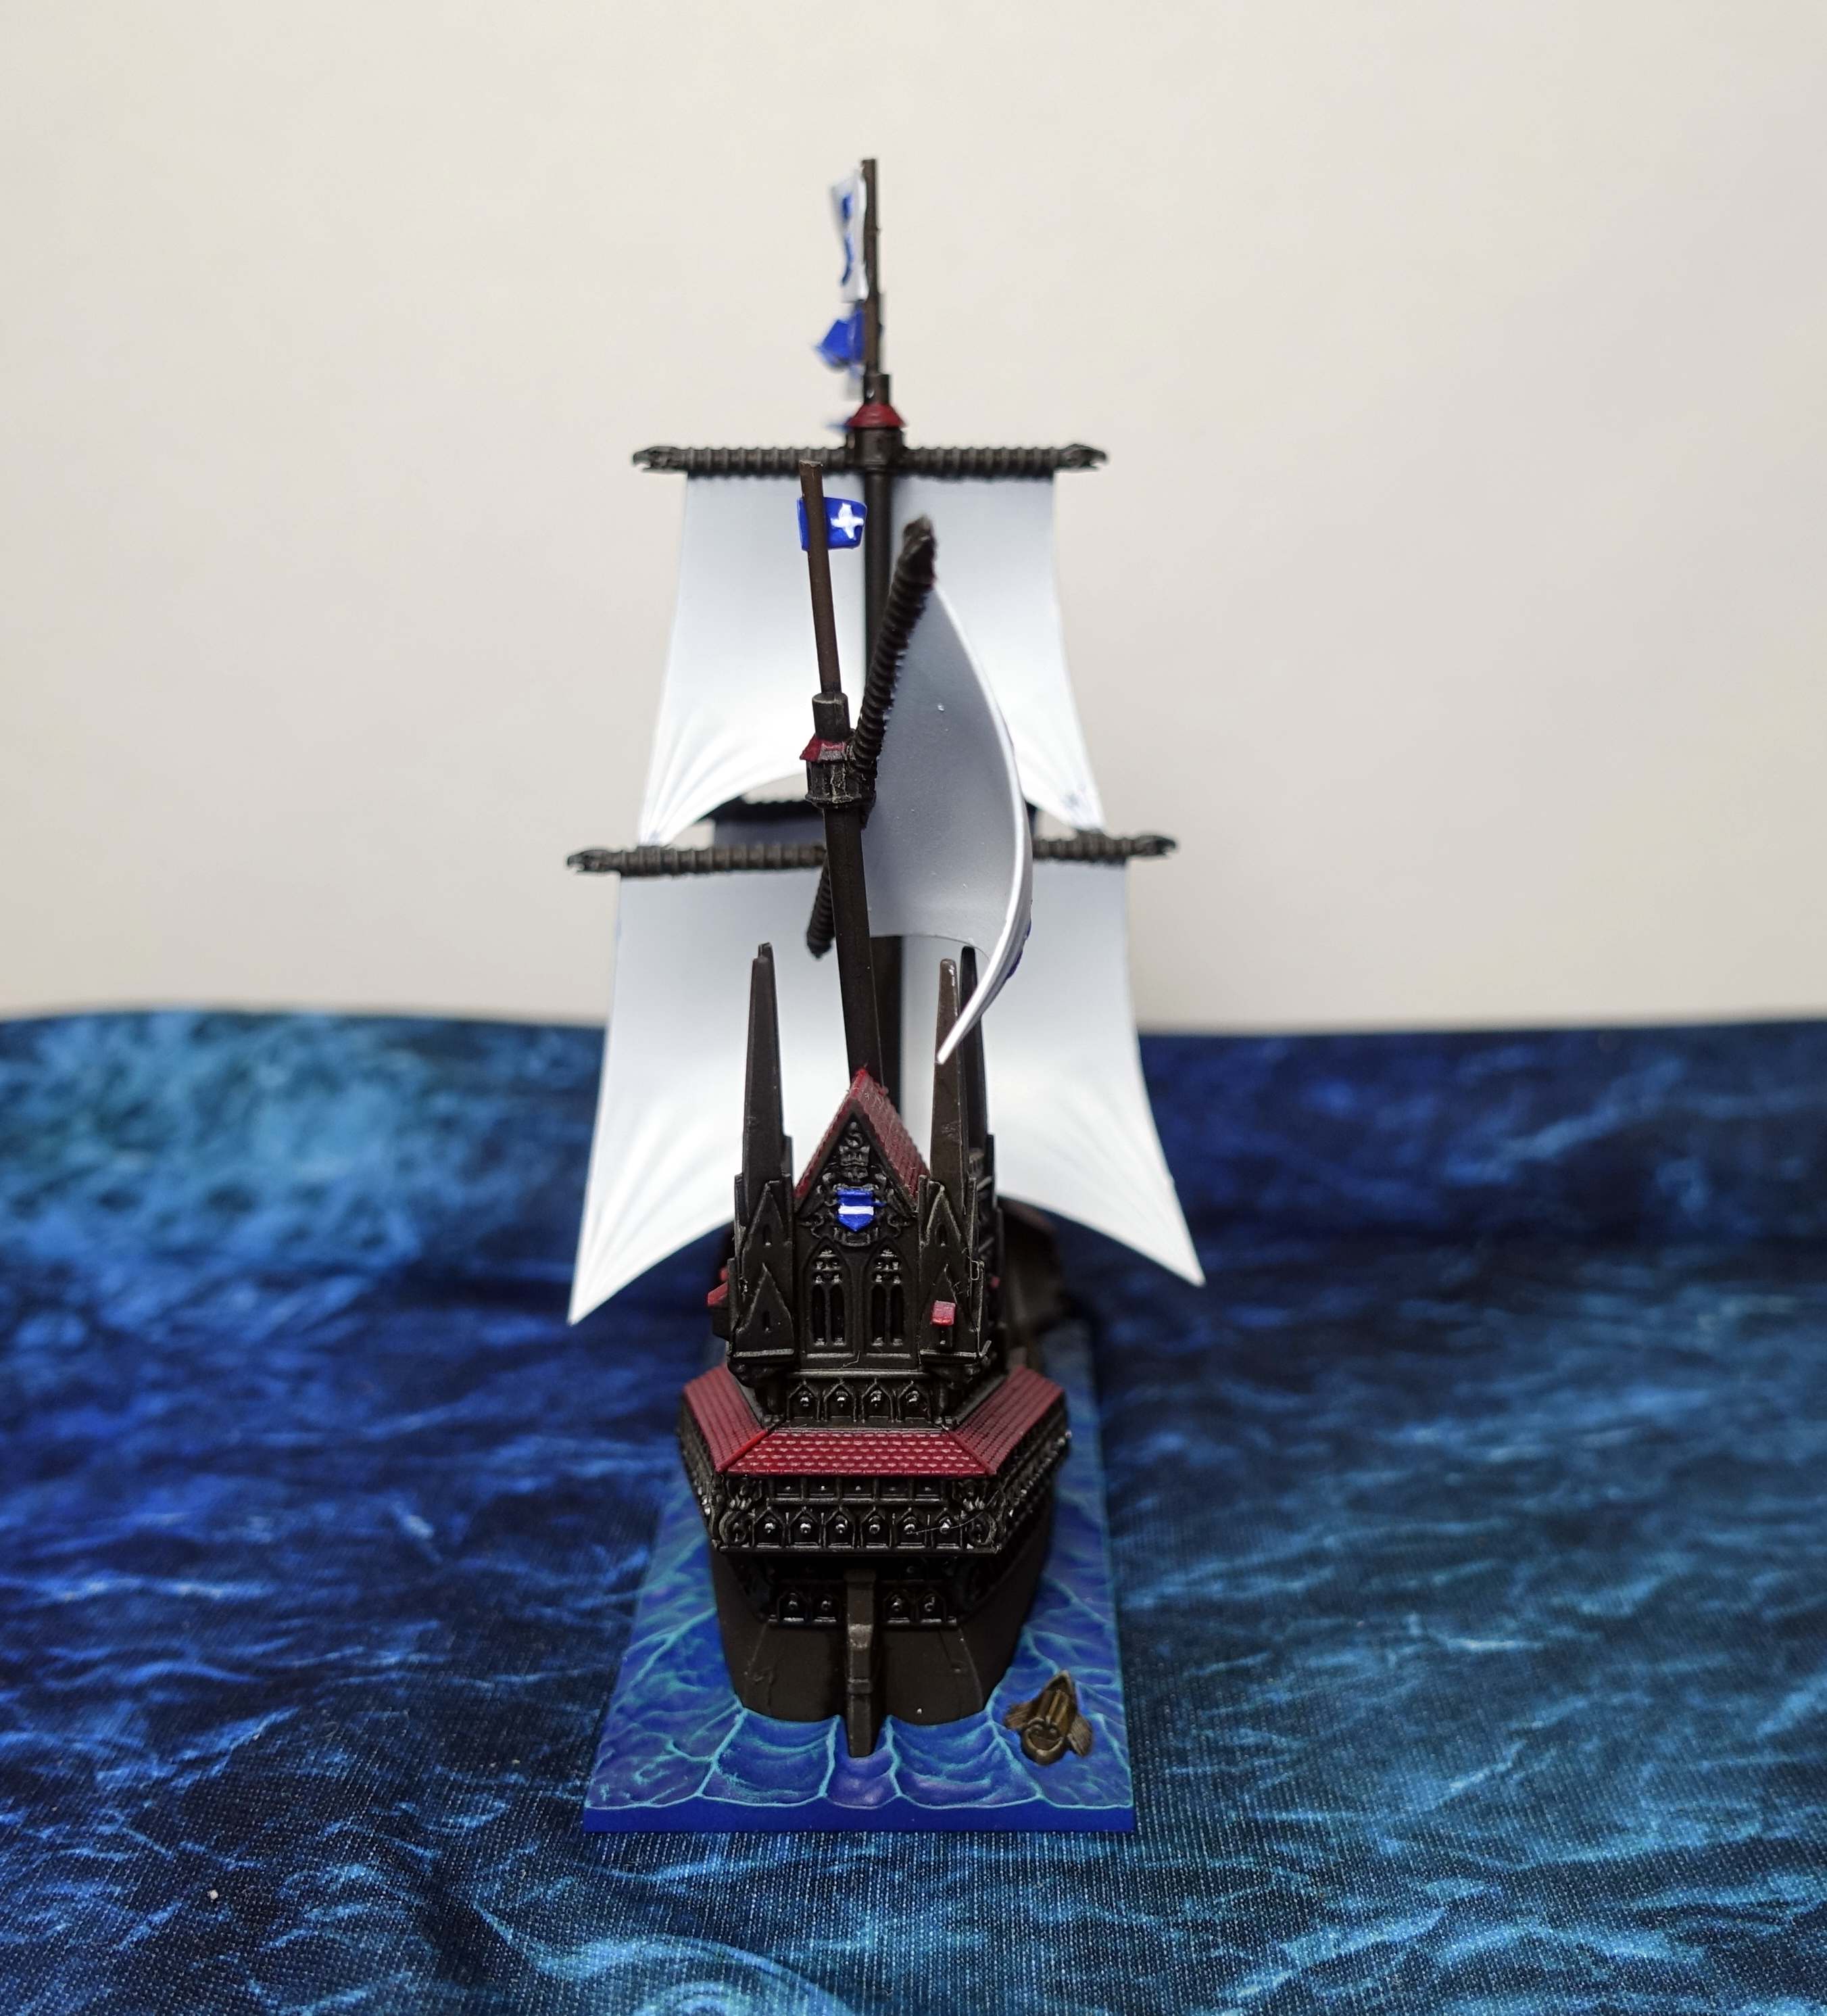
  The decorations on the stern contain a (relatively) large shield. I painted it in blue and white, to correspond with the flags and sails.
The base
Painting the water on the base had been done earlier. You can read about it in my entry “To paint the sea”.
The base of each ship contains extra details. The base of the Heldenhammer contains a small cog. I painted it with the same colours as the hull of the Heldenhammer to make them look harmonious. The oars are painted in Panzer Aces New Wood. I made use of the opportunity to paint some details on het bases of other ships as well, while I had the right paint on my brush.
This entry will be followed up by part three about the sails and flags of the Heldenhammer, once I’ve finished them.
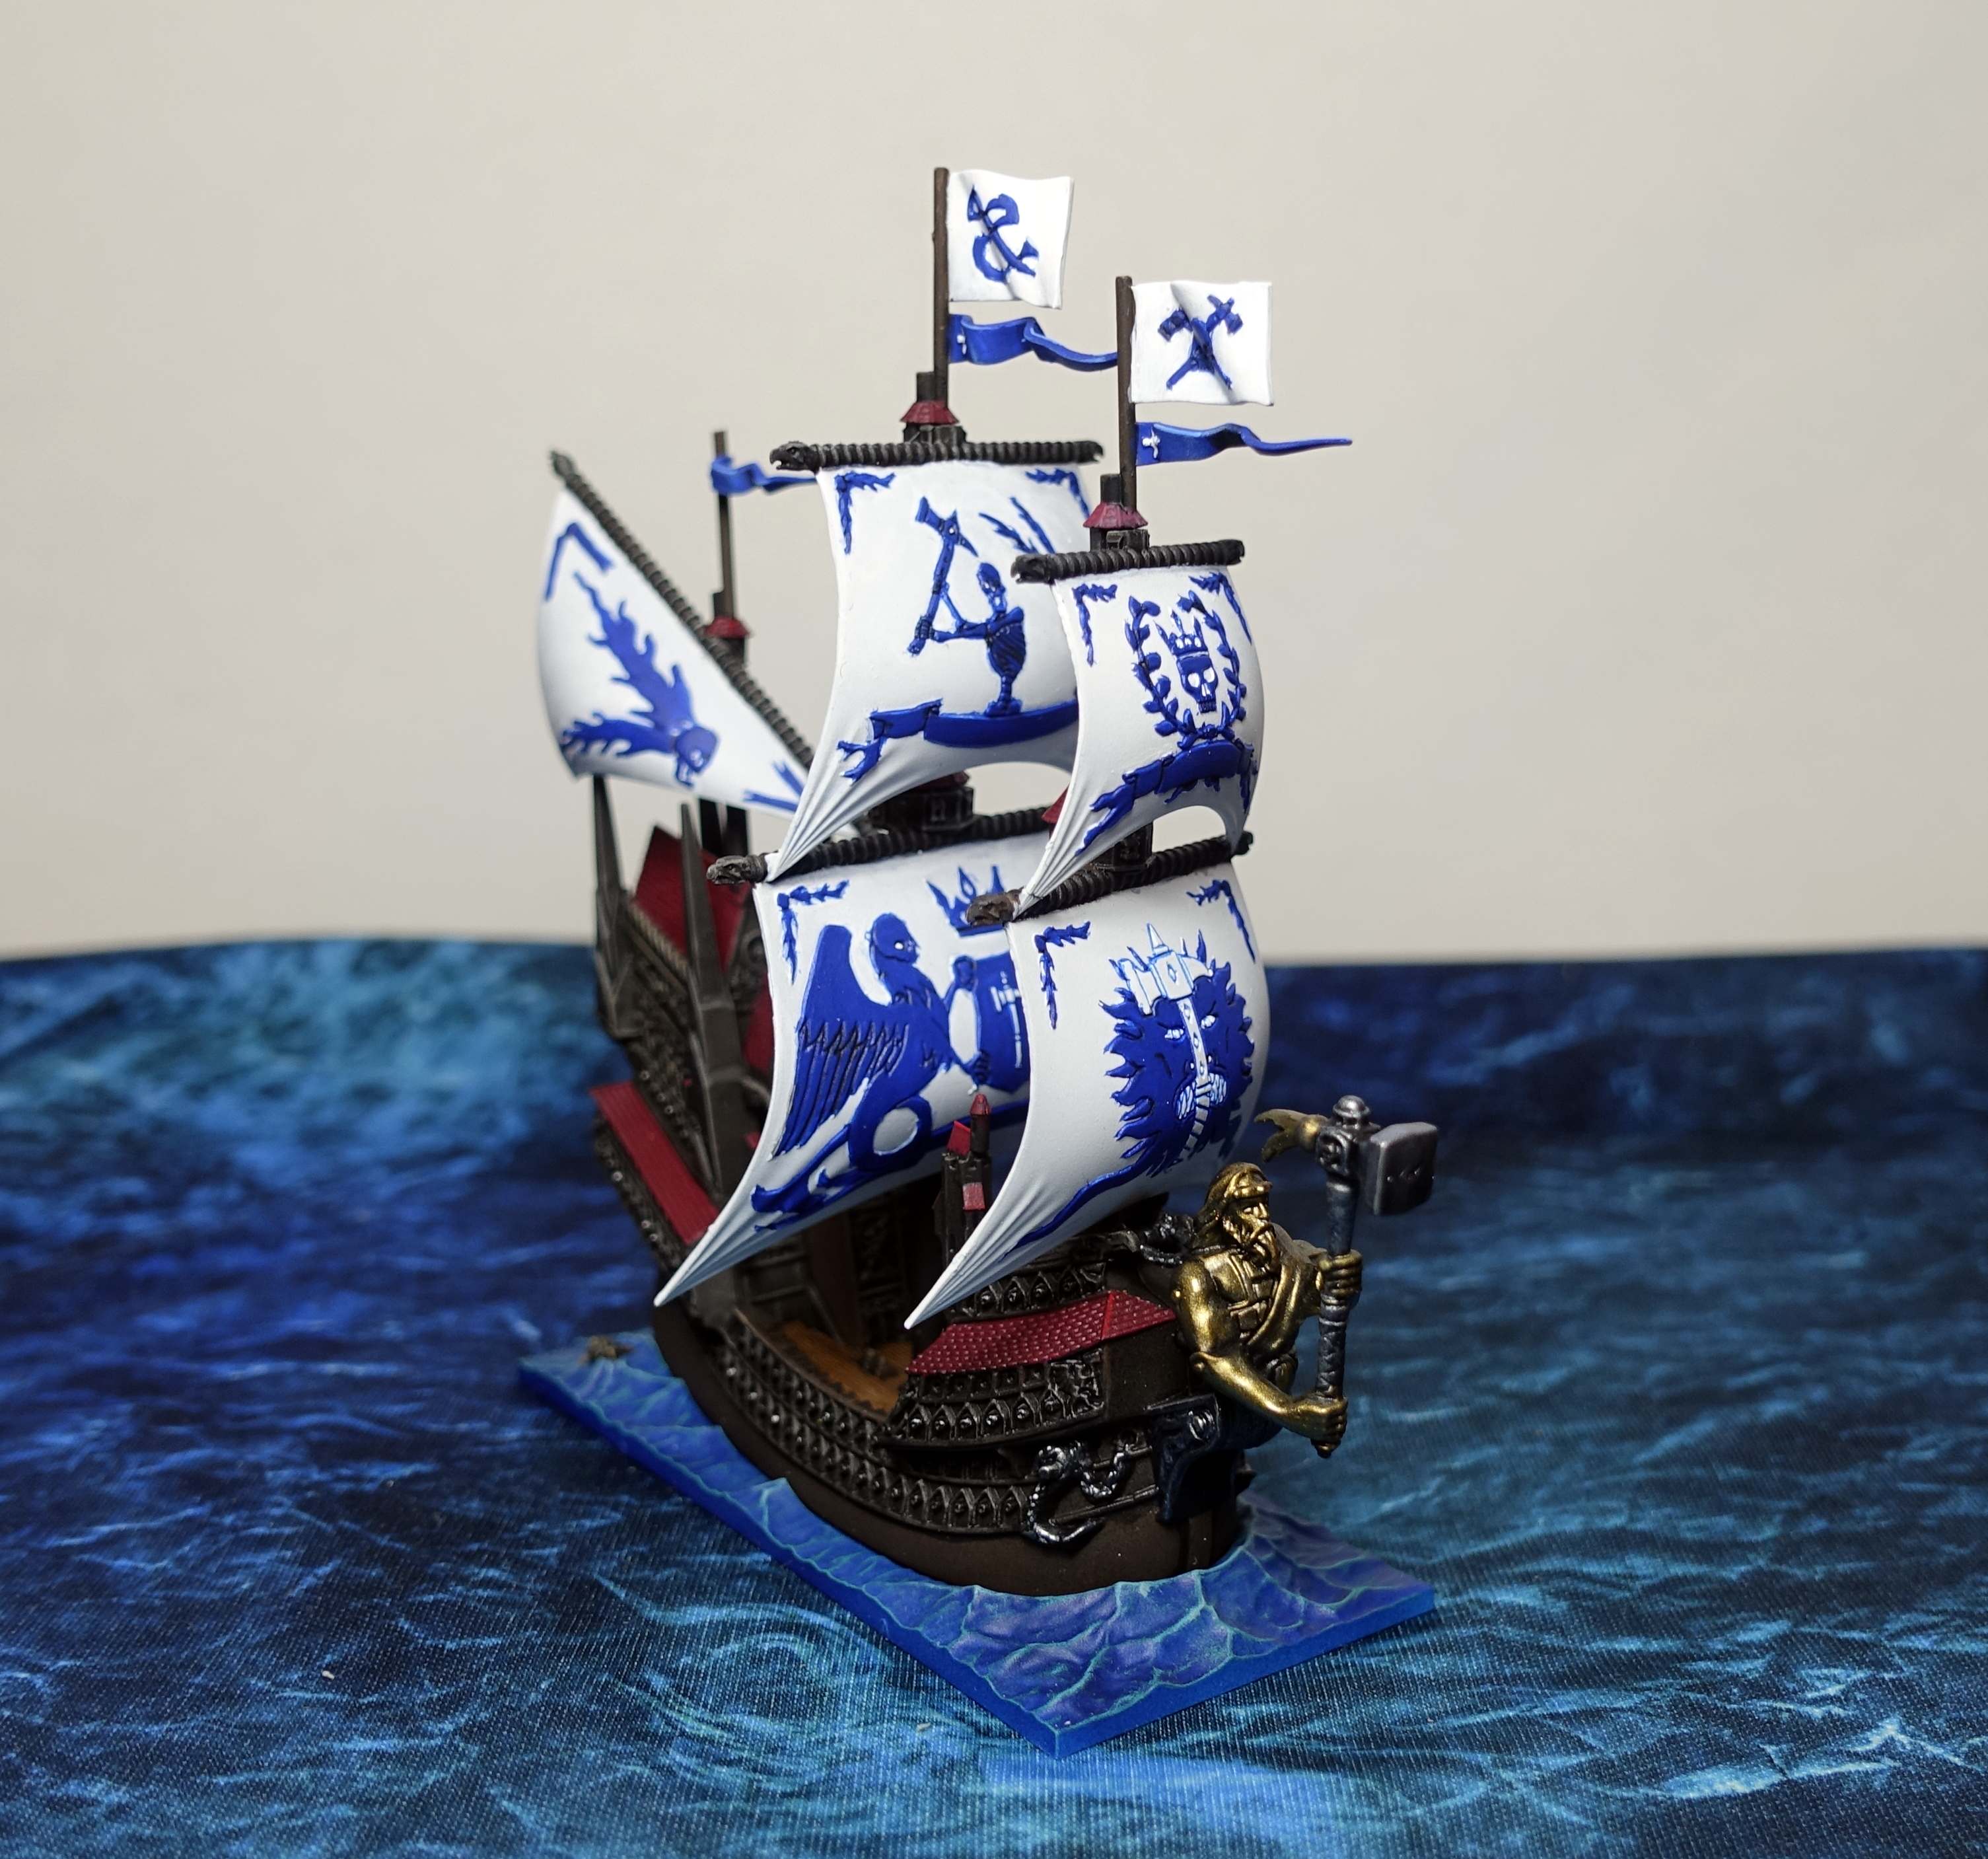
The Heldenhammer – Part 3: Flags and sails
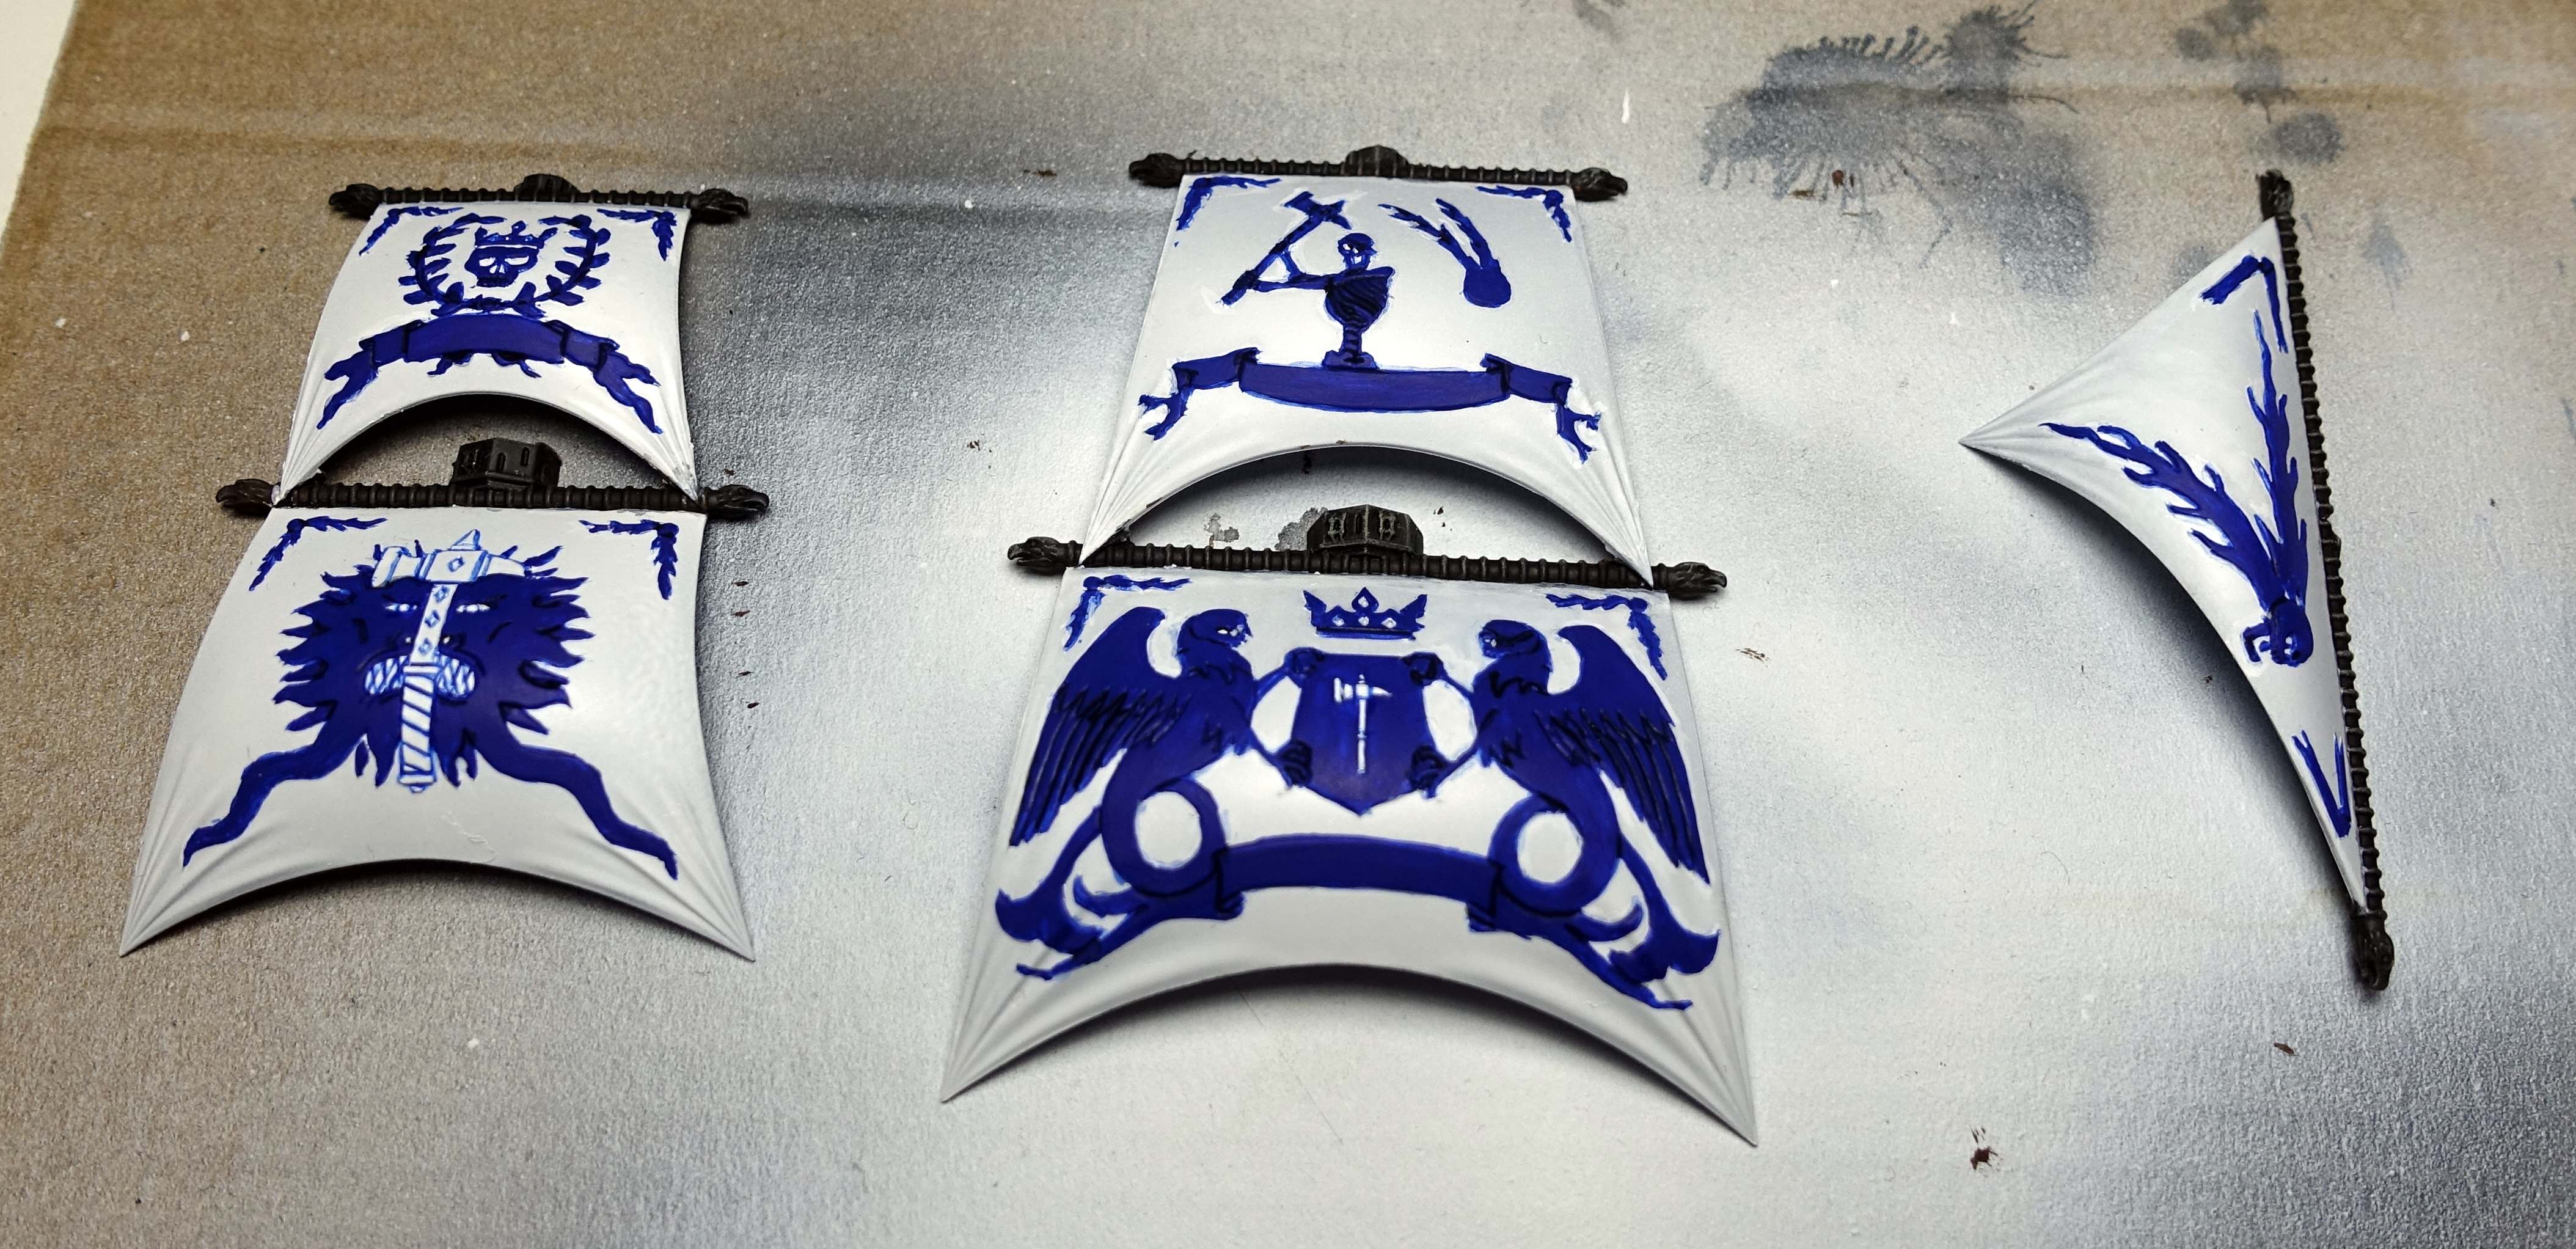
After the sails on the terrain pieces, I wasn’t looking forward to painting the sails on the Heldenhammer. This time I have no black primer to fight, but it will be tricky to get a good result. My initial plan was to leave the sails white. But since this is a flagship and the sails will draw the attention on the finished model, I will try to paint them. The images on the sails will be painted in Model Color Blue, while the rest of the sails remain white. No other colours will be used.
Some brown paint from the spar (let’s hope this is the correct naval term) ended up on the sail. With thinned down white paint, I’ve started to remove these brown stains. Watered down to prevent a thick layer of paint remaining on the sail. That would certainly look bad.
For the images on the sails I suspect the best way to paint them is with several thin coats. As thin as possible. I struggled a bit with thinning the paint on my wet pallet. Sometimes it turned into a blue wash instead of thinned paint.
To get the best result, the sides of the raised images should be painted blue systematically. The surface of these sides narrow. Painting them requires much caution and patience. I’m not a patient man. I switched to a smaller brush to paint such small details: 4/0. It takes forever to paint with such a small brush.
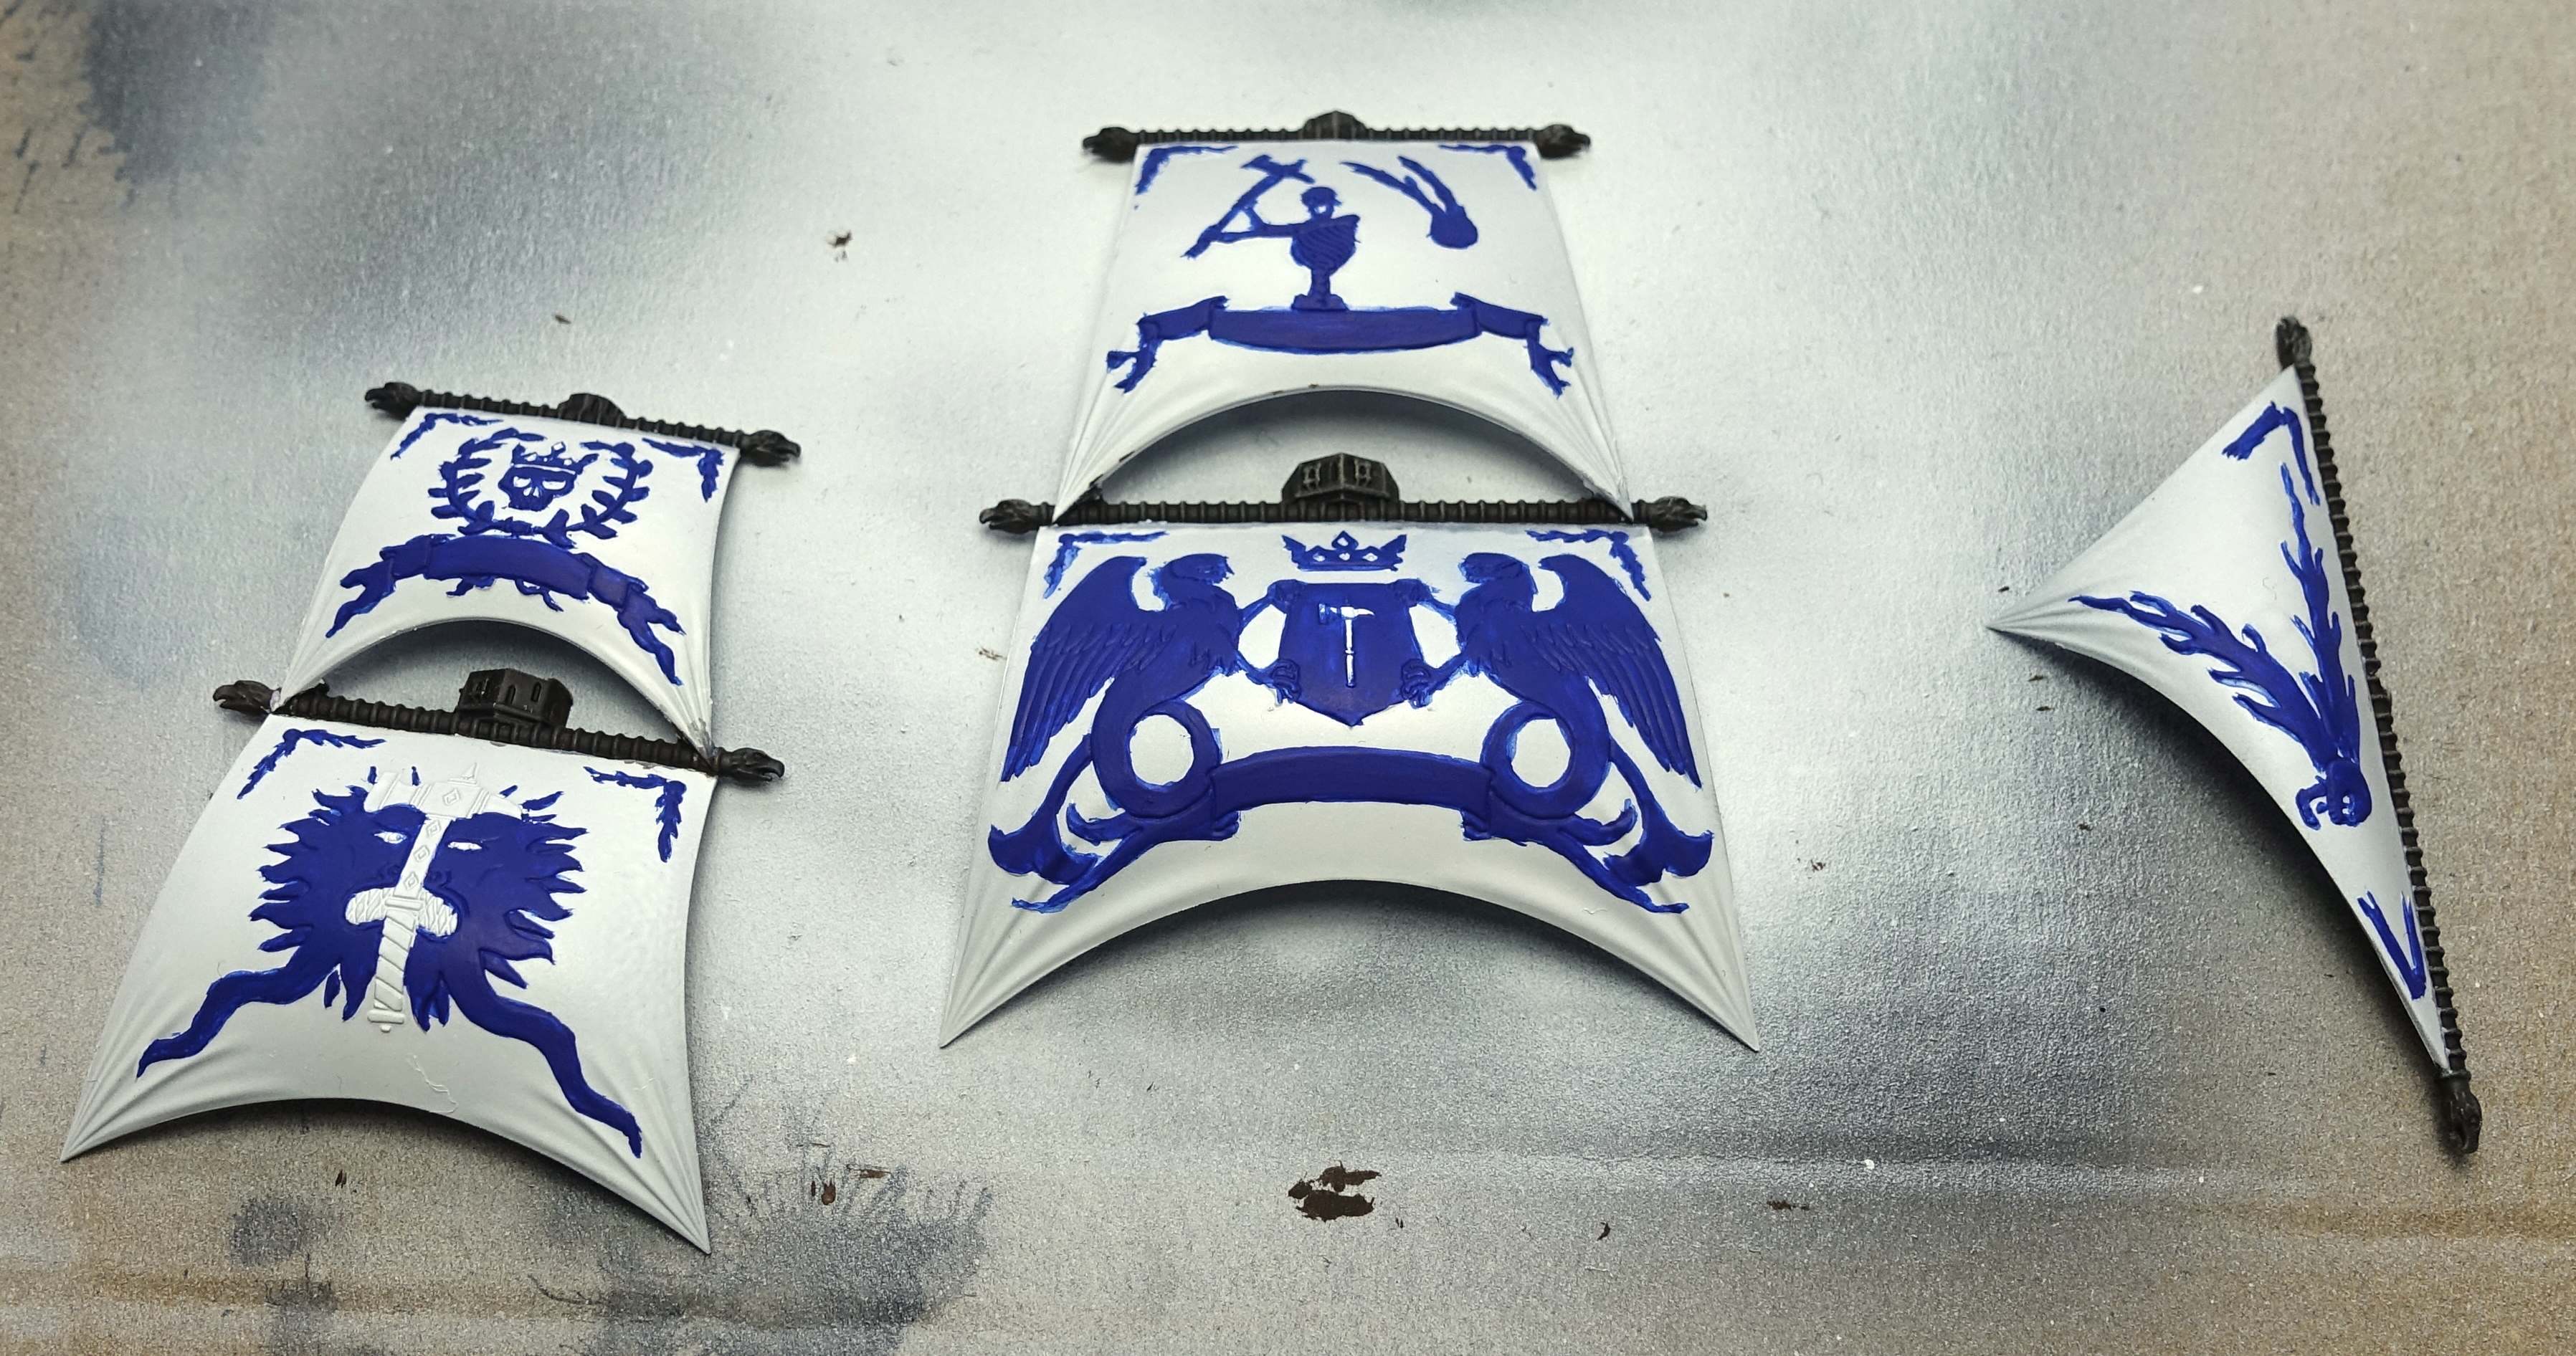
The two big flags will remain white with the images in blue, just like the sails. The three small flags are painted in reverse: blue flags with a small white cross.
Having painted the main surfaces of the images white, I encountered the following problem: sometimes two blue surfaces touch each other. The line separating them is invisible. Surfaces of the images left white (eg. the big hammer) touch each other as well or they touch the white sail and the line separating them, is invisible too. To resolve this I used blue ink (Vallejo Game Ink) where two white surfaces meat and black wash (Vallejo Game Color Wash) where two blue surfaces meat. The ink worked very well. The blue paint and blue ink are a very similar blue.
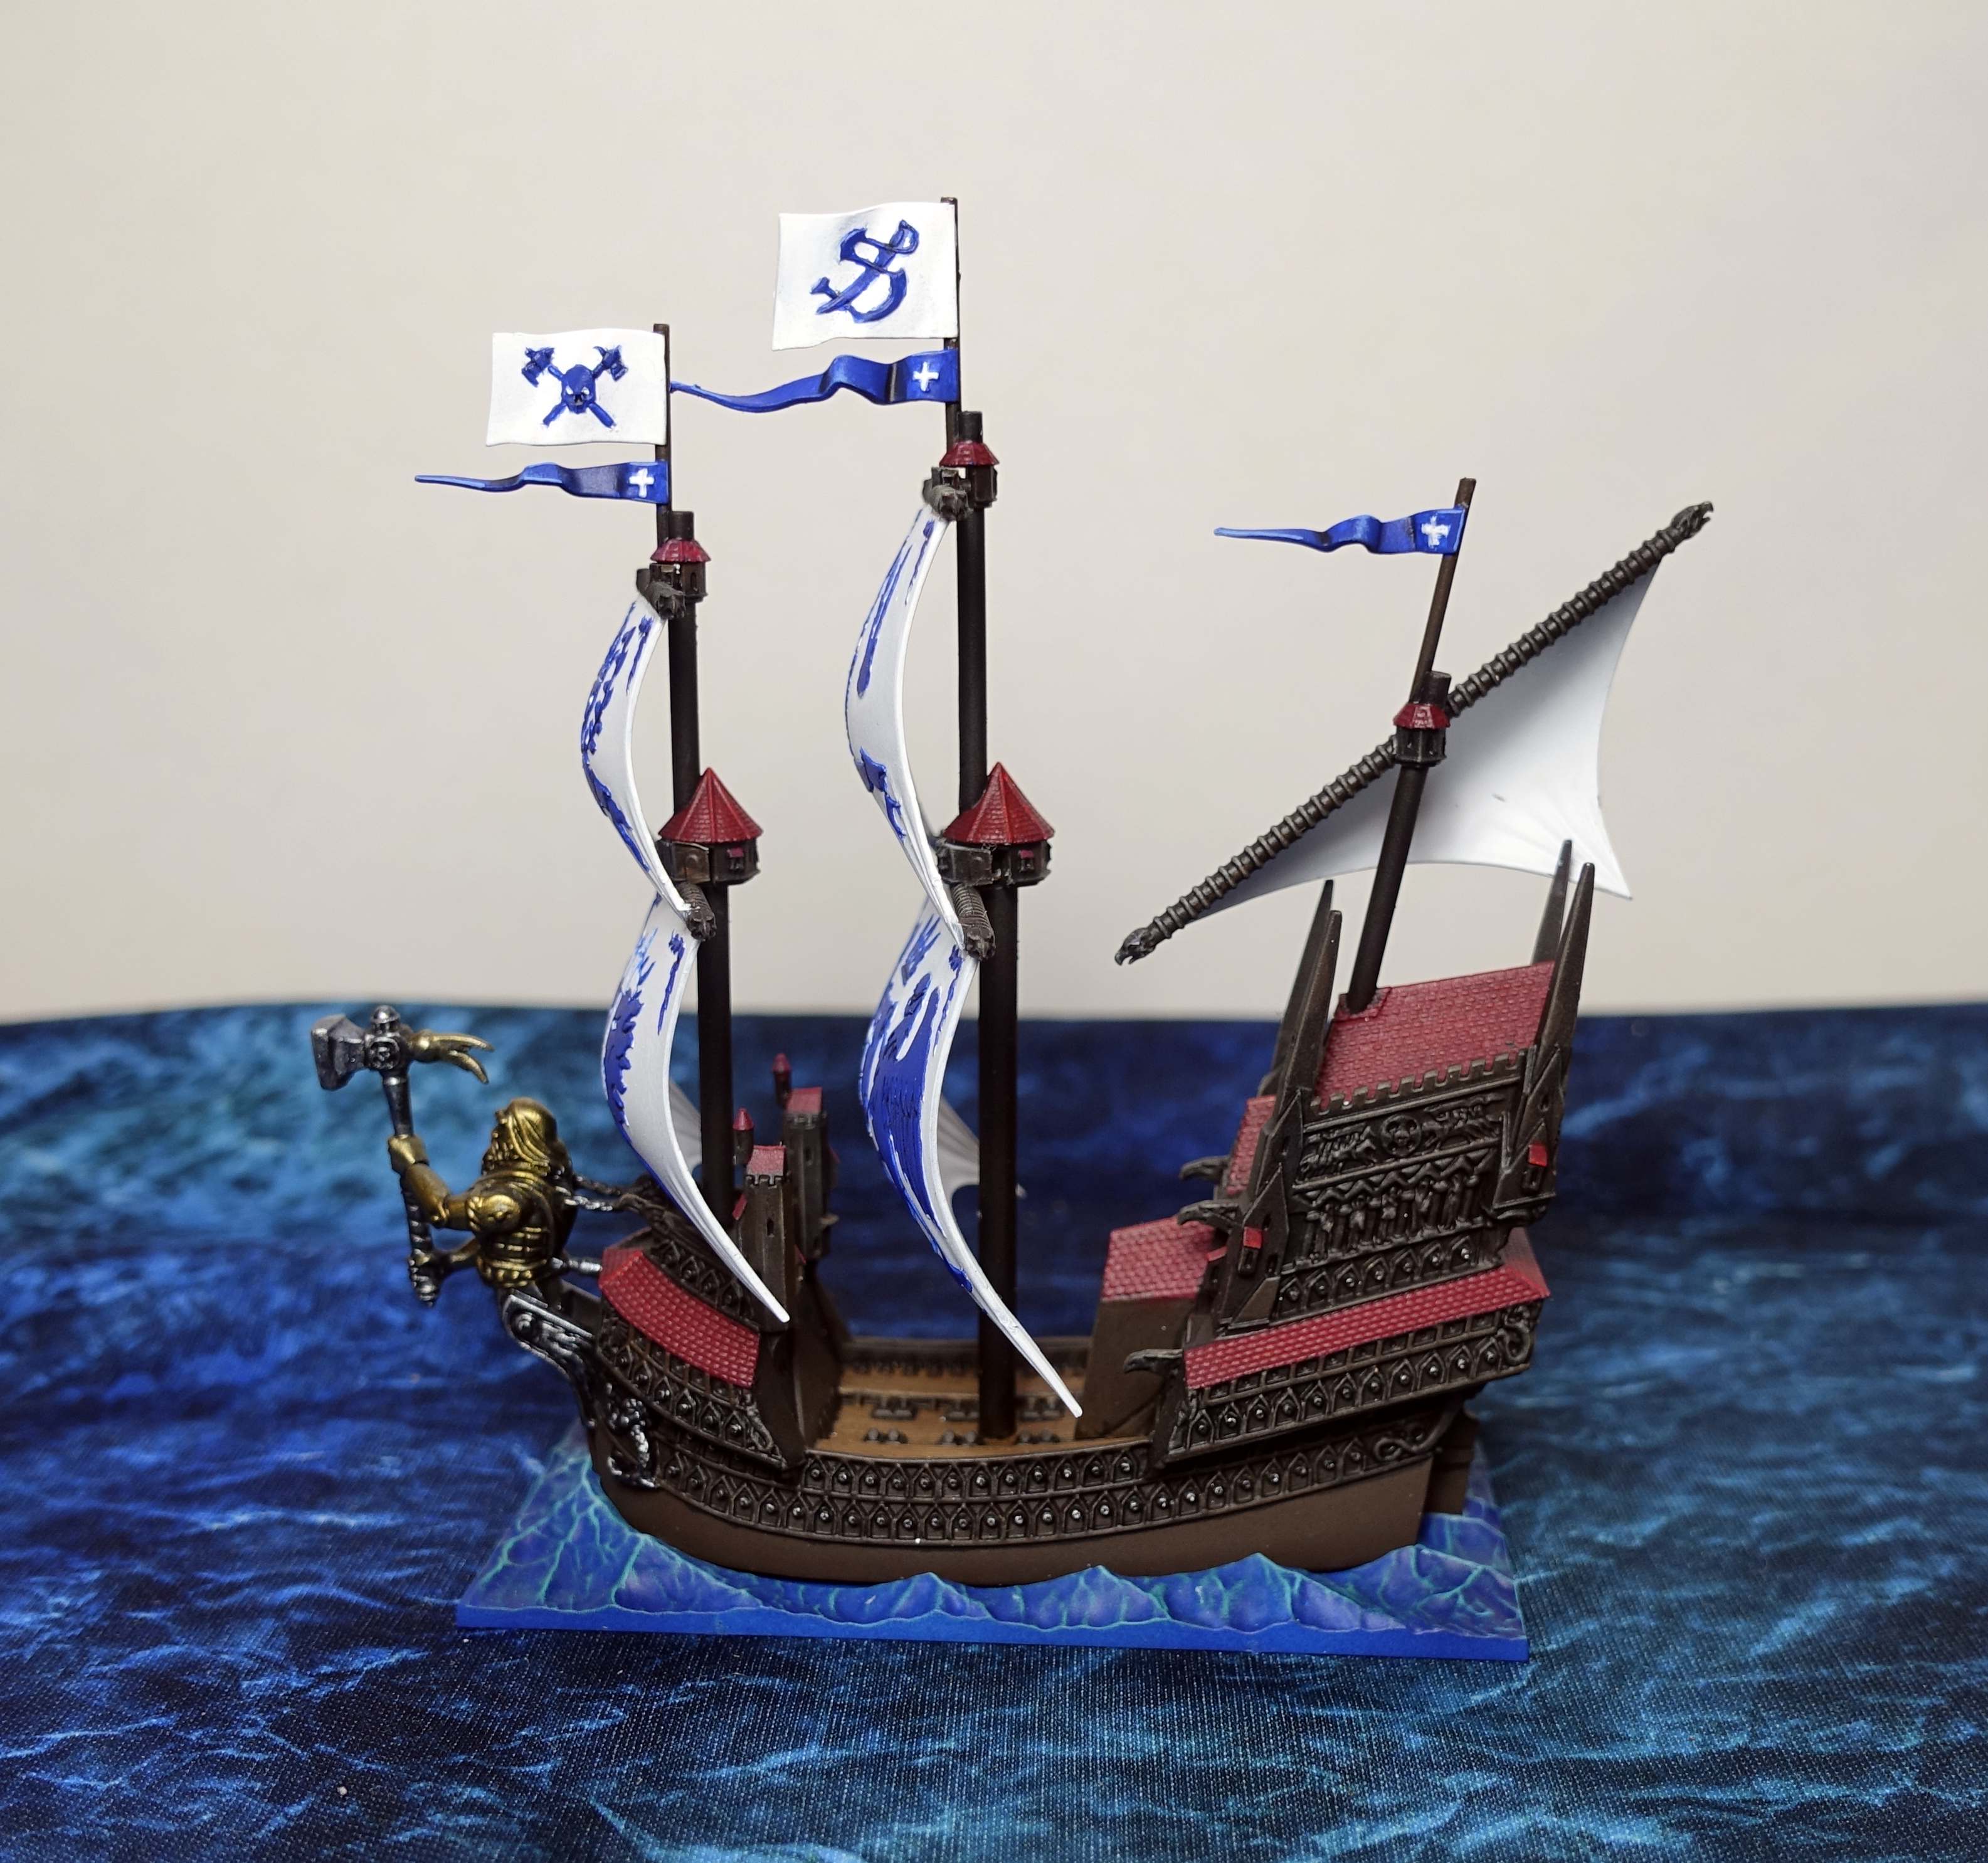
After much more finalising and correcting the sails and flags are done. They are not as good as I’ld like. The sails look as if painted at a lower level of quality than the rest of the ship. I’m affraid it takes someone with better painting skills to achieve a better result.
Cannons
Finally I’ve put a little Plate Mail Metal from The Army Painter on the cannons. The black cannons were almost unnoticeable otherwise. They stand out a bit more now.
This ship has a lot of cannons. I’m looking forward to firing them!
Lessons learned
- My sails aren’t white enough. I will give the sails of the other ships an extra coat of white paint.
- The masts hinder painting the ships. I should have glued them in place after painting the ships. Painting the elven ship I’m working on at the moment, I’ve noticed the same problem.

One last thing
Look what I found on YouTube! A cracking unboxing of Dreadfleet!
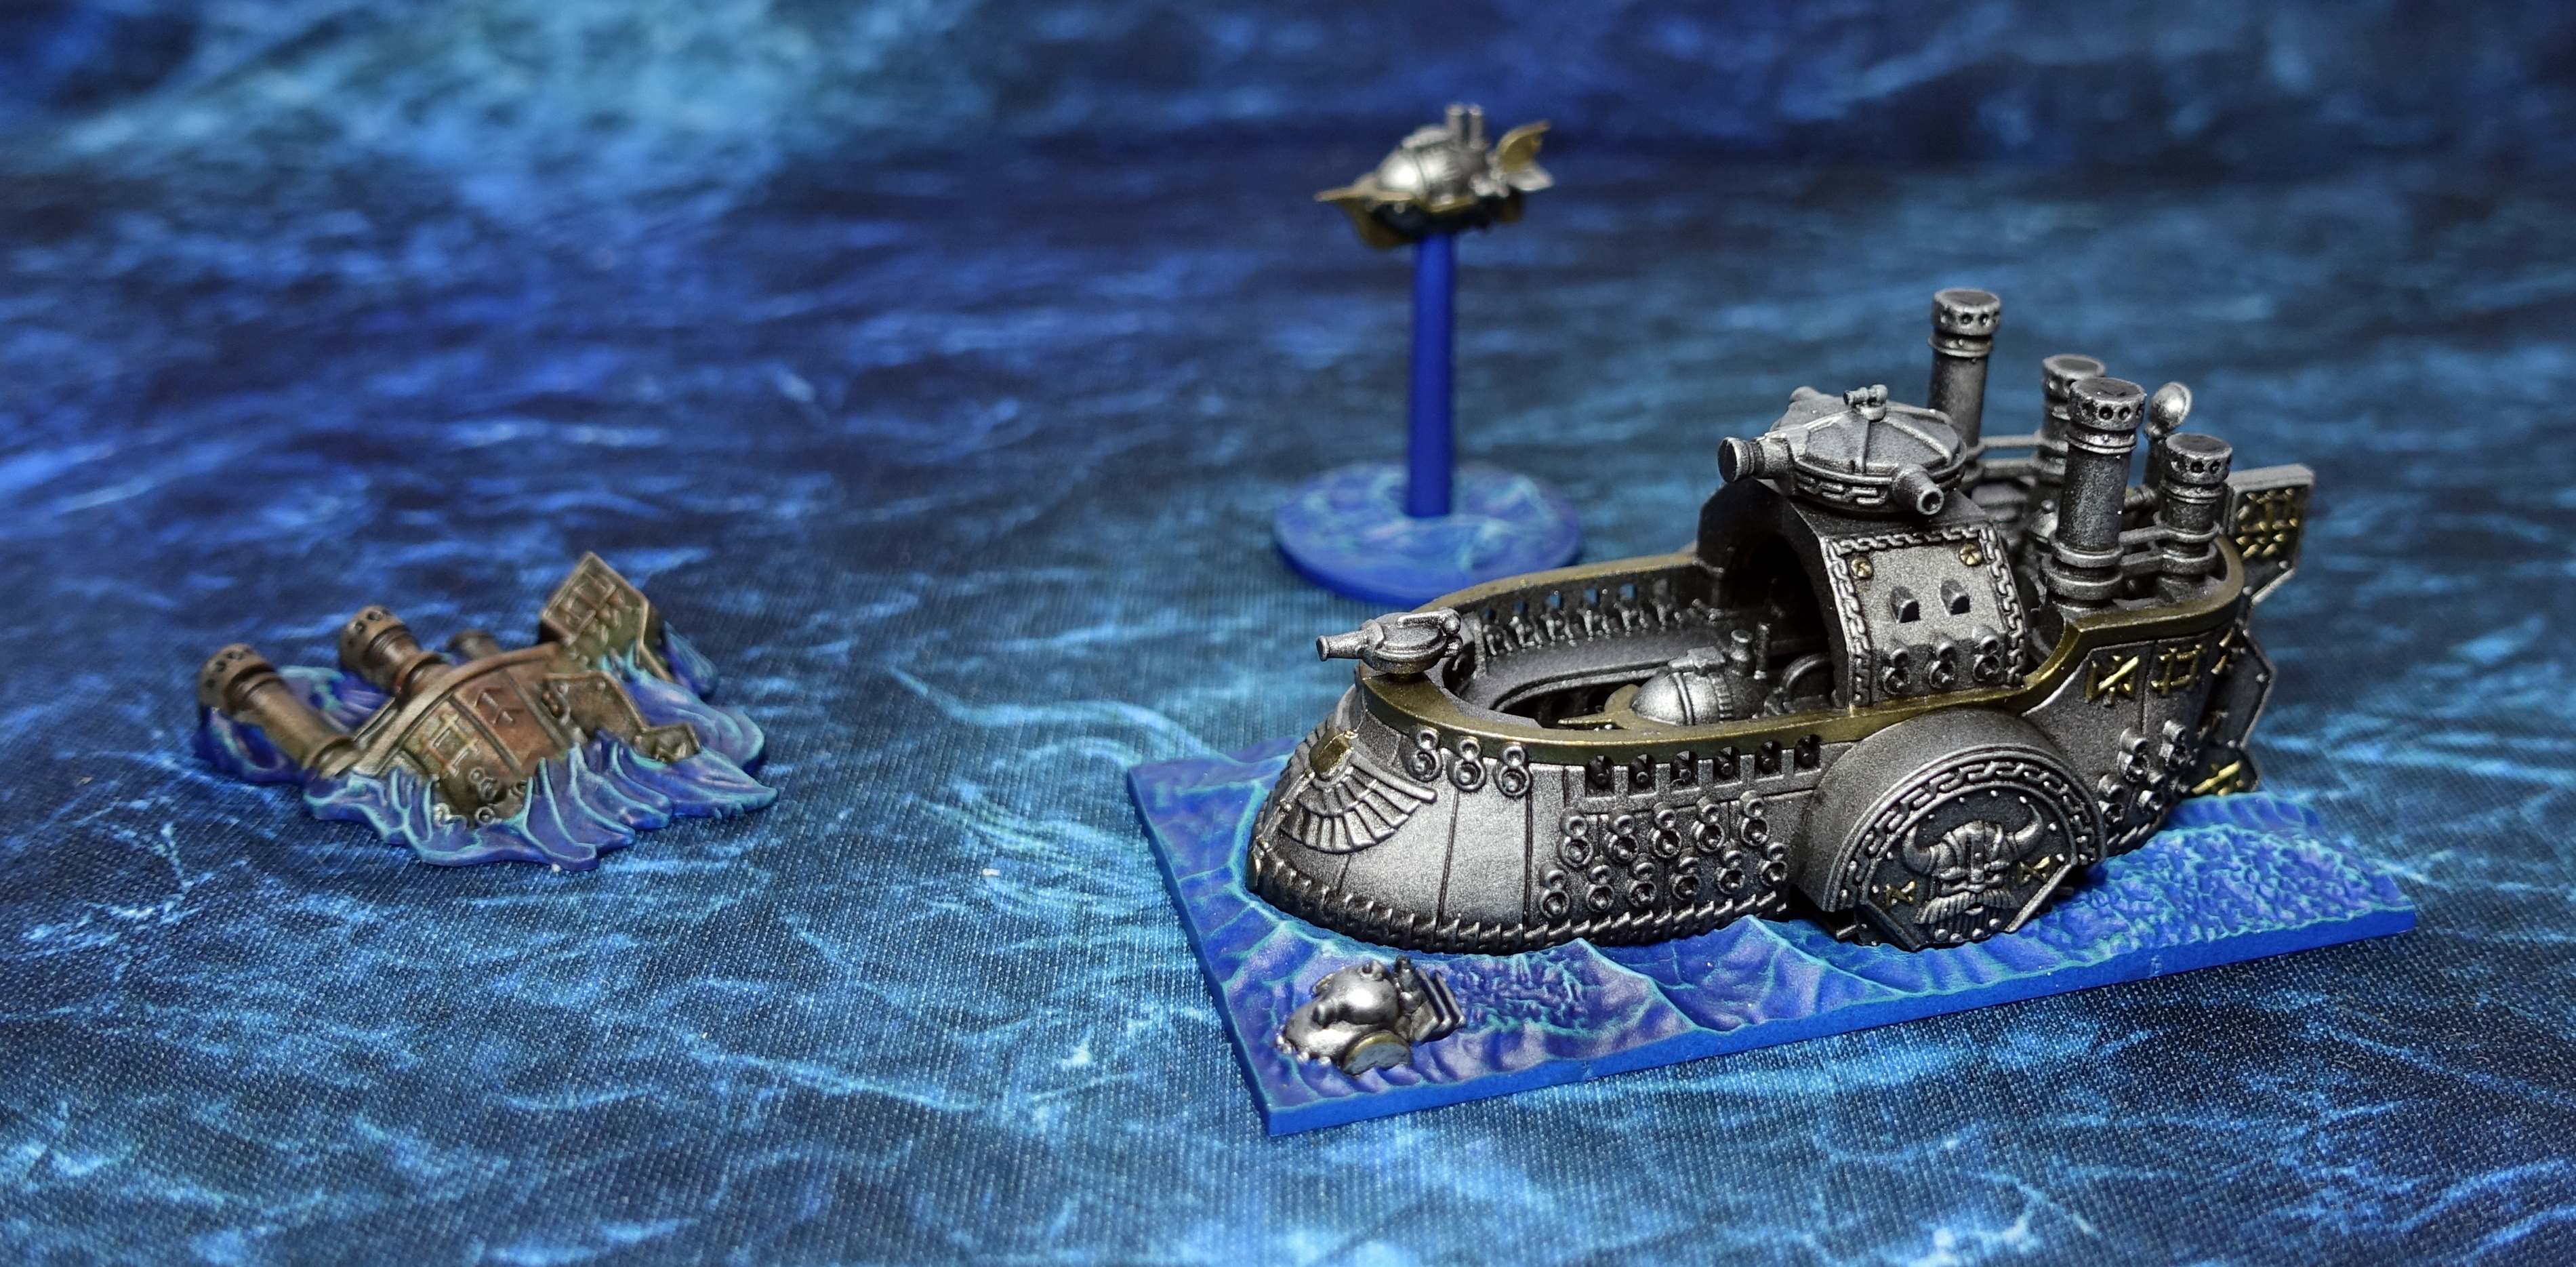
Grimnir’s Thunder
This dwarven battleship was base coated Plate Mail Metal (The Army Painter) earlier. Several details were painted in Model Color Bronze. I didn’t paint to many details in bronze to maintain the look of a steel ship. Then black paint and Game Color Black Wash was used for the recesses. All the cannons were painted black.
A dry brush with Plate Mail Metal followed and the occasional edge highlight with the same paint where necessary. The runes in bronze received a second coat of bronze paint. The dry brushing had made much of the bronze paint disappear.
The balloon coming with the ship, was painted following the same steps. So was the little steamship on the base of Grimnir’s Thunder.
This ship was a fun and quick to paint.
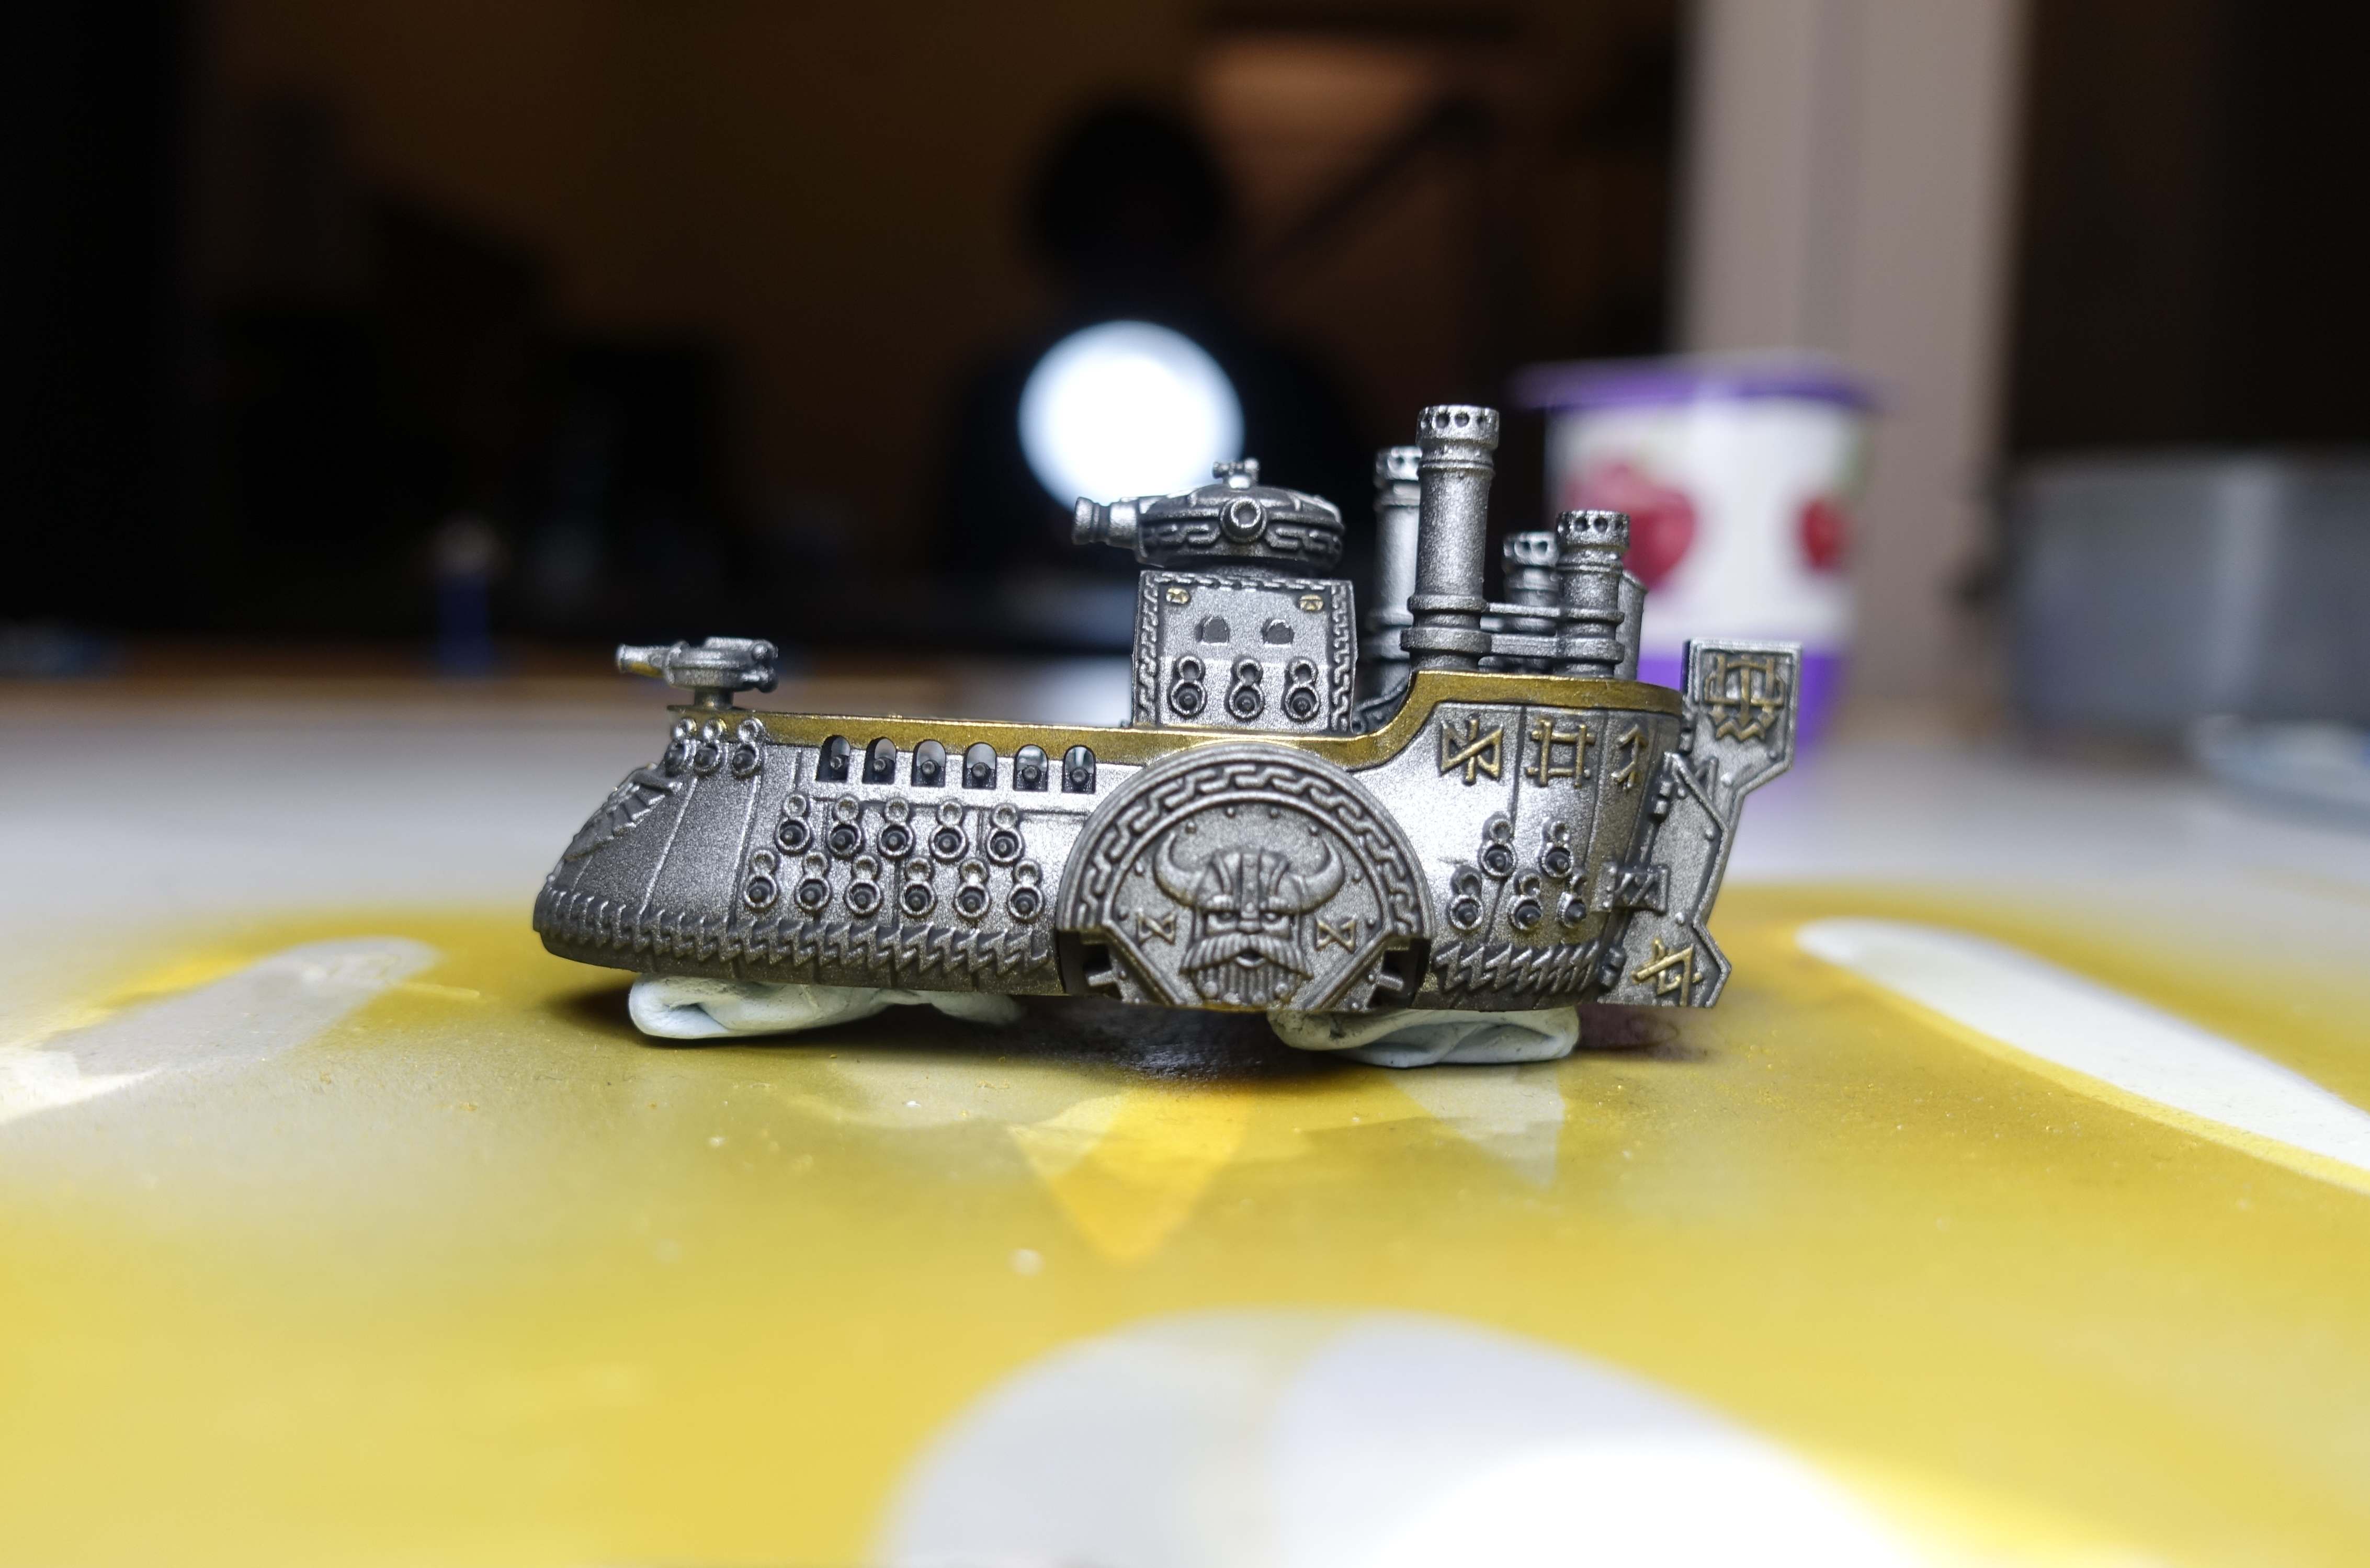
The sunken battleship
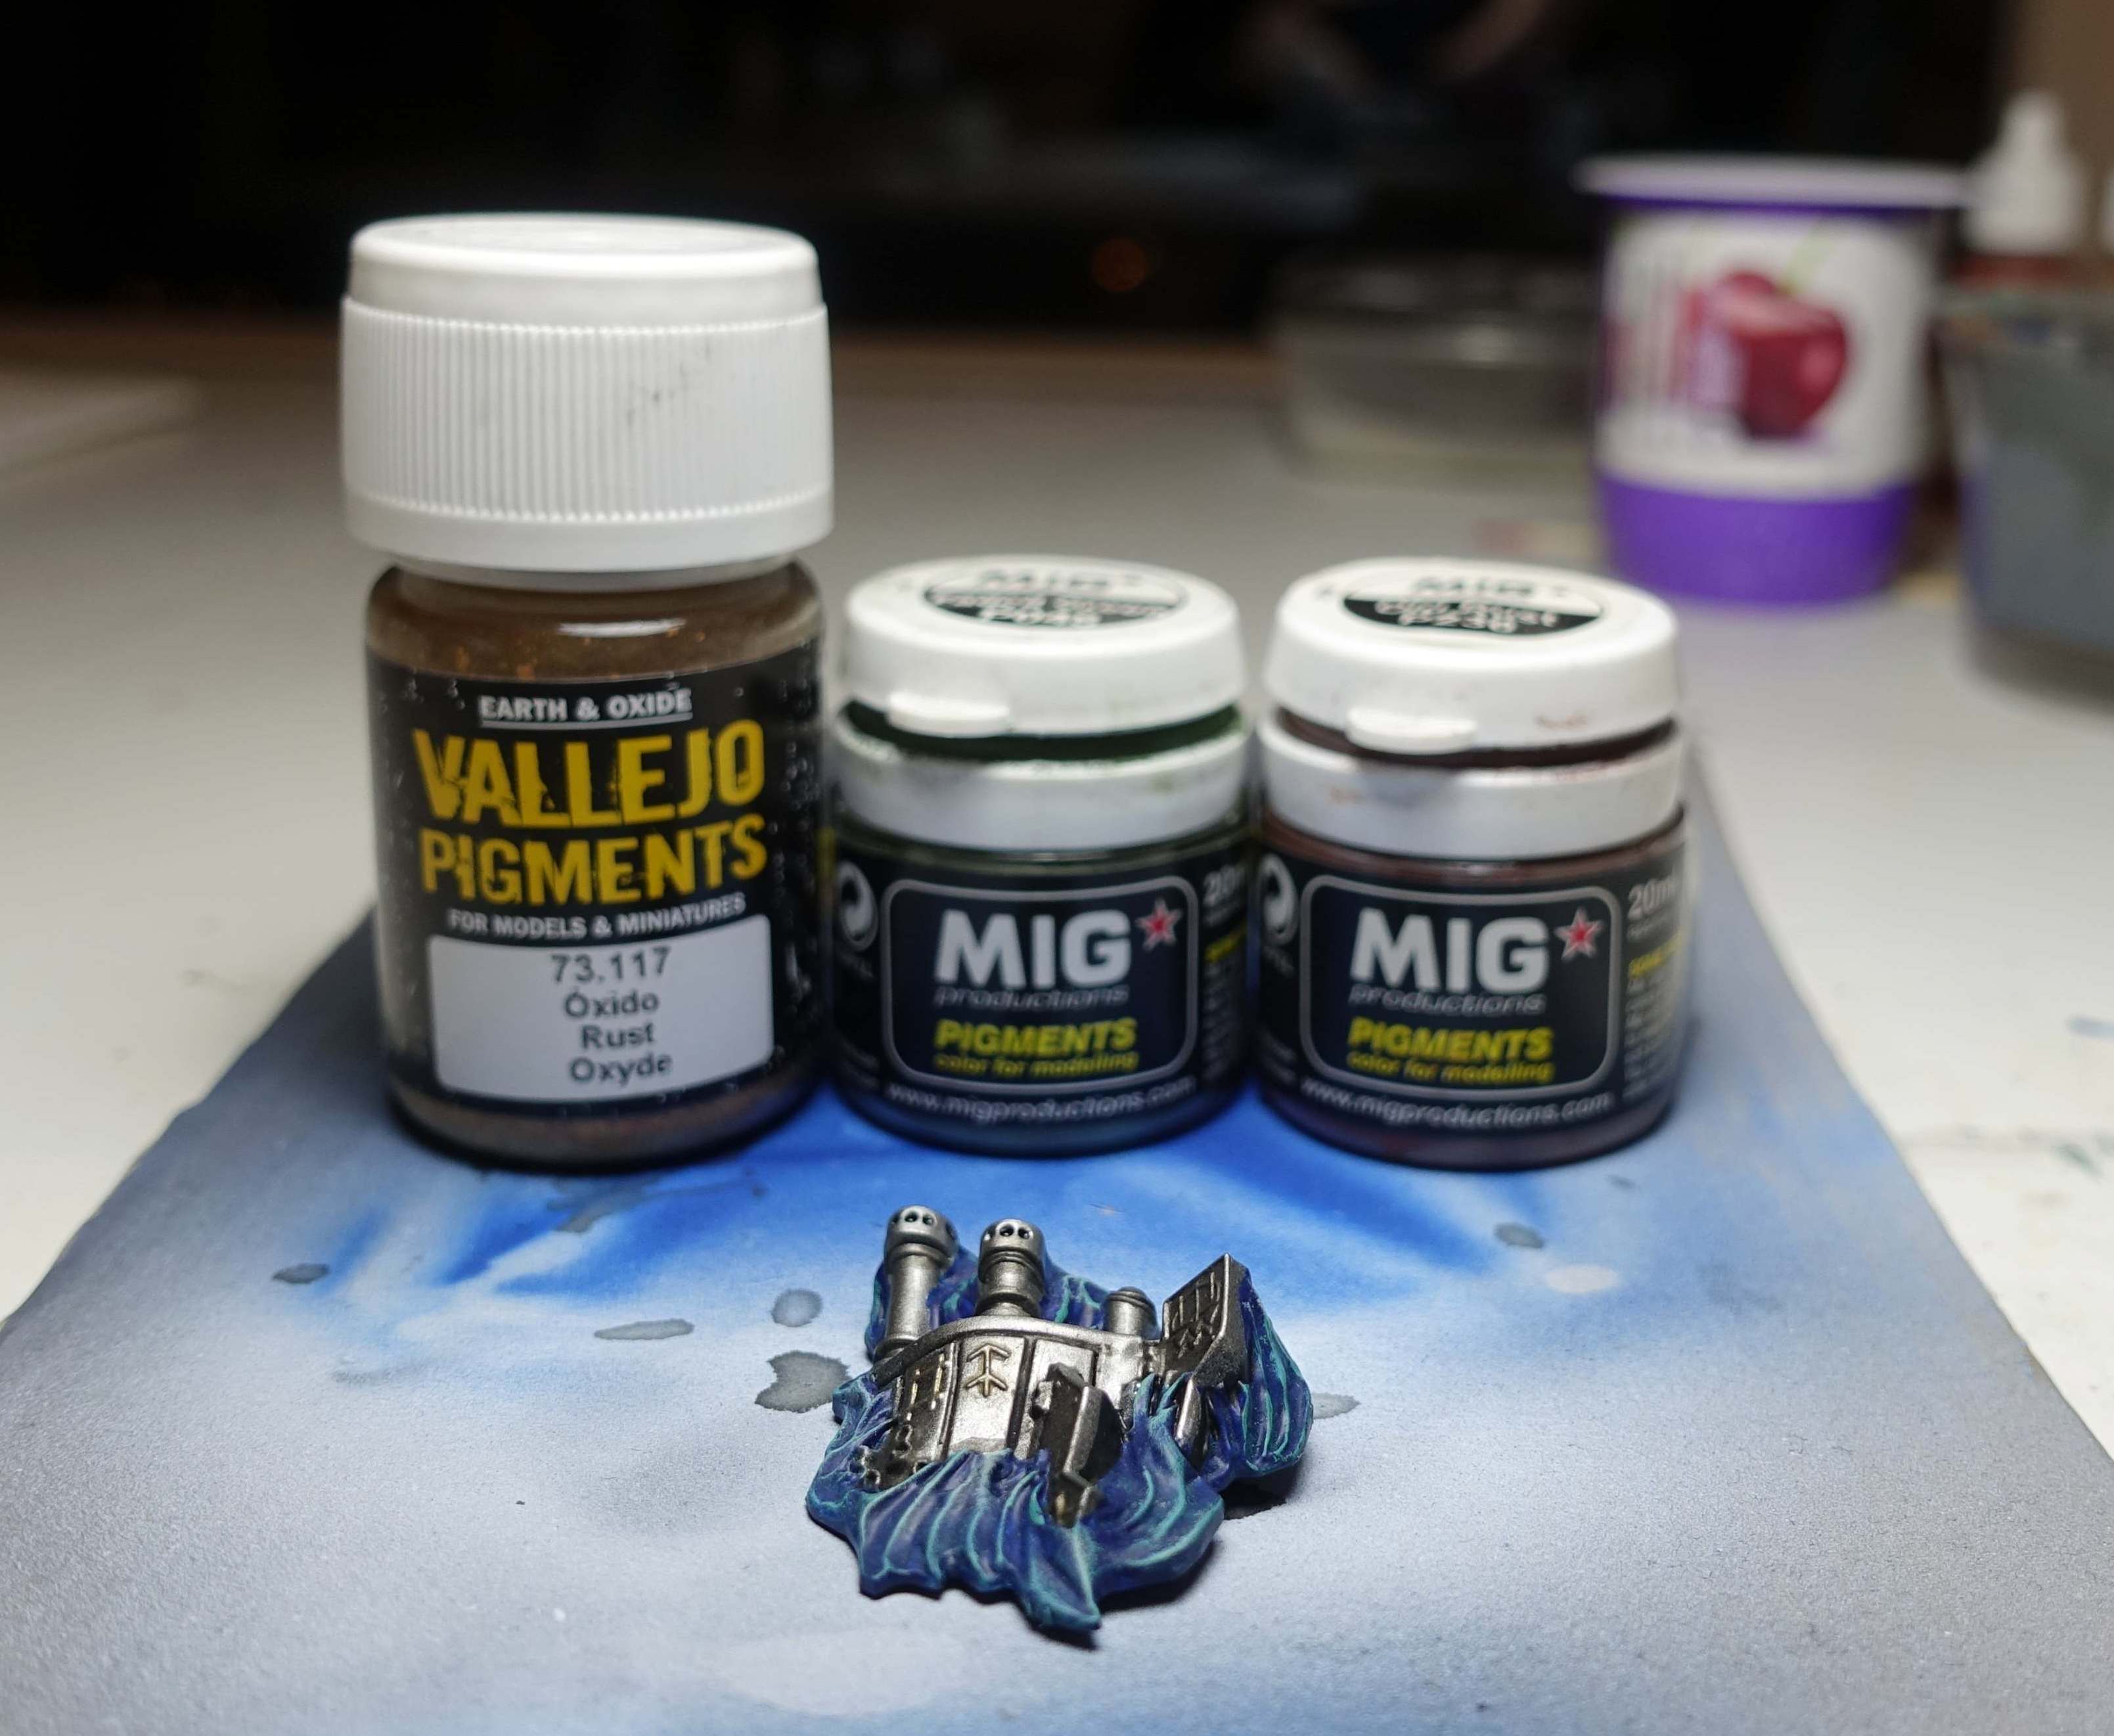
The last terrain piece to be painted is a sunken dwarf ship. It looks just like Grimnir’s Thunder. I painted it following the same steps as above. Then I added a few steps to wheater the ship, making it look as if it sank long ago. First I used Vallejo’s Model Wash Brown. This didn’t have to much effect. I switched to pigment powders.
 The clean wreck without pigment powders
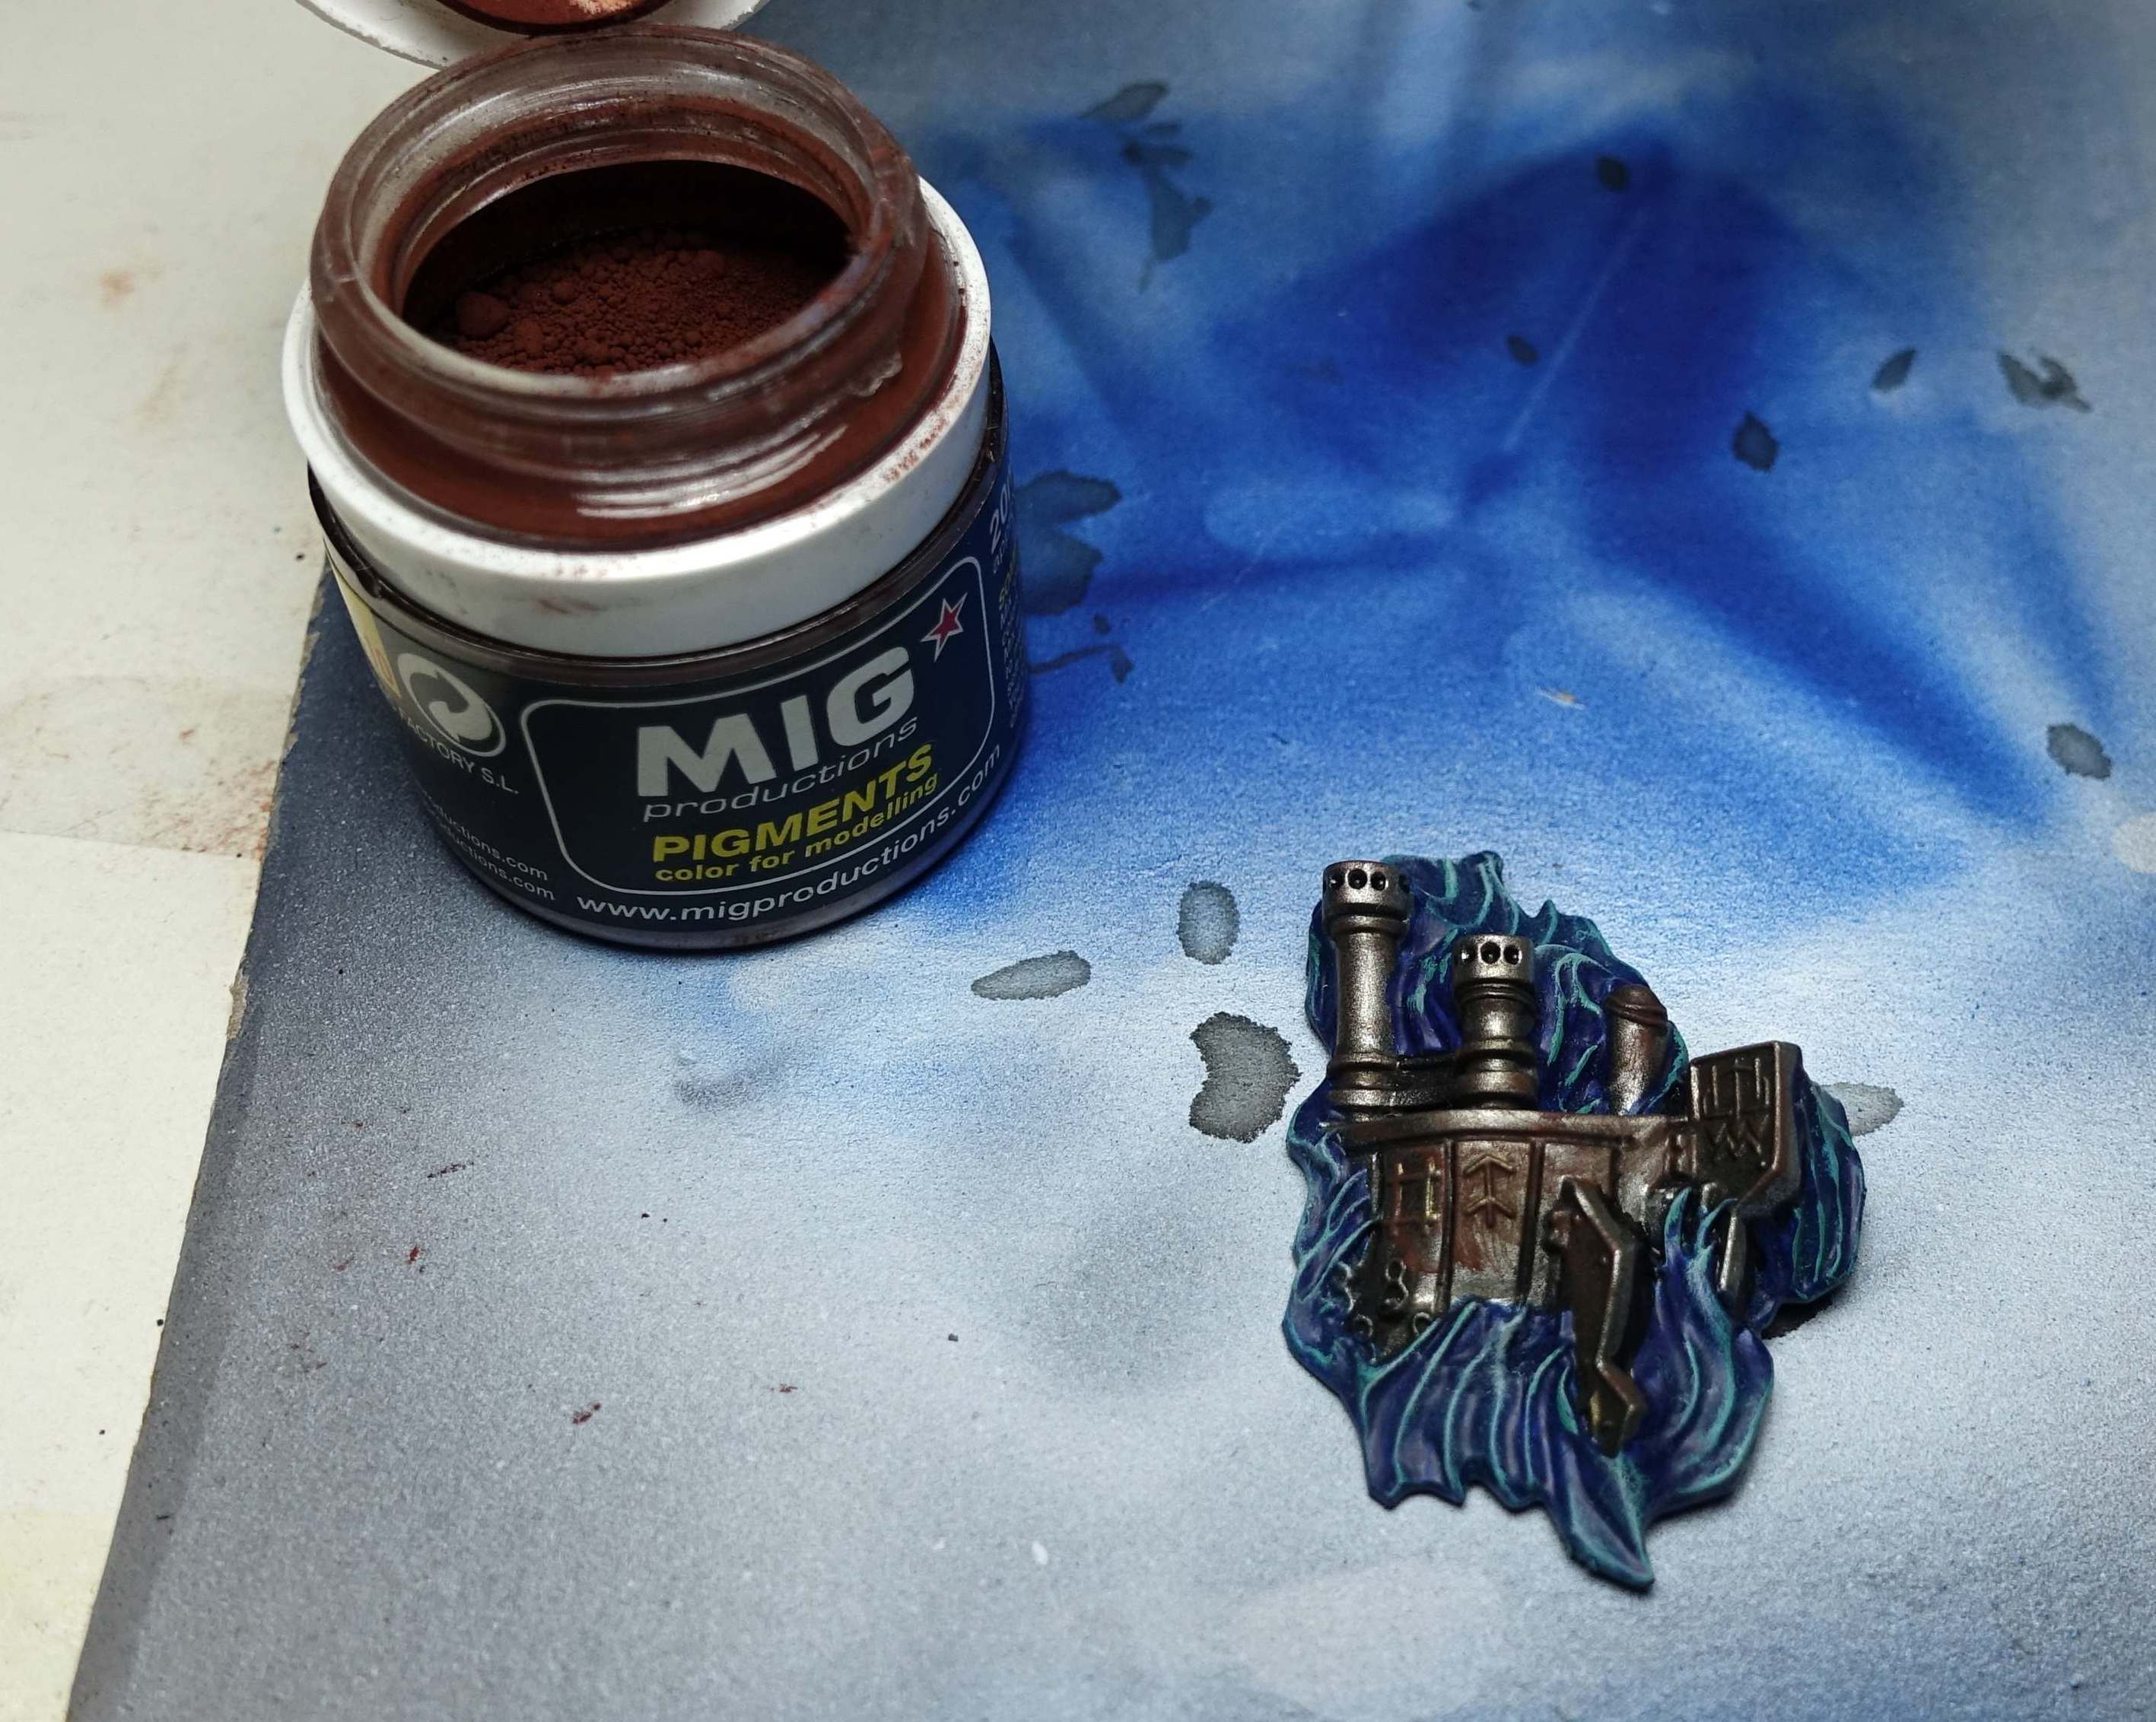 After using Mig Old Rust.
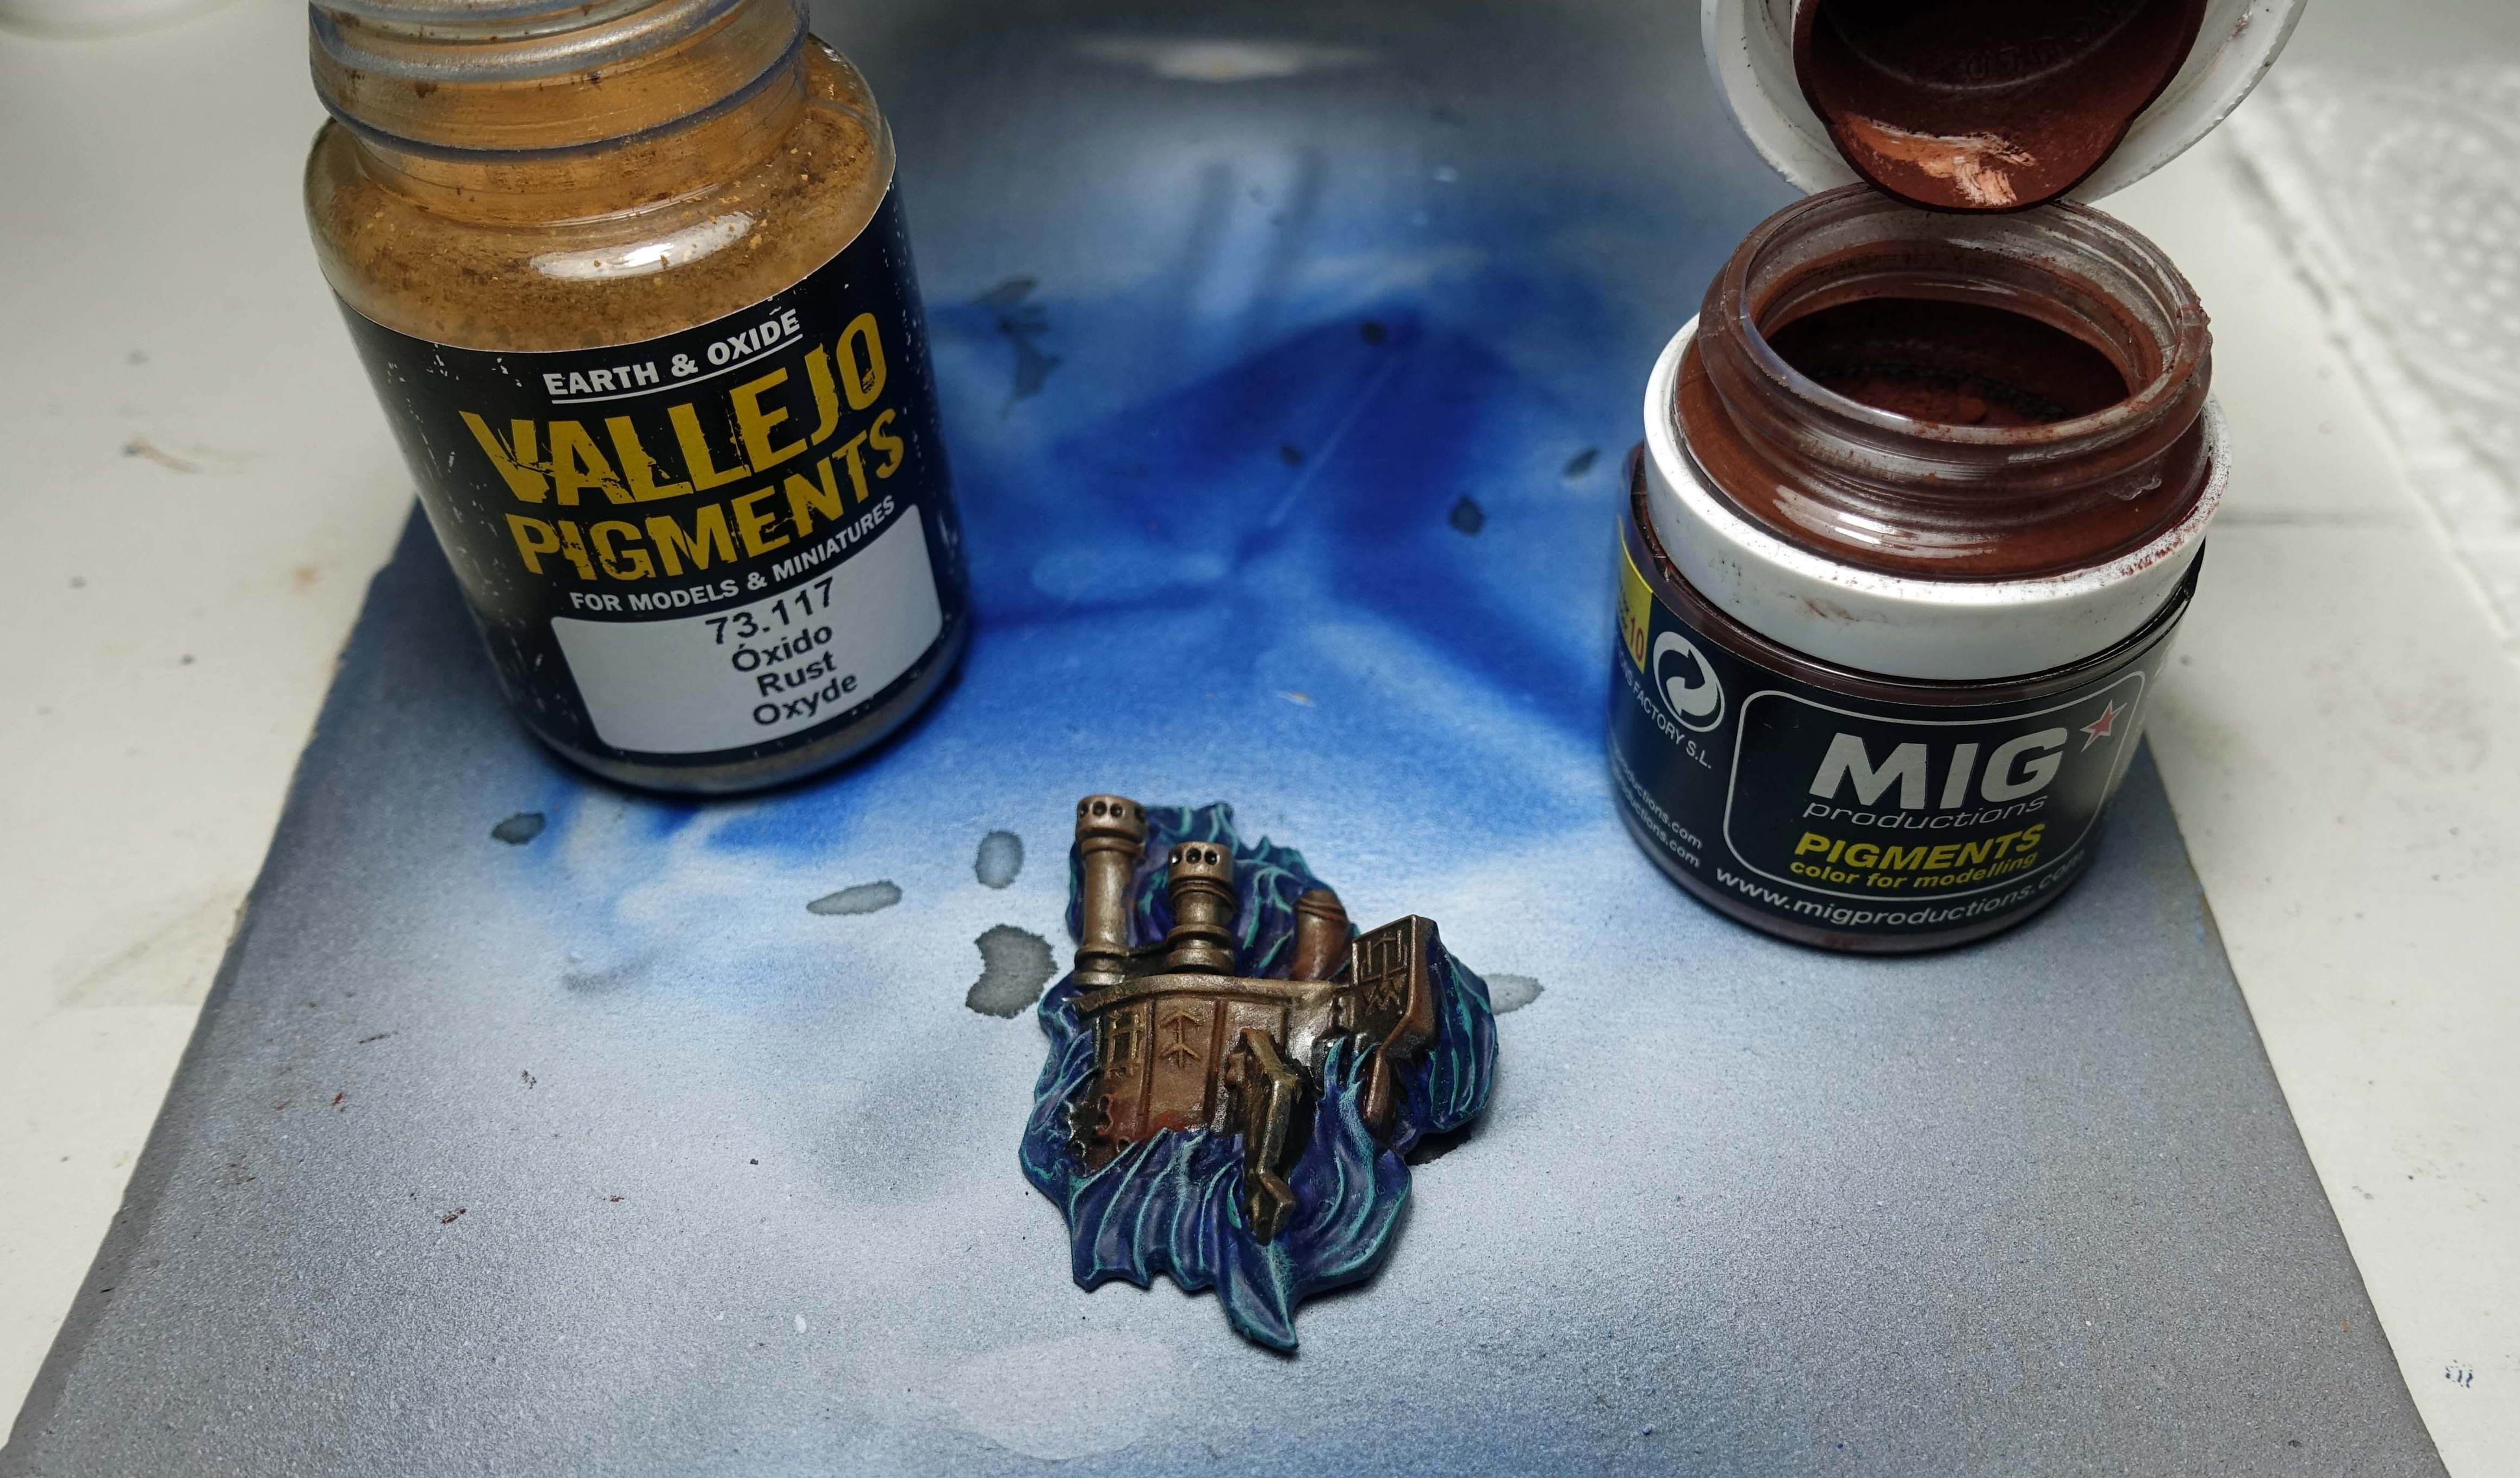 After using Vallejo Pigments Rust Oxyde and a bit more Mig Old Rust.
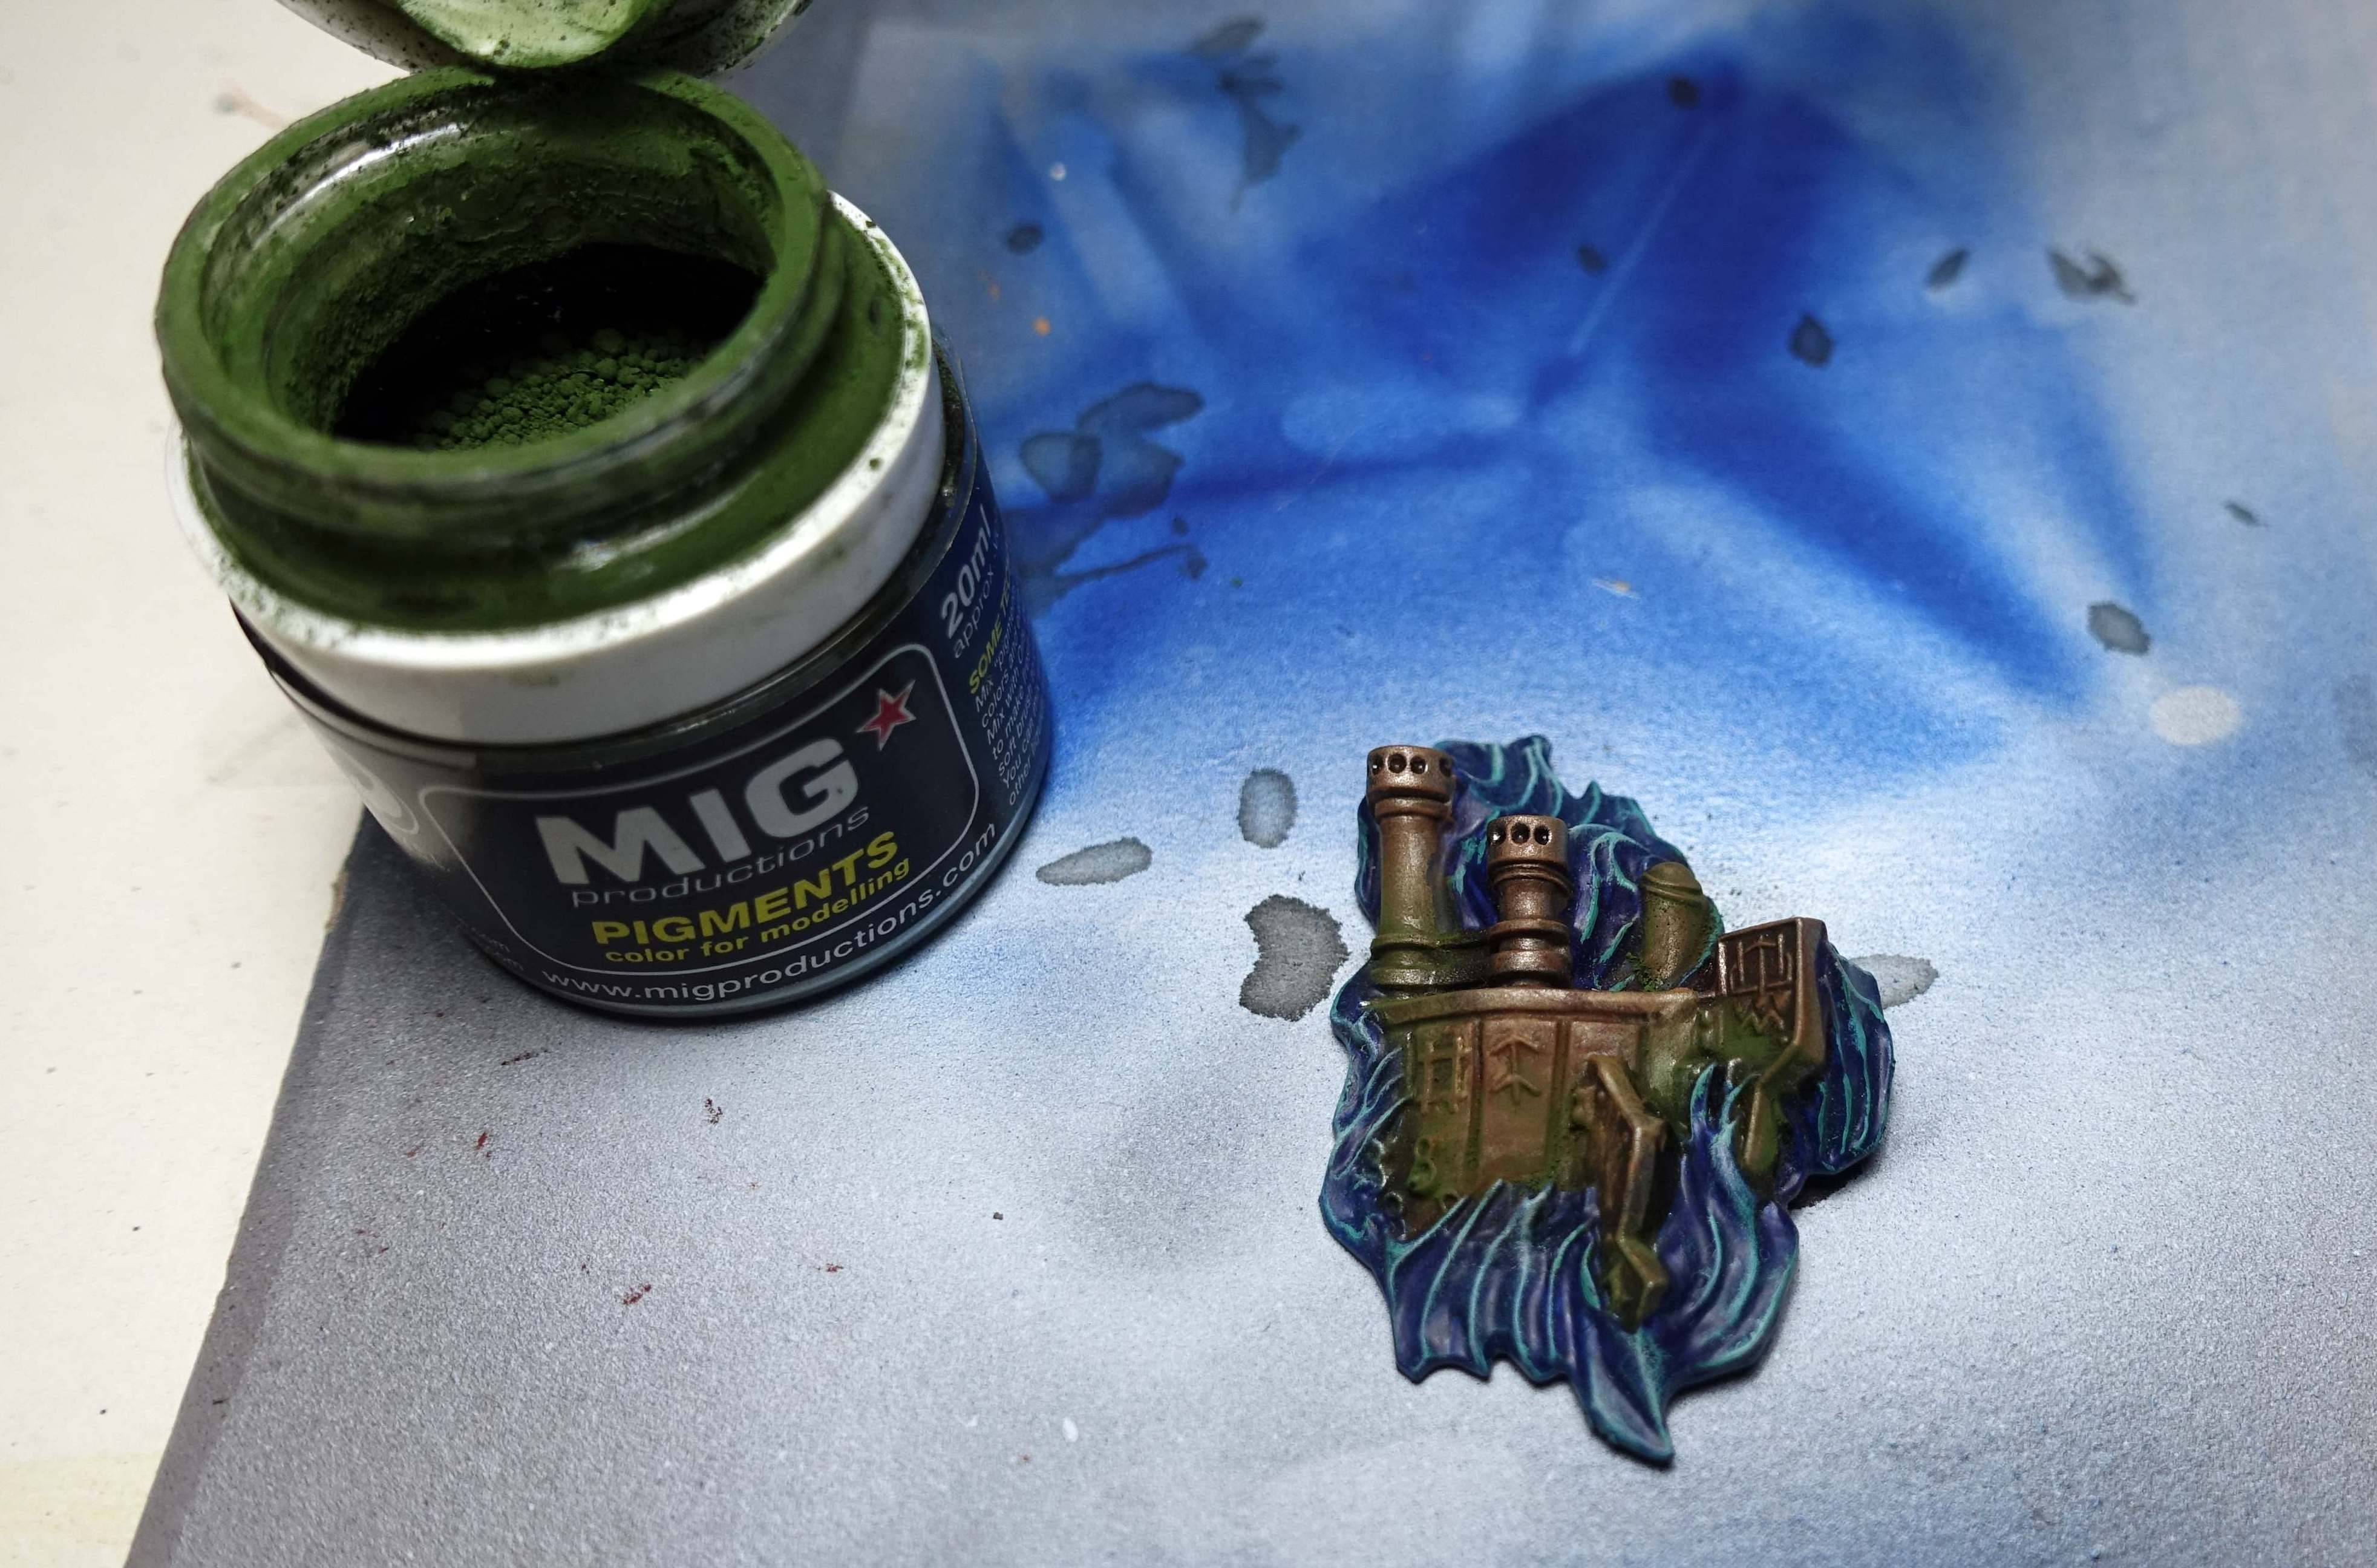 To create the impression of algae having formed on the wreck over the years: Mig Faded Green
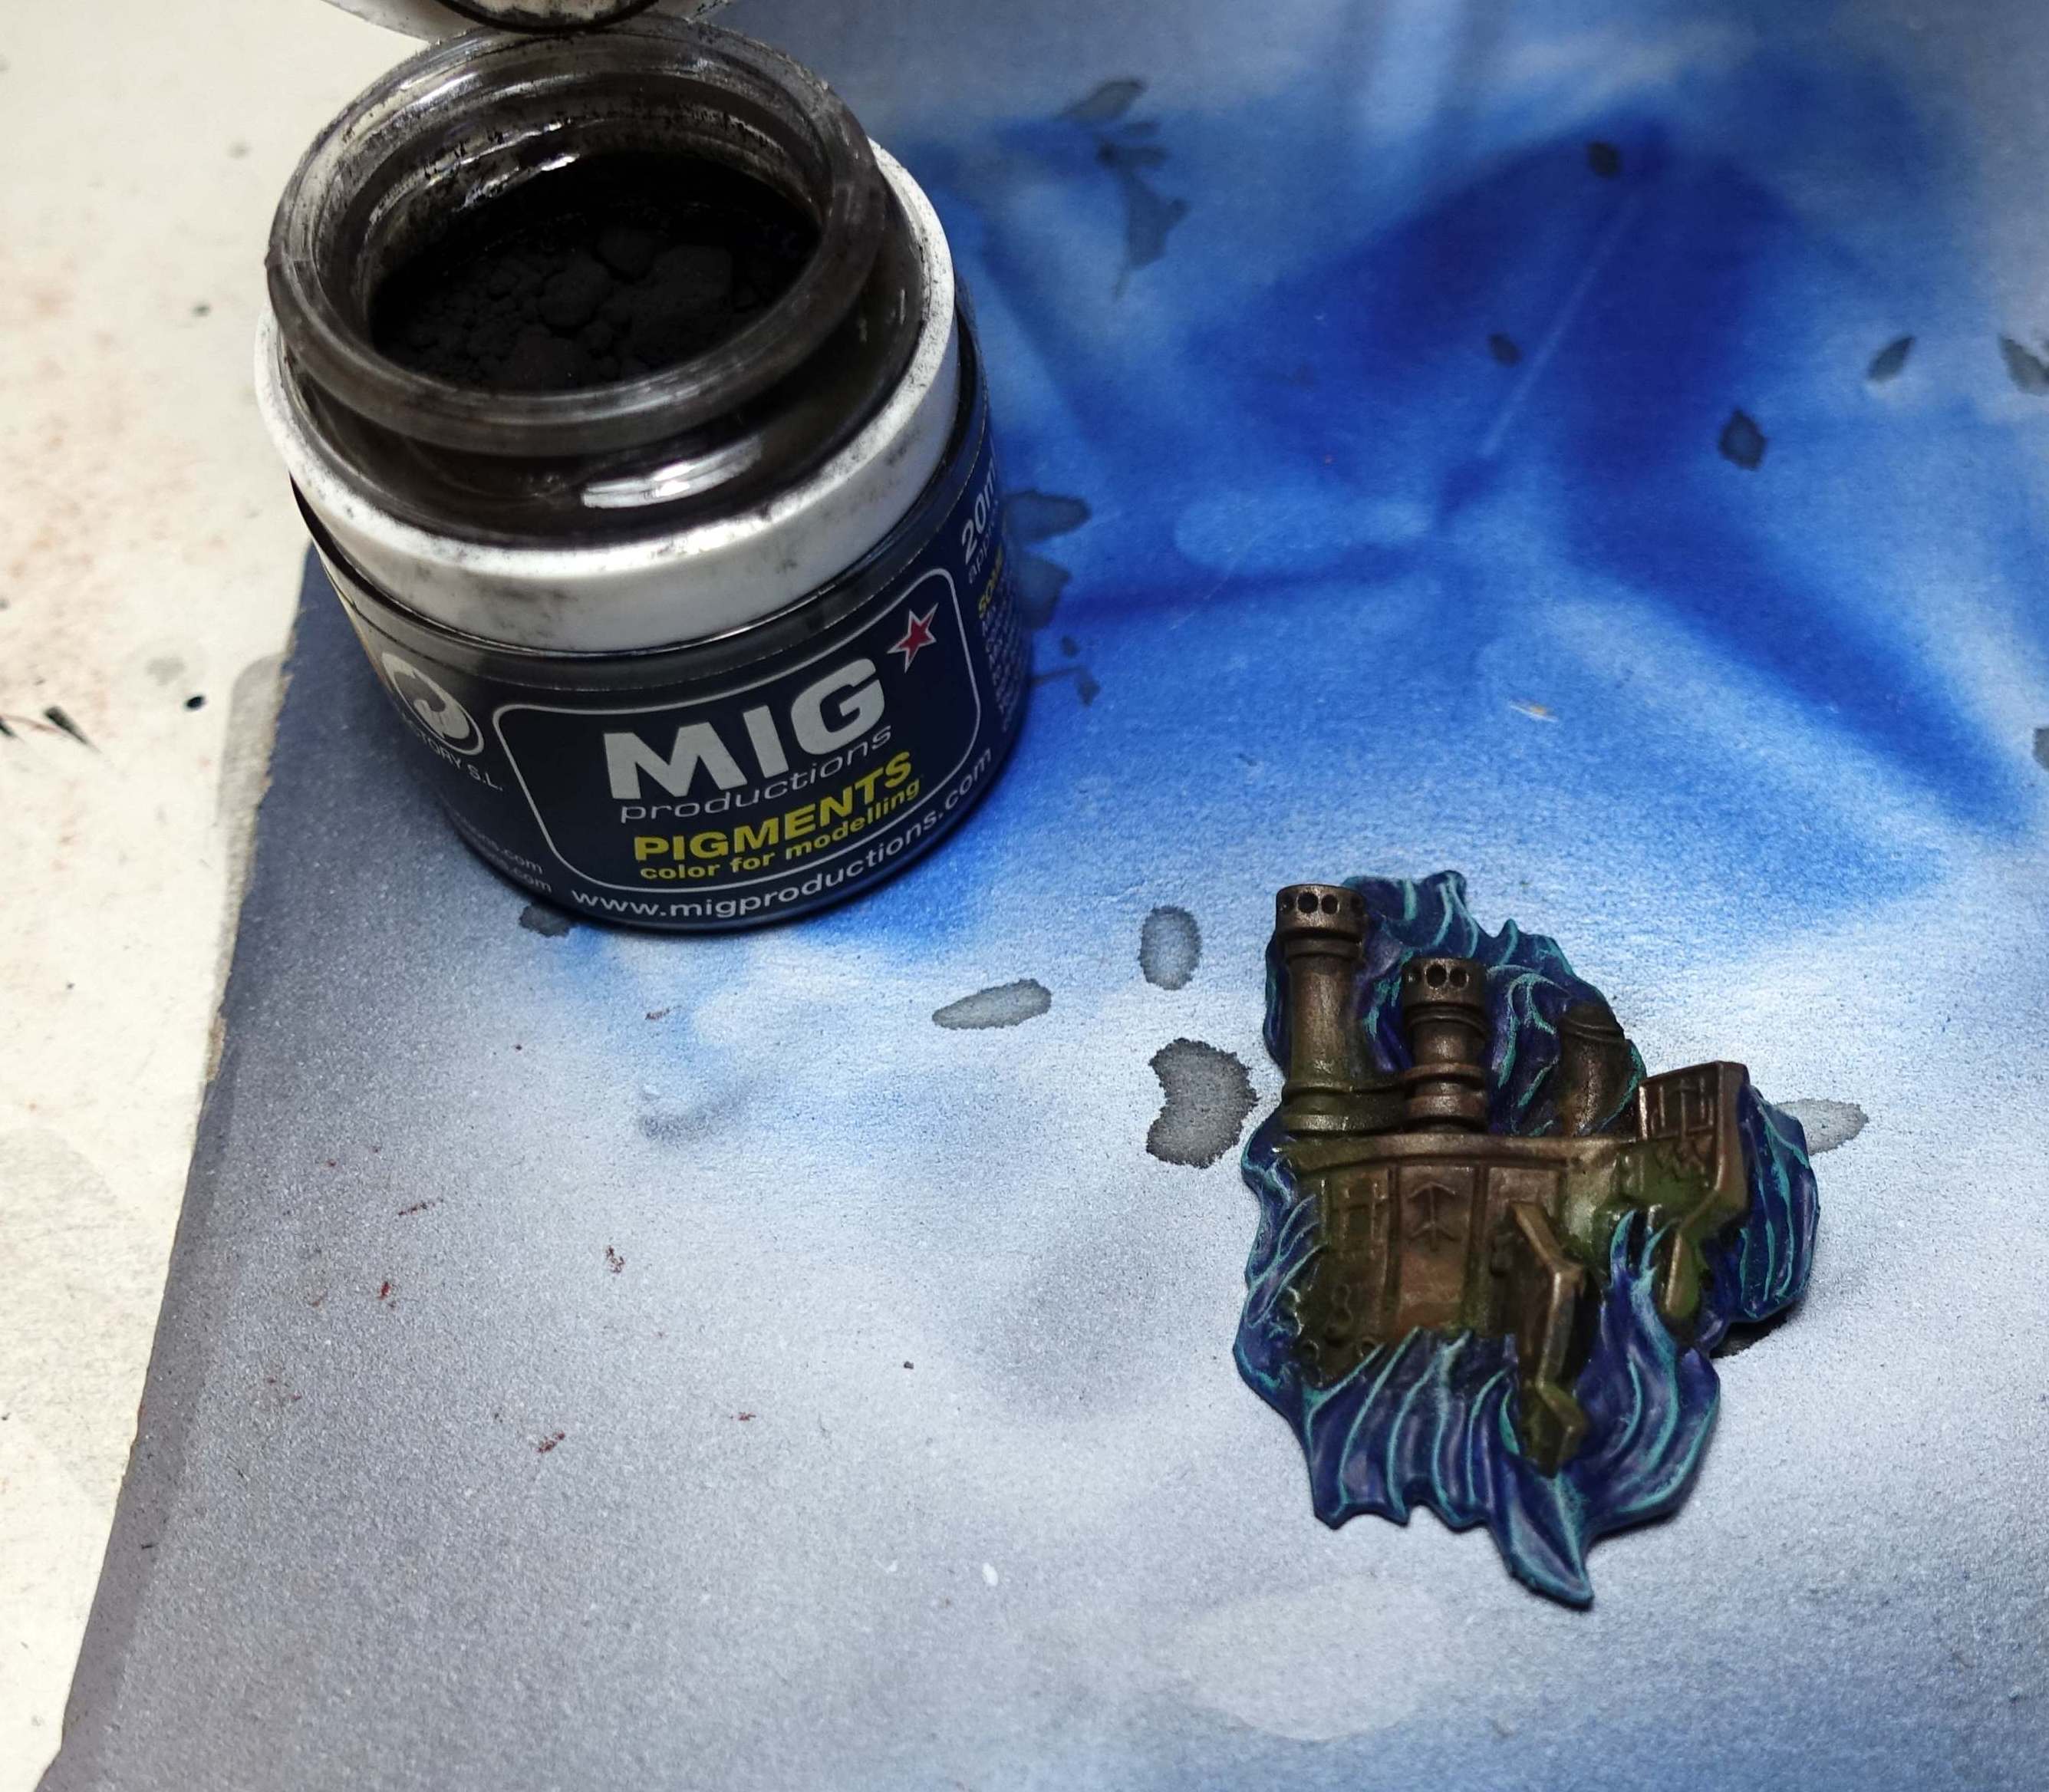 Last pigment powder: Mig Black Smoke. I used this a bit everywhere, but mostly around the top of the chimneys.
The end result looks very different from the clean and shiny Grimnir’s Thunder. I don’t think the same result can be achieved with paint and certainly not in such a short time. Wheatering with pigment powder was done in a matter of minutes and is very easy to do. The trick to good results with pigment powders, is to use several colours on top of each other.
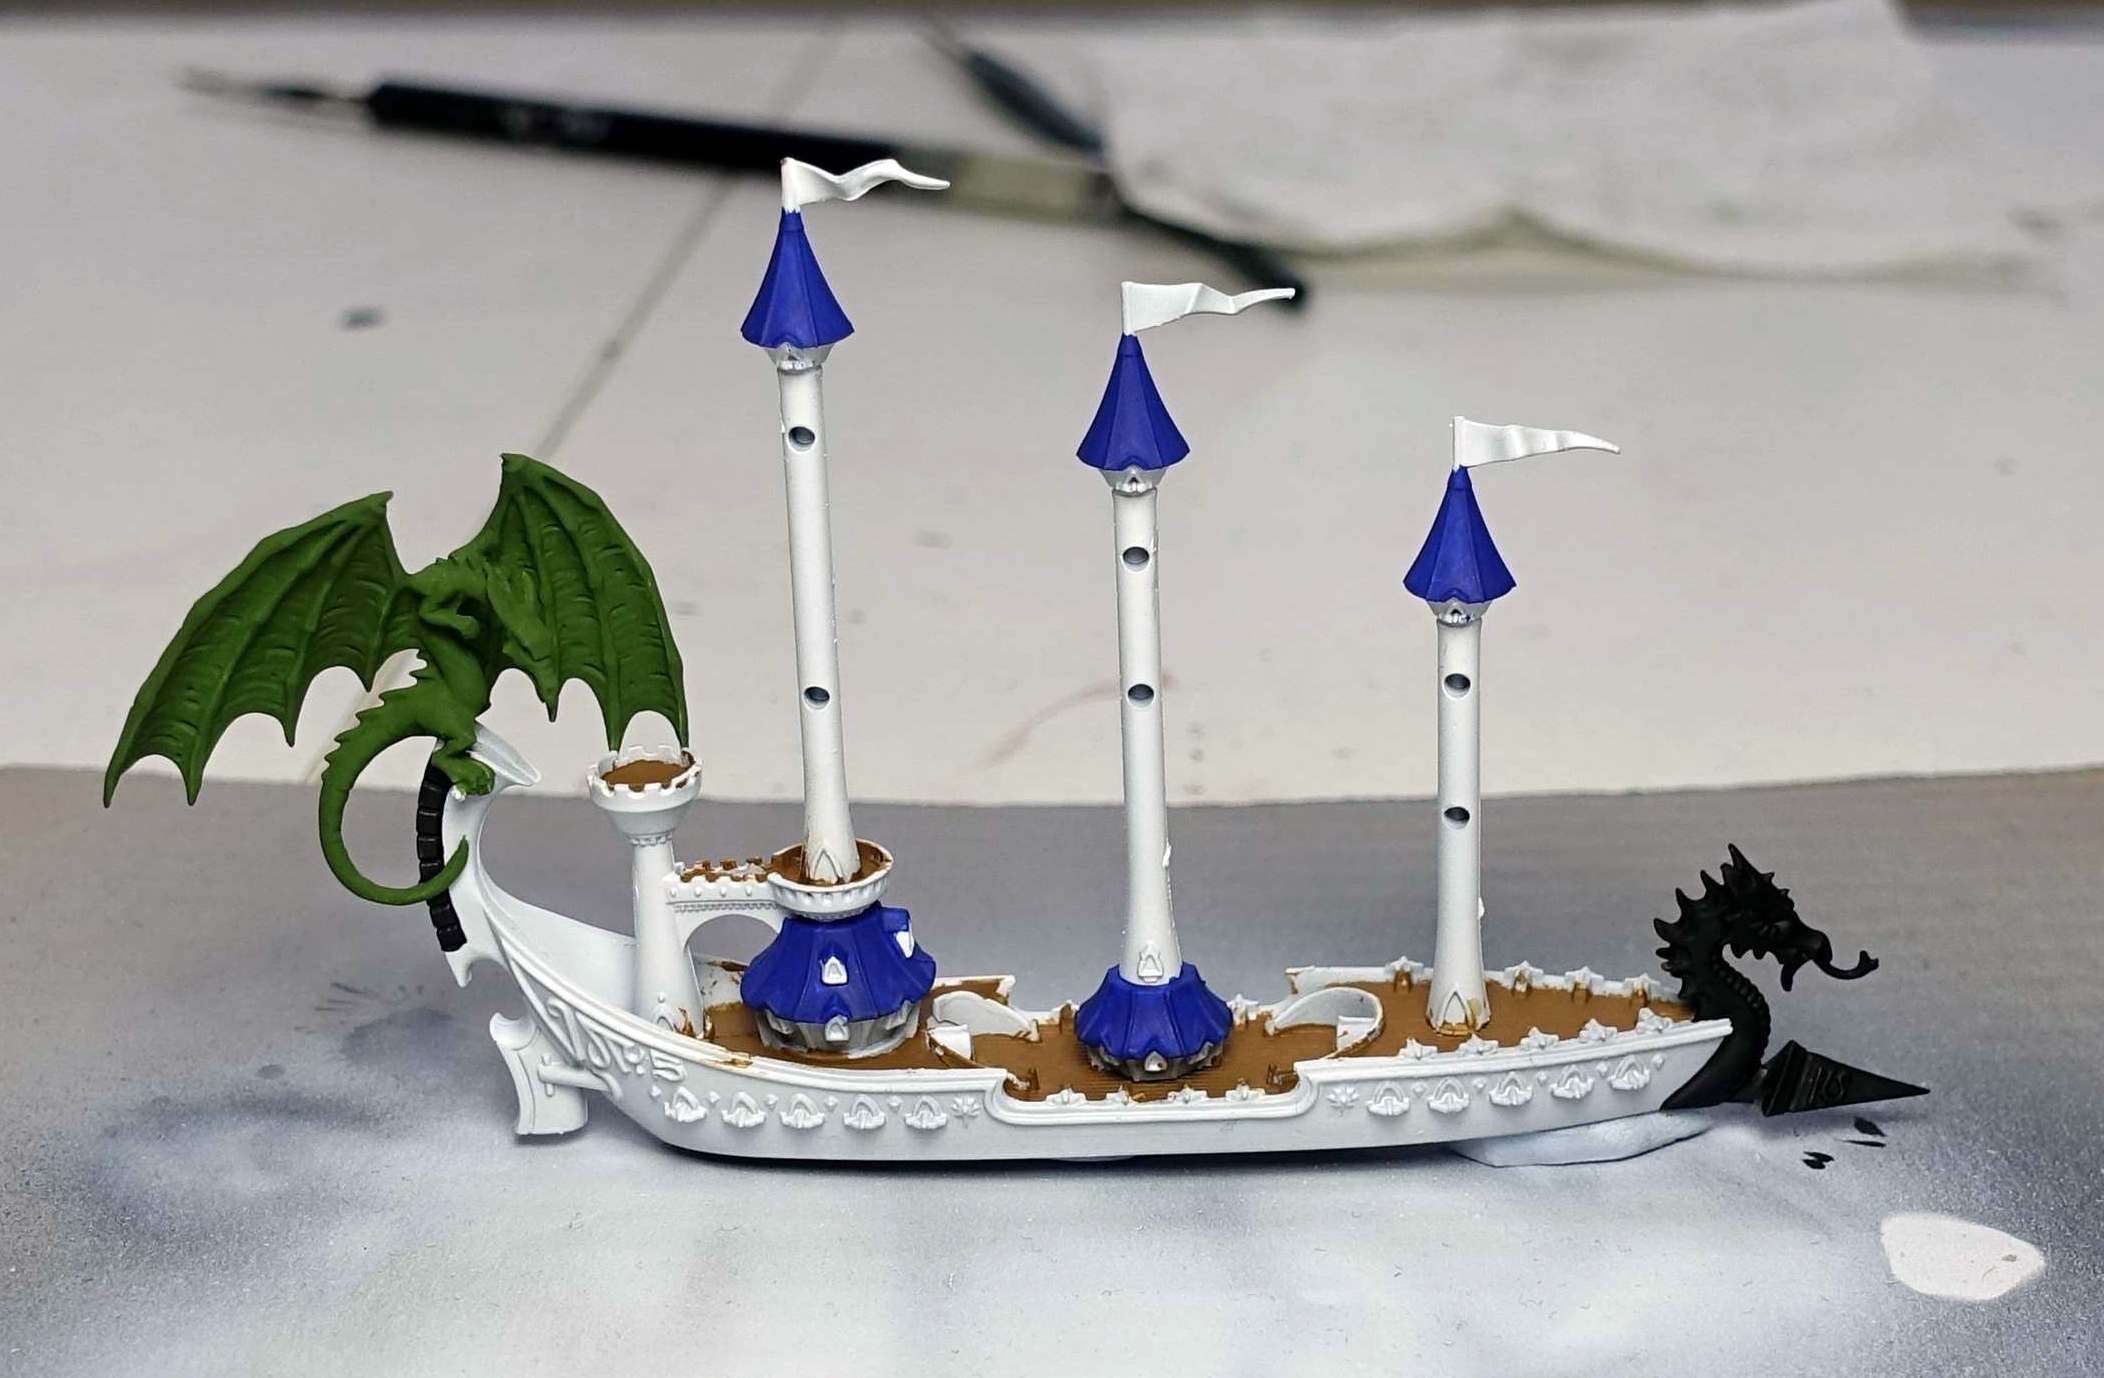
Seadrake
For the Seadrake white and blue will be the dominant colours. Besides looking coherent with the Heldenhammer, they are two typical High Elf colours. I’ve used these two colours to paint my High Elf army for Warhammer Fantasy as well.
Base coat
For base coating I’ve used these paints:
- Panzer Aces New Wood: the deck. A slightly darker brown than on the other ships to contrast more with the white hull.
- Black: figurehead. I will use metallic paints on it later.
- Model Color Blue: roofs.
- Model Color Medium Olive: dragons!
Washes
- Model Color Wood Grain: watered down to use as a wash for the deck.
- Game Color Wash Blue: the roofs.
- Game Color Wash Green: the dragons.
The blue en green washes weren’t dark enough, so I mixed them with black wash from Game Color.
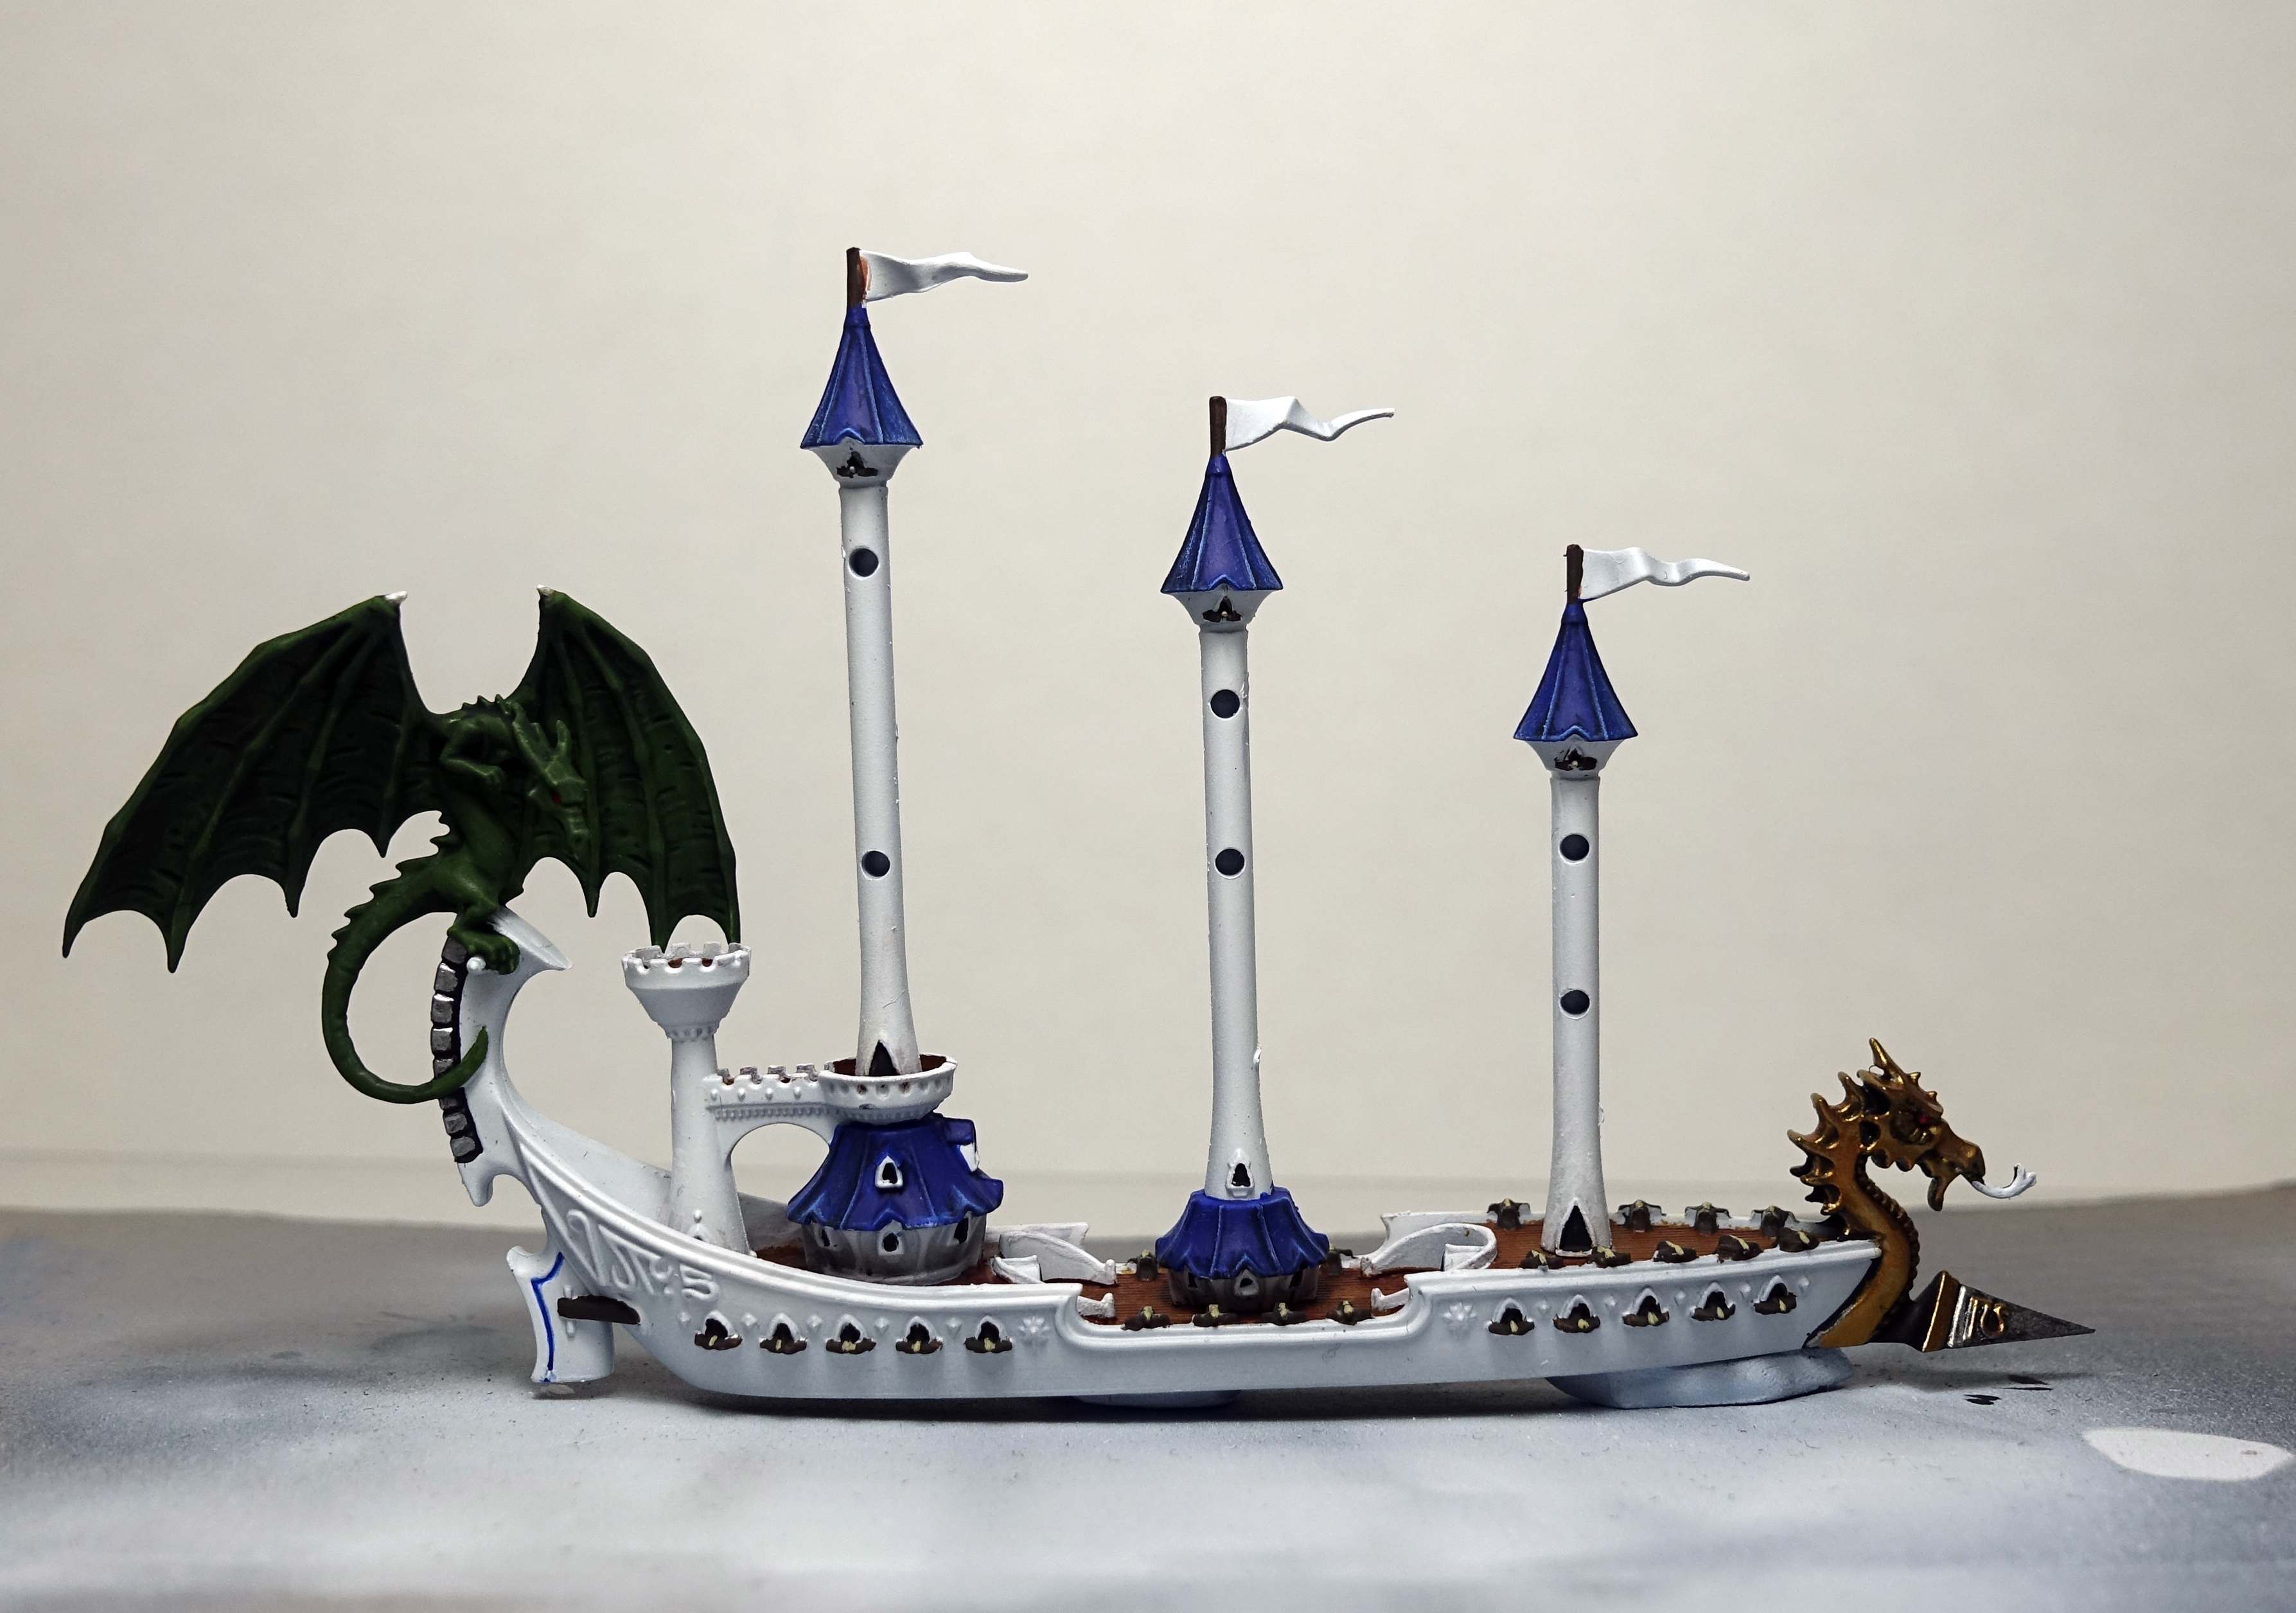
Figurehead
After the black undercoat:
- The Army Painter Plate Mail Metal
- The Army Painter Greedy Gold. This took several layers. I’m used to airbrushing metallics and didn’t expect it to be this difficult to paint gold over plate mail metal.
- Highlighting the gold: first Model Air Bright Brass. Dry brushing followed by some edge highlighting. I wasn’t happy with the result and highlighted again with Model Color Gold.
- Model Color Carmine Red: tongue and eyes. I painted the eyes and tongue white first, to make the red “pop” more. The tongue received an extra layer of Model Air Italian Red for a very red red.
- The ram received a highlight in Model Air Chrome.
Dragons!
A historical moment in my life as a wargamer: for the first time since I started painting miniatures nineteen years ago, I’ve painted a dragon! I thought they’d be taller. ?
High elf dragons are typically painted white and blue. Because there is so much white and blue already on this ship, I choose green. This contrasts a bit with the rest of the ship.
After the wash:
- Dry brush Model Color Medium Olive
- Dry brush Model Color Lime Green
- Eyes: white followed by Model Color Carmine Red
- The talon on top of the wings: Model Color Dark Sand followed by white.
 My first dragon! :-)
Roofs
It turns out I have no light blue in my collection of paints. So I mixed Model Color Blue with white on my wet pallet. Professional painters often do this in tutorials, but it’s not something I’ve often done before. Perhaps something to try out more in the future.
The roofs were dry brushed with this freshly mixed light blue.
Flags and sails
I kept the flags and sails white. The white flags contrast nicely with the blue roofs.
For the sails: I’m afraid it will take me a lot of time to achieve a mediocre result if I try to paint them. So I kept them white. I did airbrush a extra coat of white paint on the sails to create a more clean, more white look. And give the sails of the other ships I haven’t finished yet, an extra coat of white paint as well.
The end of the spars, sticking out from behind the sails, were painted Panzer Aces New Wood, just like the deck.
Bolt throwers
Bolt throwers are an iconic weapon of the High Elves. After painting them in Model Color Chocolate Brown, they didn’t look right. I’ve tried to gently dry brush them with Model Color Dark Sand. That didn’t resolve it and I can’t dry brush the bolt throwers sticking out of the side of the hull and the masts. (Look at the photo! There are bolt throwers sticking out of the top of the mast, just below the blue roofs.) As a finishing touch I’ve painted the bolts laying on top of the bolt throwers in Dark Sand. This looks better.
Dolphins!
I almost forgot there were three dolphins on the base. I’ve painted these in Model Color Light Grey. Then a light wash (1/4 blue wash, 3/4 water).
Varnishing
As usual I’ve sprayed matt varnish with a can from The Army Painter over the ship and the dragon. The ship parts in metallic paint received a coat of gloss varnish. Both dragons a coat of satin varnish. Finally I gave the white hull a coat of gloss varnish as well.
I added water to the varnish because Vallejo recommends this in their tutorials, but the gloss varnish isn’t very glossy any more after watering it down. The parts with gloss varnish received a second coat with pure varnish.
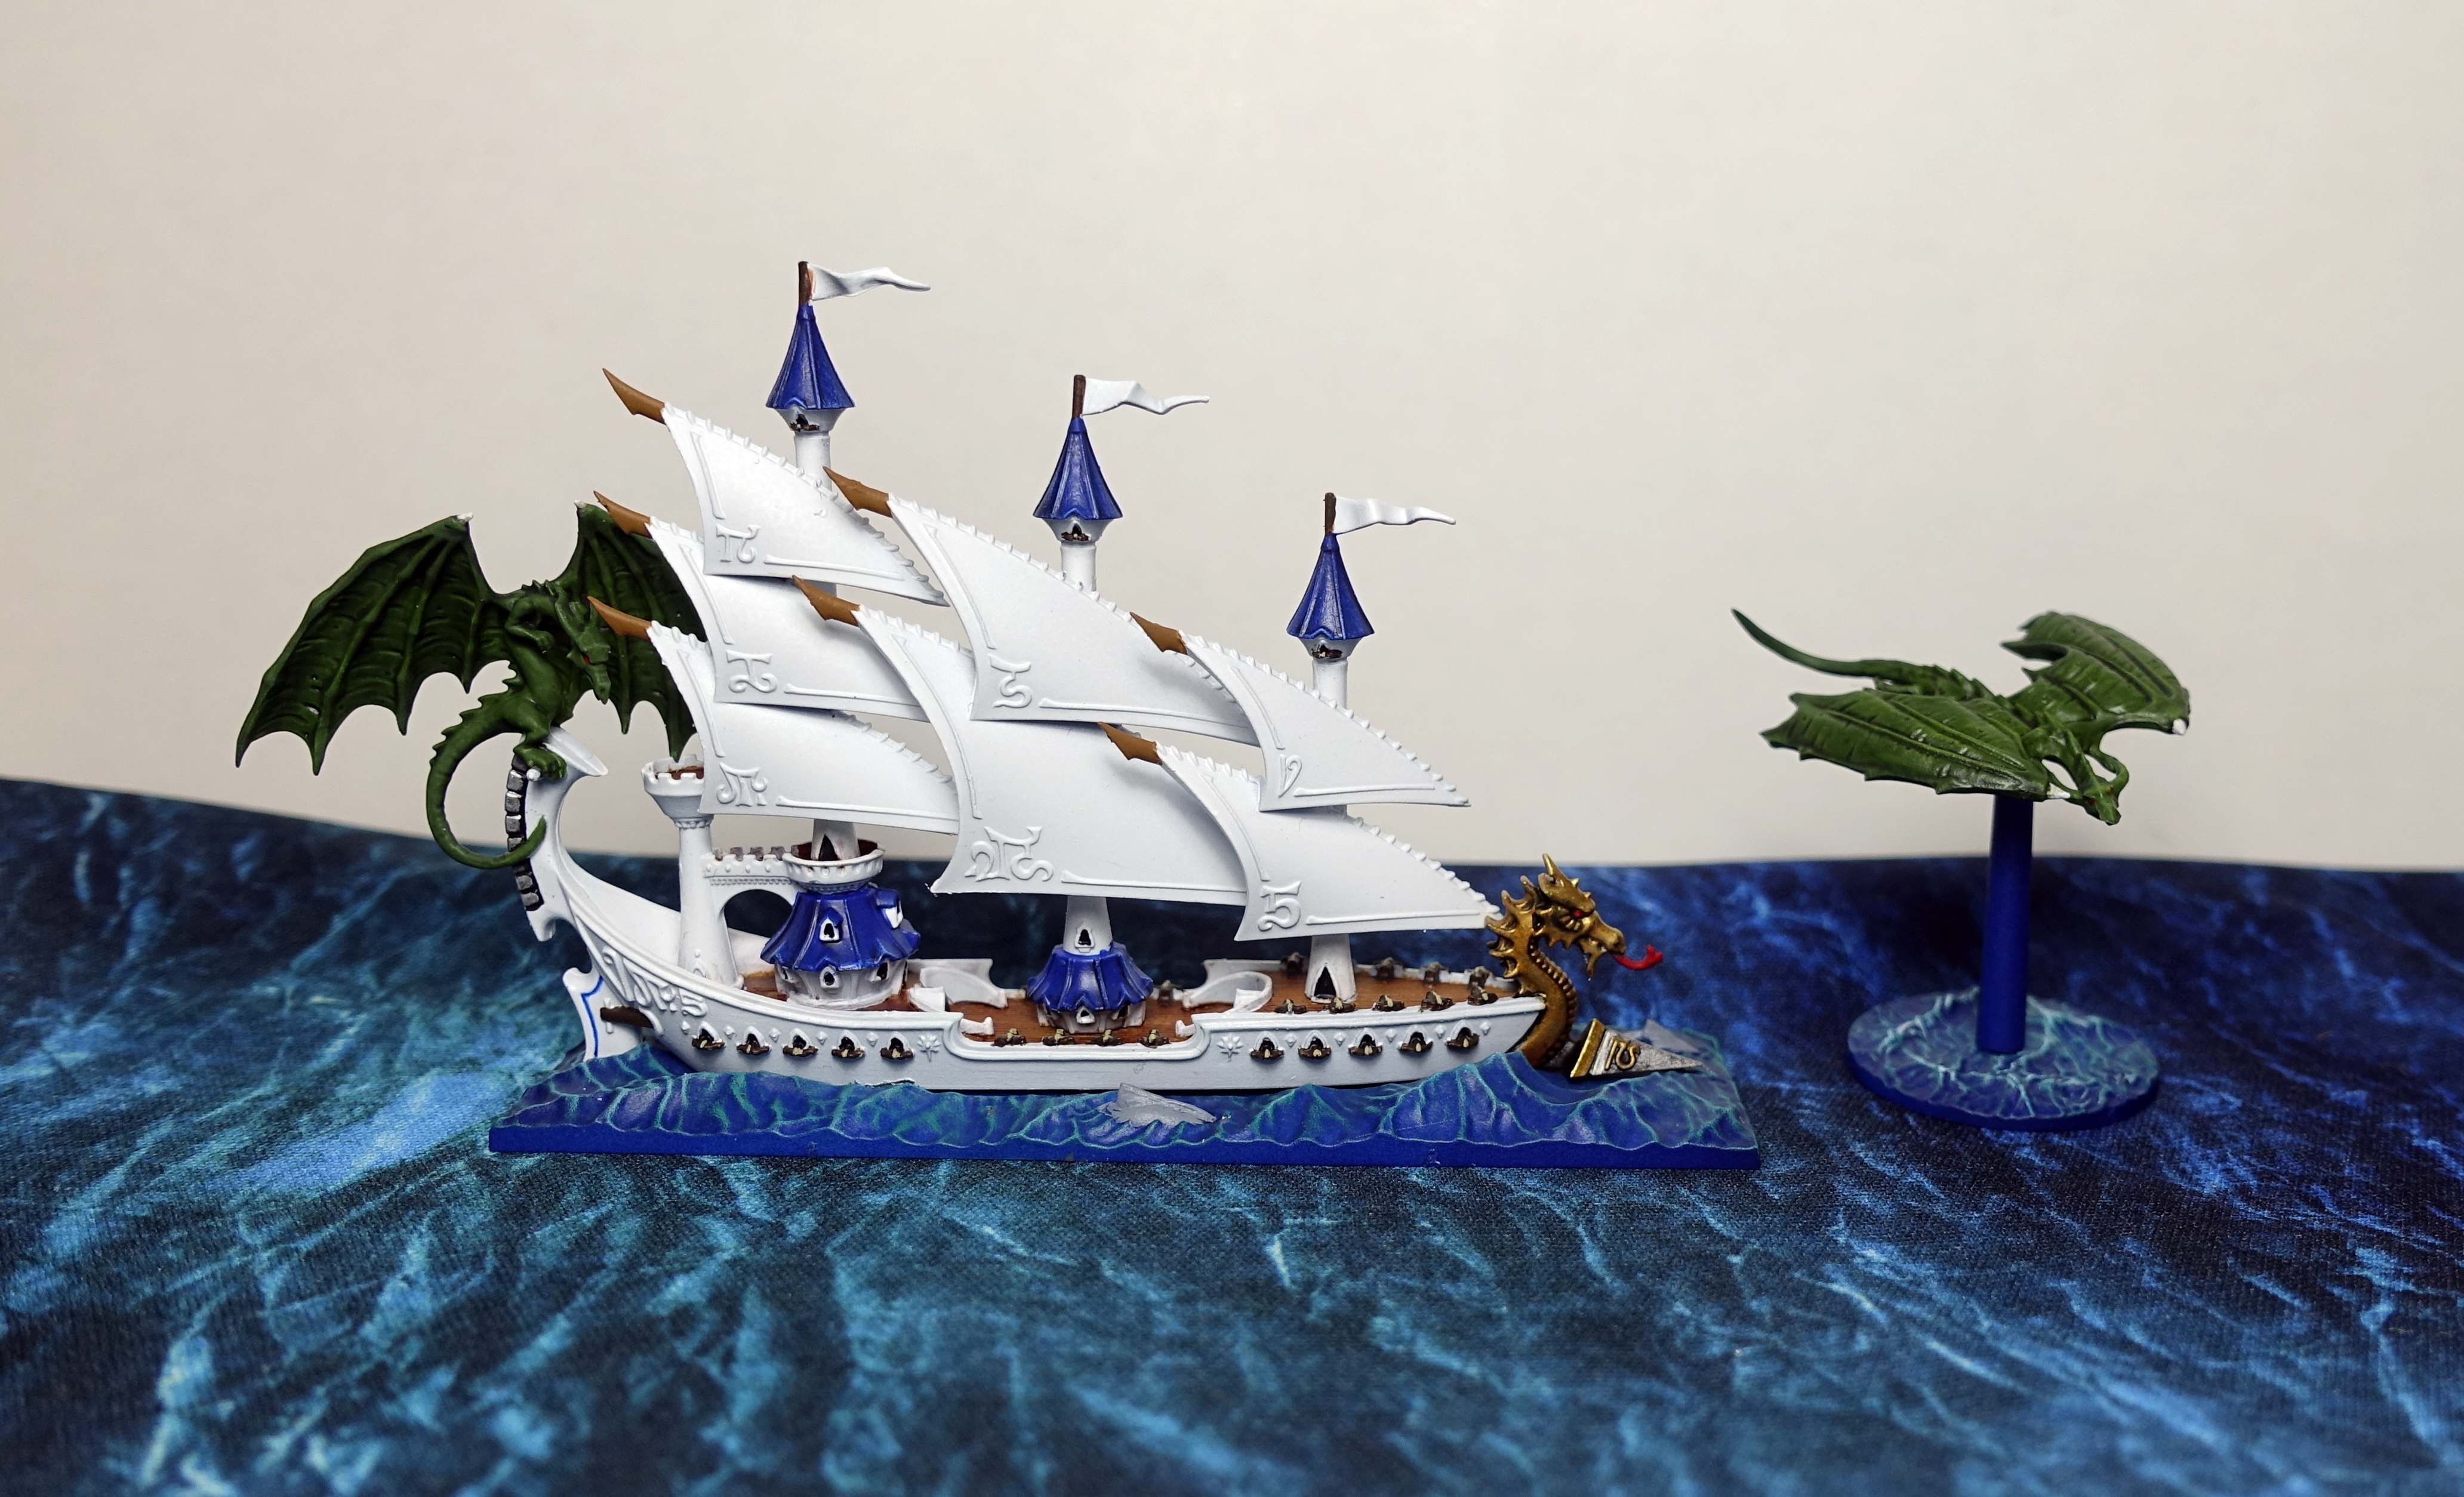 Finished!
General comment
Scale modelers who build and paint ships, tend to paint the parts first and then assemble the ship. For Dreadfleet, there is something to be said for this approach. Once again the masts were a hindrance while painting. Painting this ship took much correcting where my brush had accidentally touched the wrong part of the ship.
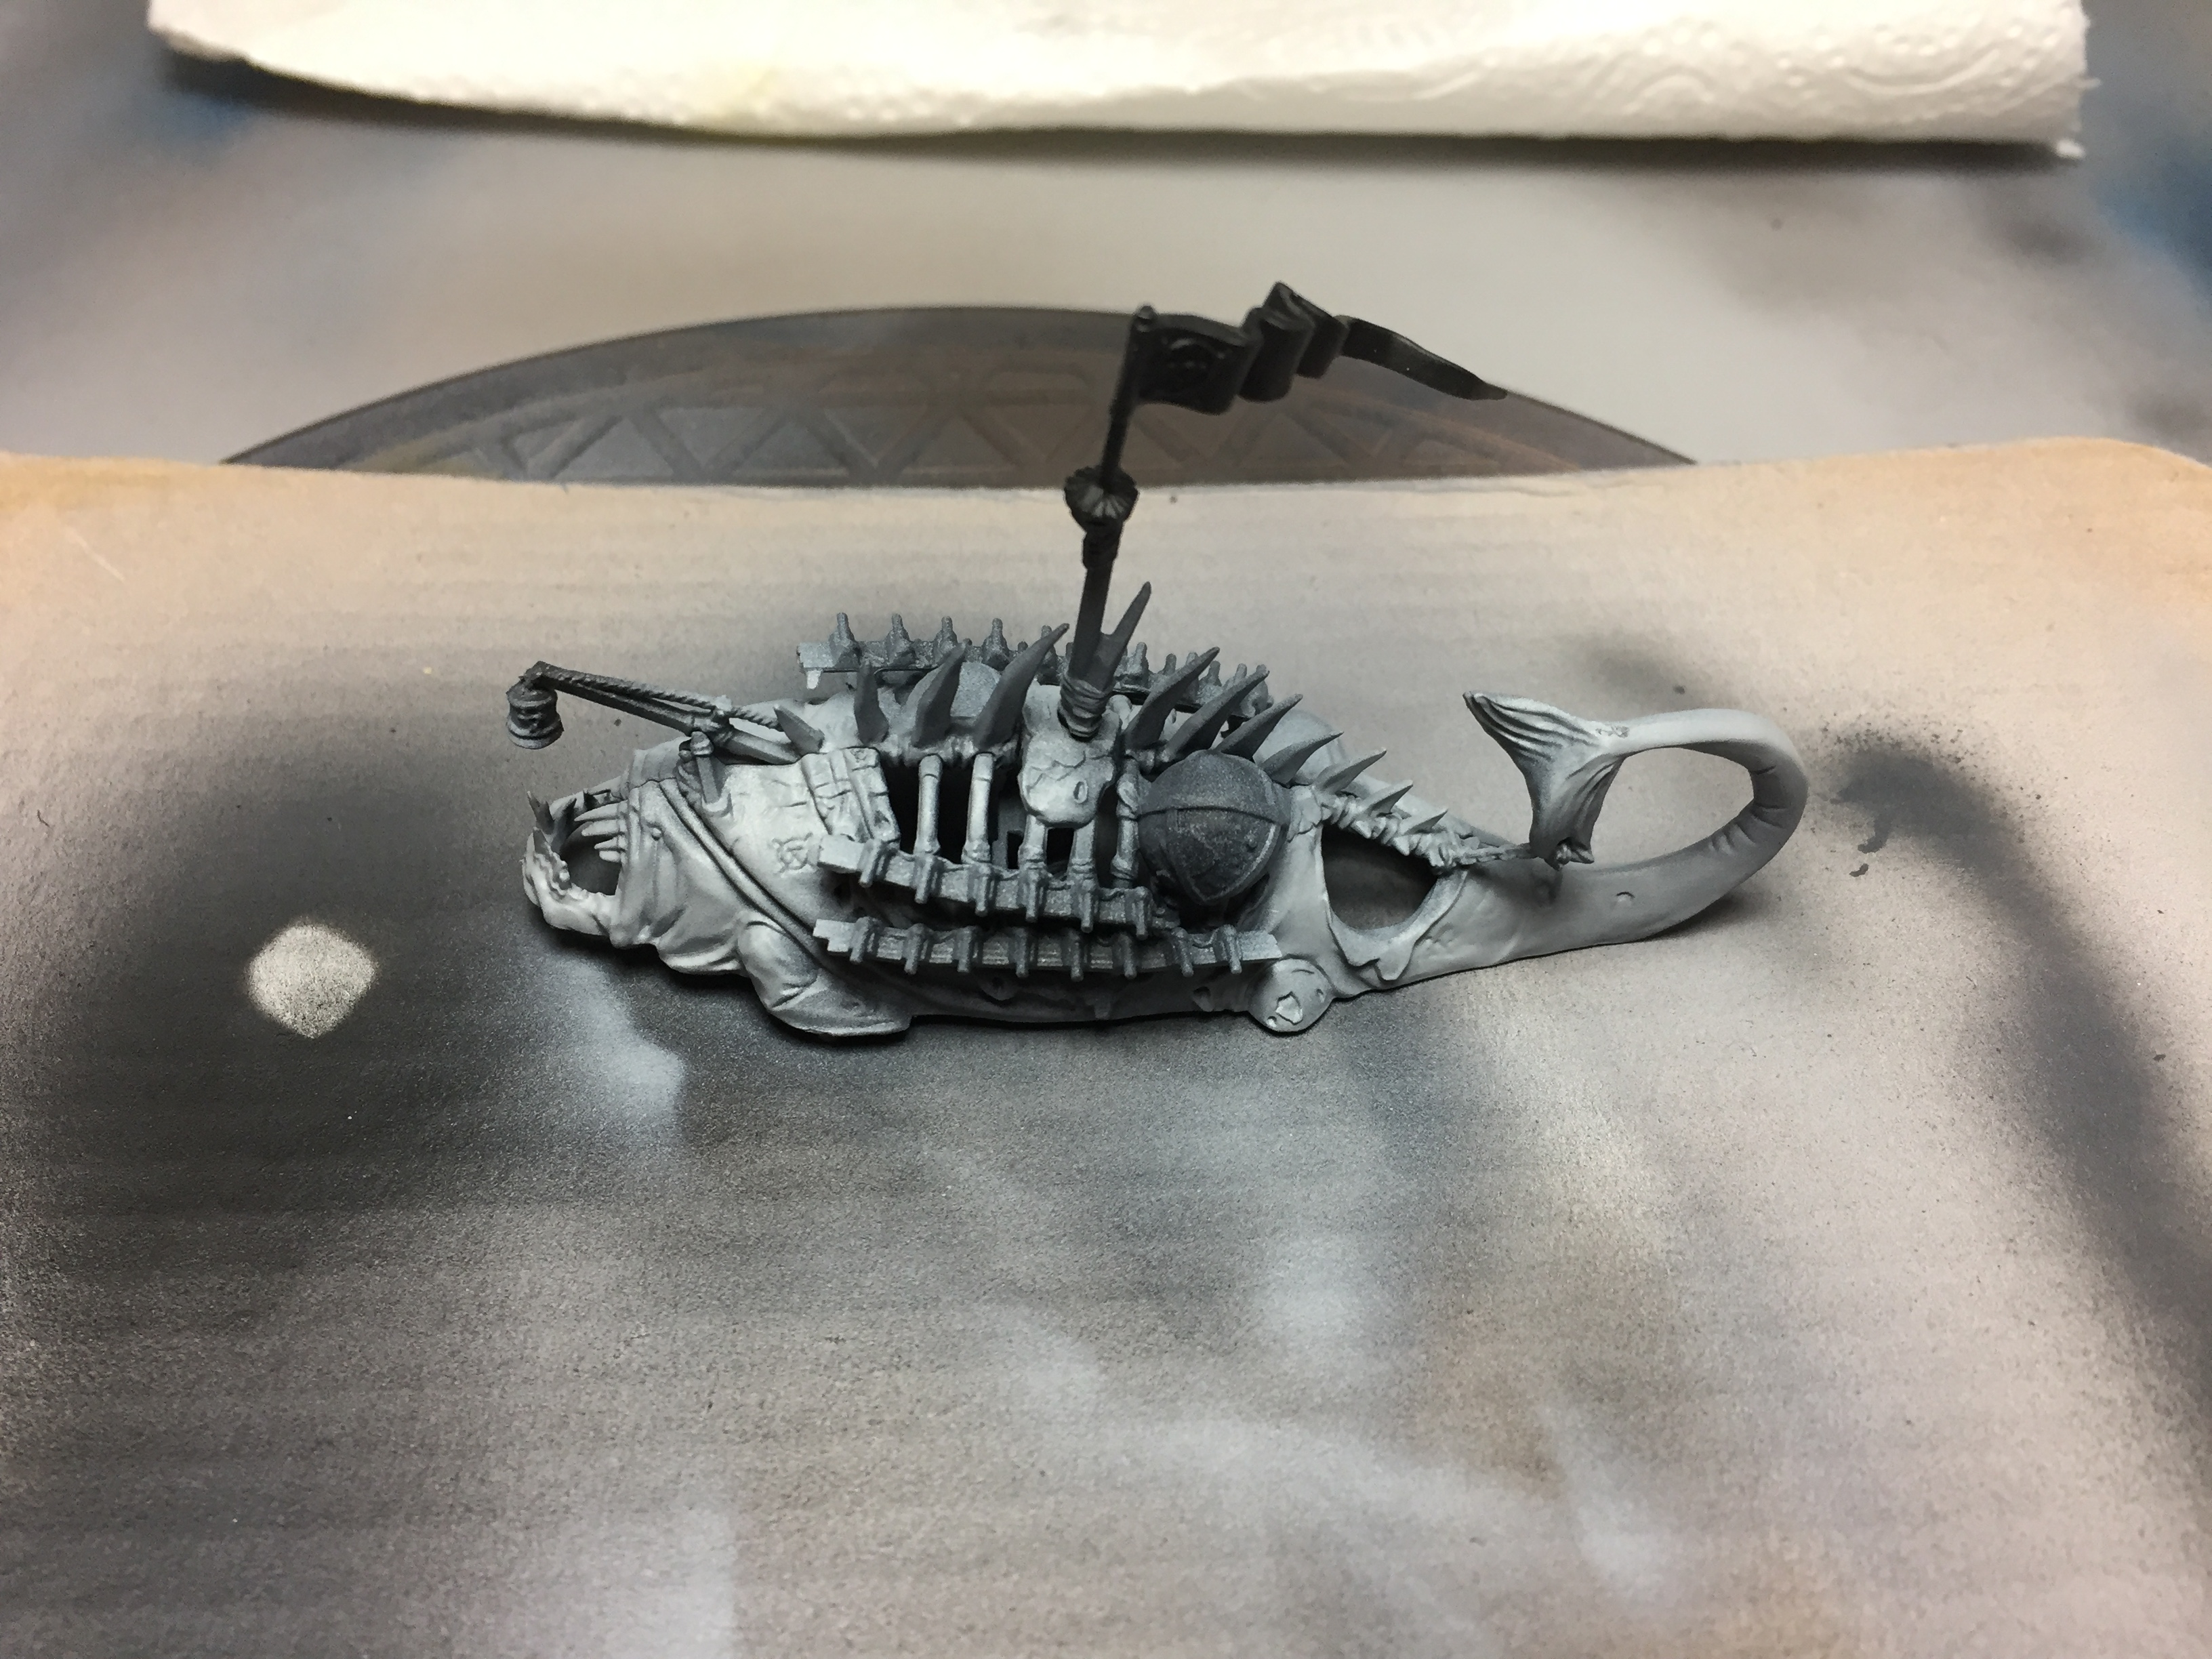
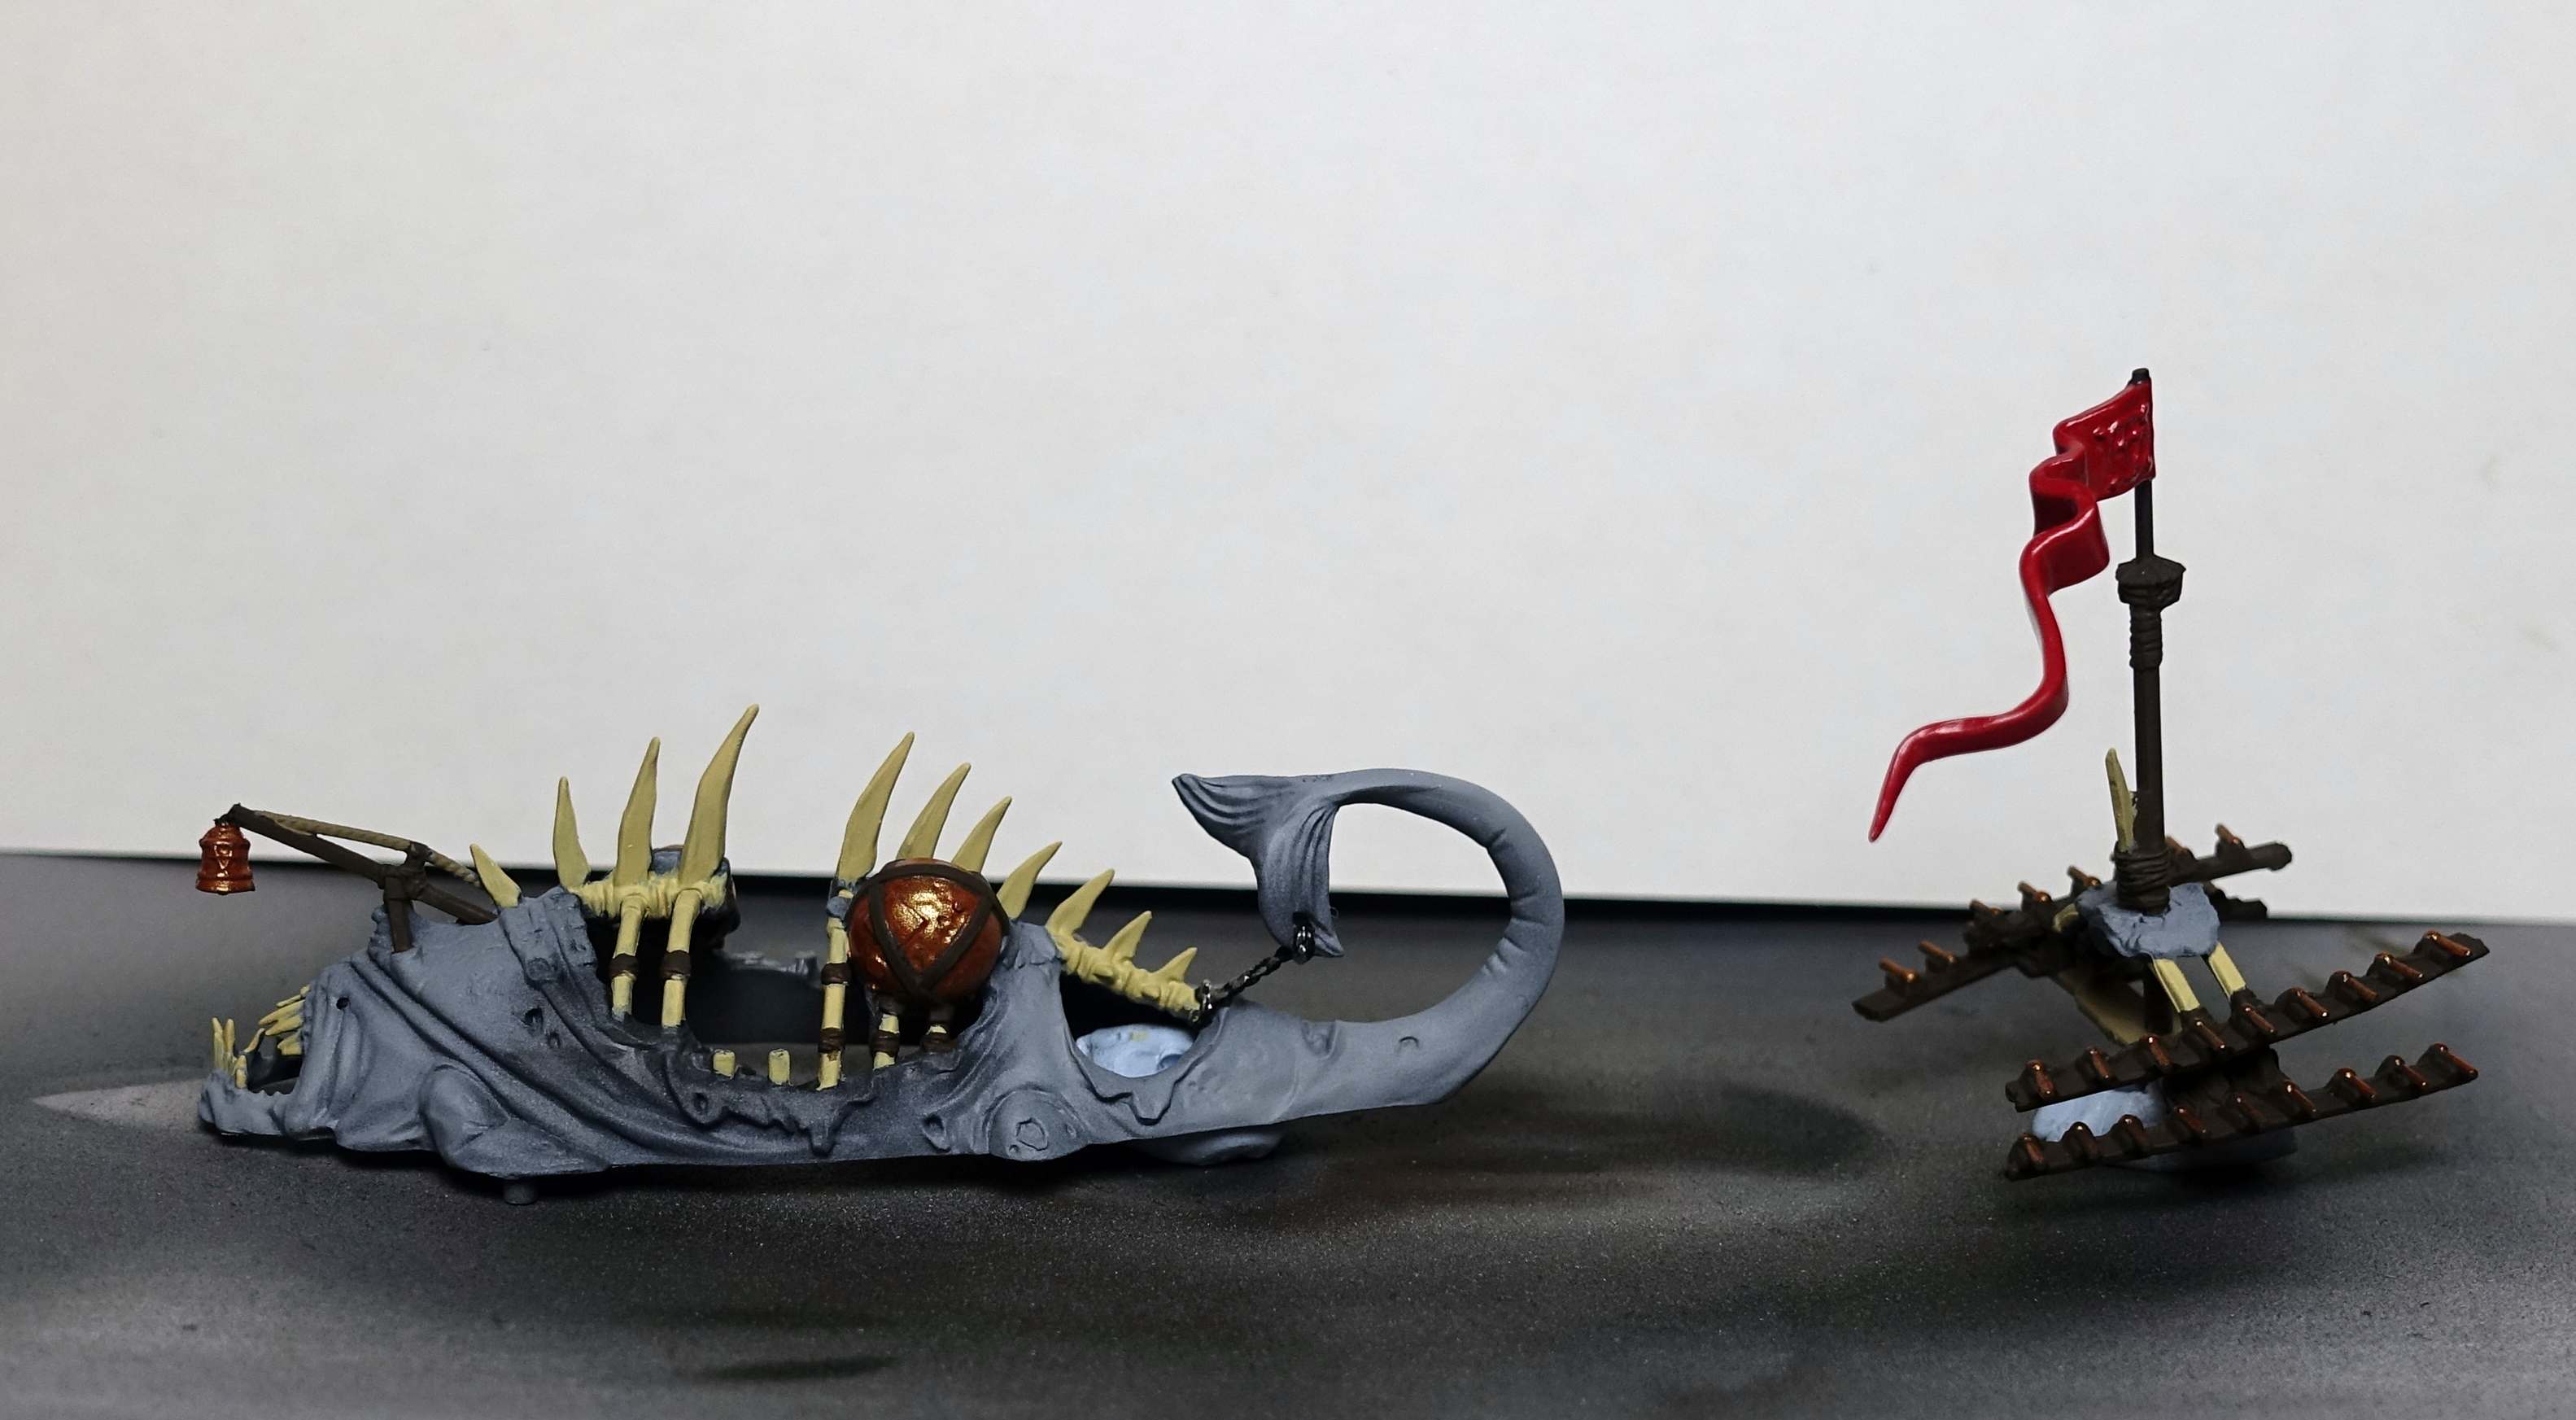
The Skabrus
First entry of the new year! Happy New Year, everyone!
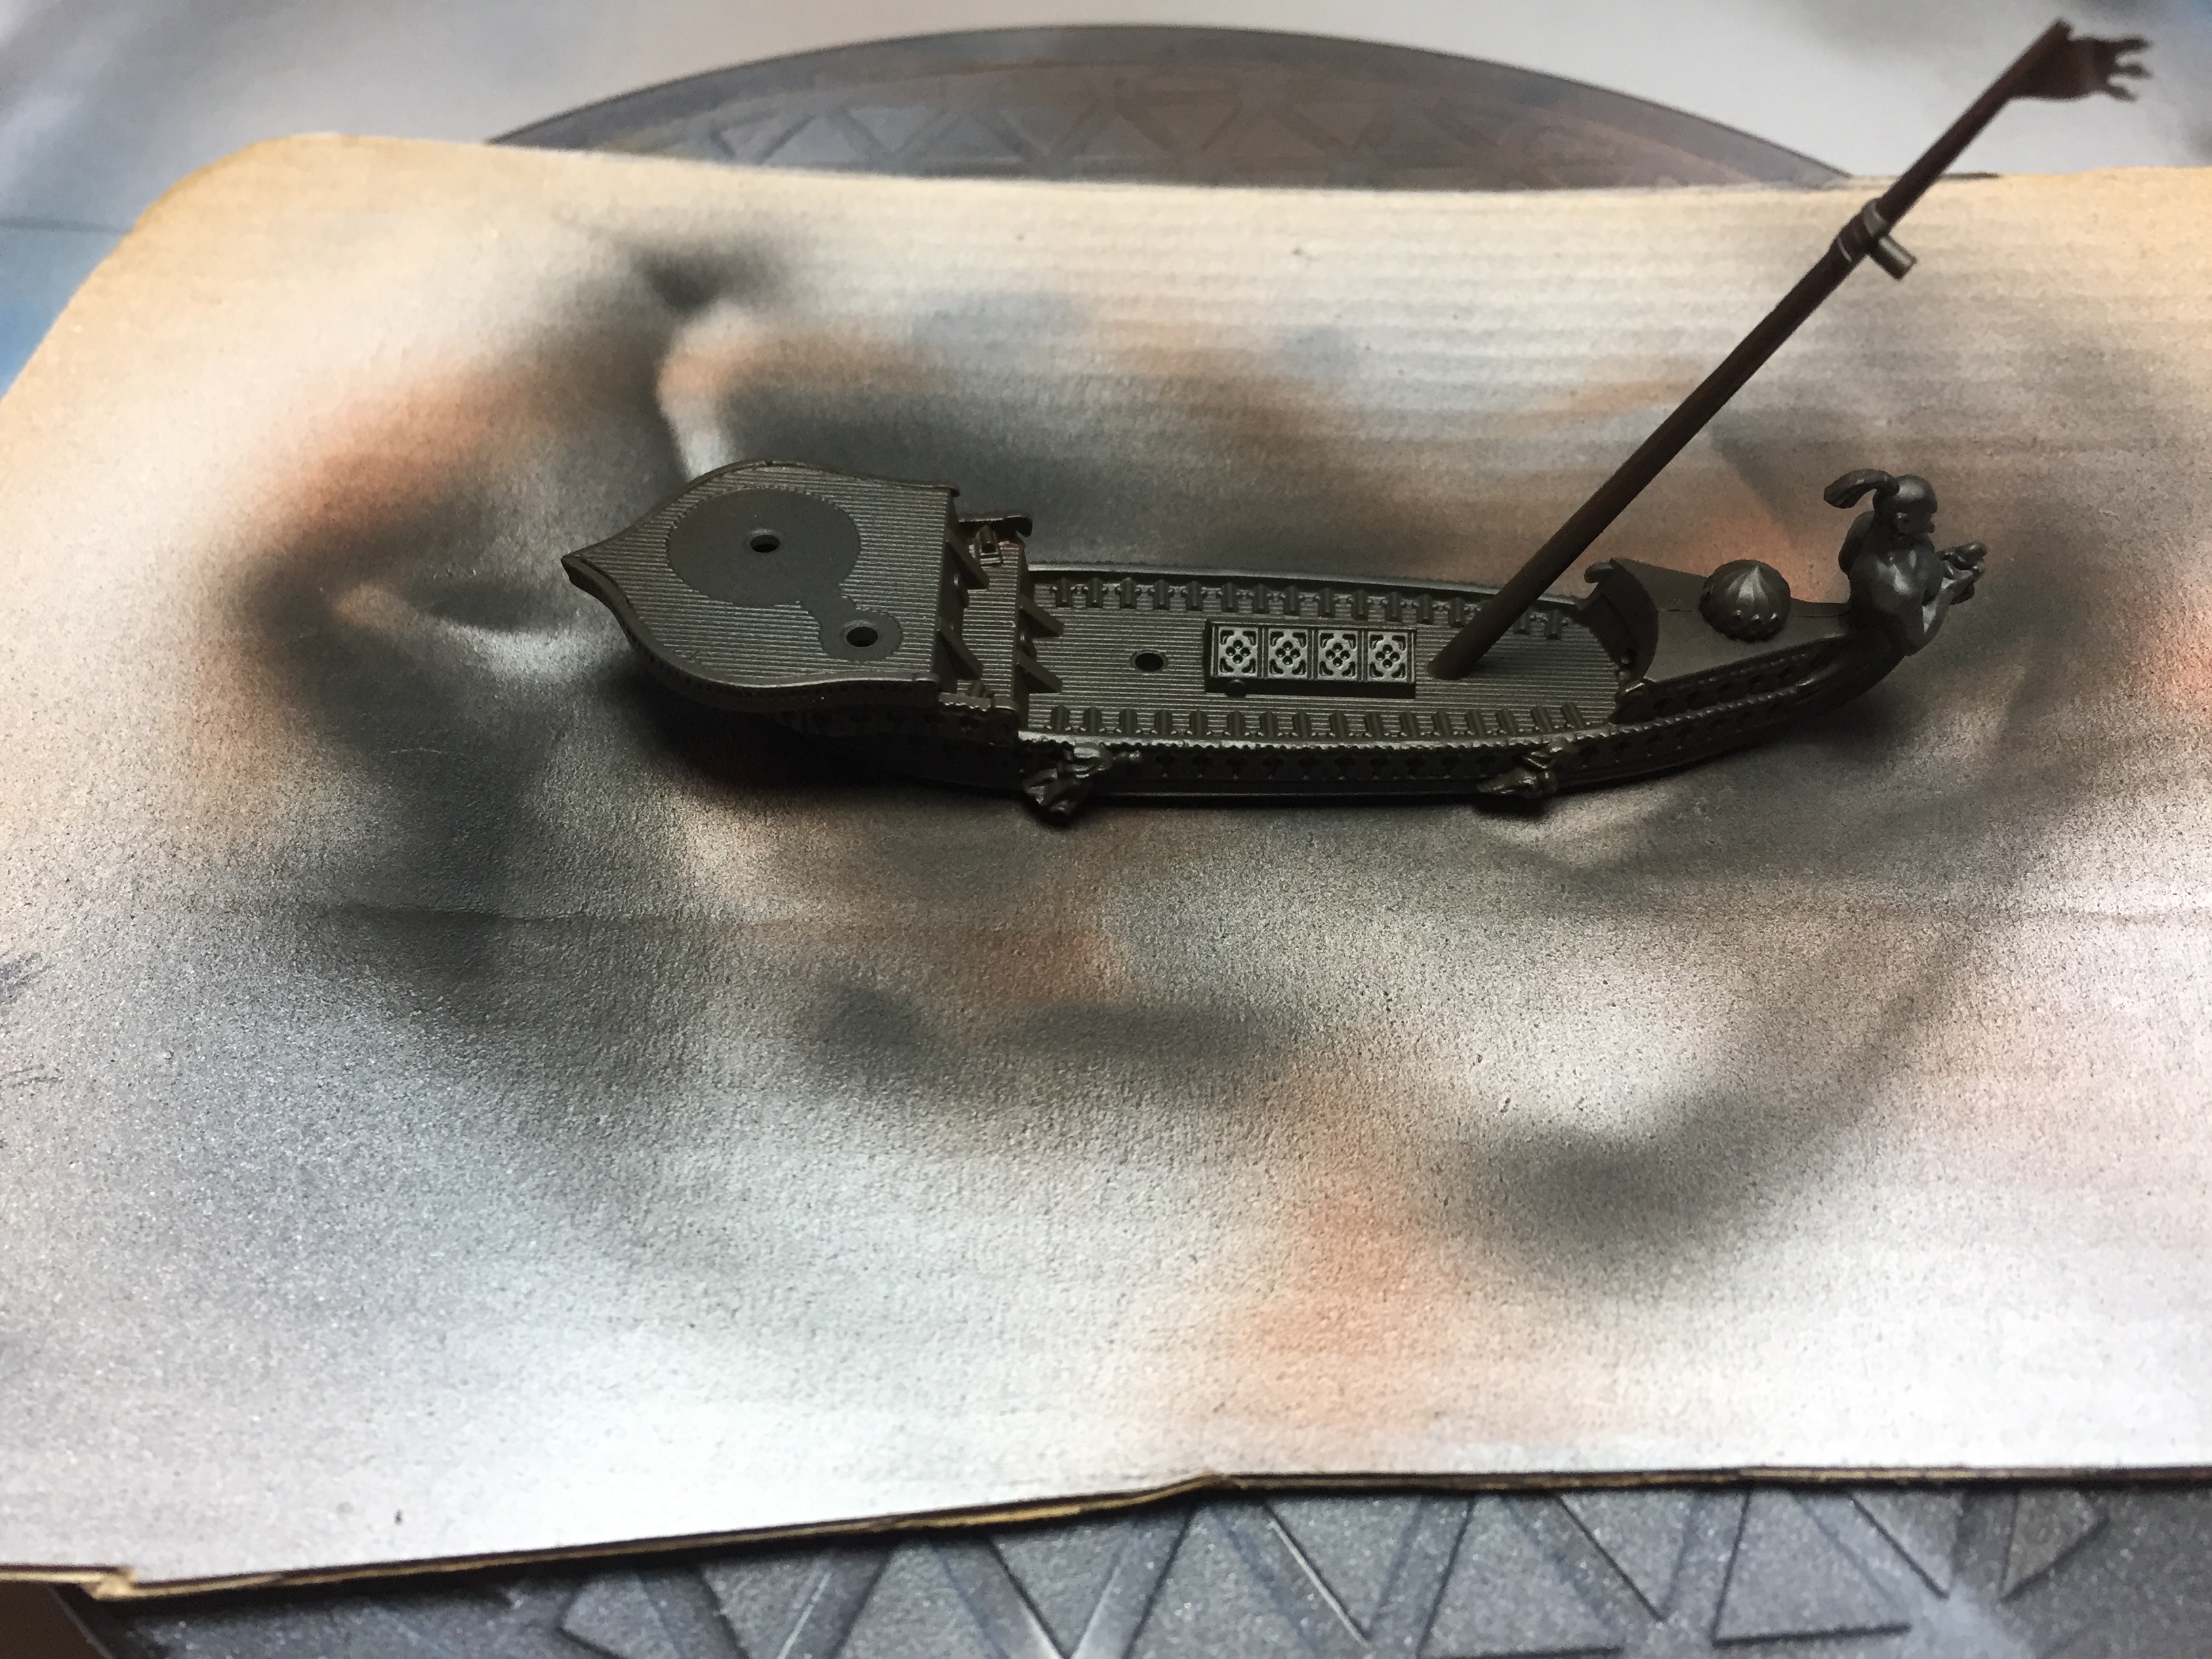
The Skabrus is essentially a big, dead fish repurposed as a ship by the Skaven. I want the ship to look like a dead fish. To achieve this I primed it black and then sprayed light grey over the entire ship, to make it look like dead skin.
While attaching the ship to a piece of cardboard with blu tack the middle section with the guns and the flag came loose. Since experience with the previous ships seemed to indicate it’s easier to paint ships in parts, I painted the to parts separately and glued them together again after they were painted.
Basecoat
For the basecoat of the different parts of the ship I’ve used:
- Model Color Chocolate Brown: the wood and what could be some sort of ropes that keep the ship together.
- Model Color Copper: the bell, the metal balls on the ship and the cannons. The cannons have the shape of Skaven Warp Lightning Cannons. So copper seemed and appropriate colour. (They have the shape of the old models for these cannons: https://www.dakkadakka.com/gallery/172948-Skaven%2C%20Warhammer%20Fantasy%2C%20Warplightning%20Cannon.html)
- Black followed by The Army Painter Plate Mail Metal: the chain at the back of the ship
- Model Color Dark Sand: the skeleton and teeth
- Panzer Aces Old Wood: the rope of the bell and the planks beneath the middle of the ship.
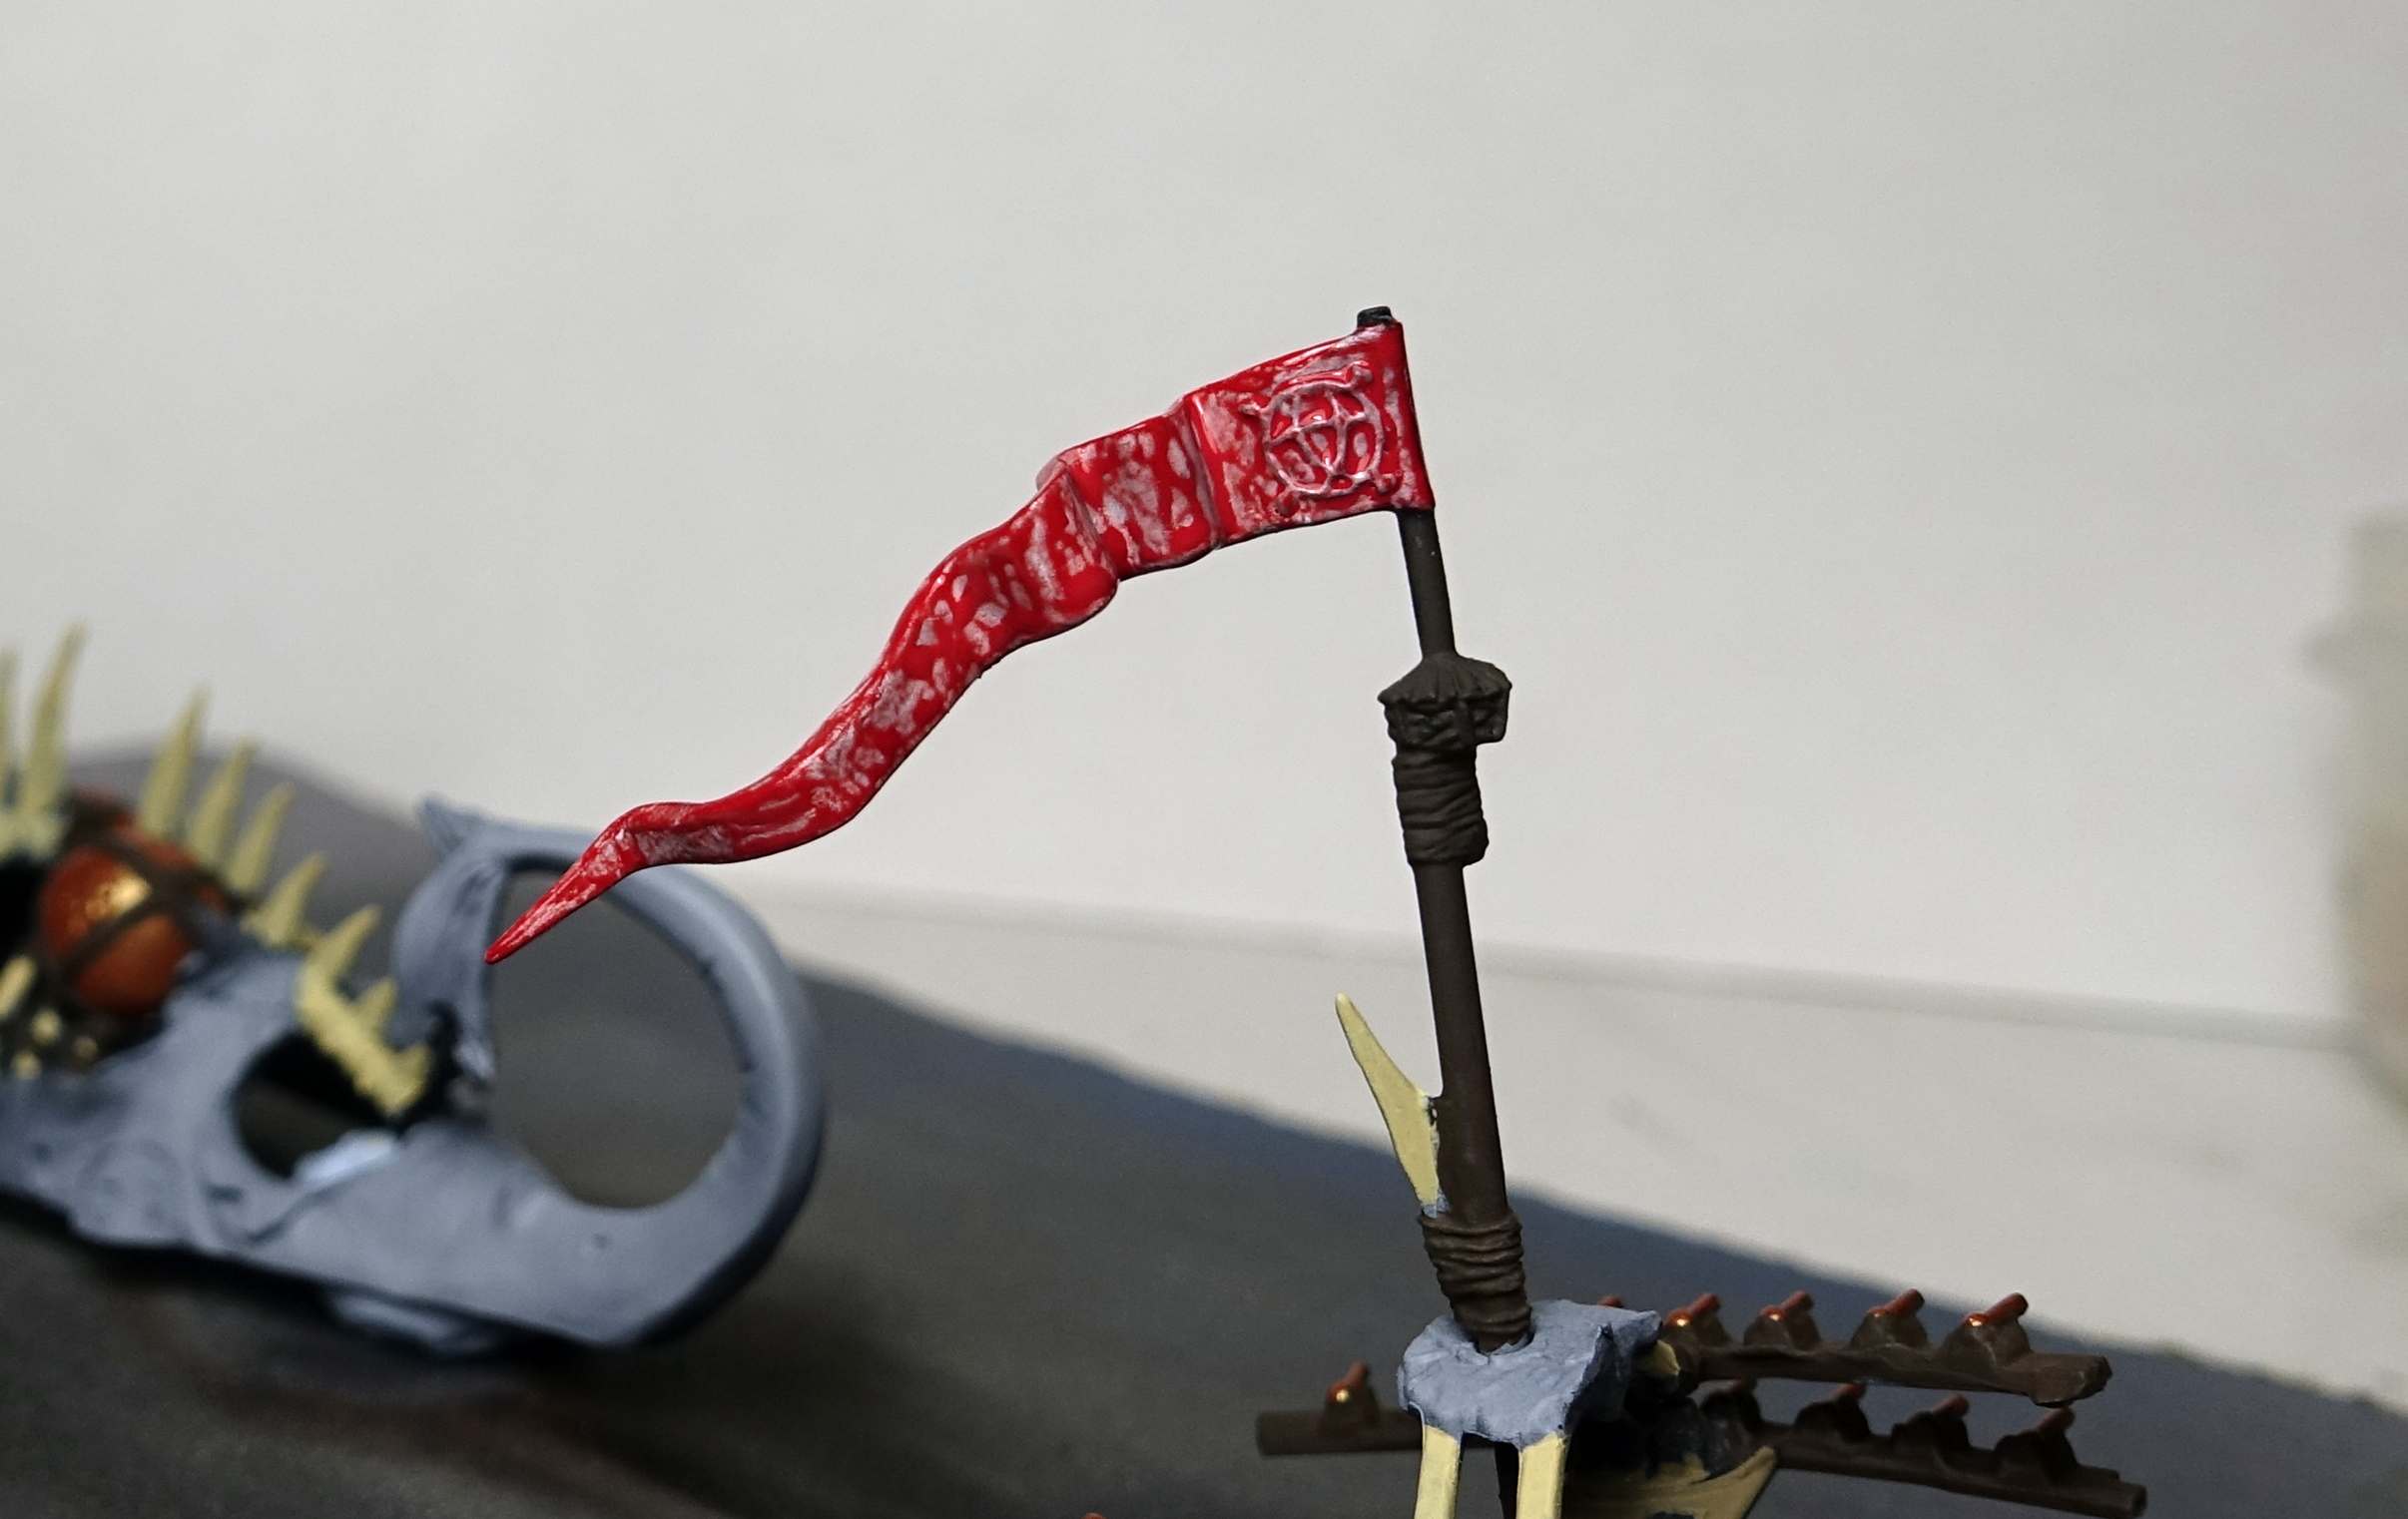
- Grey primer followed by Model Color Carmine Red: the flag.
Wash
The next step was a green wash (Game Color Wash) over the entire model to bind everything together. This ship seems to have more need to be bound together in this way than most ships. First I used a watered down wash. The wash didn’t stay in all the recesses so I gave the entire ship another layer of green wash. Pure this time.
 After the two green washes.
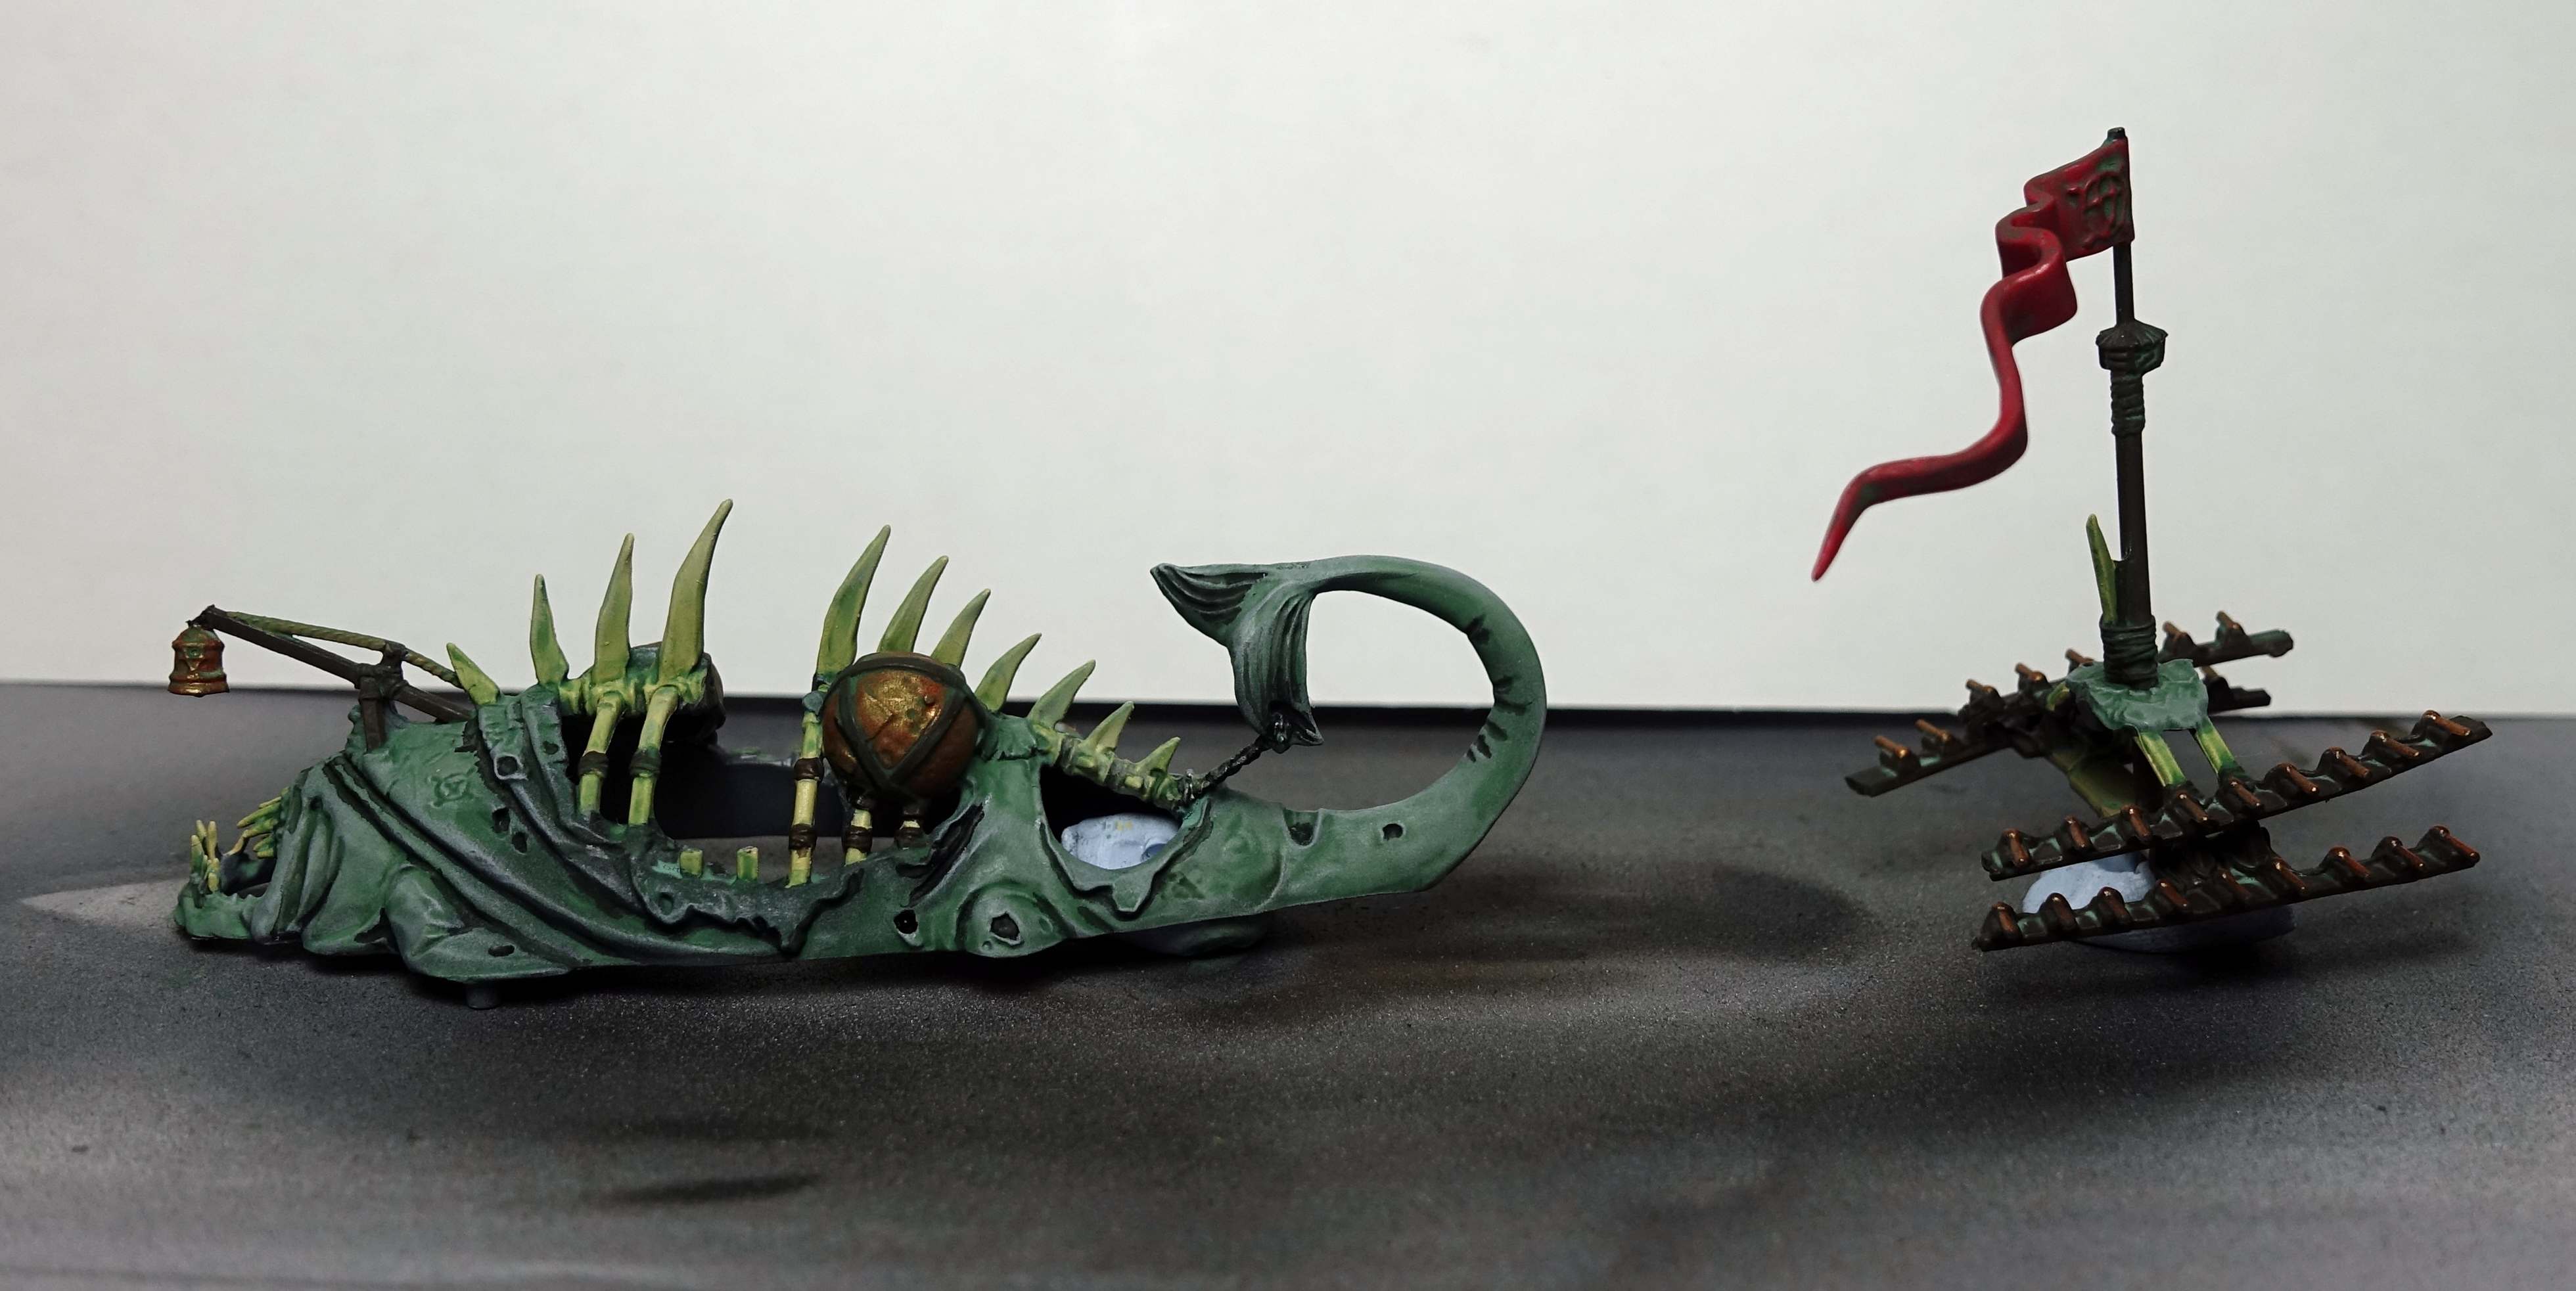 To add more shadow I then used Model Wash Dark Grey from Vallejo to give the miniature more dept.
Finalising
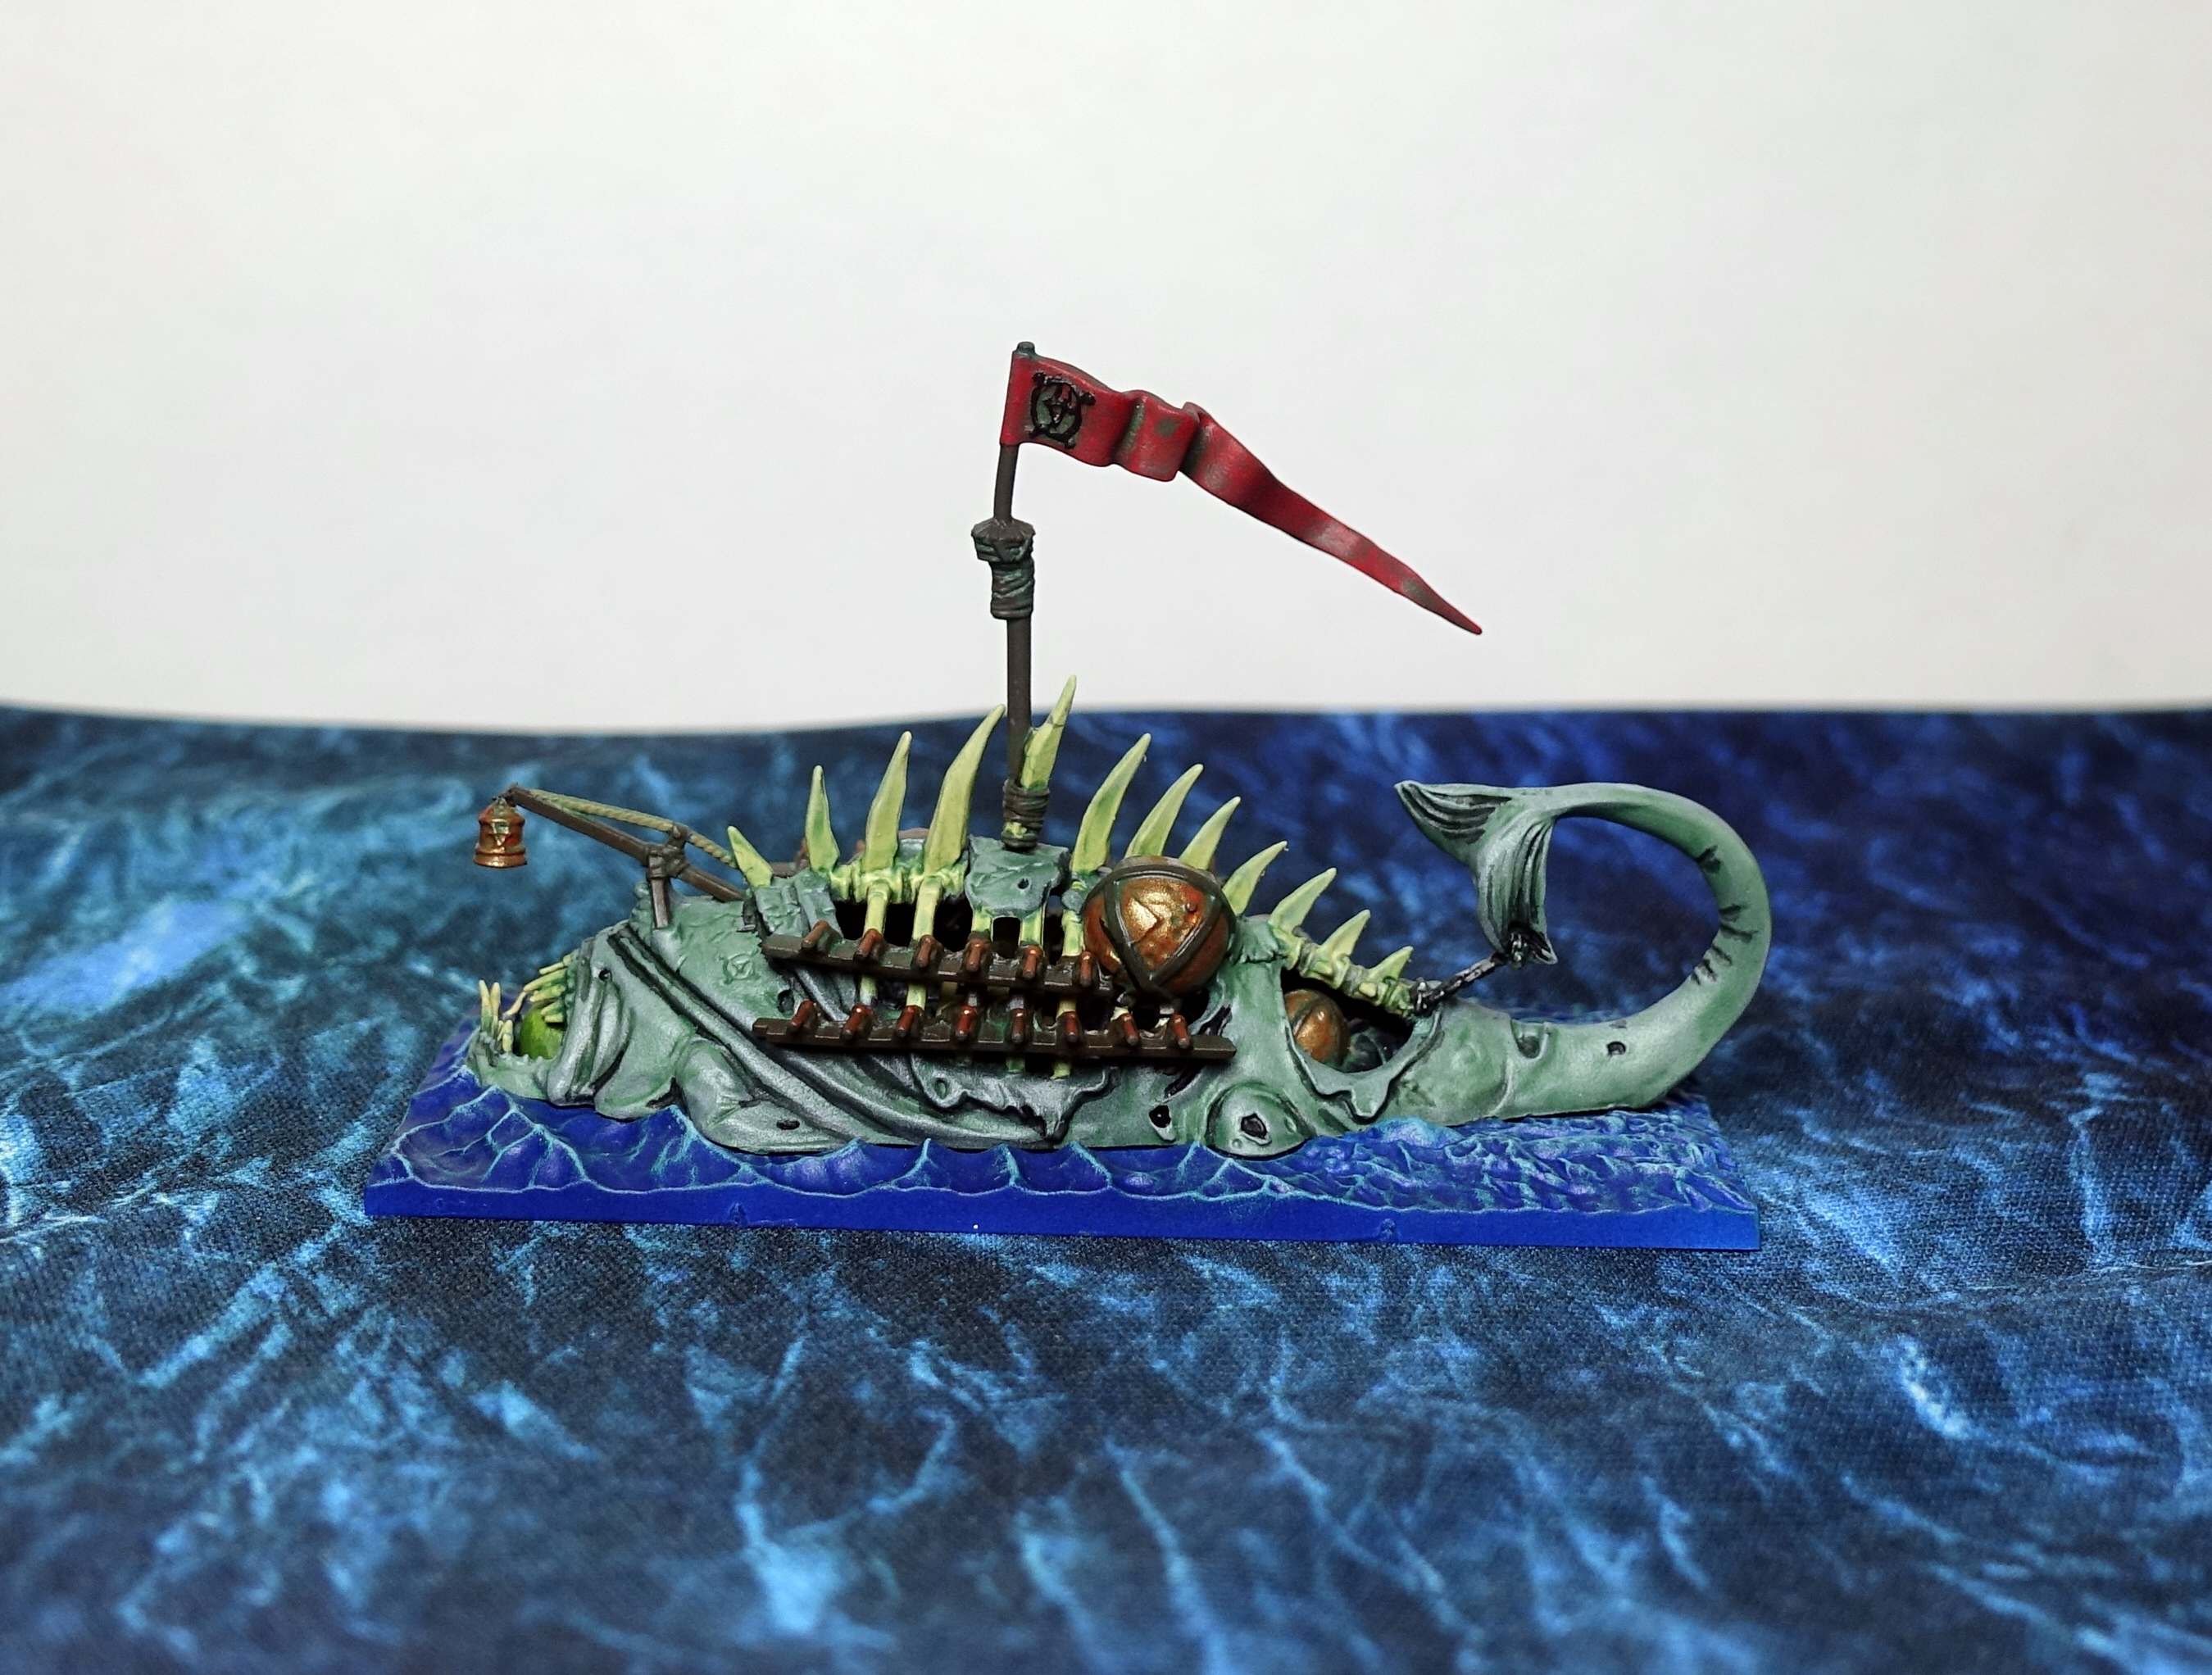
Finally I dry brushed light grey on the “hull” of the ship and Dark Sand on the skeleton. The last step was to paint the Skaven symbol on the flag black.
This is the fifth ship I’ve painted from dreadfleet. We’re have way there!
Post Scriptum
I wanted to share the photo bellow with you. I painted grey primer on this flag before switching to red because painting red directly on a black primer didn’t seem like a good idea. One coat of Model Color Carmine Red gave the result on the photo. It took several more coats to achieve a nice coat. In a different project this “technique” could be used to paint a miniature wearing a light grey coat covered in blood.