


![Very Cool! Make Your Own Star Wars: Legion Imperial Agent & Officer | Review [7 Days Early Access]](https://images.beastsofwar.com/2025/12/Star-Wars-Imperial-Agent-_-Officer-coverimage-V3-225-127.jpg)


Painting dreadfleet


Recommendations: 518
About the Project
The goal of this project is to paint everything that came in the box: ships, terrain, tokens, sea monsters,...
Related Game: Dreadfleet
Related Company: Games Workshop
Related Genre: Fantasy
This Project is Completed
How the project began
I finished painting all my ships for Dystopian Wars and needed a new project. What should I do next? Start a 16th century army with miniatures from Warlord Games? Kill team is popular and looks interesting. A 17th century army in 6 mm from Bachus?
What to do?
I could take that box from Dreadfleet out of my closet, where it has been for a year. The models are nice, the game is fun and I could use the terrain for Dystopian Wars.
So Dreadfleet it is!
The game contains two fleets: pirates and undead. Each fleet has five ships, including a flag ship. I will paint everything: the ships, the terrain and the gaming aids (rulers, tokens,…).
For this project I will paint much with my airbrush. This is an Infinity airbrush from Harder & Steenbeck.
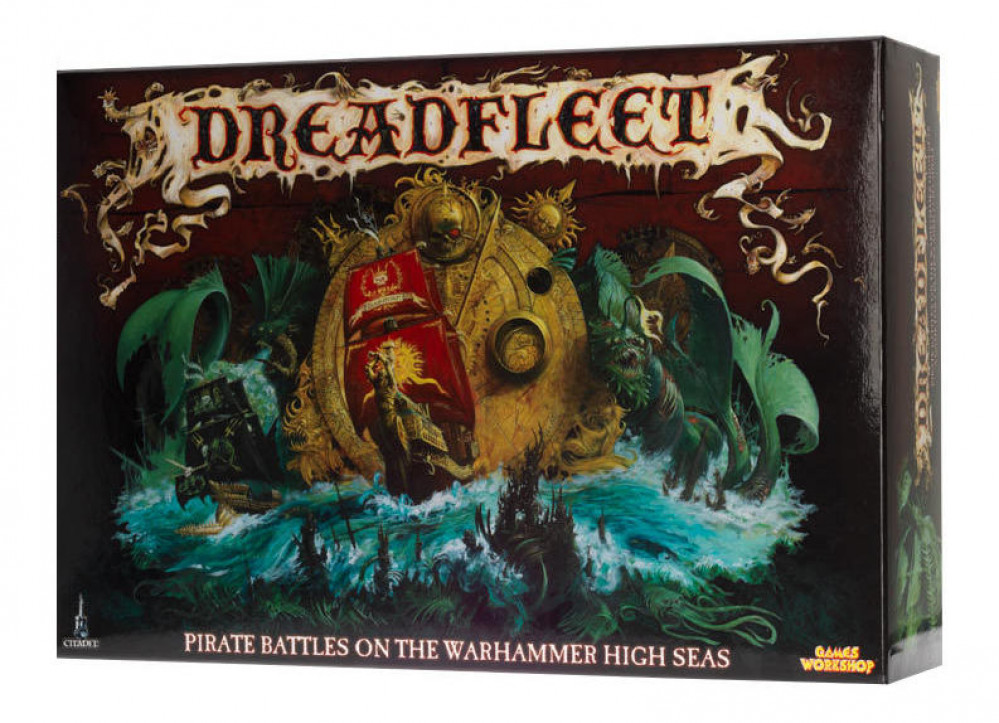
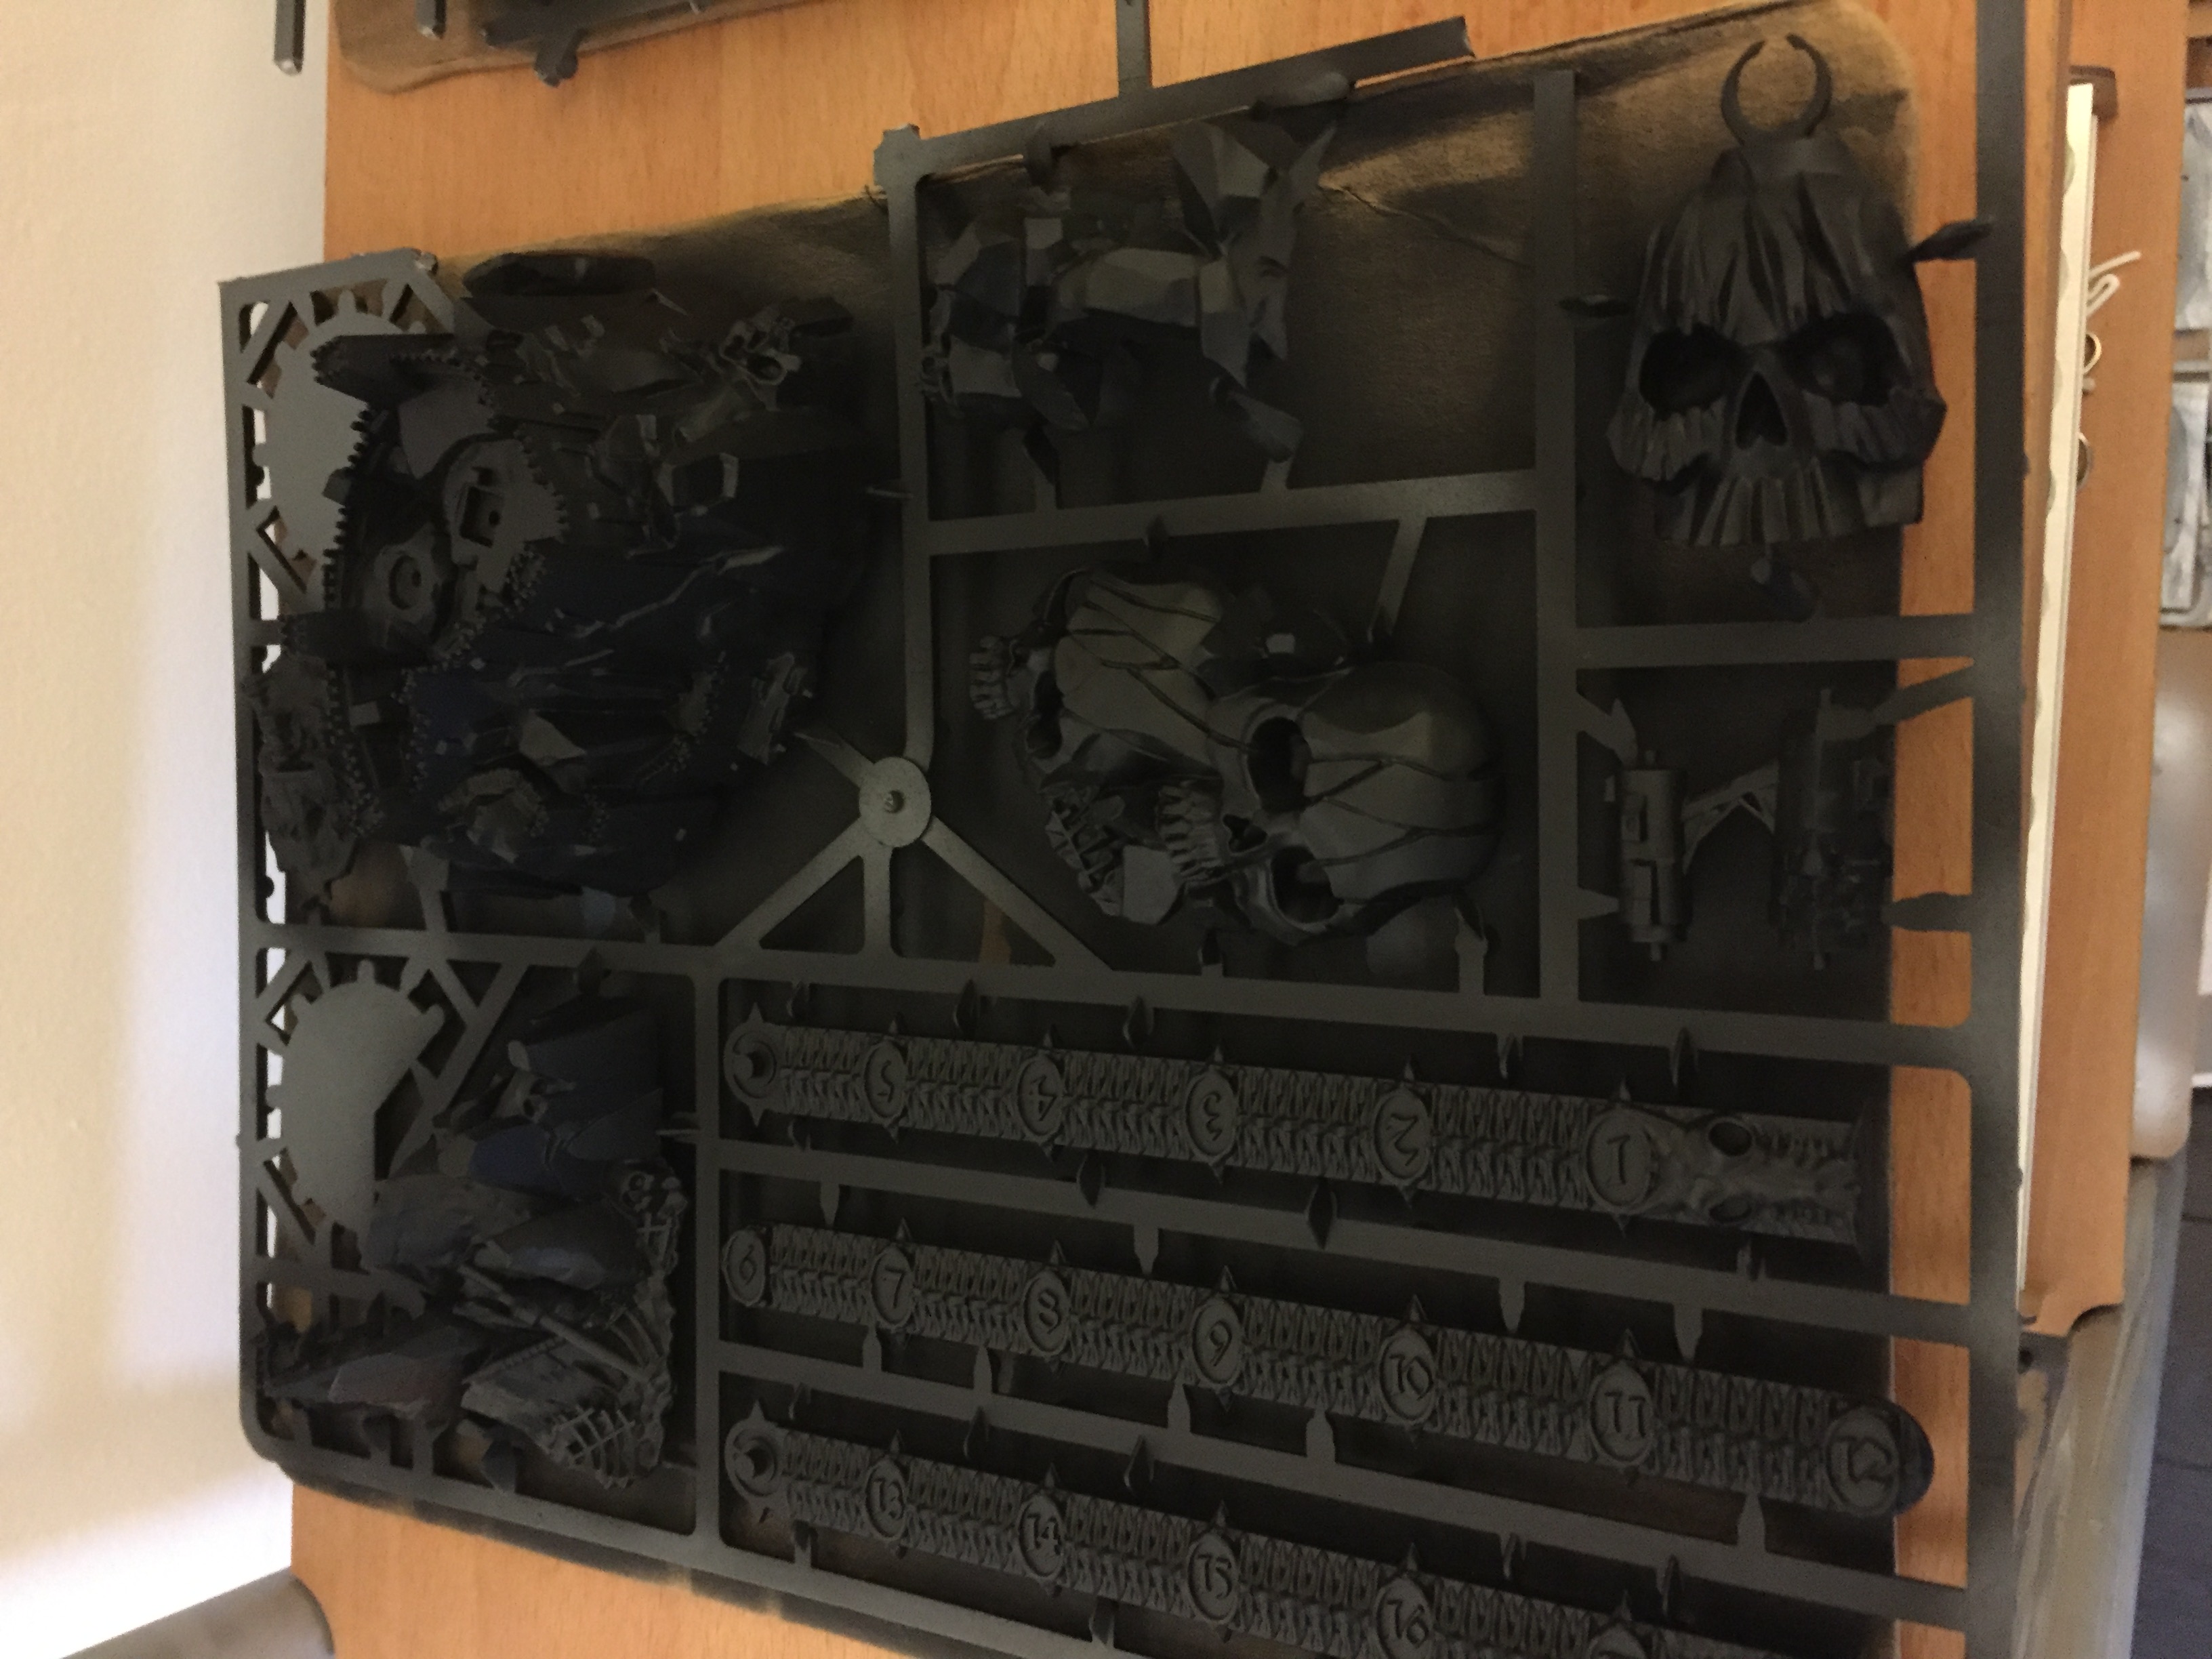
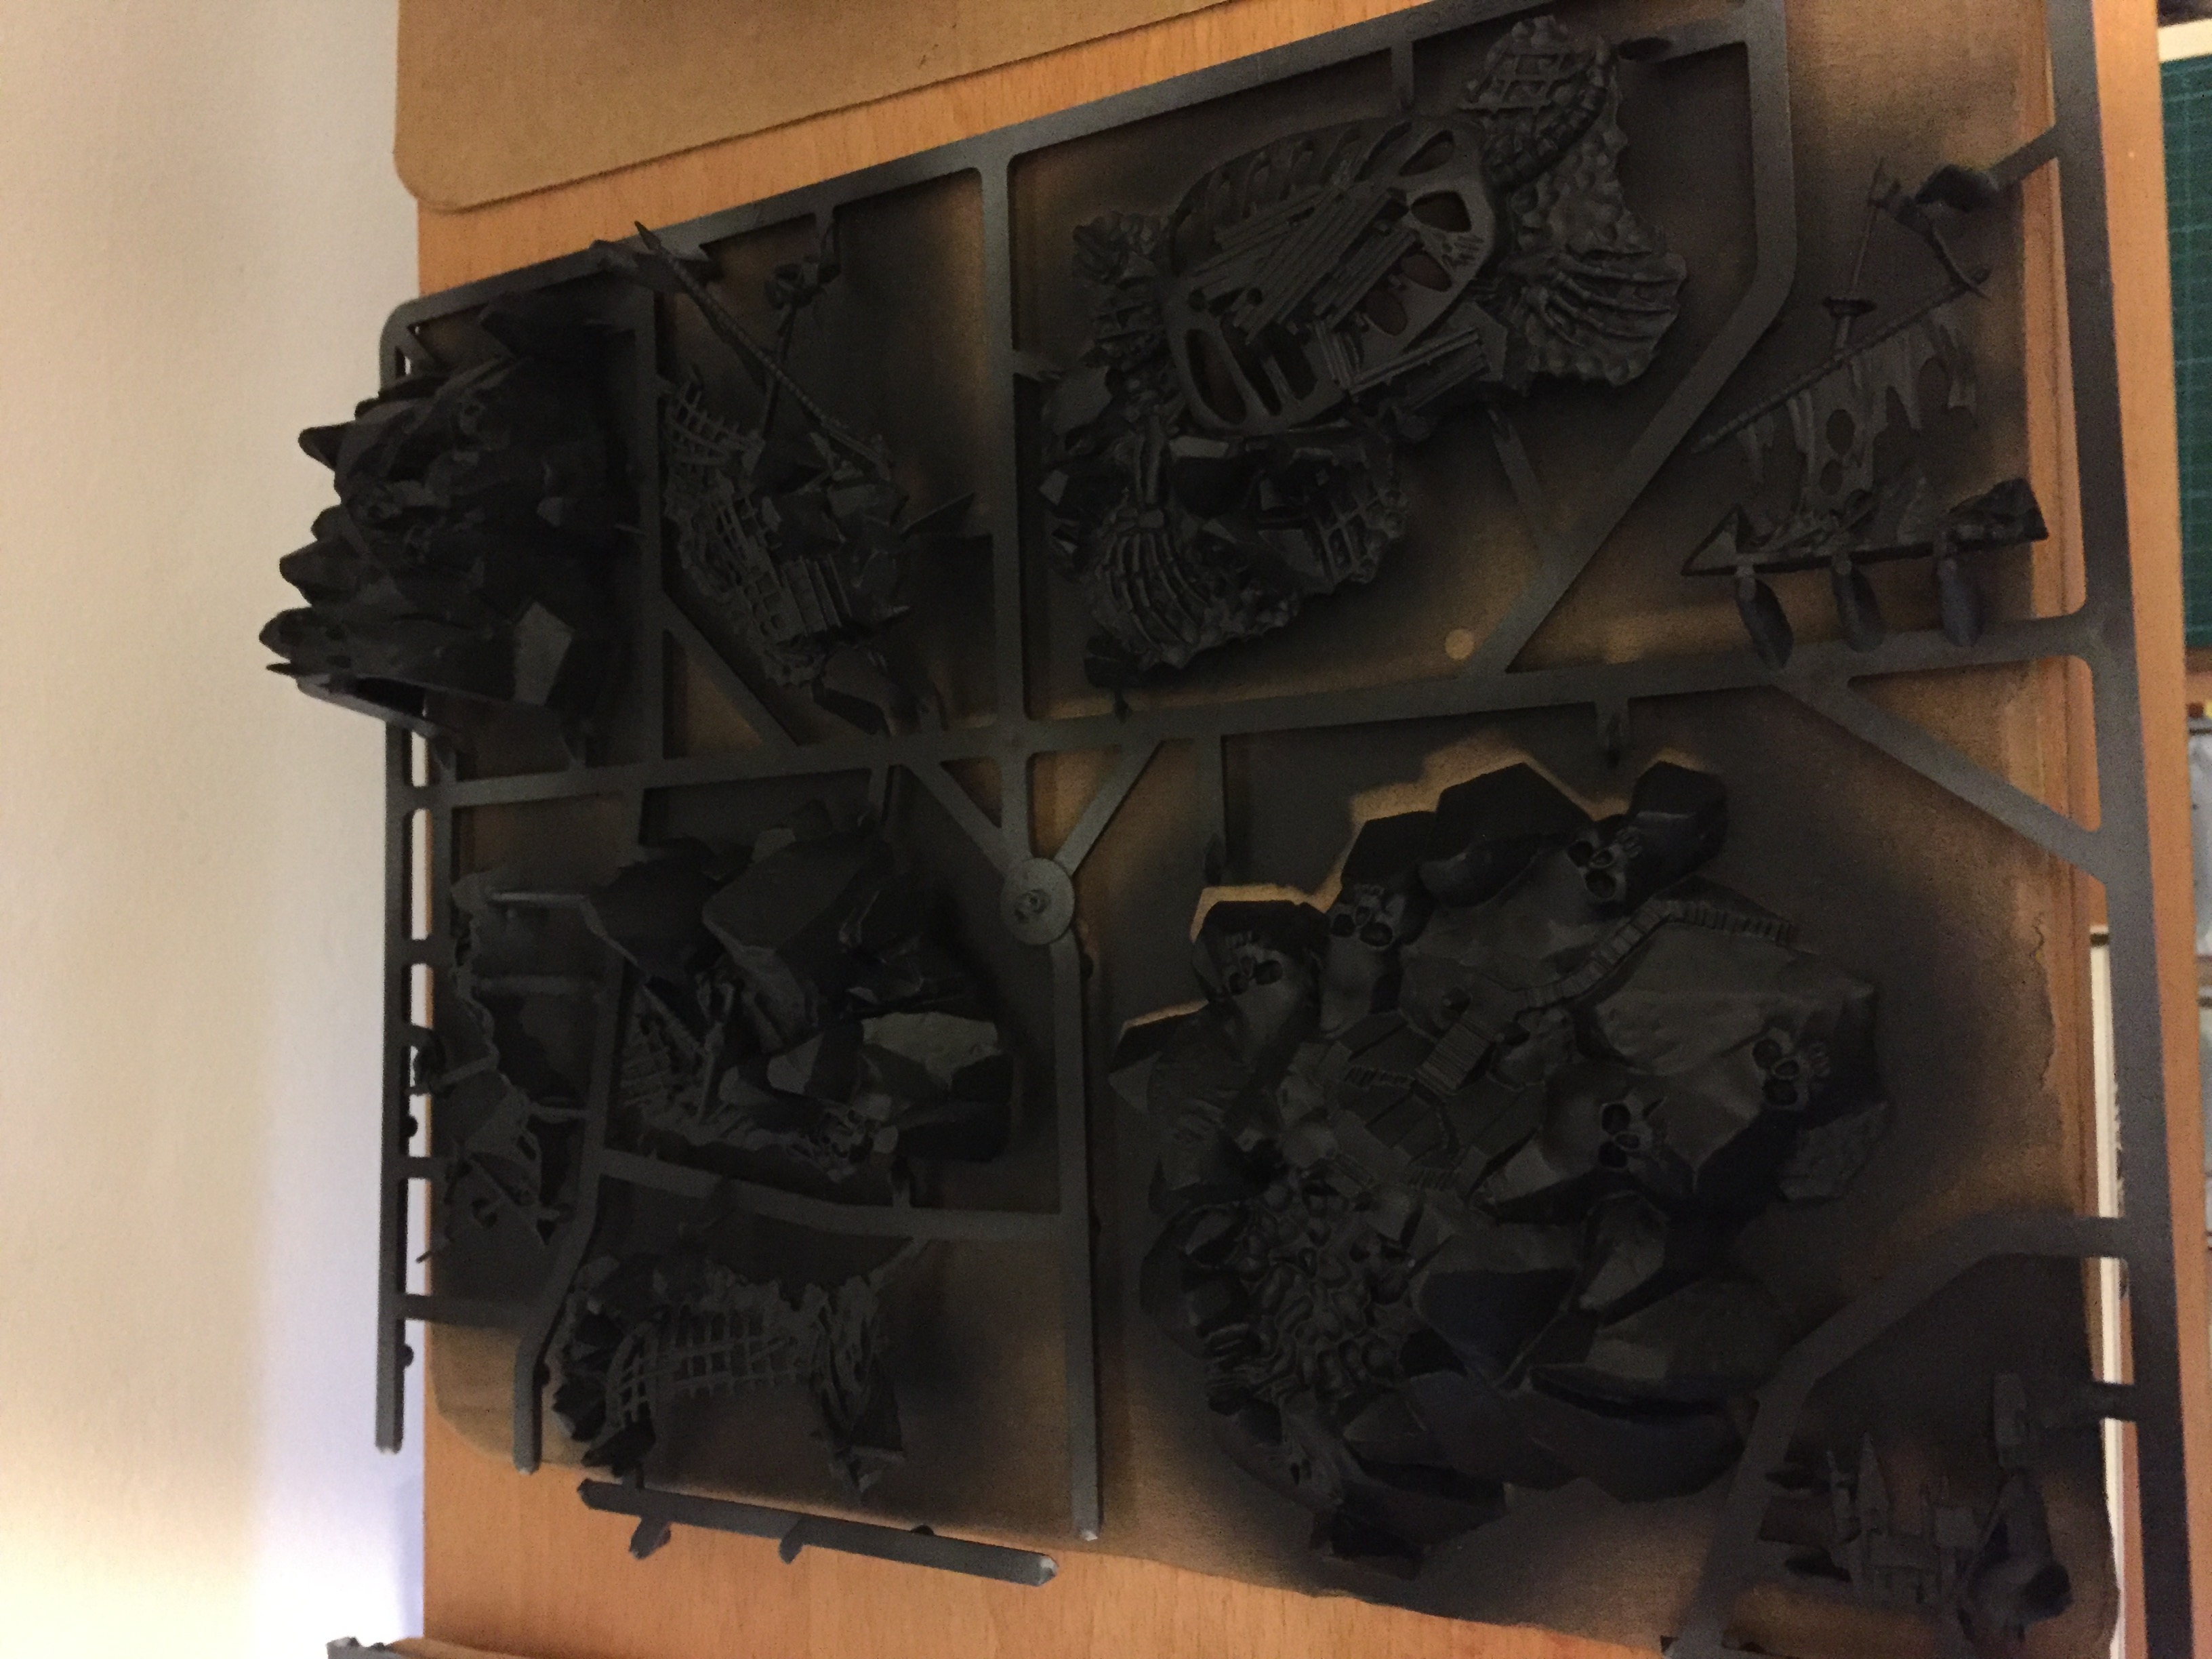
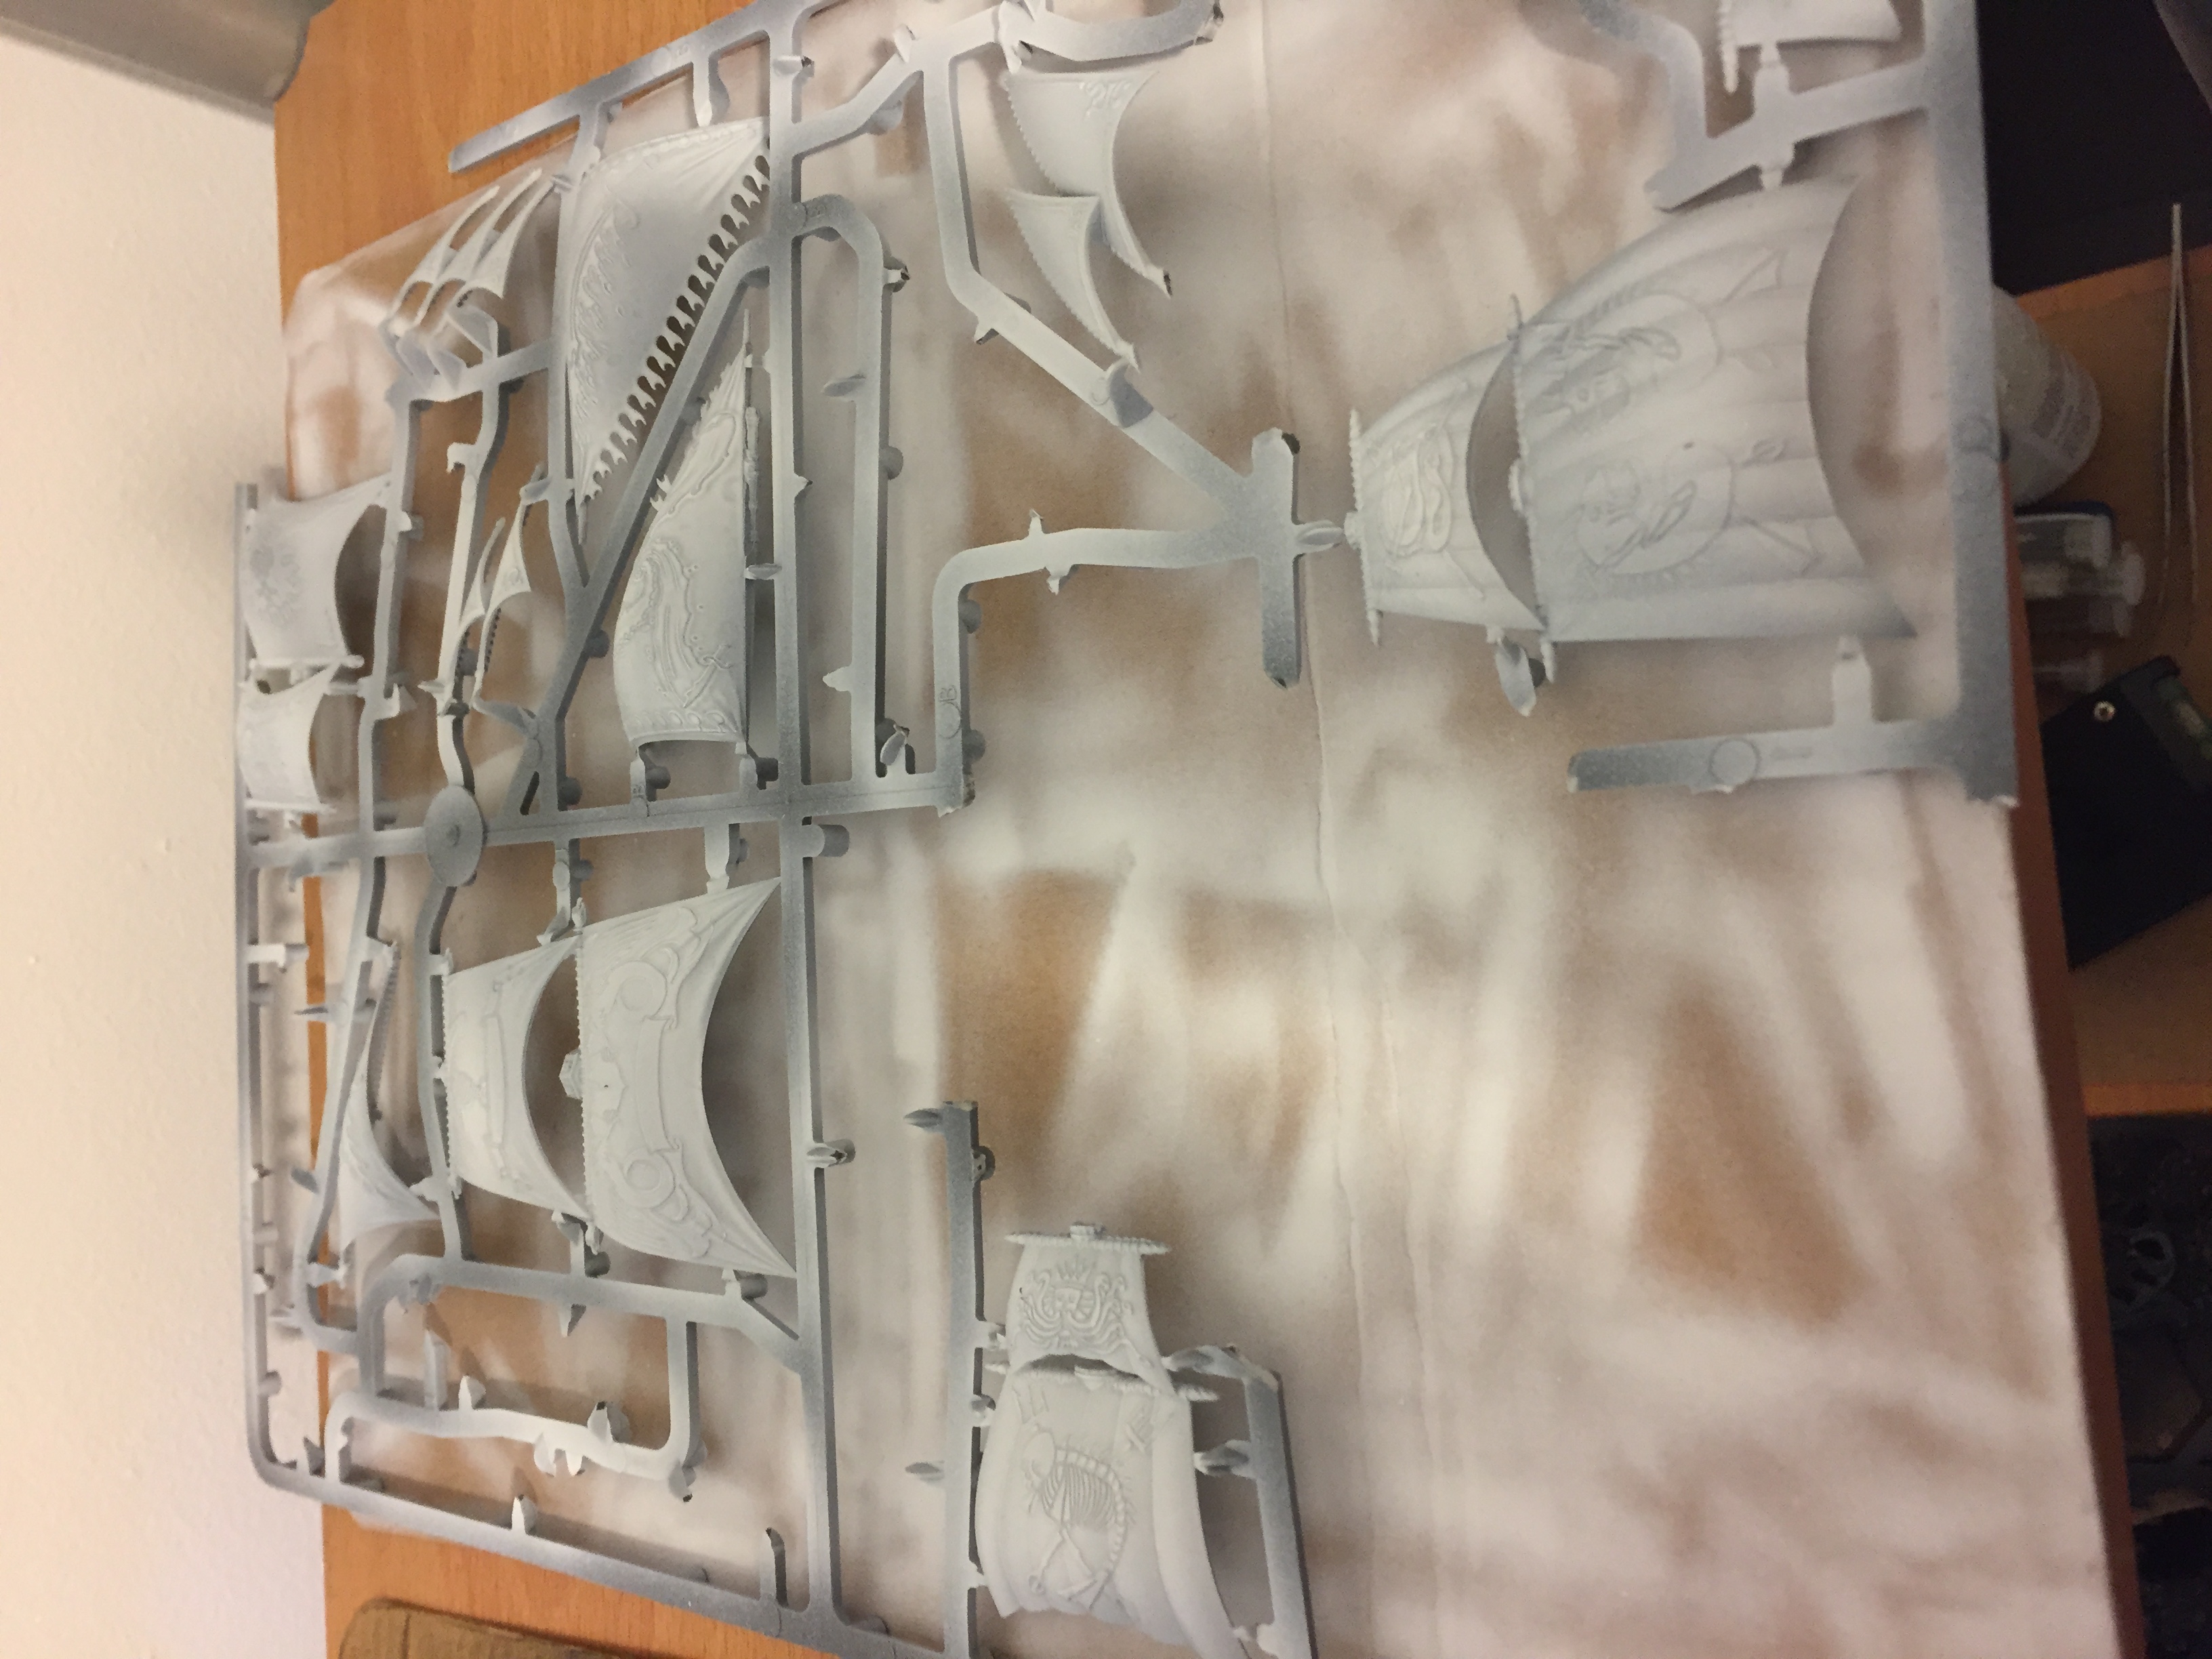
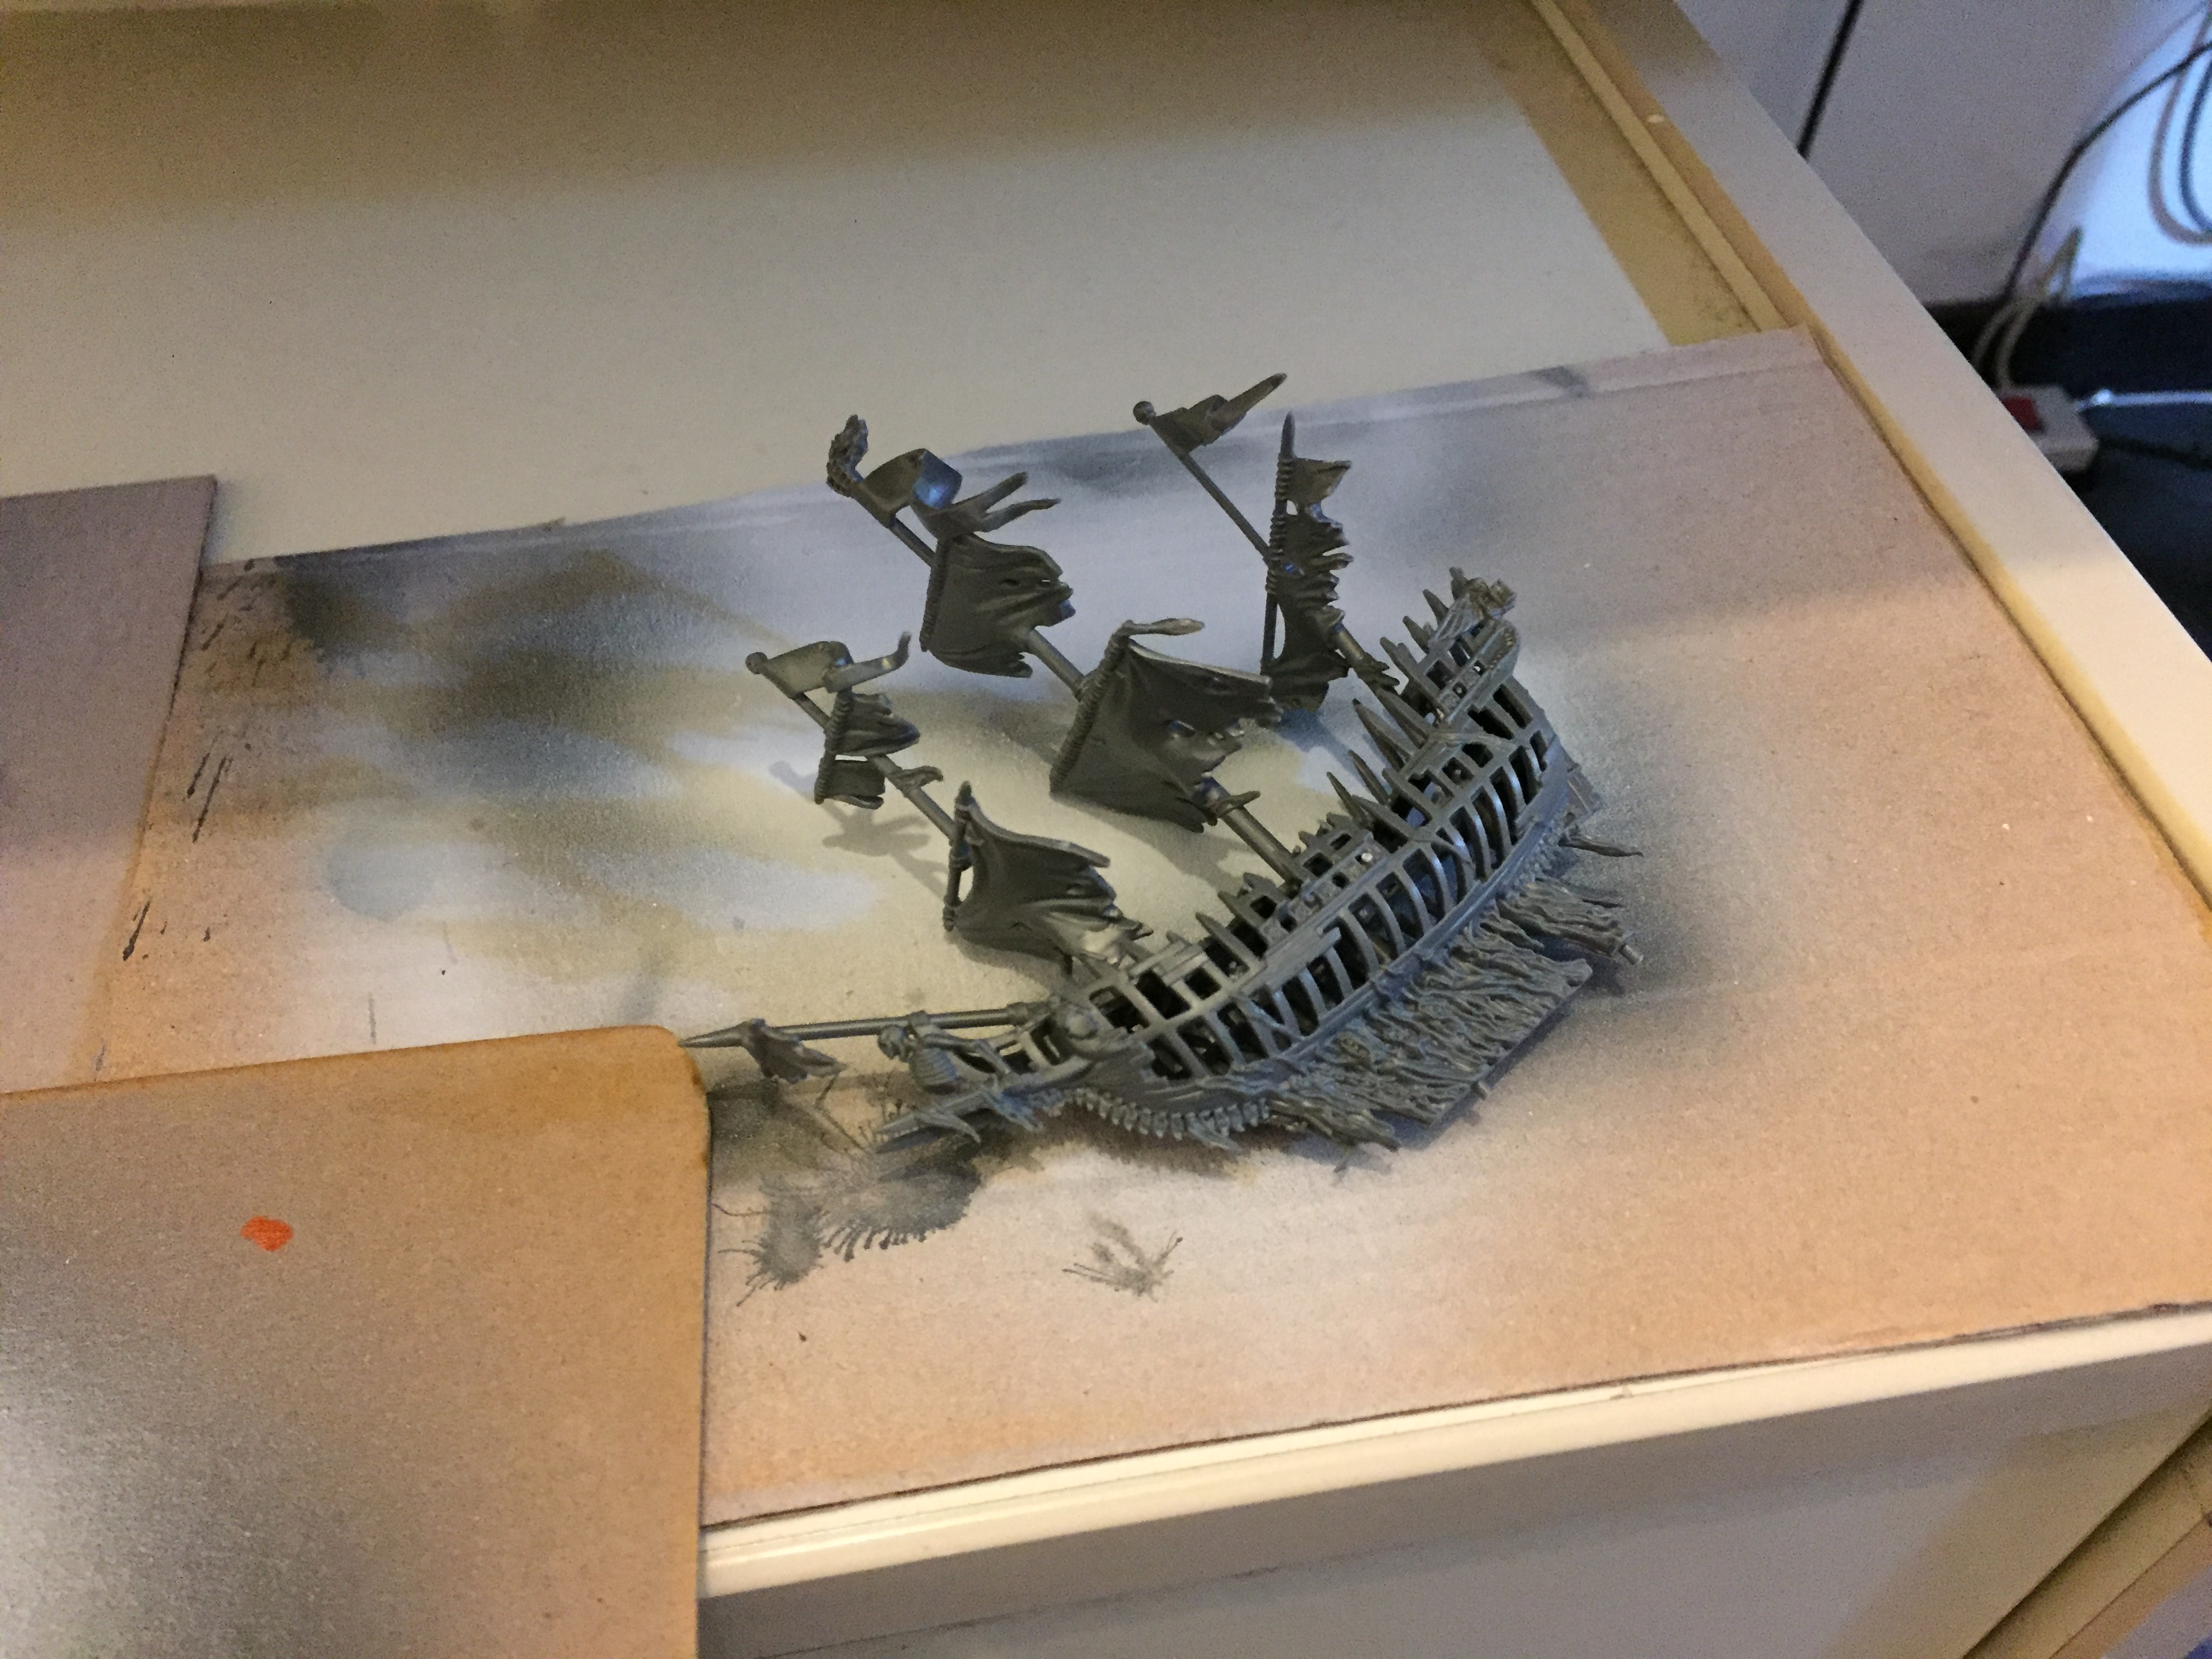
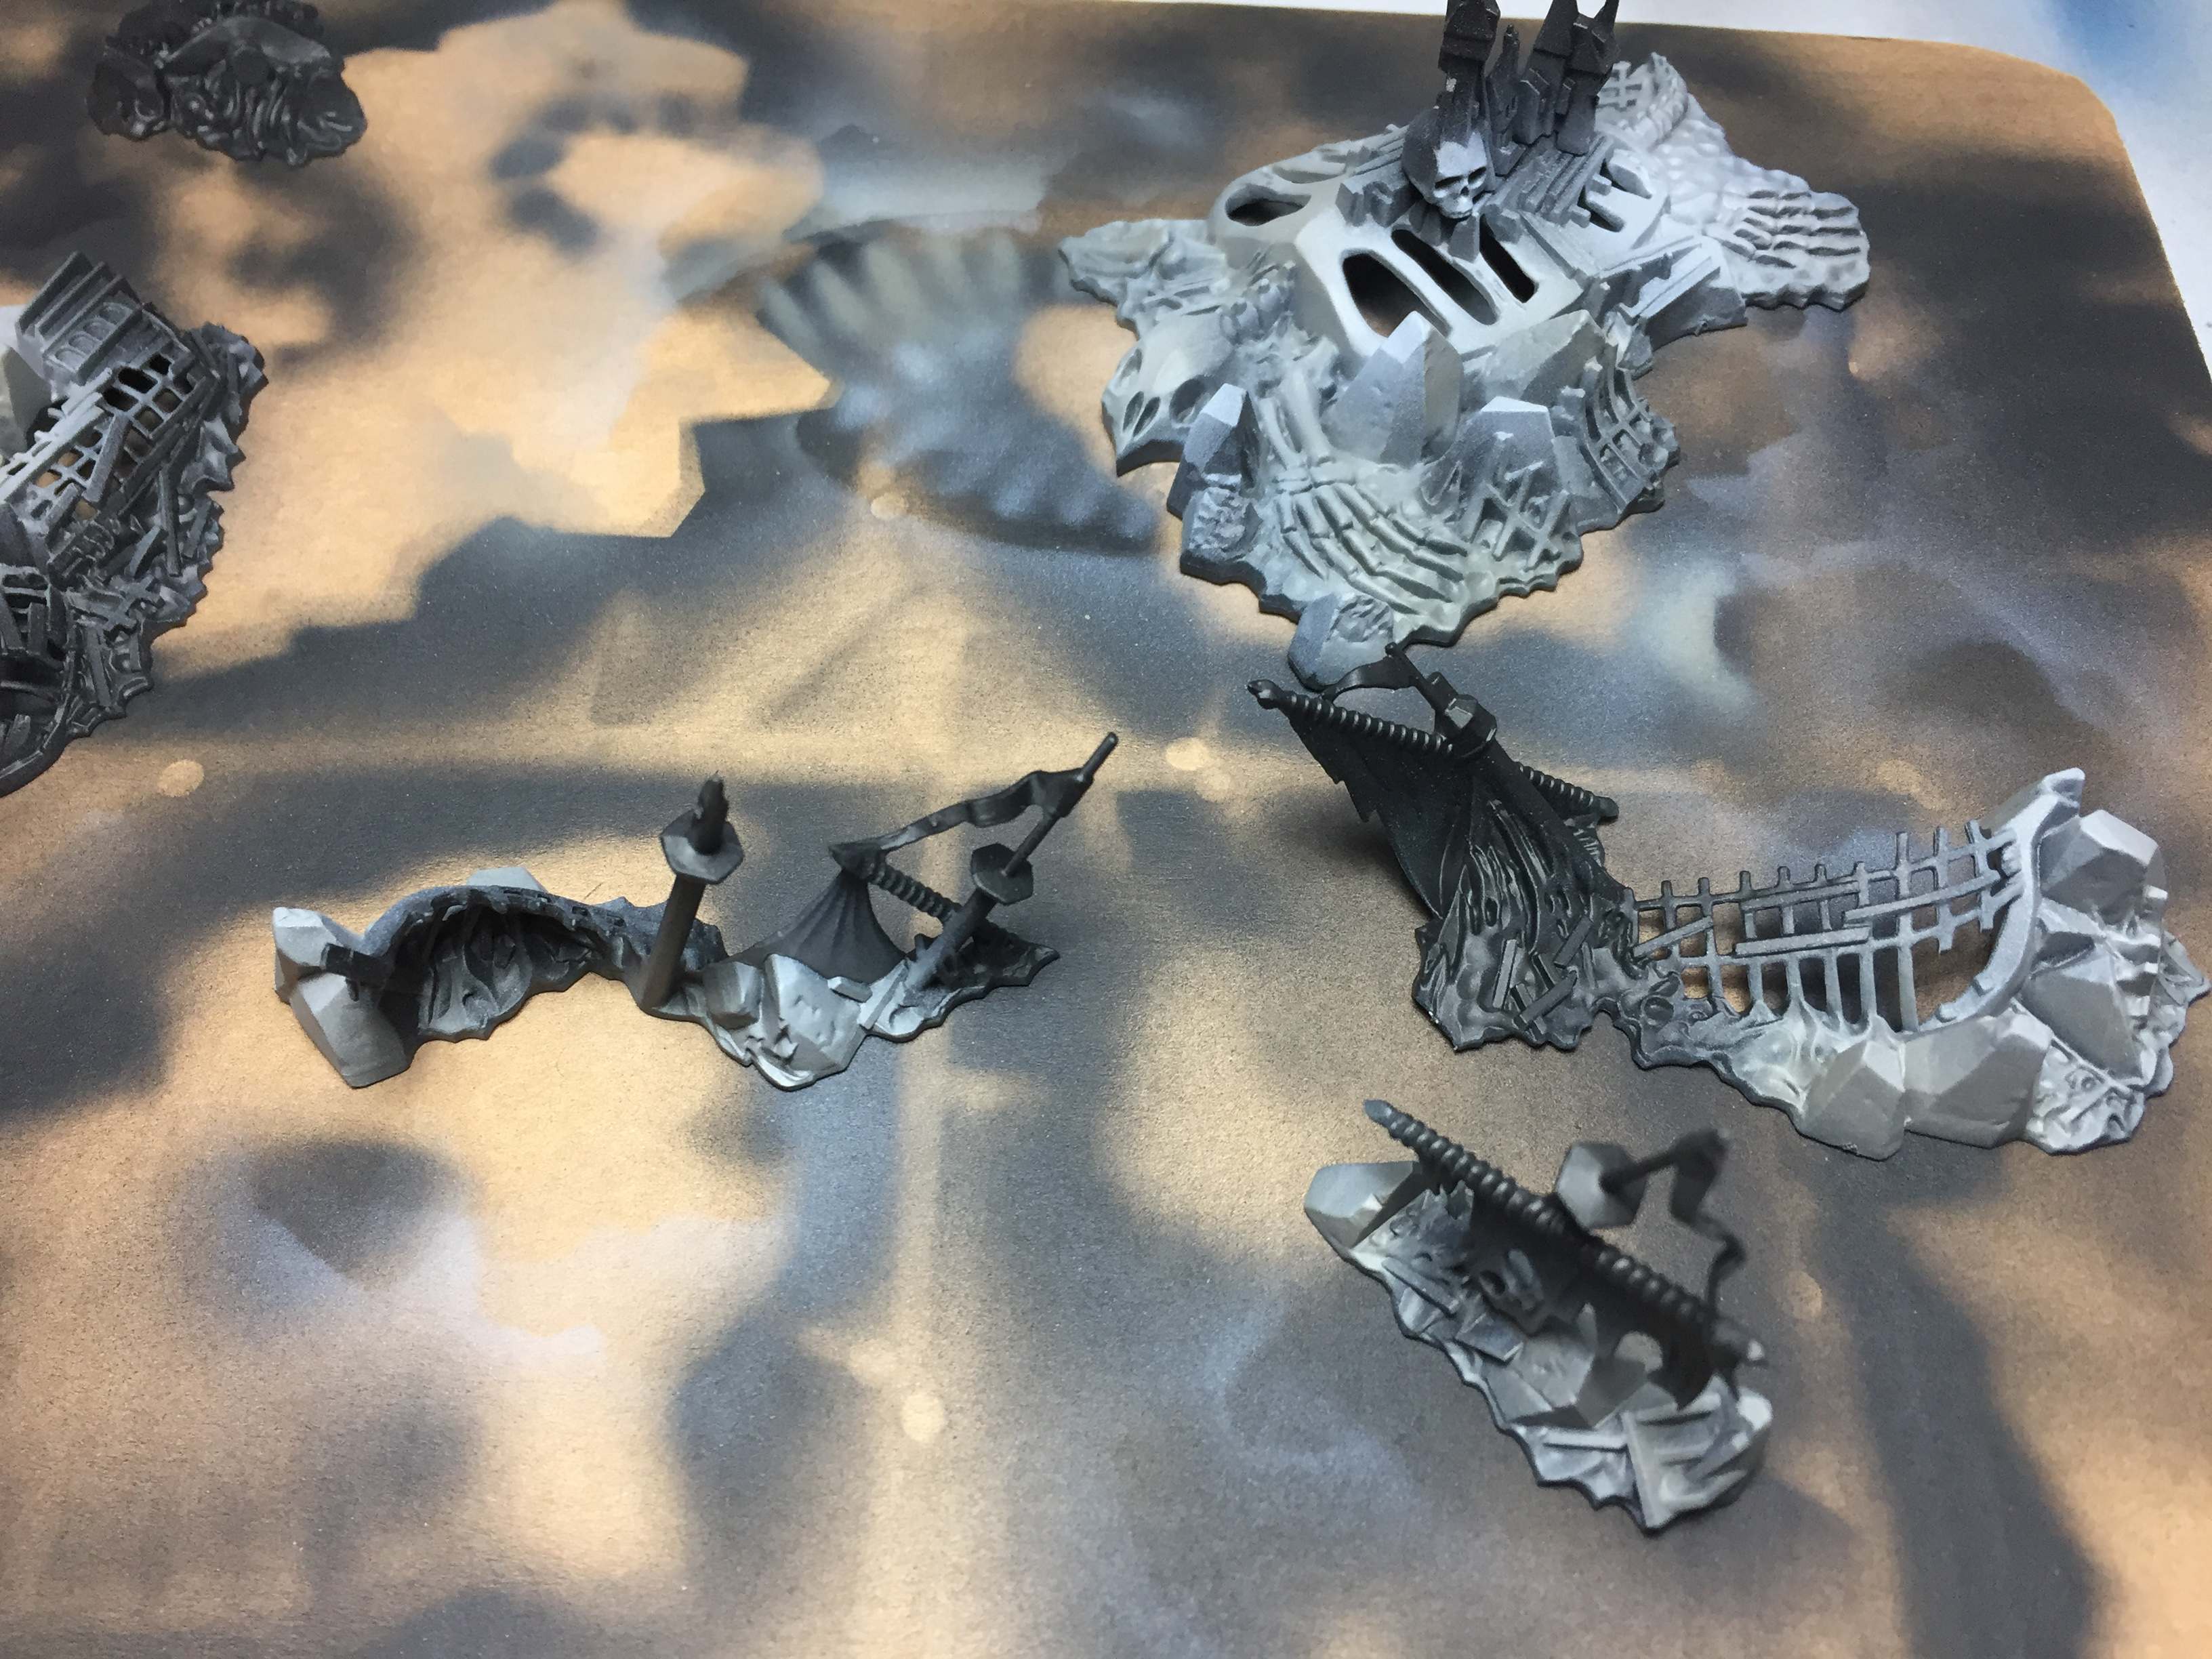
Building the ships and priming
The terrain and gaming aids have been primed on the sprue. The ships have been assembled first, without their sails and bases. The sails and the bases remain on the sprue and will only be added after painting has been completed.
I’ve used white and black surface primer from Vallejo and sprayed it on with my airbrush.
To make it easier to see which ship is on which side during game play, I will paint the sails of the pirate ships white and those of the undead ships black.
Black:
- Terrain (rocky islands mostly)
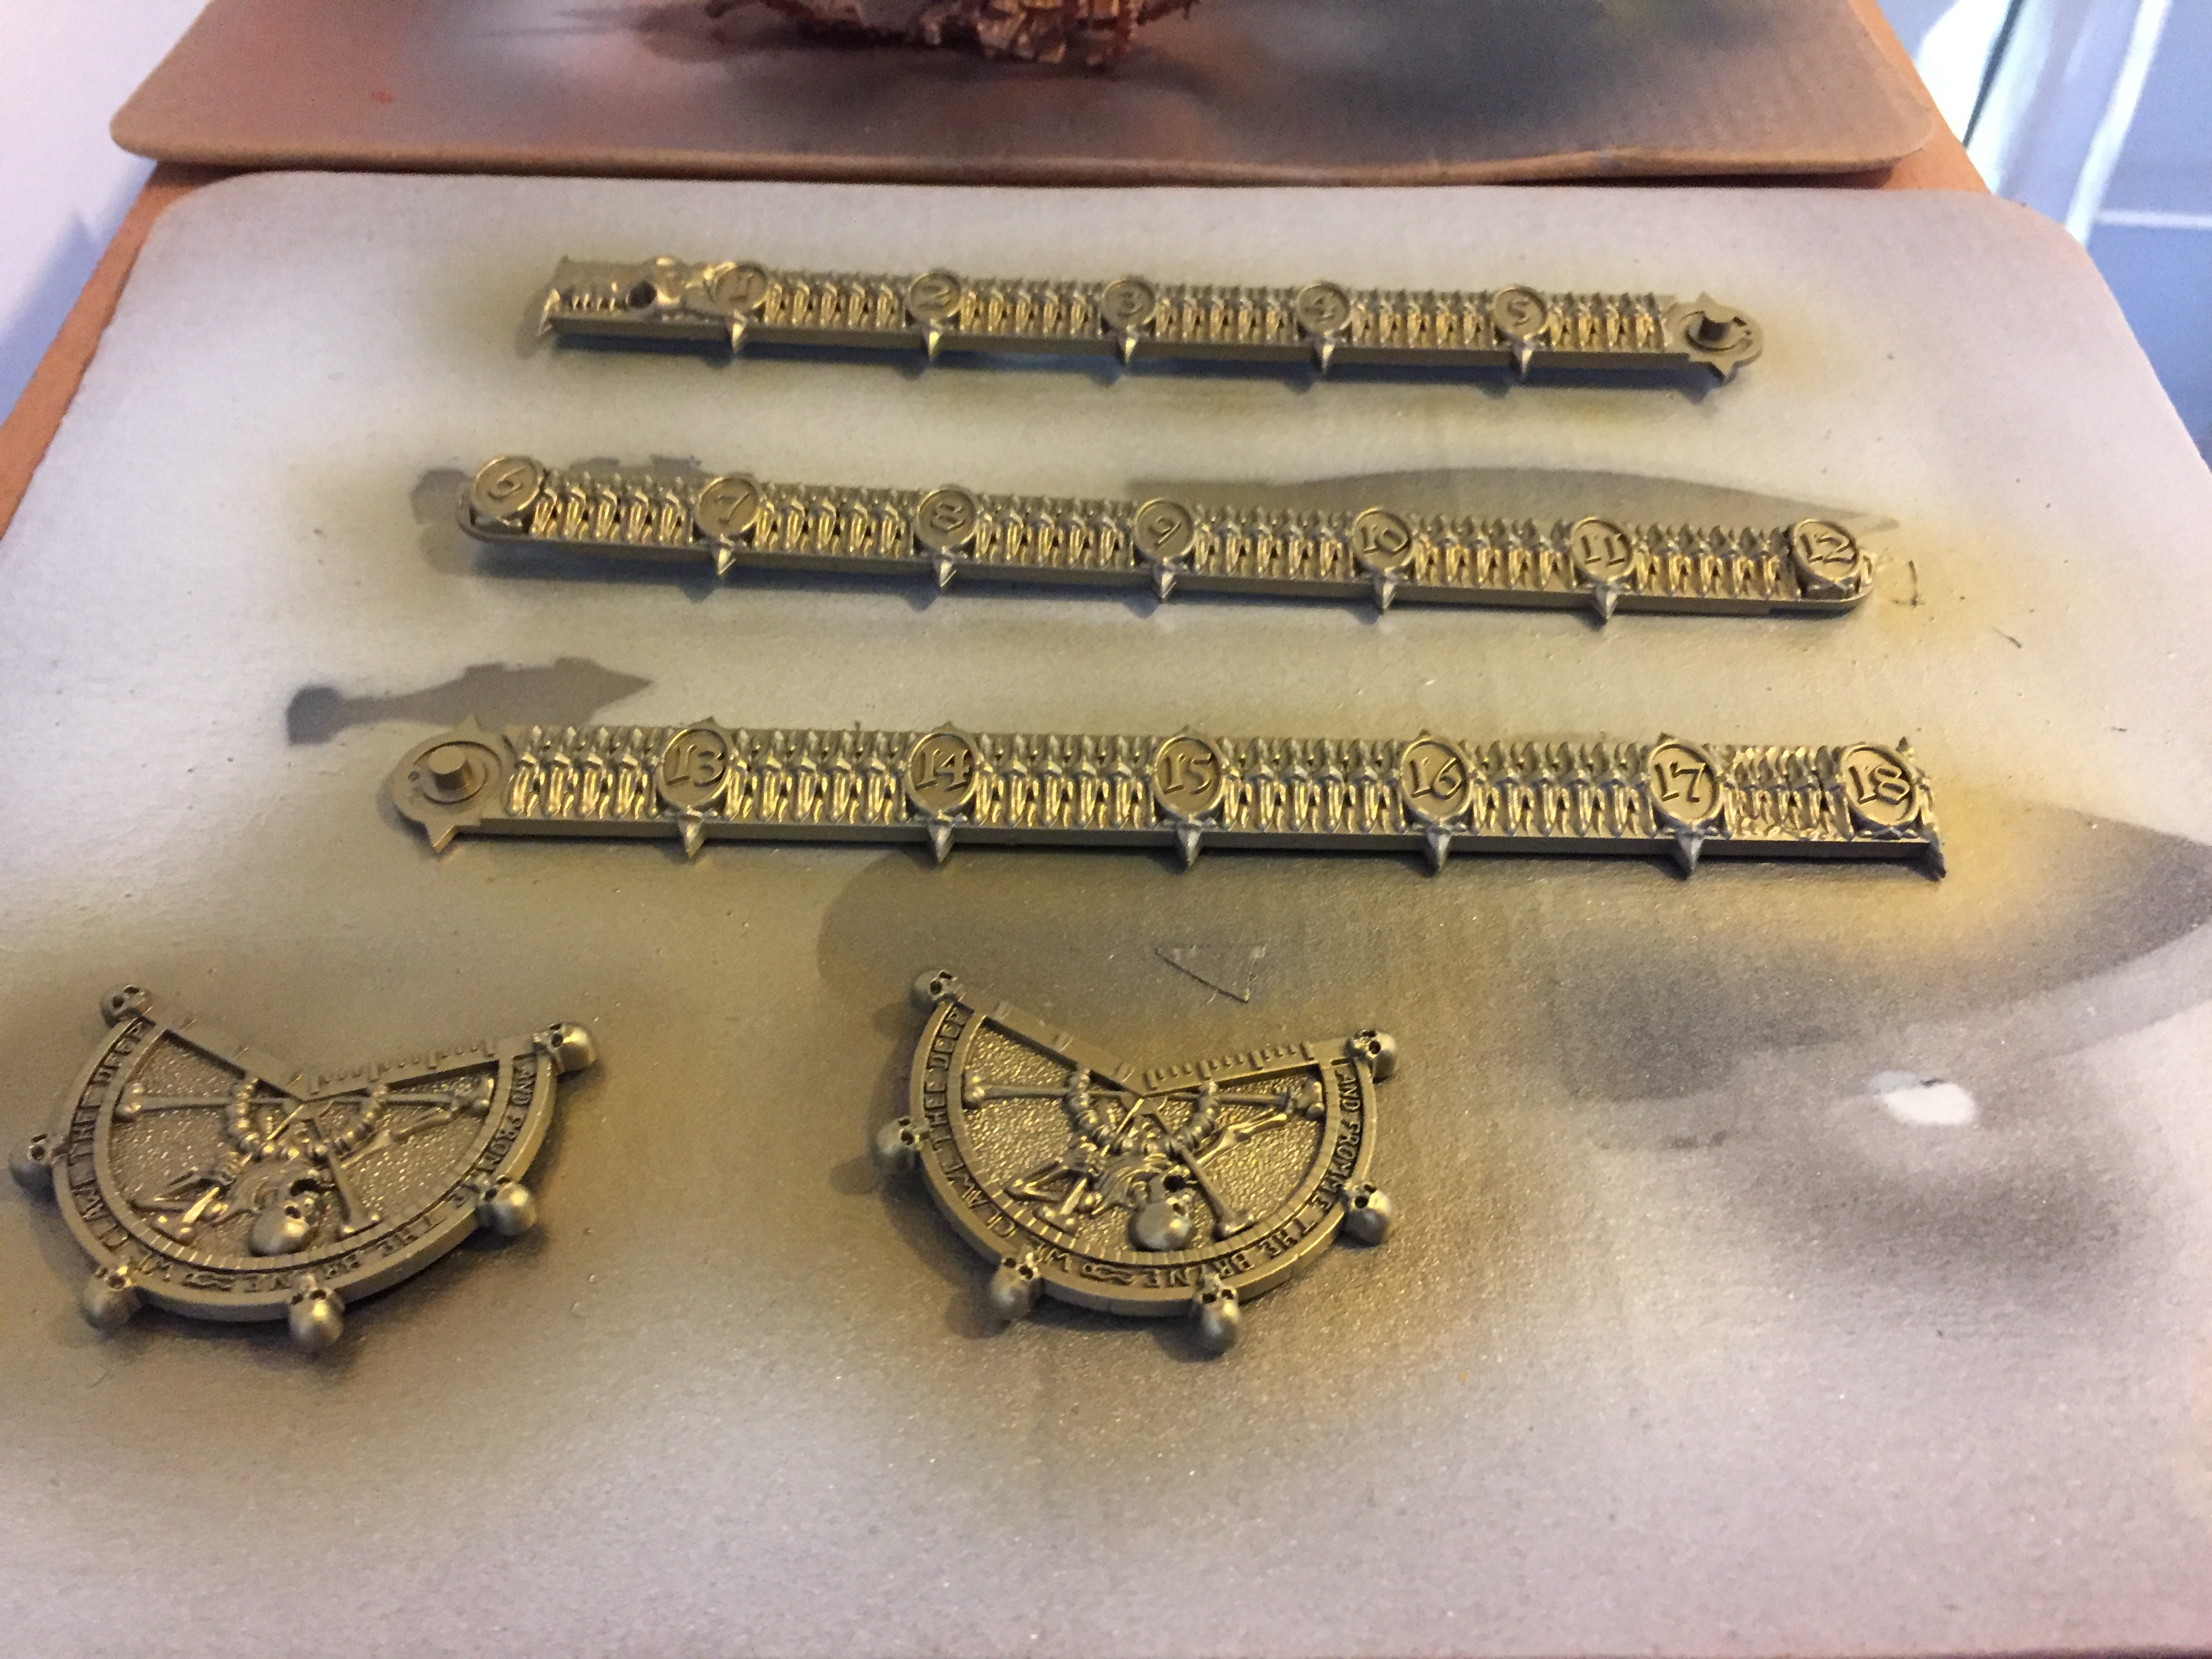
- Gaming aids (these will be painted in metallic paint latter)
- Most ships
- The sails of the undead fleet
White
- The sails of the pirate ships
- The elven ship and the flying ghost ship
- The sea monsters
- Superstructure and wind blown by a spirit, both from the Flaming Scimitar
- The bases of the ships. (White is better to achieve a nice bright blue latter)
- The cogs (small auxiliary ships; primed white to achieve bright blue sea water, just like the ships bases)


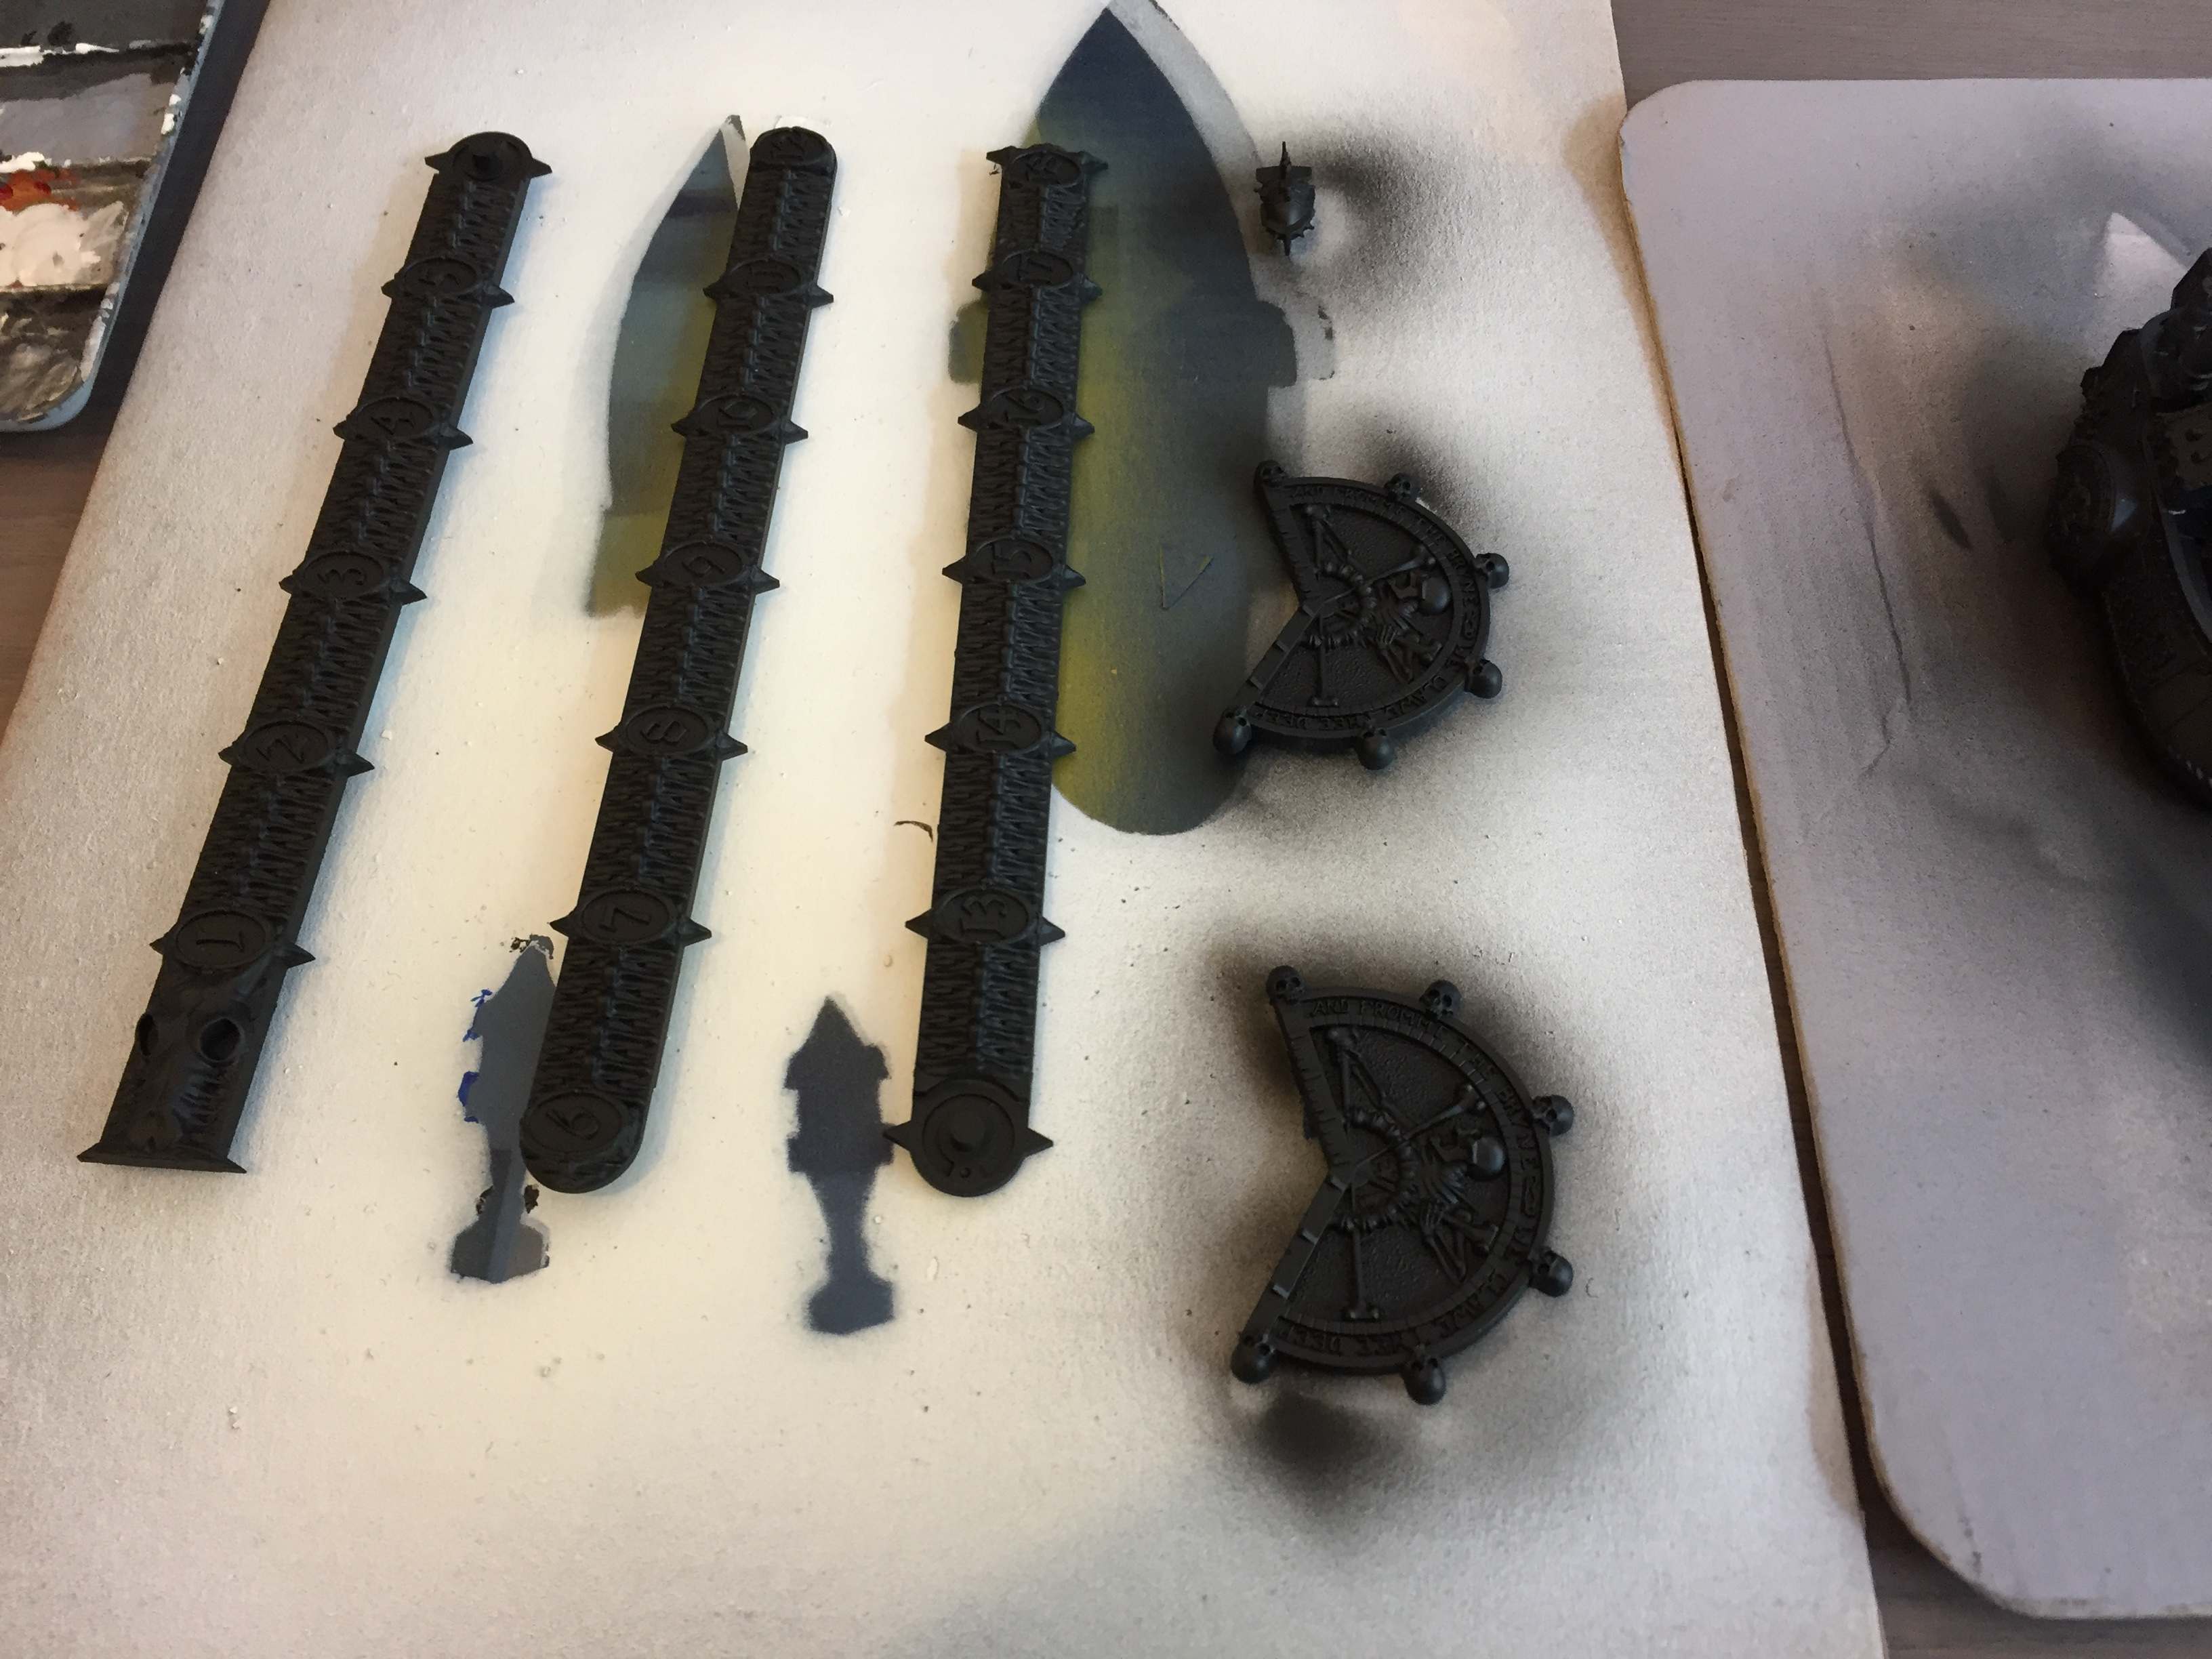
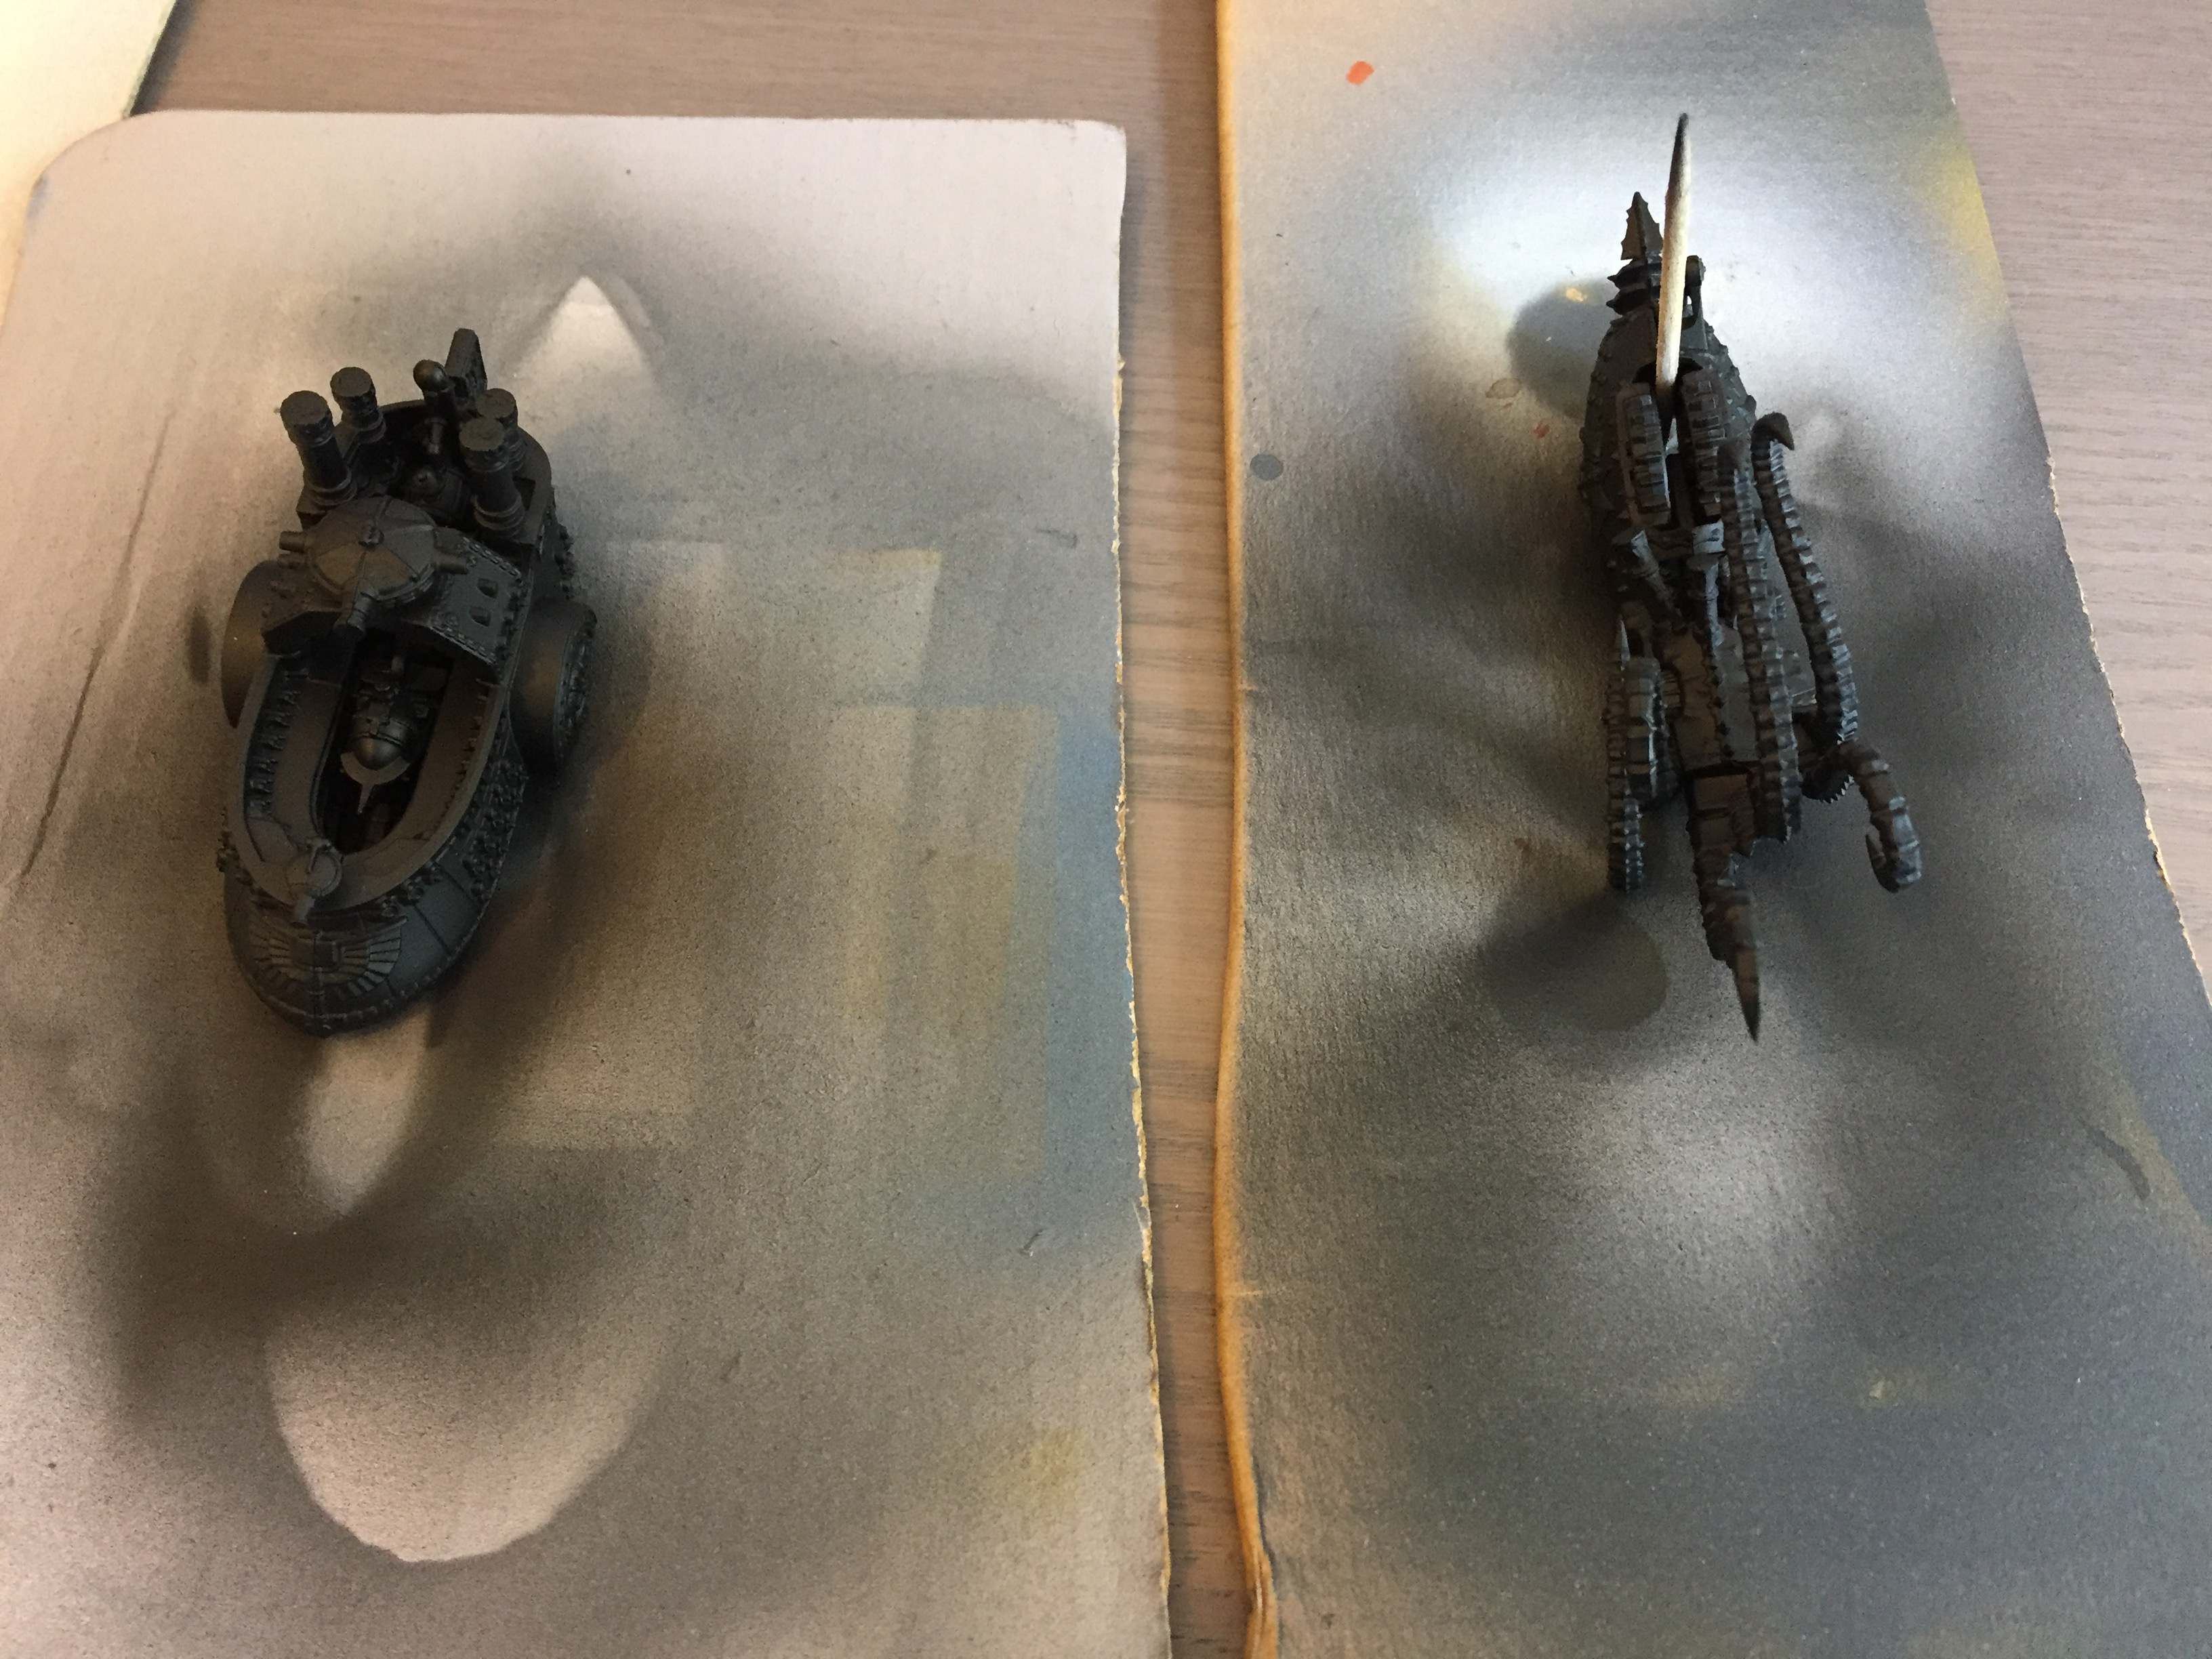
Airbrushing metallic paints
I love metallic paints. I have a large collections of them and have used them extensively ever since I started painting miniatures. Metallic paints are user friendly. It doesn’t require advanced painting skills to get a good looking result.
I followed the following steps:
- Prime black
- Base coat Plate Mail Metal from The Army Painter. I added some airbrush flow improver, because this paint isn’t made for airbrushing.
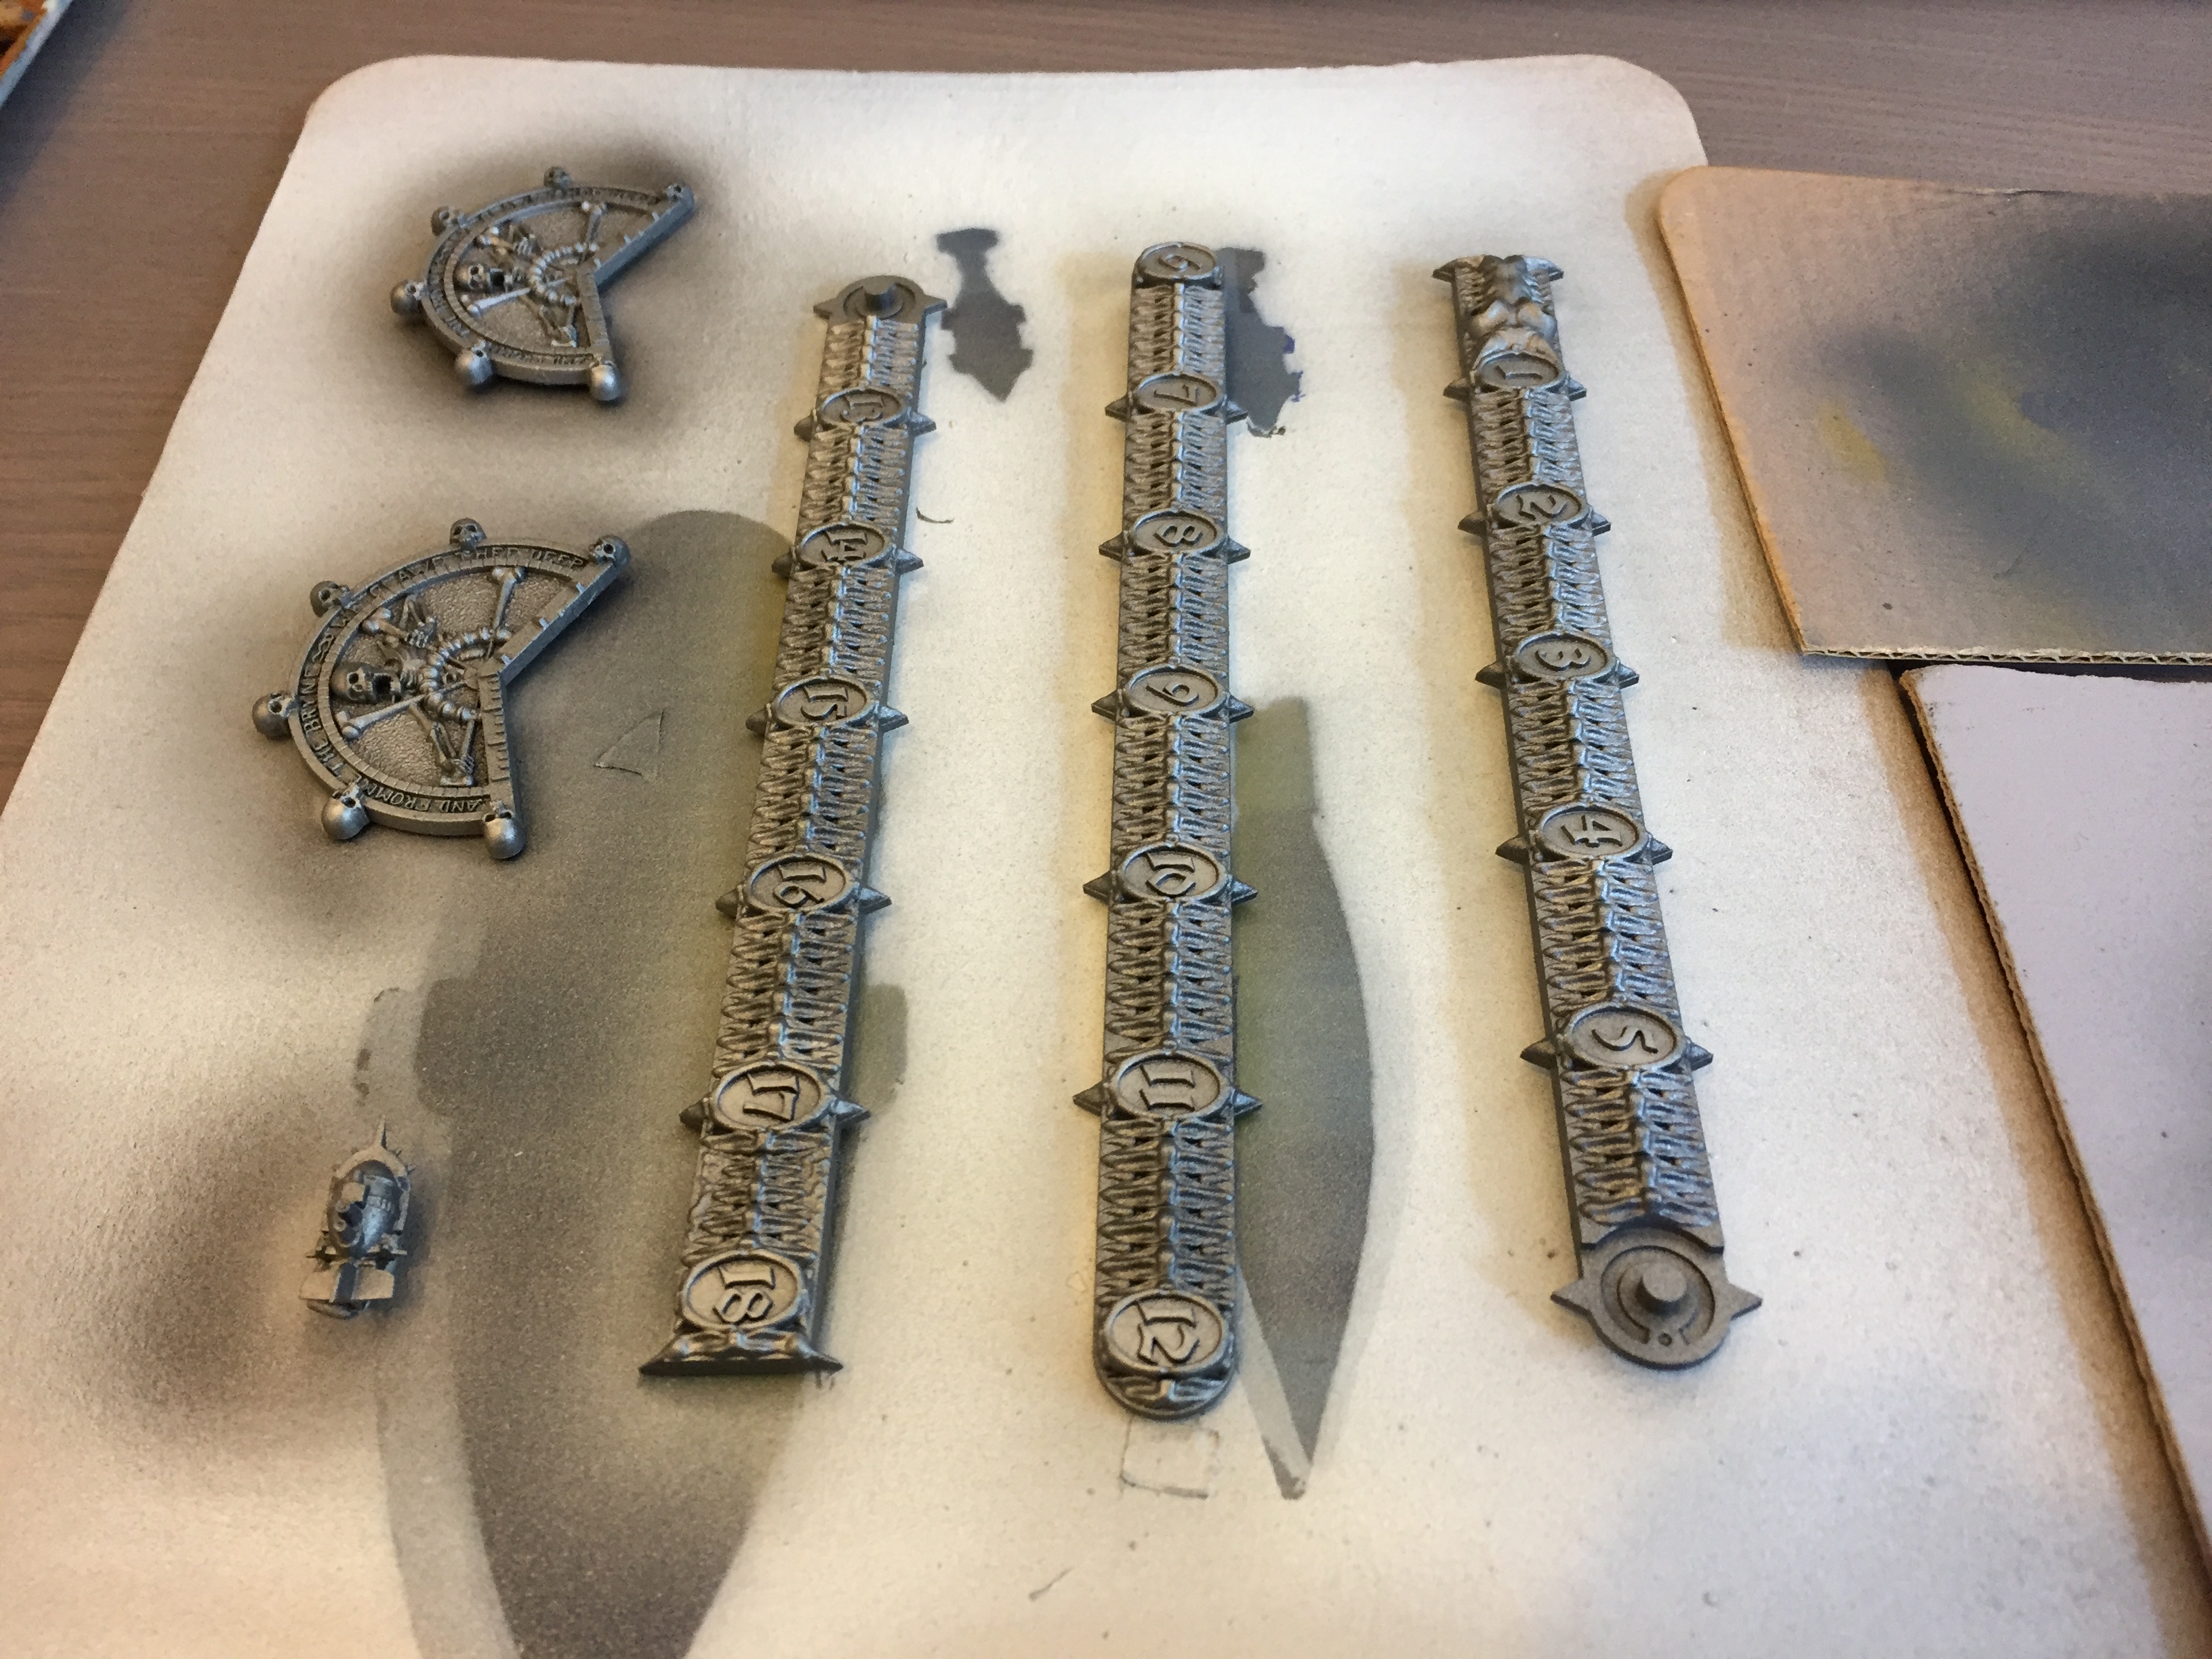
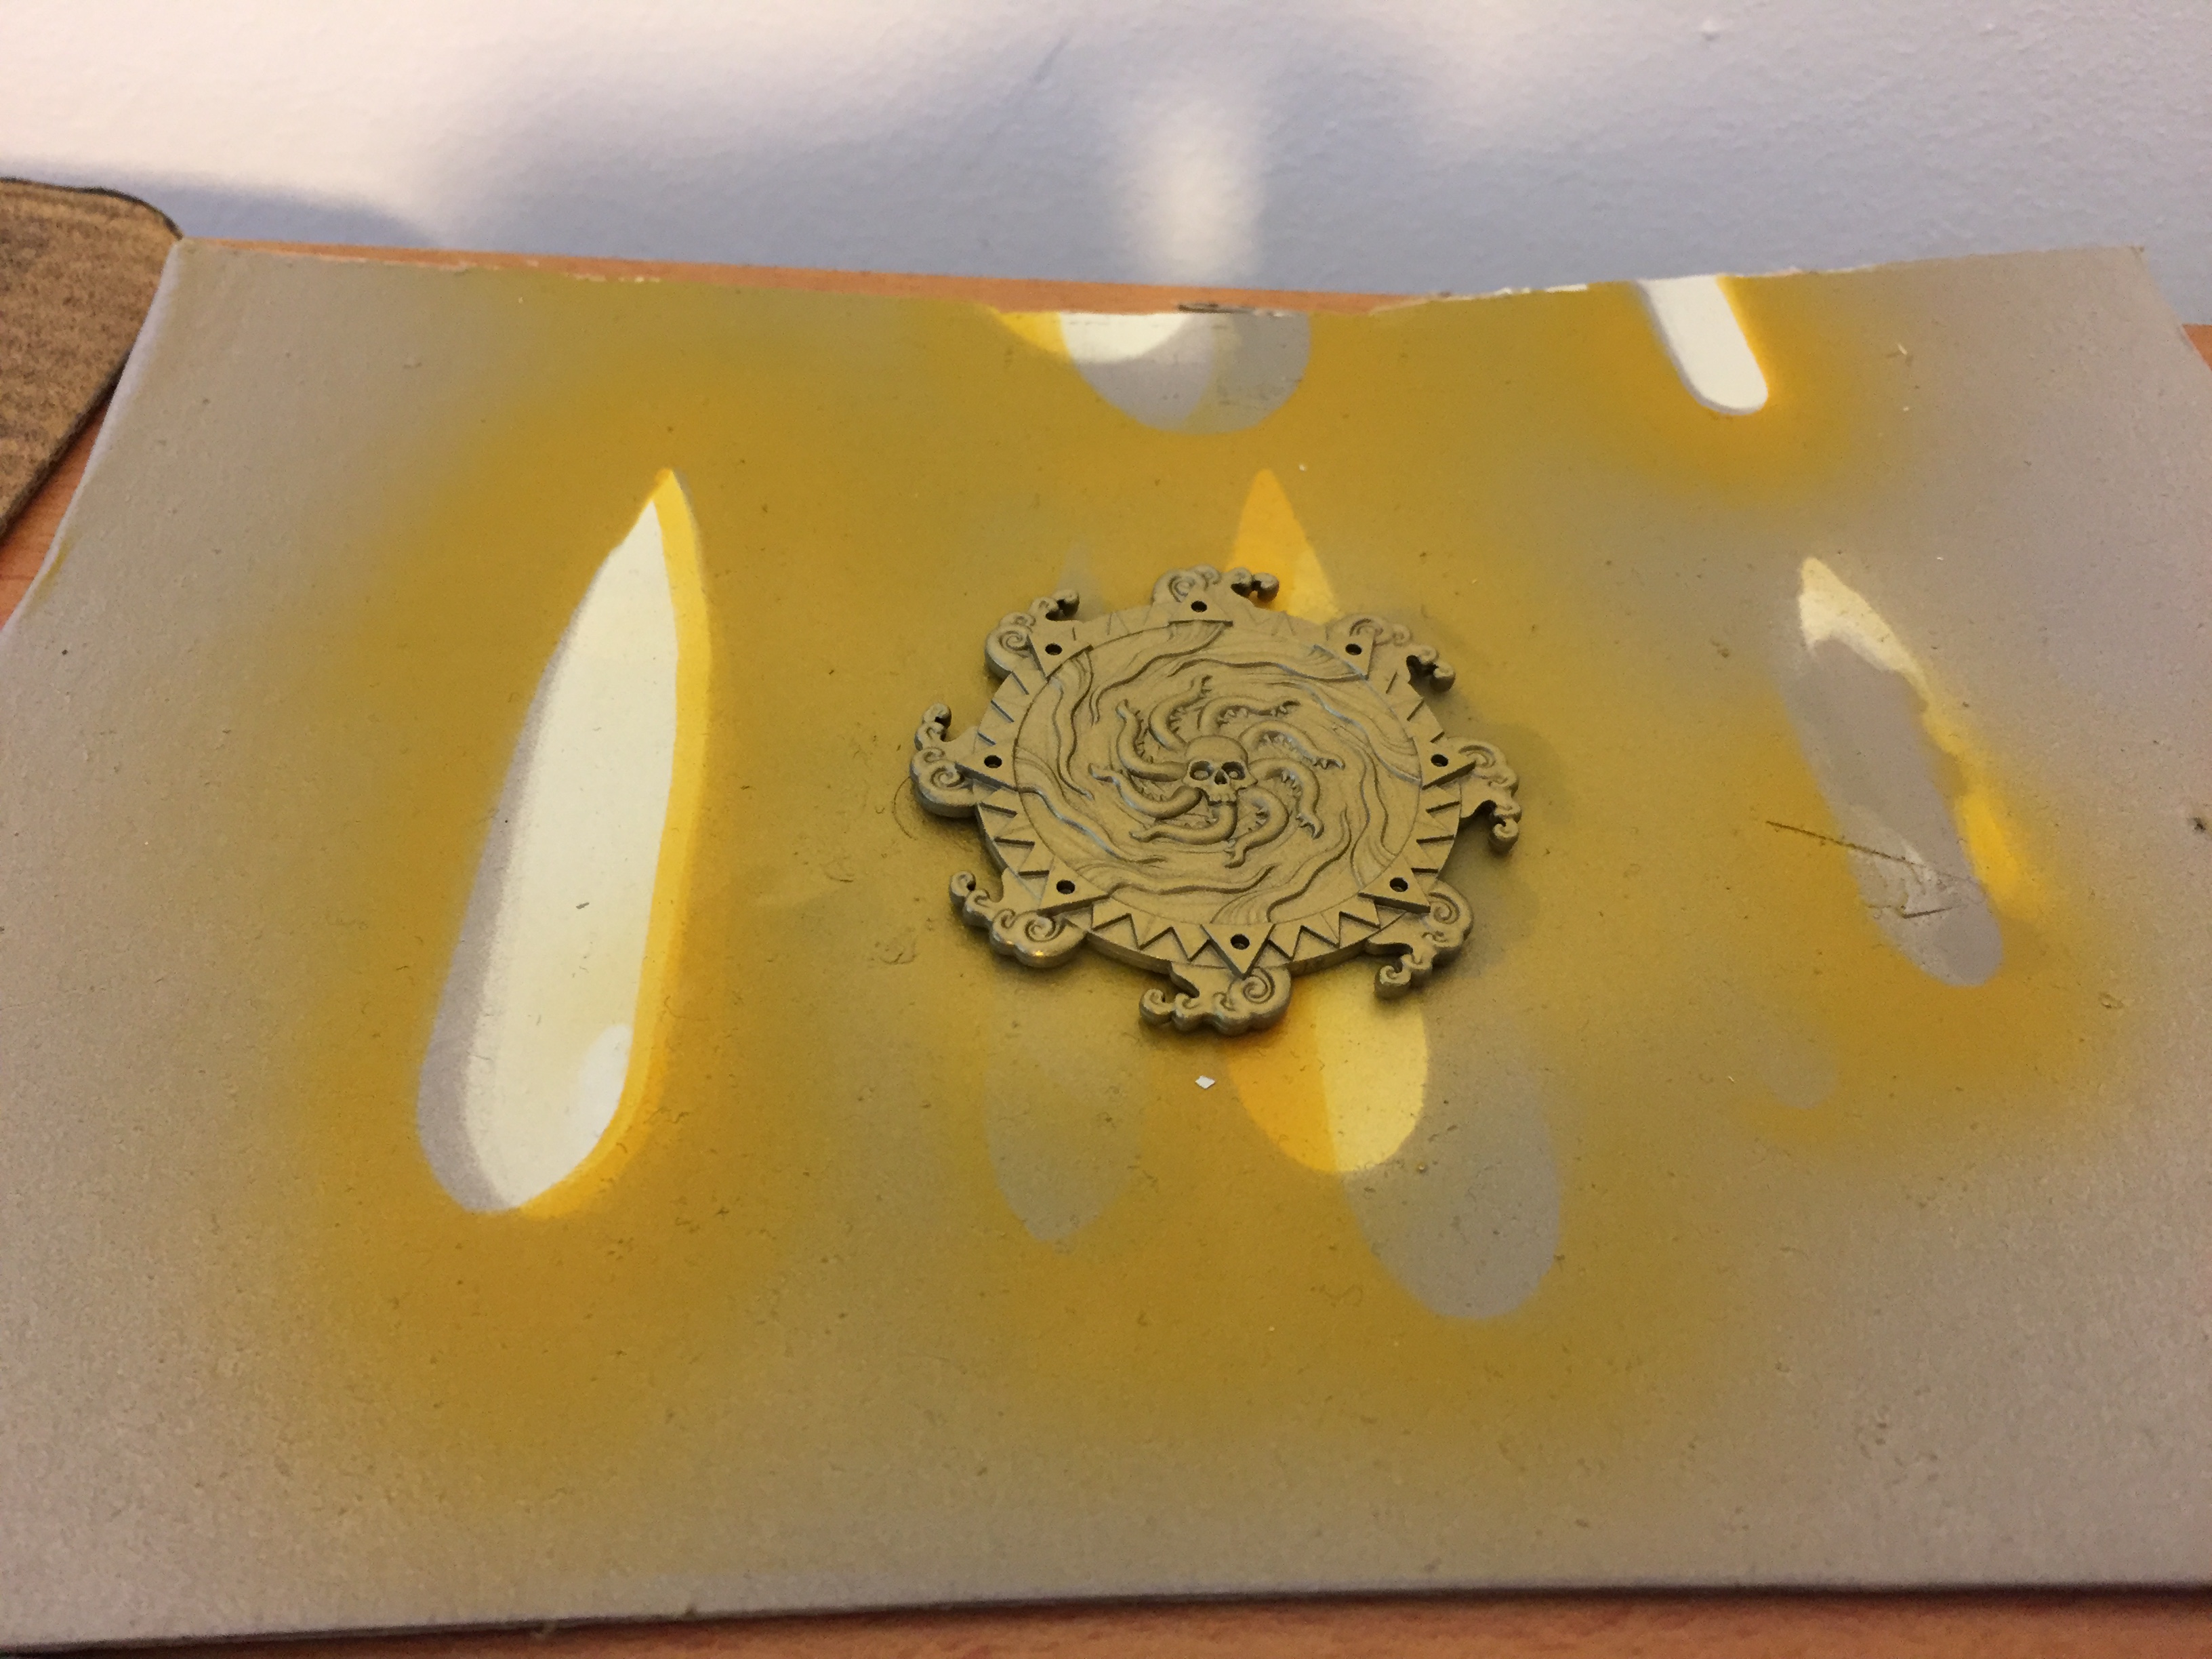
- Airbrush with the metallic paint in the colour you want. In my case:
- Model Air Bright Brass from Vallejo for the gaming aids.
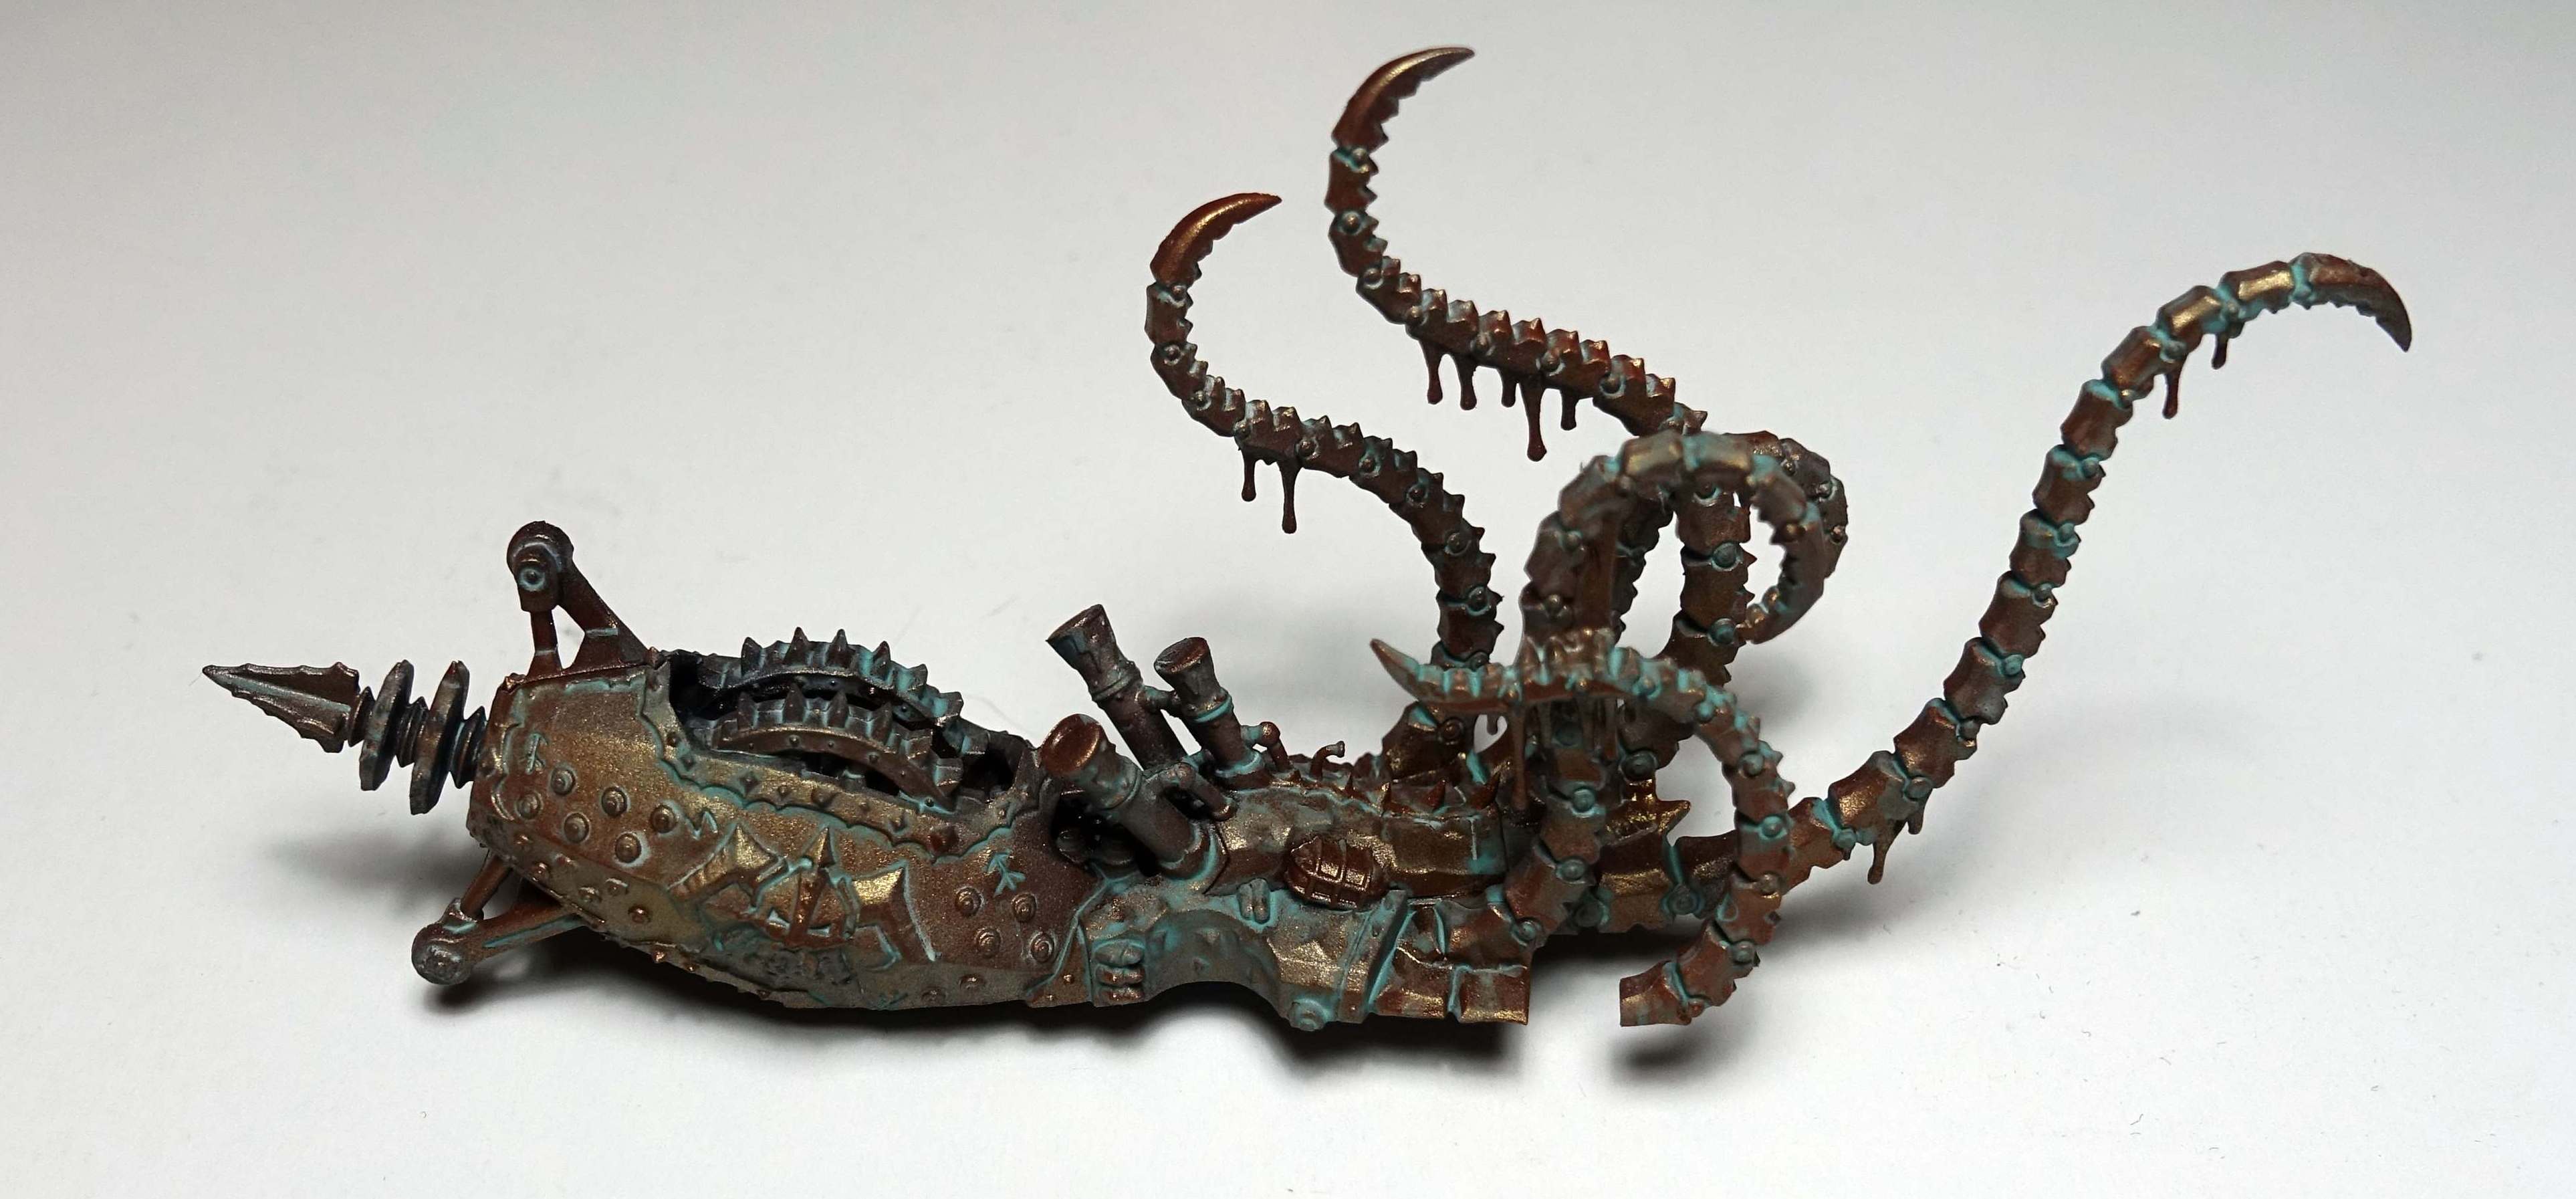
- Model Color Copper from Vallejo (mixed with airbrush flow improver) for the Chaos Dwarf submarine.
For the dwarven steamship I stopped after step 2: Plate Mail Metal. I will detail and highlight the ship in a later phase with a brush. The Chaos Dwarf submarine also needs further brushwork now that it’s painted in copper.
I’m not sure about the gaming aids yet. Maybe I’l drybrush them a bit with a lighter shade of gold or keep them as they are. Then all they need is a coat of gloss varnish.
The technique to put on iron or silver paint first and gold or copper on top, I learned from the 3 Colours up tutorials from Beasts of War. It makes the gold or copper look brighter, than when painting directly on black or brown paint. This is the tutorial: https://youtu.be/EDR6by-h2k8

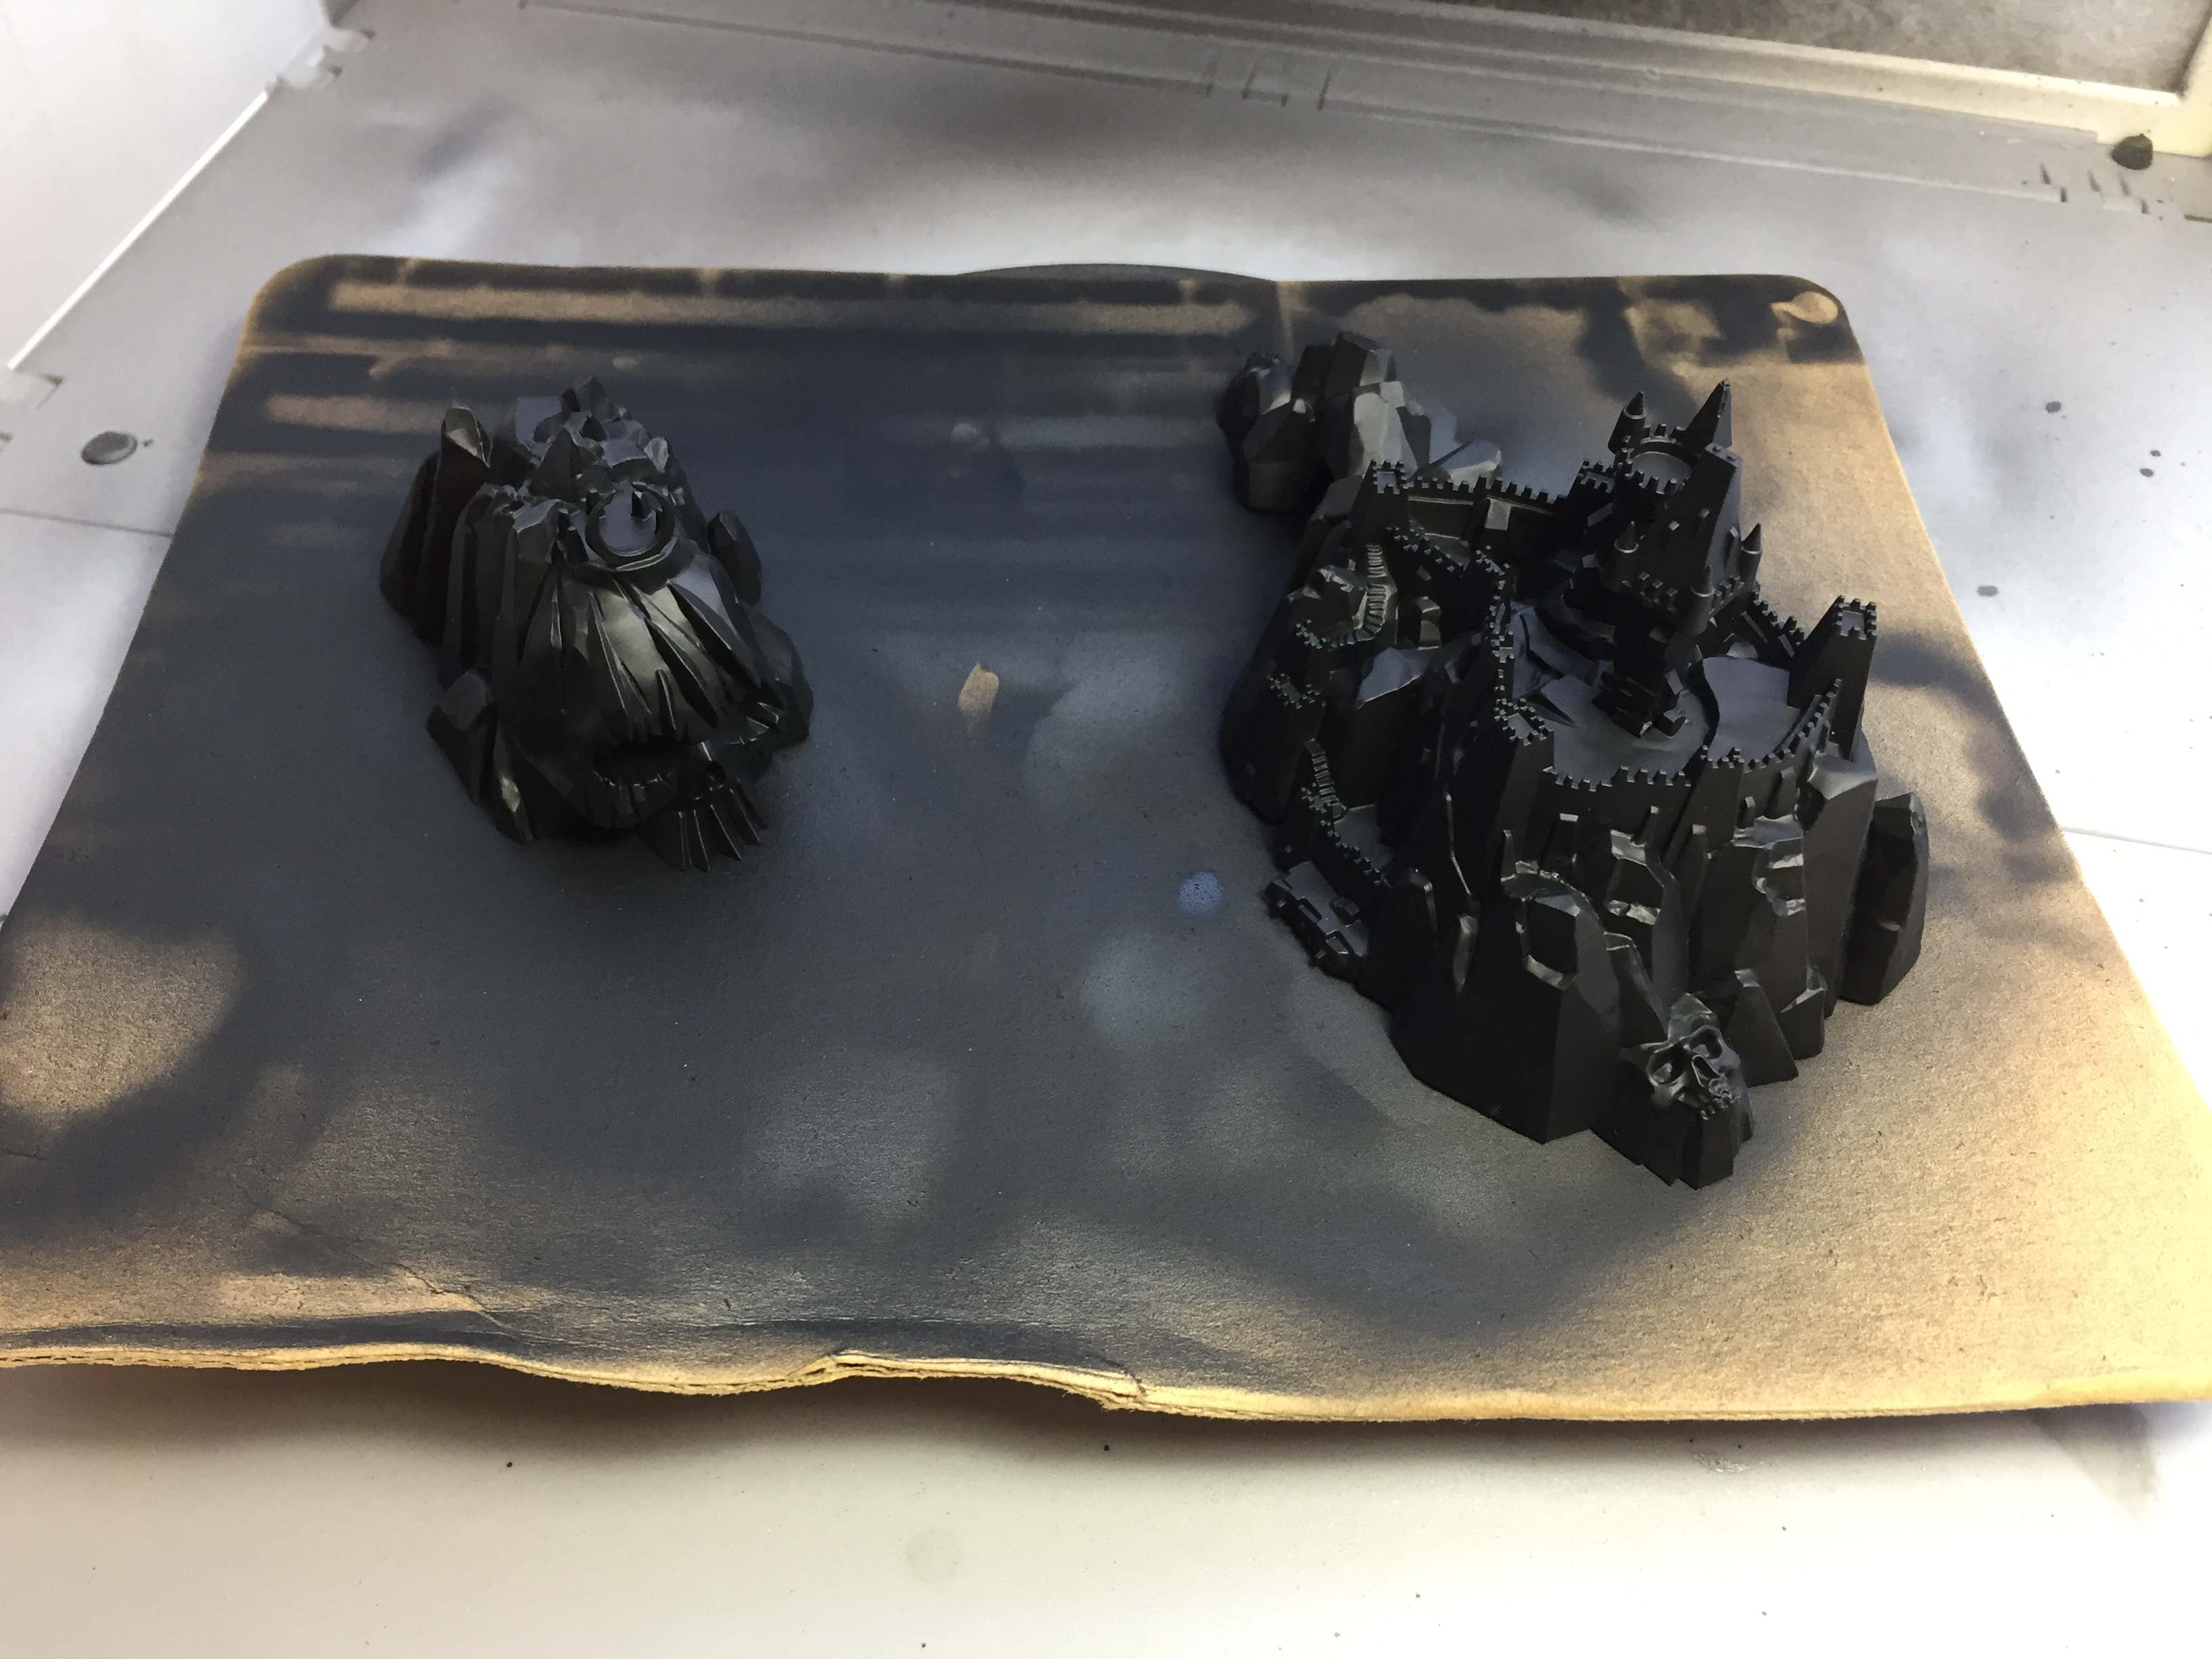
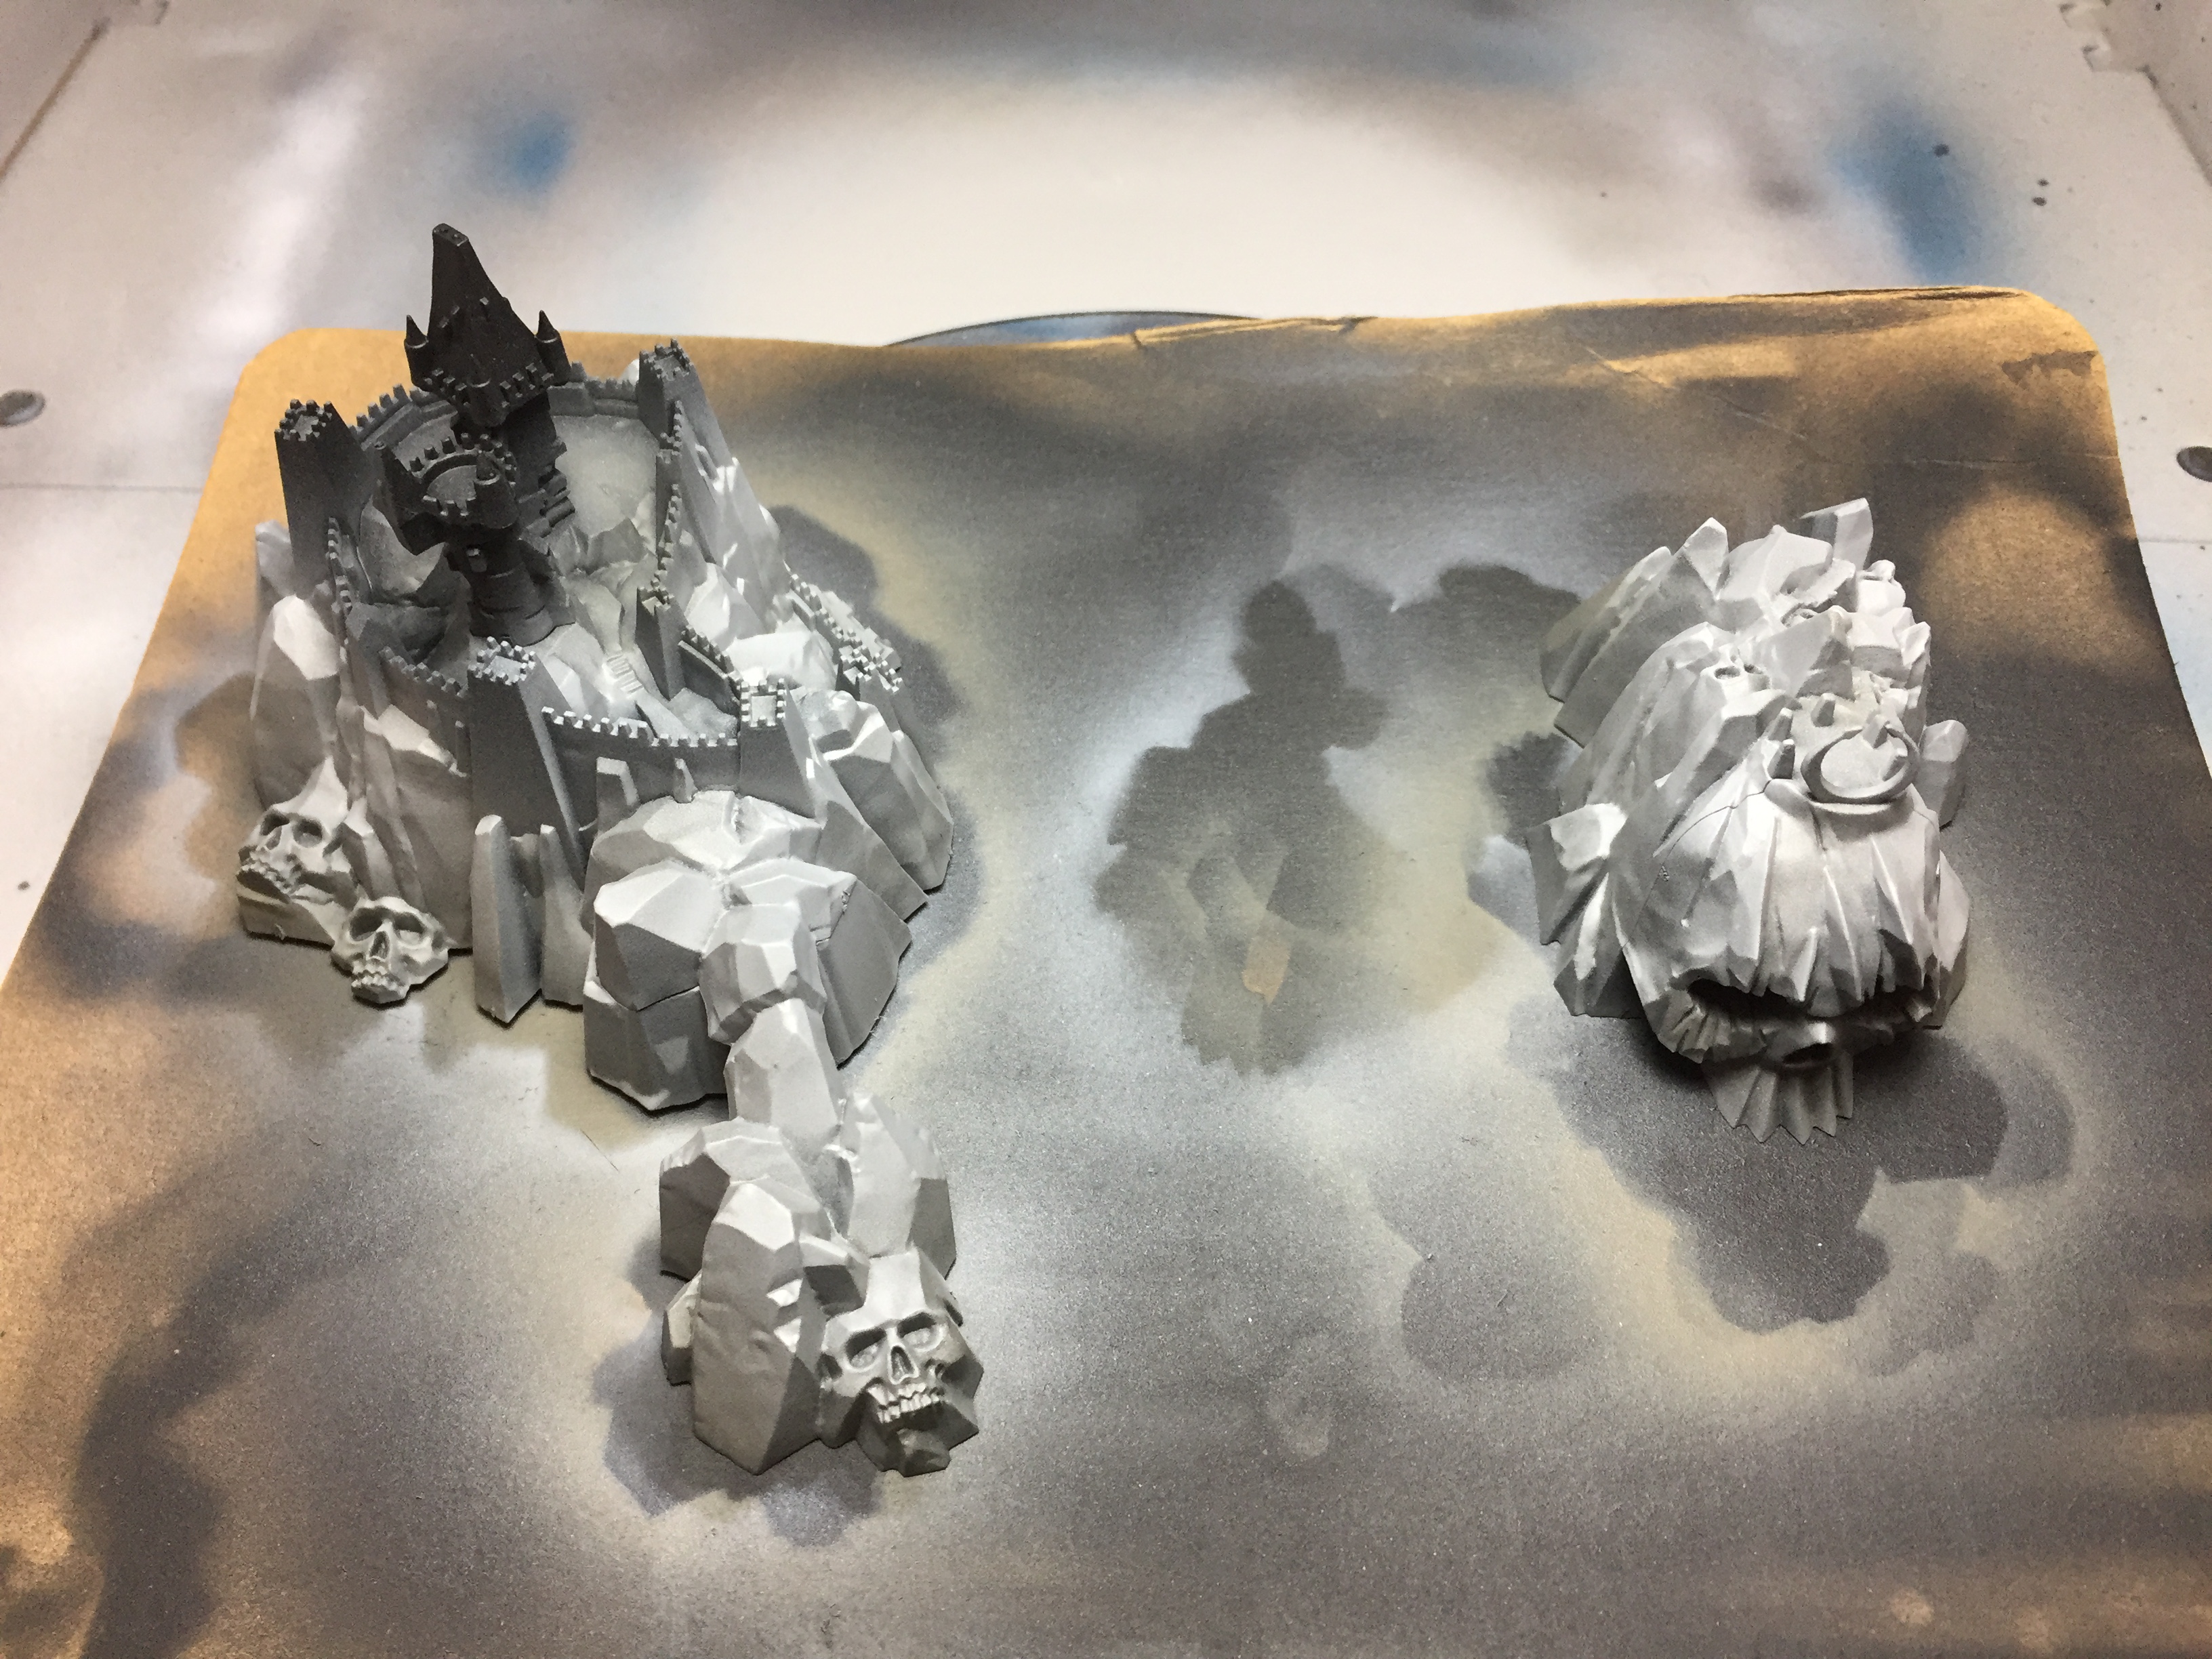
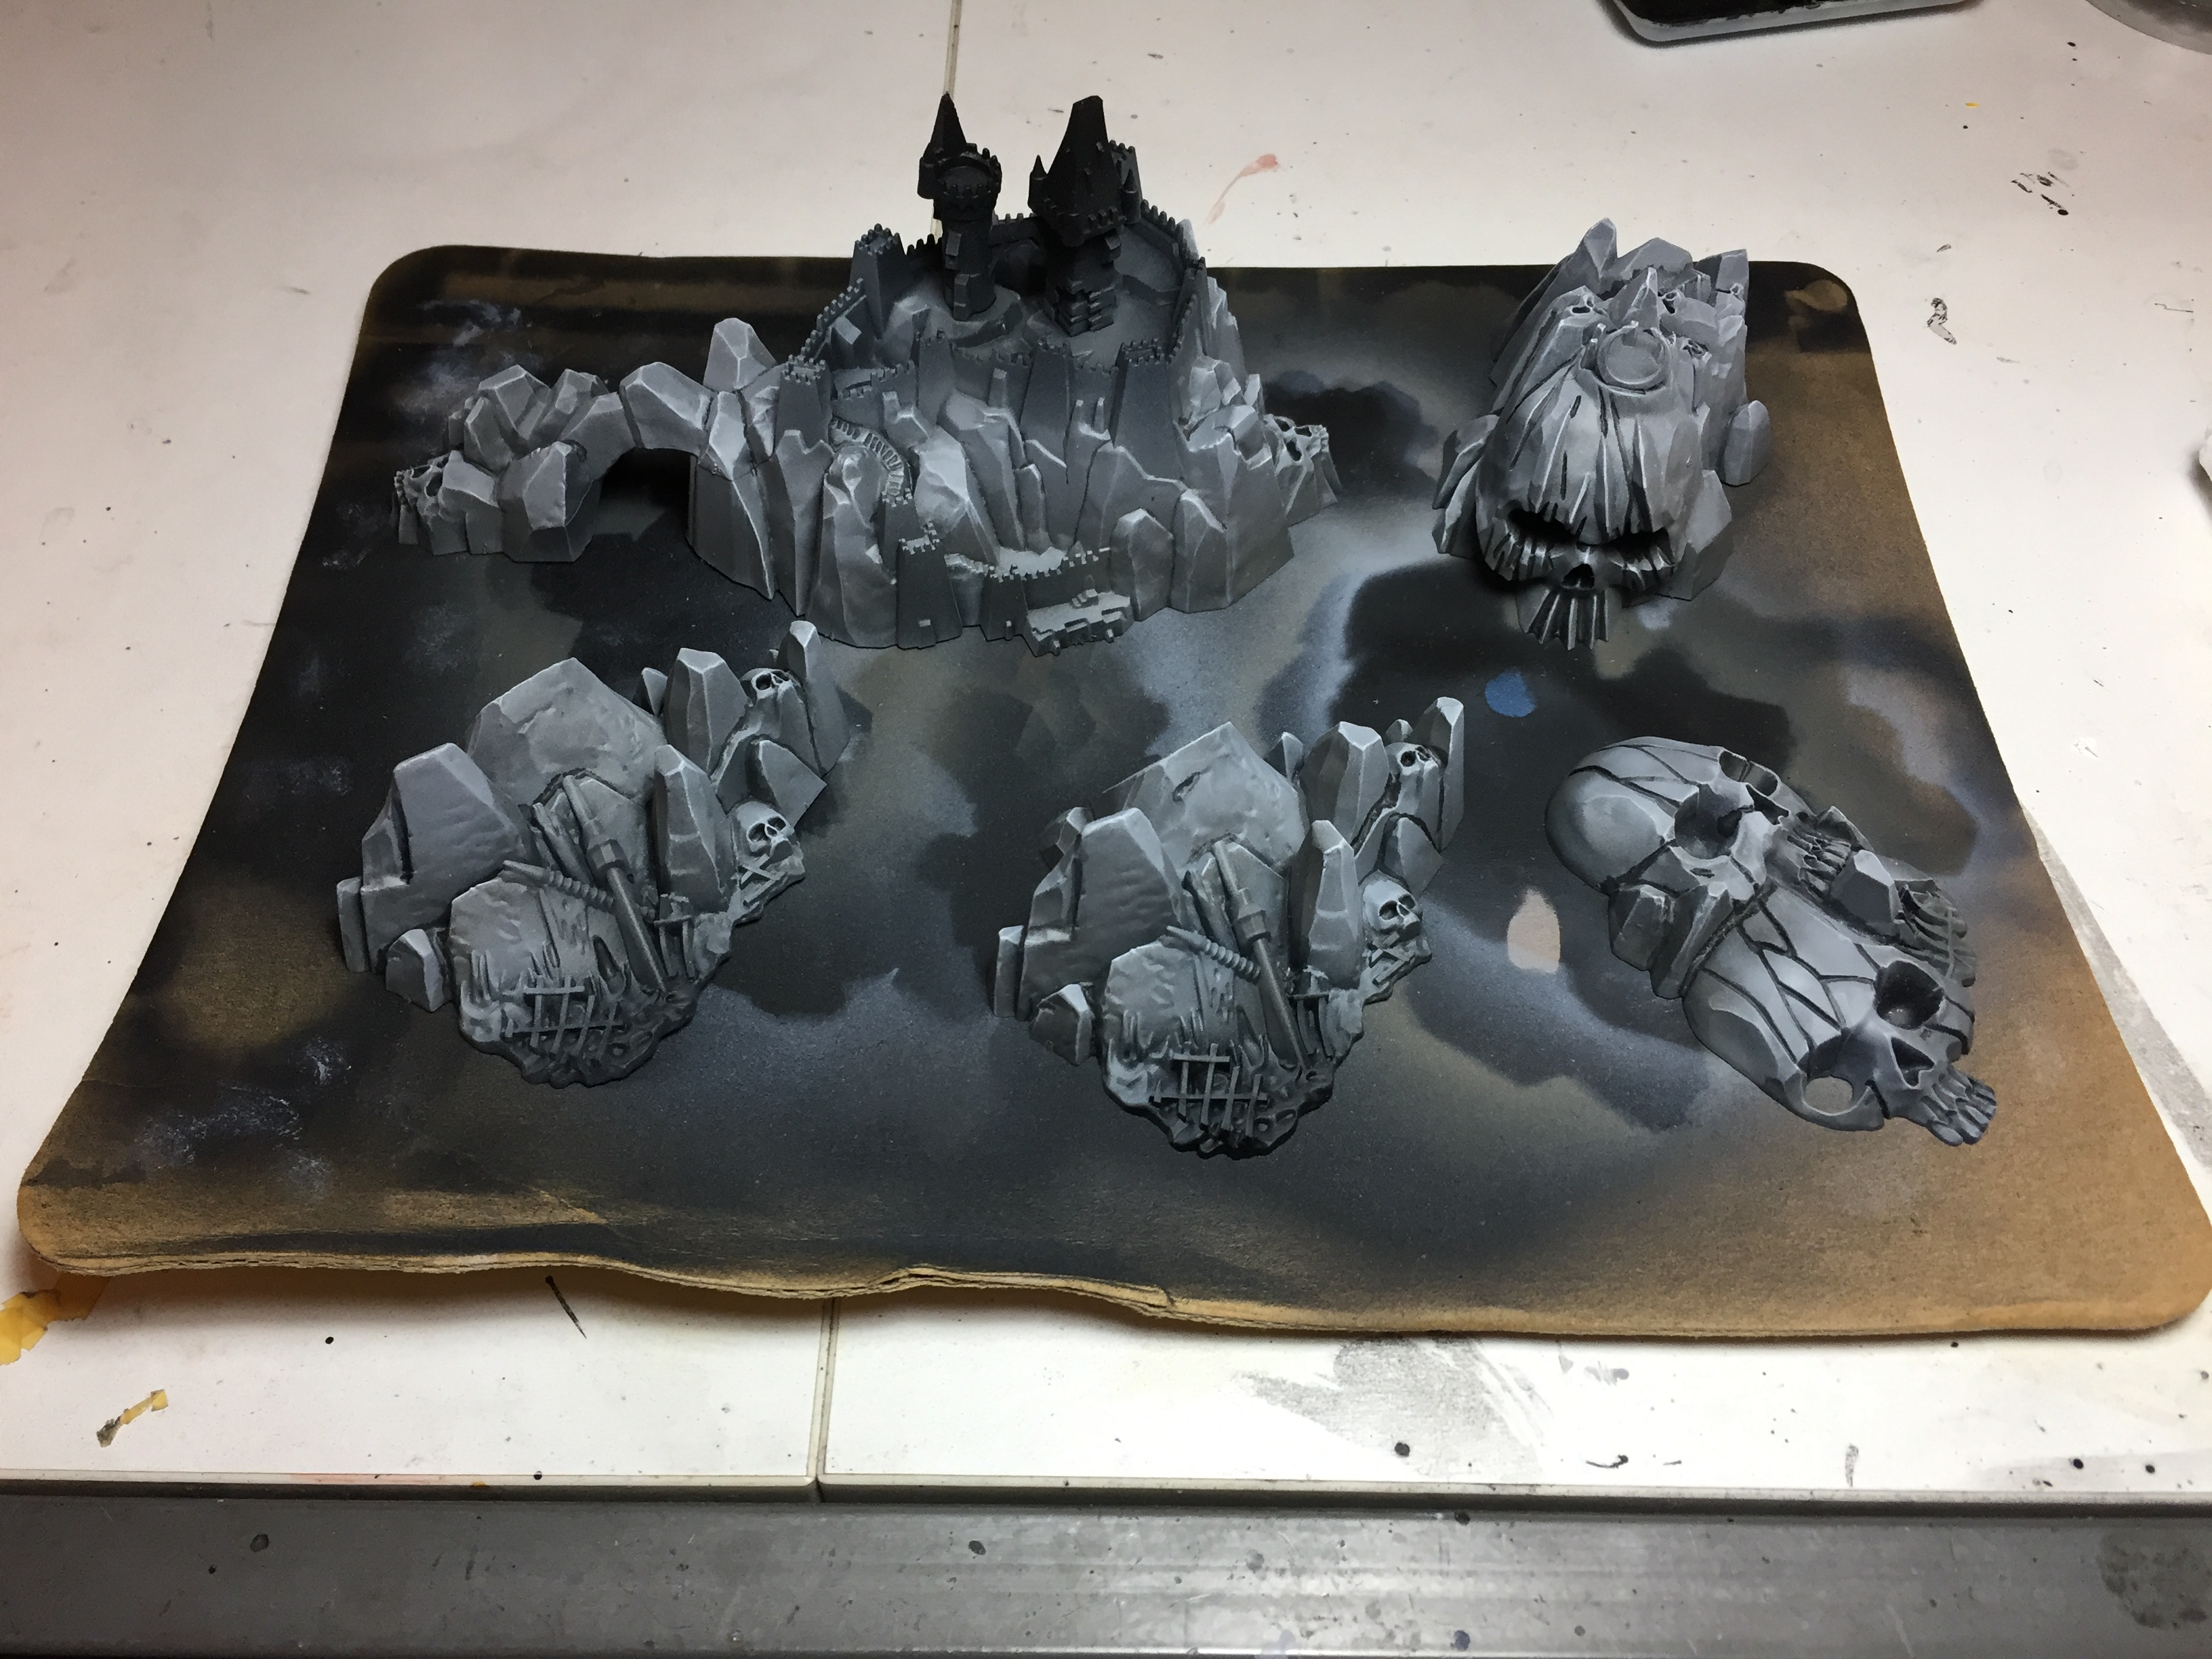
Painting rocks
Dreadfleet comes with a lot of terrain pieces. The larger pieces are islands consisting of rocks. The smaller pieces are shipwrecks with a few small rocks. For all the rocks I used the same process.
I primed them black, than sprayed model air concrete from Vallejo on top as a base coat. The concrete covers the rock entirely. Only in the deepest recesses some black primer may be left.
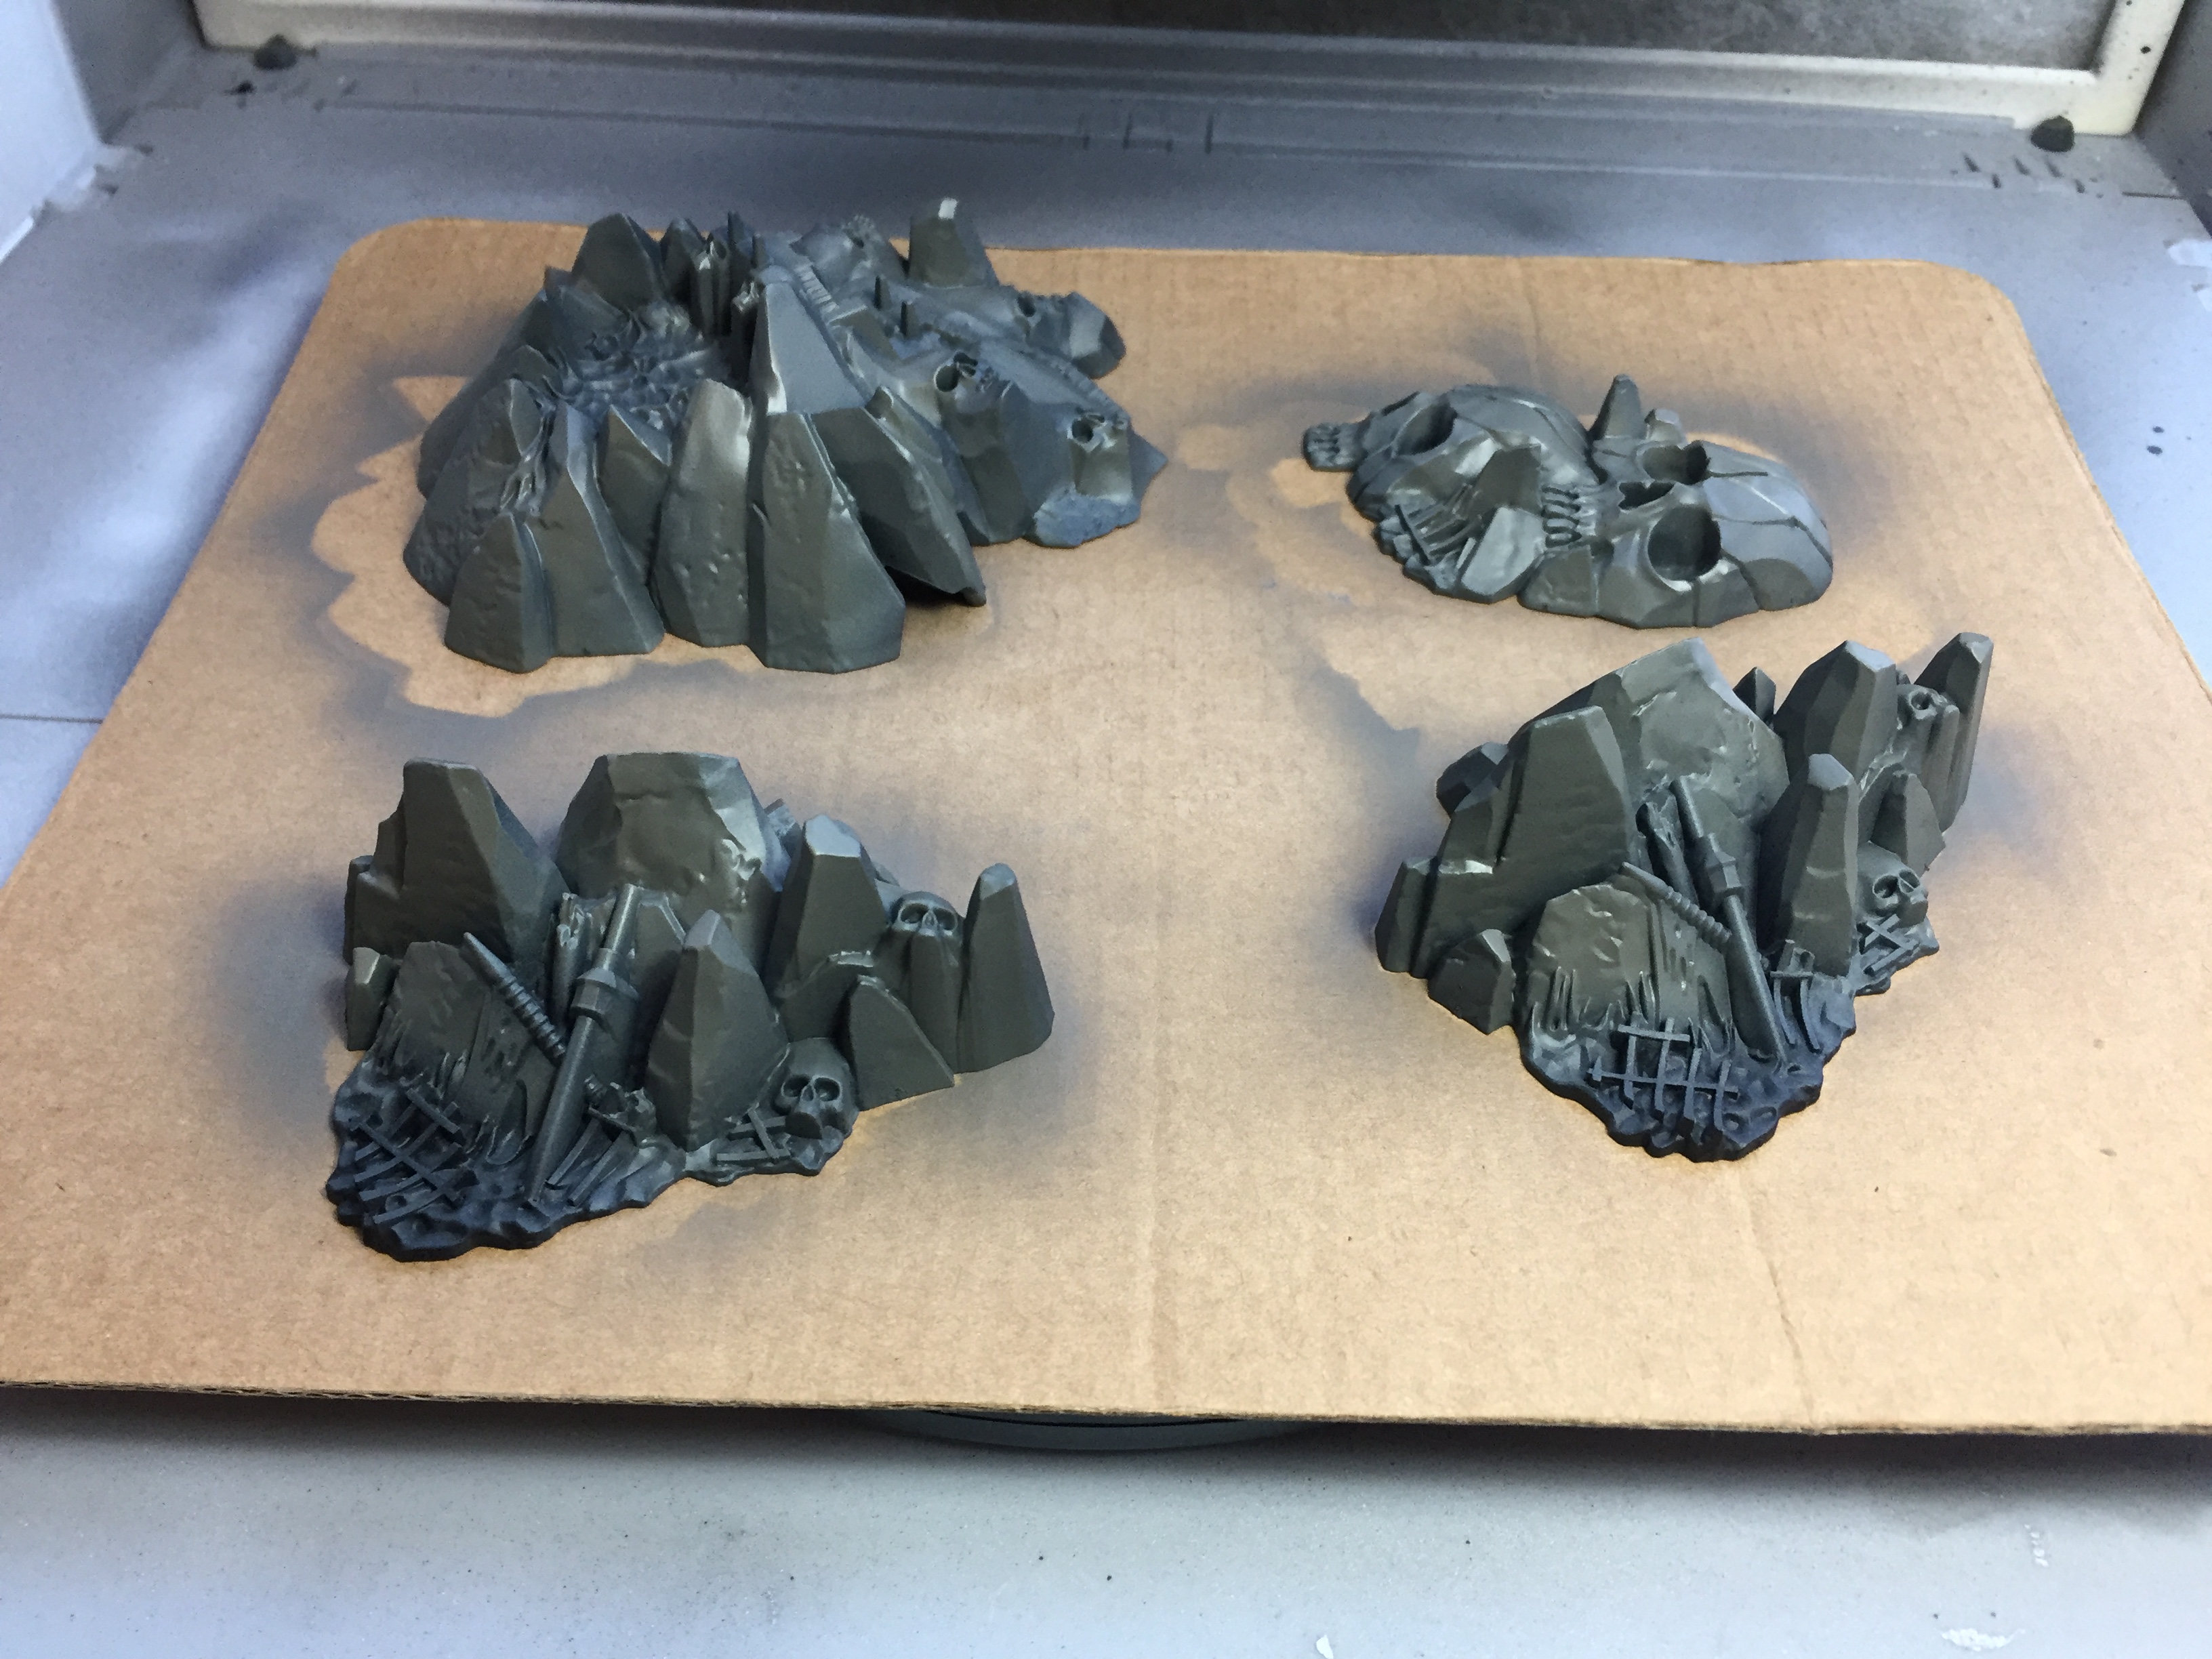
For the next step I used model air light grey from Vallejo. I tried to achieve the impression of rocks lit from above, so I sprayed from above or under an angle, mostly at the top of the rocks and less towards the bottom.
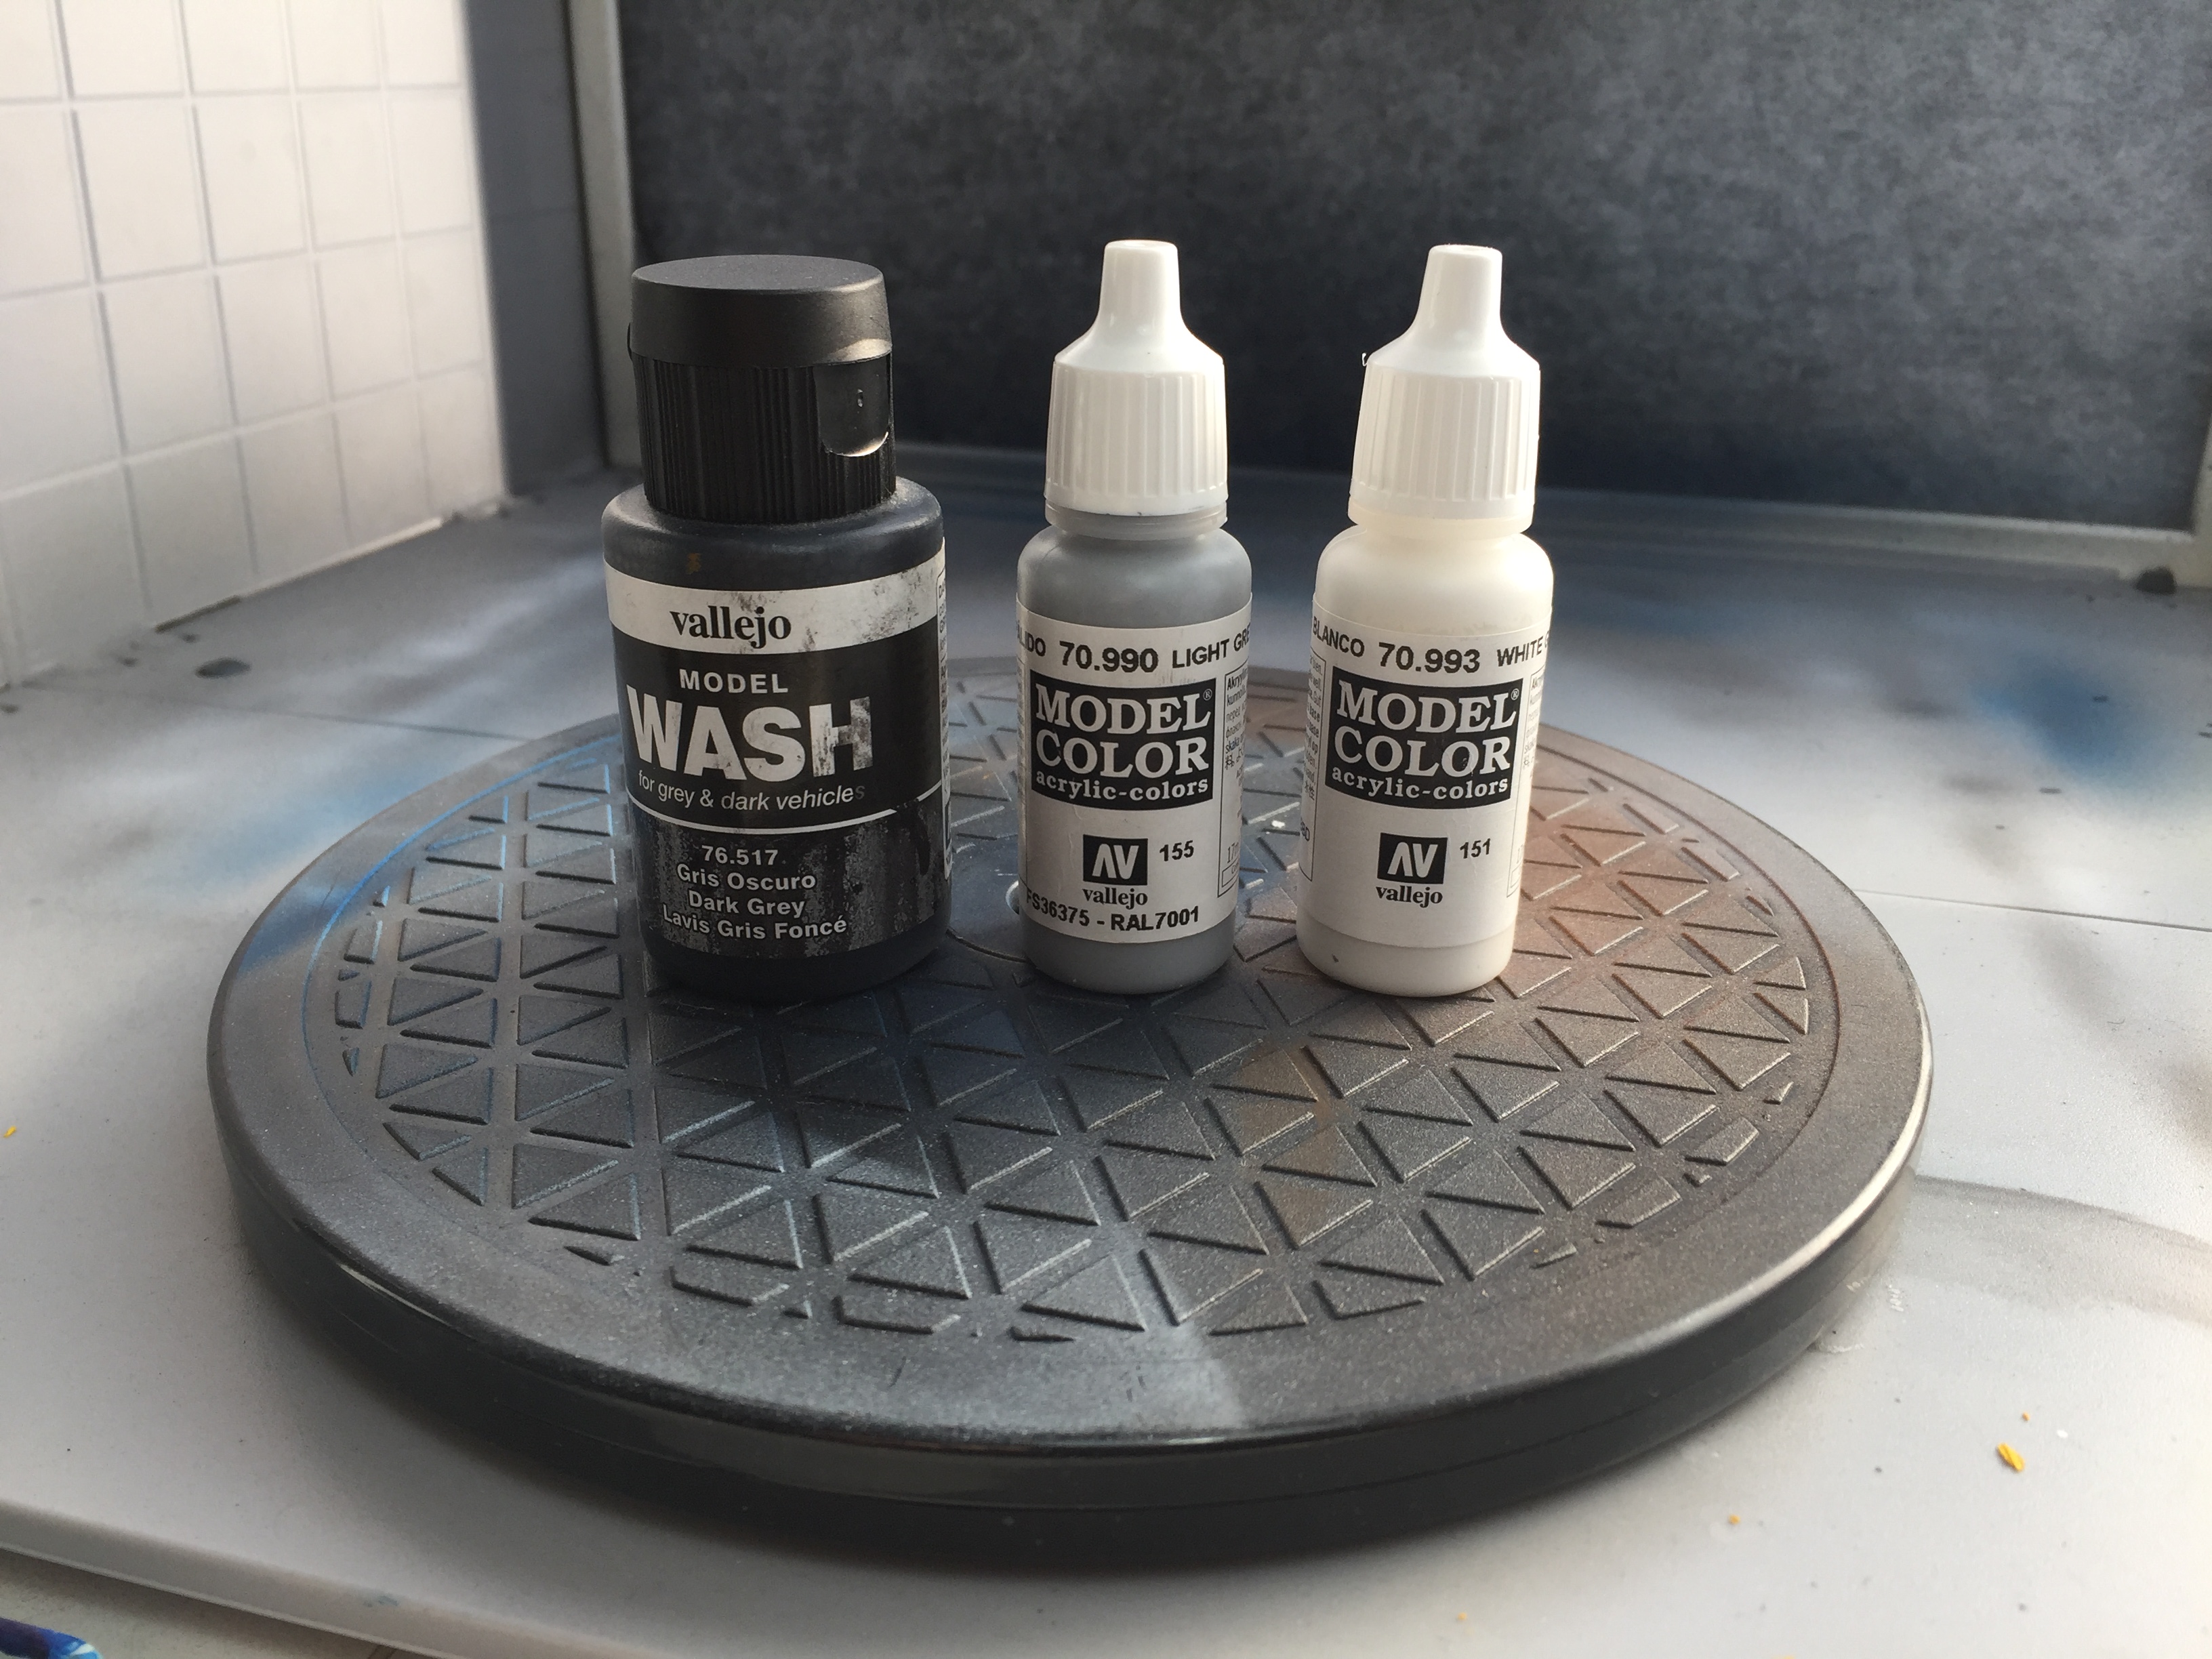
I used Vallejo Model Wash Dark Grey for the next step. Admittedly, I’m not good at using washes. I tried to pinwash, but the effect is a bit to rough for my taste. Messing with adding water didn’t help much. I should really watch a good tutorial on using washes.
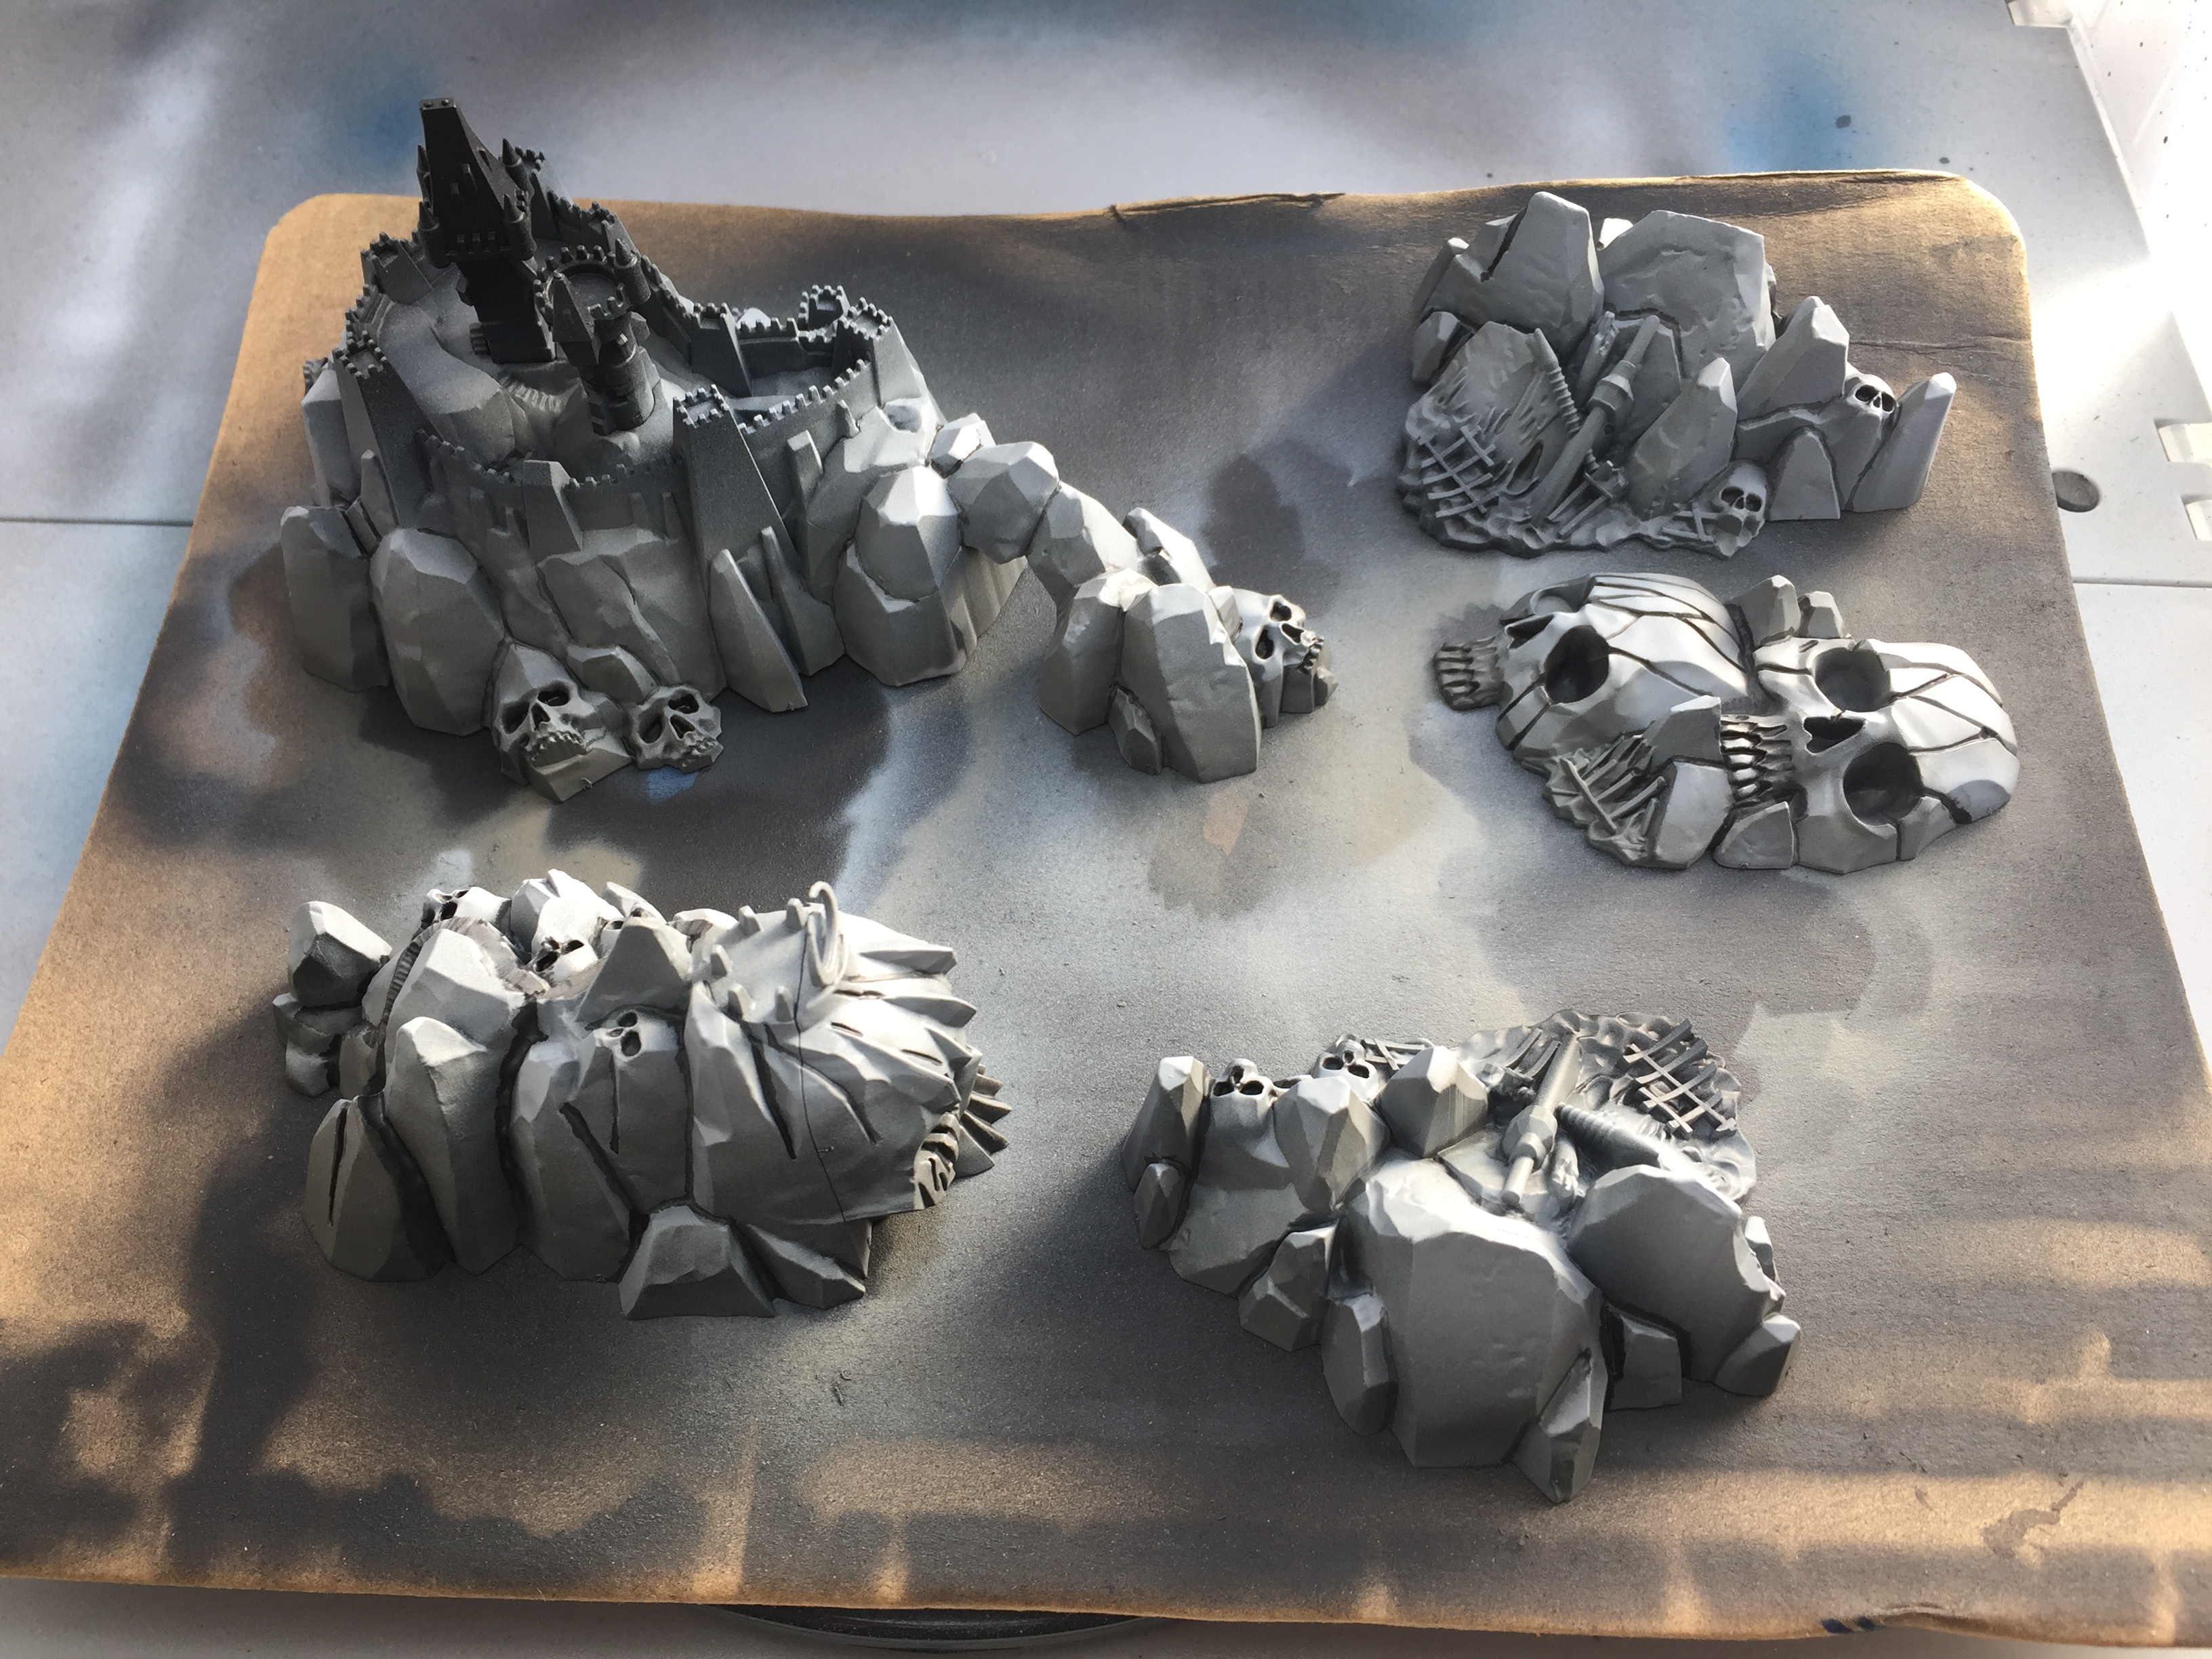
Over to dry brushing: first light grey again. The same colour I used when airbrushing. Here I went over all the edges to make them stand out more. It makes the rocks more three-dimensional. I dry brushed more towards the top of the rocks and less towards the bottom. Next: white grey from Vallejo. I dry brushed this colour only on the upper parts of each rock. The result looked good, but I wasn’t entirely happy yet. For a final highlight I dry brushed the top of the rocks and the sharpest edges with white.
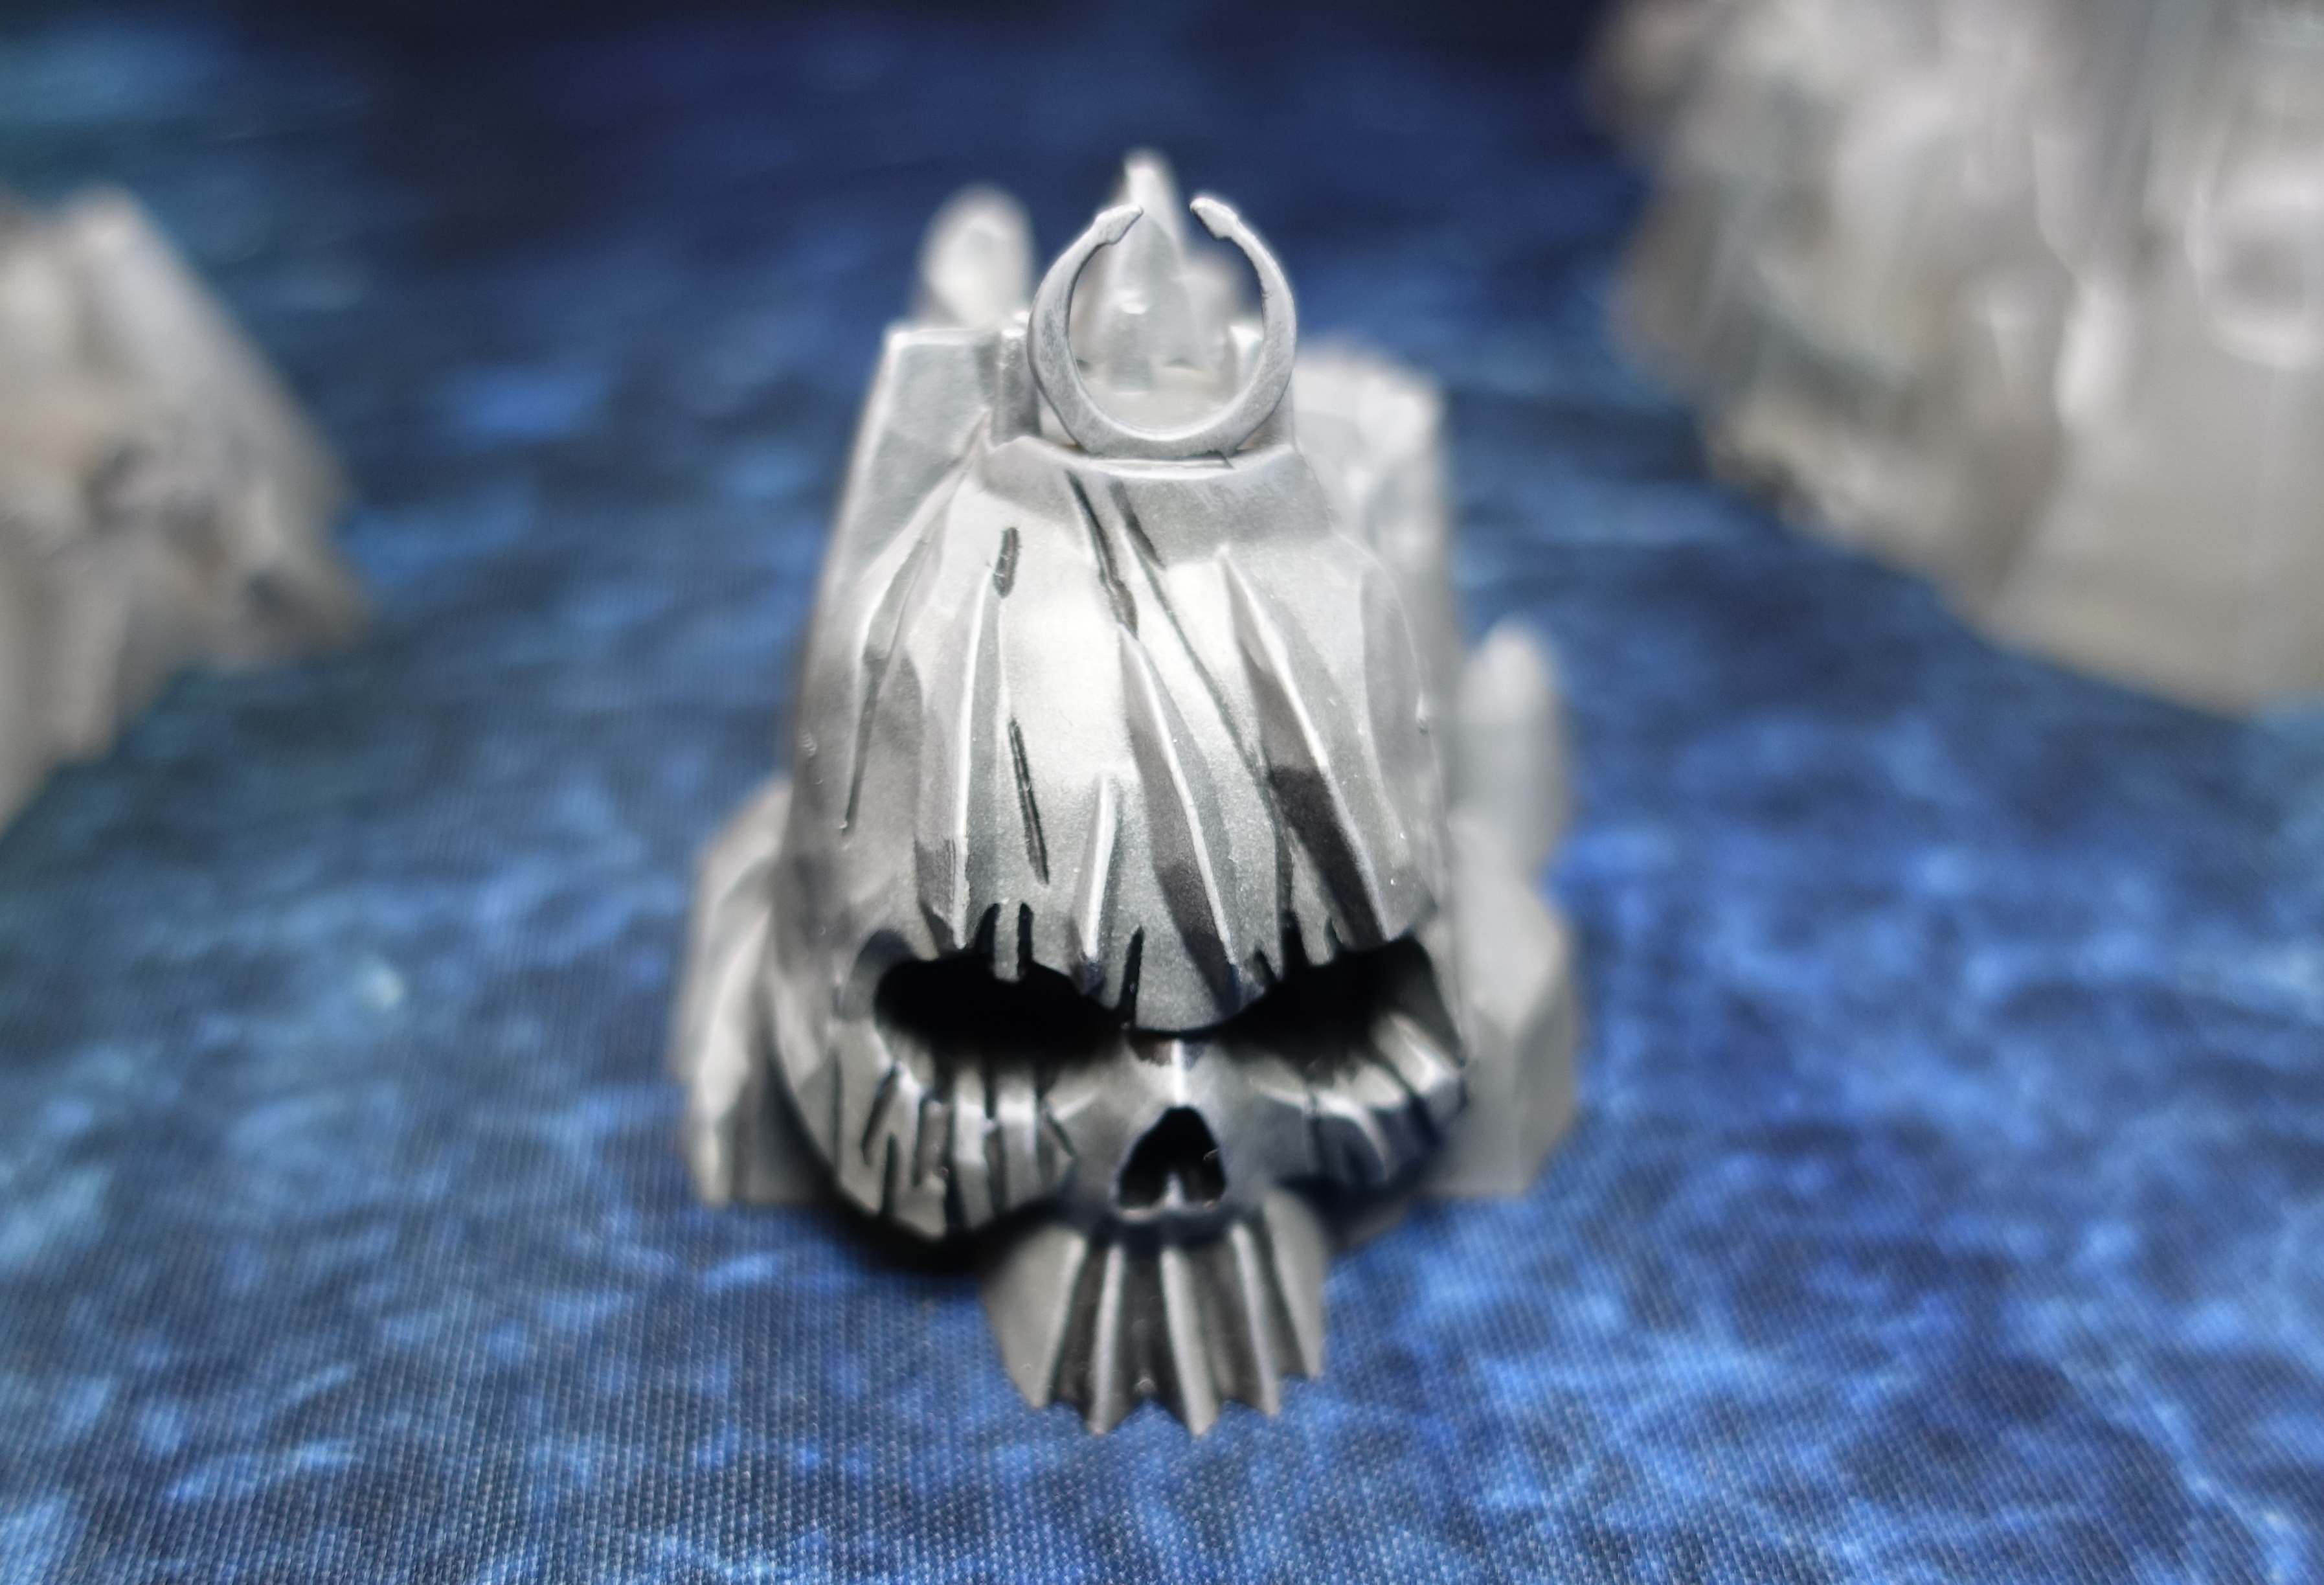
While dry brushing I dry brushed heavier on the stairs that some of the islands have and on the skulls on all the islands. Games Workshop isn’t Games Workshop without skulls everywhere. ?


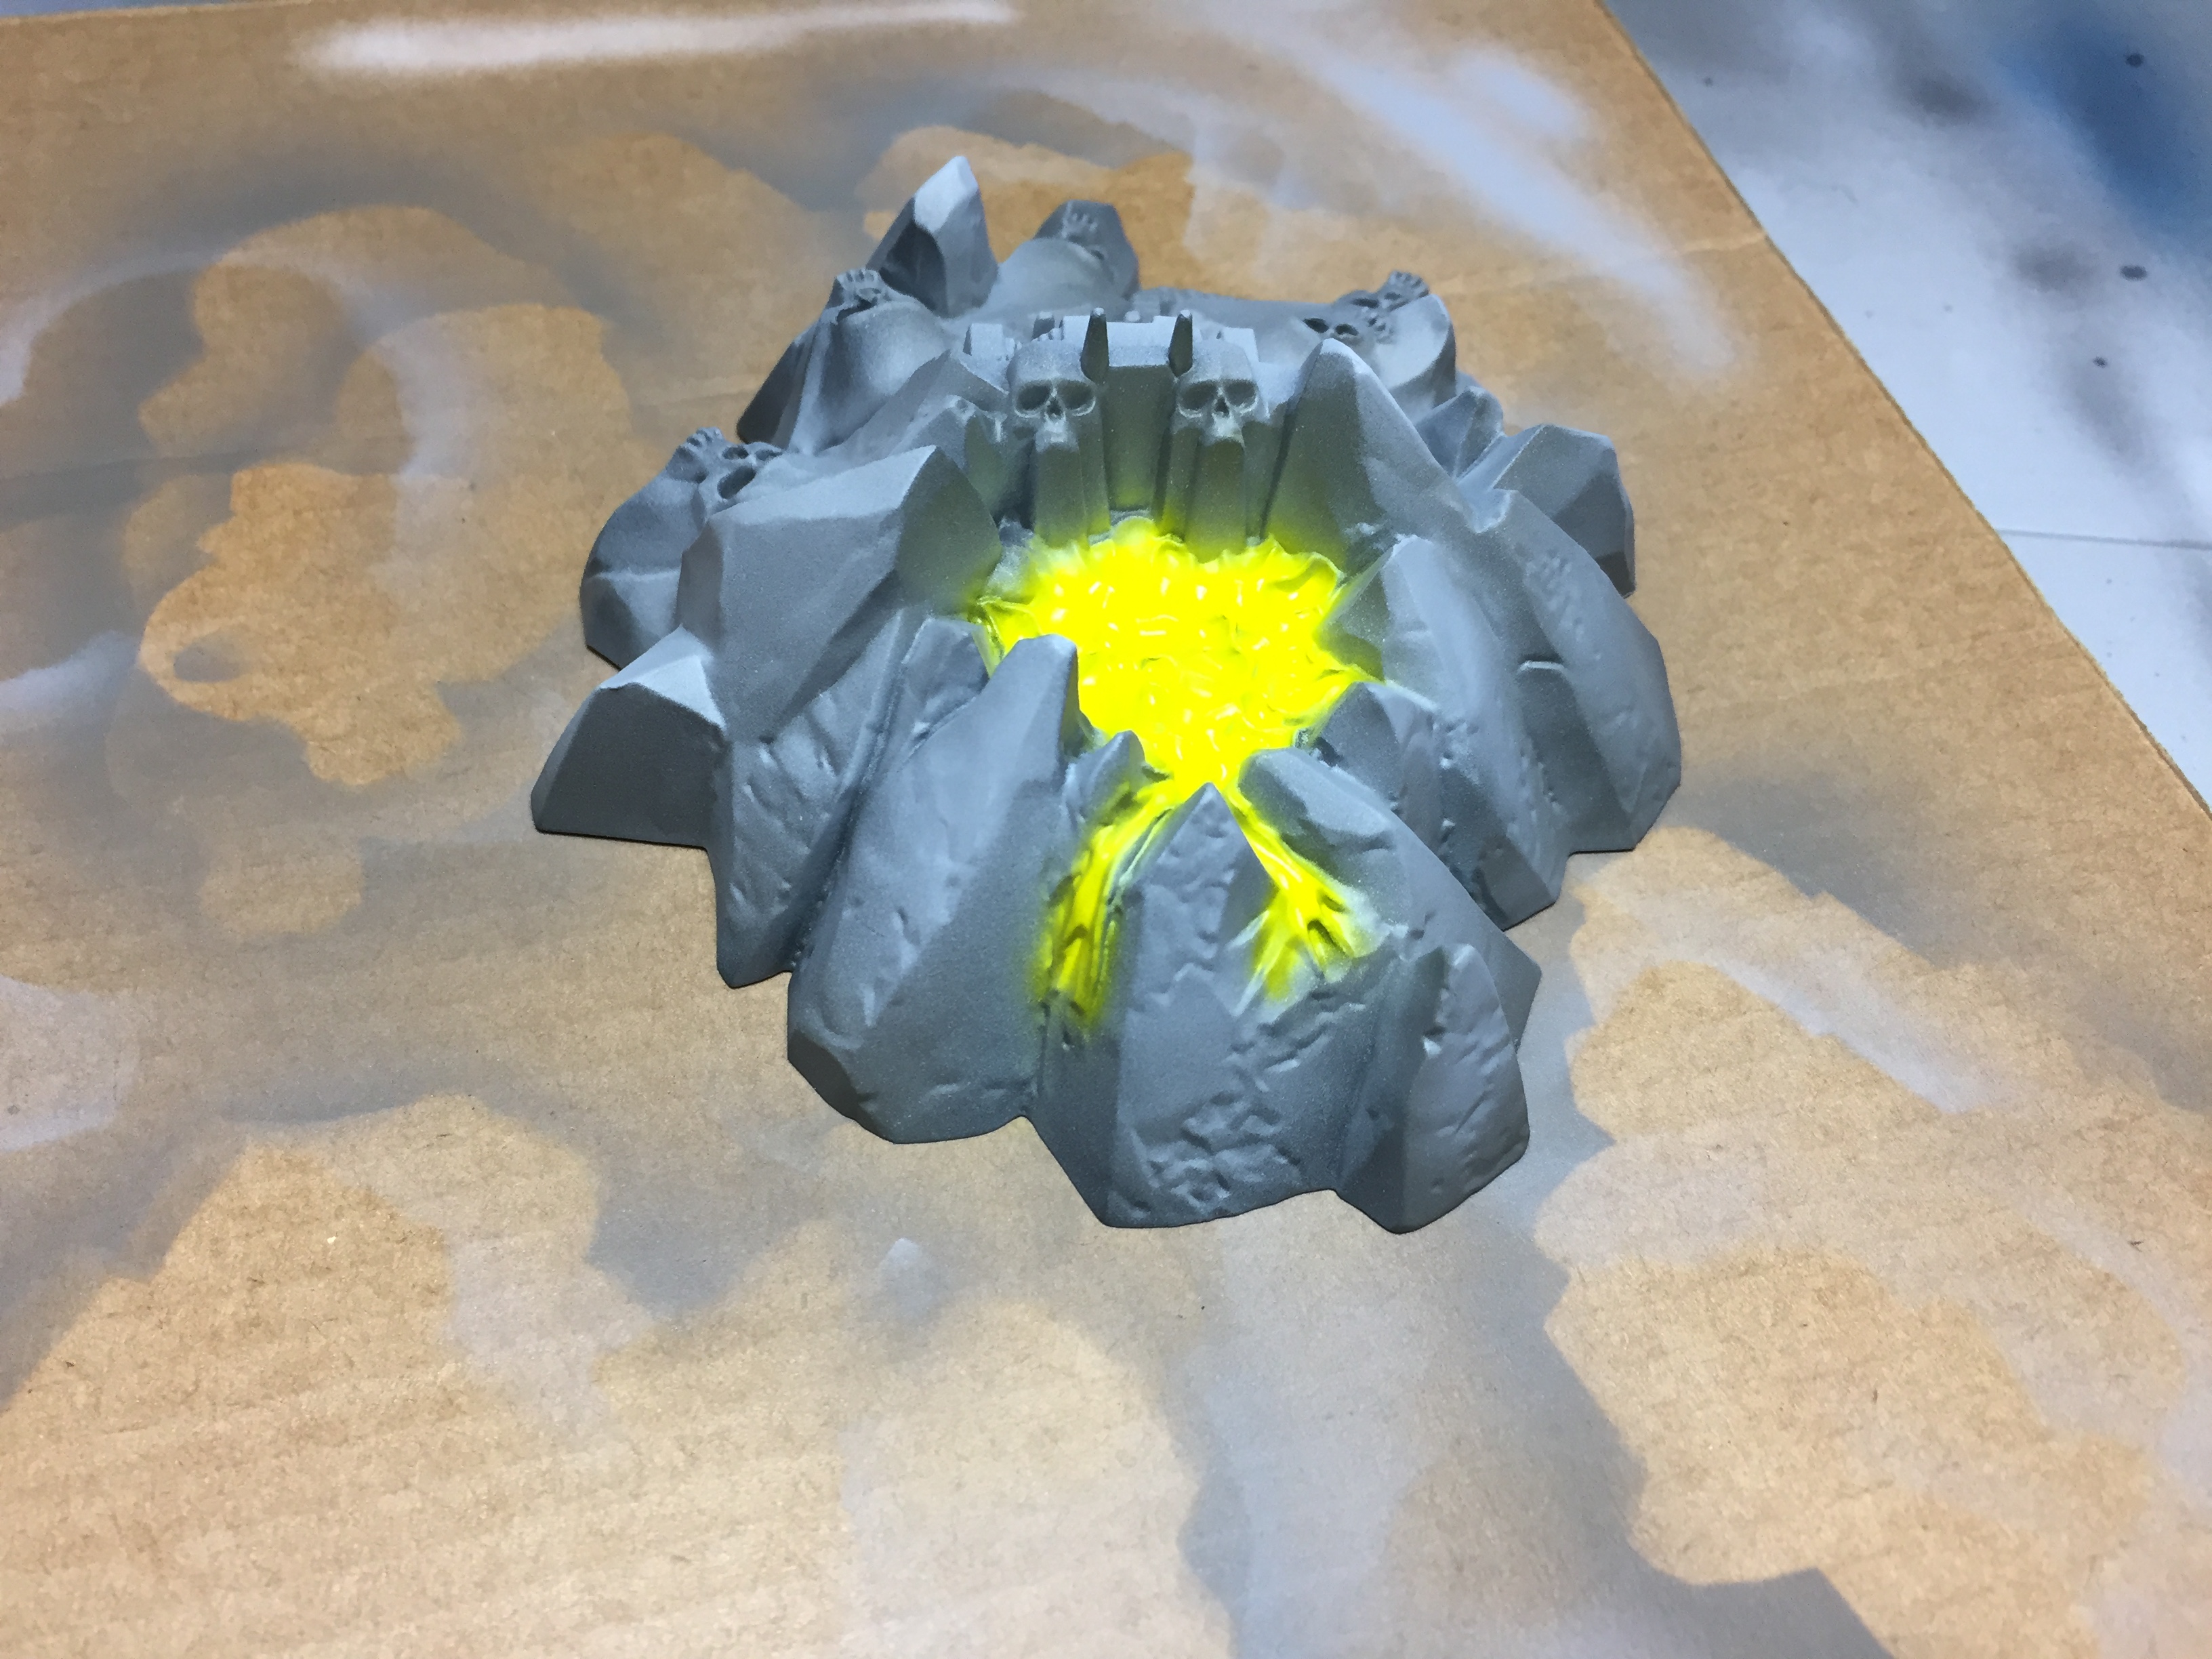
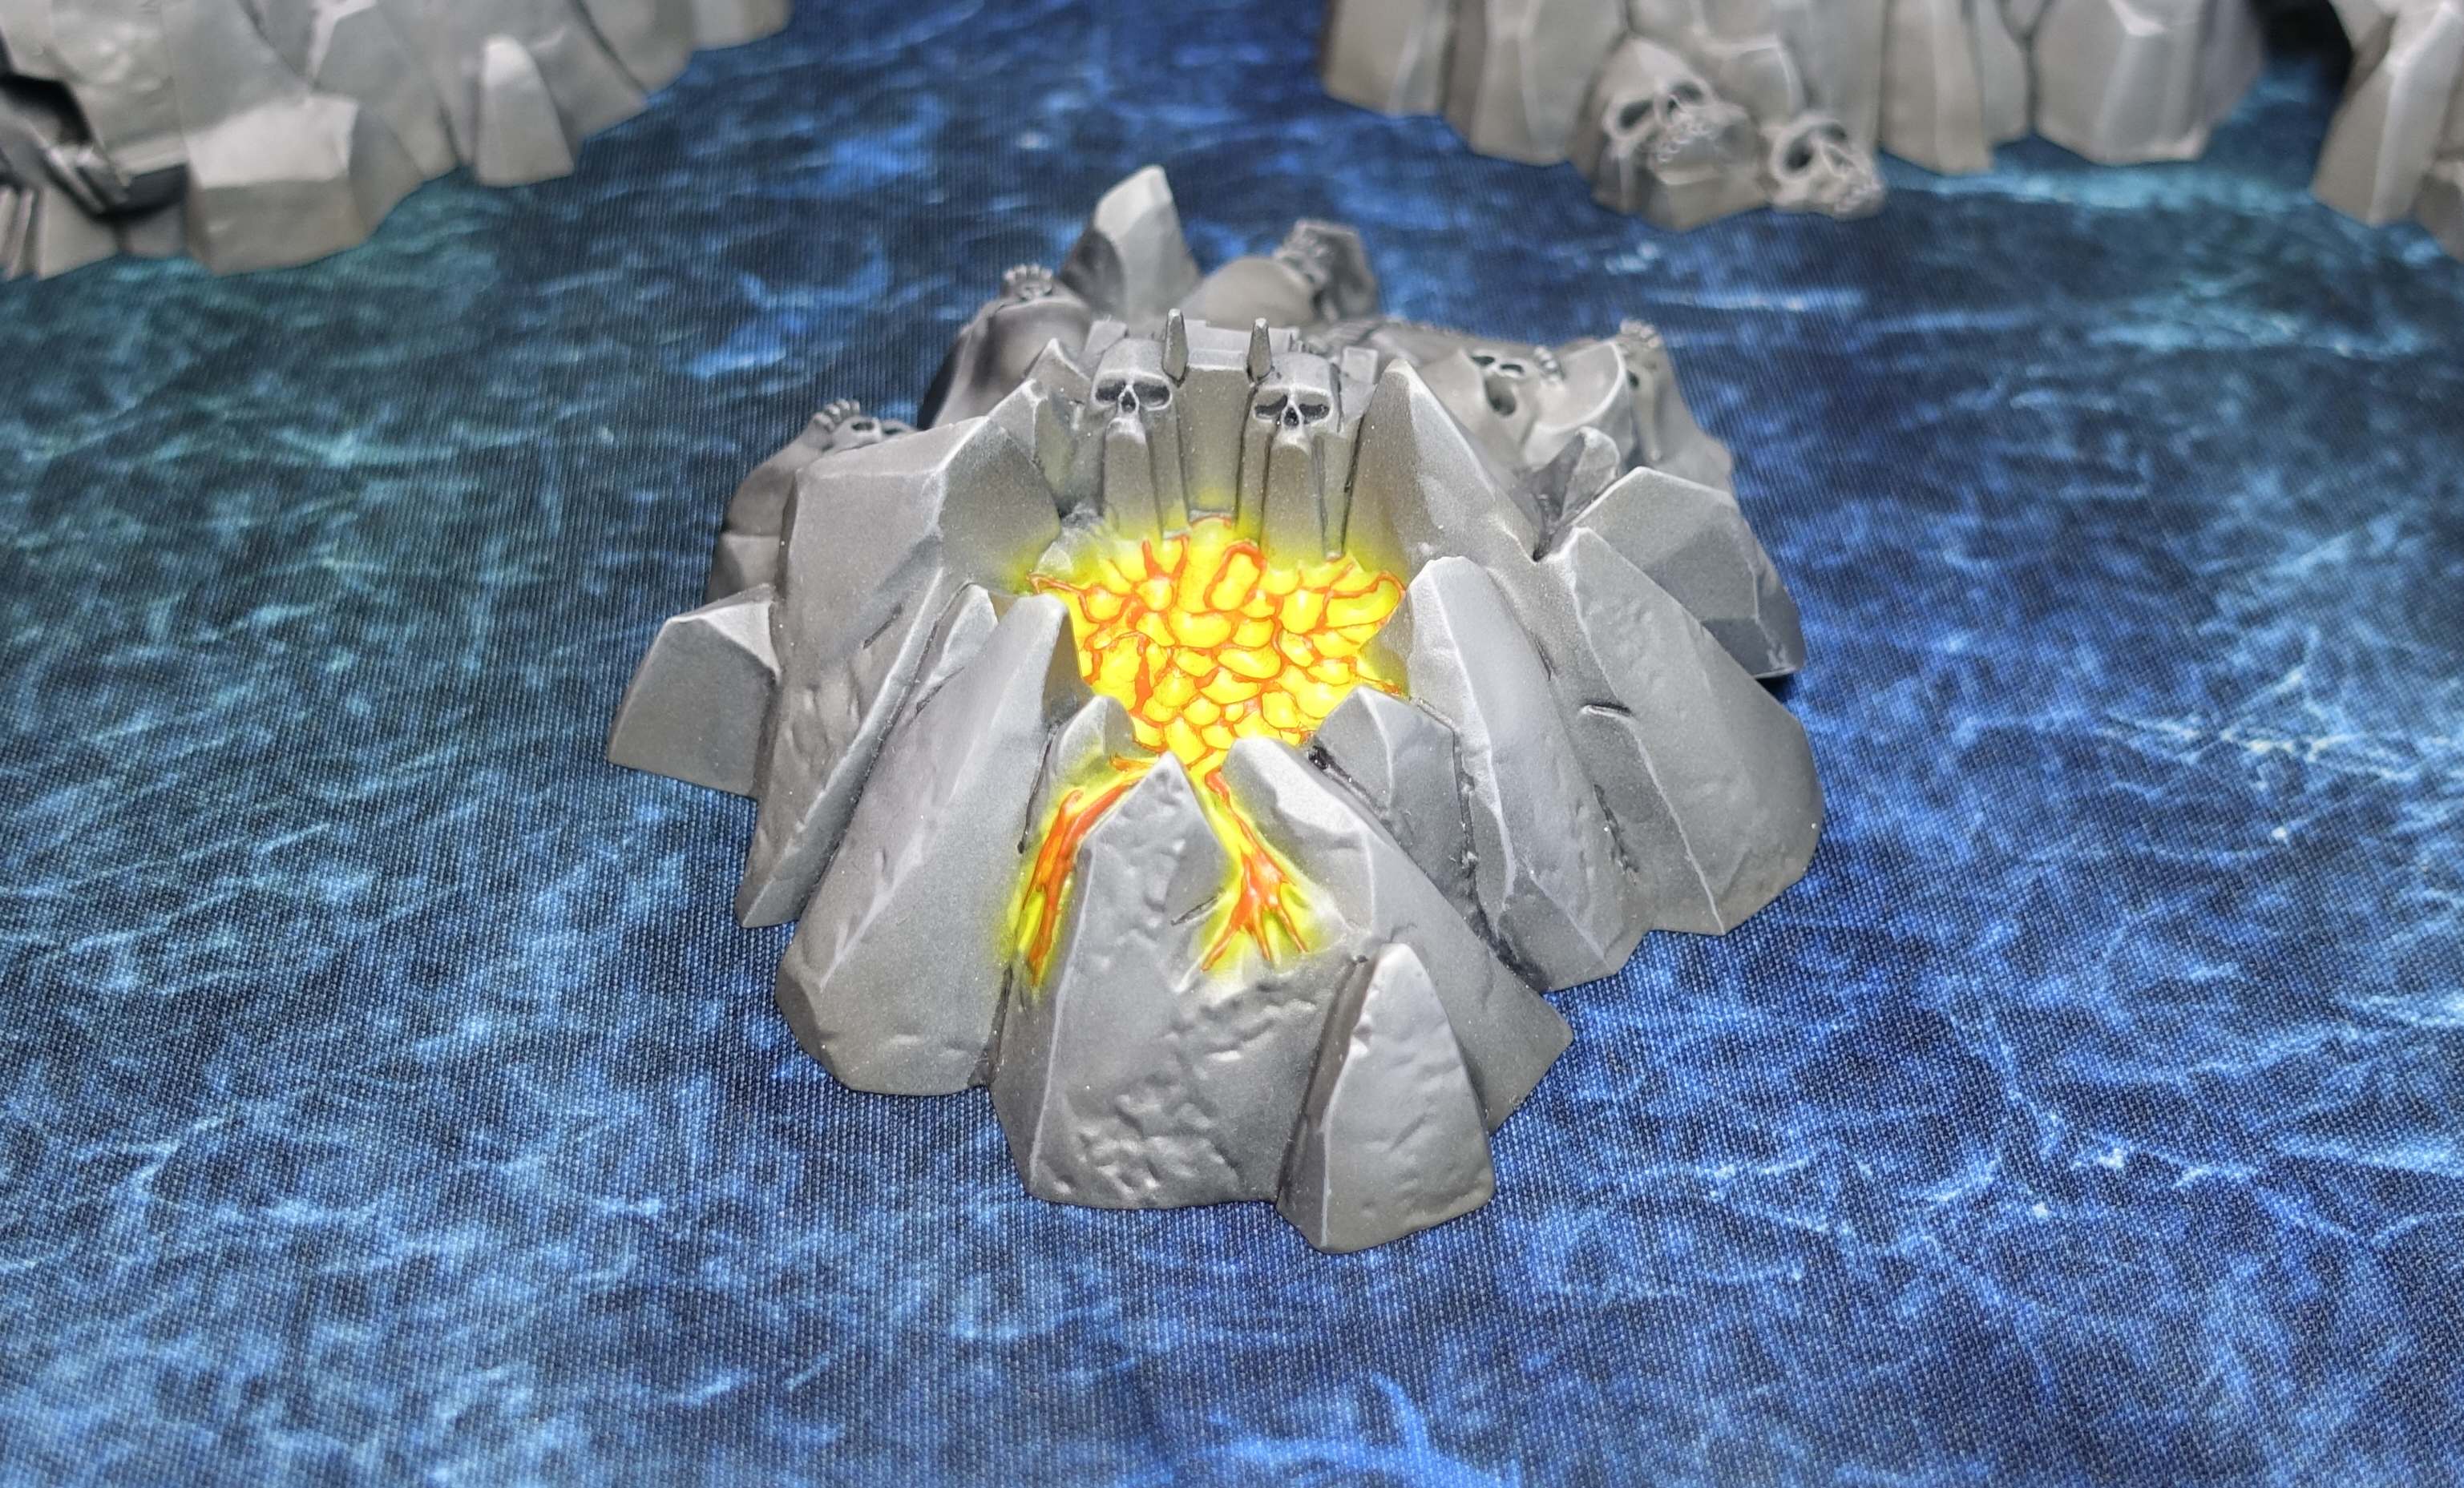
The volcano
The Volcano was a special case. Beside the steps above I airbrushed the lava white with Model Air White from Vallejo. On top of the white I airbrushed Airbrush Pro-Color Canary yellow. (Not the most common brand of paint among wargamers, but t happened to be the closest yellow at hand.). Dry brushing with orange didn’t give the desired result. So I painted orange on the edges of the lava with a brush. The orange is orange red from Vallejo.
I’m finished painting all the rocks. Painting all the buildings and other details on the terrain pieces will be for another entry. 🙂


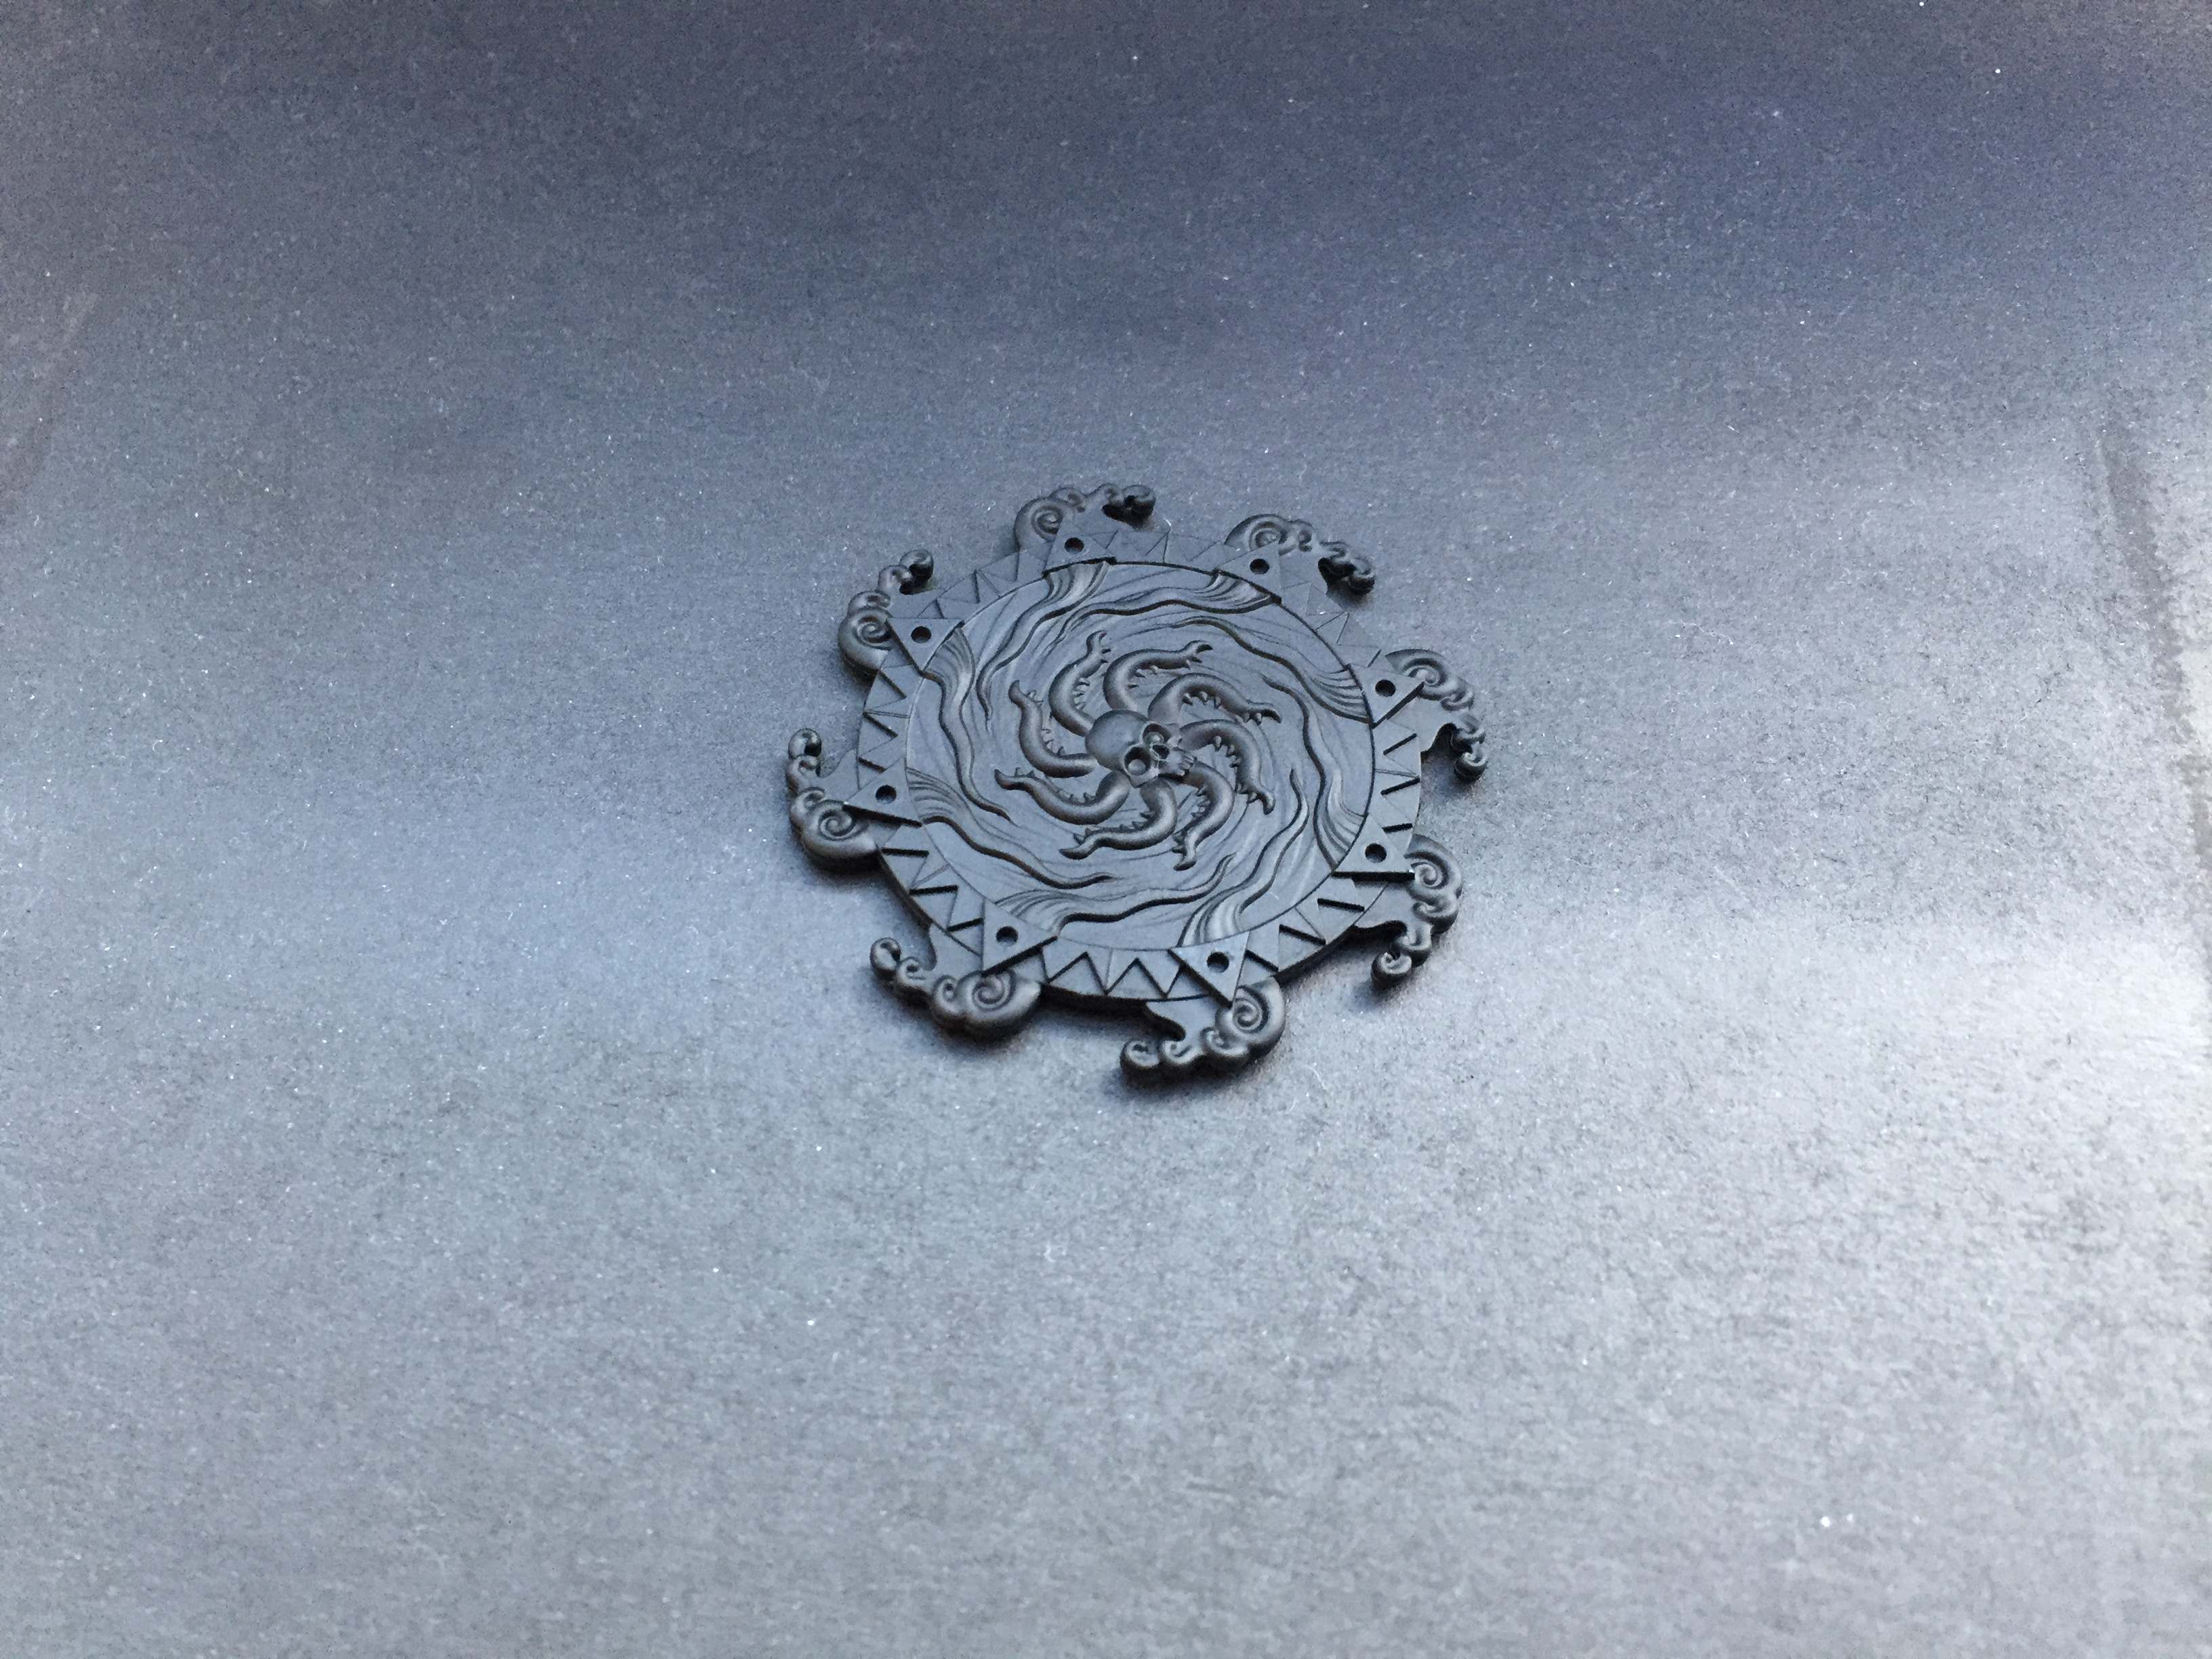
To paint the sea
Its been a while since my last update, but I have kept painting in the meantime.
The bases of the ships consist of sea surface. The miniatures of the cogs, sea monsters and the smaller terrain pieces contain sea as well. Here I only describe the bases, but I’ve followed the same steps for the other pieces containing sea.
To begin with, I primed the bases in white. I left the bases on the sprue for priming, but the result isn’t what it should be. I removed the bases from the sprue and gave them another layer of white primer.
The next step was to base coat them blue. The game comes with a gaming math in a nice saturated, dark blue. I want the bases of my ships to look similar. The goal is for the sea to have a “painted look”, like you’ld see on a painting. Not so much a realistic look.
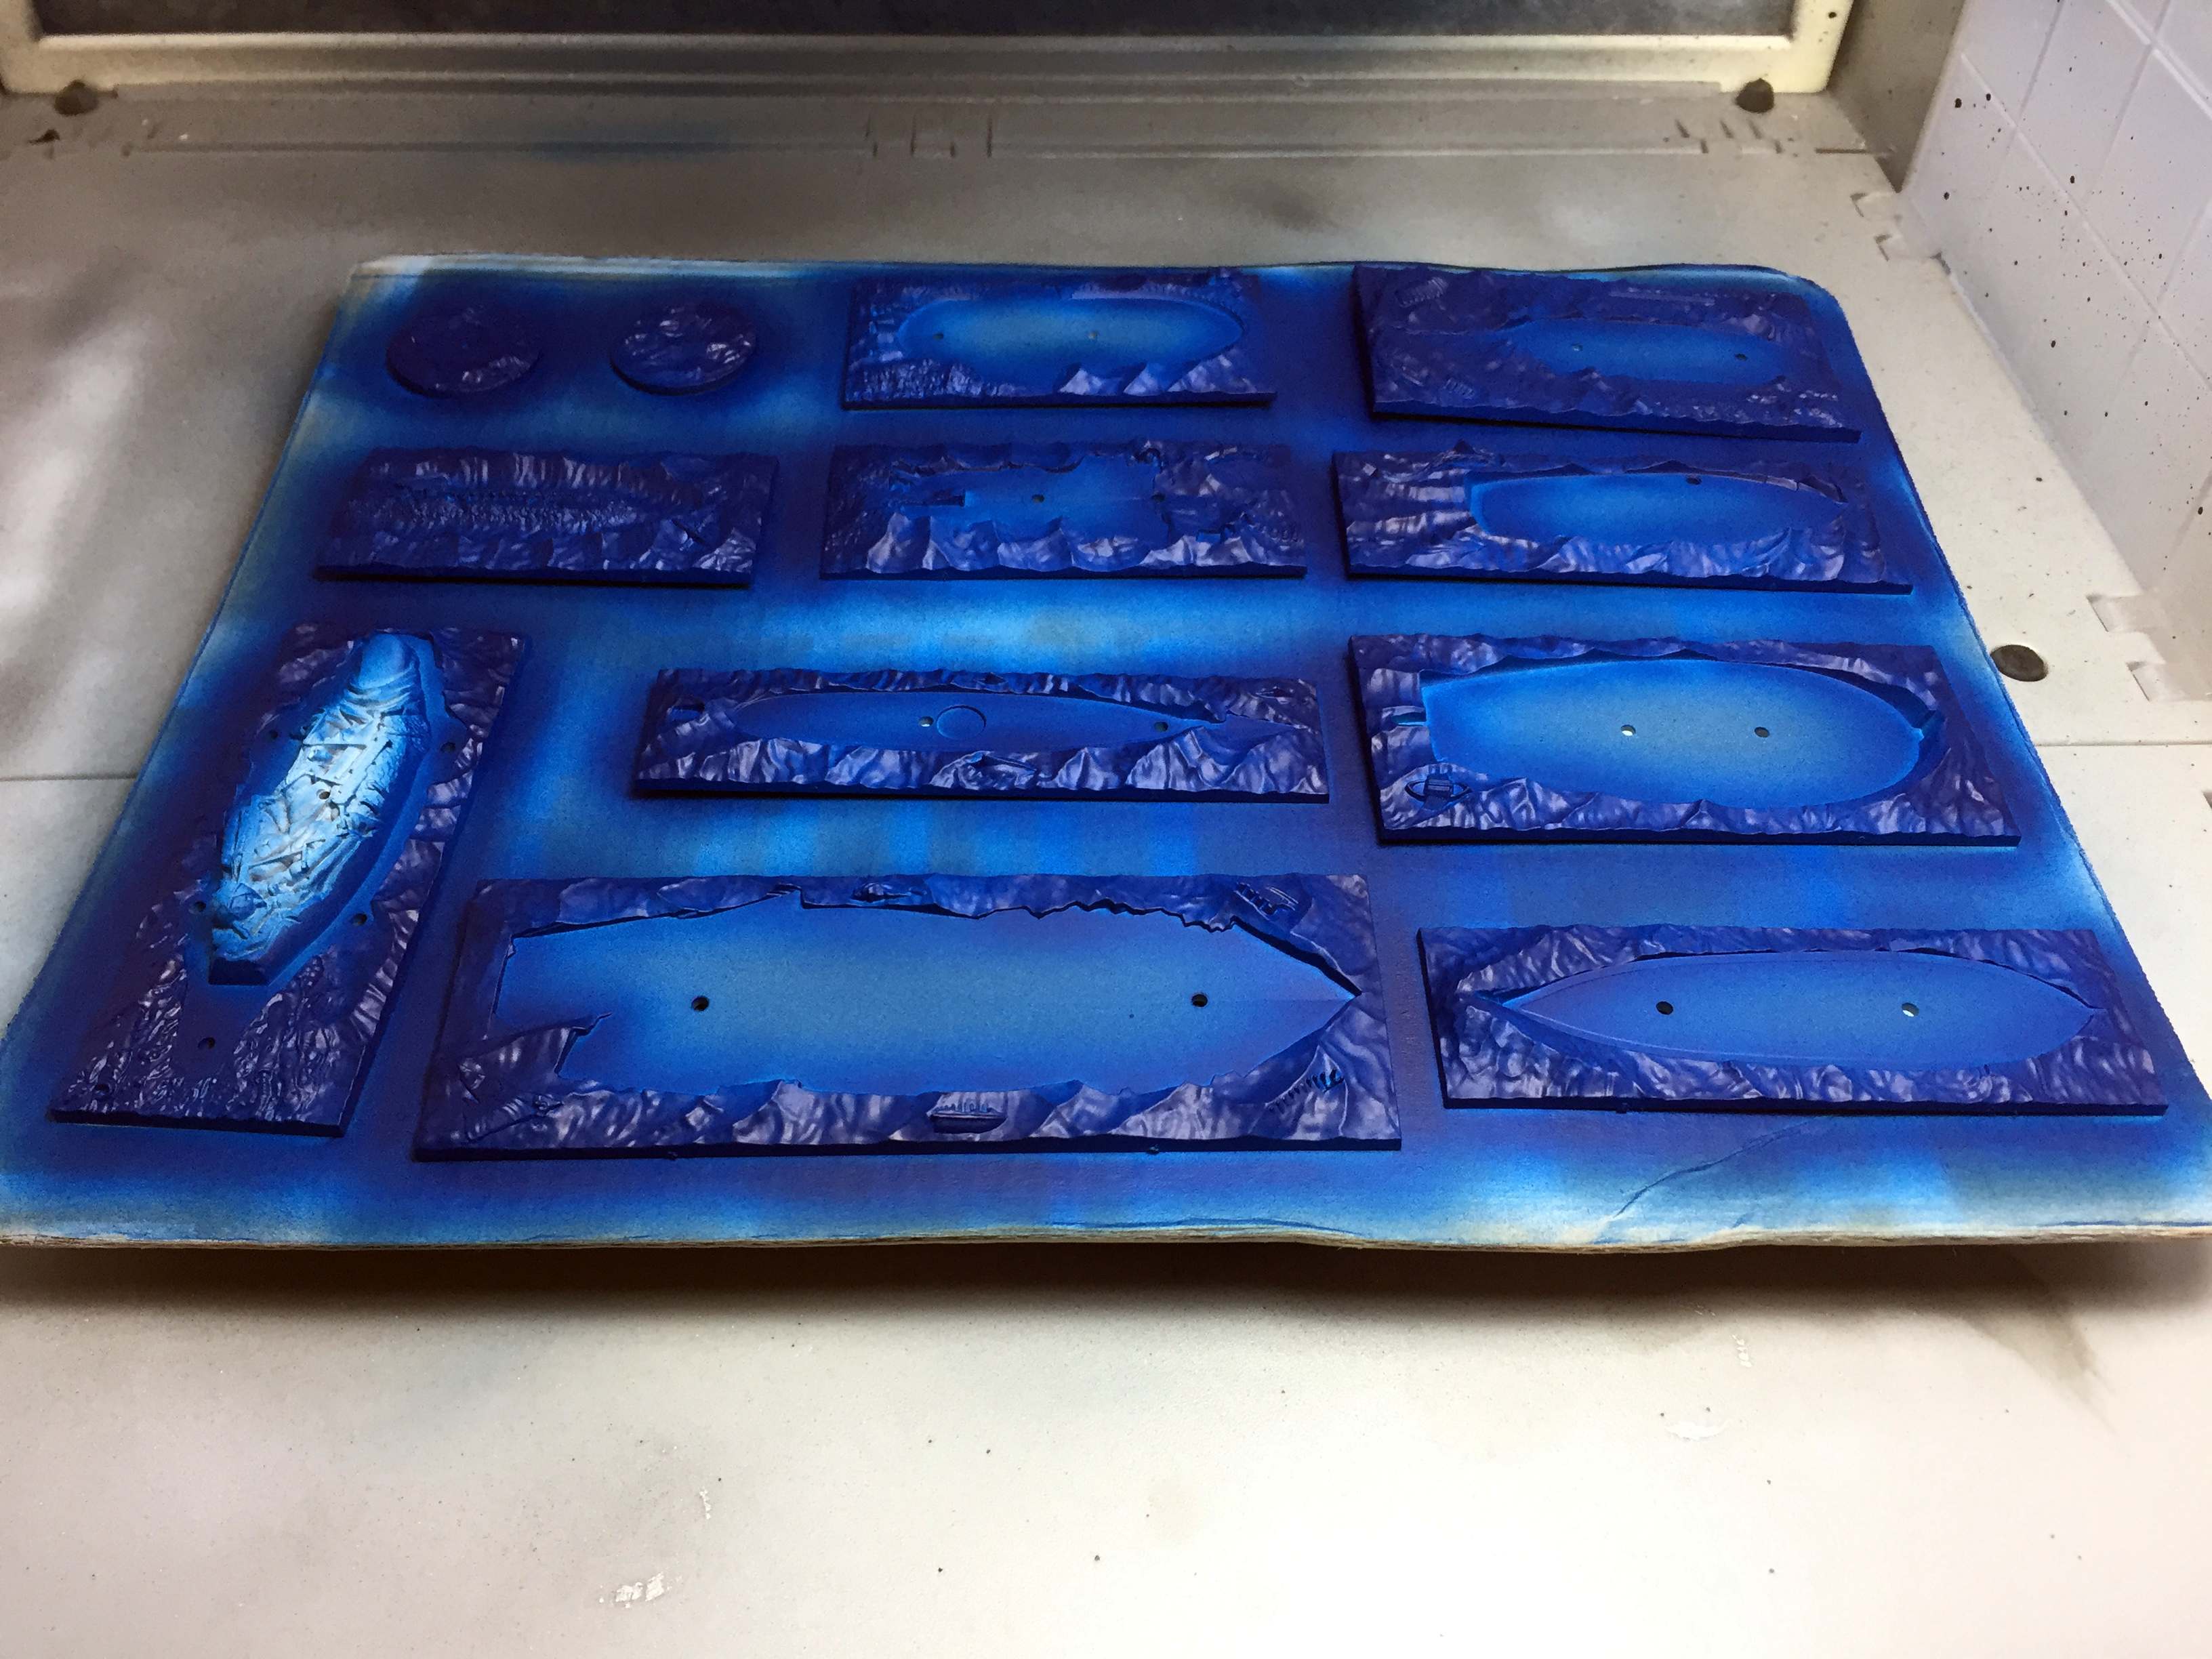 Base coated in "Blue Angels" blue
The bases were airbrushed with Model Air Blue “Blue Angels” from Vallejo Model Air. Then they were dry brushed thoroughly with Jade Green (Game Color from Vallejo). For the second layer of dry brushing I dry brushed the raised areas with blue green (Model Color). Finally the most raised areas and the peaks of the waves where dry brushed with pale blue (Model Color).
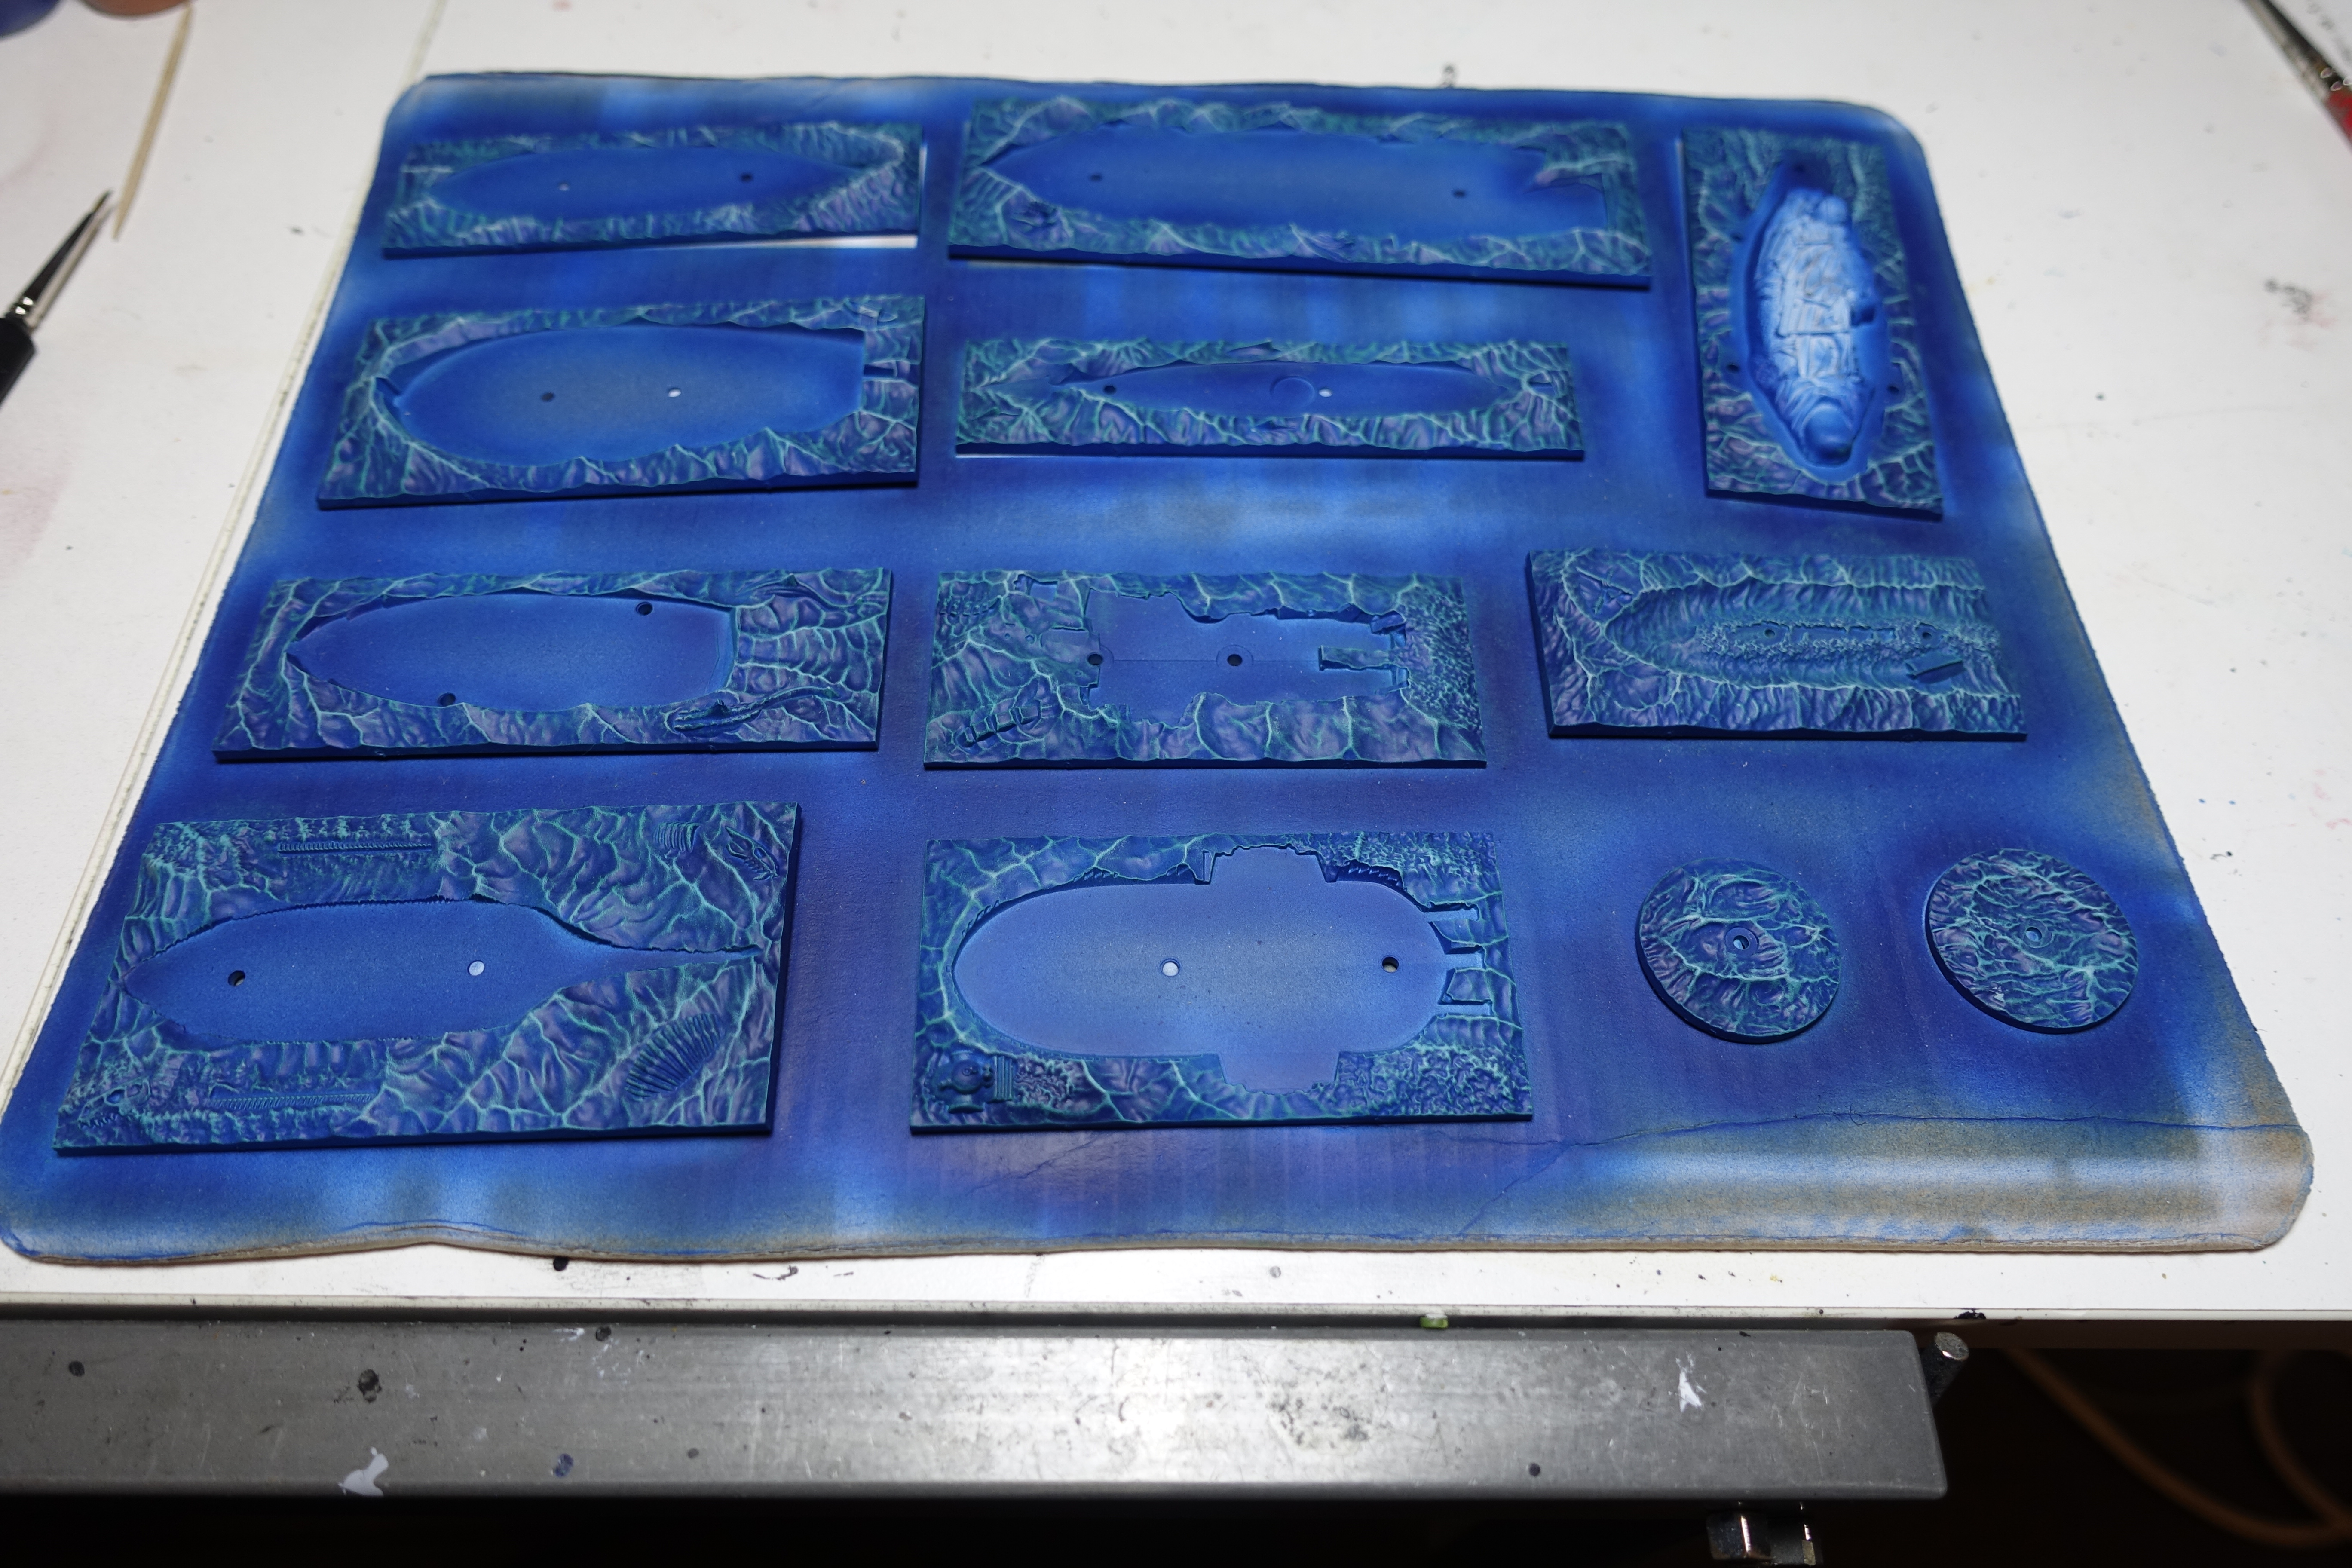 Afther dry brushing
The result looks nice. While working on the bases as well as on the rocks, I noticed dry brushing gives a really good result after the third layer of (different) paint.
With the sea painted, many details still need to be done. Each base has details that reflect the ship it’s for: the dwarf battleship has a little steam boot on it’s base, the elven ship has dolphins accompanying it,…
Painting the details will be for another time.
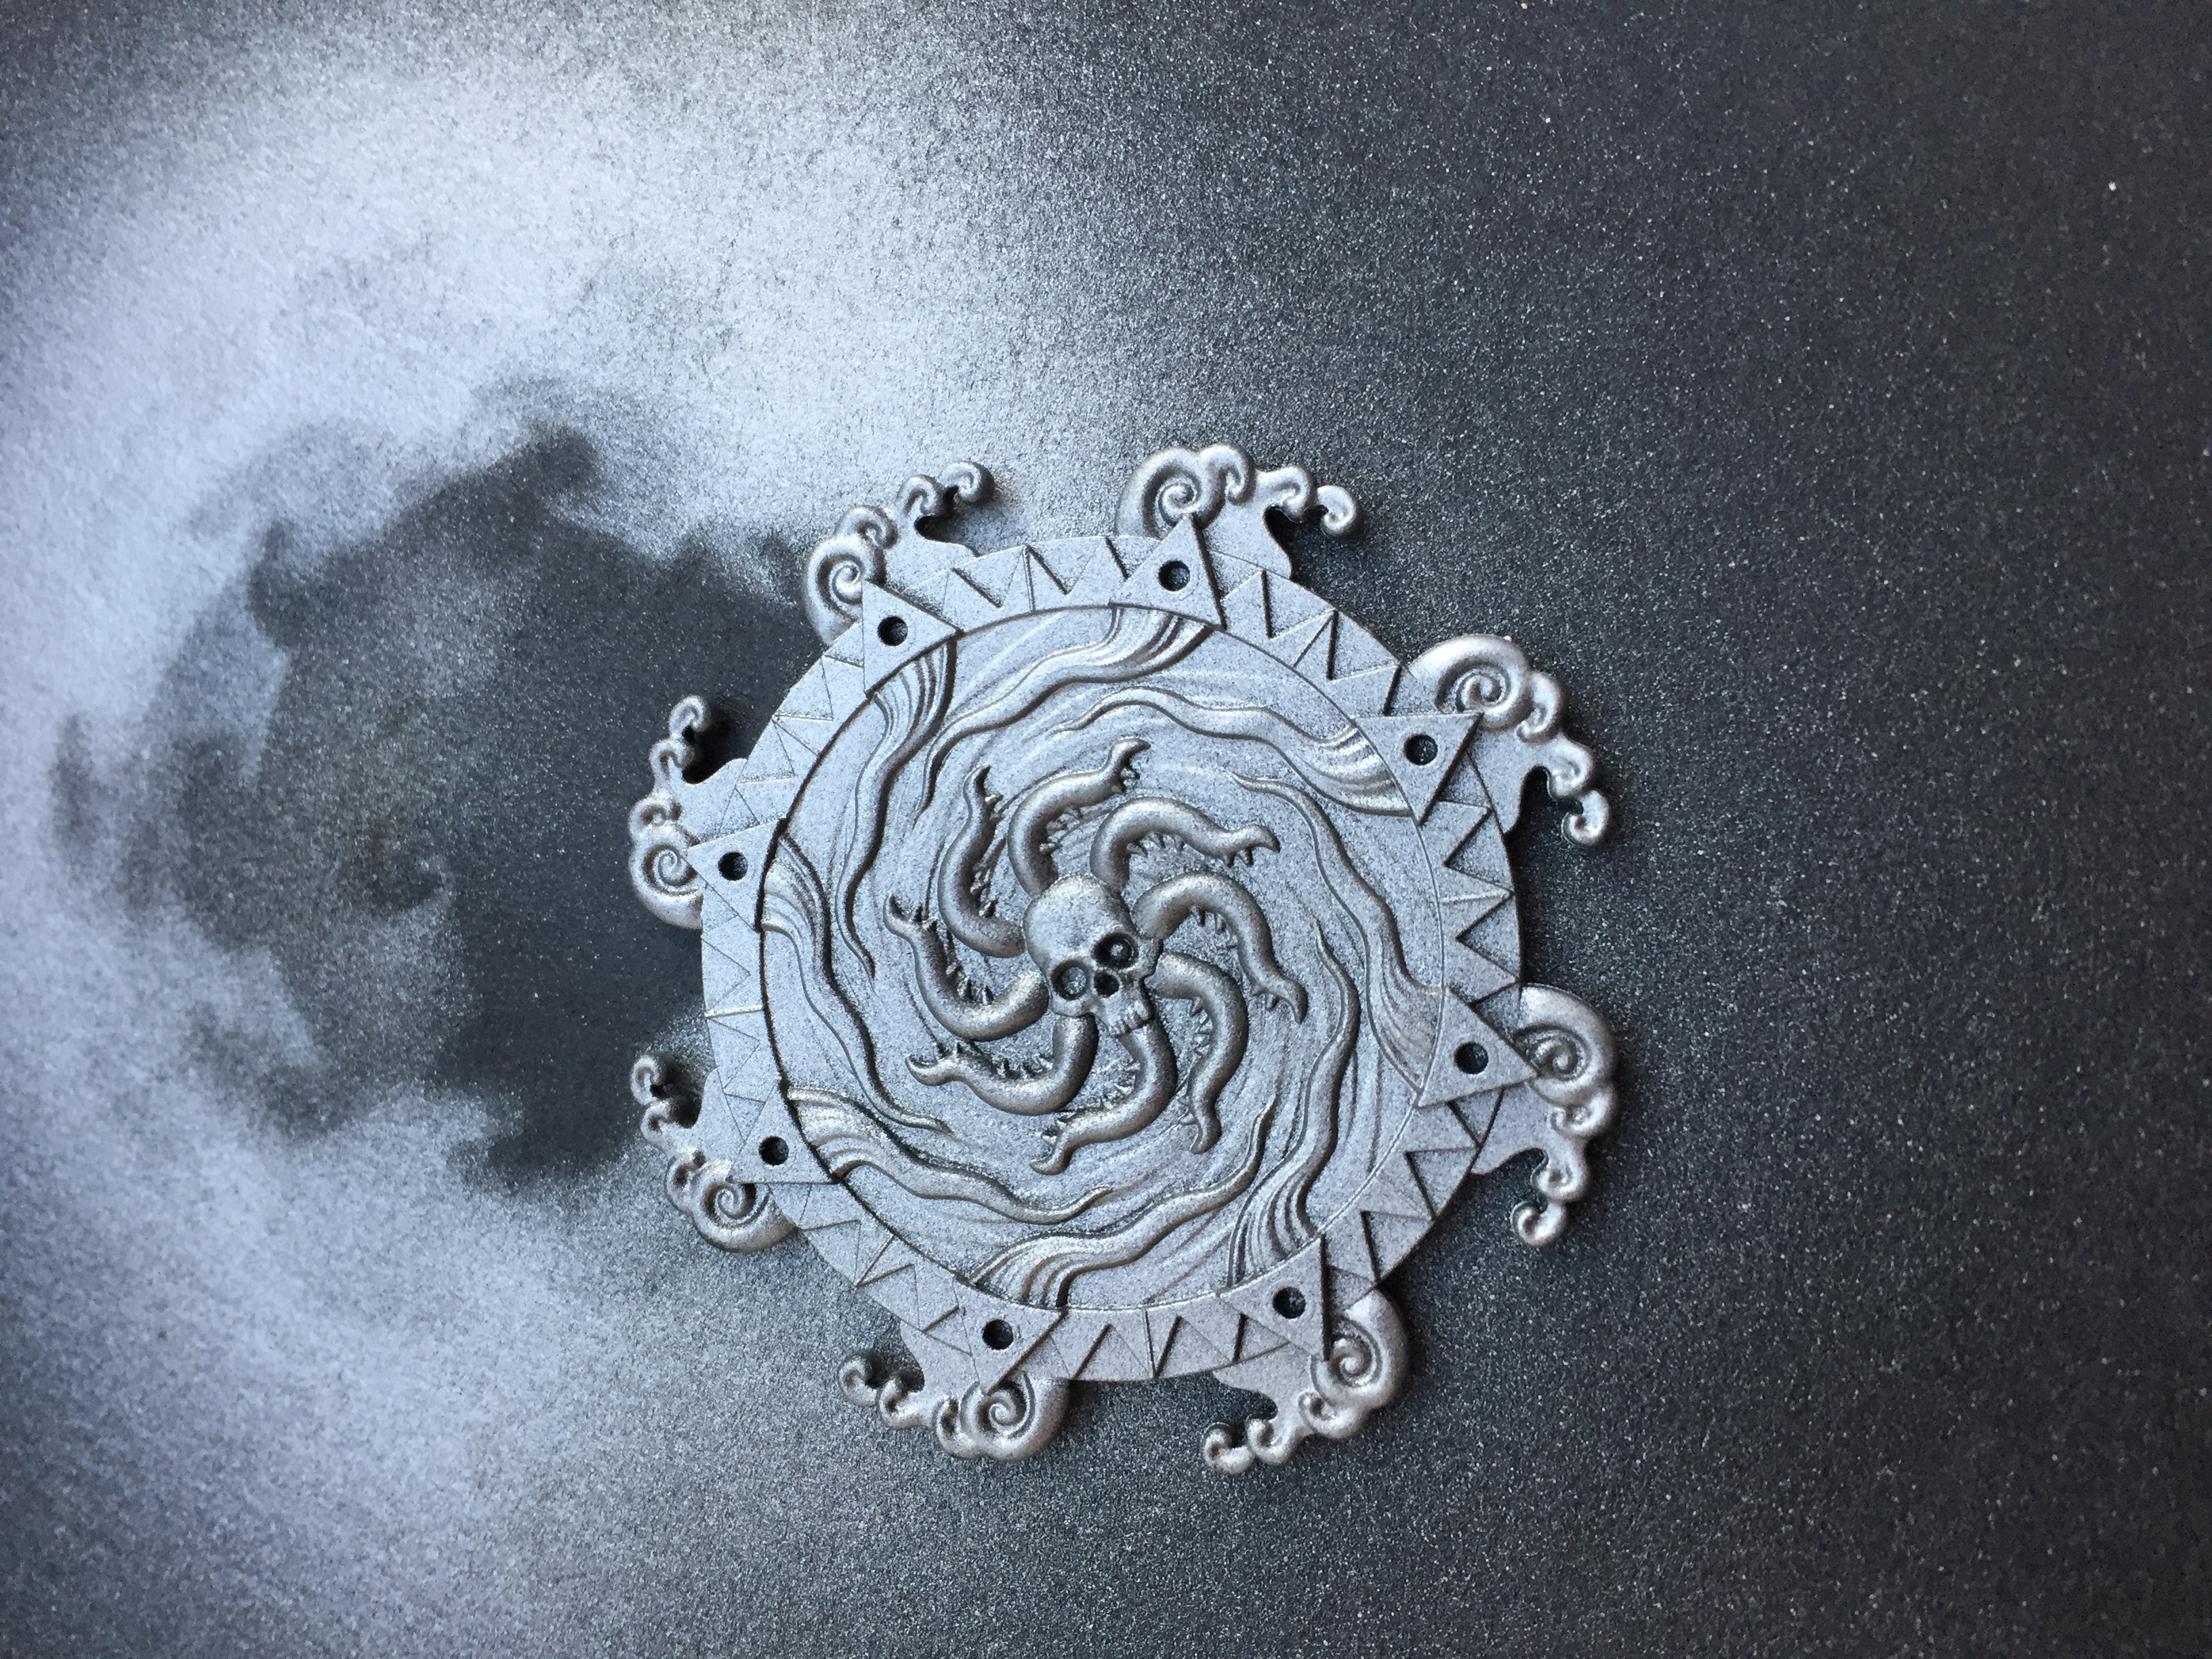
Gold
On to something completely different: I still had to varnish my golden gaming aids. At the store I asked for the glossiest gloss varnish they had. They recommended gloss topcoat from Mr. Hobby. This is the result. Some very shiny golden gaming aids. 🙂

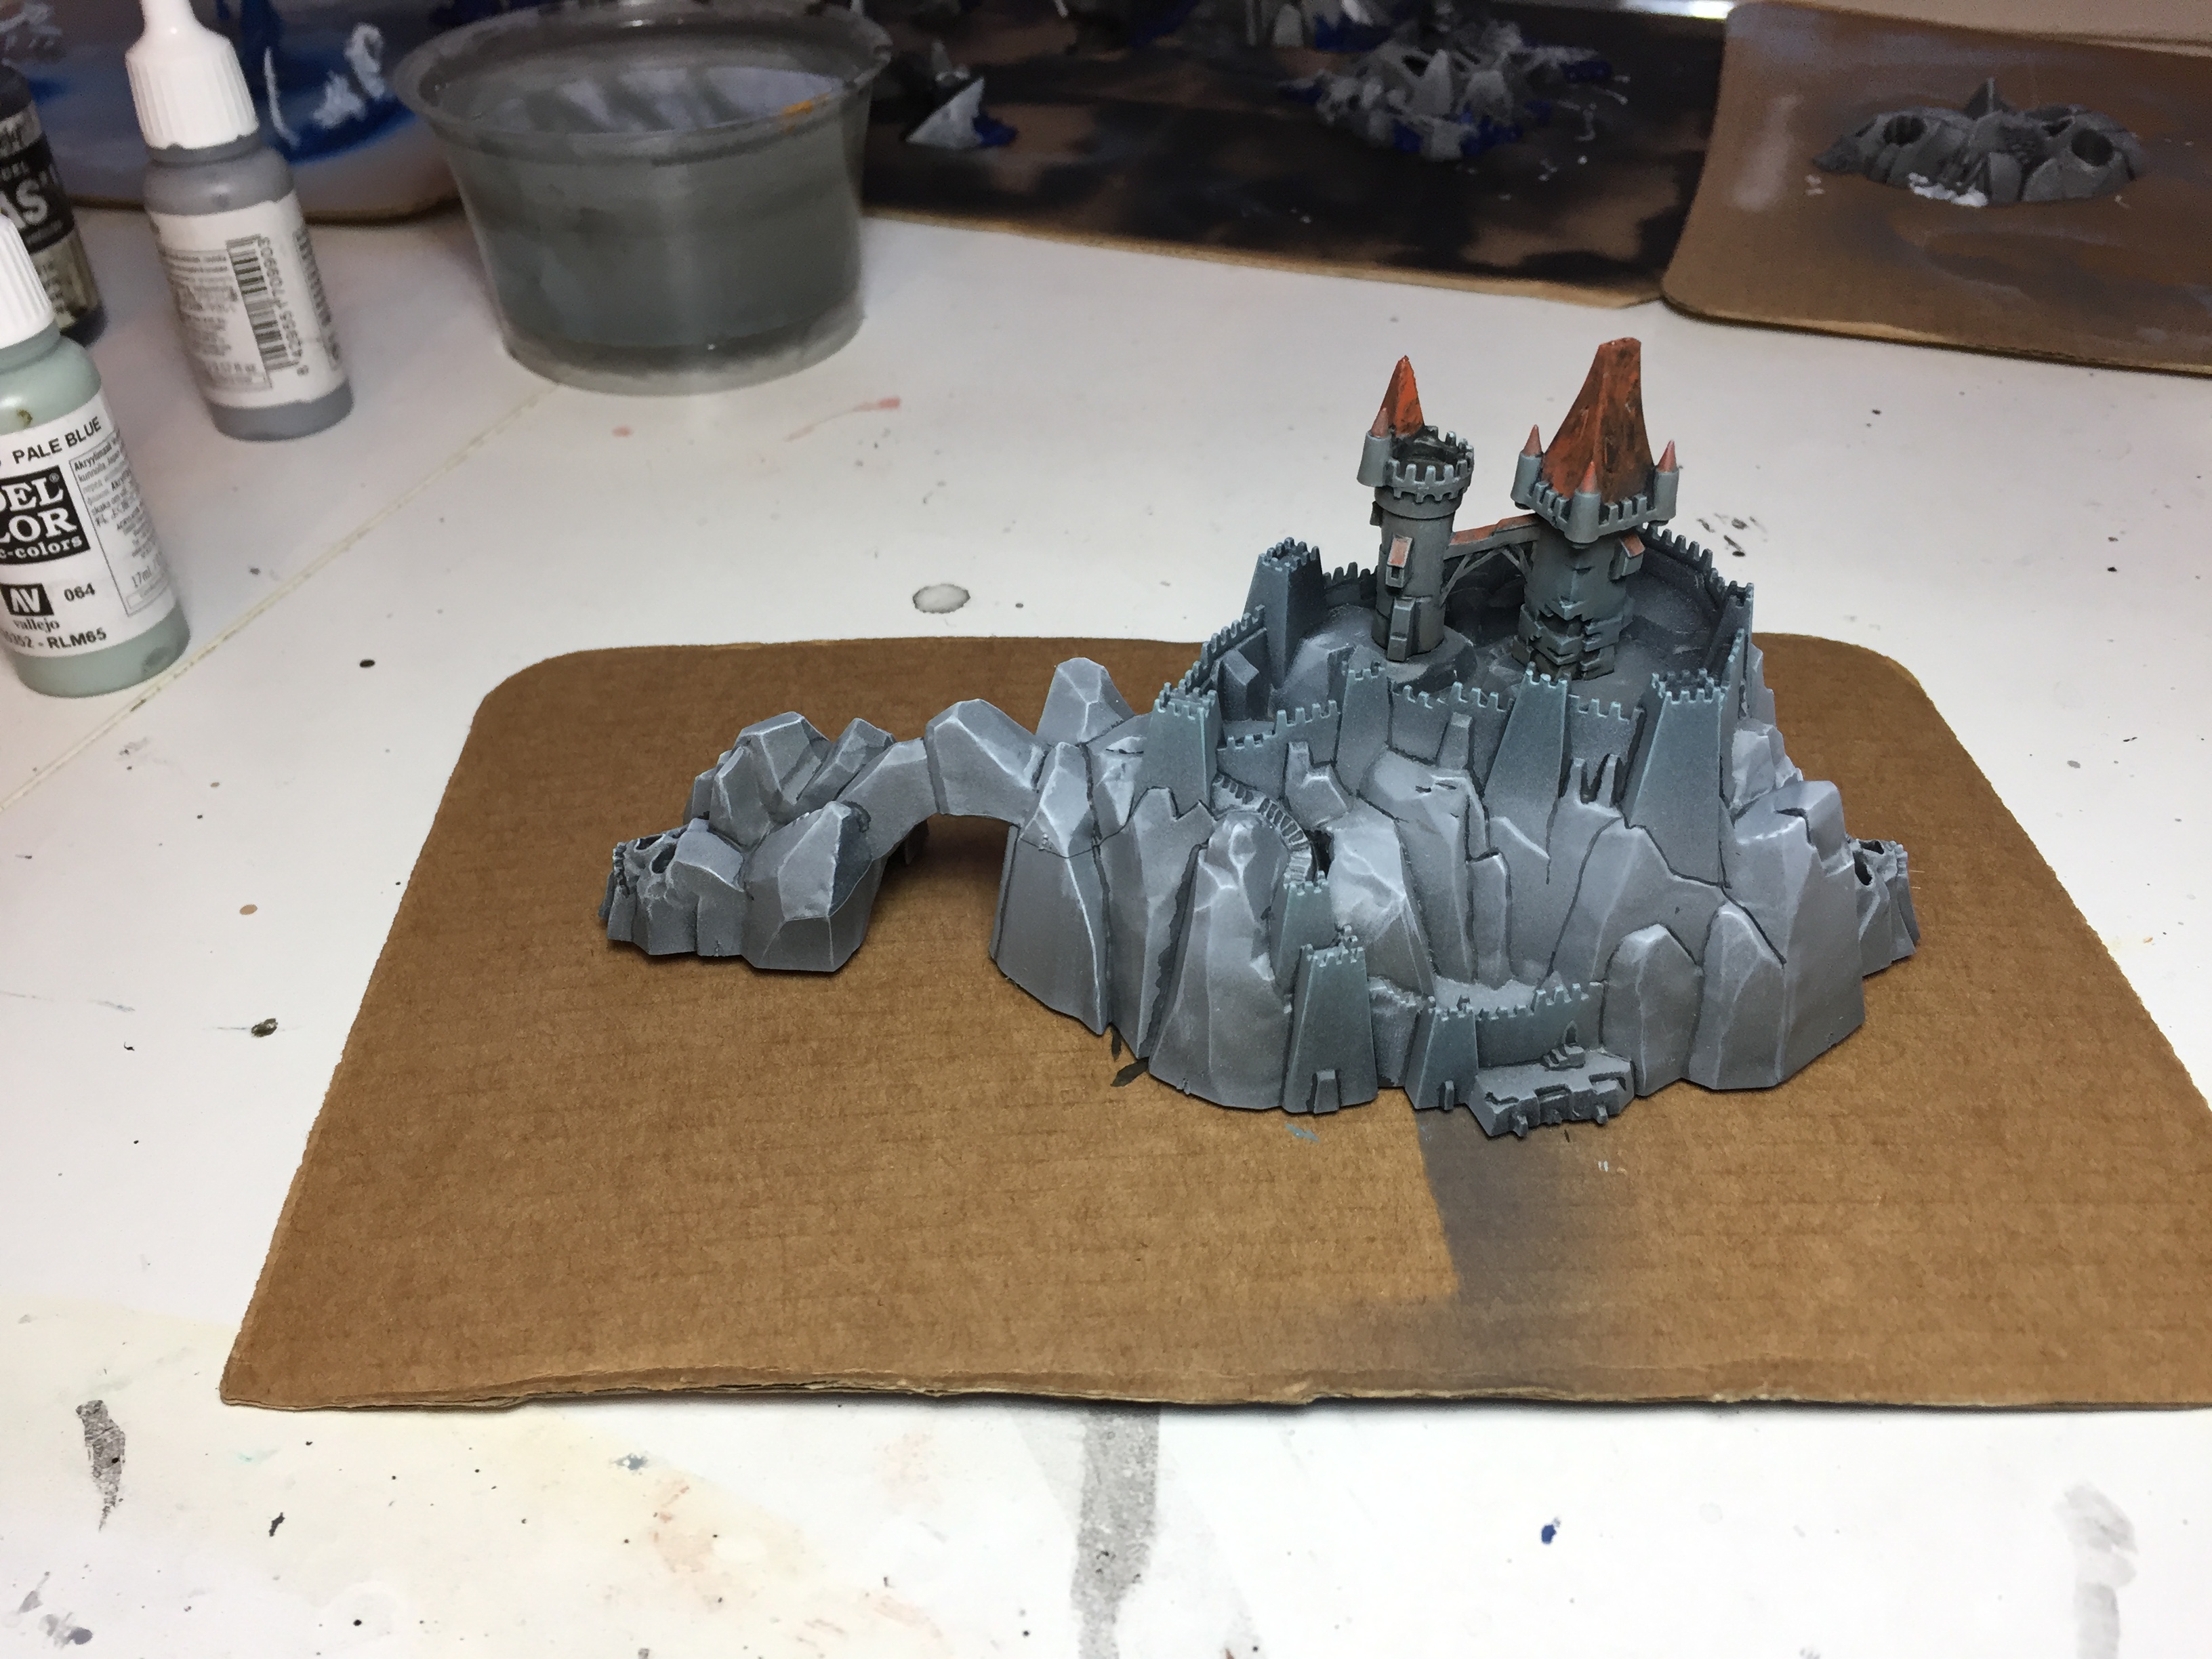
The castle
The castle is the largest terrain piece in the box. It could be considerd a centre piece, so it deserved some extra attention. The rocks on which the castle is build, have already been painted, as you could read in my earlier entry about painting rocks. At the time I had no idea how to paint the castle itself. The overspray from painting the rocks, had already given the castle walls a dark grey look. Darker then the rocks. I liked the look of the walls. A bit of dry brushing and they’d be finished. Only the two towers at the centre of the castle were still only covered in black primer.
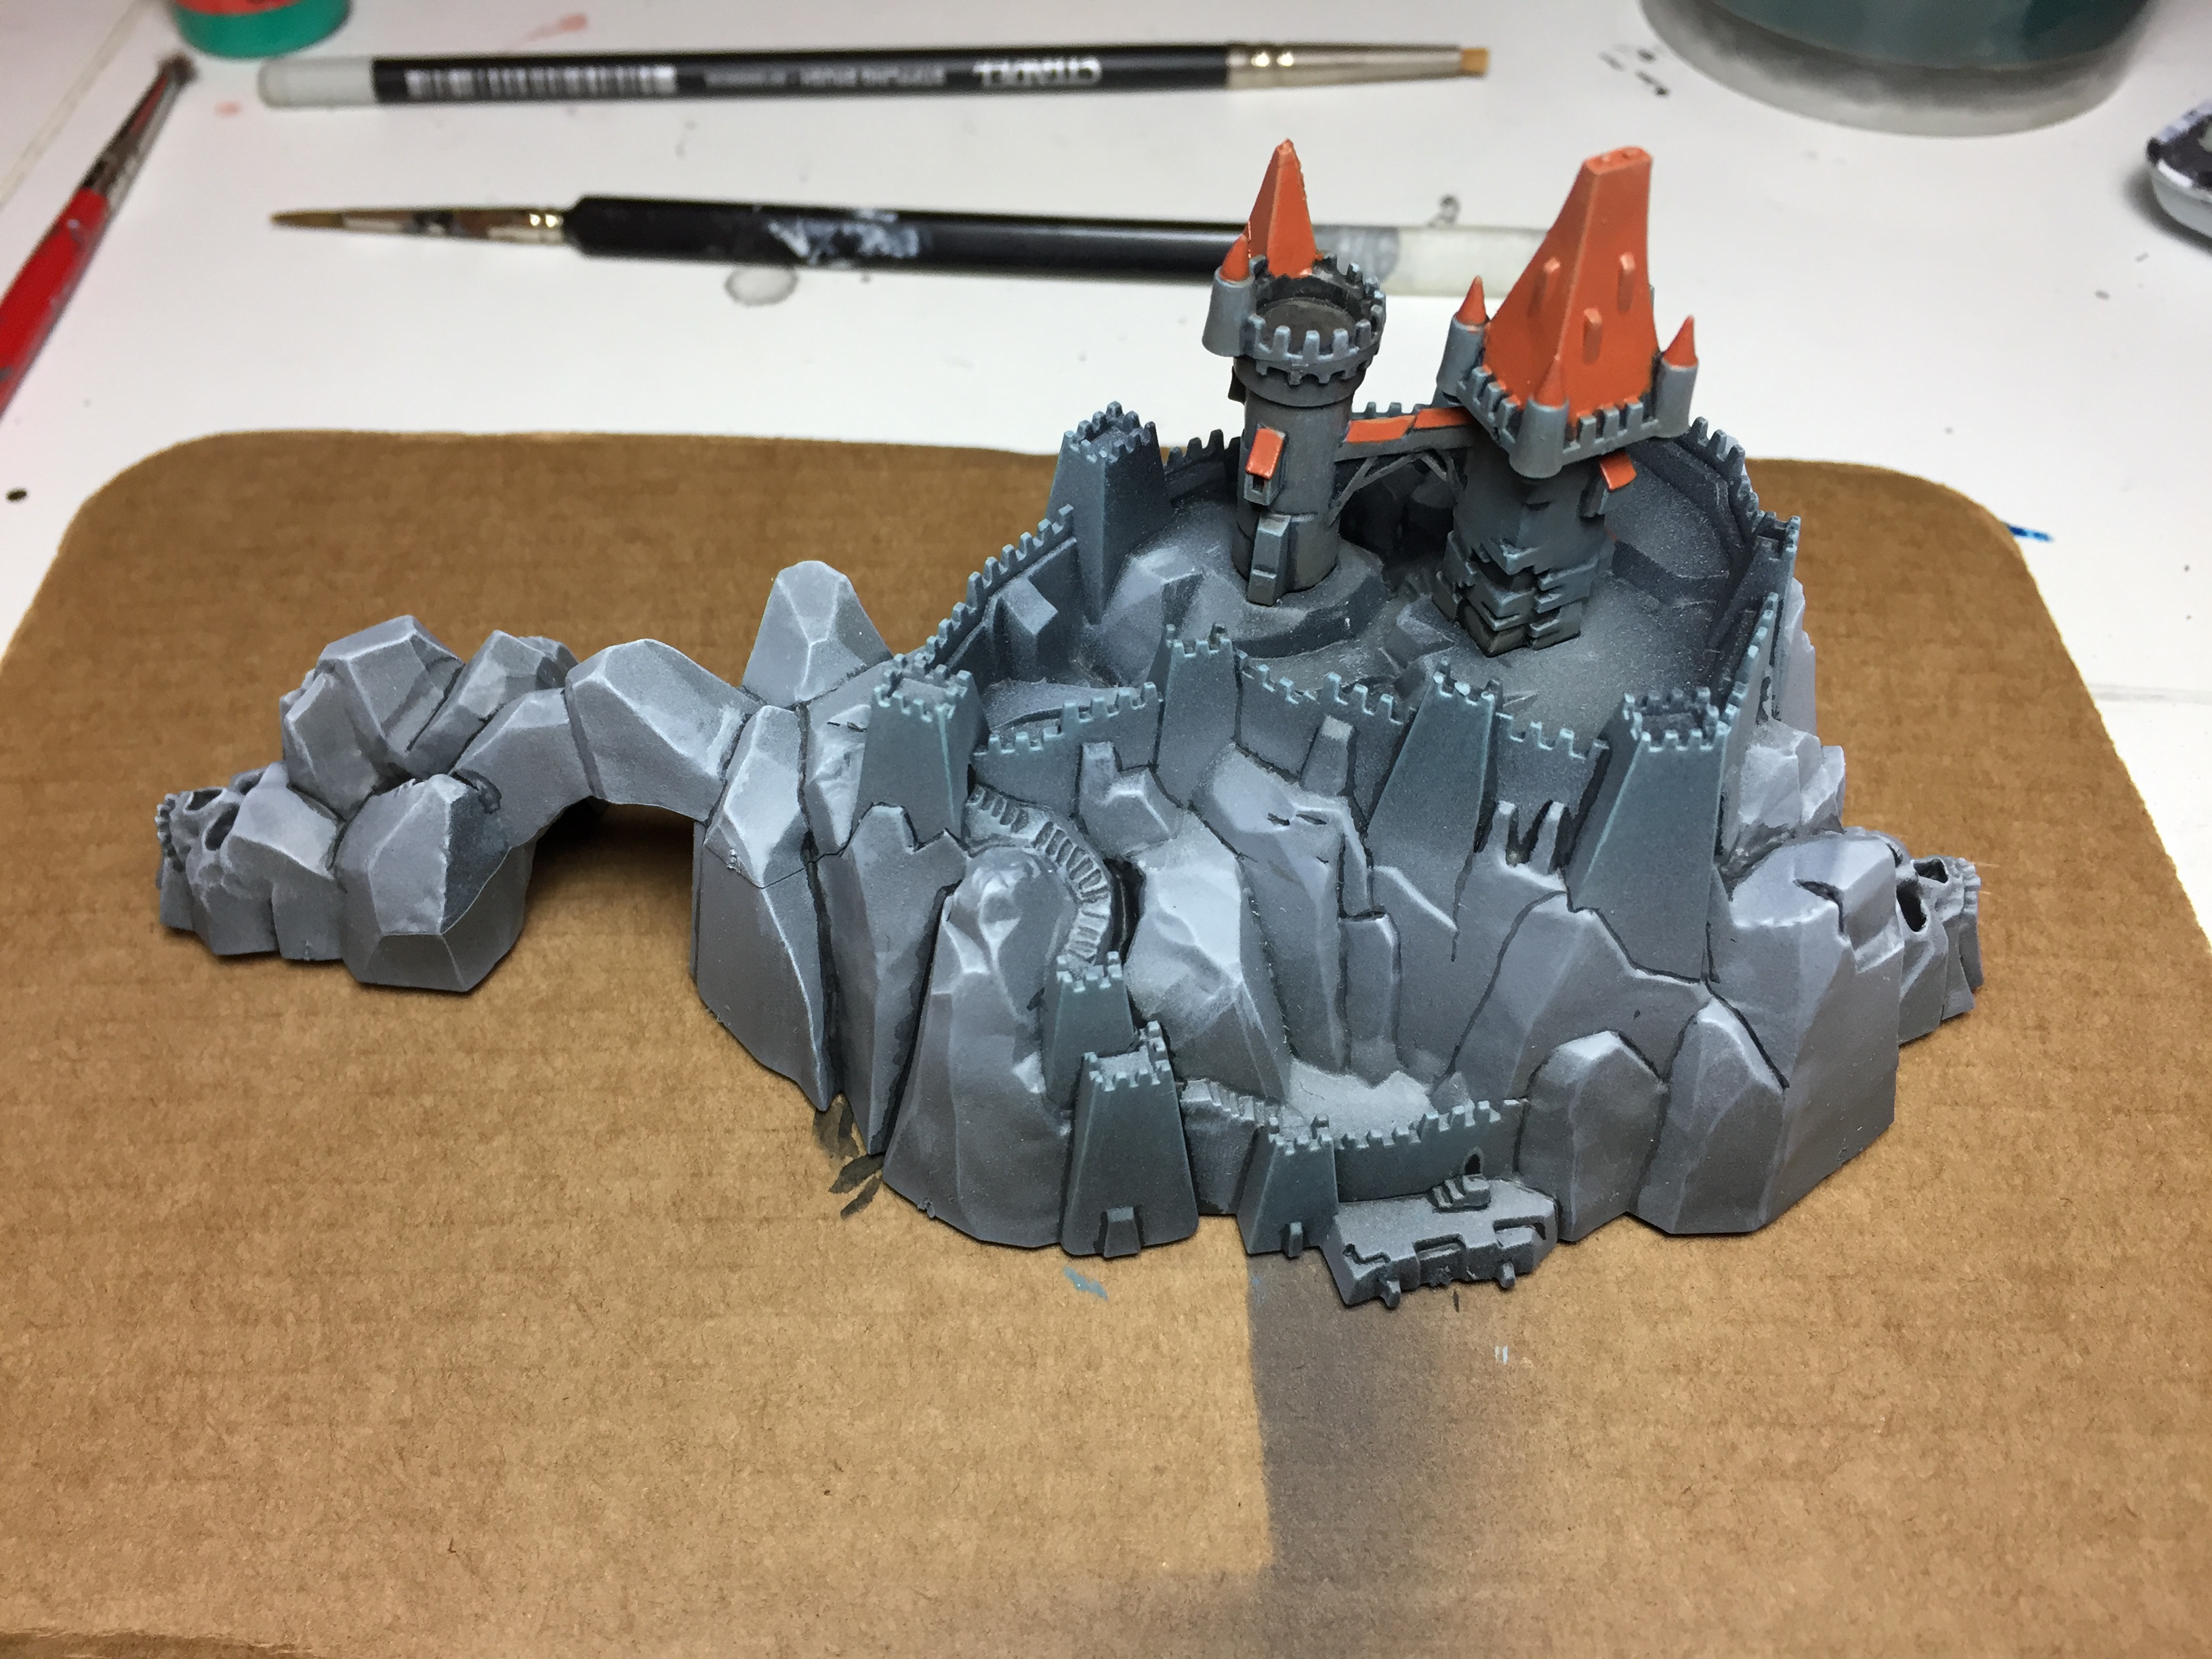
I gave the towers a base coat in model air concrete from Vallejo. The same colour I’ve used to basecoat the rocks. It took many, many layers to base coat the towers and get rid of the brush strokes. The next step was a black wash and many more coats of model air concrete. (I’m still not good at using washes. For others with this problem. A video with Sam Lenz has just been released by Tabletop Minions about using washes: https://youtu.be/PAKvwVSKqWI) A thorough dry brush with model color light grey followed.
 Afther dry brushing with light grey.
Up until this point I followed the same steps I’ve used to paint the rocks. But I don’t want the castle to look like the rocks. For the following steps I’ve used different paints to create a difference in the look of the rocks and the look of the castle. I started dry brushing the castle walls and the two towers with Model Color “Blue Blue Pale” and a second final dry brush wit Model Color “Pale Blue” (both Vallejo).
The names are very similar, but they are very different paints. (Possibly the names weren’t translated correctly from Spanish.) Blue blue pale is more blue, where as pale blue is more green. These two colours gave the castle a more blueish/greenish grey look, while the rocks are neutral grey.
 Afther dry brushing with blue blue pale and pale bluie.
Now the roofs of the castle needed to be painted. For a ceramic look I base coated them with Panzer Aces Light Rust and then dry brushed them with Panzer Aces Yellowish Rust. Both from Vallejo.
 The roofs are finished.
Finally I wanted more earth looking surfaces on the ground within the castle. I’ve experimented with some browns, but perhaps this wasn’t such a good idea.
Now I could finish the castle with a coat of matt varnish, using the cans from The Army Painter. This is the varnish I will use for almost everything in this project.
I’ve finished the volcano and another large island as well. After varnishing I’ve put some semigloss varnish on the lava, to make it look more realistic.
My largest terrain pieces have been finished!

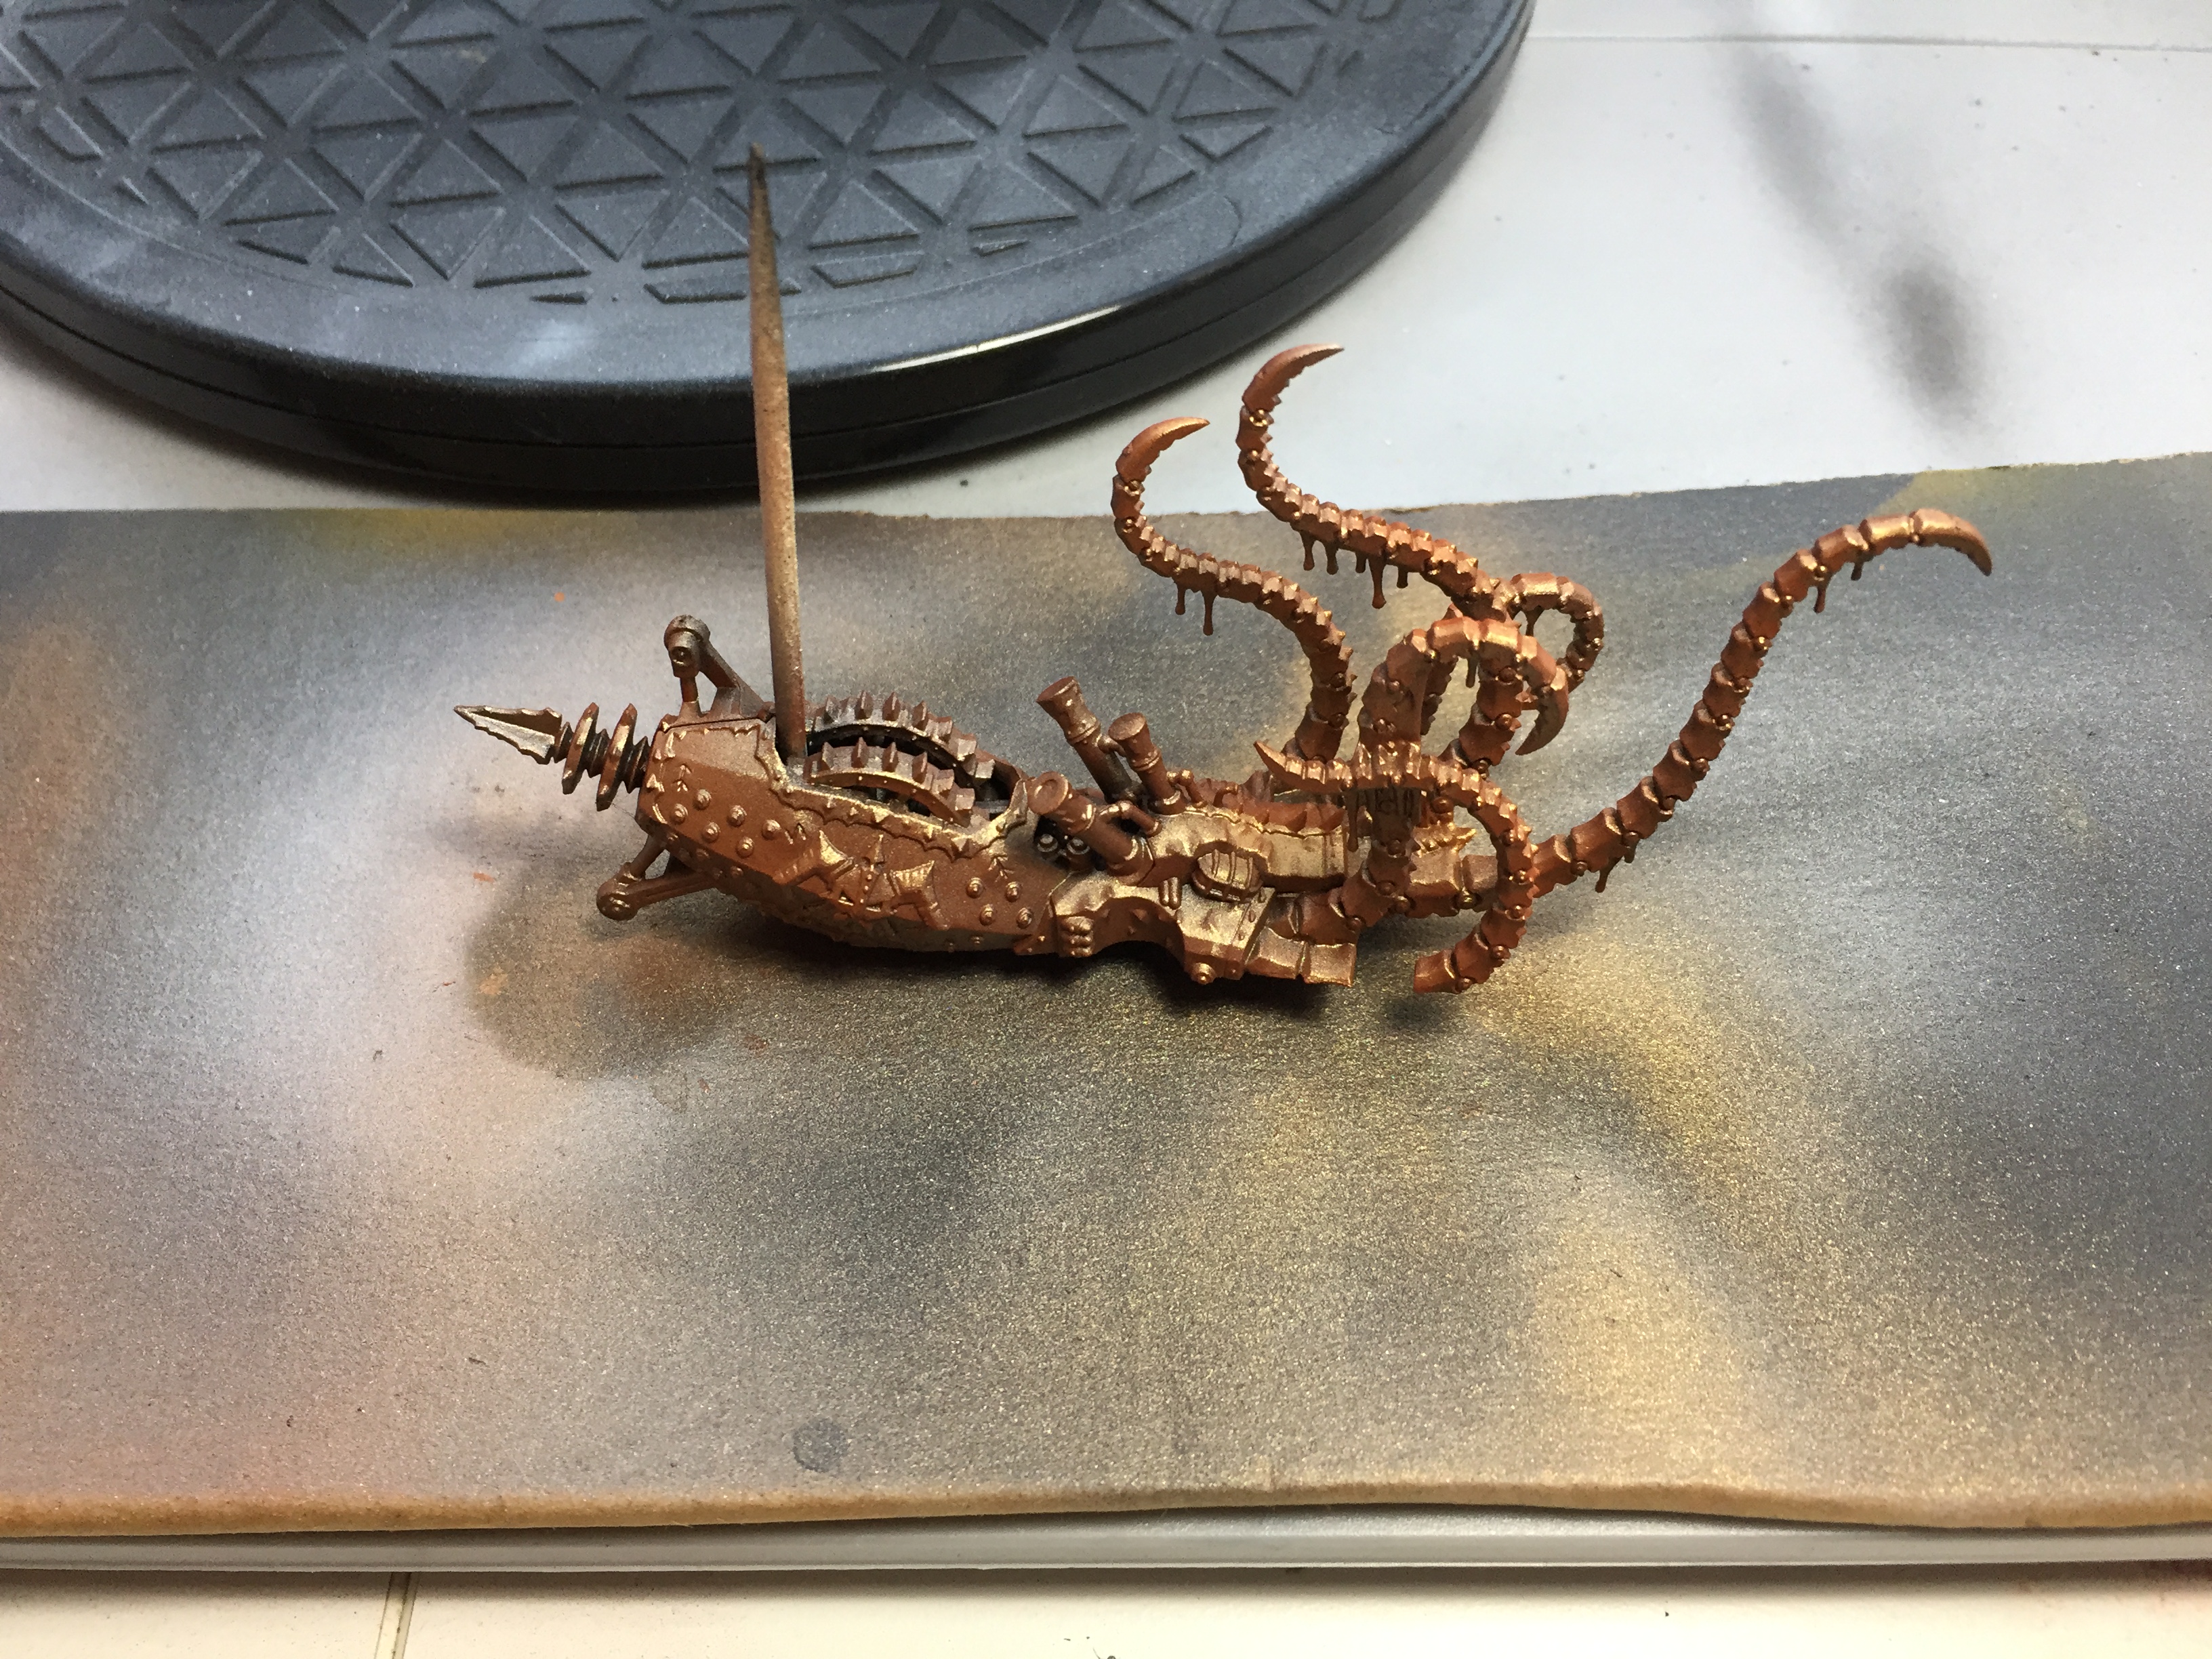
The Black Kraken
For the first time since the start of this project on a naval game: an entry about painting a ship!
The Black Kraken had been base coated in copper in my earlier entry about airbrushing metallic paint. Vallejo Model Color copper is an interesting paint. It’s red with a golden shine. An unusual and very good looking metallic paint.
To whether the ship I bought Nihilakh Oxide from Citadels range of technical paints. It’s the first time I use it. I was looking forward to trying it out, which is why I painted this ship first.
The question was how to use the oxide paint? Strait from the pot? Thinned with water to be used like a wash? If you read my previous entries, you may have noticed I struggle with washes. Eventually I experimented with painting from the pot for the deeper recesses for a heavier oxidized effect and a wash over the surfaces. The paint doesn’t need much water. It’s more liquid than ordinary paint. I can recommend this paint. Its user friendly a gave a nice effect.
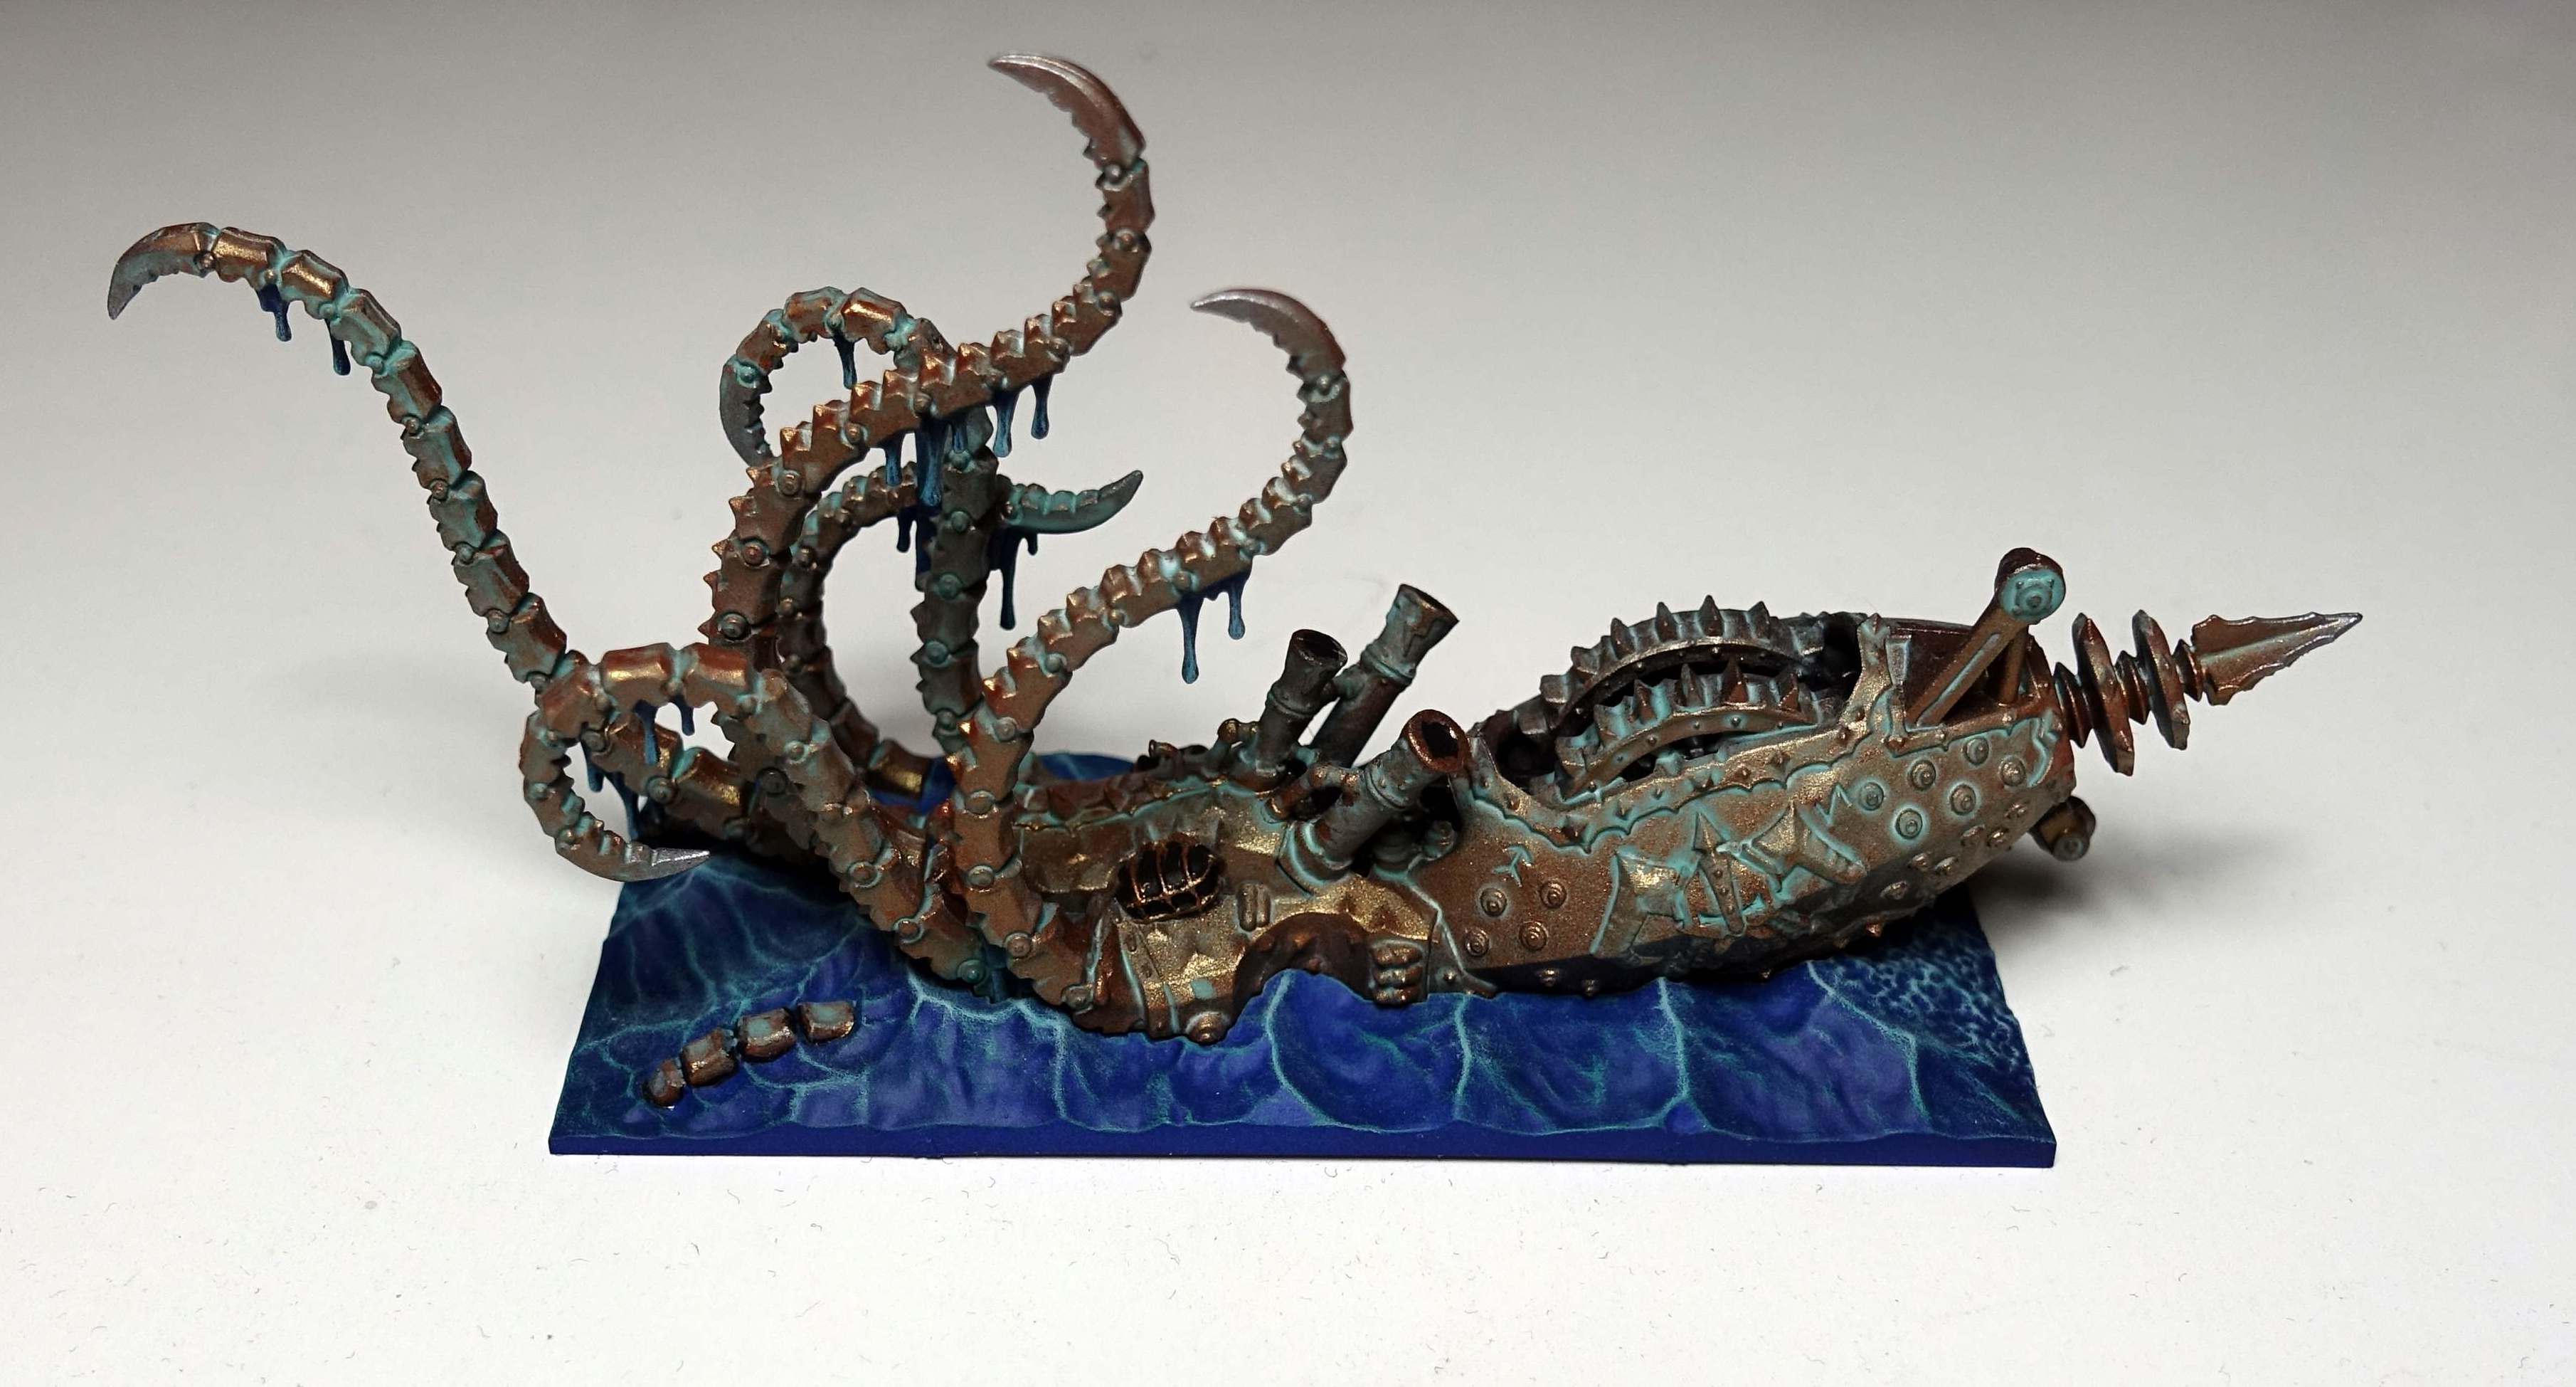
 The Black Kraken afther whetering with Nihilakh Oxide.
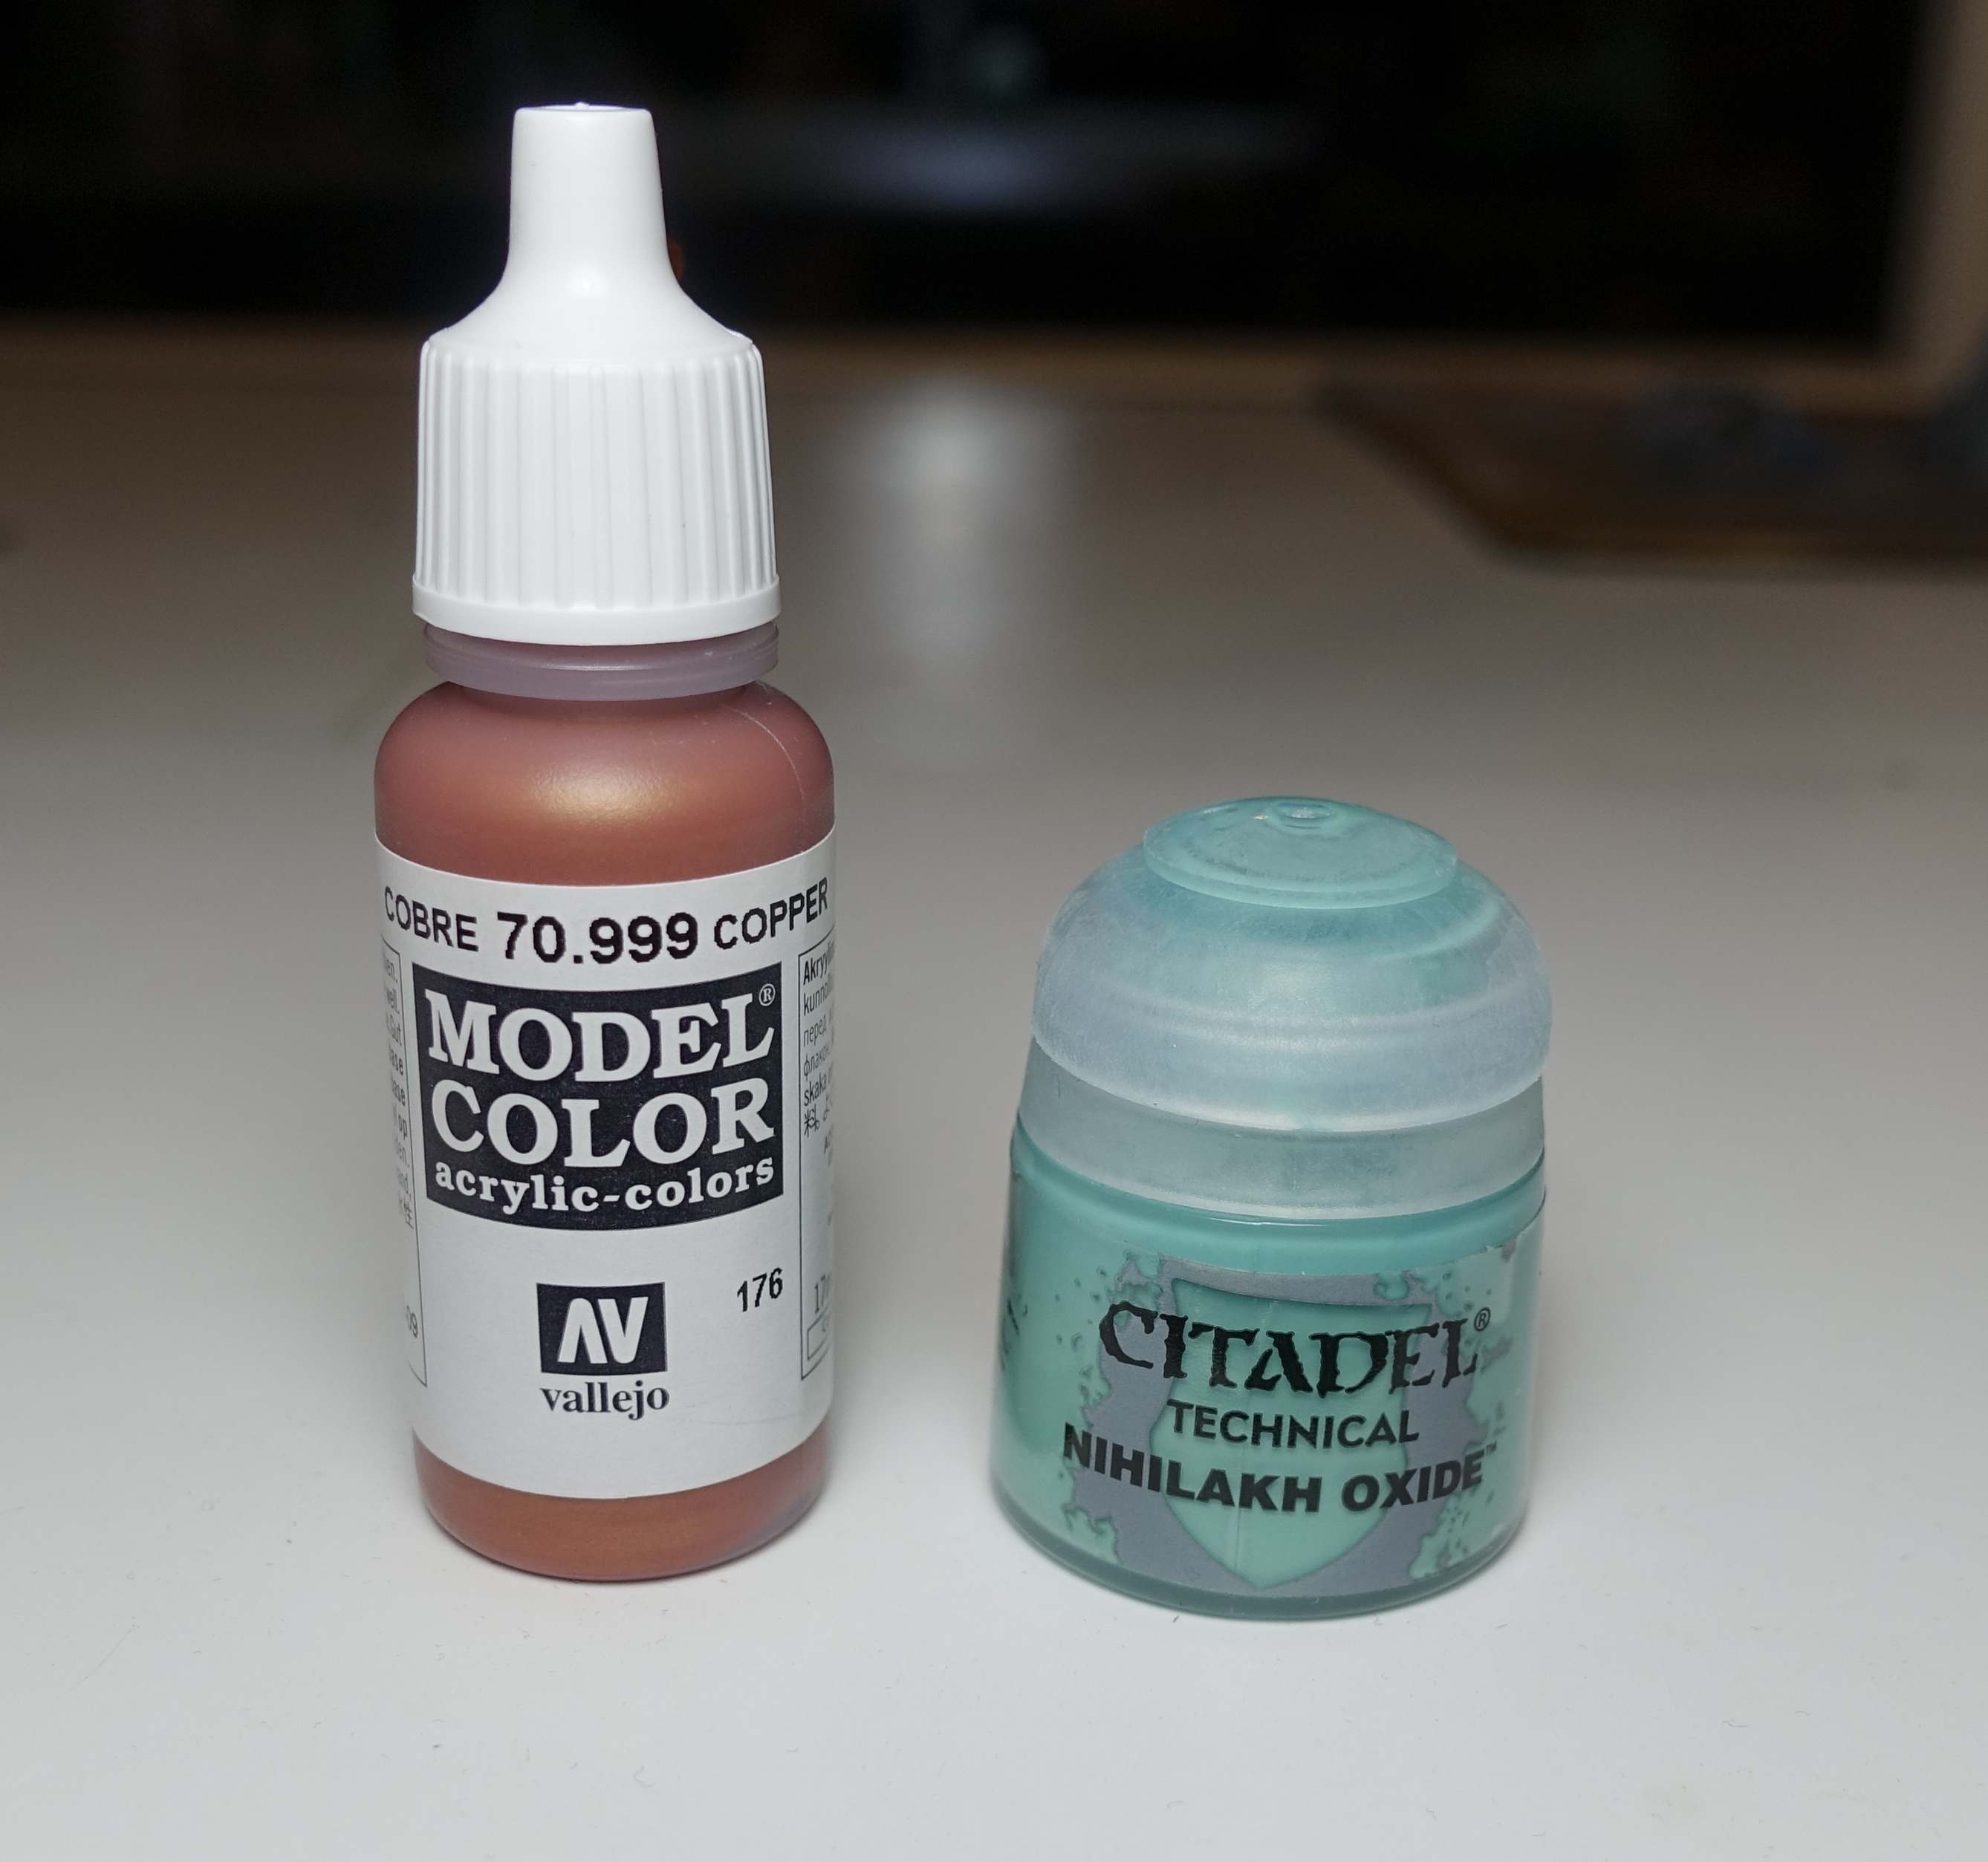
Normally I begin to dry brush the model at this stage to make it more three-dimensional and make it look as if the light comes from above. This time I didn’t. I fear dry brushing will undo or diminish the oxide effect. The only dry brushing was with Vallejo Model Color Natural Steel followed by The Army Painter Plate Mail Metal on the tips of the tentacles and the tip of the drill at the back of the ship. This makes those tips look harder, sharper and more threatening.
The water was painted in the usual style as described in my entry about painting the sea. Finally the “eyes” of the ship were painted black. I finished my first ship from Dreadfleet!
PS: I found another project about Dreadfleet on Beasts of War. The ships are painted beautifully by horus500: https://www.beastsofwar.com/project-entry/1262554/
Turtle island, varnishing and storage
Turtle island
I’m not quite finished painting large islands just yet. There is an island in the shape of the skeleton of a turtle, with a castle build on top. I wanted this castle to look different from the other, bigger castle. This castle I wanted to look like it was built with bricks. In previous projects I’ve been searching for a good “brick red” to paint walls, but I haven’t found one yet. This time I’ve used burnt red from Vallejo. The result is a nice dark red castle, but it’s not the colour of bricks.
For the planks on which the castle is build, I used old wood (Vallejo panzer aces). The poles on which the planks and castle rest are painted in chocolate brown. This colour came with a set of paints I bought from Vallejo named “Wood & Leather”. I’ll be trying out several other paints from this set painting shipwrecks, ships and other wooden parts. Next I used orange brown (also from this set) with much water added as a wash over the planks. Almost no effect. A chocolate brown wash than: better, but still not perfect. Eventually I took some black paint and painted the lines between the planks black with a fine brush. Finally the wooden parts received a dry brush with Japanese uniform WWII from Vallejo model color. Not a paint you’d expect in this project. It came with the Wood & leather set. When dry brushed over chocolate brown, it does give a wooden look.
For the castle I pin washed the recesses with black wash. The castle was then dry brushed with orange brown. I used this colour to ty it in with the wood, which received a wash with the same colour. The roof was painted black an then dry brushed blue blue pale from Vallejo.
The sea and rocks had already been painted following the methods described in earlier entries.
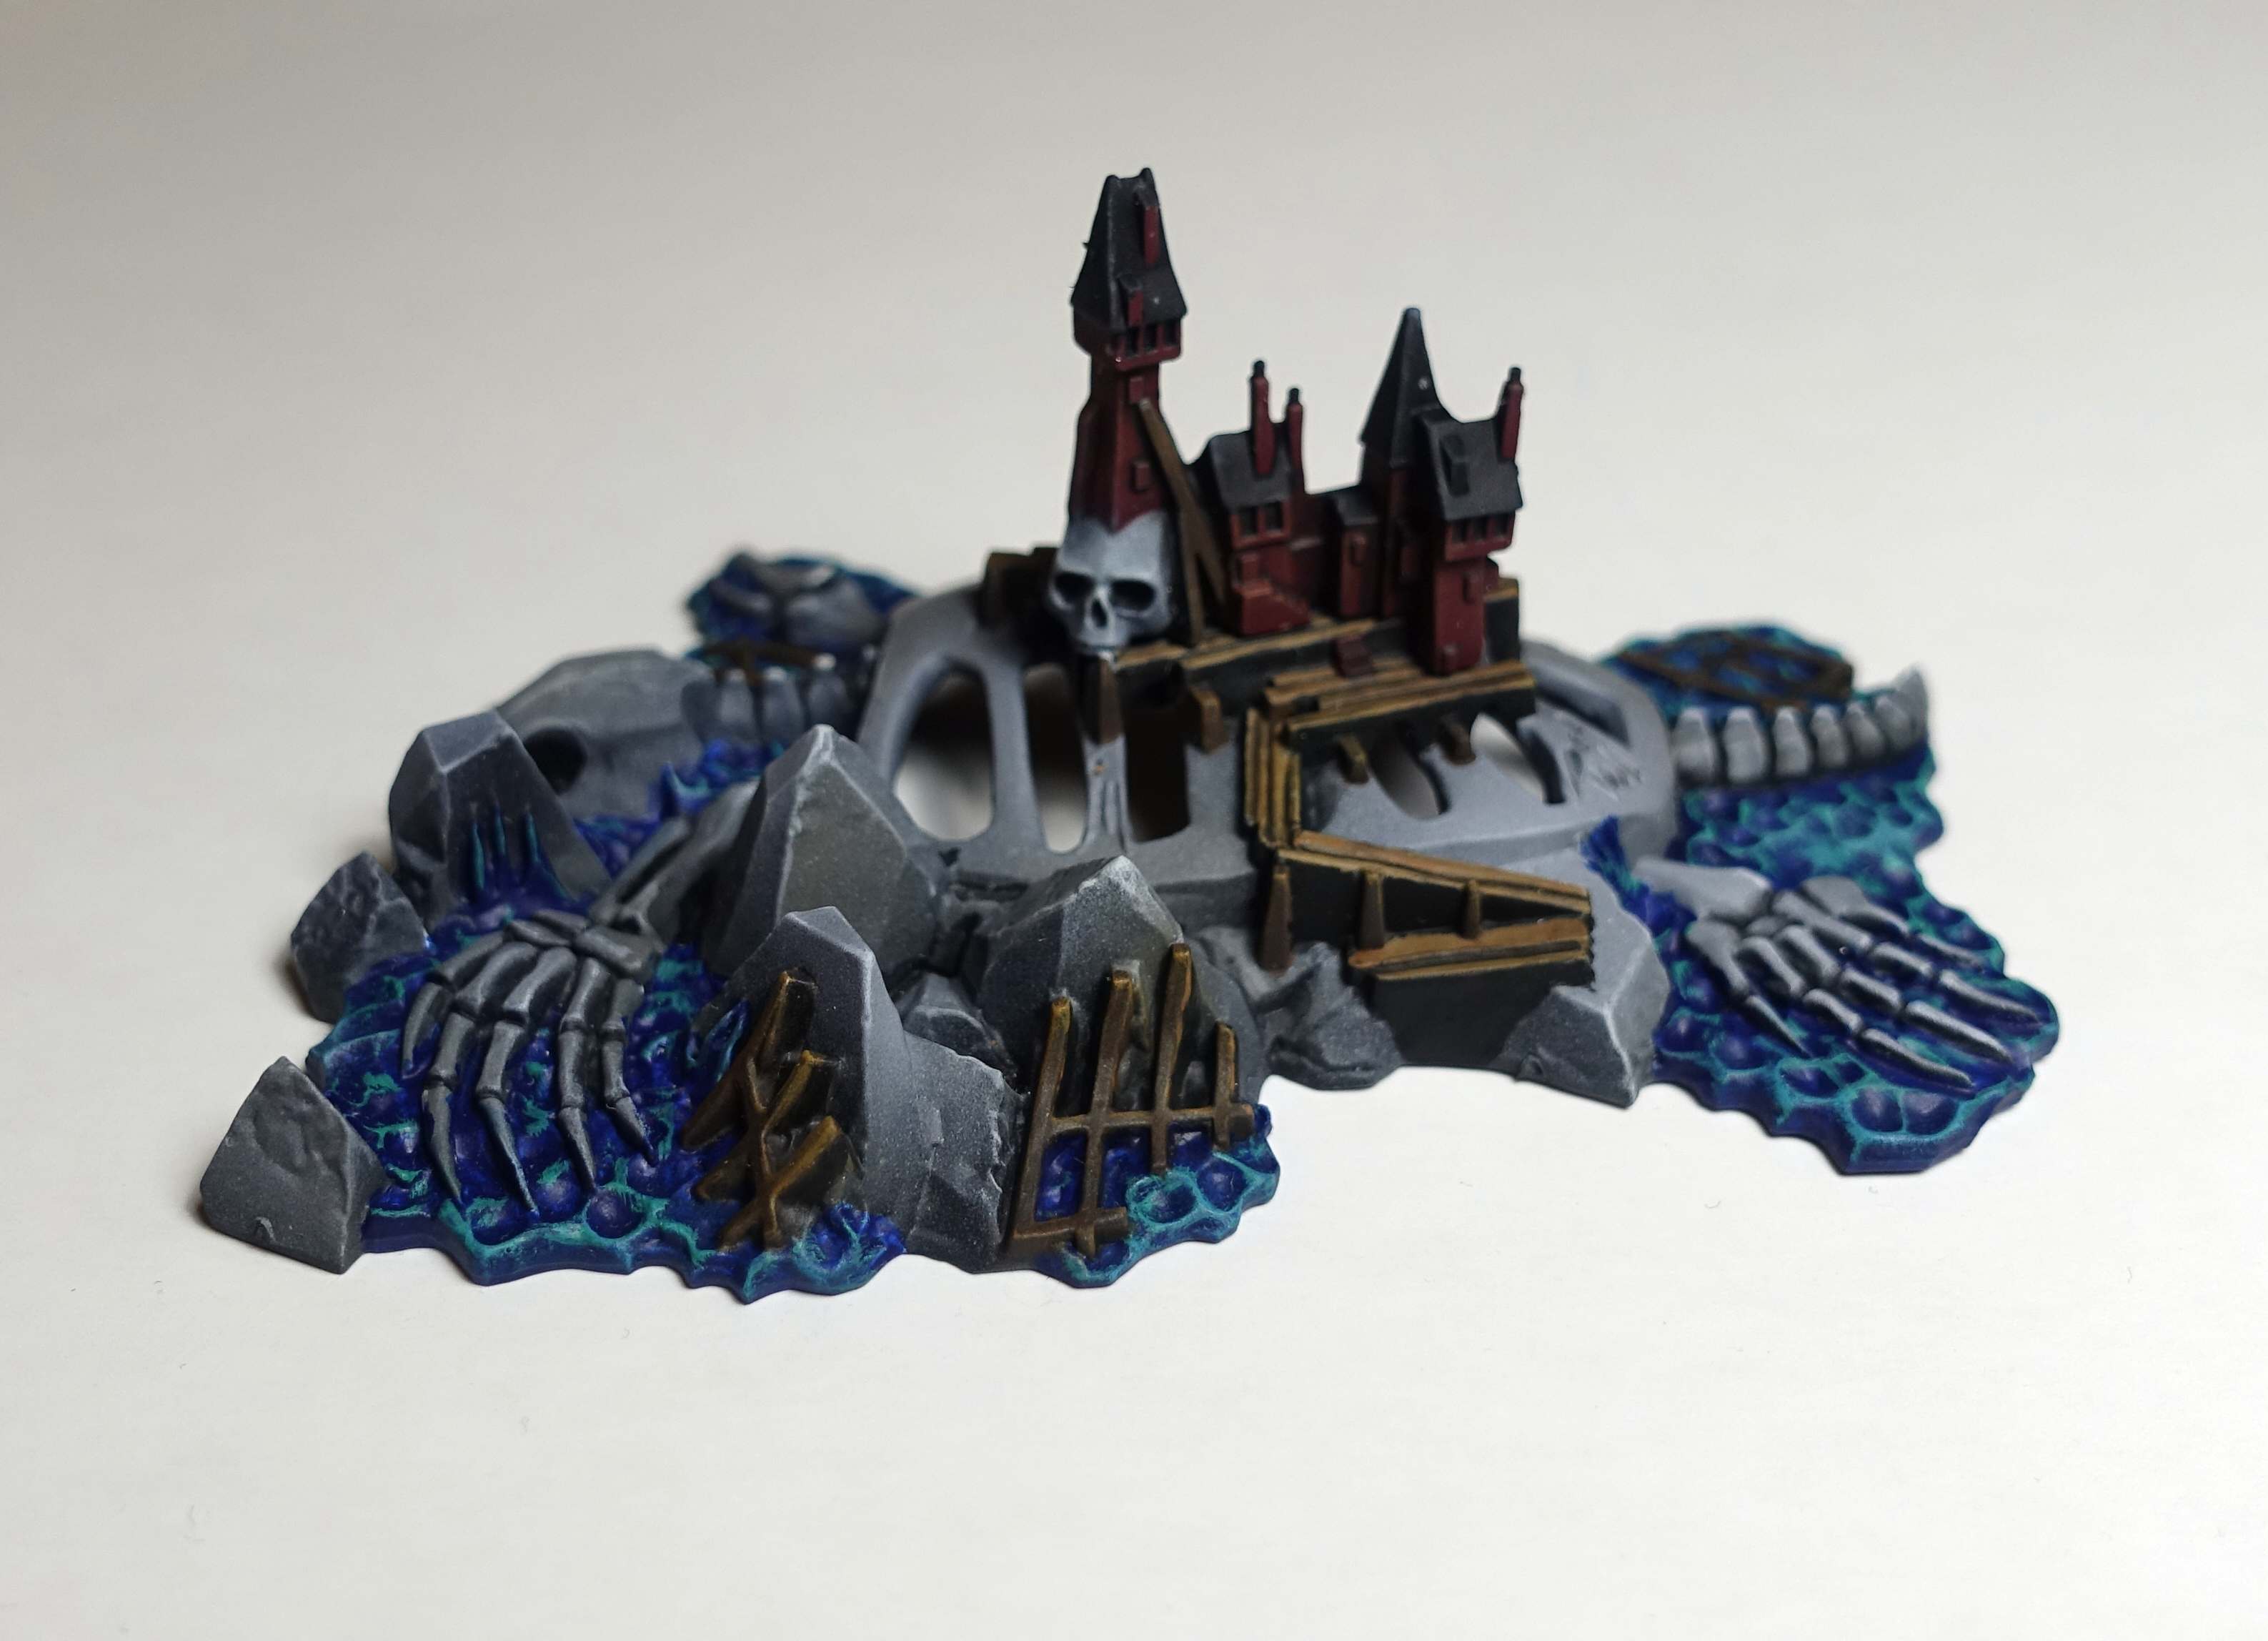 The finisthed turtle island
Varnishing the Black Kraken
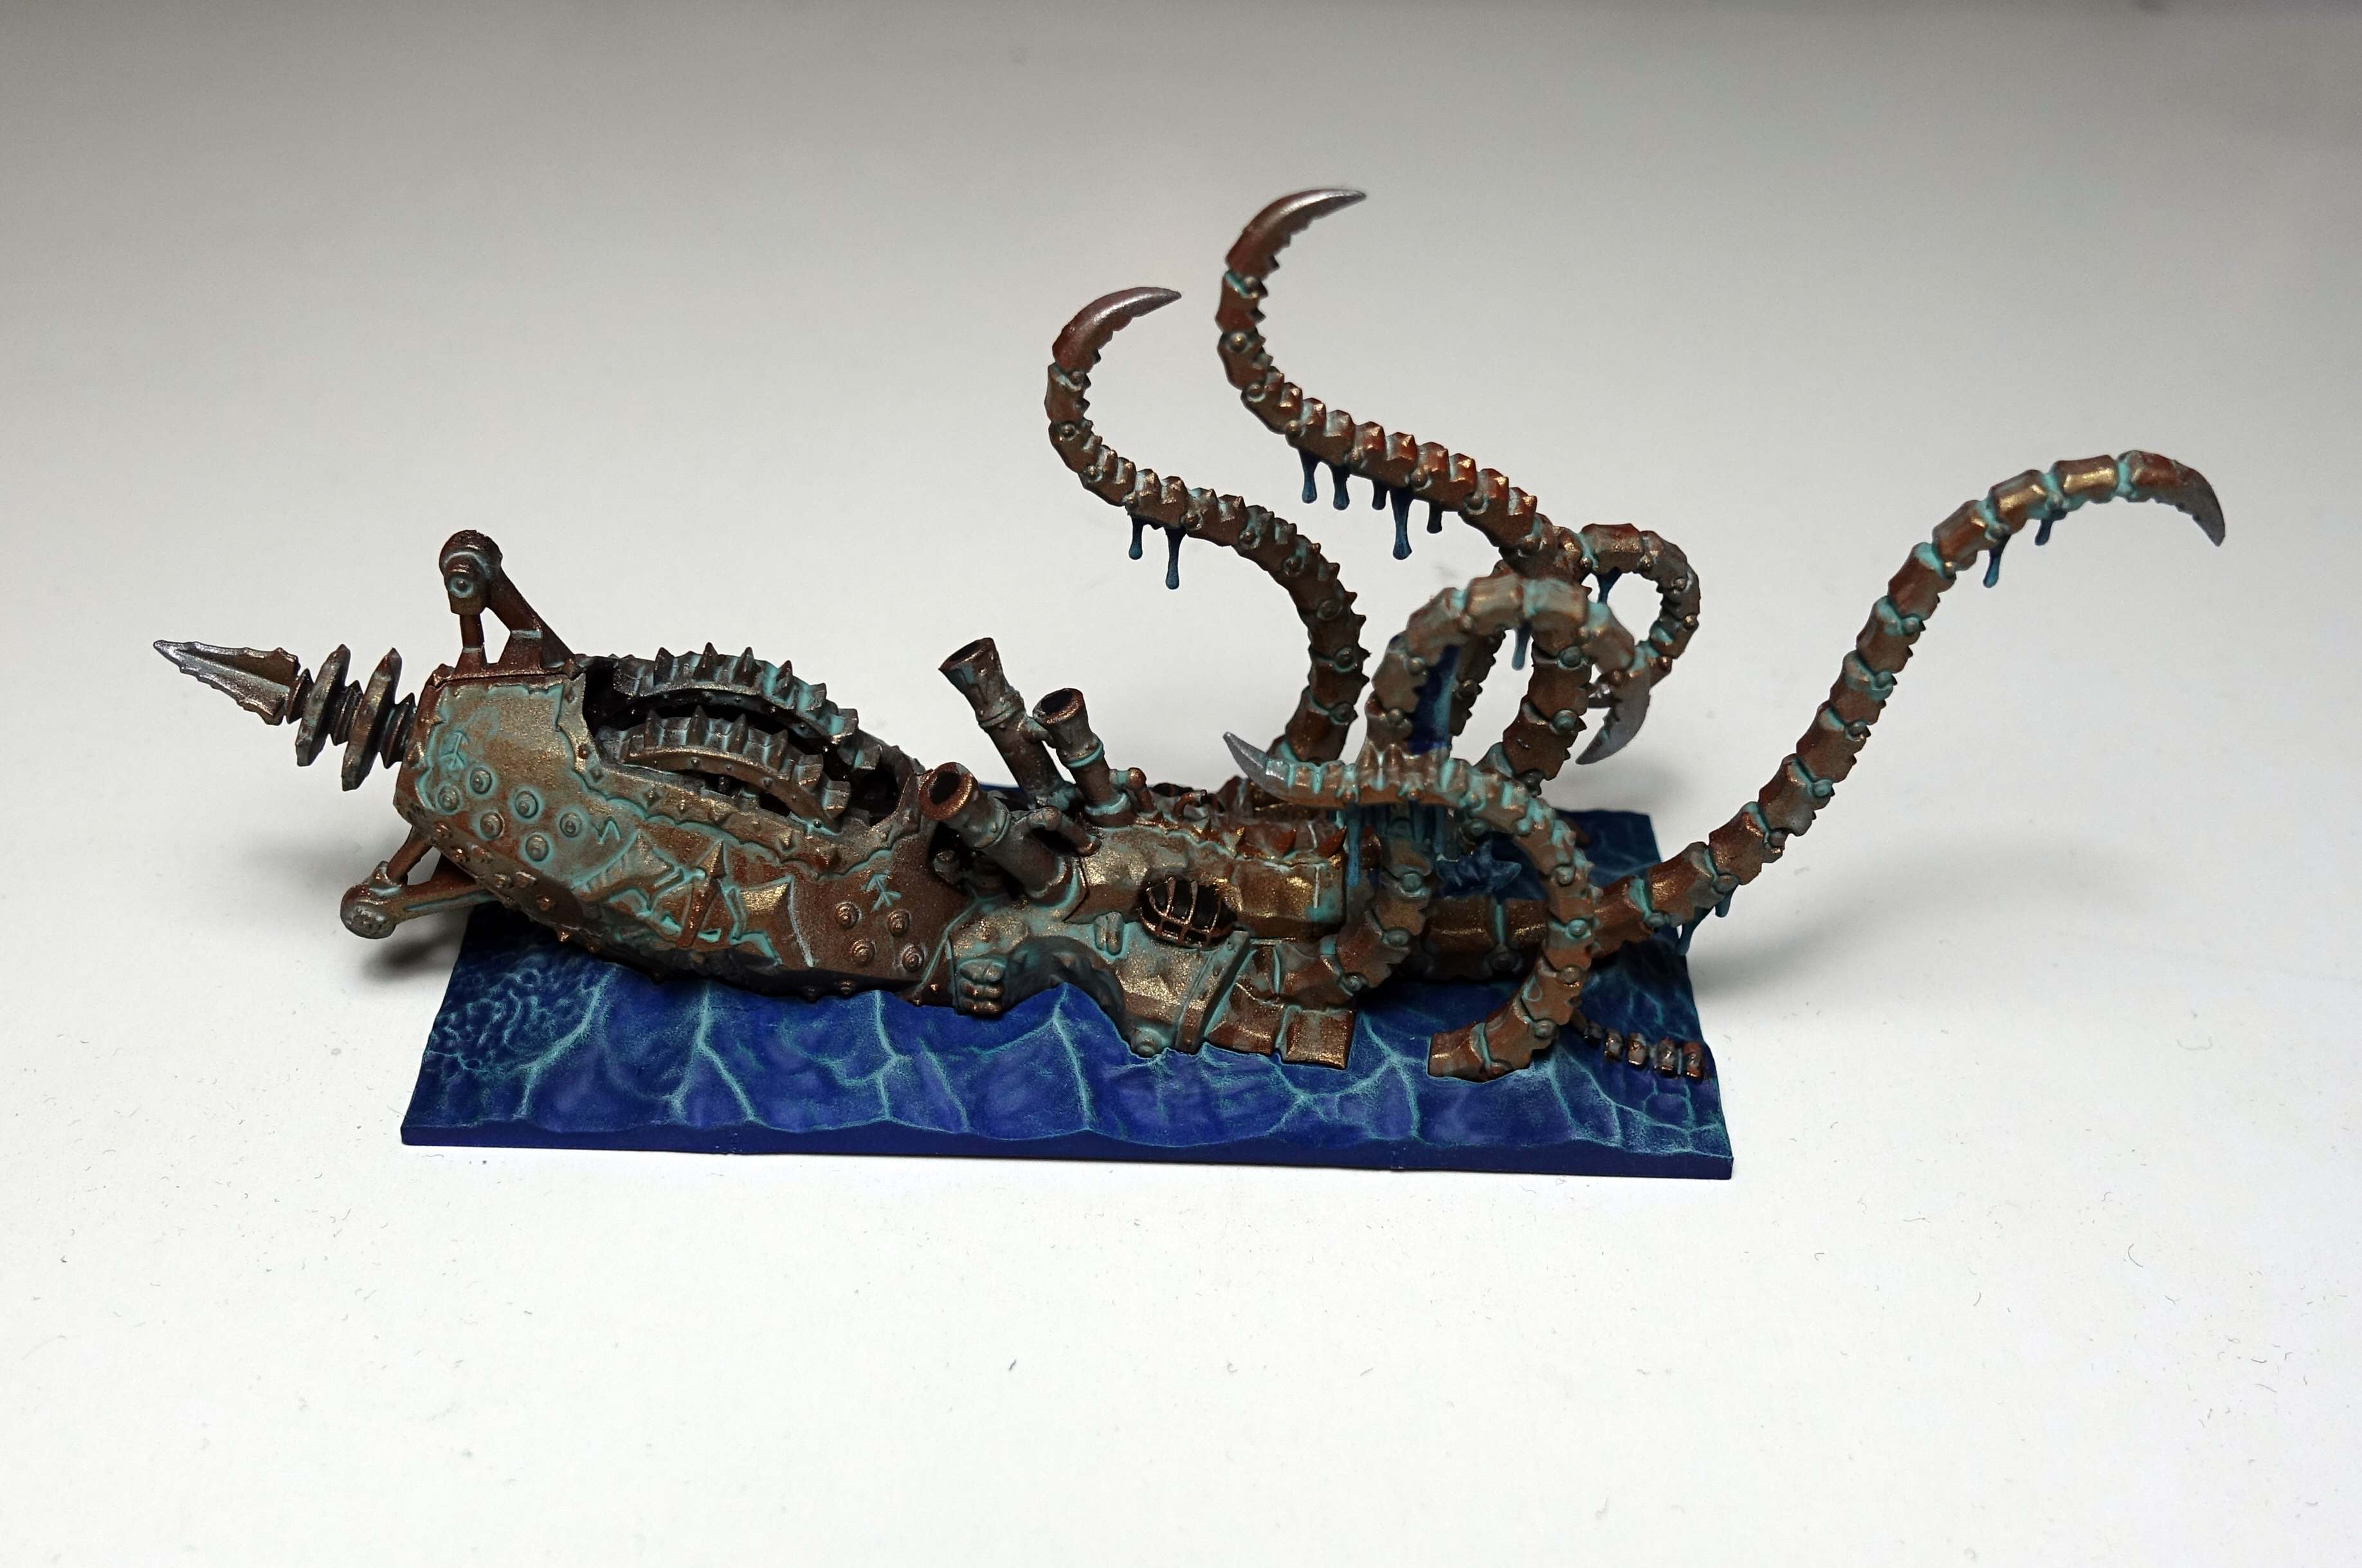
I didn’t expect to write about this ship again, as it seemed finished. After painting I sprayed matt varnish from The Army Painter on the ship. The result wasn’t quiet what I wanted. I should have thought about this beforehand: a ship painted completely in metallics shouldn’t be varnished with matt varnish. It doesn’t look right. To make it shinier, but not to shiny (because it’s old oxidized copper, not brand new copper), I’ve brushed satin varnish from Vallejo on the ship. The base and water dripping from the ship were left matt. Finally I brushed gloss varnish over the edges of the tips of the tentacles and the tip of the drill. This was done carefully over the edges only. It makes those tips look sharper.
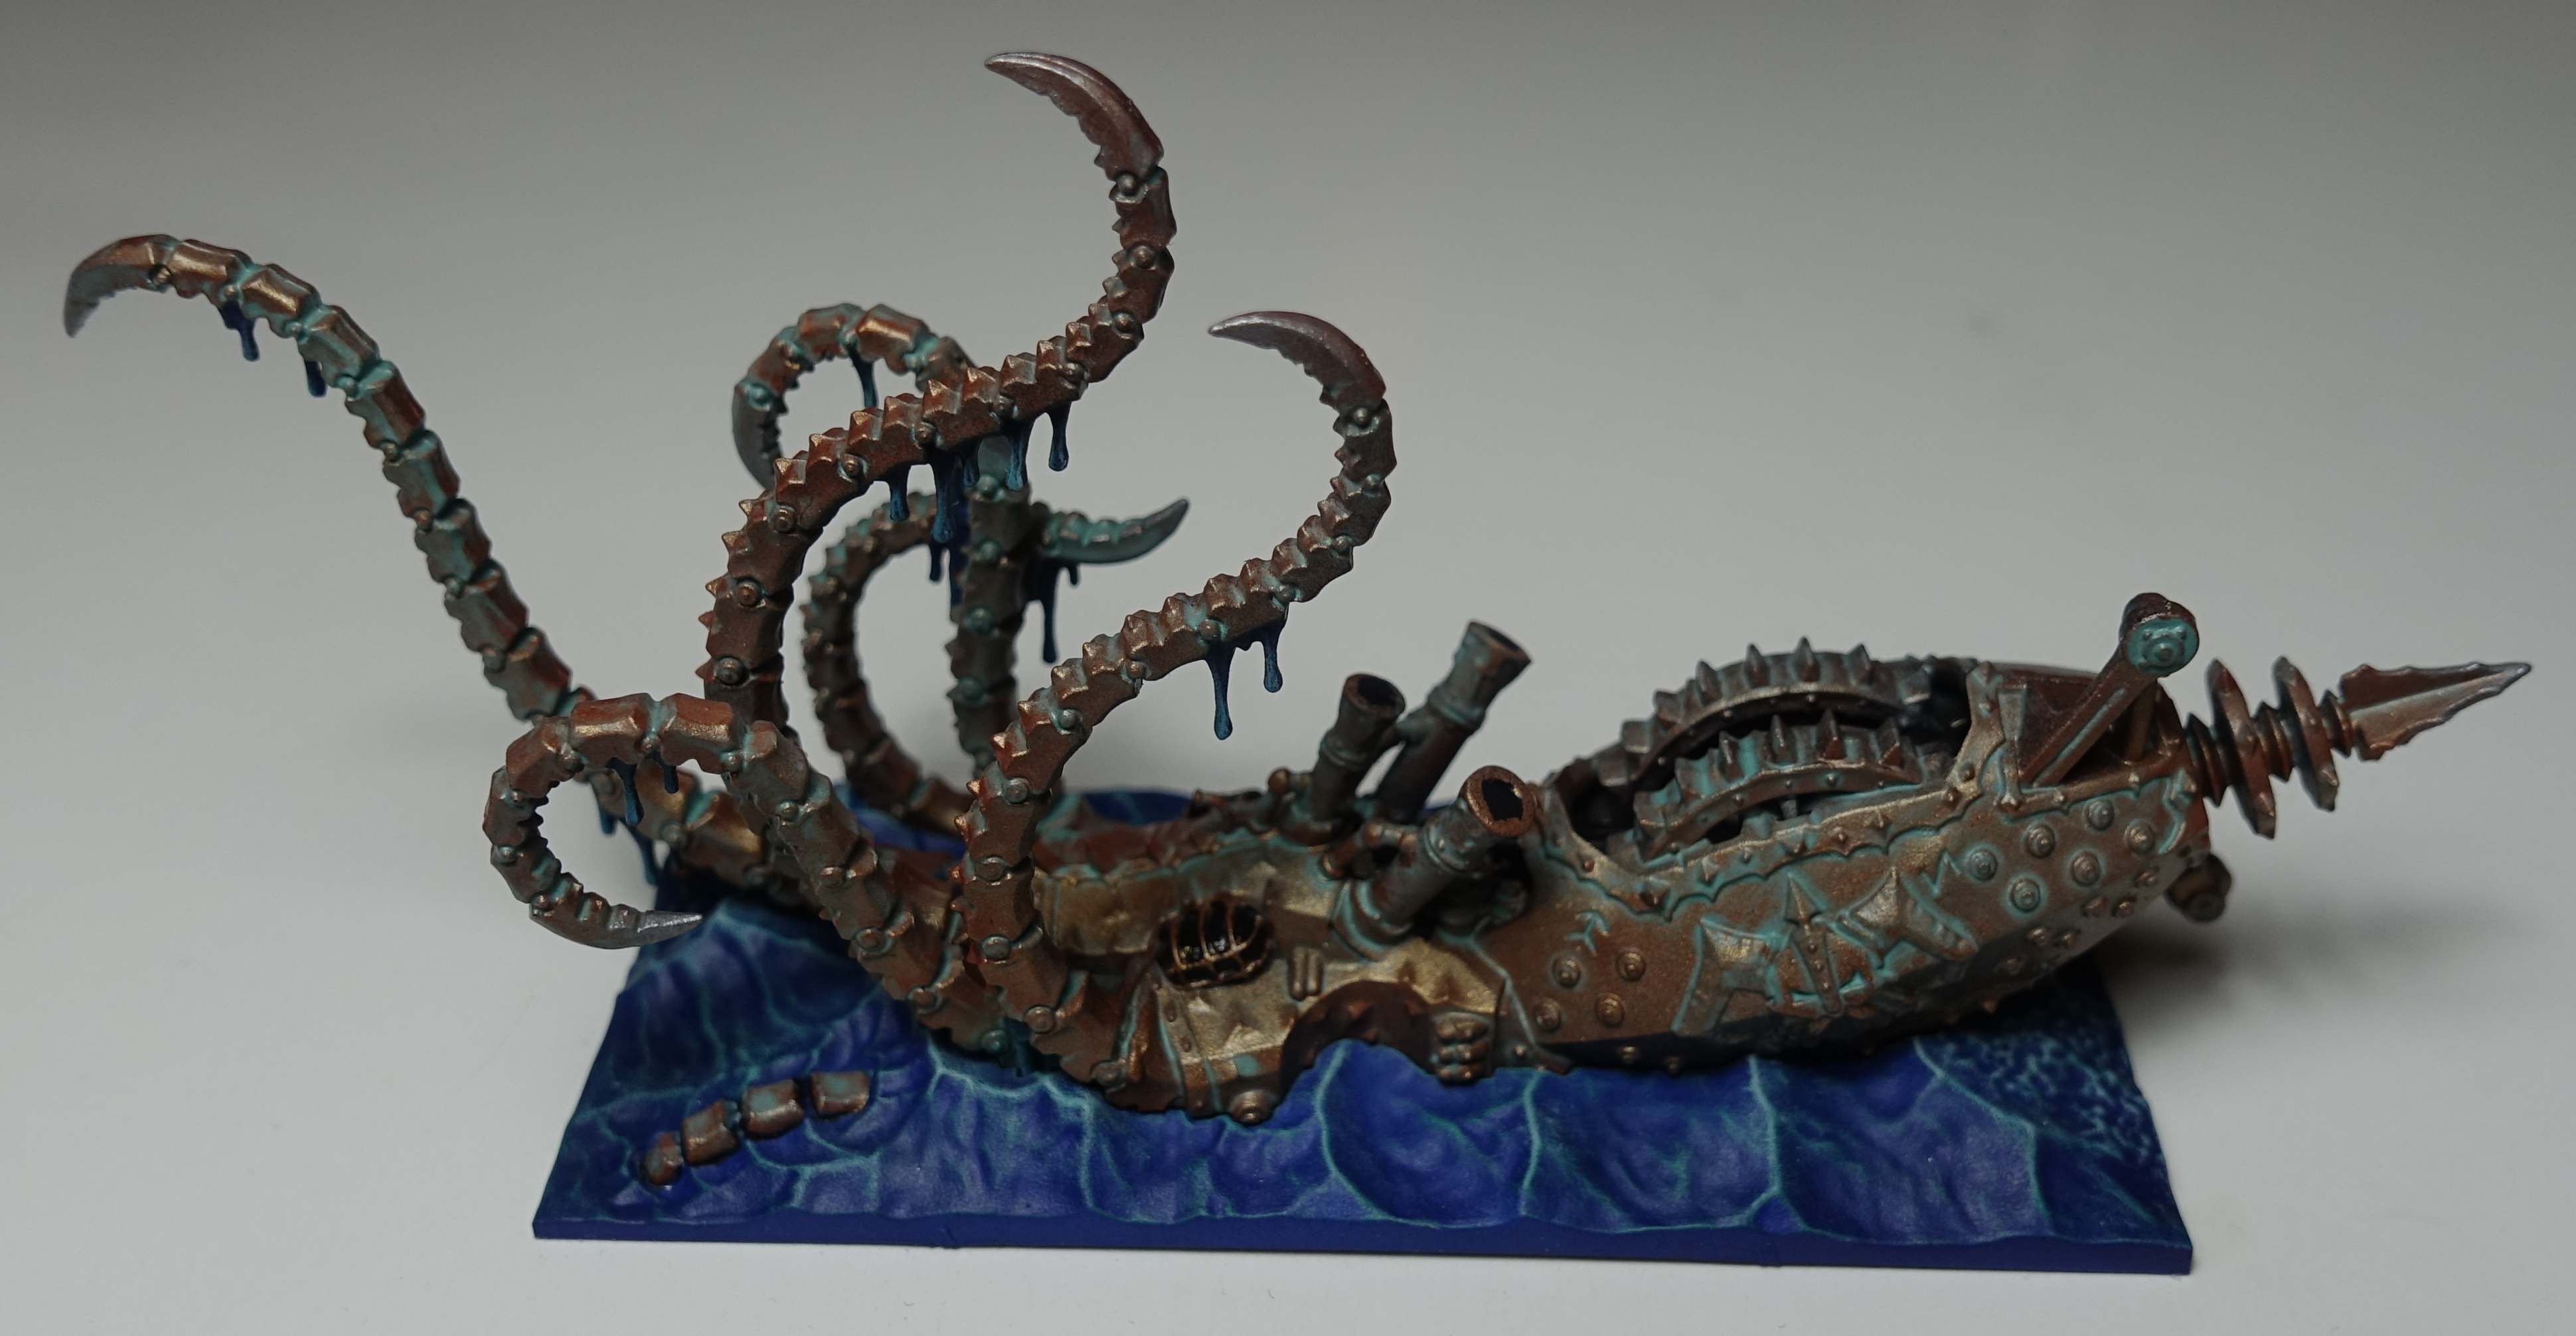 The finishend Black Kraken
To store a Dreadfleet
Since I began this project I’ve wondered how to store and transport these miniatures ones they will all have been painted. Battle foam sells foam inserts that fit in the original box and can hold all the ships, terrain pieces, gaming aids, cards,… They call it ”sea fleet”: https://uk.battlefoam.com/game-box-sea-fleet-foam-kit/
This is what I bought for my miniatures. The foam arrived in less than a week after ordering from their website.
 The box has arrived!
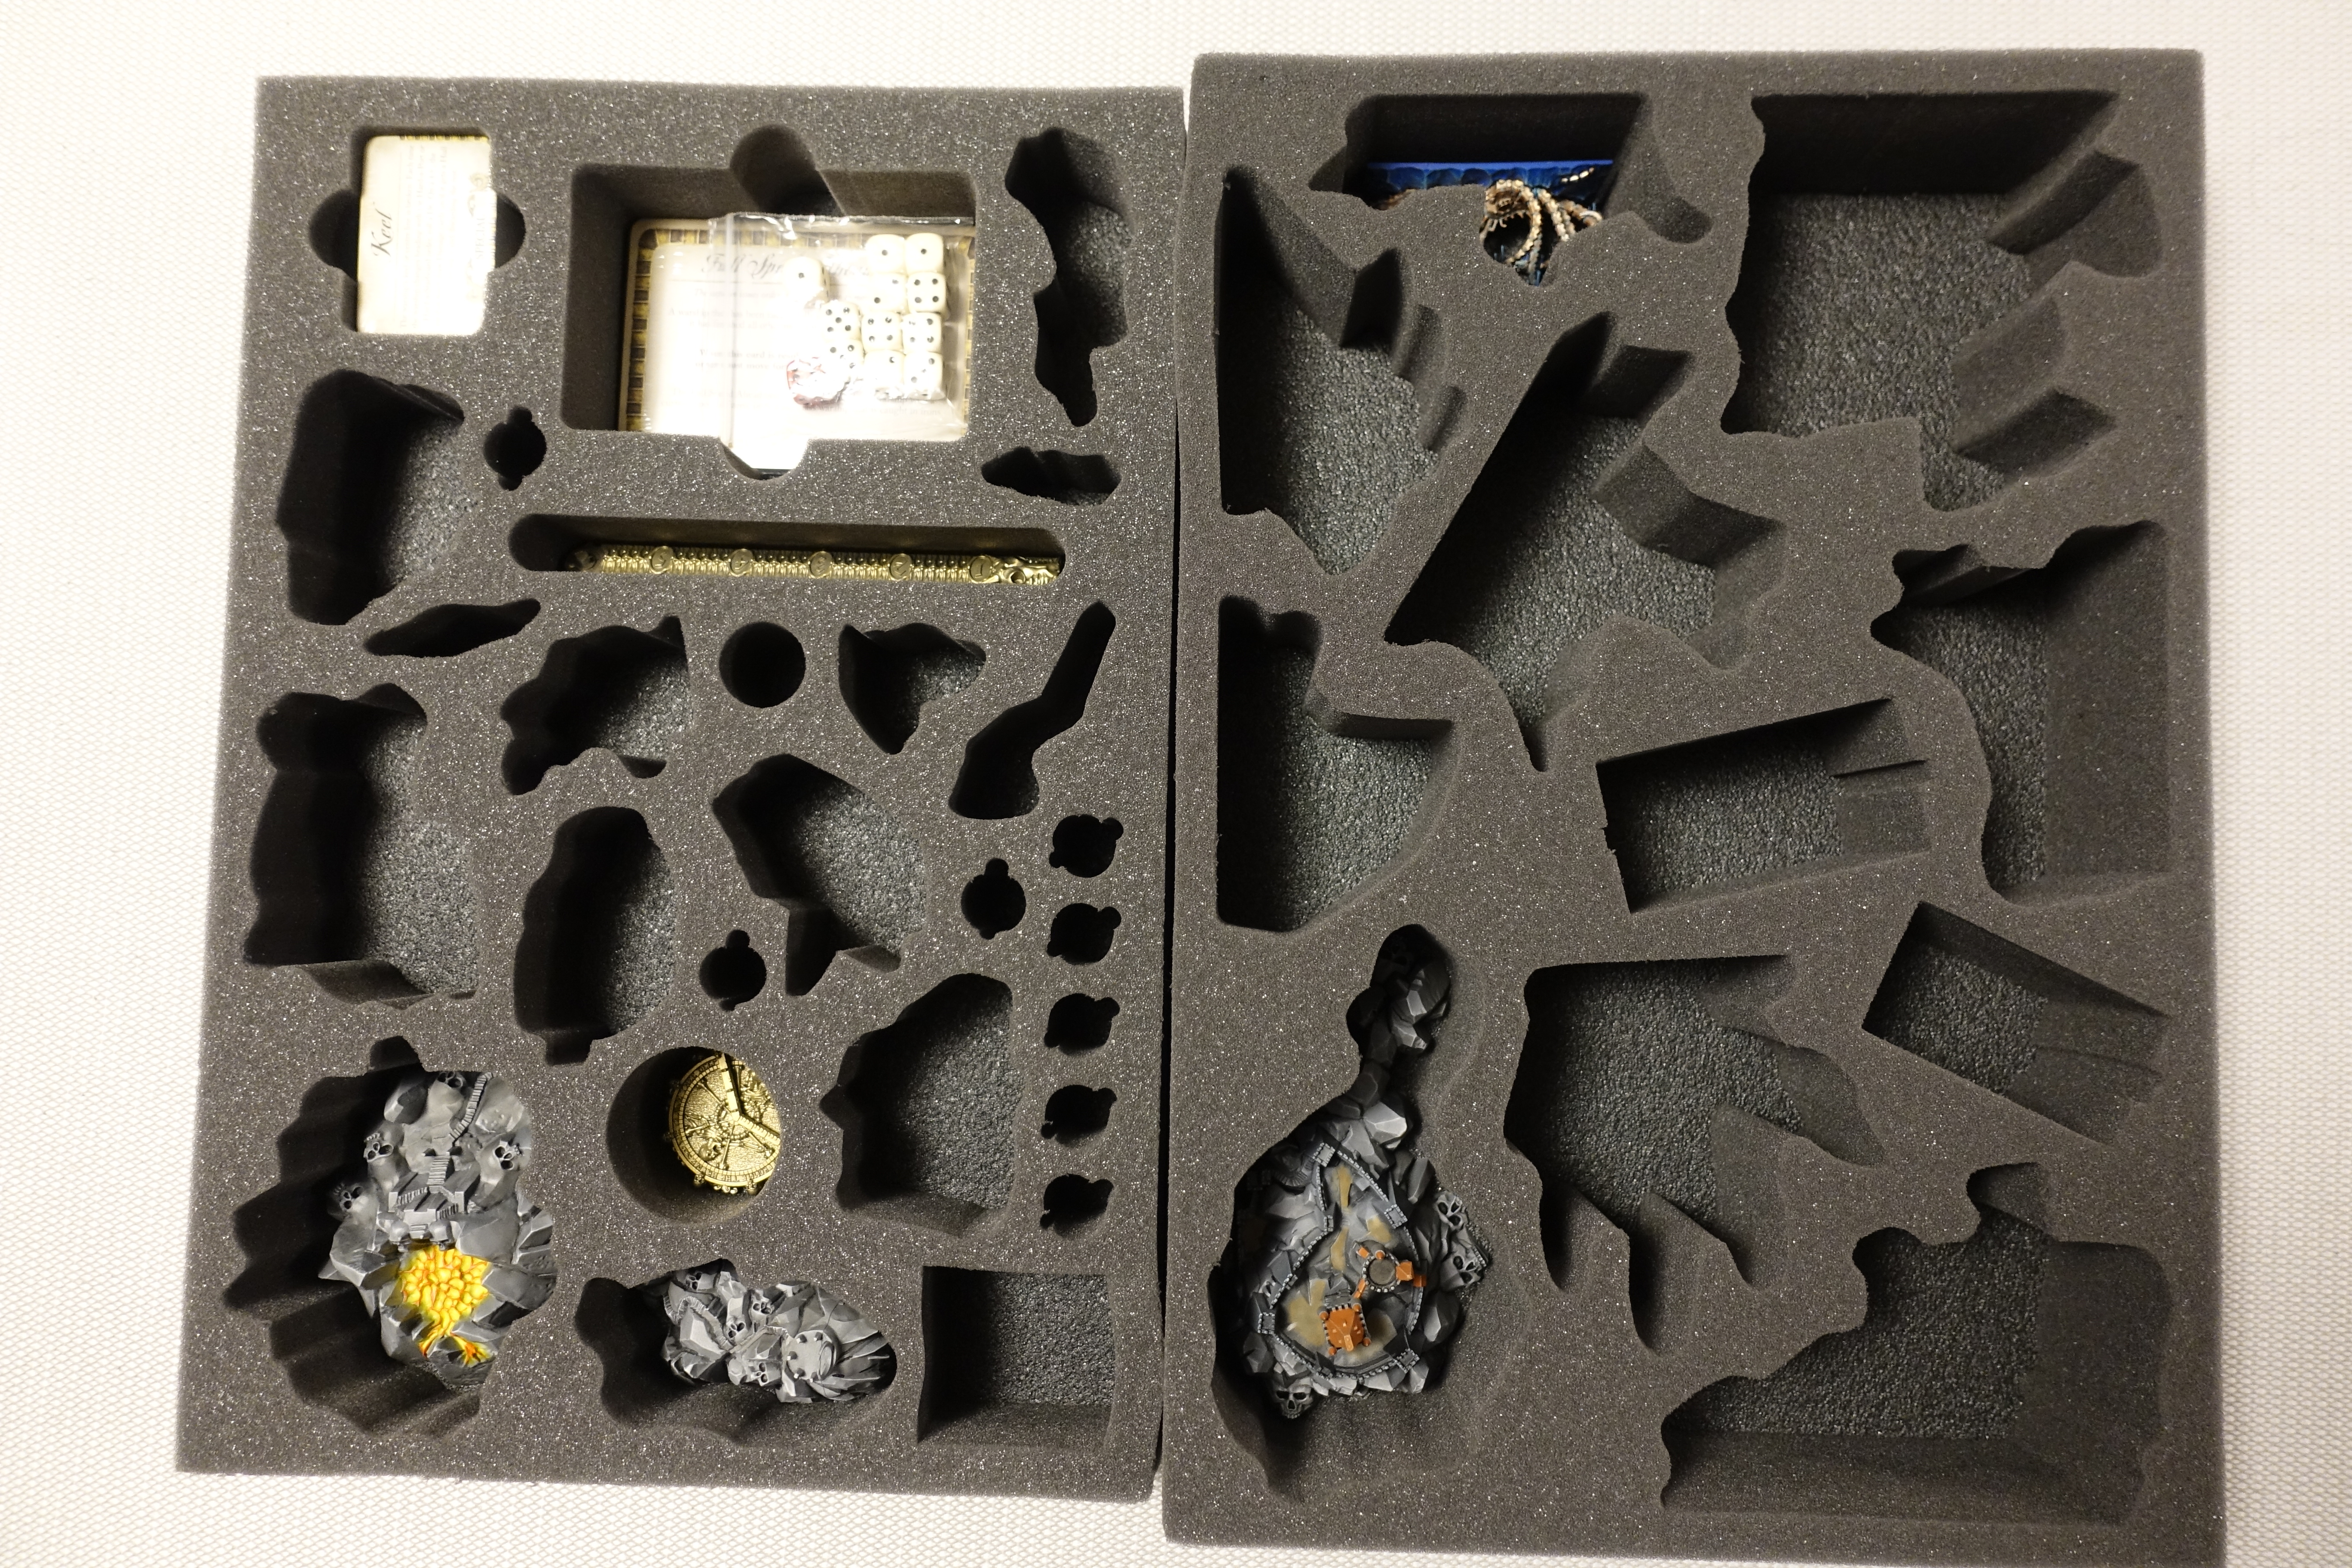 This is what the foams look like. It also shows how much I still have to paint before this project will be finished... :-)
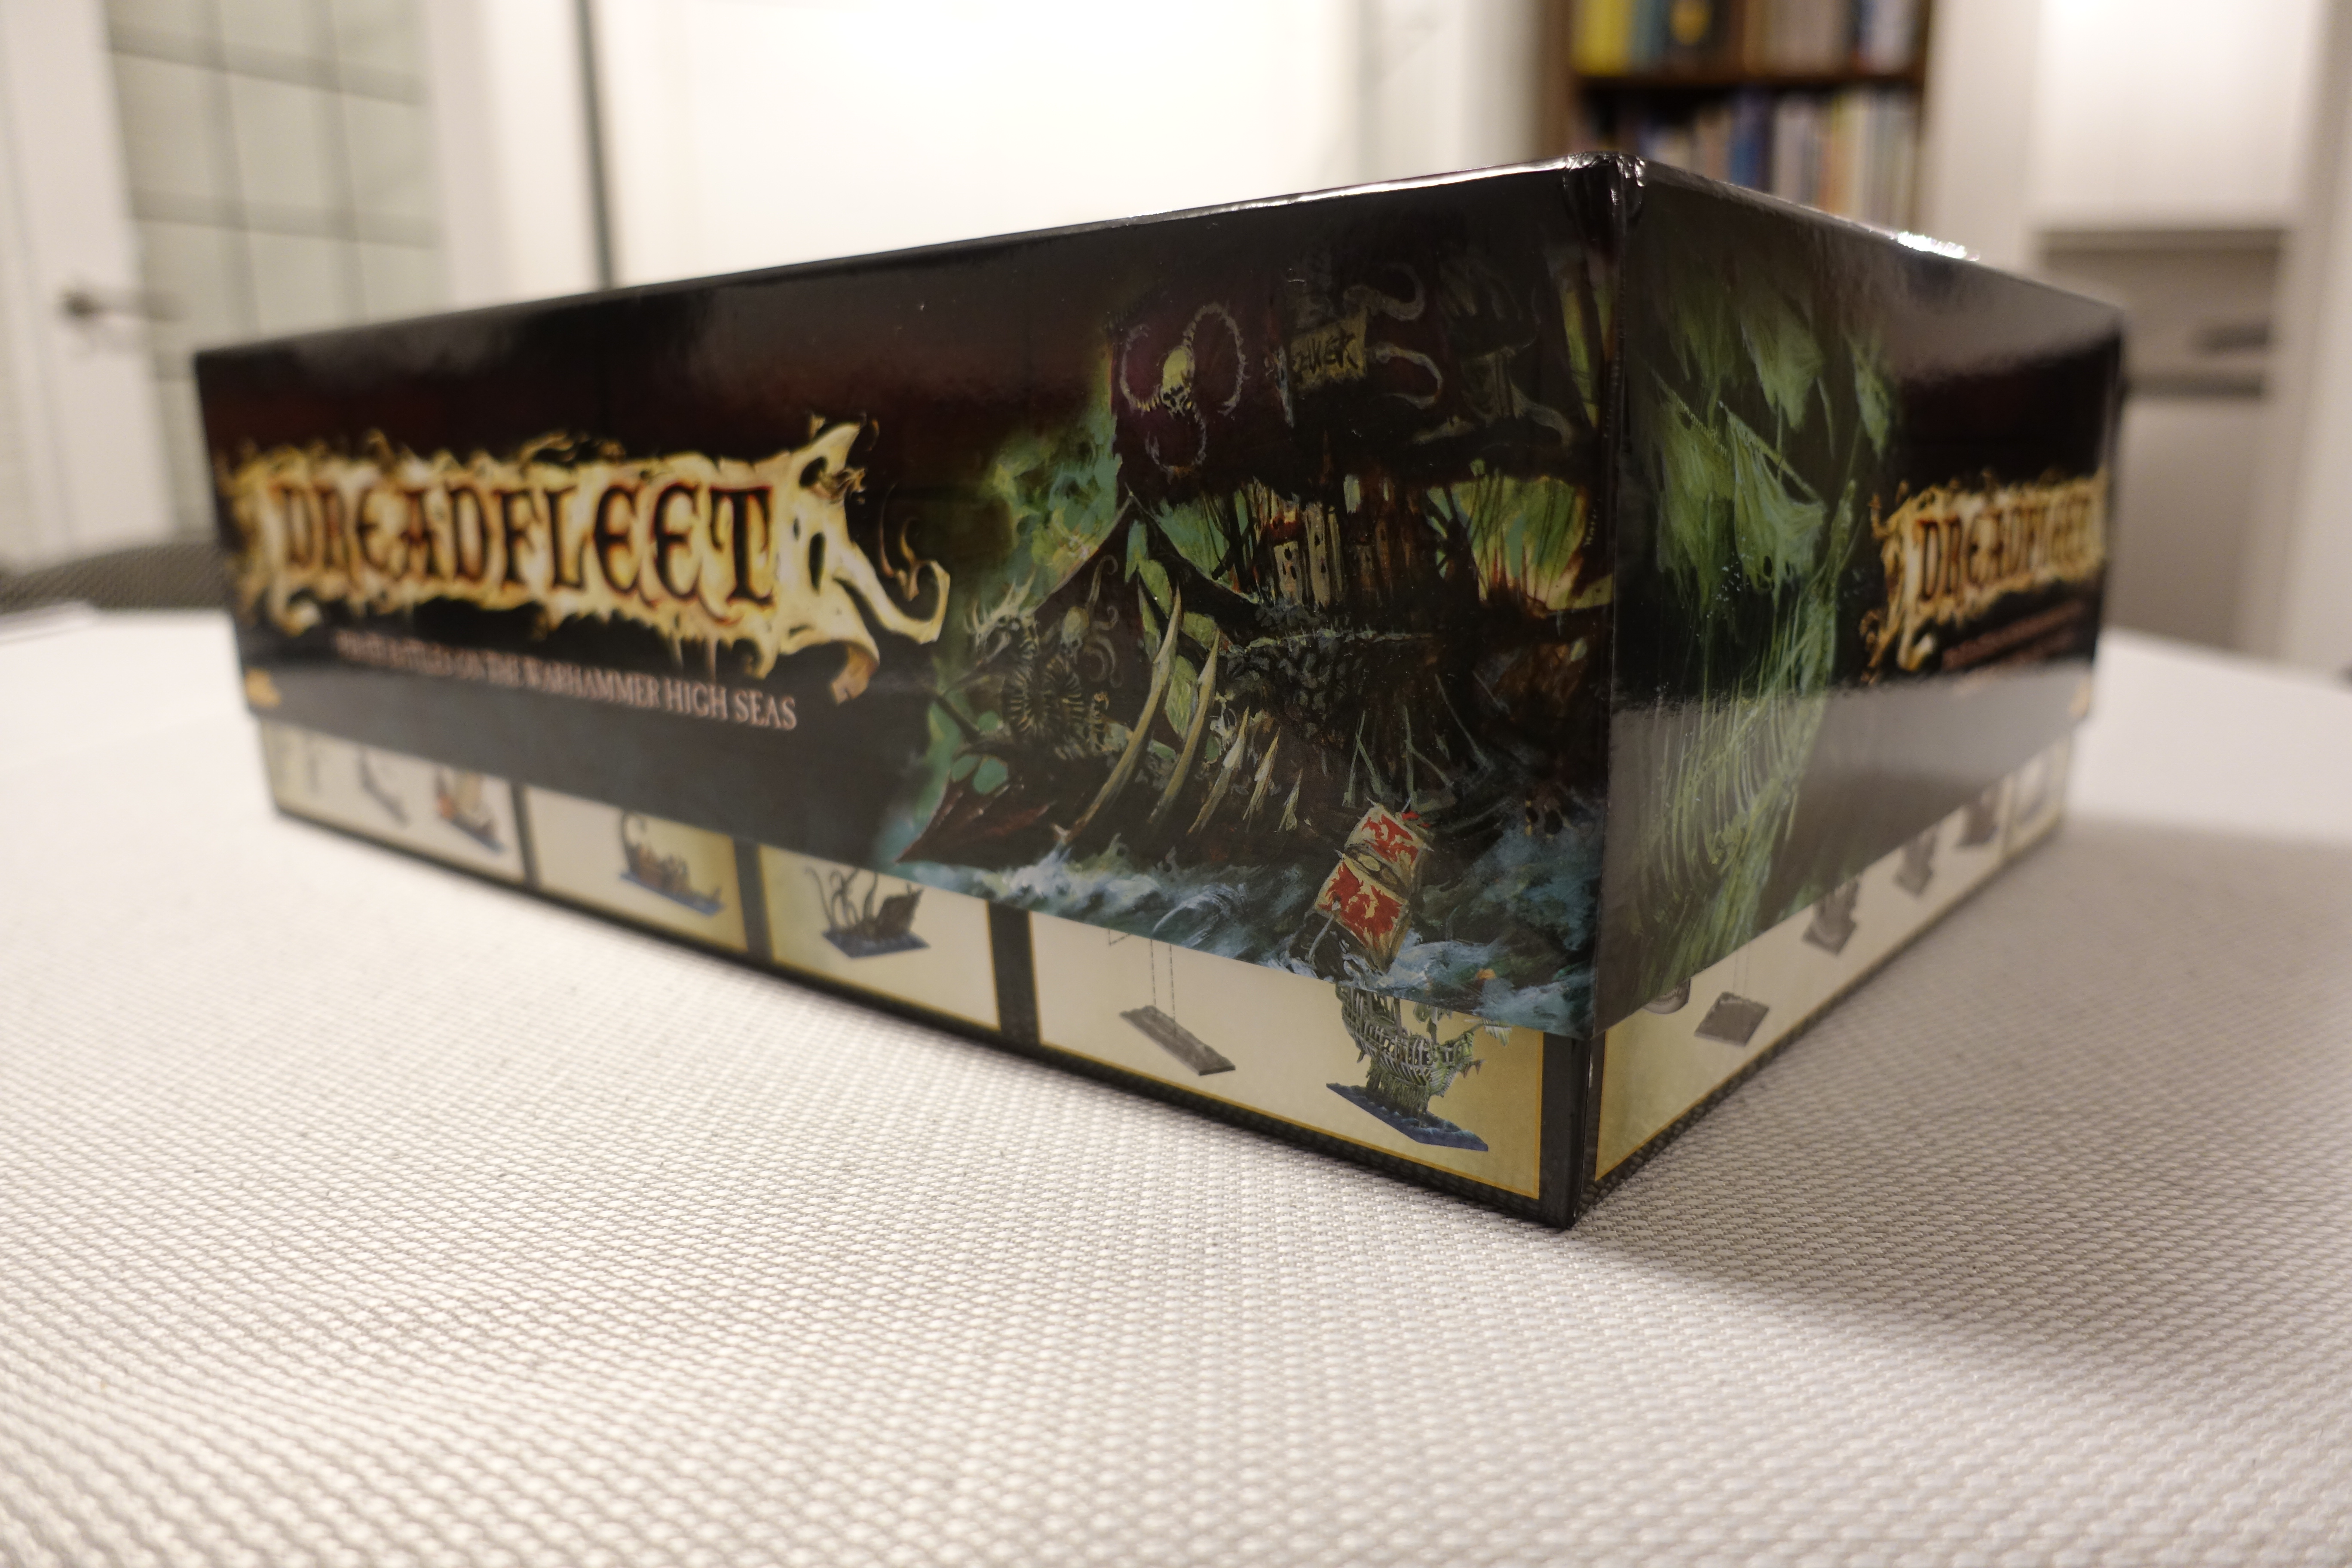 Once the foam has been put in the box, the lid of the box sticks out a little. But not very much.
Alternative storage sollutions:
Battle foam makes another set for “sea fleet” that fit’s in the bags they sell to transport miniatures: https://uk.battlefoam.com/battle-foam-sea-fleet-foam-tray-kit-for-the-p-a-c-k-system-bags-bfl/
KR Multicase also has foam trays that fit in their boxes to store miniatures: https://www.krmulticase.com/product/traysets/WHBOX-DFL-A


