


40k-Speedpainting-Challenge: A Battalion of Kasrkin in one Weekend ***COMPLETED***


Recommendations: 254
About the Project
Actually the title says it all. I'll try to paint an entire 40k-Battalion of Kasrkin in one weekend. Starting on Friday 24th of August on 1200h German time (1100 BST). I'll try to finish until Sunday.
Related Game: Warhammer 40,000
Related Company: Games Workshop
Related Genre: Science Fiction
This Project is Completed
Saturday 1239h: Back again!
After helping myself to a few beers… sorry pints after finishing yesterday I’m having a little of a slow start today. But the important thing is: I am back at the painting table. And the keyboard. Next up will be gunmetal.
1416h: First transport... erm update is away!
So, first real update for the day. Firstly I took care of gunmetal. It went onto the top of the antennas, the energy packs on the back and mainly the gun muzzles. I also used it on the swords and power coils of the plasma weaponry, but this will be painted over with a glow effect at the very end. The Prime got a metal power fist and a few details here and there. I used Model Color Gunmetal (70.863) but I wouldn’t recommend it. First time I say this about a Model Color as it is normally a very good range, but this paint has terrible consistency and very low pigment counts. It needed two coats to cover grey.
Then I used Model Color Flat Brown (70.984) on the stave of the Psyker and the gun holster of the Prime.
Next up was the skin. GW Balor Brown for the Sarges and the Prime and GW Bugmans Glow for the Psyker. I want a harsher contrast on the Psyker as he is probably a bit drained from all the warp energy.
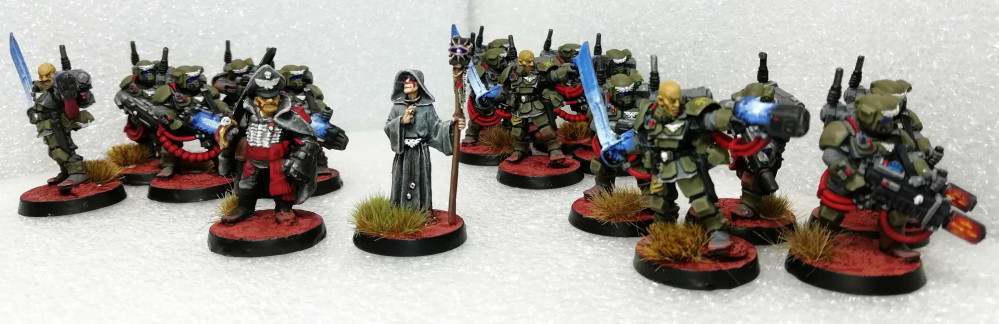
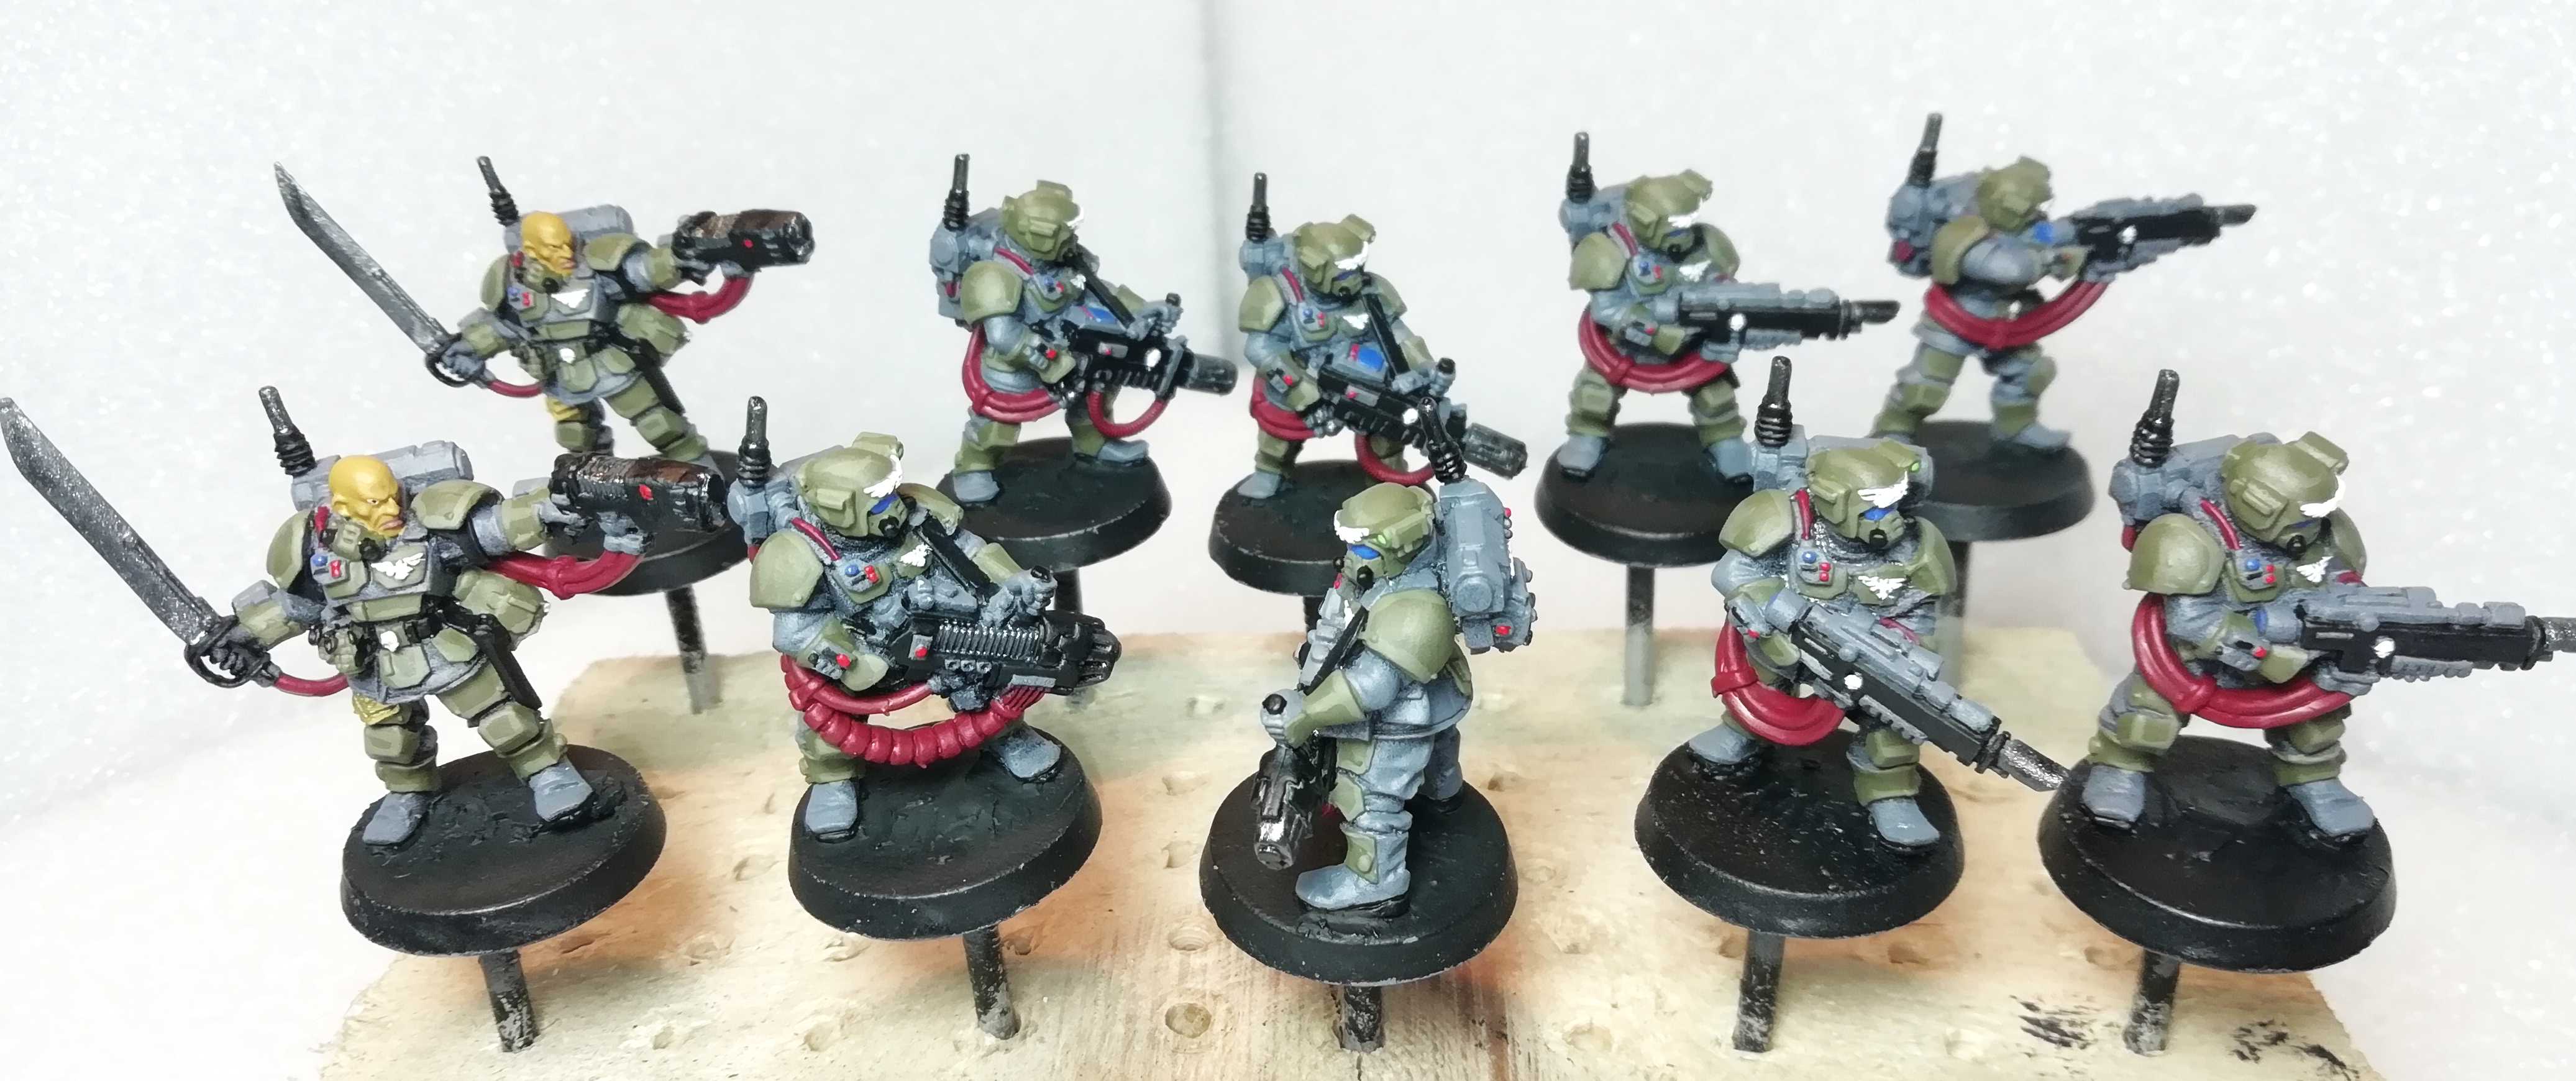
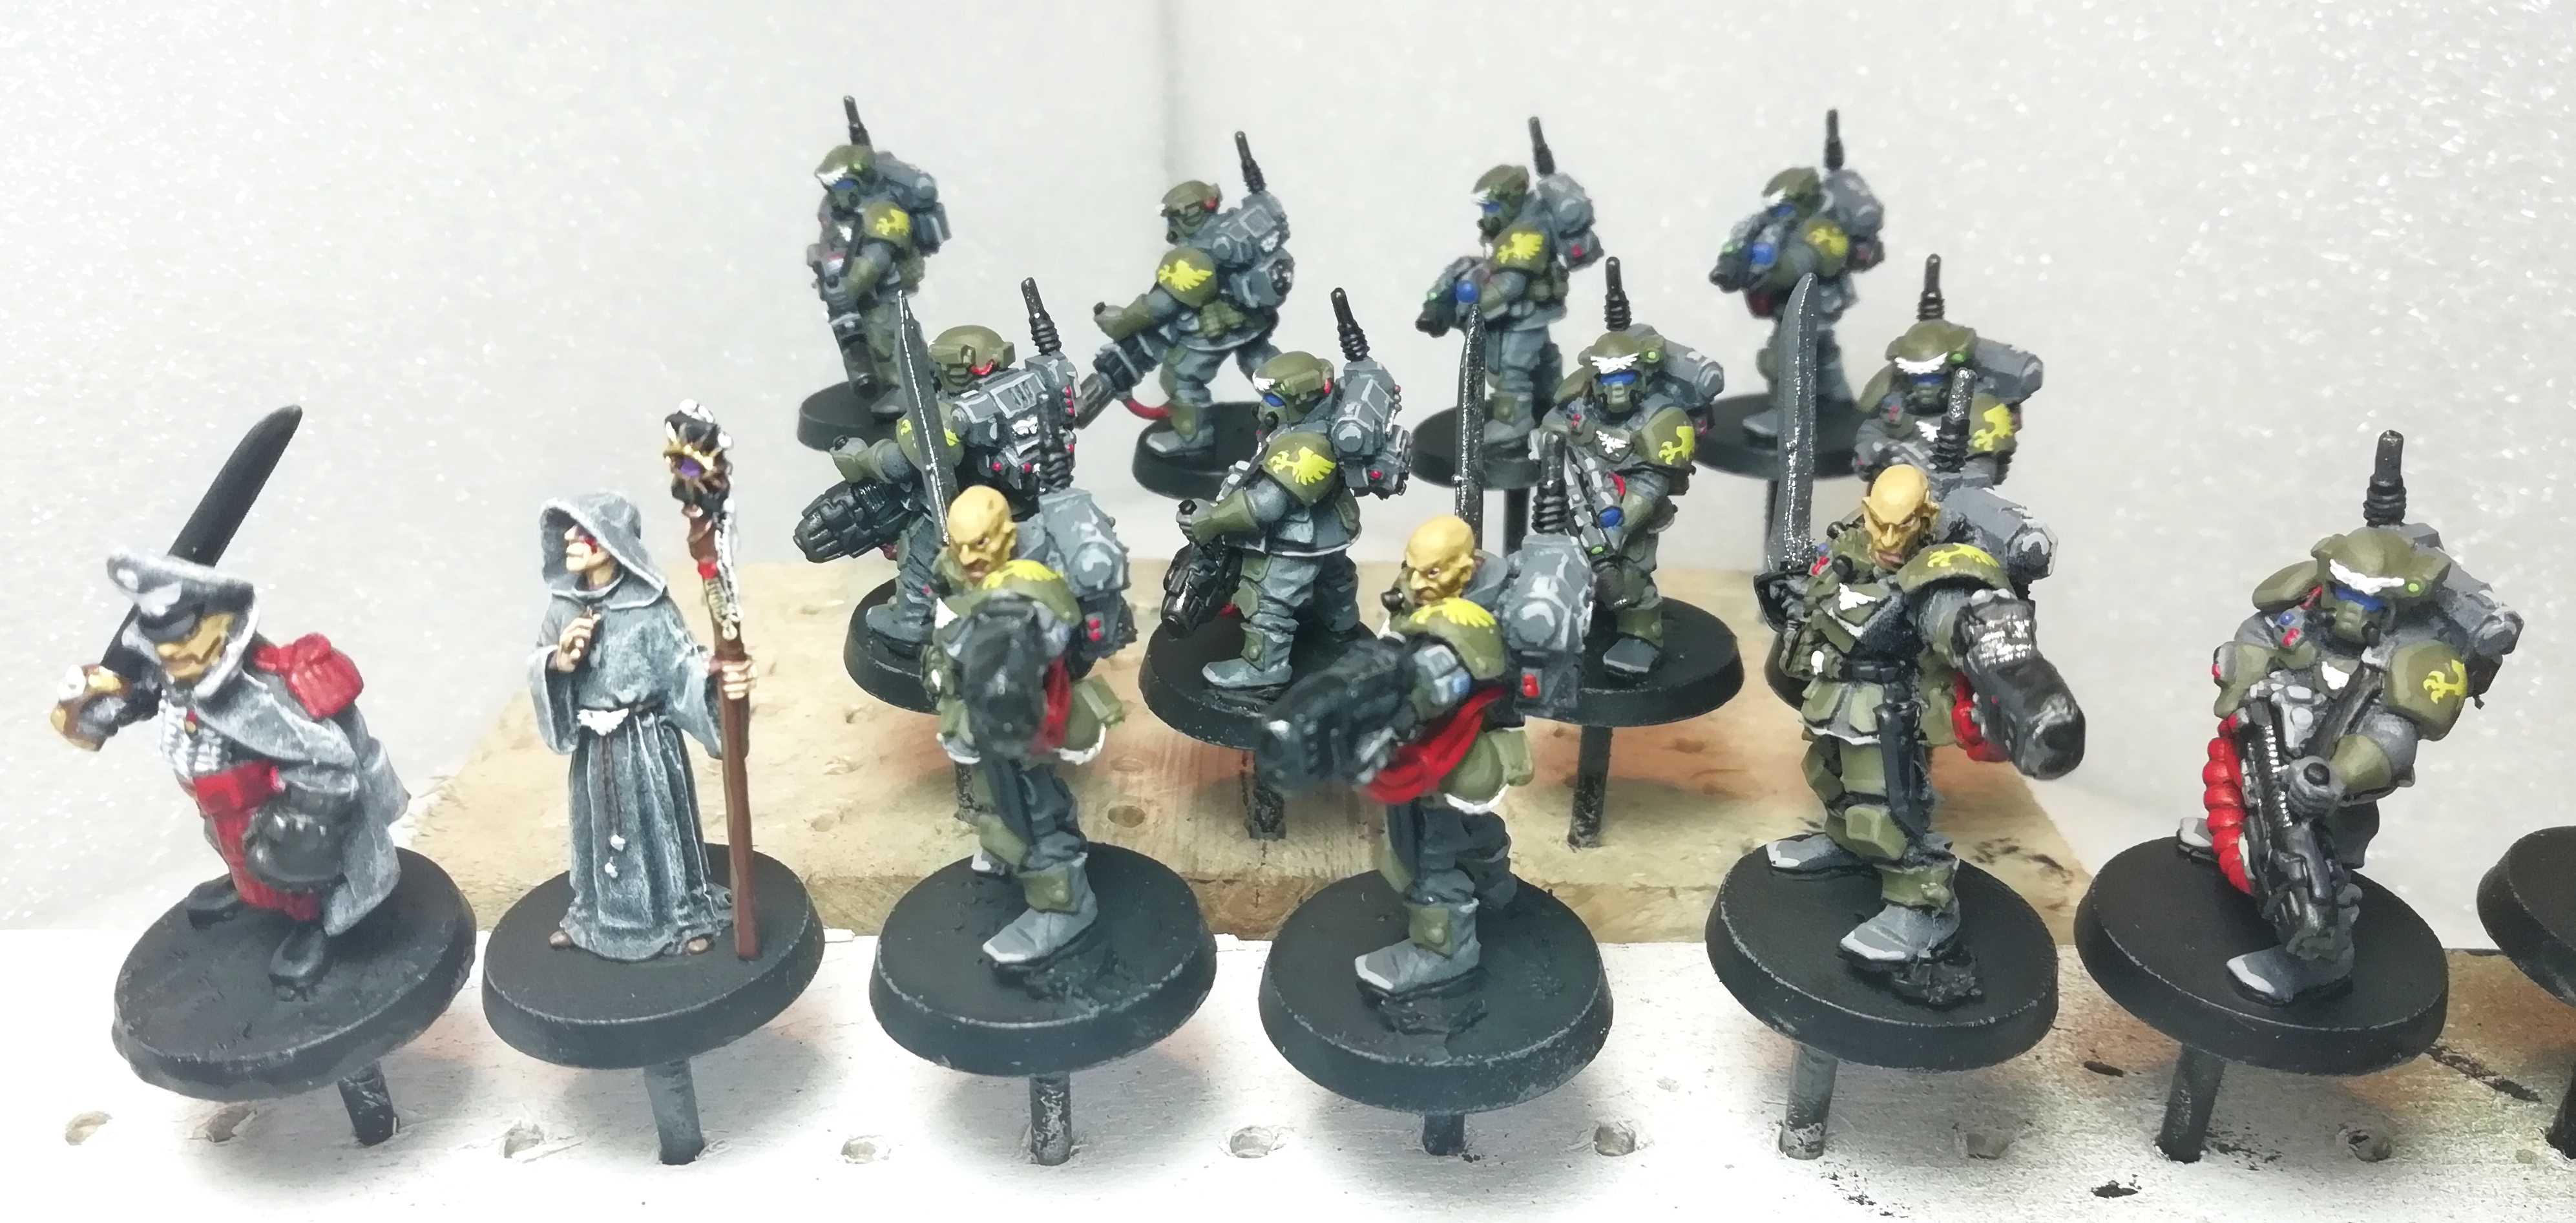
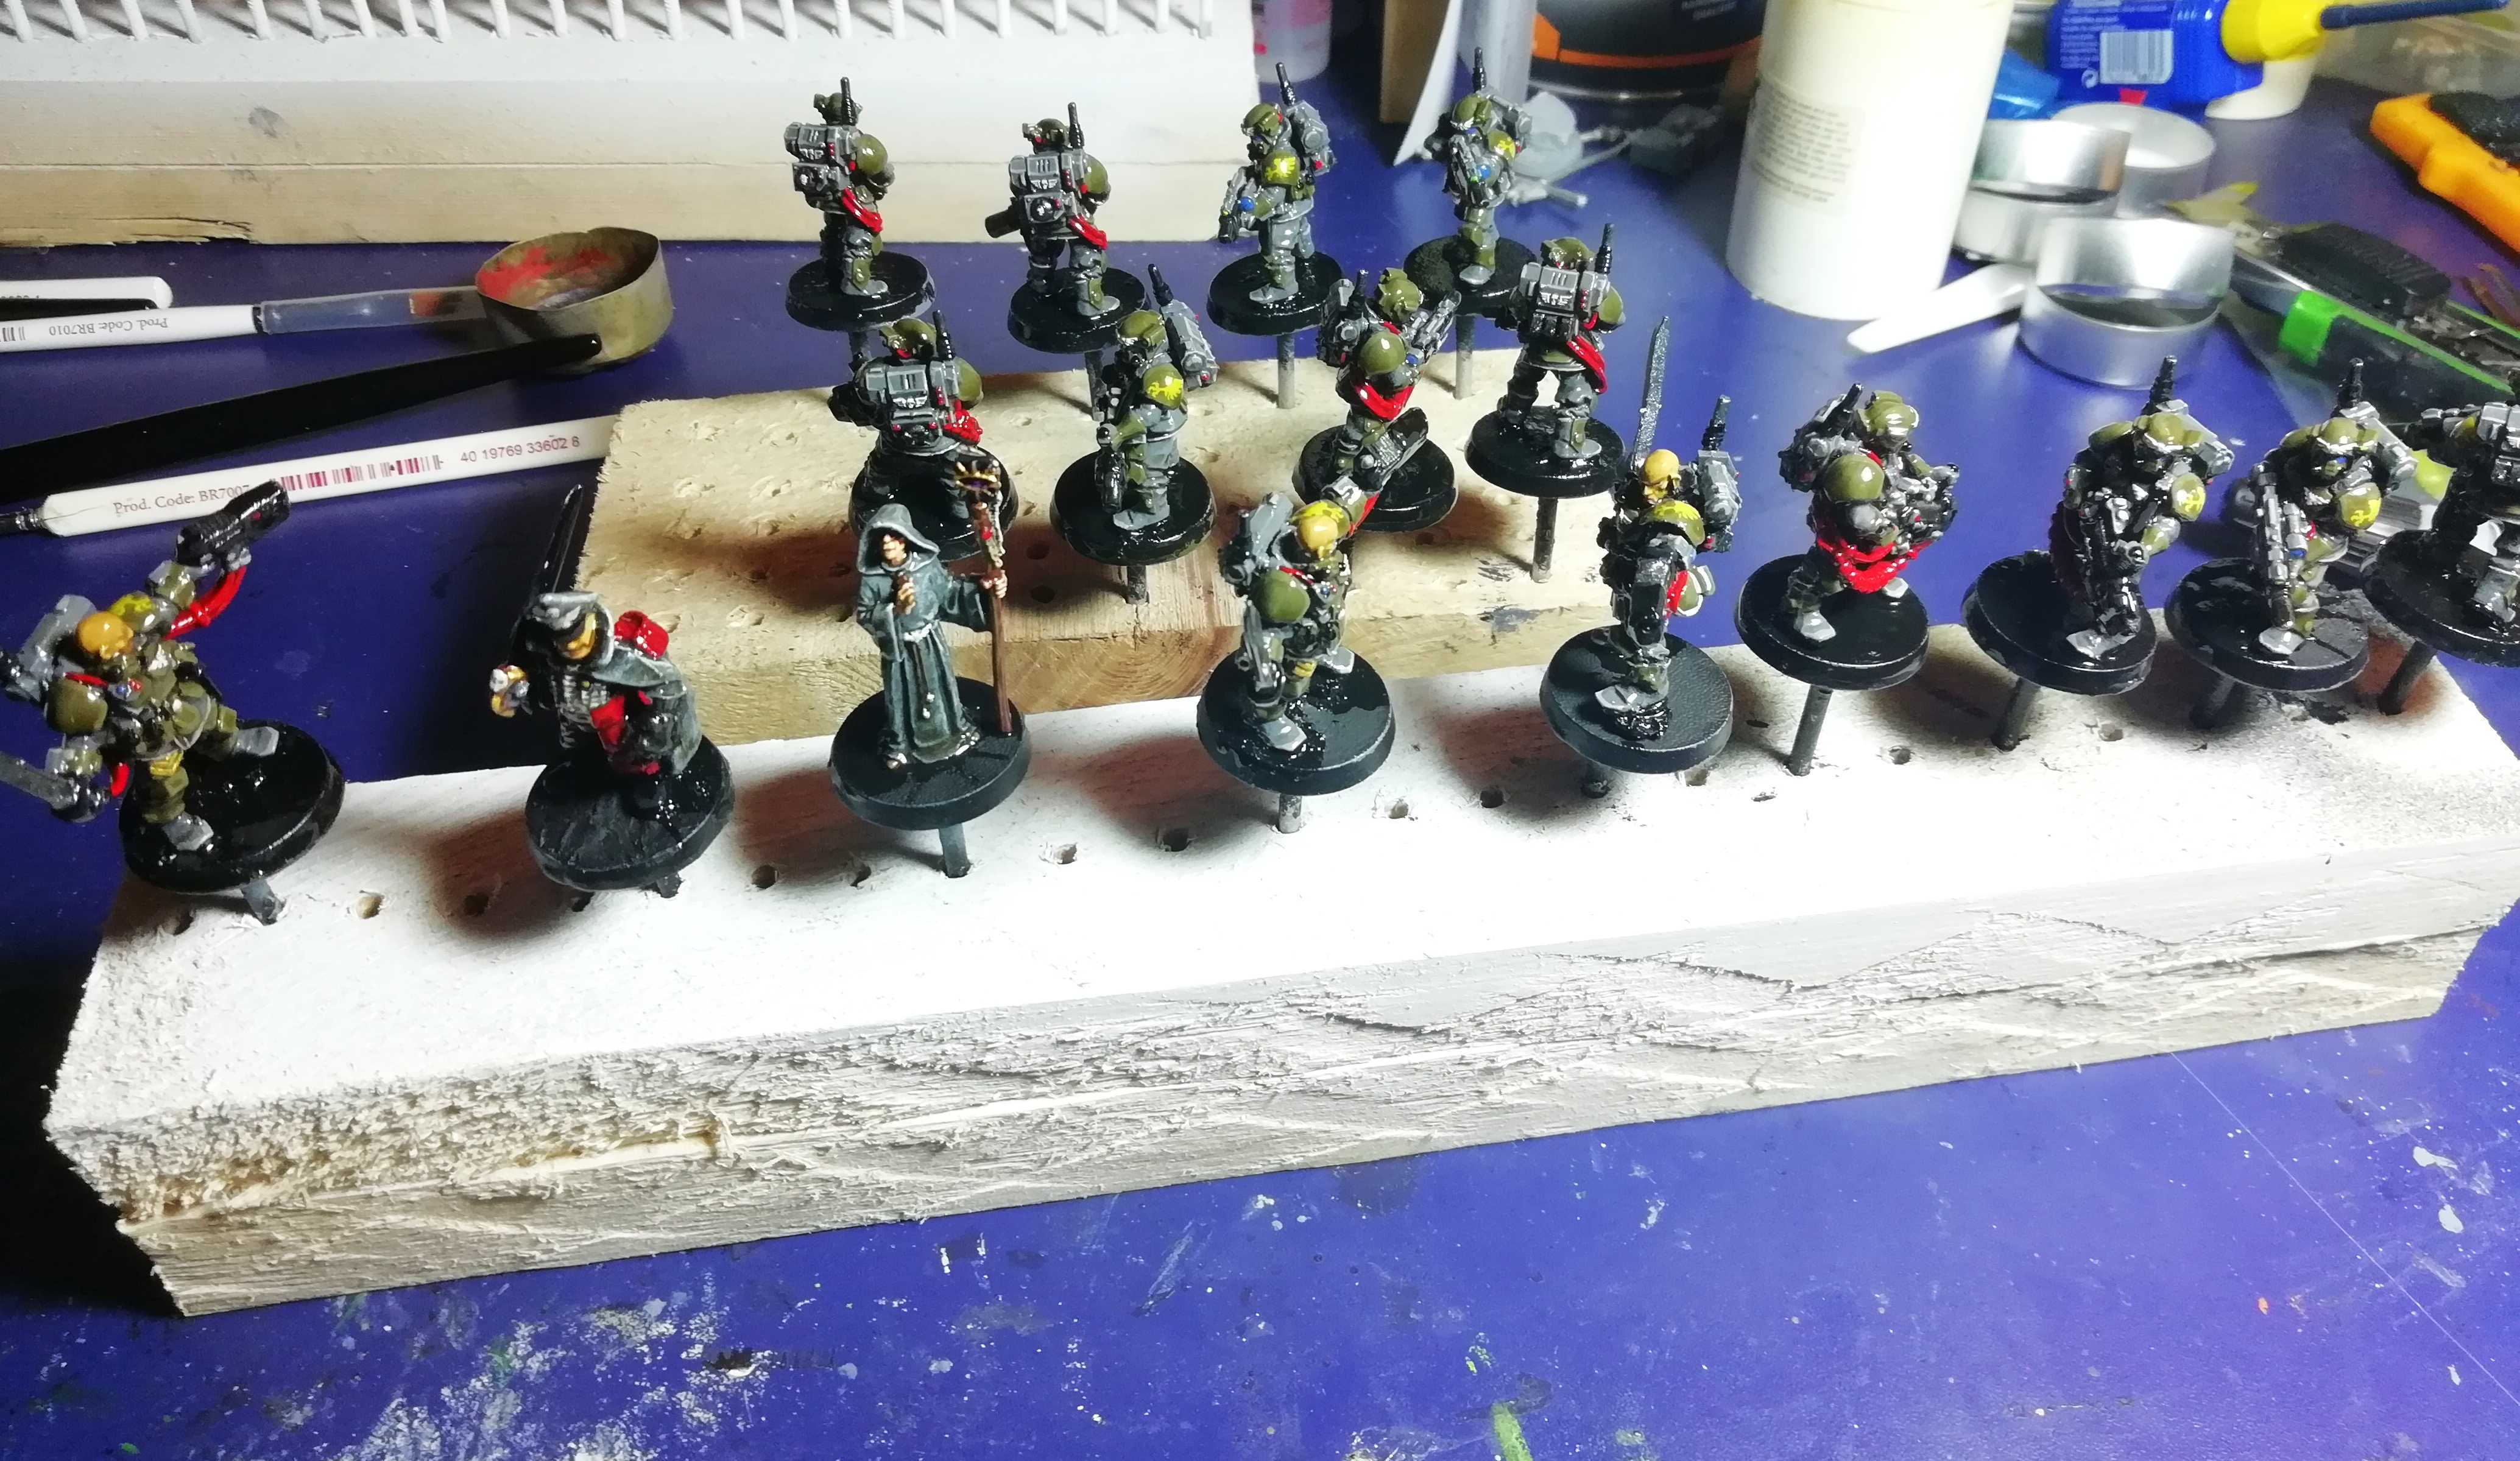
 Entire Battalion
 Prime and Psyker
 And the good old LLoyd shot, so you can see what is happening with the backpacks.
1542h: Base colors done
I finally managed to finish the base colors. Now its “only” Highlights, Decals, Dipping and Finishing Touches to go. But I get ahead of myself.
Firstly I used GW Blathasar Gold on a few details on the characters. They eye and trinket on the psykers stave. The lower part of the primes blade etc.
Then came the eye lenses of the helmets. These are GW Ultramarine Blue. As I head blue already infront of me I decided to go displays, buttons and laserpointers next. Displays went blue, buttons GW Blood Red (buttons have to be red, like power cables) and laser pointers GW Putrid Green. Again some of these pots are old or very old. The names might have changed by now.
Then I worked on the eyes. White as as base (Model Color Foundation White 70.919.) and black as a pupil (Army Painter Matt Black). With black alread on the palette I used it on the openings of the gun muzzles.
And tadaa… all the base colors are down. Onto Highlighting. I’ll start with the armor plates again.
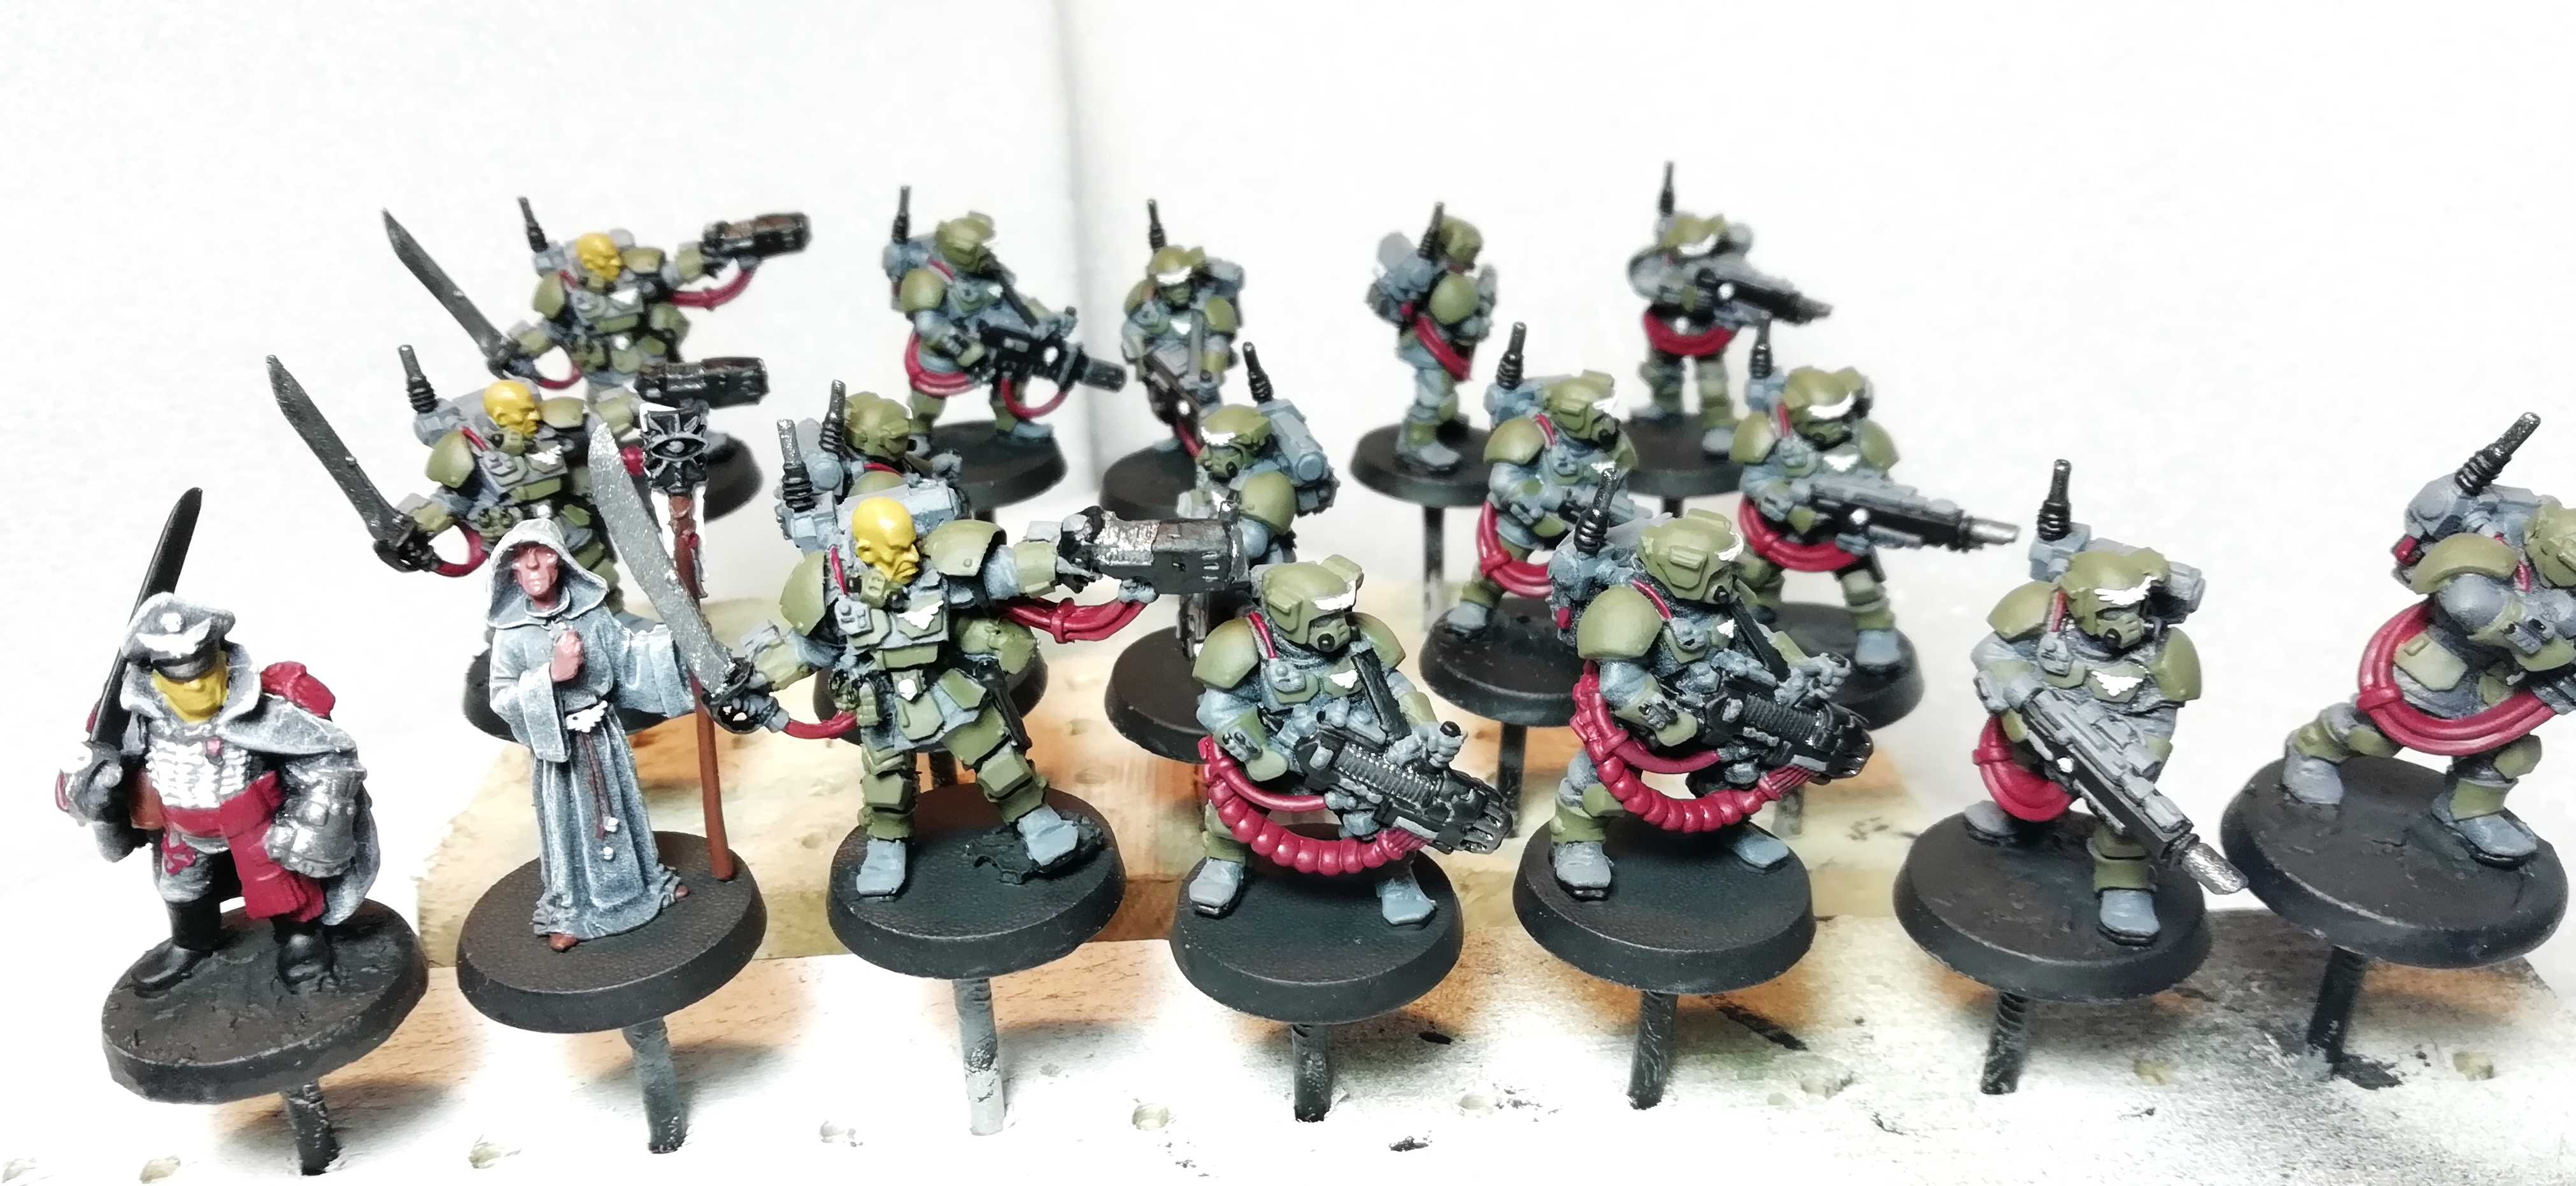
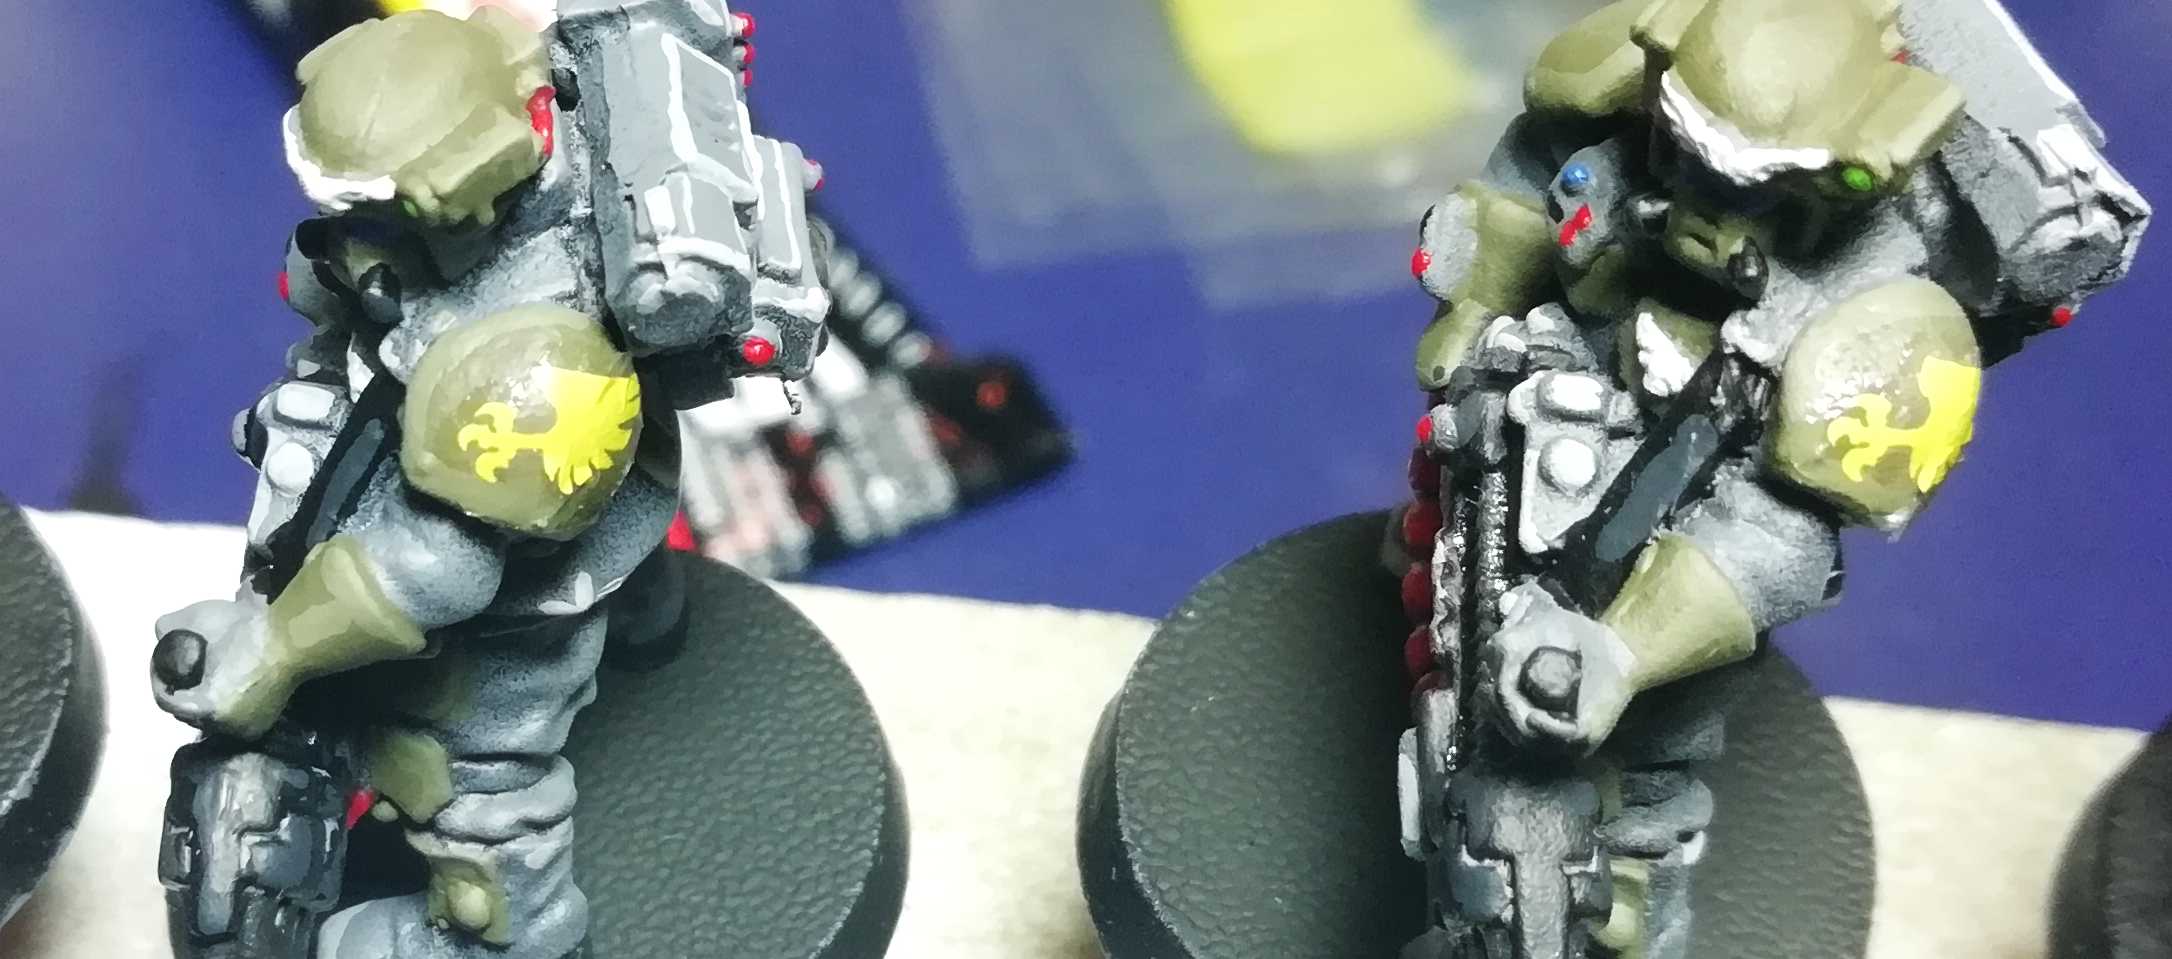
 This time we start with the Lloyd Shot
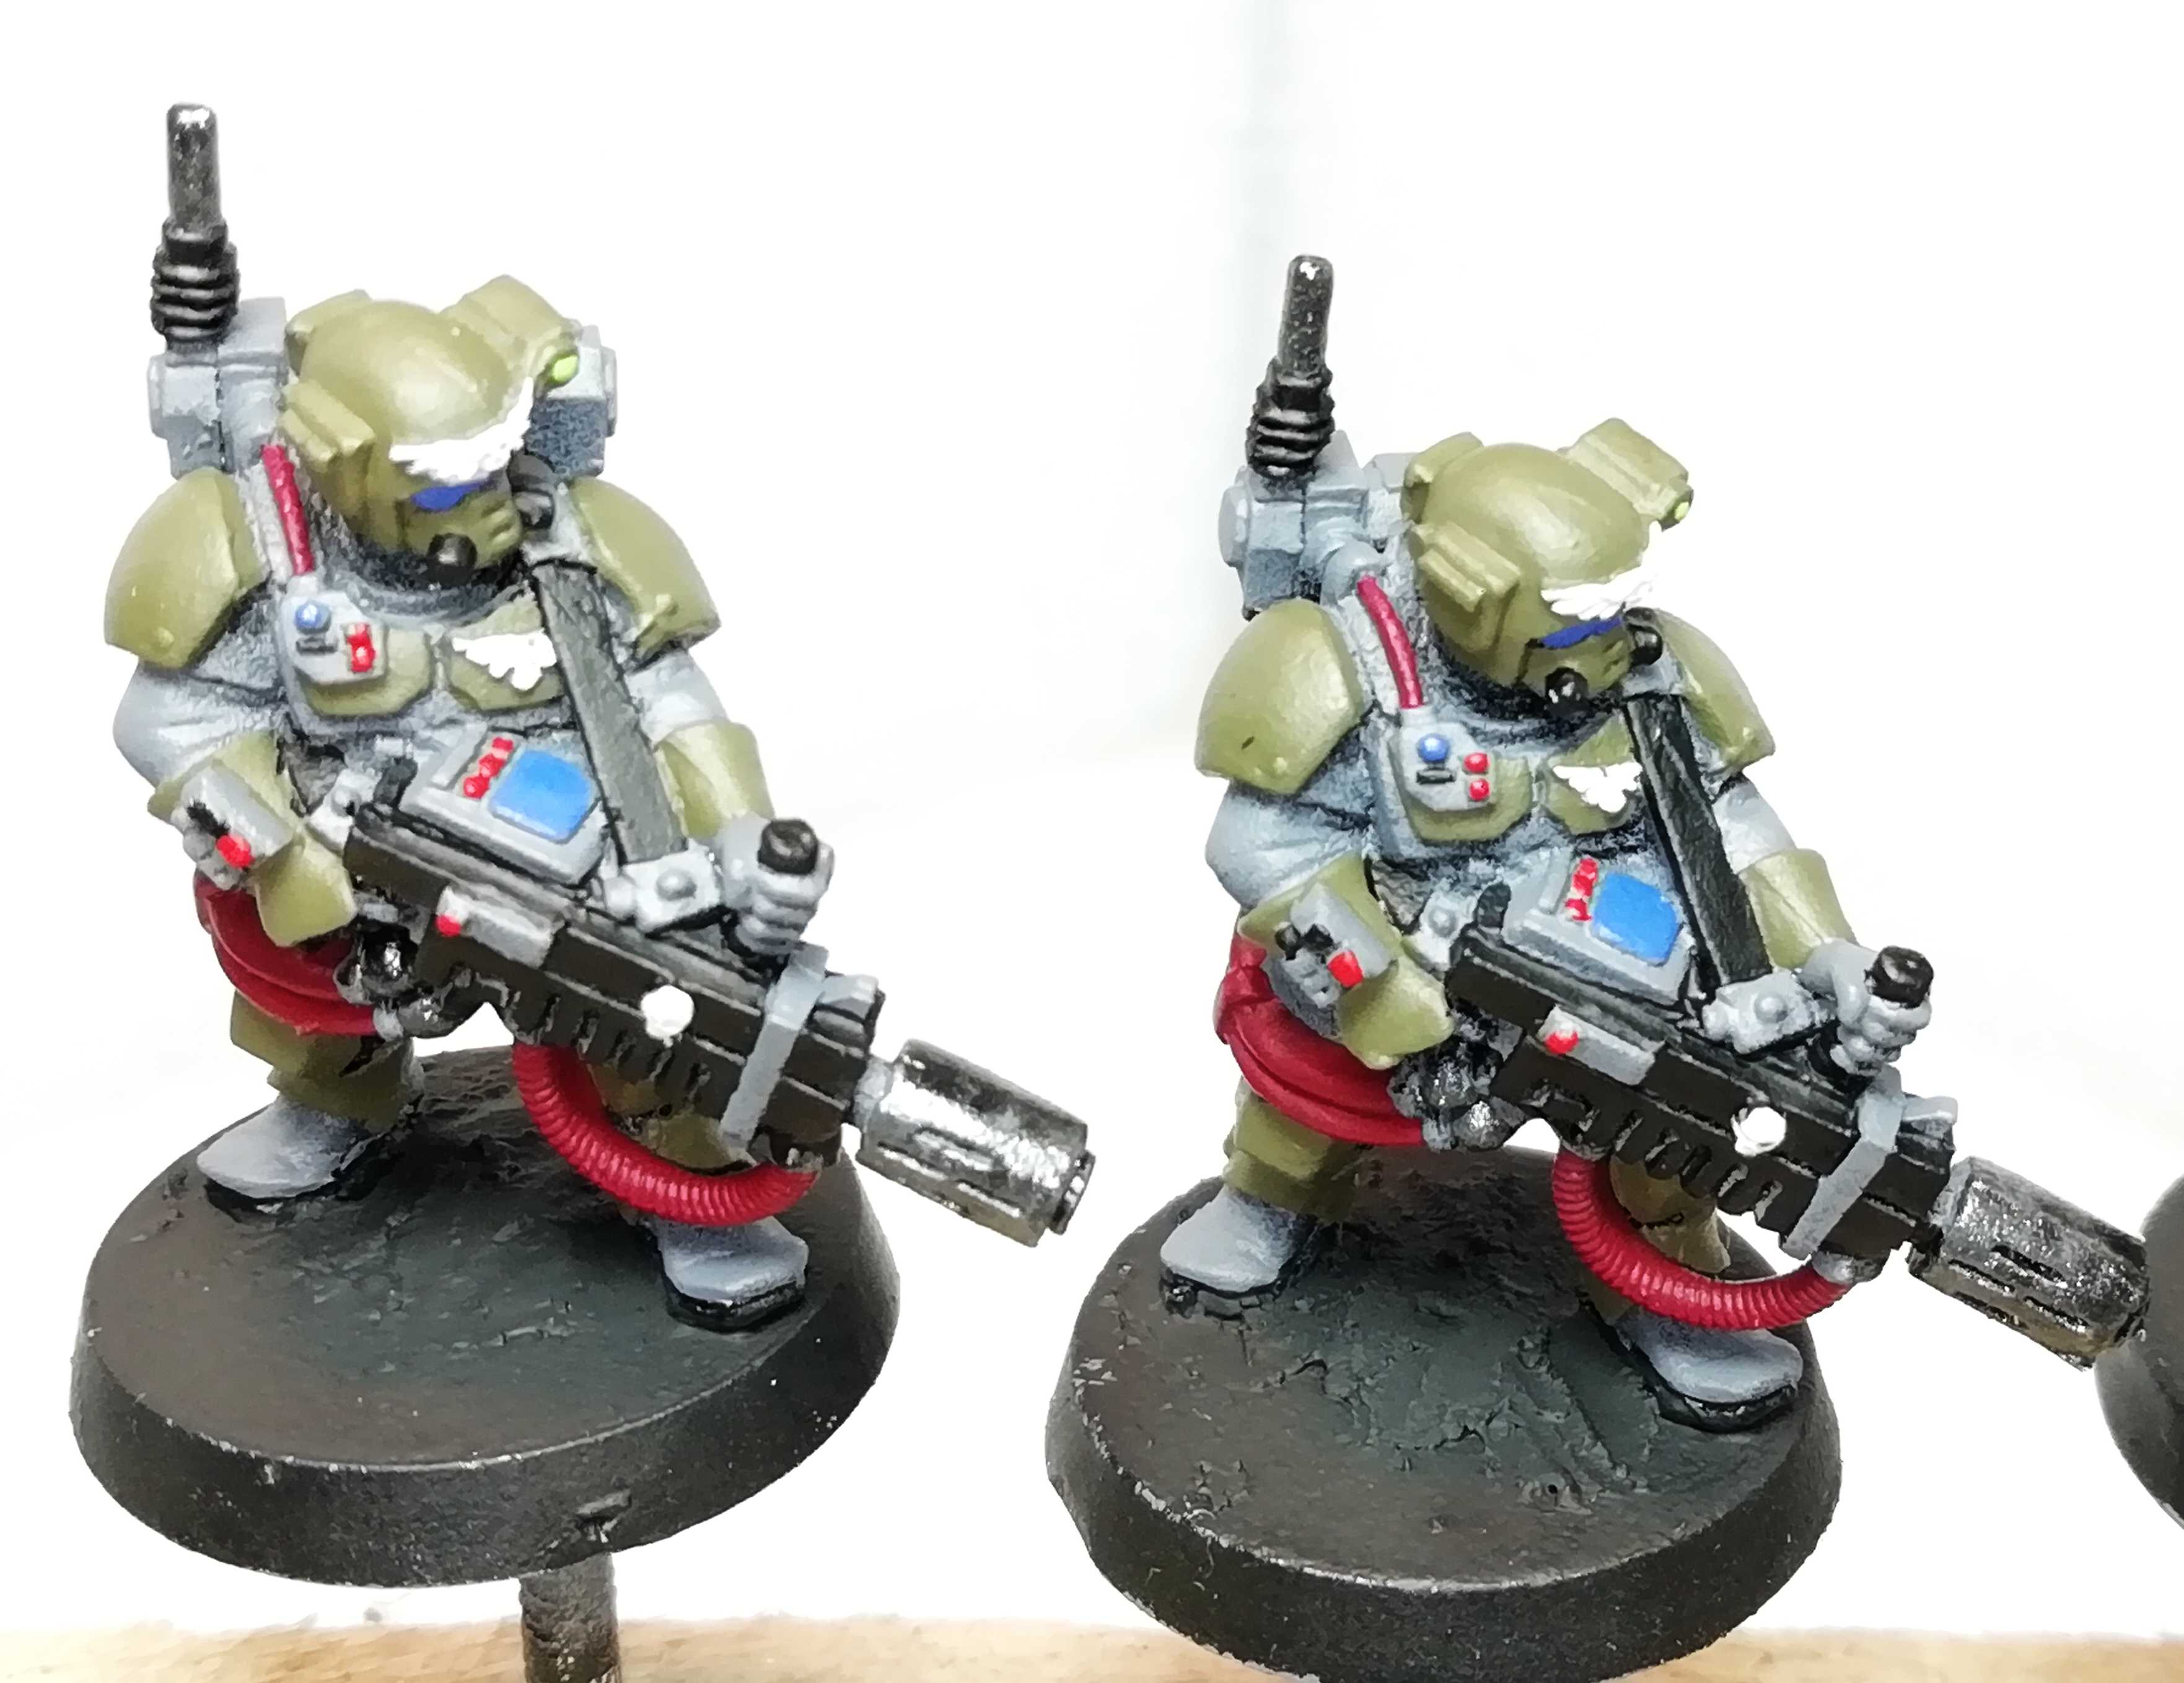 Melta Gunners with a focus on their display
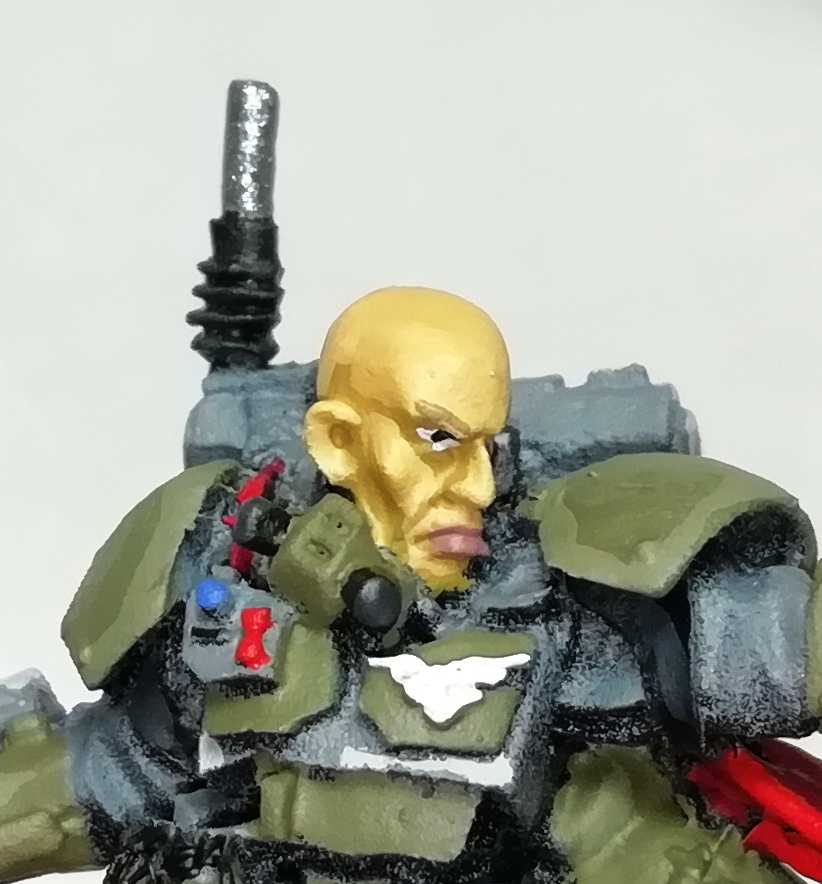
 Hellgunner, focus into the face
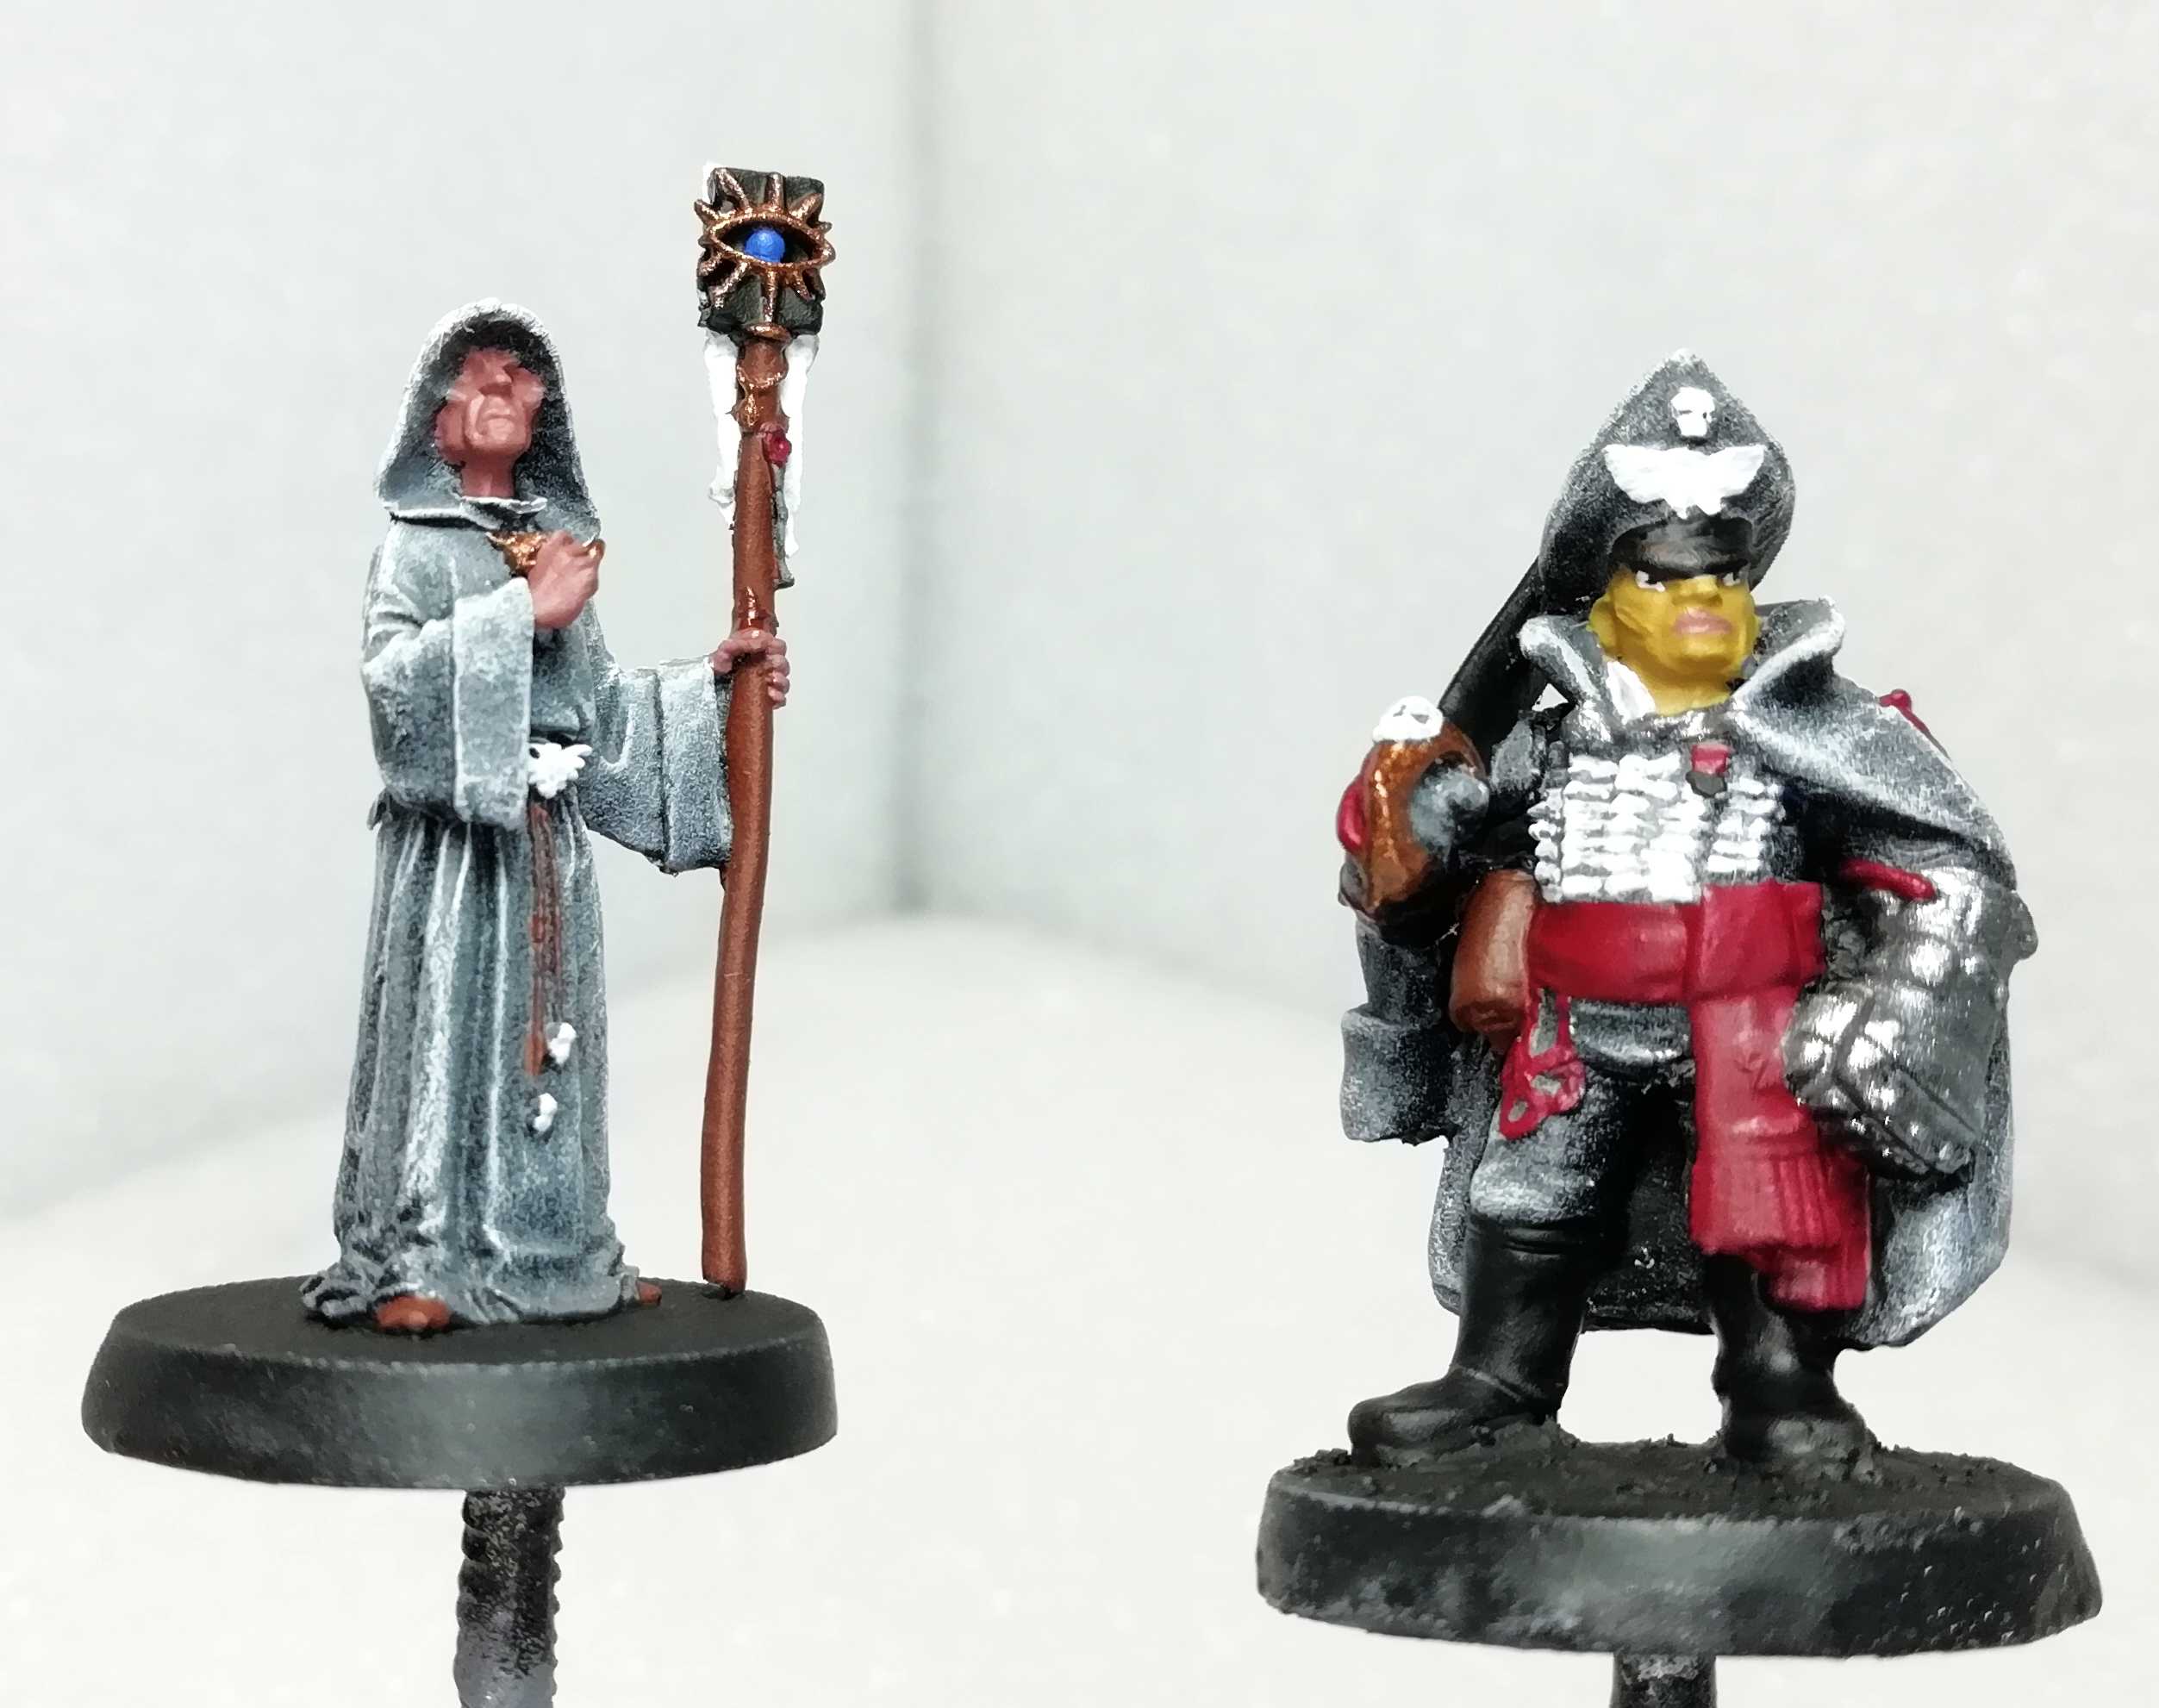 Characters. Yes I f****g broke the stave... like 5 mins ago
 Colors used
1712h: Picking up time
Done with the highlighting of the armour plates. This went much faster than I expected. So suddenly hopes are high to make it to dipping today. Unfortunately my feeble body tells me I need to eat. So a short break is in order. But then we’ll push on.
I just used the same green as before (Model Color Brown Violet) and mixed it on the palette with a bit of white. And then some quick and dirty hightlights on the armor parts.

 Wet palette: Top left is pure green from yesterday, top right same green mixed with white for highlights
2002h: Nearly done... with highlighting...
A lot happened since the last update. First I did some highlighting on the black. Therefore I mixed 2 parts Armypainter Matt Black with one part Game Color Cold Grey (72.050). Just simple hard edging on the guns and other black parts.
Then it was Red’s turn. Highlighting the cabling and the Prime’s clothing with GW Blood Red. GW Steel Legion Drap did the Highlights on the stave and the Primes pistol holster.
More of the same: I mixed the grey from above with some white and put very few accents on a few gun parts, rimming of the uniforms and boots.
Lastly Model Color Gold (70.996) used for highlighting the golden parts and painting the Sarges insignia on his right thigh.
Now only the faces and a few details on the display are left and I can go onto the decals.
Nearly forgot Army Painters Dark Tone Wash (from the dropper bottle). I used this on nearly all the metal parts to tone them done. Especially the gun muzzles and very heavy on the Prime’s power fist.

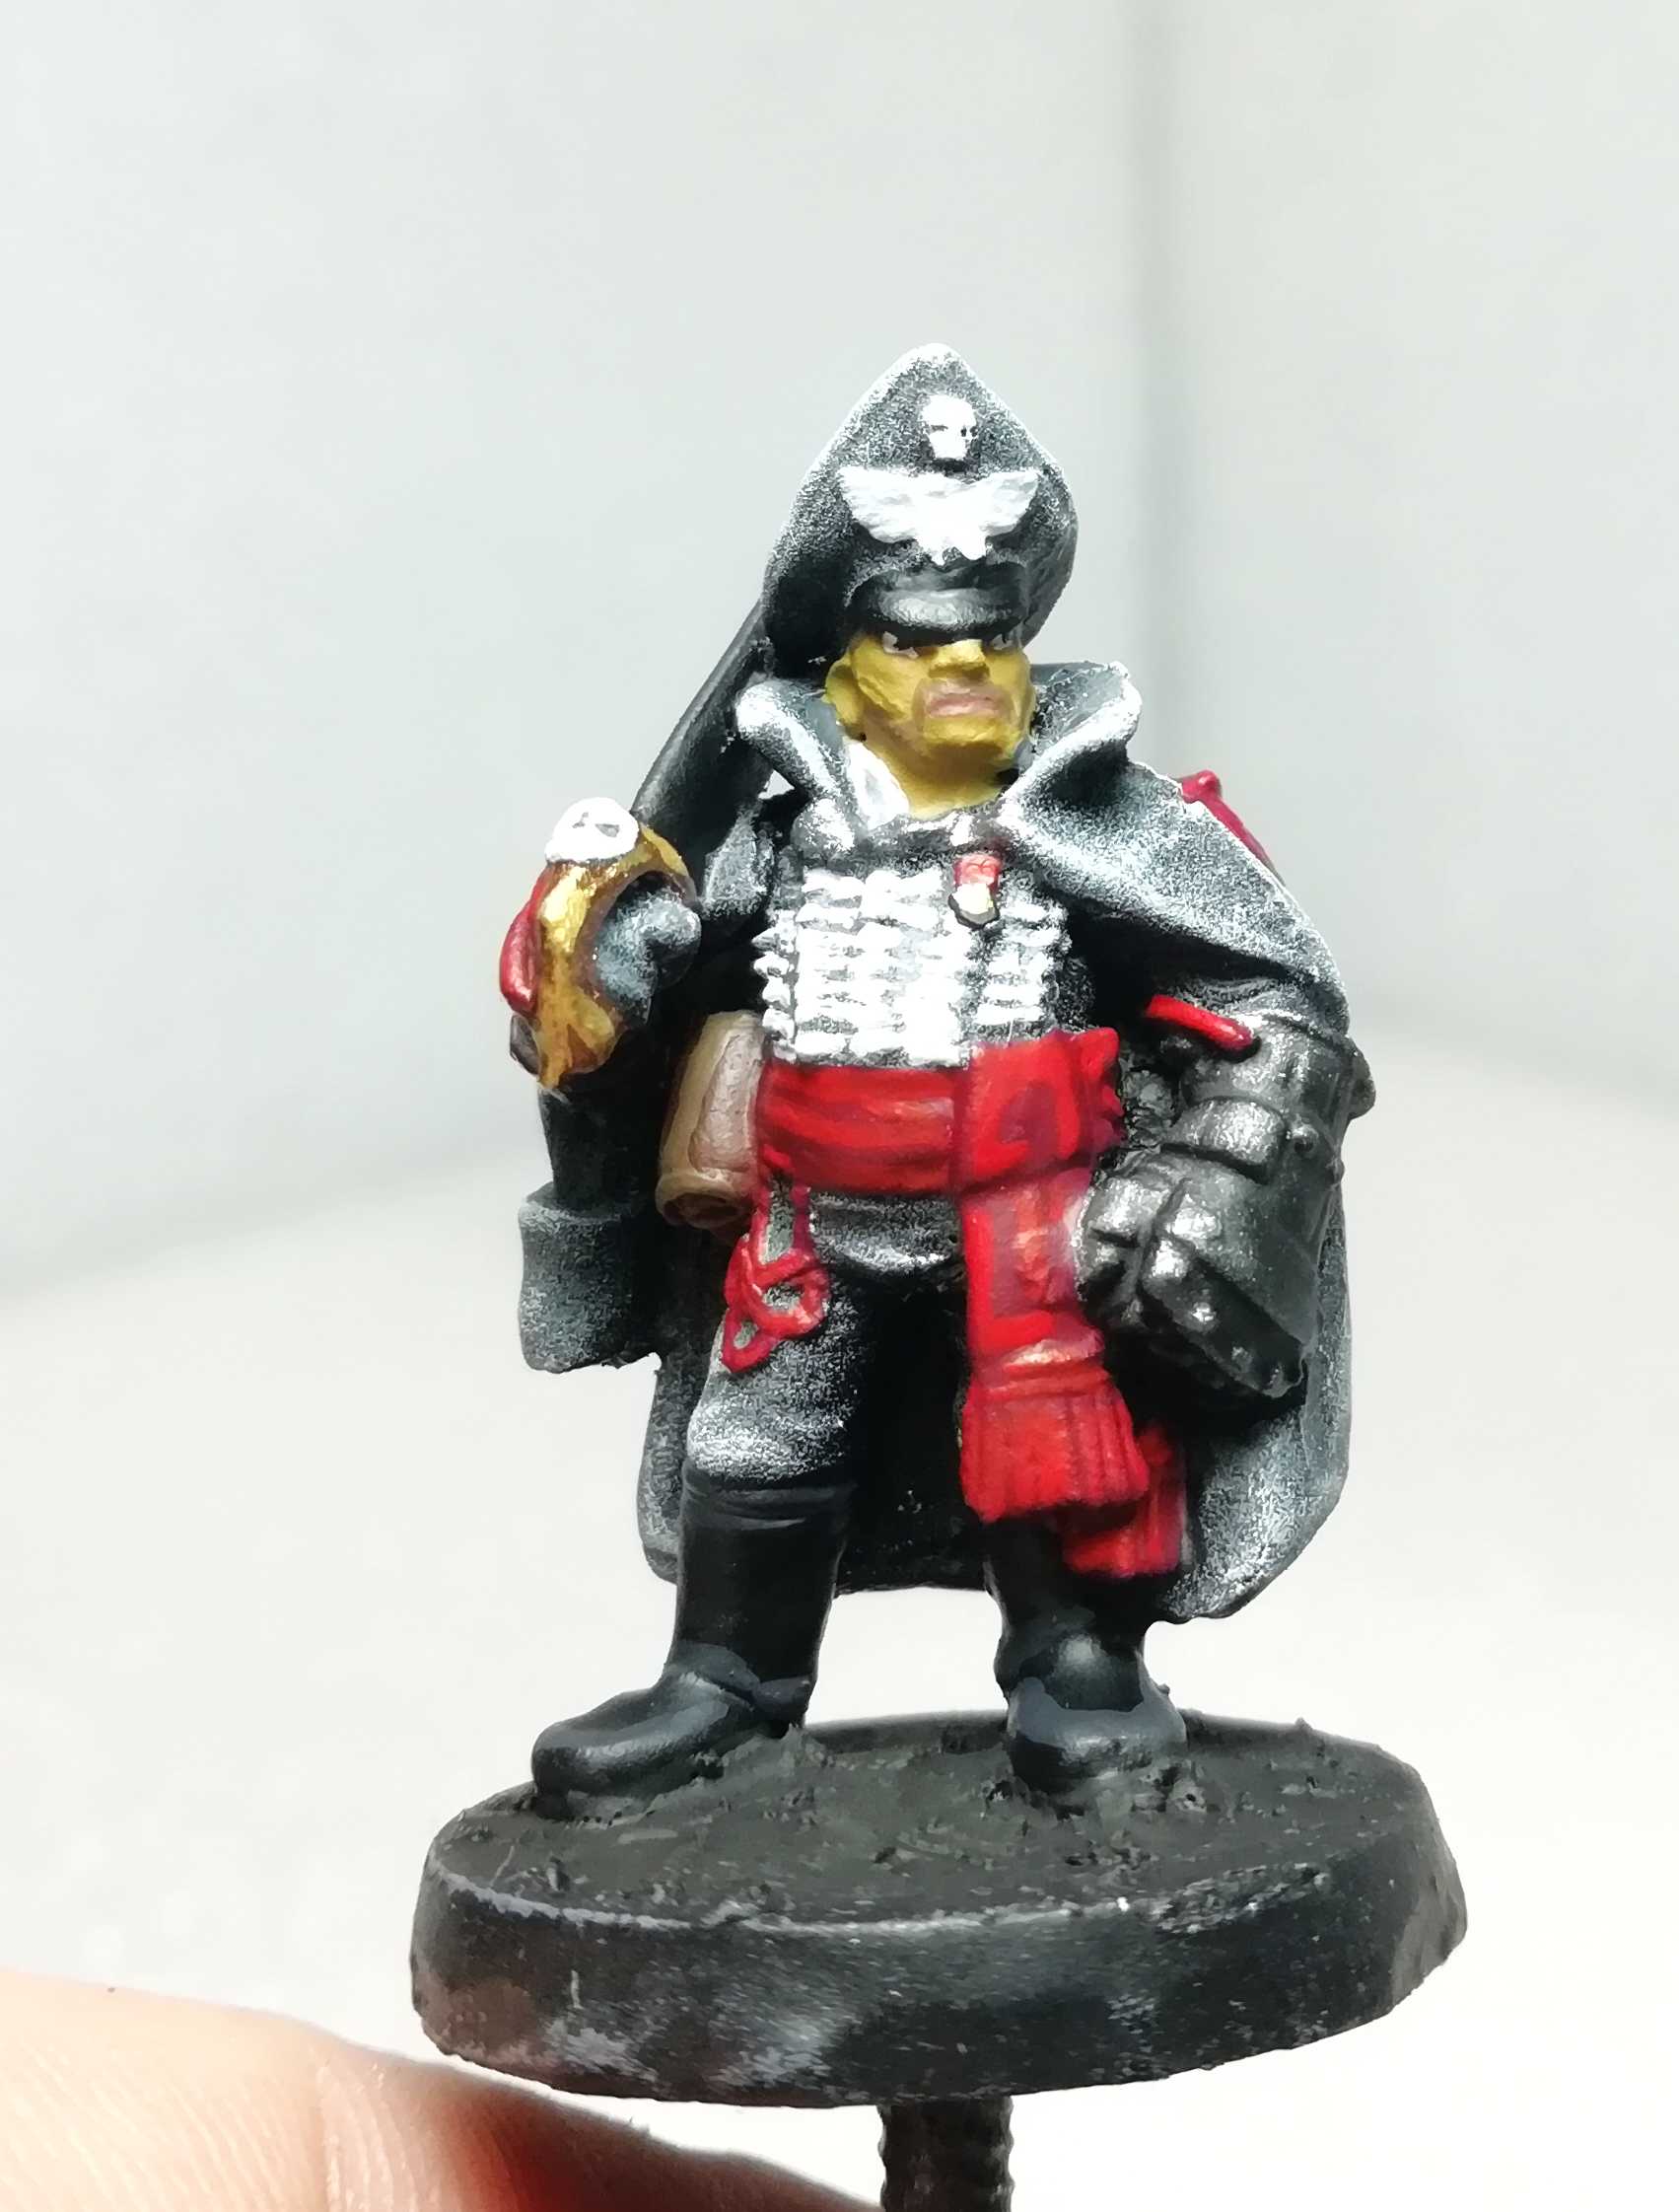 The Prime in all his Glory. Did I went a bit "Wehrmacht" on him?
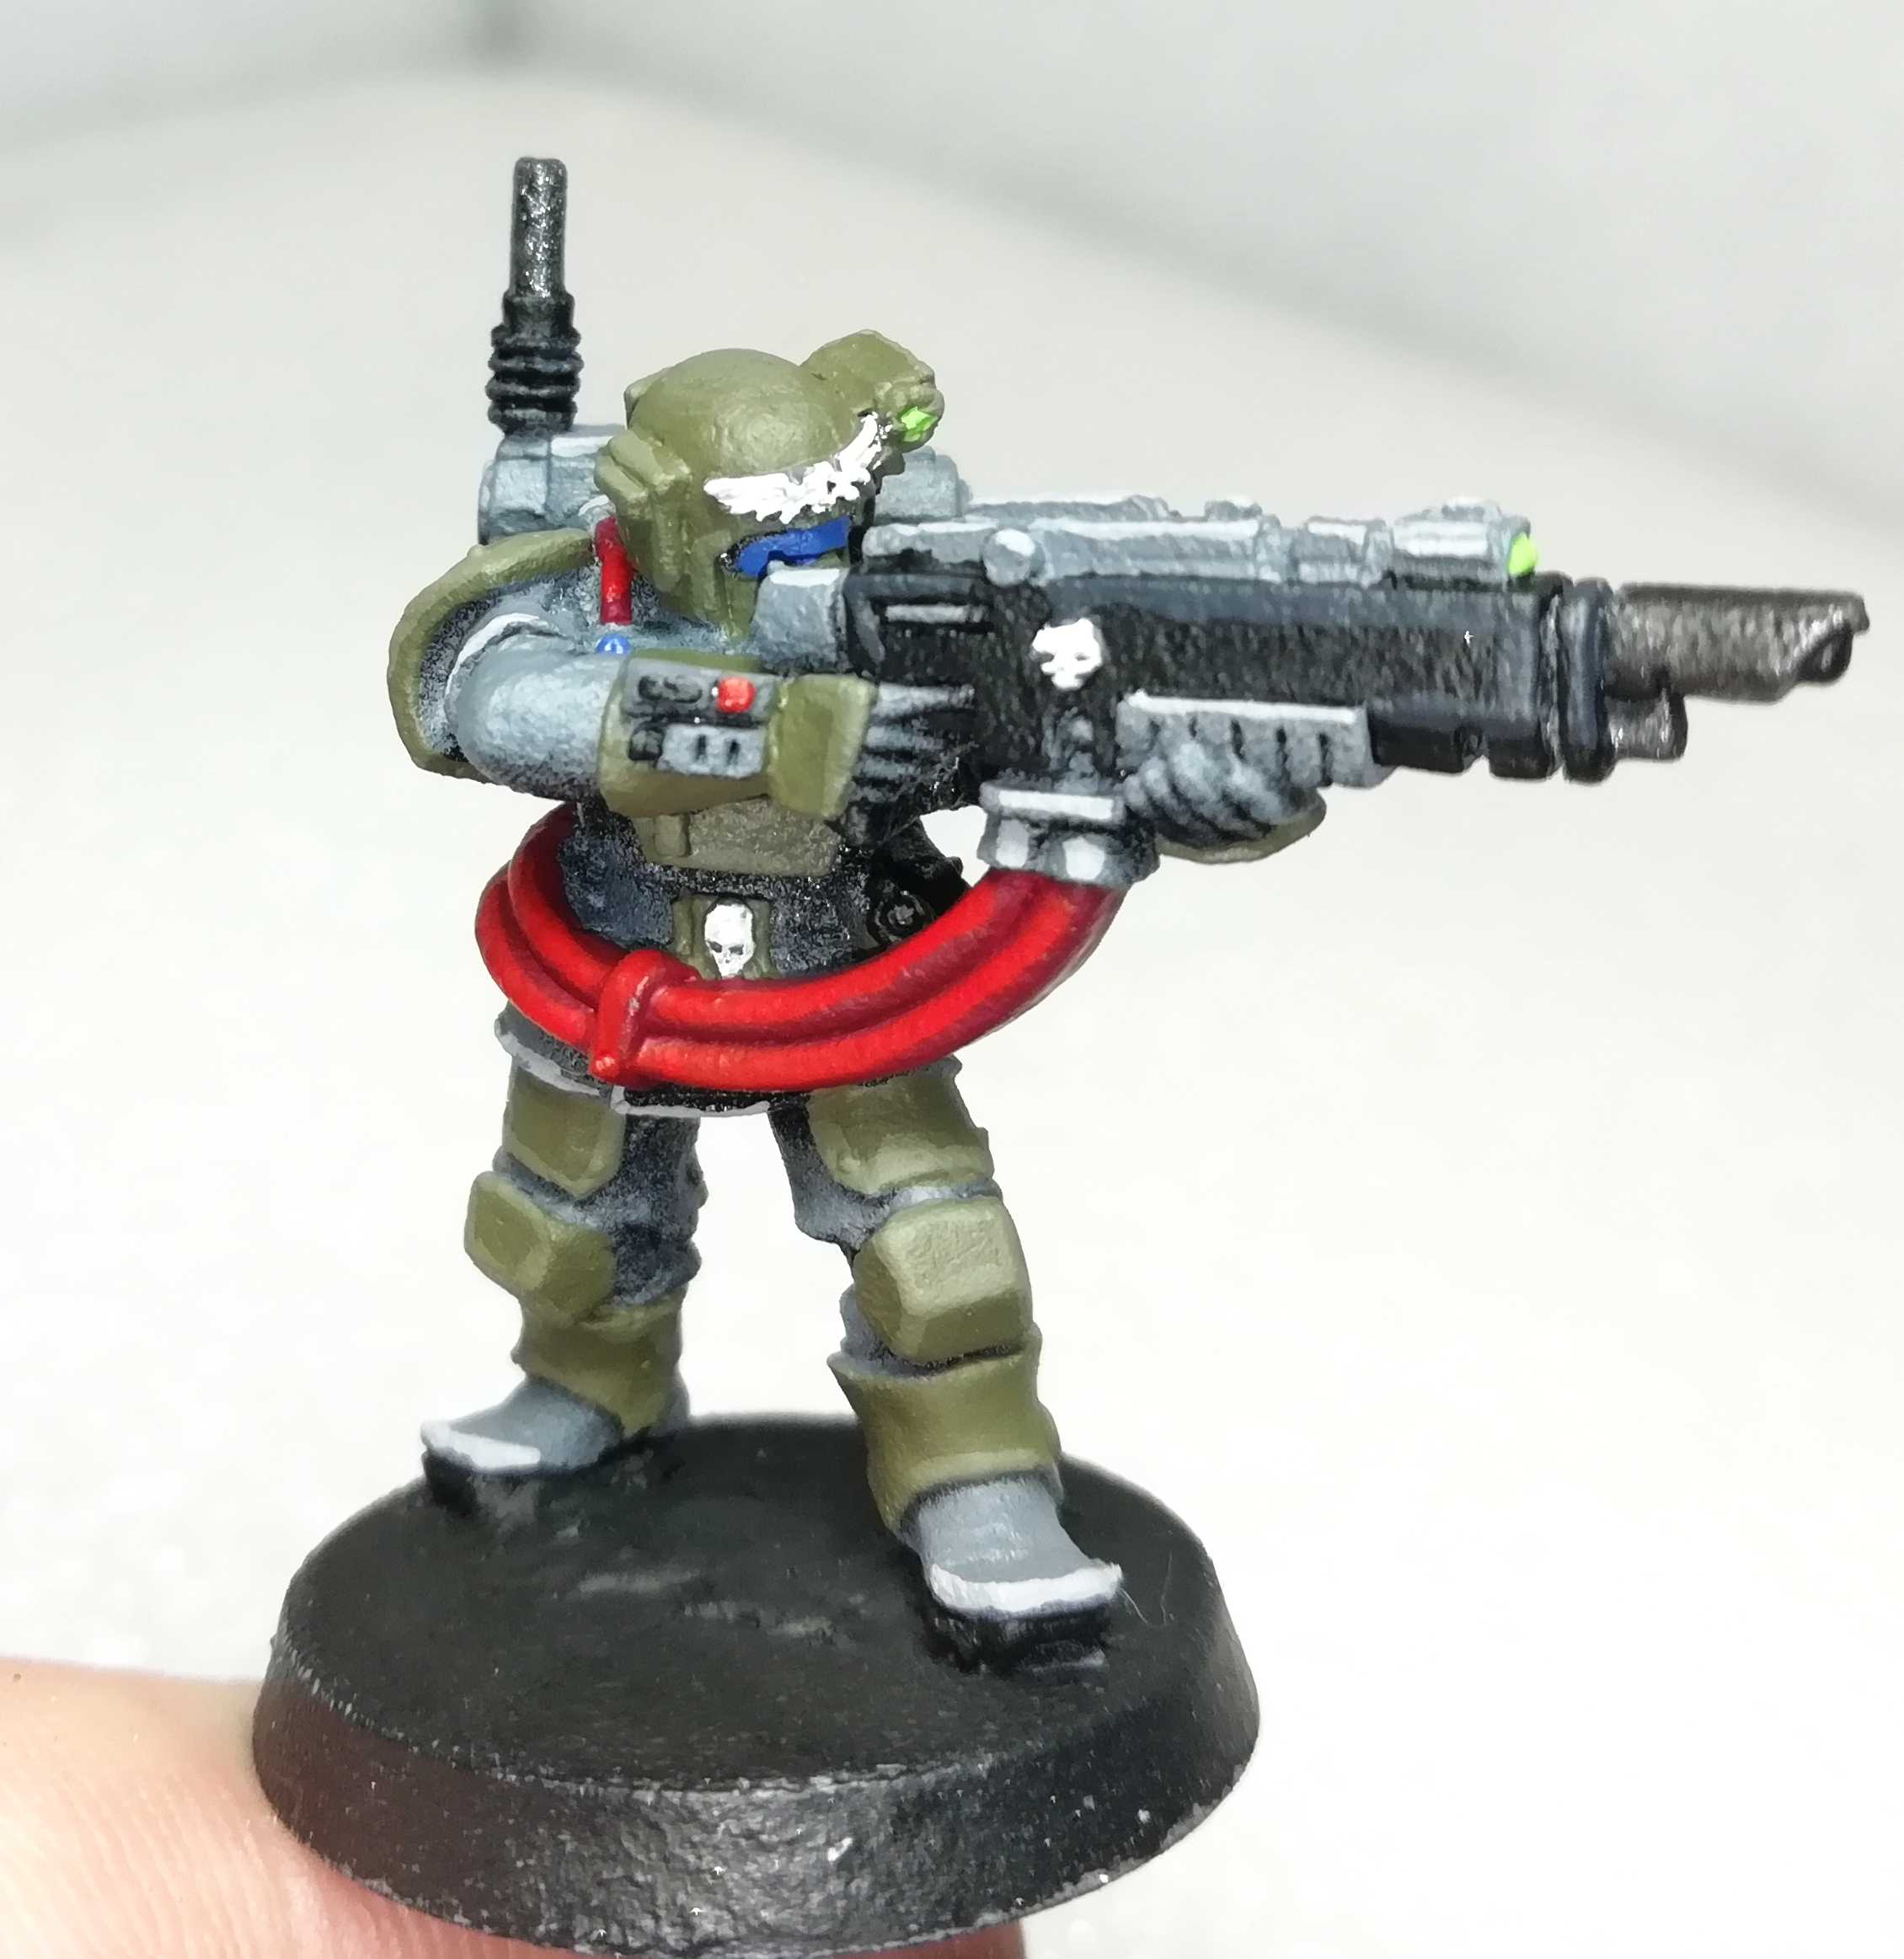 Highlights on cables, guncasing and gunparts
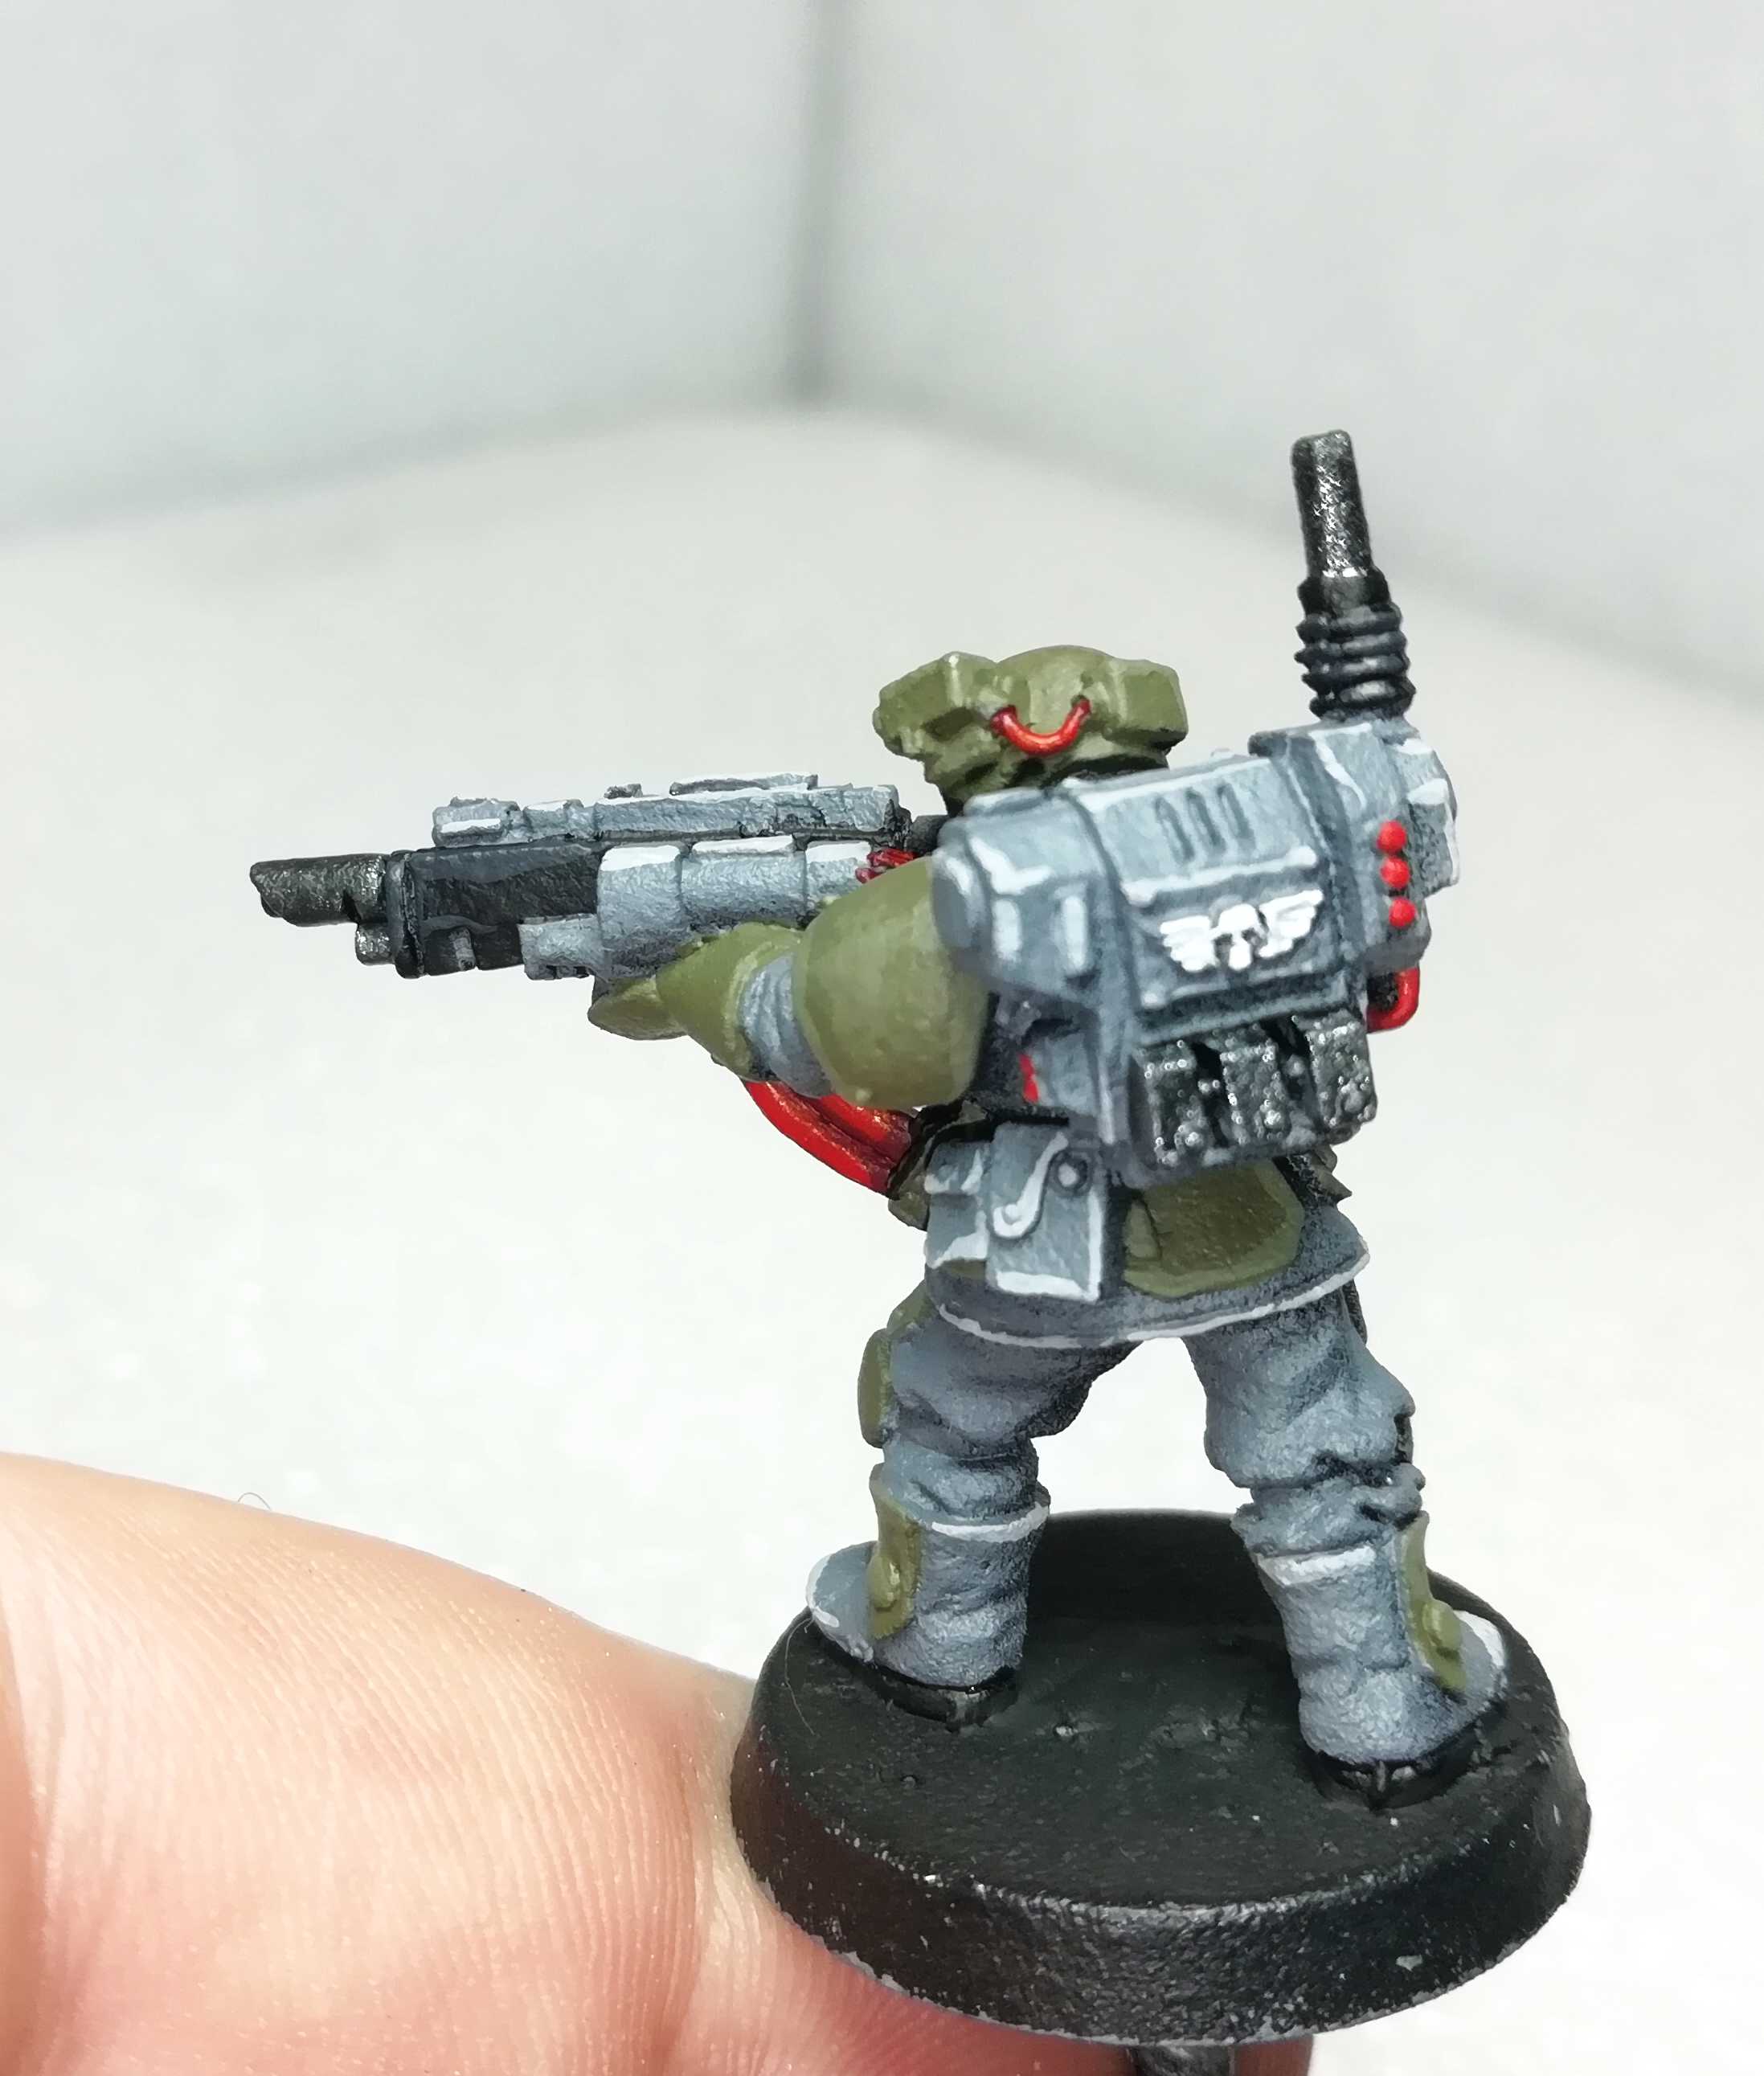 More Highlights on clothing rims and the backpack.
2101h: Painting done!
I can proudly say, that I am finished with the pre-dipping painting. Meaning only Decals are left and then it’s dipping time. I should manage to achieve this before 2400h. So I can let the Dip dry for 18h on finish the models tomorrow evening.
But again, I am getting ahead of myself. So I finished the faces and some details in this one.
Faces of the 3 Sarges and the Prime:
- The base was GW Balor Brown (painted yesterday)
- Lips (also painted yesterday, I think, lost track of time) was GW Bugmans Glow
- Layered with a 1:1 mix of GW Balor Brown and GW Elf Flesh
- Eyebrows and Hair is GW Steel Legion Drab
- Beards are Model Color Flat Brown 70.984
- The blueshade of the shaven beard is Army Painter Soft Tone Wash (from the dropper bottle)
- The wound on the Primes is GW Blood for the Bloodgod
 Face of 1st Sarge (not beard)
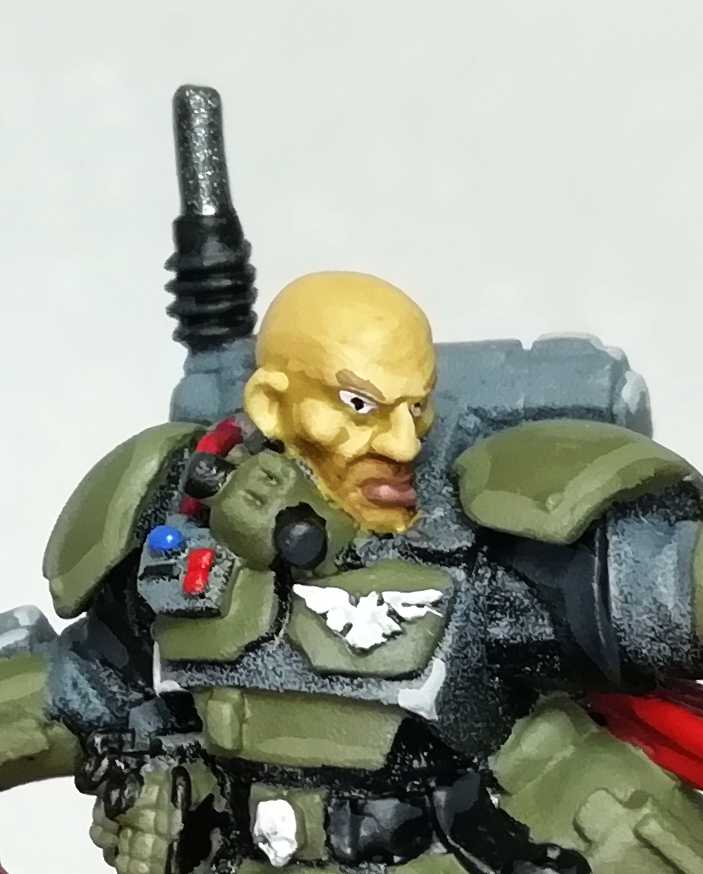 Face of 2nd Sarge with blueshade (shaven beard)
 Face of 3rd Sarge with weird Wario style mustachio (a bit shaken, sorry)
 Face of the Prime with good old Prussian-Lip-and-Cheek-Beard
Face of the Psyker:
- The base (again painted yesterday) was GW Bugmans Glow
- Layered with GW Elf Flesh
- Eyes are Army Painter Alien Purple and then highlighted with the same color mixed with white
- The Blood again is GW Blood for the Bloodgod
Top of the Stave:
- Paper is white and GW Ushabit Bone
- Writing is black, duh 😀
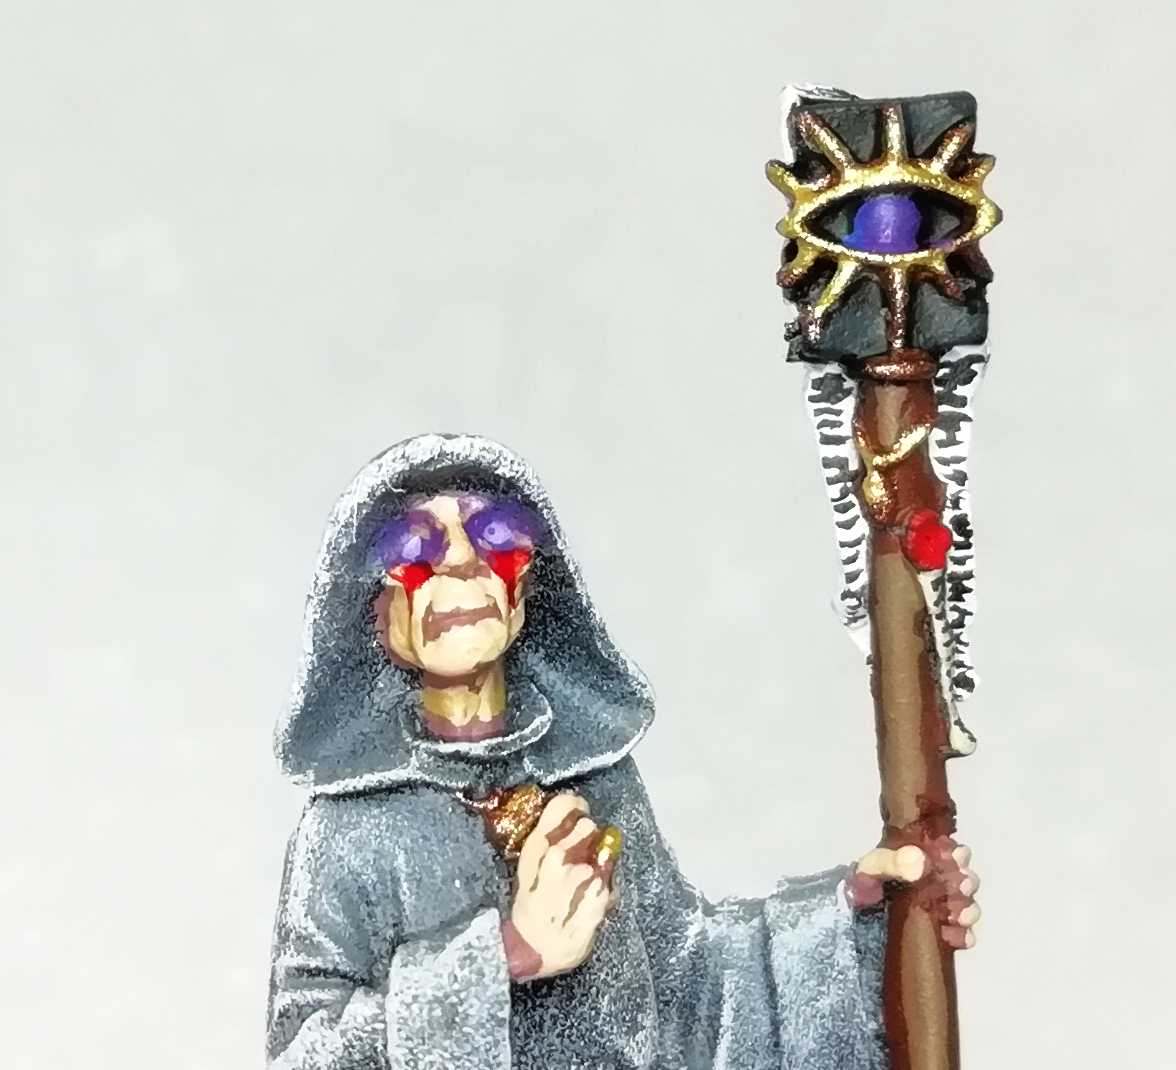 Psykers face and stave top
Display:
- Base is GW Ultramarine Blue
- Highlight GW Shadow Grey (very old pot again)
- And then white for some details
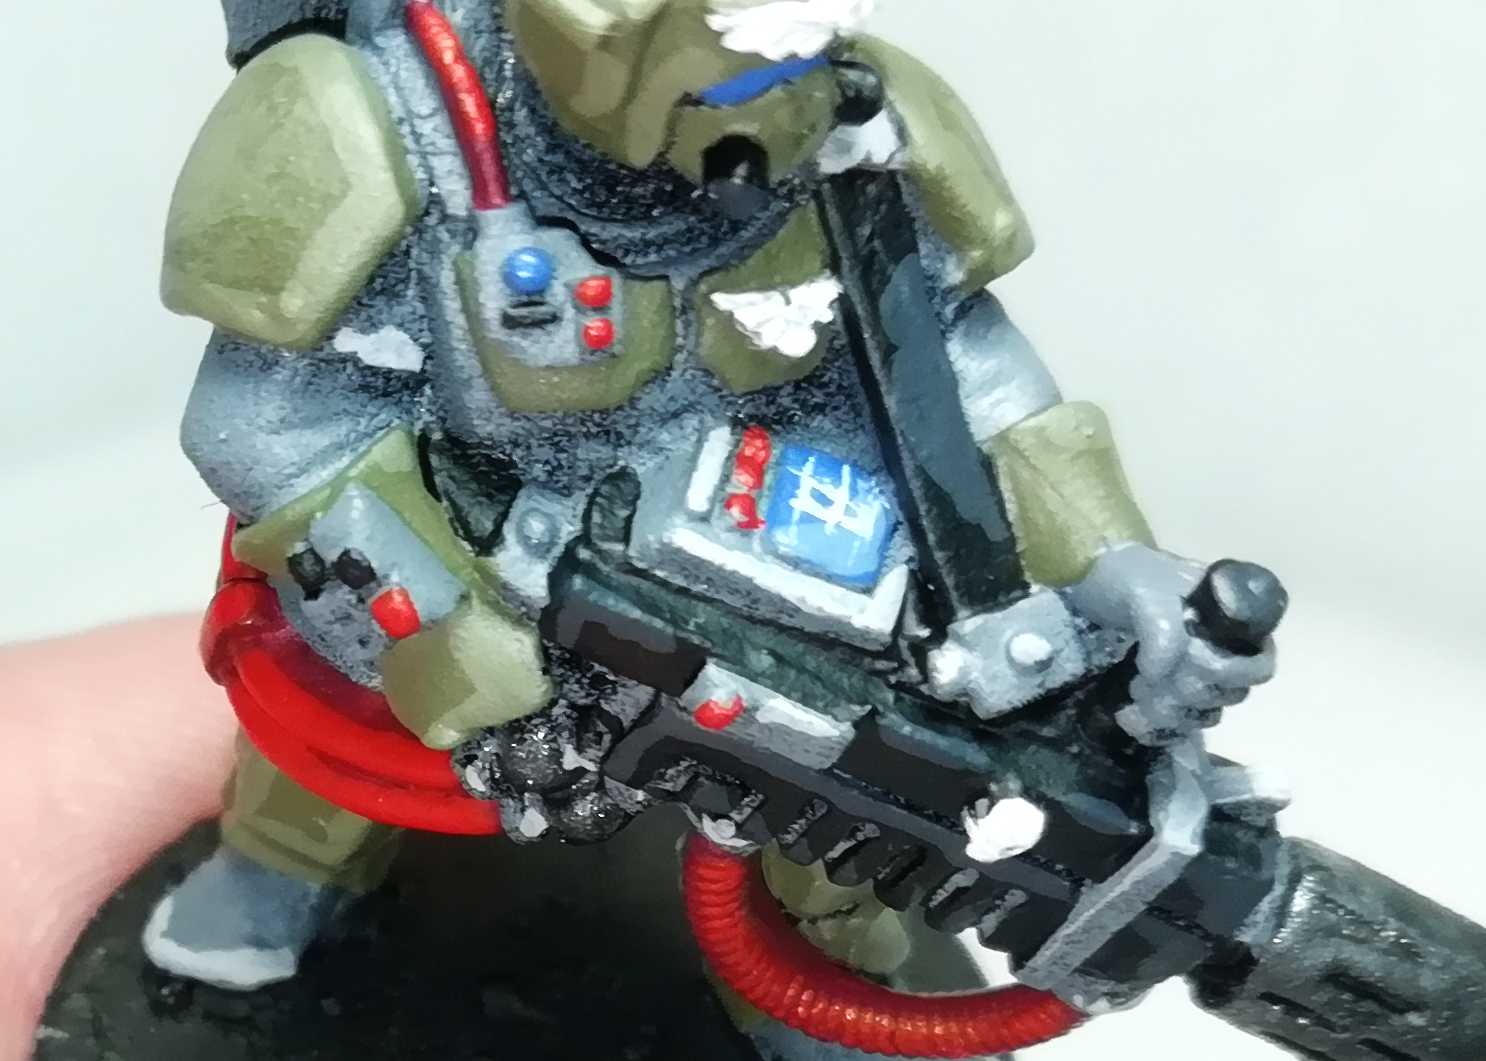 Melta Display
Next up will be Decals. I decided to go with a symbol from the Emperors Children or to be more precise and old Unity Symbol from the Emperor from a time even before the Great Crusade. I am talking about the Golden Eagles Claw (see below).
Two reasons. First of all the name of these guys will be:
Emperors Finest Droptroops, 101st Screaming Eagles
And secondly I have like a billion of these decals and they look cool. Stay tuned.

2310h: What I've been waiting for...
When doing such a project like this there is always the fear something can go wrong. You always wait for it. And now it happened. The Decals went wrong. Not terribly, but enough to have shaken my confidence for about an hour. So I took a shower, helped myself to a beer and a piece of cold pizza and fixed the problem.
As I said the Decals are old Emperors Children Decals by GW. Like 10 years old. They applied easily and had the normal air bubbles and kinks for decals applied on a round surface.
 Air bubbles and kinks in the decals (expected)
I’ve expected this as I have applied decals to many Space Marines. I grabbed my wonder weapon Micro Sol. This is a decal solvent and normally takes care of flattening the decals in 2-4 applications. As nothing was happening after like the 10th application I was getting really nervous.
Google told me that old decals are much thicker than new ones and much harder. So decal solvents have problem softening them. I had a choice to make. Repaint the shoulder pads or try to fix it. After said shower, beer and pizza I decided to try and fix it. I applied Mirco Sol a few more times in much shorter intervals and much thicker. And it worked. Puhhh…
As on other projects I used quite a hard brush to flatten the decals so they ripped in a few parts giving them a used look. So if you want to point out that I ripped the decals, that’s actually on purpose.
To seal the decals I used a single layer of Army Painter Anti Shine (from the dropper bottle).
But see for yourself
 Entire Battalion with the golden "screaming" eagle
 Decal on a Plasma Gunner
 Larger Decal on the Prime's Cloak
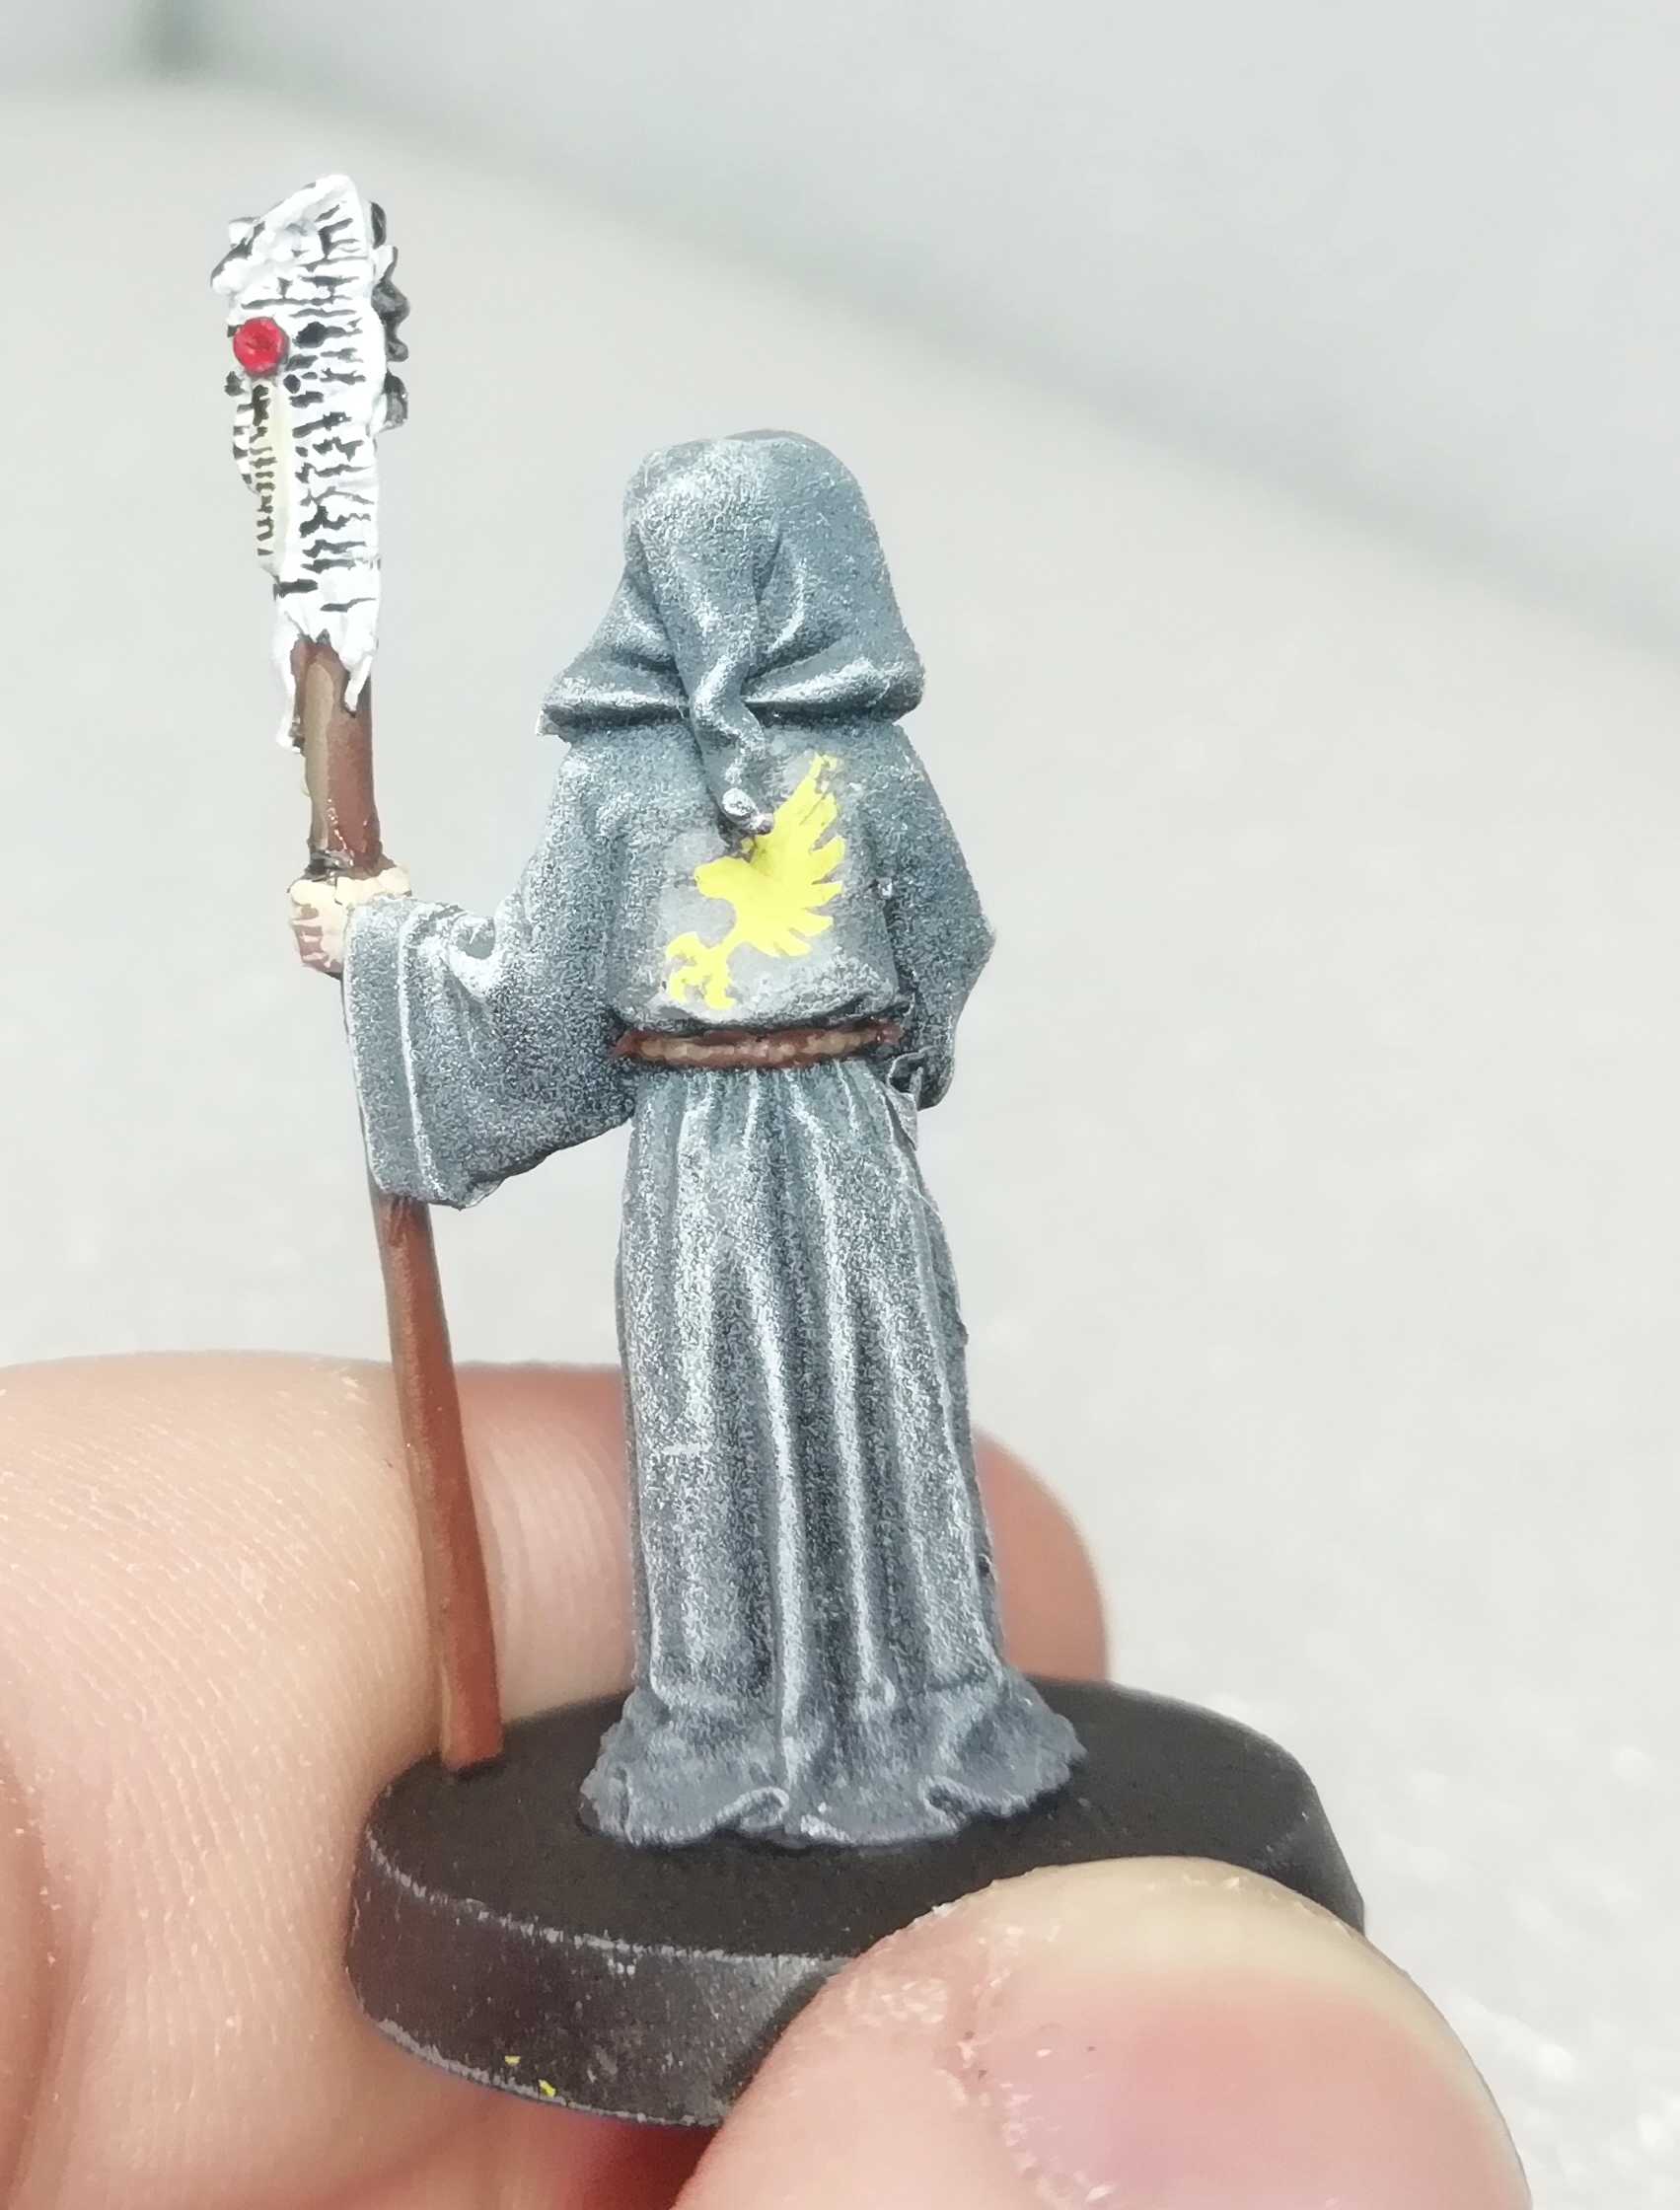 The Psyker looks a bit like a Boxer now heading to the ring
Now onto Dipping. I will use Army Painter Quick Shade Dark Tone from the big 250ml tin. That’s the solvent based stuff. I love the results of this, but I hate doing this. I always fear that something will go wrong. But it never has. Until now. Keep your fingers crossed…
2358h: Saturday (and dipping) completed
Puuuh. Ok. Dipping went fine. But this means I got nothing to do now. And for the most part of tomorrow. As the Dip takes 12h-24h to cure I can only continue with the project tomorrow evening. I think about 1900h (that’s 1800h BST). But it’s not much to do left anyways and it should take me less than 5h to finish. Leaving me with time left until 2359h:
- Mat coating 0,5-1h (I can’t use a spray can as it’s raining cats and dogs outside)
- Glow effects 1-2h
- Bases 1-2h
But back to dipping. I told you that I glued my minis on nails for different reasons. One being that it is quite useful for dipping. One of you have asked me: How? What? It goes like this:
- Glue your mini on a nail (the big end under the base)
- Span the small end of the nail into your drilling machine
- Dip the mini on the drill into the tin with Dip
- Let it drop of
- Hold the mini inside a round container with a bottom (I use a Pringles can)
- Hit it with maximum rotation for 3-10 seconds, depending on how strong the effect should be. I used 4s for the troops and 6s for the characters (lighter effect on the chars)
- Et Voilá your mini is dipped
- Once finished with all the minis pour the excess dip from the round container back into the tin with Dip
To fast? I prepared a photo story:
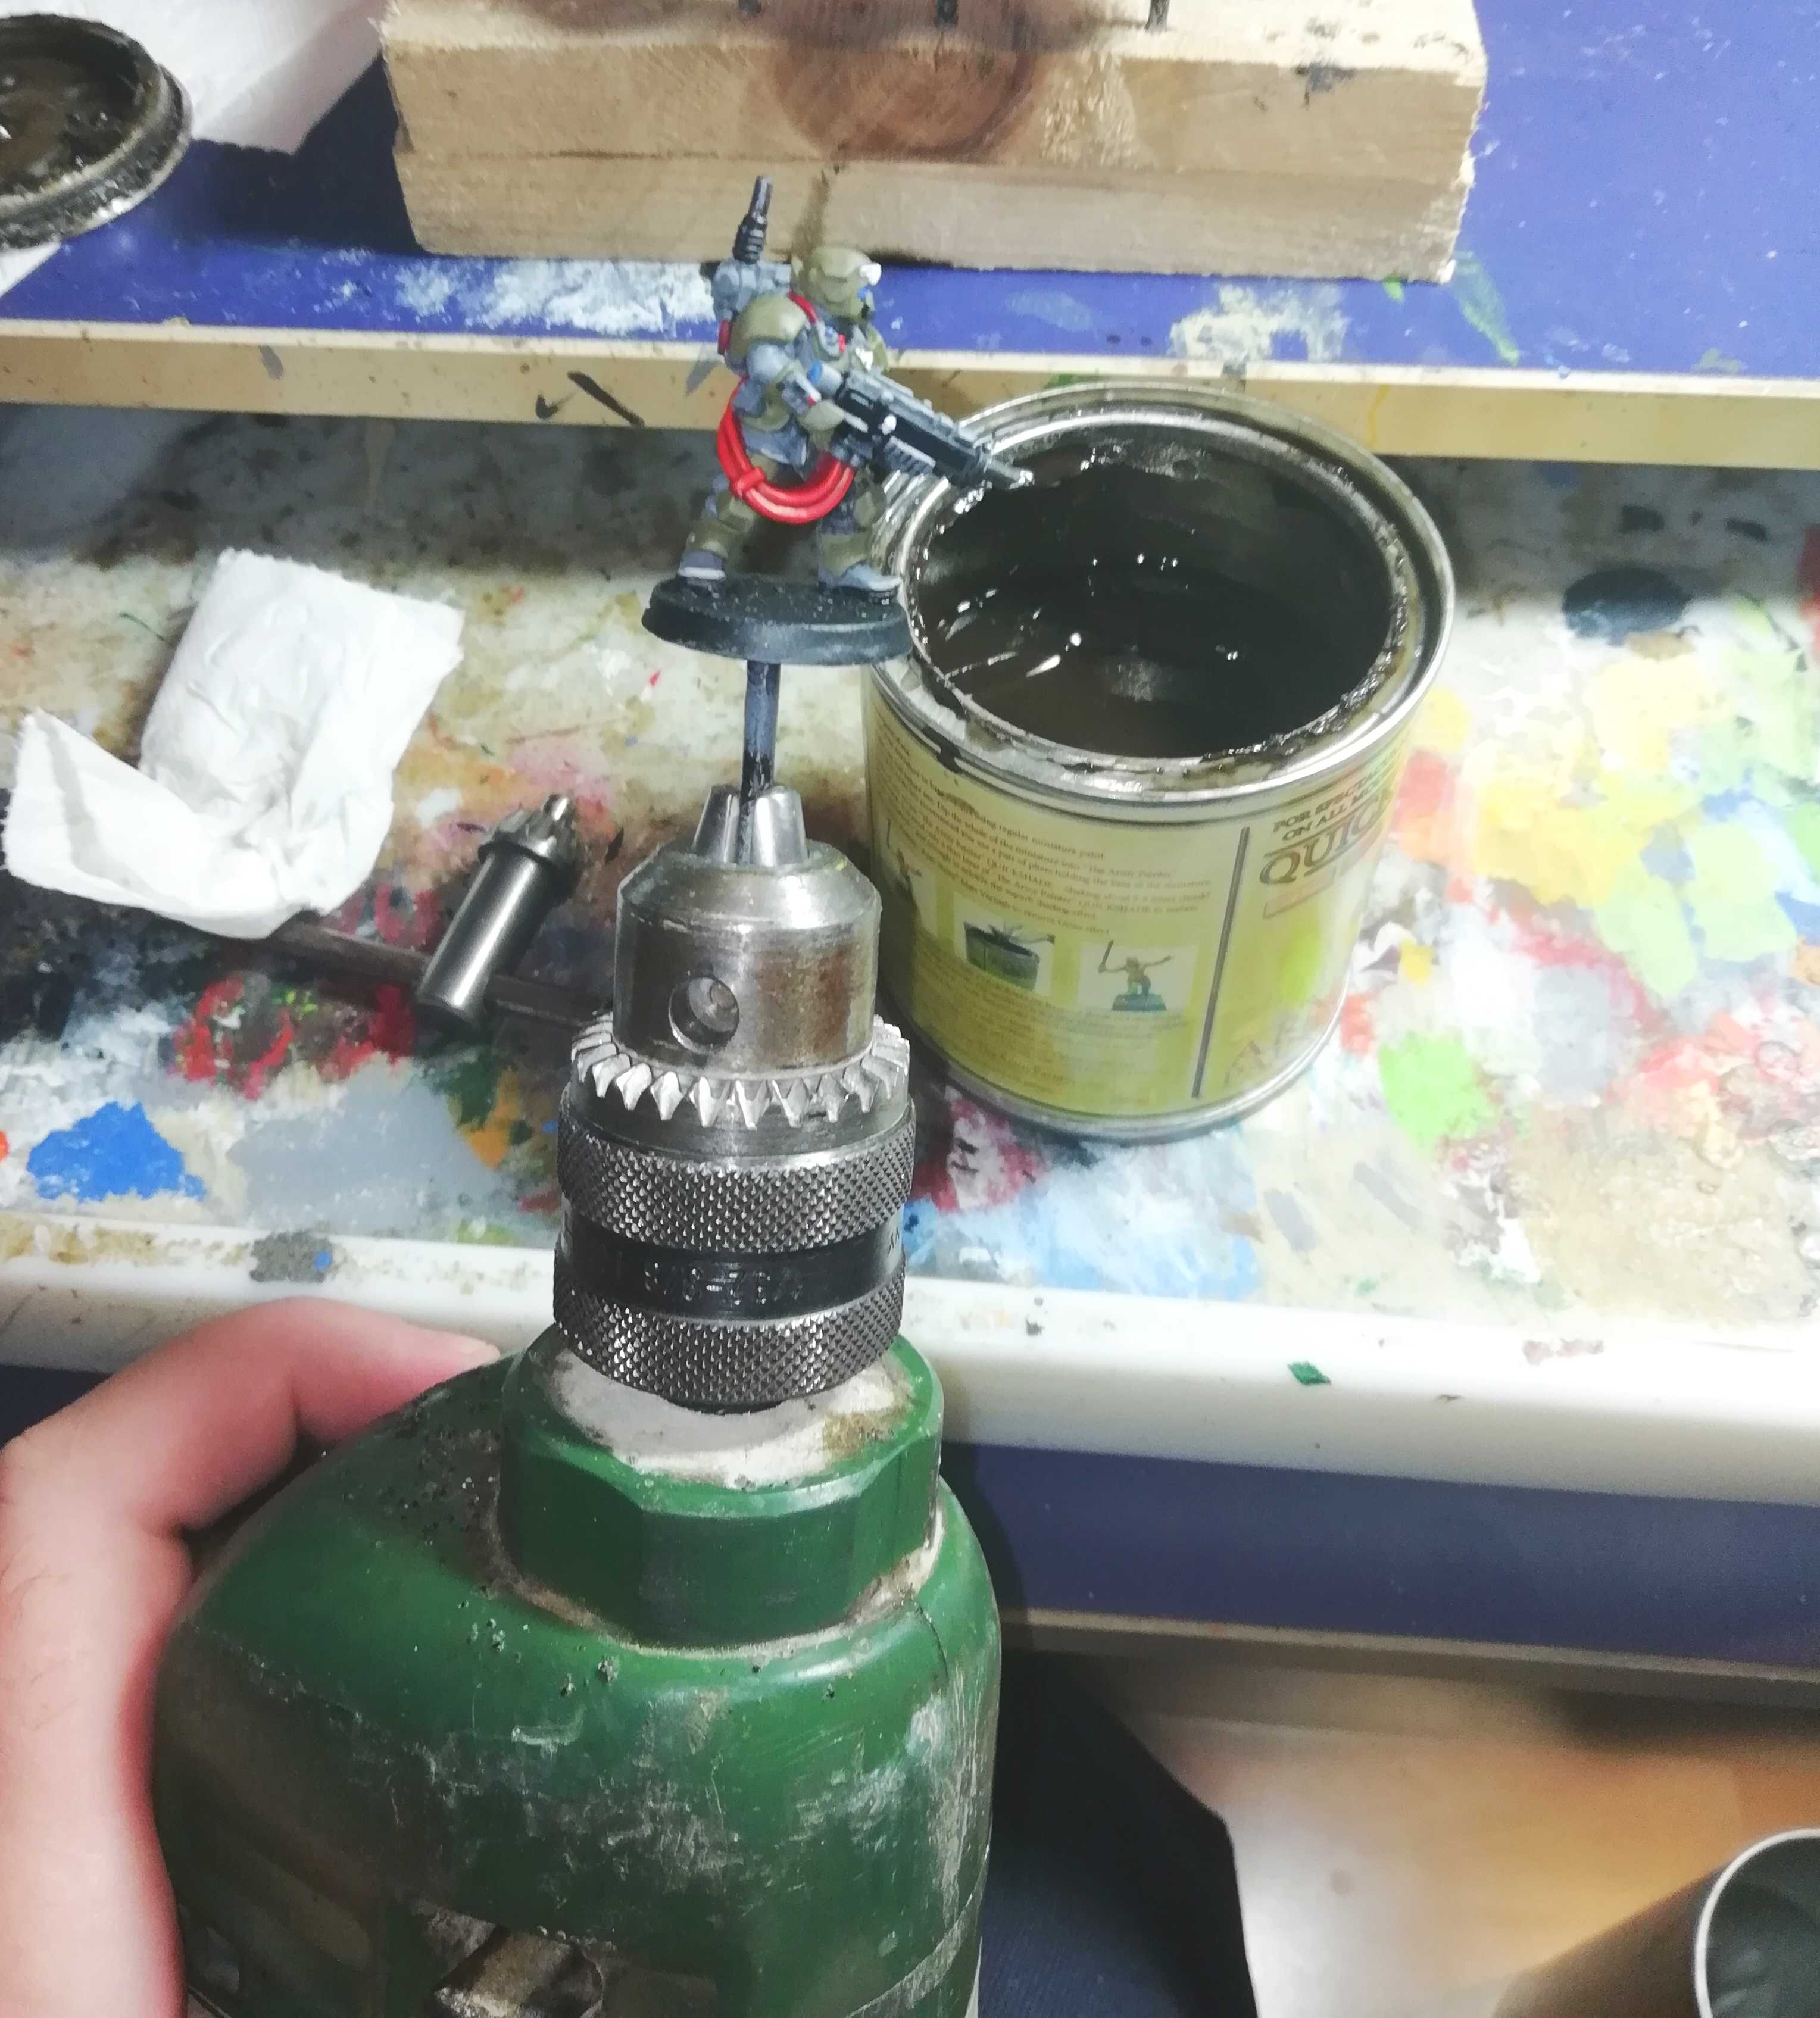 Glue mini on nail and span the nail onto a drill
 Dip the entire mini into the tin with Dip
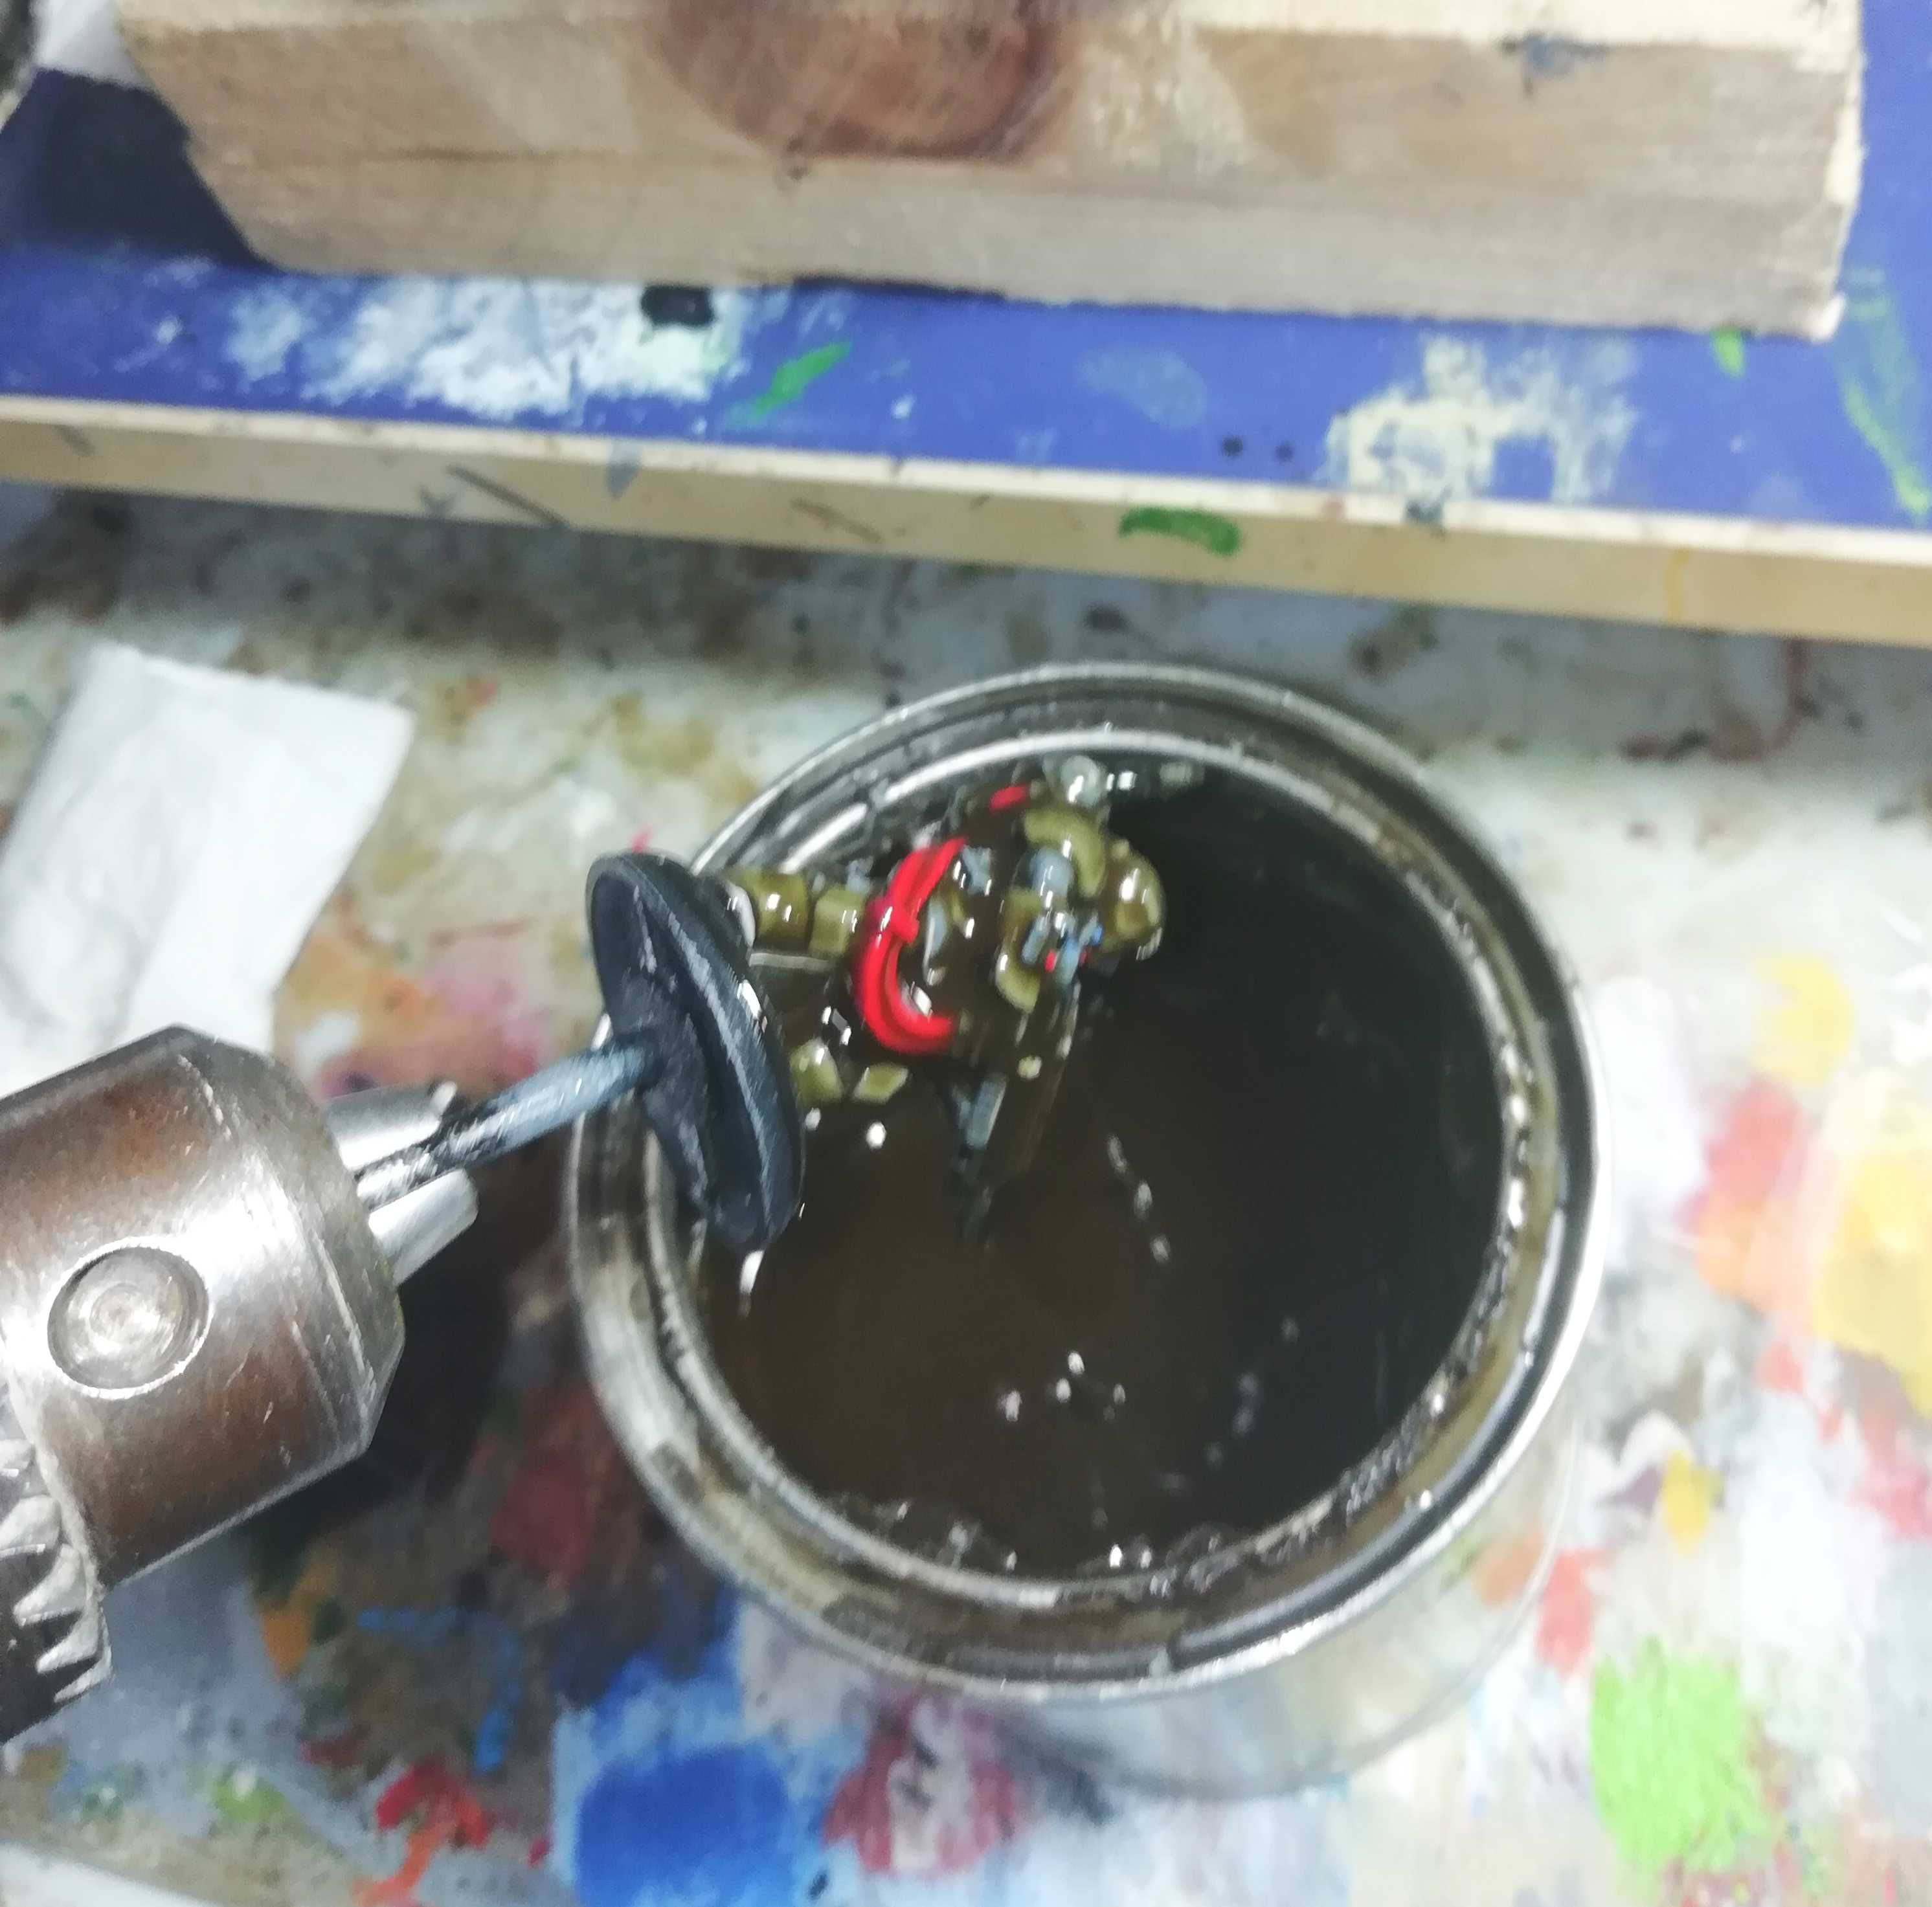 Let it drop of
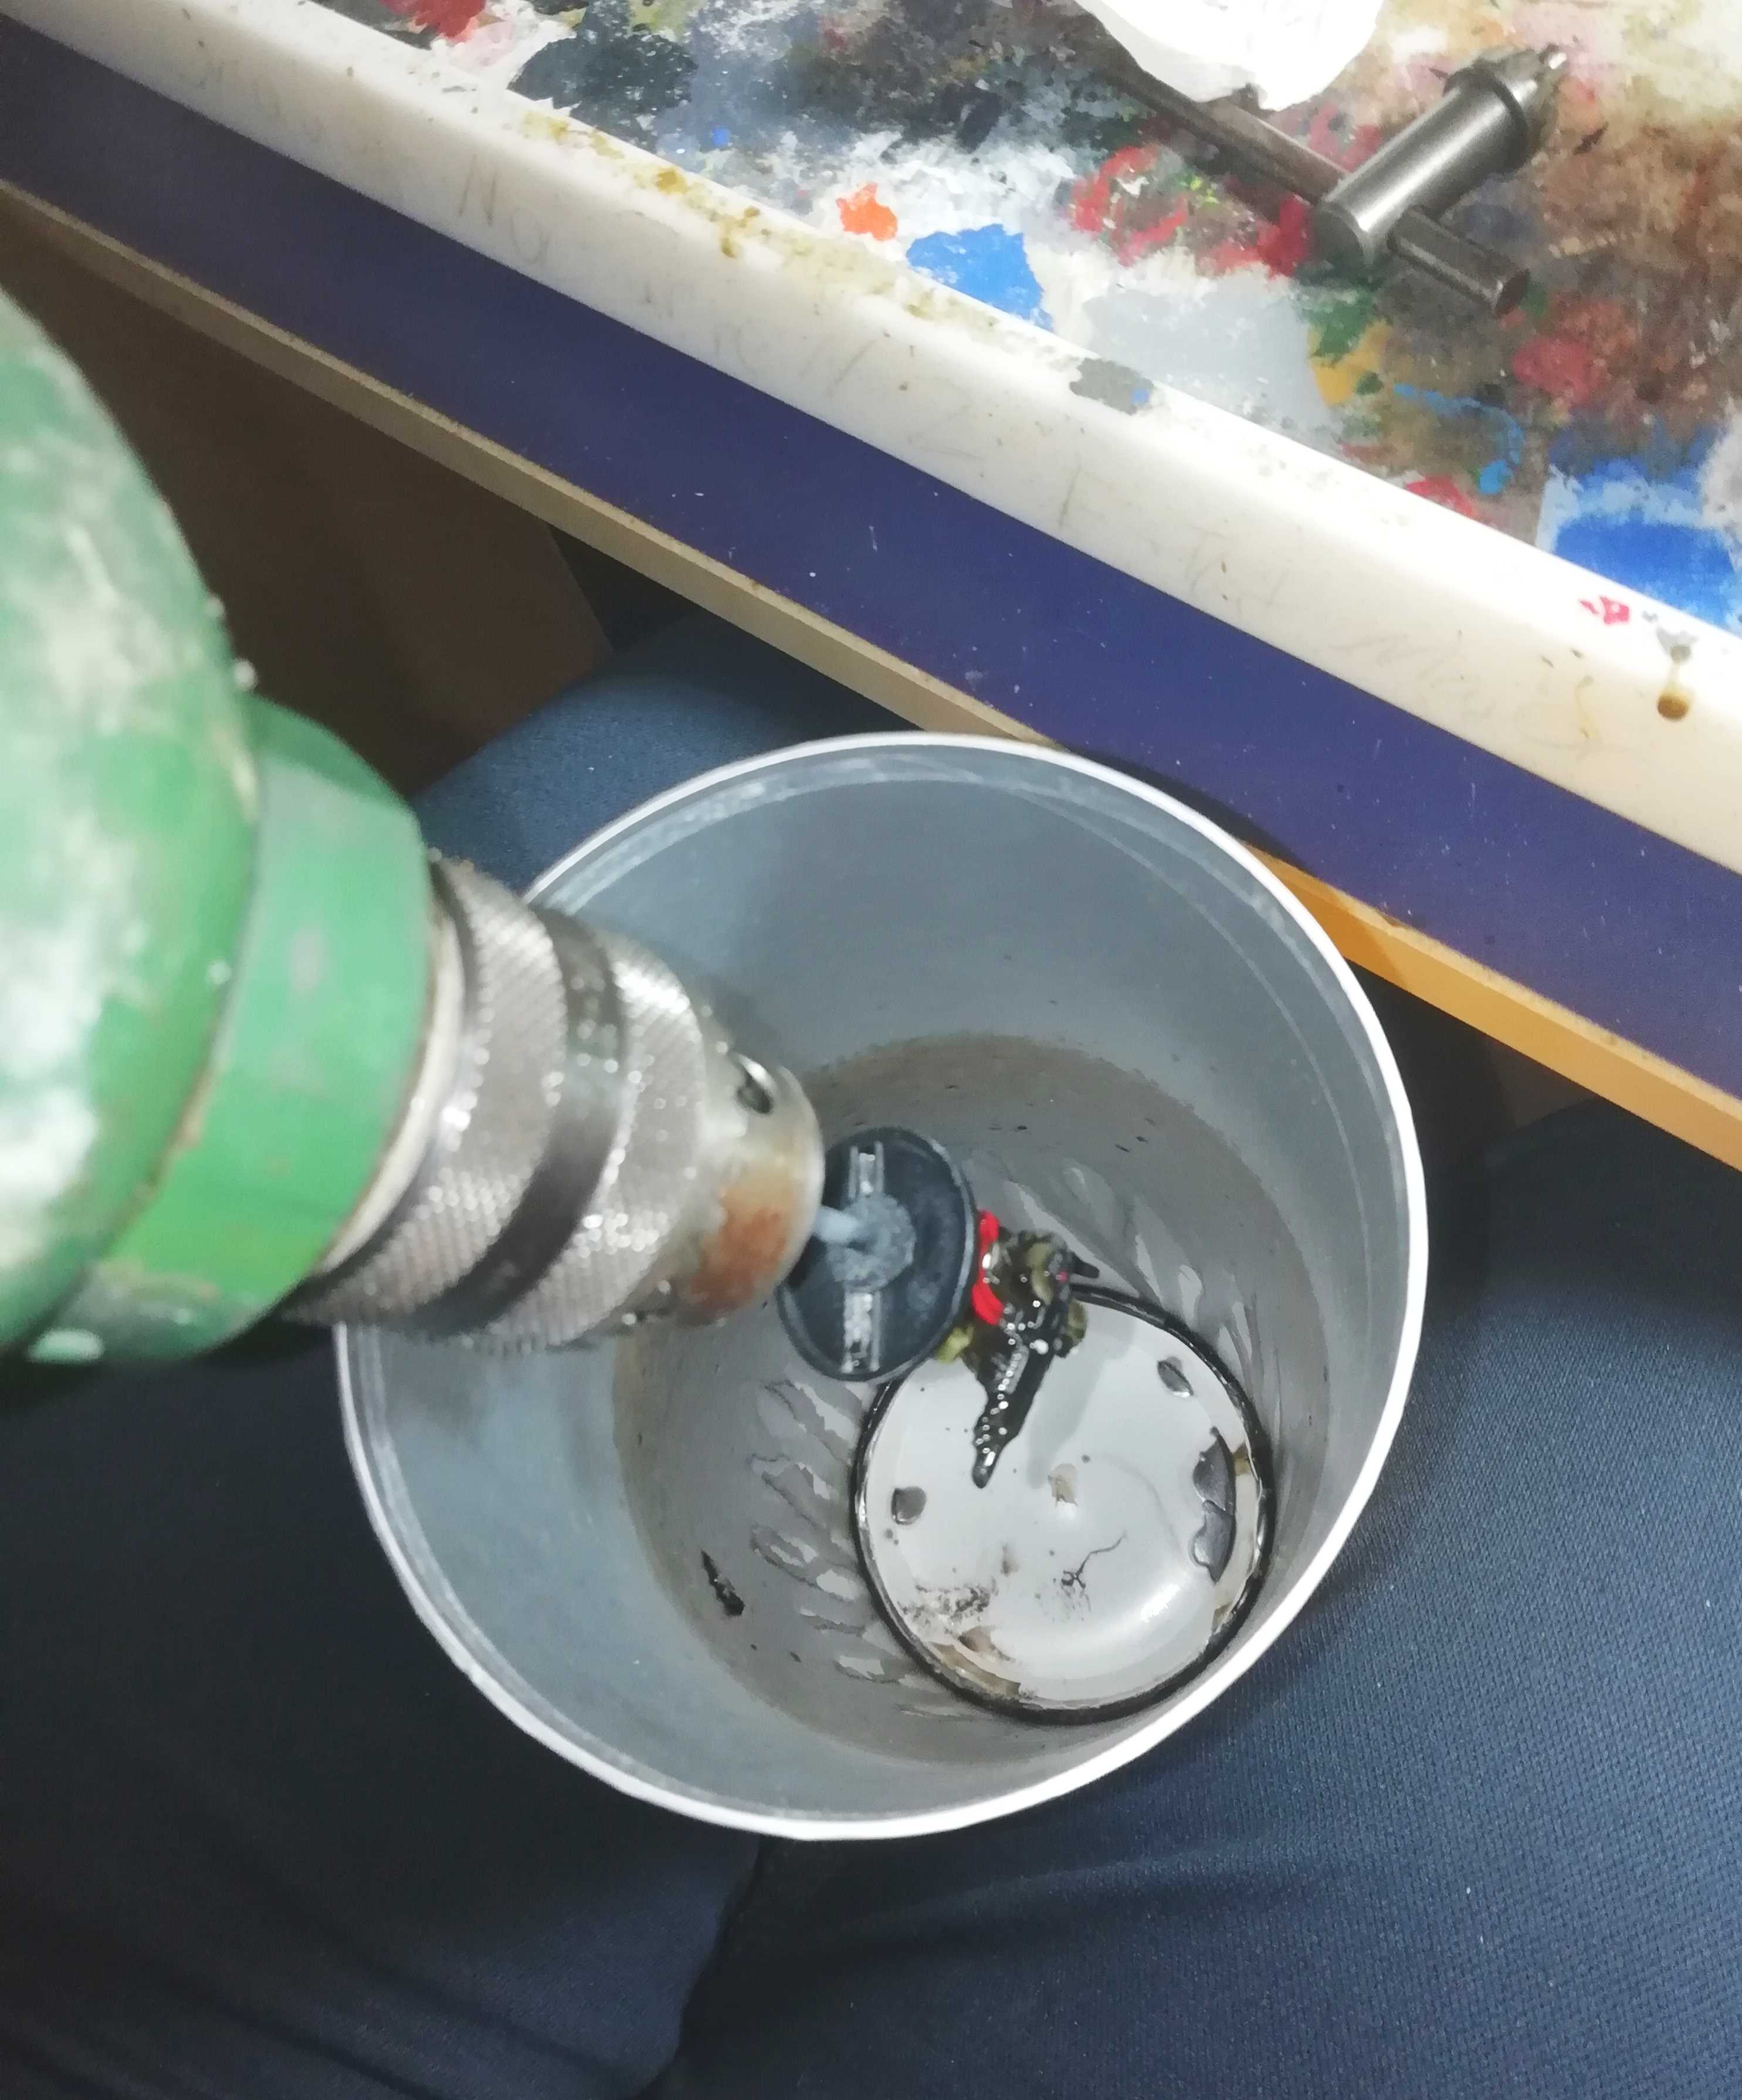 Hold inside round container and hit maximum rotation for a few seconds
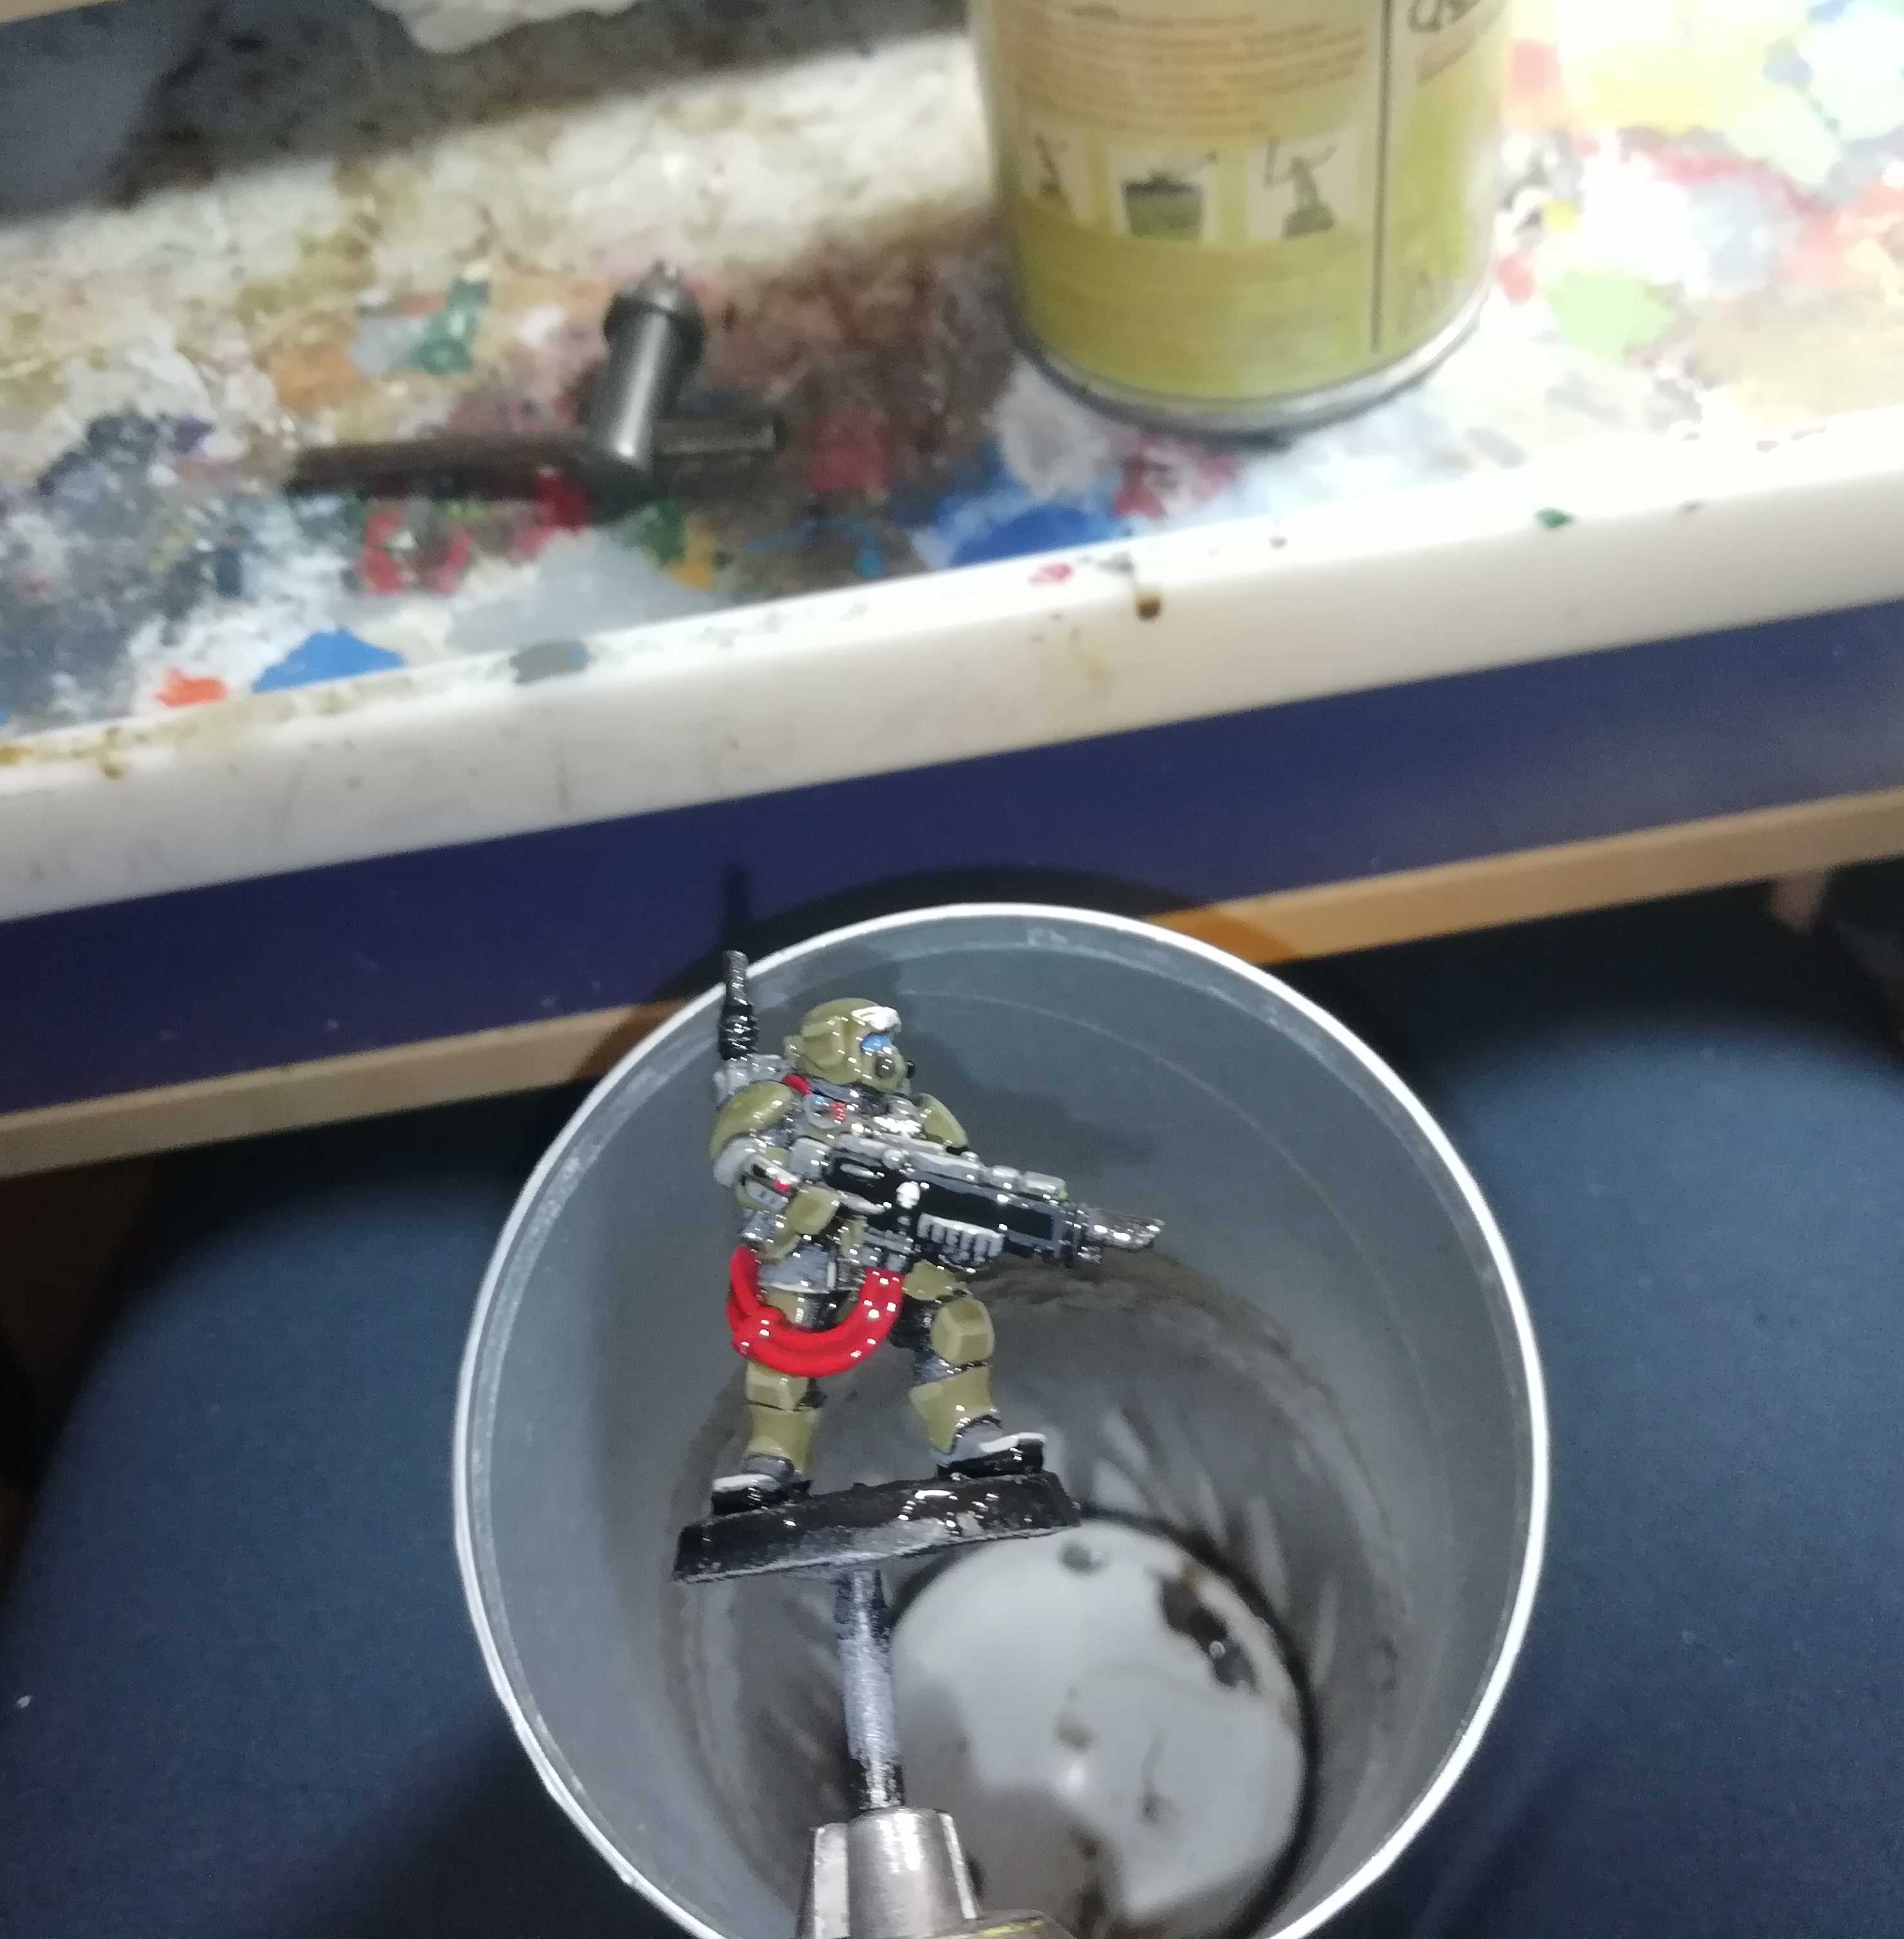 Mini is dipped :D
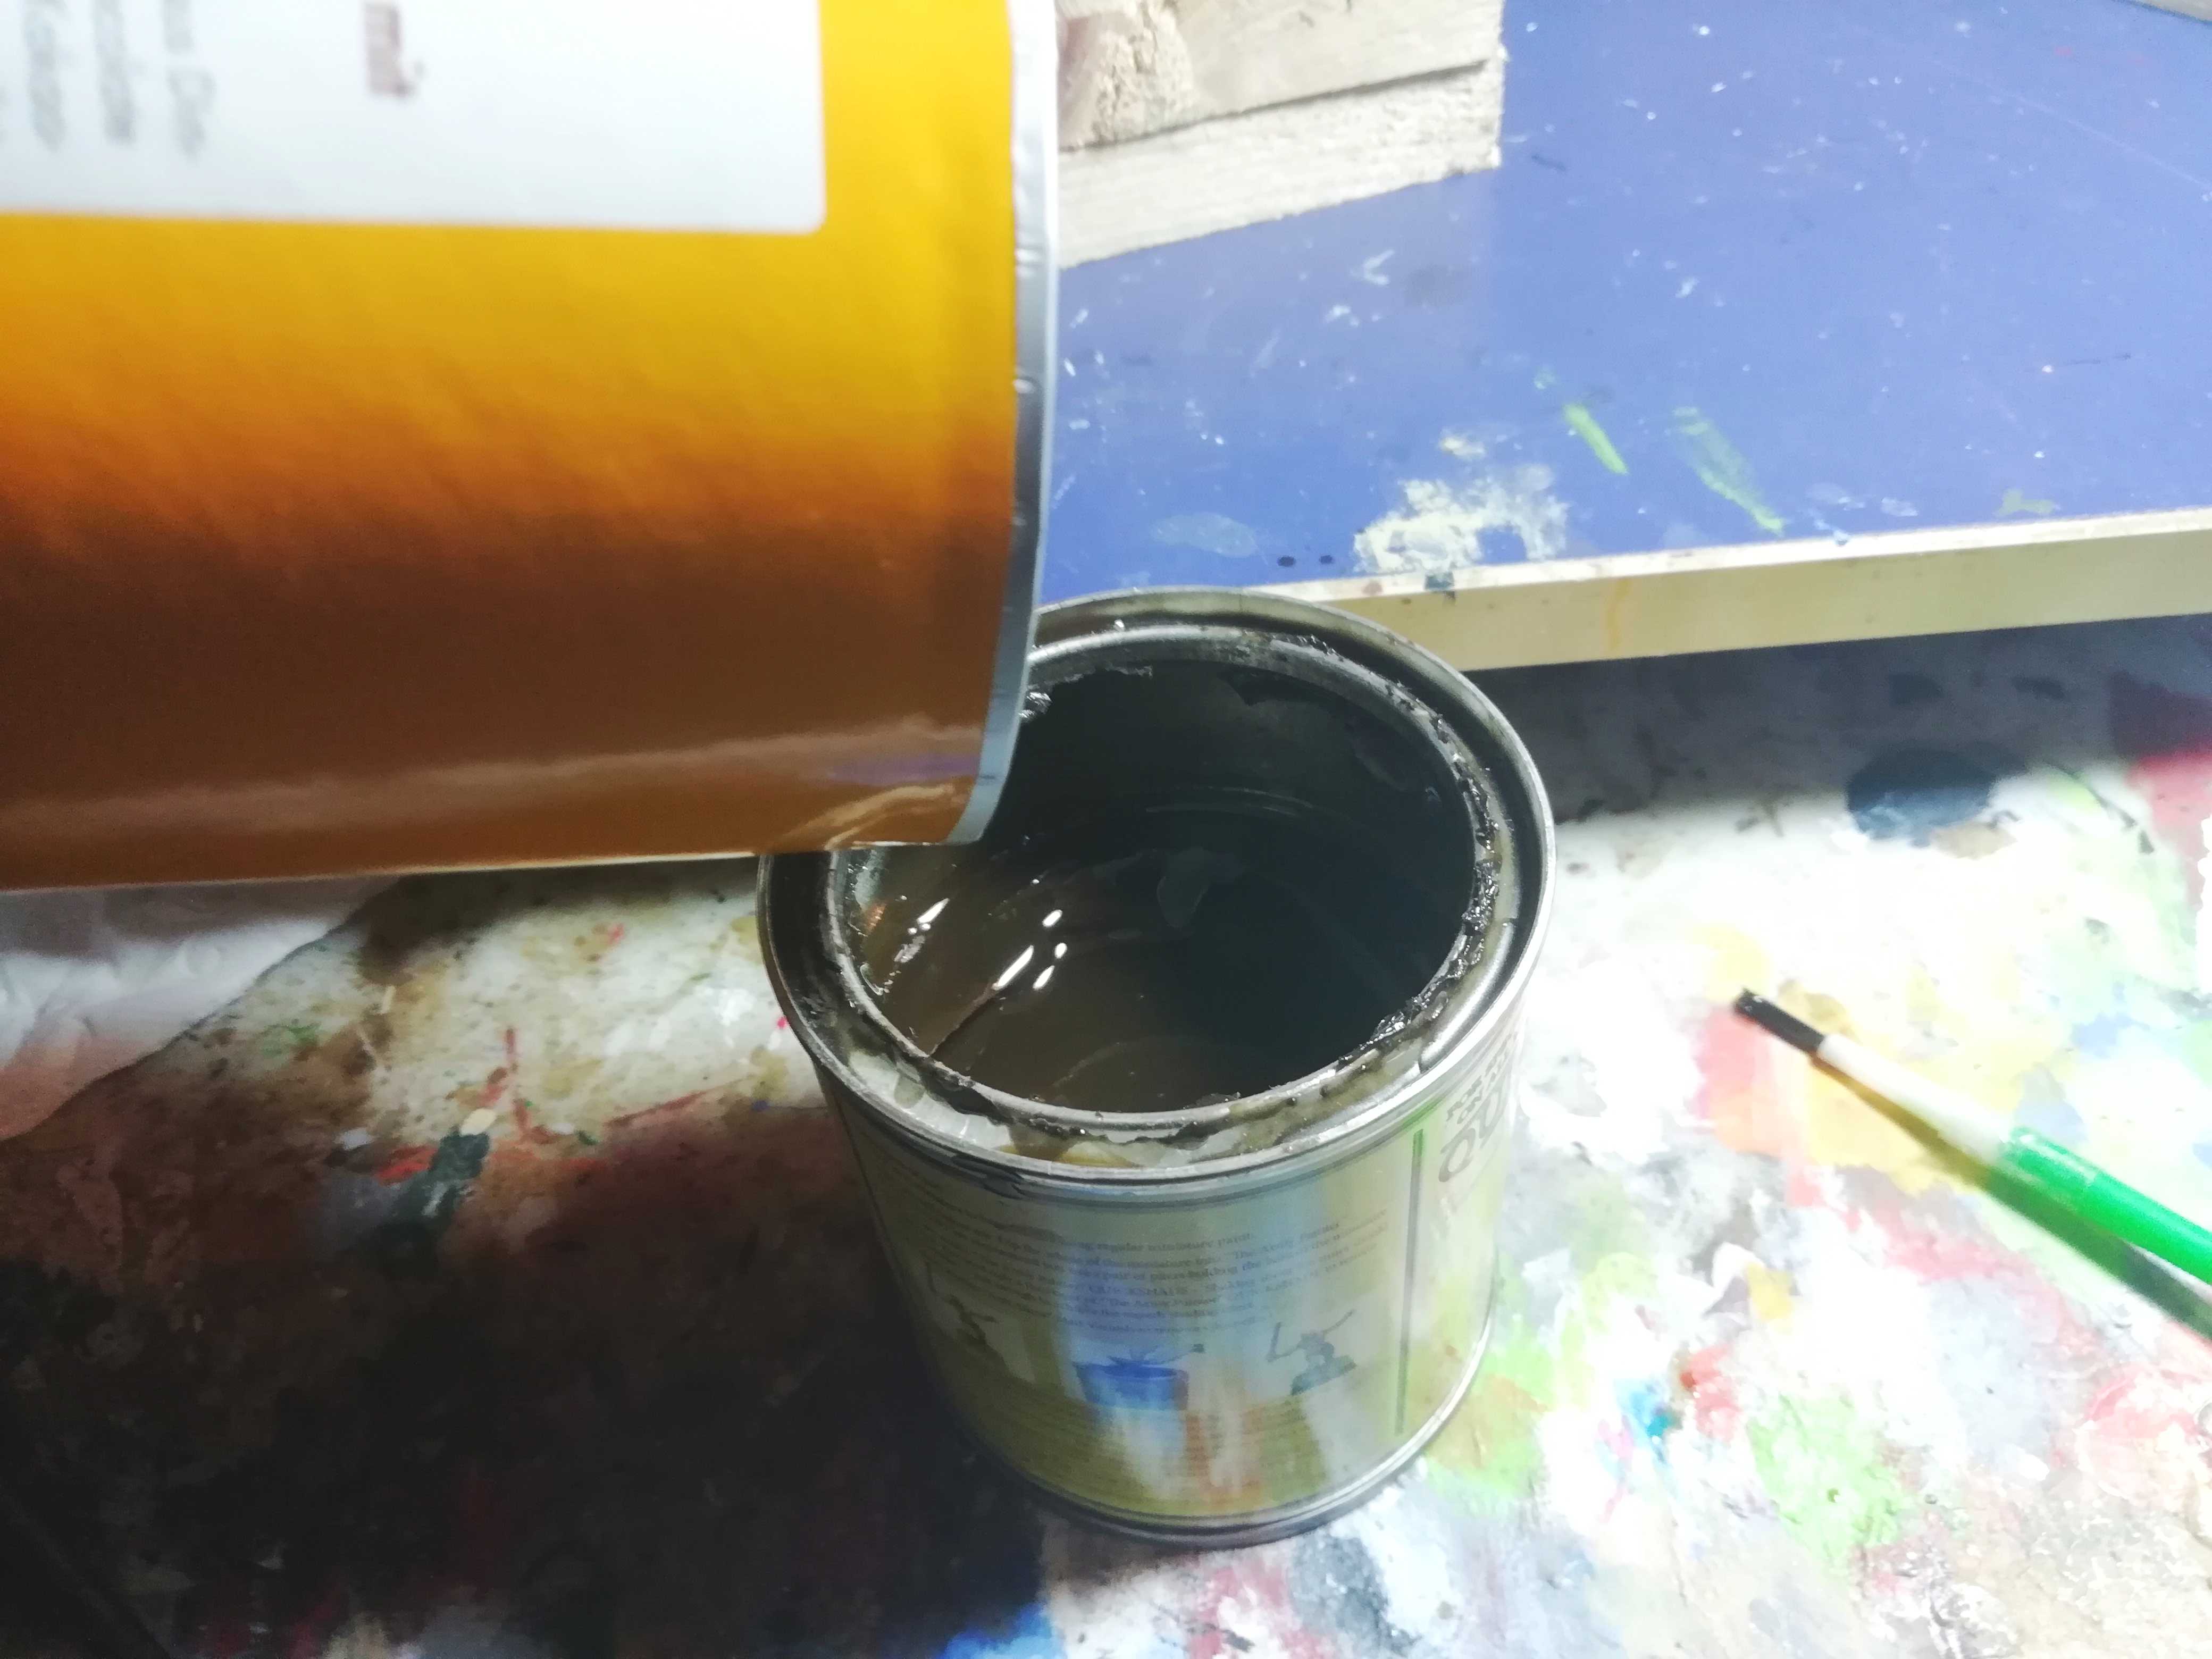 At the end just pour excess dip back into the tin
So. That finishes the Saturday for me. I spent today 10h 19m painting, dipping and decaling. Bringing me up to a total time of 20h 10m since priming. It took me longer to get here, but I am really glad that nearly everything went well until now (besides the short snafu with the decals). But we are not finished yet and will put the finishing touches on tomorrow. Thats Sunday 1800h BST.
I’ll treat myself to a beer now. Or maybe two… or nine… teen. Good Night!
 Everything dipped!


