My Attempt At Painting: Warhammer Underworlds Shadespire – The Tabletop Hub
Recommendations: 51
About the Project
Hey everybody! Sam here, aka MrStainless, aka Sam from the Tabletop Hub. Warhammer Underworlds Shadespire is a game I've been quite curious about mainly because it seems like quite an accessible title. So I thought I'd put together this project to help you get inspired and motivated to paint your Shadespire Miniatures! The 'My Attempt At Painting' series is a series for the amateur and beginner painter out there, I'm still a fledgling painter myself but hopefully by watching these videos and posts it'll help you progress on your journey. If I can do it, so can you!
Related Game: Warhammer Underworlds: Shadespire
Related Company: Games Workshop
Related Genre: Fantasy
This Project is On Hold
The Champions of the Sepulchral Guard - Warhammer Underworlds Shadespire
If you want to check out the full painting guide I’ve put together, you can check out the project post here.
S.
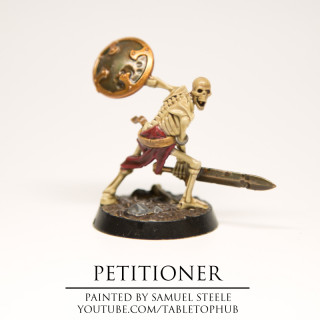
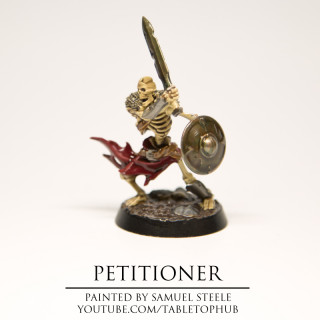
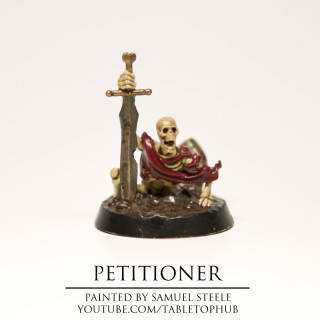
The Petitioners - Warhammer Underworlds Shadespire
If you want to check out the full painting guide I’ve put together, you can check out the project post here.
S.
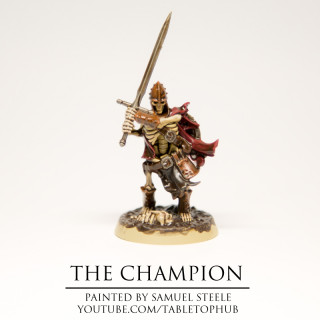
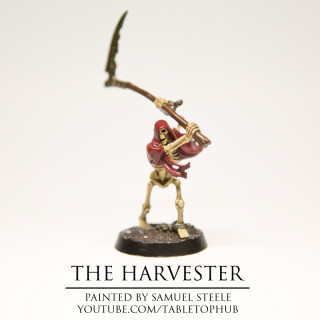
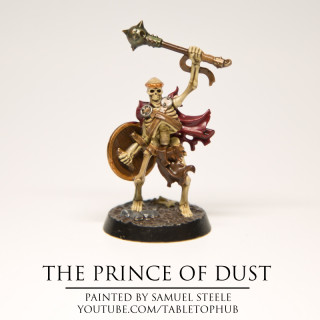
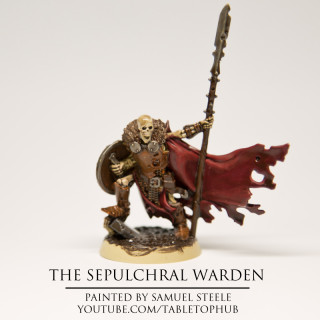
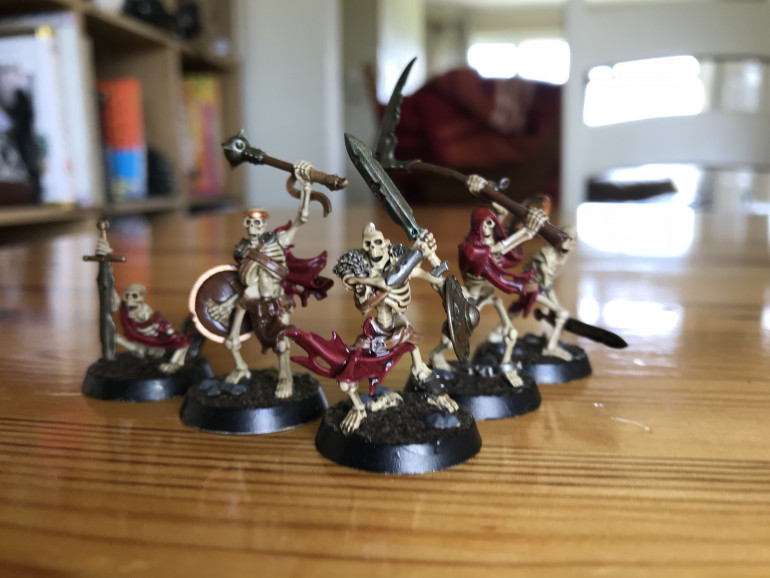
My Attempt At Painting the Sepulchral Guard - Warhammer Underworld Shadespire
Hey everyone Sam here, today I’m going to be attempting to paint the Sepulchral Guard for Shadespire. If you’re new to my ‘My Attempt at Painting’ series, it’s basically my attempt at painting some mini’s in the hopes that it’ll inspire you to pick up a brush and get painting. I wouldn’t call myself an experienced mini painter by any means and my hope is that no matter what skill level you’re at that you watch this video, read through my tutorial and think, well if this guy can do it, so can I.
So with that said let’s get stuck in. To begin with I actually gave the entire warband an undercoat of Army Painters Skeleton Bone, because the skeleton makes up so much of the mini this really just saves you a ton of time as opposed to undercoating in black.
Next I wanted to get to work painting the cloak and cloth work that are so predominant on these mini’s, so I took some Army Painters Crusted Sore, added a little bit of water and gave it a thin coating. I’m trying to water down my paints more rather than just applying them straight out of the bottle and although you’ll find you need to add an extra coat or two it really helps give you a nice, even, streak free look.
Next I took Army Painters Oak Brown and painted the shields that any of the troops had that looked like they were made of wood. I equally used Oak Brown to coat the straps of the mini’s and the spear or pike shaft that the main hero skeleton wields.
At the moment I’m trying to experiment a little more with non-metallic metals or NMM, it’s something I dabbled with when I painted my Super Mutant for Fallout Wasteland Warfare, you can check that painting guide in another of my projects here, but I wanted to do the same thing here with the breastplate of the skeletal guard. The shields of the mini’s I still painted with Gunmetal but here, because it’s so predominant I actually used Army Painters Dungeon Grey. Once that had dried I then took some Army Painters Dry Rust effect paint and grabbed my stippling brush and just dabbed and scraped the effect paint onto the appropriate areas like the breastplate and greaves. Once I had got the effect paint onto the areas I wanted it on I then took a dry brush and just brushed these areas down to smooth the effect paint into place and just thin it out a little.
For the chainmail on the main hero here I actually used Army Painters Weapon Bronze and then added some Gunmetal as a top layer just to make it look like the chainmail was a bit more rusted and worn.
For the base I painted the dirt with Army Painters Dark Stone and then painted any rocks or boulders that were on the bases with Dungeon Grey.
Once I had the miniatures painted I then just went back and tried to cover up any mistakes of where paint had gone where I didn’t want to and especially repainting some of the bones from where the reds of the rust had accidentally went over them. Once I had done that and tidied them up a little it was time to add some Quickshade.
Now it’s been a few tutorials since I’ve used Army Painters Quickshade and while I wouldn’t recommend it for high detail mini’s, in this case with the Sepulchral Guard it seemed to make sense. So I got some Strong Tone Quickshade and gave the Sepulchral Guard a generous coating, making sure to go back and remove any excess pools with my brush. If you’ve never used Quickshade before it’s kind of like a cheaters method of getting easy highlights and shadows while at the same time adding a really great protective coating to your mini’s.
Once this had been left to dry for 24 hours I came back to the mini’s to add some simple edge highlighting. Now this is something I haven’t done on a miniature successfully before so this was a little daunting but I took some Army Painters Vampire Red and added this to the highlighted areas of the cloak and cloth work. I didn’t want to highlight the entire mini just in case I completely cocked it up so this time I chose just to focus on the cloth work and highlight there and thankfully, I can safely say that it came out well and really did add a nice accent to the clothing.
All that’s really left to do now is add some matt varnish to the warband and they’ll be ready for the table, but folks that is it, this is a really simple paint scheme and it gives a really nice look to the miniatures and I hope you’ve found it helpful.
Hopefully it wont be as long before I get my next guide out but expect some high-res images of each of the warriors in the warband very soon!
New Warband Tutorial On The Way!
Hey everyone,
Apologies there haven’t been many updates recently things have been very busy and I’ve been incredibly slowly working my way through my next warband, the Sepulchral Guard. I’ve only got two mini’s left to paint and they’re also the two mini’s I’m using to create the video portion of my painting guide. Hopefully it’ll be with you all very very soon!
Community Spotlight - June 2018
Wow! Thanks to the BoW team and for all of you for choosing my Shadespire Farstriders for the Community Spotlight for June. I’ll be honest, since joining the site I’ve always looked at the Community Spotlight with admiration for the talent of hobbyists that’s displayed and equally seen it as motivation to improve my skills to perhaps one day be selected so thankyou!
As I said we’ll have more warbands painted up to show you all soon!
S.
Farstriders Photo Gallery
Hey everyone, Sam here, so as always now that the paintwork is done I thought I’d upload some images of the final product so you can see it in greater detail.
I’m currently working on the Sepulchral Guard warband and will hopefully have a painting tutorial coming your way at some point soon but in the meantime enjoy!
Hey everyone, Sam here from the Tabletop Hub and today I’m back with another painting tutorial where I try my hand at painting the Farstriders from Warhammer Underworlds Shadespire. For those of you who are new to the series, I’m not a professional painter but I’m on a journey and I’m getting better and always learning new things, my hope is that through these painting tutorials you’ll also pick up a few new ideas and equally be inspired to pick up a paintbrush and go paint some mini’s.
First off I gave all three miniatures a zenithal undercoat just so I could pick out the highlights and shadows more easily when painting the miniature, we’re going to be focusing on the paint job of one miniature in this video but I’ll touch upon the different finishing touches I added to all three at the end.
To begin I mixed some of Army Painter’s Gunmetal and applied this to all of the shadowed areas of the armour on the miniature.
Once this was done I took Army Painters Plate Mail Metal and applied this to the highlighted and mid-tone areas of the armour, don’t worry if some areas need more than one coating, we aren’t in any rush and it’s better to add a few thin coats that layer on a couple of thick coatings and cover up some of the more intricate details of the miniature. At the areas where the shadowed layer and the highlighted area met, I just blended the two layers together as best as I can, for this I find that just having little to no more paint left on your brush is best. Personally I didn’t want to wet the brush to do this just because I felt it might be too much but just a blend did the trick.
Next I got some Army Painter Oak Brown and added some Matt Black to the paint to give it a really rich dark look, as you’ll see I had painted on some Leather Brown previously but it just wasn’t dark enough and I wanted my paint scheme for the Farstriders to be more of an aged and rugged medieval look with hints of regality. This darker tone really worked well when offset by the gold and metal that we’ll see later on.
I used this same brown mixture to paint onto the shadowed ares of the Farstriders cloak both on the fur at the back and the lining on the inside. For the highlighted areas of the fur and cloak I instead took some Army Painter Leather Brown and added a dash of Matt Black for the same effect and just to bring down the lightness of the brown by a shade or two. Again much with the armour, I blended the two layers of brown together to make them fade between one another and I think it gave it a really nice look with a very simple technique.
Next I took some Army Painter Greedy Gold and painted the decorative parts of the armour, now I actually applied a lot more gold to this first miniature which I think in the end was too much, for the other two Farstriders I actually stripped it back a little bit which you’ll see. I think when it comes to the gold less is definitely more, but the main chest piece, the little lightning bolts on the knees, cloak lining and shoulder as well as some of the feature of the helmet and belt buckle all look really great when painted.
For the plume of the helmet I took some Army Painter Deep Blue and accented this on the highlights with Army Painters Crystal Blue. Again you may find that they need a couple of coatings but don’t worry, just leave it to dry and come back for another coat until you get an even finish.
I actually used these two colours to paint the sword and melee weapons of the Farstriders using the same technique of Deep Blue on the shadowed or darker areas, Crystal Blue on the highlights.
For this soldier I used Greedy Gold and Oak Brown for the crossbow however I switched this up and used Gunmetal and Oak Brown for the other Farstriders which in the end I actually preferred, again it was all about balancing out the amount of gold used for me in the end and I felt like using Gunmetal here instead of Greedy Gold just complimented the warriors better.
Then we were onto the base, for the broken tree stumps I used the same technique and mixture we used for the Farstriders cloak, Oak Brown and Matt Black for the shadows, Leather Brown and Matt Black for the highlights and went over the stump and the roots with these two paints making sure to blend them together where possible, this just gives a really nice effect when it’s dried and the way the colours faded into each other was really nice.
For the slabs I used Army Painters Dungeon Grey for the slabs in shadow and Ash Grey for the slabs in the highlighted areas, now if you use the same paints the Ash Grey may look quite bright but once we add an ink at the end remember that that’ll bring it down a tone or two. This is always something to remember when you’re painting, especially if you are using Army Painters quick shade or a dark ink that although it may look a little bright now, what you add later will bring it down a shade or two so you’ve always got to be thinking ahead to the final product.
For the dirt I gave it a base coat of Leather Brown just to fill in the colour then to add some texture to the bases I got some of Vallejo’s mud-in-a-tub as I like to call it and added Brown Earth texture to these dirt areas, one thing I will say is that this dries quickly so if you make any mistakes you’ve got to act fast to get them wiped away. As you can see I used quite a wide dry brush to apply this so make sure to give your brushes a good clean afterwards as you will have little bits of grit in it. I would equally recommend you change your water after cleaning you mud brush as you don’t want that grit getting into your brushes and affecting the rest of your painting. Once this was all done though I ran my thumb around the base edge and just rubbed or picked off any excess mud.
Once this was complete I took some of Citadel’s Nuln Oil and applied this Ink generously to the entire miniature, this just seeped into all of the little cracks in the miniature and really added a nice punch to the overall look of the Farstriders that I was really impressed with.
With regards to the other warriors, for the Farstriders champion I used Army Painters Electric Blue to colour in his little orb attached at his waist.
For the eagle or hawk he has on his shoulder, I painted the shadows of the eagle Oak Brown, the highlights Leather Brown and the breast Bonewhite from Vallejo. I wasn’t overly pleased with my paintwork for the eagle but it was the first time I’d painted an animal like this so I had to cut myself a little slack.
But folks that is it, that was my paint choices and techniques for painting the Farstriders from Warhammer Underworlds Shadespire, what do you think?


