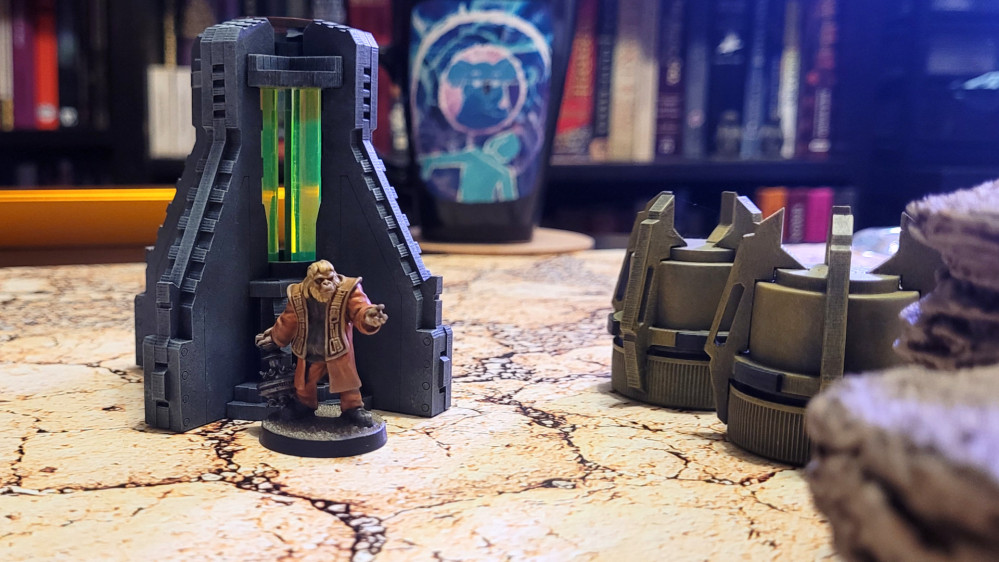
The Log of the E.C.V. Achilles
Space Apes vs. Sleazoids
For our first game of the year we’ll be playing the Pitched Battle scenario, with the Space Apes acting as the defenders and the Sleazoids as the raiders. Apparently the Sleazoids need apes for their zoo…
Star Schlock is played over four rounds, with victory points awarded throughout the game based on how many objectives you control, plus points for destroyed and routed units at the end of the game. Additionally, in this scenario the defenders get an extra victory point for all of their non-routed units still in play at the end of the game, and the raiders get +2 victory points for each unit they have captured.
For this scenario, all the units on the raider’s side are given the ability to capture any unit they destroy or rout. The risk is that the captive has to be escorted for the rest of the game — the captor’s movement is limited, and if the captor is destroyed, the captive unit goes free and re-enters the battle.
We’ve arbitrarily decided to play a 600 point game (a starter game is 500 points). I’ll be playing the Space Apes force from the starter set (Ape Officer, Gorilla Grunts, Doctor Zayce, and MONGO-RILLA), plus the BABOOMS! because why would you not use a rabble of lower primates armed with high explosives, given the chance?
Since these units come up a little short of 600 points, I’ll be using a few strategy cards, which provide either one-time or ongoing game effects: King of the Mountain, Reinforcements, and Strafe.
My opponent’s force consists of the Sleazoid Marauders and Overseer, along with some hired help in the form of The Man Hunter and Star Raider Nilo. In addition, she’ll have a few strategy cards of her own: Inspirational Speech (probably more of a scathing tirade in this case) and King of the Mountain.
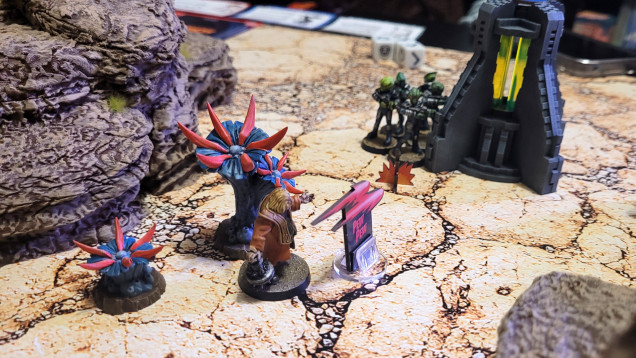
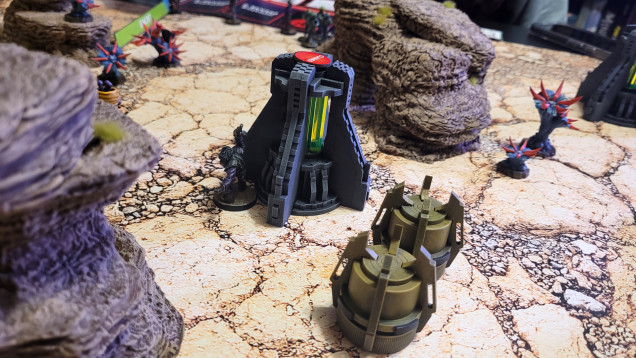
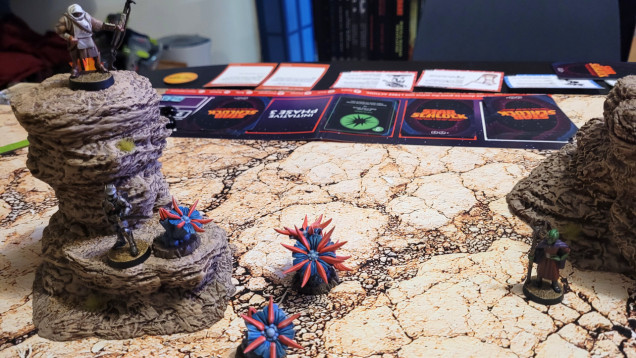
We’ve set up a 3×3 desert planet using some of the terrain I put together for TerrainFest. Star Schlock divides the board into four sectors and has fairly specific rules for where to place the three objective markers (we’ll be using power generators for those). The rest of the table is a good mix of desert rock formations and weird alien plants.
Round One
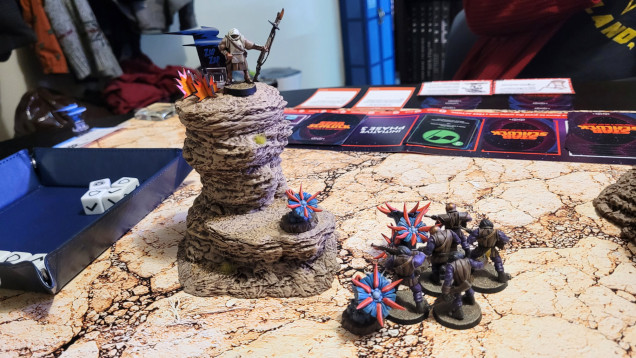
As with most wargames, the first round is mainly positional. We both have the King of the Mountain strategy card, which allows the player with a unit in the highest elevated position to draw an extra card at the end of each round — drawing extra cards is vital in this game — so my opponent rushes the Man Hunter and Nilo to the nearest rock formation in order to seize the high ground. Since she’s got such a head start, I decide not to worry about it and just rush as many objectives as I can, which also award extra card draws. I take control of one with my Ape Officer and another with my group unit of Gorilla Grunts.
My opponent is able to take control of the third objective with her Sleazoid Marauders, so I start moving Dr. Zayce in to see what he can do about it. She then moves the Sleazoid Overseer to the center objective to try to wrest control of it away from my Ape Officer. Meanwhile I send the Babooms! to try to knock Nilo and the Man Hunter off of their perch, and Mongo-rilla to back up the Ape Officer.
At the end of the round I score 5 points for my two objectives, and my opponent scores 2 points for her one.
Round Two
Things really escalate in round 2, and we start to see how the card economy works in this game.
Each player starts with a hand of three cards. Each turn you choose one card to play — cards have a level, either 2, 3 or 4) and a type of command. Then you choose a level of unit, activating all of your units of that level. If the card you played matches the level you are activating, each unit gets three actions. If it doesn’t match, the units only get two actions each. If the unit has already activated in this round, they can activate again, but they only get one action. After you play a card you draw one to replace it, so in theory you always have three cards in your hand, except…
When one of your group units is hit by an attack, they take a casualty, which means they lose one of the models in the unit. No problem, each group unit starts with five models. But when a character unit takes a casualty, they die UNLESS you play a card from your hand as Plot Armor. This saves the character from dying, and also gives them +2 dice for all subsequent attack rolls and stat tests (used for things like scaling walls or rallying after being routed), but never for defense rolls. Each character can only have as many Plot Armor cards as their level, so it won’t keep them on the table indefinitely, but it certainly helps, and the bonus to attacks and tests keeps the game moving.
Here’s the catch: when you play a card as Plot Armor, you don’t draw a replacement, which means your hand size starts dwindling. If your hand is empty when it’s your turn to play a card to activate your units, you blindly play the top card of your deck, which of course limits your tactical choices. Plus if you don’t have any cards in your hand, you can’t play them as Plot Armor. So you really need to control the objectives in order to keep a healthy supply of cards.
The Ape Officer and the Sleazoid Overseer get into a melee scuffle which results in the Overseer being routed — he has to move towards my opponents edge of the map until he makes a successful Will test. He manages to shake it off and turns around, so I have Mongo-rilla give chase. Unfortunately I’ve stumbled into a kill-zone.
Star Raider Nilo has a high position, and to make matters worse, he gets a damage bonus when attacking at long range. I have very foolishly moved Mongo-rilla right into his line of fire. I am able to take out the Overseer, but my opponent retaliates by killing Mongo-rilla — both are level 2 and can only carry two Plot Armor cards, after which they’re toast.
The Babooms! are able to keep Nilo and the Man Hunter pinned (a sort of temporary damage that limits the unit’s effectiveness) with the help of my Strafe strategy card, which targets all the models in two entire sectors of the board. and the Man Hunter has some Plot Armor on him.
Once you spend an action to take control of an objective, you retain that control until your opponent takes it away from you. Since the action is nowhere near the objective they’re guarding, I move my Gorilla Grunts across the board to back up Dr. Zayce. After some back-and-forth fire, the Sleazoid Marauders are routed and make tracks for their deployment zone.
Round Three
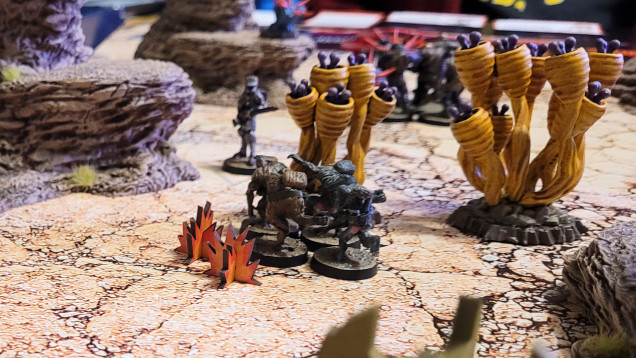
The Babooms! are hiding in a cluster of alien plants, well hidden and maddeningly too close for the Man Hunter to make good use of his free reroll on long ranged attacks. Their bonus from cover is better than his bonus for the high ground, so my opponent reluctantly moves the Man Hunter down from his desert rock to get a better shot. He moves in close and is able to rout the Babooms! — they’ve got several pin tokens affecting them, and that combined with the Man Hunter’s multiple Plot Armor cards means he’s rolling a 14 dice attack! However, when the Babooms! are routed, they instead explode, dealing damage to everyone within close range. The damage takes out the Man Hunter in a fiery conflagration.
But Star Raider Nilo hasn’t been idle. With a series of devastating long range attacks he manages to take out the Ape Officer.
On the other side of the board, the Sleazoid Marauders haven’t managed to rally from their rout, and they’re inching closer to the edge of the board. Dr. Zayce and the Gorilla Grunts take control of the third objective. Will all three under my control, I’ll score ten victory points and draw three extra cards.
Round Four
Things are not looking good for my opponent. I’ve used my Reinforcements strategy card to bring a destroyed soldier unit back into play, in this case, the Ape Officer. I get to choose which battlefield edge he deploys on, and he’s able to reappear very close to Nilo’s position. The Sleazoid Marauders have routed their way off the battlefield, leaving my opponent with only one unit remaining. Since I’ve got the first turn this round, there’s not much hope for Nilo…
The game ends with a final score of 43 points for the Space Apes and 16 for the Sleazoids. I think the critical turn of the battle was when the Sleazoid Marauders were routed and never managed to rally. Plus most of my opponent’s characters had an advantage at long range, which meant she tended to keep her distance and wasn’t able to capture any of my characters for the extra points.







![TerrainFest 2024! Build Terrain With OnTableTop & Win A £300 Prize [Extended!]](https://images.beastsofwar.com/2024/10/TerrainFEST-2024-Social-Media-Post-Square-225-127.jpg)







Leave a Reply