Skip to toolbar
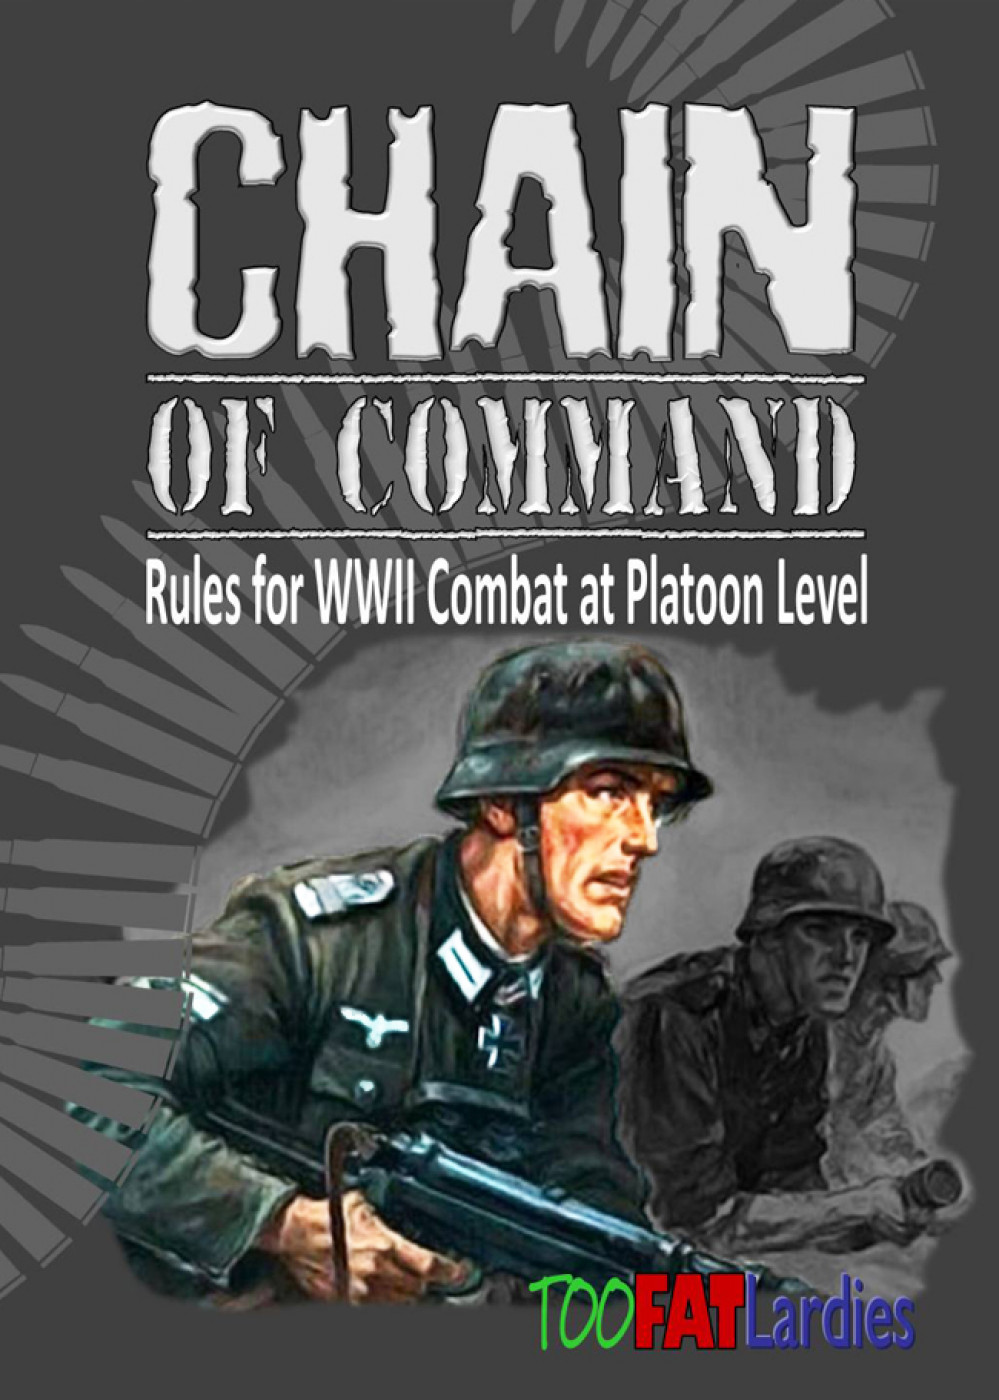
New Chain of Command project - Arnhem 2025

New Chain of Command project - Arnhem 2025

Supported by (Turn Off)

Project Entry by buggeroff Cult of Games Member

Back to Project Blog

"We" had an idea, lets do Chain of Command - Late War Panzergrenadiers

Tutoring 0
Skill 0
Idea 0
No Comments

Creating a Panzergrenadier force for a “Chain of Command” game set during the Arnhem campaign can give you a historical and effective army list. Panzergrenadiers were elite mechanized infantry units of the German army, and during Operation Market Garden (which includes the Battle of Arnhem), they played a key role in the fighting.

Here’s a suggested Panzergrenadier list for Chain of Command with a focus on Arnhem:

Core Platoon (1944 Panzergrenadier Platoon)

Platoon Headquarters:

  • 1x Leutnant (Senior Leader) armed with MP40
  • 1x Senior Leader armed with MP40

Squads (Panzergrenadier Sections x3): Each squad would generally consist of:

  • 1x Junior Leader (Obergefreiter or Unteroffizier) armed with MP40
  • 2x MG42 teams:
    • Team 1: 1x MG42 team (1x gunner, 1x loader, 2x riflemen)
    • Team 2: 1x MG42 team (1x gunner, 1x loader, 2x riflemen)

Each Panzergrenadier section would have a heavy focus on automatic firepower due to the MG42 teams, which gave these squads immense firepower on the battlefield.

Support Options (varied for Arnhem setting)

For support options, you may want to reflect the challenges faced by the Germans during the Arnhem campaign, particularly in terms of mobility and availability of heavy armor. Here are some relevant support options:

Support Options (Common Selections):

  • Sd.Kfz. 251/1 Half-Track (for mechanized transport): Iconic transport for Panzergrenadiers, although less common at Arnhem due to logistical issues.
  • Pak 40 75mm Anti-Tank Gun: To counter the Allied armor.
  • Panzerschreck Team: Anti-tank team that can provide portable armor support.
  • Mortar Support: A light 81mm mortar section or off-table artillery support.
  • Sniper Team: A single sniper can be used to pin down enemy troops.
  • MG34/42 on Tripod: A sustained-fire machine gun for defensive positions.
  • StuG III Assault Gun: A common support vehicle for infantry and excellent in urban settings.
  • Panzer IV: Medium tank, but rare in Arnhem, making it a higher-cost support option.

Tactical Considerations

Panzergrenadiers in “Chain of Command” are a formidable force, especially with their firepower, but they should be used with caution, especially given the historical context of Arnhem where German forces were often stretched thin and under pressure. Defensive positions, ambushes, and leveraging terrain will be key in using them effectively.

Additional

To better tailor the Panzergrenadier force to a specific scenario within the Arnhem campaign, we should consider the historical context and challenges faced by the German forces. In September 1944, the German units in Arnhem were a mix of various formations, including elite SS Panzer units, Fallschirmjäger (paratroopers), and ad hoc formations. The Panzergrenadiers played a crucial role in countering the British 1st Airborne Division.

Here’s an adjusted Panzergrenadier list with the particular challenges of the Arnhem campaign in mind:

Historical Adjustments for Arnhem

  • Limited Resources: German forces, though highly experienced, were under-resourced, especially in terms of fuel and heavy armor.
  • Urban Fighting: Arnhem itself provided opportunities for close-quarters urban fighting, where mobility and combined arms tactics would be critical.
  • Limited Armor: German armor was present but not in overwhelming numbers due to fuel shortages and Allied air superiority.
  • Ad-hoc Units: Due to the chaotic nature of the battle, some German units were hastily formed from available troops.

Revised Panzergrenadier List for Arnhem Chain of Command

Core Platoon: Panzergrenadier Platoon (Wehrmacht, Late 1944)

Platoon Headquarters:

  • 1x Leutnant (Senior Leader) with MP40
  • 1x Senior Leader with MP40

Squads (Panzergrenadier Sections x2): Each squad consists of:

  • 1x Junior Leader (Obergefreiter or Unteroffizier) with MP40
  • MG42 Team 1: 1x MG42 team (1x gunner, 1x loader, 2x riflemen)
  • MG42 Team 2: 1x MG42 team (1x gunner, 1x loader, 2x riflemen)

To reflect the historical context of Arnhem, you may choose to reduce the number of Panzergrenadier sections from 3 to 2. This would simulate the strain on German manpower and resources.

Support Options: Focus on Urban and Defensive Warfare

  1. Transport & Armor (Select based on availability and scenario)
    • Sd.Kfz. 251/1 Half-Track: Can be limited due to fuel shortages.
    • Opel Blitz Truck: For transport but vulnerable in urban combat.
    • StuG III: Assault gun, excellent for supporting infantry in urban fighting, and more common than tanks in Arnhem.
    • Jagdpanzer IV: A tank destroyer option, more likely in small numbers.
  2. Anti-Tank Options
    • Panzerschreck Team: Highly useful in urban ambushes, effective against Allied armor.
    • Pak 40 75mm Anti-Tank Gun: Set up in defensive positions to counter British tanks or vehicles.
  3. Infantry and Urban Warfare
    • Fallschirmjäger Reinforcements: A single squad of elite paratroopers who can support the Panzergrenadiers in close-quarters combat.
    • MG34/42 on Tripod: Set up in key defensive locations to lay down sustained fire.
    • Sniper Team: A sniper team can be effective in Arnhem’s urban environment to harass British positions.
    • Flamethrower Team: Very effective in clearing buildings or strongpoints in an urban setting.
  4. Artillery and Mortar Support
    • 80mm Mortar Team: Light indirect fire support.
    • Off-table 105mm artillery: For heavier bombardment but with a delay in arrival.
    • Infantry Gun: A small-caliber gun (e.g., 75mm) could be useful for direct fire support against enemy strongpoints.
  5. Tactical Obstacles
    • Barbed Wire or Minefields: To slow down British paratroopers in urban environments.
    • Roadblocks: Given Arnhem’s urban environment, roadblocks can be used to hinder British movement or funnel them into kill zones.

Suggested Tactical Approach

  • Ambush and Defense: Set up MG42s in good overwatch positions with overlapping fields of fire. Use the urban terrain to funnel the enemy into kill zones where your MG42s can maximize their firepower.
  • Close Support: Use a StuG III or Jagdpanzer IV sparingly, positioning them carefully due to the confined spaces in Arnhem. These vehicles can provide excellent fire support but are vulnerable to enemy anti-tank weapons in close-quarters.
  • Anti-tank Defense: Panzerschreck teams and Pak 40s can be used to counter British armor if it arrives. Ambush tactics will be crucial to getting the first shot in.
  • Fallschirmjäger Reinforcements: If British paratroopers get too close, or during an assault, deploy Fallschirmjäger to repel the attack. Their experience in airborne and defensive operations can give you a significant edge in close-quarters combat.

Support Points

In Chain of Command, the number of Support Points allocated to each side depends on the scenario being played and the relative Force Rating of the opposing platoons. The Arnhem campaign scenarios often feature asymmetrical engagements, with the Germans typically having a higher Force Rating than the British airborne troops, who rely more on their elite status.

Here’s a quick breakdown for determining Support Points:

1. Determine Force Ratings

  • A typical Panzergrenadier Platoon (Late War) has a Force Rating of +7 due to their elite status, high firepower, and multiple MG42s.
  • A British Airborne Platoon (such as the 1st Airborne Division at Arnhem) typically has a Force Rating of +8 or +9, depending on specific unit composition and scenario rules.

2. Scenario Selection

The scenario being played will give a base number of support points. Typically, the defender gets more support than the attacker.

For Example:

  • Scenario 1 (Patrol): The attacker usually receives 1d6 support points, and the defender receives the same or fewer points, depending on the roll and scenario.
  • Scenario 2 (Attack on an Objective): The attacker may receive 1d6+2 support points, and the defender might get more or less depending on the tactical situation.

3. Adjust for Force Rating Difference

If there is a difference in the Force Ratings between the two sides, the side with the lower Force Rating will receive additional Support Points to balance things out.

Example Support Calculation:

Let’s say your Panzergrenadier Platoon has a Force Rating of +7, and you’re up against a British Airborne Platoon with a Force Rating of +9. The difference is 2 points (+9 – +7 = +2).

If you’re the Germans (defender) in a scenario with 1d6+2 Support Points, and you roll a 4 on the d6:

  • Base Support Points: 4 (roll) + 2 (scenario bonus) = 6 support points
  • Difference in Force Rating: Since the British have a +9 Force Rating, they do not get extra points. However, if they were the underdog, they’d receive additional support.

So, your Panzergrenadier force would have 6 support points, while the British might get around the same or slightly fewer, depending on the scenario rules.

Typical Arnhem Support Points Range

Given the historical setting of Arnhem, support points for each side may range from 4 to 12 points, depending on:

  • Scenario type (defensive vs. offensive)
  • Force Ratings and relative strengths

The terrain for a Chain of Command scenario set during the Arnhem campaign is critical, as it reflects the unique challenges of the battle, including urban combat, defensive positions, open countryside, and wooded areas. The terrain will greatly affect the tactics used by both the German Panzergrenadiers and the British Airborne forces. Below is a breakdown of typical terrain features for an Arnhem scenario and how they can be used in-game.

Key Terrain Features for Arnhem Chain of Command

1. Urban Areas (Arnhem City)

  • Buildings: Arnhem had many residential and industrial buildings, ranging from small homes to large stone structures. Buildings should dominate the center of the table in a scenario set within the city.
    • Game Impact: Buildings provide hard cover and are ideal for close-quarters combat. Defenders (like Panzergrenadiers) can set up MG42s to cover streets and choke points, creating kill zones. British Airborne units can attempt to clear buildings with grenades or use sniper fire.
    • Tactics: You could use two-story buildings for strong defensive positions, especially for German MG teams or snipers.
  • Streets and Roads: Wide streets, narrow alleyways, and main roads should crisscross the city. The Arnhem bridge or similar key objective (if used) can be at one end of the table.
    • Game Impact: Streets provide open fire lanes but leave troops exposed unless they hug cover. Vehicles will be restricted to streets in urban areas.
    • Tactics: Panzergrenadiers can set up ambushes, using side streets for surprise MG fire or anti-tank teams. British forces can use smoke to cross streets safely.

2. Defensive Positions

  • Ruins and Rubble: Due to Allied bombing and artillery, parts of Arnhem were heavily damaged. You can scatter ruins and rubble throughout the battlefield.
    • Game Impact: Ruins provide hard cover but may also slow down movement. They also create potential bottlenecks and line-of-sight (LoS) blockages, useful for ambushes and flanking maneuvers.
    • Tactics: Use these positions for infantry ambushes or to create choke points, forcing the enemy into machine-gun crossfire.
  • Barricades, Sandbags, and Trenches: The Germans used hastily constructed defensive positions, including barricades, makeshift roadblocks, and trenches.
    • Game Impact: These features provide hard cover and create obstacles that force the attacking British to take alternative routes or clear them.
    • Tactics: Panzergrenadiers can use these to strengthen their defensive positions in key areas like road junctions or building entrances.

3. Open Countryside (Outside Arnhem and Oosterbeek)

  • Fields: The areas outside Arnhem included open fields and farmlands.
    • Game Impact: Fields provide light cover (hedgerows or low crops) or no cover at all. These are risky for infantry to cross unless they have smoke cover or proper support from armor or mortars.
    • Tactics: The British can use smoke or rapid movement to cross these open areas, while the Germans can position MG42s to create dangerous fire lanes.
  • Hedgerows and Fences: Many fields and roads were bordered by hedgerows, fences, or ditches.
    • Game Impact: Hedgerows provide light cover and block line of sight but slow down movement. Fences may hinder movement but offer little protection.
    • Tactics: Infantry can use these to stay concealed while advancing. Panzergrenadiers can set up ambushes behind hedgerows, making it difficult for the British to spot them.

4. Wooded Areas

  • Woods and Trees: Some areas around Oosterbeek and Arnhem had small patches of forest or large tree-lined roads.
    • Game Impact: Woods provide light to medium cover and block line of sight for long-range shooting. They also slow down movement for vehicles.
    • Tactics: German infantry can use woods to hide Panzerschreck teams or launch surprise flanking attacks on exposed British units. British Airborne forces can use woods for concealment before launching an assault on German positions.

5. Bridges and River Features

  • Arnhem Bridge (or similar large objectives): The famous Arnhem road bridge is a central feature in many Market Garden scenarios. Other smaller bridges or river crossings (Rhine or local streams) could also be present.
    • Game Impact: Bridges are key objectives and choke points, heavily contested by both sides. Controlling a bridge provides a major strategic advantage.
    • Tactics: The Germans can defend a bridge with MGs and artillery, placing defensive positions on both sides. The British might use smoke or a direct assault to try and capture the bridge quickly.
  • Rivers and Streams: The Rhine River and its smaller tributaries were obstacles around Arnhem.
    • Game Impact: Rivers and streams block movement, but may have fords or bridges that become key crossing points.
    • Tactics: Use these features to force the enemy into predictable movement paths. A Panzergrenadier force could defend a bridge while keeping mobile reserves ready to counter any breakthrough attempts.

6. Roads and Paths

  • Main Roads and Side Roads: Main roads leading to or from Arnhem and Oosterbeek would play a crucial role in the battle, especially as routes for reinforcements or retreat.
    • Game Impact: Roads allow rapid movement for vehicles but can be easily covered by anti-tank weapons or machine-gun fire.
    • Tactics: Roads are useful for moving half-tracks or tanks, but the German player should be aware of British AT teams lying in wait. Alternatively, they can be mined or blocked to disrupt enemy movement.

Table Layout for Arnhem Scenarios

A typical Arnhem battlefield for Chain of Command might include:

  • A mix of urban terrain (buildings, narrow streets, and ruins) on one side of the table.
  • Open countryside or wooded areas on the other side, representing the approaches to the city.
  • Key objectives such as bridges, crossroads, or defensive buildings.

This layout would offer both sides a range of tactical options, from defending hardpoints in the city to ambushing enemy units in the open or using armor and infantry to exploit gaps in the terrain.

Summary of Terrain Effects

  • Buildings/Ruins: Hard cover, ideal for defense.
  • Streets/Open Areas: Exposed but allow for fast movement; dangerous without cover.
  • Woods/Hedgerows: Provide cover and block LoS; good for ambush tactics.
  • Bridges/Rivers: Key objectives and bottlenecks.
  • Roads: Allow fast movement but are prime ambush sites.

The number of buildings on the table for an Arnhem Chain of Command scenario should reflect the urban density of Arnhem and nearby areas, but also leave enough open space for tactical maneuvering. The number of buildings can vary based on the specific scenario (city center defense, approach to Arnhem, etc.), but here are some general guidelines:

1. Full Urban Combat (City Center of Arnhem)

If you’re simulating the dense fighting in the city center of Arnhem near key locations such as the Arnhem Bridge or the surrounding streets, you should aim for a higher number of buildings with narrow streets, creating intense close-quarters combat.

Recommended Number of Buildings:

  • 10-12 medium-sized buildings (for a 6’x4′ table)
    • These could represent townhouses, shops, and industrial buildings, each providing substantial cover.
    • Arrange them with a mix of multi-story and single-story buildings to provide tactical variety.
    • Ensure there are multiple narrow streets and alleyways between buildings.

Building Types and Setup:

  • Multi-story buildings (4-6): These can be focal points for defending or assaulting forces. Panzergrenadiers can use the height advantage to set up MG42s on the upper floors.
  • Smaller houses or shops (6-8): These can be clustered to create a tight urban layout. Each could hold a single squad or support weapon, ideal for ambushes or last-ditch defense.

Tactical Impact:

  • This setup forces close-quarters engagements, with reduced effectiveness for vehicles unless used in narrow streets.
  • Streets and small squares between buildings can create dangerous fire lanes for machine guns and anti-tank weapons.

2. Mixed Urban/Suburban (Outskirts of Arnhem or Oosterbeek)

In scenarios that take place on the outskirts of Arnhem, such as Oosterbeek or the areas leading into the city, the terrain would include a mix of suburban homes, smaller farms, and more open countryside. This setup offers more flexibility for maneuver and creates more varied tactical challenges.

Recommended Number of Buildings:

  • 6-8 buildings (for a 6’x4′ table)
    • These would be more scattered across the table to reflect a less dense urban area, with streets, fields, and open ground in between.
    • Include a few clusters of buildings to represent small suburban blocks or villages.

Building Types and Setup:

  • 2-3 larger buildings (farms, manor houses, or small factories): These could act as strongpoints for defense.
  • 4-5 smaller houses: Spread out in small groups or along a road to simulate suburban streets or small hamlets.

Tactical Impact:

  • This layout creates more opportunities for maneuver and combined arms tactics. Vehicles can move more freely in open spaces, while infantry can take cover in and around the scattered buildings.
  • Snipers, MG teams, and support weapons could make good use of the more open areas to dominate certain parts of the battlefield.

3. Rural Approach to Arnhem

If the battle is focused on the approach to Arnhem, involving more open countryside with just a few structures (e.g., the outskirts or smaller villages near the Rhine), the emphasis would be on roads, hedgerows, and sparse buildings.

Recommended Number of Buildings:

  • 3-5 buildings (for a 6’x4′ table)
    • Spread these buildings widely apart, perhaps with a few clustered around a key objective like a crossroads or small farm.
    • This represents a rural village or farmland leading into the city.

Building Types and Setup:

  • 1-2 farmhouses or large barns: These can be central objectives or staging points for defenders.
  • 2-3 small homes or outbuildings: Scattered near roads, acting as defensive positions or objectives.

Tactical Impact:

  • The wide spacing of buildings allows for long-range engagements. Fields and roads will provide open fire lanes, but cover is more sparse.
  • Infantry may have to rely more on smoke, hedgerows, or vehicle support to safely approach objectives.

Table Size and Building Count

Here’s a quick rule of thumb for building count based on table size:

  • 6’x4′ table (standard): 6 to 12 buildings depending on density (urban vs. rural).
  • 4’x4′ table (smaller skirmish): 4 to 8 buildings for more dense urban environments.
  • 8’x4′ table (large scenario): 10 to 15 buildings, with more varied terrain features like fields, woods, or rivers to balance out the open space.

Overall Balance

When setting up terrain for an Arnhem scenario, the key is balance:

  • Too many buildings can make the table feel cramped and make vehicles and open maneuver difficult.
  • Too few buildings can result in the scenario feeling too open, reducing the defensive and tactical depth of urban fighting.

Conclusion

  • For city center Arnhem: 10-12 buildings, tightly packed for intense street fighting.
  • For outskirts or mixed terrain: 6-8 buildings, spaced to allow both urban and rural engagements.
  • For rural approaches: 3-5 buildings, focusing on isolated strongpoints with more open countryside.

Supported by (Turn Off)

Leave a Reply

Supported by (Turn Off)