


Building Foam Dungeon Tiles (EVA & Upholstery Foam)


Preparing the Cavern Corridor for Adventure With a Fresh Coat of Paint Part 2
Now it’s time to truly enhance the model with range of shades, capturing the essence of nature and evoking the atmosphere of a dark, damp cavern ripe for exploration.
Let's Wash It!
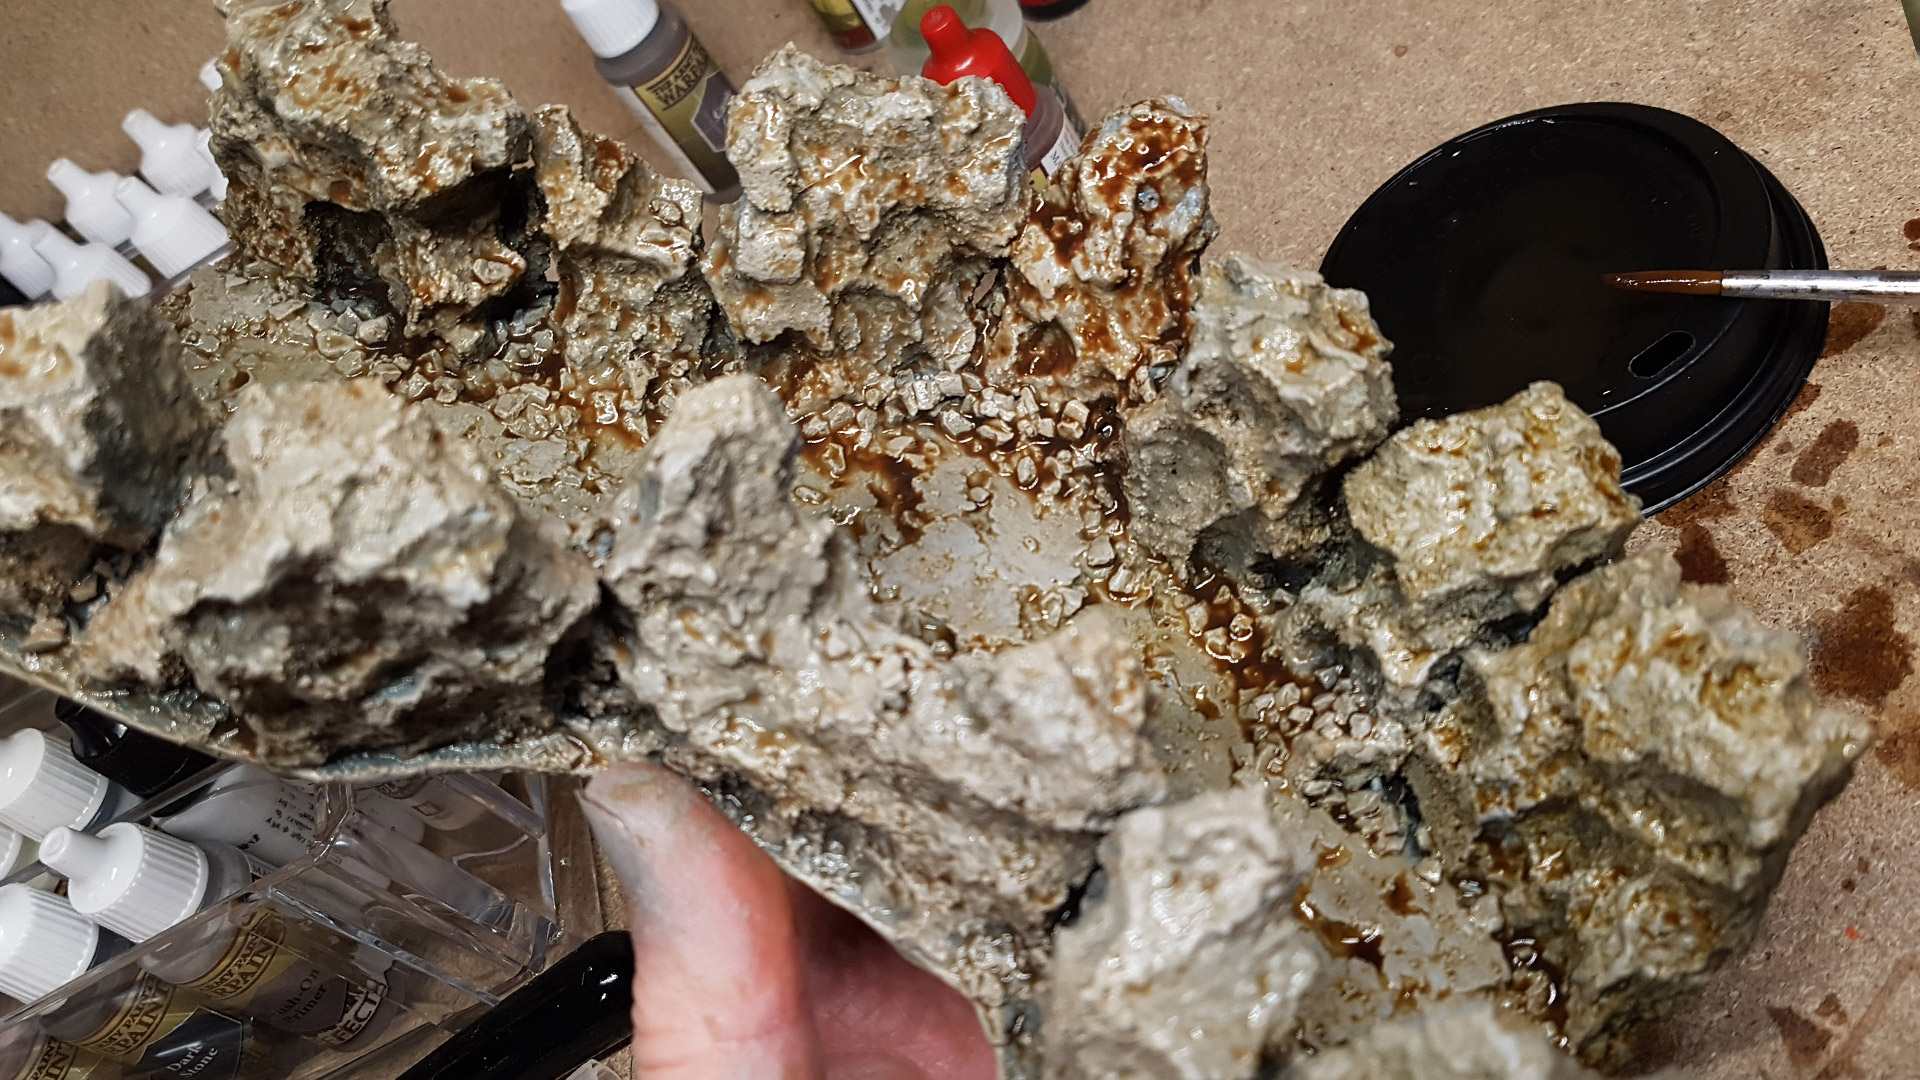 Wash of Army Painter Light Tone, Diluting It With Water in Certain Areas
Washes are an excellent method for achieving varied shading on rock textures. I began with a wash of Light Tone from The Army Painter, softening its impact in certain areas by diluting it directly on the model during application.
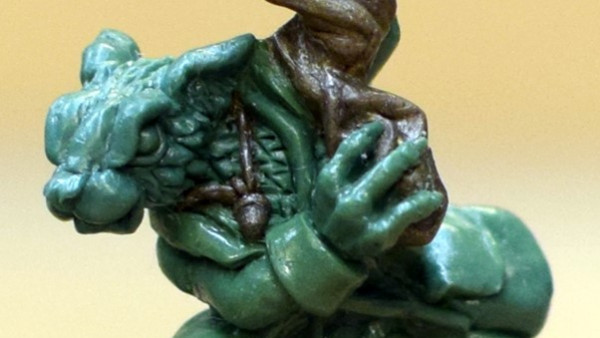
While the wash was still wet, I incorporated a green Games Workshop contrast paint, specifically Plaguebearer Flesh, into selected areas. This was primarily around the bases of walls, within cracks, and in the depressions of the rock to simulate the presence of damp, algae, further enhancing the cavern’s dank atmosphere.
Applying the wash and contrast paint simultaneously allows for seamless blending, creating additional nuances in the shading.
To increase the shading variety on the model, I applied the Light Tone wash again in specific spots, enriching the overall depth and texture.
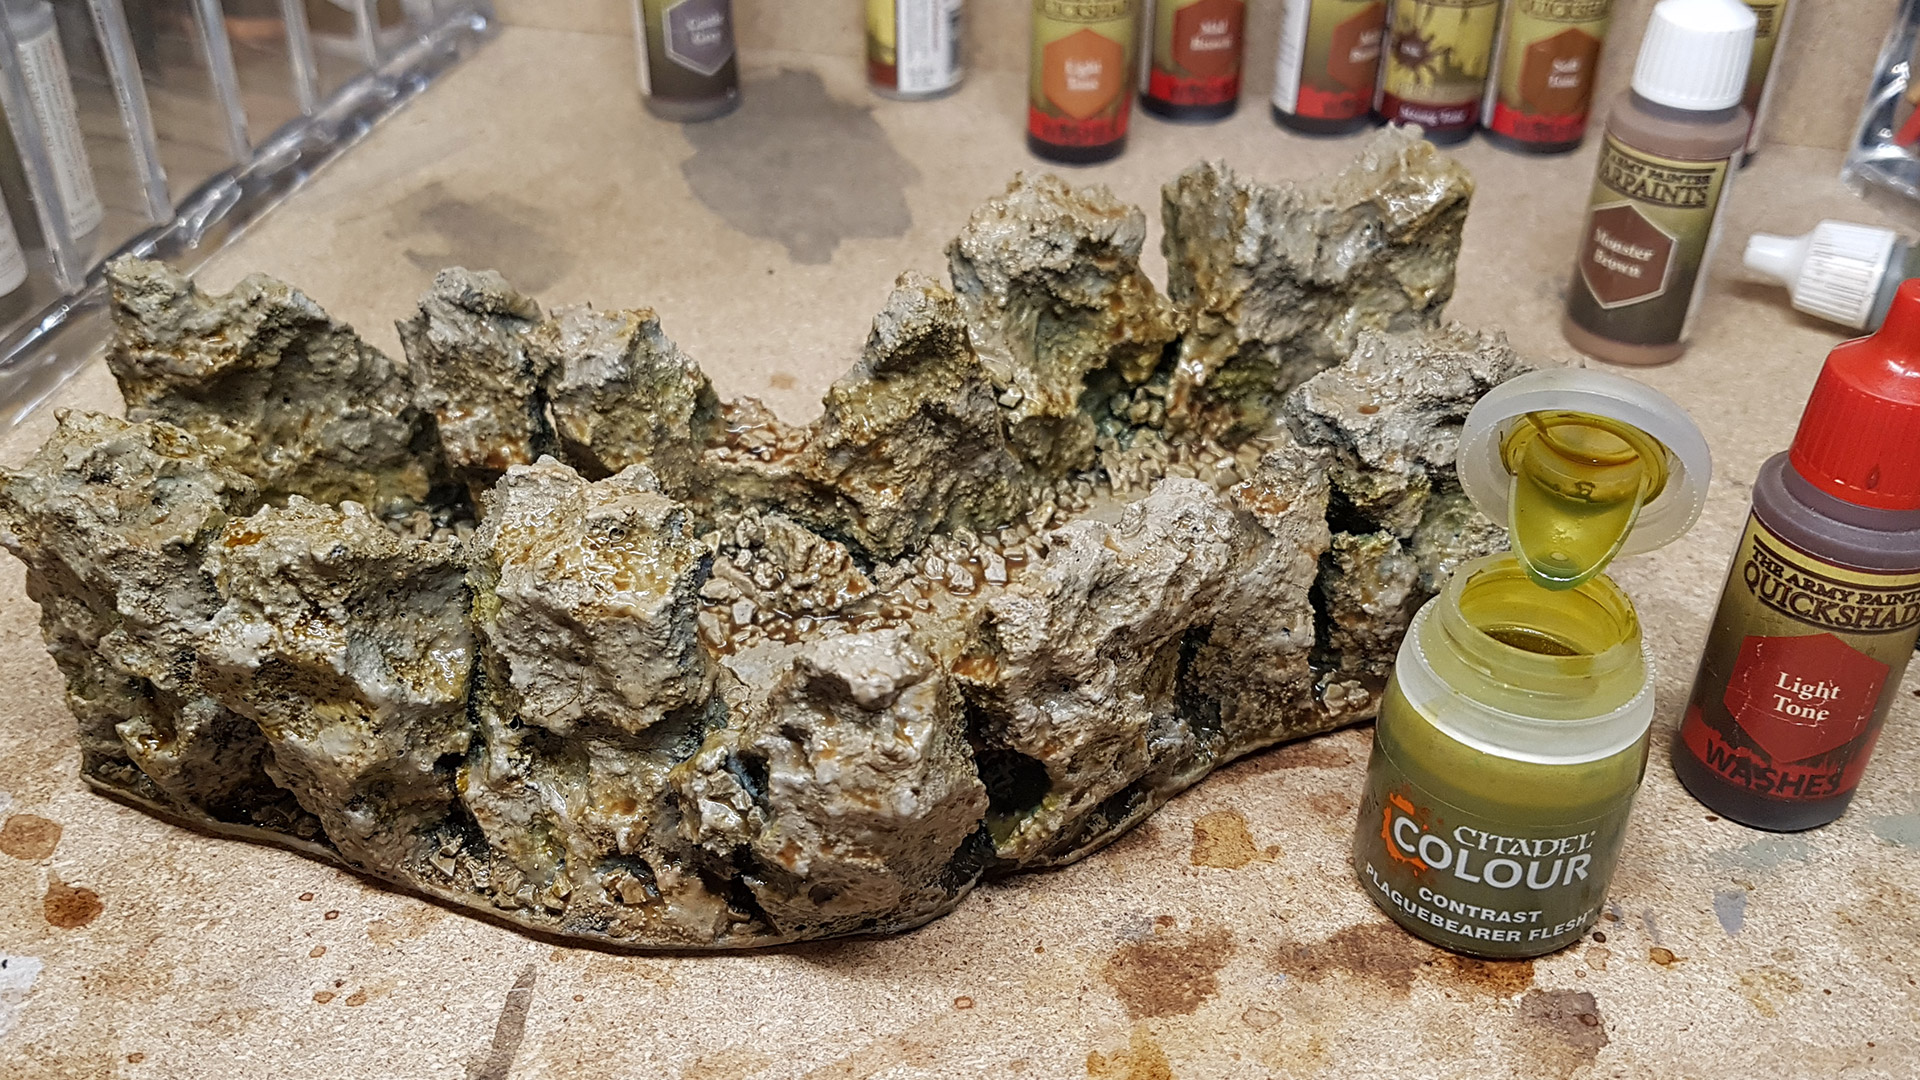 Plaguebearer Flesh Simulates the Presence of Damp Algae
I enhanced the shading on the rock walls using Strong Tone, another wash from The Army Painter. I focused on the bases of the walls, any cracks, and areas likely to be in shadow, such as beneath overhanging rock portions and depressions in both the walls and floor.
Additionally, I applied the Strong Tone around the scattered rocks on the floor, any other piles of debris, and along the edges of the flat tile areas. This technique was used to delineate one tile from another, adding depth and definition to the overall appearance of the cavern.
In addition to applying extra wash shading, I used Light Tone once more, this time selectively over every other tile on the floor. This technique further helped to delineate one tile from another, enhancing the visual distinction and depth across the cavern floor.
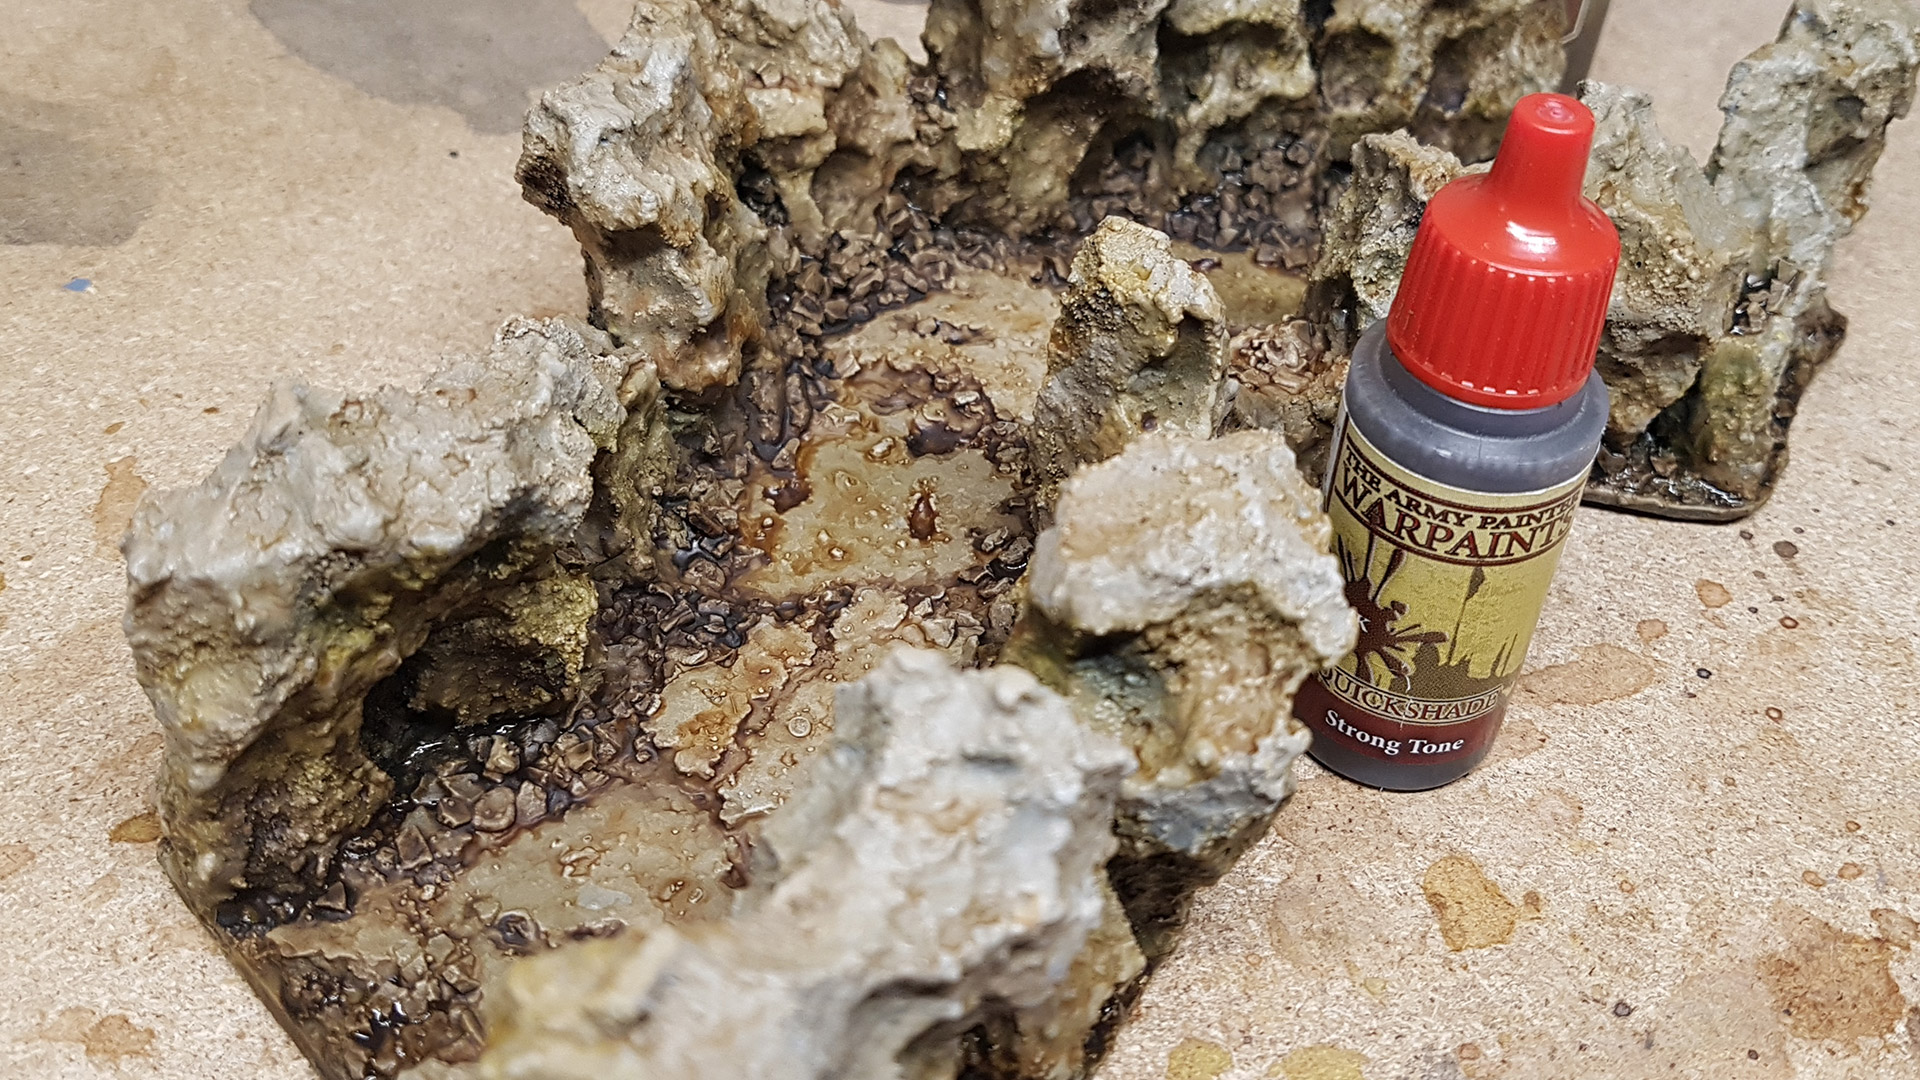 Strong Tone Applied to Scattered Rocks and Sections of the Walls
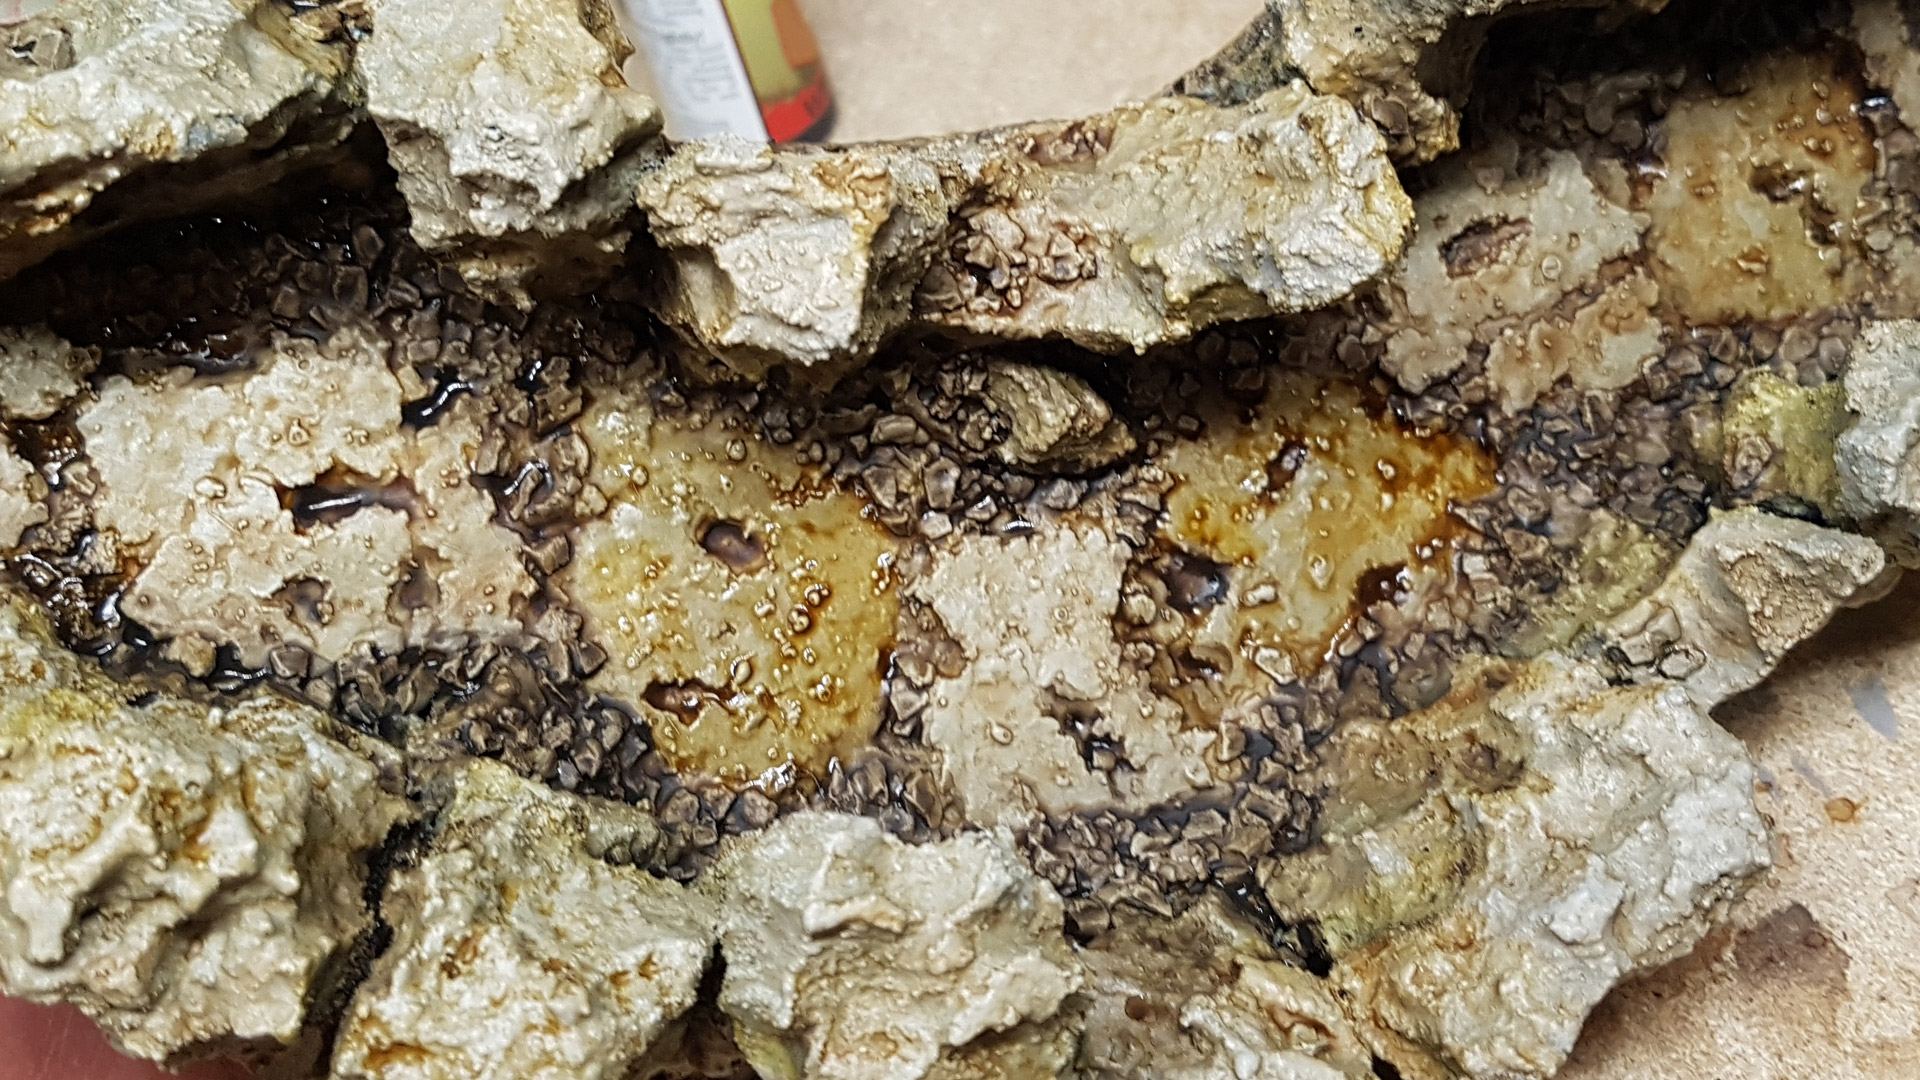 Adding Additional Wash Shading to Alternate Tiles
Returning to Painting for the Finishing Touches
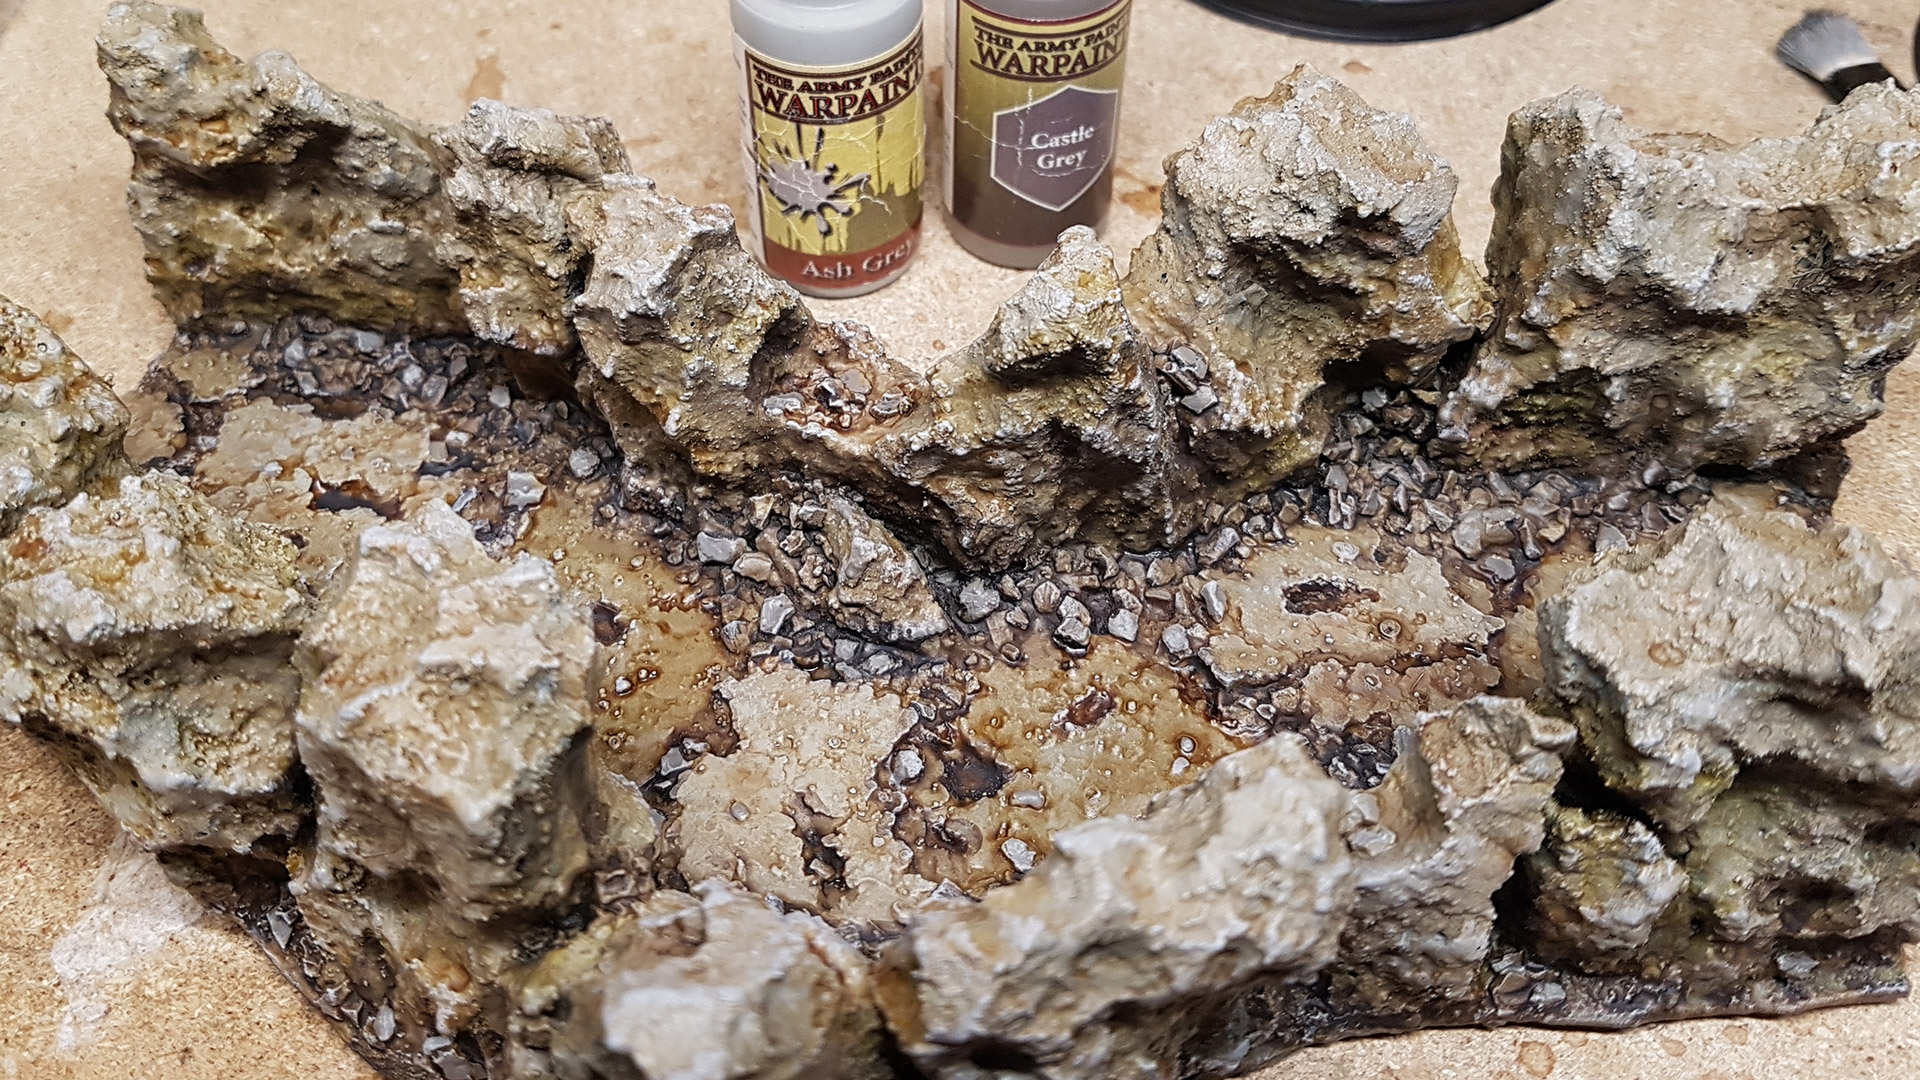
The final touches involved a comprehensive drybrush over the model to re-emphasize the highlights that had been subdued by the washes. I used Ash Grey for a subtle highlight, then added distinct splashes of colour to individual rocks using both Ash Grey and Castle Grey, paints from The Army Painter range.
Intrigued by the idea of water seeping into the cavern from the walls, I experimented with creating a water effect. I applied paper gloss varnish in drops over the scattered stones along the wall edges and in the crevices holding smaller rocks, simulating water accumulation.
Additionally, I envisaged areas of the floor and lower-level tiles as being filled with water, indicating they were at a lower elevation and thus collected water first, leaving some tiles dry as the water hadn’t reached their level yet.
For the gloss varnish, I recommend using an acrylic-based gloss varnish in future projects for quicker drying times. The paper gloss varnish, chosen out of convenience at the time, requires several days to dry thoroughly due to the solvents that need to evaporate through the gloss.
 Drybrushing and Accentuating Individual Rocks with Splashes of Colour
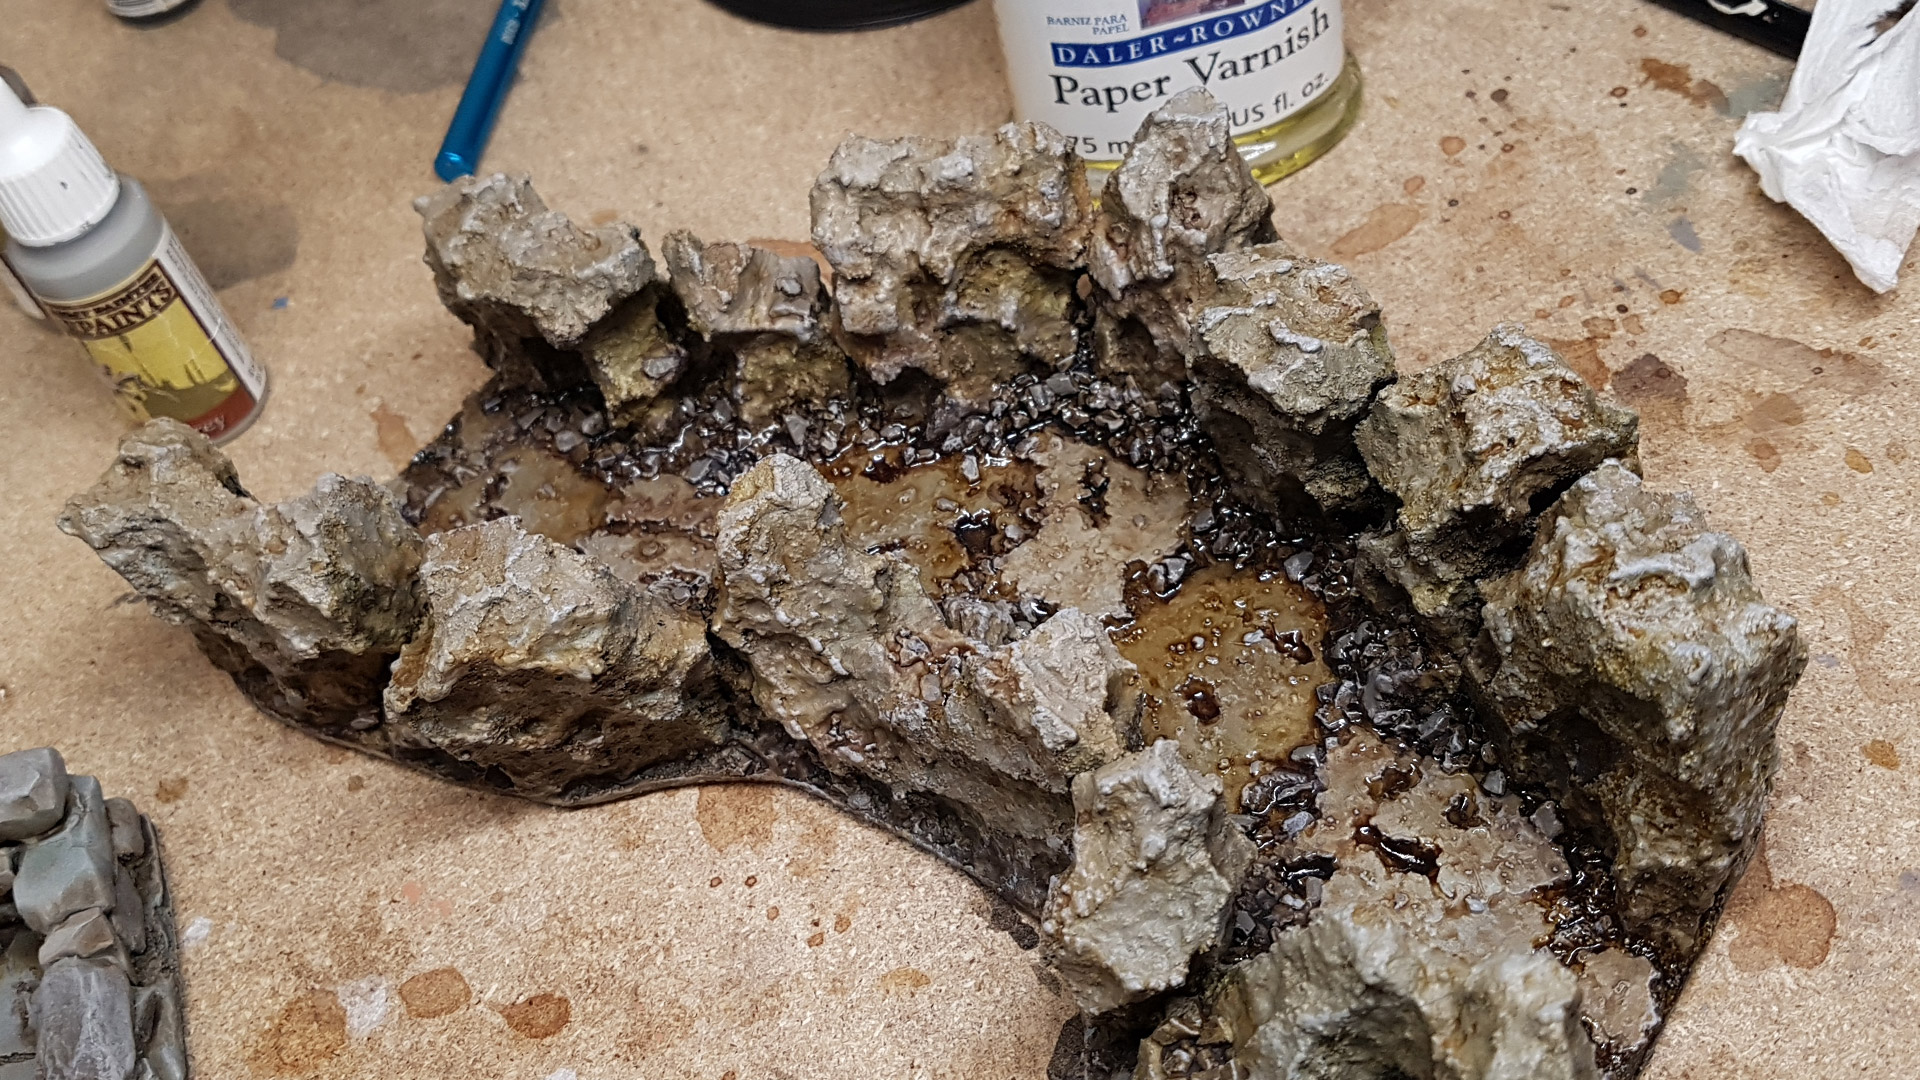 I Used Paper Gloss Varnish, but Suggest Trying Acrylic-based Gloss


Leave a Reply