


![TerrainFest 2024! Build Terrain With OnTableTop & Win A £300 Prize [Extended!]](https://images.beastsofwar.com/2024/10/TerrainFEST-2024-Social-Media-Post-Square-225-127.jpg)


Coral Reef Underwater Terrain Board


Step Three: Scatter (part 2)
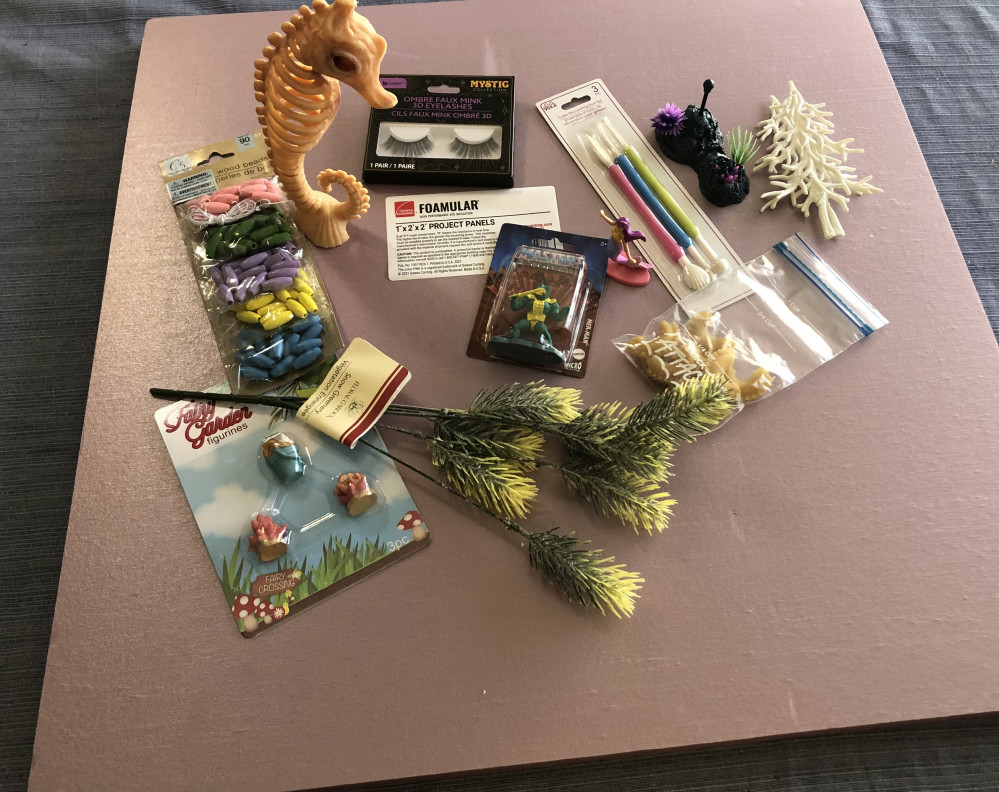
Our board isn’t nearly cluttered enough, so we need more scatter, using a combo of premade plastic pieces and more scratch-built and repurposed materials.
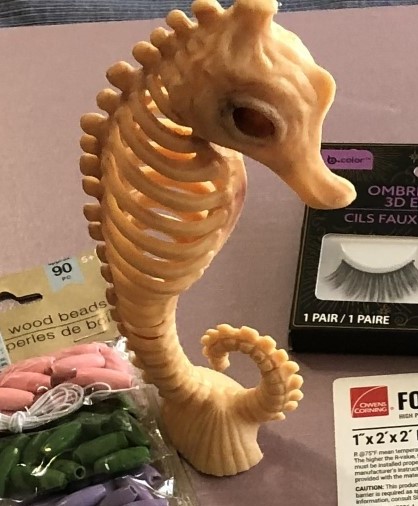
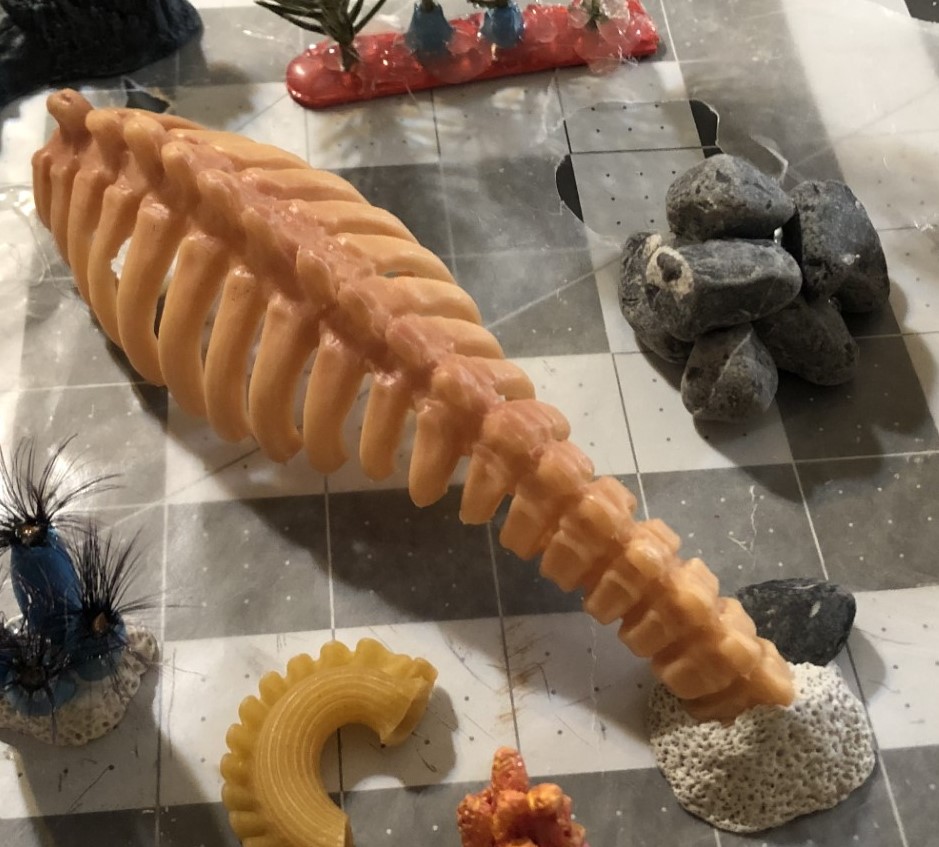
Last Spoopy season I picked up this seahorse decoration from the dollar store. It’s from the ever-expanding genre of “skeletons of things that do not have skeletons” that are so popular with the kids these days.
I thought it would make a cool whale (or what have you) skeleton. I may go back and cover it in starfish, which are filthy scavengers (saw a video on Youtube of a whalefall, and it’s crazypants.)
There were plenty of possible approaches for this, but in the end I went for a simple arrangement. I cut off the head and tail, which was a real beast because of the cheap plastic (naturally I kept these parts, as no true crafter throws away any part of the buffalo.) Then I took a pair of heavy snippers (and painkillers for my aging hands,) and cut through all the ribs of the front, leaving a spine and ribcage. I stuck this onto a small mound of sand made from plumber’s putty and a small rock. It’s not much, but it’s honest work.
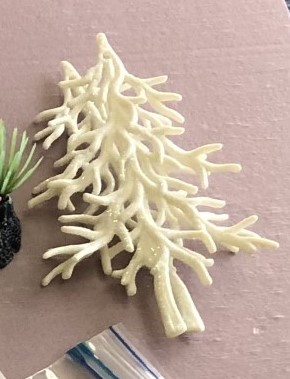
Okay, I’m a little proud of this one. When you are crafting terrain, you want to develop ‘crafting vision,’ or the ability to see what things could be, instead of what they are (like those benighted normal non-crafting people.) So with my brain in the mode of looking for things that would work for coral elements. I saw these plastic Christmas tree ornaments at the dollar store (which is basically my Mecca.) I did not see folk art-inspired holiday decor, I saw inverted staghorn coral.
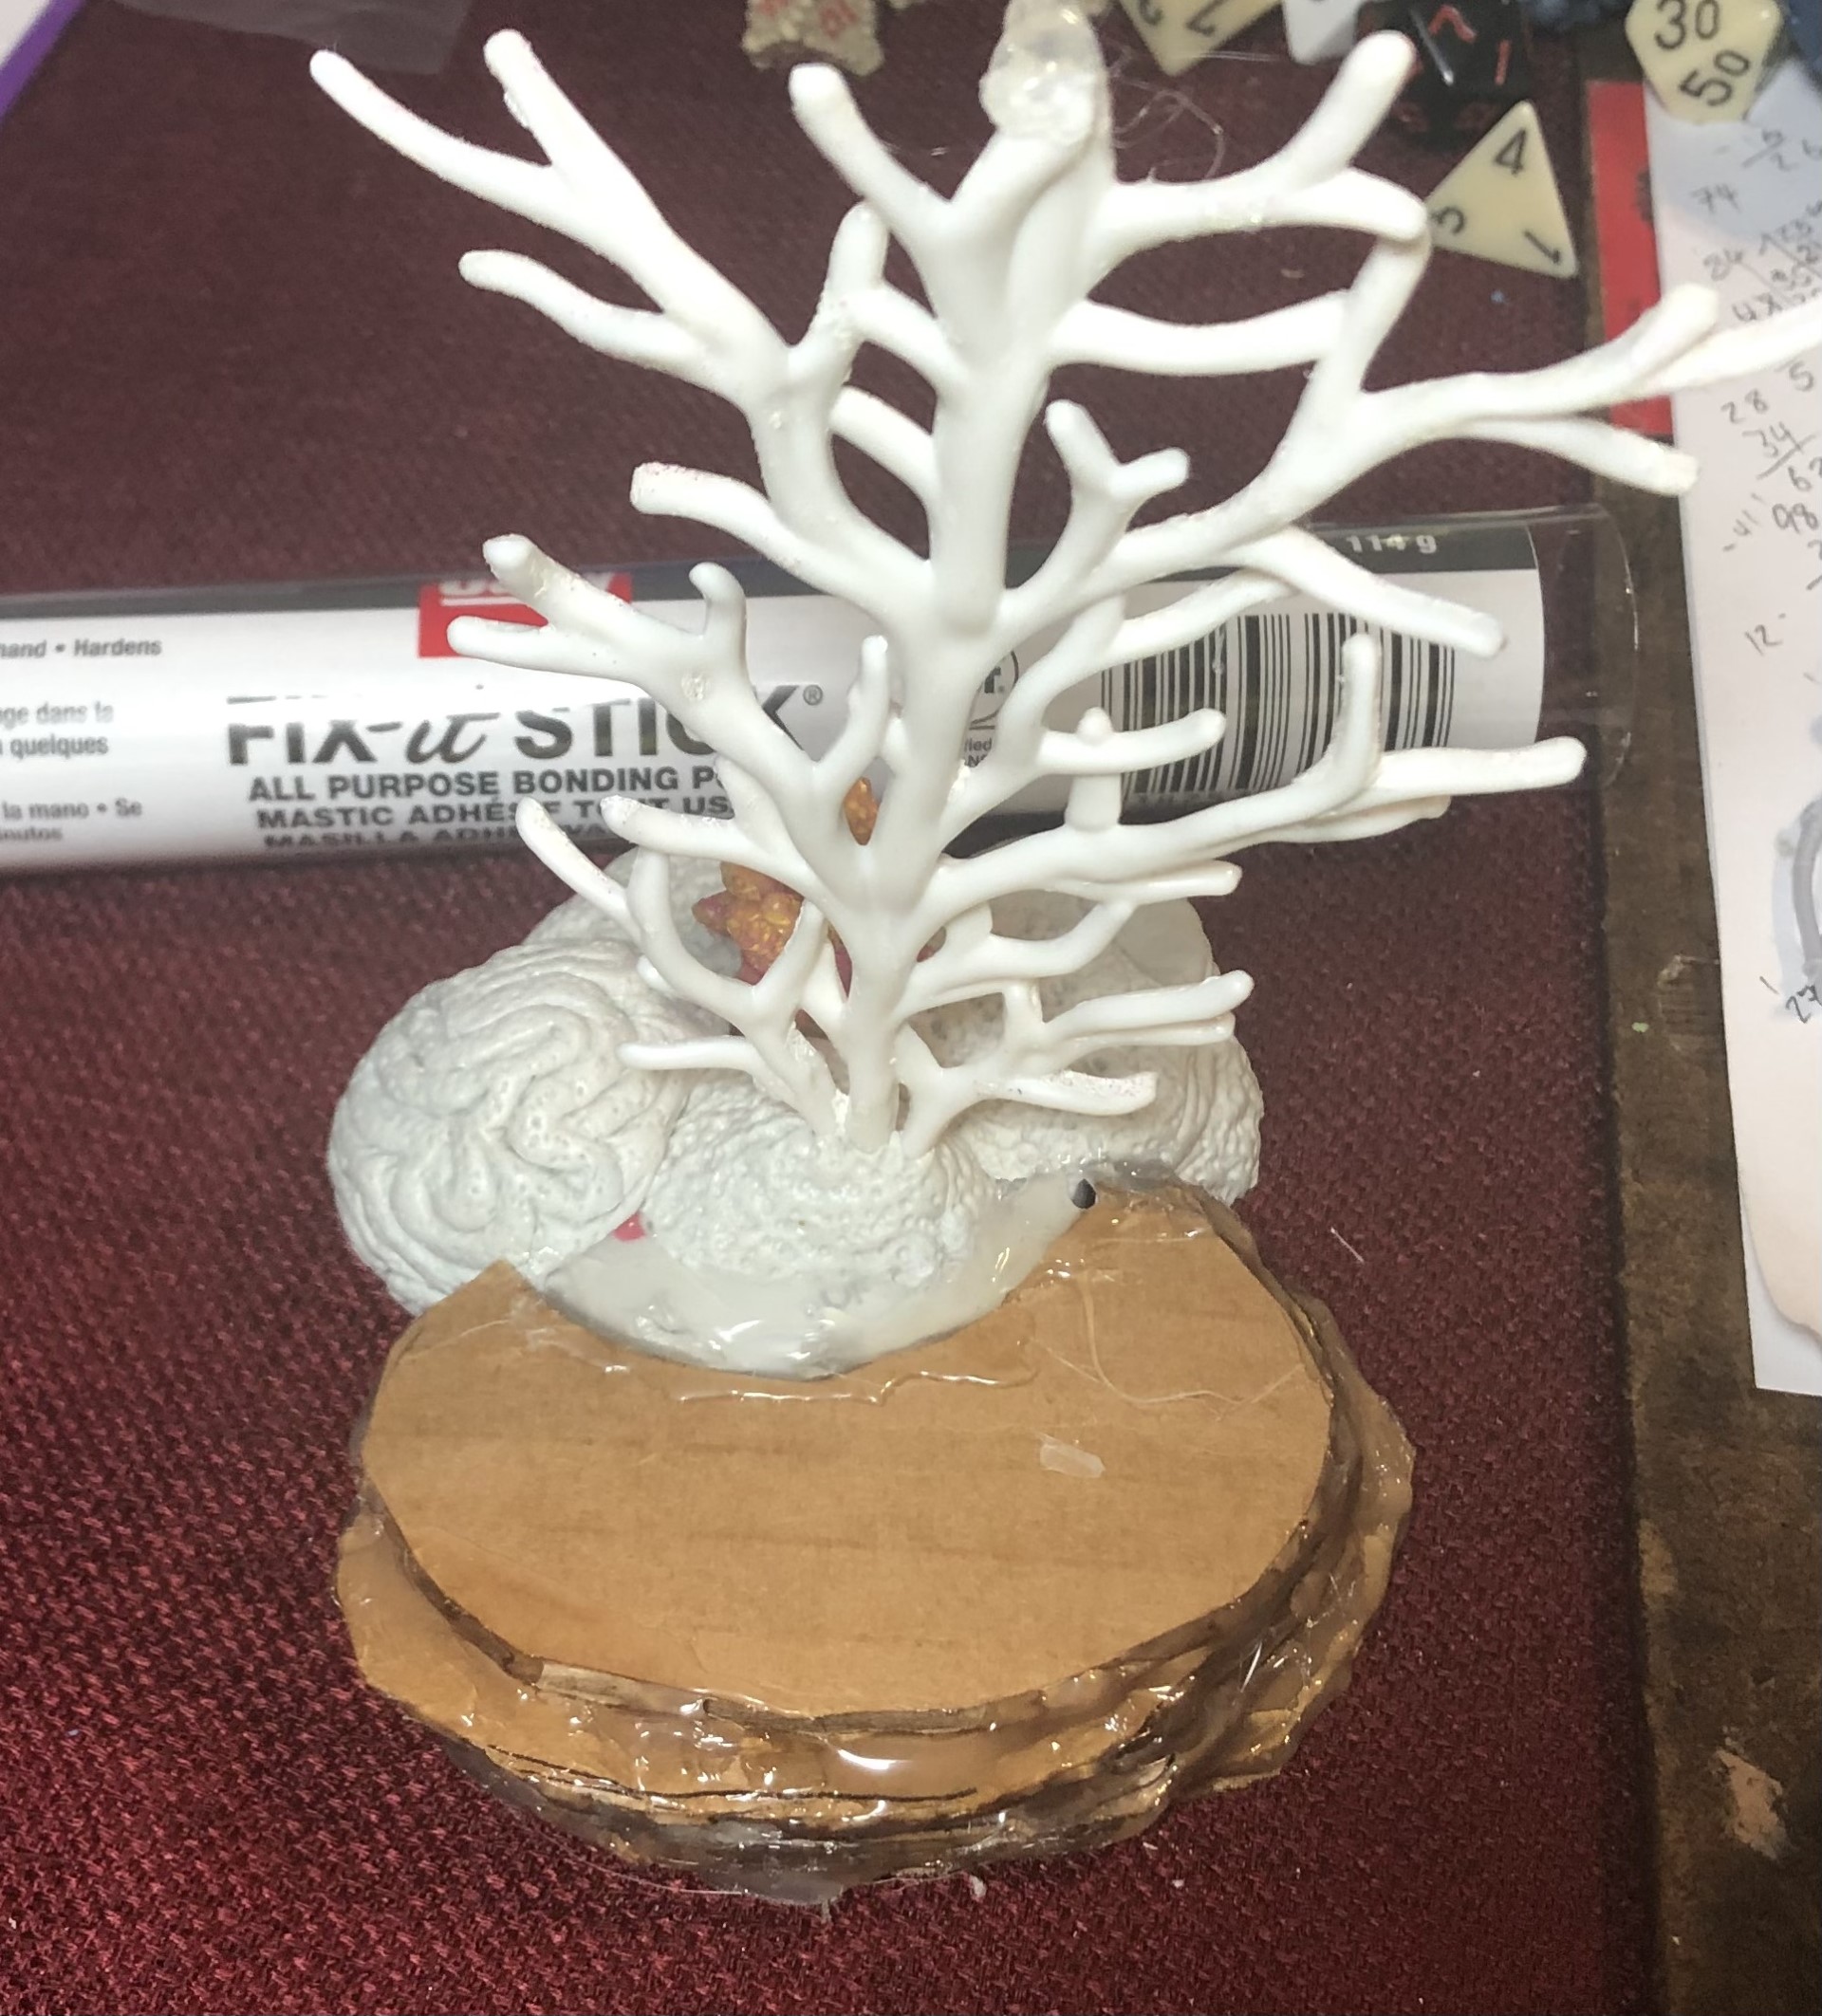
I began by scrubbing off the glitter (hiss!) and snapping off the trunk piece. It needed a base, and chose a pill bottle cap. I cut a hole big enough for the tip of it, and used hot glue to secure it in place. So now I had the coral, but it was on an obviously regular base; not exactly natural looking.
To build this up, I started with more of my beloved plumber’s putty. Most of this was textured in a simple pattern of divots to match the other general bits of coral. But I also put in a large section of brain coral from the same stuff. I wanted a wide flat section for characters to stand on (a sniper poking a rifle barrel through the coral branches was an appealing image, even if it didn’t make the most sense for an underwater scene.)
To save on putty, I cut some rounds of cardboard of irregular sizes and stacked them. Sealing the edges with hot glue, I then used a thin layer of plumbing putty to add texture.
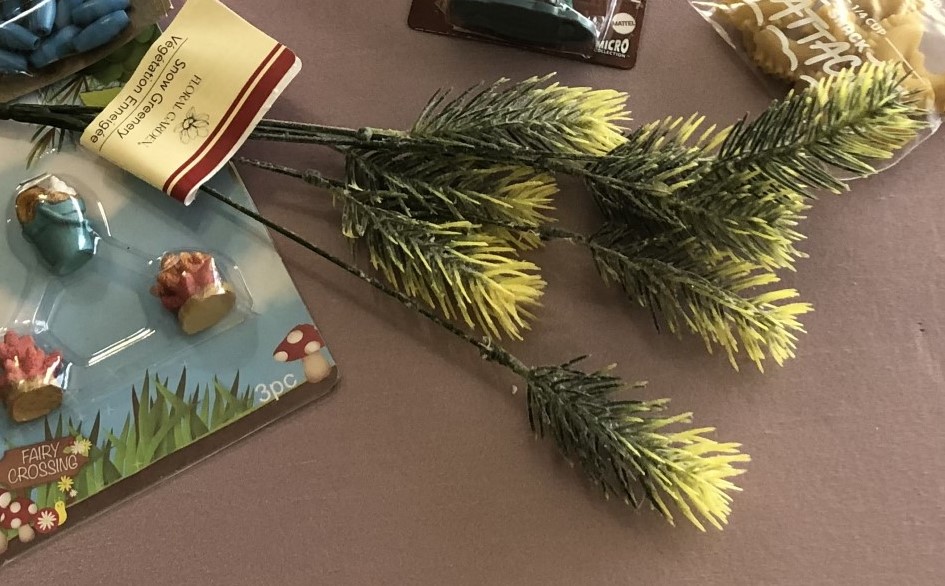
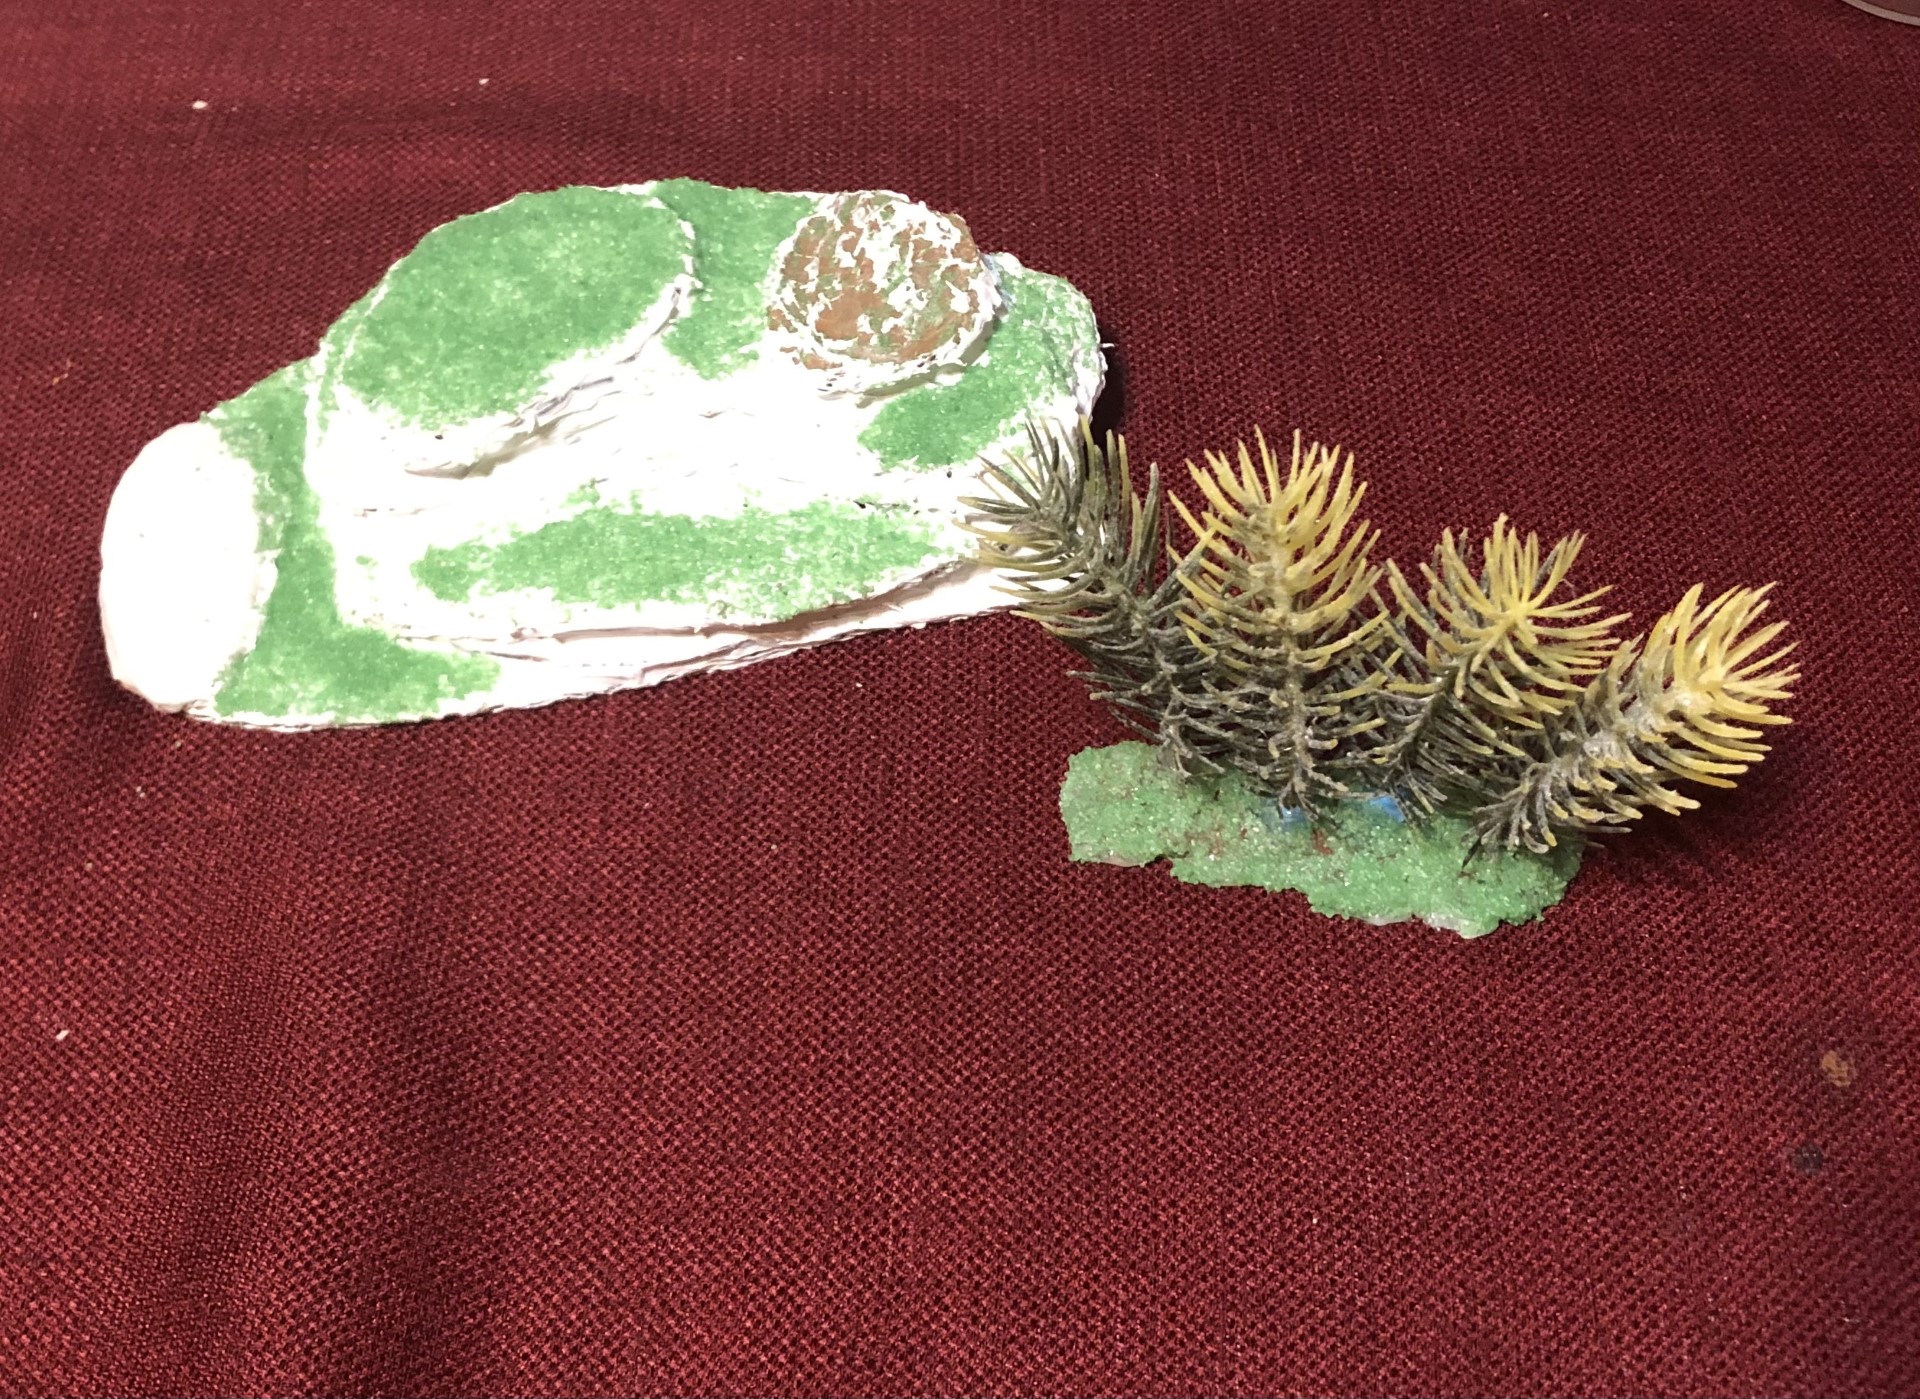
I also made a few standard pieces using tried and true methods, like a hill made from stacked cardboard shapes textured with glue and filling compound, a pile of rocks made from an actual pile of rocks hot-glued together, and a small bank of seaweed, made from the plastic foliage in the project cover image.
I pulled the little fronds off the wire stems, and hot-glued them down to a tongue depressor. More hot glue built up a mound for the base, and glue and sand gave texture.
The next step is to spray everything in the same tone as the board, and paint away!


My hands feel your pain!
We suffer for our craft.