


![TerrainFest 2024 Begins! Build Terrain With OnTableTop & Win A £300 Prize! [Extended!]](https://images.beastsofwar.com/2024/10/TerrainFEST-2024-Social-Media-Post-Square-225-127.jpg)


Medieval Mayhem - A Barons War Project


Terrain - Water Mill
Now that I had experimented with terrain building in 28mm and realised it was actually a matter of measuring and building out standard shapes I was ready to try something a little bit more ambitious. So looking around at items if terrain I have in other scales I decided to take inspiration from the watermill I have from the Joan of Arc game from Mythic games.
However first up was to decide how to base it and that required looking at my river sections that I have. So I then took a piece of A4 grey card and measured out the river and where the mill would sit.
The next decision was should I build this in a solid building or so I could create levels. I decided on level as that gave me the following advantages.
- It would be easier to build
- I could use the measurements of the previous layer to build the next layer out.
- It would be more robust
- I could use it for DnD as well.
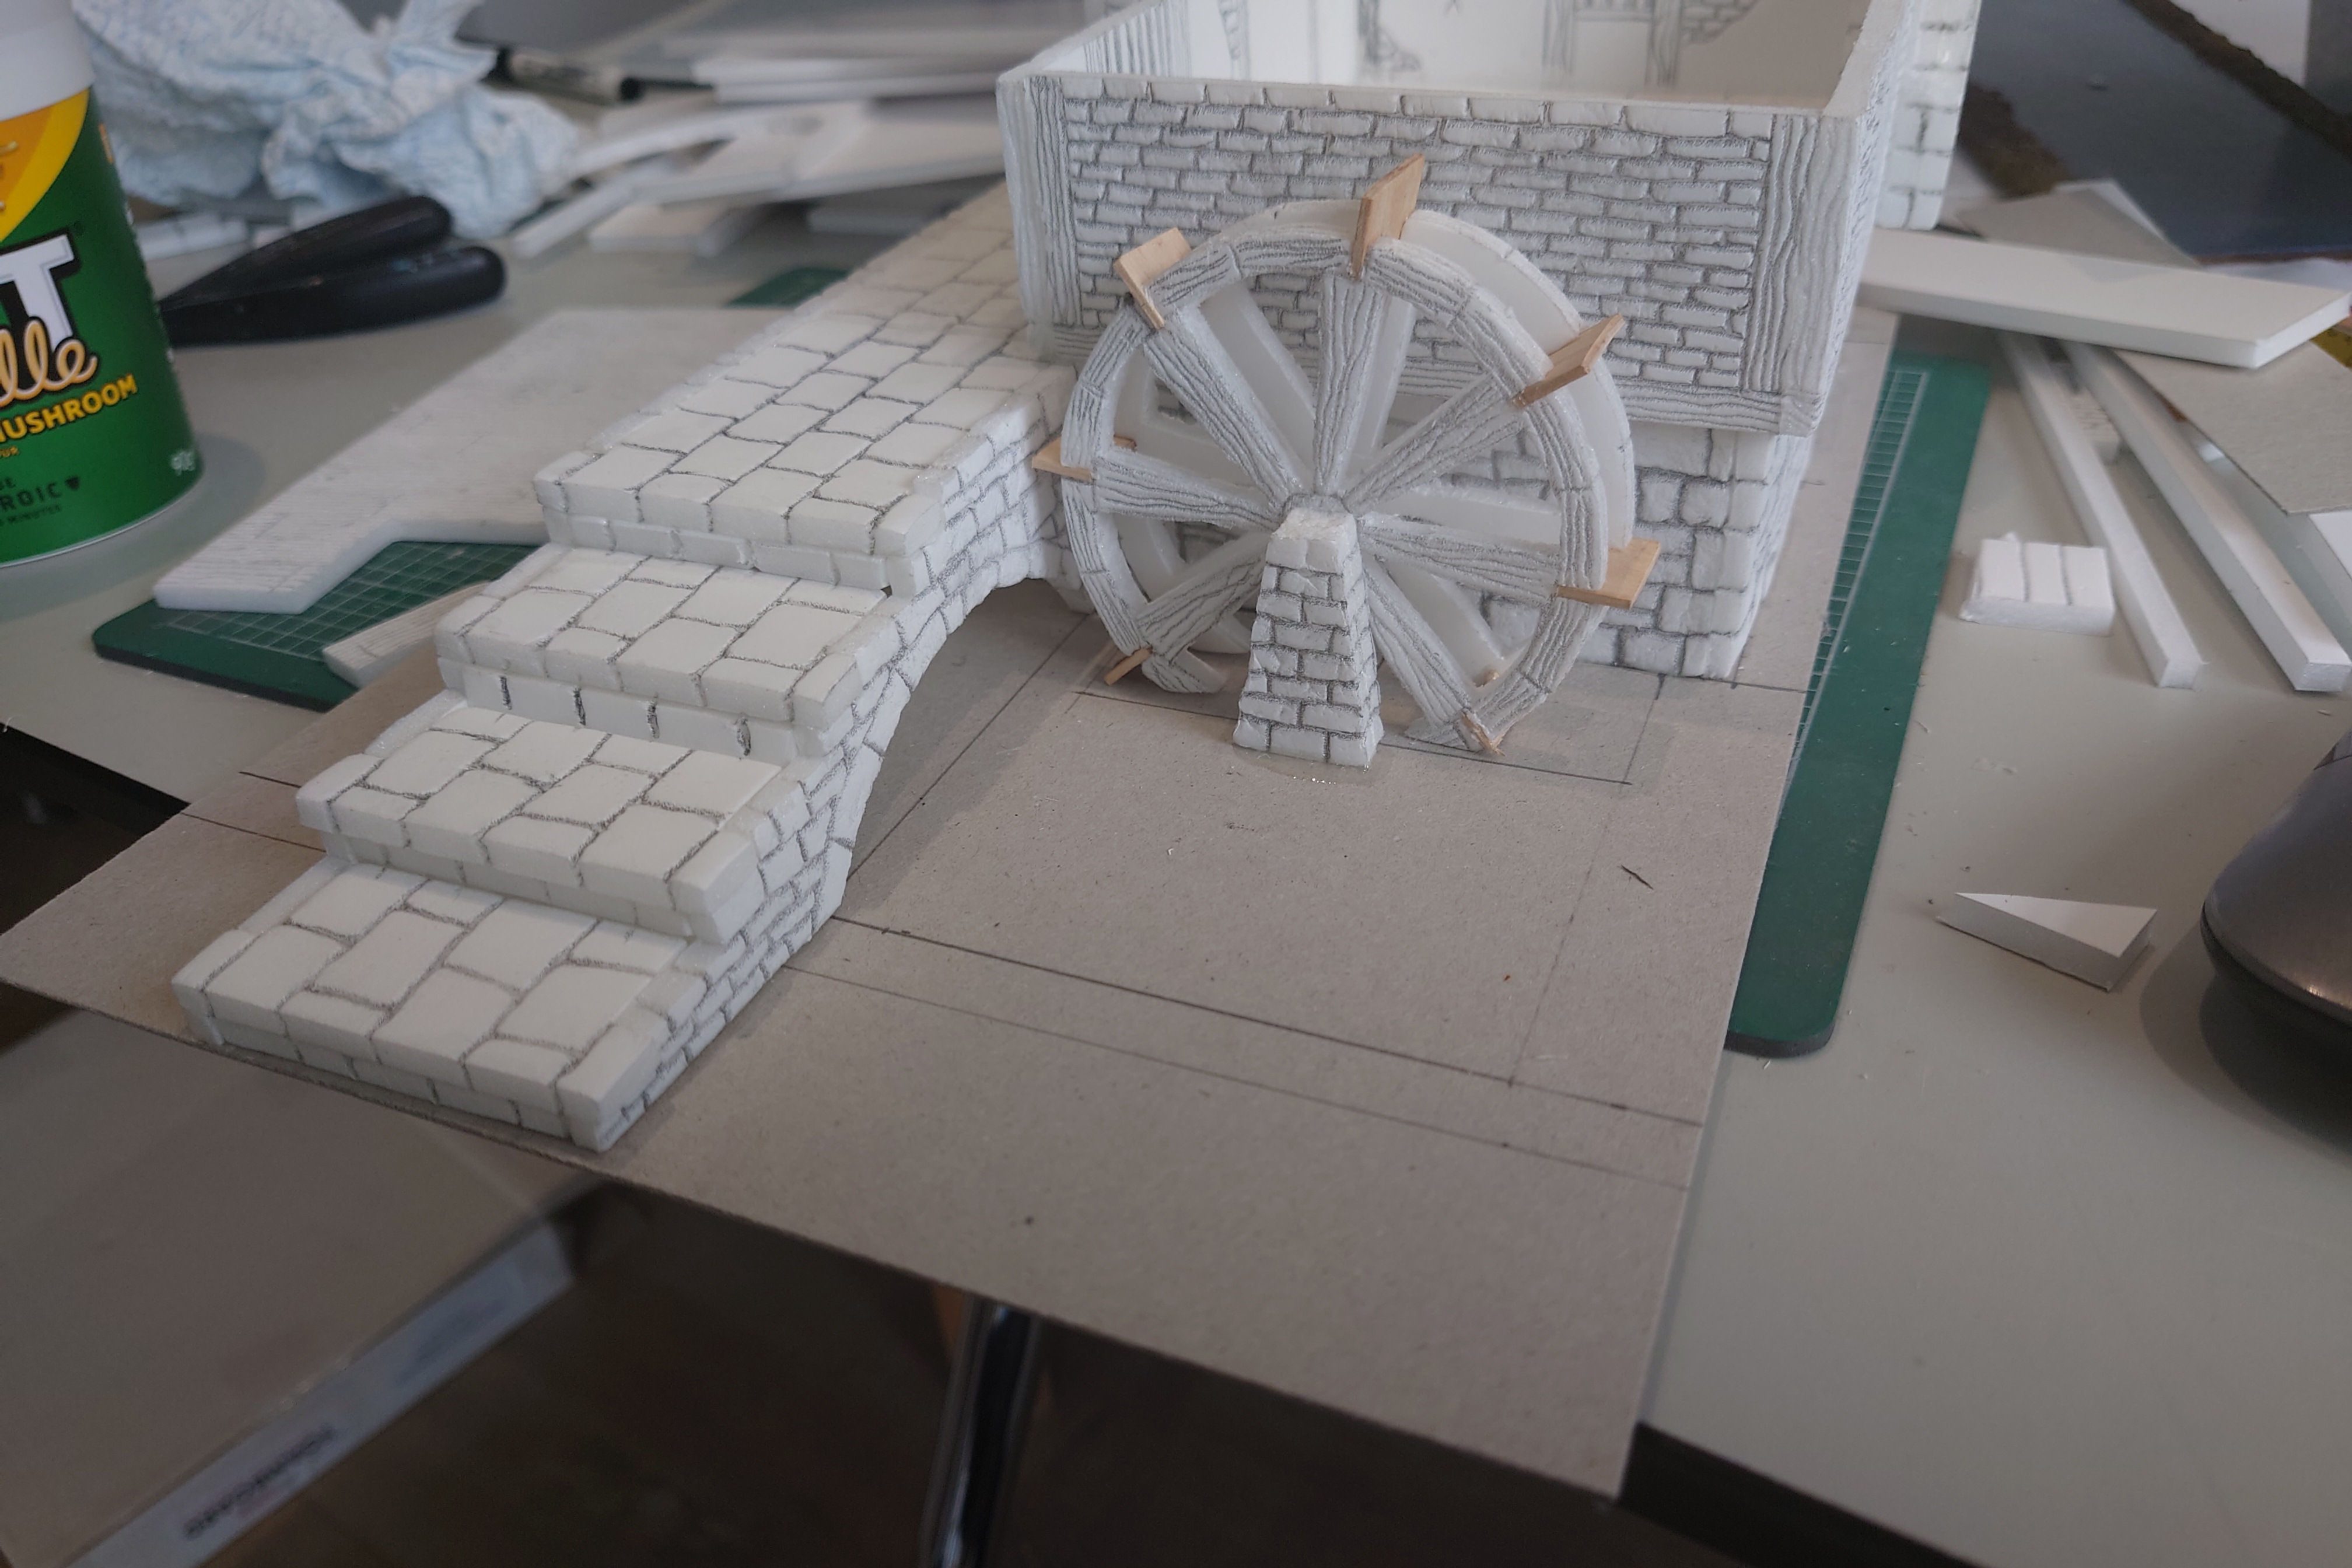
So the first level was to build the stone base and the bridge over the river and the water wheel.
Then I moved onto the main level of the mill which I glued directly onto the the base level.
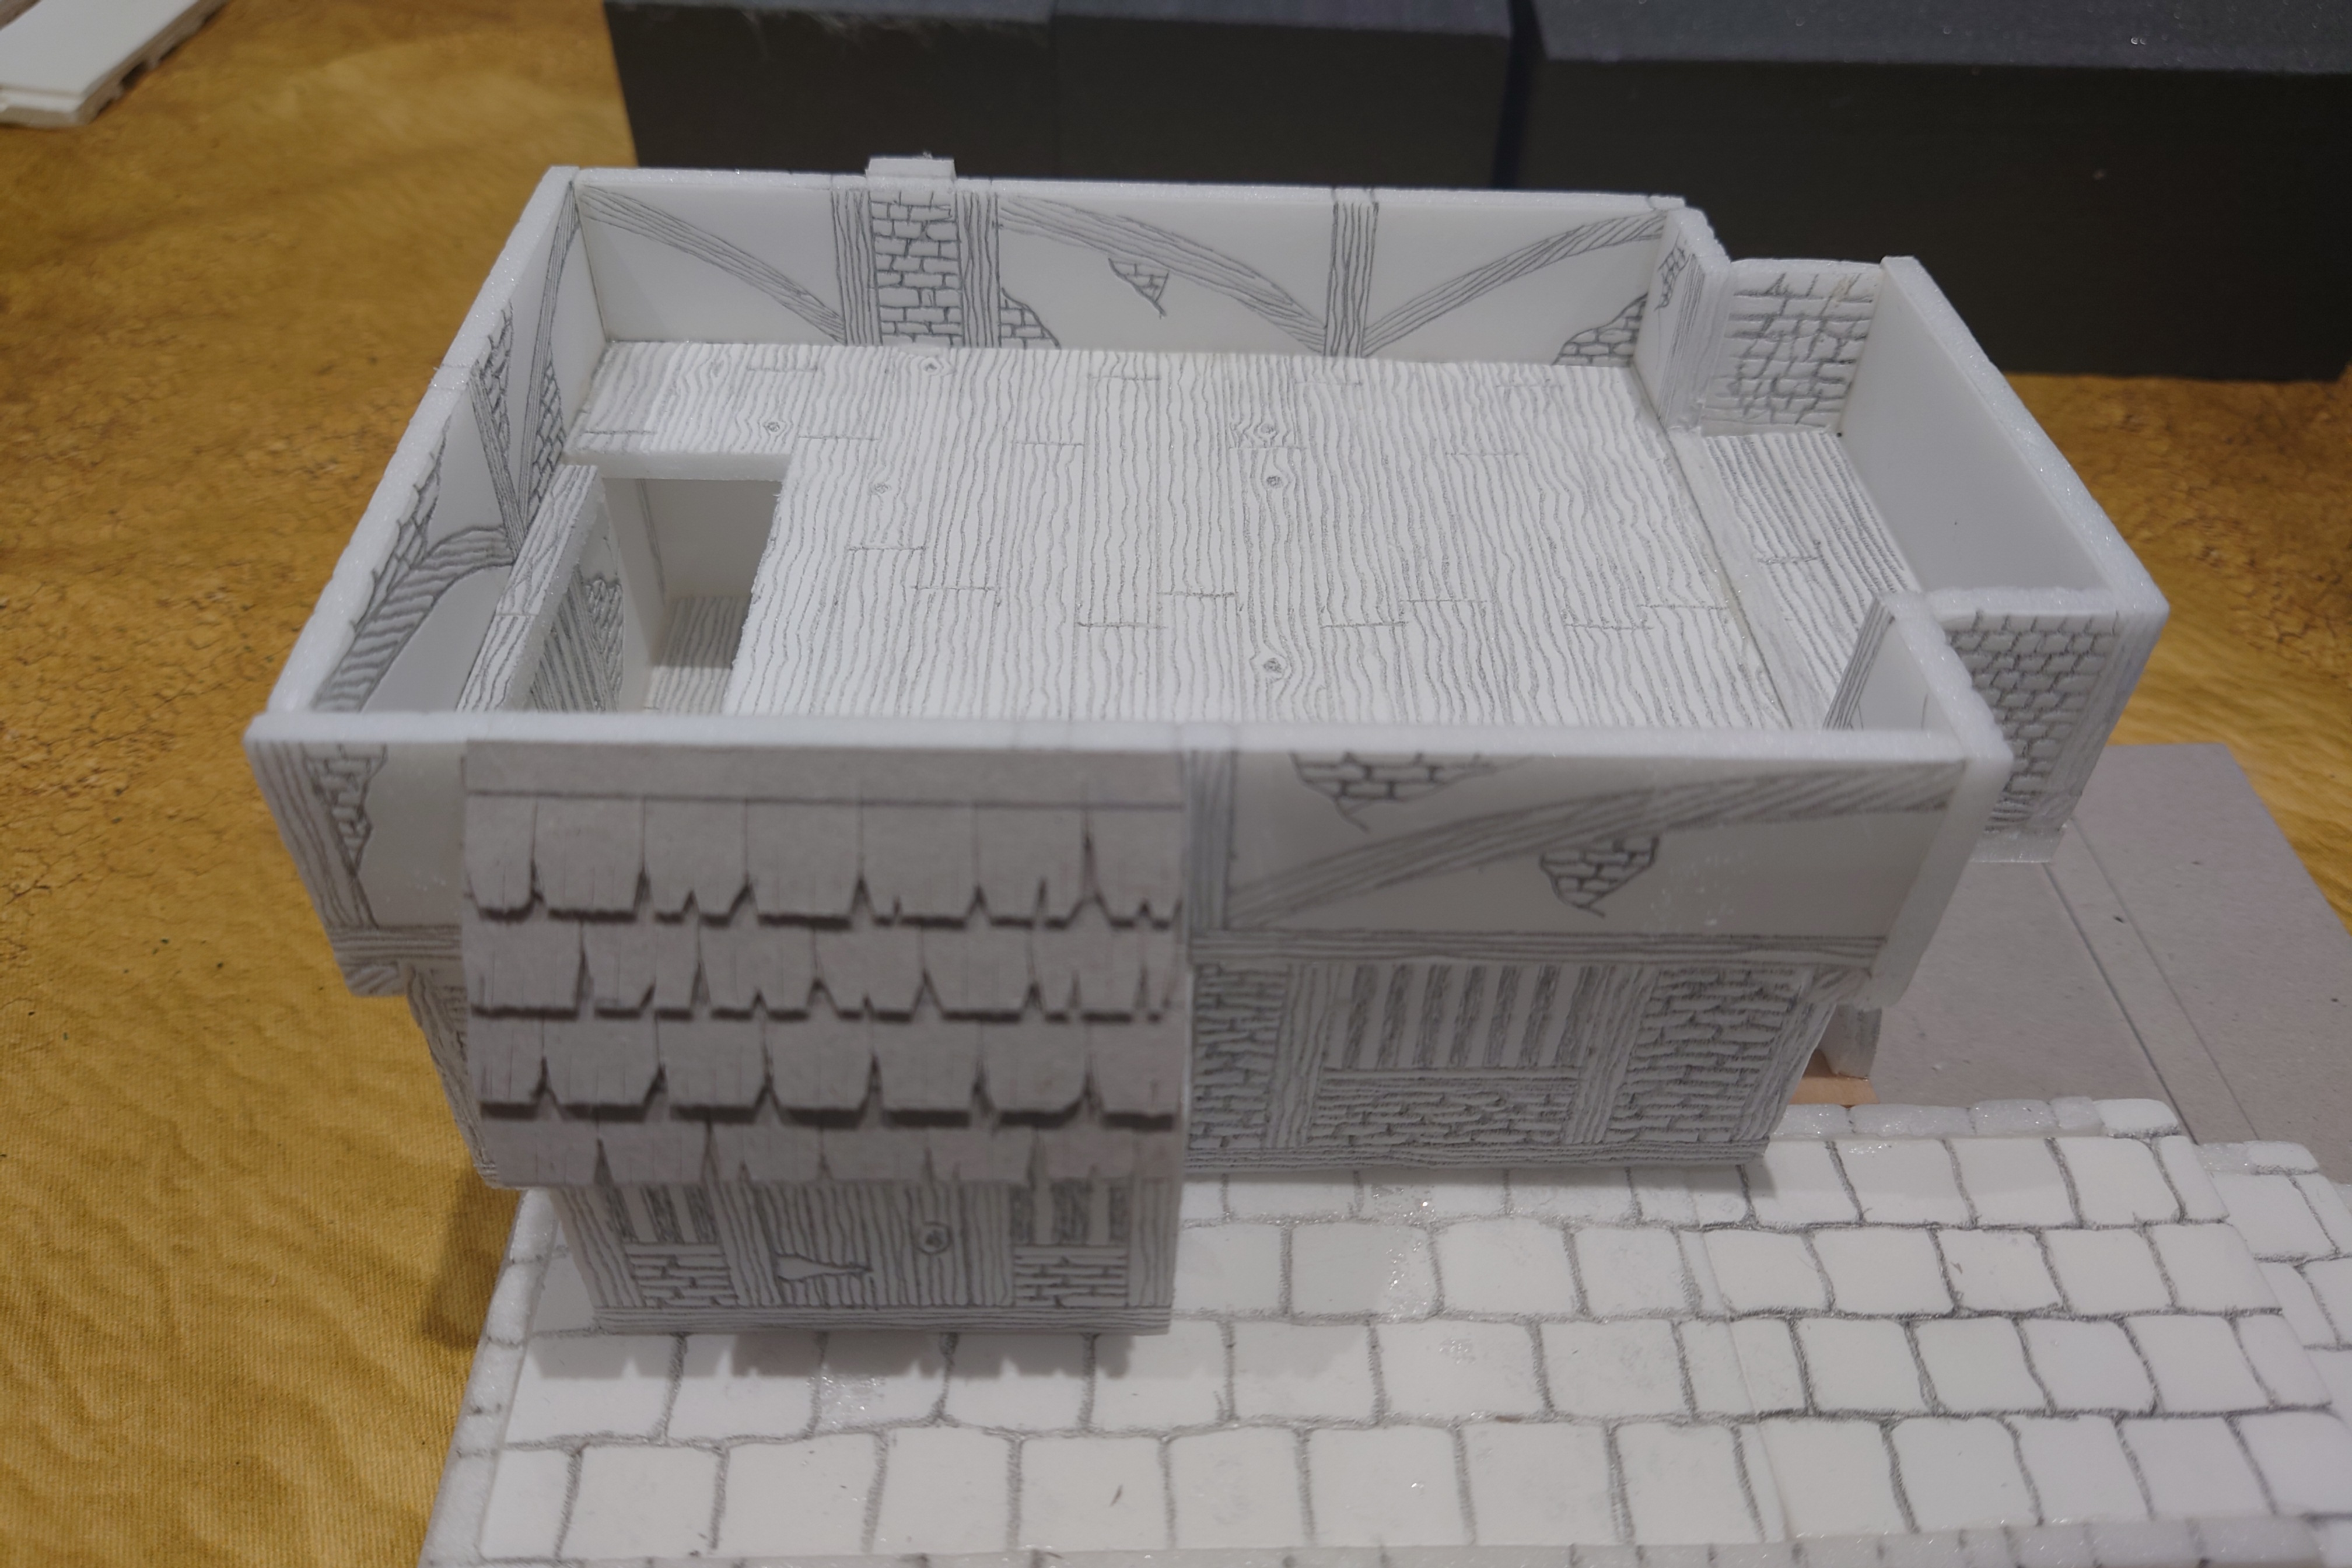
The other thing I needed to do was to consider the design of the interior and as such not only mark out the floors and the walls using pencil, but also the idea of what a mill was like inside so I created a section where a shaft would go through the floor to connect with the wheel. ( although I decided to not do the interior workings at this time as that would be an issue for future me. But I did create the fire place and windows.
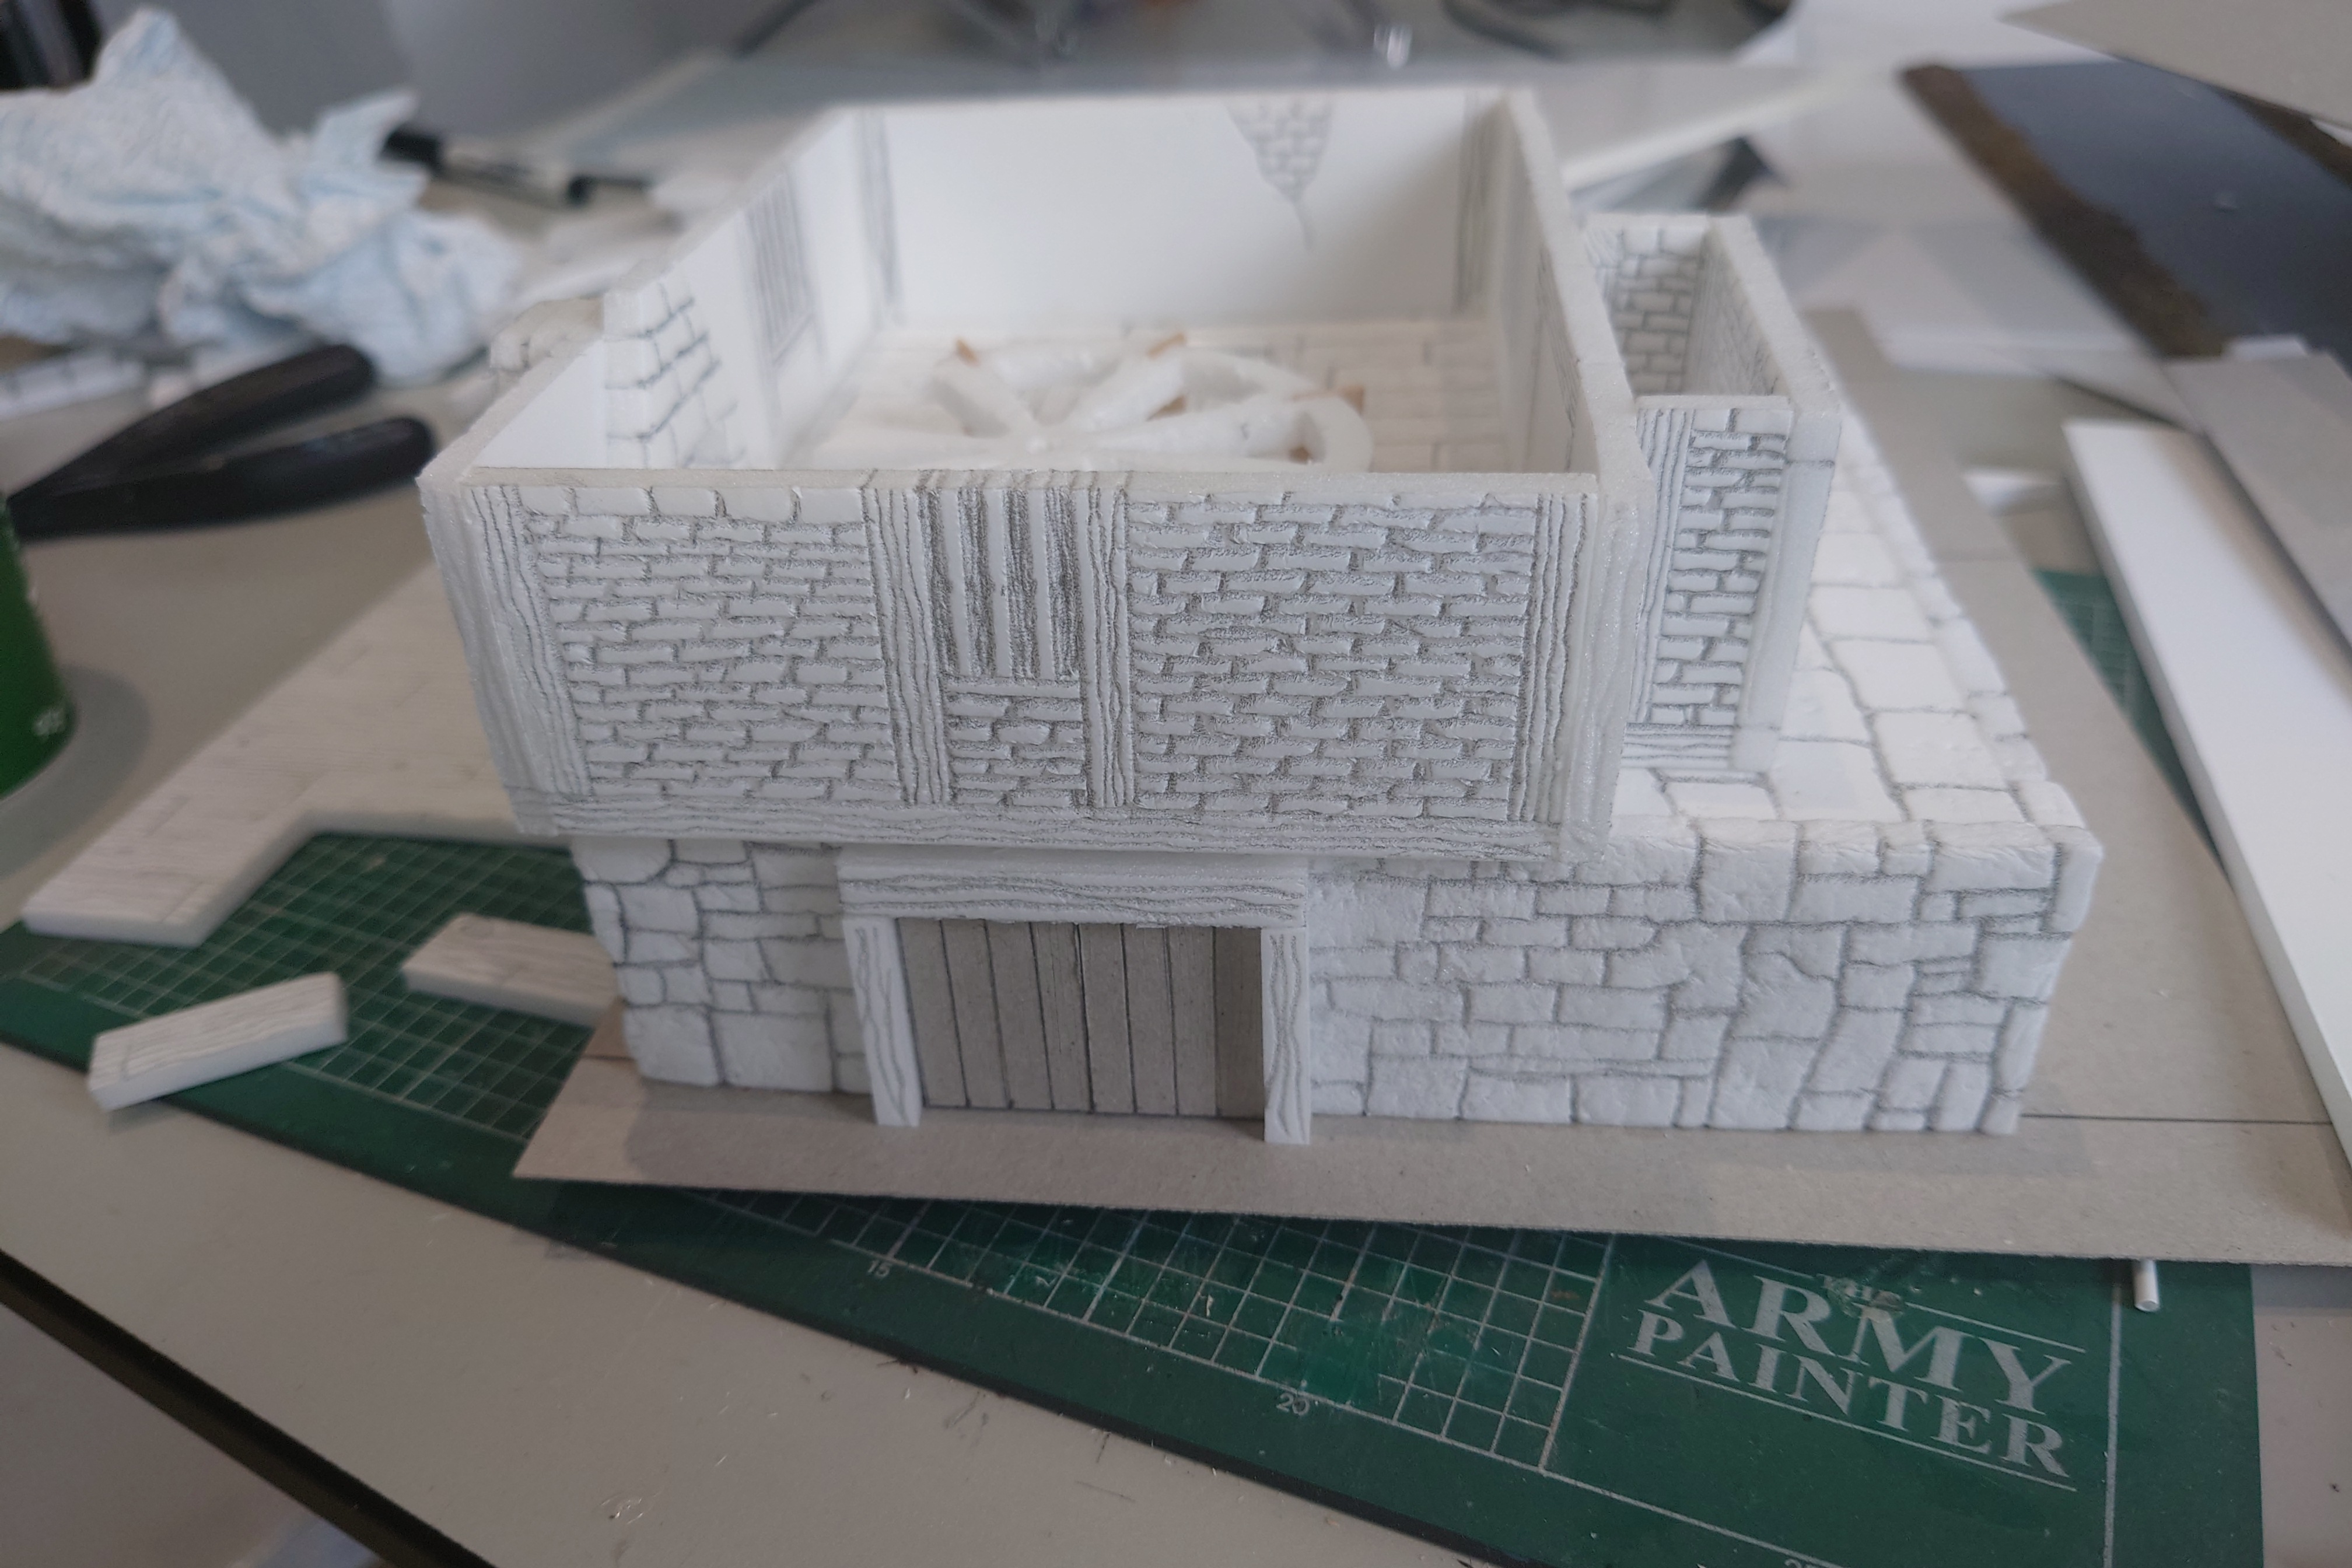
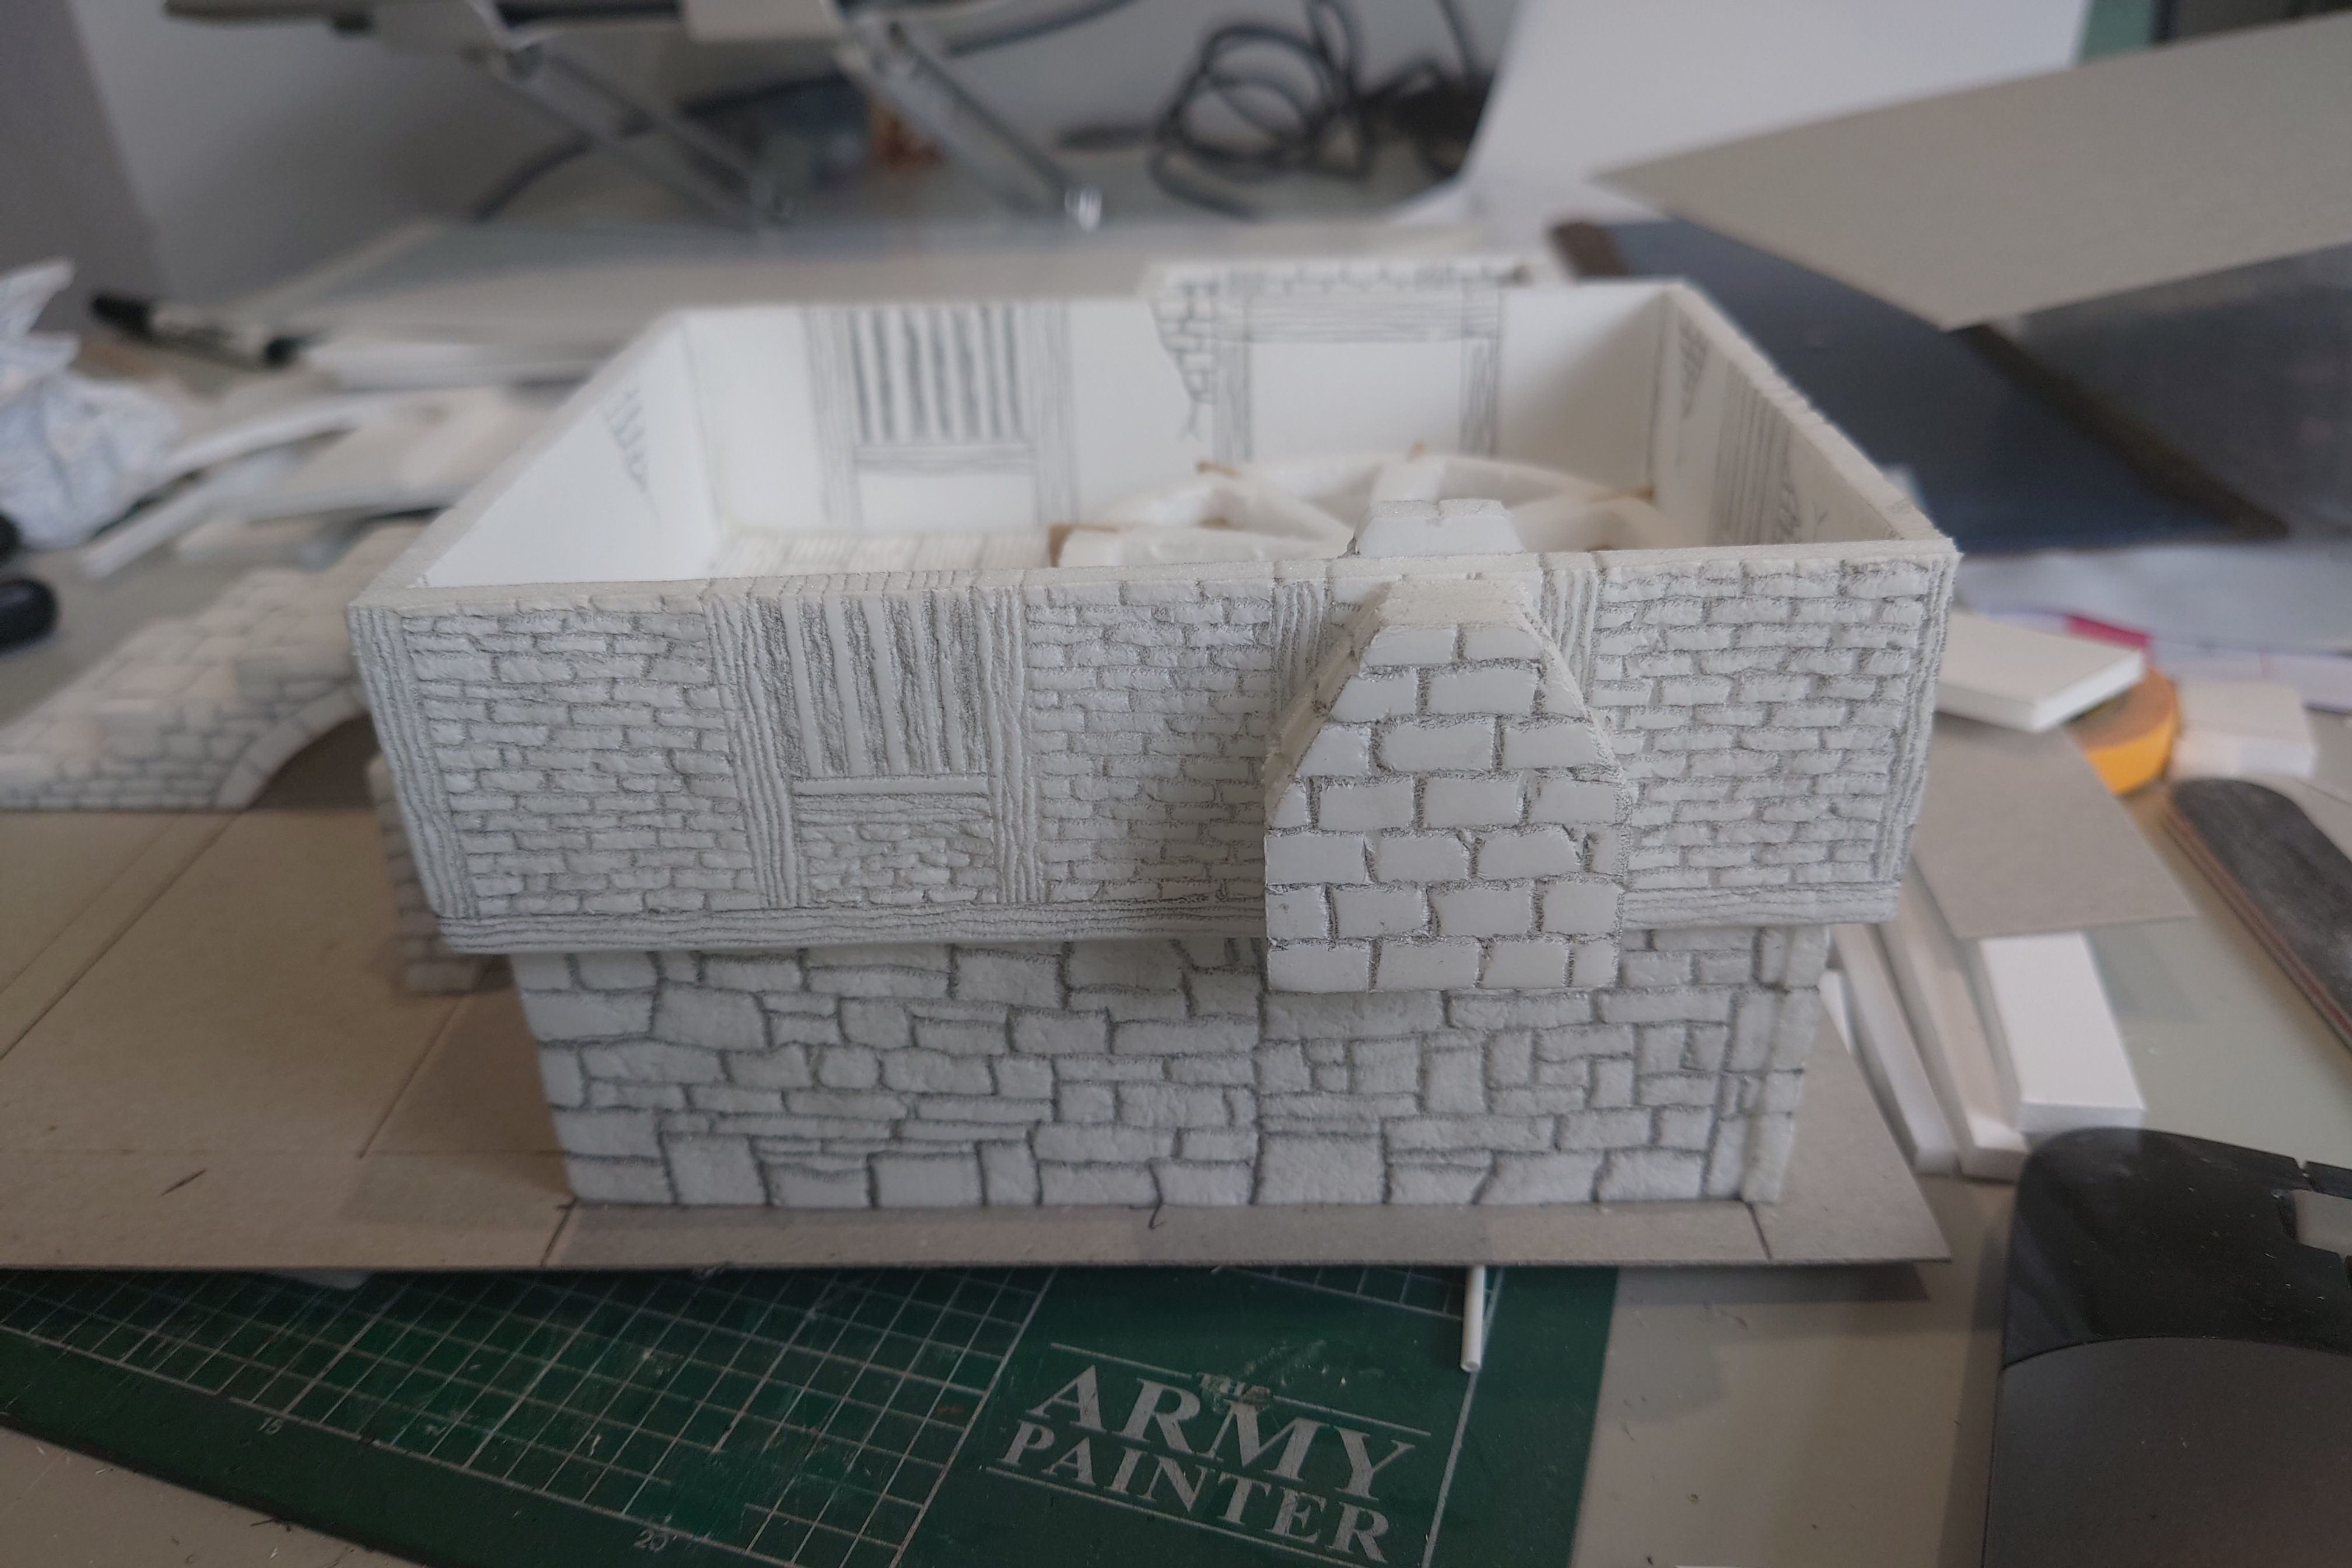
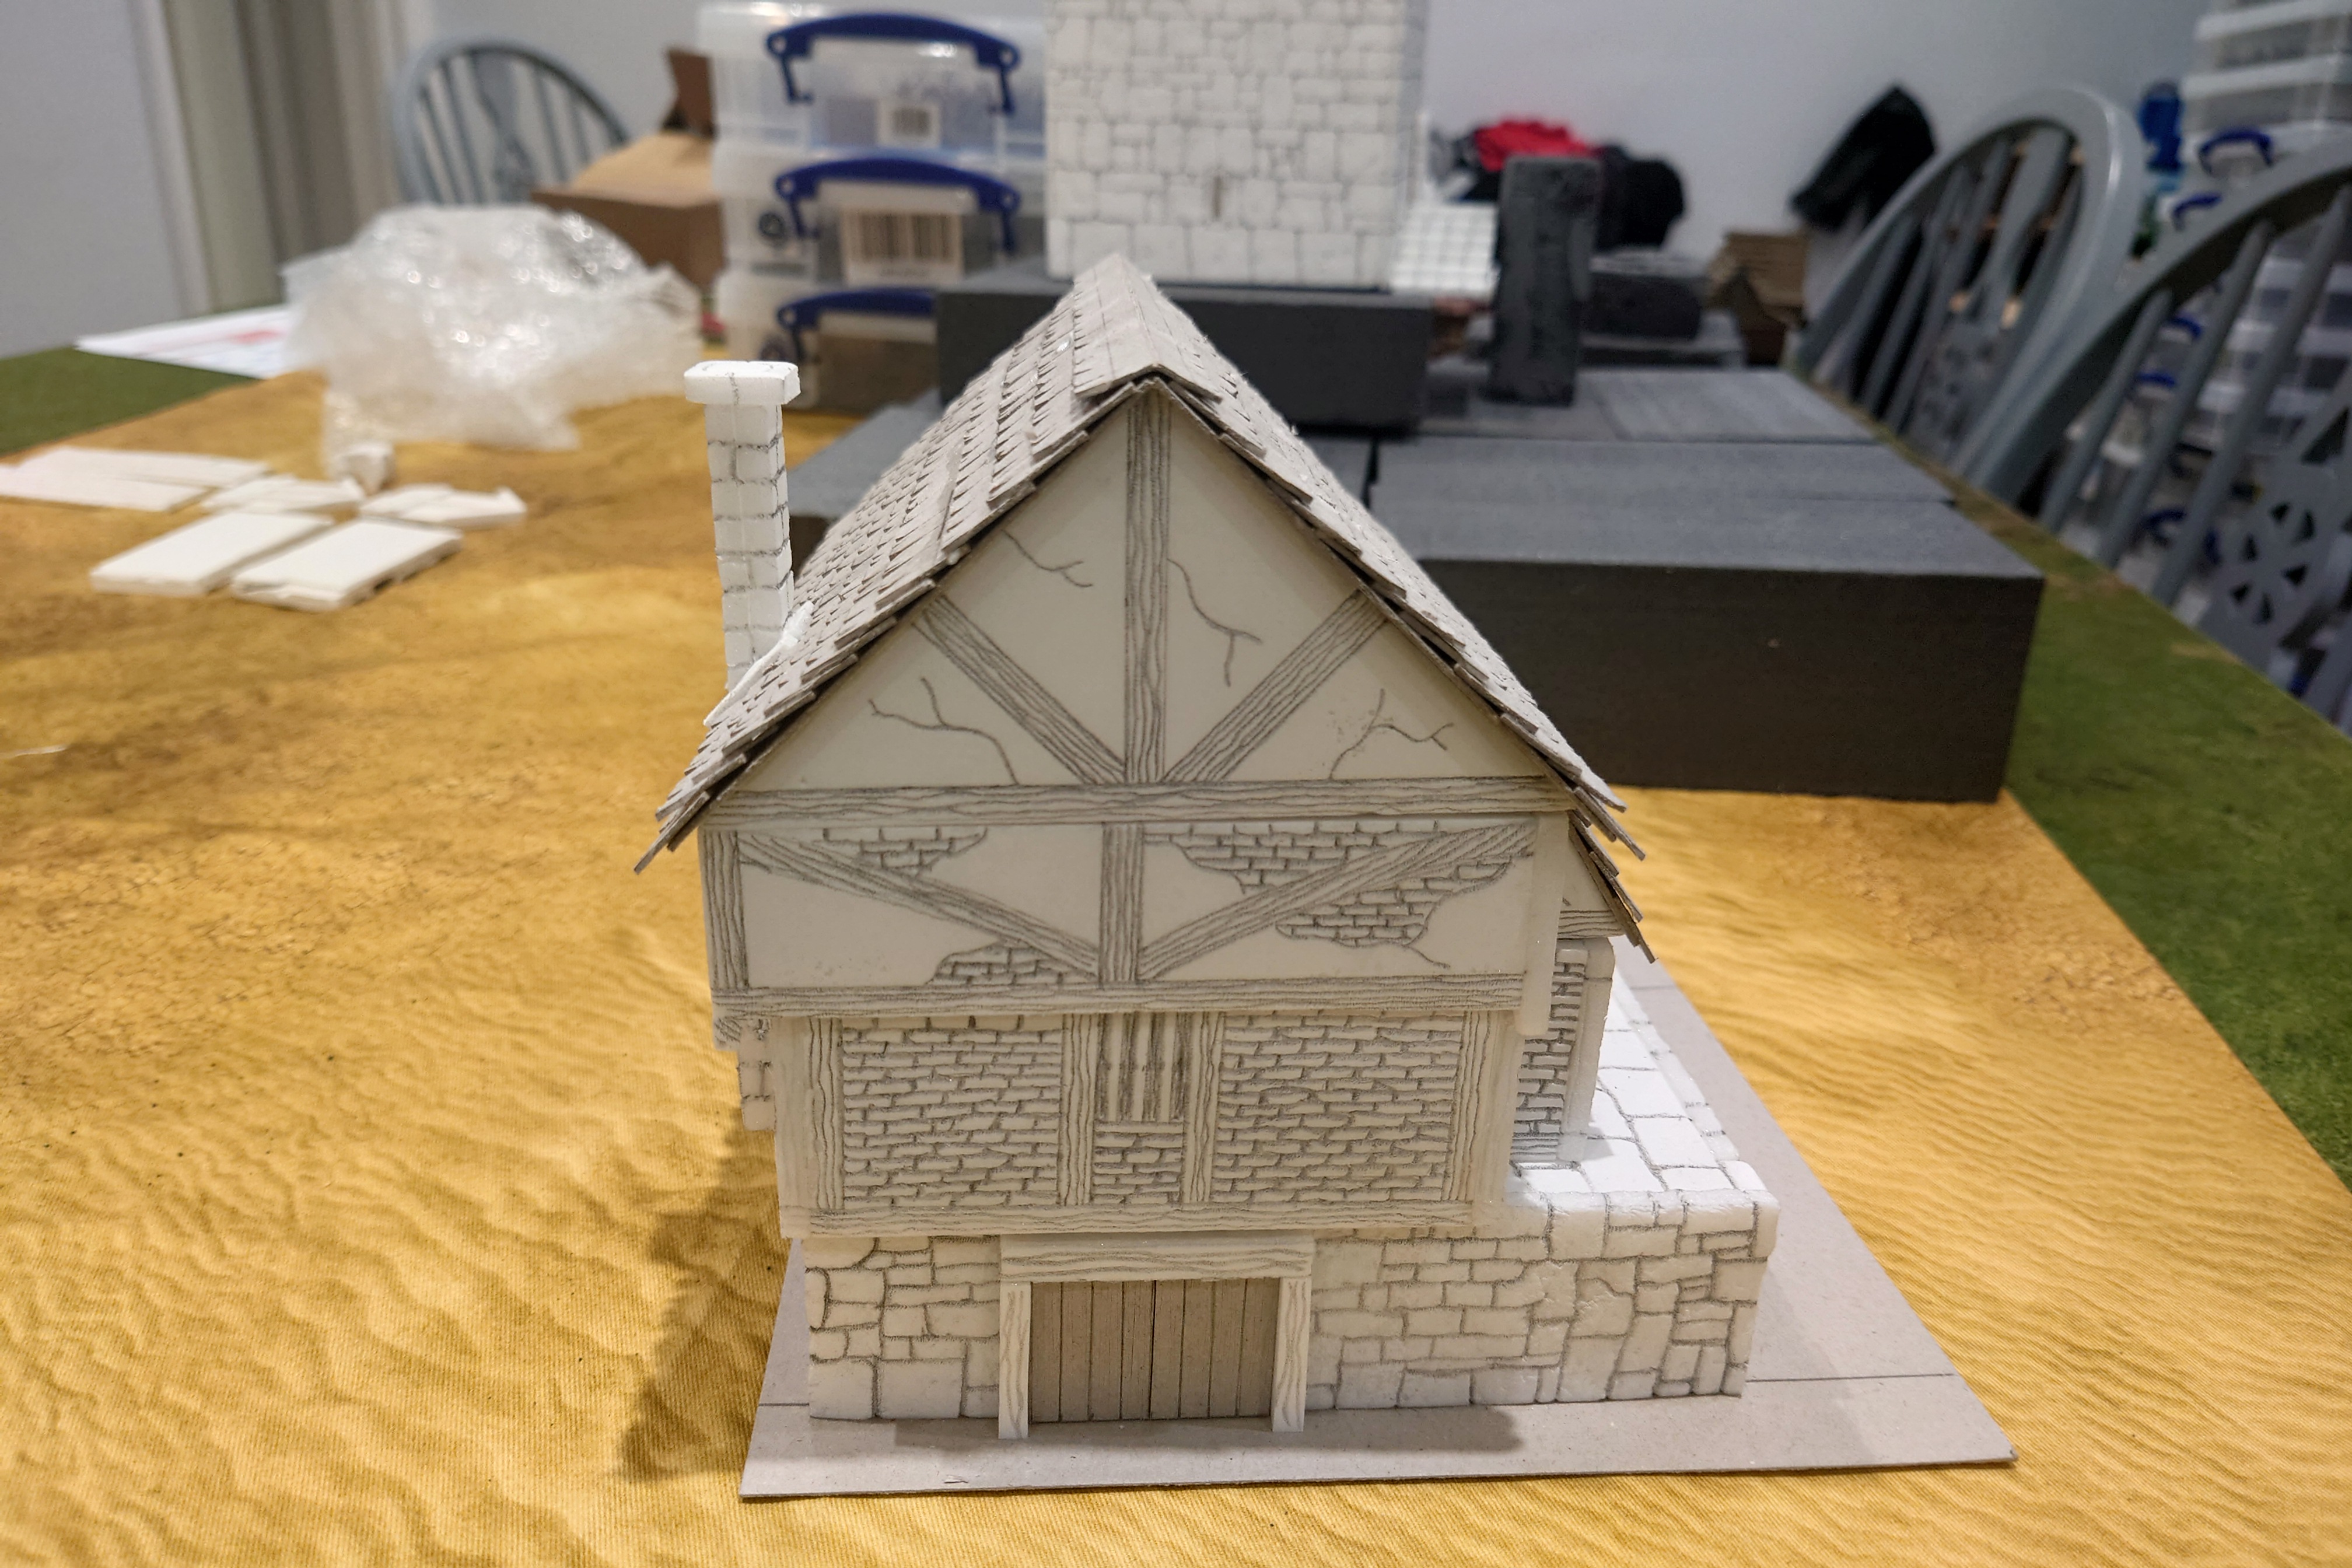
The next level required a bit more thought as it had to line up with the lower level and be able to slot over it. Plus it had to have a roof for the entrance.
This was constructed in much the same way as the previous level. I started with a piece of foam core as the floor then measured out the walls. The only difference was that I off set created a lip to slot over the lower level. This proved to be a bit tricky as so ended up cutting the lip so there were tabs in strategic places. This has replicated beams sticking out of the building as supports.
I also cut out a section where I could add a set of stairs or mor likely a ladder so access can gained to the top floor.
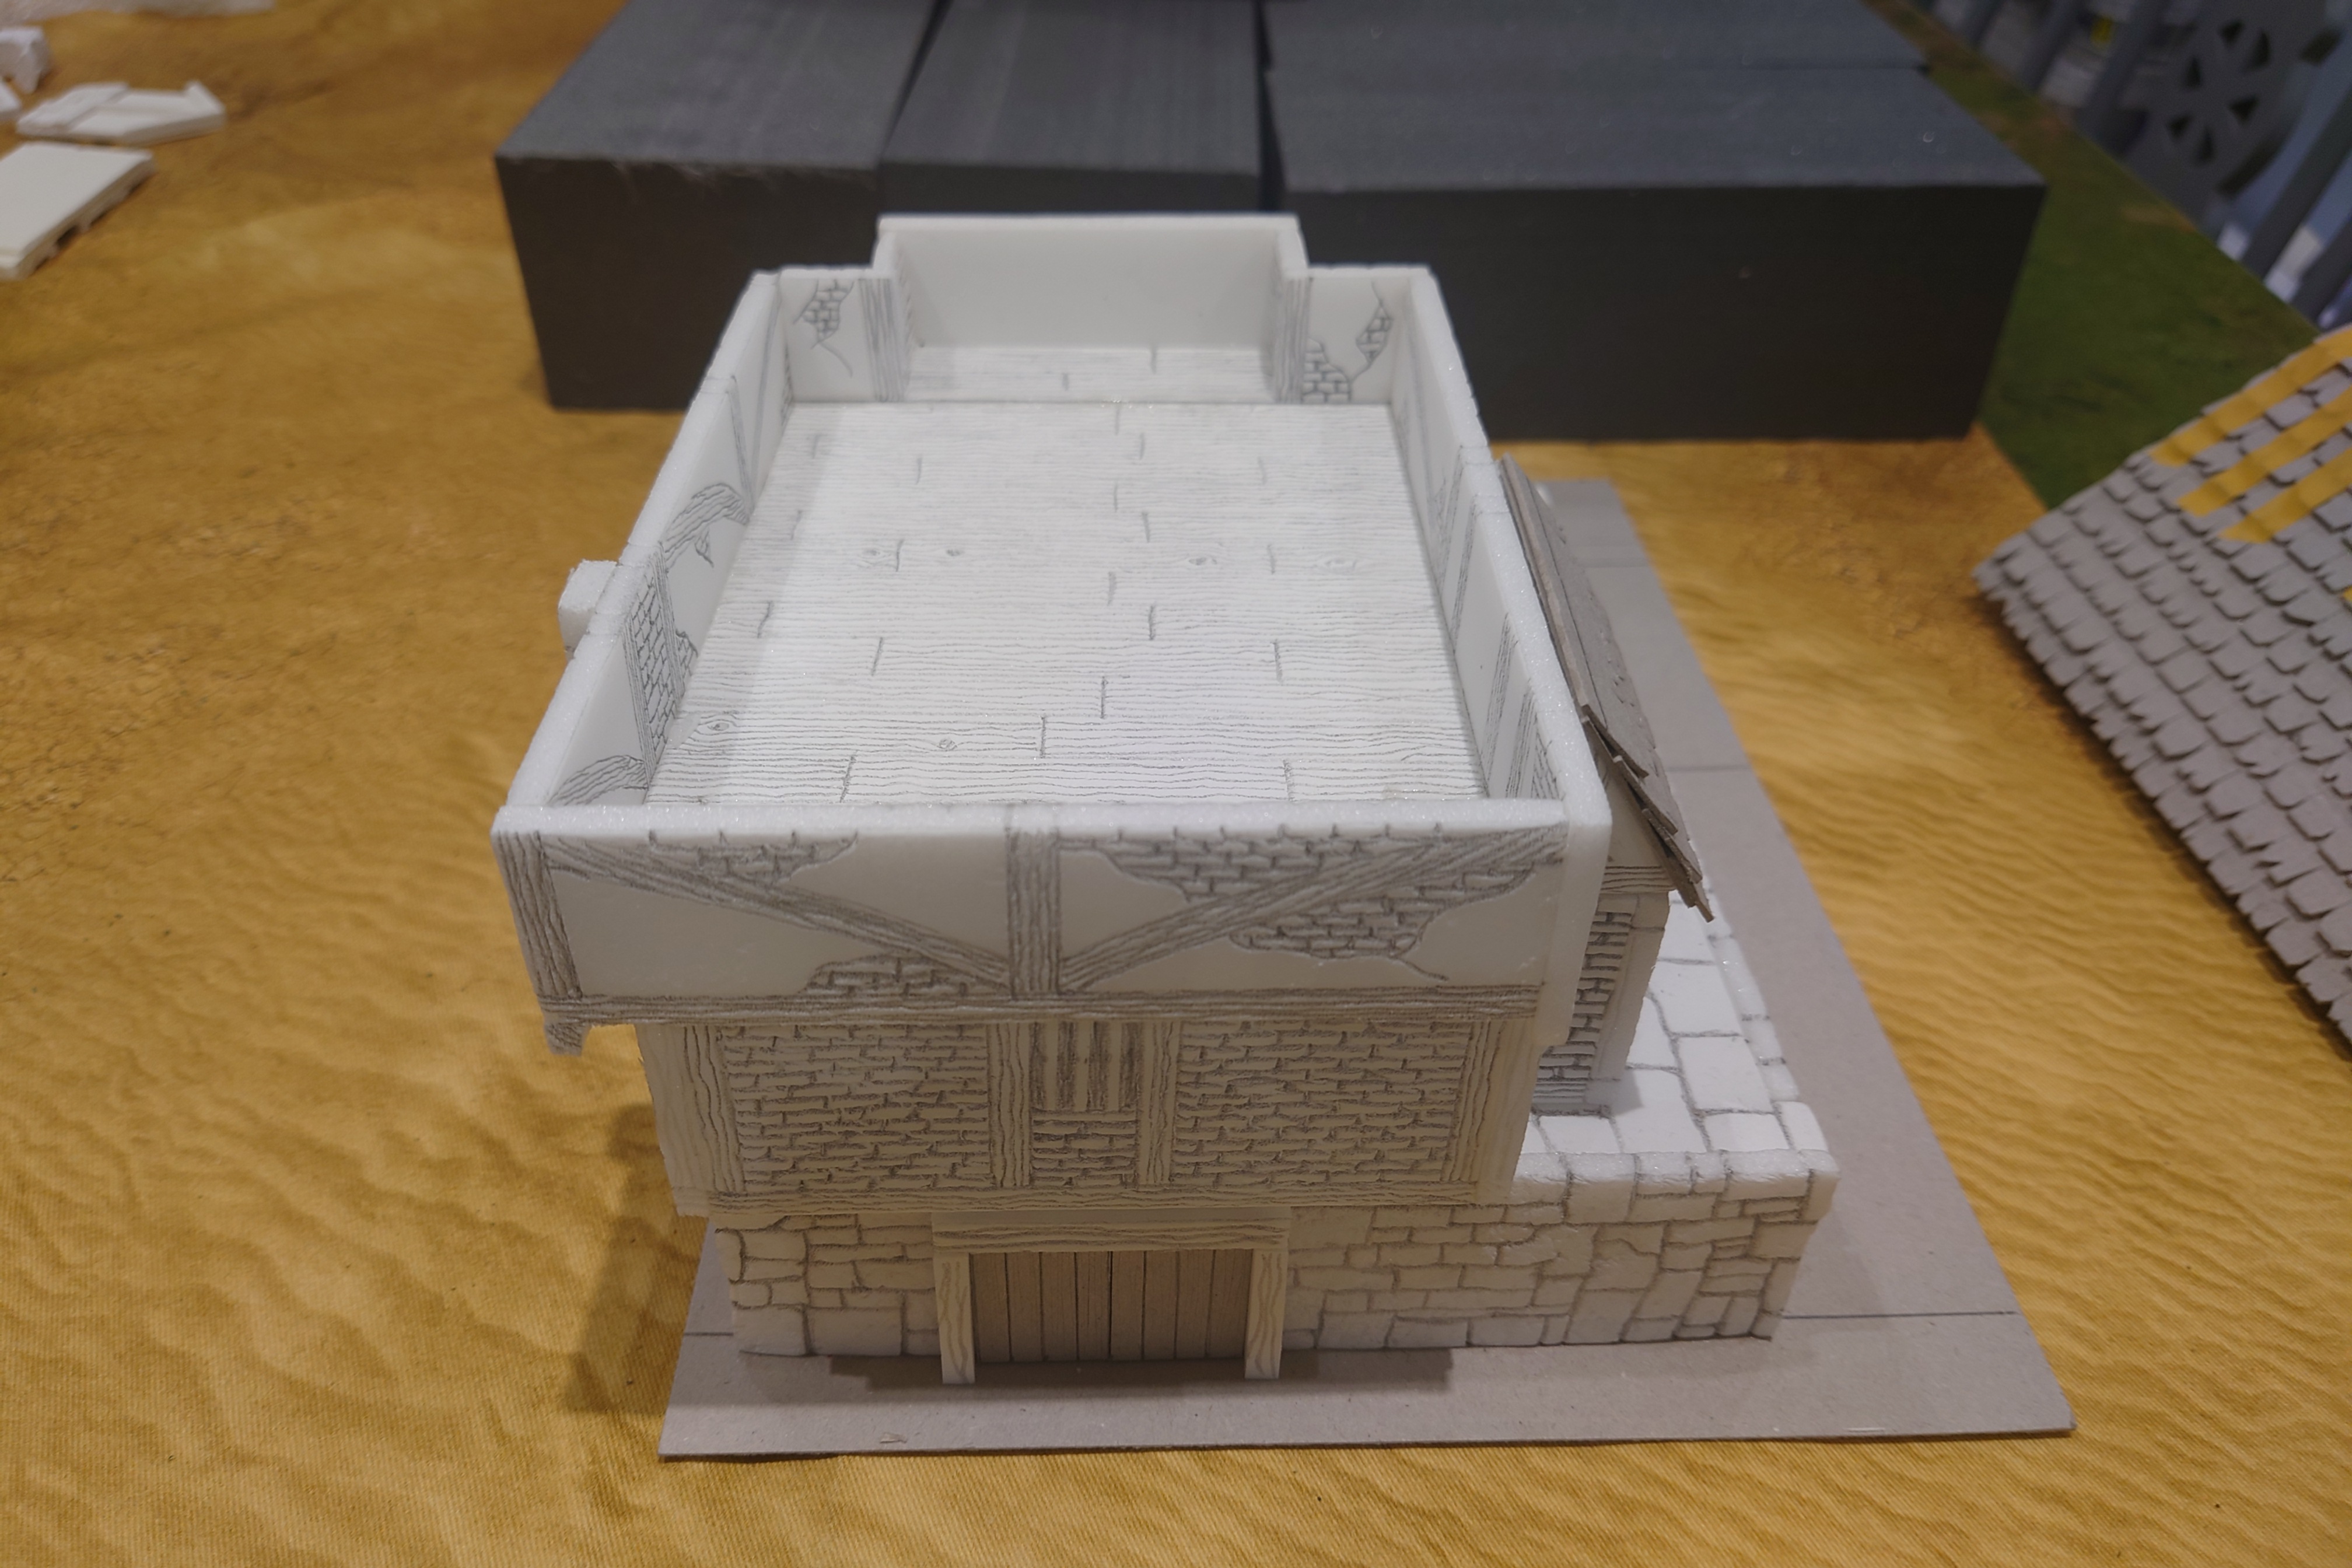
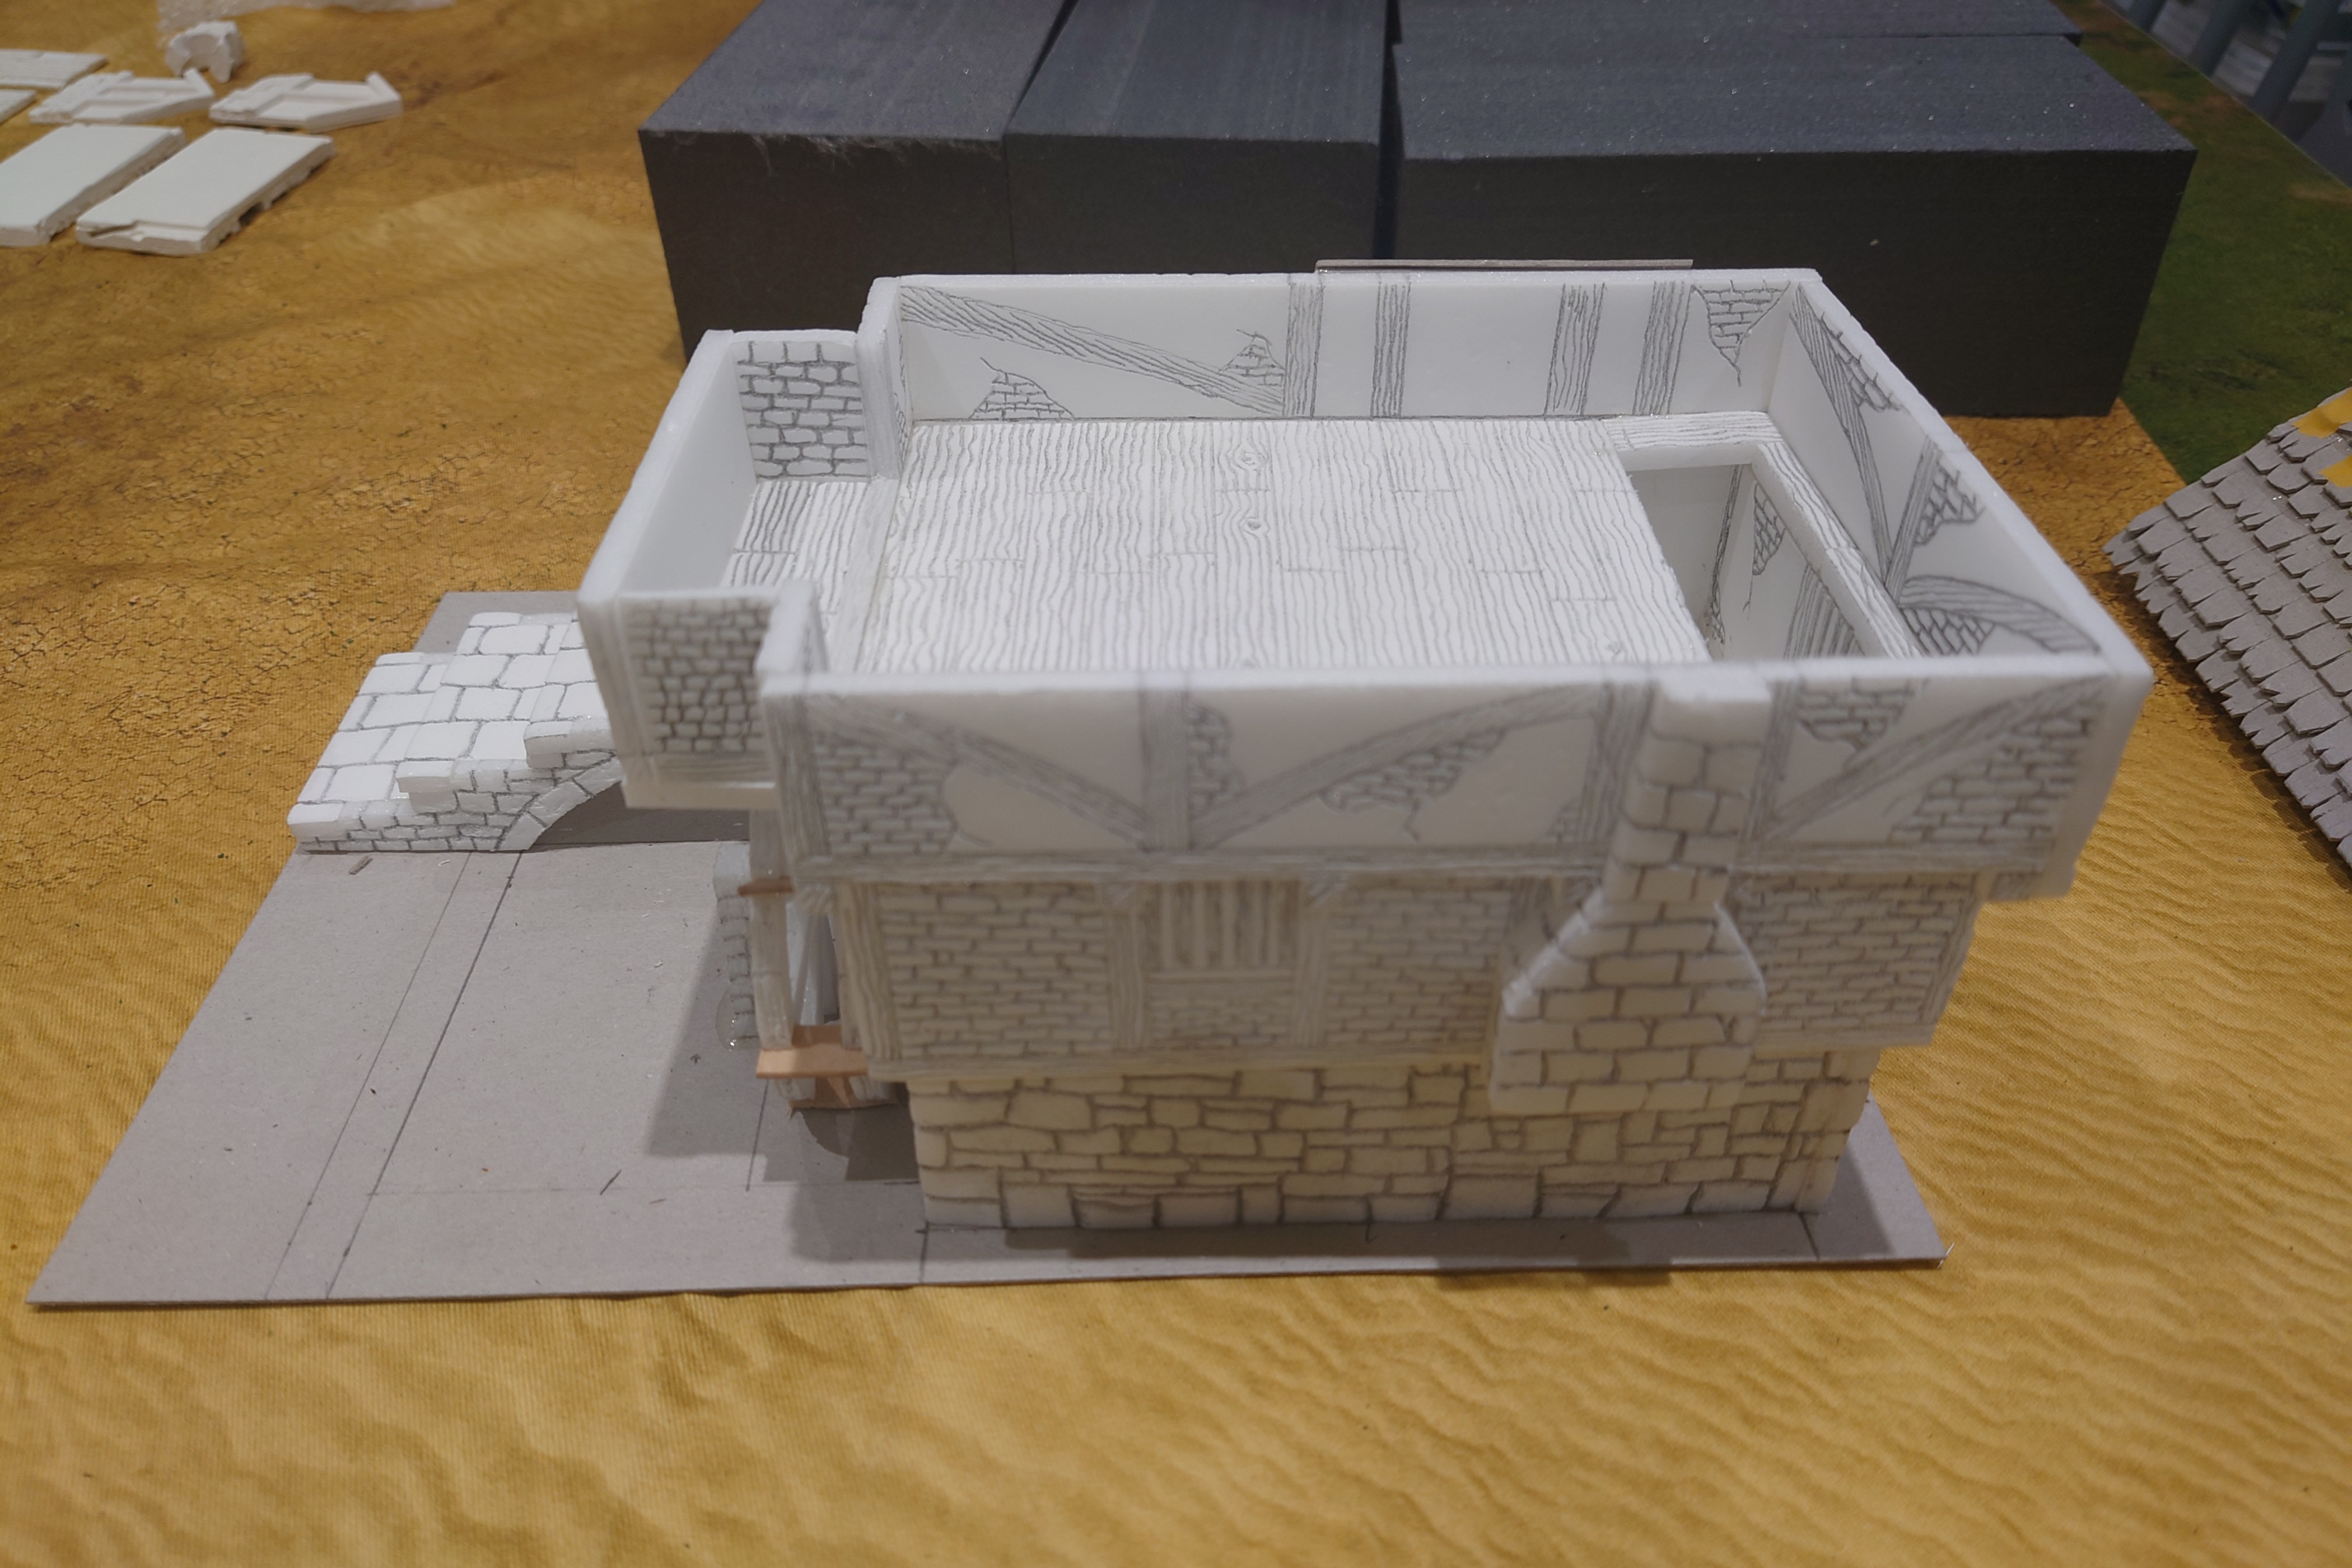
Next up was the roof section. This I knew would be required a sloping tiled roof. But only needed two end sections so would require a bracer between the end sections.. this proved to be tricky getting the measurements correct, but in the end it worked out and then I could start on the roof.
As it is a sloped roof I cut a section of card to the the size of both roof sides. Then scored it so it would bend in the middle. I then glued this to the previous structure. To create a base.
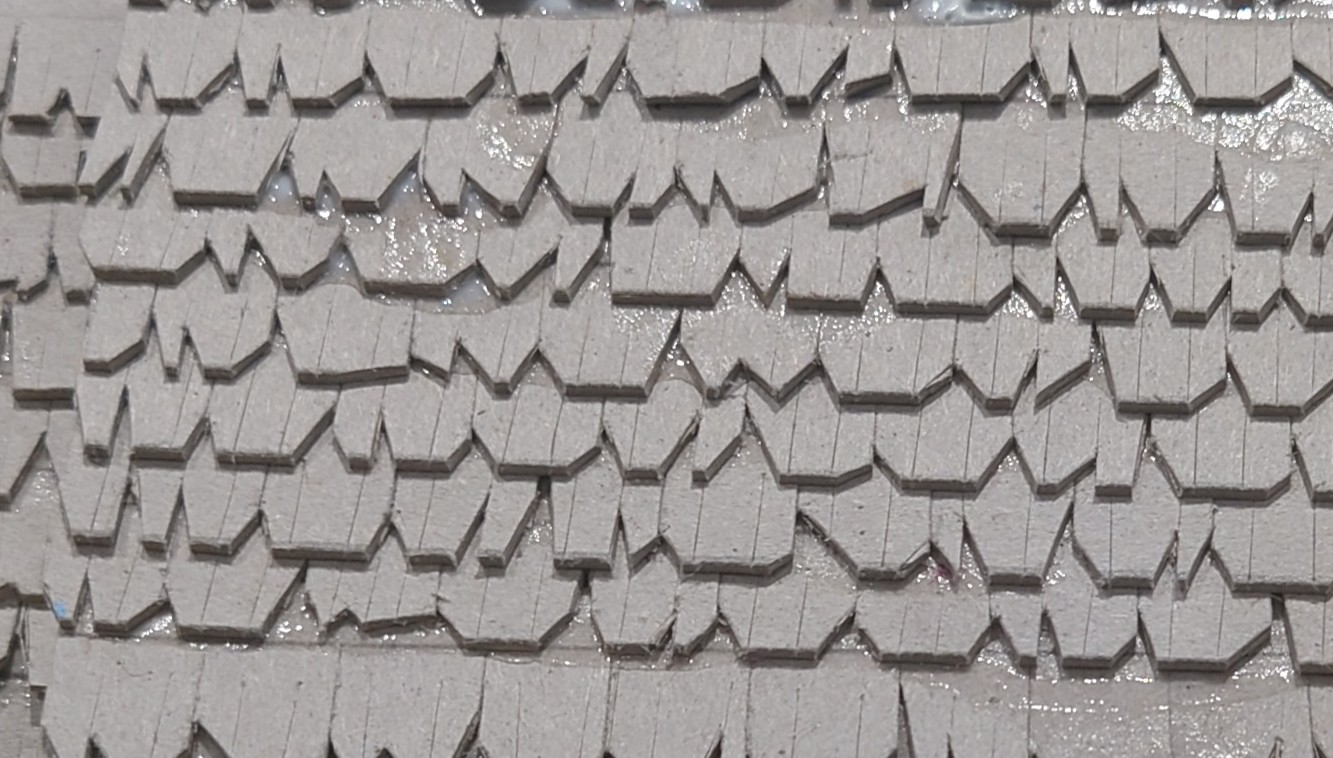
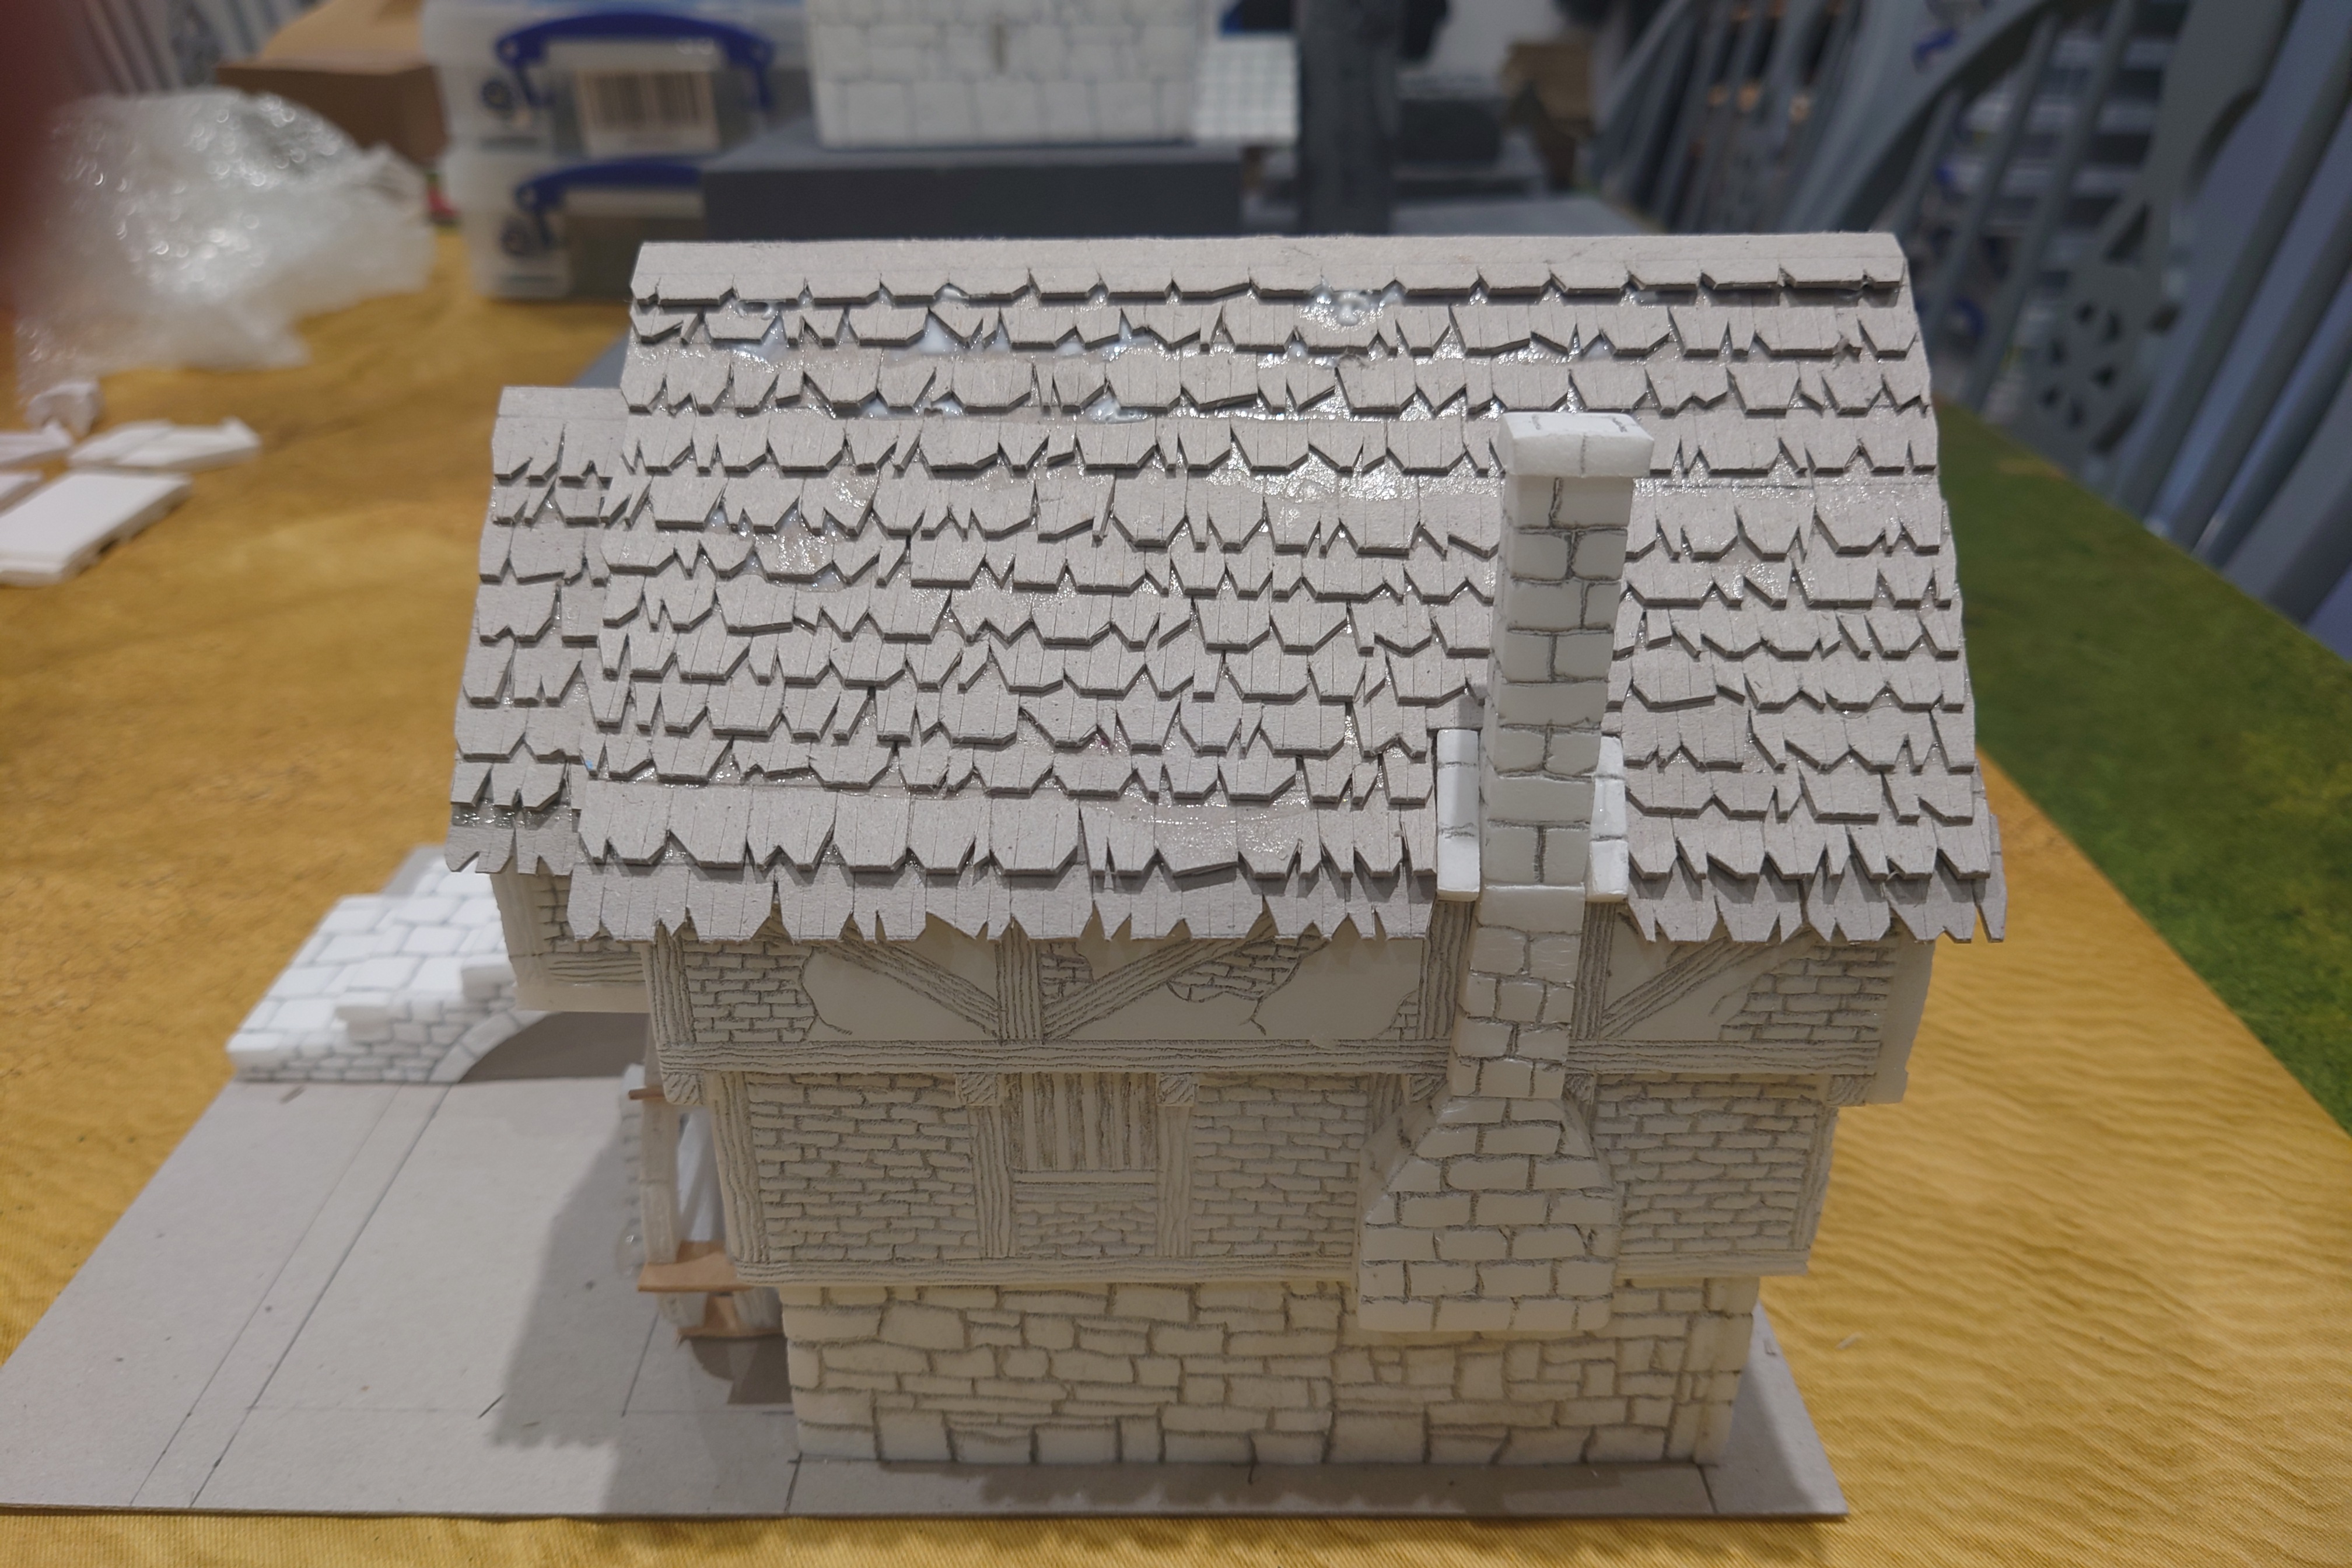
Tiles
- Then it was onto the most tedious part of the roof, doing the tiles. There are generally two methods. Create each tile individually or do them in strips. I opted to do them in strips. The reason for this was that it would be easier to add.
 Tiles
Tiles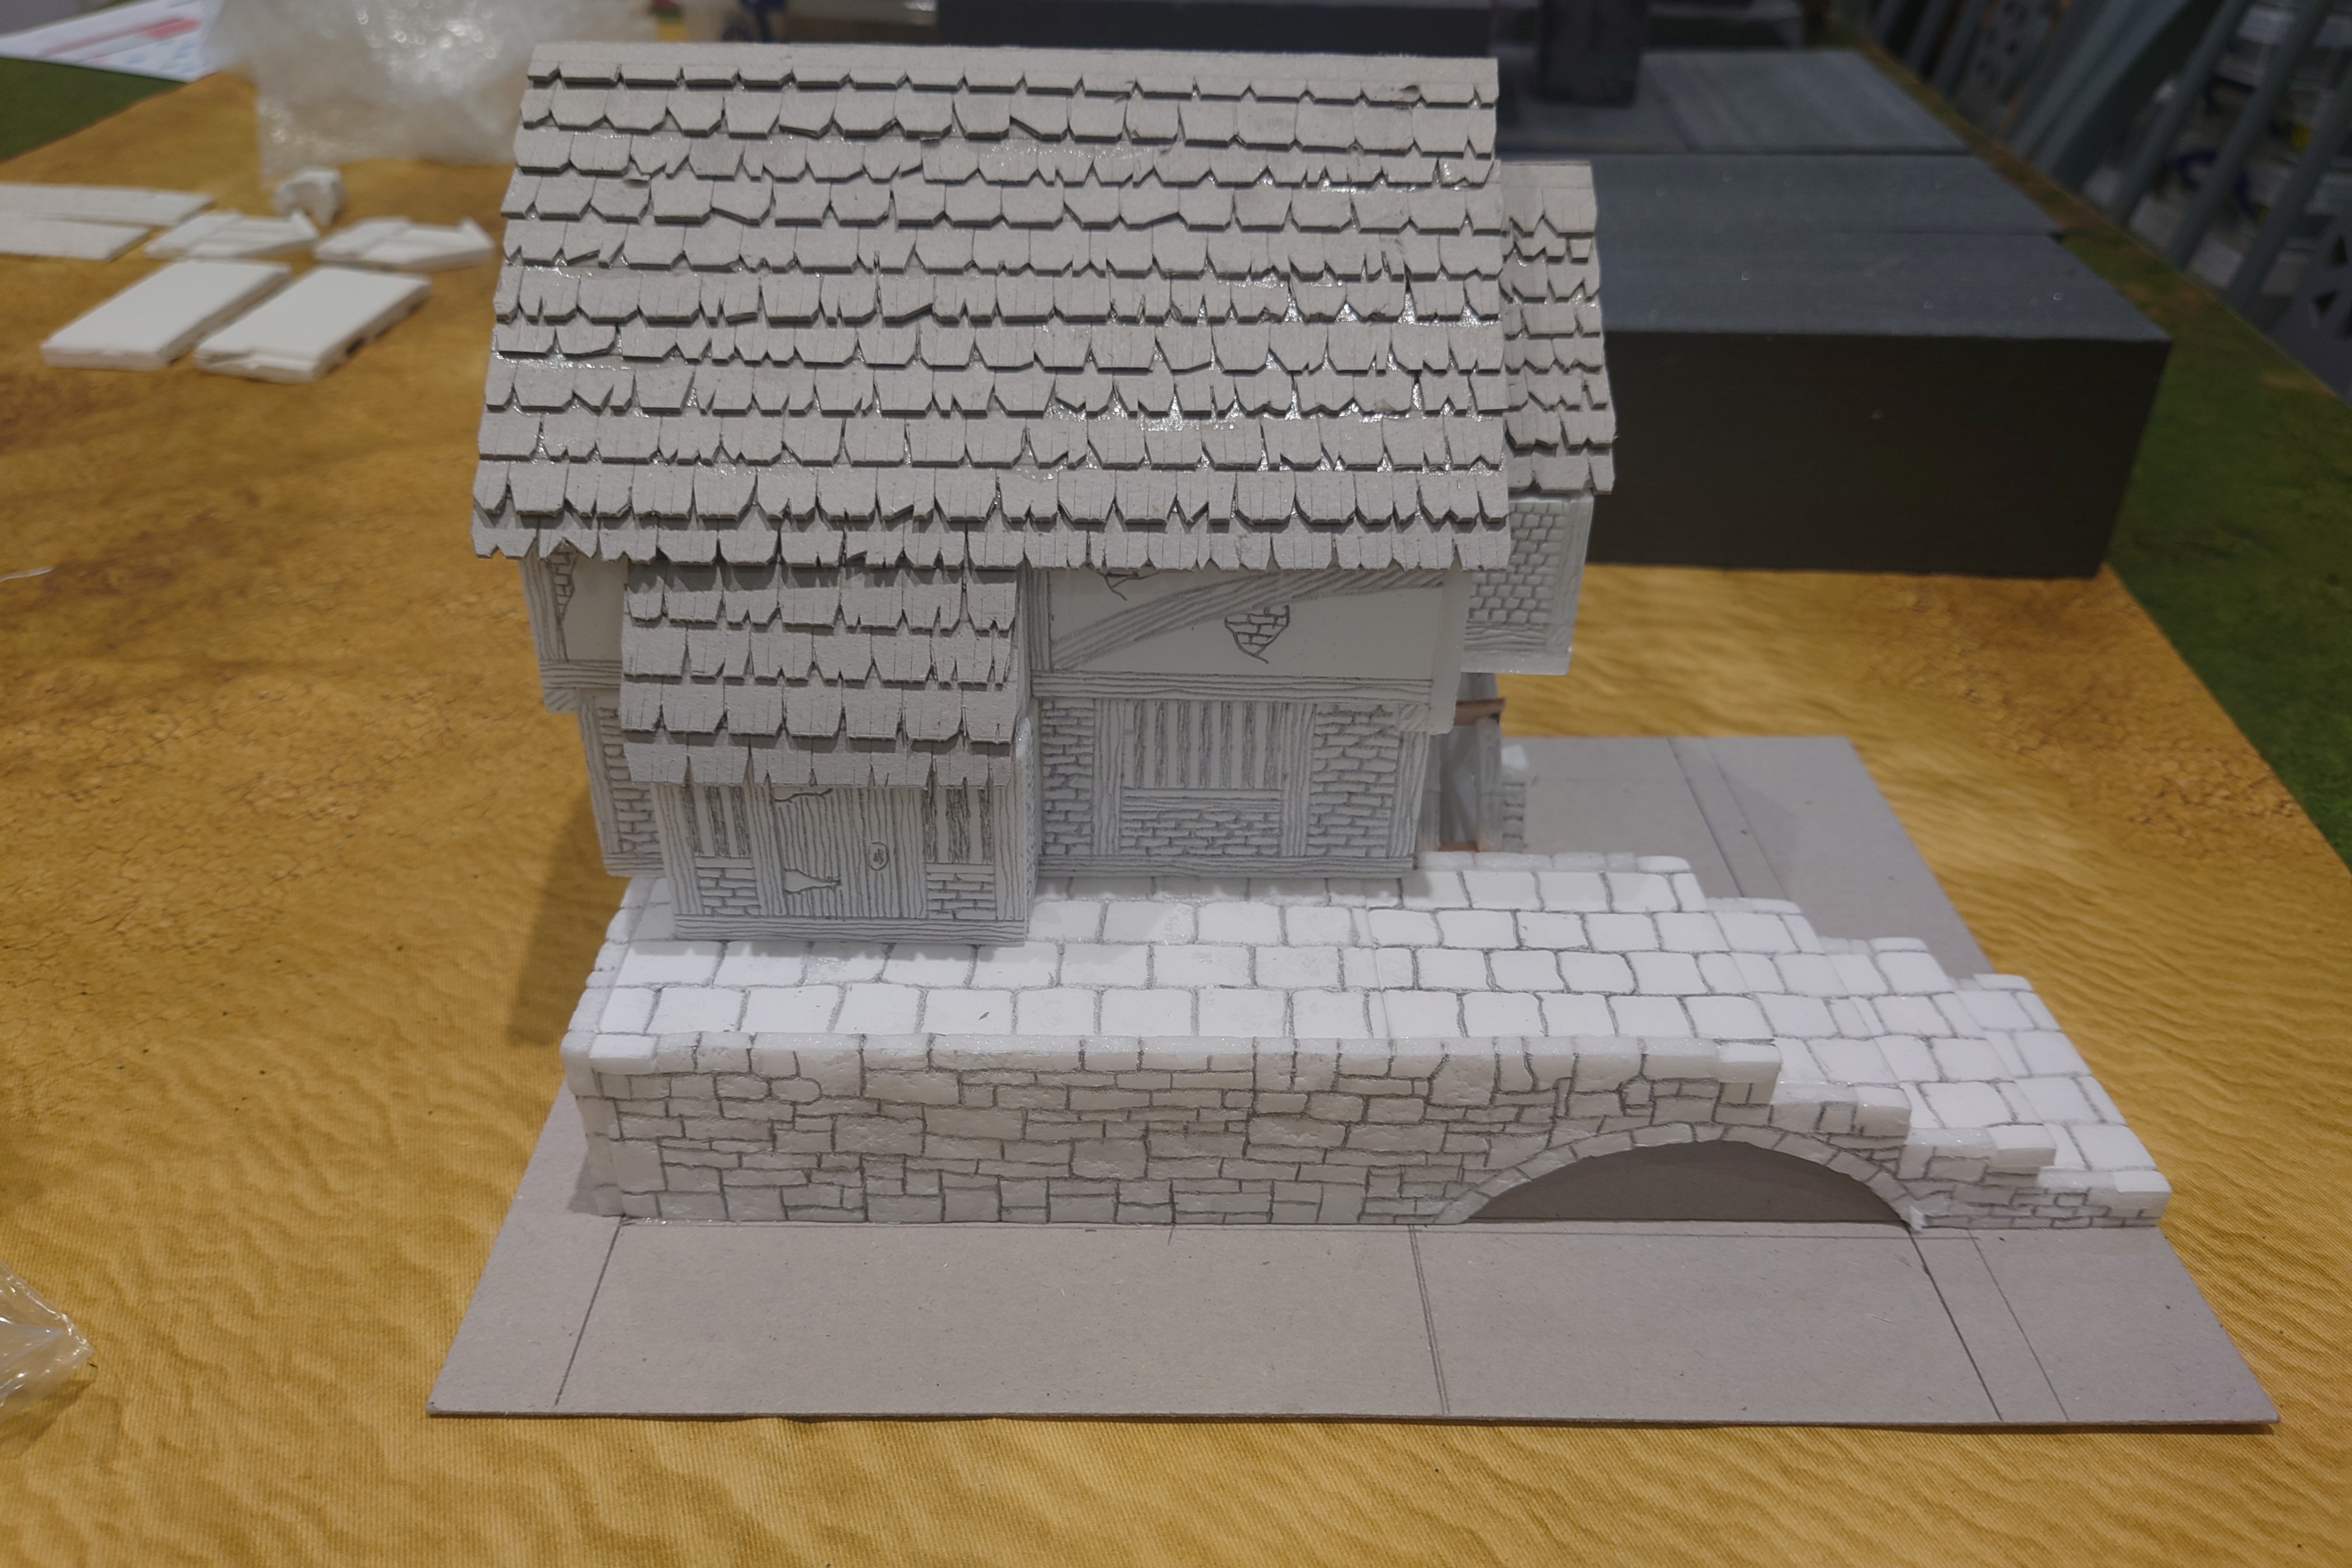

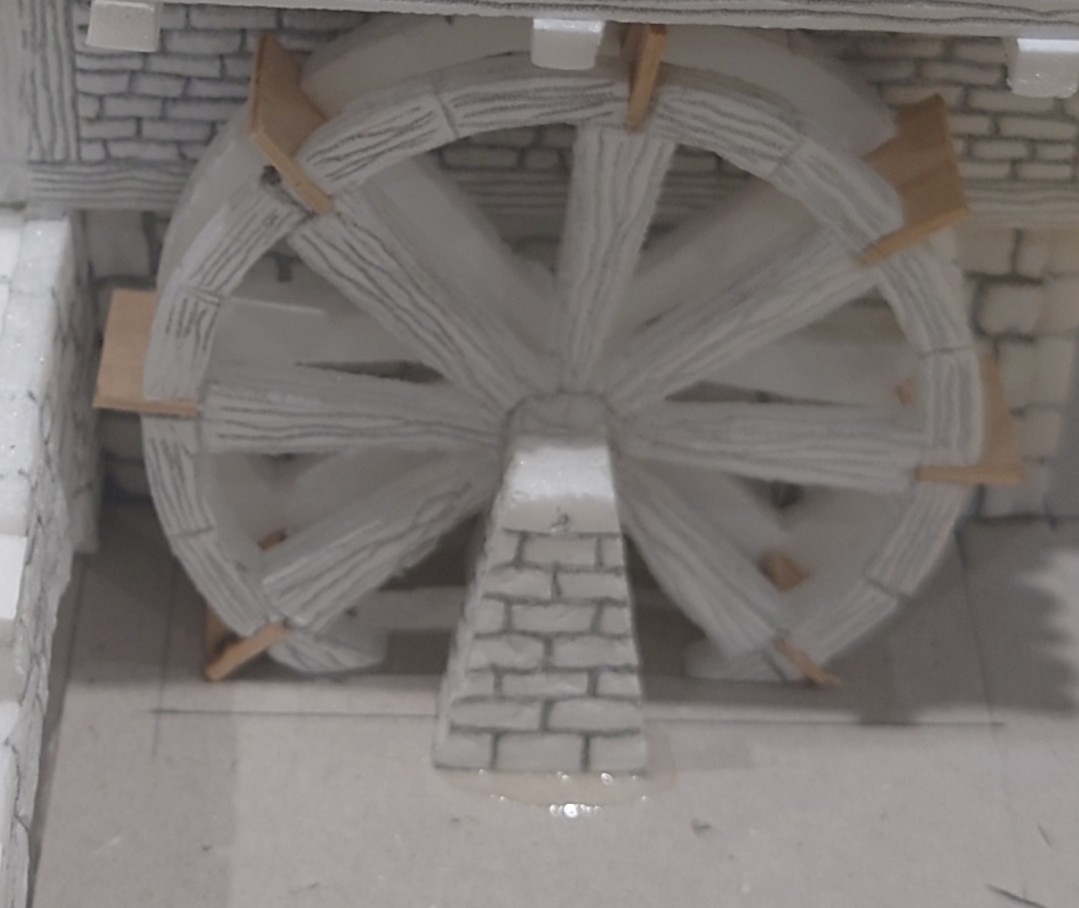 The waterwheel was made using two circles if foam core joined using some cut out pieces of tongue depressors to form the paddle. It is by no means perfect but I think is gives an impression of a water wheel.


Leave a Reply