


Tiamat Paint


I did a thing
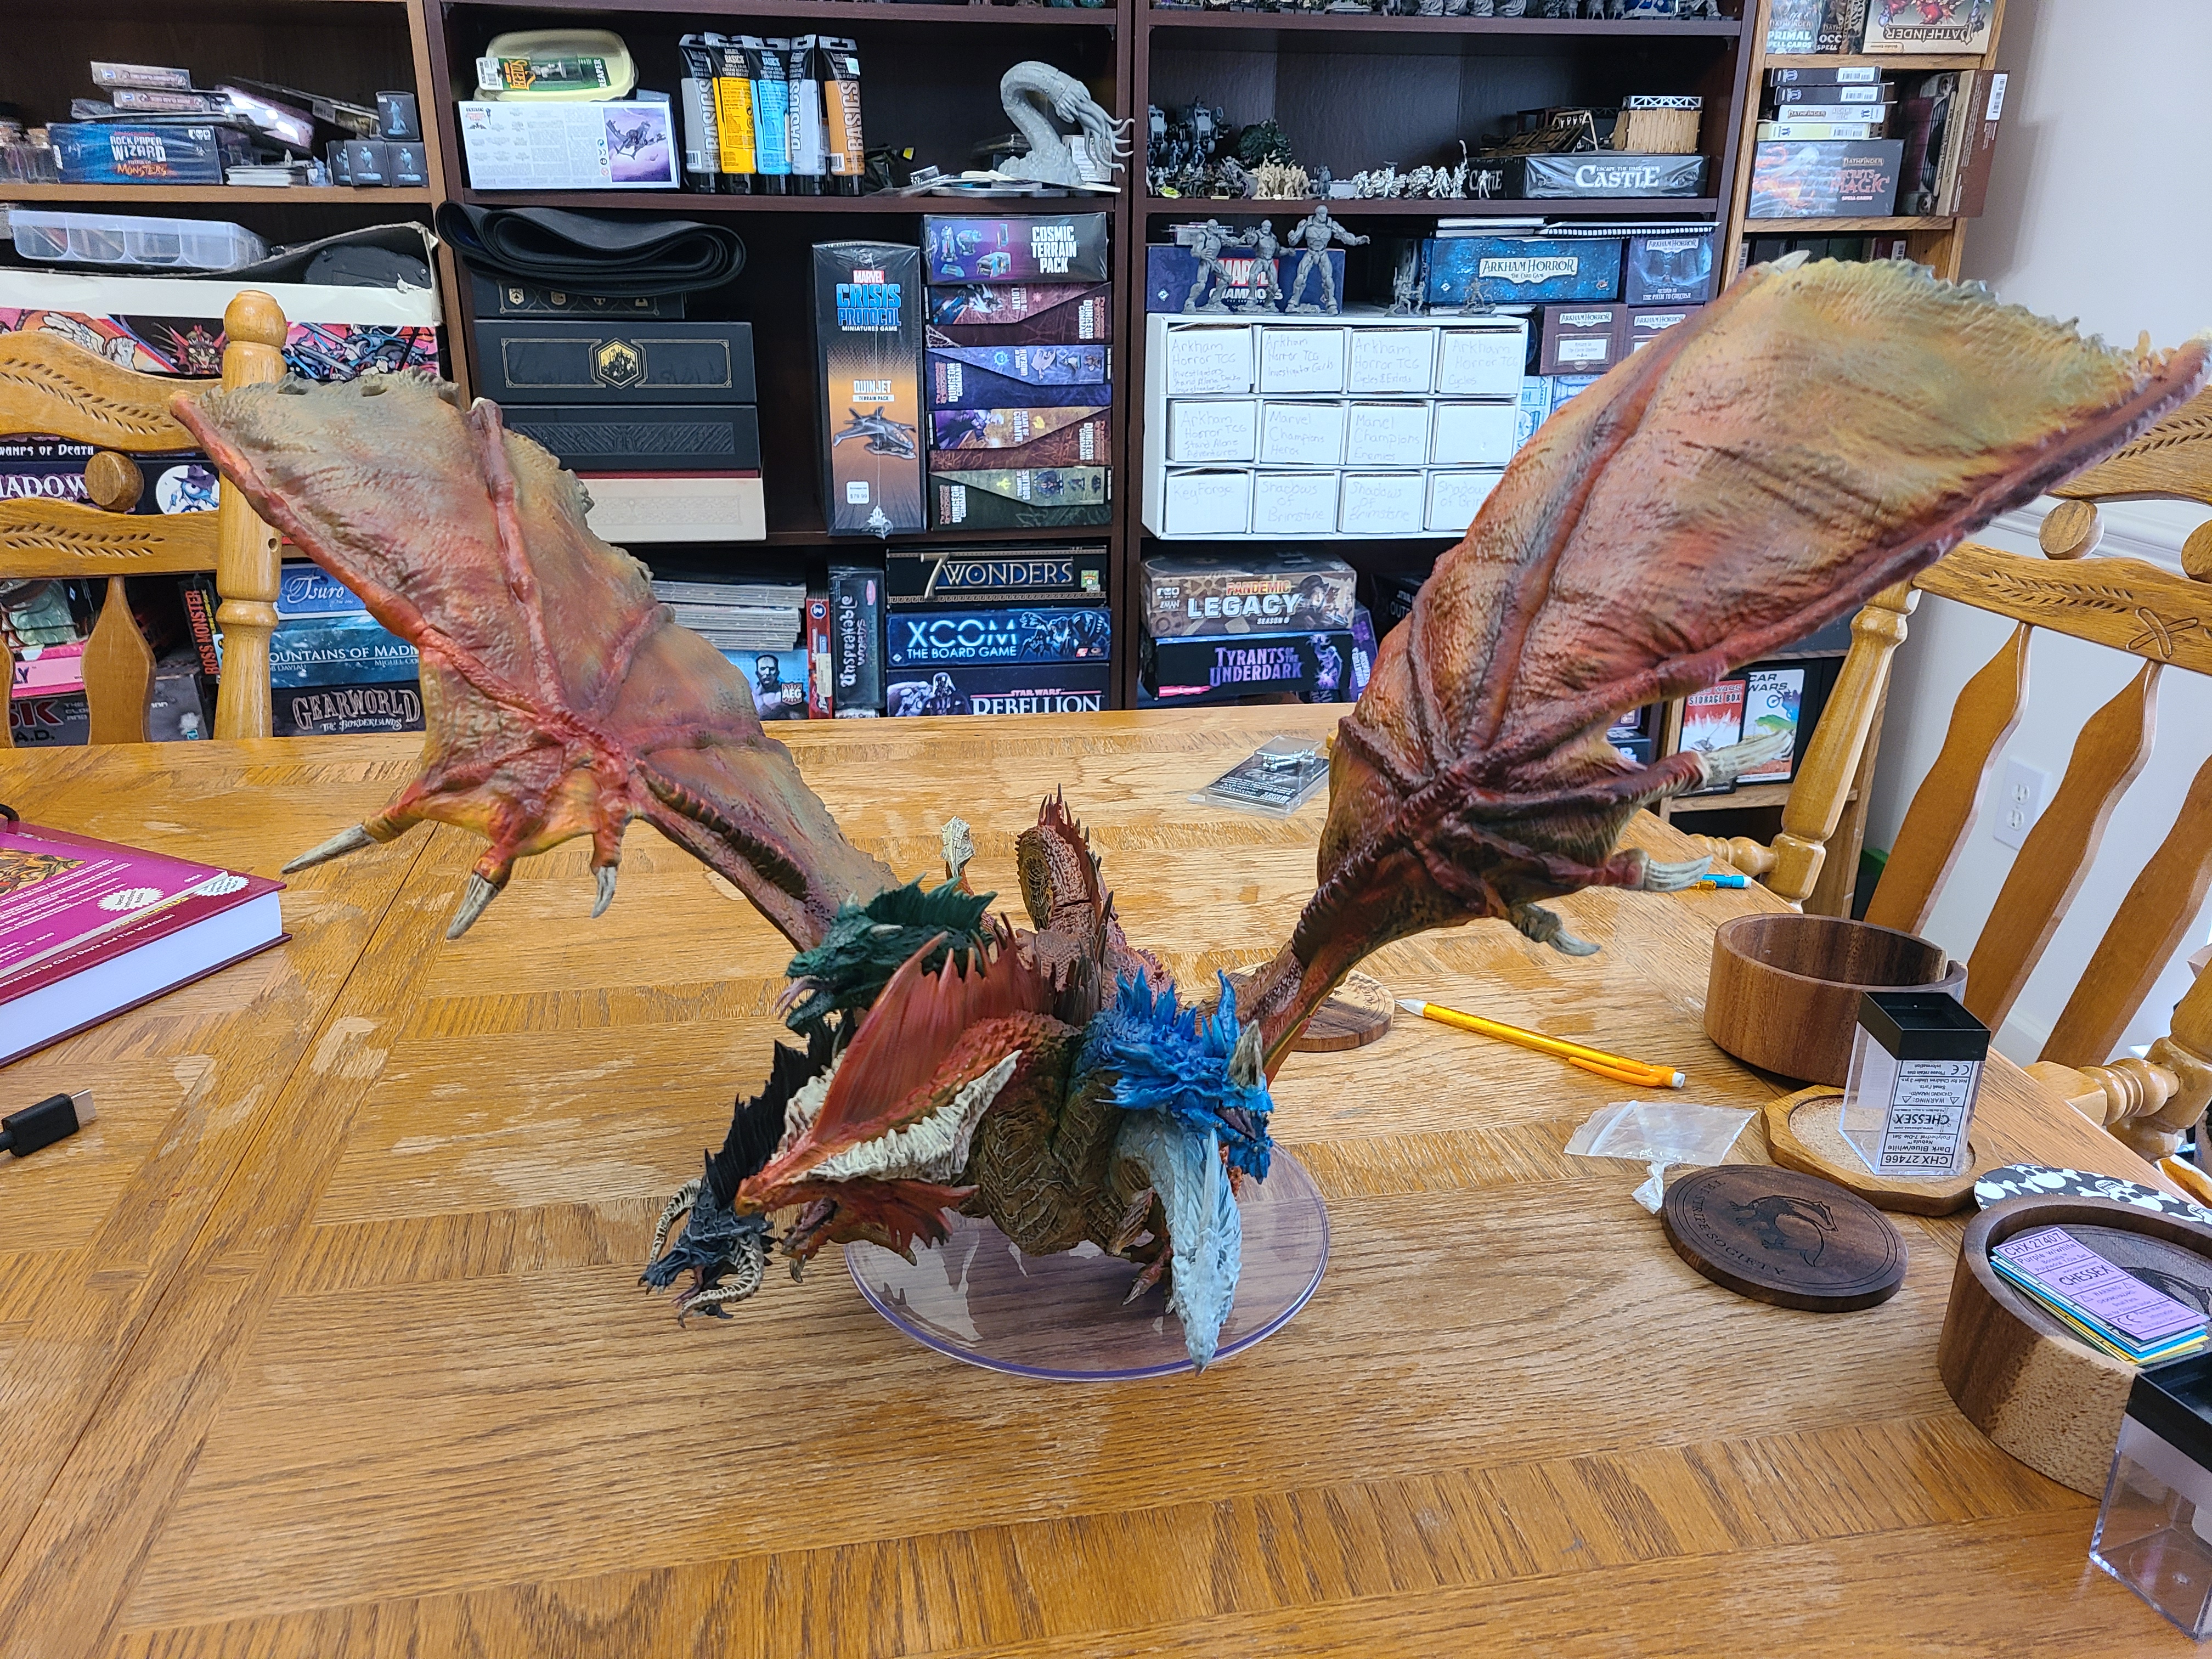

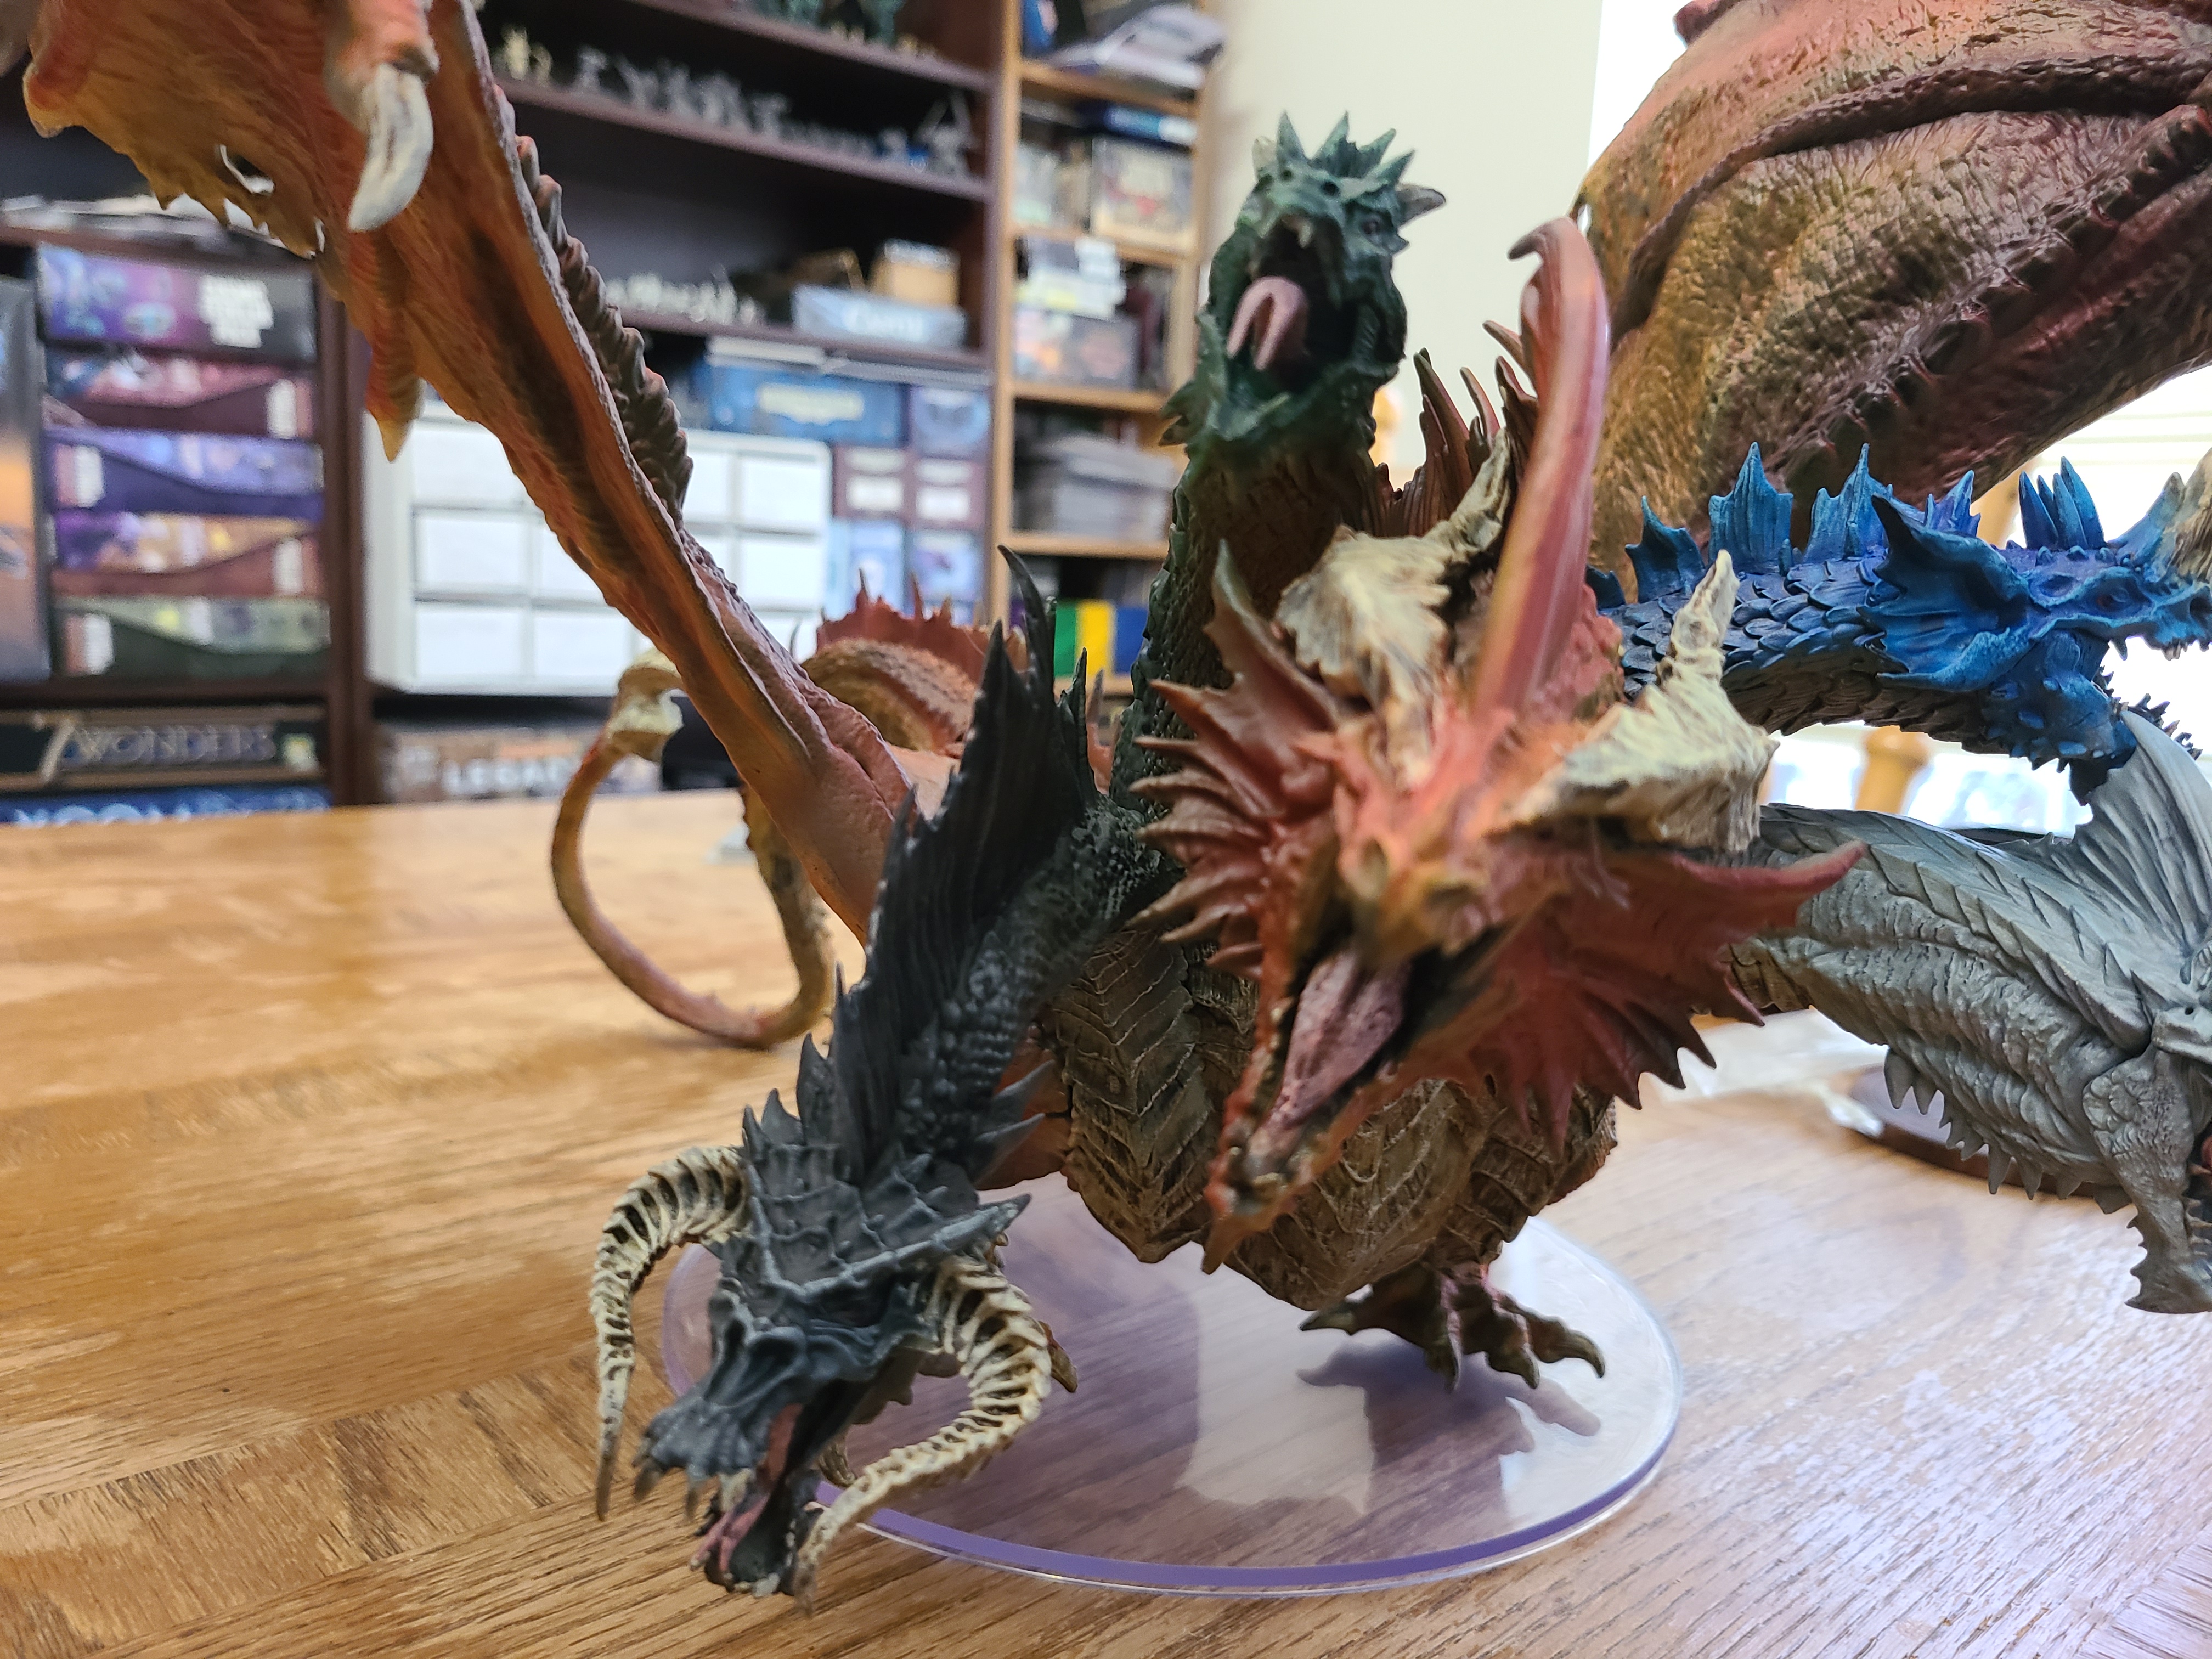
I kind of wish I took some pictures of the process, but this model is so big that it was difficult to get into my paint area, so pictures were difficult. Painting this model was very difficult due to its size.
The model itself is the Wizkids Tiamat model unpainted.
So how did I do this?
Method -> Slapchop (Mostly)
See below if you do not know what Slapchop is.
So my method in more detail.
I started with Matt Black primer from Army painter. Just used the rattle can and got to work. Technically these models come preprimed, so you do not need to prime them, but I wanted a black base and not white.
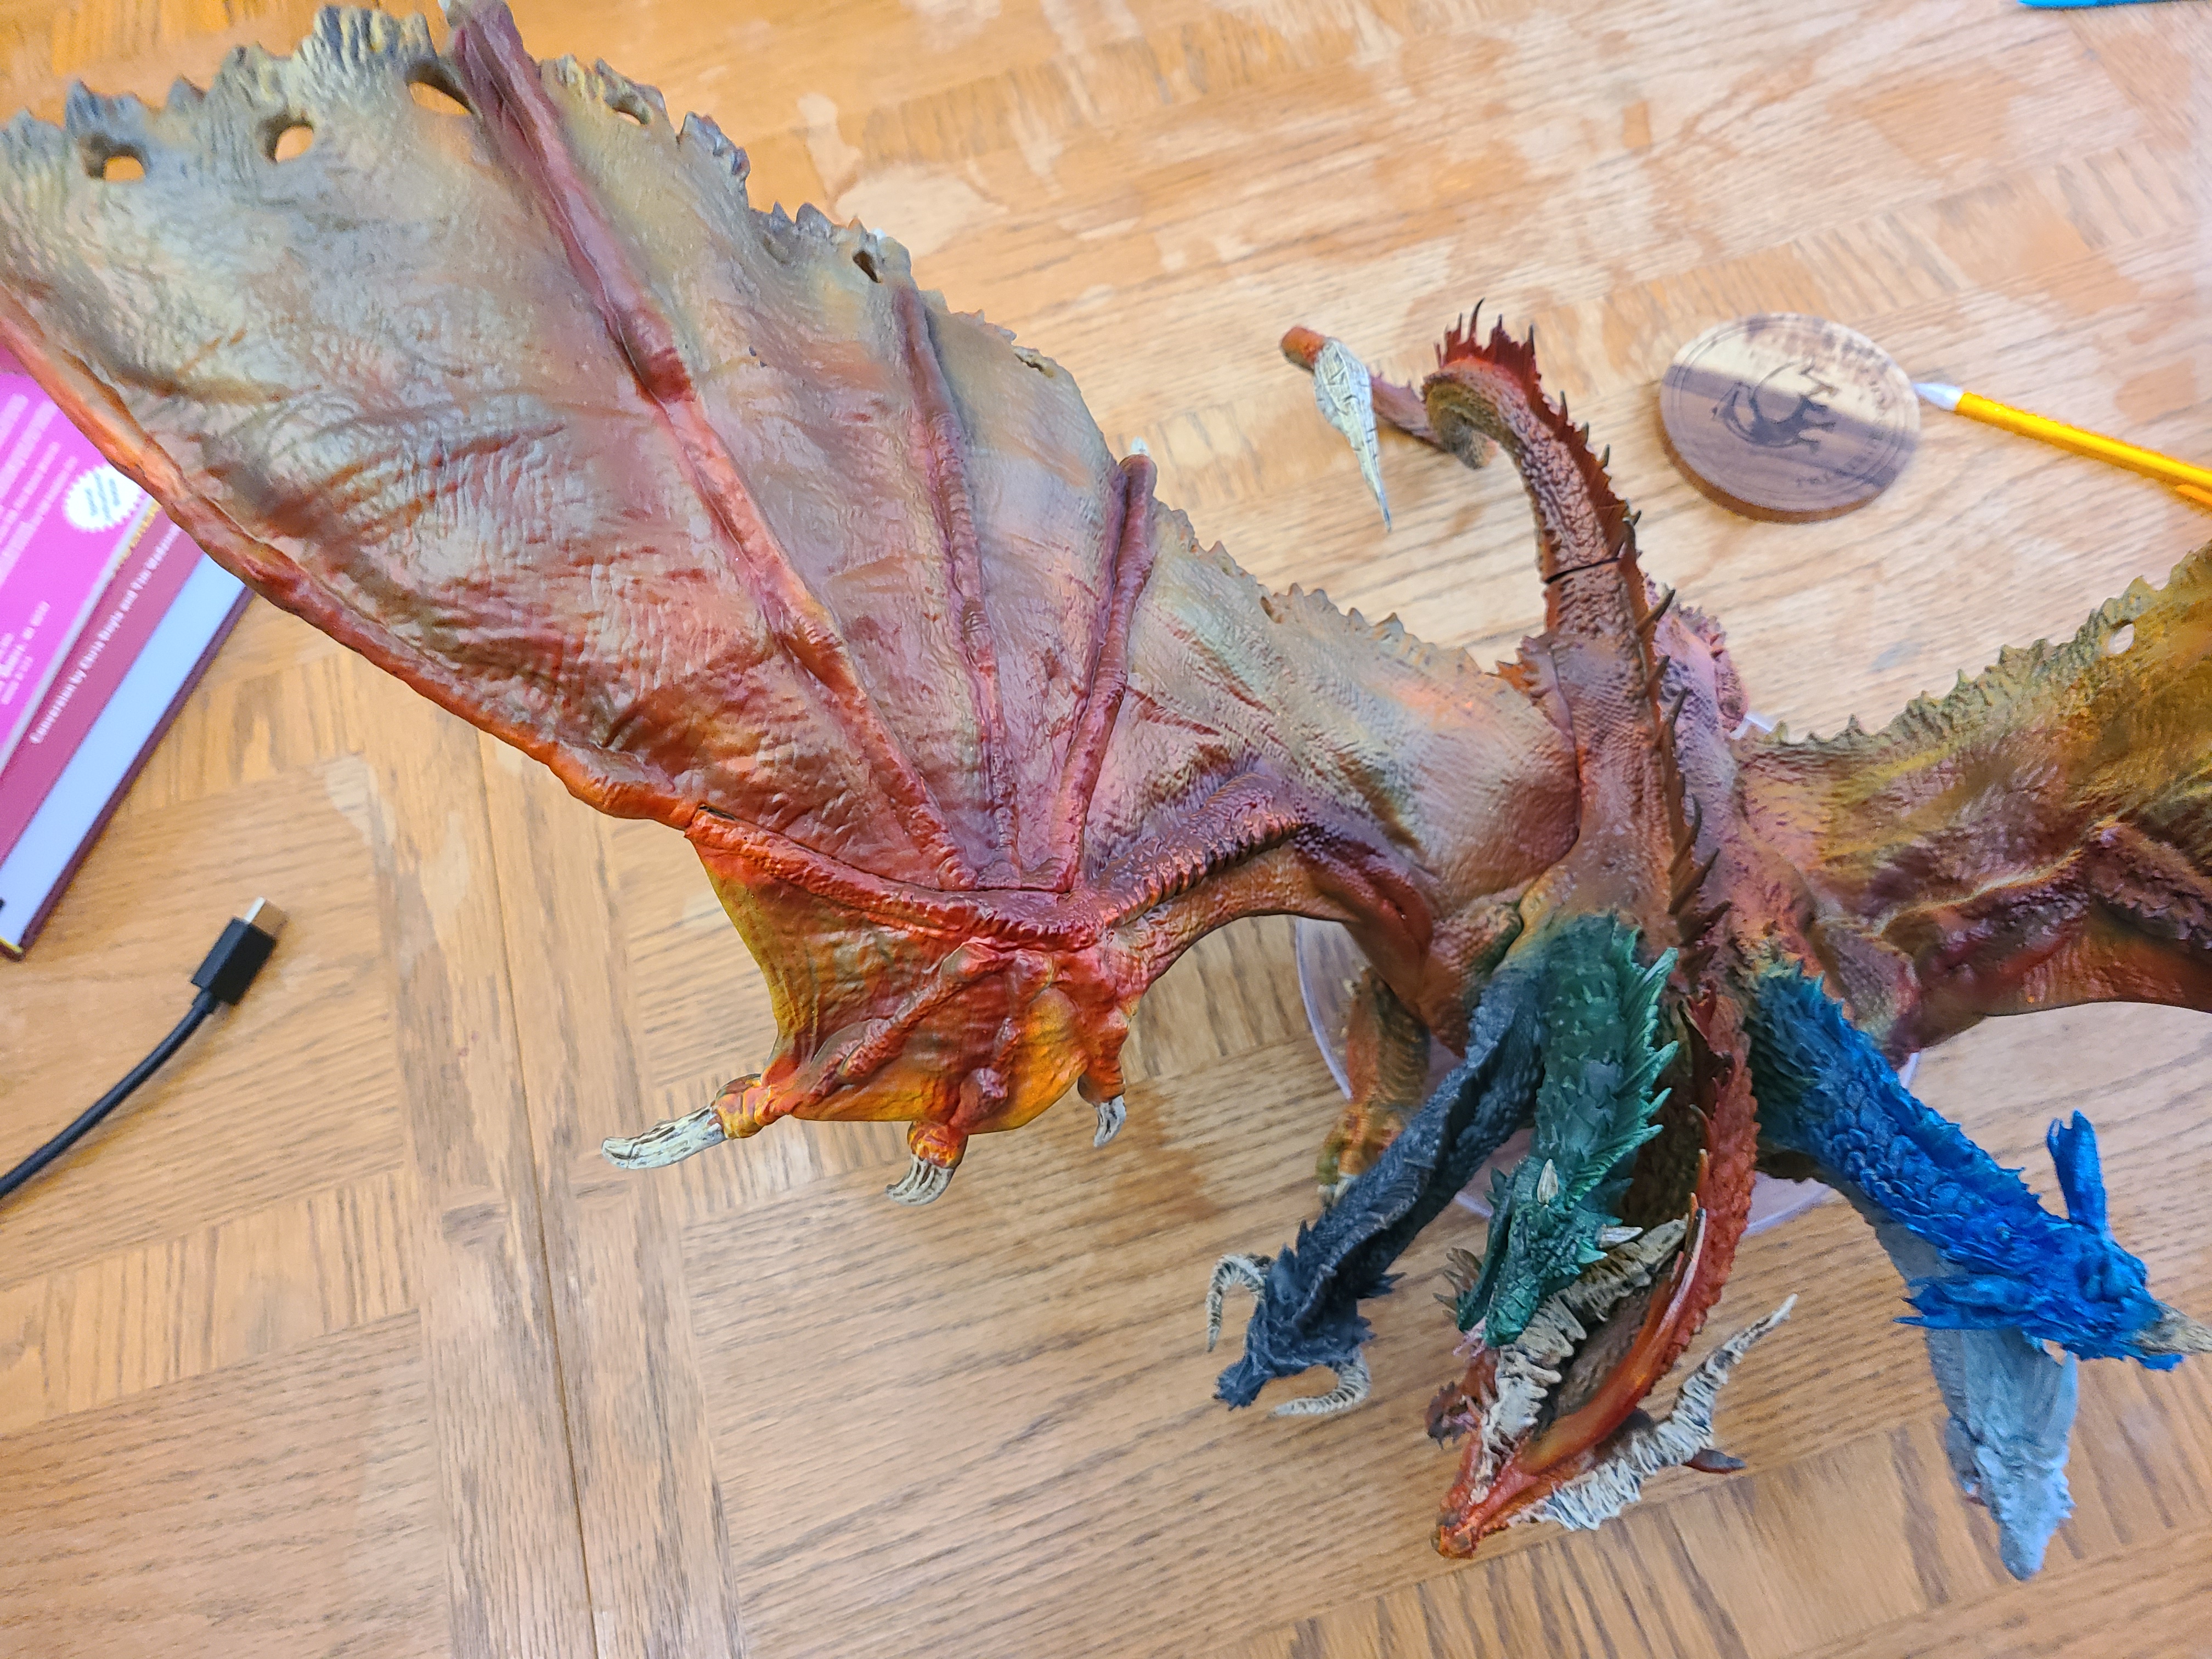
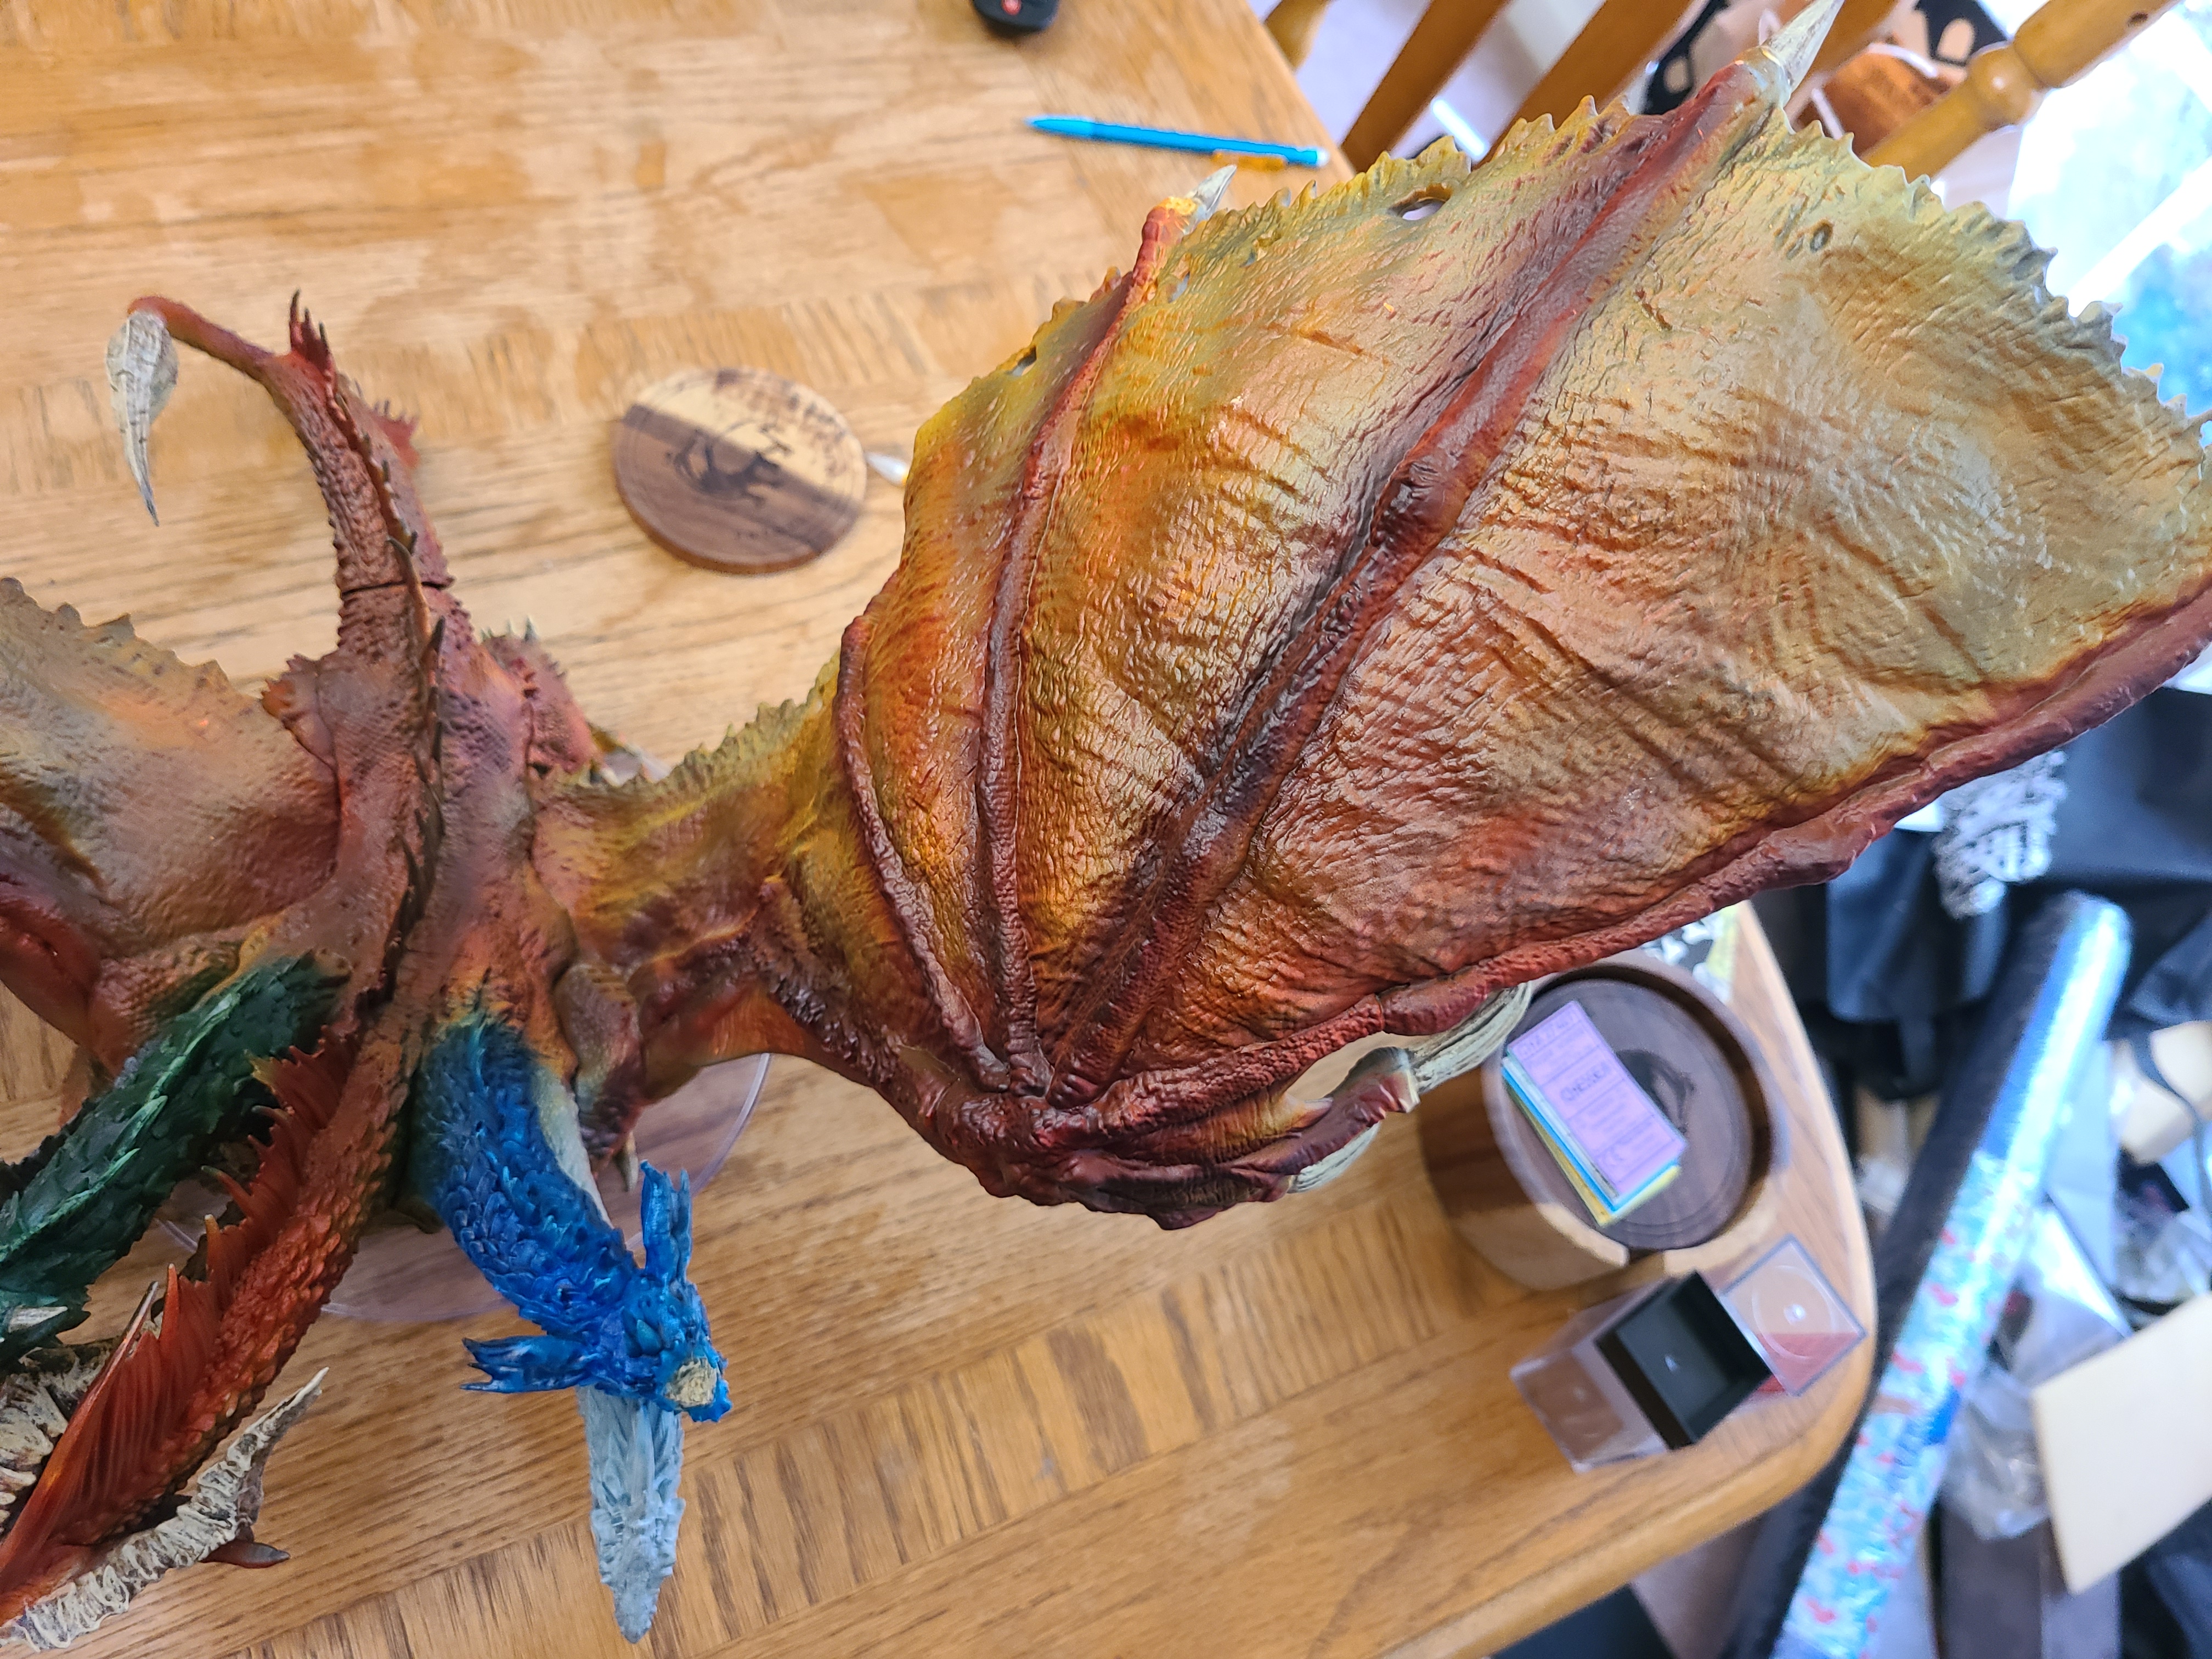
Followed up with Liquitex White Ink from an airbrush. While in most slapchop methods they suggest you go black, a medium grey, and then a white highlight for your priming step, using the ink let me skip the grey step. Since the ink was transparent you can keep layering it over the black to get greys and whites across the model. While I didn’t use zenithal highlighting exactly, I used the same concept to get the white highlights on the raised areas. If you look at the wings you will see that the colors are more vibrant up front and get darker as you move back, even though the darker color is used towards the front of the wings.
The center Red Dragon head and body are done with three layers of paint, all from the airbrush. The first layer was the Army Painter speedpaint Zealot Yellow, once done I left the model for a couple of days so the paint will dry and cure. I did not want to run into the reactivation issue that the speedpaint line has, yet. Next layer was the highlight layer of Blood Red, I used this to cover the areas I wanted to be darker. Finally, I immediately followed up with Fire Giant Orange. In this case I wanted the red to reactivate a bit, so the colors blended better. In general, the Fire Giant Orange was used to smooth the transition from the red to the yellow, especially on the wings. Any areas I missed I came back with Games Workshop Iyanden Yellow contrast paint. I was happy with the results so I did not add any additional highlights.
The blue and green heads are speedpaint Magic Blue and Absolution Green respectively. Here is where I deviated from the slapchop method, as I did a highlight then a wash to blend the colors. The highlights were Voidshield Blue for the blue and Goblin Green for the green, followed by blue wash and green wash respectively.
The black head is Speedpaint Grim Black. Yes I could have left the black primer, but since the Grim Black is transparent I did get some subtle highlights through the paint. I then just dry brushed Army Painter Stonegolem Grey over the top to get a good edge highlight going on the head.
Finally, the white head, I brought all the way up to white with the Liquitex White Ink. Then used Games Workshop Apothecary White to get depth into the model.
The last pieces were the exposed bone on the wing tips, horns, nails, and tail. I have a pretty standard method I have used forever for this. Normally I would start with Army Painter Skeleton Bone, but since I had my airbrush out and the quickpaints, I started with Pallid Bone. I then washed it down with Army Painter Strong Tone wash. Finally, brought it back up with Army Painter Skeleton Bone, highlight/drybrush.
Overall, this model took 15-20 hours to paint, not because of the detail, but the sheer size of the thing.
I have also added a link below on where I got the general idea of how to pull off this paintjob.
Products Used:
- Army Painter Matt Black spray primer
- Liquitex White Ink
- Army Painter Speedpaint Zealot Yellow
- Army Painter Speedpaint Blood Red
- Army Painter Speedpaint Fire Giant Orange
- Army Painter Speedpaint Magic Blue
- Army Painter Speedpaint Absolution Green
- Army Painter Speedpaint Grim Black
- Army Painter Speedpaint Pallid Bone
- Army Painter Stonegolem Grey
- Army Painter Voidshield Blue
- Army Painter Goblin Green
- Army Painter Skeleton Bone
- Army Painter Strong Tone Wash
- Army Painter Blue Wash
- Army Painter Green Wash
- Games Workshop Iyanden Yellow
- Games Workshop Apothecary White
There were a couple of detail colors for the eyes and mouth I left out, but for the most part this is all.


Fantastic work on the Dragon @johnsocp it looks stunning. great videos as well.