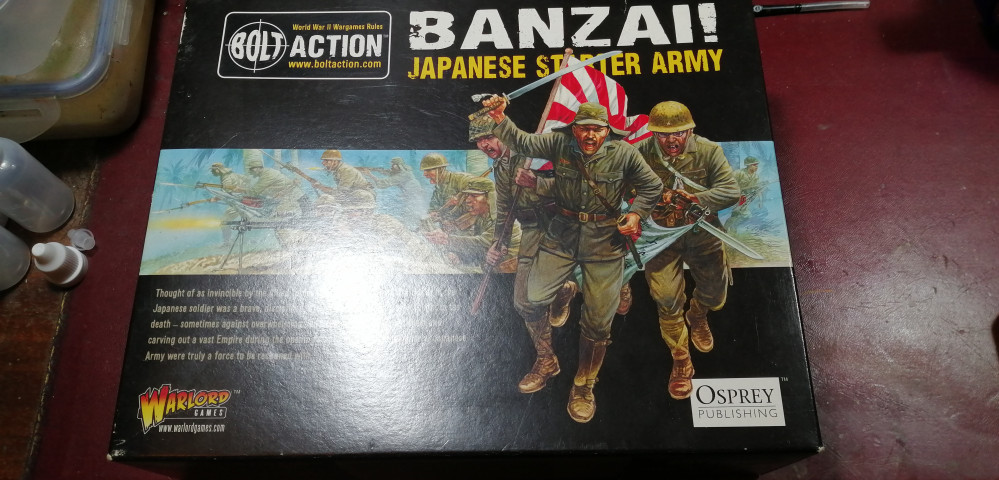
Starting Bolt Action - Fall of Singapore
Painting the Chi-Ha
Floundering outside my comfort zone again, I am tackling my first piece of historical armour.
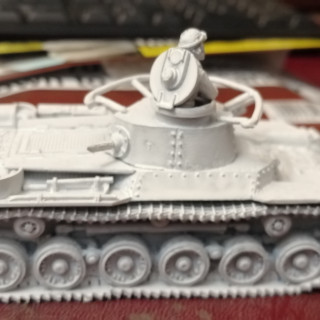
Cracking out my little used airbrush I began by priming the tank in white and then applying some black paint in the crevices in an attempt at, what I believe the internet calls, colour modulation.
Next step was researching camouflage patterns on the internet in an attempt to decide how to proceed. As most historical veterans will know, and I myself have since learned, there is very little standardisation of vehicle camouflage in most armies of the period, due to the large amount of camouflage that was applied ‘in the field’ with whatever was at hand and as circumstances demanded. The problem is further compounded by the fact that all period photography is black and white. There is however a huge amount of articles and stuff online from people far more learned than myself to which newcomers like myself can refer.
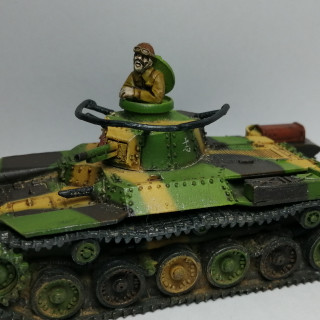
I didn’t find anything that specifically covered armour from the Japanese Malaya campaign with paint colours and camouflage etc., so drawing from numerous sources I came up with a plan that used a 3 colour camouflage scheme using a yellowish green, a rich dark brown and a creamy yellow.
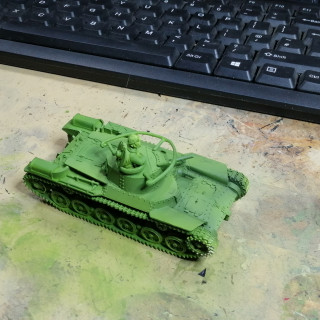
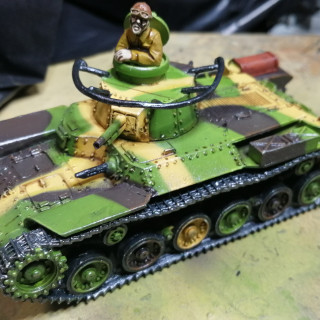
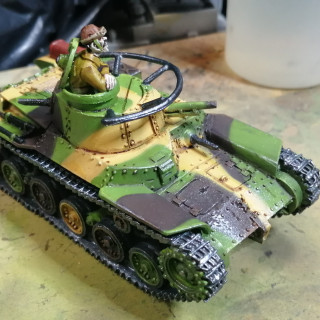
I wanted to use the airbrush and push my masking skills to create the camouflage and shade the tank, so the first step was to apply Vallejo Model Color (VMC) Olive Green over the whole tank, attempting to not obliterate the underlying modulation through over-application of paint, which frankly is a failing of mine. This done I did a bit of highlighting using a 50:50 mix of the Olive Green and VMC Lime Green to the upper edges of the turret and the outside edges of the tank armour.
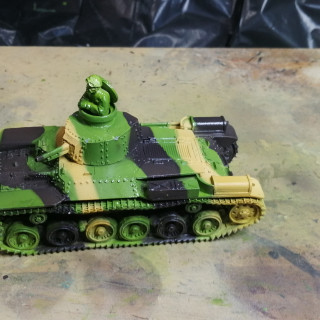
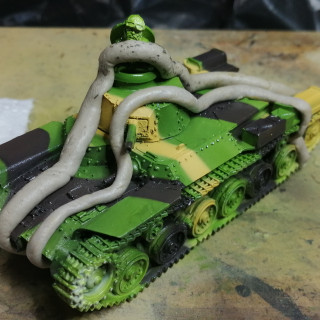
This done, I then used ‘Blu-tac’ (poster putty) and tissue paper to create irregular wavy lines over the tank before applying VMC German Camo Black Brown in the unmasked areas. Once a gain an airbrush highlight was applied with a 50:50 mix of the German Camo Black Brown and VMC Flat Earth.
When this was dry I stripped of the masks and reapplied them in a different arrangement before applying a 50:50 mix of VMC Deep Yellow and VMC Yellow Ochre, before highlighting with the original colour with a drop or two of VMC Sand Yellow in it.
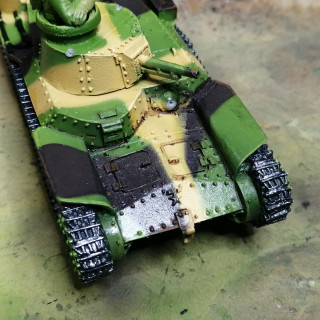
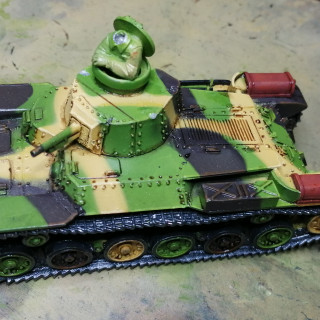
At this point I spotted my first huge noob error. When assembling the tank I had placed the turret in a jaunty dynamic pose off to the tank’s left. (The veteran tank painters among you are already facepalming I know). Well, I now realised looking at the ‘finished’ camouflage that it is usually applied with the turret facing dead straight forward and that as the turret rotates the camo pattern should ‘break’. I had no intention of cracking the turret off so this was something I would have to live with. Obviously in future projects I would need to temporarily affix the turret in a forward facing position before painting any camouflage pattern, then reposition in the final model if I wanted something a little less static in my posing.
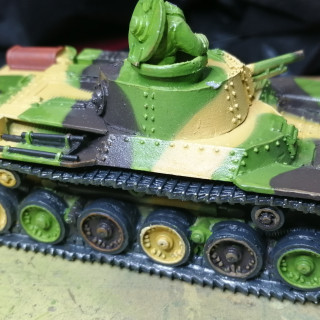
With the airbrushing done it was back to more familiar territory of brush painting. I placed edge highlights and rivet highlights on the tank using Lime Green, Flat Earth and Sand Yellow on the various areas of the tanks camouflage.
I painted the rubber rims on the roller wheels, suspension springs, hydraulics and the track itself in VMC Black Grey. The tracks, springs and hydraulics was then painted VMC Gunmetal Grey.
The exhaust mufflers were base coated with VMC Mahogany Brown, then stippled with Red Leather, Bright Orange, Light Orange and Black to get a rust effect.
With the painting almost done I then used Games Workshop Agrax Earthshade to pin-wash the tank. For those unaware pin-washing involves placing wash with surgical precision around hatches and rivets rather than flooding the model with wash and letting it find its own way into the recesses as one might do with a more highly textured infantry figure.
The last brush step was stippling the armour with Gunmetal to produce a chipping effect on the tanks outer edges and parts that get a lot of handling such as the engine compartment and main hatch.
With main vehicle painting mostly done I glued the front and rear machine guns on and the antenna rail from the turret. These items and the tools affixed to the hull in brackets were painted Black and then everything but the tools was painted in Gunmetal.
The tank commander was painted as follows:
Uniform – Japanese Uniform
Skin – Light Flesh
Tank cap – Beige Brown
Belt, Goggles – German Camo Beige
Goggle lenses – Sky Grey
After all the base colours were put down the commander was covered with Agrax Earthshade to finish him.
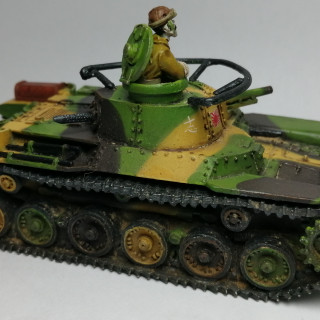
With this done the model is completed for painting purposes and we only have pigment powders and decals to do.
Decals and weathering
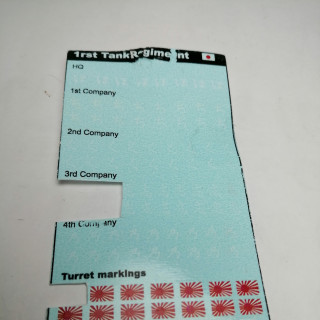
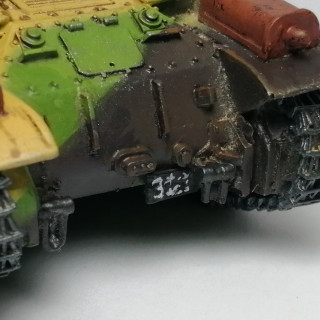
Unfortunately I purchased my kit forever ago and at this point, the Army box did not ship with Warlords decal sheet. I contacted Warlord but after a week of hearing nothing gave up on them and ordered one from the USA. Company B models do a whole range of Japanese armor (sic) decal sheets and I purchased the 1st Tank Regiment sheet. At first blush it seemed very basic but a bit of Google-fu revealed that generally the Japanese were very conservative with armour marking in the period.
I found a great article covering camouflage and other Japanese armour information and it seems generally tanks had a kanji denoting their operating group or unit and often a variant of the Imperial Japanese flag. Vehicle number plates did however follow quite regulated conventions mixing western style numerals and Japanese kanji in white on a black background.
The decals were functional but not exceptional. They are a little crowded on the sheet and I had several decals where the ink rubbed off just while handling the wet decal.
With the decals applied, it was on to weathering with pigment powders. I have never used powders before so I studied a few videos on YouTube and then purchased the Mud and Sand multipack of the Vallejo powders for a good price online.
I started by applying the lightest colour (Light Yellow Ochre) as an all over dusting to the whole tank focusing more on the upper hull. I then used the Light Sienna in all of the seams where panels but against each other such as around the turret base and between the upper hull and the track covers. I also liberally applied this powder to everywhere on the wheels and tracks of the tank and the underside of the hull at the front and rear where visible. Finally, I used the darkest of the powders, Natural Umber, on the lower tracks and around the lower wheels.
I used Games Workshop’s Munitorum spray varnish to seal the powders in but this then muted the look of the powders and made the effects less obvious so I went in and repeated the whole process, applying fresh powder and reappling the varnish.
I am not entirely happy with the results and I feel I need to learn a ton about how to use the powders to their best effect. It seemed as if I was trowelling the stuff on but losing the effects when sealing. If any veterans at weathering want to give me some handy tips or tricks please leave a comment.
This completes my Japanese army as I want it and my only two jobs remaining are the Universal Carrier and 25 pounder for my British force, for which a blog should be coming soon.




Leave a Reply