Soap Dodger's Yu Jing
Painting Yu Jing
All infinity models have the ability to change the colour of their armour at a whim. Though the propaganda you see at half time on Aristeia! and on the biased news outlets and independent reporters like Xiu Chen seem to only show parade ground colours.
You can paint any army any colour you want, they are your models. The above fluff reason is great as it gives you a great excuse to do what you want and it’s all in theme. You can even go crazy and not have a uniform colour scheme. Perhaps the lieutenant is a child of the 2160’s? Who knows or cares? Well you… that’s the point.
For a lot of my Infinity factions I go with the studio scheme. and this is how to paint them…
Primer and Zenith
After cleaning up the parts with files and sand paper and gluing them with superglue and activator I get to painting.
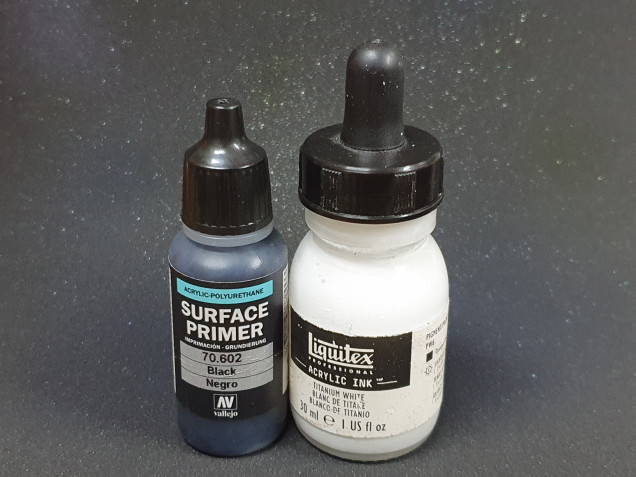
I start by Priming the models in black. In my experience using rattle cans on infinity models will obscure detail unless done is extremely light coats. You are better doing this stage by brush if you don’t have an airbrush.
All over in black. Why Black? I want contrast I also don’t want to have to waste time painting the very underside of parts I cant see. If I get a good primer coat any missed parts are just in shadow.
But your models are mostly yellow on parts at the end isn’t black a bad starting point?
Yes this is where the Zenith in white is done. On most models I do a 45 degree spray of white ink. However as Yu Jing are yellow and orange I like to do a 90 degree and up light coat of white another coat at 45 degrees and a top coat at 0 degrees. This builds up section of pure white on the top of the model but you can still see black sections if you look from the underside.
If the model your painting is mostly dark or non yellow you could just do 45 degrees or miss this step off completely.
This is just what I do though you can easily get good results doing it your own way.
Armour
This is the most Iconic part of (the studio) Yu Jing The orange/yellow armour. They used to mostly green back in my day before Angel for a hold of them.
The main colours are the same no matter what style you want
The studio way is to use Orange brown as your base airbrushed followed by a Scrofulous brown 1st highlight and add white for the last highlight. After this is done use glazes of cavalry brown by brush and that’s you.
I think you need a darker level I use hull red for the real nooks and crannies or mix black into cavalry red and do a second pass of a glaze.
If you want it darker start at Calvary down as your base if you want it lighter use Scrofulous brown as your base this is more like late N2 style.
If you didn’t have an airbrush you could dry brush these on or layer them up adding a little bit of the next colour until you cant tell the difference between what’s on your pallet and the bottle before adding the next. I tend to do this is the model is mostly not the Yu Jing yellow colour.
Airbrushing is magic? Yes and no. They can be I don’t use them to their full potential I don’t think the miniature hobby ever could. I use the airbrush to get volumes and make this easier. You can see the above step and a finished model they don’t look the same. Hopefully they have more contrast.
You need to create points of light. These tend to the closest or the highest points on that section to the direction of the imaginary light. this involves going in with the brushes again and taking your lightest mixture and adding even more white to them.
Here is where you can use retarder medium to keep the paint wet on your brush when doing so. When building these up you can also use glaze medium to help keep your paint more translucent to reduce your layer lines when moving up adding more white each time.
When your at your lightest colour you can then use this to edge highlight everything using the side of your brush tip where possible.
After this is all done I tend to go in a basecoat everything again in black this is when the model starts to pop. I go back to the above steps when fixing areas and to fix highlights that no longer look right as I paint more of the model.
Yu Jing green
Some other main clothing elements are this green colour. This is achieved by adding in a dark turquoise colour in with green and highlighting with flesh tone.
Too much blue and it looks blue to much green and it looks green. You decide how much. When done add sunny skin tone in and it changes this into a very interesting colour. Don’t be tempted to add white it desaturates this to much unless you have went for a very white looking yellow this probably wont work.
Metal or gloss black details
This is the most of the rest of the majority of Yu Jing models.
You start with black and highlight like a normal surface with a mixture of black and dark grey with a final highlight of dark grey. This sets your volumes.
Then you mix in white and highlight only the tips of points or the edges of objects adding white to the mixture.
After this is done you can use glazes of blue and turquoise to add interest and stop it from looking as stark. If it looks too light you can also use glazes of blank to darken areas down.


![TerrainFest 2024! Build Terrain With OnTableTop & Win A £300 Prize [Extended!]](https://images.beastsofwar.com/2024/10/TerrainFEST-2024-Social-Media-Post-Square-225-127.jpg)


Leave a Reply