CRC's Crazy Compendium 2; Eclectic Boogaloo
Ashes to chimneys, and dust to tracks...doesn't have the same ring to it, really...
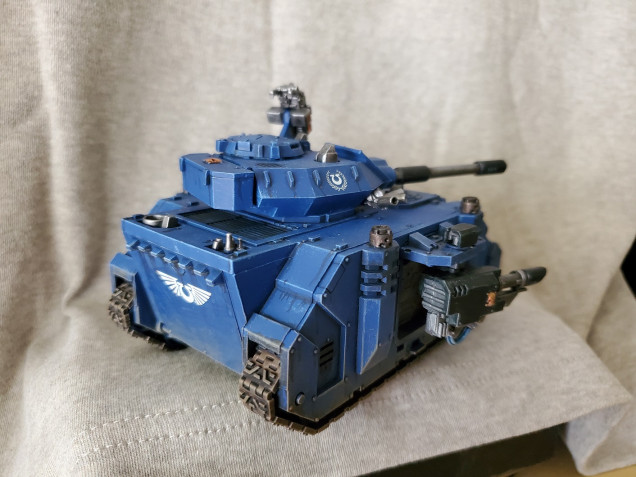
Weathering! A fun little final step with vehicles/armour/scenery/ect. Final being an important part of this…seeing as this tank has been unweathered for quite some time…as is evident from the horrid ‘before’ picture because I’m an idiot and didn’t think to take a new one before I started…
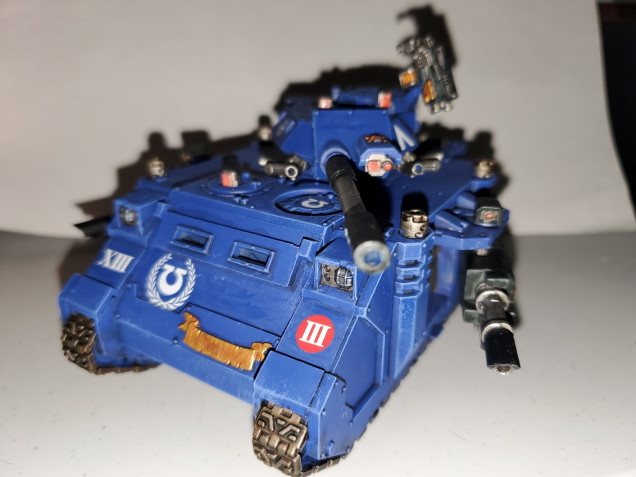 The lighting is bad, the focus is awful, and you can barely see what I'm trying to show but the paintwork looks 'clean'...I hope...
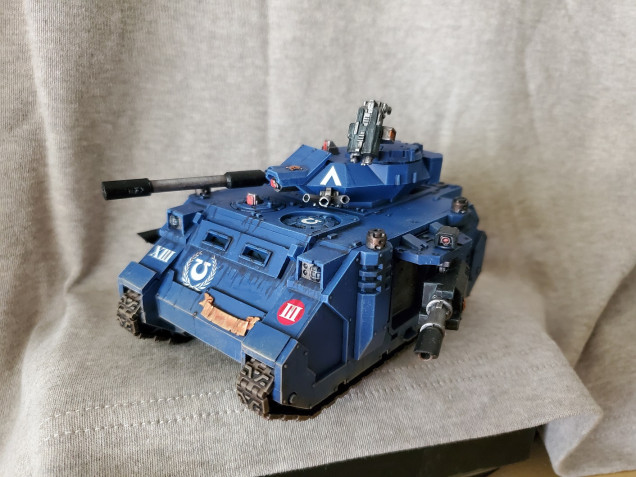
So that terrible picture aside, what I wanted to go for with this mini was a clean tank but one that is in action. Even a newly painted tank has to drive to the fight, so the main focuses here were dust and some water streaks from splashing through puddles. This is why I’ve mainly focused toward the bottom of the vehicle.
For the dust I used Tallarn Sand (GW) as a drybrush along the lower portion of the tank. I tried to brush in a circular motion to show a bit of turbulence in deposition, but in parts that wasn’t as easy to do. In parts I followed this with a lighter drybrush of Ushabti Bone (GW) in places. I did this before the streaks as I wanted them to be more like water run-off so have some darker streaks over the dried dust to look like wetter parts. I will plan on putting a base on the tank eventually and I don’t plan on adding any water to it, but I like to think that at least one river could have been crossed to get to the fight.
The vents all over the hull were coated in thinned Black Templar Contrast (GW). Just thinned it with water to deliberately change the properties a little bit. If you used the Contrast Medium (GW) I suspect it would look a little smoother, but I was going for something a little rough. The other streaks were done with Wyldwood Contrast (GW) in a similar manner and applied to areas where water should pool and then dragged down to create the streaks. I might have gone a little too far with the glacis plate in the front but I did limite the number of streaks I put on the turret to show the lower chance of water splashing that high in general use. On the top plate I just dropped some of this colour into recesses where the water would pool.
To show some smoke and soot from the chimney stacks I drybrushed and stippled Corvus Black (GW) around the top of the chimneys and around the cutouts on the sides of them to add a bit of discolouration. Didn’t go overboard here as I just wanted to show use rather than heavy use without deep cleaning going on. I want my Marines to look clean so it plays into the angelic side of their nature. If this was a Guard tank I would weather the thing to hell. 😛
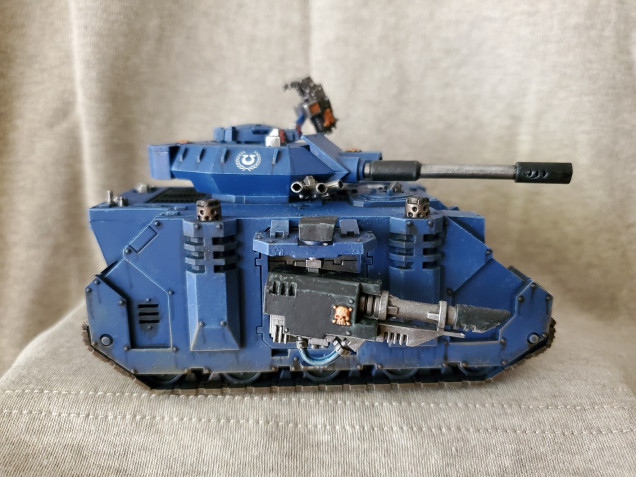 This a better focused look at the different types of weathering across the side plate. Not Lloyd shot today...unless you count the pic above as a half-Lloyd...
Still not sure about that front plate…but for now I don’t have any Macragge Blue to tidy it up a bit, so it’ll have to stay as it is for now. Of course chipping is another method of weathering that can be done, but that’ll have to be saved for the next Bolt Action tank I work on…which might be a while away (I need to do more infantry first…).




Leave a Reply