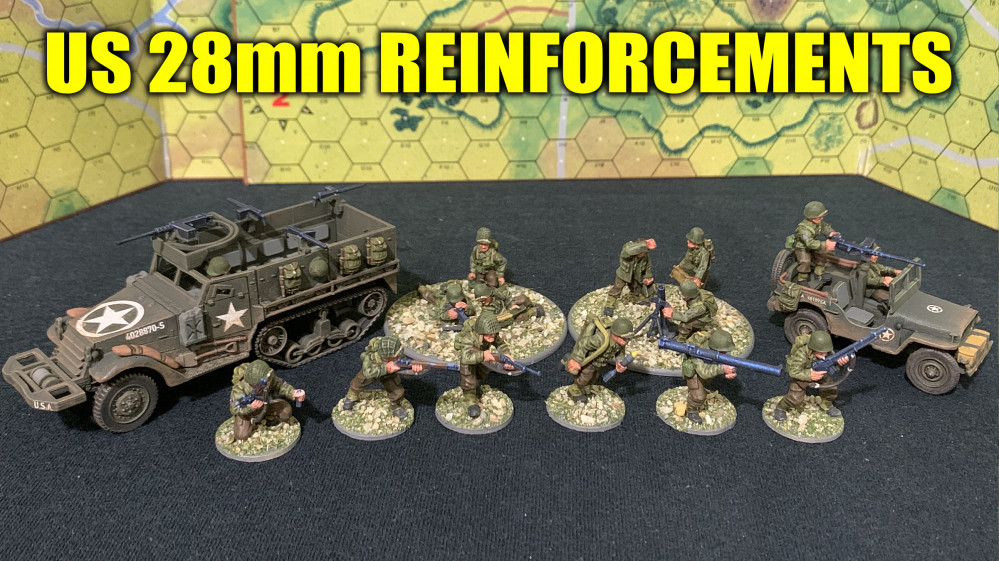
Oriskany's US 28mm Reinforcements
Damon vs. Oriskany: Yom Kippur War 1973
Good afternoon everyone. I’d like to present a belated battle report for the game Damon and I had a couple Sundays ago. The system was Avalon Hill’s The Arab-Israeli Wars, where Damon and I recreated one of the sharp, vicious engagements that took place in the closing days of the 1973 Yom Kippur War.
The game recreates one of the frantic counterattacks launched by the Egyptian 4th Armored Division (3rd Armored Brigade and 113th Mechanized Brigade), part of the Third Field Army that had been cut off in the Israeli-counter-crossing of the Suez Canal in Operation Gazelle. Now, as General Bren Adan’s 162nd Armored Division crushes its way south to Port Suez (thus completing the encirclement of the Egyptian Third Field Army), Colonel Natke Nir’s 217th Reserve Armored Brigade finds itself struck in the right wing by this desperate and hastily-mounted Egyptian counterattack.
Damon is playing the Israelis, I am playing the Egyptians.
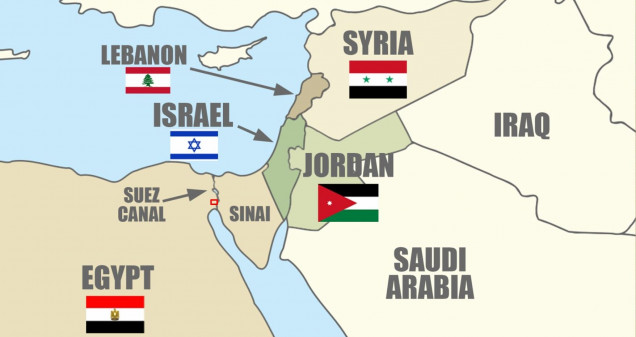 Here is the broad view of the battle’s location. Note it is on the west bank of the Suez Canal, the waterway which more or less formed the start line for the 1973 Yom Kippur War here in the Sinai.
 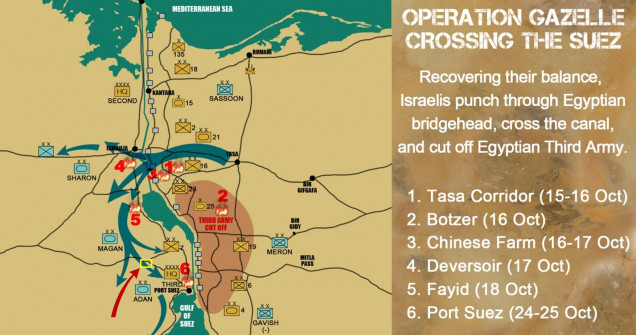 After suffering stunning setbacks and appalling losses in the face of the initial Egyptian onslaught across the Suez Canal, the Israelis have regained their balance and mounted Operation Gazelle (alternatively Operation Abirey-Halev, “Stouthearted Men”), a counter-crossing back across the Suez Canal. The Israeli objective is to turn south and take Port Suez, which will slice off the whole Third Army in vast pocket.
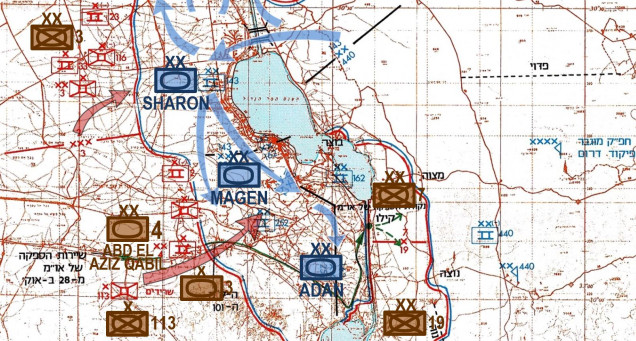 The Egyptians, of course, CANNOT let this happen. Units not in the imminent pocket are hastily mobilized and hurled against the Israeli spearhead. One of the most powerful of these was made up of the bulk of 3rd Armored Brigade and 113th Mechanized Brigade, 4th Egyptian Armored Division, which struck the side of Adan’s 162nd Division on 19 October 1973. This game will create Colonel Natke Nir’s 217th Brigade (reinforced with elements of 890th Para Battalion / 35th Brigade) part in stopping the Egyptian counterattack.
 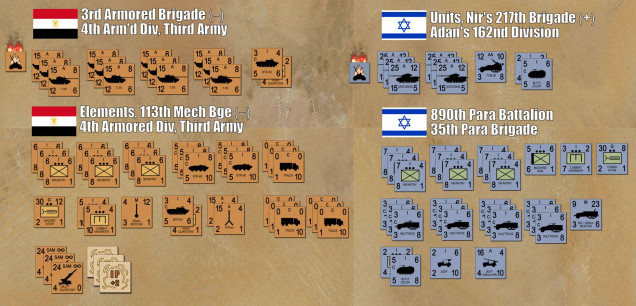 Here are the forces both sides will have in the game. For reference, each counter is a unit (platoon or half-company) of five tanks, a platoon of 40-50 men, or a battery of 3-6 guns. Note I also have three batteries of SA-2 “Guideline” surface-to-air missiles. These were critical targets for the Israelis on the West Bank of the canal, as their vaunted air force couldn’t operate safely until their ground units took out some of these firing sites. That’s right, the ground forces had to “soften things up” for the air force, instead of the other way around. So I’ve got about two battalions of about 60 tanks, a battalion of mechanized infantry in BTR-60 troop carriers, and some support assets like combat engineers, Czech 107mm recoilless rifles, and of course a few of the dreaded AT-3 “Sagger” antitank guided missiles. Damon has a battalion-sized task force of Nir’s Brigade in the superlative “Sh’ot” Centurion upgrade, a battalion of elite paratroopers I WW2-era M3 halftracks and a few odds and ends like recon jeeps with 106mm recoilless rifles. I should also note he has four A-4 Skyhawks on standby. For their strike packages Damon has selected two with American-supplied Rockeye cluster bombs for antitank work, two with Walleye TV-guided bombs for installations.
 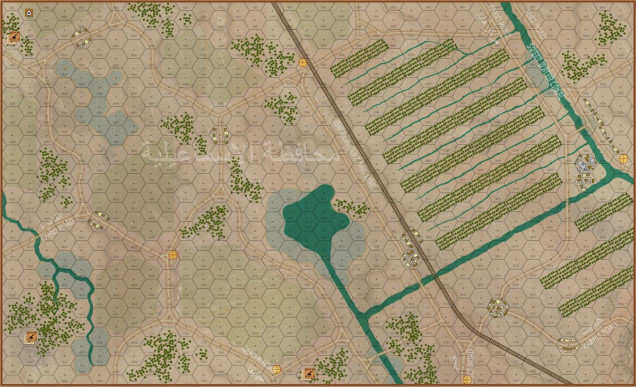 The map before the battle. Note my SA-2s are already set up. They are as much objectives as much as combat units. Damon is coming on from the roads to the northeast, I am coming on from the west and southwest. We each get a point for any objective hexes we take and hold at the end of ten turns. I also get a point for each SA-2 site still operational at the end of the game, Damon gets one for each SA-2 site eliminated. Each hex is 250 meters, or about eight feet on a 15mm table. A turn is 6-10 minutes.
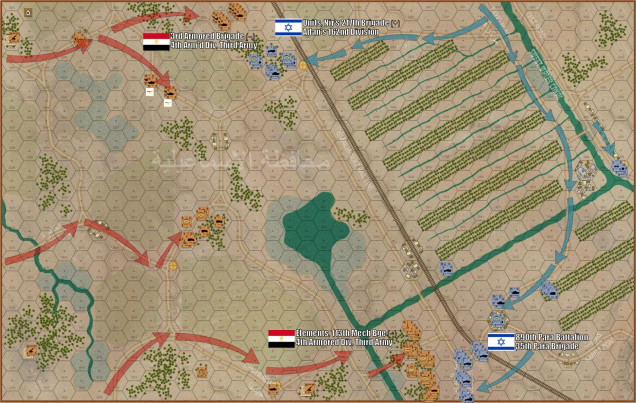 Turns 01 and 02 are now complete. Already Damon has a bit of an upper hand, having seized three of the five objective hexes: (1) the crossroad by the rail line, (2) the Test Road exit to the far east, (3) and the Port Suez Exit to the southeast. I lunged at him in the north with my two battalions of armor, I’ve taken a 20-tank salvo at him in those palm groves but missed with a “6” (worst roll in Arab-Israeli Wars). I’ve started to flank him, however, while in the south my mech battalion has rolled up in their BTR-60s and is now unloaded en masse for an attack against that Port Suez road objective.
 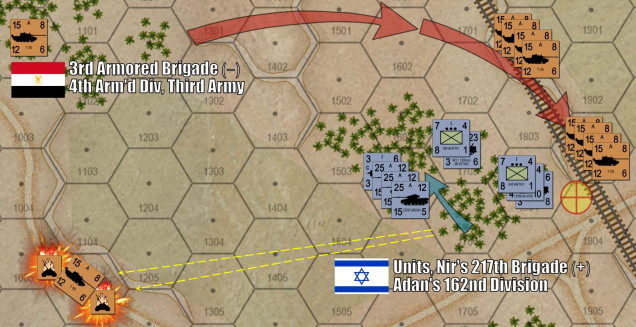 Things jump off in the north on Turn 03. Damon’s counter-fire to my opening salvo is pretty devastating, he’s disordered five of my tanks and killed ten more at a range of 1500 meters. But forty MORE tanks have already swept around behind him, and now threaten that rail line objective hex. Note Damon’s use of displace fire tactics, firing and them using split-move-and-fire rule to displace his armor 250 meters to the northwest. It’s correct to lunge like this, but he lunges the wrong way, and thus allows himself to be flanked. If he’d moved east one hex instead of northwest, he could have contested that flanking maneuver with point-blank opportunity fire and cost me at least 15 more T-55 main battle tanks.
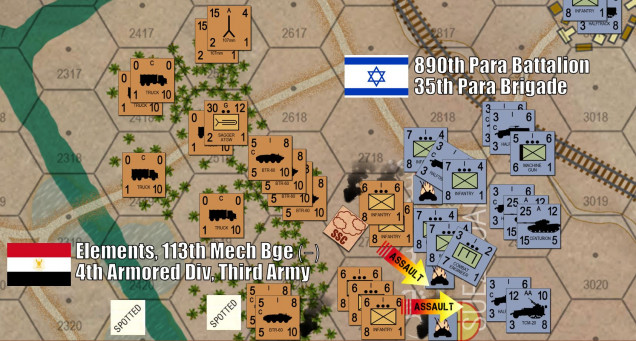 In the south, after three turns of preparation and staging, I finally launch a massive infantry assault out of the palm groves along the “Sweetwater Canal” (a fresh water irrigation canal that ran along the Suez Canal). I’ve already done quite a bit of damage with massed fire from twenty-five BTR-60s. My assault is also partially protected (ironically) by an Israeli smoke screen (SSC = smoke shell concentration). My RPG-armed infantry even get close enough to some of Damon’s dreaded Sho’t Centurion tanks, and a platoon of these beasts is now on fire. For one glorious moment, the southern objective hex is in my grasp as well.
 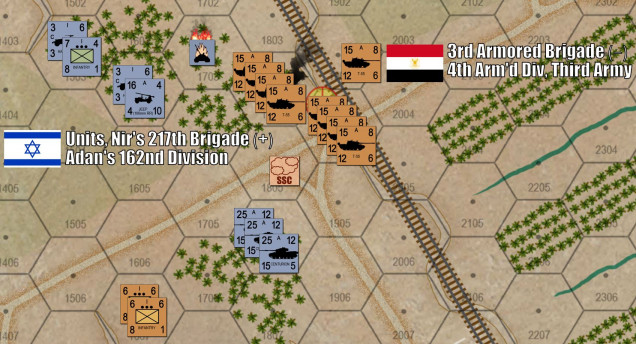 In the north, the battle is (by contrast) oddly quiet. This is because I’ve maneuvered in such a way that Damon really can’t do much about my presence. I blow up his 120mm mortar carriers, I try to fire when he side-steps with those 15 Sho’ts to get an angle on my T-55s … but AGAIN I miss. But now with 45 T-55s on the objective, Damon’s gonna have a helluva time shifting me out of here. And I have 80 infantry (two platoons) with RPGs creeping on his tanks from the southwest.
 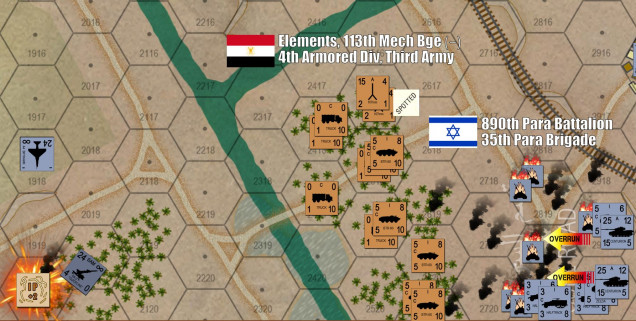 Damon is losing the game, and realizes he’s out of time. He’s shot the ever-living hell out of my infantry battalion that’s taken the Port Suez Road objective, and now masses his remaining paratroopers, their halftracks, 10 Sho’t Centurions (two counters) and even the battalion commander’s M-113 sections in a do-or-die counterassault on the Port Suez Road. It works, my entire contingent of the 113th Mechanzied Brigade is more or less shattered in a horrific slaughter. Damon and I really tore each other apart down here, we count up later that no less than twenty-one PLATOONS have been destroyed here. That’s twenty-one Bolt Action “ARMIES” shot up to the point of combat ineffectiveness. That about 130 dead and somewhere around 400 wounded to one degree or another, along with 30 armored vehicles destroyed. But he retakes the hex. Damon also bits the bullet and calls in his air strikes directly against my SAMs (never having taken any of them out on the ground). He dodges a bullet here, I don’t shoot down any A-4 Skyhawks, only forcing one to abort. The other three strikes go in, and two of them hit. That’s two of my three SA-2 sites blown off the map. I’ve also sent on five T-55s (one counter) over the canal to try and take a poke at the Test Road objective hex, held by Damon’s recon jeeps and one platoon of paratroopers – but nothing comes of it.
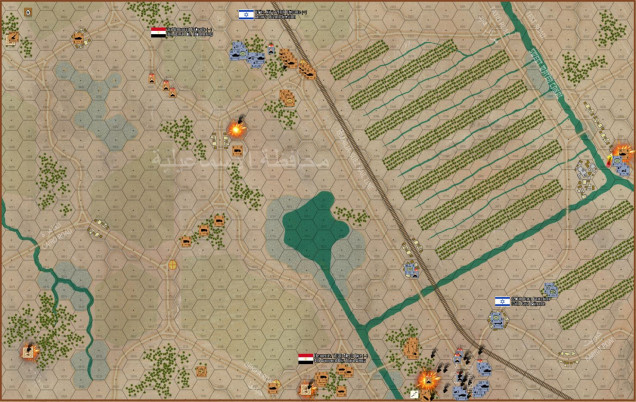 In the end, this game goes down as a hard-fought draw. I own three objective hexes and still have one SAM battery operational = four victory points. Damon has two objective hexes (Test Road and Port Suez Road) and has destroyed two of my SAM batteries = four victory points as well. WELL DONE DAMON! Not many players can fight me to a draw in Arab-Israeli Wars!







Leave a Reply