


The Emperor Protects ~ Adepta Sororitas ~ A Sisters of Battle Project


WAVE TWO BEGINS ~ A SISTERS OF BATTLE RHINO PAINTING GUIDE ~ PART 1
WHAT A TANKER
*****
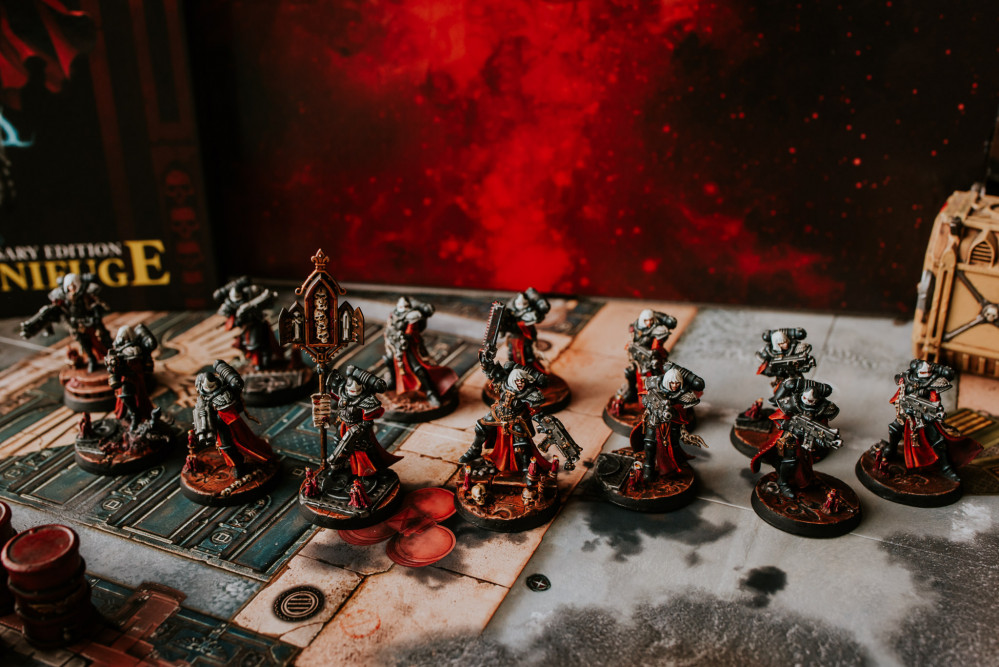
Yes i’m back & I’ve been all kinds of busy on sisters hobby goodness. I’ve actually now completed assembly of wave two of my Adepta Sororitas army. Normally I’d show off everything I’ve built at once but instead I’m gonna hit you with it bit by bit to be DRAMATIC.YES!
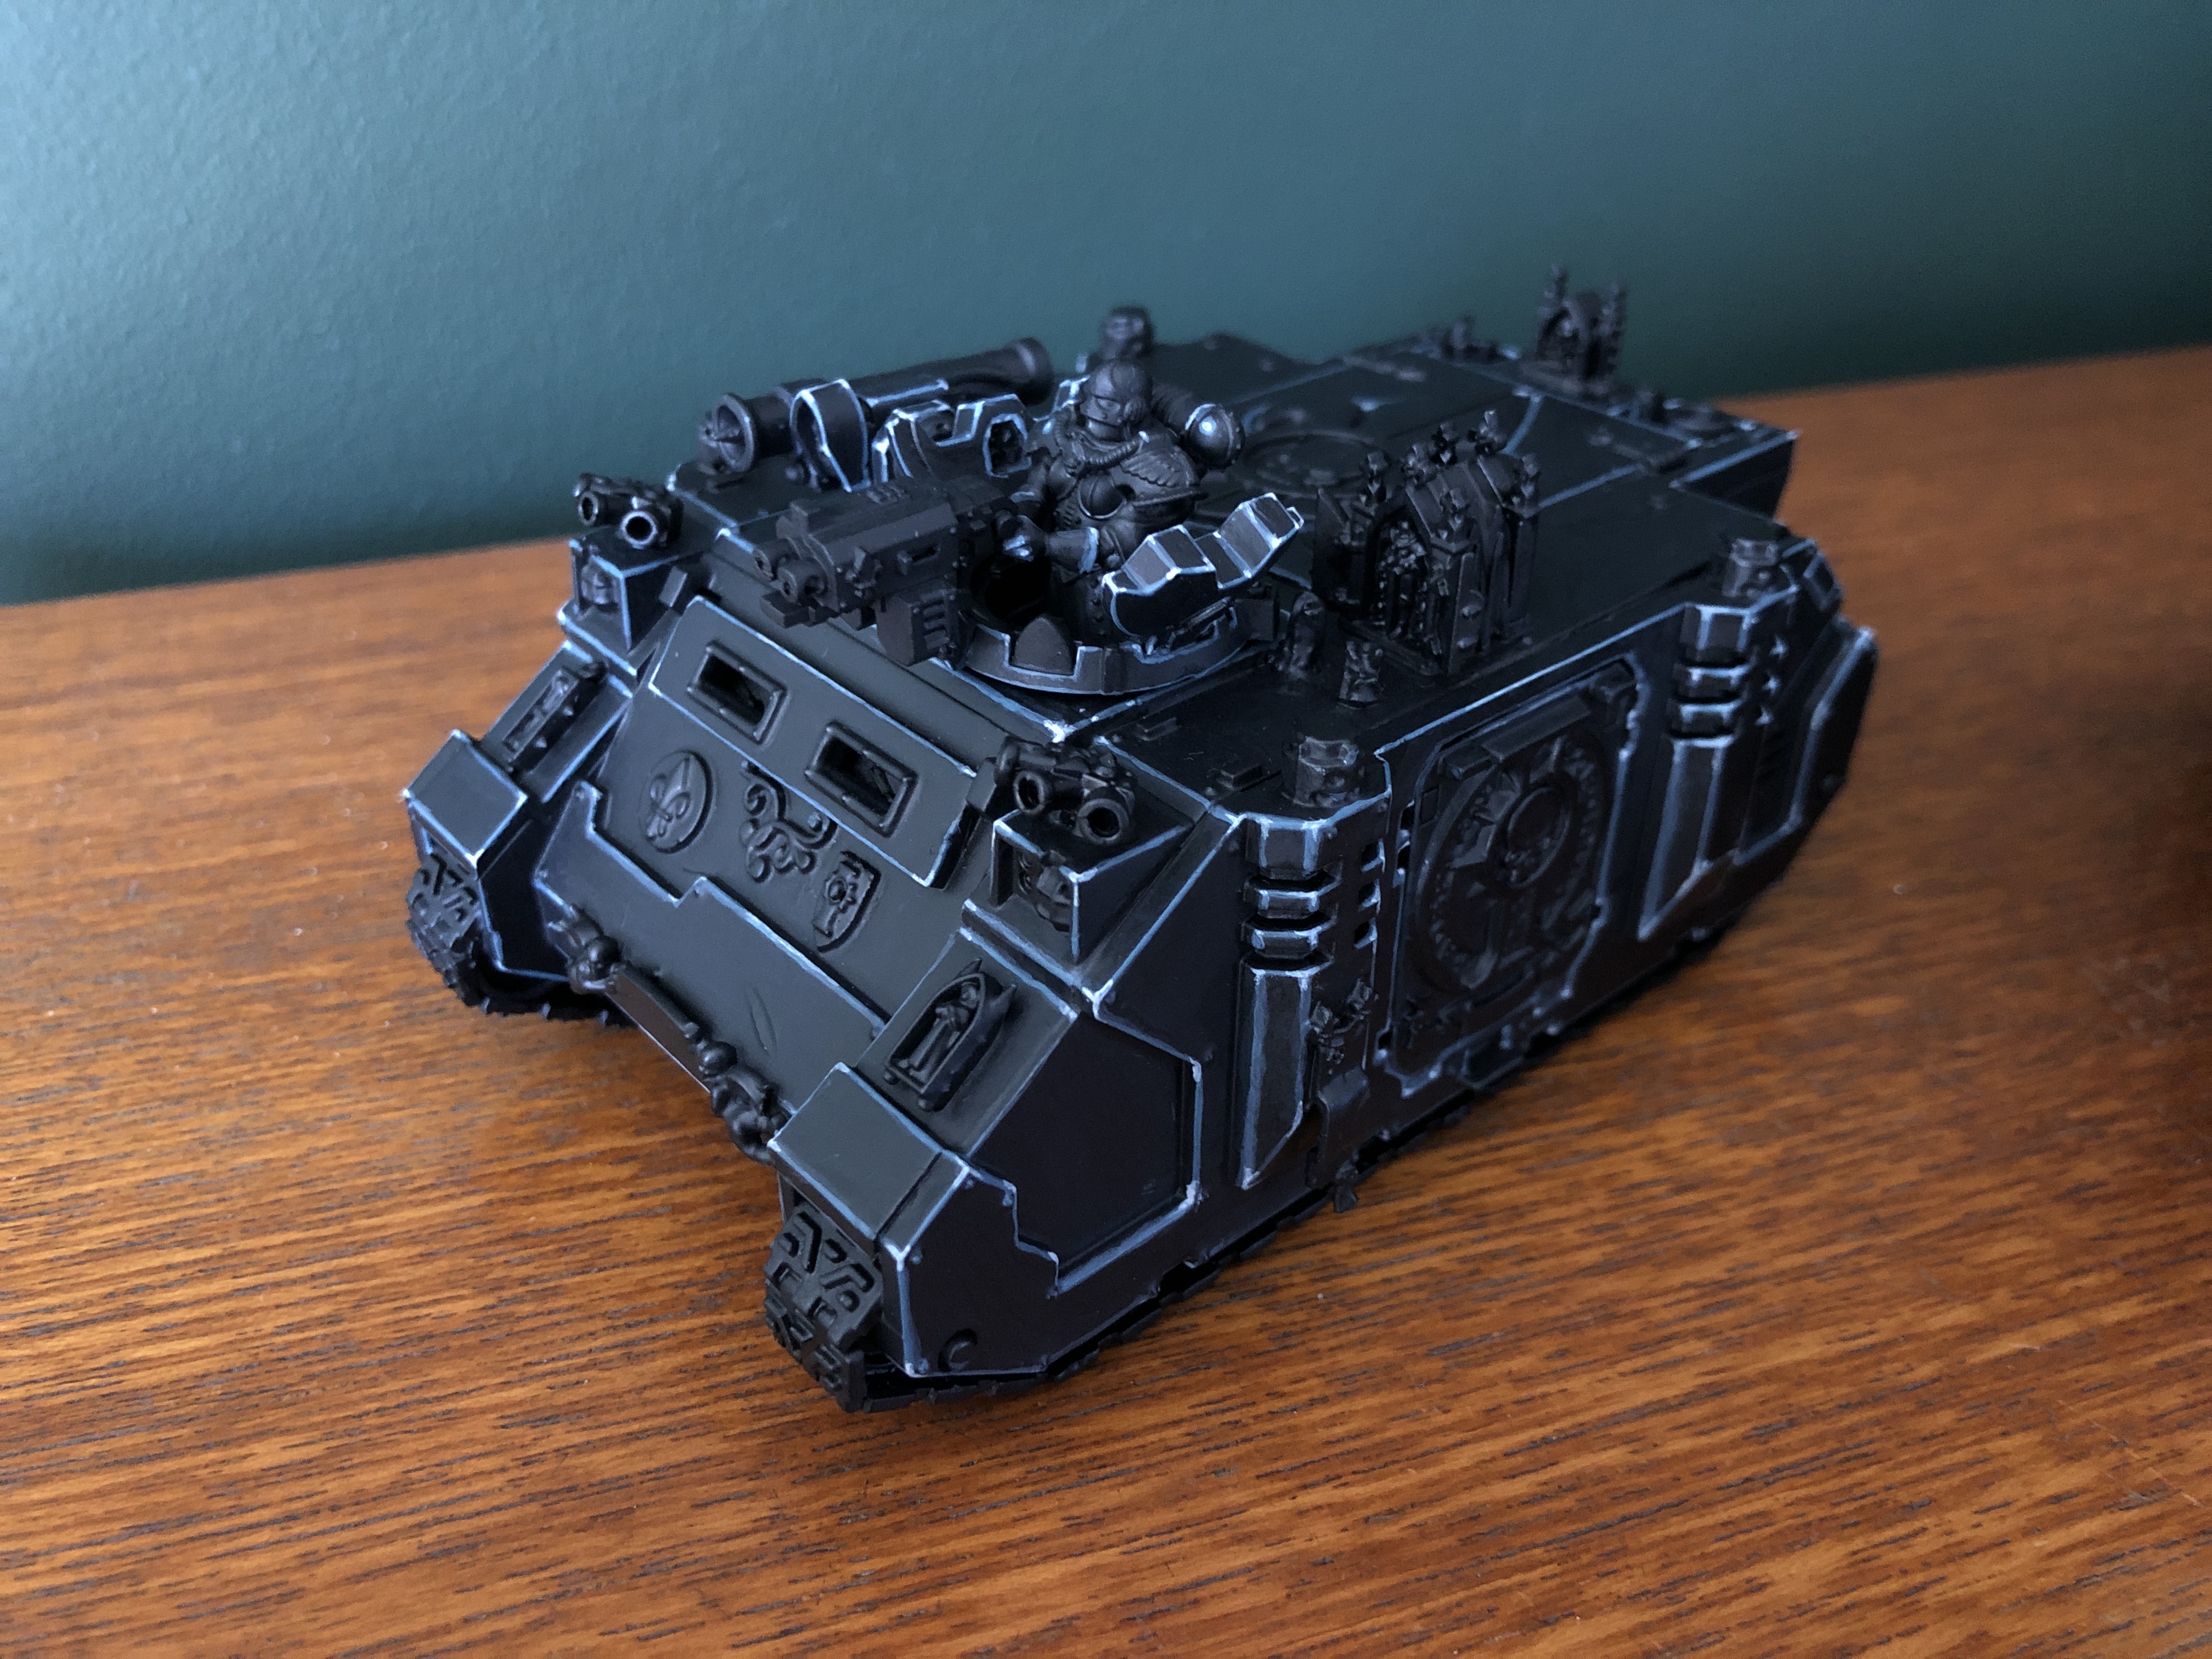
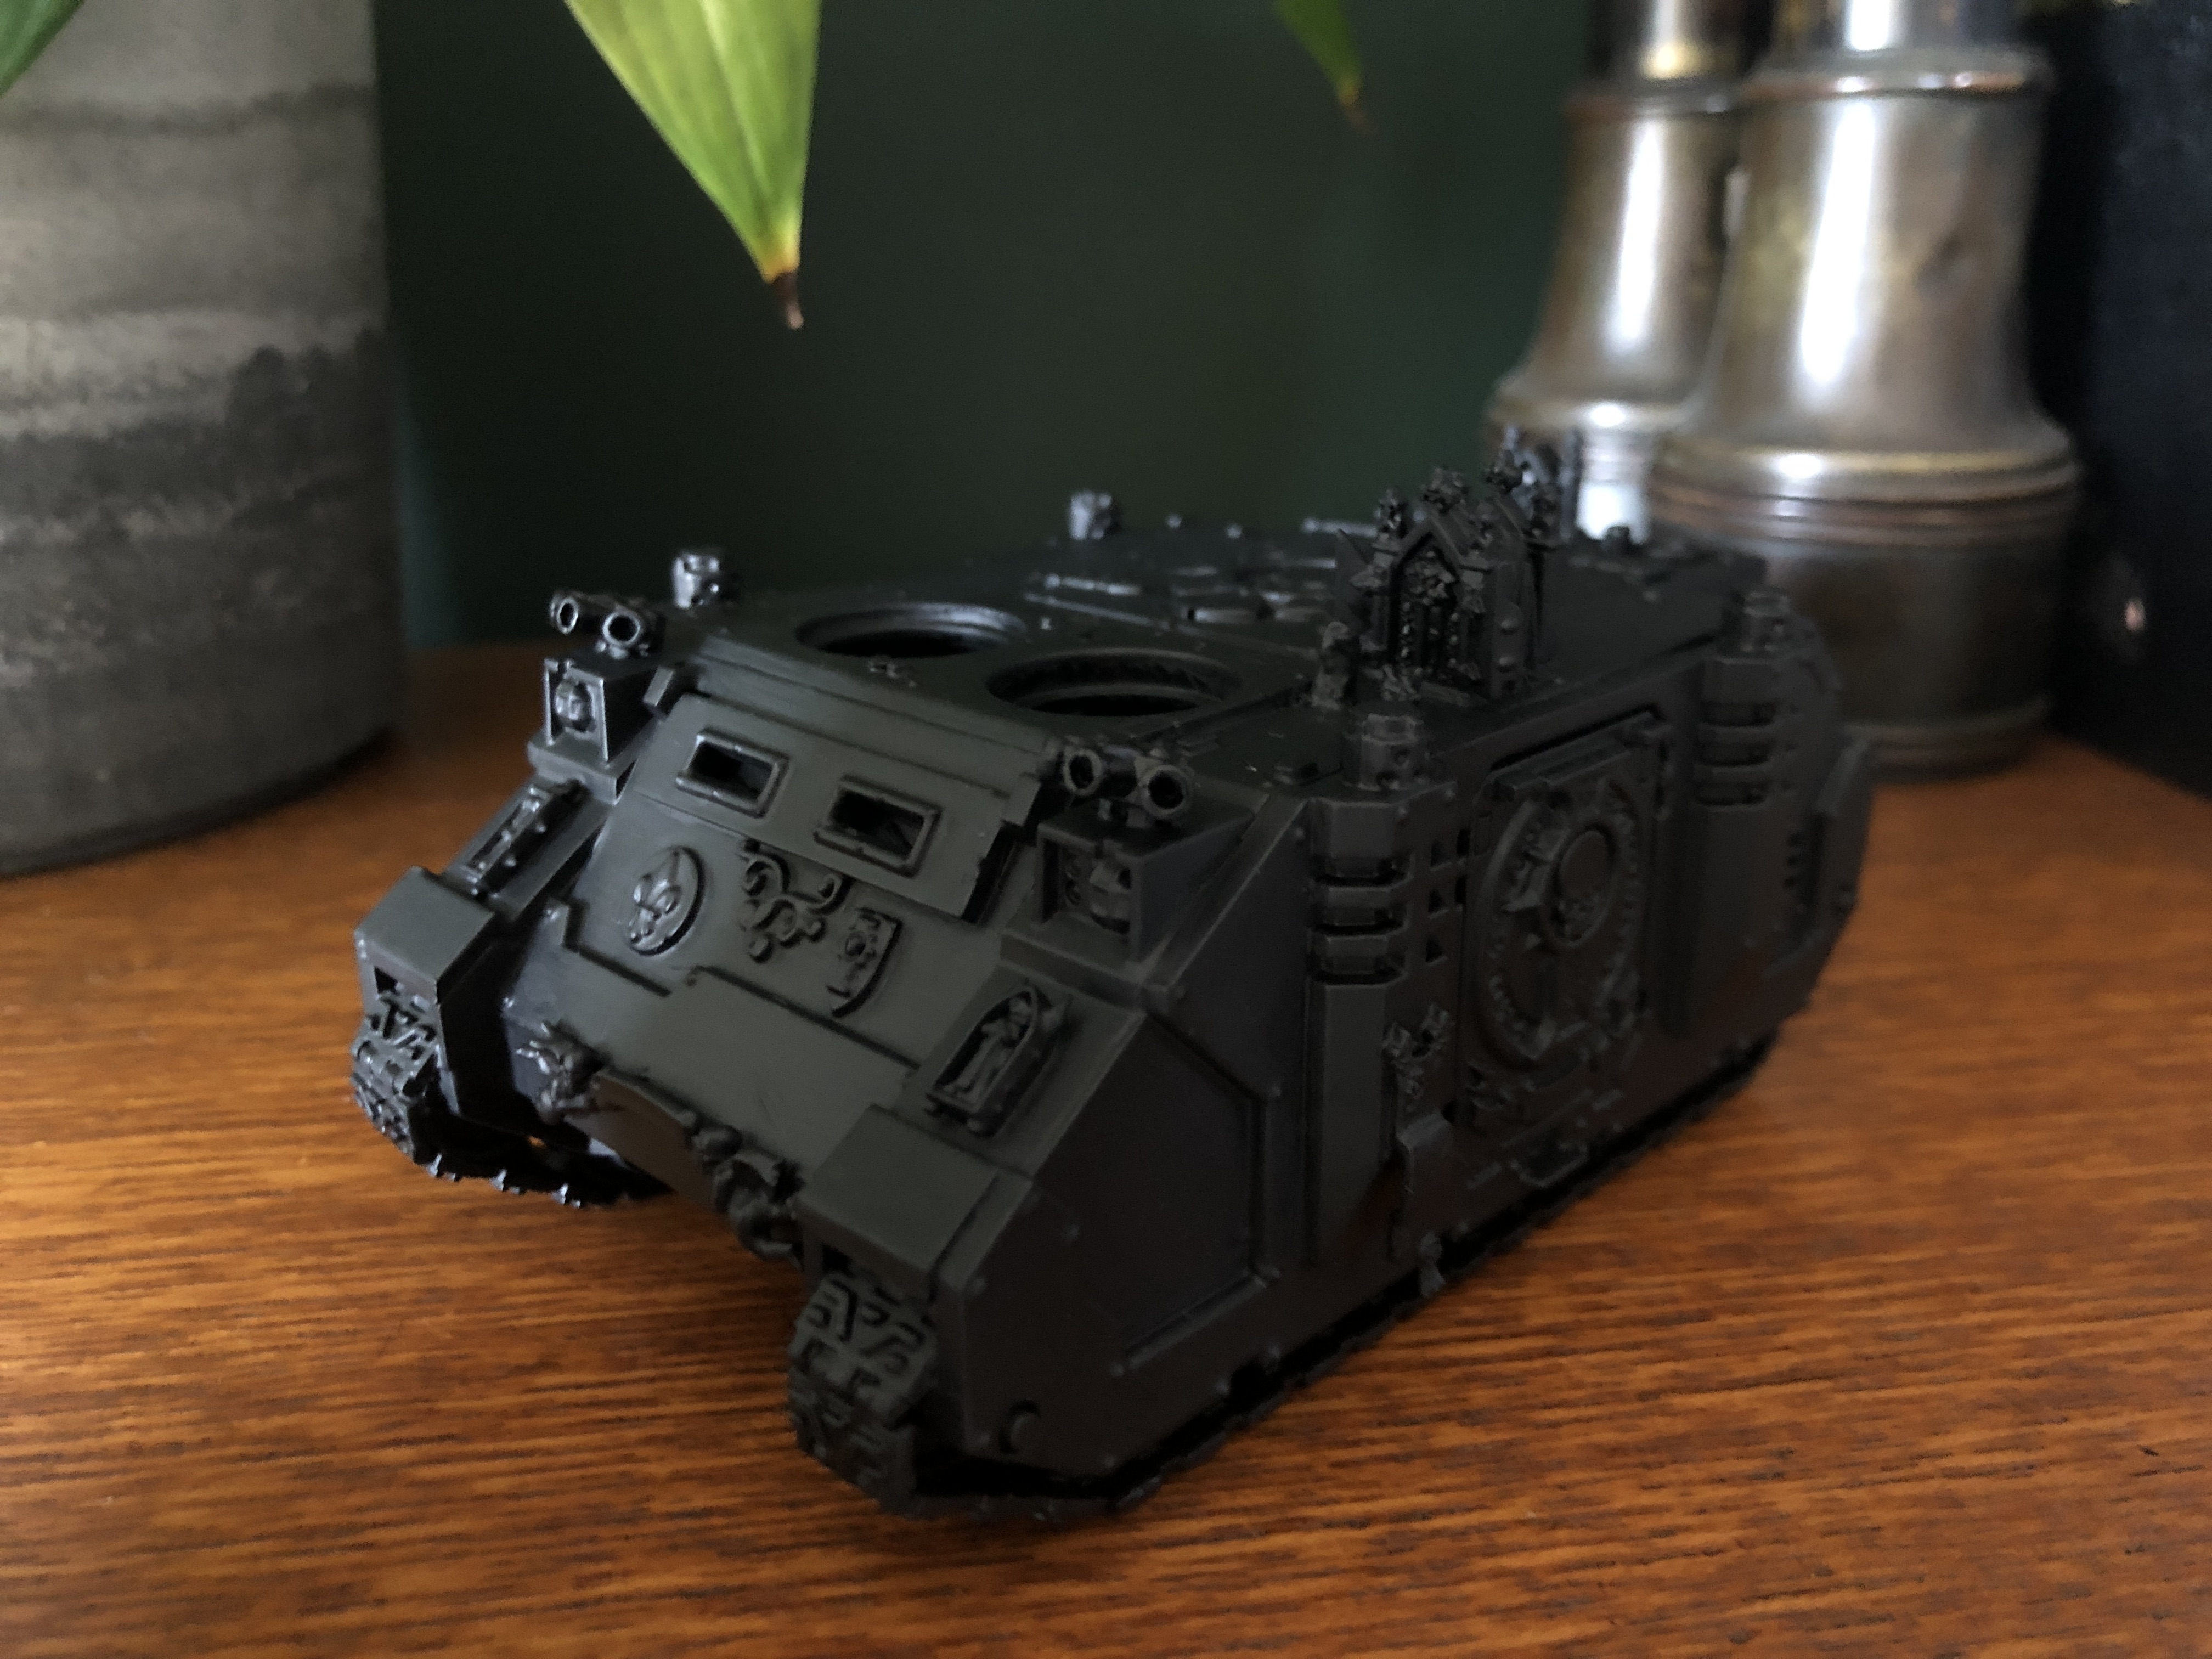
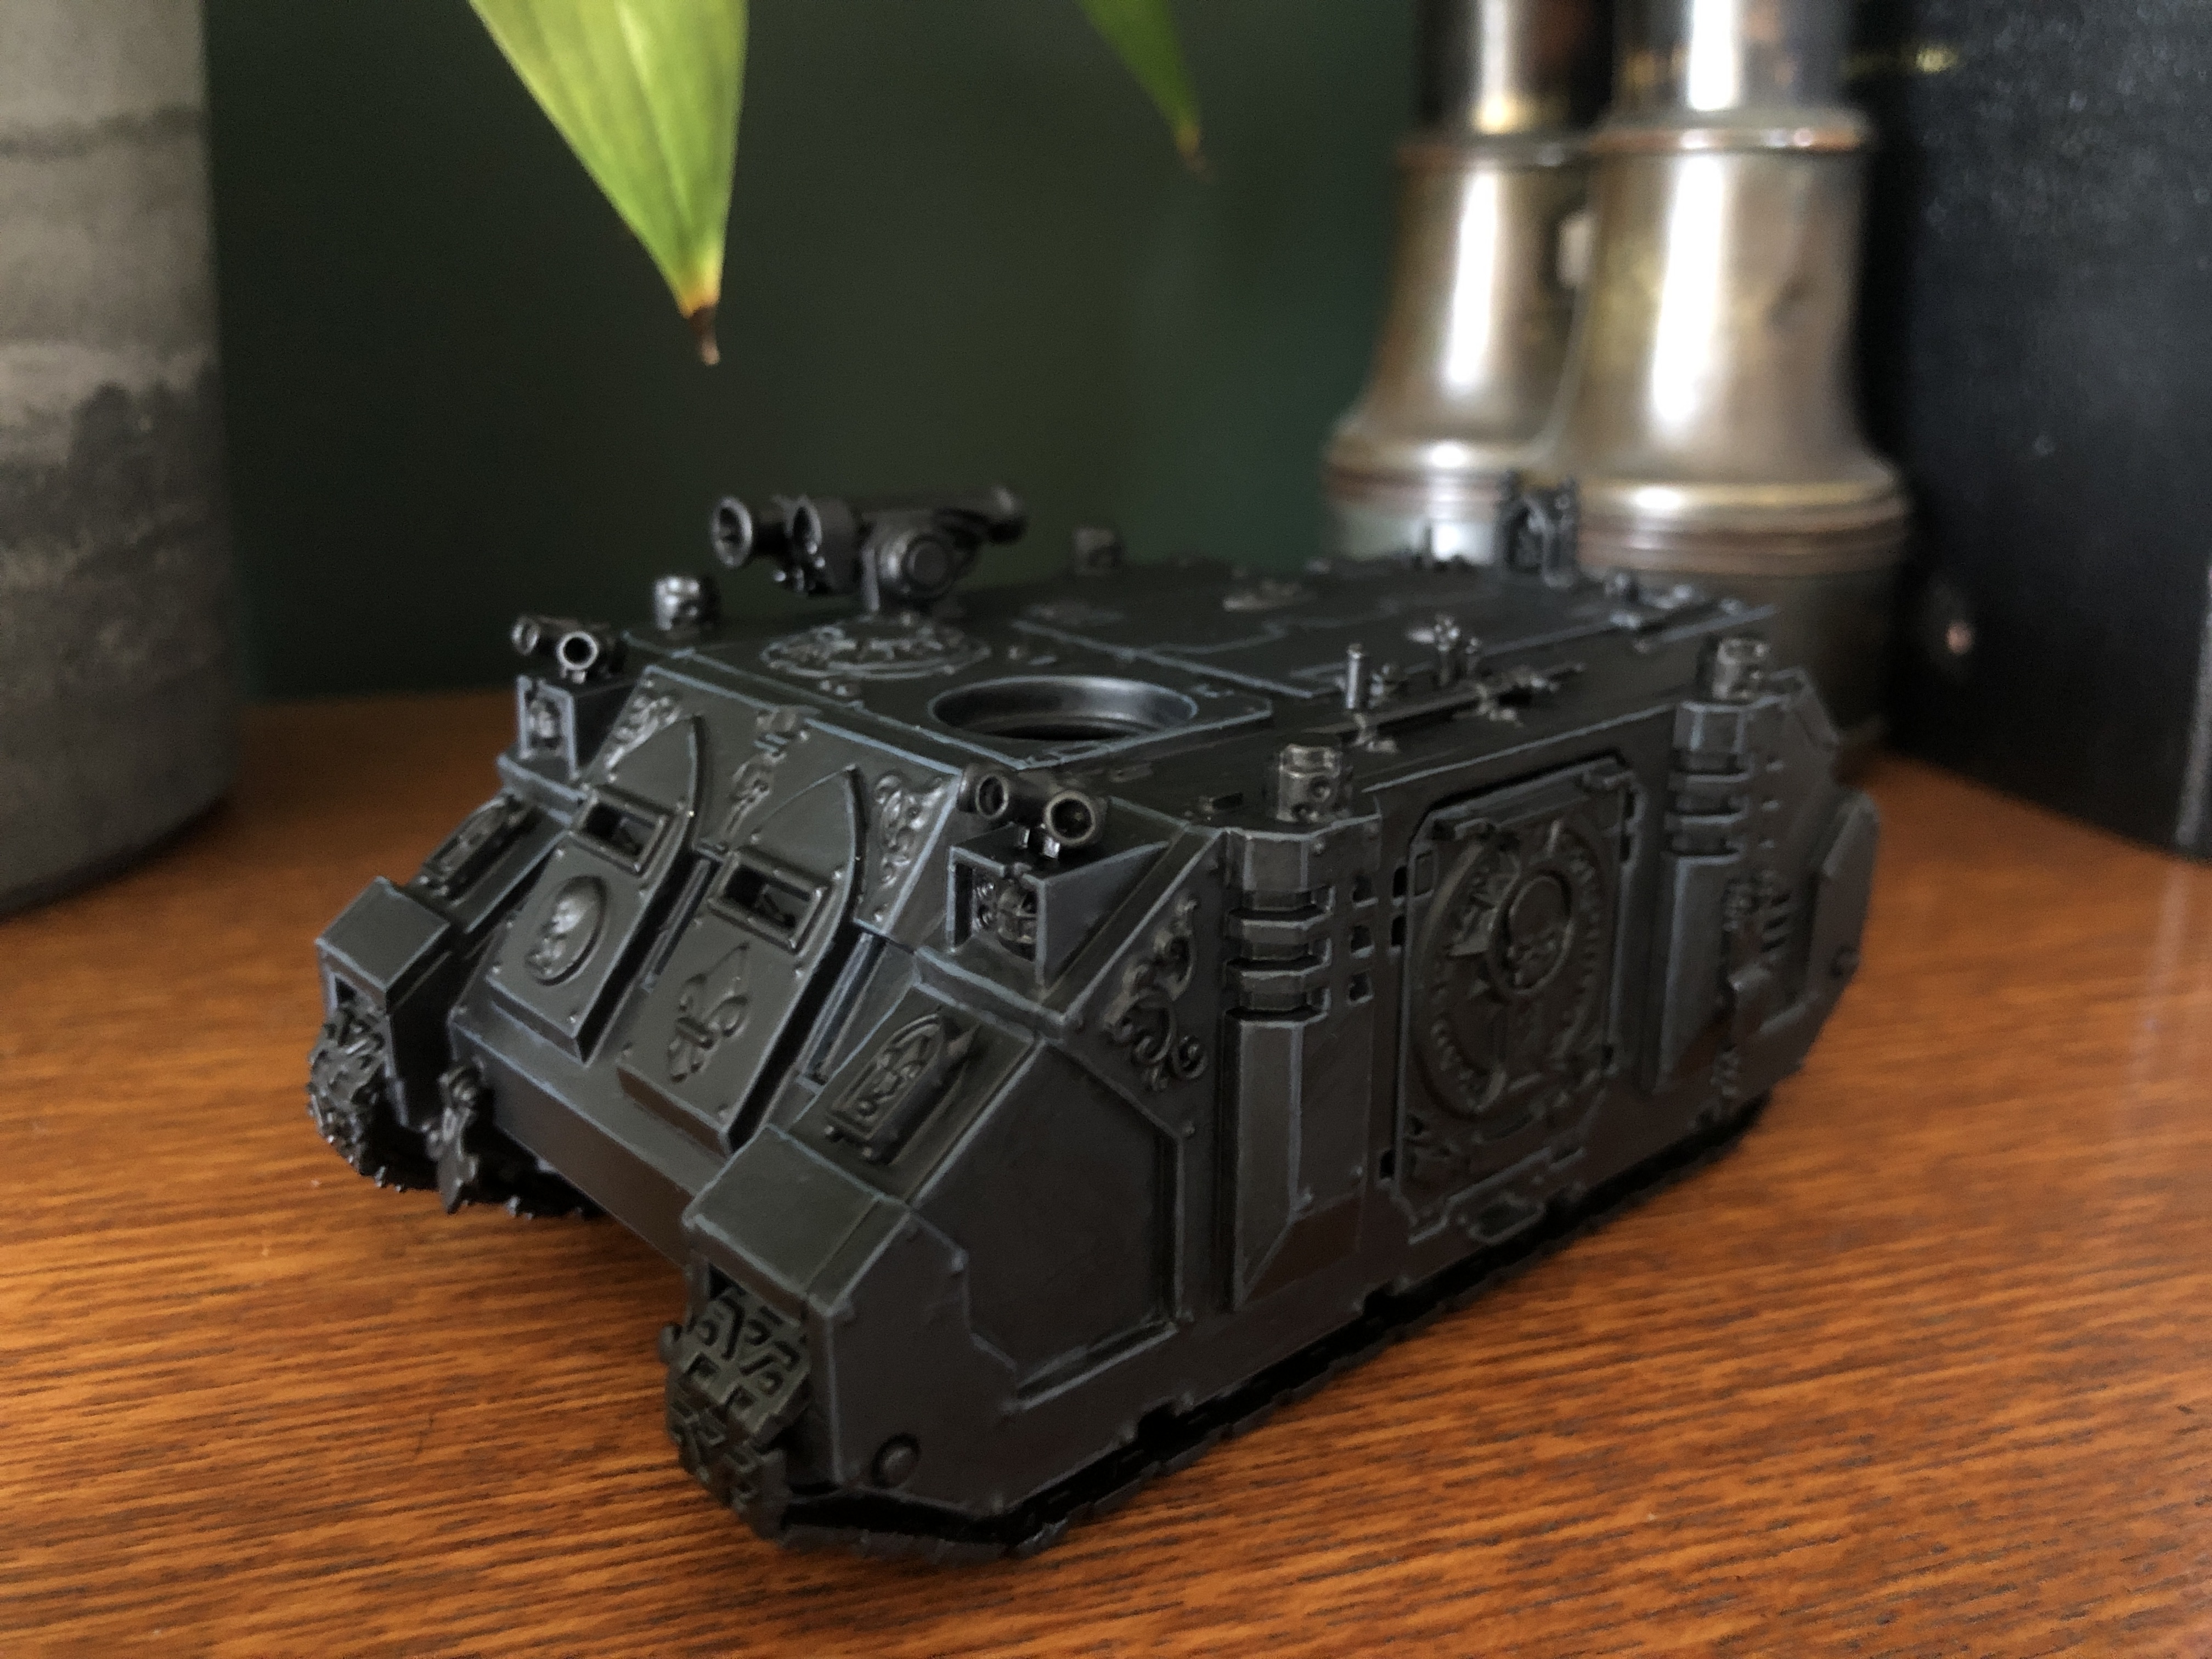
Today I’m showing off Part 1 of my painting guide for two Rhinos. I’ve had a spare Deathguard Rhino kicking about from the last run of Conquest Magazine for donkeys years. I decided to purchase one of the new Sisters of Battle Rhino kits & spread all of those badass themed accessories between the two tanks.
This did involve me converting one of the Storm Bolter hatches and making one out of spare bits. On top of that I purchased another Sisters Hunter Killer missile from eBay and some more smoke launchers. Those bits also came with a couple of spare accessories from the Exorcist kit which I made into little shrines on top of the two tank chassis. I then added a few candles here & there to tie into the rest of my army & build that narrative of Emperor worship.
I’m chuffed with how the actually kits came together in the end. So… ONTO the PAINTING.
PAINT LIST
*****
• ARMY PAINTER MATT BLACK SPRAY
• CONTRAST BLACK TEMPLAR
• DARK REPEAR
• THUNDERHAWK BLUE
• ARMY PAINTER ASH GREY

ALL BLACK. EVERYTHING
*****
I began with a spray of Army Painter Matt Black before hitting all of the tank with a base coat of Contrast Black Templar. It was at this point I realised how terrible it looked. haha. 3 more coats of Black Templar Contrast later it became a lot less patchy and a finish I could finally work with. Honestly as soon as my next cash comes in I’m buying an airbrush. I’ve had enough of crappy base coats & rattle cans not matching. It’s time to level up at last.
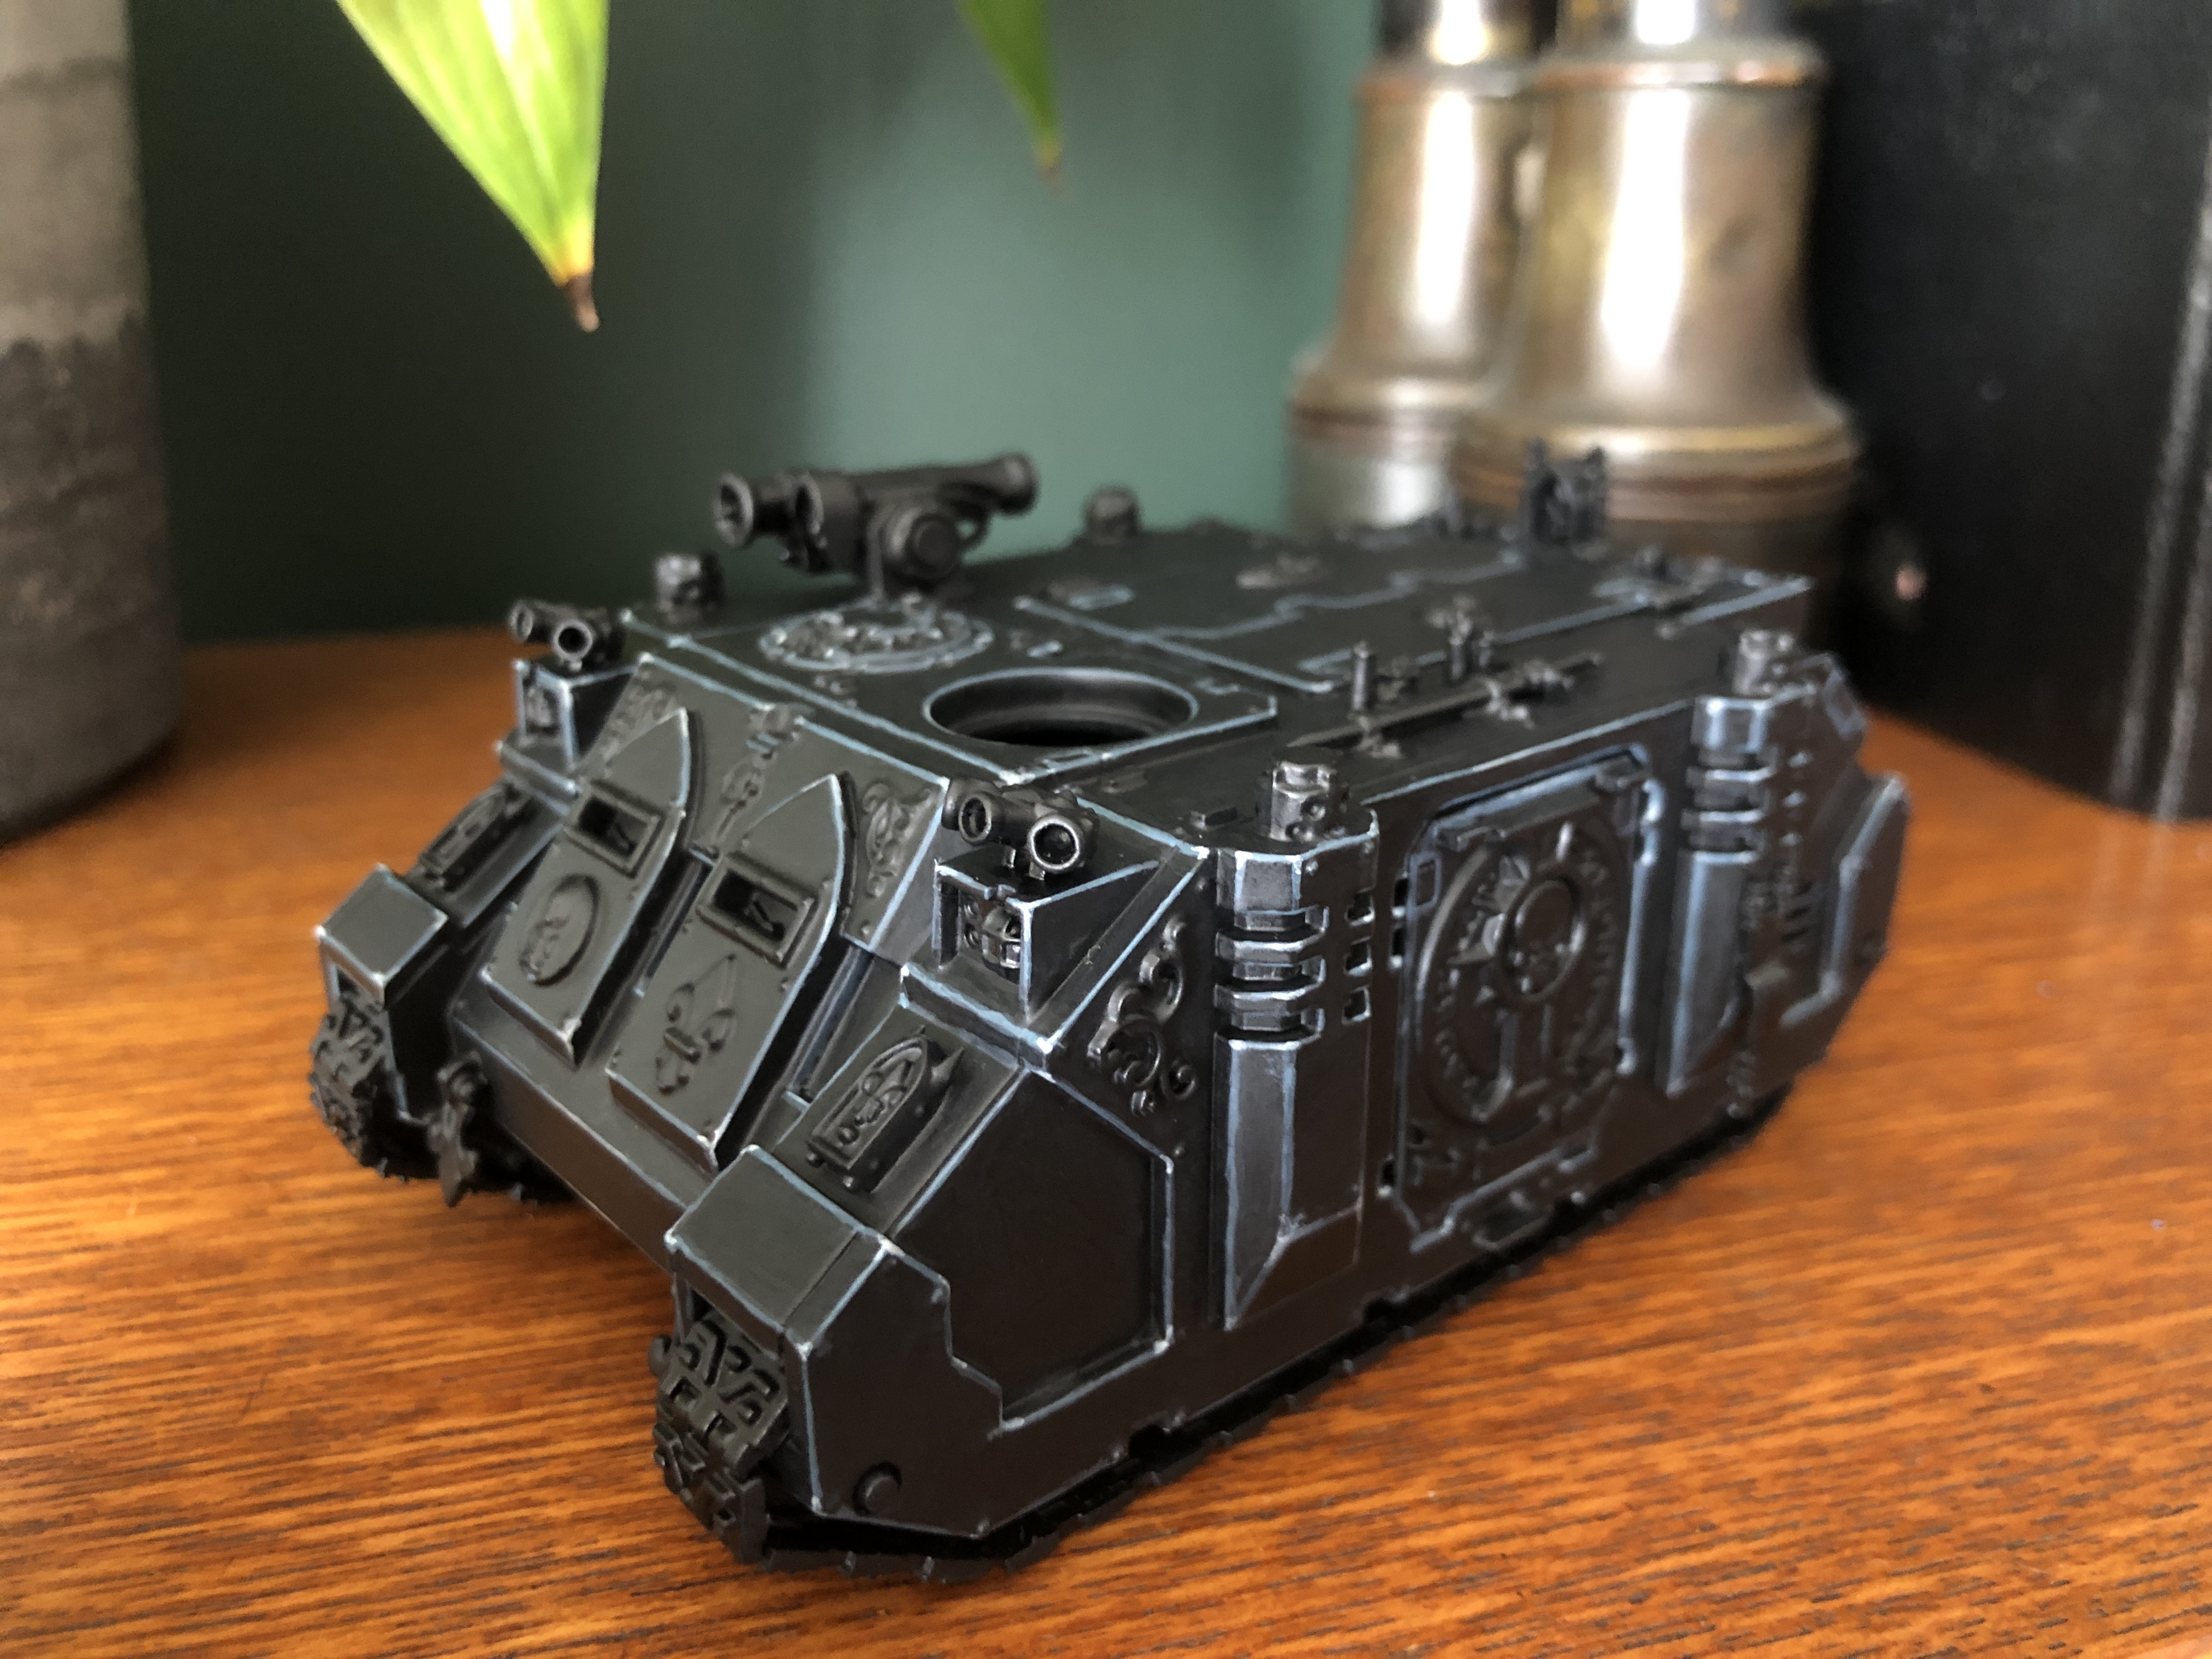
With a reasonably smooth base layer I then went about edge highlighting my Rhinos. I really wanted to push myself with these first two tanks. Seeing them as a practise run before tackling my Exorcists & Immolators. I recently invested in some Artis Opus brushes so I had no excuse. It was edge highlighting time!
The first highlight across the edges of every single rhino panel was with Dark Reaper. This first edge was a little bit broader than the others. I used a number 2 brush for all of the highlights mixing paint in a wet palette to get a consistency like semi skimmed milk.
I then applied a second highlight of Thunderhawk Blue keeping the edge thinner than the previous layer so some of the Dark Reaper still showed through. Finally I applied a last highlight of Army Painter Ash Grey to just the corners of the panels to create a catch light on each surface. I also applied the same highlight mix to all of the turrets.
RHINOS INBOUND
*****
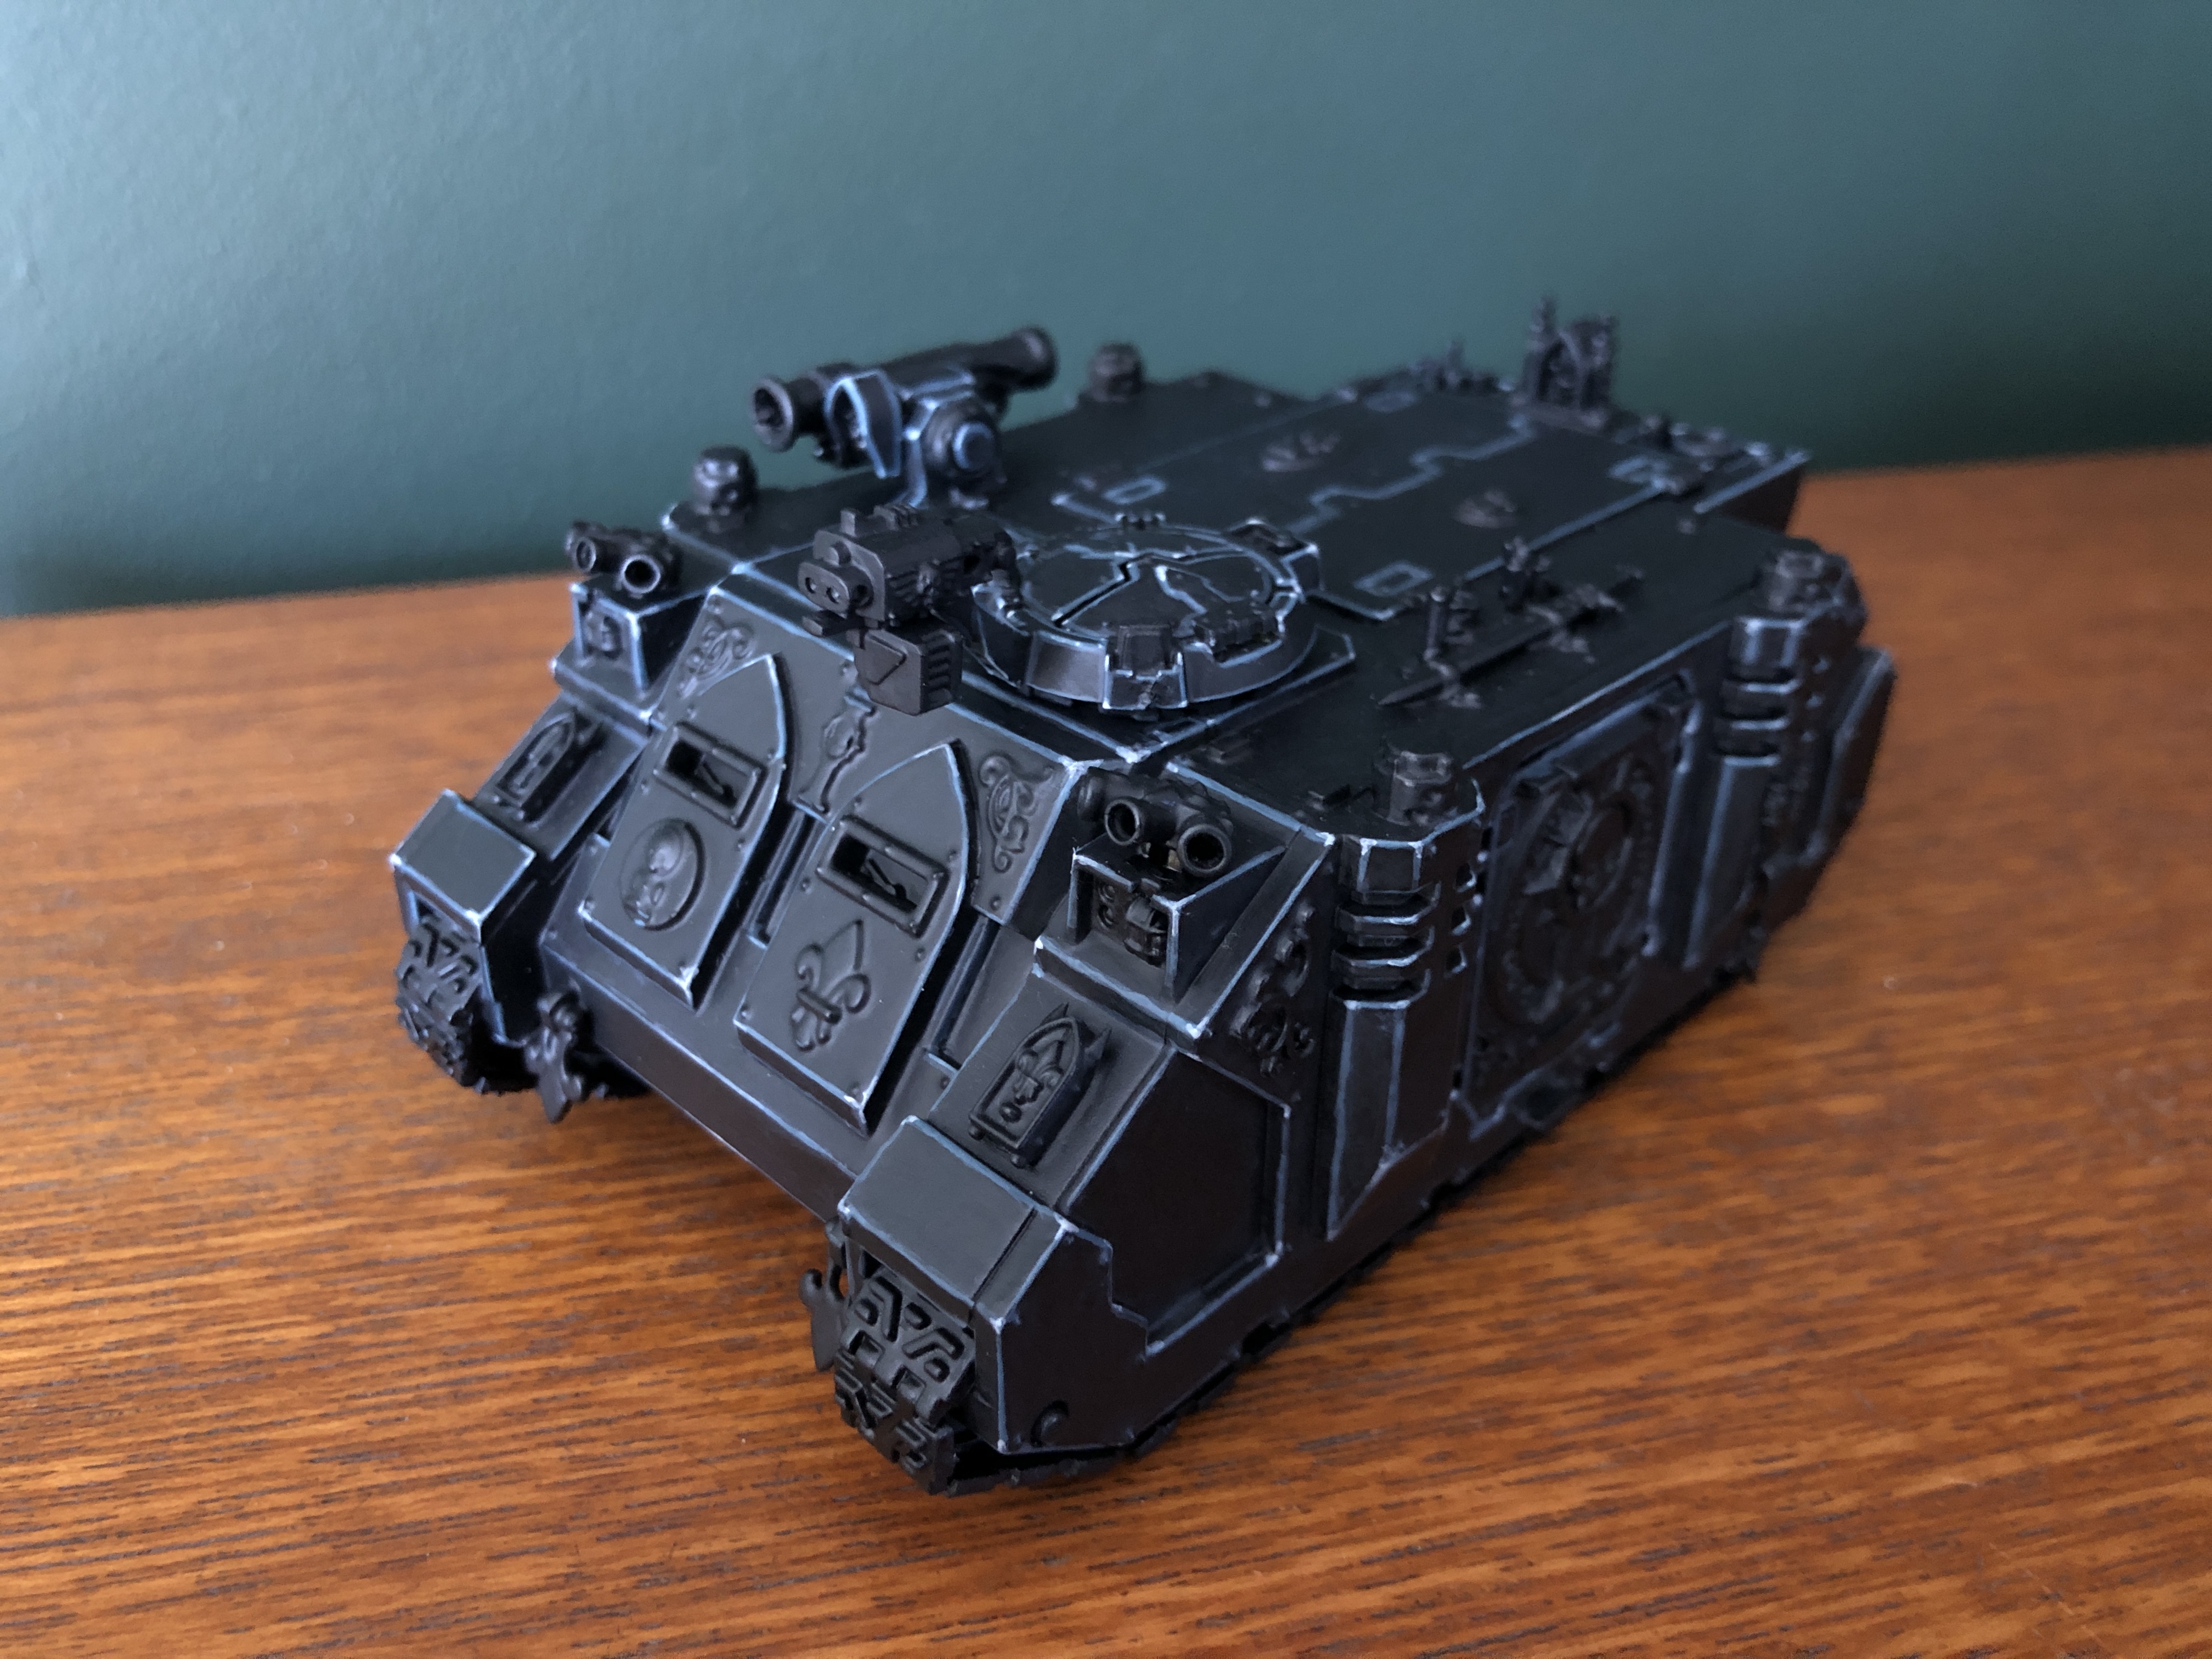
That’s the black complete on my Rhinos & I have to say I’m really pleased with how these guys have come out so far. Next I’ll be moving onto applying some details to the tanks. Stay tuned for awesomeness. YES!
Much Love
ETERNITY GATE


Leave a Reply