Spring Cleaning Military Orders
Sandstone Saga part one.
As I moved onto the set I thought, you need to do sandstone and stained glass. Quite a good thought. I knew this needed to be yellow (ish) so sand coloured sandstone. Easy yeah?
No, I have fallen out with sandstone in the past. Which is a cheek, If you have ever been to Glasgow where I am you will soon see that about 80% of all buildings are sandstone. I live in a sandstone building and can see at least 40 sandstone buildings by looking out the window. Can I paint it? Yes a small wall of sandstone is easy to paint. you use a variety of colours and can make this pop and look great. It takes time. Time I don’t have.
I needed to practice my way out of this mess. I also needed to check materials I have decided to use.
Frist comes the texture.
 Painted texture to highlight them so I would get a better feel for the end result. Zenith then skeleton bone.
This was an eye opener. All were a little time consuming but I want a highly defined brick shape. They were done either with a brush or cocktail stick hitting each corner. for the maternal.
- Pumice was too rough for the scale.
- AK was good but took a while.
- Filler didn’t adhere well but gave a good look for the scale.
- superglue and bicarb was indestructible but mopstly shrank from the edges.
- PVA and sand was good but a little too rough for the scale.
I would have went for filler but the fragility of it put me right off. That left me with the texture paste.
Material decision made I would have used this as my test piece for painting but I had a few other things to test as well.
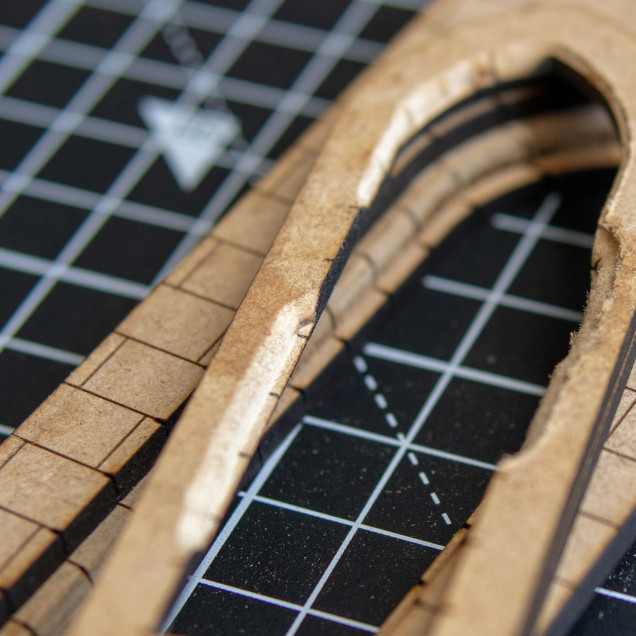 I done some tests on the window frame I wanted this to have a bezel on the central frame. My laser can only cut in 2D. I came up with a great idea of using very small router bits to do this, my tests didn't go well and when I got it to work properly the smallest router bit I had was not small enough. I ended up hand sanding it. but I will keep this for the future as I will use it to make amazingly complex and high plinths for any painting competitions I enter.
 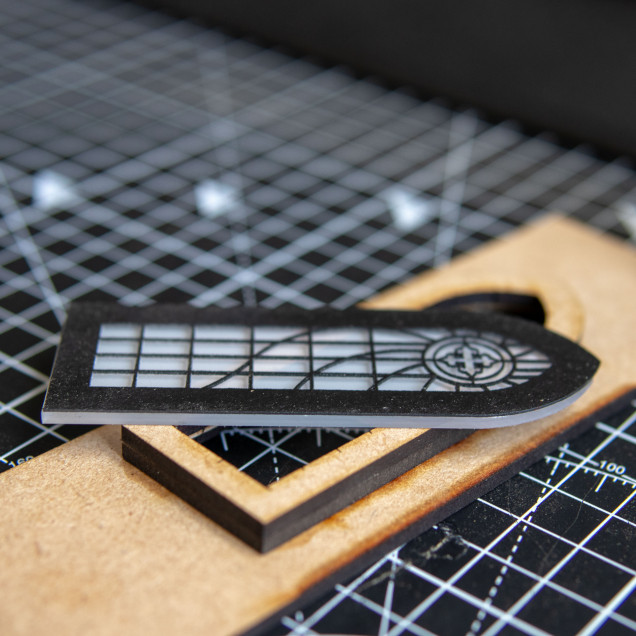 I also needed to do the stained glass. I have some stained glass paints and a tube of relief paste to draw out the design. It was a relief when I came up with a better option of laser cutting out some 0.5mm cardboard and spraying it black. I then mounted this onto acrylic with spray mount. It was a pain to get the cut settings right as this is extremely fine but it's still got to be fsster the trying to freehand this with a small tube of black toothpaste.
 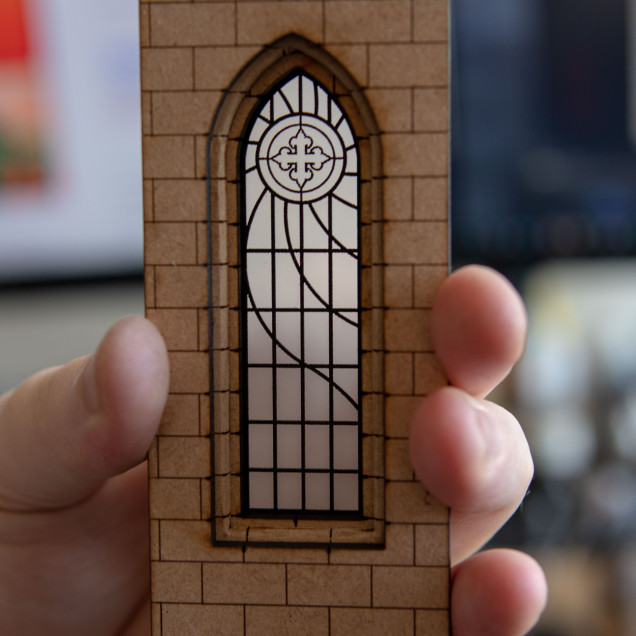 I assembled everything and I had my test piece. Looks great but too crisp. I also left on the white'ish backing film on the Perspex on the back to act as a light defuser..
I started work on the stained glass test. It’s been a few years (over 20, sigh) since I have done this. I have never used card as leading. These colours are oil based I think and brushes are cleared with turps/ white spirit. I have 4 colours: Yellow green, blue and magenta. I need 6 one for each window and two tones of each. and a few other elements for logos. I will do primary an secondary colours and mix tones using a greater addition of the stronger colour. It would be best to have a colour for each white and back but I am not spending money on it so will make do.
The test will be using yellow.
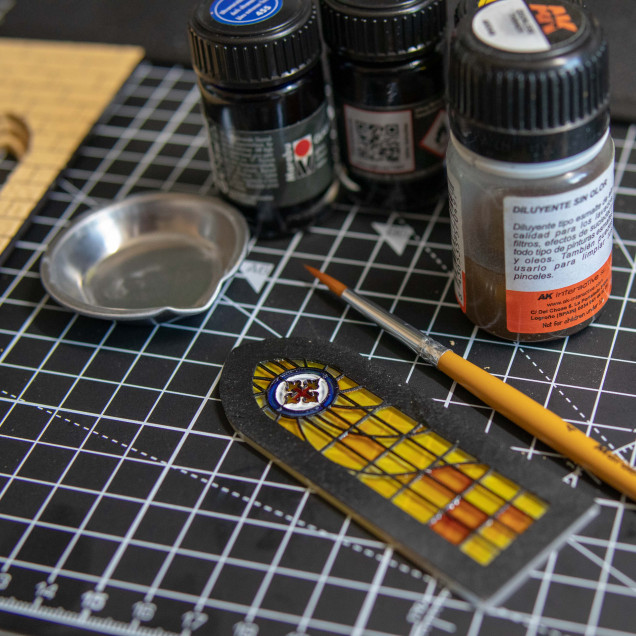 I drop the paint in and move it to the edges Though testing I got less bubbles by dropping in some white spirit before the paint, this seems to get rid of some of the surface tension. I tried to cheat and use white and gloss varnish to do the white sections. This didn't work as it was still very opaque I also tried to make black thinking if I mix all three primery colours it will make a black. it looked black but when you shine light through it, it goes more like a brown yellow colour. but the paints themselves look good but I will need to tidy the frame up after with matt black paint.


![TerrainFest 2024 Begins! Build Terrain With OnTableTop & Win A £300 Prize! [Extended!]](https://images.beastsofwar.com/2024/10/TerrainFEST-2024-Social-Media-Post-Square-225-127.jpg)


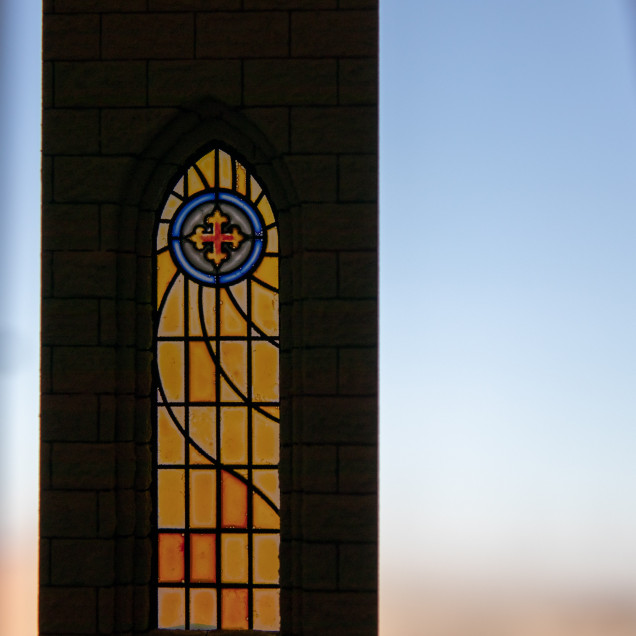


Great work.
I have to admit that having all those .svg’s I’d just colour them and print out on some acetate sheet and call it a day, alternatively I’d use tinted water effect (like still water or those UV ones) to get that distortion of old-style glass. I hate hand-painting small areas where you have to pay extra attention not to cross the line.
I really respect your work here.