
Red Rocket 3D Printed
Up on the Roof
To Start with this time, a musical interval…
I am now ready to start on the eight large roof sections.
Having played around with these in the Cura 3D printer slicer program, I have decided on a plan of action.
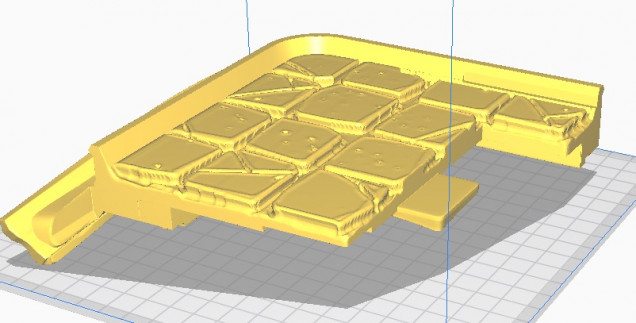
Below is the first roof piece ‘Roof A’
Any orientation that this model is set at would require extensive supports.
This would not only mean that the print time would be extremely long. It would also use a large amount of PLA Filament, that would be in effect waste.
So my answer is to Split the roof Horizontally, giving me two flat surfaces that can be stuck together.
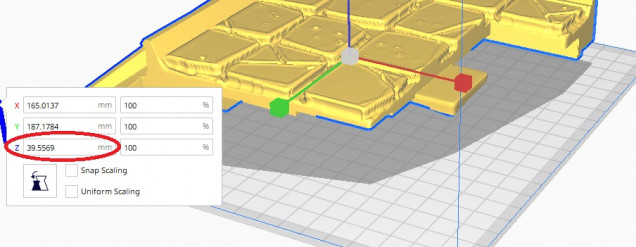
The first thing I need to do is to determine the height of the model. To do this I select the Scale tool and look at the Z (vertical) Height this is 39.5569.
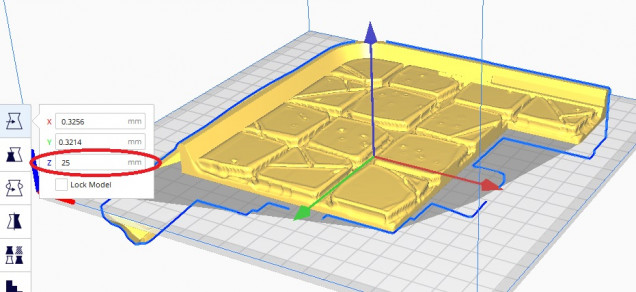
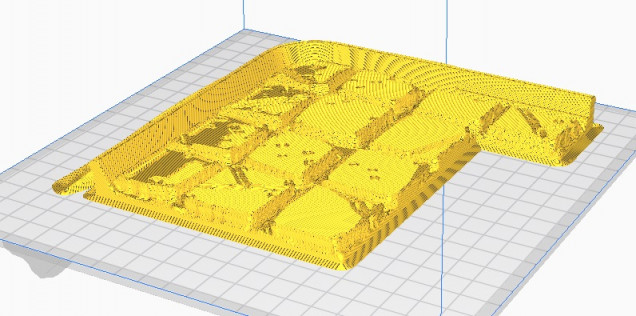
Then Selecting the Move tool I sink the model down below the build plate by -25mm. This means that only the model shown above the build plate will print.
Sunk & Preview both shown below.
Once I am happy with this I save the stl file making sure it is marked with ‘RoofATop’ and then move onto the Bottom.
I now rotate the model (insuring that the orientation mirrors the Top side).
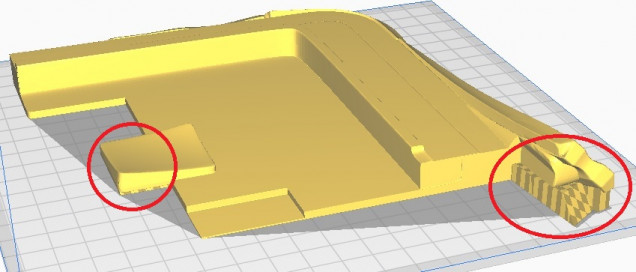
As the total Z (vertical) Height was 39.5569 and I will already be printing the top 14.5569mm,. I do a quick bit of subtraction and sink the newly orientated model to -14.5569mm,which will print the 25mm remaining model.
Upon inspection, I realise that a couple of small supports will be required (positions Ringed Below.
Again I save the stl file, making sure it is marked with ‘RoofABot’
And it’s back to the printer. Results to follow.
Catch you all later folks.
Edit: I forgot to mention that I would be printing these with a 0.25mm layer height.






























Very clever! Can’t wait to see how it comes out!
Hi @conductor , Thanks for the comment.
The first shots are now up. I will explain in an upcoming post how I will be attaching the two halves of each roof together.