24 Hour Paintathon for a Seraphon / Lizardmen Start Collecting box
Back to bases...
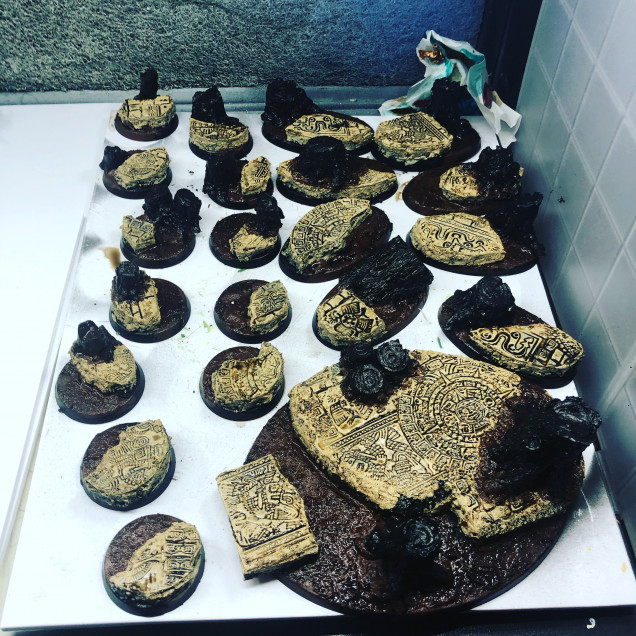
So we left the bases primed black, and I said I would do them in between as a treat and to have to do things during Curing times.
So The first steps are taken where to slap beige sand-like the colour on to the parts which were supposed to be stone. I used a Vallejo Model Color for this. You might need 2-3 layers when doing a light colour on top of a dark primer. Especially as thin layers where needed in order to keep all these details visible.
Another paint taken at this point was a brown from Vallejos Game colour Opaque ranges to slap onto the river bed parts.
And don’t forget Mother Nature, for the trees, I mixed the Vallejo Game Color Heavy Opaque Dark Brown with the Charcoal from the same range to get a very dark grey-brown on to them.
Again you may want to thin down the paints and do a few layers here to keep the details crisp.
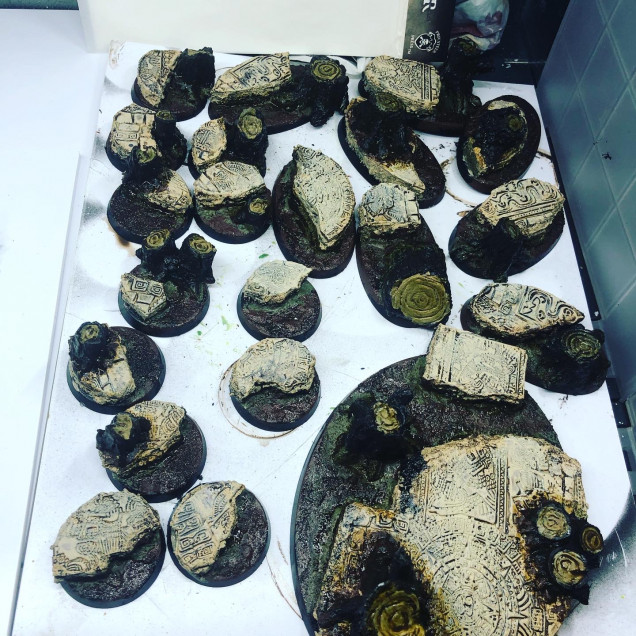
Lastly, the right amount of Agrax Earthshade was slapped onto the river bed and stone slabs
After letting the paint settle I dry brushed the stone slabs with Bleachy Bone from the Vallejo Game Color assortment (Same as the old Bleached bone from Citadel). I also used a very light greenish-brown on the visible wood parts of the trees.
I also washed the trees heavily in a green brownish colour from the Contrast range from Citadel.
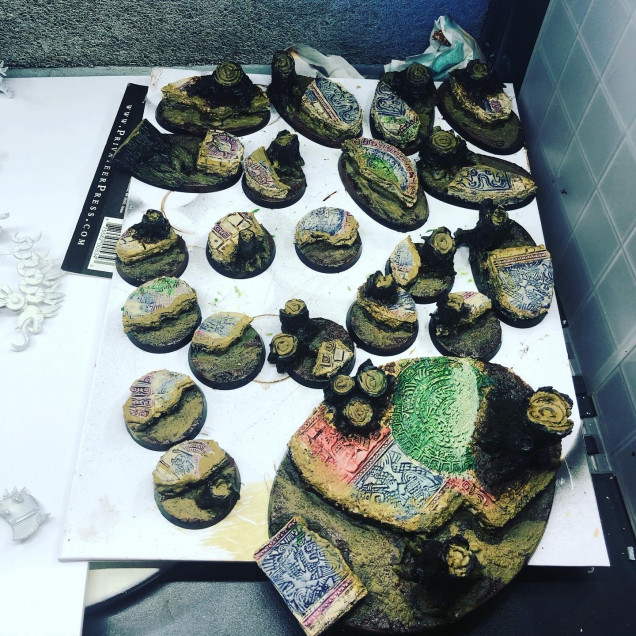
So the next step was to start to bring colour in, I used a brown, greenish Model Color to slab on to the sides of the slab to get a river bed look.
I then did green and brown washes on the riverbed sides and floor, followed by a green-yellow-brown dry brush from the middle, to blend this in.
After that, it was time to get rabbit more of an Aztec look, and luckily enough I had a friend on the stream who suggested doing washes into the stone areas and then using a kitchen towel to get the colour off except the recesses.
I did just that and used different red, purple, green and blue Contrast Paints from Citadel, followed by another Drybrush with bleached bone.
The next steps involved several brown and green and bone colours to get rings into the wood parts, but this is lacking a bit of the required texture, so if I had the time I would model tree rings with Greenstuff into those areas, but no biggy we’ll just cover this with tufts leaves and dirt later on 🙂
Speaking of which, we start adding tufts now as well, I used purple flowers from Greenstuffworld (store.ontabeltop.comn has them). Mini-Natur winter tufts (Please start selling the Mini-Natur range guys!) which I glued using Revell Plastic glue, the reason for this is it doesn’t crystallise out like superglues. It also does not melt anything but plastic and as the materials we used are resin, Greenstuff and cork we’re right here.
Unfortunately, I forgot to take a picture of this particular step of the process 🙁
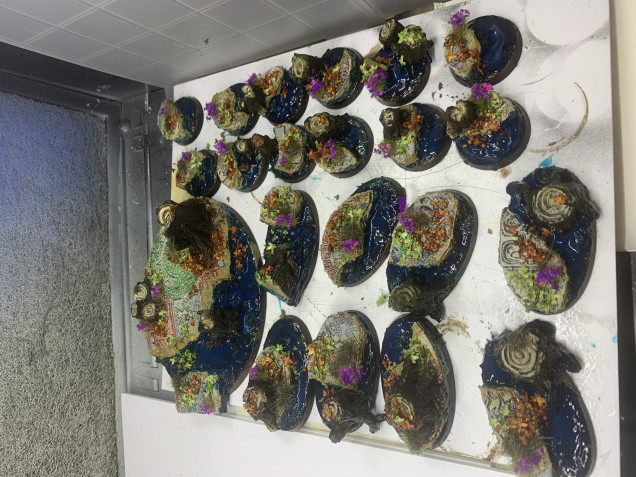
The next step was adding the first layer of water effect, and as I wanted a deep looking river, I decided to use a deep blue-tinted one. Namely, the Ak-Interactive Deep Atlantic Gel for Dioramas. This one has a distinct advantage not flowing of bases, so I did not need to build a form and thus saved a lot of time with a great result.
I use a mix of AK-Interactive Water effects and the Vallejo ones, (@ store.ontabletop.com here is another range I would like to buy from you 😉 ) and this will take curing time, so the other step we could make here is starting adding leaves, and what contrasts well with Turquoise? Right, an orange-red, bright green goes well as well, and both are bright colours that fit the jungle theme we’re aiming here.
I used the Greenstuffworld Orange and green leaves (they’re tinted seeds) (you can get those at store.ontabletop.com), and I used for the earlier mentioned reasons the Revell Glue, which has the advantage on making the leaves settle down a bit. Make sure you drip the glue with the needle onto the leafs es and floors here without touching the leaves, they will stick to the needle and clog it up as well.
The exact method I used is as follows:
Glue onto the base, place the leaves by dropping them with tweezers. Then drop more glue onto the leaves, and then ad leaves, you can repeat and add a different colour, so you can build small piles of leaves.
I also dropped a few leaves onto the curing river parts, as I want to have leaves floating in the water, to add to the impression of a flowing and wild stream, and what does more say this is a wild river then stuff floating around wildly in the water?
So at this point, we have to leave the Bases as we need curing time before we add the next layer, which will be a mix of Translucent and the Deep Atlantic water effects.




Leave a Reply