Gloomhaven Proxy Project Pt.1 - Miniatures
Hello Cultists
As mentioned in my last update I wanted to try to take on some minis which would allow me to work on improving some of my basic painting techniques. I’m quite comfortable with priming and base coating to a neat finish – even if it takes me longer than it should – so the main area I wanted to work on is my shading, highlighting and transitions between them. With this in mind I was looking for models which would give me a chance to experiment with painting clothing. In addition to this I also based my decision on the enemies we were seeing most prominently at the time, so with this in mind I decided to begin work on the Cultists.
The first thing for me to do was to find a high-res image of the game art.
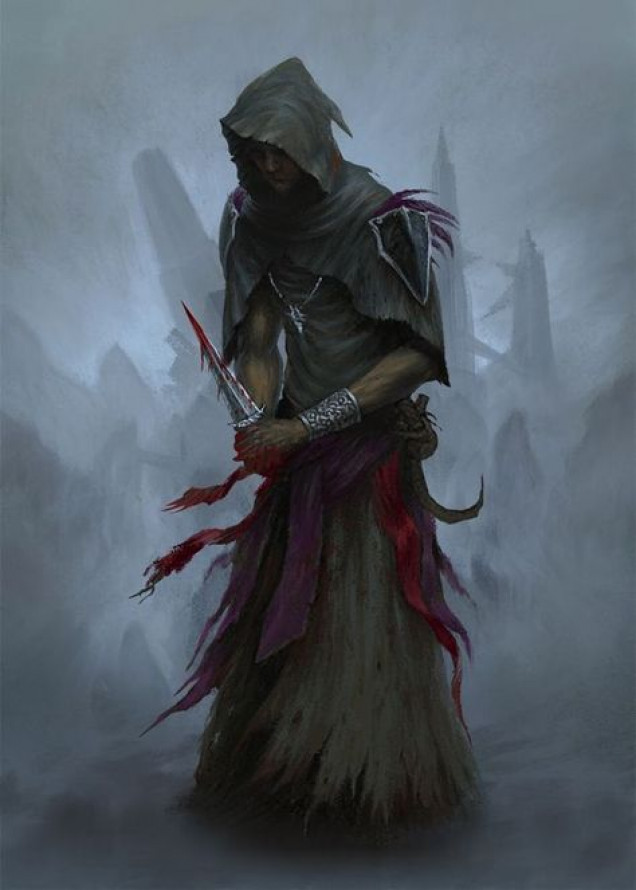
Above is the original piece of artwork by Alexandr Elichev who has an Artstation page here, but if you’re thinking of taking a peek beware – it’s chocked full of Gloomhaven spoilers.
While I wanted to take inspiration from the games art tonally most of it is quite dark so would produce a rather ‘grey and brown’ theme overall if I stuck rigidly to it. Instead I chose to use the art as a reference for colour schemes or a push-off point for ideas. I’ve used a certain amount of artistic license for colour schemes to try to keep things interesting and to stop everything just becoming a grey and brown mess when viewed from a few feet away.
In respect to models for the Cultists I had an almost ideal out-of-the-box solution in the form of the North Star Frostgrave Cultists box set. Although the detail in the sculpts may not be up to the standard of a GW or the like, for what you pay you certainly can’t argue with the quality or potential for customisation with each set of miniatures – especially if you combine this box with some of the other Frostgrave sets in North Star’s range.
If you’re looking to cover the bare minimum for the game you’ll need 6 Cultists to cover all possible requirements in the scenarios. As I’m looking to go a little further than this – and also because the models are so easy to put together and customise – so far I’ve made up a total of 7 Cultists to give me some choice and variety (I’m mostly playing either 2 or 3 player so it’s rare to require a full compliment of Cultists in any one encounter). This still leaves me with 13 bodies on sprues and a myriad of ‘bits’ which I intend to either build a few more full models with, combine with other kits to create more variations using those, or to use as part of some of the pieces in my other ongoing Gloomhaven terrain project.
CUTTING, CLEAN UP & ASSEMBLY
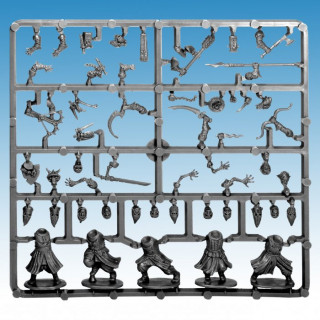
Inside the Cultists box set you get 4 identical sprues (see below) each containing 5 bodies, 12 ‘Cultist’ heads as well as a number of ghoul / undead head options, accompanying arms and a myriad of weapon and accessories. I created 10 individual looking figures with only half the box so could have saved a little money buying individual sprues, however, the cost for a full box as opposed to just those considering you’re getting 2 extra sprues was not – in my opinion – worth the saving. Obviously if you’re looking to make things as friendly to your wallet or purse as possible it’s definitely something to consider. In terms of clean-up the models required a little, but nothing too drastic – overall they’re very good for the cost.
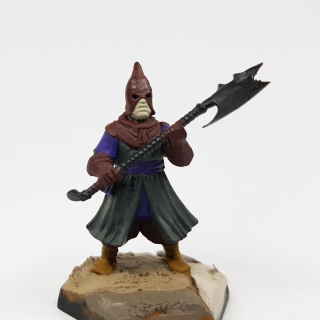
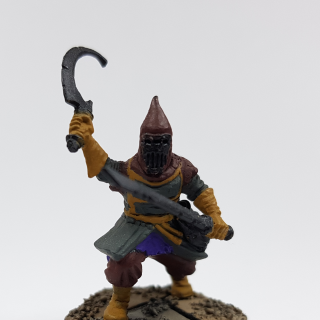
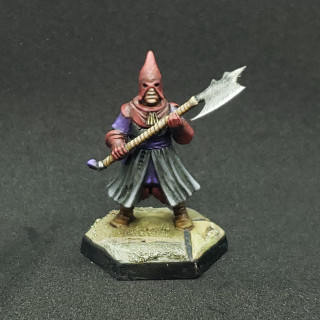
Apart from the Cultist set I have a number of other Northstar Frostgrave box sets and the arms / accessories from them seem to transfer across to these models quite nicely. The 2h Axe and arms are from the Soldiers set are a straight swap – no additional cutting or filling required – and I don’t think they look particularly out of place.
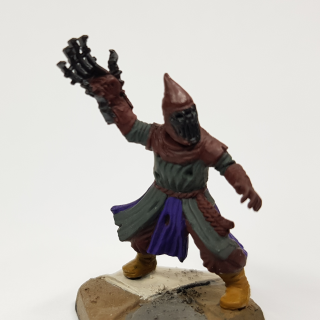
The large metal claw you can see on another of the models is from a Mantic Undead Ghouls sprue, you can usually pick these up pretty cheap on Ebay. Adding this was as simple as cutting the arm on the Cultist model at an appropriate length along with the arm which held the claw and then attaching the two using superglue and covering the join in Green Stuff. I liked the end result with this particular model as it is something a little unusual.
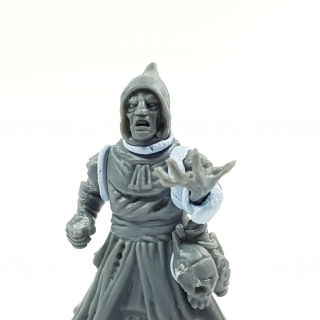
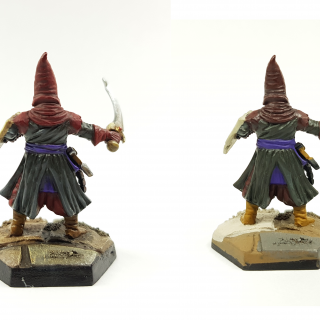
Often when I’m trying to piece together the models to achieve a configuration and pose I like I’ll assemble them with Blu-Tak and also add any accessories I want on the model as well. Not the most scientific way of doing things but it works for me!! The particular model in the gallery below is one I began working on after the main batch as I wanted a model which was holding a knife to make it a little closer to the source artwork and also have a pose which went a little more with one of the main (and rather annoying) abilities of the Cultists in the game. Just in case anyone doesn’t want spoilers I won’t reference it directly here but I’m sure if you’re familiar with the game you’ll know the one I mean. This model has actually required a fair amount of chopping and changing – all using parts available from the box though – as although there are hands holding knives they’re all lefties, and I wanted to do something different with the left hand. The left arm is from the more skeletal options on the sprues but it wouldn’t have fitted with the overall model and the fact it’s wearing robes so the top part of the arm had to go in order to make it possible for me to make it look like the lower half was properly coming out of the Cultist’s robes as he was carrying out the aforementioned ability.
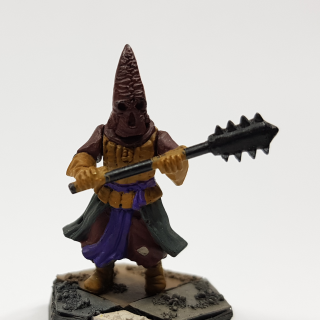
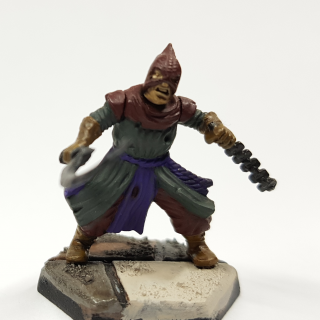
As well as this there are also shots of each of the other models I assembled and (mostly) basecoated using the overall colour scheme I intended to follow. These were all created with ‘vanilla’ parts from the Cultists box.
BASING
I’ve tested a couple of different methods of basing the miniatures, one using card and one using Das modelling clay. Unfortunately I’m not particularly happy with either. My intention was to try to create the impression that the miniatures were inside a dungeon environment, so floors with large paved slabs and a little stone scatter, however each of the results is not really what I was after.
My first mistake with the card was that I didn’t use card stock but rather packaging. This then began separating when paint was applied – quite a schoolboy error. In future I’ll be making sure I don’t go cheap on the basing materials.
For the DAS bases I followed some tips which I picked up from the Lukes APS YouTube channel, although I’m sure they’re not new. As DAS has a tendency to shrink when drying – and therefore crack – adding some PVA Glue to the DAS and kneading it together until both are combined. This should prevent the DAS from shrinking too much when drying and thus maintaining it’s shape and detail. My mistake though was using too much of the clay on each base which gives each one a rounded rather than flat finish. The gaps between slabs were made by simply pressing a ruler down into the wet clay before drying. Being hypercritical I’d say that the gaps are too large so if I were to do this again I’d use a thinner tool to create the gaps.
Overall I’m glad that I tried something new and I feel like I learnt a lot from the experience. I wasn’t able to sculpt the level of detail into the bases which I would have liked but, with it being my first time doing this I think the results are ok – ‘servicable’ if you like. I may still add some embellishments – grass tufts, some extra details etc – if I feel the need to make the bases a little more interesting but overall they serve the purpose and aren’t an eyesore which is the main thing I was after.
PAINTING METHOD
Since getting back into the hobby I’ve been binge-watching as much tutorial-style content as possible and I’m amazed by just how much is out there and how much the standard of painting has gone up since I were a wee lad. One of the YouTubers whose videos instantly grabbed me were Dr Faust’s Painting Clinic.
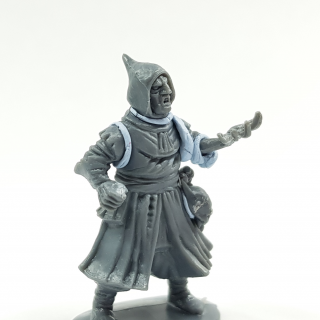
TEST MODEL
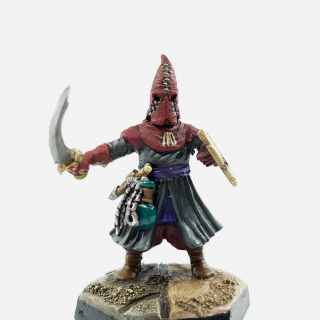
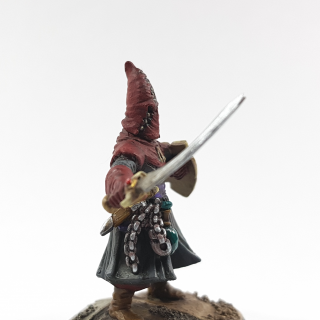
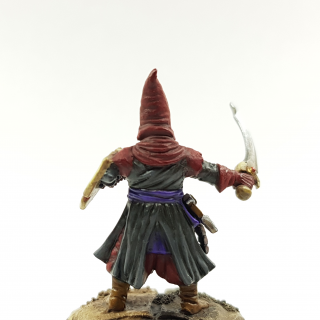
TEST MODEL CRITIQUE
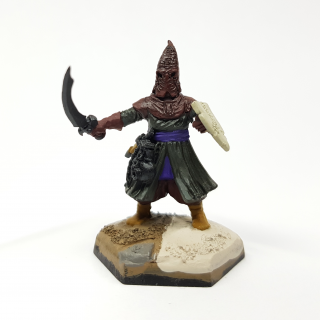
Overall I’m quite happy with how the test piece turned out and the colour palette I settled on. While it is quite dark it’s meant to be reflective of the source artwork which is also dark, but at the same time I think the greater use of reds and purples on the model avoids it looking like a grey blob – especially at board game playing distance.
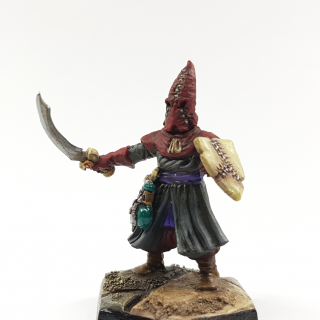
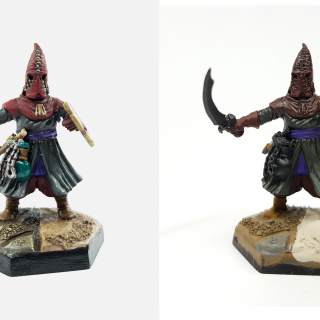
Considering this is only my second painted mini I’m also happy with how ‘clean’ the painting is and where I’ve been able to pick out some small details such as stitching etc. There are certainly improvements to be made though, most clearly in the contrast on the model. At the time of painting I felt I was adding enough contrast to the model but taking it out from under the painting lights and putting into a ‘normal’ environment it’s very obvious that I need to work on increasing the contrast much more across the entire model. Something to take into consideration for my work on the batch painting of the rest of the group.
One final take-away for me is trying to further accentuate those aspects of the model which make it more unique – on this model the shield, sword and chain/bottle are all things not on the other models. I could have worked further on the shield to add more colour around the stitching as the red and purple washes I used in there haven’t really given as much of the stretched, dead skin effect as I’d hoped it would. Likewise I wanted to add some rusting effect to the chain with orange and brown washes but they haven’t quite finished up how I’d hoped. Finally the bottle – to which I added gloss varnish once I was happy with how it was painted – actually had a far higher contrast before the varnish was added so in future I’ll need to make sure I crank up the contrast much more before adding gloss varnish to anything.
All of these things could easily be fixed by going back in and touching up the model but considering the time just this one has taken me and the fact they are ‘minions’ I’m going to call this one done and see what I can do with the rest of the bunch to try and take some of my own criticisms onboard
FINISHING TOUCHES
blah blah blah
INTRO TO FINAL SHOTS
blah blah blah Paints used etc
Final Shots
FINAL THOUGHTS
Textq 10 – Critique & What’s next? Blah blah blah
PAINTS LIST
Below is a list of the paints I used for each section of the models.
I’ve listed these in the order I used them, so the first paint will be my base or shade coat followed by progressive mixing of the next paints in the list beginning at a 50/50 mix of the next closest and highlighting up through the list as necessary to the final paint being used as my last highlight layer.
Red Clothing
VMC Black Red (035)
VMC Burnt Cadmium Red (034)
VMC Red (033)
VMC Carmine Red (030)
Purple Clothing
VMC Violet (047)
VMC Blue Violet (046)
VMC Pink mixed into Blue Violet to create final highlight
Grey Clothing
VMC Green Grey (165)
VMC Dark Sea Green (163)
VMC Neutral Grey (160)
VMC Dark Sea Grey (159)
VMC Medium Sea Grey (158)
Metals
VMA Steel (065) with VMC Black (xxx) mixed to darken
VMA Aluminum (062)




Leave a Reply