Magnetised Bullgryns for Kill Team
Step 1: Playing with (Milli)Putty
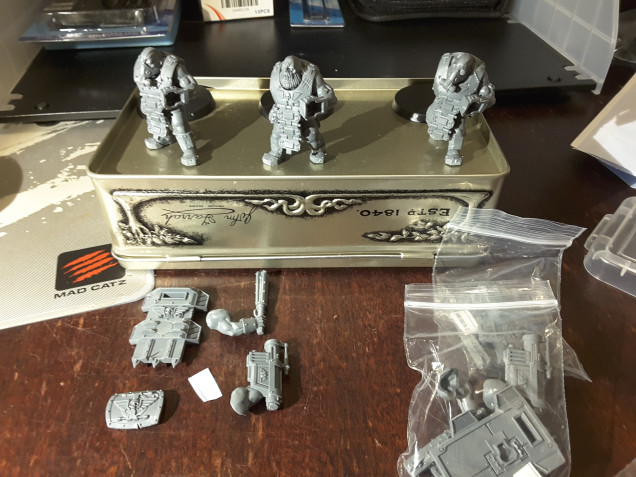
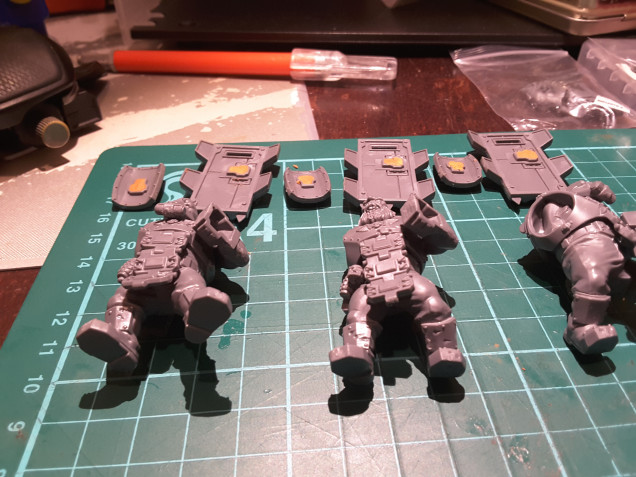
This is where I started: 3 Bullgryns made up with their left arms in place (this is where the shield options will go) and no right arms (each weapon option is posed with it’s own arm piece so will need to be attached as a single piece).
Down the bottom of the above image you a sample of the options that I hope will all be attachable:
– Slab Shield: The big one
– Brute Shield: The smaller one
– Bullgryn Maul arm: The melee weapon option
– Grenadier Gauntlet arm: The ranged weapon options
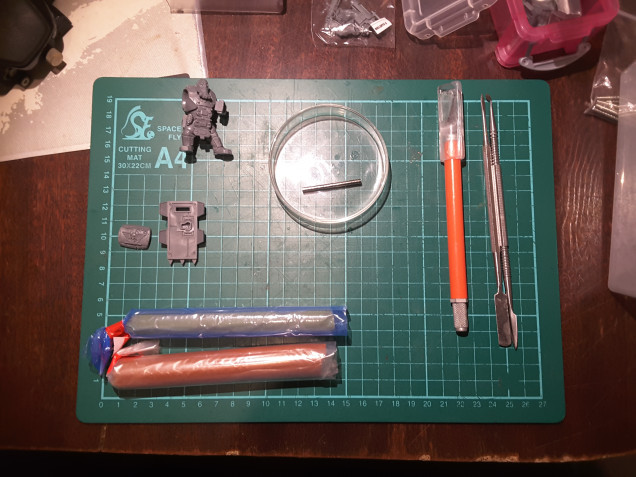
So this is what I shall be using for this first step:
- In the top left: A Bullgryn on hand and one of each of the shields.
- Top middle: Magnets, these are 3mm x 3mm (more on this later)
- Right: A craft knife for all my cutting, poking and scraping needs along with some craft tools for squishing the milliput around. Speaking of which…
- Bottom left: Milliput, standard Terracotta. Pick this up at my FLHS as a cheaper alternative to greenstuff for this work. Picked the Terracotta colour so it stands out from your typical model plastic colours.
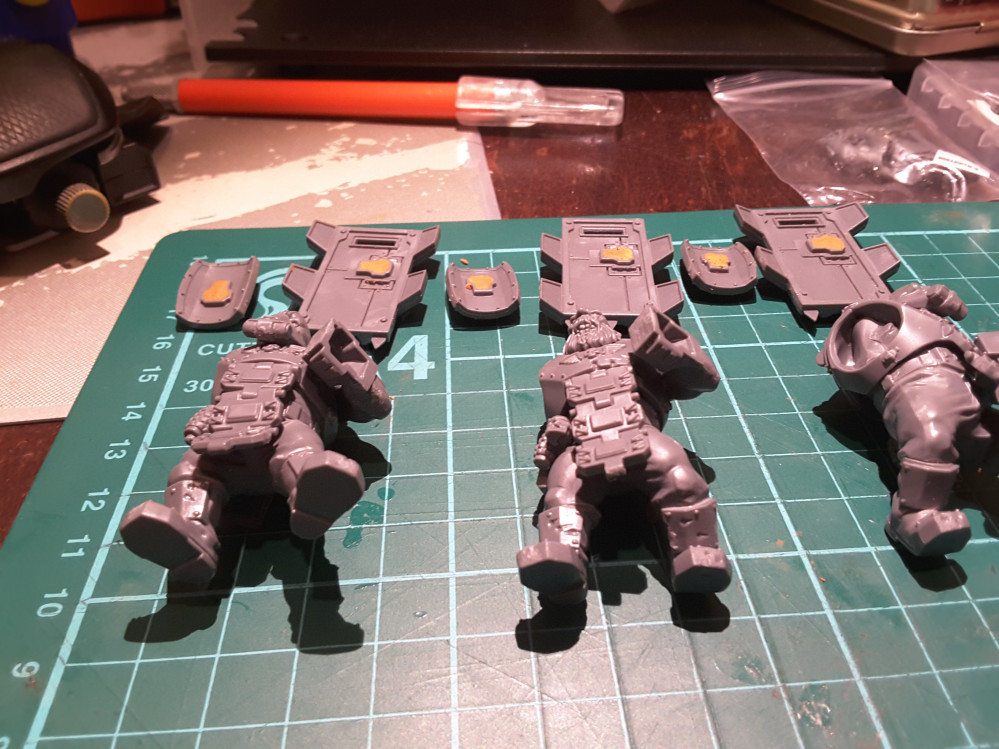
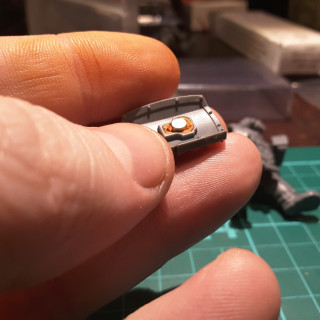
So the first thing I did was mix up some of milliput, stick it down in the hollow on the back of a shield and follow it with a magnet. As can be seen above (1), these magnets are way too big to fit in the space along with the putty. Thankfully I picked up a small number of different magnet sizes so I have some options to work with on this. A little playing around and I settled on some 2mm x 1mm magnets giving me a decent surface area of magnet with a good amount of putty behind it.
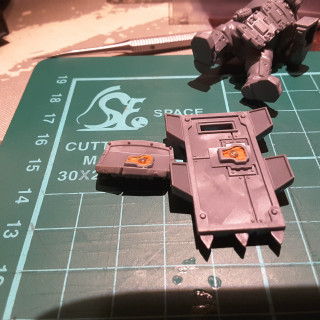
With the magnets swapped out it used a tool to pop more puyty in (filling the hole most of the way) before squidging the magnet in centrally and then smoothing a thin layer over the magnet itself.
A few more passes experimenting with the different tool heads to level off the putty with he level of the surrounding ridge but not pulling the magnet out and I had a result I was happy with (2).
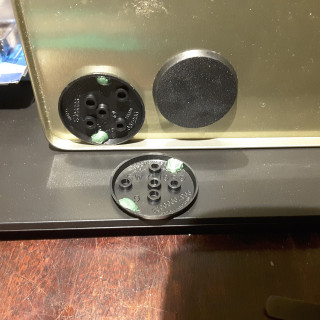
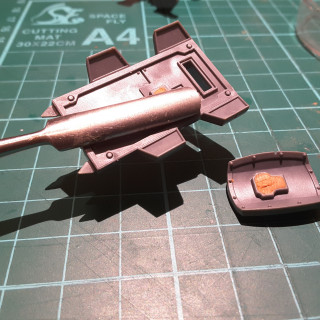
Having worked with greenstuff and magnets before in magnetising bases (3) (I use Army Case stuff for storage/transport) I have experienced the burn of setting a magnet that is too deep to actually stick to anything and I wanted to get ahead of this problem here. In order convince myself the magnet was in a position that would work, I tested each of them to see of they would attach to a this flat tool head I have and that the connection was strong enough to support the pieces weight (4).
Armed with this, I forged on and repeated the work over all 6 of the shields.
So there we have it.
I’ve decided to leave these overnight to cure (probably longer given my usual hobby speed) as I hope to use these to simply attach their partner magnets to and them shove the plastic together. Seeing as the plastic is shaped to mate together, this should allow me to get the magnet in the right place easily.
And in case anyone is wondering, yes: all the magnets have been put in with the same polarity facing out (and yes, I did have to change a few around that had slipped.
Next time: magnetising the hands to take the shields.





![TerrainFest 2024! Build Terrain With OnTableTop & Win A £300 Prize [Extended!]](https://images.beastsofwar.com/2024/10/TerrainFEST-2024-Social-Media-Post-Square-225-127.jpg)




Great idea. I was planning on magnetizing a few minis myself.
Will the shields fit centered if the location of the magnets on the model and shield aren’t perfectly aligned ?
Or do you have any plans to make sure you’re not stuck with shields that only work for one model.
I’ve been thinking of this. I ideally would like some flexibility (if nothing else, so I don’t have to work through the pile to find the right one) and I have been thinking about using a bigger magnet on the model side so that there is some give in the equation. Failing that, possibly just a strip of metal I could set in that fills a lot of the space. I have the 3×3 that are seen above along with some rectangular ones that I think might be too big but we’ll see when I can sit down with these… Read more »
I think those options could work.
Here’s a great link I found :
https://paintyourarmy.com/magnetize/
I haven’t gotten the elites book yet. Have you played with Ogryns and if so, how did you find them?
I have not played with them yet but we are looking to get Elites in soon (hence my building them now) though I will have to ask as I have been playing Tau in my current group. One of said friends has been playing Tempestus Scions and another has been playing Ad Mech.
I am “that guy” in my local that has a bunch of Kill Teams and everyone plays with my kits, still unpainted because I have about 8 in various stages of reinforcement.
Soon brothers, soon. 😛
I wish you were in my local – wouldn’t mind playing with 8 different teams! ?
Your friend should consider themselves very lucky.