


1991 Desert Storm - Iraqi Army Progress


Adding ERA panels to M-60A1 tanks
So now that this USMC task force is pretty close to complete (well, the vehicles anyway, infantry and possibly aircraft to follow), there comes the task of updating some of these from “Team Yankee” theoretical 1980s combat to 1991 historical combat.
The biggest example of this will be the addition of ERA panels (explosive reactive armor) fitted to USMC M-60A1 main battle tanks for the 1991 Gulf War.
These are sheets of metal and shaped explosive designed to explode outward when hit with slower-velocity projectiles like enemy rockets, missiles, or HEAT warhead shells.
I have reference material showing how these blocks looked in 1991 and how they were generally laid out, so I’m building my own pieces, coloring and scaling them to fit on my three M-60A1s.
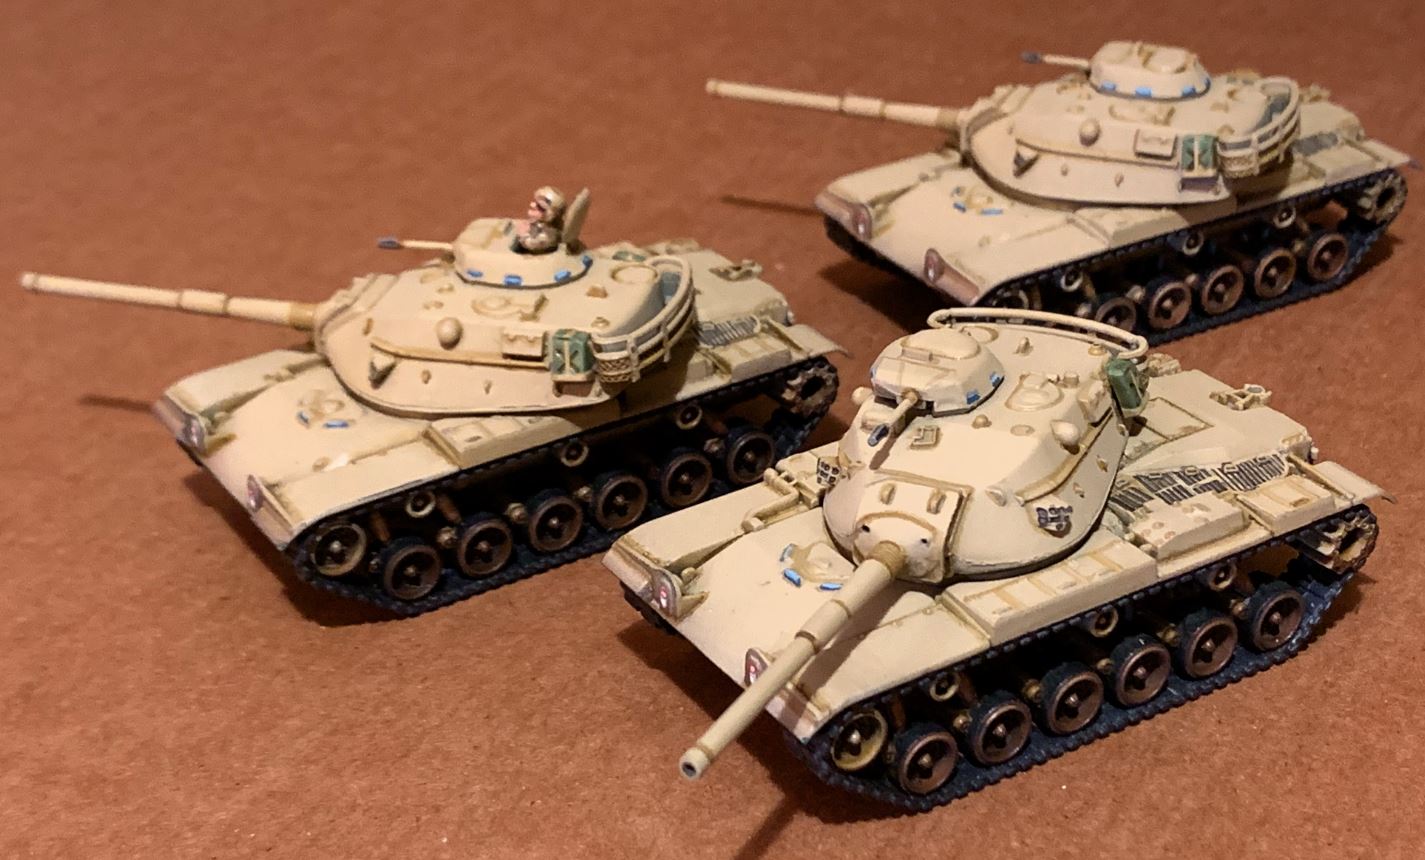 Tanks as they start (no ERA panels - right out of the Team Yankee kit, just a different pain scheme).
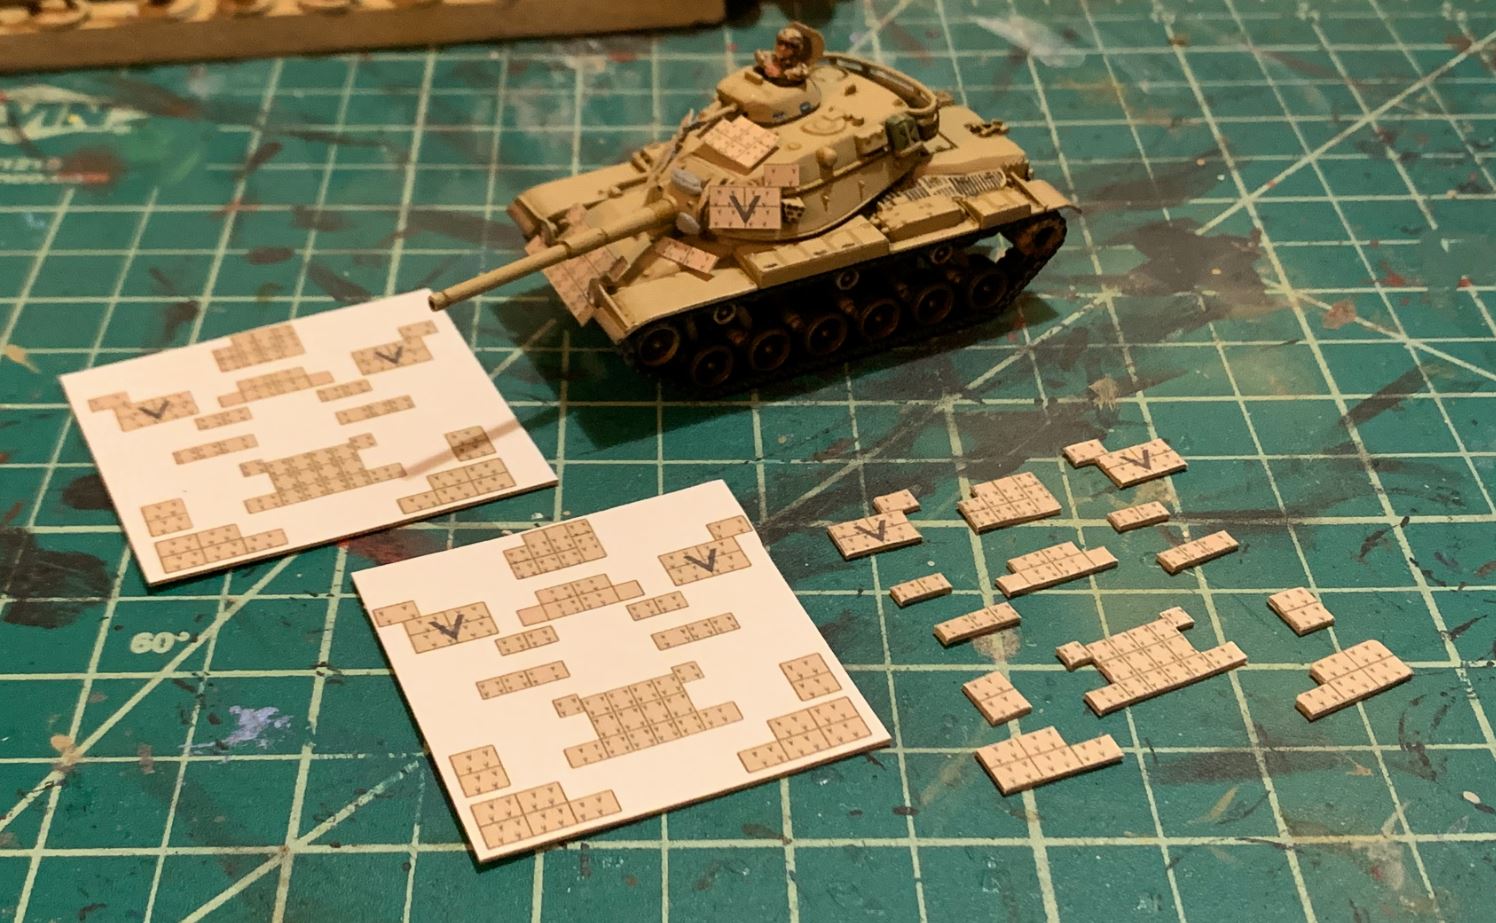 So here is one of the sheets. Designed in photoshop, with markings and the "mounting lugs" suggested in the graphic. These will be mounted on very thin cardboard, cut with razors *very* carefully, mounted in place, then painted around the edges. On the tank I have some color-test pieces just for scale and color.
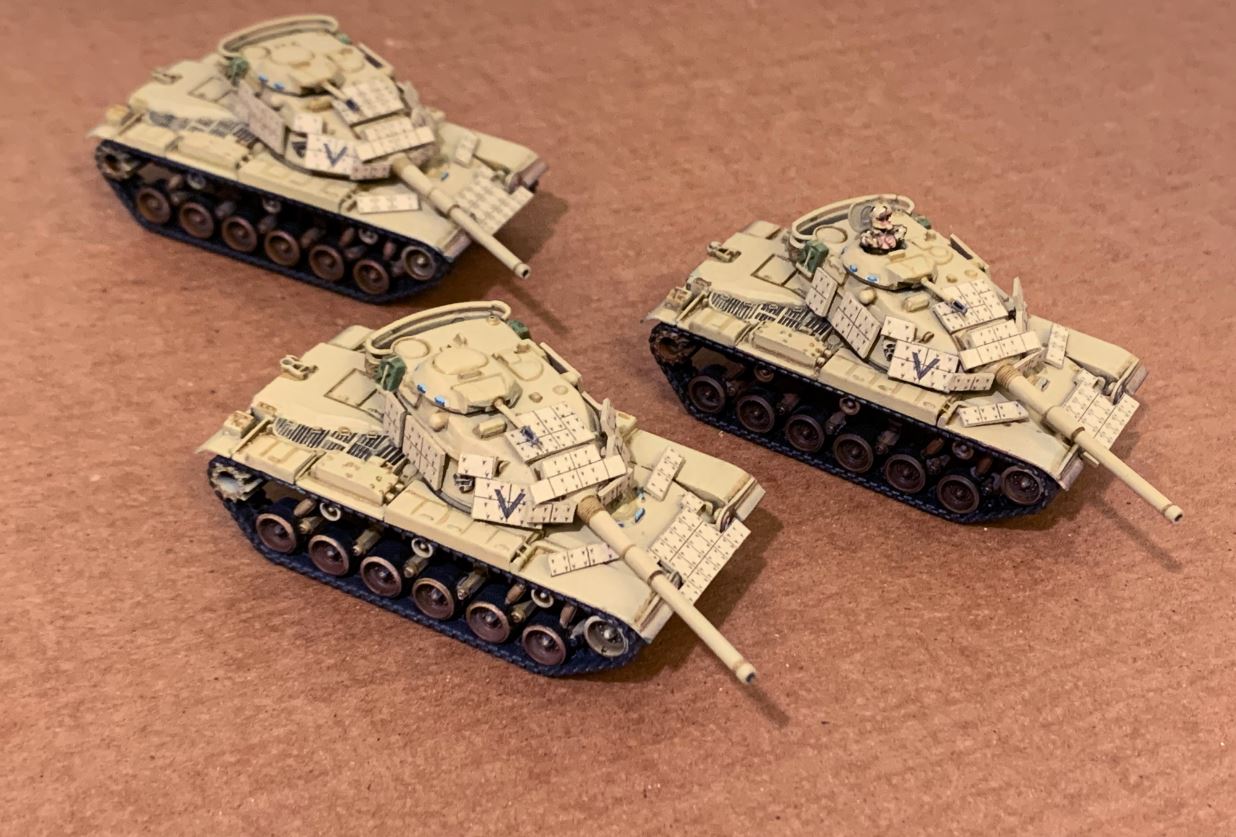 It took the better part of all evening, but these are the three tanks "finished." Now ... one thing I'm not 100% keen on at this point is SPACING of the armor. Everything's fine on the hull, glacis, and front of the turret (mantlet, etc.). What has me a little peeved are the pieces along the sides of the turret. These should be spaced much further from the tank. So they will be cut off, re-mounted with new seats, and re-painted where needed.
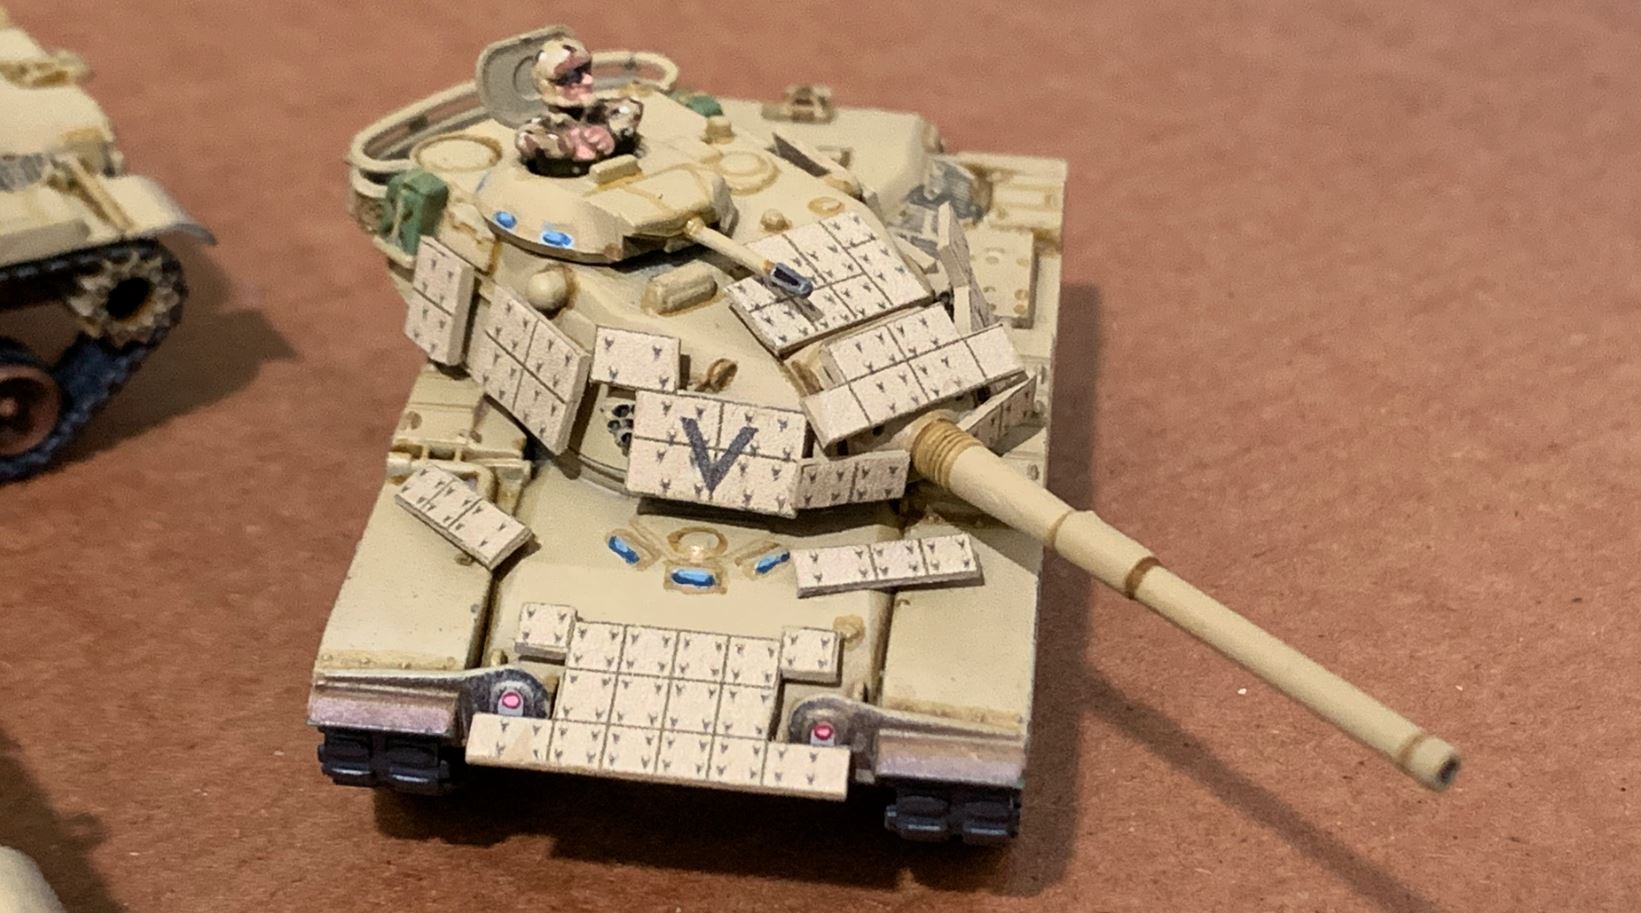 A close-up one of the the tanks before the three side pieces (one on the left side, two on the right side) are re-mounted.
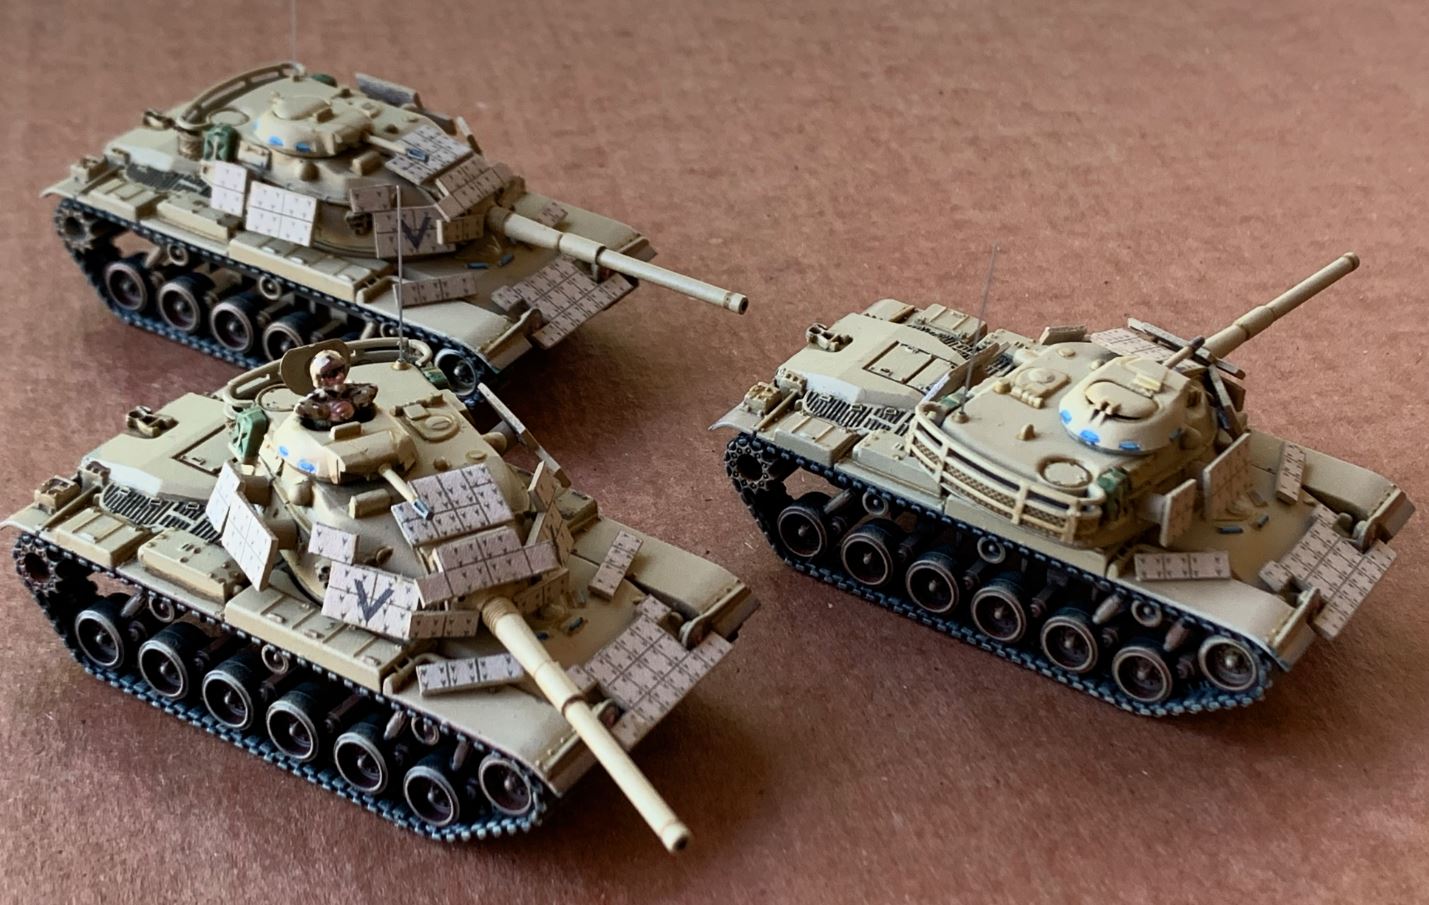 Here are the three tanks again, with the ERA panels re-mounted in much better positions. I've also mounted antenna (bristles from a small plastic whisk broom - after drilling the radio antenna mounts). This photo was taken in outdoor daylight in an attempt to give a better impression of what color these vehicles actually are (photographing khaki / sand with indoors light is pretty tough).


Was wondering how in the blazes you were going to tackle this bit. Sometimes simple (ie cardboard) is best, AND it looks the right thickness to scale anyway. The one tip I was going to add is to get a bottle of superglue with the brush applicator and just go around the corners of the bits of cardboard to expect to get knocked, it kind of sets like hard plastic and also helps stop any bending/fraying. Try it out on a spare bit first though (as you’ve already coloured the panels using the printer so you can’t paint over them)… Read more »
Thanks very much, @phaidknott! That’s actually a really great idea about the superglue. If it clouds at all, no worries, these corners and edges were painted anyway so I’ll just paint them again. 😀
I had to make similar panels for a much much larger 1:32 M-60A1, and used artist’s matboard for the scaled-up thickness – a few panels had broken off and were lost so I had to fabricate replacements.
Here, yes … I wanted something much thinner (and easier to work with) 😀
Thanks very much for the kind words! Much appreciated.
Nice work Jim!
Thanks very much @templar007 ! 😀
Now to in the infantry, and of course my Iraqi vehicles. Tanks and ZSUs are about half done, but I still have a platoon of BTR-60s coming in as well.
You’ve not done the infantry yet? I always leave the tanks till last as the “reward” for slogging through painting all the infantry (probably why so many FoW players don’t field any infantry in their armies) 😀
That’s not a bad idea, @phaidknott. Fortunately, 15mm is pretty fast for infantry. I also FINALLY got the hang of dark prime, zenithal “real color” base, wash, and light dry brush to very quickly get a “cell shading” effect on them. Putting on hew colors almost as “filters” (to tint the figure in places but not cover those shadows) is really working well (and more importantly – fast). I have six colors on them so far… I’ll just add some camo and fix up the bases. That and a last wash on the skin / equipment and dry brush over… Read more »
Neat idea, was wondering how this was going to work. I was puzzled about the risk to the finished paint job by adding extra bits but this is a clever work around. I’ve never considered using printing to produce detailing effects on a model before.
Thanks @damon – it is tricky … Getting even close to the right color is the worst part. Especially with khaki / desert sand is it murderously changes color depending on whether you’re using florescent, natural, or “standard” electric light. Here the “benefit” was that these pieces were by definition COVERING parts of the base model, so the “damage” caused by glue on the semi-finished model was … obviously covered. A few corners here and there were visible, a touch of re-paint fixed that. Another mitigating factor is that these panels were “field fitted” anyway, so there were some rough… Read more »
One thing to add (and I’m doing this from memory here) would be the fluorescent orange “air recognition” flags (VS Panel?) that appeared on top of all the US AFVs in the first gulf war (I don’t remember seeing any photo’s with them being used for the second one).
Thanks, @phaidknott – I know what you’re talking about, VS-17 Panels or the like. I find them mentioned in USMC reporting and literature (Colonel Charles J. Quilter II, U.S. Marine Corps Reserve, 1993). But only barely. “The Tiger Team made a number of recommendations that could be implemented in the near term. At the same time, General Schwarzkopf put forth proposals to mark vehicles distinctively with inverted “V” symbols, distinctive orange panels, chemical lights, and thermal tape. The team felt these measures would be of little value for air-ground identification, but might be of some use for ground-to-ground situations. The… Read more »
I remember seeing them on the UK news programs at the time of the first Gulf War initially on US Humvees (and we all wondered what they were for), never saw them on any footage from the second one however. JPs website also did an article on US marines in the first Gulf War http://jpwargamingplace.blogspot.com/search/label/Gulf%20War%201999-91 And as you can see he stuck them on EVERYTHING, but I do remember seeing them a lot as it was a “task force” of multiple nations taking to the field and it made for easy recognition (did see photos of tanks and SPG displaying… Read more »
@phaidknott – so clearly this order went down (like I noted before, I all but found a copy of it), but British units and perhaps US Army units seem to have adhered to it much more than USMC units. British Paladins with these plainly in view: Now I have been looking through hundreds of photos of USMC vehicles in the 1991 Gulf War. I had to look through dozens just of the M60A1s just to make sure my ERA panels were right (or at least close, to be honest). I do not see these VS flags / panels on the… Read more »
Heck, I’m not going to argue with a man who was there 😀
But it’s been informative (always wondered why military units were running around with these “high vis” flags on top of the carefully crafted camo, well not always carefully as quite a few units were running around with European schemes). All my info is from flaky memories of 30 years ago of News articles on the TV (I’m sure your memories are a lot more vivid).
@phaidknott – “Heck, I’m not going to argue with a man who was there” Not at all, sir, 1), I was a supply poag who was never within a hundred miles of anything, never saw the outside of my warehouse. Hell, I wasn’t even in the same country. 2) This was almost 30 years ago, I barely remember what **I** looked like … let alone vehicles on a battlefield I never saw myself. 😀 I’ve never liked the term “rivet counter,” but I confess that’s somewhat what I am … So it’s been genuinely interesting to dig into this, and… Read more »
I LOVE the “rivet counting”, it’s how you educate yourself on the period and in getting things as right as you can. As I say to fantasy and sci-fi players “When you’re reading the fiction on a game or following the paint scheme for a Space Marine chapter, you’re “rivet counting”. The history forms OUR background fluff, and we research the uniforms to get things as right as possible. I dare not tell you how many books I’ve got on Napoleonic Wurrtemburgers (like anyone else would be interested) 😀
Agree 100% @phaidknott – and that “historical research door” swings both ways. When we were doing Star Wars Battle of Hoth, we engaged in a degree of “historical research” – certainly not “real” but the basics of making the armies and the rules conform with a shared “canon” were the same. The Episode V ESB movie and novelizations were a shared “historical record” to which we tried to conform as best we could. Sure it’s not real, and not as heavy as Sword Beach or Stalingrad or Borodino … I’m sure people on OTT would be interested in Württemberg, from… Read more »
Great stuff
Thanks @rasmus – the whole task force is almost done. 😀