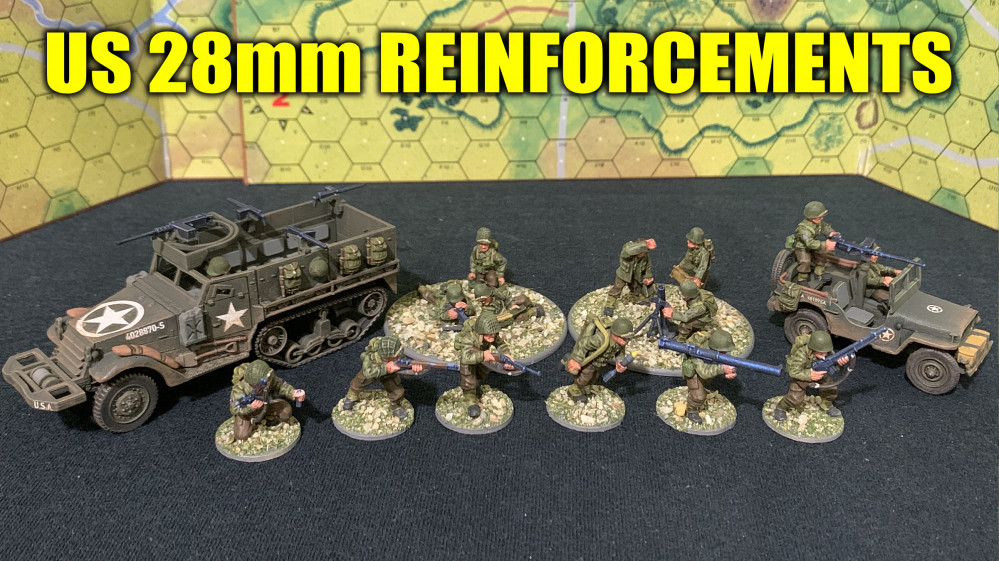
Oriskany's US 28mm Reinforcements
Normandy - D+21 - West of Caen
So yesterday my friend @damon and I had a great game of Panzer Leader, meant as a “historical approximation” of the Sherwood Rangers’ participation in Operation Martlet. This was an attack launched in Normandy during the last days of June, 1944, west of Caen. The objective was to pin German forces in place and prevent lateral shifts of reinforcements against the upcoming (much larger) attack of Operation Epsom, one of many British attempts to clear German divisions from the vicinity of Caen.
The Sherwood Rangers were requested by @damon , I found the battle, researched its general layout and topography, designed the scenario and the new map, and facilitated the game. I played units of the 12th SS Hitlerjugend and Panzer Lehr, while Damon fielded forward elements of 8th Armoured Brigade (Sherwood Rangers’ parent formation). I also included other units of 8th Armoured, including most of 4/7 Dragoons and a little of the 24th Lancers, as I’m not 100% certain they were there on this particular day (they may well have been, I only had a couple days to research this and design the game).
The three historical phase lines of this assault were Barraccuda (through the town of Fontenay-le-Pesnel), Walrus (extending ENE out of the high ground of Tessel Wood) and “Albacore” (roughly along the line of towns Vendes and Rauray).
These phase lines were used as the basis for the seven objective hexes. Damon’s British must take four of them to win the game. Thus, he only has to match the rough historical outcome of the attack, not its actual planned objectives, which were not reached on the day in question.
Again, each hex is 150 meters. Most counters are a platoon, troop, or battery. The game lasts 10 turns.
Oh, one more thing before the rivet-counting snipers start taking shots … these British tank troops are “intentionally inaccurate” historically. Again, Panzer Leader runs on platoons / troops. So each of these Sherman counters should read 10-A-8, math that is worked out to represent a four-tank troop of three “vanilla” Shermans and a Firefly. I gave Damon the choice and he elected to break up his three battalions into specialized troops, so each squadron has three counters of 9-A-8 “pure” Shermans and one of 14-A-10 Fireflies.
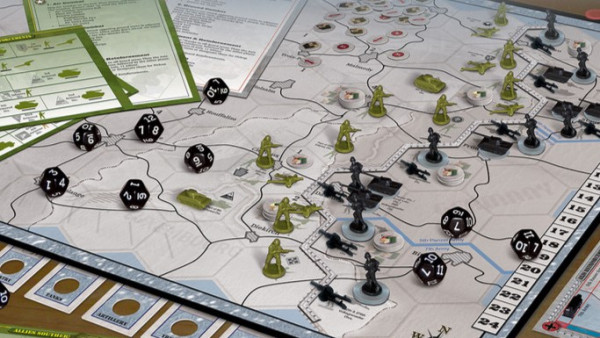
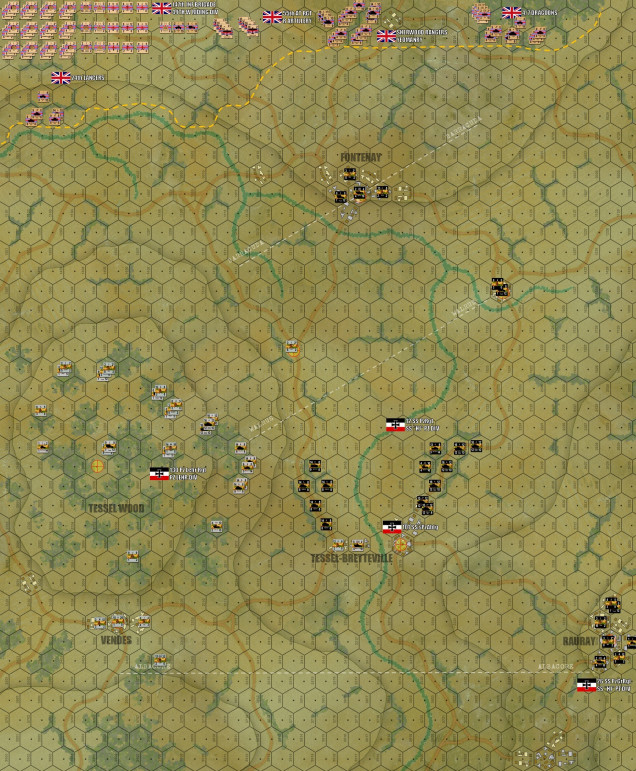 An overview of the map, initial German dispositions (Panzer Lehr’s right wing in grey, 12th SS HJ left wing in black). Along the north yellow dotted line is the start line for the British. The three historical phase lines are shown, along with the seven objective hexes in yellow targeting icons (some are obscure by German units). Note that we are NOT doing this whole battle “full bore,” i.e., with the 147th Infantry Brigade / 49th West Riding Infantry Division (the formation 8th Armoured Brigade was supporting in this attack) or the main line of German resistance, drawn by 26th SS Panzergrenadier Rgt / 12th SS HJ Division. After the detailed, high-density, infantry-heavy slaughter of Omaha, I was in the mood for a more manageable, armored maneuver game.
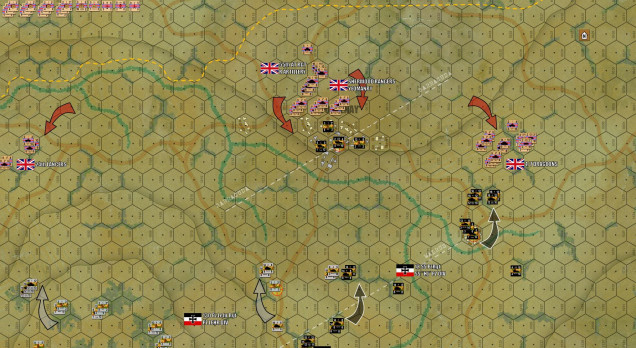 Damon starts his advance south, making contact with an over-stretched, understrength detachment of SS PzGrRgt 26 (really only a platoon of infantry, a battery of 7.5s, and some transport). Tow supporting British armored battalions (understrength) flank to either side.
 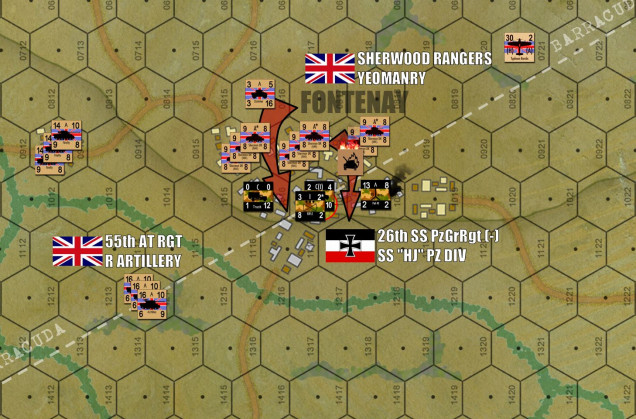 The battle in the town heats up. With the Germans dug in “heavy” urban hexes (gray buildings = stone, brick, concrete, etc.), they’re proving tough to dig out. One troop of Shermans is already afire.
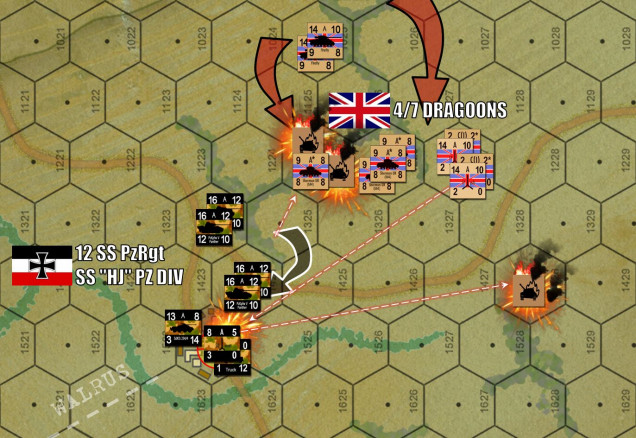 Off to the east, 4/7 Dragoons confronts 20 Panthers and some SS armored cars. The problem facing Damon here is a daunting one. Any German counter deployed in a hex containing a green “hedgerow” hexside is considered concealed per Panzer Leader rules, until it fires or an enemy unit moves adjacent. So the Germans are almost certainly going to get the first shot. Not only that, but by using split move and fire rule, they can then displace and “hide again.” Normally this isn’t that big a deal, as you can shoot the Germans as they move, but these Panthers are just fast enough, and these hedgerows are just close enough, where that window will NOT be wide enough for Damon to return fire in most cases. So yes, you force the Germans back ... but you never kill them and you are literally building a road of burning Shermans. Welcome to the hedgerows. Much like the Allied commanders of the day, Damon must find a way to break this dilemma. Meanwhile, my ATGs in the French farm open fire on transport units trying to tow 17-pounders into position. I hit one while it’s still limbered. It gives my position, but it was worth it for a kill on a battery of 17-pounders. You can see what Damon was trying to do ... set up more angles on my Panthers so at least when he flushes them (usually at the cost of more burning Shermans), at least SOMEONE gets a shot at them. Now in reality, this “flushing” would be often attempted by L5 spotter aircraft or infantry. But this was a game we were trying to wrap up in less than the 9.5 hours we spent on Gold Beach before.
 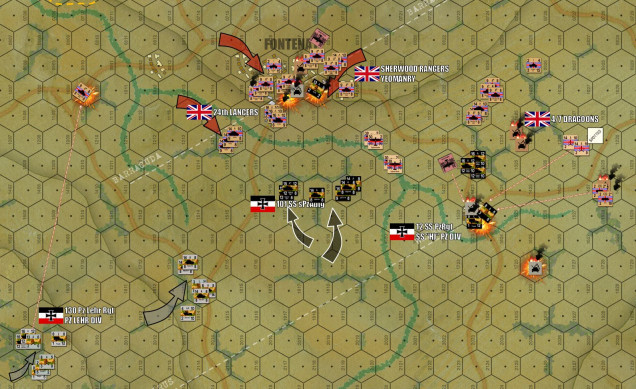 Damon wisely gives up the idea of 24th Lancers on Tessel Wood (for now), consolidating the understrength battalion with Sherwood Rangers to put pressure on the German center. AS for me, I know Fontenay is lost, I’m just hoping to plug the British up there as long as possible. Already it’s. given me time to move up more of the SSPzRgt 12 and elements of SS sPzAbtg 101. However, Typhoons are now overhead, ready to hit SS tanks when the “hedgerow hop” ... depending on WHERE exactly they hop (in this terrain I have PLENTY of choices). Meanwhile, 2.0cm FlaK halftracks that took a poke at the Typhoons were in turn spotted by Shermans and shot into flaming wreckage (German “wreck” counter at lower right). That shot was at just over 1000 yards! Well done!
 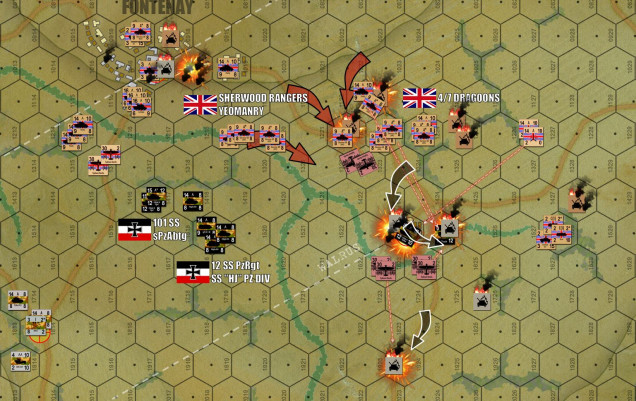 At last, German resistance ends in Fontenay. One MORE turn to redeploy, and finally Damon launches a bloody, point-blank assault on SSPzRgt 12 on the east. My fifteen Panthers fire, actually don‘t do that well, (only two Sherman platoons eliminated and a third “dispersed”). Then it comes time to run. The problem is, Damon how has close to seventy tanks within a kilometer or so, there are a lot less hiding places for me to bolt to after my “bushwack” fire. One Panther platoon is takes cover in the farm. I can’t put more in there because there’s already burning armored cars in there (wreck counters take up “space” in a hex, they count as a unit for stacking purposes), and my ATG battery is still in there. Just to get the ONE Panther platoon in there I have to sacrifice my trucks (transport for the ATGs). Another Panther platoon tries to run for down the road, but the Typhoons re-enact a classic Normandy moment, throwing rockets into German armor caught on a road in daylight. Another platoon dies in the stream, where it tried to take hull-down positions. Only the platoon in the farm survives, and even they are pinned. They’ll eventually escape, put I’ve still lost two Panther platoons for four troops of Shermans ... not a good trade for the Germans at all.
 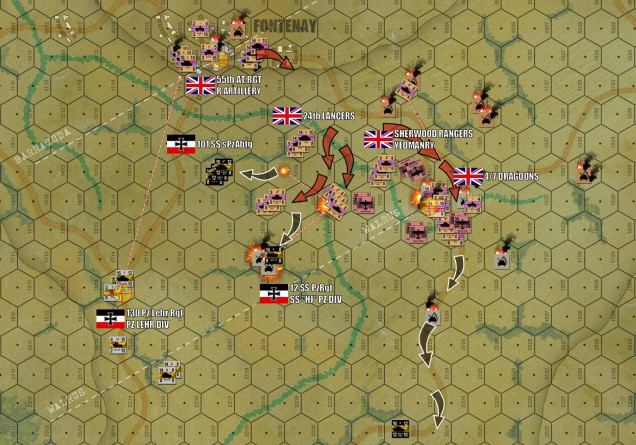 Emboldened by success, Damon’s 4/7 Dragoons and the Sherwood Rangers complete the cave-in of the German right wing, pivoting inward to roll up Phase Line Walrus. Other SS armored units now get to fire, but again I don’t do terribly well here. PzKpfw IVHs and even Tigers at LESS THAN 300 METERS fail to kill Shermans (okay, I pin down a down squadron, chalk that up to “Tiger Terror”). But of course Panzer Leader is a game smart enough to recognize that Tigers aren’t the scariest thing on the field by a long shot (at least if you’re a British tank crew). Also, those Typ0hoons are positively murdering me. The good news, they’re now OUT OF ROCKETS. Also, my Tigers have all escaped, displacing to new firing positions 300 meters further down the hedgerow. In case you’re wondering what Panzer Lehr is doing all this time, they’ve now redeployed to cover the crossroad objective at the left hand side of the board, and they’re also covering the heights of Tessel Wood. Long story short, they’re facing off against the 55th Antitank Regiment / Royal Artillery (M-10 Achilles), still deployed on high ground in covered overwatch positions in Fontenay.
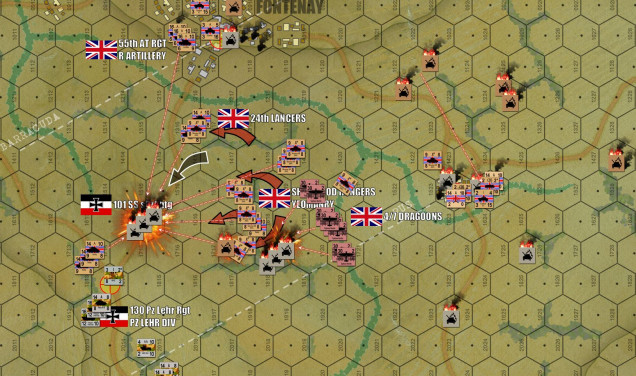 Again, the SS has stuck to its ground perhaps just a little too long. My Tigers and last PzKpfw IVHs (and JgPz IV / 48s) scored some more killed Shermans, but as they try to pull out ... My real problem here is that Damon’s learned how to assault hedgerows. You approach en masse and from MORE THAN ONE DIRECTION. Note the Squadron of 24th Lancers flanking my former position from the north. Now, no matter which way I bolt out of the hedgerow, I’m getting pinged by someone. And by Someone, I mean EVERYONE ... Because these Tigers aren’t as fast as my Panthers, obviously. In that open ground, a whole company of SS panzers is positively murdered from no less than seven positions ... seventy five tanks open fire and that’s the end of two platoons of Tigers and one of PzKpfw IVHs.
 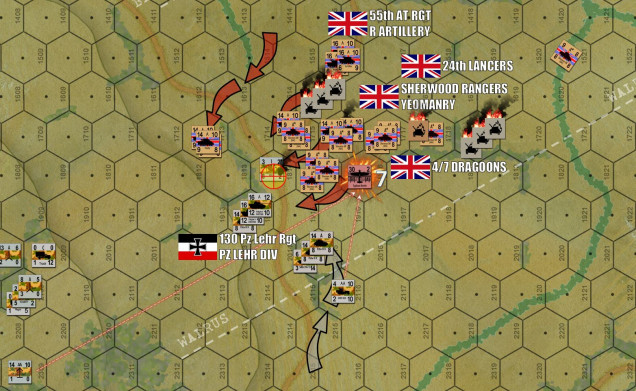 With SS Pz Rgt 12 more or less blown out of war (SOME survivors further south in Tessel-Bretteville), on Turn Nine Damon pushes forward in a combined regimental shove southwest toward the crossroads at the west end of Phase Line Walrus, and another objective hex. My Panzer Lehr Panthers and Mark IVs bide their time, invisible under cover. I know the clock is ticking against Damon and I can afford to wait until he HAS to shove right up against me for a very unhealthy dose of point-blank ambush fire. As his Typhoons come in for a strafing attack (again, all rockets expended but they still have guns) against the Lehr grenadiers in the objective hex, two FlaK positions even manage to shoot one of the Typhoons down!
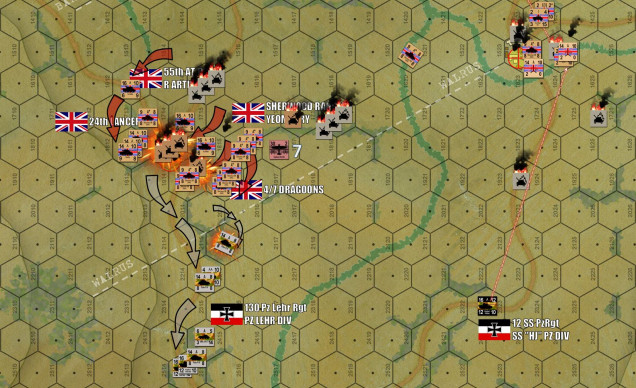 BOOM! Damon makes the fateful shove. My cagey Panzer Lehr crews positively MAUL his attack, some Pumas even getting some shots in. We kill three troops of Fireflies (ouch) and one of Shermans, Immediately falling back down the road toward Tessel-Bretteville and Vendes. We almost all escape, too, British counterfire manages to pin one platoon of PzIVs ... which would probably be surrounded and destroyed on Turn 11.
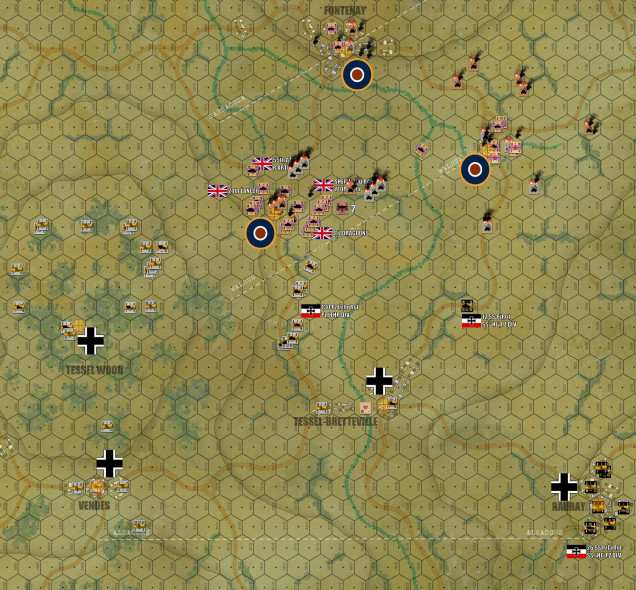 So that’s Turn 10, and that’s game. Of the seven objective hexes, the Germans still hold four, making this a bloody and narrow German win. Cheers to Damon for continuing to try Panzer Leader (he’s braver than most in this regard) and yes, he IS getting better. I swear I could almost see the light bulb going off starting on Turn 5 and 6 ... regarding just how WEAK the German forces are despite their “scary cats” ... assuming you attack them in a well-managed, multi-directional bum-rush. Even a Panther can only kill one Sherman at a time, after all. The problem was ... it was Turn 5 or 6 ... and the game was already half over by then. What beat him wasn’t my tanks, it was time. Note that Tessel Wood is now VERY WEAKLY defended ... with two more turns he could run his faster M-10s or even his scout cars up there and at least have a go at it. Again, once he takes FOUR objectives ... more than half ... he wins (i.e., roughly Phase Line Walrus ... the approximate historical result of the attack).















@oriskany nice write up, was riveted on who was going to win till the end. We are swapping nations!
Glad you liked it, @bobcockayne . Might do some “Para Leader” soon, 101st or 82nd landing behind Utah Beach.
Or maybe switch over to the Americans near St. Lo. I’ve done Mortain at least twice in the past … doesn’t mean I can’t do it again!
Some time in the next couple of weeks think we are going to get back into ‘I aint been shot Mum’ as the Americans are more likely to be completed 1st have feeling we will be looking at the scenarios post D-Day around Utah, have to look at Richard’s site on Two Fat Lardies to see what he has pr prepared. Though at sometime think we may do the fictional Kelly’s Heroes , have tow tanks done for Oddball and a company command unit which looks similar to the one in the Movie. Not as eloquent as your self but… Read more »
Sounds great, @bobcockayne ! Yes, please post progress of the projects. The more historical content we have on the site, the better!
Slowly getting the hang of this game I think.
Don’t try and take on every target at once, build up a ‘schwerepunkt’ with plenty of units, overwhelm and batter one objective, then move on en masse as fast as possible.
Thanks, @damon – Indeed, Panzer Leader is not a game that “lies down easy” for you. The other big thing Panzer Leader really demands, especially in shorter 10-turn games, is to form a single simple, but flexible, and fast plan, and then execute against that plan. This game doesn’t reward genius so much as it punishes mistakes. @aras and I have played dozens of games where we were having perfect game turn after turn … and then one of us would make a mistake … and that was usually the deciding factor unless the other player immediately returned the favor.… Read more »