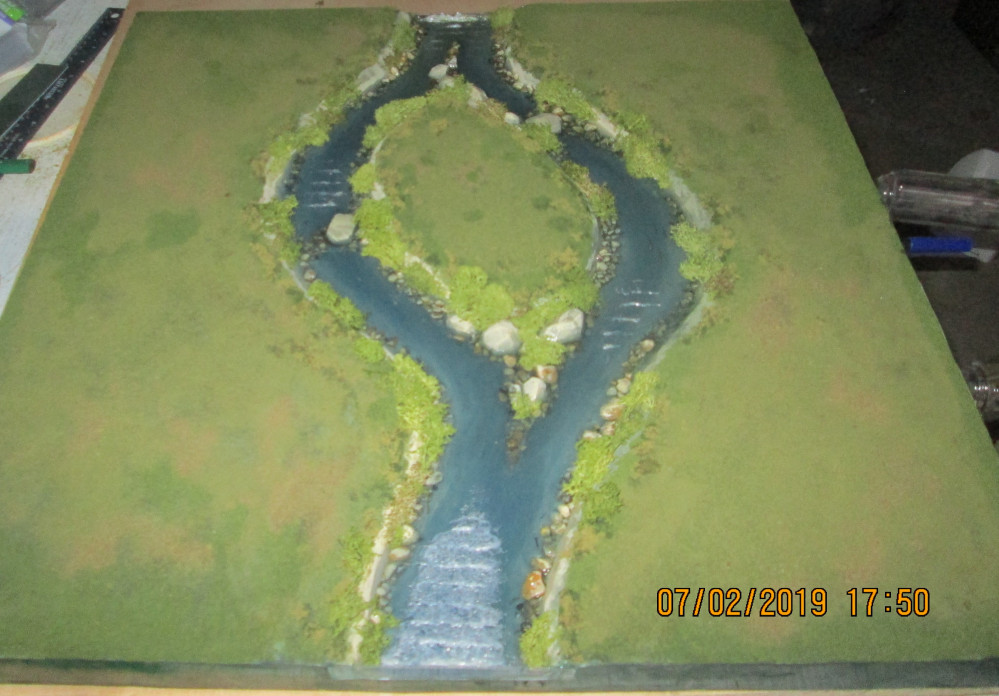
Battle Boards and Scatter Terrain
Battle Boards and Scatter Terrain
Initial Cuts
A table saw is a must at this stage, as it is almost impossible to make vertical cuts with a knife or hot wire, and you will need those cuts to be vertical to make your boards butt together properly. The only alternative I can offer is that most stores (around here at least) that sell polystyrene insulation will also offer to cut it up for you for a marginal fee.
Looking back on the diagram, you’ll note that I have only cut three 2’ by 2’ boards out of each sheet, as the blade width on the table saw made the last portion under 2’. Instead, I cut the rest of the pieces out of the end of each board, as their dimensions didn’t need to be precise.
The ‘slope’ pieces will be carved and ‘stacked’ on top of four of the boards, along an edge. The pieces marked ‘edge’, roughly 3” by 11 ¾, can be used with a slope board if the boards to either side are flat. A pic will explain it better… I’ll post one when I get there.
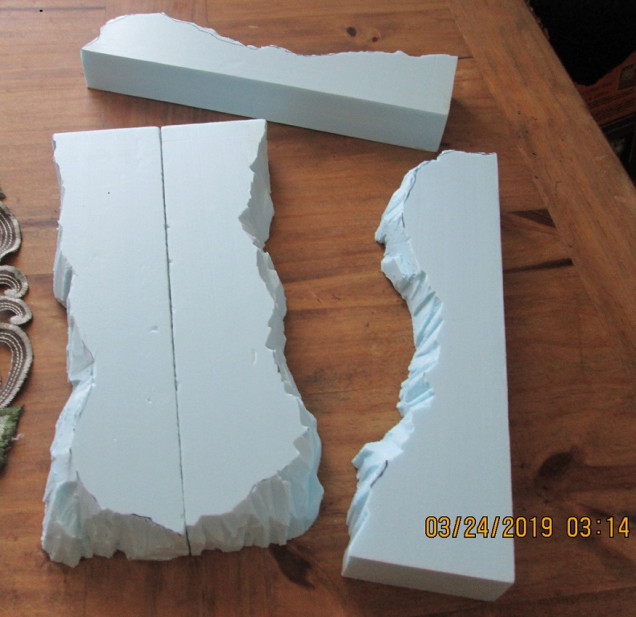 Vertical cuts are essential when building boards. Here are the four 'edge' pieces described earlier.
Scatter Terrain
The first piece I wanted to work on was the fountain/hill, as it was a proof-of-concept for both colour palette and overall aesthetic (read ‘client approval’), and also a test for different materials. I would highly recommend fiddling with something small like this first, rather than destroying a larger board if things go pear shaped.
I started by drilling out a 3” hole for the fountain then cut the removed disk in half and reinserted one half as the floor of the fountain. I sealed it with wood glue, and then used a piece of foam core (with the paper removed from both sides) to make the round wall of the fountain.
I lined it all with wall filler, both for a textured cement finish, and also to prevent the foam from being turned to sludge by any of the water effects products I was testing. I finished off the inside with a dirty green wash for algae and put some rust and water staining above the eventual waterline.
It was only after I had carved the slopes and stairs, and started the brickwork that it occurred to me that someone might be interested in the process, so you’ll forgive me if the first pic shows a more advanced state than what I’ve described. A bit of backtracking may be in order:
I used a dinner plate to trace the platform around the fountain then carved the rest with a utility knife. I’ve found that a shallow cut, followed by a little leverage to snap off the piece, will yield a more natural looking rock face than simply cutting all the way through the foam. Save your foam scraps for rockwork.
For this build I went with a fractured sedimentary strata look, and therefore spent considerable time putting horizontal slashes into the slopes *Cue ‘Psycho’ shower scene music*. I started with a tan base colour, covered it in a dark brown wash that was tinted in places with red brown, navy blue, and purple. The final drybrush was the original tan lightened with yellow.
Platform: Initially I carved in some brickwork but wasn’t happy with it, so covered it up with plasticard bits to make it look like there was an ancient marble floor lurking beneath the crumbling tiles. I used a sepia wash to put a patina on the marble
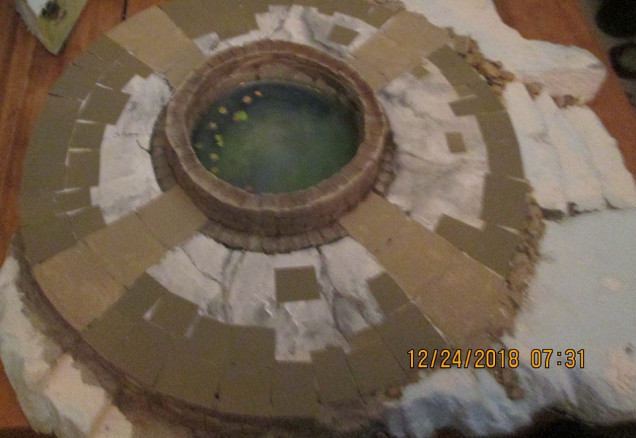 I wasn't happy with the brickwork on the edge of the platform, so covered it with plasticard 'tiles.' Another alternative would have been to fill in the sculpted bricks with wall filler.
Brickwork: a bit of experimentation here. All the castle pieces I’ve built to date have had the masonry carved right into the foam, but it always looked too smooth, and a bit unnatural. For this build I decided to make individual bricks — to see if the process was feasible for an entire castle.
I peeled the paper off one side of a piece of foam core then made bricks by cutting down to, but not through, the second layer of paper. The bricks got the same tan paint, tinted with various colours. They were peeled off the second layer of paper, and then applied randomly to the side and top of the fountain, and to the back of the hill, as if to shore up a weak slope.
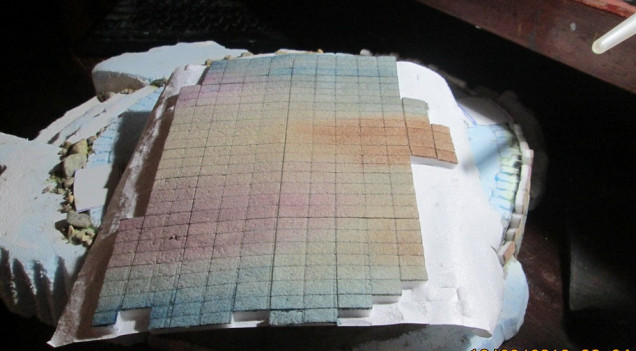 Bricks made from foam core board. The paper has been peeled away on one side, and cuts made down to, but not through, the bottom layer of paper.
The whole got a healthy dose of wall filler aka mortar, to fill in the spaces between the bricks. It dried very light, especially on the bricks themselves, so if you’re going to go this route, I suggest going over the surface of the bricks with a very damp cloth to get rid of as much of the filler as possible. The result at this point looked like new construction, but wasn’t the aged effect I was after. A wash dulled everything down, but left the individual brick colours visible – perfect.




![TerrainFest 2024! Build Terrain With OnTableTop & Win A £300 Prize [Extended!]](https://images.beastsofwar.com/2024/10/TerrainFEST-2024-Social-Media-Post-Square-225-127.jpg)


Leave a Reply