Oriskany's Build Video - 28mm Support Teams
Valor & Victory 1982 Lebanon (IDF v. PLO)
Good afternoon, everyone
Community member Elessar2590 and I had a great stream Sunday (Monday morning for him) – recorded at www.twitch.tv/sitreppodcast/videos – where we play-tested my new 1982 IDF and PLO forces and first Lebanon board for Valor & Victory. He took the PLO (on defense) and I took the IDF.
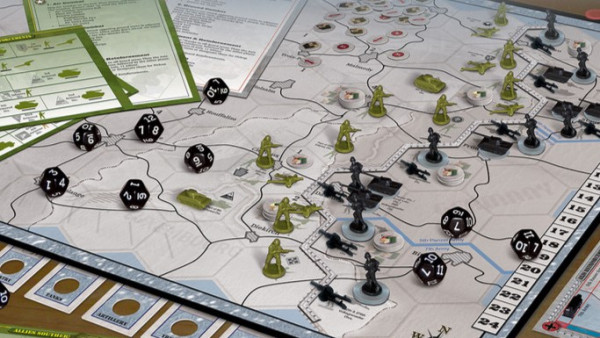
This is squad based game – each piece on the map is either a single officer, squad, fire team (half squad), or support weapon.
Each hex is about 30 yards / meters across.
The game takes place during Israel’s “Peace for Galilee” invasion of Lebanon, June 1982.
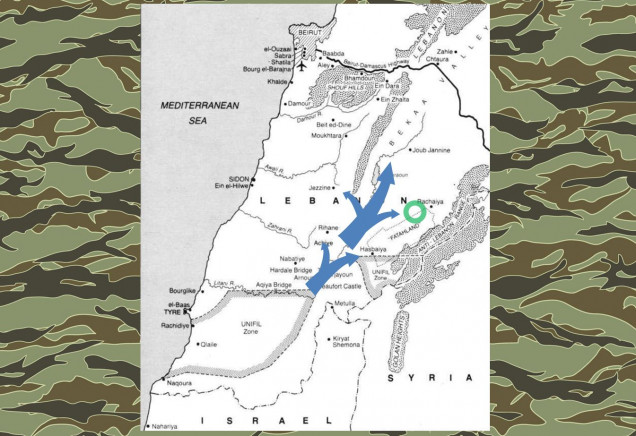 Here’s some quick background and context. One of Israeli’s invasion routes into Lebanon in 1982 was along the southeast-to-northeast axis of the “Bekka Valley.” The primary objective of this drive was to protect the flank of the frontal drive along the Lebanese coast toward Beirut, and to cut off in the interior of Lebanon from intervention from Syria (there nevertheless were some pretty serious tank and mechanized engagements in the Bekka Valley between IDF Merkava-1s and Syrian T-72s). But as this drive pushed up the Bekka Valley, infantry and support detachments fan out along either flank to clear out PLO enclaves. The green circle shows roughly where this one will take place.
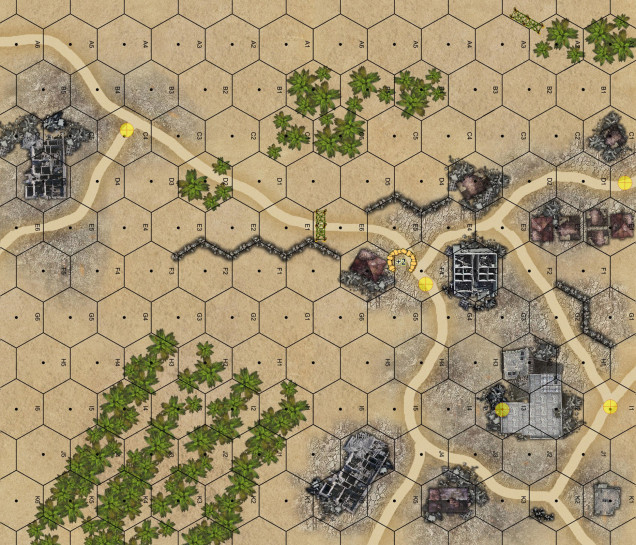 Here’s the game map. Yellow “target” markers indicate objective hexes. The Israelis must take at least three of these five by the end of Turn 6. The Israelis will be entering from the west, PLO can set up pretty much wherever they want. The objective hexes show key road junctions and access off the east end of the table, as well as the largest (tallest) building on the map, marked as an objective hex because it offers commanding fields of view across much of the surrounding countryside. Put more simply, the Israelis are coming on from the west, and have to take at least the majority of the access off the east edge of the board (to facilitate larger company-battalion level advance further east toward the Syrian border).
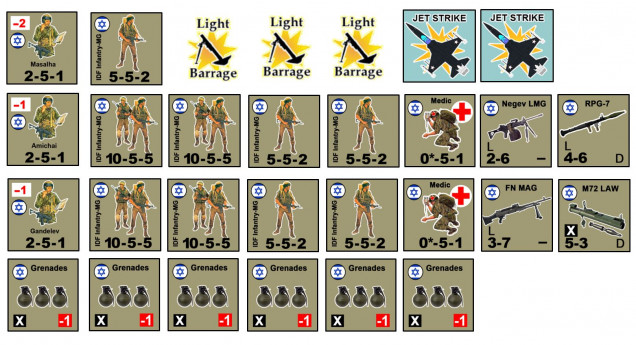 The Israeli force. I’ve got a captain, a radio team, two lieutenants, two platoons (each with two full squads and two half squads) – carrying a mix of FM MAG general purpose machine guns (GPMGs), Negev light machine guns, M72 LAW rockets and RPG-7 rockets. Each platoon also has a two-man medic team attached. We’re also carrying grenades, have three fire missions of 81mm mortars available from battalion, and two air strikes. In all, 59 officers and men.
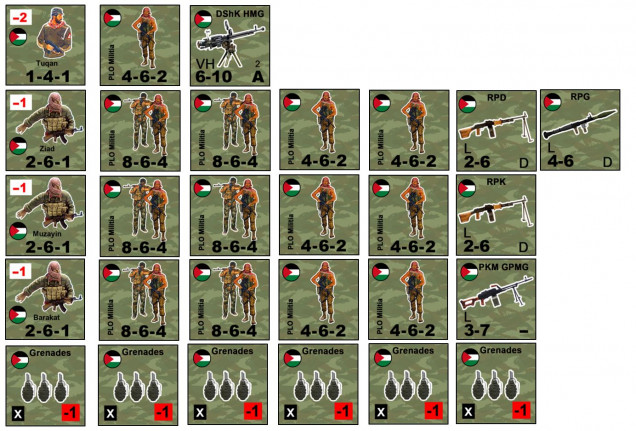 The PLO force. They have a commander and three lieutenants, with three platoons (each of which have two full squads and two half squads, plus a mix of PKM, RPD, and RPK machine guns and RPG-7 rockets). There’s also a four-man gunner team with a Soviet-made DShK 12.7mm heavy machine gun, and a supply of grenades. In all, 80 guerillas.
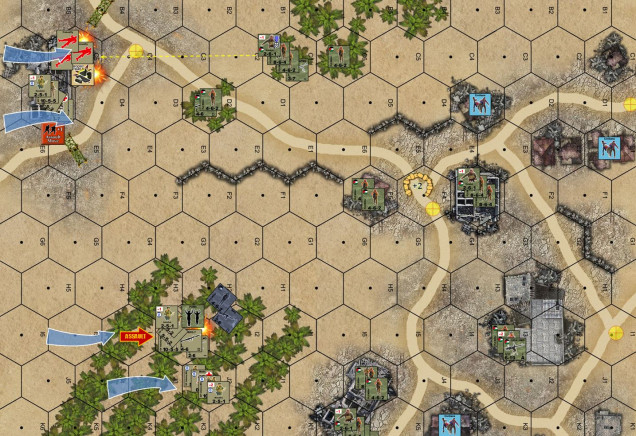 Things start off hairy right off the bat. In the south I’m as careful as a I can, coming on with a platoon in two sections, some of it able to use “assault move.” Basically, this is half-movement, but you get extra cover and are less likely to hit booby traps. Some this northern platoon can’t use assault movement, and in fact hits a booby trap hidden in that northern ruined building. In the south, my captain and one lieutenant rush into the orchard. Elessar’s opportunity fire with a forward RPG team misses, and I carry out the assault, eliminating the RPG team and taking a prisoner.
 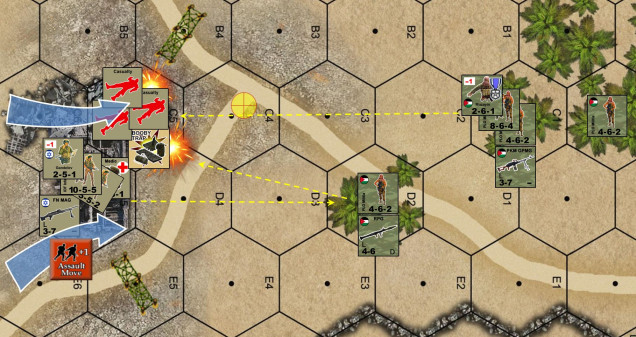 Things only get worse in the north. Elessar runs up with a squad and a half of PLO fedeyeen and scores SNAKE EYES on his 2d6 antipersonnel firepower (APFP) attack roll. Low rolls are better in this game, so this is a terrible result for my IDF infantry. Even as two more fireteams are trying to help the first fireteam that hit the booby trap, now THEY are hit as well by PLO fire. The roll is so good that Elessar’s PLO leader becomes “valorous” (note the attached medal), meaning he’s getting some insane bonuses for the rest of the game. By counterfire is largely ineffective, and another RPG team pins another of my IDF fireteams (unit in the south set at an angle). This northern section is in real trouble.
 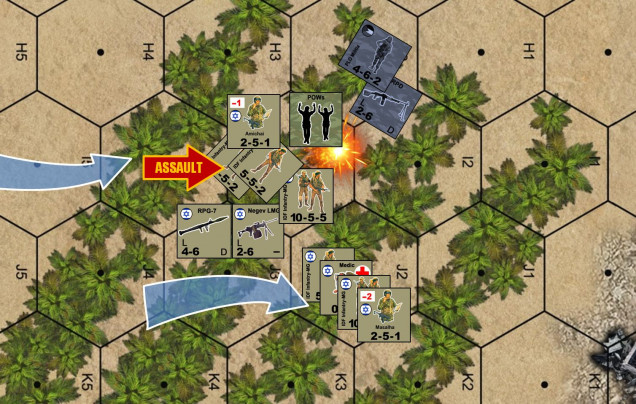 A close-up of the Lt. Amichai’s assault in the south. Again, PLO opportunity fire thankfully missed. I won the assault (quite easy, I had 17 men assaulting just 4, plus I had an officer and invested one of my grenade counters), but even a successful assault means I have to “pay” three casualty points (one for the PLO RPG team and two for the +2 woods cover bonus). I elected to pin three units, two of the 5-5-2 fireteams and my 10-5-4 full squad. The squad rallied, but the two fireteams did not. Essentially, when paying required casualty points, the game allows players to, as commanders, be cautious when they can afford it (pin more of your men, keeping casualties down) or ball-out when they have to me (accept casualties, but on fewer units, leaving other units in the stack ready for immediate action such as to repel anticipated counter-assaults). Meanwhile, a successful assault on insurgents yields me a POW counter, worth extra VP if I can evacuate him off the table.
 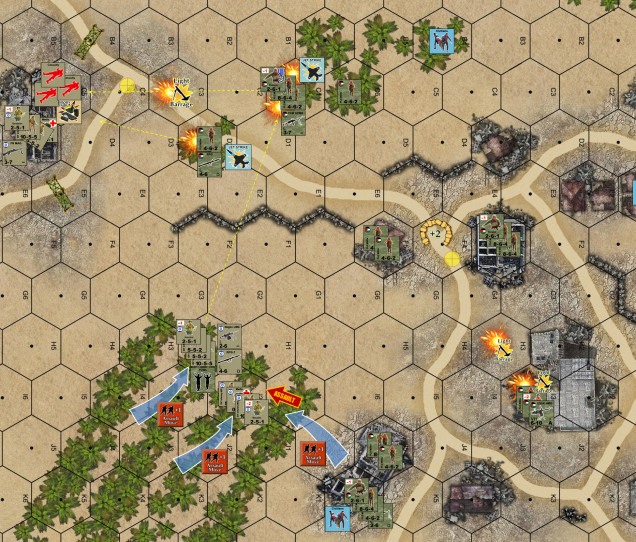 Turn 2 – on the Israeli command phase, I decide to cook off ALL my off-board support assets right away. I HAVE to save that northern platoon, if Elessar can assault the hex with all my casualties in there before I evac those casualties, they become IDF POWs worth double VP for the PLO player (already I pay 3 VP per casualty, if the PLO captures them they become 6 – to reflect torture, propaganda / ransom value, etc). Suffice it to say all mortars and air strikes are hitting NOW, and my southern attack, despite doing well and not taking a single casualty so far, must give up the planned assault to the east and instead turn north, to pin down Elessar’s forward PLO elements and cover the casualty evacuation of that northern platoon. As we see so often in Modern Warfare, the mission has immediately changed. One booby trap, that probably it up that platoon for pin-point insurgent fire from concealed positions, immediately throws the whole plan into chaos. It’s now about getting “your guys” off the battlefield and back to the aid station as fast as you can.
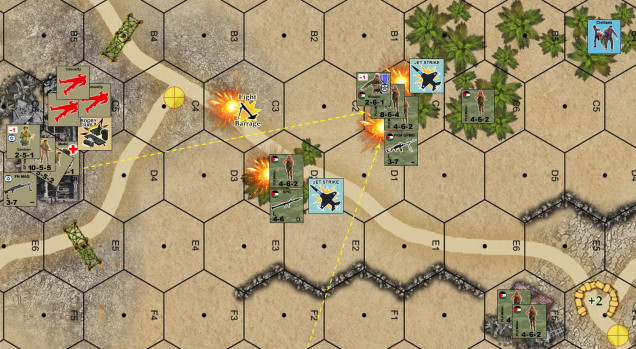 My airstrikes don’t do that much. They do paste that first RPG team, but the second one misses PLO leader Muzayin (valorous). My planned mortar strike completely drifts off target, and in fact falls short and damned near hits my own position (intended for hex C1, landed in C3). Meanwhile, Lt. Gandelev desperately pours fire down on Muzayin’s postion, later in the “Advance and Assault” phase I will belly crawl northeast one hex to get that medic into the hex with the casualties. This will get at least one casualty off the table, and I’ll have troops to defend the others.
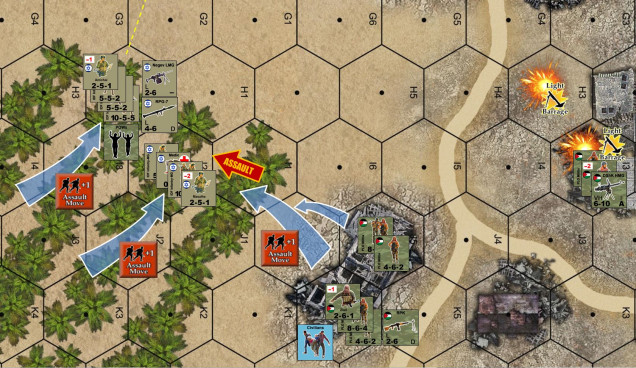 To the south, you can see where my two reinforced sections have turned north to start pouring cover fire up at the PLO nests that have my norther platoon pinned. I was able to use assault movement here again (again, half movement, additional safety), but damn, it was a good thing I did. Captain Masalha’s section rolled an 11 on 2d6 … and 11-12 hits a booby trap if you’re using normal movement, on assault movement only a 12 hits a booby trap. So someone in this section literally had his boot on a trip wire, but because the section was moving cautiously at half speed, the man behind him was able to stop him JUST IN TIME before he set it off. Gently back off, clip the wire, and defuse the mine … all while the platoon to your left continues to pour down cover fire for your wounded comrades to the north, and PLO fedeyeen squads mount an assault from the right … Meanwhile, two more Israeli mortar strikes were assigned to hit that freaking DShK nest in that fortified building. One drifted off the target, but thankfully the second hits the target and takes out the HMG nest, also killing the PLO commander.
 This is only halfway through Turn 2, folks. Stay tuned, I’ll put up the rest of this battle report later today (I hope).






![TerrainFest 2024! Build Terrain With OnTableTop & Win A £300 Prize [Extended!]](https://images.beastsofwar.com/2024/10/TerrainFEST-2024-Social-Media-Post-Square-225-127.jpg)






Leave a Reply